1
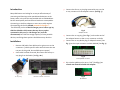
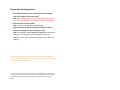
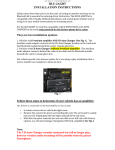
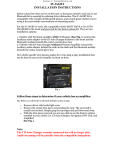
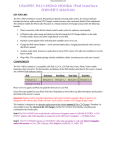
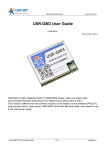
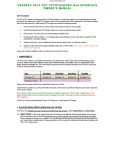
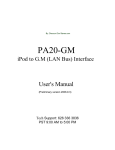
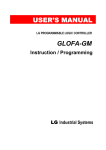
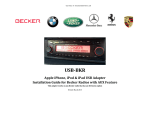
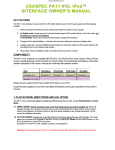
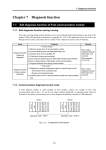
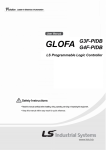
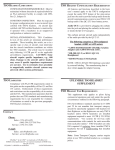
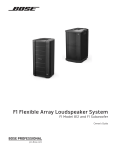
Courtesy of:DiscountCarStereo.com
PXDXGM3
Auxiliary input Adapter
Installation Guide for GM CLASS II Radios
Without external device
Revised June 2, 2015
3. Connect the factory 12-pin plug removed in step 2 to the
12-way connector on the adapter harness (See Fig. 3)
Introduction:
Many GM Owners are looking for an easy an effective way of
connecting and listening to their portable audio devices on the
factory radio. In the past this was possible with an FM Modulator
but the sound quality and interference levels were unacceptable.
Connecting an Auxiliary adapter to most cars usually requires
disconnecting the factory XM OR external CD Changer**.
The PXDXGM3 works on the CD Changer port of select 1996-09
GM Class II Radios which means that any factory option
connected to this port (i.e. CD Changer etc.) must be
disconnected, but with the storage capacity of most portable
devices, sacrificing these options should be an easy decision.
Installation:
Fig. 3
Adapter harness
4. Connect the 12-way plug (See. Fig. 1) on the other end of
the adapter harness to the 12-way connector on Radio
5. Connect the 22-way Molex plug on Adapter harness (See
Fig. 3) to the 22-pin connector on Main Module (See Fig. 4)
1.
Remove GM Radio from dashboard to gain access to the
connectors. (Vehicle specific radio removal instruction are
not part of this guide, but available upon request)
2. Once radio has been removed, disconnect the factory 12way plug from the Radio (See Fig. 1 & 2)
Fig. 4
22-way Molex connector
6. Dip switches 3 & 8 must be set to “ON” (See Fig. 5) or
consult user manual included with adapter.
Fig. 1
12-way Plug
Fig. 2
GM Class II Radio connectors
Fig. 5
dip-switches
7. Connect the yellow wire on Adapter harness to a 12V
constant (battery) source. This is available at the cigarette
lighter plug and elsewhere and connect the Black wire to
Ground (The cigarette lights plug or radio chassis are
good ground locations)
8. Connect the 8-pin DIN to RCA or 8-pin DIN to 3.5mm
cables to the Main Module. (See Fig. 6)
Test Operation:
1. Turn the Radio “ON”
2. Press the “TAPE/AUX” OR “CD/AUX” button to enter AUX
Mode
3. Connect audio device to 3.5mm jack using the gray 6 ft.
Audio cable (See Fig. 6) or RCA jacks.
Fig. 6
8-pin DIN input
9. Route the 3.5mm plug to the front of the dash or location
where audio device will reside (within 6 ft.)
Fig. 6
3.5mm plug
4. Search the device for a song and hit play. Music from
Audio device will play on car speakers.
5. Use radio volume control button to set the playback level.
To reduce distortion we recommended setting the audio
device volume level to 50% or less
Warning! Playlist and Track selection is *NOT* possible
from the GM radio. You must use the audio devices builtin controls to access audio files.
6. If correct operation is confirmed go ahead and reinstall
the GM Radio
Frequently asked questions
1.
Does the PXDXGM3 work in vehicles with a 6-CD Changer
radio (the changer is built-into radio)
YES; The PXDXGM3 works on the 6-CD Changer radio. (Radio
must have a “TAPE/AUX” or “CD/AUX” button on faceplate
2. Does this work in Bose systems
YES; works in Bose and Non-Bose applications
3. I have both an external CD Changer and XM, do I need to
disconnect anything for the AUX-GM3 to work
YES; the PXDXGM3 adapter does not retain XM or external CD
Changer. These options must be disconnected for this
adapter to work. Purschase the AUX-GM3 to retain XM or CD
Changer
** External or remote CD Changer refers to the optional Changer installed on
the lower dash, center armrest, hatch, trunk etc. (external CD Changer is not the
Changer built-into the head unit)
©1995-15 Discount Car Stereo, Inc. All rights reserved. Information in this document
is subject to change without notice. Other products and companies referred to herein
are trademarks or registered trademarks of their respective companies or mark
holders.