1
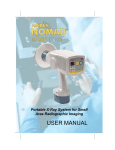
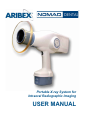
TM
Portable X-ray System for
Intraoral Radiographic Imaging
USER MANUAL
Disclaimer: NOMAD Dental is sold with the understanding that the user assumes sole
responsibility for radiation safety (as well as any state, provincial, or local regulatory
compliance) and that Aribex, Inc., its agents or representatives, do not accept responsibility
for:
a) injury or danger to personnel from x-ray exposure,
b) image overexposure due to poor operating techniques or procedures,
c) equipment not properly serviced or maintained in accordance with instructions
contained in this publication, and
d) equipment which has been modified or tampered with in any way.
DO NOT OPERATE THIS DEVICE UNTIL YOU HAVE READ THIS
MANUAL and reviewed the accompanying materials.
See the Certificate of Conformance accompanying your device. NOMAD Dental is also cleared
by the US Food and Drug Administration (FDA) as a medical device and complies with DHHS
Radiation Performance Standard, 21 CFR Subchapter J.
Aribex and NOMAD are registered trademarks within the United States and other countries.
NOMAD Dental, NOMAD Pro, PORTA-X, and the ARIBEX and NOMAD logos are trademarks
of Aribex, Inc. worldwide. U.S. patents issued: 7,224,769 and 7,496,178. United States and
international patents pending. All other brand and product names are trademarks or registered
trademarks of their respective companies.
The symbols used in this publication and used to mark the equipment
have the following meanings:
Caution or Attention, review documentation
Ionizing Radiation
Electrical Shock Hazard
Instructions for handling product at end of life
Type BF Equipment (providing a degree of protection against electric
shock, pertaining particularly to allowable leakage currents)
NOMAD
®
USER
MANUAL
Dental
Table of Contents
1.0
Getting Started .................................................................................................................................
1.1
Intended Use .....................................................................................................................
1.2
Unpack, Check, and Register NOMAD .............................................................................
1.3
Charging the Battery .........................................................................................................
1
1
1
2
2.0
Safety Precautions ...........................................................................................................................
2.1
Radiation Safety ................................................................................................................
2.2
Usage ................................................................................................................................
2.3
Cleaning ............................................................................................................................
2.4
Security, Storage, and Transportation ..............................................................................
3
3
5
6
6
3.0
Setup and Check ............................................................................................................................. 7
3.1
The Backscatter Shield ..................................................................................................... 7
3.2
Attaching a Charged Battery ............................................................................................. 8
3.3
Checking for Power and Adequate Charge ...................................................................... 8
3.4
Optional Checks ................................................................................................................. 9
4.0
Operation .......................................................................................................................................
4.1
Powering Up ....................................................................................................................
4.2
Ensuring Battery Charge Is Adequate ............................................................................
4.3
Ensuring the Right Exposure Time Is Set .......................................................................
4.4
Situating the Patient and Enabling the Device ................................................................
4.5
Initiating and Completing an X-ray Exposure .................................................................
4.6
Powering Down ...............................................................................................................
4.7
Exposure Techniques .....................................................................................................
5.0
Battery Replacement ..................................................................................................................... 14
6.0
Keeping NOMAD Up and Running ................................................................................................
6.1
Alarms and Alerts ............................................................................................................
6.2
Troubleshooting ..............................................................................................................
6.3
Repair and Maintenance .................................................................................................
7.0
Technical Description .................................................................................................................... 20
7.1
Basic Technical Specifications ........................................................................................ 20
7.2
Functional Diagram ......................................................................................................... 21
7.3
X-ray Tube Specifications and Characteristics ............................................................... 22
7.4
EMC Data ........................................................................................................................ 24
7.5
Optional Calibration Checks ............................................................................................ 26
10
10
10
10
11
11
11
12
15
15
17
19
Limited Warranty ....................................................................................................................................... 27
Thank you for choosing the Aribex® NOMAD as your x-ray solution!
At Aribex we value your business and we would like to hear from you, because your
feedback or suggestions are important to us. If you have comments, please email us:
[email protected]
NOMAD® Dental Features
¾
Performance – battery power source delivers dependable high voltage (60kV, true DC)
and direct current (2.3mA).
¾
Consistent Emission Radiation – high-frequency, constant-potential x-ray generator
provides high quality images, with a lower radiation dosage to the patient than standard
AC x-ray systems.
¾
Radiation Protection – operator shielded from source and backscatter radiation.
¾
Simple Operation – exposure time is the only setting requiring operator input, digitally
displayed on the user-friendly control panel along with indicators for machine and battery
status.
¾
Lightweight and Ergonomic – design provides complete flexibility and convenience,
enabling exposures without moving the patients.
¾
Exposure Safety Feature – cannot emit x-rays with insufficient voltage (low battery).
¾
Engineered for Compatibility – works with both film and digital imaging systems.
¾
Authorized Service – complete support and maintenance from Aribex and our authorized
distributors.
USER MANUAL..
1.0 Getting Started
1.1 Intended Use
The NOMAD Dental X-ray System is designed to be used for both adult and pediatric patients by
trained dentists and dental technicians for producing diagnostic x-ray images.
1.2 Unpack, Check, and Register NOMAD
n
Unwrap individual components from the protective plastic and check for any noticeable signs of
damage. The standard package system includes the
following items:
¾ NOMAD Device with a Backscatter Shield
attached
¾ 2 Charged Batteries
¾ Battery Charger (the charger should be
appropriate for local AC line voltage)
¾ Certificate of Conformance, Getting Started
guide and Battery Charger manual, Warranty
Card, and NOMAD Operator Training CD
o Preliminary Checks:
Item
Check
Device Labels
Verify that the device labels (Serial Number Label on lower side of unit in
front of the handle and Warning Label on the lower side behind the handle)
are legible and in place.
Other Labels
Verify that the serial number on the Warranty/Registration card matches the
device serial number and the device carrying case serial number.
Collimator Cone
Inspect for damage. The lead lining must cover the entire interior surface.
Control Panel
Should be smooth and free of nicks, scratches, or damage.
Trigger Switch
Should move freely in when depressed and out when released.
Device Housing
Should be free of cracks or fractures.
1
NOMAD
p Complete the product Warranty/Registration card and mail it with proper postage to Aribex today.
Completing the card fulfills a condition of warranty coverage (see the inside back cover of this manual)
and enables you to receive valuable product news and updates.
1.3 Charging the Battery
NOTE: Batteries are charged at the factory, and should be fully recharged before the initial use
of the NOMAD. If the system has been in long-term storage prior to iniitial use, batteries will
definitely require a proper charge first. In fact, it is recommended to fully recharge batteries
every 3 months for long-term storage to avoid damage to any low battery.
n
Unwrap the power cord of the battery
charger and connect it to an AC electrical
outlet (110/120V or 220/240V, dictated by
the country/region).
Position the battery charger away from the
normal patient environment. A plug adapter
may be used as needed; use only the
supplied battery charger (for manufacturer
and model info, see section 6.3, Repair and
Maintenance).
o
Invert one of the batteries and carefully
plug it into the charger (do not force the
battery into the charger or damage to the
battery may result). The red indicator light ☼
on the top of the charger will flash at a
steady rate while the battery is charging.
The required charge time varies (normally between 30 to 45 minutes). Battery and charger may
become warm to the touch while charging, which is a normal condition.
p When the battery is fully charged and ready to use, the indicator light ☼ will stop flashing and
remain on continuously. Remove the charged battery and charge the second battery for future use.
q Optimal battery life and performance occurs when the NiCad battery is fully discharged prior to
recharging. (For more information review the accompanying battery charger Instruction Manual, also
see section 5.0, Battery Replacement.)
2
USER MANUAL..
2.0 Safety Precautions
2.1 Radiation Safety
This x-ray unit may be dangerous to operator and bystander unless safe exposure
factors and operating instructions are observed.
Operators must follow all guidelines dictated by applicable
regulations and in-house radiation protection program in
regard to patients and operators who are pregnant or
expect to become pregnant.
Operators must be fully acquainted with safety
recommendations and established maximum permissible
doses.
Optimal operator radiation backscatter protection exists
when:
a) the operator remains within the cone-shaped
backscatter protection zone immediately behind the
backscatter shield,
b) the backscatter shield is positioned at the outer end of
the collimator cone,
c) the patient tilts their head when needed to
accommodate exposures (see section 4.7), and
d) the backscatter shield is close to the patient.
Do not enable NOMAD until patient and operator are
positioned and ready for the exposure, diminishing the
likelihood of interruption and preventing inadvertent
exposure of anyone to x-rays.
Do not attempt an exposure if anyone else is in the same
room unless it is necessary that the patient be
accompanied by another person. That person must then
stay out of the direct beam and wear protective clothing.
When selecting and using Position Indicating Devices
(PIDs), preference should be given to models that allow
the backscatter shield to remain at the outer end of the
collimator cone for maximum operator protection.
3
NOMAD
An exposure can be terminated for any reason by abruptly releasing the depressed trigger (for more
information see section 4.0, Operation).
As shown in graphic representations,
maximum protection (green area) from
backscatter radiation (red area) exists
when the NOMAD is positioned near
the patient, is perpendicular to the
operator (with the patient’s head tilted if
needed), and the backscatter shield is
fully extended toward the patient.
Operation outside the protection zone
(or with a diminished protective zone)
requires proper precautions such as the
use of lead aprons.
Proper postioning
MAXIMUM
PROTECTION
Do not operate with the backscatter NOMAD held back
shield removed!
Shield slid back
Non-perpendicular
MINIMIZED PROTECTION
NOTE: In implementing a radiation protection program, please consult all applicable (state, provincial, and local) regulations
governing radiation protection and the use of x-ray equipment, and ensure full compliance with any such regulations.
Comparative Data for Whole Body Exposure (Annual)
1
50mSv
Occupational Dose Limit
5mSv
Occupational Dose Limit Requiring Dosimetry
1
3.65mSv
Average Natural Background Radiation
2
2.19mSv
Average Occupational Radiation Exposure for Flight Crews
3
1.00mSv
General Public Dose Limit
1
0.20–0.70mSv
Range of Exposure for Dental Personnel Using Conventional X-rays
0.30mSv
Average Exposure Using NOMAD with D-Speed Film
0.12mSv
Average Exposure Using NOMAD with F-Speed Film or Digital Sensor
1) Standards for Protection Against Radiation, 10 CFR 20 (US Federal Standards), 1994 (see also NCRP Report No. 116)
2) NCRP Report No. 145 (National Council on Radiation Protection and Measurements), p7-9
3) "Estimated Cosmic Radiation Doses for Flight Personnel", Feng YJ et al, Space Medicine and Medical Engineering, 15(4) 2002, p265-9
4) Normalized average assumes 7,200 exposures per year, and the average length of exposure for D-speed = 0.50 seconds, F-speed = 0.25
seconds, digital sensor = 0.20 seconds
4
2
4
4
USER MANUAL..
Comparative Data for Hand and Extremity Exposure (Annual)
1
500mSv
Occupational Dose Limit
50mSv
Occupational Dose Limit Requiring Dosimetry
0.43mSv
Average Exposure Using NOMAD with D-Speed Film
0.22mSv
Average Exposure Using NOMAD with F-Speed Film or Digital Sensor
X-Ray Source
Focal Spot
Backscatter
Radiation
Shielding
Fixed Beam
Limiting
Device
Geometrical
Radiation Field
Due to Beam
Limiting Device
Primary
Protective
Shielding
Permanent
Filtration
Source
to Skin
Distance
1
2
2
1) Standards for Protection against Radiation,
10 CFR 20 (US Federal Standards), 1994 (see
also NCRP Report No. 116)
2) "Radiation Exposure with the NOMAD Portable
X-ray System", Goren AD et al, Dentomaxillofacial
Radiology, 37 (2008), p109-12; normalized
average (includes leakage and backscatter
radiation) assumes 7,200 exposures per year, and
the average length of exposure for D-speed = 0.50
seconds, F-speed = 0.25 seconds, digital sensor =
0.20 seconds
Patient
Plane
2.2 Usage
As a safety feature, NOMAD will not emit X-rays with insufficient voltage (low battery).
The NOMAD is also designed to avoid damage from overheating. The minimum duty cycle rating (the
relationship between duration and frequency of exposures) is 1:60. Examples of optimal use:
Duration
Cycle
0.25s
0.46s
0.50s
0.99s
Every 15 sec
Every 28 sec
Every 30 sec
Every 60 sec
Do not operate NOMAD or the battery charger if either was immersed in liquid or
subjected to an undue amount of moisture.
5
NOMAD
There are no user serviceable parts inside the NOMAD.
Do not open the device housing. Doing so will void the warranty.
NOMAD should not be used in environments where flammable cleaning agents are
present.
Locate the battery charger away from the normal patient environment (see section 5.0,
Battery Replacement).
2.3 Cleaning
n Turn off the power and detach the battery before cleaning. Ensure the battery charger is unplugged
before attempting to clean it.
o Use a non-acetone based disinfectant wipe or a cloth to wipe the exterior surfaces of the NOMAD
and charger.
NOTE: NOMAD and the accompanying battery charger are not designed to be subjected to any kind of
sterilization procedure.
2.4 Security, Storage, and Transportation
¾
NOMAD must be kept in a secure location, such as a locked cabinet, when not in use to prevent
unauthorized access.
¾
The battery serves as the device security key. When finished with NOMAD for the day, detach
the battery and lock it away in a separate location to prevent unauthorized use.
¾
Make sure NOMAD will not be knocked to the ground when not in use. Lay it on its side if
necessary. Power will automatically shut off after a period of inactivity (approximately 2.5 minutes).
¾
Do not store or carry batteries so that metal objects can contact exposed battery terminals.
¾
Do not store the NOMAD, battery charger, or batteries in extreme conditions: below –20°C (–4°F)
or above +40°C (+104°F), or beyond 95% relative humidity (non-condensing). This storage
location should be cool, dry, and away from direct sunlight. For more info about storage and
operational temperature limits, see section 7.1, Basic Technical Specifications.
6
USER MANUAL..
¾
Some battery charge may be lost during extended inactivity (leading to fewer exposures between
charging).
For long-term storage, it is recommended to fully recharge batteries every 3 months.
3.0 Setup and Check
3.1 The Backscatter Shield
In addition to the lead-lined cone, the backscatter shield provides additional protection to you, the
operator, and features an adjustable position to permit exposures made at various angles.
n Ideally, the shield should remain fully extended to the
outer edge of the cone, as close to the patient as possible
for each image taken (see 2.1, Radiation Safety).
o You may find that the backscatter shield needs to be
adjusted to accommodate position indicating devices or
angled exposures. If adjustments are needed, stand the
NOMAD on-end on a stable surface and, while holding
the backscatter shield perpendicular to the collimator
cone (tube-shaped cone), gently glide the shield up or
down along the cone using equal pressure to maintain a
perpendicular alignment and avoid binding.
p To keep the shield securely on the cone a retainer
o-ring is permanently attached in the groove at the outer
cone end. Do not attempt to remove this o-ring or to
remove the backscatter shield, attempting to do so will
result in damage to your device.
7
NOMAD
3.2 Attaching a Charged Battery
n
Properly orient and carefully insert the newly charged
battery into the base of the NOMAD handle, (a properly
oriented battery should click into place without force, forcing
the battery into position may damage the battery and/or the
NOMAD). The clicking sound ensures the snaps on both sides
of the handle bottom are fastened.
o
Make sure the battery is secure by giving it a tug.
NOMAD can be placed into service after the check for power
(section 3.3).
p Read the battery charger instruction manual for complete
information on how to achieve the longest life and best
performance from your batteries.
3.3 Checking for Power and Adequate Charge
NOMAD Control Panel
n
After inserting a fully charged battery,
press and release the POWER button. The
numeric (LED) display should illuminate,
accompanied by a single, long audible
signalÑ:.
o
NOMAD measures whether sufficient
battery charge exists prior to a timed
exposure, when ENABLE is pressed to ready
the device.
p If the battery is too low, the yellow LOW
BATTERY indicator ☼ at the lower right of the
control panel will flash (accompanied by an
intermittent audible signalÑ:).
8
USER MANUAL..
q Once a battery is depleted, indicated by the LOW BATTERY alert, it must be recharged before use.
r For continued use, insert the secondary, replacement battery (which should be charged in
advance).
NOTE: See section 5.0, Battery Replacement, for more information.
3.4 Optional Checks
The NOMAD is factory calibrated and tested prior to release (see your Certificate of Conformance),
there are no adjustment options. However, the optional checks listed below may be performed by a
qualified technician as desired.
Test firing this x-ray unit may be dangerous to the testing technician or bystanders
unless safe test exposure techniques are used such as the use a lead lined cap to cover
the end of collimator or test firing in a protected area.
ON/OFF Switch: Install fully charged battery to NOMAD device. Press the POWER button and verify the
ON and OFF conditions.
Increase/Decrease Switch (Up and Down Arrows): With the device turned ON, press each of the
Increase then Decrease buttons and verify that the exposure times as displayed on the LED display
change appropriately.
Enable Switch: With the device turned ON and the LED display set at 50 (500ms), press the ENABLE
button and verify functional conditions. Wait approximately 30 seconds, at which point the enabled
condition should expire.
Automatic Shut-Off: Press the POWER button to turn the device ON and wait for it to automatically shut
off after approximately 2.5 minutes of inactivity.
See section 6.1, Alarms and Alerts, for more information.
9
NOMAD
4.0 Operation
4.1 Powering Up
Press and release POWER button to turn NOMAD on (after approximately
2.5 half minutes of inactivity, NOMAD shuts off automatically).
When the power is turned on a single, long audible signalÑ: and an
illuminated numeric (LED) display indicate the unit has power.
example
4.2 Ensuring Battery Charge Is Adequate
If the LOW BATTERY indicator ☼ flashes, accompanied by an intermittent
audible signalÑ:, see sections 3.3, Checking for Power and Adequate
Charge and 5.0, Battery Replacement.
For other error conditions, please see sections 6.1, Alarms and Alerts or
6.2, Troubleshooting.
4.3 Ensuring the Right Exposure Time Is Set
increase
When power is turned off, the most recent setting for exposure time is
stored in memory and redisplays when power is turned back on.
(However, if the battery is replaced, the display is reset to the 00 default
value.)
To change exposure settings press the increase or decrease buttons (by
tenths / hundredths of a second). A single, short audible signalÑ:
confirms input when a button is pressed/released. (For example, 08 LED
setting = 0.08 seconds; 35 LED setting = 0.35 seconds.)
decrease
10
example
USER MANUAL..
4.4 Situating the Patient and Enabling the Device
Properly position the patient and yourself before enabling NOMAD (to
prevent accidental exposure).
Press and release ENABLE to ready the device; be sure to re-enable
NOMAD if any subsequent changes are made to the time setting prior to
exposure.
The flashing, green ENABLED indicator ☼ and audible signalÑ:
(intermittent, double beep) confirm that NOMAD is enabled. This
continues for 30 seconds or until an exposure is initiated.
4.5 Initiating and Completing an X-ray Exposure
NOTE: An exposure can be prematurely terminated for any reason by
abruptly releasing the depressed trigger.
To begin the exposure, squeeze the handle trigger (or press and hold
START). The ENABLED indicator ☼ stops flashing, and the green START
and yellow X-RAYS ON indicators ☼ illuminate.
To ensure complete exposure, keep the trigger or START button
depressed until the audible, continuous-tone signalÑ: ends and both
indicators ☼ are off.
4.6 Powering Down
Press and release POWER to turn NOMAD off. (NOMAD automatically
shuts off after approximately 2.5 minutes of inactivity.)
11
NOMAD
4.7 Exposure Techniques
NOMAD provides a high degree of flexibility, making it possible for
exposures to be produced while the patient is reclined, lying on
their back, or sitting upright.
n When taking images, hold the NOMAD using two hands; one
on the handle and the other under the battery for increased
stability and patient safety.
o
To minimize cone-cutting, NOMAD must be properly
positioned relative to the imaging system. (Check compatibility
with film holding kits or aiming devices in advance. See comments
pertaining to PIDs in section 2.1, Radiation Safety.)
p
Exposure times increase proportionally when the imaging
angles vary from 90° or perpendicular to the film or sensor. To
maintain low patient x-ray doses and keep the operator within the
protection zone, request that the patient slightly tilt their head,
and/or raise or lower their chin as needed. (Also see section 2.1,
Radiation Safety.)
q
When angled shots are required and the operator cannot be
completely within the protection zone, ensure operator protection
through the use of proper safety measures such as the use of a
lead apron. (Also see section 2.1, Radiation Safety.)
r
Avoid touching the patient with the cone or backscatter
shield; and/or use disposable plastic coverings.
s
Determine what NOMAD time settings deliver optimal results
for the type of digital or film-based imaging that is done on a
regular basis. Note that digital imaging sensors and film speeds
can vary somewhat in their characteristics and could require
different exposure settings than the suggested nominal exposure
times in the Technique Factor Chart. Adjust as needed to meet
density preference.
t For an explanation of the relationship between shot duration and rest cycle between exposures
(duty cycle), see section 2.2, Usage.
12
Molars
60kV
Premolars
& Canines
2.3mA
Incisors
Technique Factor Chart
Maxilla (upper)
Mandible (lower)
Maxilla (upper)
Mandible (lower)
Maxilla (upper)
Mandible (lower)
Maxilla (upper)
Mandible (lower)
Maxilla (upper)
Mandible (lower)
Maxilla (upper)
Mandible (lower)
09
07
08
07
15
12
10
08
15
12
10
08
12
10
09
08
15
12
15
10
15
12
15
10
12
10
10
8
20
18
16
14
20
18
16
14
Maxilla (upper)
Mandible (lower)
Maxilla (upper)
Mandible (lower)
18
13
10
8
18
13
15
10
20
18
16
14
Maxilla (upper)
Mandible (lower)
Maxilla (upper)
Mandible (lower)
Maxilla (upper)
Mandible (lower)
Maxilla (upper)
Mandible (lower)
35
25
20
15
48
40
32
28
35
25
30
20
60
49
40
32
40
35
32
28
70
58
50
40
Recommended exposure settings (X 1/100 second) with cone
perpendicular to film/sensor.
Adult
Digital Sensor
Schick
Sensor
Sensor #1 & #2
Child
Sensor #1
Air
Techniques
Accent
Sensor
Adult
Sensor #1 & #2
Child
Sensor #1
Adult
Planmeca
DIXI 3
Sensor #1 & #2
Child
Sensor #1
Phosphor
Plate
Adult
Air
Techniques
ScanX PSP
Child
Adult
Film
Kodak
Insight
Child
Adult
Kodak
Ultraspeed
Child
Bitewings
USER MANUAL..
12
10
20
16
20
16
20
16
40
32
60
50
The settings in this chart are based upon an independent university study and are intended as a
reference point only. Individual results may vary based upon a number of factors including the various
imaging sensors and film speeds and brands available, patient mass, and the technician techniques.
13
NOMAD
5.0 Battery Replacement
A flashing, yellow LOW BATTERY indicator ☼ (control panel) and intermittent audible signalÑ: indicate
the need for a freshly charged battery. NOMAD cannot emit X-rays with a low, depleted battery
(insufficient voltage). Follow these steps to clear the LOW BATTERY alert.
n Press and release POWER on the control panel in order to turn
NOMAD off.
o Grasp and depress the buttons on both sides of the battery to
release it from the handle. You may have to put pressure at the
very top of the buttons (nearest the handle). Then pull the battery
away from the handle.
p Carefully insert a newly charged battery into the base of the NOMAD handle (a properly oriented
battery should click into place without force, forcing the battery into position may damage the battery
and/or the NOMAD). A clicking sound ensures that the snaps on both sides of the handle bottom are
fastened. Make sure the battery is secure by giving it a tug. When a battery is detached, any stored
exposure time is erased from memory and has to be reset when the unit is turned on again.
q After the initial 1-hour recharge, the charger will switch to Tune-Up Mode, which continues 8 hours
as cells in the battery are equalized. The battery is ready for use and can be removed at any time
during this mode. Always unplug the charger from the power supply when it is not in service. For
additional info, specifically about the charger, see the accompanying instruction manual for the battery
charger.
r Battery charge will diminish during extended inactivity – fully recharge batteries every 3 months
during inactivity. Never place a low battery into long-term storage.
s Each battery can go through the discharge/charge cycle approximately 200 times. When the
battery charger senses a bad battery, it is spent and must be taken out of service. Do not attempt to
charge damaged batteries. An authorized distributor, Aribex, and your local recycling center will accept
spent or damaged batteries. Order new 14.4V batteries from Aribex or your authorized distributor. Do
not use batteries from other sources, which invalidates the warranty.
Risk of Shock – There is high electrical current present at the battery charger terminals.
Do not probe with fingers or conductive objects.
14
USER MANUAL..
6.0 Keeping NOMAD Up and Running
6.1 Alarms and Alerts
The visual/audible alarm signals a programmed action designed to prevent harm to operator, patients,
and/or NOMAD.
The visual/audible alerts confirm normal conditions or draw the operator’s attention to a required action.
Condition
Overheating
Visual Indicator ☼
Audible SignalÑ:
Series of long
beeps
Operation suspends if the device
overheats; after cooling for
approximately 5 minutes (or
longer depending upon room
temperature), power on (see Duty
Cycle in section 2.2, Usage)
Slow series of short
beeps
Replace the battery and reset
exposure time (for information see
section 5.0, Battery Replacement)
Continuous tone
(for the duration
of the timed
exposure)
At the end of the successful
exposure, audible signal and
indicators stop
Series of long
beeps
Activates if trigger is released
before the timed x-ray exposure
finishes and ends automatically
after 15 seconds or if power is
manually turned off/on
Slow series of
short, double beeps
Activates when ENABLE is
pressed/released; ends
automatically after 30 seconds or
when an exposure starts (trigger is
depressed or START is pressed)
LED display begins
flashing
Alarm
Low Battery
Yellow LOW BATTERY
indicator flashes
Alert
X-ray
Exposure
Green START and yellow
X-RAYS ON indicators
illuminate
Alert
Incomplete
Exposure
Green START and yellow
X-RAYS ON indicators flash
Alert
System
Readiness
Alert
Green ENABLED indicator
flashes
Function / Resolution
15
NOMAD
Condition
Visual Indicator ☼
Audible SignalÑ:
Invalid Input
Error
N/A
Two short beeps
Invalid input (for example,
triggering prior to enabling)
activates alert, which then ends
automatically
For numeric LED display,
time setting increments or
decrements
Single short beep
Valid when panel button is
pressed/released
LED display turns off
Two short beeps
Alert
Valid Input
Alert
System
Alert
Alert
Power OFF
Alert
Function / Resolution
Followed by a system shutdown
LED display turns off
Two short beeps
Followed by a system shutdown
X-ray emissions are not detected
during timed exposure but the
battery is OK
POWER button is pressed and
released (while power is on)
Power ON
LED display lights up
Alert
16
Single long beep
POWER button is pressed and
released (while power is off)
USER MANUAL..
6.2 Troubleshooting
If you encounter results and/or errors in the operation of NOMAD that are not explained in the previous
sections, check the following table on user troubleshooting to determine the need for authorized
service.
Device Symptom
Potential Problem
Underexposure (too light).
6.2.1 Image from x-ray
exposure does not have
sufficient contrast
Overexposure (too dark).
6.2.3 Green ENABLED
indicator stops flashing (and
corresponding, short double
beeps end) before an
exposure is started
Chemical developer (for filmbased imaging).
Combined movements of
operator and patient during
exposure produced too much
distortion.
NOMAD is no longer enabled. If
an x-ray exposure is not initiated
within 30 seconds of enabling,
the System Ready condition will
terminate.
6.2.4 Green START and
yellow X-RAYS ON indicators
flash (with corresponding
series of long beeps)
Incomplete exposure – the
depressed trigger was released
before the timed exposure was
able to complete.
6.2.2 Image from x-ray
exposure is blurred
Corrective Action
Increase the exposure time setting;
or see Incomplete Exposure below.
Decrease the exposure time
setting, also check film expiration
date (old film can produce dark
grainy/foggy images).
Ensure chemical freshness and
proper temperature.
Check the exposure time setting
and re-enable when operator and
patient are again properly situated.
Double-check the exposure time
setting and re-enable when
operator and patient are again
properly situated.
This condition is cleared
automatically within 15 seconds or
by manually turning NOMAD off
and back on. The exposure will
likely need to be repeated.
17
NOMAD
Device Symptom
6.2.5 Yellow X-RAYS ON
indicator does not illuminate
6.2.6 NOMAD
automatically shuts down
6.2.7 There is no power to
the NOMAD control panel
Potential Problem
No exposure – a subsequent Low
Battery alert will signal whether a
low battery is the source of the
problem.
If within a few seconds, two short
beeps are emitted and the
system automatically shuts down,
a different problem exists (see
section 6.1, Alarms and Alerts).
After about 2.5 minutes of
inactivity, NOMAD emits two
short beeps and shuts off
automatically – the system has
timed out.
However, if while attempting an
x-ray exposure two short beeps
were emitted and shutdown
occurred, a different problem
exists (see section 6.1, Alarms
and Alerts).
Corrective Action
Follow proper procedures for
replacing the battery; see section
5.0, Battery Replacement.
NOMAD will require authorized
service; see section 6.3, Repair
and Maintenance.
Manually turn on NOMAD when
you are ready to use the device.
If this condition persists, NOMAD
will require authorized service; see
section 6.3, Repair and
Maintenance.
If pressing POWER several times
does not cause the numeric
(LED) display to illuminate, the
attached battery is the likely
problem.
Ensure battery is securely
attached.
Replace with a newly charged
battery before continuing. Use the
battery charger to determine if the
first battery is spent and must be
taken out of service, or if it can be
recharged.
However, if while attempting an
x-ray exposure two short beeps
were emitted and shutdown
occurred, a different problem
exists (see section 6.1, Alarms
and Alerts).
NOMAD will require authorized
service; see section 6.3, Repair
and Maintenance.
If you have additional questions or require help contact: [email protected]
18
USER MANUAL..
6.3 Repair and Maintenance
NOMAD is a maintenance-free product, except for routine cleaning. Make sure the power is off while
cleaning, detach the battery. It is unnecessary to detach anything else in order to clean the unit. Use a
non-acetone based disinfectant wipe or a cloth to wipe the exterior surfaces of the NOMAD and
charger.
The NOMAD and the battery charger are NOT designed to be user serviceable. Do not
open the device housing, doing so will void the warranty.
Repairs can only be undertaken by trained service personnel. Direct all questions to an authorized
distributor.
The following are factory serviceable parts and components:
¾ NOMAD Dental, main apparatus assembly – item AP-0001
¾ Retainer o-rings – item CP-0046
¾ Backscatter shield / inner o-ring assembly – item AP-0012
¾ Batteries – item CP-0001
¾ 110/120V AC battery charger w/ manual (DeWalt, model DW9116 or DC9310) – item CP-0002
¾ 220/240V AC battery charger w/ manual (DeWalt, model DE9116 or DE9135) – item CP-0045
¾ Hard-shell carrying case (accessory) – item MP-0018
Instructions for handling product at end of life – Please, protect the environment and do
not improperly dispose of any part of the NOMAD system, battery, or charger; contact an
authorized distributor or Aribex, Inc. regarding assistance in returning the product for
proper disposal.
If product return is required, contact Aribex for a Return Material Authorization (RMA) number and
shipping instructions to return the product to the proper facility. If the product is under warranty, you will
be required to provide the serial number from the label affixed on the underside of the NOMAD.
Be sure to include the RMA number on the package you are returning. Products without a RMA number
cannot be serviced or given credit consideration.
Aribex will not assume responsibility for shipping damages; however, it will help you file a claim with the
freight carrier. Please see warranty information at the end of this manual.
19
NOMAD
7.0 Technical Description
7.1 Basic Technical Specifications
Maximum deviation from fixed factors
Total weight
±5% (unless otherwise noted)
4kg
Environmental
Operation
Temperature
Relative humidity
Storage and transportation
Temperature
Relative humidity
–5°C to +40°C (+23°F to +104°F)
+4°C to +40°C (+39°F to +104°F) charging
10% to 80%, non-condensing
–20°C to +60°C (–4°F to +140°F) NOMAD
–20°C to +40°C (–4°F to +104°F) battery
95%, non-condensing
Classification / Specification Compliance
IEC 60601-1 (Amnd 1 & 2), 60601-1-3,
60601-2-7; 21 CFR 1020.30 & 1020.31
MDD (93/42/EEC): Annex IX
IPX specification
Mode of operation
Conductive connection to patient
Class II, Type BF
Class IIb
IP0; do not operate under wet conditions
Intermittent operation
No conductivity with the applied part
For use in environments where no flammable anesthetics and/or flammable cleaning agents are
present; non-acetone based disinfectant wipes or cloths.
Electrical
Rechargeable NiCd battery
Low battery alert set point
Battery current at 2.3mA, 60kVp output
14.4V, 2A/hr
11.6V
16A
X-ray Controls and Generator
Exposure time range
Maximum duty cycle
Minimum inherent filtration
Maximum output power
Generator rating
Leakage technique factors
20
0.01–0.99 sec. (certified for 0.02–0.99 sec.)
1:60 (one 0.25 sec. exposure / 15 sec.)
1.5mm Al
140W nominal at 60kV, 2.3mA
2.3mA at 60kVp ±10%
60kV, 2.3mA, 0.99 sec.
USER MANUAL..
Measurement Base of Technique Factors
The kV is measured during pre-pot testing using a calibrated high voltage divider with a guaranteed
accuracy of ±2%. Final performance measurements are made using a NERO mAx, model 8000 x-ray
meter from Victoreen. Tube current (mA) is sensed across a series connected resistor with an
accuracy of ±1% and measured using a digital multimeter, prior to encapsulation; NOMAD Dental has
no provision for external measurement of beam current after final manufacture. Exposure time is
measured from the moment x-rays are detected until they are no longer detected (which means "zerocrossing mode" is selected with no timer delay) using the NERO mAx 8000 x-ray meter.
Collimator Cone
Minimum source to skin distance
Nominal dose output at cone tip (20cm)
X-ray field size and configuration
Shielding
Backscatter radiation shielding
20cm (from focal spot to cone tip)
3.28mGy / sec.
6cm diameter circle
Lead-lined
0.5mm Pb-equivalent
7.2 Functional Diagram
21
NOMAD
7.3 X-ray Tube Specifications and
Characteristics
The VTD70/0.4/12CP is designed for intraoral dental imaging by an
x-ray unit, and is available for nominal tube voltage with selfrectified or constant potential circuit – manufactured by Kailong;
distributed in the U.S.A. by Vista Technology.
Nominal tube voltage
50–70kV
Nominal focal spot (IEC 60336:1993)
0.4mm
Maximum anode heat content
4500J
Maximum current continuous service
1.5mA x 70kV
Maximum anode cooling rate
100W
Nominal anode input power
430W
Target material
Tungsten
Target angle
12°
Filament characteristics
2.2–3.0A, 2.0–3.5V
Minimum permanent filtration
0.8mm Al / 50kV
(IEC 60522:1999)
y
M4Deep10
37±1
CENTRAL X-RAY
100MIN
12°
Ø30MAX
F
X
C
C
F:FILAMENT
C:CATHODE
x axis : horizontal
22
Ø12
F
10MAX
y axis : vertical
67MAX
OUTLINE DRAWING
2MIN
USER MANUAL..
mA
V
Cathode Emission / Filament Characteristics
12
4.0
10
3.5
50kV
60kV
8
3.0
70kV
6
2.5
4
2.0
2
1.5
0
1.0
25kHz
2.2
mA
10
9
2.4
2.6
2.8
3.0A
Rating Chart
50kV
8
60kV
7
70kV
6
5
4
3
2
1
25kHz
0
0.1
1
J
10 s
Thermal Characteristics Chart
4500
--4300J
100W
4000
3500
3000
anode heating curves
50W
2500
2000
1500
anode cooling curve
1000
0500
0
50
100
150
200
250
300 s
23
NOMAD
7.4 EMC Data
Independent laboratory testing for electromagnetic compatibility for conformity to the Sub-clause 5.10
requirements of ISO/IEC 17025 "General Criteria for the Competence of Testing and Calibration
Laboratories" was conducted by:
Nemko USA, Inc.
11696 Sorrento Valley Rd, Suite F
San Diego, CA 92121-1024
USA
The NOMAD Dental X-ray System is intended for use in the electromagnetic environment as specified.
The following tables describe the tests performed and the status of the testing. The NOMAD uses RF
energy only for its internal function. In addition, the housing includes conductive shielding; therefore, its
RF emissions are very low and are not likely to cause any interference in nearby electronic equipment.
The test results show that the NOMAD is suitable for use in all establishments, including domestic
establishments and those directly connected to public low-voltage power supply network that supplies
buildings used for domestic purposes.
Test Specifications
Test Type
Conducted and Radiated
Emissions
Radio Frequency Emissions and Electromagnetic Immunity tests in
accordance with requirements of EN 60601-1-2 as follows:
In Accordance with
Document
EN 55011 (1998), A1 Class
"B"
Document Title
Limits and Methods of Measurement of Radio Disturbance
Characteristics of Information Technology Equipment
Electrostatic Discharge
Immunity
IEC 61000-4-2 (1995), A1
(1998), A2 (2000)
Electromagnetic Compatibility for Industrial Process Measurement
and Control Equipment Electrostatic Discharge Requirements
Radio Frequency Immunity
IEC 61000-4-3 (2000), A1
(2002)
Electromagnetic Compatibility, Basic Immunity Standard, Radiated
Radio Frequency Electromagnetic Field, Immunity Test
Power Frequency Magnetic
Field Immunity
IEC 61000-4-8 (1993), A1
(2000)
Electromagnetic Compatibility, Testing and Measurement
Techniques for Power Frequency Magnetic Field, Immunity Test
NOTE: The tests documented in the table above are the only tests required for this product as it is a
battery operated device and has no I/O cables. IEC 61000-4-4, 4-5, 4-6 and 4-11 are not applicable.
24
USER MANUAL..
Emissions Test Summary
Specification
Frequency Range
Compliance Status
EN 55011 (1991), Group 1, Class "B" Conducted
Emissions
0.15 MHz – 30.00 MHz
N/A for a battery powered
device
EN 55011 (1991), Group 1, Class "B" Radiated Emissions
30.0 MHz – 1000 MHz
PASS
N/A
N/A for a battery powered
device
Up to the 40th Harmonic
N/A for a battery powered
device
≤4% Maximum Relative Voltage Change;
Value of D(T) ≤3% for more than 200ms
N/A for a battery powered
device
EN 55014 (1993) – Discontinuous Disturbance Test
EN 61000-3-2 (2000) – Power Line Harmonics
EN 61000-3-3 (1995), A1 (2001) – Power Line Flicker
Immunity Test Summary
Specification
Minimum Test Level Required
per EN 60601-1-2
Test Level Completed
Compliance
Status
IEC 61000-4-2 (1995), A1
(1998), A2 (2000) – Electrostatic
Discharge Immunity
Criterion B
Air discharge up to ±8kV; contact
discharge up to ±6kV
Criterion B
Air discharge up to ±8kV; contact
discharge up to ±6kV
PASS
IEC 61000-4-3 (2000), A1
(2002) – RF Radiated Fields
Immunity
Criterion A
Radiation field strength of 3V/m from
80 – 2500MHz (80% amplitude
modulated @ 1 kHz)
Criterion A
Radiation field strength of 3V/m from
80 – 2500MHz (80% amplitude
modulated @ 1 kHz)
PASS
IEC 61000-4-4 (1995), A1
(2000), A2 (2001) – Electrical
Fast Transient Immunity
Criterion B
Power line pulses of ±2kV direct; I/O
line pulses of ±1kV
Criterion B
Power line pulses of ±2kV direct; I/O
line pulses of ±1kV
N/A for a battery
powered device
IEC 61000-4-5 (2001) –
Lightning Surge Immunity
Criterion B
Power line surges of ±2kV common,
±1kV differential mode
Criterion B
Power line surges of ±2kV common,
±1kV differential mode
N/A for a battery
powered device
IEC 61000-4-6 (1996), A1
(2000) – RF Common Mode
Immunity
Criterion A
150 kHz – 80 MHz at 3 Vrms (80%
amplitude modulated @ 1 kHz)
Criterion A
150 kHz – 80 MHz at 3 Vrms (80%
amplitude modulated @ 1 kHz)
N/A for a battery
powered device
IEC 61000-4-8 (1993), A1
(2000) – Power Frequency
Magnetic Field Immunity
Criterion A
Helmholtz coil at 50 Hz, to 3 amps
(rms) per meter
Criterion A
Helmholtz coil at 50 Hz, to 3 amps
(rms) per meter
PASS
IEC 61000-4-11 (2001) –
Voltage Dips and Short
Interruptions
Criterion B and C
Voltage Dips of >95%, 30% and
>60%; Interruptions of >95%
Criterion B and C
Voltage Dips of >95%, 30% and >60%;
Interruptions of >95%
N/A for a battery
powered device
25
NOMAD
7.5 Optional Calibration Checks
The NOMAD is factory calibrated and tested prior to release (see your Certificate of Conformance) and
there are no adjustment options. However, the optional checks listed below may be performed by a
qualified technician as desired.
Setup a calibrated Performance Meter (such as the Victoreen NERO™ mAx model 8000) according to
manufacture’s specifications to detect and report the following: X-ray Tube Voltage [kV Effective Mode],
Radiation Time [ms Effective Mode], and Dose [mR Average Mode]. The filter card for the Test
Detector should be in the 50–100kVp position.
Measurement Method: Final performance measurements are made using a NERO mAx, model 8000
x-ray meter from Victoreen. Tube current (mA) is sensed across a series connected resistor with an
accuracy of ±1% and measured using a digital multimeter, prior to encapsulation; NOMAD has no
provision for external measurement of beam current after final manufacture. Exposure time is
measured from the moment x-rays are detected until they are no longer detected (which means "zerocrossing mode" is selected with no timer delay) using the NERO mAx 8000 x-ray meter. Accelerating
voltage (kV) is measured at both peak (kVp) conditions and effective conditions (kVeff), which is the
equivalent kV as if the kV were constant through the whole exposure time. Linearity is calculated per
IEC60601-2-7, 50.102.2a.
This x-ray unit may be dangerous to testing technician and any bystanders unless safe
test exposure factors, such as placing the Test Detector in a lead lined box or the use of
a protective lead apron are observed.
Enable the NOMAD and with the cone perpendicular to the Test Detector, make exposures into the
Test Detector and capture the resulting data.
Compare the result with the factory release parameters (indicated in the chart below). For results
outside these parameters, discontinue use and contact your dealer/distributor or Aribex.
Test
Description
kVp (eff)
Accuracy
Timer
Accuracy
Acceptance
Limits
Timer Settings and Corresponding Acceptable Ranges
20ms
40ms
400ms
600ms
990ms
60kV ±10%
54 to 66
54 to 66
54 to 66
54 to 66
54 to 66
Setpoint
±10%, +1ms
17 to 23
35 to 45
359 to 441
539 to 661
890 to 1090
A duty cycle of 1:60 is required after each x-ray discharge to prevent over-heating
damage to the x-ray tube.
26
LIMITED WARRANTY
COVERAGE. Aribex, Inc. warrants its medical and dental x-ray equipment to be free from
any defects in material or workmanship for a period of one (1) year from the date of
purchase. Aribex, Inc. also warrants any accessories purchased from Aribex to be free from
any defects in material or workmanship for the period of one (1) year from the date of
purchase.
The liability of Aribex, Inc. is limited to repair or replacement of any parts that Aribex or its
authorized resellers determine to be defective. Contact Aribex for a Return Material
Authorization (RMA) number and shipping instructions. Parts proving defective shall be
repaired or replaced free of charge (labor and domestic shipping included), if defective
equipment is returned freight collect to Aribex (Utah, USA) or the location of the authorized
service center. Equipment repaired or replaced under warranty shall continue to be
warranted for the balance of the original warranty term. All warranty claims must be made
not later than ten (10) business days following the expiration of the applicable warranty
period.
LIMITATIONS OF COVERAGE. This warranty does not apply to equipment that is or has
been abused, misused, or altered (including opening enclosure or tampering), improperly
maintained, subjected to use beyond rated conditions, or damaged as a result of any
carelessness or accidents. This warranty does not cover ordinary wear and tear or
maintenance.
LIMITATIONS OF LIABILITY. Aribex, Inc. makes no other warranty, either expressed or
implied, with respect to any equipment purchased from Aribex, including without limitation
any implied warranties of merchantability or fitness for a particular purpose, whether or not
Aribex may have been informed of the actual uses to which any of such equipment may be
put. Aribex, Inc. shall not under any circumstance be liable for incidental, indirect,
consequential, punitive or exemplary damages, including without limitation damages for
delay or lost profits, and in no event shall liability of Aribex arising from the purchase, sale
or use of the equipment, or breach of any warranty made above, exceed in the aggregate
the purchase price paid therefore.
27
0473
ISO 13485 / ISO 9001
CERTIFIED COMPANY
© Aribex, Inc. 2005, 2010
All Rights Reserved
English is the original draft language for this manual.
Aribex, Inc.
744 South 400 East
Orem, Utah 84097
U.S.A.
EC
REP
Phone: 801-226-5522
Fax: 801-434-7233
Email: [email protected]
http://www.aribex.com
MT Promedt Consulting, Altenhofstr. 80, 66386 St. Ingbert, Germany
MP-0013, Rev G