1
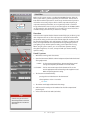
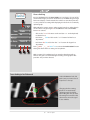
Phocus by Hasselblad User Manual 1 ??????????????????? Tethered Capture Allows the control of Hasselblad digital camera products when connected by FireWire to a computer. Tethered capture Shortcut Capture +N Ctrl + N Connection $POOFDUUIFEJHJUBMDBNFSBTZTUFNUPBDPNQVUFSWJBB'JSF8JSFDBCMF"O JDPOXJMMBQQFBSVOEFSDevices 1 in the File Browser and a heading in the Camera tool 2BöSNTUIBUDPOOFDUJPOIBTCFFONBEF3FHBSEJOHTUPSBHFTQBDFZPV DBODIFDLUIFBNPVOUMFGUCZTFMFDUJOHUIFCapture Destination GPMEFSJOUIF'JOEFS BOESFBEJOHUIFmHVSFEJTQMBZFEUPUIFSJHIUJOUIFThumbnails BrowserCBS Capture 4FFVOEFSTools for description of CameraUPPM"DDPSEJOHUPNPEFMDPOmHVSBtion, the camera can be triggered either by: the Capture icon in the Toolbar 3 )NPEFMTNPUPSJ[FE7NPEFMTBOE7 NPEFMTXJUIXJOEFSPOMZ 1 + n Ctrl + n the shortcut – UIFDBNFSBJUTFMG 2 After exposure, the capture is stored directly in the folder that you have designated to be the Capture DestinationGPMEFSEFGBVMUPhocus Captures – see File Browser section «« « about how to create a new capture destination folder) The name of this selected folder appears at the top of the File Browser as a SFNJOEFS *NNFEJBUFMZBGUFSFYQPTVSFUIFDBQUVSFQSFWJFXBQQFBSTJOUIFViewer and in the Thumbnail Browser"OJDPOBQQFBST 4 on the left hand side of the bar just above the Viewer UPJOEJDBUFQSPHSFTT*UEJTBQQFBSTXIFOUIFDBQUVSF IBTCFFOTUPSFE Points to note 3 4 t Captures are stored directly in the chosen capture destination folder. You should therefore always check beforehand that you have selected the correct folder (see $BQUVSF%FTUJOBUJPO section «« « for more information). t All tethered captures are stored as lossless compressed 3F files in the capture destination folder. t Using the $BNFSB tool you can accurately control the camera setup. There are a variety of controls available under this tool, depending on the camera model. These include, apart from shutter-speed, aperture, etc., even special focusing options allowing for remote focus increments using the “-“ or “+” buttons and modifier keys to control focus and depth of field. t The available set of active controls in the $BNFSB tool will differ according to the digital camera model. H-system cameras allow more control than V-system cameras due to their greater integration and overall more advanced data-controlled capabilities. t The Mirror Up button on the $BNFSB tool only functions with H system cameras. 33 Tethered Capture Live Video #PUI)BOE7TZTUFNDBNFSBTDBOVUJMJ[FUIFLive Video function, although UIF)TZTUFNPõFSTBHSFBUFSPQQPSUVOJUZGPSBVUPNBUJPO5IJTGVODUJPOJT intended for tethered operation in studio set-up environments for product BOETJNJMBSOPONPWJOHTVCKFDUTXIFSFDBSFGVMDPNQPTJUJPOBMQMBDJOHJO DPOKVODUJPOXJUIMBZPVUTLFUDIFTFUDJTSFRVJSFE*UQSPWJEFTBDPOUJOVBM JNBHFSFGSFTIFEBCPVUPODFFWFSZTFDPOE UIBUBQQFBSTJOUIFViewer,XIJDI DBOCF[PPNFEJOBOEDIFDLFEGPSGPDVT"OBVEJPBOEBWJTVBMBJEBSFBMTP BWBJMBCMFUPIFMQZPVNBLFWFSZBDDVSBUFGPDVTTFUUJOHT +L Ctrl + L Procedure Live Video button Mirror Up button "TUIJTGVODUJPOSFRVJSFTUIBUUIFTIVUUFSSFNBJOTGVMMZPQFOJUBMMPXTBHSFBU EFBMPGMJHIUPOUPUIFTFOTPS5IFPOMZFYQPTVSFDPOUSPMTMFGUBSFUIFSFGPSF UIFBQFSUVSFTFUUJOHBOEUIFBNPVOUPGBNCJFOUMJHIU5IJTSFTVMUTJOBOFFE GPSRVJUFMPXMFWFMMJHIUJOHBOETNBMMBQFSUVSFTOPSNBMMZBDPNCJOBUJPOPG CPUI 5IJTNJHIUEFNBOETPNFFYQFSJNFOUBUJPOSFHBSEJOHUIFQPXFSPG ZPVSMJHIUJOHTFUVQBOEUIFBQFSUVSFTFUUJOHZPVIBEQMBOOFEPOVTJOH When using H-system cameras, you can use the Auto aperture setting, UIPVHIUIJTNJHIUOPUPGDPVSTFDPSSFTQPOEXJUIZPVSEFTJSFEXPSLJOH BQFSUVSFTFUUJOH H and V-systems 1. With Phocus running, tether the camera. 2. Open the Camera tool (default: under the Capture tab) and make the desired setting adjustments H ONLY - Set the camera to Manual focus. Aperture and shutter speed settings are temporarily overridden in Live Video mode. V / CFV ONLY - The lens must remain open for the duration of the session. Use the appropriate method according to the equipment used. Make a temporary aperture setting. 3. The function is activated either by: · pressing the -JWF7JEFP button in the Camera tool · Choosing .FOV7JFX-JWF7JEFP · + l Ctrl+ l 4. The 7JFXFS now displays a black and white image. 5. Grid lines and /or overlay can be introduced to check for compositional positioning etc. 6. A focus check can also be made (see below). Tip In Preferences you can select a favored layout that is activated automatically when a camera is connected. 34 Tethered Capture ^+ + +A Focus checking Ctrl +×+A By using the Zoom tool in the Viewer Toolbar, you can obtain a close up of the TFDUJPOPGUIFJNBHFZPVXBOUUPDIFDLGPSGPDVT5IFViewer image changes GPSNBUBOEEJTQMBZTBWJFXCFOFBUI5IJTJTUIFGPDVTWJFXXIJDIQMPUTUIF BDDVSBDZPGUIFGPDVTTFUUJOHXIJMFEJTQMBZJOHJUJOUIFGPSNPGBDPOUJOVBMMZ VQEBUFEHSBQI 1 8JUIUFUIFSFE)TZTUFNDBNFSBTNBLFBOJOJUJBMBVUPGPDVTFJUIFSEJSFDUMZ on the camera or by pressing A 3 on the CameraUPPM1SFTTUIFLive Video button 1UPBDUJWBUF r $MJDLPOUIFA2 PSA4 CVUUPOTPOUIFUPPMOPUPSPOUIFLFZCPBSE UPBMUFSUIFGPDVT r )PMEEPXO / Ctrl BOEDMJDLPOUIFAPSA CVUUPOTGPSmOFSGPDVT BEKVTUNFOUT r )PMEEPXOAlt / AltBOEDMJDLPOUIFAPSA buttons for larger focus BEKVTUNFOUT Press ^ Ctrl + + a / Ctrl+×+ a to activate the Audio Feedback function UIBUTJHOBMTXIFOUIFGPDVTTFUUJOHJTBUJUTPQUJNVN 2 3 4 8JUI7TZTUFN$'7DPNCJOBUJPOTGPDVTNVTUCFBMUFSFENBOVBMMZPO UIFMFOT5IFHPBMJTUPPCUBJOUIFIJHIFTUSFBEJOHPOUIFHSBQIGPSUIBU QBSUJDVMBSBSFBZPVIBWFTFMFDUFE Focus checking in Live Video mode 4FMFDUUIFZoomUPPMBOEDMJDL POUIFBSFBZPVXBOUUPDIFDL UPQSPEVDFBDMPTFVQ $IBOHJOHUIFGPDVTTFUUJOH produces an automatically VQEBUJOHHSBQI5IFIJHIFS the reading, the more accurate the setting measured from the TFMFDUFEBSFB"OBVEJPTJHOBM JTBMTPBWBJMBCMF 35 Tethered Capture Hasselblad A/S Hejrevej 30, DK - 2400 Copenhagen, Denmark Victor Hasselblad AB Box 220, SE - 401 23 Göteborg, Sweden 11.11 - UK - v11