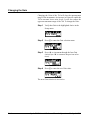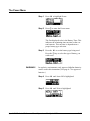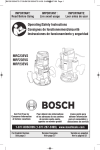
1
Spark® 704 Noise Dosimeter
Technical Reference Manual
Larson Davis
Spark® 704
Personal Noise Dosimeter
Technical Reference Manual
I704.01 Rev E
Copyright
Copyright 2006, 2007, 2008 and 2009 by PCB Piezotronics, Inc. This manual is copyrighted, with all
rights reserved. The manual may not be copied in whole or in part for any use without prior written
consent of PCB Piezotronics, Inc.
Disclaimer
The following paragraph does not apply in any state or country where such statements are not
agreeable with local law:
Even though PCB Piezotronics, Inc. has reviewed its documentation, PCB Piezotronics, Inc. makes no
warranty or representation, either expressed or implied, with respect to this instrument and
documentation, its quality, performance, merchantability, or fitness for a particular purpose. This
documentation is subject to change without notice, and should not be construed as a commitment or
representation by PCB Piezotronics, Inc.
This publication may contain inaccuracies or typographical errors. PCB Piezotronics, Inc. will
periodically update the material for inclusion in new editions. Changes and improvements to the
information described in this manual may be made at any time.
Record of Serial Number and Purchase Date
Serial Number: ___________
Purchase Date: ___________
Recycling
PCB Piezotronics, Inc. is an environmentally friendly organization and encourages our customers to
be environmentally conscious. When this product reaches its end of life, please recycle the product
through a local recycling center or return the product to:
PCB Piezotronics, Inc.
Attn: Recycling Coordinator
1681 West 820 North
Provo, Utah, USA 84601-1341
where it will be accepted for disposal
Table of Contents
Chapter 1
Introduction
1-1
About This Manual .................................................................................................1-1
About This Chapter.................................................................................................1-2
Formatting Conventions .........................................................................................1-2
Spark® Family Features .........................................................................................1-2
Spark® 706 RC Features ...................................................................................1-2
Spark® 706 Features..........................................................................................1-4
Spark® 703+/705+ Features ..............................................................................1-5
Spark® 703/705 Features...................................................................................1-6
Spark® 704 Features..........................................................................................1-7
Spark® 704 .............................................................................................................1-8
Getting Started ........................................................................................................1-8
Unpacking and Inspection..................................................................................1-9
Assembling the Spark® 704 ............................................................................1-10
Spark® 704 Standard and Optional Accessories .............................................1-12
Standard Accessories...................................................................................1-12
Optional Accessories...................................................................................1-12
Installing the Batteries .....................................................................................1-12
Using Rechargeable Batteries ..........................................................................1-14
Environmental Considerations .........................................................................1-14
Data Retention..................................................................................................1-15
Chapter 2
Operation of the Spark® 704
2-1
Overview.................................................................................................................2-1
User Interface..........................................................................................................2-1
Keypad Functions ..............................................................................................2-2
704 Icon Descriptions ........................................................................................2-2
Battery ...........................................................................................................2-2
Run Indicator.................................................................................................2-3
Overload ........................................................................................................2-3
Run-Time Clock............................................................................................2-3
Powering up the Spark® 704..................................................................................2-3
Navigating through the 704 Displays .....................................................................2-4
Tools T ...................................................................................................................2-8
Calibration of the 704 .............................................................................................2-8
Using the Lock Feature.........................................................................................2-11
Activating the Lock..........................................................................................2-11
Deactivating the Lock ......................................................................................2-12
Setting up the 704 .................................................................................................2-13
Changing the Gain ...........................................................................................2-14
Changing the Frequency Weighting ................................................................2-15
Changing the Peak Weighting..........................................................................2-16
Changing the Detector .....................................................................................2-16
Changing the Dose Measurement Settings ......................................................2-17
Changing the Threshold Level ....................................................................2-18
Changing the Exchange Rate ......................................................................2-18
Changing the Criterion Time.......................................................................2-19
Changing the Criterion Level......................................................................2-19
About................................................................................................................2-20
The Power Menu ..............................................................................................2-21
Auto-Off ......................................................................................................2-22
Display .............................................................................................................2-23
Appendix A Spark® 704 Specifications
A-1
General Characteristics ..........................................................................................A-1
Type Precision..............................................................................................A-1
Reference Direction......................................................................................A-1
Typical Measurement Ranges ......................................................................A-1
Calibration Reference Level.........................................................................A-2
Frequency Weightings..................................................................................A-2
Detector Time Weightings ...........................................................................A-3
Operating Temperature Range .....................................................................A-3
Effects of Humidity......................................................................................A-3
Storage Temperature ....................................................................................A-3
Effects of Magnetic Fields ...........................................................................A-3
Effects of Strong Acoustic Fields.................................................................A-4
Compliance with Electromagnetic Compatibility Standards .......................A-4
Effects of Mechanical Vibration ..................................................................A-5
Microphone Extension Cables .....................................................................A-6
Calibration Procedure...................................................................................A-6
Reference Frequency....................................................................................A-6
Stabilization Time ........................................................................................A-6
Microphone Electrical Impedance ...............................................................A-6
Functions Measured .....................................................................................A-6
Data Storage .................................................................................................A-7
2
Data Communications ..................................................................................A-7
Digital Display .............................................................................................A-7
Digital Display Resolution ...........................................................................A-7
Real-time Clock/Calendar ............................................................................A-7
Run-time Clock ............................................................................................A-7
Standards Met...............................................................................................A-7
Power Supply ...............................................................................................A-7
Dimensions/Weight (with Microphone, Preamplifier, and Battery, and Case)
......................................................................................................................A-8
Approved Battery Types ..............................................................................A-8
Microphone Pinout.......................................................................................A-8
Appendix B Glossary
B-1
A-weight....................................................................................................... B-1
Calibration.................................................................................................... B-1
Calibration Check......................................................................................... B-1
Criterion Duration ........................................................................................ B-1
Criterion Level ............................................................................................. B-1
C-weight ....................................................................................................... B-1
Daily Personal Noise Exposure (LEP,d) ...................................................... B-1
Detector Rate................................................................................................ B-2
Dose.............................................................................................................. B-2
Exchange Rate.............................................................................................. B-2
Equivalent-Continuous Sound Level or Leq................................................ B-2
Equivalent Time Weighted Average or TWA(x) ......................................... B-3
Frequency & Exponential-Time Weighted Sound Level or Lwt ................. B-4
Frequency Weighting ................................................................................... B-5
LEP,d............................................................................................................ B-5
Lmax............................................................................................................. B-5
Lmin ............................................................................................................. B-5
Ln ................................................................................................................. B-6
Noise Dose ................................................................................................... B-6
Peak .............................................................................................................. B-7
Peak Frequency Weighting .......................................................................... B-7
Projected Noise Dose ................................................................................... B-7
Projected Sound Exposure ........................................................................... B-8
Sound Exposure (SE) ................................................................................... B-9
Threshold Level............................................................................................ B-9
Time Weighted Average (TWA).................................................................. B-9
.................................................................................................................... B-10
Appendix C Intrinsic Safety Approvals
C-1
Back Panel Label .............................................................................................. C-3
4
List of Figures
Introduction............................................................1-1
704..................................................................................... 1-8
Spark® 704........................................................................ 1-9
Integrated microphone and preamplifier (MPR001) shown on left.
3" cylindrical mast type preamp for use as SLM (MPR002) shown
on right....................................................................................
......................................................................................... 1-10
Aligning the microphone connectors................................ 1-10
Connecting the microphone............................................. 1-11
The CCS018 protective case........................................... 1-11
Moving the battery door sliding tab.................................. 1-12
Opening the battery door ................................................. 1-13
Re-inserting the battery door ........................................... 1-13
Locking the battery door .................................................. 1-13
Operation of the Spark® 704 ................................2-1
I704 Rev D
CHAPTER
1
Introduction
Congratulations on your purchase of the Spark® 704
®
Personal Noise dosimeter. The Spark 704 is among the
smallest, most powerful noise dosimeters available today.
The rugged construction will provide you with years of
trouble-free operation.
The 704 is a full-featured dosimeter and sound level meter.
It is completely configurable and controllable via the keypad.
We invite you to read this brief manual to get the most out of
®
your Spark 704.
About This Manual
This manual has 2 chapters and 3 appendices covering the
following topics:
Spark‚ 704 Technical Reference Manual
•
Chapter 1 - Introduction: user manual overview and an
introduction to the functionality and measurement
capabilities of the 704.
•
Chapter 2 - This chapter reviews operation of the 704 via
it’s built in keypad and on-board user interface.
•
Appendix A – 704 specifications
•
Appendix B – Glossary
•
Appendix C– Intrinsic Safety Approval
Introduction
1-1
About This Chapter
Specifically, this introductory chapter covers the following
topics:
•
Formatting Conventions: explanation of the fonts and
other formatting conventions used in this manual
•
Getting Started: instructions for unpacking, inspecting,
and initially assembling the 704.
Formatting Conventions
This manual uses the following formatting conventions:
In step-by-step directions, the process (what you do) is
shown in the right column, and the rationale (why you do it)
with other cautions and comments are shown in the left column. Especially important information is shown in italics.
®
Spark Family Features
The Larson Davis Spark® family of products meet all
national and international requirements for dosimeter standards. The family is segmented into 7 instruments. The 703,
703+, 704, 705, 705+, 706, and 706RC. Each instrument has
unique features that will fit the needs of a wide variety of
users.
®
Spark 706 RC Features
1-2
•
The 706RC has the ability to connect to the 703+, 705+,
706 and other 706RC units. The Remote Control
functionality allows manual setup and control of the
remote instrument. The 706RC can also download and
®
store data from several other Spark units.
•
Stand Alone capability. In addition to the Remote
Control functions, the 706RC is a fully functional Noise
Dosimeter, having all the functionality of a standard 706
instrument.
•
Measurement range of 40 dB to 143 dB (rms), in four
ranges.
•
Peak detector range of 80 to 146 in four ranges.
Spark‚ 704 Technical Reference Manual
About This Chapter
•
Leq, Max, and Peak levels stored at 1, 5, 15, 30, or 60
second time intervals. 4 user defined time weighted
average levels or calculations are also stored, as well as
Lmin.
•
Ln statistics (1 – 99 in 0.5 dB resolution) stored at 5
minute intervals.
•
Automatic detection of Microphone Failure. Spark
instruments will detect and display a warning message if
the microphone is disconnected. (Microphone failure is
also recorded in the status byte of each time history
record).
•
4 Megabytes of nonvolatile memory.
•
Compatible infrared interface providing transfer rates to
the PC at up to 115,000 bits per second.
•
User-programmed daily start/stop times.
•
PC-based setup, dose calculation, report generation, and
graphics.
•
Manual setup of instrument functions. (Timers and Clock
can only be set from the Blaze® software).
•
Slow or Fast rms detection using A or C weighting.
•
Calculation of noise exposure in percentage dose,
projected dose, SE (Pa2 hours), and Pasques (Pa2
seconds) units using a variety of exchange rates,
threshold, and criteria values.
•
Continuous display of SPL level. The instrument will
continue to display the current SPL level, even when the
instrument is not running. During this time the
instrument will not be logging data, the value is only
being displayed on the screen.
•
Noise floor (typical) of 35 dBA (A-weighted) Slow/Fast
(using 30 dB gain).
•
Frequency Response of A and C weighting meets ANSI
and IEC Standards.
•
Detector accuracy: True RMS; less than 0.7 dB error
from 40 to 143 dB.
•
Two standard AA internal alkaline batteries provide
greater than 100 hours of continuous battery life.
®
Spark‚ 704 Technical Reference ManualSpark® Family Features
1-3
®
Spark 706 Features
1-4
•
The 706 is a fully functional Noise Dosimeter.
•
Measurement range of 40 dB to 143 dB (rms), in four
ranges.
•
Peak detector range of 80 to 146 in four ranges.
•
Leq, Max, and Peak levels stored at 1, 5, 15, 30, or 60
second time intervals. 4 user defined time weighted
average levels or calculations are also stored, as well as
Lmin.
•
Ln statistics (1 – 99 in 0.5 dB resolution) stored at 5
minute intervals.
•
Automatic detection of Microphone Failure. Spark®
instruments will detect and display a warning message if
the microphone is disconnected. (Microphone failure is
also recorded in the status byte of each time history
record).
•
4 Megabyte of nonvolatile memory.
•
Compatible infrared interface providing transfer rates to
the PC at up to 115,000 bits per second.
•
User-programmed daily start/stop times.
•
PC-based setup, dose calculation, report generation, and
graphics.
•
Manual setup of instrument functions. (Timers and Clock
can only be set from the Blaze® software).
•
Slow or Fast rms detection using A or C weighting.
•
Calculation of noise exposure in percentage dose,
projected dose, SE (Pa2 hours), and Pasques (Pa2
seconds) units using a variety of exchange rates,
threshold, and criteria values.
•
Continuous display of SPL level. The instrument will
continue to display the current SPL level, even when the
instrument is not running. During this time the
instrument will not be logging data, the value is only
being displayed on the screen.
•
Noise floor (typical) of 35 dBA (A-weighted) Slow/Fast
(using 30 dB gain).
•
Frequency Response of A and C weighting meets ANSI
and IEC Standards.
Spark‚ 704 Technical Reference Manual
Spark® Family Features
•
Detector accuracy: True RMS; less than 0.7 dB error
from 40 to 143 dB.
•
Two standard AA internal alkaline batteries provide
greater than 100 hours of continuous battery life.
•
Maximum security with full functionality in an
extremely durable case. Faceless instrument provides
indicators on face for Run Status and Battery life.
•
Measurement range of 40 dB to 143 dB (rms), in four
ranges.
•
Peak detector range of 80 to 146 in four ranges.
•
Leq, Max, and Peak levels stored at 1, 5, 15, 30, or 60
second time intervals. 4 user defined time weighted
average levels or calculations are also stored, as well as
Lmin.
•
Ln statistics (1 – 99 in 0.5 dB resolution) stored at 5
minute intervals.
•
Automatic detection of Microphone Failure. Spark
instruments will detect and display a warning message if
the microphone is disconnected. (Microphone failure is
also recorded in the status byte of each time history
record).
•
4 Megabyte of nonvolatile memory.
•
Compatible infrared interface providing transfer rates to
the PC at up to 115,000 bits per second.
•
User-programmed daily start/stop times.
•
PC-based setup, dose calculation, report generation, and
graphics.
•
Manual setup possible with the 706RC
•
Slow or Fast rms detection using A or C weighting.
•
Calculation of noise exposure in percentage dose,
projected dose, SE (Pa2 hours), and Pasques (Pa2
seconds) units using a variety of exchange rates,
threshold, and criteria values.
•
Noise floor (typical) of 35 dBA (A-weighted) Slow/Fast
(using 30 dB gain).
•
Frequency Response of A and C weighting meets ANSI
and IEC standards.
Spark® 703+/705+ Features
NOTE: The 703+ and 705+ are identical
in operation and features. The 705+
offers an extruded metal housing and
runs on a single AA battery. The 703+
offers a tough but lightweight housing
and runs on two AA batteries.
®
Spark‚ 704 Technical Reference ManualSpark® Family Features
1-5
•
Detector accuracy: True RMS; less than 0.7 dB error
from 40 to 143 dB.
•
(703+ only) Two standard AA internal alkaline batteries
provide greater than 100 hours of continuous battery life.
•
(705+ only) One standard AA internal alkaline battery
provides greater than 35 hours of continuous battery life.
•
Maximum security with full functionality in an
extremely durable case. Faceless instrument provides
indicators on face for Run Status and Battery life.
•
Measurement range of 40 dB to 143 dB (rms), in four
ranges.
•
Peak detector range of 80 to 146 in four ranges.
•
Leq, Max, and Peak levels stored at 1, 5, 15, 30, or 60
second time intervals. 4 user defined time weighted
average levels or calculations are also stored, as well as
Lmin.
•
Ln statistics (1 – 99 in 0.5 dB resolution) stored at 5
minute intervals.
•
Automatic detection of Microphone Failure. Spark
instruments will detect and display a warning message if
the microphone is disconnected. (Microphone failure is
also recorded in the status byte of each time history
record).
•
4 Megabyte of nonvolatile memory.
•
Compatible infrared interface providing transfer rates to
the PC at up to 115,000 bits per second.
•
User-programmed daily start/stop times.
•
PC-based setup, dose calculation, report generation, and
graphics.
•
Slow or Fast rms detection using A or C weighting.
•
Calculation of noise exposure in percentage dose,
projected dose, SE (Pa2 hours), and Pasques (Pa2
seconds) units using a variety of exchange rates,
threshold, and criteria values.
®
Spark 703/705 Features
NOTE: The 703 and 705 are identical in
operation and features. The 705 offers an
extruded metal housing and runs on a
single AA battery. The 703 offers a tough
but lightweight housing and runs on two
AA batteries.
1-6
Spark‚ 704 Technical Reference Manual
Spark® Family Features
•
Noise floor (typical) of 35 dBA (A-weighted) Slow/Fast
(using 30 dB gain).
•
Frequency Response of A and C weighting meets ANSI
and IEC standards.
•
Detector accuracy: True RMS; less than 0.7 dB error
from 40 to 143 dB.
•
(705 only) One standard AA internal alkaline battery
provides greater than 35 hours of continuous battery life.
•
(703 only) Two standard AA internal alkaline batteries
provide greater than 100 hours of continuous battery life.
•
Measurement range of 40 dB to 143 dB (rms), in four
ranges.
•
Peak detector range of 80 to 146 in four ranges.
•
Leq, Max, Min, and Peak levels.
•
Manual Start and Stop functions.
•
Manual setup from the instrument front panel, with
control of weighting, dose parameters and start and stop
functions.
•
Slow or Fast rms detection using A or C weighting.
•
Automatic detection of Microphone Failure. Spark
instruments will detect and display a warning message if
the microphone is disconnected. (Microphone failure is
also recorded in the status byte of each time history
record).
•
Calculation of noise exposure in percentage dose,
projected dose, SE (Pa2 hours), and Pasques (Pa2
seconds) units using a variety of exchange rates,
threshold, and criteria values.
•
Noise floor (typical) of 35 dBA (A-weighted) Slow/Fast
(using 30 dB gain).
•
Frequency Response of A and C weighting meets ANSI
and IEC standards.
•
Detector accuracy: True RMS; less than 0.7 dB error
from 40 to 143 dB.
•
Two standard AA internal alkaline batteries provide
greater than 100 hours of continuous battery life.
®
Spark 704 Features
®
Spark‚ 704 Technical Reference ManualSpark® Family Features
1-7
®
Spark 704
NOTE: The 706RC, 706, and 703+ can
also be controlled by the 706RC.
The 704 is a fully functioning dosimeter that is controlled
independently via it’s own keypad and display.
Figure 1- 1 704
The 704, shown in Figure 1- 1 includes a 3/8 in. (10.6mm)
diameter piezoelectric microphone.
Getting Started
This section outlines the steps to follow when you first
unpack the 704. The following topics are covered:
1-8
•
Unpacking and Inspection
•
Assembling the 704
Spark‚ 704 Technical Reference Manual
Spark® 704
•
Standard and Optional Accessories
•
Installing the Batteries
•
Environmental Considerations
You will then be ready to use the 704 for actual measurements (as described later in Chapter 2 of this manual).
Unpacking and Inspection
®
Your Spark 704 has been shipped in protective packaging.
Please verify the package contents with the list of Accessories and Optional Equipment in this chapter, and retain the
product packaging for safe shipment at a future date. Report
any damage or shortage immediately to PCB Piezotronics,
Inc. at (888) 258-3222. If you have not already done so,
please record your instrument’s serial number (located on
the label on the back of the 704) and the purchase date at the
beginning of this manual (see the copyright page). You will
be asked to give this information in any future communications you may have with Larson Davis.
The following system diagram (Figure 1-2) illustrates the
®
standard configuration of the Spark 704.
Figure 1- 2 Spark® 704
Spark‚ 704 Technical Reference Manual
Getting Started
1-9
®
Assembling the Spark 704
First time assembly of the 704 is quick and easy.
Remove the microphone and preamplifier from its protective
packaging. The windscreen and microphone clip should
already be attached.
Figure 1- 3 Integrated microphone and preamplifier (MPR001)
shown on left. 3" cylindrical mast type preamp for use as SLM
(MPR002) shown on right
Step 1
Align the red dots of the microphone connector
plug (on cable) and the microphone connector
receptacle (on the 704).
Figure 1- 4 Aligning the microphone connectors
1-10
Spark‚ 704 Technical Reference Manual
Getting Started
Step 2
Carefully push microphone connector plug all the
way into the connector receptacle on the 704.
Figure 1- 5 Connecting the microphone
Step 3
If you wish to use the protective carrying case
(recommended), slide the 704 into the conforming
pouch and secure the Velcro® strap.
Figure 1- 6 The CCS018 protective case
Important: When removing the 704
from the pouch, do not pull microphone connector. This can cause
damage. Instead, please push the
704 at the bottom of the pouch while
firmly holding the sides.
Spark‚ 704 Technical Reference Manual
Getting Started
1-11
®
Spark 704 Standard and Optional Accessories
®
Your Spark 704 was delivered with a number of additional
items. Please make sure that you have received the following equipment with your 704:
Standard Accessories
®
•
Spark 704 dosimeter
•
Detachable 3/8 in. (10.6 mm) microphone and preamp
with integrated 3 ft. (1 m) cable. (MPR001)
•
AA alkaline batteries (2)
•
Windscreen
•
CCS018 nylon pouch
•
Microphone clip
If you are missing any of these items, please contact your
Larson Davis sales representative, or contact Larson Davis
directly.
Optional Accessories
The following optional equipment is also available:
•
CAL150 Type 2 precision microphone calibrator
•
MPR002 3" cylindrical mast type preamp for use as
SLM
Installing the Batteries
NOTE: Only AA type batteries can be
used in the Spark instruments.
WARNING!
To insert the two AA batteries in the 704, remove the battery
cover on the back of the instrument.
Do not replace the batteries in an explosive environment.
Step 1
Move the sliding tab towards the bottom (away
from the microphone end) of the 704.
Figure 1- 7 Moving the battery door sliding tab
1-12
Spark‚ 704 Technical Reference Manual
Getting Started
Step 2
Grasp the battery door by the sides (towards the
top of the 704) and pull outward to remove.
Figure 1- 8 Opening the battery door
Step 3
If there are existing batteries in the unit, gently
remove and replace them with new AA batteries.
Replace the door by first inserting the bottom side
of the battery cover in the 704 case.
Figure 1- 9 Re-inserting the battery door
Step 4
Move the top side of the battery cover flush
against the 704 case. Then move the sliding switch
to its original “up” position.
Figure 1- 10 Locking the battery door
Spark‚ 704 Technical Reference Manual
Getting Started
1-13
Internal battery life varies, depending on the operating
mode. Operating continuously, the 704 will last beyond 100
hours. Using the backlight will reduce the battery life.
Using Rechargeable Batteries
NOTE: Only AA type batteries can be
used in the Spark instruments.
Note: The instrument should not be
operated in an explosive environment if using any batteries other
than those approved and listed in
Appendix C.
The 704 can provide up to 40 hours continuous operation
with NiCad and NiMH rechargeable batteries. If you wish to
use rechargeable batteries rather than alkaline batteries, we
recommend the following batteries and battery chargers
which are universally available.
Radio Shack Rechargeable Batteries:
Catalog Number
Description
23-149A
NiCd 1000mAH AA, 2-pack
23-525
NiMH 1200mAH AA, 2-pack
Table 1-1 Rechargeable battery recommendation
Radio Shack Battery Chargers:
Catalog Number
Description
23-405
NiCd/NiMH 1 Hour Charge
23-406
NiCd/NiMH 5 Hour Charge
Table 1-2
Battery charger recommendation
Environmental Considerations
The 704 dosimeter can be used and stored in a wide range of
temperature and non-condensing humidity conditions. However, some precautions should be taken. For example, allow
the dosimeter ample time to adjust to abrupt temperature
changes. Condensation may form inside a cold dosimeter if
it is brought into a warm room or vehicle, and may persist
long after the outside case has adjusted to the ambient temperature.
Also, temperatures inside closed vehicles can reach excessive levels. Therefore, do not leave the instrument in direct
1-14
Spark‚ 704 Technical Reference Manual
Getting Started
sunlight inside a vehicle. A simple safeguard is to keep the
instrument inside a sealed foam insulated case or bag with
desiccant silica gel, available at photographic equipment
stores or from Larson Davis (LD part number DSC001).
Data Retention
The measurement data gathered by the 704 is not stored. The
data will be lost if the batteries expire. Good measurement
practice is to replace the batteries when they are running
low.
Spark‚ 704 Technical Reference Manual
Getting Started
1-15
1-16
Spark‚ 704 Technical Reference Manual
Getting Started
CHAPTER
2
Operation of the Spark® 704
®
Spark 704 – Quick Reference
Congratulations! You now have your hands on the most
powerful, smartest noise dosimeter available. It is also one
of the smallest and lightest. We at Larson Davis thank you
®
for your purchase of the Spark 704, and hope you receive
many years of good service from it. This section has been
developed to guide you through the operation of the 704.
Overview
This manual is best used with the instrument at your side.
You will be guided through a step by step tour of the Spark®
704. The appropriate keypad button will be shown on the
page. The resultant 704 display will then be presented to
verify that you have performed the correct action.
®
You will likely find the user interface of the Spark 704 to
be fairly intuitive. This section is intended to give you a tour
of the 704’s capabilities, and insights to its operation. You
will navigate through the 704’s simple interface and make
measurements immediately. You may find that it will also be
useful to refer to this guide when trying something new with
the 704.
User Interface
Navigation within the 704 display is achieved using the keypad. The keypad allows the user to maneuver through the
704’s simple menu structure, change settings, and view data.
Spark‚ 704Technical Reference ManualOperation of the Spark® 704
2-1
Keypad Functions
The keypad functions are as follows:
v – this key is used to power the 704 on or off.
s – this is the RUN/STOP key. It initiates or ends a measurement
R – the RESET key performs a reset of the current measurement. The measurement screen will clear and a new
measurement can be acquired. RESET is also used to exit
from menus/screens.
T – the TOOLS key is used to access various system functions of the 704 such as calibration, setting the 704 locking
feature, changing the instrument setup, viewing the firmware version, viewing battery capacity, and adjusting the
contrast of the display.
The arrow keys: l,r,u,d, provide a variety of
different navigation operations within the 704 operating system. This includes maneuvering through menus and displays. Typically, the up and down arrows move the user up
and down through displays and menus. The up and down
arrows are also used to navigate through menu choices. The
left and right arrows move the user from one related screen
to another.
c – this is used to select an option or choice from a 704
menu.
704 Icon Descriptions
The 704’s graphical display also has its own icons that provide status information.
Battery
2-2
The Battery icon provides information with respect to the
remaining battery voltage of the 704. Notice that there are 3
bars within the battery graphic. When all 3 sectors are present, the battery voltage is greater than 2.8 (3.0 volts is full
power). Two bars indicate that the voltage is greater than
2.4. With one bar illuminated, the voltage is greater than 2.2
volts. If the voltage is greater than 2.0, only the outlined battery will appear. When the voltage drops below 2.0, the out-
Spark‚ 704 Technical Reference Manual Operation of the Spark® 704
lined battery will begin to flash. At 1.8 volts, the 704 will
shut itself off.
Run Indicator
When the instrument is running, this bar graph will be animated, rolling from left to right. When the instrument is in
the stopped mode, the icon will not be present.
Overload
The alarm icon indicates that measurement overloads have
occurred. This can happen when extremely loud noise levels
occur, or if the microphone was bumped.
The icon will remain visible until a reset R of the 704 has
been performed. During an overload event, the alarm icon
will flash.
The bell Icon will also come on and flash during a microphone fault. After the microphone is connected, the bell will
®
remain on until the Spark instrument is reset.
Run-Time Clock
The clock icon is always present in the top right corner of
the 704 display. It indicates the total running time of the current measurement. This time can be set to zero by pressing
the reset R button on the 704. During the first hour of run
time, the clock will display in minutes and seconds (mm:ss).
After completion of the first hour, the clock display will
adjust to show hours and minutes (hh:mm). After 99 hours,
the clock will start over again, although the actual run time
(in hh:mm:ss) will always be maintained internally.
®
Powering up the Spark 704
If you have not already done so, turn the 704 on by pressing
the On/Off key: v
The instrument will move through a short start up cycle,
where it briefly flashes the 704 ID screen. Immediately following, the 704 will stabilize to its ready state. The screen
that will be displayed will be the same screen which was
active at the previous power down.
Spark‚ 704 Technical Reference ManualOperation of the Spark® 704
2-3
If you are in a menu, press R one or more times to exit to a
measurement display. The press u or d until you see the
following screen.
Navigating through the 704 Displays
2-4
Step 1
Press s to start a measurement. Notice that the
current sound pressure level and Leq are currently
being displayed.
Step 2
Press d to view the next display screen. This
shows the current Lmax (maximum sound pressure), Leq (equivalent sound pressure level or
“average”), Lmin (minimum sound pressure
level), and Lpk (the largest peak sound pressure
level).
Step 3
Press d to view the current SE (sound exposure), the 8 hour projected SE, and the 40 hour
projected SE in units of Pa2H.
Step 4
Press d to view the noise dose data for Dose 1.
The 704 will log four simultaneous doses. These
dose computations can have independent dose
variables such as exchange rates, threshold levels,
Spark‚ 704 Technical Reference Manual Operation of the Spark® 704
criterion levels, and criterion times. This display
shows the current dose value, the projected 8 hour
dose, and the TWA (Time Weighted Average).
Step 5
Press d to view the current dose data for Dose 2.
Step 6
Press d to view the current dose data for Dose 3.
Step 7
Press d to view the current dose data for Dose 4.
Step 8
Press d to view the SPL 1 Exceedance data. The
instrument counts the number of times the SPL 1
Exceedance level was exceeded, and also records
the amount of time for which the level was
exceeded.The Hysterisis is 2 dB, i.e. the level
must fall 2 dB below the exceedance level, before
a new exceedance will be recorded.
Step 9
Press d to return to the sound pressure level
screen.
Spark‚ 704 Technical Reference ManualOperation of the Spark® 704
2-5
Step 10 Press r to move to the sound pressure level setting screen. Here you will see the current 704 settings for the gain, rms weighting, peak weighting,
and detector rate.
Step 11 Press d twice to advance to the SE data display.
Step 12 Press r to view the SE data in Pa2S (Pasques),
the 8 hour projected Pa2S and the 40 hour projected Pa2S.
Step 13 Press d to advance to the Dose 1 display.
Step 14 Press r to inspect the Dose 1 settings for the criterion time, criterion level, exchange rate, criterion
time, rms detector, and rms weighting.
If you are measuring to OSHA regulations, the following is
a list of appropriate settings:
2-6
•
RMS Weighting – A
•
Peak Weighting – Unweighted
•
Detector Rate – Slow
•
Exchange Rate – 5 dB
•
Threshold Level – 80 dB
Spark‚ 704 Technical Reference Manual Operation of the Spark® 704
•
Criterion Level – 90 dB
•
Criterion Time – 8 hours
Step 15 Press d to inspect the Dose 2 settings. As stated,
independent dose settings for all four of the 704’s
simultaneous dose measurements can be established.
Step 16 Press d three times to move to the SPL 1
Exceedance display.
Step 17 Press r to examine the SPL 2 Exceedance values. This feature allows you to measure and view
a second sound pressure level (RMS) exceedance.
It counts the number of times the SPL 2
Exceedance level was surpassed, and the total time
the RMS sound levels were above the threshold
(120 dB).
Step 18 Press r again to view the Peak Exceedance data.
The instrument counts the number of times the
Peak Exceedance level was exceeded, and also
records the amount of time for which the level was
exceeded.The Hysterisis is 2 dB, i.e. the level
must fall 2 dB below the exceedance level (140),
before a new exceedance will be recorded.
Spark‚ 704 Technical Reference ManualOperation of the Spark® 704
2-7
Tools T
The Tools area is where you go to change settings in the 704.
Let’s tour the Tools menu.
Step 1
Press T on the 704 keypad.
A number of sub menus are available within the Tools menu
including Calibration, Lock, Setup…
Step 2
Press d to move to the next set of Tools sub
menus.
…About, Power…
Step 3
Press d to move to the last set of Tools sub
menu.
Display. We will learn more about each of these sub menus
in upcoming sections.
Step 4
Press u a few times in the Tools menu to highlight Calibrate.
Step 1
To calibrate the 704, enter the Tools menu and
highlight Calibrate.
Calibration of the 704
2-8
Spark‚ 704 Technical Reference Manual Operation of the Spark® 704
®
NOTE: The Spark 704 will monitor the
calibration signal to make sure it is
within an acceptable range. If the calibration tone is too high or low, the
®
Spark 704 will not perform the calibration change.
If you need to change the Cal Level to reflect a different calibrator output level, go to Step 2. If the Cal Level is already
set to the correct value (the output signal in dB of your calibrator), press c and proceed to Step 8..
Step 2
Press c to enter the Calibrate tools menu.
If you are using a Larson Davis Model CAL250, this should
be set to 114.0. If you are using a Larson Davis CAL150 or
CAL200, the value could be set to either 94.0 or 114.0
depending on the setting of the calibrator’s adjustable level
switch.
Step 3
Press d to highlight the Cal Level. Then press
c to enable editing the Cal Level.
Step 4
Use l or r to highlight the number(s) you
wish to change.
Step 5
Then use u or d to increment/decrement to
the desired number.
Step 6
When you have the correct calibrator output level
entered, press c to accept.
Spark‚ 704 Technical Reference ManualOperation of the Spark® 704
2-9
Step 7
Press u to highlight Perform Cal.
Step 8
Insert the 704 microphone into the calibrator
opening. Switch the calibrator on.
Step 9
Press c to initiate the calibration
During the calibration, notice the circle building
on the left side of the display.
When the calibration is finished, the completed
circle changes to a check √.
Step 10 Press c to accept the calibration.
Step 11 Press c again to keep this calibration. You will be
returned to the Calibrate menu.
2-10
Spark‚ 704 Technical Reference Manual Operation of the Spark® 704
Step 12 Press R to return to the Tools menu.
Using the Lock Feature
The 704 has a very useful keypad Lock feature. When the
Lock is activated, the 704’s display and keypad are disabled.
This renders the 704 virtually tamper proof during operation.
The Lock is activated, and deactivated by way of a 4-digit
user defined Lock code.
Activating the Lock
Step 1
From with the Tools menu, press d to highlight
Lock.
Step 2
Press c to bring up the Lock combination screen.
Step 3
Type in any four-digit combination using l and
r to move between number fields and u and
d to increment and decrement the numbers.
Step 4
Press c to enter the combination code. The following message/warning will appear.
Spark‚ 704 Technical Reference ManualOperation of the Spark® 704
2-11
Step 5
Press r to highlight YES.
Step 6
Press c to activate the Lock.
Step 1
To deactivate the lock, press any key on the 704
keypad to bring up the Lock combination entry
screen.
Step 2
Using l and r to move between number
fields and u and d to increment and decrement the numbers, enter the 4-digit Lock combination you defined earlier.
Step 3
Press c to enter the combination code and deactivate the Lock. You will be returned to the display
screen prior to entering the Tools menu.
Deactivating the Lock
2-12
Spark‚ 704 Technical Reference Manual Operation of the Spark® 704
Setting up the 704
Step 1
Press T on the 704 keypad to enter the Tools
menu.
Step 2
Press d to highlight Setup.
Step 3
Press c to enter the Setup menu.
Within the Setup menu, you can access the 704 setup functions such as Gain, Frequency Weighting, Peak Weighting,
Detector setting, Dose 1 settings, Dose 2 settings, Dose 3
settings, and Dose 4 settings. The choices for these different
setup functions are:
•
Gain (0, 10, 20, or 30 dB)
•
Frequency Weighting (A or C)
•
Peak Weighting (Unweighted or C)
•
Detector Setting (Slow or Fast)
•
Dose 1 (Threshold Level, Exchange Rate (3, 4, 5, 6), Criterion Time, Criterion Level)
•
Dose 2 (Threshold Level, Exchange Rate (3, 4, 5, 6), Criterion Time, Criterion Level)
•
Dose 3 (Threshold Level, Exchange Rate (3, 4, 5, 6), Criterion Time, Criterion Level)
•
Dose 4 (Threshold Level, Exchange Rate (3, 4, 5, 6), Criterion Time, Criterion Level)
Spark‚ 704 Technical Reference ManualOperation of the Spark® 704
2-13
Changing the Gain
Changing the Gain of the 704 will alter the measurement
range of the instrument. An increase in Gain will enable the
704 to measure lower noise levels. It will also reduce the
upper measurement range of the 704. To change the Gain:
Step 1
Verify that Gain is the highlighted choice in the
Setup menu.
Step 2
Press c to enter the Gain selection menu.
Step 3
Press u to increment through the four Gain
choices (use d to return to the previous selections).
Step 4
Press c to enter the new Gain value.
The new Gain selection is now active.
2-14
Spark‚ 704 Technical Reference Manual Operation of the Spark® 704
Changing the Frequency Weighting
The choices are either A or C weighting, although A is the
most common setting.
Step 1
Step 1 To change the RMS frequency weighting,
first highlight Frq Wght by pressing d in the
Setup menu.
Step 2
Press c to enter the Frequency Weighting edit
field.
Step 3
Press u or d to move your desired weighting
value.
Step 4
Press c to accept the new choice.
Spark‚ 704 Technical Reference ManualOperation of the Spark® 704
2-15
Changing the Peak Weighting
This function is used to change the weighting of the 704’s
Peak Detector. The choices here are either C or U
(Unweighted). Peak weighting is independent of the RMS
weighting.
Step 1
To change the Peak weighting, first highlight Pk
Wght by pressing d in the Setup menu.
Step 2
Press c to enter the Peak Weighting edit field.
Step 3
Press u or d to move to the desired weighting
value.
Step 4
Press c to accept the new choice.
Changing the Detector
This function is used to change the rate of the 704’s rms
(root-mean-square) detector which is used to collect data.
This is normally set to Slow for dosimetry applications,
however you need to verify this with your particular countries regulations. Choices are either S (Slow) or F (Fast).
2-16
Spark‚ 704 Technical Reference Manual Operation of the Spark® 704
Step 1
To change the Detector rate, first highlight Detector by pressing d in the Setup menu.
Step 2
Press c to enter the Detector edit field.
Step 3
Press u or d to move to your desired Detector
rate.
Step 4
Press c to accept the new choice.
Changing the Dose Measurement Settings
The 704 has the facility to measure 4 simultaneous dose
measurements. These are denoted as Dose 1, Dose 2, Dose
3, and Dose 4. Each of these Dose measurements can have
independent settings, and thus be set with different Threshold Levels, Exchange Rates, Criterion Levels, and Criterion
Times.
Step 1
To change the Dose 1 settings, highlight Dose 1 by
pressing d in the Setup menu.
Step 2
Press c to enter the Dose 1 Settings menu.
Spark‚ 704 Technical Reference ManualOperation of the Spark® 704
2-17
Changing the Threshold Level
Changing the Exchange Rate
2-18
Step 3
Press c to enter the Dose 1 Threshold Level edit
field.
Step 4
Press l and r to move between number fields
and u or d to move the number to your choice
of Threshold Level.
Step 5
Press c to accept the new choice.
Step 6
Press d to highlight the Dose 1 Exchange Rate.
Step 7
Press c to enter the Dose 1 Exchange rate edit
field.
Step 8
Press u or d to cycle to your desired
Exchange Rate (3, 4, 5, or 6).
Step 9
Press c to accept this Exchange Rate choice.
Spark‚ 704 Technical Reference Manual Operation of the Spark® 704
Changing the Criterion Time
Step 10 Press d to highlight the Dose 1 Criterion Time.
Step 11 Press c to enter the Dose 1 Criterion Time edit
field.
Step 12 Press l and r to move between number fields
and u or d to move the number to your choice
of Criterion Time.
Step 13 Press c to accept the new Dose 1 Criterion Time.
Changing the Criterion Level
Step 14 Press c to enter the Dose 1 Criterion Level edit
field.
Step 15 Press l and r to move between number fields
and u or d to increment/de-increment the
numbers to your Dose 1 Criterion Level of choice.
Step 16 Press c to accept this new Dose 1 Criterion
Level.
Spark‚ 704 Technical Reference ManualOperation of the Spark® 704
2-19
Changing the Dose 2, Dose 3, and Dose 4 measurement
setup is achieved in the same manner as shown with Dose 1.
The values that were entered in this tutorial do not necessarily reflect desirable or accurate dose settings. Please ensure
that your 704 contains the settings that are pertinent to your
particular country’s regulatory requirement. For OSHA
these values are: RMS Weighting – A; Peak Weighting –
Unweighted; Detector Rate – Slow; Exchange Rate – 5 dB;
Threshold Level – 80 dB; Criterion Level – 90 dB; Criterion
Time – 8 hours.
Step 17 Press R to return to the Setup Menu
Step 18 Press R again to exit to the Tools Menu
About
About screen contains the firmware version and serial number of your 704.
Step 1
Press d to highlight About.
Step 2
Press c enter the About Screen.
The firmware version of the 704 is displayed.
Step 3
Press d to see the 704 serial number.
The704’s serial number appears.
Step 4
2-20
Press R to exit to the About Screen.
Spark‚ 704 Technical Reference Manual Operation of the Spark® 704
The Power Menu
Step 1
Press d to highlight Power.
Step 2
Press c to enter the Power menu.
The first displayed value is the Battery Time. This
indicates the remaining time run time on the current batteries. This run time is dependent on a
proper battery type selection.
Step 3
WARNING!
Press the d to see the battery type being used.
Press the c key to select the type of battery you
wish to use.
In explosive environments, only approved alkaline batteries
can be used in this instrument. (See page A-7 for approved
batteries.)
Step 4
Press d until Auto-Off is highlighted.
Step 5
Press d until Volts is highlighted.
Spark‚ 704 Technical Reference ManualOperation of the Spark® 704
2-21
The Volts value displayed, reflects the remaining
voltage in the batteries. New alkaline batteries will
yield 1.5V each for a total displayed battery voltage value of about 3V. Fully charged NiCad’s or
NiMH’s should indicate roughly 2.4V.
If you are using rechargeable batteries (NiCad or
NiMH), it may take a few moments for the battery
voltage value to stabilize.
Auto-Off
The Auto-Off feature allows you to set a time whereby the
704 automatically powers off. If a 704 key has not been
pressed during this Auto-Off period, the 704 automatically
shuts off to conserve power.
The maximum time that can be set is 60 minutes. The minimum is 1 minute. Selecting the "Never" option disables this
feature, leaving the 704 power on indefinitely, or until the
unit is powered off using v.
Auto-Off is disabled during a manual start (run) until the
unit is stopped.
2-22
Step 1
Press c to edit the Auto-Off time.
Step 2
Press d to cycle through the Auto-Off times.
Step 3
When you have highlighted your Auto-Off time,
press c to accept.
Step 4
Press R to exit to the Power menu.
Spark‚ 704 Technical Reference Manual Operation of the Spark® 704
Display
Display allows you to adjust the contrast of the 704 display,
adjust the brightness of the display backlight, and establish a
backlight shutoff time to conserve battery power.
Step 1
Press d to highlight Display.
Step 2
Press c to enter the Display menu.
Contrast adjusts the contrast of the 704 screen.
The larger the percentage, the darker the screen
will appear. To adjust the contrast, highlight the
contrast menu item, press the c key, and use the
u and d arrows to adjust to the desired level.
When finished, press the c key to return to the
display menu.
Step 3
Press d to highlight BL Bright (Backlight
Brightness).
This adjusts the brightness of the backlit display of
the 704. A value of 0% turns the backlight off.
This maximizes the battery life of the 704.
Step 4
Press d to highlight BL Save (Backlight Save).
The Backlight Save feature allows you to set a
time whereby the 704 screen backlight automatically powers off. If a 704 key has not been pressed
during this Auto-Off period, the backlight is automatically turned off to conserve power.
Spark‚ 704 Technical Reference ManualOperation of the Spark® 704
2-23
Step 5
2-24
Press R to exit to the Display menu.
Spark‚ 704 Technical Reference Manual Operation of the Spark® 704
APPENDIX
A
Spark® 704 Specifications
Specifications are subject to change without notice. Numerical values given are typical. Refer to specific calibration or
test results for accurate data on a specific unit.
General Characteristics
®
Type Precision
The Larson Davis Spark series meters with attached
MPR001, combined preamplifier, 3/8" microphone cable
and connector, is a Type 2 combination personal noise
dosimeter and personal noise exposure meter.
Reference Direction
The reference direction is perpendicular to the plane of the
microphone diaphragm.
Typical Measurement Ranges
RMS Detector
•
Dynamic Range > 75 dB
•
Primary Indicator Range > 70 dB
Measurement Ranges
Gain = 30dB
Gain = 20dB
Gain = 10dB
Gain = 0dB
43 - 113 dBA
53 - 123 dBA
63 - 133 dBA
73 - 143 dBA
•
Crest Factor Limit > 50
•
Pulse Range = 70dB
Spark‚ 704 Technical Reference ManualSpark® 704 Specifications
A-1
The instrument's Noise Floor, Lower Limit, and Overload Level, vary, depending upon the sensitivity
of the attached microphone. Typical values for a MPR001 or MPR002 3/8" microphone are listed in
the table below.
Typical Overload
Typical Max
Peak Level
Gain = 30dB
Gain = 0dB
Gain = 0dB
40.0 dBSPL
143.0 dBSPL
146.0 dBSPL
Typical Noise Floor
Typical Lower Limit
A-Weighted
A-Weighted
Gain = 30dB
35.0 dBSPL
Worst Case
Overload
Noise Floor
Lower Limit
A-Weighted
A-Weighted
Gain = 30 dB
Gain = 30 dB
Gain = 0 dB
Gain = 0 dB
40 dB SPL
45 dB SPL
140 dB SPL
143 dB SPL
Max Peak Level
Peak Detector
Calibration Reference Level
Frequency Weightings
•
Dynamic Range > 40 dB
•
Primary Indicator Range > 35 dB
•
Measurement Range is approximately 80 to 146 dBSPL
Peak in 4 ranges
The reference level is 114.0 dBSPL.
The available frequency weightings for the Model 704 are
described in the following table.
Detector
A Weight
C Weight
RMS
√
√
Peak
A-2
Spark‚ 704 Technical Reference Manual
√
Flat
Weighting
√
Spark® 704 Specifications
The typical frequency response of the Peak detector with
FLAT weighting is shown in the following table.
Nominal
Frequency
Hz
Unweighted
Peak FLAT
Weighting dB
Nominal
Frequency
Hz
Unweighted
Peak FLAT
Weighting dB
Nominal
Frequency
Hz
Unweighted
Peak FLAT
Weighting dB
10
−0.4
160
0.0
2500
0.0
12.5
−0.3
200
0.0
3150
0.0
16
−0.3
250
0.0
4000
0.0
20
−0.2
315
0.0
5000
0.0
25
−0.2
400
0.0
6300
−0.1
31.5
−0.1
500
0.0
8000
−0.1
40
−0.1
630
0.0
10000
−0.1
50
0.0
800
0.0
12500
−0.2
63
0.0
1000
0.0
16000
−0.2
80
0.0
1250
0.0
20000
−0.2
100
0.0
1600
0.0
125
0.0
2000
0.0
Detector Time Weightings
The available RMS detector time weightings are FAST and
SLOW.
Operating Temperature Range
The SPL level varies ≤ 0.5 dB when the complete instrument
is tested over the -10° C to 50° C temperature range. The reference reading, for this test, is taken at 20° C and 36% relative humidity (RH); the input signal is at 1000 Hz at 114.0
dB SPL.
Effects of Humidity
The SPL level varies ≤ 0.5 dB when the complete instrument
is tested over the 30% to 90% RH range. This test is performed at 40° C, with an input signal of 1000 Hz at 114.0 dB
SPL.
Storage Temperature
Permanent damage can occur when stored or operated above
60° C or below -20° C. Condensation of moisture will make
readings inaccurate but will be correct when moisture has
dissipated.
Effects of Magnetic Fields
The SPL level varies ≤ 0.5 dB when the complete instrument
is tested in an 80 A/m, 60 Hz magnetic field (worst case orientation). Even at a field strength of 240 A/m the SPL level
variation is still ≤ 0.5 dB.
Spark‚ 704 Technical Reference ManualSpark® 704 Specifications
A-3
Effects of Strong Acoustic
Fields
With the microphone replaced by an equivalent electrical
impedance, the instrument was placed in a sound field of
100 dBSPL. The acoustic signal (sine wave) was swept from
31.5 Hz to 8000 Hz at a 0.1 octave/second rate. The strong
acoustic field did not affect the reading on the instrument.
Compliance with
Electromagnetic Compatibility
Standards
CE Standard
IEC 61326-1
(2005)
IEC 61000-4-2
(2008)
IEC 61000-4-3
(2006)
IEC 61000-4-8
(2001)
A-4
Description
Electrical equipment for measurement,
control and laboratory use – EMC
requirements – Part 1: General requirements.
Consisting of the tests b elow.
Electrostatic discharge immunity test.
(±4kV contact, ±8kV air discharge).
Radiated, radio-frequency, electromagnetic
field immunity test.
AM at 1 kHz, 80%. 26 MHz to 1.0 GHz (10
V/m), 1.4 GHz to 2.0 GHz (3 V/m), 2.0 GHz to
2.7 GHz (1 V/m). ∆<±2 dB from 85 dB SPL.
Power frequency magnetic field i mmu nity
test.
80 A/m. ∆<±2 dB from 85 dB SPL.
Spark‚ 704 Technical Reference Manual
Spark® 704 Specifications
Effects of Mechanical Vibration
The entire instrument (including the microphone and preamplifier) was sinusoidally vibrated at an acceleration of 1 m/s2
at 1/3 octave frequencies from 10 Hz to 1000 Hz. The results
of this test are shown in the following tables.
X Axis: Acceleration parallel to the mic diaphragm (mic/
preamp body was laid on its side on the shaker)
Nominal Frequency
Hz
Instrument Reading
(10 sec Leq)
dB(C) SPL
Nominal Frequency
Hz
Instrument Reading
(10 sec Leq)
dB(C) SPL
73.9
10
66.1
160
12.5
66.5
200
73.2
16
68.0
250
70.5
20
69.2
315
76.9
25
70.7
400
76.0
31.5
71.7
500
76.2
40
72.6
630
75.2
50
73.2
800
75.6
63
73.7
1000
75.9
80
74.1
100
74.4
125
74.1
Y Axis: Acceleration perpendicular to the mic diaphragm
(mic/preamp body was laid on its side on the shaker)
Nominal Frequency
Hz
Instrument Reading
(10 sec Leq)
dB(C) SPL
Nominal Frequency
Hz
Instrument Reading
(10 sec Leq)
dB(C) SPL
80.6
10
68.4
160
12.5
69.6
200
80.5
16
72.1
250
79.6
20
73.9
315
81.8
25
75.7
400
81.6
31.5
77.5
500
81.5
40
78.8
630
82.5
50
79.6
800
83.2
63
80.2
1000
84.3
80
80.4
100
80.7
125
80.7
Spark‚ 704 Technical Reference ManualSpark® 704 Specifications
A-5
Z Axis: Acceleration perpendicular to the top surface of the
MRP001 cap
Nominal Frequency
Hz
Instrument Reading
(10 sec Leq)
dB(C) SPL
Nominal Frequency
Hz
Instrument Reading
(10 sec Leq)
dB(C) SPL
66.1
10
66.1
160
12.5
66.1
200
66.1
16
66.1
250
66.1
20
66.1
315
66.1
25
66.1
400
66.1
31.5
66.1
500
66.1
40
66.1
630
66.1
50
66.1
800
66.1
63
66.1
1000
66.6
80
66.1
100
66.1
125
68.5
Microphone Extension Cables
Microphone extension cables cannot be used with the Spark
series meters.
Calibration Procedure
The calibration procedure for the Spark series meters is
described on page 2-9 of this manual.
Reference Frequency
The reference frequency is 1000 Hz.
Stabilization Time
At power-on, the Spark series meters will not proceed to a
running condition until it is allowed to stabilize. A short stabilization time (approx. 5 seconds) is also invoked when certain settings (Weighting, Gain, etc.) are changed.
Microphone Electrical
Impedance
The Larson Davis ADP046 should be substituted for the
MPR001 microphone when performing electrical tests on
the Spark series meters.
Functions Measured
A-6
•
Dose, Projected Dose, Time Weighted Average (TWA),
and Leq
•
Exposure in Pa2S and Pa2H, (including the E8 and E40
calculations)
•
SPL, Lmax, Lmin, and Lpeak
•
Exceedance count and duration for 115 and 120 dBSPL
(RMS), and 140 dBSPL (Peak)
Spark‚ 704 Technical Reference Manual
Spark® 704 Specifications
Data Storage
•
No data storage capability
Data Communications
•
Infrared serial interface for computer communications
•
Data Rate: 115,000 bits per second
•
97 x 32 pixel, graphical LCD display
•
Icons for displaying battery life, run time, overload,
IrDA activity and Microphone Disconnect
•
dB levels: 0.1 dB
•
Dose: 0.001%
•
Elapsed Time: 1 second
•
Update Rate: 5 time/second
•
Accuracy: 0.02% (-10 to 50 degrees C)
•
24 hour clock: hh:mm:ss
•
1 second resolution
•
Year 2000 compliant
•
One second resolution
•
Format: mm:ss, (switches to hh:mm after 59 minutes and
59 seconds and colon flashes to indicate seconds)
•
99 hours and 59 minutes
•
IEC60651 - 1979 (including amendment 1 - 1993)
•
IEC60804 - 1985 (including amendment 1 - 1985, and
amendment 2 - 1993)
•
IEC61252 - 1993 (including amendment 1-2000)
•
ANSI S1.4 - 1983
•
ANSI S1.25 - 1991
•
Operates with 2 AA alkaline batteries, approximately
100 hour operation
•
Operates with 2 NiCd or NiMH batteries, run time is
reduced to approximately 40 hour operation
•
Current draw when unit is off is approximately 800μΑ
(batteries will drain down in about three months)
Digital Display
Digital Display Resolution
Real-time Clock/Calendar
Run-time Clock
Standards Met
Power Supply
Spark‚ 704 Technical Reference ManualSpark® 704 Specifications
A-7
Dimensions/Weight (with
Microphone, Preamplifier, and
Battery, and Case)
Approved Battery Types
WARNING!
•
Actual run-times vary depending on operating conditions
•
Battery-life indication selected from keyboard or computer program
•
Width: 2.5 inches (6.4 cm)
•
Length: 5.6 inches (14 cm) - without MPR001 (Microphone, Preamplifier, cable and connector combination.)
•
Depth: 1.25 inches (3.2 cm)
•
Weight: 8.4 ounces (238 gm)
To comply with the intrinsic safety rating of this instrument,
one of the following battery types must be used when this
instrument is operated in an explosive environment.
•
Duracell® MN1500 AA Alkaline
•
Eveready® Energizer® E91 AA Alkaline
Do not replace batteries in an explosive environment.
In NON-explosive environments, NiCd or NiMH rechargeable batteries may be used. (See page 1-17 for recommended
rechargeable batteries).
Microphone Pinout
A-8
Spark‚ 704 Technical Reference Manual
Spark® 704 Specifications
APPENDIX
B
Glossary
A-weight
A standard frequency weighting to simulate the response of
the human ear.
Calibration
Adjustment of the system so that the measured sound level
agrees with a reference sound source.
Calibration Check
A check for variations between the measured level and a reference level - no adjustment is made to the system.
Criterion Duration
Criterion duration is the time required for a continually
applied sound of the selected criterion level to produce a
dose of 100%. Criterion duration is typically 8 hours.
Criterion Level
It is the level of a sound which will produce a dose of 100%
if continually applied for the criterion time. The current
OSHA criterion level is 90 dB.
C-weight
A standard frequency weighting that simulates the response
of the human ear to high amplitude (loud) noise.
Daily Personal Noise Exposure
(LEP,d)
LEP,d is the level, expressed in dB, of a constant sound over a
specified normalization time period (Tn) that contains the
same energy as the actual (unsteady) sound measured over a
stated measurement period (T2 - T1). The measurement
period is generally shorter, so the actual noise exposure is
spread out (or normalized) over the normalization time
period.
Spark‚ 704 Technical Reference Manual
Glossary
B-1
.
T2
2
⎛1
P (t) ⎞
---------------- dt⎟ dB
L EP, d = 10Log 10 ⎜
2
T
n
⎝ T P0
⎠
1
∫
OR
L EP, d = Leq + 10Log 10 [ ( T2 – T1 ) ⁄ Tn ] dB
Leq = frequency weighted (A or C), equivalent-continuous sound pressure level in dB
P(t) = instantaneous, frequency weighted (A or C), sound pressure in pascals
P0 = reference sound pressure, 20 μPa
Tn = normalization period (Criterion Duration)
T2 - T1 = measurement period (Run Time)
Detector Rate
Dose
See Frequency and Exponential-Time Weighted Sound
Level.
See Noise Dose.
Exchange Rate
Exchange rate is defined in ANSI S1.25 as "the change in
sound level corresponding to a doubling or halving of the
duration of sound level while a constant percentage of criterion exposure is maintained". Possible values for this field
are 3, 4, 5, or 6. The current OSHA exchange rate is 5. A
value of 3 will produce Leq-like levels.
Equivalent-Continuous Sound
Level or Leq
Leq is the level of a constant sound, expressed in dB, which
in a given time period (T= T2 - T1) has the same energy as
does a time varying sound. For the Spark dosimeters, an
Leq value is recorded for 2 different time intervals. First, an
Leq is recorded for the entire record’s Run Time. Second, an
Leq is recorded for each individual time history sample.
On the Spark dosimeters, Leq is annotated as LAeq or
LCeq (A or C frequency weighted Leq)
.
B-2
Spark‚ 704 Technical Reference Manual
Glossary
T2
⎛ 1 P2 ( t ) ⎞
Leq = 10Log 10 ⎜ --- ------------- dt⎟ dB
⎝ T T P02
⎠
1
∫
P(t) = instantaneous, frequency weighted (A or C), sound pressure in pascals
P0 = reference sound pressure, 20 μPa
T = measurement period (Run Time or time history interval), T = T2 - T1
Equivalent Time Weighted
Average or TWA(x)
The level of a constant sound, expressed in dB, which if
measured for a time period equal to the criterion duration,
will produce the currently measured noise dose. The x in
TWA(x) represents the criterion duration.
For example, suppose a worker is exposed to a noise environment with a TWA of 90 dB. Also, assume that the
exchange rate is 5, the criterion level is 90 dB, and the criterion duration is 8 hours. After 1 hour, the worker’s noise
dose will be 12.5%, the TWA(8) will be 75.0 dB, and the
TWA will be 90.0 dB. A TWA(8) of 75 dB indicates that if
the worker is instead exposed to a noise environment with a
TWA of 75 dB, then the noise dose after 8 hours will be
12.5%.
Spark‚ 704- Technical Reference Manual
Glossary
B-3
T
TWA ( x ) = TWA + q log 10 -----TC
TWA = time weighted average sound level in dB
T = measurement period (Run Time)
TC = criterion duration
q = exchange rate constant
if exchange rate = 3, q = 10
if exchange rate = 4, q = 4/Log10(2) ≈ 13.29
if exchange rate = 5, q = 5/Log10(2) ≈ 16.61
if exchange rate = 6, q = 20
Frequency & Exponential-Time
Weighted Sound Level or Lwτ
Lwτ is the frequency and exponential-time weighted sound
level in dB. Lwτ is sometimes referred to as the "rms sound
level". Similarly the A or C frequency weightings are sometimes referred to as the "rms frequency weighting" (rms is an
acronym for root-mean-square).
The Detector Rate setting on a Spark dosimeter corresponds
to an exponential time constant of SLOW (1 second) of
FAST (0.125 seconds), which is designated as τ in the equation below. These time constants are required by both ANSI
and IEC standards.
In the Lwτ symbol, the w designates the frequency weighting (A or C) and the τ designates the exponential time constant (SLOW or FAST). For example, on the Spark
dosimeters, LAS signifies the A weighted, SLOW expo-
B-4
Spark‚ 704 Technical Reference Manual
Glossary
nential-time weighted sound level. Similarly, LCF signifies the C weighted, FAST level.
t
⎛ 1 P 2 ( ξ )e – ( t – ξ ) ⁄ τ ⎞
Lw τ = 10Log 10 ⎜τ--- --------------------------------------- dξ⎟ dB
2
⎝ –∞
⎠
P0
∫
Lwτ = frequency and exponential-time weighted sound level in dB
w designates the frequency weighting (A or C)
τ designates the exponential time constant (SLOW or FAST)
ξ = dummy variable of time integration
P(t) = instantaneous, frequency weighted (A or C), sound pressure in pascals
P0 = reference sound pressure, 20 μPa
t = time of observation
τ = exponential time constant SLOW (1 second) or FAST (0.125 seconds)
Frequency Weighting
See Frequency and Exponential-Time Weighted Sound
Level
LEP,d
See Daily Personal Noise Exposure.
Lmax
Lmax is the maximum value, expressed in dB, of the frequency and exponential-time weighted sound level (Lwτ) in
a given time interval. For the Spark dosimeters, an Lmax
value is recorded for 2 different time intervals. First, an
Lmax is recorded for the entire record’s Run Time. Second,
an Lmax is recorded for each individual time history sample.
On the Spark display, the Lmax annotation includes the current settings for frequency weighting and exponential-time
weighting. For example, on a Spark dosimeter LASmx
signifies the maximum, A weighted, SLOW level. Similarly, LCFmx signifies the maximum, C weighted, FAST
level.
Lmin
Spark‚ 704- Technical Reference Manual
Lmin is the minimum value, expressed in dB, of the frequency and exponential-time weighted sound level (Lwτ) in
a given time interval. For the Spark dosimeters, the time
interval is the record’s Run Time.
Glossary
B-5
On the Spark display, the Lmin annotation includes the current settings for frequency weighting and exponential-time
weighting. For example, on a Spark dosimeter LASmn
signifies the minimum, A weighted, SLOW level. Similarly, LCFmn signifies the minimum, C weighted, FAST
level.
B-6
Ln
An Ln is the frequency and exponential-time weighted
sound level (Lwτ) that is exceeded n percent of the time in a
give time interval. For example, L10 is that sound level,
expressed in dB, which was exceeded for 10% of the total
Run Time. The default Ln percentages are 10, 30, 50, 70,
90.
Noise Dose
Noise dose is the percentage of time that a person is exposed
to noise that is potentially damaging to hearing. Zero represents no exposure and 100 or more represents complete
exposure. It is calculated by dividing the actual time of
exposure by the allowed time of exposure. The allowed time
of exposure is determined by the Criterion Duration and by
the sound level (the higher the level, the shorter the allowed
time). The sound levels must be measured with A-weighting
in frequency and slow-exponential weighting in time.
Spark‚ 704 Technical Reference Manual
Glossary
T2
Dose = ( 100 ⁄ T c )
∫
OR
T1
[ ( L AS – L c ) ⁄ q ]
10
Dose = ( 100T ⁄ T c ) ⋅ 10
dt
[ ( TWA – L c ) ⁄ q ]
LAS = frequency (A) and exponential-time (SLOW) weighted sound level in dB
(in the formula above, if the sound level is less than the user specified threshold
level, then LAS = -∞)
Lc = criterion level in dB
Tc = Criterion duration in hours (8 hours typical)
T = Measurement period (Run Time), T= T2 - T1
TWA = time weighted average in dB
q = exchange rate constant
if exchange rate = 3, q = 10
if exchange rate = 4, q = 4/Log10(2) ≈ 13.29
if exchange rate = 5, q = 5/Log10(2) ≈ 16.61
if exchange rate = 6, q = 20
Peak
The maximum value of the instantaneous, frequency
weighted (C or Unweighted), sound pressure in a given time
interval. For the Spark dosimeters, a Peak value is recorded
for 2 different time intervals. First, a Peak is recorded for
the entire record’s Run Time. Second, a Peak is recorded for
each individual time history sample. Note, the Peak metric
is not an integrated or averaged value, and it is measured
with a separate peak detector circuit, which has a very fast
rise time (see specifications for more details).
Peak Frequency Weighting
It is the frequency weighting of the peak detector. Possible
selections are C(weighted) or U (unweighted). Peak weighting is independent of the RMS frequency weighting.
Projected Noise Dose
The Noise Dose assuming that the current rate of noise dose
exposure continues for the duration of a work shift. On the
Spark display, projected dose is shown as DPROJ.
Spark‚ 704- Technical Reference Manual
Glossary
B-7
T2
ProjectedDose = ( 100 ⁄ T )
∫
10
[ ( L AS – L c ) ⁄ q ]
dt
T1
OR
ProjectedDose = 100 ⋅ 10
[ ( TWA – L c ) ⁄ q ]
LAS = frequency (A) and exponential-time (SLOW) weighted sound level in dB
(in the formula above, if the sound level is less than the user specified threshold
level, then LAS = -∞)
Lc = criterion level in dB
TWA = time weighted average in dB
q = exchange rate constant
if exchange rate = 3, q = 10
if exchange rate = 4, q = 4/Log10(2) ≈ 13.29
if exchange rate = 5, q = 5/Log10(2) ≈ 16.61
if exchange rate = 6, q = 20
Projected Sound Exposure
Projected sound exposure shows what the actual sound
exposure will be (for a specified time period) if the current
equivalent-continuous sound level (Leq) remains at its current level. The Spark dosimeters calculate an 8 hour and a
40 hour projected sound exposure. On the Spark display,
these values are shown as EA8 and EA40 (A frequency
weighting) or EC8 and EC40 (C frequency weighting).
T2
8
E 8 = --T
∫
T2
2
P ( t ) dt
and
E 40
T1
40
= -----T
∫
2
P ( t ) dt
T1
P(t) = instantaneous, frequency weighted (A or C), sound pressure in pascals
T2 - T1 = measurement period (Run Time)
B-8
Spark‚ 704 Technical Reference Manual
Glossary
Sound Exposure (SE)
Sound Exposure is the total sound energy of the actual sound
in a given time interval. For the Spark dosimeters, the time
interval is the record’s Run Time. The units for sound exposure are Pa2S (pascal squared seconds) or Pa2H (pascal
squared hours).
T2
E =
∫
2
P ( t ) dt
T1
P(t) = instantaneous, frequency weighted (A or C), sound pressure in pascals
T2 - T1 = measurement period (Run Time)
Threshold Level
ANSI S1.25 defines threshold as "a sound level below which
the dosimeter produces little or no dose accumulation as
specified in this stand." The threshold should be selected to
be within the measurement range of the instrument which is
between 70 dB and 140 dB for the Spark. The current OSHA
threshold is 80 dB.
Time Weighted Average (TWA)
The level of a constant sound, expressed in dB, which in a
given time period (T = T2 - T1) would expose a person to the
same noise dose as the actual (unsteady) sound over the
same period. ANSI S1.25-1991 refers to the time weighted
average as Lav or average sound level.
The Spark dosimeters simultaneously calculate 4 separate
TWA values. The user specifies the exchange rate, criterion
level, criterion duration, and threshold level for each TWA.
These 4 separate TWA values are recorded for 2 different
time intervals. First, 4 TWAs are recorded for the entire
records record’s Run Time. Second, 4 TWAs are recorded
for each individual time history sample.
Spark‚ 704- Technical Reference Manual
Glossary
B-9
T2
1
TWA = q ⋅ log 10 --T
∫
10
( L AS ) ⁄ q
dt
T1
LAS = frequency (A) and exponential-time (SLOW) weighted sound level in dB
(in the formula above, if the sound level is less than the user specified threshold
level, then LAS = -∞)
T = measurement period (Run Time or time history interval), T = T2 - T1
q = exchange rate constant
if exchange rate = 3, q = 10
if exchange rate = 4, q = 4/Log10(2) ≈ 13.29
if exchange rate = 5, q = 5/Log10(2) ≈ 16.61
if exchange rate = 6, q = 20
B-10
Spark‚ 704 Technical Reference Manual
Glossary
APPENDIX
C
Intrinsic Safety Approvals
This appendix presents details of the Spark 704 instrument instrinsic safe approval.
®
Classification
Class I
Division 1
Class II
Division 1
Class III
Division 1
Applicable Standards
th
UL 913, 5 Edition:1997
CAN/CSA-C22.2 No. 157-92
See ITS Listing Report J20024945.002
Groups C D
Groups E F G
FM 3600: March 1989
FM 3610: October 1988
See ITS Listing Report J20024945.003
Temperature Code T4
Ambient Temperature –10 to 50 °C
NOTES:
Class I: Gases or Vapors
Class II: Dusts
Class III: Fibers or Flyings
Division 1: An explosive concentration of the hazardous material may be continuously, intermittently or periodically present under
normal operating conditions.
Group C:
Group E:
Ethylene
Metal dust
Group D: Propane, Methane
Group F: Carbon dust
Group G: flour, starch, grain
Maximum surface temperature produced under fault conditions at an ambient temperature of 40ºC
T4: 135ºC
Classification
Class I
Zone 0, 1, and 2
Groups IIA, IIB
AEx ia IIB T4
Ambient Temperature –10 to 50 °C
Applicable Standards
UL 2279
IEC 79-0-1983
IEC-79-11-1995
See ITS Listing Report J20024945.001
NOTES:
Class I: Gases or Vapors
Zone 0:
Zone 1:
Zone 2:
An explosive air/gas
An explosive air/gas
An explosive air/gas
exist only for a short
mixture is continuously present or present for long periods.
mixture is likely to exist under normal operating conditions for short periods.
mixture is not likely to occur under normal operating conditions and if such a condition occurs, it will
period.
ia: Intrinsically safe with 2 countable faults and all non-countable faults
Group IIB: Ethylene
Group IIA: Propane, Methane
Maximum surface temperature produced under fault conditions at an ambient temperature of 40ºC
T4: 135ºC
Spark‚ 704 Technical Reference ManualIntrinsic Safety Approvals
C-1
Classification
MSHA approved for use in gassy underground mines
Approval No. 2G-4121-0
Applicable Standards
Title 30 Code of Federal Regulations
Part 18
Methane Air Mixtures Only
NOTE: This approval is from the
U.S. Department of Labor
Mine Safety and Health Administration
Warning! For safe operation, Do not replace batteries in an explosive
atmosphere.
To comply with the intrinsic safety rating of this instrument, one of the following battery types must
be used when this instrument is operated in an explosive environment.
o Duracell MN1500 AA Alkaline
o Eveready Energizer E91 AA Alkaline
Warning! To reduce the risk of explosion do not mix old batteries with new
batteries, or mix batteries from different manufacturers.
NOTE: The 704 must remain in the protective case during service. The user
should replace the protective pouch when it shows signs of deterioration.
C-2
Spark‚ 704 Technical Reference Manual
Intrinsic Safety Approvals
Back Panel Label
This section presents the intrinsic safe label which appears on the back of the Spark 704..
®
Model
Serial
PERMISSIBLE NOISE DOSIMETER
Approval No. 2G-4121-0
United States Department of Labor
MSHA
MSHA tested for intrinsic safety in methaneMine Safety and Health Administration
WARNINGS: air mixtures only.
1. Use only with two Duracell MN1500 or two Eveready
Energizer E91, 1.5 Volt, "AA" alkaline batteries.
2. Do not mix batteries from different manufacturers.
Replace both batteries at the same time.
3. External connection port is for use only with an
MPR001 or MPR002 microphone.
®
C
US
LISTE D
INTRINSICALLY SAFE FOR
HAZARDOUS LOCATIONS
Class I Div. 1 Group C D
Class II Div. 1 Group E F G
Class III Div. 1 AEx ia IIB T4
2000830
Conforms to UL Std 913 & UL Std 2279
Certified to CAN/CSA Std C22.2 No. 157
For more info see:
www.larsondavis.com
TYPE 2 NOISE DOSIMETER
ANSI S1.4-1983, S1.25-1991
IEC 60651-1979, 60804-1985, 61252-am1-2000
M706.12(F)
Ambient Temperature -10 to +50 °C. Read manual.
Do not replace batteries in an explosive atmosphere.
LARSON DAVIS - a Division of
PCB Piezotronics, Inc.
Made in USA
Spark‚ 704 Technical Reference ManualIntrinsic Safety Approvals
C-3
C-4
Spark‚ 704 Technical Reference Manual
Intrinsic Safety Approvals
Index
Numerics
704 Displays .................................................................................................................................... 2-4
706 power menu............................................................................................................................. 2-21
706/703 Features.............................................................................................................................. 1-2
A
Accessories .................................................................................................................................... 1-12
Activating the Lock ....................................................................................................................... 2-11
Assembling .................................................................................................................................... 1-10
B
Backlight ........................................................................................................................................ 2-23
Batteries ......................................................................................................................................... 1-12
Battery icon...................................................................................................................................... 2-2
C
CAL150 ......................................................................................................................................... 1-12
Calibration ....................................................................................................................................... 2-8
Changing the Gain ......................................................................................................................... 2-14
Contrast .......................................................................................................................................... 2-23
Criterion Level ............................................................................................................................... 2-19
Criterion Time................................................................................................................................ 2-19
D
Data Retention ............................................................................................................................... 1-15
Deactivating the Lock .................................................................................................................... 2-12
Detector.......................................................................................................................................... 2-16
Display ........................................................................................................................................... 2-23
Displays ........................................................................................................................................... 2-4
Dose Measurement ........................................................................................................................ 2-17
E
Environmental................................................................................................................................ 1-14
Exchange Rate ............................................................................................................................... 2-18
F
Formatting Conventions .................................................................................................................. 1-2
Frequency Weighting..................................................................................................................... 2-15
I704 Rev E
G
Gain ................................................................................................................................................2-14
Getting Started..................................................................................................................................1-8
I
Icon Descriptions..............................................................................................................................2-2
Intrinsic Safety
Approvals ................................................................................................................................. C-1
K
Keypad Functions.............................................................................................................................2-2
L
Lock Feature...................................................................................................................................2-11
M
microphone preamplifier ................................................................................................................1-10
O
Operation ..........................................................................................................................................2-1
Overload ...........................................................................................................................................2-3
overloads...........................................................................................................................................2-3
Overview ..........................................................................................................................................2-1
P
Peak Weighting ..............................................................................................................................2-16
Power menu - 706...........................................................................................................................2-21
Powering up......................................................................................................................................2-3
Q
Quick Reference ...............................................................................................................................2-1
R
Rechargeable Batteries ...................................................................................................................1-14
RESET..............................................................................................................................................2-2
Run Indicator ....................................................................................................................................2-3
RUN/STOP key ................................................................................................................................2-2
S
Screen Backlight.............................................................................................................................2-23
Screen Contrast .............................................................................................................................. 2-23
Setting up ....................................................................................................................................... 2-13
Setup menu .................................................................................................................................... 2-13
T
Threshold Level ............................................................................................................................. 2-18
TOOLS............................................................................................................................................. 2-2
Tools ................................................................................................................................................ 2-8
U
Unlocking....................................................................................................................................... 2-12
Unpacking and Inspection ............................................................................................................... 1-8
W
Weighting....................................................................................................................................... 2-15
I704 Rev E
Total Customer Satisfaction Guaranteed
3425 Walden Avenue, Depew NY USA 14043
Phone: 716-926-8243 Toll Free: 888-258-3222
LarsonDavis.com FAX: 716-926-8215