1
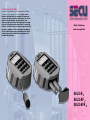
Electronic
lock
SELO-B 2
SELO-BF 2
SELO-BFE 2
1
1. Generally
Thank you for deciding for a safe with the SECU
Sicherheitsprodukte SELO-B 2, SELO-BF 2 or SELO-BFE 2. You
have acquired a product meeting extremely high security
requirements and developed and manufactured using the latest
technical potential.
Please read the entire User Manual before programming and store
it at a safe place for future reference.
The electronics is available in a version with a fingerscan unit
SELO-BF 2 / SELO-BFE 2 and in another version without the
fingerscan unit SELO-B 2.
The present user manual applies to both versions, however, the
menu structure is able to detect automatically the appropriate
version and thus only the menu items intended
for it are active. The items relevant only for the electronics with a
fingerscan unit are marked with *.
Generally, you can open the safe in three possible ways:
• with a code (SELO-B 2, SELO-BF 2 and SELO-BFE 2)
• with an E-Key (SELO-B 2, SELO-BF 2 and SELO-BFE 2, ident
medium E-Key not included in the delivery)
• with your fingerprint (SELO-BF 2 and SELO-BFE 2)*
The administrator code when delivered from the factory is
123456. This code must be changed. Additional 9 users with a
code to be entered by the keyboard can be defined. Such code
has always six digits, similarly to administrator’s code.
Additionally, up to 250 E-Keys for contactless opening can be
stored.
In case you posses a safe with a fingerscan unit, up to 20 users
with fingerscan can be additionally stored. Users with fingerscan
are identified in the user list of the lock as
USER xxx_FP.
The SELO-BF 2 electronics is the first safe electronics, for which
the opening based on fingerscan is certified.
At least two opening codes shall be entered to open the safe using
fingerprint (SELO-BF 2 and SELO-BFE 2). Another opening code
must be entered in addition to fingerscan. This can be either
another Fingerscan (SELO-BF 2 only), but also a pin code or an
additional E-Key.
All the fingerscans are stored in the system with a value of 6/12
(corresponding to a half value). In order to acquire the
authorization to open, a value of at least 1 must be achieved. A pin
code with a value of at least ½ must be therefore entered for the
opening, a value of 1 can be also achieved with an additional
fingerscan.
Attention: The values can be adjusted only using additional software. When
the programming is made on the safe faceplate, the pin code and the E-Key
are automatically assigned the value of 1, the fingerscan receives the value of
½.
Attention: For security reasons as related to programming using the software,
it is not allowed to communicate all the opening codes to a single user in case
three opening codes are used (value A fingerscan is ½, value B 1/3, value C
1/3).
Example:
User A has defined his finger in the system as opening code (its value is ½).
This user can be still authorized in the system with an additional opening code
with a value of 1/3. A user B now needs an additional opening code with a
value of at least 1/3. If a code and/or an E-Key should be additionally
assigned to a user with fingerscan, it is to be created separately. Inversely,
the fingerscan should be assigned separately to a user with a code and/or an
E-Key*.
Made in Germany
www.secu-gmbh.de
To enable the use of additional functions such as time switching or calendar
functions, you need additional software. Then you will be able to use the
overall user administration.
Attention: Should the user data in the safe electronics be administered using
the software, the data must be stored on a removable data carrier. Their
saving in a computer is not admissible, is identified by the system and not
allowed. The removable data carrier should be stored at a safe place (e.g. a
safe) after the programming.
In order to enhance the protection against intrusion, the following points
should be observed:
For locking systems with material code carriers, e.g. an E-Key:
• The code carrier should be consistently stored safely, so that it
is accessible only to the authorized persons.
• In case of a loss of the code carrier, the lock should be
immediately replaced or converted to a new combination by
changing the coding, and/or the code of the lost code carrier
should be blocked/deleted.
For locking systems requiring a code:
• No personal data (e.g. dates of birth) or other data, for which a
link can be derived to the code owner, should be used for
coding.
• If the code is stored in writing, such document should be
• consistently stored safely, so that it is accessible only to the
authorized persons.
SELO-B 2
SELO-BF 2
SELO-BFE 2
2
• Attention: Any changes of the administrator code and of the user
codes shall be made with the safe door opened!
•
•
• When the locking system has been reset to another code, this
new code should be repeatedly used with the safe door opened.
1.1 Description of basic functions
You can program your lock based on the following description.
You can see the programming instructions on the display. To program the
lock (enter into the menu), please press the “Function” key, when the symbol
“M” is displayed. You can move within the menu using the keys “1” scroll up
(symbol on display) and “2” scroll down (symbol on display). When the
symbol “<” is displayed, you can use the “Function” key to skip to the next
higher menu level, and choose a particular menu
item using the “Enter/On” key.
•
•
•
The battery symbol indicates the current battery status:
███■ :
Battery full
[
] ■ : Battery empty (please replace the batteries)
1.2 Description of programming and user mode
•
Please find the menu structure shown on the following pages. Also the
navigation is indicated. Additionally, each of the menu items is clarified:
Code change menu
Change of the administrator and user codes
Language/Sprache menu
Language setup
E-Key synchronization menu
In this program, the channel of the E-Key is adapted to the channel of the
input unit.
This function is necessary when the radio channel of an input unit is modified,
although other radio keys (with the old channel setup) are still logged.
Info menu
Indication of version and serial number
SNA: Lock serial number
Administrator menu
This includes all the menus that can be used only with the administrator
authorizations. They include:
•
Create User
Users can be created here. A user has either a code, or an E-Key, or
both. A separate user is always created for a fingerscan. Anatomically,
there are people, the fingerprints of whom are not sufficiently articulated
for the system.
•
•
•
Assign E-Key
An E-Key can be additionally assigned to a selected user here.
Delete
Users and E-Keys can be deleted here. When a user is deleted,
also the code and the E-Key belonging to the user are deleted.
When an E-Key is deleted, the user is retained. To delete a
fingerscan, the corresponding user has to be deleted. To
delete all the fingerscans, please use the “FS-Reset” function (see
below). *.
Time
Entry of the time and calibration of the clock. The clock is
automatically calibrated between two specific times. Exceptions
are a replacement of batteries and the switchover from summer to
winter time.
Date
Entry of date
Radio Channel
The radio channel can be set up here (12 channels to select
from). This can be required when the radio channel is already
used by another application, e.g. WLAN. In case of collision with
WLAN systems, a space of three channels is recommended.
Priority:
In case the door cannot be opened after several attempts with the
E-Key, the priority of the door can be increased by this function.
Inversely, also the priority of other door within the direct
environment can be reduced.
Restructure:
The use of this function is recommended when several users have
been deleted.
Register:
When either the lock unit or the keyboard is replaced, the two
units are newly tuned to each other.
FS-Reset*:
All the stored fingerprints are deleted, however, the corresponding
users are retained. Please select this menu and follow the
instructions on the display also in case of repeated error functions
related to the use of fingerscans.
Made in Germany
www.secu-gmbh.de
SELO-B 2
SELO-BF 2
SELO-BFE 2
3
1.3 Detailed description of selected basic functions
1. Opening the safe using the factory code
• Press the On/Enter key
• The Code/Fingers** indication is displayed (**in case you possess
electronics without fingerscan, Code is displayed instead.
• Enter the factory set code 123456
• The instruction Please turn knob is displayed
Attention: The message Please turn knob implies the action with the knob of
the locking unit, for which the opening code has been entered.
2. Changing the administrator code
• Press the On/Enter key
• The indication of Code/Fingers* is displayed
• Press the Function key
• The Change code menu is displayed
• Press the On/Enter key
• The indication of Administrator is displayed
• Press the On/Enter key
• The indication of the Old code is displayed
• Enter the factory set code 123456
• Press the On/Enter key
• The indication of the New code is displayed
• Enter the new code
• Press the On/Enter key
• The indication of Repeat code is displayed
• Enter the new code
• Press the On/Enter key
• The indication of Code successfully changed is displayed
3. Creating a user with a code:
• Press the On/Enter key
• The indication of Code/Fingers** is displayed
• Press the Function key
• The Change code menu is displayed
• By pressing the key 2 reach the Administrator menu
• Press the On/Enter key
• Admin setup Create user is displayed
• Press the On/Enter key
• Create code is displayed
• Press the On/Enter key
• At this point you are asked to enter the admin. code (factory setting
123456)
• The indication of User 00x is displayed
• Please enter the user code and confirm it with ENTER
• Press the On/Enter key
• FS combination to be confirmed with ENTER*** is displayed
• Press the On/Enter key and accordingly the Function key
• After confirmation, Save with the On key is displayed.
***If a user with a value of 1 (right to open alone) should be created, the
message FS combination to be confirmed with ENTER must be
followed by pressing the Function key. If the user should be assigned
access in combination with a fingerscan only, this inquiry is to be
confirmed with ENTER.
4. Creating a user with an E-Key:
• Press the On/Enter key
• The indication of Code/Fingers** is displayed
• Press the Function key
• The Change code menu is displayed
• By pressing the key 2 reach the Administrator menu
• Press the On/Enter key
• Admin setup Create user is displayed
• Press the On/Enter key
• Create E-Key is displayed
• Press the On/Enter key
• At this point you are asked to enter the admin. code (factory setting
123456)
• FS combination to be confirmed with ENTER*** is displayed
• Press the On/Enter key and accordingly the Function key
• User 00x Store E-Key using ENTER is displayed
• Press the On/Enter key
• E-Key in Prog mode, continue with Enter is displayed
• Press the On/Enter key
• After confirmation, Save with the On key is displayed.
Made in Germany
www.secu-gmbh.de
***If a user with a value of 1 (right to open alone) should be created, the
message FS combination to be confirmed with ENTER must be
followed by pressing the Function key. If the user should be assigned
access in combination with a fingerscan only, this inquiry is to be
confirmed with ENTER.
5. Storing a user with fingerprint*:
• Press the On/Enter key
• The indication of Code/Fingers** is displayed
• Press the Function key
• The Change code menu is displayed
• By pressing the key 2 reach the Administrator menu
• Press the On/Enter key
• Admin setup Create user is displayed
• Press the On/Enter key
• By pressing the key 2 reach the Create fingerscan menu
• Press the On/Enter key
• At this point you are asked to enter the admin. code (factory setting
123456)
• The indication of Create fingerscan is displayed
• The indication of Store finger is displayed
• This procedure is repeated several times
• After a successful entry the indication User xxx successfully created
is displayed
SELO-B 2
SELO-BF 2
SELO-BFE 2
4
Attention: When saving a fingerprint it is important that the finger is laid
evenly and in a straight position over the sensor. Follow the instructions on the
display. The finger is saved only when it can be read in an optimum quality.
6. Opening with fingerprint*:
• Press the On/Enter key
• The indication of Code/Fingerp is displayed
• Move the saved finger over the sensor
• Value not achieved is displayed
• The Code/Fingers indication is displayed
• At this point, enter an additional opening code (not Fingerprint with
electronic SELO-BFE 2).
• The instruction Please turn knob is displayed
In case following message is displayed: Value not achieved , an additional
opening code shall be entered. (When the programming is made using the
software only. When programming using the safe electronics, the indication
Please use rotating knob is displayed already when the second opening code
has been entered.)
7. Deleting a finger*:
• Press the On/Enter key
• The indication of Code/Fingers** is displayed
• Press the Function key
• The Change code menu is displayed
• By pressing the key 2 reach the Administrator menu
• Press the On/Enter key
• Admin setup Create user is displayed
• By pressing the key 2 reach the Admin. setup Delete menu
• Press the On/Enter key
• Delete user is displayed
• Press the On/Enter key
• At this point you are asked to enter the admin. code (factory setting
123456)
• Now you have to select the appropriate user by pressing the keys 1
or 2
• Press the On/Enter key
• The indication of Delete data to be confirmed with the On key is
displayed.
• Press the On/Enter key
• The indication of Data record deleted is displayed
Additional users can be deleted using the On/Enter key. By pressing the
Function key, you can reach higher menu levels up to the code entry.
1.4 Error messages*
The following error messages are indicated when a finger is being saved or
the safe opened:
Error message
Elimination of causes
too fast! please repeat
Move the finger more slowly
over the sensor
too aslant! please repeat
too short! please repeat
Move the finger straight over
the sensor be read
Made in Germany
www.secu-gmbh.de
Move the finger over the
sensor in a way allowing more
surface area to
place to the center and repeat! Place your finger centrally
over the sensor
SELO-B 2
SELO-BF 2
SELO-BFE 2
5
1.5 Menu structure
Made in Germany
www.secu-gmbh.de
SELO-B 2
SELO-BF 2
SELO-BFE 2
6
1.6 REPLACING THE BATTERIES
As soon as the symbol depicting the battery condition indicates
„almost empty“, the operator is also warned Please replace
batteries! each time the lock is operated. We recommend
you heed the advice and change the batteries! The lock can
only be unblocked a further, approximately, 50 times.
Please note that none of the number codes can be changed
until a set of fresh batteries has been fitted. To change the
batteries, lift off the cover of the battery compartment with
the tip of a screwdriver. Fit three leak-proof, type Mignon
LR6, AA, alkaline batteries, paying attention to the correct
polarity. Dispose of the old batteries in accordance with
anti-pollution legislation!
Made in Germany
www.secu-gmbh.de
SELO-B 2
SELO-BF 2
SELO-BFE 2
7
Made in Germany
www.secu-gmbh.de
SECU Sicherheitsprodukte GmbH
Wormgermühle
D – 58540 Meinerzhagen
Germany
www.secu-gmbh.de
[email protected]
Irrtum und Änderungen vorbehalten
Omissions and changes reserved
Sous réserve de fautes d‘erreurs et de modifications
BA SELO-B 2 , SELO-BF 2 and SELO-BFE 2
©SECU Sicherheitsprodukte GmbH
MD 07/2011
SELO-B 2
SELO-BF 2
SELO-BFE 2
8