1
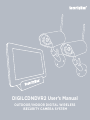
DIGILCDNDVR2 User’s Manual
OUTDOOR/INDOOR DIGITAL WIRELESS
ISECURITY CAMERA SYSTEM
© Copyright 2014
This manual is furnished under license and may be used or copied only in
accordance with the terms of such license. Except as permitted by such license,
no part of this publication may be reproduced, stored in a retrieval system, or
transmitted, in any form or any means, electronic, mechanical, recording, or
otherwise, including translation to another language or format, without the
prior written permission of SecurityMan. The content of this manual is furnished
for informational use only, is subject to change without notice, and should not
be construed as a commitment by SecurityMan. SecurityMan Inc assumes no
responsibility or liability for any errors or inaccuracies that may appear in this book.
FCC Information
Notes on FCC’s “Consistent Statement of Information” This product meet the
requirements specified in Part 15 of FCC Regulation. Operation rests with the
following two conditions:
(1) The equipment should not cause any harmful interference.
(2) The equipment must receive and process any interference, including any
possible interference caused by operation mistakes.
After testing the product, we confirm that the camera complies with the provision
for class C digital equipment in the 15th part in FCC regulations; and the receiver
complies with the limitations for class B digital equipment in Part 15 of FCC
regulation. The product generates, applies and emits radio waves. It might cause
harmful interferences to wireless communication if not be installed and used
following the description of the manual.
The product may cause interference in residential area, and the customer should
take remedies to eliminate the interference on their own costs.
If the product causes any harmful interference to wireless equipment or disturbs the
receiving of TV signals (it can be identified by turning on and off the product), you
can solve the trouble by following methods:
• Readjust the product or put it in another place.
• Extend the distance between the equipment interfered and the product.
• Refer to dealers or experienced radio electrician for help.
Warranty
SecurityMan Inc warrants that this product will be free from defects in title,
materials and manufacturing workmanship for one year or otherwise specified
on the product packaging. This limited warranty shall commence from the date
of purchase. SecurityMan products warranty is not transferable and is limited
to the original purchaser. If the product is found to be defective then, as your
sole remedy and as the manufacturer’s only obligation, SecurityMan will repair
or replace the product. This warranty shall not apply to products that have been
subjected to abuse, misuse, abnormal electrical or environmental conditions,
normal wear and tear, or any condition other than what can be considered normal
use.
Warranty Disclaimers
SecurityMan Inc, makes no other warranties, express, implied or otherwise,
regarding this product, and specifically disclaims any warranty for merchantability
or fitness for a particular purpose. The exclusion of implied warranties is not
permitted in some states and the exclusions specified herein may not apply to you.
This warranty provides you with specific legal rights. There may be other rights
that you have which vary from state to state.
Limitation of Liability
The liability of SecurityMan Inc, arising from this warranty and sale shall be limited
to a refund of the purchase price. In no event shall SecurityMan be liable for costs
of procurement of substitute products or services, or for any lost profits, or for any
consequential, incidental, direct or indirect damages, however caused and on any
theory of liability, arising from this warranty and sale. These limitations shall apply
not withstanding any failure of essential purpose of any limited remedy.
For Tech Support Call: 888-977-3777
SecurityMan
4601 E. Airport Drive
Ontario, CA, 91761, USA
Tel: 909-230-6668
Fax: 909-230-6889
Email: [email protected]
Website: www.securitymaninc.com
Copyright 2014 by SecurityMan v1.0
Table of Contents
Introduction
Features
Important
Restrictions
Package Contents
Product Basics
Receiver (SM-871DR)
Camera (SM-816DTX)
Quick Start
Hardware Setup / Installation
Receiver (SM-871DR)
Camera (SM-816DTX)
Smartphone Remote Access
Android
iPhone
Basic Operations
Turning the DVR On/OFF
Locking / Un-Locking the DVR
Screen Calibration
Adding a Camera
Recording
Video
Manual Recording
Motion Detection Recording
Photo Snapshots
Enabling Photo Snapshots
Manual Snapshot
Motion Detection Snapshots
Setting the Time & Date
Volume Control
Pan / Tilt and Zoom
Pan / Tilt (SM-821DT only)
Zoom
Playback
Video
Pictures (Snapshots)
DVR Menu Options
Settings
Camera
Camera Pairing
Brightness Control
Motion Detection
Network
IP Setting
Static IP
1
1
1
2
6
7
7
7
8
8
8
9
10
10
12
15
15
16
16
17
18
18
18
19
20
20
21
22
23
24
25
25
26
27
27
29
31
32
32
32
34
35
36
37
37
DHCP
Security Setting
Device & Admin Password
Changing your Device & Admin Passwords
Information
Alarm
Alarm Time
Alarm Volume
Email Alert
Setting Up Email Alerts
SMTP Server
SMTP Port
User Name
Password
SSL
Email To
System
Date Time
Recorder
SD Card
Format
Formatting Your SD Card
Overwrite
Enabling / Disabling Overwrite
Screen Auto Lock
Enabling Screen Auto Lock
Upgrade
Upgrading Your Firmware
Reset
Applying Factory Default Settings
Language
Volume
Volume Adjustment
Playback
Playing Back Recorded Video
Playing Back Photos (Snapshots)
Loop
PTZ (Pan, Tilt, Zoom)
Pan / Tilt (SM-821DT only)
Zoom
39
40
40
41
42
43
43
43
44
44
45
45
45
45
45
45
46
47
47
47
48
48
48
49
49
49
50
50
51
51
52
52
52
53
54
56
57
58
58
59
Introduction
Thank you for purchasing our product. The SecurityMan DIGILCDNDVR2
iSecurity camera system allows you to monitor your home or business
on your mobile device anytime from anywhere in the world. The
DIGILCDNDVR2 utilizes the best digital wireless technology with a
wireless transmission range of up to 490ft and a portable 7” touch
screen/LCD monitor which allows you take your iSecurity with you
anywhere on your property.
Important
This guide provides important information on the use and operation of
your DIGILCDNDVR2 and the images/features shown throughout the
manual are subject to change without notice due to system and firmware
upgrades. Please read all the information carefully prior to using the
product for the best performance and to prevent any damage/injuries
or misuse of the device(s). Customers are entitled to have read through
this complete user’s manual before using the DIGILCDNDVR2. Any
unapproved changes or modifications will void your warranty. Please
ensure to have a complete understanding of the following restrictions.
Features
• Do-it-yourself (D.I.Y) easy to set up and use 2.4GHz digital wireless
recording system
• Space saving 7” LCD Touch Screen monitor with an Integrated SD
digital video recorder and 1800mAh rechargeable battery
• Remote monitoring by Smartphone or Tablet
• Docking station with charging base and Ethernet network connection
1
• Includes two outdoor/indoor digital wireless camera with IR LEDs for
night vision (30ft B/W)
• Increased range of transmission up to 200ft between walls and up to
490ft in clear line of sight
• No Wi-Fi interference; no interference from crowded analog devices900MHz/2.4GHz/5.8GHz/6.0GHz devices
• Secure signal: neighbors cannot pick up the signal or listen in
• Built-in microphone for audible recording up to 30ft away
• Motion detection and manual recording with optional video (mp4) or
picture selection (JPEG)
• Auto overwrite function when SD is full
• Records up to 27,000 (30-sec) video clips (single channel quad view)
on a 32GB (not included) SD card with time and date stamp
• Upgradable by adding 2 more cameras (SM-816DTX and/or SM-821DT
pan/tilt/2x digital zoom camera)
• Records 1 channel at 25fps or all 4 channels at the same time (in Quad
mode) at 15fps
• Single channel full screen, auto sequential rotation or Quad view display
• Playback directly from the receiver or PC via SD card reader with any
media player software
Restrictions
When using this product, the safety precautions below must be taken to
avoid possible legal liabilities and damages. Retain and follow all product
safety and operating instructions. Observe all warnings in the product
operating instructions. To reduce the risk of bodily injury, electric shock, fire
and damage to the equipment, observe the following precautions.
PLEASE NOTE that under certain circumstances, audio/video recording
may be PROHIBITED by law. This device should be used only in compliance
2
with all applicable federal, state and local statutes.
• DO NOT place this product too close to medical equipment.
1. Radio waves may potentially cause breakdown of medical electrical
equipment and thus cause incidents.
2. Place this product at least 22cm from the heart pacemaker. Radio
wave potentially influences heart pacemaker and thus leads to
respiratory disturbance.
• DO NOT uses this product to monitor equipment or activities that are
relevant to one’s privacy.
Monitoring one’s private activities without consent is illegal and this
product is not designed or manufactured for these purposes.
• DO NOT use this product to carry out any illegal activities such as
sneak preview, and etc.
SecurityMan shall not be responsible for any consequences of illegal
conducts made by users.
• DO NOT put the plastic package bags in reach of children or babies.
Young children can choke on these items if they put them into their
mouths.
• DO NOT plug the AC adapter into the outlet in improper situations.
• Plugging in an AC adapter with wet hands might cause electric shock.
• Plugging in the AC adapter unsteadily might cause fire or electric
shock.
• DO NOT cover the AC adapter when it is connected to an outlet, place
the adapter near heaters, or put it on the floor which is equipped with
a heater. The above mentioned operation might cause fire or
incidents.
3
• DO NOT use it aboard; please abide by the airway’s provision. It might
influence communication aboard and the flying apparatus if departing
from the airway’s regulation. This will result in accident, possible
death and severe physical hurt.
• DO NOT disassemble or repair the camera, receiver or other relevant
peripheral equipment s by yourself. Improper disassembly might
cause damages to the product or the peripheral equipment.
• DO NOT put the camera in quaky paces. The camera may be unstable
or out of operation if installed improperly. Such installation may also
cause breakdown.
• DO NOT touch, shake or hold the antenna. Touching, shaking or holing
the antenna might influence the receiving of electromagnetic wave,
and thereby influence the receiving effect.
• DO NOT use the camera in complex environment, the obstruction of
stumbling block will affect the electromagnetic wave and influence
the receiving range. Wall, tree and other stumbling block might
absorb, reflect the electromagnetic wave, and influence the receiving
range.
• DO NOT use the camera in the places which are covered with
metal. The around metal, such as elevator and cabin, might shield the
electromagnetic wave, and result in inability to receive signals.
Conditions
Please read the following messages to make sure your working
environment is suitable.
4
• The temperature should be kept between –10˚C and 50˚C (14˚F to
122˚F). The relative humidity should be kept between 20% and 80%.
• Avoid putting the product in places where temperature or humidity
may change rapidly.
• Keep it dry, dustless and avoid lens exposure in direct sunlight.
• Keep product away from heat sources such as electric heaters.
• Do not use the camera near harmful chemicals.
• Do not place product near any strong magnetic objects
• It might influence the normal operation of the product if used at the
fringe range of normal temperature. Please turn off the power when
not in use.
• Do not disassemble the product.
• Do not shake or strike the product.
• Please obey the local government’s environment protection policy.
5
Package Contents
1x SM-871DR
8GB SD Card
(Supports up to 32GB)
1 x Ethernet Cable
3x AC Adapters
Mounting Screws
User’s Manual
6
2x SM-816DTX
(W/Antennas & Brackets)
Quick Start Guide
Product Basics
RECEIVER (SM-871DR)
Antenna
Power Button
SD Slot
Speaker
LCD Stand
Reset
Power Socket
Ethernet Port
Power Socket
LCD Docking Station
CAMERA (SM-816DTX)
IR LED’s
Antenna
Camera Lens
Light Sensor
Pair Button
Power Socket
Power LED
Microphone
Angle Adjust
Mounting
Bracket
7
Quick Start
Hardware Setup/ Installation
RECEIVER (SM-871DR)
Power Button
Exend the Antenna
Insert included 8GB SD
(support up to 32GB)
Connect the
Power Adapter
Connect the Ethernet
Cable to your Router
NOTE: The docking station must remain connected to your router in order for you to be
able to remotely view you cameras using a Smartphone or tablet.
8
CAMERA (SM-816DTX)
Attach the
Antenna
Adjust the
Viewing Angle
Connect the
Power Adapter
Mounting the
Camera
NOTE: Please make sure that your cameras are paired to your receiver before mounting
them.
9
Smartphone Remote Access
Please make sure that the docking station is connected to your router
using an Ethernet cable and that your DVR is sitting on the docking
station.
NOTE: You will not be able to access your system remotely if the DVR is
off the cradle.
Android
1. Open the Play Store on your mobile device. Then search for and install
the “WatchBot” application developed by “Eric Xu”. Once installed, tap
on the “WatchBot” icon (Fig. 1.1), select “+” to add a new device (Fig.
1.2) and then select the “QR Scan” option (Fig. 1.3).off the cradle.
Fig. 1.1
Fig. 1.2
10
Fig. 1.3
2. Aim your camera at the QR Code located on the bottom of the dock
station (Fig. 1.4) so that the app can capture your Device ID. Create a
System name (Fig. 1.5) and enter the Device Password that is associated
with your system (Fig. 1.6).
NOTE: The default password is 222222.
Fig. 14
Fig. 1.5
Fig. 1.6
3. When you are done entering the Device Name and Password tap on
“Save” (Fig. 1.7). Now select your device (Fig. 1.8) to bring up the live
view screen (Fig. 1.9).
11
Fig. 1.7
Fig. 1.8
Fig. 1.9
iPhone
1. Open the App Store on your mobile device. Then search for and install
the “WatchBot” application developed by “Long Xu”. Once installed,
tap on the “WatchBot” icon (Fig. 1.1), select “+” to add a new device
(Fig. 1.2) and then select the “Scan” option (Fig. 1.3).
12
Fig. 1.1
Fig. 1.2
Fig. 1.3
2. Aim your camera at the QR Code located on the bottom of the dock
station (Fig. 1.4) so that the app can capture your Device ID. Create a
System name (Fig. 1.5) and enter the Device Password that is associated
with your system (Fig. 1.6).
NOTE: The default password is 222222.
13
Fig. 1.4
Fig. 1.5
Fig. 1.6
3. When you are done entering the Device Name and Password tap on
“Save” (Fig. 1.7). Now select your device (Fig. 1.8) to bring up the live
view screen (Fig. 1.9).
14
Fig. 1.7
Fig. 1.8
Basic Operations
Turning the DVR On/OFF
To turn your DVR On/Off, press and hold the Power button.
15
Fig. 1.9
Locking / Un-Locking the DVR
To prevent un-authorized users from accessing your DVR you can lock
the screen by “pressing and releasing” the Power button. You can then
un-lock the DVR by simply “pressing and releasing” the power button
one more time.
NOTE: Locking your DVR will hide all live view icons; time, motion, rec
etc. Locking your system during recording will not affect the recording
process.
Screen calibration
When you first turn on your LCDDVR you will be prompted to calibrate
the touch panel by tapping on the “X” located at the each corner of the
screen.
16
Adding a camera
The SM-871DR is a 4 channel receiver and can support up to 4 cameras
(SM-816DTX or SM-821DT). To add a camera, make sure that the camera
is powered on and is no more than 2 feet away from the receiver and
follow the steps below.
NOTE: You can relocate the camera after you have successfully added it.
1. Tap the Menu icon on the receiver and then tap on the Settings icon.
2. Tap on the Camera icon and select which channel you want to add the
new camera too.
NOTE: You can add up to 4 cameras to the DVR. Adding a camera to
a channel that is currently occupied will replace the current camera.
Please select a vacant channel.
17
3. Now select Camera Pairing from the available options and “keep
pressing” (press/release/press/release) the Pairing Button located
on the back of your camera until you see a green “Check Mark” on the
screen.
NOTE: Please repeat the process if a red “X” is displayed at any time
during the pairing process.
Recording
• Video
The LCDNDVR is equipped with two video recording methods, Manual
and Motion Detection.
Manual Recording
Manual recording is activated by simply tapping on the Camera icon
located at the top of each cameras live view screen and is deactivated
automatically once the set time frame has expired.
NOTE: Manual recording can only be activated for those channels that
display the camera icon and the length of each manually recorded
event is based on the time frame set under the Recorder Settings
(Settings>System>Recorder).
18
Motion Detection Recording
Motion Detection recording can be enabled / disabled on a “Per
Camera” base and is identified by a Walking Person icon located at the
top of each cameras live view screen. Motion detection can be activated
/ deactivated by following the steps below.
NOTE: Each motion detected recoding event is fixed at 2 minutes per
event, unless motion is continuously being detected.
1. Tap the Menu icon on the receiver and then tap on the Settings icon.
2. Tap on the Camera icon and select which camera you want to enable /
disable motion detection recording on.
NOTE: You can switch between cameras by tapping on the “<” & “>”
icons.
19
3. Now select Motion Detection from the available options and select
the desired sensitivity level for the camera being configured.
NOTE: When you are done, you can press the back arrow located to
the right of the Camera label to go back to the previous screen or you
can switch between cameras by tapping on the “<” & “>” icons to begin
configuring the next camera.
• Photo Snapshots
The LCDNDVR is equipped with two methods to take photo snapshots,
Manual and Motion Detection.
Enabling Photo Snapshots
Before you can utilize the snapshot feature the DVR’s recording method
must be changed from “Video” to “Photograph”.
1. Tap the Menu icon on the receiver and then tap on the Settings icon.
20
2. Tap on the System icon and select Recorder from the available options.
3. On the Recorder Setup screen tap on Photograph and then tap on the
back arrow located to the right of the Recorder Setup label to exit.
Manual Snapshot
Manual snapshots are taken by simply tapping on the Camera icon
located at the top of each cameras live view screen and is deactivated
automatically once the snapshot is taken.
21
Motion Detection Snapshot
Motion Detection snapshots can be enabled / disabled on a “Per
Camera” bases and is identified by a Walking Person icon located at the
top of each cameras live view screen. Motion detection can be activated
/ deactivated by following the steps below.
1. Tap the Menu icon on the receiver and then tap on the Settings icon.
2. Tap on the Camera icon and select which camera you want to enable /
disable motion detection recording on.
NOTE: You can switch between cameras by tapping on the “<” & “>”
icons.
3. Now select Motion Detection from the available options and select
the desired sensitivity level for the camera being configured.
NOTE: When you are done, you can press the back arrow located to
the right of the Camera label to go back to the previous screen or you
can switch between cameras by tapping on the “<” & “>” icons to begin
configuring the next camera.
22
Setting the Time & Date
The SM-871DR can be set to either 12-hour or 24-hour format.
1. Tap the Menu icon on the receiver and then tap on the Settings icon.
2. Tap on the System icon and select Date Time from the available options.
3. On the Date Time screen, select the time format that you want to use.
Then tap on the value that you want to change and use the up/down
options to increase/decrease its value. Tap on the save option when you
are done to save your changes.
23
NOTE: After the date and time are set up on the APP, please place a
check mark or uncheck “Daylight saving” based on your current local
time.
Volume Control
You can adjust your cameras volume level by following the steps below.
NOTE: Placing your cameras too close to the receiver will result in a
loud undesirable screeching noise.
1. Tap the Menu icon on the receiver and then tap on the Volume icon.
24
2. Use “-” and “+“icons to adjust the volume as needed and tap anywhere on the screen when you are finished.
Pan/Tilt and Zoom
Using the PTZ controls, you can move your camera up, down, left, right
(SM-821DT only) and even zoom in on the live view image that is being
displayed on your DVR.
NOTE: Pan / Tilt features are only applicable to SM-821DT cameras.
• Pan / Tilt (SM-821DT only)
The Pan / Tilt feature allows you to adjust the viewing angle of the camera by moving it Up, Down, Left & Right at any given time.
1. Tap on the cameras image that you want change the viewing angle on.
Tap the Menu icon on the receiver and then tap on the PTZ icon.
NOTE: Pan / Tilt features are only available on SM-821DT cameras.
25
2. Use the Up, Down, Left & Right options on the PTZ icon to move the
camera in the desired rotation.
NOTE: The SM-821DT is not an outdoor camera. The outdoor images
used in this example were used to help give an example of the camera
being moved in different directions.
• Zoom
Zooming in on the live view image can be done on both SM-816DTX and
SM-821DT cameras.
1. Tap on the cameras image that you want to zoom (2x digital zoom) in
on. Tap the Menu icon on the receiver and then tap on the PTZ icon.
NOTE: you can enlarge any your cameras quad mode image to single
channel live view by simply taping on the cameras live view image.
26
2. Tap on the Magnifying Glass icon. Then tap on the area of the live
view image that you would like to zoom in on and that portion of the
image will be digitally enlarged on the screen. You can exit from the
zoomed image by simply taping anywhere on the screen at anytime or
simply wait 2 minutes and the DVR will exit back to quad mode automatically.
NOTE: this only affects the live view image not the recorded events.
Playback
Playing back recorded events (video/photo) can be done directly using
the LCDDVR or on a computer by ejecting the SD card and inserting it
into your computers media card reader. The following will instruct you
on how to playback recorded events using the LDCDVR.
• Video
1. Tap the Menu icon on the receiver and then tap on the Playback icon.
NOTE: The default playback mode is “Video”, you can switch between
photo/video by tapping on the “<” & “>” icons located to the right and
left of the main banner.
27
2. Set the month that you want to view recorded events on by tapping
on the “<” & “>” located to the side of the date banner and tap on any of
the 5 camera icons. The days that contain events will be highlighted.
NOTE: You can choose to display each cameras event individually by
tapping on a specific camera or you can view all events at once by tapping on the camera icon that contains the letter “A”.
3. Tap on any of the highlighted dates to view all recorded events for
that day. The event list screen will display each event in ascending order
and also provides you with the option to delete any event by pressing
the “X. The file naming convention for each event is as follows: An event
labeled “A081356-4.mp4” would mean that the event was created at
08:13:56 am; on camera #4 (.mp4 is the file format).
28
4. Tap on the dated event that you want view and it will be playable using the DVR’s playback feature and options.
Next event
Back 1 sec
Play/Pause
Delete
Previous event
Forward 5 sec
Stop
Back to event list
• Pictures (Snapshots)
1. Tap the Menu icon on the receiver and then tap on the Playback icon.
29
2. Change the playback mode from “Video” to “Photo” by tapping on
the “<” & “>” icons located to the right and left of the main banner. Set
the month that you want to view recorded events on by tapping on the
“<” & “>” located to the side of the date banner and tap on any of the 5
camera icons. The days that contain events will be highlighted.
NOTE: You can choose to display each cameras event individually by
tapping on a specific camera or you can view all events at once by tapping on the camera icon that contains the letter “A”.
3. Tap on any of the highlighted dates to view all recorded events for
that day. The event list screen will display each event in ascending order
and also provides you with the option to delete any event by pressing
the “X. The file naming convention for each event is as follows: An event
labeled “A081356-4.jpg” would mean that the event was created at
08:13:56 am; on camera #4 (.jpg is the file format).
30
4. Tap on the dated event that you want view and it will be playable using the DVR’s playback feature and options.
DVR Menu Options
The DVR’s menu options consist of settings, options and features that
will allow you to configure your security system based your preferences
and requirements. To access main menu options and features, simply
tap on the Menu icon at any time to display them.
1: Settings : DVR configuration
2: Volume: Live view volume control
3: Playback: Video/Photo playback
4: Loop: Live view auto rotation
5: PTZ: Pan, Tilt & Zoom
31
Setting
1: Camera : Camera settings
2: Network: Network configuration
3: Alarm: MD alert configuration
4: System: Live view auto rotation
• Camera
The camera settings are used to add a camera to your system, adjust
the brightness level and also enable/disable motion detection for each
camera independently.
• Camera Pairing
• Brightness Control
• Motion Detection
Camera Pairing
The Camera pairing option is used to add cameras to your DVR. To add
a camera, make sure that the camera is powered on and is no more than
2 feet away from the receiver and follow the steps below.
NOTE: You can relocate the camera after you have successfully added it.
32
1. Tap the Menu icon on the receiver and then tap on the Settings icon.
2. Tap on the Camera icon and select which channel you want to add the
new camera too.
NOTE: You can add up to 4 cameras to the DVR. Adding a camera to
a channel that is currently occupied will replace the current camera.
Please select a vacant channel.
3. Now select Camera Pairing from the available options and “keep
pressing” (press/release/press/release) the Pairing Button located
on the back of your camera until you see a green “Check Mark” on the
screen.
NOTE: Please repeat the process if a red “X” is displayed at any time
during the pairing process.
33
Brightness Control
The Brightness control option is used to control the live view brightness
level of each camera. To adjust the brightness level, make sure that the
camera is powered on and follow the steps below.
1. Tap the Menu icon on the receiver and then tap on the Settings icon.
2. Tap on the Camera icon, and select which camera you want adjust the
brightness level on.
34
3. Now select Brightness Control from the available options and use the
“-” and “+“icons to adjust the brightness as needed.
NOTE: When you are done, you can press the back arrow located to the
right of the Brightness Setting label to go back to the previous screen
or you can switch between cameras by tapping on the “<” & “>” icons to
begin configuring the next camera.
Motion Detection
Motion Detection recording can be enabled / disabled on a “Per Camera” base and can be activated / deactivated by following the steps
below.
NOTE: Each motion detected recoding event is fixed at 2 minutes per
event, unless motion is continuously being detected.
1. Tap the Menu icon on the receiver and then tap on the Settings icon.
35
2. Tap on the Camera icon and select which camera you want to enable /
disable motion detection recording on.
NOTE: You can switch between cameras by tapping on the “<” & “>”
icons.
3. Now select Motion Detection from the available options and select
the desired sensitivity level for the camera being configured.
NOTE: When you are done, you can press the back arrow located to
the right of the Camera label to go back to the previous screen or you
can switch between cameras by tapping on the “<” & “>” icons to begin
configuring the next camera.
• Network
The Network settings will allow you to configure your DVR’s, network
parameters, Login passwords and display your systems current network
configurations.
36
• IP Setting
• Security Setting
• Information
IP Setting
The IP Setting options will allow you to enable and configure the internet
protocol to be used when accessing you r cameras remotely. The two
options are Static or DHCP (recommended).
• STATIC IP: Allows you to manually configure your DVR’s network
parameters.
• DHCP: Allows your router to automatically configure your DVR’s network parameters.
37
• Static IP
Please make sure that you have the IP address that you will be assigning
to you r DVR, Sub Net, Default Gateway and DNS server values ready
before you begin.
NOTE: Please contact your network administrator for assistance.
1. Tap the Menu icon on the receiver and then tap on the Settings icon.
2. Tap on the Network icon, and select IP Settings from the menu options available.
3. Now select Static IP from the available options and tap on any of the
available value slots (IP Address, Subnet Mask, etc) to begin inputting its
values.
38
4. Using the onscreen key board enter the values for each of the 4
categories (IP address, Subnet, Gateway & DNS server) and press the
ENT key when you are done. Pressing the back arrow will discard your
entries. values.
5. When you are done entering the values for each category, press the
OK button and restart your system when prompted.
• DHCP
39
DHCP is enabled by default and is the recommended protocol to use
for users with little or no network experience. DHCP allows your router
to automatically assign all parameters needed to remotely access your
system.
Security Setting
The Security Setting options will allow you to change the default Device
and Admin passwords (111111) that are used when remotely accessing
your DVR.
NOTE: The default Device is 222222 & Admin password is 111111.
• Device Password: Used to access your system remotely
• Admin Password: Used to configure your system remotely using your
smart phone.
40
Changing your Device & Admin Passwords
1. To create/change the default Device or Admin passwords tap the
Menu icon on the receiver and then tap on the Settings icon.
2. Tap on the Network icon, and select Security Setting from the menu
options available.
3. Now tap on any of the available value slots (Device Password, Admin
Password) and use the on screen keyboard to begin inputting its values.
41
4. Press the ENT key to save when you are done to save your password.
Pressing the back arrow will discard your entries.
5. When you are done entering the values for each category, press the
OK button and restart your system when prompted.
Information
The information option provides you with detailed device configuration
such as; DVR and camera firmware versions, network addresses and
device id, passwords.
42
Alarm
The Alarm settings are used to configure your DVR’s audible alert time
length, volume and motion detected email alert notifications.device id,
passwords.
• Alarm Time
• Alarm Volume
• Email Alert
Alarm Time
The Alarm Time option is used to adjust the Motion Detection audible
alert length.
Alarm Volume
The Alarm Volume option is used to adjust the Motion Detection audible
alert volume. When selected, use the “-“ and “+” icons to adjust the
volume level.
43
Email Alert
The Alarm Alert option is used to Enable / Disable your DVR’s Motion
Detection Email alert notification which allows the DVR to send you
emails whenever motion is detected by any of the cameras.
• Setting up Email Alerts
Please make sure that you have your Email providers SMTP server and
port number before you begin.
NOTE: Please contact your Email provider or use Google as a tool for
more assistance.
1. To enable and configure your DVR’s Email Alert feature, tap the Menu
icon on the receiver and then tap on the Settings icon.
2. Tap on the Alarm icon, and select Email Alert from the menu options
available.
44
3. Now select Enable from the available options and tap on any of the
available value slots (SMTP Server, SMTP Port, Username, etc) to begin
inputting its values.
• SMTP Server: SMTP server used by your email provider. Google your
providers name followed by SMTP for more info.
• SMTP Port: Port number used by your email provider. Google your
providers name followed by SMTP Port for more info.
• User Name: Email address associated with the SMTP server being
used.
• Password: Password associated with the email account being used to
send the emails.
• SSL: Checked if required by your email provider.
• Email To: The email address that you want the alert notifications to be
sent to.
4. Using the onscreen key board enter the values for each of the 5 categories (SMTP Server, SMTP Port, etc) and press the ENT key when you
are done. Pressing the back arrow will discard your entries.
45
5. When you are done entering the values for each category, press the
OK button and restart your system when prompted.
System
The System settings are used to configure basic DVR settings such as
date and time, SD card format, language, etc.
•
•
•
•
• Recorder
• Power Saving
• Upgrade
• Language
Date Time
SD Card
System Auto Lock
Reset
46
Date Time
The Date Time option is used to set/update your systems current time/
date.
Recorder
The Recorder option is used to set your DVR to either take photos, record video, & also set the length of each recorded video event.
•
•
•
•
30S – 30 second video clip
60S – 60 second video clip
120S – 120 second video clip
Photograph - Enables snapshots only
SD Card
The SD Card option is used to enable/disable automatic overwrite and
to format your SD card.
47
• Format
• Overwrite
• Format
The Format option assures that your SD card is formatted to be used
with your device and should only be used when using a newly purchased
SD card.
Formatting Your SD Card
To format your SD card, tap the Format icon and then tap on Yes to
proceed.
WARNING: formatting your SD card will delete all its contents.
• Overwrite
The Overwrite option is used to enable (default) / disable the DVR’s automatic overwrite feature. Enabling the overwrite option allows the DVR
to keep recording continuously once the SD card is full.
48
NOTE: Disabling the overwrite feature will haul all recording once the SD
card is full.
Enabling / Disabling Overwrite
To Enable or Disable automatic overwrite tap the Overwrite icon and
then tap on the ON/Enable or OFF/Disable to proceed.
NOTE: Disabling the overwrite feature is not recommended and will haul
all recording once the SD card is full.
Screen Auto Lock
The Screen Auto Lock option is a feature used to keep un-wanted users
from using the DVR. Enabling this option will disable the touch screen
feature until the user presses the power button.
NOTE: The Screen auto lock feature can also be enabled manually by
pressing the power button during live view.
Enabling Screen Auto Lock
To enable the Screen Auto Lock feature tap the Screen Auto Lock icon
and then tap on any of the auto lock time frames to proceed.
NOTE: The Screen auto lock feature can also be enabled manually by
pressing the power button during live view.
49
Upgrade
Upgrading your firmware
1. Shut down your DVR by pressing and holding the Power button and
insert the SD card containing the updated firmware.
2. Turn your DVR back on and tap the Menu icon on the receiver and
then tap on the Settings icon.
3. Tap on the System icon and select Upgrade from the options available.
50
4. Now tap on Start and select Yes to begin the Upgrade.
Reset
The Reset option is used to reset your DVR to its factory default settings
NOTE: Restoring your DVR will reset all passwords and email settings.
Applying Factory Default Settings
To reset your DVR to is factory default settings tap the Reset icon. Tap
on the Start option and then tap Yes to confirm.
51
Language
The language option is used to change the Language displayed on you
r DVR.
Volume
The volume option is used to control your DVR’s “Live View” volume
level.
• Volume Adjustment
You can adjust your cameras volume level by following the steps below.
NOTE: Placing your cameras too close to the receiver will result in a loud
undesirable screeching noise.
1. Tap the Menu icon on the receiver and then tap on the Volume icon.
52
2. Use “-” and “+“icons to adjust the volume as needed and tap anywhere on the screen when you are finished.
Playback
Playing back recorded events (video/photo) can be done directly using
the LCDDVR or on a computer by ejecting the SD card and inserting it
into your computers media card reader. The following will instruct you
on how to playback recorded events using the LDCDVR.
53
Playing Back Recorded Video
1. Tap the Menu icon on the receiver and then tap on the Playback icon.
NOTE: The default playback mode is “Video”, you can switch between
photo/video by tapping on the “<” & “>” icons located to the right and
left of the main banner.
2. Set the month that you want to view recorded events on by tapping
on the “<” & “>” located to the side of the date banner and tap on any of
the 5 camera icons. The days that contain events will be highlighted.
NOTE: You can choose to display each cameras event individually by
tapping on a specific camera or you can view all events at once by tapping on the camera icon that contains the letter “A”.
54
3. Tap on any of the highlighted dates to view all recorded events for
that day. The event list screen will display each event in ascending order
and also provides you with the option to delete any event by pressing
the “X. The file naming convention for each event is as follows: An event
labeled “A081356-4.mp4” would mean that the event was created at
08:13:56 am; on camera #4 (.mp4 is the file format).
4. Tap on the dated event that you want view and it will be playable using the DVR’s playback feature and options.
Next event
Back 1 sec
Play/Pause
Delete
Previous event
Forward 5 sec
Stop
Back to event list
55
Playing Back Photos (Snapshots)
1. Tap the Menu icon on the receiver and then tap on the Playback icon.
2. Change the playback mode from “Video” to “Photo” by tapping on
the “<” & “>” icons located to the right and left of the main banner. Set
the month that you want to view recorded events on by tapping on the
“<” & “>” located to the side of the date banner and tap on any of the 5
camera icons. The days that contain events will be highlighted.
NOTE: You can choose to display each cameras event individually by
tapping on a specific camera or you can view all events at once by tapping on the camera icon that contains the letter “A”.
3. Tap on any of the highlighted dates to view all recorded events for
that day. The event list screen will display each event in ascending order
and also provides you with the option to delete any event by pressing
the “X. The file naming convention for each event is as follows: An event
labeled “A081356-4.jpg” would mean that the event was created at
08:13:56 am; on camera #4 (.jpg is the file format).
56
4. Tap on the dated event that you want view and it will be playable using the DVR’s playback feature and options.
Previous event
Delete
Next event
Play/Pause(auto switch)
Back to event list
Loop
The Loop feature is used to activate the DVR’s Single Channel Live View
Auto Rotation feature. This feature is useful if you would like the DVR
to display each camera’s live view image in full screen for a set period of
time.
NOTE: Enabling the loop feature is not recommended for users who
want to record multiple cameras at once.
57
PTZ (Pan, Tilt, Zoom)
Using the PTZ controls, you can move your camera up, down, left, right
(SM-821DT only) and even zoom in on the live view image that is being
displayed on your DVR.
NOTE: Pan / Tilt features are only applicable to SM-821DT cameras.
• Pan / Tilt (SM-821DT only)
The Pan / Tilt feature allows you to adjust the viewing angle of the camera by moving it Up, Down, Left & Right at any given time.
1. Tap on the cameras image that you want change the viewing angle on.
Tap the Menu icon on the receiver and then tap on the PTZ icon.
NOTE: Pan / Tilt features are only available on SM-821DT cameras.
58
2. Use the Up, Down, Left & Right options on the PTZ icon to move the
camera in the desired rotation.
NOTE: The SM-821DT is not an outdoor camera. The outdoor images
used in this example were used to help give an example of the camera
being moved in different directions.
Zoom
Zooming in on the live view image can be done on both SM-816DTX and
SM-821DT cameras.
1. Tap on the cameras image that you want to zoom (2x digital zoom) in
on. Tap the Menu icon on the receiver and then tap on the PTZ icon.
59
NOTE: you can enlarge any your cameras quad mode image to single
channel live view by simply taping on the cameras live view image.
2. Tap on the Magnifying Glass icon. Then tap on the area of the live
view image that you would like to zoom in on and that portion of the
image will be digitally enlarged on the screen. You can exit from the
zoomed image by simply taping anywhere on the screen at anytime or
simply wait 2 minutes and the DVR will exit back to quad mode automatically.
NOTE: this only affects the live view image not the recorded events.
60
Specifications
General
Camera
(SM-816DTX)
Optional
PTZ Camera
(SM-821DT)
Monitor
(SM-871DR)
Docking station
Operating frequency
Transmission rate
Transmission distance
Operating temperature
Storage temperature
Operating humidity
Network interface
Network protocol
System protocol
Video coding
Users
Package dimensions/G.W.
Imaging sensor type
Resolution
Minimum illumination
LED night vision range
Viewing angle
Pairing button
Power supply
Weatherproof rating
Antenna
Consumption current
Dimensions (camera body)
Weight
Imaging sensor type
Resolution
Minimum illumination
LED night vision range
Viewing angle
PTZ
Pairing button
Antenna
Power supply
Consumption current
Dimensions (camera body)
Weight
Screen size
Resolution
Touch screen
Rechargeable battery
Recording time
(based 32GB)
Manual recording
Motion detection recording
Power saving
Auto screen lock
Overwrite
Language
Speaker
Supply voltage
Consumption current
Image format
Video format
SD card
Video system
Dimensions
Weight
Network port
Power
Dimensions
Weight
2.4 GHz
25 fps (only with effective distance)
Up to 490 ft clear line of sight; up to 200 ft (indoor)
-10 ~ +50 °C/ +14 ~+122 °F
-20 ~ +60 °C/-4 ~+140 °F
<85%RH
10Mb/100Mb BaseTX IEEE802.3
TCP/IP,DHCP,SMPT,HTTP,DDNS,UPNP,PPPoE
P2P
H.264
6
9.7” x 6.1” x 5.9” (inches)/ 3.5 lbs
CMOS Color
640 x 480 pixels (NTSC/PAL selectable)
2 Lux (IR o); 0 Lux (IR on)
Up to 30ft (B/W)
H: 55° V: 40°
1
DC 5V 1.0A
IP 54
1 x Angle adjustable antenna
500 ±100mA
6.1” x 2.3” x 1.8” (inches)
0.66 lbs (300g)
CMOS Color
640 x 480 pixels (NTSC/PAL selectable)
2 Lux (IR o); 0 Lux (IR on)
Up to 30ft (B/W)
Horizontal:210° Vertical:90°
Pan/Tilt/2x digital zoom
1
1 x Angle adjustable antenna
DC 5V 1.2A
500 ± 100mA
5” x 4.5” x 4” (inches)
0.66 lbs (300g)
7” (Diagonal)
800X3(RGB)X480
Yes
1800mAh (1-hour record, 2-hour stand-by, & 6-hour charge time)
Motion detection: 1-camera quad 27,000 (30-sec) video clips, 4-camera quad 9,906 (30-sec) video
clips/camera. Manual recording: 1-camera quad 232Hr. 2-camera quad 116Hr/camera (232Hr total),
3-camera quad 154Hr/camera (463Hr total), 4-camera quad 115Hr/camera (463Hr total)
10min, 20min, or 30min (no continuous manual recording)
30sec fixed per event or take 3 consecutive snapshots per event
On/Off (default off)
10sec, 30sec, 60sec, Off (default off)
Yes
English (default), Espanola, Francaise, Deutsch
Built-in
DC 5V 1.2A
700 ±100mA
JPEG
MP4
8GB card included (Class 6 or above, supports up to 32GB)
vPAL/NTSC
7.5” x 4.5” x 1” (inches)
0.86 lb
RJ45 Ethernet
DC 5V 1.2A
5” x 3” x 1” (inches)
0.20 lb
61
If you encounter any difficulty in the operation of this product after
reading the manual, please feel free to contact us. You can reach us by
phone at 1-888-977-3777 from 8:30 AM to 5:30 PM Monday through Friday (Pacific Standard Time) or by email techsupport@securitymaninc.
com. We will be happy to answer your questions and help you in any
way we can.
62