1
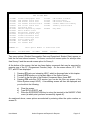
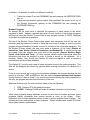
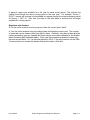
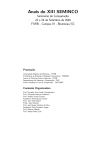
Chapter 6
ONLINE PROGRAMS AND REPORTS FOR REQUEST
The online programs are a series of screens providing districts with the ability to browse
(look at) their data stored on the information database. These programs are provided to
assist the districts in troubleshooting their data. The programs described in this document
run at North West Regional Data Center (NWRDC) in the County CICS region.
This chapter provides information on how to sign on to CICS and how to navigate between
the screens. Illustrations of some of the online screens are provided throughout the
chapter.
Establishing a Session
If the connection to NWRDC is via SNA, the terminal displays the VTAM menu for the SNA
host center.
1.
2.
Type NWRCICC, and
Press the ENTER/RETURN key.
Once the terminal is successfully connected to NWRDC's County CICS system, the
following screen will be displayed:
NWRDC --- CICS SECURITY SYSTEM
SPECIFY USER-ID AND PASSWORD
TERMINAL === XXNN
TIME === NN.NN.NN
USER-ID ===
=== REQUIRED
PASSWORD ===
=== REQUIRED
NEW PASSWORD ===
1.
2.
3.
4.
Type the USER-ID,
Tab down to the PASSWORD field,
Type the password,
To change the password (the first time you logon or any other time you wish to
change your password):
a) Tab down to the NEW PASSWORD field,
b) Type the new password you want (following the password requirements) in
the NEW PASSWORD field, and then
c) Press the ENTER/RETURN key
User Manual – Updated January 14, 2015
Page 6- 1
NOTE: Do not press the ENTER/RETURN key until both the USER-ID and
PASSWORD have been typed. For future logons, omit Step 4 unless you wish to
change the password.
The new password will be known only to the user and not to the DOE Contact. If the
password is lost or forgotten, call the EIAS Contact Person. This person will have the
Education Data Center (EDC) reestablish the password at NWRDC. Try to avoid this
problem by maintaining the password in a safe place. Remember to treat all
database passwords as confidential information. They are the keys to your share
of the information database.
The next screen in the logon sequence is as follows:
NWRDC
--- CICS SECURITY SYSTEM
SPECIFY ACCOUNT TO BE CHARGED FOR THIS SESSION
LOGON-ID ===
=== REQUIRED
SUB-PROJECT
=== === OPTIONAL
PASSWORD
=== === REQUIRED
IF ABOVE IS AS DESIRED, DEPRESS ENTER, ELSE ENTER DESIRED VALUES
This screen requires that you specify a valid NWRDC LOGON-ID that will be charged for
the session. The LOGON-ID should already be set up and should be the same as your user
ID. You need only press the ENTER/RETURN key.
The next screen is the NWRDC CICS screen from which you access the Online Programs
for browsing.
-------------NWRDC --- CICS SECURITY SYSTEM ------------LAST SIGNON WAS 15.37.31 85.180
NWR CICS SESSION BEGINNING
14.36.40 85.201
TERMINAL (XXNN) USER(XXXXXX) GROUP(XX-XXXXX)
---------------------------SIGNON COMPLETED-----------Note the terminal-ID, user and group information for future reference in case of terminal or
network problems. (Write it down if necessary.)
1.
2.
3.
User Manual
Clear the screen,
Type MMnn (where nn is the number of your district; e.g., MM06 for district 06,
Broward),
Press the ENTER/RETURN key.
Online Programs and Reports for Request
Page 6- 2
At this point, the Main Menu will appear as follows and you will have successfully signed on
to the Online System.
STATE OF FLORIDA
MAIN
STUDENT/STAFF/FINANCE
MAIN MENU
1-SDCM
Student Component Menu
2-SFCM
Staff Component Menu
3-FNCM
Finance Component Menu
4-WDIS
WDIS Component Menu
5-CCCM
Course Code Component Menu
6-MESS
Broadcast Messages
99-HELP
Help Main Menu
Enter Option Number or 4-Character Code
COMMAND ==
PF1=HELP
PF9=EXIT
Navigating the Online Programs
From the Online Programs Main Menu screen, you may enter:
1.
2.
3.
4.
5.
6.
Student Component of the information database,
Staff Component, or
Finance Component, or
WDIS Component, or
Course Code Component, or
Broadcast Messages.
The Help Main Menu is no longer available.
Each menu option has assigned to it both a menu number and a screen ID. Screen ID's are
4-character codes that are displayed in the upper right-hand corner of the screen. "MAIN" is
the screen ID for the Main Menu. Menu options can be selected by entering either the
option number or the associated screen ID.
To select the Student Component Menu:
User Manual
Online Programs and Reports for Request
Page 6- 3
1.
2.
3.
Type either the number "1" on the COMMAND line, or
Type the code "SDCM" on the COMMAND line and
Press the ENTER/RETURN key.
This will result in the display of the following screen:
STATE OF FLORIDA
STUDENT COMPONENT MENU
1-DEMO
2-SCRS
3-TCRS
4-EXCS
5-EXCP
6-FSIS
7-PRSC
8-LENG
9-STTP
10-REIS
11-TISV
12-STAS
13-DEM8
Student Demographic Data
Student Course Data
Teacher Course Data
Exceptional Student Data
Exceptional Program Data
FED/STATE Indicator Data
Prior School Status
English Language Learners
Student Transportation
Responsible Instructor
Title 1 Services
Student Assessment
Student Demo Survey 6, 8
18-SSCD
19-SFTE
20-TSCD
21-CLAS
22-DFTE
23-EDST
24-FNLR
25-STUL
26-RRPT
27-CCNN
28-STLI
29-STL8
30-STSN
SDCM
Student Schedule
Student FTE Data
Teacher Schedule
Class Roster
DIST/SCHL Weight/Unweight FTE
Edit Status
Final Reports
Student Location
Reports for Request
Course Numbers/Names
Student Local Id Demo Browse
Student Local Id 6,8 Browse
Student Locator by SSN
Please page forward (PF8) for End of Year Formats
COMMAND ==>
PF1=HELP
Enter Option Number or 4-Character Code
PF5=MAIN MENU
PF8=FRWD
BROWSE
PF9=EXIT
This is the first part of the Student Component Menu.
•
Options 1 through 25 and 27 through 30 permit a district to browse data on
individual tables of the information database.
•
Option 26 allows a district to request that reports or files be generated.
This is the first part of the student menu. To access the second part of the menu press PF8
(Programmed Function key 8).
User Manual
Online Programs and Reports for Request
Page 6- 4
STATE OF FLORIDA
END OF YEAR MENU
35-DEM5
36-VCRS
37-VTCH
38-STUC
39-EOYS
40-DISC
41-FSCE
42-ADCH
43-EXC5
45-DOPP
46-SATT
47-STRN
48-SAFE
49-DJEN
50-DJEX
Student Demographic Data
CTE Student Course Data
CTE Teacher Course Data
VOC Student Characteristics
End of Year Status Data
Discipline Data
FED/ST Compensatory-Chapt1
Adult Student Course
Exceptional Student Data
Dropout Prevention Prog
Student Attendance Data
Student Transcript Data
School Safety Data
DJJ Student Entry
DJJ Student Exit
COMMAND ==>
PF1=HELP
EYCM
51-VSCD
52-VCLS
53-VTSC
54-AFND
55-INDC
CTE Student Schedule
CTE Class Roster
CTE Teacher Schedule
Student Additional Funding
Industry Certification
99-HELP
Help Menu
Enter Option Number or 4-Character Code
PF5=MAIN MENU
PF7=BWKD
BROWSE
PF9=EXIT
Two menu options (Student Demographic Data and Exceptional Student Data) appear on
both the first and second screens. For these, use the first screen option for surveys other
than Survey 5 and the second screen option for Survey 5.
At the bottom of the screen, the last two lines display commands that may be executed by
pressing one of the PF (Programmed Function) keys. On the screen above, PF1, PF5,
PF7, and PF9 are displayed.
1.
2.
3.
4.
Pressing PF1 gets you interactive HELP, which is discussed later in this chapter.
Pressing PF5 returns you to the Main Menu of the Online System.
To return to the first part of the Student Component Menu, press PF7.
Pressing PF9 ends this CICS session (you can do this from any screen of the
Online System except HELP). A terminating screen will then be displayed and
you should do the following:
a)
b)
c)
Clear the screen,
Type SECU,LOGOFF, and
Press the ENTER/RETURN key to return the terminal to the NWRDC VTAM
menu (at which point you have successfully signed off).
As mentioned above, menu options are selected by entering either the option number or
screen ID.
User Manual
Online Programs and Reports for Request
Page 6- 5
An option may be selected by entering its screen ID even if the option does not
appear on the current menu display. For example, if the Main Menu screen is displayed,
typing SFTE will display the Student FTE Data screen. The same is true of a selection's
option number, with the provision that if the option doesn't appear on the screen you should
enter its fully qualified number. Fully qualified means that you would type both the main
menu and component menu option numbers together. For example, since the Student
Component Menu is option number 1 on the Main Menu, and the Student Course Data
browse/update program is option number 3 on the Student Component Menu, you would
type "1.3" to enter its fully qualified option number. Of course, if you are in the Student
Component Menu already, you would only have to enter a "3" to select this option. It's only
from other menus that the fully qualified form must be entered. To go directly to option
number 5 on the Staff Component Menu, you could type "2.5" and use this as a way to
bypass the display of the Staff Component Menu.
Selecting the Student Course Data browse option results in the display of the following
screen:
STUDENT DATA BASE
STUDENT COURSE DATA
SCRS
To BROWSE -- Enter AT LEAST through Student ID, AT MOST through TERM
DISTRICT OF INSTRUCTION:
SCHOOL OF INSTRUCTION:
STUDENT ID:
COURSE:
SECTION:
PERIOD:
YEAR:
-
TERM:
SURVEY:
STUDENT ID, LOCAL:
CRS GR:
FLEID:
DISTRICT OF ENROLLMENT:
STUDENT LOCATION:
SCHOOL OF ENROLLMENT:
DAYS/WEEK:
READ INTERVENTION:
- DAY OF WEEK SCHEDULED FEFP PROGRAM:
FTE EARNED:
M
T
W
T
F
S
C
MINS/WEEK:
VIRT INSTR PROV:
GRADE:
DUAL ENROLLMENT:
VOC.PGM CODE:
ELL INSTR MODEL:
YEAR ROUND SCHL:
FTE PENDING (FYI):
COMMAND ==>
blank=Browse A=Add C=Chg X=Del ,PF1=Help PF2=Refresh PF3=Student Menu
PF5=Main Menu PF7=Bkwd Browse PF8=Frwd Browse PF9=Exit CLEAR=Erase Data
From this screen the following can be used:
•
•
•
•
User Manual
PF1 to get interactive Help,
PF3 to exit this screen and return to the Student Component Menu,
PF5 to exit and return to the Online System Main Menu, or
PF9 to exit the Online System entirely.
Online Programs and Reports for Request
Page 6- 6
In addition, it is possible to switch to a different screen by:
1.
2.
Typing its screen ID on the COMMAND line and pressing the ENTER/RETURN
key, or
Typing the new screen's option number (fully qualified if the screen is not one of
the Student Component options) on the COMMAND line and pressing the
ENTER/RETURN key.
Browse Programs
No attempt will be made here to describe the operation of each screen of the online
programs in detail. Instead, a general discussion of each function of the browse programs
will be given using the Student Course Data browse program (screen ID SCRS, displayed
on the previous page) as an example.
The top of the Student Course Data browse screen has instructions that tell the user the
minimum (and the maximum) number of fields the user needs to supply in order to give the
program enough information to locate a record or records on the information database. For
the Student Course screen, the user must enter a minimum of five fields (District of
Instruction, Year, Survey, School of Instruction, and Student ID). A specific record can
be located if the user supplies five more fields to the program (Course, Section, Begin
Period, End Period and Term). All other screens contain similar instructions about the
information that must be supplied in order to locate a record on the database. At a
minimum, District, Year, Survey and Student ID must be supplied in order to access a
record/screen on the student database.
The Student ID, Local is never used to locate a student record in the online programs. This
field will be displayed but should be ignored when entering information for retrieval of a
record.
If one or more records are found on the information database, the program displays the first
record for the user. PF7 and PF8 can then be used to browse backward and forward
through the set of records found. If no records are found matching the criteria specified by
the user, the program provides this information to the user.
Additional function keys the user should be aware of are the following:
1.
2.
PF2 - Pressing PF2 will refresh the screen.
CLEAR - Pressing CLEAR will erase all variable information on the screen
While many programs display database records one at a time for browse purposes, some
programs display information from several records at once on the screen. Often,
information from multiple database tables is used in putting together these displays. The
following are short descriptions of these programs. Option numbers and screen ID's follow
the program names in parentheses:
User Manual
Online Programs and Reports for Request
Page 6- 7
STUDENT COMPONENT MENU
Student Schedule (18-SSCD) - a list of the classes taken by a student within a given
School of Instruction.
Student FTE Data (19-SFTE) - a list of all classes taken by a student within the District
of Instruction, displaying FTE Earned, Course for each course. Also, if FTE Earned,
Course has been NULLed by a validation rule, the value of the FTE Earned prior to
nulling is displayed under the heading "NONFUNDABLE FTE."
Teacher Schedule (20-TSCD) - a list of all classes taught by a teacher within a given
School of Instruction.
Class Roster (21-CLAS) - a program that produces two lists that the user can view one
at a time, by pressing PF6. The first list names the students taking a given class. The
second is a list of the teachers teaching that class.
DIST/SCHL Weight/Unweight FTE (22-DFTE) - a summarization of FTE Earned by
School of Instruction, FEFP, and Grade. Totals can be produced for rows for which FTE
will be funded and for rows containing errors that would invalidate the row for use in FTE
funding calculations.
Edit Status (23-EDST) - a program that will allow districts to monitor the progress of
their data in the System. Use this program to (1) make sure that an initial submission or
batch update has been processed (2) to view totals related to that processing, and (3) to
see what datasets are available for retrieval.
Final Reports (24-FNLR) - a program that allows districts to see which end-of-thesurvey reports (final reports) are available for retrieval.
Student Location (25-STUL & 30-STSN) - a program that locates a student by last
name, birth date, and gender. Option 30 allows for entering the SSN.
Reports for Request (26-RRPT) - a program that allows districts to request reports and
files to be generated according to the schedule in effect at the time.
Course Numbers/Names (27-CCNN) - a program that allows districts to browse the
Course Code Directory, the Postsecondary Courses, and Vocational Courses.
CTE Student Schedule (51-VSCD) - the Survey 5 version of Student Schedule (SSCD)
for career and technical education courses only.
CTE Class Roster (52-VCLS) - the Survey 5 version of Class Roster (CLAS) for career
and technical education courses only.
User Manual
Online Programs and Reports for Request
Page 6- 8
CTE Teacher Schedule (53-VTSC) - the Survey 5 version of Teacher Schedule (TSCD)
for career and technical education courses only.
STAFF COMPONENT MENU
FTE for Staff (4-FTES) - a display of both primary and additional job assignments for
individual staff.
Staff Supplements and Benefits (7-SUBN) - a display of both Supplement and Benefit
information for individual staff.
Edit Status (14-EDST) - a program that allows districts to monitor the progress of their
data in the System. Use this program to (1) make sure that an initial submission or
batch update has been processed, (2) to view totals related to that processing, and (3) to
see which datasets are available for retrieval.
Final Report (15-FNLR) – a program that allows districts to see which end-of-the-survey
(final reports) are available for retrieval.
Staff Browse by Last Name (16-SFBM) – a program that displays identifying
information for a staff member upon input of the staff member’s Last Name.
Reports for Request (17-RRPT) - a display of reports available for requesting and the
option to request generation.
Interactive Help
The Interactive Help facility is no longer being updated with new edits, changes to edits and
changes to documentation.
Serious Error Processing
In the event of a data base error or an unforeseen error in the programs of the Online
System itself, a serious error screen will be displayed. This screen will contain diagnostic
information that will aid EIAS in resolving the problem that has occurred. Information on
serious errors will be logged to a file at NWRDC, but if this log is damaged, the only copy of
what has transpired will be what appears on your screen. You should therefore preserve
this information (write it down or make a screen print) and report the problem to the EIAS
Contact Person as soon as possible.
The following is a sample serious error screen. If you ever encounter this screen, write
down the information displayed or make a screen print and call the EIAS Contact Person.
User Manual
Online Programs and Reports for Request
Page 6- 9
*************SERIOUS ERROR DESCRIPTION SCREEN*************
**************************************************
A SERIOUS ERROR HAS OCCURRED
PLEASE CONVEY THE FOLLOWING INFORMATION
TO THE EDS PROGRAMMING STAFF (SUNCOM 278-7911)
***********************************************************************
PROGRAM NAME ===
PARAGRAPH
===
TRANSACTION ===
ORIGINAL TRAN ===
TERMINAL ID
===
FUNCTION KEY ===
FUNCTION CODE ===
RETURN CODE ===
DATASET
===
SQL CODE
ERROR CODE
===
FNGQ30
6000
GQ30
MM21
FNXD
PF1
100A
000000000000
===
T106
0100
T106: An error occurred during an SQL FETCH operation.
-911: Deadlock or time out. Try again later.
To exit the serious error screen, press the CLEAR key. You may then restart your
session by typing MMnn (where nn is your district number) or sign off from CICS by typing
SECU,LOGOFF and pressing the ENTER/RETURN key.
Reports Available for Request and Retrieval
By using the Edit Status online screen (item 23 on the STUDENT MENU or item 14 on the
STAFF MENU of the DOE Information DatabBase online programs) the user can check to
see when the latest edit and validation reports were created. The PF6 function key returns
a screen that shows the data set name and current run date of these reports.
The Student Course screen also includes selected FTE reports. It should be noted that the
Student Course Schedule Validation report F60857 is only available during the state
processing window.
After the state processing window, FINAL Reports can be generated. Appendix L lists these
reports and the surveys to which they apply. The Final Report online screen (Item 24 on the
STUDENT MENU and item 15 on the STAFF MENU of the DOE Information Data Base
online programs) allows the user to see when the most recent reports were run.
User Manual
Online Programs and Reports for Request
Page 6- 10
In general, reports are available for a full year for each survey period. This includes the
overlap time through the same survey period in the next year. For example, Survey 1,
2010-11 reports will continue to be available for request through the state processing period
for Survey 1, 2011-12. After that, the data on the data base is archived and no longer
available for running reports.
Questions and Answers
Q: Do the online screens ever bring up more than the current year’s data?
A: Yes, the online screens bring up multiple years including the current year. The number
of years that can be viewed varies from table to table. Generally, two years of data plus the
current processing year are viewable but there may be more years viewable for the smaller
tables (including staff database tables). Each year the screens are updated to show only
the most current fields. So, if a field was deleted in 2010-11 the online screen for the 200910 record would not contain the deleted field and the data in that field.
User Manual
Online Programs and Reports for Request
Page 6- 11