1
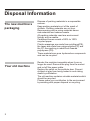
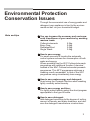
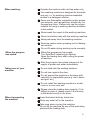
S
Computer Controlled Slimline Frontloader
Operating and Installation Instructions
WM 1065
Family 1085
Silver 1095
en
Please read this specification carefully before you use the product.
Any failure and losses caused by ignoring the above mentioned items and cautions
mentioned in the operation and installation instruction are not covered by our warranty
and any liability. Please keep all documents in a safety place for future reference. If
you have any doubt, please contact our local service center of dealer.
If you need an English user manual, please download it from siemens web. Or you
can send the E-mail to service department, or you can call up service hot line for free
supply. Thanks!
http://www.siemens-ha.com.cn
[email protected]
4008899999
Table of Contents
Disposal Information . . . . . . . . . . . . . . . . . . . . . .2
Operating
Instructions
Environmental Protection/Conservation Issues . .3
Safety Precautions and Warnings . . . . . . . . . . . . 4
Your New Washing Machine . . . . . . . . . . . . . . . . 6
Programmes and Functions . . . . . . . . . . . . . . . . 8
Laundry Detergents and Additives . . . . . . . . . . .10
First Wash Cycle . . . . . . . . . . . . . . . . . . . . . . . .12
Preparing, Sorting and Loading the Laundry . . .13
Washing . . . . . . . . . . . . . . . . . . . . . . . . . . . . . . 18
When the Programme has Ended. . . . . . . . . . . 20
Special Applications . . . . . . . . . . . . . . . . . . . . . 21
Cleaning and Care . . . . . . . . . . . . . . . . . . . . . . 23
Troubleshooting Minor Faults . . . . . . . . . . . . . .28
Customer Service . . . . . . . . . . . . . . . . . . . . . . . 31
Programme Table . . . . . . . . . . . . . . . . . . . . . . 32
Installation, Connection and Transport . . . . . . .33
Installation
Instructions
1
Disposal Information
,
The new machine s
packaging
Your old machine
2
Dispose of packing materials in a responsible
manner.
Keep packing materials out of the reach of
children. Packing materials are not toys.
Reprocessing and re-using materials saves
raw materials and reduces waste.
All packing materials used are environment
friendly and re-usable.
Cardboard boxes consist of 80% to 100%
recycled paper.
Plastic wrappings are made from polythene(PE),
the tapes are made from polypropylene(PP) and
the CC-free packing is made from foamed
polystyrene (PS).
These materials are pure hydrocarbon compounds
and can be recycled.
Render the machine inoperable when it can no
longer be used. Remove the plug from the socket
and cut off the power cable.
Destroy the catch on the porthole door. Prevent
children at play from being locked in and risking
death by suffocation.
The old machine contains valuable materials which
should be recycled.
Please make your contribution to the environment
by assisting with proper disposal or recycling.
Environmental Protection
Conservation Issues
Through the economical use of energy,water and
detergent,your appliance is kind to the environments as well as your household budget.
You can increase the economy and environmental friendliness of your macnine by washing
maxium loads:
Cottons/coloureds:
5.2kg
Easy-Care:
2.6kg
Delicates/Wool:
2.0kg
Single Wash:
3.5kg
How to save energy:
For small amounts of laundry,the automatic
control system reduces the consumption of both
water and energy.
Where possible,use the 60 C Cottons/coloureds
,,
programme with additional function Intensive
instead of the 90 C Cottons/coloureds+prewash
programme. This 60 C programme achieves a
cleaning result comparable to that of the 90 C
programme using considerably less energy.
,,
Hints and tips
How to save water,energy and detergent:
Avoid using the Prewash function when washing
lightly normally soiled laundry.
How to save energy and time:
For lightly soiled laundry,select the short program
appropriate to the type of textile.
How to save detergent:
Add detergent according to the degree of soiling,
amount of laundry and water hardness, and observe the detergent manufacture s instructions.
3
Safety Precautions and Warnings
Before using for the
first time:
This machine complies with all relevant safety
regulations.
Please read the enclosed documents carefully
before using the washing machine for the first
time. They contain important information on the
installation, use and safety of the machine.
The manufacturer does not accept liability if
these instructions are not followed.
Please contact an authorized technician to
install the machine and instruct the using method.
Please keep all documents in a safe place for
future reference.
Install the machine in accordance with the
instructions(page 33-41). Remove the transit
bolts and keep them in a safe place.
The washing machine must be installed and
operated in a room with the drain.
When heating, the maximum current of the
washing machine is 10A,so please make sure
that the power supply system(voltage; current
and the cable) is applicable to the load of the
applied appliance.
In order to ensure your safety, you must plug
the cable into a socket which connected to
earth. And please check your socket to make
sure that it is connected with reliable earth
correctly.
If the washing machine is visibly damaged, do
not connect it up. If you are in doubt, contact
your customer service representative or dealer.
This machine use thread connection water inlet
hose, connect it to the water tap together with
the machine according to the require of page 37.
(carry out by an authorized technician)
4
When washing:
Operate the machine with cold tap water only.
Your washing machine is designed for domestic
use only, i.e. for washing machine-washable
textiles in a detergent solution.
Never use flammable; explosible and/or poisonous solvents, such as gasoline; alcohol etc. As
the washing lotion. Please only use the lotions
suitable for using in washing machine available
in the market.
Never wash the carpet in the washing machine.
Never let children play with the washing machine.
Keep pets away from the washing machine.
Exercise caution when pumping out hot detergent solution.
Do not fill water during washing cycle manually.
When the programme
has ended:
,,
The Spin/End indicator light flashes.
Open the loading door after cutting the power
of machine.
,,
When the program
has ended:
After the program has ended, please cut the
supply of power and water immediately.
Taking care of your
machine:
Do not climb onto the washing machine.
Do not lean against the door.
Do not expose the machine in the place with
causticity or explosibility gas.(e.g. dust, steam
and gas, etc.)
Do not install the washing machine in a bathroom or a room very wet.
Please close the loading door correctly, if it is
difficult to close it, please check if the laundry
is distributed evenly in the drum.
When transporting
the machine:
Insert the transit bolts by technician.
Drain any water left in the machine.
Take care when moving the machine.
Do not lift the machine by any of the protruding
parts,and the loading door.
5
Your New Washing Machine
Adding detergent/cleaning
product
Dispenser I:
Detergent for pre-wash or starch.
Dispenser II:
Detergent for main wash,
soaking agent, water softener,
blench or stain remover.
Dispenser
:
Additives, e.g. fabric softener or
former. (Fill at least to lower edge
of insert 1. )
Open the loading door
6
and close it
Drain washing solution
if necessary.
Control Panel
“开始/暂停”
,,
Start/Pause button
For starting/pausing the wash cycle (programme
must have been selected).
,,
Programme selector
For switching the machine on and off and
for selecting the programme.
Can be rotated in either direction.
The programme selector does not rotate
while the programme is running the
programme sequence is electronically
controlled.
Indicatolr lights
Indicate the status of the washing machine:
Press buttons for additional functions
(Where required to supplement the programme)
“准备/洗涤”
强力去污 Intensive Stains: Increase the
programme duration.
额外漂洗 Extra Rinse: Additional rinse cycle.
Ready/Wash Indicate light flashes, if the
programme is selected; is on, the programme
is running.
“漂洗”
Rinse indicator light is on, the rinsing cycle
is running.
“脱水/结束”
Spin/End indicator light is on, the spinning
cycle is running; flashes, if the selected programme is ended.
Additional options can be combined before the
programme is started.
The indicator lights of the buttons come on, if
the additional options are active.
Switch off additional option: press button again.
7
Programmes and functions
Basic programme
,,
Programme selector
Select the desired programme
,, (refer also to
separate Programme Table ).
90 C Cottons/coloureds+prewash
+
An energy-intensive program for heat-resistant
fabrics made from cotton or linen.
For the protection of the drainage pipe, the hot
washing solution is mixed with approx.5 liters
of cold water before being drained.
Cold, 30-Quick wash, 40, 60 C
Cottons/coloureds
For hard-wearing fabrics.
Cold, 40, 60 C Easy-care
For easy-care fabrics made from cotton,
synthetics or blended fabrics.
Cold, 30 C Delicates
For delicate, washable textiles, e.g. Silk, satin,
synthetic materials or blended fabrics(e.g.
curtains).
Delicates cycle at 30 C for machine washable
silk. We do not recommend washing these
textiles with other rougher textiles.
Cold, 30 C , Wool
For hand or machine-washable fabrics made
from wool or wool blend.
Programme options
Single wash
Single wash cycle without subsequent drain and
spin cycle.
Rinse
Rinse cycle with subsequent spin cycle for rinsing
hand-washed items or for starching.
Reduced spin speed.
8
Spin
Spin cycle for spinning hand-washed items after
selection of required speed. Washing water or
rinsing water is drained before the spin cycle.
Additional function
buttons
Intensive stains
For very dirty clothes, the washing duration will
be prolonged 20 to 60 minutes after pressing
this button, and this is decided by the program
that you selected.
Extra Rinse
An additional rinsing cycle performed; the washing
duration will be prolonged 10 minutes.
Observe the maximum load for each type of fabric;
Remove the laundry immediately after the spin
cycle.(depend on different models)
For your clothes, there are different spin speeds
in different washing programme of SIEMENS
washing machines. (see Maximum spin speed )
Spin speed
Pro
M
sp axim
ee u
d( m
rp sp
m in
)
gra
e
mm
Cottons Easy-care Delicates
Wool
Single *
wash
Rinse
Spin
model
WM 1065
600
600
600
600
600
600
600
Family 1085
800
800
600
800
800
800
800
Silver 1095
800
800
600
800
800
800
800
* Single wash cycle without subsequent spin cycle, if the spin cycle is desired after
this wash cycle, please select the addtional function Extra Rinse.
9
Laundry Detergents and
Additives
!
Risk of explosion
Do not use solvent-based cleaning agents in
fully automatic washing machines. Explosion
hazard.
Keep detergents and additives out of the reach
of children.
You can use any standard powder or liquid detergent which is suitable for automatic washing
machines.
Do not use any detergent boosters containing
solvents or dirt and stain-removing spraying
near the machine, as these could damage the
machine.
Do not use non-automatic detergent as these
produce too much foam.
Amount of
detergent
The best washing results will only be achieved
if you add the correct amount of detergent.
Observe the instructions for use shown on the
detergent packing.
When using liquid detergents, you can use any
measuring aids provided with the detergent,
such as dosage balls of bags.
Please put the liquid detergents into correct
chamber.
The amount of detergent depends on:
- water hardness
- degree of soiling
- laundry load
- amount of detergent to be added according to
its manufacturer.
10
Dispensing the correct amount of detergent
relieves the strain on the environment and ensures
optimum washing results.
Frequent use of insufficient detergent will eventually
become noticeable as follows:
- washing appears grey or not properly clean
- grey-brown stains(grease marks) form on the
washing
- scale builds up on the heating elements
Too much detergent results in:
- unnecessarily high environmental pollution
- due to the generation of too much foam, the
washing is hardly agitated which leads to
poor washing results.
The amount of detergent indicated on its packaging
refers to a full machine load.
For small loads or less soiling, reduce the amount
of detergent.
Chamber II:
Detergent for main wash, water softener, bleach
and stain removal product.
Chamber :
Additives, e.g. fabric softener of former.
,,
- Do not fill beyond the MAX mark, otherwise
will be flushed into the machine together with
the detergent at the start of the program.
- If the liquid additive is thick, mix with a little
water before dispensing(prevents clogging of
the overflow).
,,
Filling laundry
detergent and/or
additive dispensers
Chamber I:
Detergent for prewash, starch or pre-soaking
agent.
Pull out the detergent dispenser up to the end
stop.
Add the detergent and/or additive.
Close the detergent dispenser.
11
First Wash Cycle
The installation of the washing machine is
finished.(see page 33-41)
All machines are all tested in the factory. So, it
maybe left a bit little of water in the drum.
Please carry out the first wash cycle without
laundry to remove any water.
Do not load any laundry.
Turn the tape ON.
Pull the detergent drawer out as far as it will go.
Input about 1 liter of water in chamber II.
Pour half a measuring cup of detergent into
chamber II.
Do not use a special detergent for delicates or
wollens as these will create too much foam.
Turn the programme selector to 90 C Cottons/
coloureds+prewash.
,,
Ready/Wash indicator light flashes.
,,
,,
Press the Start/Pause
button. ,,
,,
Ready/Wash and Start/Pause indicator lights
are on. The programme starts.
,,
,,
,,
,,
The Spin/End indicator light flashes if the
selected programme is ended.,,Turn the
programme selector to
Off .
,,
,,
12
Preparing, Sorting and Loading
the Laundry
Preparing the
laundry
Remove any loose items or metal objects, such
as safety pins, paper clips, etc. from the laundry.
Brush sand, coins, etc. out of pocket and cuffs.
Close zips and button up cushion covers, duvet
covers, etc.
Remove curtain runners, or secure them in a
net bag.
Particularly delicate items, such as tights or lace
curtains, or smaller items, such as tiny socks or
handkerchiefs, should only be washed in a net
bag or pillow case.
Some items are best turned inside out. These
included knitwear, trousers, T-shirts and sweatshirts.
Make sure that the wire-cup bras are machine
washable.
! Make sure that wire-cup bras in a pillow case
which can be securely closed with a zip or
buttons. If the wire works itself out of the cup it
may fall through the holes of the drum and
cause extensive damage.
13
Caution
Sorting the laundry
According to colour and
degree of dirt
Items of clothing can become discoloured.
Never wash new multi-coloured items together
with other items.
White items may become grey. Always wash
white and coloured items separately.
Degree of dirt
Slight dirt
No recognizable dirt or staining. Laundry may
have some body odour.
- Light summer clothing and sportswear that
has only been worn for a few hours.
- T-shirts, shirts and blouses that have been
used for one day.
- Bed linen and guest towels that have been
used for one day.
Normal dirt
Visible dirt and/or some light staining recognizable.
- T-shirts, shirts and blouses that are very sweaty
or have been worn several times.
- Underwear that has been worn for one day.
- Tea towels, hand towels and bed linen that have
been used for up to one week.
- Net curtains (without nicotine staining) that have
not been washed for up to 1/2 year.
14
Intensive dirt
Dirt and/or staining reconizable.
- Kitchen hand towels that have been used for
up to one week.
- Fabric napkins.
- Children's outer clothing or football shirts and
shorts with grass and soil stains.
- working clothes such as overalls or baker's
and butcher's coats.
Typical stains
- Skin fat, cooking oils/fat, sauces, mineral oil,
wax(containing fat/oil)
- Tea, coffee, red wine, fruit, vegetables(bleachable).
- Blood, egg, milk, starch(containing protein/
carbohydrate).
- Soot, soil, sand(pigments), red sand on tennis
clothes.
Removing stains
Wherever possible, remove/pretreat stains
whilst they are still fresh.
First, dab soapy water onto the stain. Do not
rub.
Subsequently wash the items of clothing using
the appropriate program.
Several washing cycles may sometimes be
required in order to remove stubborn/dried in
stains.
15
Sorting laundry
according to their
care label
specifications
Only wash laundry that is labelled with the
following care symbols:
95
90
90 C Cottons + lines
60
40
30
60 C, 40 C, 30 C Cottons + lines
60
40
30
60 C, 40 C, 30 C Easy-care
40
40
30
30
40 C, 30 C Delicates
40
40
30
30
40 C, 30 C Wollens
(hand and machine-washable)
Laundry that is labelled with the following care
symbol must not be washed in the washing
machine.
= do not wash
!
Loading the
laundry
Risk of explosion
Items of clothing that have been pretreated
with solvent-based cleaning agents, e.g. stain
remover and dry cleaning spirit, represent an
explosion hazard once loaded into the washing machine.
Therefore, these items must be rinsed thoroughly
by hand.
Caution
Loose debris in the washing machine drum can
damage the laundry. Before loading the laundry,
check that there is no debris in the drum.
16
Open the loading door.
Unfold the sorted items of clothing and place
them loosely into the drum. Mix up large and
small items. Items of varying size will distribute
better during the spin cycle.
Do not exceed the maximum load: Overloading
will cause poor wash results and encourage
creasing.
When washing a small amount of laundry, the
washing machine automatically reduces the
amount of the water and energy used.
Close the loading door.
Take care not to trap any items of clothing
between the loading door and rubber seal.
klack
17
Washing
( Picture example: WM 1065, 40 C Easy-Care)
1. Turn on the tap.
2. Turn the programme selector to the desired
,,
programme (refer to Programme table ).
,,
The Ready/Wash indicator light flashes.
,,
,,
3. Where required,press the option button(s) for
additional function(s).
,,
4. Press the Start/Pause
button.
,,
The Ready/Wash indicator light stops flashing
and comes,, on, the programme starts. The
Spin/End indicator light flashes when the
selected programme is ended.
,,
,,
,,
18
Turn the programme selector to
,,
Changing the
programme
If you have accidentally selected the wrong
programme:
,,
Off .
Turn the programme selector to the desired
programme.
,,
The Ready/Wash indicator light comes on.
,,
,,
Press the Start/Pause
button.
,,
The Ready/Wash indicator light comes on
and the new programme starts.
,,
,,
If you wish to prematurely end a programme:
Turn the programme selector to
,,
Cancelling the
programme
,,
Off .
Turn the programme selector to Spin .
,,
The Ready/Wash indicator light comes on.
,,
,,
Press the Start/Pause
button.
,,
The Ready/Wash
indicator
light stops flashing,
,,
Spin/End indicator light is on.
,,
,,
,,
,,
,,
,,
1. Reday/Wash indicator is on: cannot add or
remove laundry, for your safety, in some period
of time the loading door cannot be opened.
,,
,,
2. Reday/Wash indicator flashes: the laundry
can be added/removed. Wait about 2 minutes,
,,
Ready/Wash indicator light goes off, open the
door, add/remove the laundry, close the loading
door.
,,
,,
,,
If required, press the Start/Pause button again,
,,
the programme restarts, Start/Pause indicator
light is on and the washing machine continue
the interrupted programme.
,,
,,
A pause in active
programme
If you want to add/remove the laundry during
active programme and the set programme
sequence will not be changed.
,,
Press the Start/Pause button
,, during the
working cycle, Start/Pause indicator flashes,
the programme is pause.
19
When the Programme has Ended
,,
Spin/End indicator light flashes.
,,
,,
Turn the programme selector to
,,
Off .
If required:
Select an additional programme (Spin or Rinse).
,,
Press the Start/Pause button.
,,
At the end of the programme option, turn the
programme selector to Off.
Unloading the
laundry
Turn off the water tap.
Open the loading door.
If the loading door can not be opened:
Wait for 2 minutes(the safety function is active)
Unload the laundry.
Caution:
Remove any debris (e.g. coins, paper clips)
from the drum and rubber seal-risk of rust
formation!
Leave the loading door open to allow the inside
the washing machine to dry out.
20
Special Applications
Load laundry of the same color.
Pre-soak
Add the pre-soak agent to chamber II according
,
to the manufacturer s specifications.
,,
Turn the programme
,, selector to 30 C-Quick ,
Cottons/coloureds .
,,
The Ready/Wash indicator flashes.
,,
Press the Start/Pause button.
,,
The Ready/Wash indicator light stops flashing
and comes on, the programme starts.
,,
,,
,,
After approx. 10,, minutes, turn the programme
selector to Off . The laundry is left to lie in the
water.
,,
Select a programme after the desired soaking
period.
Do not add any additional detergent. The presoak solution continues to be used in the wash
programme.
The laundry must not be treated with fabric softener,
Load the laundry.
Dispense the correct amount of starch for
approx. 15 liters of water. Powered starch must
first be dissolved in water according to the
,
manufacturer s specifications.
Turn the programme selector to Rinse.
,,
Press the Start/Pause button.
,,
Starching
21
As soon as water starts to enter the machine:
Pull out the detergent dispenser slightly.
Add the starching solution to chamber I.
Close the detergent dispenser.
Dyeing
Only use dyes that are environmentally compatible and suitable for use in washing machines.
Caution
Discoloration of the laundry in subsequent wash
cycles cannot be completely ruled out.
Always use dyes in accordance with the man,
ufacturer s instructions.
After dyeing:
Add 1/2 a measuring beaker of detergent to
chamber II.
Without any laundry in the drum, allow
the
,,
90 C+prewash Cottons/coloureds programme
to run through.
,,
Wipe the seal clean.
Caution:
Decolorizing
22
Decolorants may contain sulphur or chlorine.
These substances can cause parts of the
washing machine to corrode. Do not decolorize
items of laundry in the washing machines.
Cleaning and Care
! Risk of electric shock!
Always disconnect the appliance from the
mains before cleaning.
Never clean the washing machine with a jet
of water.
! Risk of explosion!
Never use solvents to clean the appliance.
As required:
Cleaning the
appliance housing
and control panel
Cleaning the drum
Use hot soapy water or a mild, non-abrasive
cleaning agent.
Rub dry with a soft towel.
In the event that rust spots have formed due
to leftover debris(e.g. coins, paper clips, needles,nails):
Use a chorine-free cleaning agent. Follow the
manufacturer's instructions. Never use steel
wool.
23
Cleaning the
detergent dispenser
In the event that residual detergents or additives
have accumulated.
Pull out the detergent dispenser up to the end
stop, press down the hollow on the insert and
remove the detergent dispenser completely.
Pull up the insert.
Rinse the detergent dispenser under hot running water.
Push down the insert until it clicks into place.
Insert the detergent dispenser.
Cleaning the drain
pump
Drain the washing
solution
24
This is necessary if the washing solution can not
be completely drained. The pump is blocked by
either loose debris or fluff which accumulates if
fluff-giving fabrics are washed at high temperature.
The water in the drum should be drained first
before cleaning the drain pump.
Up to 20 litres. Have a suitable container ready.
! Risk of scalding
Allow the hot washing solution to cool.
,,
Turn the program selector to Off .
,,
Fold down the cover panel.
(WM1065 Family1085)
2.
1.
(Silver1095)
Carefully remove the pump cap.But don t fully
remove it and allow a little more residual water
flow into the suitable container.
Remove any loose debris/fluff from inside the
pump and clean the pump. The pump impeller
must be able to rotate.
Clean any residual suds or fluff from the thread
of the pump cap and pump housing.
Attach and tighten the pump cap.
Attach and close the cover plate.
(WM1065 Family1085)
To avoid unused detergent from flowing into the
drain during the next wash cycle:
Pour 1 litre of water into chamber II.
,,
Select the Spin programme.
,,
(Silver1095)
25
Cleaning water inlet
strainers
This is necessary if very little or no water flows
into the washing machine.
First release the water pressure in the supply
hose:
Turn off the water tap.
Turn the programme
selector to any programme.
,,
(Except Spin )
,,
,,
Press the Start/Pause button, and allow the
programme to run for approx.40 seconds.
,,
Cleaning the strainer at
the water tap
Disconnect the hose from the water tap.
Rinse the strainer under flowing water.
Reconnect the hose.
Cleaning the strainer on
the washing machine
Disconnect the hose from the back of the
washing machine.
Pull out the strainer and rinse under running
water.
Insert the strainer and reconnect the hose.
Turn on the water tap and check whether water
is still discharged. If water is still discharged,
check that the strainer is attached properly.
Turn off the water tap.
26
Descaling the
washing machine
Caution:
Descaling agents contain acids which can attack
parts of the washing machine and discolour the
laundry.
Provided that you use the correct amount of detergent, it is not necessary to descale the washing
machine.
If, however, descaling the appliance becomes necessary, please follow the instructions provided
by the descaling agent manufacturer.
If the machine is located in a room which is
exposed to freezing temperatures, any residual
water in both the pump and the water inlet hose
must be drained immediately every time the
machine is used.
Draining the pump:
,,
See Cleaning the pump on page 24.
,,
Frost protection
Draining the water inlet hose:
1.Turn the tap OFF.
2.Unscrew the hose from the tap and hold the
end of the hose in a container.
3.Switch ON any of the wash programs for
approximately 40 seconds. Water left inside
the inlet hose will be drained out.
4.Screw the hose back onto the tap.
27
Troubleshooting Minor Faults
! Risk of electric shock
Repairs must only be carried out by our
Customer Service or an authorized technician.
If repaires are needed, and assuming that you
cannot eliminate the fault yourself with the aid
the following table:
,,
Turn the program selector to Off .
,,
Disconnect the washing machine from the mains.
Turn off the water tap.
Call Customer Service.
Fault
The loading door cannot
be opened.
Detergent residue in the
detergent dispenser.
Cause
Action
There is water in the drum.
Select Spin programme .
Safety function is active.
Wait for 2 minutes.
Detergent was damp or
lumpy.
Clean and dry the detergent
dispenser(refer to Page 24)
Use the dispensing aid for liquid
detergent.
The gasket is crimped.
This may appears after
Remove the transport bolts, operate
installing the transport bolts. the machine for a period of time,
the gasket will return to the original
shape.
The belt gets off the pulley.
Too much laundry is in the Put in the laundry well and according
drum or the laundry is put in to the maximum load specifiction.
badly, and close the window
with excessive force.
The program does,, not start. Loading door not closed.
The Ready/Wash
and
,,
Start/Pause indicator light
flash.
,,
,,
28
Check whether laundry is trapped
in door.
Close the loading door(a click
should be heard).
Fault
Cause
Action
Control lights do not
come on.
A fuse has triggered.
Switch on/replace the fuse.
Call Customer Service if this fault
is repeated.
Power failure.
An interrupted programme will be
resumed when power returns. If
you wish to unload the laundry,
proceed
,, as in Cleaning the drain
pump , Page 24.
,,
Plug is loose or not inserted.
,,
,,
Programme does not start.
Start button does not
pressed.
Press the Start/Pause button.
Water does not enter the
machine or detergent is
not wash
,, away.
,,
Rinse and Spin/End
indicator lights flash.
Water tap not turned on.
Turn on water tap.
Supply hose kinked or
trapped.
Strainer in supply hose
clogged.
Clean the strainer
(refer to Page 26)
,,
,,
Detergent in chamber I is
not wash away.
A program without Prewash Select 90 ,,C Cottons/coloureds
was selected.
+ prewash .
Water cannot be seen in
drum.
This is not a fault.
The water lies below the visible part of the drum.
Washing solution is not
completely drained. The
,,
Ready/Wash
and Spin/
,,
End indicator lights flash.
Loose debris is blocking
the pump.
Water is flowing out from
underneath the machine.
The thread of the supply
hose is not tight.
Tighten the thread.
Leak in the drain hose.
Replace the drain hose.
To much detergent.
Mix1 tablespoon of fabric softener
with 1/2 litre of water and pour
into chamber I of the detergent
dispenser.
,,
,,
,,
Foam coming out of the
detergent dispenser.
Clean the pump.
(refer to Page 24)
Fluff-producing laundry was Clean the water drainage pipe
washed at a high temperat- and/or drain hose.
ure. The water drainage
pipe or drain hose is blocked.
Reduce the amount of detergent
next time.
29
Fault
Cause
Action
Repeated spinning at short
intervals.
This is not a fault.
The imbalance compensation system is attempting to balance
the load through repeated spins.
The program takes longer
than usual.
This is not a fault.
The imbalance compensation system is attempting to
balance the load by distributing the laundry more
evenly.
Wash large and small items
together to reduce imbalances.
The foam detection feature Add a more appropriate amount
has activated an additional of detergent next time.
rinsing cycle to reduce the
amount of foam.
The degree of dirt was
higher than supposed.
Select a more suitable program.
Not enough detergent.
Add detergent according to the
manufacturer's specifications.
Detergent residual on the
laundry.
Some phosphate-free
detergents contain
water-insoluble residues
that may appear as light
spots on the laundry.
Select Rinsing immediately, or
brush off spots when laundry is
dry.
Grey residues on the
laundry.
Dirt accumulation from
ointments, fats or oils.
Add the maximum amount of detergent and select the highest
permissible temperature next time.
The laundry was not spun.
Large items of clothing
Always load large and small items
became entangled and
together into the drum.
could not be distributed
evenly in the drum.
For safety reasons, the
high-speed final spin cycle
was automatically cancelled.
30
,,
Unsatisfactory washing
result.
,,
Customer Service
Before calling the Customer Service, please
make sure that you cannot eliminate the fault
yourself(refer to Page 28). This is because
consultation provided by our technicians, even
within the warranty period, will lead to costs
being incurred by yourself.
If you cannot correct a problem yourself, switch
off the washing machine, remove the plug from
the socket, shut off the water supply and call
Customer Service. When calling the Customer
Service, please specify the product number
(E-Nr.)of your appliance.
label
These numbers are shown on the label which
can be found behind the door and also behind
the washing machine.
E-Nr.
Product number
In specifying the product number and production
number of your appliance, your help us in our
attempt to prevent unnecessary travelling and
the associated extra costs.
Technical data:
Rated voltage:220V~
Washing power:200W
Rated frequency:50Hz
Spinning power:460W
Washing capacity:5.2kg
Heating power:1800W
Spinning capacity:5.2kg
Maximum power:2000W
Water pressure:0.1~1MPa Maximum current:10A
Water proof :1PX4
31
Cottons/coloureds
30 C-Quick 5.2
Extra rinsing
Program duration
in minutes
(approx. time)
39(59)*
80(120)*
60 C
5.2
90(138)*
90 C+prewash5.2
Wool Delicate Easy-Care
70(110)*
5.2
140(180)*
Cold
2.6
50(70)*
40 C
2.6
60(80)*
60 C
2.6
70(90)*
Cold
2.0
50(70)*
30 C
2.0
55(75)*
Cold
2.0
35(55)*
30 C
2.0
40(60)*
3.5
20(40)*
Rinse
14
Spin
8
,,
,,
duration after
* Time shown in ( ) is the programme
,,
,,
selecting Intensive Stains .
,,
After selecting Extra rinse , the programme duration
will prolong 10 minutes.
,,
32
**
40 C
Single wash
**
Additional
functions
Intensive stains
Chamber
5.2
Detergent and
fabric softener
Chamber II
Cold
Always follow the
,
manufacturer s care label
instructions
Chamber I
Programme
Laundry up to(kg)
Programme Table
= obligatory
= optional
Installation, Connection
and Transport
Safety information
! Risk of injury
The washing machine is heavy. Take care when
lifting it.
Caution
Frozen hoses can tear/burst. Do not install the
washing machine outdoors or in an area prone
to frost.
Take care not to damage the washing machine.
Do not hold onto protruding parts (e.g. loading
door) when lifting.
In addition to the safety information listed here,
the local water and electricity supplier may have
special requirements.
If in any doubt, have the appliance connected by
an authorized technician.
Before leaving the factory every machine is thoroughly tested under operating conditions any
moisture or residual water which you may find
in the machine or drainage hose are left over
from this testing.
On the back of the machine:
- Water drain hose.
- Power cord.
Useful tools
The following tools are helpful:
- Wrench.
- Spirit level.
33
Dimensions
a=600mm
b=560mm
c=860mm
Approx. weight=68 kg
Installation location
To ensure the proper operation of the machine,
please pay attention to the following when you
install the machine.
The machine should be installed on the solid
and flat floor, never put the machine on the soft
carpet or on the wood floor. Do not installed the
machine on the homemade plinth, if the
installation location cannot be changed, the
plinth must be improved as required, such as
enlarge the size, secure with brackets. Never
put the machines on the separate brackets. It
is possible the machine moves a little by the
factors of overloading, situation of the plinth(wet)
and so on, so it will be a risk the machine falls
down from the plinth after working for a period
of time.
Keep the environment dry and vented.
Never put small appliance, such as microwave
oven; and/or jar cooker, on the machine.
Keep the machine away from the flaming
equipment, such as candle; cooking stove;
liquefied gas container etc.
Never put the pressure containers on the
machine.
34
Never put the machine over the opening of an
uncovered drainage.
In the case of suspended wooden floors, place
the machine on a water-resistant wooden board
(plinth) of at least 30mm thickness which is
screwed to the floor. If possible, install the
machine,in a corner of the room. Secure the
machine s feet with brackets (this applies
particularly to tower arrangements).
35
Removing the
transport bolts
The transport bolts must always be removed before
using the appliance for the first time and must be
retained for any subsequent transport (e.g. when
moving).
Use the spanner provided only if a ring spanner is
unavailable.
Undo the 4 fixing bolts A and remove them.
Remove the four spacers B. They will fall to the
floor when you tip the machine.
A
B
Insert cover caps C which you will find in the
bag containing the documentation.
D
C
36
Hose and cable
lengths
Left-hand connection
~100cm
max.60cm
max.100cm
~140cm
~110
cm
Right-hand connection
max.60cm
~150cm
Water connection
Water supply
max.100cm
~150cm
~110cm
For the water connection a standard cold-water
line with a minimum water pressure of 0.1MPa
is required(with tap full ON, at least 8 litres of
water must flow out in one minute). If the water
pressure exceeds 1 MPa, a pressure reducing
valve must be added.
Never connect the machine to the mixer tap of
a pressureless hot-water heater.
Caution! Connections are under full water
pressure; check for leaks with tap turned fully
ON.
37
The filters at the free end of the inlet hose and
at the back of machine should only be removed
for cleaning purposes.
To avoid water damage the tap must be turned
OFF after using the machine.
The plastic nuts on the hose connections must
only be tightened by hand.
G 1/2
For tight connection between washing machine
and water source, you can,
1. Call Customer Service before you install the
machine,get the plastic connector freely. It may
connect tightly the water inlet pipe and your
water tap.
Plastic connector
CS code 424387
2. Or you may purchase the specific water tap
from customer service. It is designed by factory.
It may be better connected with machine than
your water tap.
Note: The water tap is not free.
Water tap
CS code 184611
Caution
Do not disassemble the water inlet hose frequently, the untight connection will lead to leakage.
We suggest that you use a water inlet hose specially for the washing machine.
If you need to lengthen the water inlet hose together with the machine, please contact local
CS center/station or dealer to buy additional
lengthening hose.
Additional lengthening water inlet hose is not
free.
38
Water drainage
Caution
Do not bend or pull the water drainage hose.
Height between the placement area and drainage
point: maximum 100cm.
minimum 60cm.
Drainage into a wash basin(The hose elbow is in
the drum).
Caution
The plug must not block the drain of the wash
basin.
Secure the water drainage hose so that it does
not slide out.
When water is being drained, check that the
water flow is fast enough.
Leveling procedure
All four appliance feet must be firmly on the
ground. The washing machine must not wobble.
Level the washing machine with the assistance
of the four adjustable feet and a spirit level:
Loosen the counter-nut 1 using the wrench.
Adjust the height by means of turning the
appliance foot 2.
Tighten the counter-nut 1.
39
Electrical
connection
When heating, the maximum current of the
washing machine is 10A,so please make sure
that the power supply system(voltage; current
and the cable) is applicable to the load of the
applied appliance.
The machine must only be connect to an alternating current supply via a correctly installed
earthed socket.
The voltage indicated on the rating plate at the
back of the machine must match the mains voltage at the installation location.
Connected load and required fuse or line
protecting cut-out are indicated on the rating
plate.
It must be ensured that the plug and socket
match, that the conductor cross-section is
sufficient and that the earthing system has
been installed in compliance with regulations.
Multiple plug connectors and extension cables
must not be used.
Do not connect the machine to electrical outlets
while your hands are wet or damp.
To remove the plug from the socket, grasp the
plug firmly and pull it out. Do not pull at the cable.
If the supply cord is damaged, it will be replaced
by a special cord or a assembly available from
the manufacturer or its service agent.
In the event that an earth-leakage circuit breaker
is to be used, only use types marked with the
following symbol:
. Only this symbol can
guarantee compliance with all current regulations.
40
Transport
e.g. when moving
Before transporting the washing machine:
- Turn off the water tap,
- Drain any residual washing solution(refer to
Page 25),
- Release the water pressure in the supply hose
(refer to Page 26),
- Disconnect the washing machine from the mains,
- Dismantle the supply and drainage hose,
- Install the transport bolts.
Having transported the appliance and ensured
proper installation and connection, allow the
"Draining" program to run through before starting
the first wash program.
Preparing and inserting
the transport bolts
Remove the covers C.
Remove the back panel D (see Page 36),
preparing the transit bolt:
Insert and tighten the bolts.
41
Contents of this brochure could be changed without written notice.
Product Standard:
GB 4706.1-1998
GB 4706.24-2000
GB 4706.26-2000
GB 19606-2004
WM 1065
Family 1085
Silver 1095
0705en
9000104705en