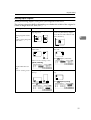
1
Color Scanner
Operating Instructions
Network Delivery Scanner Reference
ZDLH300.eps
Read this manual carefully before you use this product and keep it handy for future
reference.
For safety, please follow the instructions in this manual.
Color Scanner Operating Instructions
Printed in Japan
EE GB
UE USA G558-6641
Introduction
This manual contains detailed instructions on the operation and maintenance of this machine. To get
maximum versatility from this machine all operators should carefully read and follow the instructions in
this manual. Please keep this manual in a handy place near the machine.
Please read the Safety Information before using this machine. It contains important information related
to USER SAFETY and PREVENTING EQUIPMENT PROBLEMS.
Important
Parts of this manual are subject to change without prior notice. In no event will the company be liable
for direct, indirect, special, incidental, or consequential damages as a result of handling or operating
the machine.
Power Source
Color Scanner: 220 - 240V, 50/60 Hz, 5A or more
Please be sure to connect the Power Cord to a power source as above.
Caution:
Use of controls or adjustment or performance of procedures other than those specified in this manual
might result in hazardous radiation exposure.
Do not attempt any maintenance or troubleshooting other than that mentioned in this manual. This
scanner contains a laser beam generator and direct exposure to laser beams can cause permanent
eye damage.
•
In this manual, all the information about Windows was written with the assumption that users are
familiar with Windows. If you are not familiar with the Windows environment, please refer to your
Windows literature.
•
In this manual, the term Windows NT® refers to Windows NT® Workstation and Windows NT Server.
Declaration of Conformity
“The Product complies with the requirements of the EMC Directive 89/336/EEC and the Low Voltage
Directive 73/23/EEC.”
In accordance with IEC 60417, this machine uses the following symbols for the main power switch:
a means POWER ON.
b means POWER OFF.
Copyright © 2001
Trademarks
Microsoft®, Windows® and Windows NT ® are registered trademarks of Microsoft Corporation in the United States and/or other countries.
Other product names used herein are for identification purposes only and might
be trademarks of their respective companies. We disclaim any and all rights in
those marks.
Notes:
Some illustrations might be slightly different from your machine.
Certain options might not be available in some countries. For details, please contact your local dealer.
Note
The proper names of the Windows operating systems are as follows:
• Microsoft® Windows® 95 operating system
• Microsoft® Windows® 98 operating system
• Microsoft® Windows® Millennium Edition (Windows Me) operating system
• Microsoft® Windows® 2000 Professional
• Microsoft® Windows® 2000 Server
• Microsoft® Windows NT® Server operating system Version 4.0
• Microsoft® Windows NT® Workstation operating system Version 4.0
• Microsoft® Windows NT® Server network operating system version 3.51
• Microsoft® Windows NT® work station operating system version 3.51
i
Safety Information
When using your scanner, the following safety precautions should always be
followed.
Safety During Operation
In this manual, the following important symbols are used:
R WARNING:
Indicates a potentially hazardous situation which, if instructions are
not followed, could result in death or serious injury.
R CAUTION:
Indicates a potentially hazardous situation which, if instructions are not followed, may result in minor or moderate injury or damage to property.
R WARNING:
• Connect the Power Cord directly into a wall outlet and never use an extension cord.
• Disconnect the power plug (by pulling the plug, not the cable) if the power cable or plug becomes frayed or otherwise damaged.
• To avoid hazardous electric shock or laser radiation exposure, do not remove any covers or
screws other than those specified in this manual.
• Turn off the power and disconnect the power plug (by pulling the plug, not the cable) if any
of the following conditions exists:
• You spill something into the equipment.
• You suspect that your equipment needs service or repair.
• Your equipment's cover has been damaged.
• Disposal can take place at our authorized dealer or at appropriate collection sites.
ii
R CAUTION:
• Protect the equipment from dampness or wet weather, such as rain, snow, and so on.
• Unplug the Power Cord from the wall outlet before you move the equipment.
While moving the equipment, you should take care that the Power Cord will not be damaged
under the equipment.
• When you disconnect the power plug from the wall outlet, always pull the plug (not the cable).
• Do not allow paper clips, staples, or other small metallic objects to fall inside the equipment.
• For environmental reasons, do not dispose of the equipment or expended supply waste at
household waste collection points. Disposal can take place at an authorized dealer or at appropriate collection sites.
• The inside of the machine could be very hot. Do not touch the parts with a label indicating
the "hot surface". Otherwise it could cause a personal burn.
• Our products are engineered to meet high standards of quality and functionality, and we recommend that you only use the expendable supplies available at an authorized dealer.
Lithium Batteries (Memory Back-up)
R WARNING:
• Do not try to replace the lithium batteries by yourself. A battery of this type can explode if
incorrectly replaced. If the lithium batteries need to be replaced, contact an authorized dealer
to request servicing.
• Never dispose of the lithium batteries by incineration. This can cause them to rupture resulting in injury.
Note
❒ Please return used NIC boards to our authorized dealer or service representative. Your
cooperation with our recycling activities is appreciated.
❒ NIC boards are equipped with a lithium battery. In the case NIC boards are disposed of
by the customer, please dispose them in accordance with national or local regulations after separating the lithium batteries from the NIC board.
iii
How to Read This Manual
Symbols
In this manual, the following symbols are used:
Important
If this instruction is not followed, paper might be misfed, originals might be
damaged, or data might be lost. Be sure to read this.
Preparation
This symbol indicates the prior knowledge or preparations required before operating.
Note
This symbol indicates precautions for operation or actions to take after misoperation.
Limitation
This symbol indicates numerical limits, functions that cannot be used together,
or conditions in which a particular function cannot be used.
Reference
This symbol indicates a reference.
[
]
Keys that appear on the machine's panel display.
Keys and buttons that appear on the computer's display.
{
}
Keys built into the machine's operation panel.
Keys on the computer's keyboard.
Names of Major Options
Major options of this scanner are referred to as follows in this documentation.
• SDRAM module II (32, 64, and 128 MB) --> Memory module
For other options, see the respective documentation.
The following software products are referred to using a general name.
• DeskTopBinder V2 Lite (standard) and DeskTopBinder V2 Professional (sold
separately) --> DeskTopBinder V2
• ScanRouter V2 Lite (standard) and ScanRouter V2 Professional (sold separately) --> ScanRouter V2 Lite/Professional
iv
TABLE OF CONTENTS
Before Using This Product ....................................................................... 1
Network Delivery Scanner Overview............................................................. 1
Manual Contents and Reference Material..................................................... 3
1. Before Use
Preparation................................................................................................. 5
Software and Manuals Supplied on CD-ROM ......................................... 7
List of Files .................................................................................................... 7
Software for the Network Delivery Scanner .................................................. 8
Instruction Manuals and Help Files ............................................................. 11
Software Installation Sequence................................................................... 12
2. Initial Scanner Setup
Use as a Network Delivery Scanner.......................................................
Scan Setup ...............................................................................................
Settings .......................................................................................................
Registration Operation Sequence ...............................................................
Scanner Configuration............................................................................
Settings .......................................................................................................
Setting Procedure .......................................................................................
15
17
17
19
23
23
27
3. Sending Originals
Original Setting........................................................................................
Original Orientation and Scan Area Setting ................................................
Setting the Original on the Platen Glass .....................................................
Setting Originals in the ADF........................................................................
Sending Scans with a Network Delivery Scanner ................................
Displaying Destinations and Senders .........................................................
Sending Scans ............................................................................................
Making Scan Settings Manually ..................................................................
29
30
32
32
34
35
36
40
4. Appendix
Remarks ...................................................................................................
Troubleshooting ......................................................................................
The Network Delivery Scanner is Unusable................................................
The scanner Does Not Scan Originals as Expected ...................................
When an Error Message is Displayed.........................................................
43
44
44
44
45
INDEX........................................................................................................ 48
v
vi
Before Using This Product
This manual describes how to use the network delivery scanner. The following
section contains an overview of the scanner and a description of the contents of
this manual, as well as information about related material.
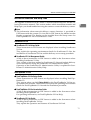
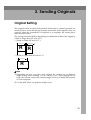
Network Delivery Scanner Overview
When used as a network delivery scanner, the scanner delivers scan data to a
specified destination selected from a list of destinations programmed in the delivery server. This requires that ScanRouter V2 Lite or ScanRouter V2 Professional (sold separately) is installed on the delivery server on the network.
3
SCN
SCN
2
SCN
5
4
SCN
SCN
1
7
SCN
8
SCN
5
6
1. Scan data
Specify destination and scan document.
Send scan data to the delivery server.
2. Delivery processing by delivery
server
ScanRouter V2 Lite/Professional is installed on the server. The server delivers
scan data to devices on the network. With
the ScanRouter V2 Administration Utility, destinations and sender names are
stored in an address book format, and delivery options can be selected individually for each destination. The ScanRouter
V2 Administration Utility allows setting
the following delivery options.
• In-Tray save
Scan data is saved in the in-trays of the
delivery server.
6
5
ZEPX010J
• Save as Windows file
Scan data is saved in a specified folder
on a computer on the same network as
the delivery server.
Note
❒ The optional ScanRouter V2 Professional provides the following additional functions. For details, see the
ScanRouter V2 Professional documentation.
• Deliver scan data as an e-mail attachment
• Deliver scan data with DeskTopBinder V2
• View scan data with a web browser
or download to a client computer
1
3. Save scan data in an in-tray
An in-tray is created for destinations programmed with the ScanRouter V2 Administration Utility. Data sent from the
scanner is saved according to settings
made with the ScanRouter V2 Administration Utility.
4. File arrival notification and file
retrieval with ScanRouter V2 Link
The ScanRouter V2 Link (part of DeskTopBinder V2) monitors the in-trays of
the delivery server. When the delivery
server receives scan data from the scanner, ScanRouter V2 Link processes the
data according to the setting made in advance. The following functions are available.
• Retrieve scan data from the in-tray
and store in the DeskTopBinder V2
work folder
• Retrieve scan data from the in-tray
and store in a specified folder
• Notify the client computer when scan
data arrives in the in-tray
2
5. Client computer
6. Edit scan data with DeskTopBinder V2
DeskTopBinder V2 is installed on a client
computer.
This software allows viewing scan data
downloaded to the client computer, and
also viewing and deleting scan data
saved in the in-tray of the delivery server.
7. Data viewing/erasing/retrieval
with DeskTopBinder V2
When you selected to save scan data in
the in-tray with the ScanRouter V2 Administration Utility, and data is not retrieved with ScanRouter V2 Link, data is
saved in the in-tray. DeskTopBinder V2
can then be used to view, delete, or retrieve the scan data files in the in-tray.
8. Save in a specified folder
According to a setting made with the
ScanRouter V2 Administration Utility,
scan data sent to the delivery server can
be saved in a specified folder.
Manual Contents and Reference Material
This manual explains how to setup the scanner to be used as a network delivery
scanner, place documents to be scanned, and deliver scan data. This manual also
contains information about software used with this scanner and troubleshooting
for unexpected scanning results.
To deliver scan data scanned, settings on the delivery server as well on this scanner must be made. See the network delivery scanner user manuals and make the
necessary settings. Depending on the setup or operation to be performed, see the
respective manuals below.
Reference
You can find the network delivery scanner user's manual in PDF format on
the CD-ROM provided with this scanner. For further details, see " P.11 “Instruction Manuals and Help Files” ".
❖ Setting up the scanner
For more information about the operation and Configuration of the scanner
(i.e. how to set up the scanner, how to set user names), see the Setup Guide.
❖ Setting up the delivery server (installing ScanRouter V2 Lite/Professional)
For more information about the setup and operation of the delivery server
(i.e. how to install ScanRouter V2 Lite/Professional on the delivery server,
how to record addresses and users on the delivery server, how to perform delivery server maintenance), see the following manuals:
• ScanRouter V2 Setup Guide
• ScanRouter V2 Management Guide
❖ Setting up and operating client computers (installing DeskTopBinder V2 )
For more information about client computer setup and operation (i.e. how to
install theDeskTopBinder V2 on a client computer, how to view documents
using the DeskTopBinder V2 ), see the following manuals:
• DeskTopBinder V2 Setup Guide
• DeskTopBinder V2 Introduction Guide
• ScanRouter V2 Link Guide
3
4
1. Before Use
Preparation
Before using this scanner as a network delivery scanner, the following preparations are required.
❖ Setting the scanner to be used as a network delivery scanner
To use this scanner in a network environment with a delivery server, the following settings are required. ⇒ P.15 “Use as a Network Delivery Scanner”
• "Network settings" in Initial setup
Make sure that the appropriate basic settings were made, such as the IP address, to allow the scanner to be used as a network scanner.
Reference
For information about how to make basic settings to allow the scanner
to be used as a network scanner, see the Network Quick Installation
Guide.
• "Delivery options" in Scanner settings
Select delivery options and make the necessary settings to use the scanner
as a network delivery scanner.
• "Delivery server IP address" in Network settings
Specify the delivery server IP address.
Note
❒ Specifying the IP address is only possible when "Delivery options" in
the Scanner settings is selected.
❖ Setting the scanner to scan documents as a network delivery scanner
To scan documents using the scanner or a network delivery scanner, the following settings are required.
• Scan setup
Make the necessary settings for scanning documents, such as density, resolution and scan size. By specifying settings under user names beforehand,
you can easily change them for each document.
• Scanner Configuration
Make the settings for scanner operation such as the maximum data size
that can be sent to the delivery server.
Reference
For more information, see " P.15 “Initial Scanner Setup” ".
5
Before Use
❖ Installing software and setting up the delivery server
Install the necessary software on the delivery server and the client computer.
• On the delivery server, install ScanRouter V2 Lite/Professional. With
ScanRouter V2 Administration Utility, you can register an address book (a
list of destinations and senders) and make settings for maintenance of the
delivery server. For more details, see the user manuals provided with
ScanRouter V2 Lite/Professional.
⇒ScanRouter V2 Setup Guide
⇒ScanRouter V2 Management Guide
1
Note
❒ It is not necessary to register this scanner in the ScanRouter V2 Administration Utility "Set I/O Device".
• On client computers, install the DeskTopBinder V2 .
DeskTopBinder V2 allows you to view documents in the delivery server
with a client computer. In addition, with ScanRouter V2 Link, you can receive notification that a document has arrived in an in-tray of the delivery
server and automatically retrieve that document. For more details, see the
user manuals provided with DeskTopBinder V2
DeskTopBinder V2 Setup Guide
DeskTopBinder V2 Introduction Guide
ScanRouter V2 Link Guide
Reference
For details about the software provided with this scanner, see " P.7 “Software and Manuals Supplied on CD-ROM” ".
6
Software and Manuals Supplied on CD-ROM
Software and Manuals Supplied on CD-ROM
The software that enables this scanner to be used as a network scanner is installed in the "Scanner Driver & Utilities" CD-ROM provided with this product.
This section contains information about the software on the "Scanner Driver &
Utilities" CD-ROM, the instruction manuals, and Help.
1
Note
❒ This manual mainly gives information about the software required to use this
scanner as a network delivery scanner. For details about other software, see
the Scanner Reference.
List of Files
CDROM
Drive
Wizard for the TWAIN driver and utilities
Drivers
TWAIN
TWAIN driver for Windows 95/98/Me, Windows 2000, Windows NT 4.0 and Windows NT
3.51
UTILITY
ROUTERV2
ScanRouter V2 Lite ScanRouter V2 Administration Utility
DESK V2
DeskTopBinder V2 Lite Job Binding ScanRouter V2 Link
Acrobat
Acrobat Reader 4.05
NETWORK
AFICIOMAN
Aficio Manager for Admin
Aficio Manager for Client
7
Before Use
Software for the Network Delivery Scanner
ScanRouter V2 Lite
1
ScanRouter V2 Lite is to be installed on the delivery server. Scanned data can be
sorted and stored in specified in-trays, or saved in folders of client computers on
the same network.
❖ File storage folder
The files are stored in the following folder on the CD-ROM provided with the
scanner.
\UTILITY\ROUTERV2
❖ System requirements
The following system requirements must be met to use ScanRouter V2 Lite.
Note
❒ Install the software on a stand-alone server running Windows NT Server
or Windows 2000 Server. It must not be installed on the primary domain
controller or backup domain controller.
• Hardware
PC/AT compatible
• CPU
Pentium 200 MHz or faster (Pentium 350 MHz or faster recommended)
• Operating system
Microsoft® Windows95 (OSR 2 or later)
Microsoft® Windows® 98
Microsoft® Windows® 98 Second Edition
Microsoft® Windows® Millennium Edition
Microsoft® Windows® 2000 Server
Microsoft® Windows NT® Server 4.0 (with Service Pack 5 or higher)
• Memory
64 MB or more (128 MB or more recommended)
• Hard disk space
Minimum free space required for installing: 200 MB
Note
❒ In addition to the space required for installation, the hard disk should
have at least 500 MB of free space for files. High resolution (for example
600 dpi), high color scans become very large files, so confirm that you
have enough space on your hard disk, as required. File sizes always
vary according to file type and resolution. For details, see the Scanner
Reference.
• Network protocol
TCP/IP
8
Software and Manuals Supplied on CD-ROM
❖ Utility (ScanRouter V2 Administration Utility)
ScanRouter V2 Administration Utility, a utility of ScanRouter V2 Lite, manages the delivery system run by ScanRouter V2 Lite. This utility is to be installed together with ScanRouter V2 Lite on the delivery server.
To sort scanned documents, you can register destination and sender information in an address book in the delivery server. In addition, this utility can
monitor free disk space, record error logs and maintain the delivery server.
1
Note
❒ ScanRouter V2 Administration Utility can be installed not only on the delivery server but also on client computers. To install it, click [ScanRouter V2
Lite] [ScanRouter V2 Administration Utility] on the ScanRouter V2 Lite setup
screen.
Reference
For information about the setup procedure using the ScanRouter V2 Administration Utility, see the ScanRouter V2 Lite Management Guide.
DeskTopBinder V2 Lite
DeskTopBinder V2 Lite is to be installed on the client computers for integration
and management of various kinds of data such as scanned image data, files created with applications, and existing image files.
This software allows you to view documents in in-trays. In addition, by installing the TWAIN driver provided, the scanner can be used as a network TWAIN
scanner.
For details, see the DeskTopBinder V2 Lite Introduction Guide or DeskTopBinder V2 Lite Help.
❖ File storage folder
The files are stored in the following folder on the CD-ROM provided with the
scanner.
\UTILITY\DESK V2
❖ System requirements
The following system requirements must be met to use DeskTopBinder V2
Lite.
• Hardware
PC/AT compatible
• CPU
Pentium 133 MHz or faster (Pentium 266 MHz or faster recommended)
9
Before Use
• Operating system
Microsoft® Windows®95 (OSR 2 or later)
Microsoft® Windows® 98
Microsoft® Windows® 98 Second Edition
Microsoft® Windows® Millennium Edition
Microsoft® Windows® 2000 Server
Microsoft® Windows® 2000 Professional
Microsoft® Windows NT® Server 4.0 (with Service Pack 5 or higher)
Microsoft® Windows NT® Workstation 4.0 (with Service Pack 5 or higher)
• Memory
48 MB or more (64 MB or more recommended)
• Hard disk space
50 MB or more (200 MB or more recommended)
• Display resolution
800 x 600 pixels, 64 K color or higher
1
❖ Utility (ScanRouter V2 Link)
ScanRouter V2 Lite, a utility of DeskTopBinder V2 Lite, is to be installed on
client computers together with DeskTopBinder V2 Lite.
With ScanRouter V2 Lite, in-trays in the delivery server are monitored from
the client computer. In addition, when a document arrives in the in-tray, the
client computer can be notified or the document can be retrieved.
10
Software and Manuals Supplied on CD-ROM
Instruction Manuals and Help Files
The supplied "Scanner Driver & Utilities" CD-ROM contains help files and the following instruction manuals. This section outlines which instruction manuals and
Help topics you should read before using the scanner as a network delivery scanner.
1
Note
❒ The information about network delivery scanner functions is provided in
PDF format with the scanner. To view files in PDF format, the Adobe Acrobat
Reader is required. The Reader can be installed from the Setup screen for
DeskTopBinder V2 Lite or ScanRouter V2 Lite.
ScanRouter V2 Lite
❖ ScanRouter V2 Lite Setup Guide
These instructions in PDF format are displayed when installing ScanRouter
V2 Lite.
They explain the operating environment details for ScanRouter V2 Lite, the
installation of ScanRouter V2 Lite and the delivery server setup procedure.
❖ ScanRouter V2 Lite Management Guide
A link to these instructions in PDF format is added to the Start menu when
installing ScanRouter V2 Lite.
They contain a function outline for ScanRouter V2 Lite and explain delivery
server maintenance using the ScanRouter V2 Administration Utility.
Operation of the ScanRouter V2 Administration Utility is explained in ScanRouter V2 Administration Utility Help.
DeskTopBinder V2 Lite
❖ DeskTopBinder V2 Lite Setup Guide
These instructions in PDF format are displayed when installing DeskTopBinder V2.
They appear when you click [Setup Guide] on the DeskTopBinder V2 Lite setup screen of the installer. The instructions explain the operating environment
details for DeskTopBinder V2 Lite and the installation procedure.
❖ DeskTopBinder V2 Lite Introduction Guide
A link to these instructions in PDF format is added to the Start menu when
installing DeskTopBinder V2.
For operating information, see DeskTopBinder V2 Lite Help.
❖ ScanRouter V2 Link Guide
A link to these instructions in PDF format is added to the Start menu when
installing DeskTopBinder V2 Lite.
They explain the operation and features of ScanRouter V2 Link.
11
Before Use
Software Installation Sequence
Installation under Windows 95/98/Me, Windows 2000, and Windows NT4.0
uses the Auto Run feature. An example for operation under Windows 98 is given
below. Operation under Windows 95/Me, Windows 2000, and Windows NT4.0
is similar.
1
Limitation
❒ Close all other applications before starting the installation.
❒ Under Windows NT 3.51, installation using the Auto Run feature is not possible. See the Setup Guide for more information about how to install the DeskTopBinder V2 Lite in Windows NT 3.51.
Auto Run Feature
When the CD-ROM is inserted under Windows 95/98/Me, Windows 2000, or
Windows NT4.0, the Auto Run feature automatically starts the installation process for the TWAIN driver and the various utilities.
Note
❒ Auto Run might not automatically work with certain OS settings. In this case,
launch “Launch.EXE” located in the CD-ROM root directory.
❒ If you want to cancel Auto Run, hold down the {Shift} key (when your system
is Windows 2000, hold down the left {Shift} key) while inserting the CDROM. Keep the {Shift} key held down until the computer has finished accessing the CD-ROM.
Limitation
❒ When performing the installation under Windows 2000, Windows NT4.0,
and Windows NT 3.51, log on as a member of the Administrators group.
❒ Under Windows NT 3.51, installation using the Auto Run feature is not possible. For information about how to perform the installation, see the Setup
Guide.
12
Software and Manuals Supplied on CD-ROM
The installation sequence using Auto Run is as follows.
1
13
Before Use
Installation (Windows 95/98/Me, Windows 2000, Windows NT 4.0)
A Verify that Windows is running. Insert the supplied CD-ROM labeled
"Scanner Driver & Utilities" into the CD-ROM drive of the computer.
The installer starts.
1
B Click the button of the software to be installed.
• Clicking [DeskTopBinder V2 Lite] displays the “DeskTopBinder V2 Lite Setup” screen.
• Clicking [ScanRouter V2 Lite] displays the “ScanRouter V2 Lite Setup”
screen.
Reference
For further information, see the documentation for the respective software
or the Setup Guide that can be displayed from the setup screen.
If the setup screen contains a button marked [Read This First] or [Setup
Guide], display this information first, before starting the setup procedure.
Installation (Windows NT 3.51)
For information about how to perform the installation under Windows NT 3.51,
see the Setup Guide.
Note
❒ DeskTopBinder V2 Lite and ScanRouter V2 Lite are not compatible with Windows NT 3.51.
14
2. Initial Scanner Setup
To use the scanner as a network scanner, you must make basic network environment settings in addition to the scanner settings .
To make the basic settings such as timer setup and network environment settings, see the Network Quick Installation Guide. Then proceed to the detailed
network delivery scanner settings.
Use as a Network Delivery Scanner
This section explains how to make the
minimum necessary initial settings to
use this scanner as a network delivery
scanner. First, you need to set the "Delivery options" in the Scanner settings, then set the delivery server
address.
Important
❒ These settings should only be
made by the network administrator, or under supervision of personnel charged with network
management.
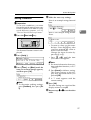
A Press the {UserTools}} key.
C Press [↓↓Next] until [7. Delivery option] appears, and then press[OK].
D Press [↓↓] and select “Installed”.
An "*" appears with the current
setting.
E Press [OK].
ZDLH470
The Scanner Features screen appears.
B Press [Config.].
Note
❒ When you set the delivery option to "Installed", you can make
the initial settings for the network delivery scanner functions. However, the condition
(enabled or disabled) of the network delivery scanner function
does not change until you have
restarted the scanner.
15
Initial Scanner Setup
2
F Press [PrevMenu].
I Press [PrevMenu].
G Press [Network].
J Press [Exit].
H Set the server IP address.
K Restart the scanner.
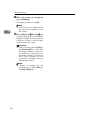
A Press [↓
↓Next] until [7. Delivery
Server Address] appears, and
then press [OK].
B Enter the server IP address.
Press 0 and 1 to move between fields.
Note
❒ Confirm the address with
your network administrator.
❒ The IP address is "000.000.000.000"
by default.
C When you are done, press [OK].
The delivery server address is
set.
16
The network delivery scanner
functions are enabled. Make other
settings as required.
⇒ P.17 “Scan Setup”
⇒ P.23 “Scanner Configuration”
Important
❒ If you change the "Delivery options" settings, be sure to restart
the scanner because the condition (enabled or disabled) of the
network delivery scanner function does not change until then.
Scan Setup
Scan Setup
You can specify scan conditions when
you scan originals. If you frequently
scan the same type of original, you
can easily select scan conditions when
you send documents if you register
the most suitable scan conditions beforehand.
Note
❒ The scan conditions registered for
"Default" are used as the initial
conditions for "Manual settings". If
you do not select any scan conditions when sending documents,
originals are scanned according to
the conditions in "Manual settings". You can also use "Manual
settings" freely to specify scan conditions. ⇒ P.40 “Making Scan Settings Manually”
❒ You can register scan settings under three names: user 1, user 2, and
user 3. If you assign certain conditions to each user, you can easily
switch between scan conditions for
each type of original. For example,
you can assign scan conditions for
color originals to user 1 and scan
conditions for monochrome originals to user 2.
Settings
There are nine types of scan conditions available:
2
Note
❒ The default settings described here
are the values registered as "Default". The default settings differ
for each set of scan conditions,
such as user 1.
❖ Scan type
You can scan originals using the
appropriate settings for your type
of original. The factory default is
"Text".
• Text
This refers to standard originals
mainly composed of text.
• Text/Photo
This refers to originals composed of a mix of photos, images, and text.
• Photo
This refers to photos or binary
image originals.
• Gray Scale
This refers to photos or color/
grayscale image originals.
• Color
This refers to color photos or
color/grayscale image originals.
Note
❒ While "Photo" does binary scans
only, "Grayscale" does color/
grayscale scans. Binary is a standard suitable for printing and
color/grayscale is one suitable
for displaying documents on a
computer screen.
17
Initial Scanner Setup
❖ Resolution
You can select the resolution of
scans from 100 dpi, 200 dpi, 300
dpi, 400 dpi, 600 dpi and Custom
Resolution. The factory default is
"100 dpi".
Note
❒ The higher the resolution, the
better the quality of the scan data. However, you should keep
in mind that this also increases
the size of the data. If you handle a lot of data, high-resolution
scans put more strain on the delivery server and the system.
For example, an A3, 11" x 17"
(DLT) size original, scanned in
"Color" at 600 dpi, One-sided,
yields a file of 200 MB. For this
reason, it is recommended to
scan images at high resolutions
only when absolutely necessary.
2
❒ If you select "Custom Resolution", you can select a resolution
between 100 and 600 dpi by increments of 1 dpi.
❖ Scan size
You can select the scan area for the
original. The factory default is
"Auto".
• Auto
You can let the automatic sizing
function set the size of the area
to be scanned.
• A3S,A4S,A4R,A5S,A5R,11x17
S,81/2x14S,81/2x13S,81/2x11
S,81/2x11R,51/2x81/2S,51/2x
81/2R,B4S,B5S,B5R,Custom
Size
If you select one of the sizes
above, regardless of the size of
the original, the size of your
scan will be of the selected size.
18
Note
❒ If you select "Custom Size",
you can specify the dimensions of the scan area in millimeters or inches.
❒ Select millimeters or inches
as default units in "Configuration" in Initial settings.
❖ Density
This is the density at which the
original is scanned. Select a density
from 1 (light) to 7 (dark). The factory default is set to a medium density.
❖ Erase Color
You can use this setting to delete
specific colors when scanning. For
example, you could choose to
erase the lines on scanned graph
paper. You can select from Off,
Red, Green and Blue.
The factory default is "Green".
Note
❒ This setting is available except
when the scan type is "Color".
❒ As a rule, you should leave
"Erase Color" to "Green". This
allows you to scan black and
white originals faster than any
other setting.
❖ Noise Reduction
This setting erases imperfections
such as dark spots that can appear
on originals. You can select from
Off, 3 x 3, 4 x 4 and 5 x 5.
The factory default is "Off".
Note
❒ This setting is available except
when the scan type is "Grayscale" or "Color".
Scan Setup
❒ 3 x 3, 4 x 4 and 5 x 5 refer to areas
(in dots) searched when eliminating dots and marks. Isolated
marks that fit into the frame
(width: 1 dot) of the specified
area are searched and erased.
For example, if 5 x 5 is specified,
isolated dots with a maximum
size of 3 x 3 are erased.
❖ Edge Smoothing
This smoothes the edges of characters, illustrations and so forth, during the scanning process.
The factory default is "Off".
Registration Operation
Sequence
Preparation
Before you can register scan conditions, you must first make initial
settings so that the scanner can be
used as a network delivery scanner. ⇒ P.15 “Use as a Network Delivery Scanner”
2
A Press the {User tools}} key.
Note
❒ This setting is available except
when the scan type is "Color".
❖ Filter
It is possible to specify whether
you want to filter scans or not. You
can select from "Off", "Fine
Noise(2x2) ", and "MTF".
• If you select "Off", the scan is
not filtered.
• If you select "Fine Noise(2x2)",
the scan is shaded.
• If you select "MTF", the scan is
sharpened.
The factory default is "Off".
❖ Positive/NegativePositive/Negative
You can reverse the polarity of
your scans from positive to negative. You can select from "On" and
"Off".
The factory default is "Off".
Note
❒ This setting is available except
when the scan type is "Full Color".
ZDLH470
The Scanner Features screen appears.
B Press [Scan].
C Use the number keys to enter the
number of the name for which
you want to register scan conditions.
Scan type is displayed as the first
item of scan conditions.
19
Initial Scanner Setup
D Press [↑↑Prev.] or [↓↓Next] until the
item you want to set appears, then
press [OK].
2
E Make the necessary settings.
Example: image density setting
Example: resolution setting
F Repeat steps D to E and set the
next item.
Reference
For details on the operation
when Scan size is "Custom
Size", see P.20 “Customizing the
Scan Size”.
G When all your settings are done,
press [PrevMenu].
The display returns to the step B
screen.
Note
❒ You can make "Network Setup"
and "Config." settings from this
display.
H Press [Exit].
• When you need to enter values,
enter the digits with the number
keys. If you press the {#} key after you have entered information, you can enter values in the
next column. You can change
the input position by pressing
0 or 1.
• To scroll up or down the list of
settings, press [↑
↑] or [↓
↓] until
the item you want to set appears.
Note
❒ For more details about the content of each setting, see P.17
“Settings”.
❒ If you want to cancel a setting,
press [Cancel]. The setting is not
changed, and the screen returns
to the display that appeared before you pressed [OK].
❒ An "*" mark appears with the
current setting.
20
The new settings are saved and the
display returns to the screen that
was displayed before you started
making settings.
Customizing the Scan Size
If you select "Custom Size" as your
scan size, you can specify the dimensions of the scan area in millimeters or
inches.
Note
❒ Select the measurement units in
"Configuration" in Scanner Features.
A Display
"Custom Size" in the
Scan size selection screen, and
press [OK].
Scan Setup
B Using the reference start point as
the origin, enter the horizontal
and vertical distances from the origin of the area you wish to scan.
Next, enter the size of the area.
Then, press {#}
}.
This is an example when using
millimeters.
B
When originals are set in the
Auto Document Feeder (ADF):
2
ZEPY030E
Press {#} to move the cursor to the
next field. You can also move the
cursor by pressing 0 or 1.
The following illustration shows
how to make your adjustments using the reference start point of the
scanner.
A When originals are set on the
platen glass:
Positioning
Start point, Scan area,
horizontal
markhorizontal
Note
❒ The reference start point of the
ADF is located on the inside of
the fully extended paper guide
on the operation panel side of
the scanner.
❒ When performing duplex scans,
you can scan monochrome and
color originals up to 297 mm
(11.7") vertically and 432 mm
(17") horizontally from the origin.
Start point,
vertical
Scan area,
vertical
In this situation, you can scan
monochrome and color originals
up to 297 mm (11.7") vertically
from the origin. Horizontally, you
can scan monochrome originals up
to 2000 mm (78.74") from the origin, and color originals up to 630
mm (24.8") from the origin. Make
adjustments so that the area you
wish to scan does not fall outside
this perimeter.
Scan area
TNSY090E
In this situation, you can scan
monochrome and color originals up to 300 mm (11.8") vertically and 432 mm(17")
horizontally from the origin.
Make adjustments so that the
area you wish to scan does not
fall outside this perimeter.
21
Initial Scanner Setup
C Enter
all dimensions and press
[OK].
2
D Press [↑↑Prev.] or [↓↓Next] until the
setting you want to check appears
and confirm it.
E After you have confirmed the setting, press [Exit].
The display returns to step 3.
Checking the Delivery Result
Before the scan, you can confirm all
the specified settings to make sure
they are correct.
A Press [Menu] on the network delivery scanner screen.
Note
❒ If the Network TWAIN scanner
screen appears, press [Cancel].
B Press 0 or 1 to select the user
you want to check.
C Press [Status].
22
F Press [Cancel].
The display returns to the network
delivery scanner screen.
Scanner Configuration
Scanner Configuration
This section describes the settings
necessary for this scanner's scanner
function.
Settings
❖ Function Priority
You can choose between "TWAIN"
o r " D e l iv e r y " , d e p e n d i n g o n
whether you want the Network
TWAIN scanner mode or the network delivery scanner mode to
start when the scanner is turned
on.
The factory default is "Delivery".
Note
❒ If you select "TWAIN", the scanner starts in Network TWAIN
scanner mode when it is turned
on. You can switch back to the
network delivery scanner mode
by pressing [Cancel].
❒ If you select "Delivery", this
scanner starts in network delivery scanner mode when the
power is turned on. However,
you cannot switch from the network delivery scanner mode to
the Network TWAIN scanner
mode. If you want to use the
scanner as a Network TWAIN
scanner, access the scanner
from a client computer that can
perform scans.
Important
❒ When changing this setting, be
sure to restart the scanner to apply the change.
❖ TWAIN Connection Timeout
The length of time after which the
scanner can switch modes can be
set for when the scanner is used as
a network delivery scanner and
another client accesses the scanner
to use as a network TWAIN scanner.
• If you select "Immediate", the
scanner immediately switches
to network TWAIN scanner
mode.
• If you select "On", enter the
length of the interval, in seconds (3 to 30).
The factory default is "Immediate".
2
❖ Scanner Auto Reset Timer
If the scanner remains idle for a
certain amount of time, a sender's
address, name and scan conditions, set in the network delivery
scanner mode, are deleted. You
can set the length of time after
which the scanner performs this
task.
• If you select "On", enter the
length of time, between 10 and
999 seconds, after which the settings are deleted.
• If you select "Off", the settings
are not deleted.
The factory default is "Off".
Note
❒ If the scanner automatic clear
function is active, the sender's
address, name, and scanning
conditions are cleared after the
specified number of seconds.
Further, the display returns to
the "Function Priority" screen.
23
Initial Scanner Setup
❖ Date(Year/Month/Day)
You can set the date and time. Enter the year (4 digits), month, day,
hour (24-hour/12-hour display),
minutes and seconds with the
number keys.
Note
❒ When the scanner is used as a
network delivery scanner, client
computer users can use the date
and time to confirm when the
originals were scanned.
2
❖ Compression(Binary)
It is possible to choose to apply binary compression (B&W) to scan
data. By compressing the data, you
reduce the amount of time it takes
to transfer the data to the delivery
server. You can select from "Off",
"MH", "MR" and "MMR".
The factory default is "MMR".
Note
❒ Compression makes data transfer
from the scanner to the delivery
server much faster. Data transferred to the delivery server is
compressed according its settings.
❒ The compression rates in sequence from high to low are
"MMR", "MR", "MH", "Off". It
takes longer to send noncompressed data.
❒ The amount of time it takes to
transfer data differs depending
on the size of the data and the
network conditions.
24
❖ Compression(Color/Gray Scale)
It is possible to choose to apply a
degree of binary compression to
data scanned in color/grayscale.
By compressing the data, you reduce the amount of time it takes to
transfer the data to the delivery
server. You can select from "Off",
"Standard", "Low" and "High".
The factory default is "Standard".
Note
❒ Compression makes data transfer from the scanner to the delivery server faster. Data
transferred to the delivery server is compressed according to
the its settings.
❒ The compression rates in sequence from high to low are:
"High", "Standard", "Low" and
"Off". It takes longer to send
noncompressed data.
❒ The amount of time it takes to
transfer data differs depending
on the size of the data and the
network conditions.
❖ Delivery Options
You can set the scanner as a network delivery scanner with the
ScanRouter V2 Lite or ScanRouter
V2 Professional (sold separately).
If you select "Installed" for the Delivery options, you can make the
settings below. If you select "Not
installed", no settings are available.
• "7. Delivery Server Address" in
Network setup.
• Scan conditions
• "1. Function Priority", "2. Enter
number", "3. Scanner Auto Reset Tim er", "4 . Date(Y ear/
Month/Day)", "8. Auto Address
Update", "9. Unit of Measure",
"11. End of Scan Option" and
"15. Job delivery data max. setting" in Configuration.
Scanner Configuration
The factory default is "Not installed".
Important
❒ When you make changes to
these settings, be sure to restart
the scanner after you are finished. If you fail to do this, the
changes will not take effect.
❖ Auto Address Update
You can set the scanner to update
the contents of the address book
(list of destinations and senders) in
its memory with the latest information on the network server
when you use the scanner as a network delivery scanner.
• If you select "On", when you
press [Dest.] in network delivery
scanner mode, the contents of
the scanner's address book are
compared with those of the delivery server address book and
updated.
• If you select "Off", the contents
of the scanner's address book
are compared with those of the
delivery server address book
and updated only when the
scanner is turned on.
The factory default is "Off".
Note
❒ When there is no change in the
contents of the address book,
we recommend you select "Off"
to reduce the update time.
❒ When the automatic update is
inactive and the delivery server
address book changes, you
need to restart the scanner to
update the address book. If the
delivery server address book
changes but the scanner's remains unchanged, documents
are not sent. Instead, they are
saved in the undelivered data
tray until the scanner's address
book is updated.
2
❖ Unit of Measure
It is possible to specify which units
of measurement are displayed on
the operation panel when you select "Custom Size" for scanning
originals. You can select from
"mm", "inch" and "Internal selfalign".
The factory default is "Internal selfalign".
Note
❒ If you select "Internal selfalign", the scanner automatically uses the units of measurement standard in your country.
❖ sRGB
WithsRGB you can select to scan
your originals with color matching. You can select from "On" or
"Off".
The factory default is "On".
Note
❒ sRGB is a display color definition standard used in Windows.
sRGB reduces the differences in
tones between the originals and
the display on the screen.
25
Initial Scanner Setup
2
❖ End of Scan Option
You can make the settings for certain operations performed after
scans. You can select from "Clear
settings after each scan job" and
"Display options after each scan
job".
• If you select "Clear settings after
each scan job", the scanner
clears the scan conditions, delivery destination and sender
settings once it finishes scanning the originals.
• If you select "Show options after
each scan job", the scanner does
not clear the scan conditions,
delivery destination and sender
settings once it finishes scanning the originals. This way,
you can set another original,
continue scanning and combine
the documents into one or use
the previous settings to scan a
separate document.
The factory default is "Clear settings after each scan job".
❖ Language Select
You can select the language displayed on the operation panel.
The available selections are English, Deutsch, Francais, Espanol,
P o r t u g u e s , N ed er la n d s , I t a l ianoand Japanease.
The factory default is "English".
❖ Border Erase
When shadows appear around the
edges (border) of scanned originals, you can erase the shadow by
painting it white.
You can select to erase "0 mm", "1
mm", "2 mm", "3 mm", "4 mm" or "5
mm" from the four edges of
scanned originals.
The factory default is "0 mm".
❖ Job Delivery Data Max. Setting
You can set the maximum size of
files that can be transferred from
the scanner to the delivery server.
• "Off" sets no limit on the data
size for each document sent to
the delivery server.
• "On" allows you to enter a data
size limit (1 to 9999 MB by 1 MB
increments) with the number
keys for each document.
The factory default is "210 MB".
Note
❒ If one side of the scan area is set
to less than 20 mm, the setting
becomes invalid.
26
❖ ADF Thin Paper
You can set the ADF to scan A5 ( 8.5"
x 5.5 ") size paper or thin paper that
is less than 52 g/m2 (45 kg) thick.
Available choices are "On" and "Off".
• If you select "On", originals are
fed only after the document table has finished adjusting its
height and the scanner has recognized the paper type.
• If you select "Off", originals are
set as usual. Use this setting
when you do not use thin paper.
When you select "Off", originals
are fed more quickly than when
"On" is selected.
The factory default is "Off".
Note
❒ When you set a high resolution in
the scanning conditions, the size
of scan data is accordingly large.
The larger your data, the higher
the strain on the delivery server
and the system. For this reason, it
is recommended to scan images
at a moderate resolution.
Scanner Configuration
D Make the necessary settings.
Setting Procedure
Preparation
To set scan conditions, you must
first make initial settings necessary
for the scanner to be used as a network delivery scanner. ⇒ P.15
“Use as a Network Delivery Scanner”
A Press the {User tools}} key.
ZDLH470
The Scanner Features screen is displayed.
B Press [Config.].
C Press [↑↑Prev.] or [↓↓Next] until the
item you want to change appears,
and then press [OK].
Note
❒ To discontine making settings,
press [PrevMenu], then press [Exit].
Here is an example using date and
time.
2
Here is an example using Border
Erase.
• To enter a value, use the number keys. Press the {#} key after
you have entered the value to
move to the next field.
Change the input location by
pressing 0 or 1.
• Press [↑
↑] or[↓
↓] until the item
you want to set appears.
Note
❒ For more information about settings and their functions,⇒ P.17
“Settings”
❒ Press[Cancel] to delete a setting.
The screen returns to the display that appeared before you
pressed [OK].
❒ A "*" mark appears with the
current setting.
E Press [OK].
The new settings are saved and the
display returns to step C.
F Repeat steps C to E to set the other
items.
27
Initial Scanner Setup
G When all settings are completed,
press [PrevMenu].
The display returns to step B.
Note
❒ You can also set "Network setup" and "Scan conditions" from
this screen.
2
H Press [Exit] or the {User Tools}} key.
The new settings are saved and the
display changes from the Scanner
Features screen to the Normal
scanner functions screen.
Important
❒ After you have pressed [Exit] or
the {User Tools} key, wait until
the display returns to the Scanner functions screen before you
restart the scanner. If you do not
wait, your changes are not
saved and settings return to
their default values.
Note
❒ Changes to settings are not
saved until you press [Exit] or
the {User Tools} key.
28
3. Sending Originals
Original Setting
The original can be set either in horizontal (landscape) or vertical (portrait) orientation, but to assure that the top/bottom orientation of the original comes out
correctly when the scanned file is displayed on a computer, the correct placement must be chosen.
The setting orientation differs depending on whether the width of the original is
within or larger than 297 mm (11.7")
• Width is within 297 mm (11.7").
297mm(11.7")
R
297mm(11.7")
R
• Width is wider than 297 mm (11.7").
297mm(11.7")
R
Note
❒ Depending on how you place your original, the settings for its direction
might change when sending. ⇒ P.36 “Sending Scans”. By changing the settings, the scanner rotates the scanned image so that it is displayed correctly
on your computer.
❒ Use the ADF when you perform duplex scans.
29
Sending Originals
Original Orientation and Scan Area Setting
If originals are set in an upright ( ) position, you must change the original orientation settings when performing duplex scans.
Reference
For details about how to set the orientation of originals, see P.36 “Sending
Scans”.
Scanning One-sided Originals
3
The setting orientation differs depending on whether the width of original is
within or larger than 297 mm (11.7").
Original width
Setting originals on the
platen glass
297 mm (11.7") or less
Wider than 297 mm (11.7")
Place the original so that the top
edge touches the top-left of the
platen glass.
Place the original so that the top
edge touches the top-left of the
platen glass.
Place the top edge of the original
first.
Place the original so that the top
edge is set on the far side of the
ADF tray.
Select
Select
⇒ P.32 “Setting the Original on the Platen Glass”
Setting originals in the
ADF
⇒ P.32 “Setting Originals
in the ADF”
[One-sided].
Original orientation settings
⇒ P.36 “Sending Scans”
Note
❒ Because this is the initial value of this setting, you do not
need to change it.
30
[One-sided].
Original Setting
Scanning duplex Originals
When performing duplex scans, place your originals in the ADF.
The setting orientation differs depending on whether the width of the original is
within or larger than 297 mm (11.7").
Original width
297 mm (11.7") or less
Wider than 297 mm (11.7")
Place the original right side up,
top edge first.
Place the original right side up, in
such a way that the top edge is
set on the far side of the far side
of the ADF tray.
Placing originals in the
ADF
3
⇒ P.32 “Setting Originals
in the ADF”
When the original is bound on
either side:
When the original is bound on either side:
Select
duplex (side bind).
Select ⇒ P.36 “Sending Scans”
[duplex (side bind)].
Original direction settings
⇒ P.36 “Sending Scans”
When the original is bound at
the top:
When the original is bound at the
top:
Select
Select
[duplex (top bind)].
[duplex (top bind)].
31
Sending Originals
When set with this direction,
the original orientation setting
for delivery must be changed.
⇒ P.36 “Sending Scans”
Setting the Original on the
Platen Glass
A Lift the ADF.
C Lower the ADF.
Note
❒ Raise the ADF fully (more than
30 degrees). The opening/closing action triggers the automatic
original size detection process.
3
B Place
the original on the platen
glass with the side to be scanned
facing down. Align the far left
edge of the original with the mark.
For information about original orientation, see P.29 “Original Setting”.
A Original width is within 297
mm (11.7").
Setting position
Setting Originals in the ADF
A Adjust the side guides to the size
of your originals.
B Place
your originals face up
(when performing duplex scans,
front page up), and align them.
For information about original orientation, see P.29 “Original Setting”.
Note
❒ If the scan width is the same,
you can set originals that different length.
❒ The originals are scanned in sequence, starting with the top
page.
A Setting an original less than 297
mm (11.7") wide:
TNSY021J
B
Original width is wider than
297 mm (11.7").
Setting position
ZEPY010J
TNSY023J
32
Original Setting
B
Setting an original wider than
297 mm (11.7"):
3
ZEPY020J
When set with this orientation,
the original orientation setting
for delivery must be changed.
⇒ P.36 “Sending Scans”
Note
❒ When performing duplex scans,
original orientation settings
must be changed, regardless of
the orientation of your original.
⇒ P.36 “Sending Scans”
33
Sending Originals
Sending Scans with a Network Delivery
Scanner
Specify a destination and scan your original, then send it to the delivery server.
Documents delivered from the scanner to the delivery server are delivered to the
specified destination according to the settings made in the ScanRouter V2 Administration Utility.
This section describes function displays of the network delivery scanner and the
sequence for sending documents to the delivery server.
3
Note
❒ You need a delivery server to send documents.
❒ To use the ScanRouter V2 Administration Utility, you must first create an address book (list of destinations and senders) on the delivery server. For details
on how to configure the ScanRouter V2 Administration Utility, see the ScanRouter V2 Management Guide and the ScanRouter V2 Administration Utility
Help.
❒ It is possible to send a document of up to 100 pages.
❒ Since you can store up to five documents waiting for delivery in the scanner,
you can scan other documents while one is being sent to the delivery server.
❒ When the following screen appears, the scanner is ready to work as a network
TWAIN scanner. Press [Cancel] to switch to the network delivery scanner
screen.
34
Sending Scans with a Network Delivery Scanner
Displaying Destinations and Senders
When sending documents using the network delivery scanner, specify a destination and a sender. Press [Dest.] or [Sender] on the network delivery scanner
screen. A screen similar to the one below appears.
Note
❒ This is an example of the screen that appears when you press [Dest.]. The
screen configuration is similar when you press [Sender].
❒ If you select "Auto Address Update" in Configuration and make settings so
that the address book (list of destinations and senders) is automatically updated, the address book is updated with the latest information when [Dest.] is
pressed. If you make settings so that the address book is not automatically
updated, the address book is updated only when the scanner is turned on.
1. Page number
3. [Exit]
When destinations and senders are displayed on multiple pages, you can confirm which page they are displayed on.
Press to return the display to the network
delivery scanner screen.
2. Destinations and senders
Destination and sender information registered on the delivery server through the
ScanRouter V2 Administration Utility
appears here.
Note
❒ Up to four destinations and senders
appear on each page.
❒ A ' appears in the check box next to
destinations once you select them.
❒ When selecting destinations and
senders, press 0 or 1 to highlight,
and then press [Select].
3
4. [Select] and [Deselect]
• [Select]
Press to select the highlighted destination or sender. A ' appears in the
check box next to destinations and
senders that have been selected.
Note
❒ You can only select one sender at a
time.
• [Deselect]
Press to cancel the selection of the destination or sender.
5. [↑
↑Prev.] and [↓
↓Next]
These allow you to switch between pages
that display destinations and senders.
35
Sending Originals
6. Short ID number
An ID number is assigned to each destination and sender. You can enter a short
ID number and highlight the desired destination or sender.
Note
❒ The short ID number is a number assigned by the ScanRouter V2 Administration Utility. For details on the
short ID number, see the ScanRouter
V2 Administration Utility Help.
3
Sending Scans
Scanned documents are delivered to a
destination registered on the delivery
server.
Note
❒ Scanned originals are sent from
this scanner to the delivery server,
and then delivered to the specified
destination using specific settings.
❒ The delivery method from the delivery server to the different users
varies according to the ScanRouter
V2 Administration Utility settings.
Note
❒ If the network TWAIN scanner
screen is displayed, press [Cancel].
C Select the scan conditions.
The main scan conditions currently selected appear on the third line
of the screen. If these settings are
satisfactory, proceed to specify a
destination in step D. To change
these settings or confirm detailed
scan conditions, perform the following procedure.
Note
❒ If you want to clear specified
destinations and scan conditions then start from the beginning, press the {Reset} key.
A Press [Menu].
A Set the original.
Note
❒ For details on how to set originals, see P.29 “Original Setting”.
B Confirm that the network deliv-
B Press 0 or 1 to select the scan
conditions of "User 1", "User 2"
or "User 3", and then press [OK].
ery scanner screen is displayed.
Note
❒ You can register the desired
scan conditions in Users 1 to
3 in Scanner Features. If you
register frequently used conditions beforehand, you can
easily select scanning conditions. ⇒ P.17 “Scan Setup”
36
Sending Scans with a Network Delivery Scanner
❒ To confirm the values registered in Users 1 to 3, highlight
the desired scan condition
and press [Status]. The Setting
status screen appears and you
can confirm the values for that
condition. ⇒ P.22 “Checking
the Delivery Result”
❒ When freely specifying registered setting values that you
want to scan with, highlight
"Manual settings" and press
[Settings]. Set the desired settings in the Settings screen
displayed for scan conditions. ⇒ P.40 “Making Scan
Settings Manually”
D Specify the destination for delivery.
A Press [Dest.].
The short ID number and name
for the destinations registered
in the delivery server appear.
Note
❒ If the address book (list of destinations and senders) is automatically updated, you can
always use the latest version
of the address book. If the contents of the address book
change frequently, use the automatic update function.
❒ When the automatic address
book update function is not active and the address book has
been changed on the delivery
server, you must restart the
scanner to update the address
book. If the address book
changes on the delivery server,
documents are not sent. Instead
they are saved in the undelivered data tray until the address
book on this scanner is updated.
B Highlight the name of a destination.
3
If you know the short ID number
of the desired destination, enter
it directly with the number keys.
If you do not know the short ID
number, press [↑
↑Prev.] or [↓
↓Next]
until the destination you want
appears, then press 0 or 1 to
highlight the destination.
Note
❒ You can change the display
sequence for destinations in
the ScanRouter V2 Administration Utility settings.
C Press [Select].
The highlighted name is selected
as the destination and a ' mark
appears in the check box next to
the destination. If you press [Deselect], the selection is cancelled.
37
Sending Originals
D When sending to multiple destinations, repeat steps B to C.
E Once all of the destinations are
specified, press [Exit].
Specified destinations are displayed on the second line of the
screen. If you specified multiple
destinations, press 0 or 1 to
view the other destinations.
3
B Highlight the name of the
sender.
If you know the short ID number of the sender you want to
send information to, enter it directly. If you do not know the
short ID number, press [↑
↑Prev.]
or [↓
↓Next] until the sender you
want appears, and then press 0
or 1 to highlight the sender.
C Press [Select].
E Specify the sender (sender of the
original).
Note
❒ When a sender has been specified, this information is added
to the scan data file. When the
optional ScanRouter V2 Professional is used to send scan data
files as e-mail, the sender information is automatically entered
in the message sender field.
❒ You can omit the sender. If you
do, the sender name will not appear in the sender column.
❒ You can only select one sender at
a time from the sender list registered on the delivery server.
A Press [Sender].
The short ID number and name
of the senders registered on the
delivery server appears.
38
The name you highlight is selected as the sender and a '
mark appears in the check box
next to it. If you press [Deselect],
the selection is cancelled.
D Press [Exit].
F Make
original orientation set-
tings.
If originals are set in an upright ( )
position, perform the following
procedure to change the original
orientation settings when performing duplex scans.
A Press [R
R1↔R2].
Sending Scans with a Network Delivery Scanner
B Select the orientation of the
original and One-sided or duplex.
Reference
For details on selecting original orientation and One-sided or duplex, see P.30
“Original Orientation and Scan
Area Setting”.
C Press [OK].
The display returns to the step
A screen.
G Press the {Start}} key.
The scan starts.
To stop scanning, press the {Clear/
Stop} key. If you stop the scan, the
part of the original that has already
been scanned is deleted and the
original is not sent.
The following screen appears as you
place an original on the platen glass,
after the first page was scanned.
If you want to scan another page,
place the original on the platen
glass and press the {Start} key.
When the scan is completed, press
[End Job].
The operations you need to perform depend on the settings in
"End of Scan Option" settings in
Configuration. See P.39 “Selecting
Options after Scanning”.
Selecting Options after Scanning
End scan operations vary according
to "End of Scan Option" settings in
Configuration.
❖ When "Show options after each scan
job." is selected
When you place originals in the
ADF, the screen below is displayed
once the entire original has been
scanned.
3
• If you press [Add], the original is
scanned and added to the previously scanned document. Place
the original you want to add in
the ADF and press the {Start}
key.
• If you press [New Job], the original is scanned using the same
scanning conditions as the previously scanned document, and
the destination and sender settings are also preserved.
You can continue and use the
same settings, or change the settings as required, and scan the
original as a separate document.
If you set the original and press
the {Start} key, the original
starts scanning as a separate
document.
• If you press [Exit], the display
returns to the network delivery
scanner's Initial screen, and
scanned data is sent to the delivery server.
39
Sending Originals
When scanning with the platen glass,
the following screen appears while
the first page is scanning.
When scanning with the platen
glass, the following screen appears
while the first page is scanning.
If you press [End Job], the following
screen appears.
If you press [End Job], the display
returns to the network delivery
s c a n n e r ' s I n i t i a l s c re e n , a n d
scanned data is sent to the delivery
server.
3
• If you press [New Job], the original
is scanned using the same scanning conditions as the previously
scanned document, and the destination and sender settings are also
preserved.
You can continue and use the same
settings, or change the settings as
required, and scan the original as a
separate document. If you set the
original and press the {Start} key,
the original starts scanning as a
separate document.
• If you press [Exit], the display returns to the network delivery scanner's Initial screen, and scanned
data is sent to the delivery server.
❖ Making settings in "Clear settings after each scan job."
When scanning with the ADF, the
display returns to the network delivery scanner's Initial screen once
scanning has finished, and
scanned data is sent to the delivery
server.
Note
❒ If the {Start} key or [End Job] are
not pressed within 60 seconds,
the scanner finishes scanning,
and the scanned pages are sent
to the delivery server.
Making Scan Settings
Manually
You can select scanning conditions
from the previously set "Manual settings", "User 1", "User 2", and "User 3",
or you can specify your own scanning
conditions.
A Press [Menu] on the network delivery scanner screen.
B With
"Manual settings" highlighted, press [Settings].
The Settings screen for scanning
conditions is displayed.
40
Sending Scans with a Network Delivery Scanner
C Press 0 or 1 until the item you
want to set is highlighted, and
then press [OK].
Note
❒ When the item you want to set
is not displayed, press [↑
↑Prev.]
or [↓
↓Next] to display the desired
item.
3
Reference
For a detailed explanation on
the contents of scanning conditions, see P.17 “Settings”.
D Press 0 or 1 to select the setting
value, and then press [OK].
Note
❒ When you want to enter the value, enter a digit with the number keys, and then press the {#}
key.
E Repeat steps C to D to change other settings.
F Press [OK] to finish.
G Highlight "Manual settings" and
press [OK].
41
Sending Originals
3
42
4. Appendix
Remarks
Observe the following points when setting up the scanner or changing settings.
For details, see the documentation and help for ScanRouter V2 Lite, DeskTopBinder V2, and the TWAIN driver.
❖ When a dial-up router is connected in a network environment
With the ScanRouter V2 Administration Utility, ScanRouter V2 Link or DeskTopBinder V2, for network devices and client computers, the settings for the
delivery server to be connected must be made appropriately.
If the network environment changes, make the necessary changes for the delivery server with ScanRouter V2 Administration Utility.
Important
❒ When the software is set up to connect to the delivery server via a dial-up
router, the router will dial and go on-line whenever connection to the delivery server is initiated. Telephone charges may be incurred.
❖ When connected to a computer that uses dial-up access
• Do not install ScanRouter V2 Lite/Professional on a computer which uses
dial-up access.
• When using the ScanRouter V2 Administration Utility (ScanRouter V2
Lite/Professional), DeskTopBinder V2, ScanRouter V2 Link, or the
TWAIN driver on a computer with dial-up access, dial-up may be performed when connecting to the delivery server and other equipment. If the
computer is set up to connect to the Internet automatically, the confirmation dialog box will not appear, and telephone charges may be incurred
without the user being aware of it. To prevent unnecessary dial-up, the
computer should be set up so that the confirmation dialog box is always
displayed before establishing a connection. Make sure that no unnecessary
dial-up is performed when using the above listed software.
❖ When working in a WAN environment
In a WAN environment, do not use the ScanRouter V2 Link or other ScanRouter V2 Administration Utility installed on a client computer. In some network environments, timeout may occur and normal delivery may not be
possible.
43
Appendix
Troubleshooting
This section describes problems you might encounter during use, their probable
causes and methods to fix the problems. Also, this section contains information
on the meaning of error messages on the operation panel.
The Network Delivery Scanner is Unusable
Conditions
The network delivery scanner screen
is not displayed.
4
Cause, Remedy, Reference
If the scanner displays the network TWAIN scanner
screen upon start up, see P.36 “Sending Scans”, and
switch to the network delivery scanner mode.
If you do not switch to the network delivery scanner
mode, the settings for use with the network delivery
scanner will not work properly. See P.15 “Initial Scanner
Setup” and make network delivery scanner settings.
The scanner Does Not Scan Originals as Expected
Conditions
Scanned images contain noise.
Cause, Remedy, Reference
• The platen glass, ADF platen glass, white
sheet or document roller is dirty.
• Clean the platen glass, ADF contact glass,
pressure plate or document roller as needed.
⇒ See "Cleaning" in the Scanner Reference.
Images are blurred.
• The original was moved during scanning.
Do not move the original during scanning.
• The original was not placed flush on the
platen glass. Make sure that there is no
clearance between the original and the
platen glass.
The image was scanned upside down.
• The original was positioned in reverse.
Make sure that the top/bottom orientation
is correct.
⇒ P.29 “Original Setting”
Images were not scanned.
• The original was positioned upside down.
Make sure that the original facing orientation is correct.
• When placed directly on the platen glass,
the side to be scanned must face down.
When fed via the ADF, the side to be
scanned must face up.
44
Troubleshooting
Conditions
Scanning stops mid-way through.
Cause, Remedy, Reference
• If the scanner's memory (standard: 8 MB)
becomes full during a scan, scanning stops
until there is enough memory to continue.
Wait for scanning to restart. If the optional
memory module is installed, it reduces the
frequency of stops during scanning, and
scanning operations become smoother. ⇒
See "Installation options" in the Network
Quick Installation Guide.
• If scanning at a high resolution, the size of
data increases and scanning stops more
frequently. Scan originals at a moderate
resolution. ⇒ See "Resolution and scanning area" in the Scanner Reference.
4
When an Error Message is Displayed
This section describes error messages that appear on the operation panel of the
scanner. Messages are divided into scan setting errors, hardware errors, and network delivery scanner errors.
Note
❒ If an error message that is not contained in this section appears, turn off the
power switch of the scanner, and then turn it on again. If the message still is
shown, note the content of the message and the error number and contact
your service representative.
Reference
If an error message appears on the client computer from which scanning is to
be controlled, see the Scanner Reference.
When a Scanning Condition Error Message is Displayed
Message
Cannot detect original size.
Check whether original is placed,
and select the proper size.
Cause, Remedy, Reference
The original is not on the platen glass, or it is
placed, but the scan size cannot be automatically detected.
• If the original is not there, place it on the
platen glass.
• Because the scanner detects the scan size
when the ADF is opened and closed, make
sure you open the ADF to an angle of 30 degrees or more.
• Small size paper and some paper sizes may
not be detected automatically. ⇒For details, see the Scanner Reference.
45
Appendix
Message
Invalid data size.
Check the scanning resolution..
Cause, Remedy, Reference
• Since the data size of the original exceeds
the current settings for scan conditions
specified in [Job delivery data max. setting]
in Scanner Features, the original cannot be
scanned. Reduce the degree of resolution
in the scan conditions, or increase the maximum delivery size per document.
• The data size for the original exceeded the
size set for [Job delivery data max. setting]
in Configuration.
Job delivery data max.exceeded. Send the exThe message above is displayed if the first
isting scanned data or delete to cancel this job.
page cannot be scanned. If this occurs,
press [Exit].
The message below is displayed if a page
cannot be scanned after the first page is
scanned. To send the data up to the previous page scanned, press [Send].
If you press [Delete], all data after the first
page is deleted and the document is not
sent.
Rescan the pages that could not be sent as
a separate document.
Job delivery data max.exceeded. The scanned
data has been deleted.
4
When a scanner Error Message is Displayed
Message
Cover Open
Cause, Remedy, Reference
Close left ADF cover.
• The left panel of the ADF is open. Close the
panel.
ADF left in open position.
• The ADF is open. Close it.
Close ADF.
Clear Misfeed(s).
Remove originals from ADF.
Cannot scan. Another application is currently
in use.
• The scanner is being used as a network
TWAIN scanner from a client computer.
Wait a moment before continuing operations.
Functional Problems
• Confirm that the scanner is properly connected to the network.
Turn the main power switch off then on. If the
error appears again, call service.
46
• Some pages are jammed in the ADF. Remove the jammed pages.
• Restart the scanner. If the error appears
again, note the contents of the error message and the error number, and contact
your nearest service center. ("SC4xxx" is
the error number. The number displayed
differs according to the error type.)
Troubleshooting
When a Network Delivery Scanner Error Message is Displayed
Message
Updating the address book...
Please wait.
Address update failed. Try again?
Cause, Remedy, Reference
Press [Dest.] to access the sender and destination information from the delivery server and
update the address book. This function allows
you access the latest destination information.
Depending on the number of destinations and
senders registered, and the network conditions, you may have to wait a moment while
the address book is being updated.
Address book (list of destinations and senders) information could not be accessed on the
network server. Click [Yes] and try again.
4
If the same message appears, one of the following may have occurred.
• The delivery server is not turned on, or it is
not being serviced.
• The delivery server is temporarily down
for reasons such as insufficient memory.
Cannot communicate with the server. Check No response from the delivery server. One of
the operating status and server connection.
the following may have occurred.
• The delivery server is not turned on, or it is
not being serviced. Check with the delivery
server.
• Basic network settings, such as the scanner
address or delivery server address are not
set correctly so the scanner can be used in a
network environment. Confirm initial settings for the scanner and set them correctly.
Error in sending image.
Scan with the same settings and resend.
An error occurred on the network while sending scan data to the delivery server, and the
image could not be sent properly. The scanned
data was deleted. Rescan the original.
If the same message appears after you rescanned the original, the network might be congested. Ask your network administrator.
Page limit exceeded, to scan remaining pages, Continued scanning and reached the maximum
press Exit then Start ( to run as a new Job).
scan limit (100 pages). Press [Exit]. The scanned
original is sent. The specified destination and
scanning condition settings remain the same
even after you have pressed [Exit]. Place the next
original and press the {Start} key.
Job limit exceeded. Please wait until the cur- The delivery server can store up to five docurent data has been sent.
ments at any one time. Once this limit has been
reached, you cannot scan any more documents. Wait until the other documents have
been sent before sending another document.
47
INDEX
C
Caution, ii
Configuration
ADF Thin Paper, 26
Automatic address update, 25
Border Erase, 26
Compression(Binary), 24
Compression(Color/Gray Scale), 24
Date(Year/Month/Day), 24
Delivery Options, 24
End of Scan Option, 26
Function Priority, 23
Job Delivery Data Max. Setting, 26
Language Select, 26
Scanner Auto Reset Timer, 23
sRGB, 25
TWAIN Connection Timeout, 23
Unit of Measure, 25
Custom Size, 20
D
DeskTopBinder V2 Lite, 9
Displaying destinations and senders, 35
Setting on the platen glass, 40
N
Network delivery scanner overview, 1
48
S
Scan conditions
Density, 18
Edge smoothing, 19
Erase color, 18
Filter, 19
Noise reduction, 18
Positive/Negative, 19
Register, 17
Resolution, 18
Scan size, 18
Scan type, 17
ScanRouter V2 Lite, 8
Sending documents
Setting on the platen glass, 34
Setting originals, 29
Setting originals in the ADF, 32
Setting the original
Setting on the platen glass, 32
Software installation, 12
Software on the CD-ROM, 7
T
Troubleshooting, 44
W
Warning, ii
MEMO
49
MEMO
50
EE
GB
UE
USA G558