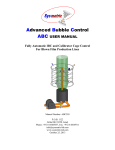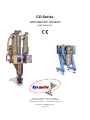
1
CD Series GRAVIMETRIC DOSERS USER MANUAL Hatasia St., Afula Illit 1857617, ISRAEL Tel: +972-4-6069700 Fax: +972-4-6405911 [email protected] www.sysmetric-ltd.com MANUAL NUMBER: NS5V5 April, 2013 User Manual CD Series Table of Contents 1. INTRODUCTION .................................................................................................................. 4 1.1. 1.2. 1.3. 1.4. 2. STANDARD FEATURES ........................................................................................................... 4 HAZARDS .............................................................................................................................. 5 SAFETY FEATURES ................................................................................................................ 5 SAFETY SYMBOLS ................................................................................................................. 5 SYSTEM OVERVIEW .......................................................................................................... 6 2.1. BATCH DOSING ..................................................................................................................... 6 2.2. OPERATOR PANEL ................................................................................................................. 7 2.3. SYSTEM DISPLAY .................................................................................................................. 8 2.3.1. Entering Numeric Values .............................................................................................. 8 2.3.2. Main Screen .................................................................................................................. 9 2.3.3. Program Screen .......................................................................................................... 10 2.3.4. Operate Screen ........................................................................................................... 11 2.3.5. Service Screen............................................................................................................. 12 2.4. MAIN RAW MATERIAL CHANNEL........................................................................................ 13 2.5. RAW MATERIAL VIBRATIONAL CHANNELS ......................................................................... 13 2.6. WEIGHING BUCKET ............................................................................................................. 14 2.7. MIXER ................................................................................................................................. 14 2.7.1. Positive Pressure Mixer .............................................................................................. 14 2.7.2. Negative Pressure Mixer ............................................................................................ 14 2.8. HOPPER FLANGE AND BOTTOM FLANGE ............................................................................. 15 2.9. DEMAND SENSOR ................................................................................................................ 15 2.10. POWER AND CONTROL .................................................................................................... 15 2.11. NORMAL OPERATING SEQUENCE..................................................................................... 16 3. INSTALLATION AND CHECK-OUT .............................................................................. 17 3.1. 3.2. 3.3. 3.4. 4. OVERVIEW .......................................................................................................................... 17 INSTALLATION..................................................................................................................... 17 MIXER CHECK-OUT............................................................................................................. 18 CHECKING THE LOAD-CELL ................................................................................................. 19 SYSTEM OPERATION ....................................................................................................... 20 4.1. 4.2. 4.3. 4.4. 5. STARTING THE UNIT ............................................................................................................ 20 BRINGING THE UNIT TO A FULL STOP .................................................................................. 20 CLEANING THE UNIT FROM A PREVIOUS JOB ....................................................................... 21 ENTERING A NEW FORMULA INTO THE UNIT ....................................................................... 22 SERVICE AND MAINTENANCE ..................................................................................... 23 5.1. LOAD-CELL CALIBRATION................................................................................................... 23 5.2. VIBRATOR TUNING .............................................................................................................. 25 5.2.1. Vibrator Screen........................................................................................................... 25 5.2.2. Manually Operating the Vibrators ............................................................................. 25 5.2.3. Sleeve Height Adjustment ........................................................................................... 26 5.2.4. Flow Parameter .......................................................................................................... 26 5.3. SYSTEM AND BATCH PARAMETERS ..................................................................................... 26 5.3.1. Bucket Size and Batch Size ......................................................................................... 27 5.3.2. Mixing Time ................................................................................................................ 27 5.4. SYSTEM MONITORING ......................................................................................................... 28 5.5. VACUUM ............................................................................................................................. 29 5.6. AMPLIFYING CARD ADJUSTMENT ....................................................................................... 30 5.7. RAW MATERIAL SENSOR ..................................................................................................... 32 5.7.1. Sensitivity Calibration ................................................................................................ 32 6. TROUBLESHOOTING ....................................................................................................... 33 -2- www.sysmetric-ltd.com CD Series User Manual 6.1. ALARM LOG ........................................................................................................................ 33 6.2. ALARMS LIST ...................................................................................................................... 34 6.2.1. “Bad Conveying Hopper Loader #” ........................................................................... 34 6.2.2. “No Flow Channel #” ................................................................................................ 34 6.2.3. “Short Circuit in Vibrator #” ..................................................................................... 35 6.2.4. “Open Circuit in Vibrator #” ..................................................................................... 35 6.2.5. “Vibrator Card is Not Responding” ........................................................................... 35 6.2.6. “Material Leaking From Channel #” ......................................................................... 35 6.2.7. “Weighing Error” ...................................................................................................... 35 6.2.8. “Formula Not Replaced” ........................................................................................... 36 6.2.9. “Mixer is Empty” ....................................................................................................... 36 6.2.10. “Mixer Not Rotating” ................................................................................................. 36 6.2.11. “Low Battery in PLC” ................................................................................................ 37 6.2.12. “Emergency Stop” ...................................................................................................... 37 6.2.13. “Bucket Not Close” .................................................................................................... 37 6.3. OTHER PROBLEMS ............................................................................................................... 38 6.3.1. Unit Does Not Make Batches ...................................................................................... 38 6.3.2. Unit Doesn’t Stabilize ................................................................................................. 38 6.3.3. Mixer Overload Protection Trips Repeatedly ............................................................. 38 6.3.4. The Unit Does Not Stay Calibrated Over Time .......................................................... 39 APPENDIX A – DIMENSIONS AND VOLUMES ................................................................... 40 APPENDIX B – SPARE PART LIST ......................................................................................... 42 APPENDIX C – ELECTRICAL DIAGRAM OF CD CONTROLLER .................................. 49 APPENDIX D – SYSTEM SPECIFICATION ........................................................................... 50 APPENDIX E: CERTIFICATES OF CONFORMITY ............................................................ 51 www.sysmetric-ltd.com -3- User Manual CD Series 1. Introduction The CD series of Gravimetric Dosers is Sysmetric’s solution to raw material dosing for extrusion and injection molding processes. The CD doser reduces material cost, utilizing its high accuracy to lower the amount of expensive additives in the product. The batch weighing nature of the doser offers calibration-free operation and up-to-the-gram accumulation of raw material flowing through the system. The mechanical simplicity of the CD series units, and its practical design, ensures easy maintenance-free operation. The control unit combines automatic adaptive tuning and noise filtering algorithms with the ruggedness, open architecture, and extensibility of an industry-standard PLC. The CD Series dosing units are divided into 5 models for different capacities: CD100 for up to 100Kg/h CD400 for up to 400Kg/h CD800 for up to 800Kg/h CD800HD200 for up to 1000Kg/h CD800HD400 for up to 1200Kg/h The stated capacities refer to granulated material with 0.5 Liter/Kg density and may vary for different materials. Note: all of the information on CD800 in this manual also refers to the CD800HD200 and the CD800HD400 models unless otherwise specified. 1.1. Standard Features -4- Works with extruders and injection molding machines. Vibrational feeders for all but the main channel accommodates most existing raw materials, in granule, powder and regrind forms. Highly accurate gravimetric dosing, utilizing automatic adaptive tuning for each ingredient. Specifies percentage for each ingredient. Special vibrators controller for high accuracy at high throughputs. Single Off-center load-cell maintains high accuracy without the need for frequent calibrations. Screw type vertical mixer. Color touch-screen display for programming and monitoring system operation. OMRON host-link interface support enables integration with standard HMI/SCADA (Human machine interface) software. Alarms for system failures and hardware malfunctions. Monitors total amount of material for each channel. Easy system cleanup when changing jobs. Material hoppers, channels and mixer are all made of stainless steel. All unit parts are easily replaceable. Optional Vision MES Extrusion or Injection PC software for remote system operation and data acquisition. www.sysmetric-ltd.com CD Series User Manual 1.2. Hazards The Mixer is driven using substantial torque. Never place your hand in the mixer chamber while power is on. Serious injury could result. The main channel valve can slam-closed without warning. It will cause injury to your fingers. The power and the control cabinets contain high voltage electricity. The key to these cabinets should be in the possession of service personnel only. 1.3. Safety Features The service door is equipped with a safety interlock switch that prevents the mixer motor from running when the door is opened. Do not attempt to bypass this switch. 1.4. Safety Symbols Below are examples of safety symbols and their meanings. Consider those warning where the symbols appear on the system. 1. Caution – consult accompanying documents ! 2. Caution – risk of electric shock 3. Ground – connect power supply ground wire here www.sysmetric-ltd.com -5- User Manual CD Series 2. System Overview 2.1. Batch Dosing Batch dosing is a method of dosing whereby the system prepares the blend in batches (as opposed to continuous feeding of various kinds). In each batch the ingredients are fed one at a time into a weighing bucket according to their percentage in the batch and the batch is then mixed. Batch dosing offers several advantages over continuous loss-in-weight dosing: Single weighing unit, as opposed to multiple weighing units in continuous feeding systems. The multitude of weighing units in continuous feeding systems introduces the need for frequent component calibration. If one of the load-cells loses calibration, it will continuously feed the wrong amount of material, causing damage to product quality or raising material costs without the system ever knowing about it. Some of the higher-end loss-in-weight systems are capable of calibrating themselves, which makes them more costly. The batch system doesn’t have this problem at all since one load-cell weights all ingredients, thus, ensuring accurate proportioning of the ingredients. The single weighing unit approach also lowers the cost of the system. The batch system always operates in “closed-loop mode”. The weighing unit is continuously weighing and can determine the system’s accuracy and correct it as needed. A loss-in-weight system on the other hand has “refill” periods where the feeder switches to the volumetric mode of operation since it can’t determine how much material has passed through it. The batch system can accurately total the amount of each ingredient that passed through it, to allow automatic reliable inventory and waste control. Loss-in-weight systems can only estimate the total. The CD doser employs a special kind of batch dosing. The ingredients are divided into a main component and additives. The main component is fed through the “main channel” and the additives are fed through the “additive channels”. The main channel uses gravitational feeding and the additive channels are fed using vibrational feeders. The main component is fed first and the actual amount that has been fed serves as the basis for calculating the amounts of the additional components. This method increases the doser’s production rate while retaining accuracy. Note: Although the term “Additive Channels” is used, each of the additive channels can feed the full range 0-100% of the batch. The main channel on the other hand, can be zero, or 20 to 100% of the batch. The reason for this is that the main channel is less accurate than the additive channels. -6- www.sysmetric-ltd.com CD Series User Manual 2.2. Operator Panel SYSTEM 0 1 ALARM CANCEL Omron NS-5 Display The operator panel contains the following components: 1. SYSTEM switch – for activating and stopping the system. Note: switching the SYSTEM switch to 0 position stops the unit only after it finishes the current batch. 2. System Status Indicator. This indicator is a green lamp located in the SYSTEM switch. It has three modes: 1. Off: The unit is stopped. 2. On: The unit is waiting for a demand from the processing machine. 3. Blinking: The unit is preparing a batch. 3. ALARM CANCEL push button. This push button has four functions: 4. Inhibiting unit alarm (R11 potential free contact). 5. Display and toggle unresolved alarms on the display. 6. Stopping the unit in the middle of a batch preparation cycle by pressing ALARM CANCEL continuously for ten seconds (SYSTEM switch should be off). 7. Holding ALARM CANCEL push button pressed for three seconds will turn on all the lamps for testing the lamps. 4. Alarm Indicator. This indicator is a red lamp located in the ALARM CANCEL push button. It flashes whenever there is an active alarm. 5. Programming/Monitoring display. The display has three major functions: 8. Monitoring the unit’s performance 9. Entering recipes and operation parameters 10. Performing maintenance tasks www.sysmetric-ltd.com -7- User Manual CD Series 2.3. System Display Figure 2.3-1 – System Display The system display is a color touch-screen panel. Every operation on the display is carried out by pressing gently on the display. Activating a button is carried out be pressing gently on the display where the button appears. Changing numeric values is carried out by pressing gently on the display where the value is written. 2.3.1. Entering Numeric Values Several screens (e.g. PROGRAM screen) have one or more editable numeric items (e.g. the percentage of each component). To modify the value of an item, carry out the following steps: 1. Select the item that you want to edit by pressing gently on the display where the item is shown. A pop-up screen with a numeric keypad will appear on the display. 2. Enter the new value using the numeric keypad. If the item has a decimal point, use the ‘.’ key to move to the fractional part. For example, to enter 12.3, push ‘1’, ‘2’, ‘.’ followed by ‘3’. 3. Press the Enter key to confirm the change. The keypad screen will close and the item will have the new value. Cancel editing by pressing the X button in the keypad screen. Figure 2.3-2 – Numeric keypad -8- www.sysmetric-ltd.com CD Series User Manual 2.3.2. Main Screen Pressing the MAIN button shows the main screen on the display which is used for monitoring the system. This screen shows the active formula, the actual performance of the system (formula accuracy) and the total amount of material that was dispensed at each channel and by the whole system. Figure 2.3-3 – Main Screen The ACTIVE column shows the current active formula with the desired percentage of each channel and the ACTUAL column shows the actual percentage achieved in the last cycle. Note that, since several batches are mixed together in the mixer, the actual accuracy obtained is better than the one displayed because the errors have a tendency to cancel out. The TOTAL column displays the total amount of material that was dispensed at each channel and by the whole system. The accumulators never reset themselves. Reset them by pressing the Reset button on the main screen. Note that the same set of accumulators may be read and reset through the Host Link interface to manage the material consumption of the process machine. If such a setup is used, the accumulators should not be reset from the display. An optional key can be provided to prevent reset of totals via the display. Note: the number of channels that appear in the main screen (5 channels in the above example) depends on the actual number of channels in the dosing system. The number of channels is determined by the customer. www.sysmetric-ltd.com -9- User Manual CD Series 2.3.3. Program Screen The PROGRAM button is used to display the program screen. In this screen the next formula to be used is entered. The next formula is specified by entering the weight percentage for each channel. If the sum of the new SET formula is 100% the Formula Replace button will appear enabling replacing the ACTIVE formula with the new SET formula. If the Formula Replace button is pressed when the unit is in the middle of a batch preparation cycle, the new formula will be activated on the start of the next cycle. Entering values in this screen does not affect the operation of the unit as long as the Formula Replace button is not pressed. The new formula will only be active after the Formula Replace button is pressed and a new batch is prepared. Changing the formula may not immediately change the output of the unit because the mix chamber contains an amount of blended material equal to several batches. It is recommended to clean the mixing chamber prior to any formula change. Figure 2.3-4 – Program Screen Note: the number of channels that appear in the program screen (5 channels in the above example) depends on the actual number of channels in the dosing system. The number of channels is determined by the customer. - 10 - www.sysmetric-ltd.com CD Series User Manual 2.3.4. Operate Screen Pressing the OPERATE key will switch the display to the operate screen. This screen contains various control buttons for setting the system operation: 1. Default Controls: Channel #1 Emptying – manually drains material from the main channel. Holding this button pressed will open channel #1 and will keep it open as long as the button is pressed. 2. Optional Controls: Program Local/Remote – activating remote PC control. This option is available when the dosing unit is connected to a remote PC and is used to enable formula replacement and totals reset only via the remote PC. Machine Conv – activating hopper loader on the production machine for conveying material from the dosing unit to the production machine. This hopper loader is used when the dosing unit is not installed on top of the production machine. Recycled – available when working with recycled (re-ground) material. Activating this option takes the recycled channel percentage out of the dosing formula. Low Level – preparing batches according to a low level proximity switch. When working at low level mode the system holds one prepared batch at the weighing bucket which is dropped down to the mixing chamber according to the low level Demand proximity switch (instead of holding the mixing chamber filled with prepared material). This option requires the installation of a low level proximity switch. Figure 2.3-5 – Operate Screen Note: Machine Conv, Program Local/Remote, Recycled, Low Level and other optional control switches are available only if specified by the customer. www.sysmetric-ltd.com - 11 - User Manual CD Series 2.3.5. Service Screen The SERVICE key is used to access the service screen in order to adjust display parameters and access various maintenance screens. Note: entering the Service screen requires an access code. The default code is 4321. Display Parameters: Language – select the interface language. Brightness – set the screen brightness. Contrast – set the screen contrast. Time and Date – set the current time and date (for the alarm log). Imperial/Metric - select units. Maintenance Screens: Calibrate – calibrating and checking the weighing amplifier and load-cell. See 5.1 for details. Vibrators – manually activating the vibrators in order to tune the vibration level. See 5.2 for details. Parameters – setting system and batch parameters. See 5.3 for details. Monitor – view the batch cycle. See 5.4 for details. Vacuum – activating and monitoring the hopper loaders and vacuum pumps. See 5.5 for details. ETN IP – edit IP address Figure 2.3-6 – Service Screen Note: Vacuum maintenance is available only if the dosing system controls the hopper loader and/or a vacuum pump. - 12 - www.sysmetric-ltd.com CD Series User Manual 2.4. Main Raw Material Channel Figure 2.4-1 – Main Channel The gravitational main channel has a valve that is operated by air cylinder. When the cylinder is in the (+) position the valve is closed. When the cylinder is in the (-) position the valve is open. The cylinder is operated by a pneumatic valve that is mounted on side of the control cabinet. An indicator shows the valve’s position. 2.5. Raw Material Vibrational Channels CD100 CD400/CD800 Figure 2.5-1 – Vibrational Cannel 1- Material container 2- Adjustable sleeve 3-Vibrational feeder 4- Locking knob Each channel has an adjustable automatically controlled vibration level. Above the vibrator funnel sits the raw material container that can be filled up using manual or automatic means (usually a hopper loader or venturi-valve-type loader that is mounted on the hopper flange). The container has an adjustable sleeve on its exit that allows better control over the material flow rate. On CD400 and CD800 units the channel’s vibrator can be rotated backwards for easy emptying and cleaning of the container. On CD100 units the vibrator is rotated sideways and a manual activation button is used for draining the container. www.sysmetric-ltd.com - 13 - User Manual CD Series 2.6. Weighing Bucket CD100 CD400/CD800 Figure 2.6-1 – Weighing Bucket 1- Loadcell 2- Weighing Bucket ATTENTION! DO NOT APPLY FORCE ON THE WEIGHING BUCKET THE BUCKET DRAIN DOORS CLOSES ON POWER OFF AND WHEN CALIBRATING The weighing bucket (2) sits on an offset-center type loadcell (1). The bucket is situated inside the mixing chamber which shields the bucket and the loadcell from knocks. The signal from the loadcell is amplified by an electrical circuit that filters out noise and high frequency vibrations. A pneumatic valve controls the weighing bucket’s doors. 2.7. Mixer The mixer is a vertical screw operated after each batch preparation for mixing the ingredients. A safety interlock switch disables the mixer rotations when the service door is opened. There are two types of mixers: positive pressure mixer and negative pressure mixer. ATTENTION! ALWAYS TURN THE MAIN SWITCH OFF BEFORE SERVICING THE MIXER DO NOT BYPASS THE SAFETY INTERLOCK OR SERIOUS INJURIES MAY RESULT 2.7.1. Positive Pressure Mixer Positive pressure mixer mixes the batch by pushing material downwards at the center of the mixing chamber. The material then flows back upwards up the sides of the chamber. This type of mixer rotates counterclockwise and can work without synchronization with the batch preparations. The following table details the diameters of positive pressure mixers: CD100 80 mm CD400 105 mm CD800 105 mm 2.7.2. Negative Pressure Mixer Negative pressure mixer mixes the batch by pulling material upwards at the center of the mixing chamber. The material then flows back downwards at the sides of the chamber. This type of mixer rotates clockwise and usually works for 20-30 seconds after the batch has dropped down to the mixing chamber from the weighing bucket. The following table details the diameters of negative pressure mixers: CD100 mm051 - 14 - CD400 mm011 CD800 mm051 www.sysmetric-ltd.com CD Series User Manual 2.8. Hopper Flange and Bottom Flange Figure 2.8-1 – Hopper and Bottom Flanges for CD400/CD800 The mixing chamber has a standard bottom flange. With floor-mounted units, the flange can be mounted on an optional vacuum-takeoff assembly with a bottom slide-gate for emptying the unit. With machine-mounted units, the flange should be bolted to the machine’s hole pattern, usually by using an adapter. An optional magnet chamber with a slide-gate, a drainage outlet and a custom-made bottom flange for the machine can be supplied. 2.9. Demand Sensor The Demand sensor is located in the mixing chamber and its purpose is to trigger a new batch preparation cycle when the material level in the mixing chamber is below the sensor’s height. This sensor is a capacitive normally closed (N.C.) proximity switch with an indicator LED and sensitivity tuning screw. 2.10. Power and Control The power cabinet and the control cabinet of the dosing unit hold the following main parts: Programmable Logic Controller (PLC). Vibrator controller card – this is a module responsible for activating the vibrators at the desired vibration level. It also has some auxiliary relays for the mixer, and a potential free contact for signaling alarm status. Load-cell amplification card. Mixer motor contactor and overload protection. www.sysmetric-ltd.com - 15 - User Manual CD Series 2.11. Normal Operating Sequence The following is a schematic description of how the unit prepares one batch. Its purpose is to give a general understanding of how the various elements in the unit interact and which factors affect the unit’s throughput and accuracy. Initial condition – bucket is open, mixer is stopped and the Demand sensor is covered with material. This means that the last prepared batch is lying unmixed in the mixing chamber above several mixed batches. The new batch preparation cycle starts when the Demand sensor is not covered with material and triggers the following sequence: 1. Demand sensor is not covered. This means, that the entire last prepared batch is inside the mixer and there is no material between the Demand sensor and the weighing bucket. The mixer therefore, can start mixing and the bucket can close. 2. The mixer starts mixing for a time specified by one of the unit’s parameters (usually between 20 and 35 seconds). The following steps occur in parallel with mixer operation: a. Bucket closes. Unit waits for weight to stabilize. b. “Zero weight” level adjusted. Desired percentage for main channel converted to desired weight. c. Fast (coarse) flow of main component, until the weight in the bucket reaches a certain level and the flap closes. At this stage there’s some “in flight” material so that when the weight settles, the bucket will presumably contain the desired amount. d. The valve of the main channel closes and the system waits for the weight to stabilize. e. Based on the actual amount of main component, the control unit computes the desired amounts for the other components. f. Fast (coarse) flow of first additive channel, until the amount in the bucket is near the desired amount (around 90% of the desired amount). g. Slow (fine) flow until desired weight is very near the desired amount. h. Vibrator stops, the system waits for all the material to drop into the bucket and checks for an “overshoot” or “undershoot” condition. In cases of undershoot, a correction is attempted a few times. If needed, a special tuning algorithm corrects the pre-closing variable and the fast flow to slow flow variable. The corrections will take effect in the next batch. Normally, after inserting a new recipe, it will take 2-3 batches to achieve the best accuracy. If the new recipe doesn’t contain any new components then the system will be accurate from the first batch. i. Repeat steps f - h for each component. j. Wait for mixer to stop mixing (Usually, the mixer has stopped mixing by now). 3. Bucket opens, batch falls into the mixing chamber, usually covering the Demand sensor, so the unit returns to the initial condition. If the new batch doesn’t cover the sensor, the unit immediately, moves to step 1. Otherwise, the unit will start again when the material level drops below the sensor level. - 16 - www.sysmetric-ltd.com CD Series User Manual 3. Installation and Check-out The following is an overview of the steps required to install the unit and check that it is working properly. The description assumes some prior technical knowledge. For more information contact Sysmetric. 3.1. Overview The unit is configured at the factory ready to start working as soon as it is “unpacked” However, to ensure proper operation, follow the procedures in this section. The installation and check-out procedure is composed of the following steps: Installation. In this step you position the unit in its place, and plug it into the power and air supplies. Mixer checkout. This step ensures that the mixer rotates in the right direction. Load-cell checkout. This step ensures that the load-cell hasn’t been damaged during shipment. 3.2. Installation 1. Positioning the unit: If the unit is floor-mounted, it comes with two legs attached to the unit’s chassis. If the unit is machine-mounted, bolt the unit to the machine (an adapting flange should be supplied - see 2.8). Note: when choosing the location and the orientation for the unit, make sure that the operator panel and the mixing chamber service doors are not obstructed. 2. CD400/CD800 only – open the service door, the weighing bucket is inside the mixing chamber and is not connected to the loadcell to prevent damage to it during shipment. Remove any shipping materials from the weighing bucket and mount it to the loadcell using the two bolts on the loadcell. Use a 5mm Allen wrench to fasten the bolts. Note: for the unit to work properly, the weighing bucket must have NO physical contact with anything except for the loadcell on which it is mounted. Make sure that the bucket is free. Also verify that the air hoses surrounding the bucket don’t come in contact with the walls of the mixing chamber. 3. 4. 5. Connect air pressure supply to the unit through the air filter/regulator with at least 6.5Bar. Lubricated air is NOT recommended. At this stage, both the weighing bucket doors and the main channel valve should be closed. Adjust the pressure regulator to 6Bar. Make sure that the power MAIN SWITCH and the SYSTEM switch are both in the OFF position. Connect the unit to the power supply (3 phases 380VAC, 50Hz): Using a screwdriver, fasten the 3 phase wires to the brown terminal blocks marked L1, L2 and L3 in the power cabinet of the system and the neutral wire to the blue terminal block marked N in the power cabinet Using a ring wrench fasten the ground wire to the screw marked on the side of the power cabinet. ATTENTION! USE AN EXTERNAL 3 PHASE CIRCUIT BREAKER OF AT LEAST 6AMP AND AN EXTERNAL OVER CURRENT PROTECTION RATED MAXIMUM 6AMP FOR THE POWER SUPPLY, USE A CABLE OF AT LEAST 1.5mm² (16AWG), RATED FOR AT LEAST 6AMP THAT IS SAFETY APPROVED MAKE SURE THAT THE GROUND WIRE OF THE POWER SUPPLY CABLE IS COLORED YELLOW/GREEN www.sysmetric-ltd.com - 17 - User Manual CD Series AIR PRESSURE: IT IS THE RESPONSIBILITY OF THE INSTALLER TO ENSURE (BY MEANS OF PRESSURE REGULATOR, PRESSURE RELIEF VALVE OR ANY OTHER MEANS) THAT THE AIR SUPPLY PRESSURE WILL NOT EXCEED 10 BAR 6. Turn the MAIN SWITCH to 1. At this stage nothing should happen and all indicators should be off. Figure 3.2-1 – Power supply connection 3.3. Mixer Check-Out Make sure that the mixer’s service door is closed and secure. Manually operate the mixer using the contactor in the power cabinet. Make sure that the mixer rotates in the direction pointed to by the arrow on the mixer motor. If the mixer does not rotate at the correct direction switch one of the phases of the power supply. See 2.7 for details on the mixer rotation direction. ATTENTION! DO NOT OPERATE THE MIXER WHEN THE SERVICE DOOR IS OPEN WHEN OPERATING THE MIXER DIRECTLY FROM THE CONTACTOR THE SAFETY INTERLOCK SWITCH IS BYPASSED - 18 - www.sysmetric-ltd.com CD Series User Manual 3.4. Checking the Load-cell 1. 2. 3. 4. 5. 6. Make sure the MAIN SWITCH is on and that the SYSTEM switch is off. In the display, press SERVICE, enter the access code (4321) and press Calibrate. The display should switch to the Calibration screen. The Mass field should show 0 (zero). If not, refer to chapter 5.1 “Load-cell Calibration”, to calibrate the unit. Open the service door, and gently press and release the bucket. The value of Mass should rise and then drop back to zero (plus or minus 2 grams). Gently pull the bucket upwards and release it. The value should decrease below zero and then rise back to zero (plus or minus 2 grams). Press the MAIN key on the display. If the weight does not return to its original value, then something is touching the weighing bucket or the load-cell. The unit cannot work reliably in this condition. Figure 3.4-1 – Calibration Screen Note: the steps described here are the first steps in the calibration procedure. For more information and details see 5.1. www.sysmetric-ltd.com - 19 - User Manual CD Series 4. System Operation 4.1. Starting the Unit The following procedure is used to start the unit: 1. Make sure that the SYSTEM switch is off. 2. Turn MAIN SWITCH on to connect the main power supply. 3. Verify that each channel is programmed with the correct percentage. If not move to the program screen and set the correct formula. 4. Make sure that all the raw material containers contain the correct raw material. 5. Turn SYSTEM switch to the on position. 4.2. Bringing the Unit to a Full Stop The following procedure describes how to stop the unit, after which, the unit can be serviced. It is assumed that the unit is working. 1. Turn SYSTEM switch to the off position. 2. Wait for the system status indicator to go off. Note: to stop the unit, in the middle of a batch preparation cycle, move SYSTEM switch to off and continuously press the ALARM CANCEL push-button for 10 seconds. - 20 - www.sysmetric-ltd.com CD Series User Manual 4.3. Cleaning the Unit from a Previous Job The following procedure is to be used when a complete cleaning of the unit is required: 1. Bring the unit to a full stop (See 4.2). 2. Turn off the hopper loader of the system (via program screen). 3. Empty the main channel by pushing the CHANNEL #1 EMPTYING button in the operate screen. The valve stays open as long as the button is pressed. 4. Empty vibrational channels: Cannels 2-5 on CD400/CD800 units – unlock the clamps at the bottom of the vibrator’s support and rotate the vibrator backwards. The material flows from the rear of the funnel. Channel 6 on CD400/CD800 – same as channels on CD100. On the CD100 – rotate the vibrator sideways, and start it manually by pressing the pushbutton on the vibrator. CD100 CD400/800 Figure 4.3-1 – Purging Material 5. 6. 7. Clean the containers with compressed air or with a vacuum cleaner. Turn the main switch off. Open the mixing chamber service door. Clean both the interior and the exterior of the weighing bucket with compressed air. Note: try not to touch the bucket. In any event, be careful not to apply pressure on the weighing bucket or the loadcell may be damaged. 8. 9. Drain the mixing chamber by opening the drainage outlet and clean with compressed air. Close the service door and turn the main switch back on. Close all service doors. www.sysmetric-ltd.com - 21 - User Manual CD Series 4.4. Entering a New Formula into the Unit 1. 2. 3. Press the PROGRAM key on the display. Set the desired percentage for each additive channel. Remember that the main channel can be zero or 20-100% and that the formula must add up to 100% Press the Formula Replace key to activate the new formula. Note: it is recommended that the mixing chamber be drained whenever the formula is changed. It is obvious that the mixing chamber should be drained and cleaned while changing materials (especially colors) but it is less obvious if only a change in percentage is needed. The reason behind this is that the mixing chamber always contains blended material. This is done to improve the accuracy of the unit, as well as to facilitate the use of the unit as an “active hopper” above the process machine. If the formula is changed without draining the mixing chamber, the new batches will mix with the old ones, causing a very slow and gradual change. - 22 - www.sysmetric-ltd.com CD Series User Manual 5. Service and Maintenance 5.1. Load-cell Calibration Load-cell calibration is carried out in order to verify that the load-cell is operating properly and to ensure that the weight reported by the unit is identical to the actual weight of raw material in the bucket. It is recommended to perform this calibration every six months. During the calibration procedure, three checks are performed: Hysterasis Test – ensures that there is no friction in the load-cell and weighing bucket. Calibration Test – ensures the correct ratio used by the unit, to convert from the load-cell voltage output to the actual displayed weight. Linearity Test – ensures the linearity of the load-cell. There are two important notes about these tests: 1. Each of these tests must be performed in order to ensure proper functioning of the unit. 2. There is no point in performing a test if the unit failed a previous test. For example, if the unit fails the hysterasis test then there is no point in performing the calibration test, because there is some friction (mechanical or otherwise) that is preventing the load-cell from working properly. Calibration Procedure: 1. Bring the unit to a full stop by turning SYSTEM switch to off, wait for the system to finish the current batch and for the bucket to open. 2. If the unit is floor-mounted, disable blend conveying from the unit. (The air flow may exert pressure on the load-cell). 3. Open the service door on the mixing chamber and clean the weighing bucket with compressed air. In addition clean the space between the load-cell and the plate above it. Make sure nothing is touching the bucket, and that there is nothing above the load-cell. 4. Press the SERVICE button on the display and then press Calibrate. The display switches over to the calibration screen. This screen has the following fields: Ampl. – displays the weighing amplifier output voltage. Mass – shows the actual net weight. Ref – the reference weight used in the calibration procedure. Calibrate Mode – press this button to enable calibration of the system. Once you press the Calibration Mode button, two more buttons will appear: TARE – this button sets the zero point of the load-cell. CAL – this button calibrates the weighing Figure 5.1-1 – Calibration Screen www.sysmetric-ltd.com - 23 - User Manual CD Series Note: when activating calibrate mode the bucket door will close and will remain closed while the system is in calibrate mode. Entering the Service screen requires an access code. The default code is 4321. 5. 6. When there’s no load on the bucket, the voltage display Ampl should show 0.000.1V. If the value exceeds this tolerance, make sure the weighing bucket is empty and has no forces exerted on it. If the value is still not zero, perform amplifying card calibration (see 5.6) and perform a complete calibration procedure (see 5.1). Open the service door on the mixing chamber and install the calibration tray. Wait 10 seconds for the weight to stabilize. Press TARE so the unit can “learn” the weight of an empty bucket. The Mass value should show 0 (zero). CD100 CD400/800 Figure 5.1-2 – Calibration Tray 1 – Calibration Tray 7. 8. 2 – Calibration Weight Hysterasis test – gently press the weighing bucket and release it. The value Mass should increase and then drop back to zero, meaning that it returned to its original weight. Allow a tolerance of 2 grams. Gently pull the bucket up and let go of it, the value should now drop below zero, and then return to zero. Calibration test – press TARE to counter any residual effects from the hysterasis check. Put a reference weight according to unit model on the calibration tray. The weight of the reference weight must be known within 1g. Make sure the Ref value matches that of the reference weight, or change the Ref value accordingly. If the load-cell is calibrated, the Mass value should match that of the Ref value (allow a tolerance of 2 grams). If the weight reported matches that of the reference weight, skip to step 10. If not, perform steps 5-8 again, before continuing to step 9. The reason for redoing steps 5-8 is that it’s not likely that the conversion factor has changed because the amplifying card’s gain is very stable and so is the load-cell. Recommended reference weights for the various models: CD100 1,000-2,000g CD400 3,000-4,000g CD800 7,000-8,000g CD800HD200/400 10.00-12.00kg Calibration – after performing steps 1 through 8, while the reference weight is still on the tray, press CAL. The unit calibrates it self and the Mass value will match the Ref value (1g). 10. Linearity test – place a weight that is different from the weight used for the calibration on the tray. Check that the Mass value matches that of the new weight. This can be repeated with additional reference weights in order to verify the whole range. 9. - 24 - www.sysmetric-ltd.com CD Series User Manual Recommended reference weights for the various models: CD100 400-600g CD400 1,500-2,500g CD800 3,500-4,500g CD800HD200/400 5.00-8.00kg 11. Remove the calibration tray and close the service door. When the SYSTEM switch is turned back to on, the unit will automatically exit calibration mode. Alternatively, exit calibration screen by pressing any of the menu buttons. 5.2. Vibrator Tuning 5.2.1. Vibrator Screen The vibrator tuning screen enables adjusting the vibration cycle time of each vibrator and manually operating each vibrator for testing. This screen shows the following parameters: Channel – selecting the channel to tune and test. Power – manually operating the current channel. Cycle – the vibration cycle time of the current channel’s vibrator. Flow parameter – controls the vibration power. Act frequency – the working frequency of the current channel’s vibrator. Act power – the current power of the current channel. Figure 5.2-1 – Vibrator Tuning Screen The cycle time of each channel is set by Sysmetric during manufacturing and should not be changed without consulting Sysmetric technicians. The default Cycle times are: CD100 16-18 CD400 16-18 CD800 20-21 5.2.2. Manually Operating the Vibrators 1. 2. 3. 4. 5. 6. Bring the unit to a complete stop. Switch to vibrator tuning screen, press the SERVICE button and then press Vibrators. Select the desired Channel (2-5) by entering its number. i.e.: Channel: 2 Change the vibration amplitude up to maximum by entering: Power: 19z Check that the act power is 100% (Power = 19z = 100%). If not, enter a higher unit number. Check all channels to make sure that the vibrators are running properly. www.sysmetric-ltd.com - 25 - User Manual CD Series Note: entering the Service screen requires an access code. The default code is 4321. 5.2.3. Sleeve Height Adjustment Above each vibrator, on the output of the container, there is a sleeve that controls the flow of material down to the vibrator. Adjusting the sleeve’s height affects the material flow rate. As a rule, the sleeve height should be as follows: Down to the minimum for very small percentages (below 2%), unless the pellets do not come out, in which case the sleeve should be lifted slightly. Half way up for most other cases. All the way up for hard-flowing materials (such as re-ground) or when the unit has a throughput problem. 5.2.4. Flow Parameter The Flow Parameter determines the vibrator power and can be adjusted for different materials. The four digits of this parameter are divided into two groups with the format of xx.yy: yy – the second two digits define the minimum vibration power. The minimum power is calculated as a percentage by the ratio between the yy parameter and the cycle time: Minimum Power yy Cycle Time x 100 For example: for a relative power of yy=04 when the cycle time is 20msec the minimum vibrator power will be 20%. Normal values for yy are between 03 for small systems that require high accuracy to 08 for relatively large systems that work with high throughputs and/or recycled material. xx – the first two digits determine the threshold for maximum vibrator power. The system changes the vibration power linearly from the minimum power for 0 percent material up to the maximum power for xx percent material. If the set percentage of a channel is higher than xx the vibrator will always work at the maximum power. Normal values for xx are 40 for relatively large systems up to 80 for small systems with high accuracy. 5.3. System and Batch Parameters The unit has parameters that are factory set. These parameters are system constants and are never altered by the software. To modify those parameters, press SERVICE and then press Param to reach the parameters screen. The parameters in this screen are: Bucket size – the maximum weight of material that the bucket can contain. Batch size – the set weight for batch preparation. Mixing time – defines the mixing time at the end of batch cycle. Max Dosing Error – the alarm threshold. Above this value the system will alarm. - 26 - www.sysmetric-ltd.com CD Series User Manual Figure 5.3-1 – Parameters Screen Note: entering the Service screen requires an access code. The default code is 4321. 5.3.1. Bucket Size and Batch Size The bucket size determines the maximum weight of material that can enter the bucket without overflow. It is factory-set to fit the bucket’s physical dimensions and materials used in the process. It may be necessary to change this value if you detect that your material is overfilling the bucket during operation. This happens in particular when working with large amounts of reground material. The Batch Size value determines the batch size in grams. The amount per batch from each channel is the corresponding percentage of this amount. Normal values depend on the materials used and the bucket’s physical dimensions. The following table details the recommended values for the Bucket size and Batch size: Bucket Volume Bucket size Batch size CD100 4.2 Liter 2,100g 1,000-2,000g CD400 9 Liter 4,100g 3,000-4,000g CD800 20 Liter 8,100g 6,000-8,000g CD800HD200/400 50 Liter 22.00kg 15.00-20.00kg Note: If the bucket size is smaller than the batch size, the batch will be prepared in several weighing cycles. This is an incorrect procedure, since the space between the bucket and the mixer is limited. As a rule, set the batch size to 600 grams less than the bucket size. 5.3.2. Mixing Time The Mixing Time parameter determines how long the mixer works during each cycle. Normal values are between 20 and 35 seconds. The minimum mixing time is 10 seconds. www.sysmetric-ltd.com - 27 - User Manual CD Series 5.4. System Monitoring Whenever the unit appears to be malfunctioning, the best thing to do is to watch the batch cycle and look for irregularities or deviations from the normal cycle (as described in section 2.11). Watching the weighing bucket and channels shows you what the unit is doing. The monitor screen on the display shows you what the unit is supposed to do. A combination of both, plus a general understanding of how the unit works, is sufficient to solve most of the problems. To reach the monitor screen, press the SERVICE button on the display and the Monitor button in the service menu. The screen content continually updates during batch preparation, showing the following parameters: Channel – the current working channel. Set – the set weight of material for the current channel. Actual – the actual weight of material from the current channel. Weight – the current total weight in the weighing bucket. Power – vibration level of the vibrator (when the vibrator of the current channel is working). Cycle – the current batch cycle time. Mixing – the current mixing time. Last work time – last batch cycle time. Figure 5.4-1 – Monitor Screen Note: entering the Service screen requires an access code. The default code is 4321. - 28 - www.sysmetric-ltd.com CD Series User Manual 5.5. Vacuum The vacuum screen enables monitoring the status of the hopper loaders and the vacuum pump. Press the SERVICE button on the display and the Vacuum button in the service menu to reach the Vacuum screen. The screen shows the following: 1. Hopper loaders: Transparent if the hopper loader is off (the control switch of the hopper loader at the PROGRAM screen is off). Filled (gray) if the hopper loader is switched on. 2. Vacuuming time – the last vacuum time of each hopper loader. 3. Material level proximity switch: Orange if it senses material (the hopper loader is full). Yellow if it does not sense material (the hopper loader is empty). 4. Vacuum valve: Blue if the valve is closed (the hopper loader is not vacuuming currently). Green if the valve is open (the hopper loader is currently vacuuming). 5. Flap door: Closed when the flap door is closed (the reed switch on the flap door is closed). Opened when the flap door is open (the reed switch on the flap door is open). 6. Vacuum pump: Gray when the vacuum pump is off (the control switch of the vacuum pump on the OPERATE screen is turned off). Green when the vacuum pump control switch is turned on. Flashing green if the vacuum pump is currently working. Red when the vacuum pump is in error. 7. Vacuum Pump valves: Blue if the valve is closed. Green if the valve is open. Figure 5.5-1 – Vacuum Screen Note: the various contents of the vacuum screen (i.e. hopper loader and vacuum pump) are available only if they are present and controlled by the dosing system. Entering the Service screen requires an access code. The default code is 4321. www.sysmetric-ltd.com - 29 - User Manual 5.6. CD Series Amplifying Card Adjustment The amplifying card is factory-set to work with the system’s loadcell. In the following cases the amplifying card should be readjusted: Replacement of the loadcell. Replacement of the amplifying card (the new card should be adjusted). Difficulties in loadcell calibration. The amplifying card is located inside the power cabinet of the dosing unit. Figure 5.6-1 – Amplifying Card The following procedure describes how to adjust the amplifying card to work with the loadcell: 1. Bring the unit to a full stop by turning SYSTEM switch to off, wait for the system to finish the current batch and for the bucket to open. 2. If the unit is floor-mounted, disable blend conveying from the unit. (The air flow may exert pressure on the loadcell). 3. Open the service door on the mixing chamber and clean the weighing bucket with compressed air. Also clean the space between the loadcell and the plate above it. Make sure nothing is touching the bucket, and that there’s nothing above the loadcell. 4. Press the SERVICE button on the display and then press Calibrate to switch to the calibrate screen. Open the power cabinet to gain access to the amplifying card 5. Make sure that the gain jumper is closing the pins marked 01¹ and that the offset jumpers are at the center closing the pins marked 0. 6. Turn Zero trimmer counterclockwise about 20 turns. 7. Turn Cal trimmer counterclockwise about 20 turns. 8. Using a voltmeter, read the voltage at the output terminals of the amplifying card and adjust it to 00.1V by turning the Zero trimmer clockwise. The voltage at the calibrate screen should also read 00.1V. 9. Open the service door and install the calibration tray. - 30 - www.sysmetric-ltd.com CD Series User Manual CD100 CD400/800 Figure 5.6-2 – Calibration Tray 1 – Calibration tray 2 – Reference weight 10. Put a reference weight on the tray and using the Cal trimmer on the amplifying card adjust the voltage according to the following table: Reference Weight Voltage/Kg CD100 1.000kg 2.0Volt CD400 4.000kg 2Volt/Kg CD800 8.000kg 1Volt/Kg CD800HD200/400 8.000kg 0.3Volt/Kg 11. Perform the standard calibration procedure (See 5.1). Note: amplifying card adjustment is no substitute for calibration. Always perform calibration after amplifying card adjustment, even if exact calibration is not needed. www.sysmetric-ltd.com - 31 - User Manual CD Series 5.7. Raw Material Sensor Raw material sensors are found in various places in the system. All systems have the Demand sensor, some have channel container sensors, and some have a low level sensor. The sensors are normally closed (N.C.) connected, which means that they activate the input to the PLC when the sensor does not detect material. The sensor has an indicator LED and there are two types: one where the LED is on when the sensor detects material and one where the LED in on when the sensors does not detects material. This manual refers to the type of sensors where the LED is on when material is not detected. The Sensor’s sensitivity is calibrated by adjusting the sensitivity screw on the back of the sensor. On some sensors, the screw is covered with a plastic cap, which should be removed first. Turning the screw clockwise increases the sensitivity, and turning counterclockwise decreases the sensitivity. Note: It is a common error to turn the cap instead of turning the calibration screw. This is because the cap has the shape of a screw itself. Be sure to remove the cap first. 5.7.1. Sensitivity Calibration Follow this procedure to calibrate the sensor’s sensitivity 1. Make sure the sensor doesn’t have any raw material in its vicinity. For a channel’s container sensors, first empty the container. For the Demand sensor, first clean out the system. 2. Turn the sensitivity screw clockwise to increase the sensitivity until the LED lights up. 3. Slowly turn the sensitivity screw counterclockwise to decrease the sensitivity until the LED extinguishes. Turn the screw counterclockwise half a turn more. - 32 - www.sysmetric-ltd.com CD Series User Manual 6. Troubleshooting An alarm condition exists whenever the system recognizes that a fault has occured. When an alarm condition occurs the unit does the following: The alarm relay closes. Refer to the wiring list for details on how to connect a siren or main alarm indicator to this contact. Pressing the ALARM CANCEL button opens the relay but if the alarm condition continues, the contact closes again after 1 minute. While the alarm is active, a corresponding alarm message is displayed on the display. Pressing the ALARM CANCEL button also deletes this message. Further pressing the ALARM CANCEL button toggles the alarm messages of all active alarms. The alarm is written in the alarm log. The alarm indicator on the operator panel keeps blinking until the alarm is resolved. The system keeps trying to make batches as if an alarm has not occurred (except during weighing errors). 6.1. Alarm Log The system creates an alarm log. Press the ALARM button on the display to switch to the alarm log screen. Figure 6.1-1 – Alarm Screen The alarm log shows the following details: The alarm that was activated. The time at which the alarm was activated. The status of the alarm – red if the alarm is still active or blue if the alarm was stopped. In addition the log can be cleared by marking some or all the alarms and pressing the delete button. www.sysmetric-ltd.com - 33 - User Manual CD Series 6.2. Alarms List The following is a list of alarm messages that can appear on the display according to the active alarm, the possible causes for the alarm and the action to take. 6.2.1. “Bad Conveying Hopper Loader #” Meaning: Malfunction in one of the hopper loaders. Causes: 1. 2. Material is not available for the hopper loader. Malfunction in the vacuum system. Action: 1. 2. Check material availability. Check the vacuum system. 6.2.2. “No Flow Channel #” Meaning: The load on the load-cell does not change when material is supposed to be flowing into the bucket. The channel that should be feeding the material is indicated in the alarm message. Causes: 1. 2. 3. 4. The channel is empty. The channel doesn’t work (main channel). If a vibrational channel is not working, there are separate alarms for that. The weighing bucket is open. The weighing bucket isn’t free to press the load-cell. Action: 1. In accordance with the type of channel that is not working, do the following: Vibrational channel – check the working channel to see if it is empty. If it is, refill the raw material container of the channel. If material is flowing and the alarm persists, go to step 2. Main channel – check if the channel is open and whether material is flowing. If the channel is empty, refill the raw material container of the channel. If material is flowing and the alarm persists, go to step 2. If the valve is closed, make sure the unit is connected to the air supply (check pressure level of 6.5Bar on the air regulation unit). 2. If there is raw material flowing from the channel and the No-Flow alarm is on, it is possible that the unit is clogged up with raw material. If it is, first perform the cleaning procedure described in section 4.3 (apart from clearing the containers of the channels) then restart the system. If the problem persists, proceed to the following: Open the mixing chamber service door and check if the bucket is closed. If it is, proceed to step 3. If the bucket door is open during a No-Flow alarm, it means that something is preventing the weighing bucket from closing. Check that the air pressure is okay and that nothing is mechanically preventing the bucket from closing. If nothing can be found, replace bucket pneumatic valve. 3. Check that the bucket is fastened to the load-cell, and that the load-cell is fastened to the chassis of the unit. Make sure that the bucket does not come in contact with anything but the load-cell. If everything seems fine, stop and clean the unit and perform a calibration procedure as described in 5.1. - 34 - www.sysmetric-ltd.com CD Series User Manual 6.2.3. “Short Circuit in Vibrator #” Meaning: One of the vibrators is electrically shorted. Causes: 1. 2. The vibrator is malfunctioning. The vibrator’s wires are electrically shorted. Action: 1. 2. Check the vibrator’s wires and verify no short circuit. Replace the vibrator. 6.2.4. “Open Circuit in Vibrator #” Meaning: The vibrator is disconnected. Causes: 1. 2. The vibrator’s wires are disconnected from the vibrator controller. The vibrator is malfunctioning. Action: 1. 2. Verify the connections of the vibrator’s wires with the vibrator controller. Replace the vibrator. 6.2.5. “Vibrator Card is Not Responding” Meaning: No communication between the PLC and the vibrator controller. Causes: Blown fuse in the vibrator controller card. Action: Check the fuses on the vibrator controller card. If a fuse is blown replace it with a new one. Note: only use glass cylinder fuse 5x20mm of 3.15Amp. 6.2.6. “Material Leaking From Channel #” Meaning: Material is leaking from the channel. Causes: 1. 2. On channel #1 – no air supply, air valve failure or mechanical interference. On channels #2-#6 – vibrator controller malfunction Action: 1. 2. If the alarm is for channel #1 check: Air pressure supply (check pressure level of 6.5Bar on the air regulation unit). Check intactness of the air valve. Verify no mechanical interference disturbs the channel from closing. If the alarm is for channels #2-#6 check the vibrator controller. 6.2.7. “Weighing Error” Meaning: An illegal voltage from the amplifier card has reached the Analog/Digital converter on the PLC. www.sysmetric-ltd.com - 35 - User Manual CD Series Causes: 1. 2. 3. 4. The unit is clogged up with material. No power reaches the amplifier card. The load on the load-cell is outside the allowed range (either overload or negative load). The load-cell is not properly connected. Action: 1. 2. 3. 4. Check whether the unit is clogged up. If it is, stop the unit and clean it. It may become clogged if the Demand sensor is malfunctioning, or if one of the channels is constantly feeding material due to a malfunction of some other component. Check if the green power LED indicators on the amplifier card are on. If they are, go to step 3. Otherwise resume power to the amplifier card. Open the service door. See that the bucket isn’t touching anything. Make sure that the bucket is fastened to the load-cell and that the load-cell is fastened to the chassis. Stop the unit and perform a calibration check as described in 3.4. 6.2.8. “Formula Not Replaced” Meaning: The formula in the program screen is different from the working formula. Causes: 1. 2. The operator has forgotten to press the Formula Replace key. The operator started to replace the formula and didn’t finish. Action: 1. Press the PROGRAM button and verify that the working formula is the correct one. Either replace the formula by pressing Formula Replace or change the percentages in the program screen, so that they are identical to the working formula. 6.2.9. “Mixer is Empty” Meaning: The material level in the mixer chamber is below the Demand sensor for a long time (usually more than 90 seconds). Causes: The system’s throughput is not sufficient. Action: Consult with Sysmetric about increasing the system throughput. 6.2.10. “Mixer Not Rotating” Meaning: The mixer overload protection has turned on. Causes: 1. 2. There was a disruption in the power supply. The mixer is rotating in the wrong direction. Action: 1. 2. 4. Open the power cabinet and turn the overload protection back on. Verify that the mixer is rotating in the right direction, positive pressure mixer - clockwise, negative pressure mixer – anticlockwise (see 2.7). If the mixer is not rotating in the right direction change the phase order. Check the power supply – 380 V, 3 Phase. A missing phase causes the mixer to rotate in the wrong direction. Verify that the mixer door is shut. - 36 - www.sysmetric-ltd.com 3. CD Series 5. User Manual Verify that the mixer door magnetic safety sensor is working properly. 6.2.11. “Low Battery in PLC” Meaning: The power of the backup battery of the Omron PLC is low. Action: Replace the battery in the PLC. Note: use only Omron's original battery (3G2A9-BAT08). 6.2.12. “Emergency Stop” Meaning: The emergency stop switch on the power cabinet is pressed. Action: Release the emergency stop switch and press the alarm cancel push button for 3 seconds. The system will resume working from where it stopped. 6.2.13. “Bucket Not Close” Meaning: The weighing bucket is not empty when starting a new batch. Causes: 1. 2. Material level in the mixing chamber is too high. The weighing bucket is not draining material. Action: 1. 2. 3. 4. Check that nothing interferes with material draining from the weighing bucket. Check operation of the Demand sensor in the mixer chamber. Check the air pressure supply (check pressure level of 6.5Bar on the air regulation unit). Check the air valve and the air piston of the weighing bucket’s door. www.sysmetric-ltd.com - 37 - User Manual CD Series 6.3. Other Problems The following are problems not detected by the system. Each problem is described along with its possible causes and the appropriate troubleshooting procedure. 6.3.1. Unit Does Not Make Batches Description: The machine needs material but the system is idle. Possible Causes: 1. 2. 3. 4. SYSTEM switch is off. An alarm condition prevents the unit from working. Demand sensor senses material, therefore, no new batch is being prepared. (See 2.9 for a description of the Demand sensor) The PLC is not in “RUN” mode. Action: 1. 2. 3. 4. Check the SYSTEM switch. If it is off, toggle it. If it is on go to step 2. When the SYSTEM switch is on, the system status indicator lamp should be either on or flashing, if it is neither, check the SYSTEM switch itself and the indicator lamp. Check the system alarm indicator. If it is flashing see section 6.2. Otherwise, go to step 3. Check if the Demand sensor detects material. If it is, open the service door on the mixing chamber and check if the sensor is indeed immersed in raw material: If it is immersed in material, then the mixer is full and the unit is OK. If the dosing unit is floor-mounted, check the conveying system from the unit to the processing machine. If there is no material, recalibrate the sensor, or replace it if necessary (see 5.7). Try switching screens on the display. If there is no response, the CPU is probably not in “RUN” mode. Turn the power off, wait 10 seconds and turn the power back on. 6.3.2. Unit Doesn’t Stabilize Description: One of the product’s attributes (e.g. color) is varying. Alternatively, the product is uniform most of the time, but once in a while a major deviation occurs. No unit alarms are active. Possible Causes: It must be noted that any part of the unit could be causing the problem. For example, even if there is a color problem, the problem may be in the main channel which may be working in parallel with the color channel and thereby causing the desired amount of color to be reached too soon. These are the main causes: 1. Two channels are working in parallel due to a malfunction of some component. 2. A problem with the weighing unit. Action: 1. 2. Check whether any alarm is being reported by the system. You can press the ALARM CANCEL button to see whether there is an active alarm or press ALARM to check the alarm log and see if there was an alarm in the system. Perform calibration check as described in 3.4. 6.3.3. Mixer Overload Protection Trips Repeatedly Description: The mixer’s motor overload protection trips several times a day or it trips every time the motor is started. Possible Causes: 1. - 38 - The mixer is rotating in the wrong direction. www.sysmetric-ltd.com CD Series 2. 3. User Manual The load on the mixer motor is too high because of a mechanical problem or because the mixer is clogged up with material. Overload protection malfunction. Action: 1. 2. 3. Check that the mixer motor is rotating in the direction pointed to by the arrow on the back of the motor. If not, switch between two power phases. See 2.7. See if the motor is overheating or if grease is dripping out of the gearbox. These are signs of overload, should they occur, check for possible reasons: mixer clogged up with material or some other mechanical problem. Replace the overload protection unit with a new one of identical specification. ATTENTION! ALL OPERATIONS CONCERNING CHECKS AND REPLACEMENT OF ELECTRICAL PARTS MUST BE PERFORMED BY QUALIFIED PERSONNEL ONLY 6.3.4. The Unit Does Not Stay Calibrated Over Time Description: The unit often fails the calibration test and needs to be recalibrated. The hysterasis and linearity checks have been found to be ok. Possible Cause: The power supply to the unit is not stable (typically too low). Action: Measure the AC power supply to the amplifying card. The voltage between the two 9V terminals (located on the upper left side of the card) and the 0V terminal (located between the two 9V terminals) should be 9-10VAC. If it is less than 9VAC, check the power supply to the dosing unit. The voltage should be within 10% of the rated voltage of the dosing unit. If the voltage is ok, perform calibration and check voltages periodically for an occasionally unstable supply. www.sysmetric-ltd.com - 39 - User Manual CD Series Appendix A – Dimensions and Volumes General dimensions - 40 - www.sysmetric-ltd.com CD Series User Manual Flanges dimensions CD800 Flanges dimensions CD400/CD100 Main Channel Container Vibrator Channel Container Weighing Bucket Mixer Chamber CD100 3.3 Liter 1.2 Liter 4.2 Liter 11 Liter CD400 3.3 Liter 3.3 Liter 9 Liter 20 Liter CD800 7.3 Liter 7.3 Liter 20 Liter 60 Liter CD800HD200 7.3 Liter 7.3 Liter 50 Liter 60 Liter CD800HD400 7.3 Liter 7.3 Liter 50 Liter 90 Liter Volumes Table www.sysmetric-ltd.com - 41 - User Manual CD Series Appendix B – Spare Part List When ordering spare parts, specify the item number, catalog number and description. Power and control cabinets CD100 Power and control cabinets CD400/CD800 (interior) - 42 - www.sysmetric-ltd.com CD Series User Manual Power and control cabinets CD400/CD800 (exterior) www.sysmetric-ltd.com - 43 - User Manual CD Series General View CD400/CD800 - 44 - www.sysmetric-ltd.com CD Series User Manual General View CD100 Vibration channel CD400/CD800 www.sysmetric-ltd.com - 45 - User Manual CD Series Vibration channel CD100 Main channel Weighing bucket CD400/CD800 - 46 - www.sysmetric-ltd.com CD Series User Manual Weighing bucket CD100 Item 1 2 3 4 5 6 7 8 9 10 10 11 12 13 14 15 16 17 18 19 20 21 21 21 22 23 24 25 26 26 26 27 27 27 28 29 30 31 31 31 Catalog Number E50 A15 E62 P101 E-100 E-CQM51CPU-NL CQM1 ID212 CQM OD212 AB 100-M05 AB 140M-C2M-1-1.6 AB 140M-C2M-2.5-1.6 AB B-S271M1A AB B-S191C6 E-NT11S-SF12 AB 800EP-LSM23 AB 800EP-LSM25 AB 800E-3DLOX10 AB 800EP-LF4 AB 800EP-FA6 AB 800E-3LX10 AB 194L-E12-1753 M-M4-3 M-M4-5 M-M4-7 P1 P2 P3 P200 231-3 231 231-1 232-3 232 232-1 M400 M3 M300 E1040x15 E1040x30 E1040x50 www.sysmetric-ltd.com Description Weighing load cell amplifier CD Controller (vibrators operating card ) Transformer 230V / 10, 0, 10, 20, 20,230 Solenoid Valve 24V DC 5x2 1/8” Power Supply 2.5amp CPU for CQM PLC Input CQM card Output CQM card Mixer motor contactor CD100, CD400 Mixer motor overload CD800 Mixer motor overload Semi automatic fuse, 1Amp, for power supply Semi automatic fuse, 6Amp, for PLC Omron NT11 screen Selector switch green lighted head Selector switch orange lighted head Lighted switch complete Lighted push button head, red Lighted push button head, blue Switch complete Main contactor Gear Motor for CD100 Gear Motor for CD400 Gear Motor for CD800 Air cylinder 16x80 ISO, Weighing basket CD400&CD800 Air cylinder 16x25 ISO, Weighing basket CD100 Air Cylinder 16x50 ISO, Filing Valve CD100 Air regulator with filter Transparent cover, rear, for CD100 Transparent cover, rear, for CD400 Transparent cover, front, for CD800 Transparent cover, side, for CD100 Transparent cover, side, for CD400 Transparent cover, side, for CD800 Spring Lock 6701 Adjustable foot pad M16 Screw with plastic head M6 Load Cell 15kg Tedea 1042, for CD100 & CD400 Load Cell 30kg Tedea 1042, for CD800 Load Cell 50kg Tedea 1042, for CD800 HD - 47 - User Manual 32 33 34 34 34 35 36 36 36 37 37 37 38 38 38 38 38 38 38 38 38 39 40 41 - 48 - E1 E2 B1303 B1300 B1301 M2101 A3503-1 A3502 A3501 B2010 A2001 A2002 A1200-18 A1200-19 A1200-20 A1200-10 A1200-11 A1200-12 A1200-14 A1200-15 A1200-16 100 M1 M400-1001 CD Series 30mm Capacity switch, 24V DC Mixer door sensor CD100 vibration channel assembly CD400 vibration channel assembly CD800 vibration channel assembly Vibrator FMC FT-0 CD100 Central channel assembly CD400 Central channel assembly CD800 Central channel assembly CD100 Weighing basket CD400 Weighing basket CD800 Weighing basket CD100 Mixer standard auger CD100 Mixer double auger CD100 Mixer pushing auger CD400 Mixer standard auger CD400 Mixer double auger CD400 Mixer pushing auger CD800 Mixer standard auger CD800 Mixer pushing auger CD800HD-200 Mixer standard auger Plastic glass Locking washer 6mm, starlock CD100 Vibrator locking handle www.sysmetric-ltd.com CD Series User Manual Appendix C – Electrical Diagram of CD Controller L + OUTPUT100. 00 OUTPUT100. 01 OUTPUT100. 02 OUTPUT100. 03 INPUT000. 05 OUTPUT100. 04 OUTPUT100. 05 OUTPUT100. 06 INPUT000. 04 INPUT000. 03 A 24+V 0V A B C CONTROL F.B. MIXER ALARM BUCKET O.L. PROX. AUX. CD CONTROLLER DOOR SW. CH .#1 MIXER O.L. MIXER AUX. PROX . PROX . SW. SW. ALARM CH #4 . CH #5 . 2 CH #6 . CH #7 . M IXER C10 220V 20V 20V TRANSFORMER MIXER MOTOR CONTACTOR VIBRATOR CHANNEL #5 VIBRATOR CHANNEL #4 VIBRATOR CHANNEL #3 VIBRATOR CHANNEL #2 Dry contact www.sysmetric-ltd.com MIXER INLET PROXIMITY MIXER MOTOR OVERLOAD E10 CH #3 . SYSTEM RUN/STOP SWITCH 1 CH #2 . GROUND BUCKET VALVE C 10 - 49 - User Manual CD Series Appendix D – System Specification Power Supply Voltage – 3 Phases 380VAC Frequency – 50/60Hz Current – 2 Amp Air Pressure Supply – 6-8Bar dry air 8mm fast connectors Dimensions CD100 – 600x635x1158mm CD400 – 980x960x1511mm CD800 – 1175x1052x1756mm Weight CD100 – 110kg CD400 – 130kg CD800 – 150kg Environmental Conditions Storage: o Temperature -20°C to 80°C o Humidity 0-90% o Altitude up to 5000m Operation: o Temperature 0°C to 50°C o Humidity 0-85% o Altitude up to 5000m Standards - 50 - CE Approved – EN61010, EN61326 www.sysmetric-ltd.com CD Series User Manual Appendix E: Certificates of Conformity www.sysmetric-ltd.com - 51 - User Manual - 52 - CD Series www.sysmetric-ltd.com CD Series www.sysmetric-ltd.com User Manual - 53 - User Manual - 54 - CD Series www.sysmetric-ltd.com