1
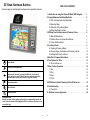
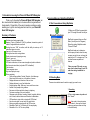
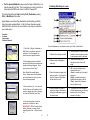
EZ Road Specifications
EZ ROAD MANUAL
Processor
Display
Resolution
ROM
Memory slot
GPS
Precautions and Notices
For the safety of yourself and others, please observe the following
safety requirements:
Ø
USB
Do not attempt to operate any Pharos GPS navigation and routing system in a
vehicle while the vehicle is in motion, or in any way that interferes with safe
driving.
Battery
Ø
Secure your EZ Road to the vehicle in such a way as to not endanger the
driver or passengers while driving or during operation.
Ø
Do not use the EZ Road in any area (country, state, city, etc.) that prohibits the
use of electronic displays in motor vehicles.
Ø
GPS signals cannot pass through opaque solid materials. Overhead obstacles,
such as tall buildings, tunnels, highways, dense trees, and bad weather, can
effect signal reception. If the car’s window tint contains metallic material, GPS
signal cannot pass through.
Ø
Cordless phones, radar detectors, satellite radio receivers, and other wireless
devices may interfere with GPS reception or result in poor GPS reception
quality.
Ø
Navigation maps may contain errors and omissions or may be out-of-date with
recent road changes or conditions. Please be attentive to roadway signage,
all posted roadway information, and the condition of the road itself.
Ø
GPS positioning is intended for use as a reference, not for precise
measurement of direction, distance, location or topography. Routes generated
by Ostia are only recommendations for personal use.
Ø
The calculated route is for reference only. The user is expected to follow the
traffic signs and local regulations.
Ø
Do not leave the product in direct sunlight or heat for extended periods of time.
Overheating the battery can be dangerous and/or cause malfunctions.
Ø
Pharos software and hardware may not be used for any purpose in which
failure could lead to personal injury, physical, or environmental damage.
Ø
Use this product prudently. The product manufacturer is not liable for any
damages or lost profits caused by misuse of the product. Pharos and its
suppliers specifically disclaim any warranties, either expressed or implied, for
their products’ fitne ss for use in any high-risk activity.
Intel XScale PXA-255 300MHz
3 5" Color Transreflective LCD, LED Backlight
320 x 240, 65K colors, QVGA resolution, Landscape
32MB Flash + 32MB SDRAM
SD/MMC slot for memory card
SiRF GPS module built-in + Patch antenna
USB 1.1 (Client, mini USB receptacle) for data
transmission
Rechargeable Lithium battery cell 1350 mAh
SYSTEM REQUIREMENTS for Desktop/Laptop
CPU: Pentium class
Operating System: Windows 95/98/ME/NT/2000/XP
USB port or Card Reader for data transfer to EZ Road; must have
Microsoft ActiveSync installed and connected if transferring data via EZ
Road connection to USB port using MapFinder.
Available hard drive space: 24 MB min. for map installation to EZ Road.
Ostia maps vary in size up to 30 MB for USA maps / 25 MB for Canada
maps. The Ostia maps are made up of 156 maps segments for USA / 15
maps segments for Canada, separated into geographical sections.
i
ii
Charging via USB port
Package Contents
1.
1. Connect the USB
Charging Cable to
the EZ Road unit
and to a Desktop or
Notebook PC via a
USB port.
3.
4.
Charging in the Car
2.
CAUTION: Always make sure to start your vehicle FIRST before
5.
connecting the in-vehicle charger to prevent damage from sudden current
changes.
1. Connect the USB Charging
Cable to the DC Car Charger. Do
not force them together; the USB
connector should fit without
resistance.
Box Contents:
1. EZ Road with 128MB
SD card
2. ActiveSync CD and
Map CDs for the US
6.
2. Plug the USB Charging Cable
into the EZ Road unit and plug the
DC Car Charger into a cigarette
lighter of your vehicle.
3. USB Comm. Cable
(not for charging)
4. USB Charging Cable
5. DC Car Charger
7.
6. Windshield & AC
Vent Mounts
7. User Manual and
Quick Start Guide
iii
iv
EZ Road Hardware Buttons
TABLE OF CONTENTS
Functions apply to Ostia Navigation software unless specified otherwise
Power Button
Return to EZ Road Main Menu
Cycles through the different map views of the Ostia Navigation
software when the route is created and GPS info. (See Section 6)
In the main menu of the EZ Road, it serves as the back button when
accessing other features aside from the navigation software.
Recent Destinations
Zoom-In Button
Zoom-Out Button
1. Introduction to using the Pharos EZ Road GPS Navigator. . . .
2. Copying Maps and Installing MapFinder . . . . . . . . . . . . .
2.1 Get Connected and Using MapFinder
2.2 Selecting Maps
2.3 Extracting & Transferring Maps
2.4 Other MapFinder Functions
3. EZ Road User Interface menus & Common Terms . . . . . . . .
3.1 Main EZ Road Menu
3.2 Ostia Software On-screen Menu Buttons
3.3 Terms & Abbreviations
4. Creating a Route . . . . . . . . . . . . . . . . . . . . . . . . . .
4.1 Opening & Viewing a Maps
4.2 Finding Origins, Destinations and Creating a Route
4.3 Adding Multi-stops to a Route
5. Satellite & Compass Information. . . . . . . . . . . . . . . . . .
6. View Options for Ostia . . . . . . . . . . . . . . . . . . . . . . .
6.1 Zoom-in/Zoom-out
7. Menu Toolbar Functions . . . . . . . . . . . . . . . . . . . . . .
7.1 File
7.2 Find
7.3 View
7.4 Tools
1
2
2
2
3
5
6
6
7
8
9
9
10
12
13
13
14
15
15
15
16
17
8. GPS Status Indicator/ Powering On the GPS receiver. . . . . .
9. Troubleshooting. . . . . . . . . . . . . . . . . . . . . . . . . . .
9.1 Contact Us
10. Software License Agreement . . . . . . . . . . . . . . . . . . .
19
Navigation Pad
Moves up, down, left or right by pressing the corresponding area of the
pad. Press the center of the Navigation Pad to confirm a selection or use
as an Enter key.
v
vi
20
20
20
1. Introduction to using the Pharos EZ Road GPS Navigator
2. Copying Maps and Installing MapFinder
Thank you for choosing the Pharos EZ Road GPS Navigator, an
all-in-one device that enables you to be more efficient, organized, and
travel smarter. Please think of the users’ manual as a reference guide
enabling you to get the most enjoyment and use from your Pharos EZ
Road GPS Navigator.
2.1 Get Connected and Using MapFinder
1) Make sure EZ Road is connected to
your PC through Microsoft ActiveSync.
Microsoft ActiveSync
Summary of Features
MapFinder is opened from your Start
Menu. (Usually found in Programs)
When first starting MapFinder select
“Pharos EZ Road”
Detailed street level mapping data
Mapping “Points of Reference” (PoR) by address, intersection, points of
interest, longitude/latitude or contacts
Routing from one “PoR” to another, with the ability to create up to 10
intermittent stops in a route
Open up to 10 maps at a time
Driving directions and route guidance
Display street name by tapping on map
Zoom in / zoom out
Personal “Favorites” database
GPS status indicators, with on screen strength and position indicator
Real time route simulation (only when GPS is disabled)
Text directions
Three navigation views
Night time display of maps
When navigating:
o Three routing methods: Fastest, Shortest, Avoid freeways.
o Street name of the next turn at the bottom of screen.
o Displays distance and direction of the next turn.
o Displays distance to your final destination.
o Screen displays: Map, Split map / arrow, and Arrow views.
o Audible Voice prompt route guidance.
o Auto zoom-in before and after change in trajectory.
o Trip-trace recording of the route traveled.
o Compass mode with time, heading, latitude, longitude, altitude,
rate of travel, relative distance and direction to destination.
o GPS position is origin while on street with GPS locked.
o Auto re-route option, or one-touch Re-route button.
o Moving map while navigating with the GPS receiver.
o Selectable “North Up” or “Heading Up” for map display.
o Selectable “on” or “off” for voice prompt.
1
MapFinder helps you to determine
which maps you need, select the map
or maps you wish to use, and copy the
maps to your PC or storage card. You
can also browse map data and
features.
*Have your map CDs ready, as you
may need to insert them in your CDrom drive during installation or
copying.
2.2 Selecting Maps
There are two methods used to select a map(s) you want to use.
1. Searching
A) Enter a city name or zip code and
click “Search”
Note: A zip code is the most precise
way to search. Areas on the edge of
maps may need more than one map
to travel efficiently.
2
•
B) To browse a map, right mouse
click on it, and choose “View Current
Map”. This allows searching for
addresses, Points of Interest, and
other features.
•
MS ActiveSync – transfer maps
directly to EZ Road or SD/MMC
card in the EZ Road via
ActiveSync.
Card Reader – transfer maps
directly to a SD/MMC card in a
card reader. Make sure you
know ahead of time, which drive
letter your card is assigned to.
1. Choose appropriate option, and
click “Execute Map Copy”.
-After searching, a list matching
your criteria appears in the
results field. Double-click these
names to select maps.
•
When using MS ActiveSync, a
window will appear confirming
that you want to copy a map(s) to
the memory card.
•
Using a Card Reader it will ask
which drive letter to use.
-OR2. Directly selecting maps
Place the mouse cursor over
the map to be selected; the
information for that map will be
displayed.
-Double-click on the map to
directly select it.
- MapFinder displays how many
maps you have selected, and
how much storage is required in
the upper right corner of the
window.
3. Select the appropriate location and
click OK to continue. Continue to
click OK. The last screen will display
progress of the transfer.
2.3 Extracting & Transferring Maps
After selecting maps, they need to be
extracted and sent to the “My
Documents” folder on the SD/MMC
memory card in your EZ Road or
card reader.
After selecting maps, the top right
corner of the screen has two options:
3
4
2.4 Other MapFinder Functions
3. EZ Road User Interface Menus & Common Terms
3.1 Main EZ Road Menu
By right clicking on a map, the following menu will appear:
View Current Map –open a map on the
MapFinder Menu Functions
PC to be viewed.
Un-Select ALL Maps – Clears all map
selections.
Copy Current Map… – maps currently
selected will be copied to the Memory
Card.
Copy Selected Map… – downloads maps
already on your hard drive to the Memory
Card.
Extracting Maps to the Hard Drive–
extract maps directly to your hard drive.
Deleting Maps –delete maps from your
hard drive.
MapFinder Help– Online help for
MapFinder
About MapFinder – Displays software
information.
Minimize – Minimizes MapFinder.
Exit – Exits MapFinder completely.
Ostia Navigator
Contacts
Calendar
MP3 Player
Settings
Starts the Ostia navigation software.
Contacts address book.
Accesses the calendar.
Starts the built-in MP3 player.
Note: MP3 music files must be stored
on the SD/MMC memory card in the
root directory or MP3 folder.
Accesses the settings menu for the EZ
Road device. See buttons below.
Backlight & Volume
Adjusts the brightness of the screen
and overall volume of devices sounds.
Touch Screen Calibration
Calibrates the touch screen to ensure
accuracy when using the stylus.
Power
Shows status of the battery power.
Date/Time
Set time and calendar.
About
Shows Company information.
Exit
Exits the settings menu.
5
6
3.2 Ostia Software On-screen Menu Buttons
3.3 Terms and Abbreviations
Menu - toggles Menu buttons on / off.
Point of Reference (PoR):
Go Home - routes you to the favorite
pre-designated as home.
Any item used to define a specific point
or coordinate used in navigation (Ex.:
origin, destination, Point of Interest
(POI), intersection, address, etc.). You
also set a PoR by double clicking on
the map.
Recent - provides a list of last 11
destinations to be used again
Point Of Interest (POI):
Favorite - accesses favorites to set
as a destination.
Common places of interest you can
use as “PoRs”, such as city centers,
shopping centers, and airports.
Address - enter specific address as
destination, with option to save .
Favorite:
Point of Interest - access built-in
Saved locations stored on your EZ
Road for use as a PoR.
POIs to use as a destination.
Text Directions - Turn-by-turn text
Intersection:
directions.
3D View - Toggles the map view to
3D view.
Satellite - cycle through satellite and
Address:
Specific address with building number,
street name, and city.
Multi-Stop:
Add up to 10 stops to a route between
Origin & Destination.
Microsoft ActiveSync:
Developed by Microsoft, use with EZ
Road and your desktop computer to
install/manage maps and MP3s. This
software can be downloaded from:
www.PocketPC.com.
compass info screens.
Smart Finder - Access the Smart
Finder database to customize your
POIs.
Smart Traffic - Display / refresh the
traffic data on your screen.
Store Favorite - Allows a Favorite
MapFinder:
to be created from a Lat/Long or GPS
position.
Options - configure basic options for
using Ostia.
7
8
Intersection of roadways you can set
as a PoR
Automates the copying of maps.
4. Creating a Route
3. A list of all available maps will be
listed.
Please note: After creating a route, the GPS may need to be Powered On in the
software before navigation can begin. (Section 8.1)
4. Click on the map that you want to
use to have it displayed on the screen.
Note: 1 through 3 must be repeated to
open multiple maps.
4.2 Finding Origins, Destinations, and Creating Routes
There are 2 methods to find a route, active and pre-planned.
•
The Active Method is using the buttons from the on-screen menu.
1. First, Power On the GPS to locate
your position, which will be used as the
route origin (starting PoR). (See
Section 8.1) – only if you are on a
paved roadway.
Note: GPS is Powered On by default
4.1 Opening & Viewing a Map
1. Click File à Maximum Maps.
(See section 3.1 for details)
Up to 10 maps can be open at the
same time. Set max number of maps
to be open at same time. This setting
will be saved for future use, 3 is the
default.
2. Next select one of the Menu items
and enter the appropriate information
to find a destination (ending PoR).
After a destination has been set, the
system will ask if you would like to
create a route, select YES.
3. The route will be displayed on the
screen along with on-screen text
directions and you are ready to
navigate.
2. Click File à Open
Note: last map opened re-opens,
previous PoRs clear when new map
opens
Continued on next page >>
9
10
•
The Pre-planned Method is using a specific Origin & Destination of a
route by searching for both. This is used when you wish to plan future
routes when the GPS is not locked, or GPS is Powered Off.
4.3 Adding Multi-Stops to a route
The method for finding an Origin (starting PoR), Destination (ending
PoR), or Multi-Stop is the same.
Origin displays as a Green Flag, Destination as a Red Flag, and Multistop(s) as purple numbered flags. In the Find menu there are several
methods to find a location if you are not able to use what you need from
your overlay menu:
- Favorites
- Address
- Intersection
- Points of Interest
Once all stops are set, to calculate a route, go to Find à New Route
1. Click Find à Origin, Destination, or
Multi-Stop à and choose a point of
reference. For this example, we
choose to use a specific address.
1. Table list of multi-stops entered
5. Select this option to have a routes
created to each stop one at a time
in the sequence listed in the table
2. Enter address number and street
name in the fields; below, streets most
closely matching will appear. Tap a
street name, and then "Next".
2. Address detail of highlighted
multi-stop
6. These arrows allow you to
change the order of the multistops
Note: Should the results display
“None”, please check the information
you have entered or verify you have
the correct map opened.
3. Select this option to apply multistops to a route. If not selected
only the Origin and Destination
will be used in a route
7. OK = confirms selections and
calculates the route
Cancel = cancels out of the multistop menu
Delete = deletes the currently
highlighted multi-stop in the list
Clear = clears ALL multi-stops
from the list and map.
4. Select this option to create a
route from Origin to Destination
utilizing the multi-stops as part of
the overall route
8. This option will route through all
of the stops based on your routing
preference for Ostia (Fastest,
shortest or No hwy.)
3. Next, select the city. You can click
the Zip Code box at the bottom of the
screen to display zip codes. Choose a
city from the list below, then "Next".
4. You have the option to save the
location as a Favorite or Home.
IMPORTANT: GPS is Powered On by
default, however, you may need to
manually power it on – refer to section
8.1
11
12
5. Satellite and Compass Information
This screen shows satellite
information…. A nominal value of 40
or higher on at least 3 bars is required
for a GPS lock. The bars will be blue.
The satellites are the dots on the
currently on the right, which will turn
green when you have a lock.
Simplified Arrow and Text view
Split Arrow View
The compass indicates the following
information when moving at 5 miles an
hour or faster:
•
General direction of travel
•
Approximate:
•
o
speed
o
altitude
o
line-of-sight distance
o
global time
Note: Tap the text to sound the voice prompt for the next direction
Other screen options
Night View
Uses optimal color scheme for night
use.
The red line is the general direction
of your destination.
6. View Options for Ostia
6.1 Zoom-in/Zoom-out
Tapping this icon will cycle through the
three (3) navigation screens that can
be used while driving as shown below:
These buttons bring up the zoom bar to
adjust the current view of the map.
Standard Map View
Continue on next page >>
13
14
Zooming in and out can also be
achieved by:
These services are accessible via Internet through ActiveSync
and require subscription from Pharos.
Zoom In
www.PharosGPS.com/SmartNavigator
Dragging the stylus on the screen in a
motion from the upper left corner
towards the bottom right corner to
create a box on the screen. The
software will attempt to do a best-fit
zoom to the area within the box.
This allows for the lookup of the following as a Destination of a
route:
Destination
- Contacts
- Favorites
- Address
- Intersections
- Points of Interest
Zoom Out
This allows for the lookup of the following as an Origin of a
route:
Zooming out is the opposite direction,
bottom left to upper right.
Origin
7. Menu Toolbar Functions
- Contacts
- Favorites
- Address
- Intersections
- Points of Interest
7.1 File
Multi-stop
File Menu
Description
This allows up to 10 stops to be added to an existing route
between the Origin and Destination.
New Route: calculate a new route.
Open
Select this item to open a map file. (See section 4.1)
New Route
Listed
Maps…
Lists the last 3 maps that were used.
List Active
Map(s)
Gives a list of all the maps currently opened and in use.
Close Map(s)
Maximum
Maps
Delete Map
About…
Exit
Smart
Navigator
2. The Destination is shown as a red flag.
The Route is a blue path
Reverse
Route
Closes opened map(s), clears the screen.
Sets the maximum amount of maps that can be open at the
same time. (limit 10)
Deletes a map from the SD/MMC memory card.
Display current version of Ostia software and/or maps on your
EZ Road.
Closes the Ostia Navigation software.
Reverse Route: switch the Origin and Destination of a route.
Note: Due to one-way streets and turn restrictions, the reverse
route may differ from original.
7.3 View
Text
Directions
GPS
Information
7.2 Find
Find Menu
1. The Origin is shown as a green flag.
Description
This selection consists of three options:
- Smart Traffic: access to real-time traffic data
- Smart Finder: access to a large active POI database
- Smart Mapper: capability to download maps to your device
Displays text turn-by-turn directions of the current route.
Displays satellite and compass information. (See section 5)
•
Displays icons on the map for:
- Smart Traffic
- Smart Finder
that has previously been downloaded.
•
Trip Traces that have been previously recorded can be
Show…
15
16
shown with this option.
Brings up the menu screen:
Favorites that have been stored in the system can be viewed
and deleted.
Clear…
Destination
Origin
This function will clear any of the following off of the map screen:
- Smart Finder icons
- Smart Traffic icons
- Trip Trace
- Favorites
- A Route
- Multi-stops
Displays current Destination
Displays current Origin
• Auto Re-route – When selected this option will automatically
recalculate the route to the destination if you deviate from the
original route.
Multi-stop
Displays Multi-stops
Full Route
Displays entire route from Origin to Destination
• Smart Heading Up – When selected this will orient the map
screen to always have the direction you are traveling in as the
top of the map. If this is unselected, north will be the top of
the map.
7.4 Tools
Simulation
Options…
Simulation: after a route is set, the software can run a
simulation as though you were actually traveling in real time.
• Car with Circle – When selected this will place a white ‘halo’
circle around the red GPS position arrow on the map to help
aid in making in easier to see.
*Will not work while GPS is Enabled.
Record Trip
Trace
This function can be set up to leave markers along a route at
set intervals to record the points you have traveled across.
Store
Favorites
Store Favorite Store a latitude and longitude point on the map
or current GPS position to be stored as a Favorite.
Export
Favorites
This function exports the list of all Favorites to a directory you
specify which contains the name of each favorite along with the
Latitude and Longitude of each Favorite.
• Night View – When selected this will apply the night colors to
the map. When unselected daytime colors will apply.
• Voice Prompt – This will allow either English or a Custom
voice prompt to be used for navigation or to turn off the voice
prompts.
• Route Options – How a route is calculated is selected here:
- Fastest (Default) – The route is calculated based on the
fastest speed limits of available roads.
Continued on next page >>
- Shortest – The route is calculated on the most direct route
to the destination from the origin.
- No Hwy – The route will be calculated without using any
highways.
• 3D Bird View – This will change the angle at which the map
will be viewed on the screen for navigation.
17
18
8. GPS Status Indicator/ Powering On the GPS receiver
9. Troubleshooting
The Happy Face on the menu bar
indicates the current status of the GPS
receiver.
TAPPING THE GPS STATUS
INDICATOR WILL ALLOW THE GPS
TO BE ENABLED AS WELL.
See the Pharos website (http://www.pharosgps.com) for FAQ’s, tips, troubleshooting and
latest updates.
9.1 Contact Us
Pharos Science and Applications, Inc.
http://www.pharosgps.com
411 Amapola Avenue, Torrance, CA 90501-1478, USA
Phone:
310-212-7088 (General Inquiries and Technical Support)
310-533-8888 (Sales and Product Information)
Fax:
310-320-1808
Email:
[email protected]
Telephone technical support is available Monday through Friday between the hours of
8:30 AM to 5:30 PM Pacific Standard Time.
Red Face = The GPS receiver is not
Powered On.
Yellow Face = The GPS receiver is
acquiring signals from the satellites but
does not have a GPS lock.
10. SOFTWARE LICENSE AGREEMENT
Green Face = A GPS signal lock has
been established and the system is
ready for navigation. When this
happens, a red arrow should appear on
the map, signifying the current position
of the GPS receiver.
This is a legal agreement ("this Agreement") between you ("Licensee") and
Pharos Science & Application, Inc. (Pharos). By opening the EZ Road, Ostia
software package ("Software Package") and or by using the EZ Road, Ostia
software ("Software"), you agree to be bound by the term of the Agreement.
If you do not agree to the terms of this Agreement, promptly return the software
and its accompanying items to the retailer.
1. Grant of License: This Software License Agreement ("License") permits
Licensee to use one (1) copy of the Software Package enclosed with the
License. The Software Package includes Software and documentation. This
non-exclusive License, without the right to sublicense, rent or lease, is to install
and use the Software on a single personal computer.
2. Software Transfer: Licensee may permanently transfer the License and all
rights hereunder to a third party by written notification to Pharos and where the
recipient agrees to the terms of the License. When Licensee delivers the entire
Software Package to a third party, Licensee must also destroy any and all
remaining copies of the Software whether installed on a personal computer or
other device. Such a transfer terminates Licensee's rights to upgrade the
Software or map information.
3. Pharos' Rights: Licensee acknowledges that the Software consists of
proprietary, unpublished products of Pharos, protected under U.S. copyright law
and trade secret laws of general applicability. Licensee further acknowledges
and agrees that all right, title, and interest in and to the software are and shall
remain with Pharos. This Agreement does not convey to licensee an interest in
or to the software, but only a limited right of use, revocable in accordance with
the terms of this Agreement.
19
20
4. Limitation of Liability: IN NO EVENT WILL PHAROS OR ITS SUPPLIERS BE
LIABLE FOR ANY INDIRECT, SPECIAL INCIDENTAL, ECONOMIC OR
CONSEQUENTIAL DAMAGES, ARISING OUT OF THE USE OF OR INABLITY
TO USE THE SOFTWARE PACKAGE, INCLUDING SOFTWARE OR
DOCUMENTATION, EVEN IF ADVISED OF THE POSSIBILITY OF SUCH
DAMAGES. IN NO CASE SHALL PHAROS OR ITS SUPPLIERS' LIABILITY
EXCEED THE AMOUNT PAID BY LICENSEE FOR THE SYSTEM. Some states
do not allow the exclusion or limitation of liability for incidental or consequential
damages, so in those states, the above limitation or exclusion may not apply to
you.
5. Disclaimer of Warranty: THIS SOFTWARE AND THE ACCOMPANYING
FILES ARE SOLD "AS IS". PHAROS AND ITS SUPPLIERS DISCLAIM ANY
WARRANTIES AS TO PERFORMANCE OR MERCHANDISE OR ANY OTHER
WARRANTIES WHETHER EXPRESSED OR IMPLIED. In particular, there is no
warranty for high-risk activities. NO WARRANTY OF FITNESS FOR A
PARTICULAR PURPOSE IS OFFERED. The user must assume risk of using
the program.
13. Restricted Rights: End User hereby represents and warrants that the
Products shall be protected for public disclosure and considered exempt from
and statute, law, regulation, or code, including any sunshine Act, Public Records
Act, Freedom of Information Act, or equivalent, which permits access and/or
reproduction or use of the Products. In the event of breach of any part of this
paragraph by such disclosure, this Agreement shall be considered breached and
any and all right to retain any copies or to use of the Products shall be terminated
and considered immediately null and void. Any copies of the Licensed Products
held by End User shall immediately be destroyed. If any court of competent
jurisdiction considers this clause void and unenforceable in whole or in part, for
any reason this Agreement shall be considered terminated and null and void, in
its entirety, and any and all its copies of the products shall immediately be
destroyed.
14. Portions of this product, Copyright (c) 1996-2004 Telcontar.
6. Limitations on Reverse Engineering, Decompilation, and Disassembly:
Licensee may not reverse engineer, decompile, or disassemble the Software,
except and only to the extent that such activity is expressly permitted by
applicable law notwithstanding this limitation.
7. Separation of Components: The Software is licensed as a single product. Its
component parts may not be separated for use on more than one computer.
8. Termination: Without prejudice to any other rights, Pharos may terminate this
License if Licensee fails to comply with the terms and conditions of this license.
In such event, Licensee must destroy all copies of the Software and all its
component parts.
9. Copyright: All title and copyrights in and to the Software (including but not
limited to any images, photographs, animations, video, audio, music, and or text
incorporated into the Software), the accompanying printed materials, and any
copies of the Software are owned by Pharos or its suppliers. Copyright laws and
international treaty provisions protect the Software. You may not copy the
printed materials accompanying the Software.
10. Governing Law: The agreement shall be governed by the laws of the State of
California.
11. Export Laws and Regulations: Licensee agrees to comply fully with all
relevant export laws and regulations thereof, is not exported, directly or indirectly,
in violation of United States laws.
12. Proprietary Products: For purpose of any public disclosure provision under
and federal, state or local law, it is agreed that the Products are a trade secret
and a proprietary commercial product and not subject to disclosure.
21
22