1
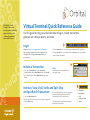
The Orbital Virtual
Terminal is a browserbased, payment processing
application that resides
on Chase Paymentech’s
internal Web servers.
Virtual Terminal Quick Reference Guide
Use this guide to help you understand how to log in, initiate transactions,
generate and retrieve reports, and more.
Login
Navigate to https://secure.paymentech.com/manager.
Enter your Chase Paymentech user ID and password, and
click Login. Click the Forgot Your Password link if you
need assistance.
Initiate a Transaction
n Sale – On the New Order menu, select Authorize.
n Refund/Return – On the New Order menu, select Credit.
n Voice Authorization – On the New Order menu, select
Force.
Click the switch id link to select a different merchant/terminal ID, if applicable.
Click the log out link to log out of Orbital. Click the help link to access the Orbital
Virtual Terminal User Manual.
Note
Additional options may display based on
your specific setup.
Retrieve, View, Void, Settle and Split Ship
nce the results generate, select the appropriate
an Open Batch Transaction Otransaction’s
radio button and then click the
n Select the Open Batch menu.
Enter the applicable search criteria, choose the type of query and
click the Search button.
command button for the desired action.
n View Order
n Ship Partial
n Void
n Return to Search
Unsettled transactions will remain in the Open
Batch view for four months.
n Settle
Virtual Terminal Quick Reference Guide cont.
Review Settled Batches and Transactions
For Additional
Assistance
To speak with a member
of Chase Paymentech’s
Orbital Gateway Support
group, call 1.866.645.1314,
or e-mail GatewaySupport@
ChasePaymentech.com.
On the Review menu, select the option to search by - batch or transaction.
Available transactions are settled and can be up to four months old.
Initiate a Gift Card Transaction
Note: Gift Card and the FlexCache option are only available for U.S. and Canadian merchant IDs.
n Redemption, Add Value and Voice Authorization – On the FlexCache menu, select New Transaction and then
choose the Redemption, Add Value, Prior Redemption or Prior Add Value radio button.
n Balance Inquiry – On the FlexCache menu, select Balance Inquiry.
n Activation – On the FlexCache menu, select Activation.
n View, Manage and Generate Reports on Settled/Unsettled Gift Card Transactions – On the FlexCache
menu, select Current Transactions to specify an unsettled transaction; select Historical Transactions
to specify a settled transaction. Gift card transactions are settled daily at 5 a.m. EST.
Retrieve Reports
User IDs with administrative rights can select the
Reporting option to retrieve previously generated
reports.
Note
Once generated, reports and files will be available
for up to seven days.
Admin
User IDs with administrative rights have the option
to select from the Admin menu and accomplish the
following tasks:
n Administrate card account truncation and scheduled reports.
n Specify the AVS or CVD response codes to decline.
n Define the unit of measure options for Purchase Card III.
n Create, search, edit or delete customer profiles.
n Modify the text that appears on receipts.
n Designate a schedule for Managed Billing.
n Generate auto e-mails for Managed Billing customers.
n Specify options for purchase cards, AVS and settlement.
n Specify options for soft declines.
Import Files
User IDs with administrative rights can select the Import File menu option to upload a CSV file.
Contact your Chase Paymentech representative to have your CSV file tested and certified prior to uploading.
©2009, Chase Paymentech Solutions, LLC. All rights reserved.