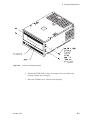
1
(;%PP&DUWULGJH7DSH
6XEV\VWHP
0DLQWHQDQFH
Copyright
Copyright 1991 by EXABYTE Corporation. All rights reserved. This item and the information
contained herein are the property of EXABYTE Corporation. No part of this document may be
reproduced, transmitted, transcribed, stored in a retrieval system, or translated into any language
or computer language in any form or by any means, electronic, mechanical, magnetic, optical,
chemical, manual, or otherwise, without the express written permission of EXABYTE
Corporation, 1685 38th Street, Boulder, Colorado 80301.
Disclaimer
EXABYTE Corporation makes no representation or warranties with respect to the contents of
this document and specifically disclaims any implied warranties of merchantability or fitness for
any particular purpose. Further, EXABYTE Corporation reserves the right to revise this
publication without obligation to notify any person or organization of such revision or changes.
Trademark Notices
EXABYTE is a registered trademark and EXATAPE is a trademark of EXABYTE Corporation.
Pull-A-PLCC is a trademark of Emulation Technology, Inc. TORX is a registered trademark of
Camcar Division of Textron, Inc.
Revision History for 510204
Previous revisions of this manual include the following:
Revision
000
Date
August 1991 (initial release)
For information about the changes and enhancements to this revision, refer to page iv.
ii
510204
Product Warranty Caution
The EXB-8500 8mm Cartridge Tape Subsystem (EXB-8500) is warranted to be free from defects
in materials, parts, and workmanship and will conform to the current product specification upon
delivery. For the specific details of your warranty, refer to your sales contract or contact
the company from which the EXB-8500 was purchased.
The warranty for the EXB-8500 shall not apply to failures of any unit when:
■
The EXB-8500 is repaired by anyone other than the Manufacturer’s personnel or
approved agent.
■
The EXB-8500 is physically abused or is used in a manner that is inconsistent with the
operating instructions or product specification defined by the Manufacturer.
■
The EXB-8500 fails because of accident, misuse, abuse, neglect, mishandling,
misapplication, alteration, faulty installation, modification, or service by anyone other
than the factory service center or its approved agent.
■
The EXB-8500 is repaired by anyone, including an approved agent, in a manner that is
contrary to the maintenance or installation instructions supplied by the Manufacturer.
■
The Manufacturer’s serial number tag is removed.
■
The EXB-8500 is damaged because of improper packaging on return.
CAUTION
Returning the EXB-8500 in unauthorized packaging may damage the unit and void
the warranty.
If you are returning the EXB-8500 for repair, package it in its original packaging (or
in replacement packaging obtained from your vendor). Refer to the packing
instructions in the EXB 8500 8mm Cartridge Tape Subsystem User’s Manual.
If problems with the EXB-8500 occur, contact your maintenance organization; do not void the
product warranty by allowing untrained or unauthorized personnel to attempt repairs.
October 1991
iii
Changes and Enhancements to This Manual
This revision of EXB-8500 8mm Cartridge Tape Subsystem Maintenance includes the following
changes and enhancements:
iv
■
Updated Chapters 4 and 9 to describe different versions of the KRW card and top cover.
■
Added Chapter 18 to describe how to adjust the servo read amplitude for the newer
version of the KRW card.
■
Updated regulatory and safety agency standards.
■
Updated torque values in all chapters whose instructions involve removing and replacing
screws.
510204
Contents
1 General Information . . . . . . . . . . . . . . . . . . . . . . . . . . . . . . 1-3
1.1 About This Manual . . . . . . . . . . . . .
Intended Audience . . . . . . . . . . . .
Related Publications . . . . . . . . . . .
1.2 Regulatory and Safety Agency Standards
1.3 Other Test Standards . . . . . . . . . . .
.
.
.
.
.
.
.
.
.
.
.
.
.
.
.
.
.
.
.
.
.
.
.
.
.
.
.
.
.
.
.
.
.
.
.
.
.
.
.
.
.
.
.
.
.
.
.
.
.
.
.
.
.
.
.
.
.
.
.
.
.
.
.
.
.
.
.
.
.
.
.
.
.
.
.
1-3
1-4
1-5
1-5
1-6
2 Approaches to Maintaining the EXB-8500 . . . . . . . . . . . . . . . . . . 2-1
2.1 Required Tools and Equipment . . . . . . .
2.2 Required Test Equipment . . . . . . . . . .
Test Software . . . . . . . . . . . . . . . .
Test Tapes . . . . . . . . . . . . . . . . .
2.3 Static Protection Requirements . . . . . . .
2.4 Recommended Approaches to Maintenance
Test the EXB-8500 before Replacing Parts
Replace Parts . . . . . . . . . . . . . . .
Test the EXB-8500 After Replacing Parts .
.
.
.
.
.
.
.
.
.
.
.
.
.
.
.
.
.
.
.
.
.
.
.
.
.
.
.
.
.
.
.
.
.
.
.
.
.
.
.
.
.
.
.
.
.
.
.
.
.
.
.
.
.
.
.
.
.
.
.
.
.
.
.
.
.
.
.
.
.
.
.
.
.
.
.
.
.
.
.
.
.
.
.
.
.
.
.
.
.
.
.
.
.
.
.
.
.
.
.
.
.
.
.
.
.
.
.
.
.
.
.
.
.
.
.
.
.
.
.
.
.
.
.
.
.
.
2-1
2-3
2-3
2-3
2-4
2-4
2-4
2-5
2-6
3 R-Pack Replacement . . . . . . . . . . . . . . . . . . . . . . . . . . . . . 3-3
3.1
3.2
3.3
3.4
Required Tools . . . . .
Removing an R-Pack . .
Installing an R-Pack . . .
Testing the Replacement
.
.
.
.
.
.
.
.
.
.
.
.
.
.
.
.
.
.
.
.
.
.
.
.
.
.
.
.
.
.
.
.
.
.
.
.
.
.
.
.
.
.
.
.
.
.
.
.
.
.
.
.
.
.
.
.
.
.
.
.
.
.
.
.
.
.
.
.
.
.
.
.
.
.
.
.
.
.
.
.
.
.
.
.
.
.
.
.
.
.
.
.
.
.
.
.
3-3
3-4
3-5
3-6
4 Top Cover Replacement . . . . . . . . . . . . . . . . . . . . . . . . . . . 4-1
4.1
4.2
4.3
4.4
Required Tools . . . . .
Removing the Top Cover
Replacing the Top Cover
Testing the Replacement
5 Door Replacement
.
.
.
.
.
.
.
.
.
.
.
.
.
.
.
.
.
.
.
.
.
.
.
.
.
.
.
.
.
.
.
.
.
.
.
.
.
.
.
.
.
.
.
.
.
.
.
.
.
.
.
.
.
.
.
.
.
.
.
.
.
.
.
.
.
.
.
.
.
.
.
.
.
.
.
.
.
.
.
.
.
.
.
.
.
.
.
.
.
.
.
.
.
.
.
.
4-2
4-3
4-4
4-5
. . . . . . . . . . . . . . . . . . . . . . . . . . . . . . 5-1
5.1 Required Tools . . . . . . . . . . . . . . . . . . . . . . . . . . . . . 5-1
5.2 Removing the Door . . . . . . . . . . . . . . . . . . . . . . . . . . . 5-1
5.3 Replacing the Door . . . . . . . . . . . . . . . . . . . . . . . . . . . 5-3
October 1991
v
6 Faceplate Replacement
. . . . . . . . . . . . . . . . . . . . . . . . . . . 6-1
6.1 Required Tools . . . . . . . . . . . . . . . . . . . . . . . . . . . . . 6-1
6.2 Removing the Faceplate . . . . . . . . . . . . . . . . . . . . . . . . 6-2
6.3 Replacing the Faceplate . . . . . . . . . . . . . . . . . . . . . . . . 6-4
7 Card Retainer Replacement . . . . . . . . . . . . . . . . . . . . . . . . . 7-1
7.1
7.2
7.3
7.4
7.5
7.6
Required Tools . . . . . . .
Preparing the EXB-8500 . .
Removing the Card Retainers
Replacing the Card Retainers
Reassembling the EXB-8500
Testing the Replacement . .
.
.
.
.
.
.
.
.
.
.
.
.
.
.
.
.
.
.
.
.
.
.
.
.
.
.
.
.
.
.
.
.
.
.
.
.
.
.
.
.
.
.
.
.
.
.
.
.
.
.
.
.
.
.
.
.
.
.
.
.
.
.
.
.
.
.
.
.
.
.
.
.
.
.
.
.
.
.
.
.
.
.
.
.
.
.
.
.
.
.
.
.
.
.
.
.
.
.
.
.
.
.
.
.
.
.
.
.
.
.
.
.
.
.
.
.
.
.
.
.
.
.
.
.
.
.
.
.
.
.
.
.
7-1
7-1
7-2
7-3
7-3
7-3
8 Deck Hanger Replacement . . . . . . . . . . . . . . . . . . . . . . . . . . 8-1
8.1
8.2
8.3
8.4
8.5
8.6
Required Tools . . . . . . .
Preparing the EXB-8500 . .
Removing the Deck Hanger .
Replacing the Deck Hanger .
Reassembling the EXB-8500
Testing the Replacement . .
.
.
.
.
.
.
.
.
.
.
.
.
.
.
.
.
.
.
.
.
.
.
.
.
.
.
.
.
.
.
.
.
.
.
.
.
.
.
.
.
.
.
.
.
.
.
.
.
.
.
.
.
.
.
.
.
.
.
.
.
.
.
.
.
.
.
.
.
.
.
.
.
.
.
.
.
.
.
.
.
.
.
.
.
.
.
.
.
.
.
.
.
.
.
.
.
.
.
.
.
.
.
.
.
.
.
.
.
.
.
.
.
.
.
.
.
.
.
.
.
.
.
.
.
.
.
.
.
.
.
.
.
8-2
8-2
8-3
8-4
8-5
8-5
9 Edge Mounted Card Replacement . . . . . . . . . . . . . . . . . . . . . . 9-1
9.1
9.2
9.3
9.4
9.5
9.6
9.7
9.8
Required Tools . . . . . . . . . . . . . . . . . . .
Preparing the EXB-8500 . . . . . . . . . . . . . .
Removing an Edge Mounted Card . . . . . . . . .
Replacing the KRW Card . . . . . . . . . . . . . .
Detaching the KRW Card’s Ribbon Cable . . . . .
Compatibility of the KRW Card with the Top Cover
Replacing an Edge Mounted Card . . . . . . . . .
Reassembling the EXB-8500 . . . . . . . . . . . .
Adjusting the Servo Read Amplitude . . . . . . . .
Testing the Replacement . . . . . . . . . . . . . .
.
.
.
.
.
.
.
.
.
.
.
.
.
.
.
.
.
.
.
.
.
.
.
.
.
.
.
.
.
.
.
.
.
.
.
.
.
.
.
.
.
.
.
.
.
.
.
.
.
.
.
.
.
.
.
.
.
.
.
.
.
.
.
.
.
.
.
.
.
.
.
.
.
.
.
.
.
.
.
.
.
.
.
.
.
.
.
.
.
.
.
.
.
.
.
.
.
.
.
.
9-2
9-2
9-3
9-4
9-4
9-5
9-6
9-7
9-7
9-7
10 SYS Card Cover Replacement . . . . . . . . . . . . . . . . . . . . . . 10-1
10.1
10.2
10.3
10.4
10.5
vi
Required Tools . . . . . . . . .
Removing the SYS Card Cover
Replacing the SYS Card Cover
Adjusting the Head Sync Timing
Testing the Replacement . . .
.
.
.
.
.
.
.
.
.
.
.
.
.
.
.
.
.
.
.
.
.
.
.
.
.
.
.
.
.
.
.
.
.
.
.
.
.
.
.
.
.
.
.
.
.
.
.
.
.
.
.
.
.
.
.
.
.
.
.
.
.
.
.
.
.
.
.
.
.
.
.
.
.
.
.
.
.
.
.
.
.
.
.
.
.
.
.
.
.
.
.
.
.
.
.
10-1
10-2
10-3
10-3
10-3
510204
11 SYS Card Replacement . . . . . . . . . . . . . . . . . . . . . . . . . . 11-1
11.1 Required Tools . . . . . . . . . . . . . . . . .
11.2 Preparing the EXB-8500 . . . . . . . . . . . .
11.3 Removing the Mounting Screws . . . . . . . .
11.4 Disconnecting the SYS Card Connectors . . .
11.5 Reconnecting the SYS Card Connectors . . .
11.6 Reattaching the SYS Card to the Main Housing
11.7 Reassembling the EXB-8500 . . . . . . . . .
11.8 Loading Microcode onto a New SYS Card . . .
11.9 Adjusting the Head Sync Timing . . . . . . . .
11.10 Testing the Replacement . . . . . . . . . . .
.
.
.
.
.
.
.
.
.
.
.
.
.
.
.
.
.
.
.
.
.
.
.
.
.
.
.
.
.
.
.
.
.
.
.
.
.
.
.
.
.
.
.
.
.
.
.
.
.
.
.
.
.
.
.
.
.
.
.
.
.
.
.
.
.
.
.
.
.
.
.
.
.
.
.
.
.
.
.
.
.
.
.
.
.
.
.
.
.
.
.
.
.
.
.
.
.
.
.
.
.
.
.
.
.
.
.
.
.
.
11-1
11-2
11-3
11-4
11-7
11-7
11-8
11-8
11-8
11-9
12 Deck Assembly Replacement . . . . . . . . . . . . . . . . . . . . . . . 12-1
12.1
12.2
12.3
12.4
12.5
12.6
12.7
Required Tools . . . . . . . . .
Preparing the EXB-8500 . . . .
Removing the Deck . . . . . .
Replacing the Deck . . . . . .
Reassembling the EXB-8500 .
Adjusting the Head Sync Timing
Testing the Replacement . . . .
.
.
.
.
.
.
.
.
.
.
.
.
.
.
.
.
.
.
.
.
.
.
.
.
.
.
.
.
.
.
.
.
.
.
.
.
.
.
.
.
.
.
.
.
.
.
.
.
.
.
.
.
.
.
.
.
.
.
.
.
.
.
.
.
.
.
.
.
.
.
.
.
.
.
.
.
.
.
.
.
.
.
.
.
.
.
.
.
.
.
.
.
.
.
.
.
.
.
.
.
.
.
.
.
.
.
.
.
.
.
.
.
.
.
.
.
.
.
.
.
.
.
.
.
.
.
.
.
.
.
.
.
.
12-1
12-2
12-2
12-3
12-3
12-3
12-4
13 Main Housing Replacement . . . . . . . . . . . . . . . . . . . . . . . . 13-1
13.1
13.2
13.3
13.4
13.5
13.6
13.7
Required Tools . . . . . . . . .
Preparing the EXB-8500 . . . .
Removing the Main Housing . .
Replacing the Main Housing . .
Reassembling the EXB-8500 .
Adjusting the Head Sync Timing
Testing the Replacement . . . .
.
.
.
.
.
.
.
.
.
.
.
.
.
.
.
.
.
.
.
.
.
.
.
.
.
.
.
.
.
.
.
.
.
.
.
.
.
.
.
.
.
.
.
.
.
.
.
.
.
.
.
.
.
.
.
.
.
.
.
.
.
.
.
.
.
.
.
.
.
.
.
.
.
.
.
.
.
.
.
.
.
.
.
.
.
.
.
.
.
.
.
.
.
.
.
.
.
.
.
.
.
.
.
.
.
.
.
.
.
.
.
.
.
.
.
.
.
.
.
.
.
.
.
.
.
.
.
.
.
.
.
.
.
13-1
13-2
13-2
13-3
13-3
13-3
13-3
14 Cleaning the EXB-8500 . . . . . . . . . . . . . . . . . . . . . . . . . . 14-3
15 Loading New Microcode to the EXB-8500 . . . . . . . . . . . . . . . . 15-1
15.1 Deciding Which Loading Method to Use . . . . . . . . . . . . . . . 15-1
15.2 Where to Find Code Loading Information . . . . . . . . . . . . . . 15-1
16 Removing Tape from the Tape Path . . . . . . . . . . . . . . . . . . . 16-1
16.1 Before Starting the Procedure
Preliminary Procedure . . . .
Required Tools . . . . . . . .
16.2 Preparing the EXB-8500 . . .
October 1991
.
.
.
.
.
.
.
.
.
.
.
.
.
.
.
.
.
.
.
.
.
.
.
.
.
.
.
.
.
.
.
.
.
.
.
.
.
.
.
.
.
.
.
.
.
.
.
.
.
.
.
.
.
.
.
.
.
.
.
.
.
.
.
.
.
.
.
.
.
.
.
.
.
.
.
.
.
.
.
.
16-1
16-2
16-2
16-2
vii
16.3
16.4
16.5
16.6
16.7
16.8
Preparing the Data Cartridge . . . . . . . . . . . . . . .
Removing the Erase Head Bracket and Tape Guide . . .
Removing the Tape from the Tape Path . . . . . . . . . .
Removing the Door and Faceplate . . . . . . . . . . . .
Winding the Loose Tape and Ejecting the Data Cartridge .
Reassembling the EXB-8500 . . . . . . . . . . . . . . .
.
.
.
.
.
.
.
.
.
.
.
.
.
.
.
.
.
.
.
.
.
.
.
.
.
.
.
.
.
.
16-3
16-4
16-6
16-8
16-9
16-10
17 Adjusting the Head Sync Timing . . . . . . . . . . . . . . . . . . . . . 17-1
17.1 Required Equipment . . . . . . . . . . . . . . . . . . . . . . . . . 17-1
17.2 Using the Head Sync Tape . . . . . . . . . . . . . . . . . . . . . 17-2
18 Adjusting the Servo Read Amplitude . . . . . . . . . . . . . . . . . . 18-1
18.1
18.2
18.3
18.4
Required Tools and Equipment . . . . . . . . . . . . . .
Preparing the EXB-8500 . . . . . . . . . . . . . . . . . .
Adjusting the Servo Read Amplitude for EXB-8200 Format
Adjusting the Servo Read Amplitude for EXB-8500 Format
.
.
.
.
.
.
.
.
.
.
.
.
.
.
.
.
.
.
.
.
18-1
18-2
18-4
18-5
19 Replacing the Boot PROM . . . . . . . . . . . . . . . . . . . . . . . . 19-1
19.1 Required Tools . . . . . . . . . . . . . . .
19.2 Preparing the EXB-8500 . . . . . . . . . .
19.3 Removing and Replacing the Boot PROM
Removing the Existing Boot PROM . . . .
Installing a New Boot PROM . . . . . . .
19.4 Reassembling the EXB-8500 . . . . . . .
viii
.
.
.
.
.
.
.
.
.
.
.
.
.
.
.
.
.
.
.
.
.
.
.
.
.
.
.
.
.
.
.
.
.
.
.
.
.
.
.
.
.
.
.
.
.
.
.
.
.
.
.
.
.
.
.
.
.
.
.
.
.
.
.
.
.
.
.
.
.
.
.
.
.
.
.
.
.
.
19-1
19-2
19-3
19-3
19-4
19-5
510204
Figures
Figure 3-1
Figure 4-1
Figure 5-1
Figure 5-2
Figure 5-3
Figure 6-1
Location of R-Packs (Back View of EXB-8500) . . . . . .
Location of Top Cover Screws . . . . . . . . . . . . . .
Location of Door Release Lever (Side View of EXB-8500)
Separating the Door Parts (Front View of EXB-8500) . .
Position of Door, Door Retainer, and Door Bracket . . . .
Location of Door Release Lever (Side View of EXB-8500)
.
.
.
.
.
.
.
.
.
.
.
.
.
.
.
.
.
.
.
.
.
.
.
.
.
.
.
.
.
.
.
.
.
.
.
.
.
.
.
.
.
.
.
.
.
.
.
.
.
.
.
.
.
.
3-4
4-3
5-2
5-2
5-3
6-2
Figure 6-2
Figure 8-1
Figure 8-2
Figure 9-1
Figure 9-2
Figure 9-3
Location of Faceplate Screws . . . . . . . . . . .
Deck Hanger . . . . . . . . . . . . . . . . . . .
Correct Position of Deck Hanger’s Copper Shield
Edge Connector Mounted Cards . . . . . . . . .
KRW Card with Bus Bar . . . . . . . . . . . . . .
KRW Card with Springs . . . . . . . . . . . . . .
.
.
.
.
.
.
.
.
.
.
.
.
.
.
.
.
.
.
.
.
.
.
.
.
.
.
.
.
.
.
.
.
.
.
.
.
.
.
.
.
.
.
.
.
.
.
.
.
.
.
.
.
.
.
6-3
8-3
8-4
9-3
9-5
9-5
Figure 9-3 Compatibility of the KRW Card with the Top Cover . . . . . .
Figure 10-1 SYS Card Cover Screws (EXB-8500 Shown Upside Down) .
Figure 11-1 SYS Card Screws . . . . . . . . . . . . . . . . . . . . . .
Figure 11-2 SYS Card Connectors . . . . . . . . . . . . . . . . . . . .
Figure 11-3 SYS Card Connectors . . . . . . . . . . . . . . . . . . . .
Figure 12-1 Location of Deck Screws . . . . . . . . . . . . . . . . . .
.
.
.
.
.
.
.
.
.
.
.
.
.
.
.
.
.
.
.
.
.
.
.
.
.
.
.
.
.
.
.
.
.
.
.
.
. 9-6
10-2
11-3
11-5
11-6
12-2
.
.
.
.
.
.
.
.
.
.
.
.
.
.
.
.
.
.
.
.
.
.
.
.
Figure 13-1
Figure 16-1
Figure 16-2
Figure 16-3
Removing the Main Housing . . . . . . . . . . . . . . . . . . . . .
Taping Open the Data Cartridge Door . . . . . . . . . . . . . . . .
Location of Screw for Erase Head Bracket . . . . . . . . . . . . .
EXB-8500 with Tape Loaded (Tape Guide and Erase Head Bracket
Removed) . . . . . . . . . . . . . . . . . . . . . . . . . . . . .
Figure 18-1 Location of Test Points on KRW Card . . . . . . . . . . . . . . . .
Figure 18-2 Location of Ground Points on the KRW Card . . . . . . . . . . . .
. . 13-2
. . 16-3
. . 16-4
Figure 18-3
Figure 18-4
Figure 18-5
Figure 19-1
Figure 19-2
.
.
.
.
.
October 1991
Oscilloscope Reading for EXB-8200 Format Servo Read Amplitude
Oscilloscope Reading with No Delay . . . . . . . . . . . . . . . .
Oscilloscope Reading for EXB-8500 Format Servo Read Amplitude
Location of Boot PROM on the SYS Card . . . . . . . . . . . . . .
Location of Notch in Boot PROM . . . . . . . . . . . . . . . . . .
. . 16-7
. . 18-2
. . 18-3
.
.
.
.
.
18-5
18-6
18-7
19-3
19-4
ix
Tables
Table 2-1 Tools Needed for EXB-8500 Maintenance Procedures . . . . . . . . . . . 2-2
Table 2-2 Tests and Procedures to Perform after Replacing FRUs . . . . . . . . . . 2-7
Table 4-1 Compatibility of the Top Cover with the KRW Card . . . . . . . . . . . . . 4-1
x
510204
Part 1
Preparing for Maintenance
1 General Information
1 General Information
This manual provides instructions for performing maintenance procedures on
the EXABYTE® EXB 8500 Cartridge Tape Subsystem (EXB 8500). It lists
the diagnostic tools available for the EXB 8500 and recommends approaches
to analyzing failures and verifying fixes. It explains how to load upgrades to
firmware, clean the tape path, and remove, replace, and adjust field
replaceable units (FRUs).
1.1 About This Manual
This manual contains the information described below.
Part 1 - Preparing for Maintenance
To prepare for EXB-8500 maintenance, read Chapters 1 and 2. These chapters
contain the following:
■
Chapter 1 provides general information about the EXB-8500, including
information about using this manual, related publications, and the
EXB 8500’s compliance with regulatory and safety agency standards.
■
Chapter 2 contains information about the tools and materials you need to
test and maintain the EXB-8500 and describes recommended approaches
to testing and maintaining the EXB-8500.
Part 2 - Replacing Field Replaceable Units
Chapters 3 through 13 provide step-by-step instructions for removing and
replacing EXB-8500 field replaceable units (FRUs). These chapters also
recommend tests to perform after a part has been replaced to ensure that it
was replaced correctly. Instructions for replacing the following FRUs are
included:
■
■
■
■
■
■
■
■
■
■
■
October 1991
R-packs (terminators)
Top cover
Door
Faceplate
Card retainer
Deck hanger
Edge mounted cards (DIF/SIF, KCD, and KRW cards)
SYS card cover (bottom cover)
SYS card
Deck assembly
Main housing
1-3
1 General Information
Part 3 - Performing Other Maintenance Procedures
Chapters 14 through 17 contain additional maintenance procedures that
should be performed as needed. The following information is included:
■
Chapter 14 contains instructions for cleaning the EXB 8500.
■
Chapter 15 provides a brief discussion on loading new firmware to the
EXB-8500.
■
Chapter 16 contains instructions for removing tape from the tape path of a
nonfunctioning EXB 8500.
■
Chapter 17 contains instructions for using the automatic head sync tape to
adjust the head sync timing for the EXB 8500.
■
Chapter 18 contains instructions for adjusting the servo read amplitude for
the EXB-8500 for both 8200 and 8500 read modes.
■
Chapter 19 contains instructions for replacing the boot PROM located on
the EXB-8500’s SYS card.
■
A glossary, index, and reader’s comment form are included at the back of
this manual.
Intended Audience
This manual is provided to assist EXABYTE self-maintenance contract
customers in the testing and maintenance of the EXB-8500.
IMPORTANT
The procedures in this manual must be performed by a qualified
service technician whose organization has a self-maintenance
agreement with EXABYTE Corporation. If these steps are performed
by a non-qualified individual, the product warranty will be voided.
1-4
510204
1 General Information
Related Publications
The following manuals and user’s guides will help you understand some of
the tasks referred to in this manual.
■
EXB-8500 8mm Cartridge Tape Subsystem User’s Manual, 510201
■
EXB-8500 8mm Cartridge Tape Subsystem Product Specification, 510200
■
EXPERT User’s Guide, 510010
■
Monitor User’s Guide for the EXB-8500 8mm Cartridge Tape Subsystem,
510206
1.2 Regulatory and Safety Agency Standards
When purchased from EXABYTE Corporation, the EXB-8500 is certified as
a component by the following domestic and international product safety
standards. Certification of the final product is the responsibility of the system
integrator.
■
UL Standard 1950, 1st Edition, Information Technology Equipment
■
UL Standard 478, 4th Edition, Electronic Data Processing Units and
Systems
■
CSA Standard certified C22.2 No. 220-M1986, Information Processing
and Business Equipment
■
CAN/CSA Standard C22.2 No. 950-M89, Safety of Information
Technology Equipment (pending)
■
IEC 950/EN60950, Safety of Information Technology Equipment
including Electrical Business Equipment (TUV)
When integrated into a final product, the EXB-8500 is designed to meet the
requirements of the following agencies:
October 1991
■
FCC Rules, Part 15, Class B, Computing Devices
■
Canadian Department of Communications, Radio Interference Regulation,
Digital Apparatus, Class B
■
VDE Vfg 1046/1984, Class B
■
CISPR Publication 22, 1985, Class A
1-5
1 General Information
1.3 Other Test Standards
When shipped, the EXB-8500 is packaged in a manner that complies with the
testing criteria defined by National Safe Transit Association (NSTA) Project 1.
1-6
510204
2 Approaches to Maintaining the EXB-8500
2 Approaches to Maintaining the EXB-8500
This chapter lists the tools and equipment required for testing and maintaining
the EXB 8500 and describes the recommended approaches to maintaining the
EXB 8500.
2.1 Required Tools and Equipment
Refer to Table 2-1 on page 2-2 to determine the tools you need to perform the
procedures described in this manual. Also, a list of the tools needed for a
procedure is provided in the chapter for the procedure.
Note:
October 1991
In Table 2-1, the term “T-# bit” indicates a specific size of TORX®
driver bit for a torque-limiting screwdriver, 3.4 to 5.0 inch-pounds
(3.9 to 5.8 kg-cm).
2-1
2 Approaches to Maintaining the EXB-8500
✓
Deck assembly
✓
✓
Deck hanger
✓
✓
✓
Door
✓
Faceplate
✓
✓
✓
✓
✓
✓
✓
✓
✓
✓
✓
Head sync
KCD card
✓
✓
KRW card
✓
✓
✓
✓
✓
Main housing
✓
✓
✓
✓
✓
✓
✓
✓
Microcode
✓
R-pack
SIF or DIF card
✓
✓
SYS card
✓
✓
SYS card
cover
b
c
d
e
Servo read amplitude
adjustment toolse
✓
Cleaning
a
Microcode filed
Adhesive tape
EXABYTE automatic
head sync tapec
EXABYTE 8mm
Cleaning Cartridgeb
✓
PROM removal toola
✓
Potentiometer
adjustment tool
Card retainer
Flat-nose pliers
✓
#1 flat-blade screwdriver
✓
#1 Phillips screwdriver
Boot PROM
#0 Phillips screwdriver
You will need the following tools . . .
Tweezers
To replace
this part or
perform this
procedure . . .
T-8 bit
Tools Needed for EXB-8500 Maintenance Procedures
T-10 bit
Table 2-1
✓
✓
✓
✓
✓
Tape
removal
✓
✓
Top cover
✓
✓
✓
✓
✓
✓
✓
✓
✓
✓
Such as Emulation Technology’s Pull-A-PLCC™.
Or an EXABYTE-manufactured 8mm cleaning cartridge.
EXABYTE automatic head sync tape for the EXB-8500, part number 180025.
Depending on your requirements, you can load new microcode in one of three ways. See Chapter 15.
Additional tools required to adjust the servo read amplitude include: EXPERT software, a blank EXATAPE, and
an oscilloscope. See Chapter 18 for instructions.
2-2
510204
2 Approaches to Maintaining the EXB-8500
2.2 Required Test Equipment
To perform tests on the EXB-8500 before and after replacing FRUs, you need
the test software and tapes described in this section.
Test Software
EXABYTE recommends the following software and accompanying user’s
guides for testing the EXB-8500:
■
EXABYTE EXPERT software (version 6.53 or later) and equipment
required to run EXPERT. EXPERT tests are designed to evaluate the
performance of the EXB-8500 during specific types of operations. For
more information about EXPERT and the equipment required to run
EXPERT, refer to the EXPERT User’s Guide.
■
EXABYTE Monitor software for the EXB 8500 (version 10.01 or later)
and equipment required to run Monitor. For more information on Monitor
and the equipment required to run Monitor, refer to the Monitor User’s
Guide for the EXB 8500 8mm Cartridge Tape Subsystem.
Test Tapes
This section describes the tapes that are required to test the EXB 8500 and the
methods you should follow when creating these tapes. Label the tapes
appropriately for easy identification.
Write/Read Test Tape This is an EXATAPE 112m tape. To make this
tape, run the EXPERT Inter_chg test in 8200 mode on the EXB-8500
being tested. Then, read the tape on a known good EXB-8500 to verify
interchangeability.
8200 Mode Interchange Test Tape This is an EXATAPE 112m tape.
To make this tape, run the EXPERT Chg_WrtRd test with the density
code option set for 8200 mode (14h) on the EXB-8500 being tested. Then,
read the tape on a known good EXB-8500 (or EXB-8200 if available).
Carefully check the test tapes to ensure that any failures reported by EXPERT
are EXB-8500-related rather than tape-related. If a media error occurs, repeat
the test with a known good tape to verify that the failure is EXB 8500-related.
October 1991
2-3
2 Approaches to Maintaining the EXB-8500
2.3 Static Protection Requirements
The testing and maintenance environments for the EXB-8500 must be free of
conditions that could cause electrostatic discharge (ESD). To ensure that these
environments are as free from ESD as possible, follow these procedures when
testing and maintaining the EXB-8500:
■
■
Static protection for the testing environment
❏
Ensure that the power supply connected to the EXB-8500 is properly
grounded.
❏
Ensure that the personal computer used for EXPERT and Monitor
software and for the SCSI bus is properly grounded.
Static protection for the maintenance environment
❏
Place a static protection mat on the work surface. Use a 1-megohm
resistor to ground the static protection mat.
❏
Wear a static protection wrist band whenever you handle the
EXB-8500 or EXB-8500 cards that have been removed from their
antistatic bags. Connect this wrist band to the static protection mat or
to other suitable ESD grounding.
❏
Keep all cards in antistatic bags when not in use.
2.4 Recommended Approaches to Maintenance
For best results when maintaining the EXB 8500, EXABYTE recommends
the following approaches.
Test the EXB-8500 before Replacing Parts
When a problem arises with the EXB 8500, test the EXB 8500 before
performing any maintenance procedures to determine the problem and
possible solutions. Follow these testing guidelines:
2-4
■
Use the test equipment listed in Section 2.2 to perform these tests.
■
Make sure the test environment meets the static protection requirements
listed in Section 2.3.
510204
2 Approaches to Maintaining the EXB-8500
■
Use a known good power supply for each EXB-8500 under test to verify
operation and to eliminate any outside influences on the test. Verify that
all power to the test area is clean and free of feedback or inductive spikes.
Power problems will typically cause a high percentage of rewrites or error
correction code (ECC)—or extreme difficulty getting known good
EXB-8500s to pass the tests consistently.
■
To ensure accuracy and consistency when testing a string of EXB-8500s,
start all EXB-8500s at the same time and run them without interruption to
completion. Doing this reduces the likelihood of operator error and
computer software hangs.
Replace Parts
Once you have determined which part or parts (FRUs) need to be replaced,
follow the appropriate instructions in Chapters 3 through 13 to replace the
part. Before you start, perform the following preliminary maintenance
procedures:
1. Make sure the current operation has completed and that tape motion has
stopped.
2. If necessary, unload the tape by pressing the unload button or issuing a
LOAD/UNLOAD (1Bh) command to the EXB 8500.
Note:
If a data cartridge is loaded in a nonfunctioning EXB 8500,
refer to Chapter 16 for instructions on removing the data
cartridge.
3. If necessary, remove the EXB 8500 from its enclosure or mounting
brackets.
4. Disconnect the power cord from the EXB 8500.
5. Disconnect the SCSI cable from the EXB 8500.
6. Make sure the maintenance environment meets the static protection
requirements listed in Section 2.3.
October 1991
2-5
2 Approaches to Maintaining the EXB-8500
Test the EXB-8500 After Replacing Parts
For each part (FRU) you replace, follow the instructions for testing the
replacement. These tests involve running EXPERT tests and using the test
tapes listed on page 2-3.
Notes:
■
When you replace the SYS card, you must also update the microcode on
the new SYS card. Chapter 15 provides a brief description of the steps
involved in updating the code on the SYS card. For more detailed
instructions on updating code, refer to the Monitor User’s Guide for the
EXB 8500 8mm Cartridge Tape Subsystem.
■
When you replace the SYS card, SYS card cover, deck, or main housing,
you must also use the automatic head sync tape from EXABYTE to adjust
the head sync timing (see Chapter 17).
■
When you replace the KRW card, you must also adjust the servo read
amplitude (see Chapter 18).
Table 2-2 on page 2 7 lists the tests and procedures that you should perform
after replacing the indicated part. For more details about the tests or
procedures and the results you should expect, refer to the chapter for the part
you are replacing.
2-6
510204
2 Approaches to Maintaining the EXB-8500
Table 2-2
October 1991
Tests and Procedures to Perform after Replacing FRUs
Field Replaceable
Unit (FRU)
Tests or Procedures to
Perform after Replacement
Discussed in...
Card retainer
EXPERT WrtVari
Chapter 7
Deck assembly
EXPERT WrtVari
EXPERT Motion
Head sync
Chapter 12
Deck hanger
EXPERT WrtVari
Chapter 8
DIF/SIF card
EXPERT WrtVari
Chapter 9
Door
none
Chapter 5
Faceplate
none
Chapter 6
KCD card
EXPERT WrtVari
Chapter 9
KRW card
EXPERT WrtVari
Servo read amplitude
adjustment
Chapter 9
Main housing
EXPERT WrtVari
EXPERT Motion
Head sync
Chapter 13
R-Pack
EXPERT WrtVari
Chapter 3
SYS card cover
(bottom cover)
EXPERT WrtVari or Short
EXPERT Motion
Head sync
Chapter 10
SYS card
EXPERT WrtVari
EXPERT Motion
Update microcode
Head sync
Chapter 11
Top cover
EXPERT WrtVari
Chapter 4
New microcode
EXPERT WrtVari
Chapter 15
2-7
2 Approaches to Maintaining the EXB-8500
Notes:
2-8
510204
Part 2
Replacing Field Replaceable Units
3 R-Pack Replacement
3 R-Pack Replacement
This chapter describes how to remove and replace the resistor terminators
(R-packs) on the back of the EXB 8500.
The single-ended version of the EXB-8500 (SIF card) uses two internal
R-packs with the following characteristics:
■
■
■
■
■
10-pin
9-resistor
Single in-line package (SIP)
Socket-mounted
110 ohms
The differential version of the EXB-8500 (DIF card) does not use internal
R-packs.
WARNING
Before starting any replacement procedures, make sure that the
EXB-8500 is not in use, as follows:
1.
Make sure that any current operation has completed and that
tape motion has stopped.
2. Unload the data cartridge by pressing the unload button or issuing
a LOAD/UNLOAD (1Bh) command to the EXB-8500.
3.
Disconnect the power cord from the EXB-8500.
4. Disconnect the SCSI cable from the EXB-8500.
5. Move the EXB-8500 to the maintenance area.
3.1 Required Tools
To replace an R-pack, you need the following tool:
✓
October 1991
Flat-nose pliers
3-3
3 R-Pack Replacement
3.2 Removing an R-Pack
To remove an R-pack, follow these steps:
1. Locate the two R-packs on the back of the EXB-8500. Figure 3-1 shows
the locations of these R-packs, labeled RP1 and RP2.
2. Using a pair of flat-nose pliers, grasp either one of the R-packs in the
center. Be careful not to squeeze the pliers too tightly or you may break
the R-pack.
3. Pull the R-pack straight out.
Figure 3-1
3-4
Location of R-Packs (Back View of EXB-8500)
510204
3 R-Pack Replacement
3.3 Installing an R-Pack
CAUTION
If you replace the R-packs, be sure to use the correct size and type of
terminators. Otherwise, damage to the EXB-8500 can occur. The
EXB-8500 uses two 10-pin, 9-resistor SIP terminators of 110 ohms.
Replacement R-packs are available from EXABYTE (part number
002228).
In addition, when replacing an R-pack, make sure that pin 1 of the
terminator is aligned with pin 1 of the socket and that no pins are bent.
To install an R-pack, follow these steps:
1. Orient the R-pack so that pin 1 is toward the SCSI connector on the SIF
card. Pin 1 has the wide line over the pin.
2. Carefully position the R-pack on the socket. Check to ensure that each
pin on the R-pack is aligned with a hole in the socket.
3. Press the R-pack into the socket. Be careful to provide even pressure on
the outer edge of the R-pack so that all pins are inserted at the same
time. Uneven pressure can result in the R-pack being only partially
inserted or in bent pins on the R-pack.
4. Inspect the R-pack to ensure that all of the pins have been correctly
inserted. If the R-pack is not fully seated in the socket, apply additional
pressure to make sure that all pins have been fully inserted.
5. If any of the pins are bent, remove the R-pack. Then, straighten the pins
and reinsert the R-pack. Follow the previous steps to remove, insert, and
inspect the R-pack.
Note:
October 1991
Do not use the R-pack if any of the pins are broken.
3-5
3 R-Pack Replacement
3.4 Testing the Replacement
To test the replacement of an R-pack, run the EXPERT WrtVari test. If the
test fails, check the EXPERT trace log for causes and to help determine the
appropriate action to take.
Note:
3-6
Refer to the EXPERT User’s Guide for more information on running
EXPERT tests.
510204
4 Top Cover Replacement
4 Top Cover Replacement
This chapter describes how to remove and replace the top cover.
Compatibility of the Top Cover with the KRW Card
There are two versions of the top cover:
■
■
One version has a conductive gasket on its underside.
The other version does not have a conductive gasket on its underside.
There are also two versions of the KRW card:
■
■
One version has a bus bar at the top.
The other version has two springs at the top.
Only certain combinations of these two parts are compatible. Table 4-1 shows
the compatiblity of the top cover with the KRW card.
Table 4-1
Compatibility of the Top Cover with the KRW Card
This top cover...
Is compatible with this KRW card...
With bus bar
With springs
With gasket
Yes
Yes—if gasket is
removed
Without gasket
No
Yes
Before you replace the top cover, ensure that the new top cover is compatible
with your KRW card. For more information about the compatibility of the top
cover and the KRW card, see Chapter 9.
October 1991
4-1
4 Top Cover Replacement
WARNING
Before starting any replacement procedures, make sure that the
EXB-8500 is not in use, as follows:
1.
Make sure that any current operation has completed and that
tape motion has stopped.
2. Unload the data cartridge by pressing the unload button or issuing
a LOAD/UNLOAD (1Bh) command to the EXB-8500.
3.
Disconnect the power cord from the EXB-8500.
4. Disconnect the SCSI cable from the EXB-8500.
5. Move the EXB-8500 to the maintenance area.
4.1 Required Tools
To replace the top cover, you need the following tools:
4-2
✓
Torque limiting screwdriver, 3.4 to 5.0 inch-pounds (3.9 to 5.8 kg-cm)
✓
T-10 TORX driver bit
✓
T-8 TORX driver bit
510204
4 Top Cover Replacement
4.2 Removing the Top Cover
To remove the top cover, follow these steps:
1. Remove the five top cover screws as follows (see Figure 4-1):
a.
Use a T-8 TORX bit to remove the two screws located on the top of
the EXB-8500 near the edges.
b.
Use a T-10 TORX bit for the remaining three screws.
2. Gently lift the cover at the rear of the EXB-8500 so that the tabs located
at the rear and on each side of the top cover are clear of the main
housing.
3. Move the cover toward the rear of the EXB-8500 to disengage the tabs
on the front of the top cover from the faceplate and set the cover aside.
Figure 4-1
Location of Top Cover Screws
October 1991
4-3
4 Top Cover Replacement
4.3 Replacing the Top Cover
Note:
Before replacing the top cover, make sure it is compatible with your
KRW card. If your KRW card has two springs at the top, remove the
gasket on your top cover before reassembling the EXB-8500. See
Chapter 9 for more information.
To replace the top cover, follow these steps:
1. Holding the rear of the cover up slightly, position the cover with the flat
tabs toward the front of the EXB-8500 and the two downward bent tabs
toward the rear of the EXB-8500.
2. Slide the cover toward the front of the EXB-8500 so that the flat tabs are
inserted into the corresponding slots on the faceplate.
3. Lower the rear of the cover so that the tabs line up with the screw holes
in the card retainers. You may need to apply slight pressure to seat the
top cover properly.
CAUTION
Do not overtighten the screws. Overtightening these screws can strip
the holes in the main housing, the card retainers, or the deck hanger. If
any of the screw holes in the main housing become stripped, replace
the main housing.
4. Secure the rear of the cover through the card retainers and through the
center of the top cover to the deck hanger using the three larger screws
(use the T-10 bit). Refer to Figure 4-1 for the locations of these screws.
Tighten the screws to 5.0 inch-pounds (5.8 kg-cm) of torque.
5. Secure the top of the cover at the left and right edges using the two
smaller screws (T-8). Refer to Figure 4-1 for the locations of these
screws. Tighten the screws to 3.4 inch-pounds (3.9 kg-cm) of torque.
4-4
510204
4 Top Cover Replacement
4.4 Testing the Replacement
To test the replacement of the top cover, run the EXPERT WrtVari test. If the
test fails, check the EXPERT trace log for causes and to help determine the
appropriate action to take.
Note:
October 1991
Refer to the EXPERT User’s Guide for more information on running
EXPERT tests.
4-5
4 Top Cover Replacement
Notes:
4-6
510204
5 Door Replacement
5 Door Replacement
This chapter describes how to remove and replace the door.
WARNING
Before starting any replacement procedures, make sure that the
EXB-8500 is not in use, as follows:
1.
Make sure that any current operation has completed and that
tape motion has stopped.
2. Unload the data cartridge by pressing the unload button or issuing
a LOAD/UNLOAD (1Bh) command to the EXB-8500.
3.
Disconnect the power cord from the EXB-8500.
4. Disconnect the SCSI cable from the EXB-8500.
5. Move the EXB-8500 to the maintenance area.
5.1 Required Tools
To replace the door, you need the following tools:
✓
#1 flat-blade screwdriver
✓
Pointed, non-conductive tool, such as a potentiometer adjustment tool
5.2 Removing the Door
To remove the door, follow these steps:
1. Open the door by using a small nonconductive tool, such as a
potentiometer adjustment tool, to move the door release lever toward the
front of the EXB-8500. Figure 5-1 shows the location of the door
release lever.
The amount of force required to activate the door release lever is slight,
and the lever should move no more than one-eighth of an inch. Be
careful not to damage the small switch contacts next to the lever.
October 1991
5-1
5 Door Replacement
Figure 5-1
Location of Door Release Lever (Side View of EXB-8500)
2. Using a flat-blade screwdriver, separate the door from the door retainer.
The locking tabs that hold the two together are near the top edge of the
door. Figure 5-2 shows where to position the screwdriver to separate the
door and the door retainer.
Start with either side of the door and position the screwdriver so that the
prying force will separate the two components. Apply the force so that it
pushes the door retainer tab toward the outside edge of the door as well
as away from the door.
3. Unlatch the remaining locking tab using the same method described in
step 2.
4. Separate the two components so that the bottom locking tabs are also
released and both parts can be removed and set aside.
Figure 5-2
5-2
Separating the Door Parts (Front View of EXB-8500)
510204
5 Door Replacement
5.3 Replacing the Door
Before attempting to put the door and door retainer on the EXB-8500,
practice assembling the two pieces independently of the EXB 8500. Be sure
to observe the final relationship of all of the locking tabs so that it is clear
how they should look when they are placed on the door mechanism. View A
in Figure 5-3 shows how the door, the door retainer, and the door bracket are
positioned on the EXB-8500. View B shows a side view of the door, the door
bracket, and the door retainer.
Figure 5-3
Position of Door, Door Retainer, and Door Bracket
October 1991
5-3
5 Door Replacement
To replace the door, follow these steps:
1. To avoid damaging tape, ensure that there is no data cartridge in the
EXB 8500.
2. Position the door on the arms of the door bracket so that the bottom
locking tabs on the door are in the notches on the bottom of the door
bracket.
3. Hold the door in position on the door bracket with your thumb and first
finger of one hand and position the door retainer so that the locking tab
notches on the bottom of the door retainer are by the locking tabs on the
door.
4. Squeeze the door and door retainer together using your thumb and first
finger of each hand so that the bottom notches snap together with the
locking tabs. Apply the pressure so that the door retainer moves in and
up under the locking tabs. It might be easier to secure one notch at a
time.
5. Squeeze the door and door retainer together at the top edge to engage
the top locking tabs.
6. Inspect the door to make sure all tabs are in the correct position. If one
of the bottom tabs is not in its correct position, separate the door and the
door retainer and restart the replacement procedure.
5-4
510204
6 Faceplate Replacement
6 Faceplate Replacement
This chapter describes how to remove and replace the faceplate.
WARNING
Before starting any replacement procedures, make sure that the
EXB-8500 is not in use, as follows:
1.
Make sure that any current operation has completed and that
tape motion has stopped.
2. Unload the data cartridge by pressing the unload button or issuing
a LOAD/UNLOAD (1Bh) command to the EXB-8500.
3.
Disconnect the power cord from the EXB-8500.
4. Disconnect the SCSI cable from the EXB-8500.
5. Move the EXB-8500 to the maintenance area.
6.1 Required Tools
To replace the faceplate, you need the following tools:
October 1991
✓
Torque limiting screwdriver, 3.4 to 5.0 inch-pounds (3.9 to 5.8 kg-cm)
✓
T-8 TORX bit
✓
#1 flat-blade screwdriver
✓
Pointed, non-conductive tool, such as a potentiometer adjustment tool
6-1
6 Faceplate Replacement
6.2 Removing the Faceplate
To remove the faceplate, follow these steps:
1. To avoid damaging tape, ensure that there is no data cartridge in the
EXB-8500.
2. Open the door by using a small nonconductive tool, such as a
potentiometer adjustment tool, to move the door release lever toward the
front of the EXB-8500. Figure 6-1 shows the location of the door
release lever.
Note:
The amount of force required to activate the door release lever is
slight, and the lever should move no more than one-eighth of an inch.
Be careful not to damage the small switch contacts next to the lever.
Figure 6-1
Location of Door Release Lever (Side View of EXB-8500)
3. Remove the EXB 8500’s door, as described in Chapter 5.
4. Close the door bracket.
5. Using a T-8 TORX bit, loosen (but do not remove) the four faceplate
mounting screws. Figure 6-2 shows the location of these screws.
6-2
510204
6 Faceplate Replacement
Figure 6-2
Location of Faceplate Screws
6. Position the EXB-8500 so that it is resting on the rear of the main
housing with the door facing up.
7. Move the faceplate away from the main housing.
October 1991
6-3
6 Faceplate Replacement
6.3 Replacing the Faceplate
To replace the faceplate, follow these steps:
1. Position the EXB-8500 so that it is resting on the rear of the main
housing with the door facing up.
2. With the door bracket closed, slide the faceplate around the door frame
and align it with the four mounting screws (see Figure 6-2).
3. Position the faceplate so that the mounting tabs are under the four
mounting screws and the faceplate is flush with the door when the door
is closed.
CAUTION
Do not overtighten the screws. Overtightening the mounting screws
can damage the faceplate mounting tabs or strip the screw holes in the
main housing. If any of the screw holes in the main housing become
stripped, replace the main housing.
4. Using the T-8 TORX bit, tighten the mounting screws to 3.4
inch-pounds (3.9 kg-cm) of torque.
5. Replace the door and door retainer, as described in Chapter 5.
6-4
510204
7 Card Retainer Replacement
7 Card Retainer Replacement
This chapter describes how to remove and replace the card retainers.
WARNING
Before starting any replacement procedures, make sure that the
EXB-8500 is not in use, as follows:
1.
Make sure that any current operation has completed and that
tape motion has stopped.
2. Unload the data cartridge by pressing the unload button or issuing
a LOAD/UNLOAD (1Bh) command to the EXB-8500.
3.
Disconnect the power cord from the EXB-8500.
4. Disconnect the SCSI cable from the EXB-8500.
5. Move the EXB-8500 to the maintenance area.
7.1 Required Tools
To replace a card retainer, you need the following tools:
✓
Torque limiting screwdriver, 3.4 to 5.0 inch-pounds (3.9 to 5.8 kg-cm)
✓
T-10 TORX bit
✓
T-8 TORX bit
7.2 Preparing the EXB-8500
To access the card retainers, first remove this part:
Top cover
October 1991
Chapter 4
7-1
7 Card Retainer Replacement
7.3 Removing the Card Retainers
To remove a card retainer, follow this step:
1. Grasp the ends of the card retainer between your thumb and first finger
and lift straight up. You should feel no resistance when removing a card
retainer.
2. Repeat step 1 for the other card retainer.
Figure 7-1 shows the locations of the card retainers. Note that there is a left
and a right card retainer.
Figure 7-1
7-2
Location of Card Retainers
510204
7 Card Retainer Replacement
7.4 Replacing the Card Retainers
The card retainers are designed as left and right components and will fit
correctly only one way. To replace the card retainers, follow these steps:
1. Place each card retainer so that only one card is in a slot, the deck
hanger fits in the slot farthest away from the screw hole, and the screw
hole is lined up with the hole on the tab at the rear of the EXB-8500. If
the cards are aligned squarely in the EXB-8500, the card retainers will
slide on with little or no force.
2. Adjust the card and deck hanger positions to get them into their slots in
the retainer.
3. After both card retainers are in place, exert downward pressure on the
top of both card retainers simultaneously. This will ensure that all cards
are properly seated in the EXB-8500.
7.5 Reassembling the EXB-8500
To reassemble the EXB-8500, replace the top cover as described in Chapter 4.
7.6 Testing the Replacement
To test the replacement of the card retainer, run the EXPERT WrtVari test. If
the test fails, check the EXPERT trace log for causes and to help determine
the appropriate action to take.
Note:
October 1991
Refer to the EXPERT User’s Guide for more information on running
EXPERT tests.
7-3
7 Card Retainer Replacement
Notes:
7-4
510204
8 Deck Hanger Replacement
8 Deck Hanger Replacement
This chapter describes how to remove and replace the deck hanger, which
separates the card section of the EXB-8500 from the deck section. The deck
hanger has two functions:
■
The plastic portion of the deck hanger prevents the KRW ribbon cable
from interfering with the moving parts of the deck.
■
The copper portion (copper shield) of the deck hanger reduces
electrostatic noise in the tape path.
The plastic portion of the deck hanger clips onto the deck hanger bracket
along the rear edge of the deck base. The copper shield is attached to the
plastic portion of the deck hanger and covers the tape drum and tape path.
WARNING
Before starting any replacement procedures, make sure that the
EXB-8500 is not in use, as follows:
1.
Make sure that any current operation has completed and that
tape motion has stopped.
2. Unload the data cartridge by pressing the unload button or issuing
a LOAD/UNLOAD (1Bh) command to the EXB-8500.
3.
Disconnect the power cord from the EXB-8500.
4. Disconnect the SCSI cable from the EXB-8500.
5. Move the EXB-8500 to the maintenance area.
October 1991
8-1
8 Deck Hanger Replacement
8.1 Required Tools
To replace the deck hanger, you need the following tools:
✓
Torque limiting screwdriver, 3.4 to 5.0 inch-pounds (3.9 to 5.8 kg-cm)
✓
T-10 TORX bit
✓
T-8 TORX bit
✓
#1 flat-blade screwdriver
8.2 Preparing the EXB-8500
To access the deck hanger, first remove these parts in the following order:
Top cover
Card retainers
8-2
Chapter 4
Chapter 7
510204
8 Deck Hanger Replacement
8.3 Removing the Deck Hanger
To remove the deck hanger, follow these steps:
1. Locate the locking tabs that hold the deck hanger in place, as shown in
Figure 8-1. The locking tabs protrude through the deck hanger from the
rear of the EXB-8500.
2. Using a #1 flat-blade screwdriver, press one of the tabs toward the rear
of the EXB-8500 while pulling up on the same end of the deck hanger.
Hold that end of the deck hanger in the unlocked position until you
release the other tab. Then remove the deck hanger from the EXB-8500.
Figure 8-1
October 1991
Deck Hanger
8-3
8 Deck Hanger Replacement
8.4 Replacing the Deck Hanger
To replace the deck hanger, follow these steps:
1. From the front of the EXB 8500, position the copper shield so that the
left side of it is to the left of the black tab that protrudes from the tape
load mechanism. Make sure that the right side of the copper shield does
not interfere with the tape path mechanism or wires in the deck. See
Figure 8-2.
Figure 8-2
Correct Position of Deck Hanger’s Copper Shield
2. Line up the plastic portion of the deck hanger with the locking tabs
behind it and the support arms in front of it. The locking tabs and
support arms work together to hold the deck hanger firmly in place.
3. While making sure that the copper shield is still in place, slide the deck
hanger down between the locking tabs and support arms until it snaps
into place. Use very slight pressure.
8-4
510204
8 Deck Hanger Replacement
8.5 Reassembling the EXB-8500
To reassemble the EXB-8500, replace these parts in the following order:
Card retainers
Top cover
Chapter 7
Chapter 4
8.6 Testing the Replacement
To test the replacement of a deck hanger, perform the following steps:
1. Apply power to the EXB-8500. Make sure the power-on self-test
completes normally.
2. Load a data cartridge into the EXB-8500. Perform another power-on
cycle and make sure it completes normally.
3. Run the EXPERT WrtVari test. If the test fails, check the EXPERT
trace log for causes and to help determine the appropriate action to take.
Note:
October 1991
Refer to the EXPERT User’s Guide for more information on running
EXPERT tests.
8-5
8 Deck Hanger Replacement
Notes:
8-6
510204
9 Edge Mounted Card Replacement
9 Edge Mounted Card Replacement
This chapter describes how to remove and replace the edge mounted cards.
These cards consist of the following:
■
■
■
KCD (clocking and detection card)
KRW (read/write card)
SIF or DIF (single-ended or differential interface card)
Notes:
■
If you are replacing the KRW card, you must also adjust the servo
read amplitude, as described in Chapter 18.
■
There are two versions of the KRW card and two versions of the top
cover. Only certain combinations of these two parts are compatible.
See Section 9.4 for details.
WARNING
Before starting any replacement procedures, make sure that the
EXB-8500 is not in use, as follows:
1.
Make sure that any current operation has completed and that
tape motion has stopped.
2. Unload the data cartridge by pressing the unload button or issuing
a LOAD/UNLOAD (1Bh) command to the EXB-8500.
3.
Disconnect the power cord from the EXB-8500.
4. Disconnect the SCSI cable from the EXB-8500.
5. Move the EXB-8500 to the maintenance area.
October 1991
9-1
9 Edge Mounted Card Replacement
9.1 Required Tools
To replace edge mounted cards, you need the following tools:
✓
Torque limiting screwdriver, 3.4 to 5.0 inch-pounds (3.9 to 5.8 kg-cm)
✓
T-10 TORX bit
✓
T-8 TORX bit
✓
#1 flat-blade screwdriver
To replace the KRW card, you need the following tools in addition to those
listed above:
✓
Known good EXB-8500
✓
EXPERT software
✓
Blank EXATAPE
✓
Oscilloscope
✓
Potentiometer adjustment tool
9.2 Preparing the EXB-8500
The edge connector socket-mounted cards plug into the SYS card. To access
these cards, first remove these parts in the following order:
Top cover
Card retainers
Deck hanger
Note:
Chapter 4
Chapter 7
Chapter 8
The deck hanger needs to be removed only to replace the KRW card.
The deck hanger does not need to be removed to access any other
card.
IMPORTANT
When removing or inserting a card, hold the card on the edges. To
avoid damaging the card, do not hold the components or connectors
mounted on the card. After removing the card, hold and place it on its
edges whenever possible.
9-2
510204
9 Edge Mounted Card Replacement
9.3 Removing an Edge Mounted Card
Figure 9-1 shows the position of each edge mounted card. To remove any of
these cards, follow these steps:
Note:
Before removing the KRW card, remove the KRW card’s ribbon
cable as explained in Section 9.4 on page 9-4.
1. Grasp the card between your thumb and first finger on both ends of the
card.
2. Rock the card from left to right to release it from the edge connector
socket. This will require a reasonable amount of force since the card fits
securely into the socket.
3. Lift the card straight up and out of the EXB-8500.
Figure 9-1
October 1991
Edge Connector Mounted Cards
9-3
9 Edge Mounted Card Replacement
9.4 Replacing the KRW Card
When removing the KRW card, be aware of the following:
■
Unlike the other edge connector mounted cards, the KRW card has a
ribbon cable connected to it that you must detach before removing the
card.
■
There are two versions of the KRW card, one of which is incompatible
with the version of the top cover that does not have a conductive gasket
on its underside.
■
When you replace the KRW card, you must also adjust the servo read
amplitude. See Chapter 18 for instructions.
This section describes how to detach the KRW card’s ribbon cable and the
compatibility of the KRW card with the top cover. Adjusting the servo read
amplitude is described in Chapter 18.
Detaching the KRW Card’s Ribbon Cable
The KRW card, shown in Figure 9-1 on page 9-3, has a ribbon cable
connected to it and is the only card with the major components facing the
front of the EXB-8500.
To remove the KRW card’s ribbon cable, follow these steps:
1. Remove the deck hanger to allow access to the ribbon cable connector
on the KRW card (see Chapter 8).
2. Use a flat tool (such as the blade of a flat-blade screwdriver) to slide the
ribbon cable connector open to the right. Once the connector is open,
carefully pull out the cable.
3. Remove the KRW card as described in Section 9.3.
9-4
510204
9 Edge Mounted Card Replacement
Compatibility of the KRW Card with the Top Cover
There are two versions of the KRW card:
■
■
October 1991
One version, shown in Figure 9-2, has a bus bar at the top.
The other version, shown in Figure 9-3, has two springs at the top.
Figure 9-2
KRW Card with Bus Bar
Figure 9-3
KRW Card with Springs
9-5
9 Edge Mounted Card Replacement
There are also two versions of the top cover:
■
■
One version has a conductive gasket on its underside.
The other version does not have a conductive gasket on its underside.
Table 9-1 shows the compatibility of the KRW card with the top cover.
Table 9-1
Compatibility of the KRW Card with the Top Cover
This top cover...
Is compatible with this KRW card...
With bus bar
With springs
With gasket
Yes
Yes—if gasket is
removed
Without gasket
No
Yes
Before you replace the KRW card, ensure that the new KRW card is
compatible with your top cover. If you have a KRW card with springs,
remove the gasket from your top cover before reassembling the EXB-8500.
9.5 Replacing an Edge Mounted Card
To replace an edge mounted card, follow these steps:
1. Align the edge connector with the edge connector socket. The positions
of the edge connectors on the SYS card are keyed; only one type of card
fits into a particular socket. Ensure that the component side of the card
is facing the rear of the EXB-8500.
Note:
Make sure that the components of the KRW card face the front
of the EXB-8500.
2. Press on both ends of the card at the same time until the card is properly
seated in the card edge connector on the SYS card.
3. Insert the ribbon cable into its connector on the KRW card. Once the
cable is fully inserted, close the connector by sliding it to the left.
If you have just installed a KRW card with springs, remove the gasket
from your top cover before reassembling the EXB-8500.
9-6
510204
9 Edge Mounted Card Replacement
9.6 Reassembling the EXB-8500
To reassemble the EXB-8500, replace these parts in the following order:
Deck hanger
Card retainers
Top cover
Chapter 8
Chapter 7
Chapter 4
9.7 Adjusting the Servo Read Amplitude
If you have replaced the KRW card, you must also adjust the servo read
amplitude. See Chapter 18 for instructions.
9.8 Testing the Replacement
To test the replacement of an edge mounted card, run the EXPERT WrtVari
test. If the test fails, check the EXPERT trace log for causes and to help
determine the appropriate action to take.
Note:
October 1991
Refer to the EXPERT User’s Guide for more information on running
EXPERT tests.
9-7
9 Edge Mounted Card Replacement
Notes:
9-8
510204
10 SYS Card Cover Replacement
10 SYS Card Cover Replacement
This chapter describes how to remove and replace the SYS card cover. This
cover also serves as the bottom cover of the EXB-8500.
WARNING
Before starting any replacement procedures, make sure that the
EXB-8500 is not in use, as follows:
1.
Make sure that any current operation has completed and that
tape motion has stopped.
2. Unload the data cartridge by pressing the unload button or issuing
a LOAD/UNLOAD (1Bh) command to the EXB-8500.
3.
Disconnect the power cord from the EXB-8500.
4. Disconnect the SCSI cable from the EXB-8500.
5. Move the EXB-8500 to the maintenance area.
10.1 Required Tools
To replace the SYS card cover, you need the following tools:
October 1991
✓
Torque limiting screwdriver, 3.4 to 5.0 inch-pounds (3.9 to 5.8 kg-cm)
✓
T-8 TORX bit
✓
EXABYTE automatic head sync tape for the EXB-8500, part number
180025
10-1
10 SYS Card Cover Replacement
10.2 Removing the SYS Card Cover
To remove the SYS card cover, follow these steps:
1. Turn the EXB-8500 upside down so that the SYS card cover is facing
up.
2. Use a T-8 TORX bit to remove the six screws that hold the SYS card
cover to the main housing. Figure 10-1 shows the locations of these
screws.
3. Lift the SYS card cover off of the main housing.
Figure 10-1
10-2
SYS Card Cover Screws (EXB-8500 Shown Upside Down)
510204
10 SYS Card Cover Replacement
10.3 Replacing the SYS Card Cover
To replace the SYS card cover, follow these steps:
1. Position the SYS card cover so that the tabs are down and the stamped
part number is on the end closest to the faceplate. Make sure that all six
of the mounting pads are in contact with the SYS card, and that the
holes are lined up with the corresponding holes in the SYS card.
2. Set the SYS card cover in place on the main housing and start the six
screws that were removed previously. Do not tighten the screws yet.
3. As needed, move the cover slightly to align all of the mounting holes.
CAUTION
Do not overtighten the screws. Overtightening these screws can
damage the SYS card or strip the holes in the main housing. If any of
the screw holes in the main housing become stripped, replace the main
housing.
4. When all of the mounting holes are aligned, use a T-8 TORX bit to
tighten the mounting screws to 3.4 inch-pounds (3.9 kg-cm) of torque.
10.4 Adjusting the Head Sync Timing
After you replace the SYS card cover, you must adjust the head sync timing
using the EXABYTE automatic head sync tape for the EXB-8500. For
instructions on using this tape, see Chapter 17.
10.5 Testing the Replacement
To test the replacement of the SYS card cover, perform these steps:
1. Run the EXPERT WrtVari or Short test.
2. Run the EXPERT Motion test.
If either EXPERT test fails, check the EXPERT trace log for causes and to
help determine the appropriate action to take.
Note:
October 1991
Refer to the EXPERT User’s Guide for more information on running
EXPERT tests.
10-3
10 SYS Card Cover Replacement
Notes:
10-4
510204
11 SYS Card Replacement
11 SYS Card Replacement
This chapter describes how to remove and replace the SYS card.
WARNING
Before starting any replacement procedures, make sure that the
EXB-8500 is not in use, as follows:
1.
Make sure that any current operation has completed and that
tape motion has stopped.
2. Unload the data cartridge by pressing the unload button or issuing
a LOAD/UNLOAD (1Bh) command to the EXB-8500.
3.
Disconnect the power cord from the EXB-8500.
4. Disconnect the SCSI cable from the EXB-8500.
5. Move the EXB-8500 to the maintenance area.
11.1 Required Tools
To replace the SYS card, you need the following tools:
October 1991
✓
Torque limiting screwdriver, 3.4 to 5.0 inch-pounds (3.9 to 5.8 kg-cm)
✓
T-10 TORX bit
✓
T-8 TORX bit
✓
Tweezers
✓
#1 flat-blade screwdriver
✓
Floppy diskette containing microcode files
✓
EXABYTE automatic head sync tape for the EXB-8500, part number
180025
11-1
11 SYS Card Replacement
11.2 Preparing the EXB-8500
The SYS card is mounted on the bottom of the EXB 8500 and is the card into
which the other cards (KRW, KCD, and SIF or DIF) are inserted. The SYS
card performs the functions of a mother board and contains all of the control
circuitry. Before removing the SYS card, remove these parts in the following
order:
Top cover
Card retainers
Deck hanger
SIF/DIF card
KCD card
KRW card
SYS card cover
Chapter 4
Chapter 7
Chapter 8
Chapter 9
Chapter 9
Chapter 9
Chapter 10
IMPORTANT
When removing or inserting a card, hold the card on the edges. To
avoid damaging the card, do not hold the components or connectors
mounted on the card. After removing the card, hold and place it on its
edges whenever possible.
11-2
510204
11 SYS Card Replacement
11.3 Removing the Mounting Screws
Using a T-8 TORX bit, remove the two screws that mount the SYS card to the
main housing. Figure 11-1 shows the locations of the screws.
Once these screws are removed, the SYS card will be loose and the
connectors can be removed. To remove the connectors, follow the instructions
in Section 11.4.
Figure 11-1
October 1991
SYS Card Screws
11-3
11 SYS Card Replacement
11.4 Disconnecting the SYS Card Connectors
CAUTION
Do not pull on the wires to remove the connectors or you may damage
the wires.
To disconnect the SYS card connectors, follow these steps:
1. Turn the EXB-8500 so that it is resting on its side with the bottom
facing toward you and the front facing to your left.
2. Pull the SYS card away from the main housing so that you can access
the connectors. There are 14 connectors and cables on the SYS card,
which are attached to various components on the deck. Figure 11-2 on
the next page shows the location of these connectors on the SYS card.
11-4
510204
11 SYS Card Replacement
Figure 11-2
SYS Card Connectors
3. Starting with the connector closest to the rear of the EXB-8500, remove
all of the connectors along the edge facing you.
Note:
October 1991
Use a pair of tweezers (or similar tool) to push down on the
bottom of the key portion of the connector plug, then push the
plug away from the SYS card connector socket. Each
connector socket has either one or two key slots (see Figure
11-3). On those connector plugs with two keys, push
alternately on each key so that the connector is removed
evenly from the socket.
11-5
11 SYS Card Replacement
Figure 11-3
SYS Card Connectors
4. Turn the EXB-8500 so that it is resting on its back with the front facing
up.
5. Pull the SYS card away from the main housing and remove all of the
connectors along the front edge of the card.
6. Turn the EXB-8500 again so that the bottom of the EXB-8500 is still
facing you and the front faces to your right.
7. Remove all of the connectors along this edge of the card.
8. Once you have disconnected all the electrical connections, pull the SYS
card away from the main housing.
11-6
510204
11 SYS Card Replacement
11.5 Reconnecting the SYS Card Connectors
To reconnect the SYS card connections, follow the instructions for removing
the SYS card connections in reverse order, as follows:
1. Start at the rear of the EXB-8500 and work around to the front.
2. Then, work across the front and back toward the rear.
3. End with the rear connector on the right side of the EXB 8500.
4. Ensure that all connectors are fully seated.
CAUTION
Be sure to plug the connectors into the correct sockets. The connectors
and the sockets are color coded or sized differently to help you
determine which connector goes with which socket.
11.6 Reattaching the SYS Card to the Main Housing
To reattach the SYS card to the main housing, follow these steps:
1. Turn the EXB-8500 upside down with the front of the EXB-8500 facing
you.
2. Set the SYS card in place and start the two screws that attach the SYS
card to the main housing. Do not tighten these screws yet.
3. Carefully inspect the edges of the SYS card to ensure that no wires are
caught between the SYS card and the main housing.
CAUTION
Do not overtighten the screws. Overtightening these screws can
damage the SYS card or strip the holes in the main housing. If any of
the screw holes in the main housing become stripped, replace the main
housing.
4. Using a T-8 TORX bit, tighten the two screws to 3.4 inch-pounds (3.9
kg-cm) of torque.
October 1991
11-7
11 SYS Card Replacement
11.7 Reassembling the EXB-8500
To reassemble the EXB-8500, replace these parts in the following order:
SYS card cover
KRW card
KCD card
SIF/DIF card
Deck hanger
Card retainers
Top cover
Chapter 10
Chapter 9
Chapter 9
Chapter 9
Chapter 8
Chapter 7
Chapter 4
11.8 Loading Microcode onto a New SYS Card
After replacing the SYS card with a new SYS card, you must load the
required microcode onto the new SYS card EPROMs. With the replacement
SYS card, you should have received a 51⁄4-inch floppy diskette. This diskette
contains two binary files with the following types of names:
85C-xxxx.BIN
85E-xxxx.BIN
Control and servo code, where xxxx is the code level
Customer-specific code, where xxxx is the code level
Use the EXB-8500 Monitor program to load the new code from these files
onto your SYS card. For more information about using the Monitor program,
refer to the Monitor User’s Guide for the EXB 8500 8mm Cartridge Tape
Subsystem.
11.9 Adjusting the Head Sync Timing
After you have replaced the SYS card and loaded the microcode, you must
adjust the head sync timing using the EXABYTE automatic head sync tape
for the EXB-8500. For instructions on using this tape, see Chapter 17.
11-8
510204
11 SYS Card Replacement
11.10 Testing the Replacement
To test the replacement of the SYS card, do the following:
1. Run the EXPERT Inter_chg test.
2. Run the EXPERT WrtVari test.
3. Run the EXPERT Motion test.
If any EXPERT test fails, check the EXPERT trace log for causes and to help
determine the appropriate action to take.
Note:
October 1991
Refer to the EXPERT User’s Guide for more information on running
EXPERT tests.
11-9
11 SYS Card Replacement
Notes:
11-10
510204
12 Deck Assembly Replacement
12 Deck Assembly Replacement
This chapter describes how to remove and replace the deck assembly. The
deck assembly contains the data cartridge loader, the tape path mechanism,
and the head assembly.
WARNING
Before starting any replacement procedures, make sure that the
EXB-8500 is not in use, as follows:
1.
Make sure that any current operation has completed and that
tape motion has stopped.
2. Unload the data cartridge by pressing the unload button or issuing
a LOAD/UNLOAD (1Bh) command to the EXB-8500.
3.
Disconnect the power cord from the EXB-8500.
4. Disconnect the SCSI cable from the EXB-8500.
5. Move the EXB-8500 to the maintenance area.
12.1 Required Tools
To replace the deck assembly, you need the following tools:
October 1991
✓
T-10 TORX bit
✓
T-8 TORX bit
✓
#1 flat-blade screwdriver
✓
#1 Phillips screwdriver
✓
Pointed, non-conductive tool, such as a potentiometer adjustment tool
✓
EXABYTE automatic head sync tape for the EXB-8500, part number
180025
12-1
12 Deck Assembly Replacement
12.2 Preparing the EXB-8500
To replace the deck, first remove these parts in the following order:
Top cover
Card retainers
Deck hanger
Door
Faceplate
KRW card
SIF/DIF card
SYS card cover
SYS card
Chapter 4
Chapter 7
Chapter 8
Chapter 5
Chapter 6
Chapter 9
Chapter 9
Chapter 10
Chapter 11
12.3 Removing the Deck
To remove the deck, follow these steps:
1. Using a #1 Phillips screwdriver, remove the four Phillips screws that
mount the deck to the main housing, as shown in Figure 12-1.
2. Carefully push the deck out the front of the EXB-8500 and away from
the main housing.
Figure 12-1
12-2
Location of Deck Screws
510204
12 Deck Assembly Replacement
12.4 Replacing the Deck
To replace the deck, follow these steps:
1. Carefully slide the new deck in place and start the four mounting screws
to hold the deck in place while you are reassembling the EXB-8500. Do
not tighten these screws yet.
2. Install the faceplate from the old deck on the new deck (see Chapter 6).
3. Mount the door assembly from the old deck on the new deck (see
Chapter 5).
CAUTION
Do not overtighten the screws. Overtightening the deck screws can
strip the holes in the deck. If any of the screw holes in the deck
become stripped, replace the deck.
4. Tighten the deck mounting screws until they are snug.
12.5 Reassembling the EXB-8500
To reassemble the EXB-8500, replace these parts in the following order:
SYS card
SYS card cover
SIF/DIF card
KCD card
KRW card
Deck hanger
Card retainers
Top cover
Chapter 11
Chapter 10
Chapter 9
Chapter 9
Chapter 9
Chapter 8
Chapter 7
Chapter 4
12.6 Adjusting the Head Sync Timing
After you replace a deck assembly, you must adjust the head sync timing
using the EXABYTE automatic head sync tape for the EXB-8500. For
instructions on using this tape, see Chapter 17.
October 1991
12-3
12 Deck Assembly Replacement
12.7 Testing the Replacement
To test the replacement of the deck, do the following:
1. Run the EXPERT Inter_chg test.
2. Run the EXPERT WrtVari test.
3. Run the EXPERT Motion test.
If any EXPERT test fails, check the EXPERT trace log for causes and to help
determine the appropriate action to take.
Note:
12-4
Refer to the EXPERT User’s Guide for more information on running
EXPERT tests.
510204
13 Main Housing Replacement
13 Main Housing Replacement
This chapter describes how to remove and replace the main housing.
WARNING
Before starting any replacement procedures, make sure that the
EXB-8500 is not in use, as follows:
1.
Make sure that any current operation has completed and that
tape motion has stopped.
2. Unload the data cartridge by pressing the unload button or issuing
a LOAD/UNLOAD (1Bh) command to the EXB-8500.
3.
Disconnect the power cord from the EXB-8500.
4. Disconnect the SCSI cable from the EXB-8500.
5. Move the EXB-8500 to the maintenance area.
13.1 Required Tools
To replace the main housing, you need the following tools:
October 1991
✓
Torque limiting screwdriver, 3.4 to 5.0 inch-pounds (3.9 to 5.8 kg-cm)
✓
T-10 TORX bit
✓
T-8 TORX bit
✓
#1 flat-blade screwdriver
✓
Pointed, non-conductive tool, such as a potentiometer adjustment tool
✓
EXABYTE automatic head sync tape for the EXB-8500, part number
180025
13-1
13 Main Housing Replacement
13.2 Preparing the EXB-8500
To replace the main housing, first remove these parts in the following order:
Top cover
Card retainers
Door
Faceplate
SYS card cover
Note:
Chapter 4
Chapter 7
Chapter 5
Chapter 6
Chapter 10 (See Note below.)
You must remove the SYS card mounting screws (see Section 11.3),
but the SYS card can remain in place. You should also remove the
deck mounting screws (see Section 12.3), but you do not need to
remove the deck.
13.3 Removing the Main Housing
After separating the main housing from all other assemblies and components,
you can remove it. To remove the main housing, follow these steps:
1. Grasp the main housing by the sides toward the front.
2. Spread the sides of the main housing apart.
3. Push the main housing away from the rest of the EXB-8500 until it is
completely separate from the deck and cards, as shown in Figure 13-1.
Figure 13-1
13-2
Removing the Main Housing
510204
13 Main Housing Replacement
13.4 Replacing the Main Housing
To replace the main housing, follow these steps:
1. Grasp the main housing by the sides at the front.
2. Spread the sides of the main housing apart.
3. Pull the main housing around the deck and cards until it is in place.
4. Inspect the mounting tabs for the SYS card cover to ensure that they are
positioned so that the SYS card and SYS card cover can be properly
mounted to the main housing. The screws for the SYS card cover should
go through the SYS card cover and SYS card before they go into the
main housing.
13.5 Reassembling the EXB-8500
To reassemble the EXB-8500, replace these parts in the following order:
SYS card cover
Card retainers
Faceplate
Door
Top cover
Chapter 10
Chapter 7
Chapter 6
Chapter 5
Chapter 4
13.6 Adjusting the Head Sync Timing
After you replace the main housing, you must adjust the head sync timing
using the EXABYTE automatic head sync tape for the EXB-8500. For
instructions on using this tape, see Chapter 17.
13.7 Testing the Replacement
To test the replacement of the main housing, do the following:
1. Run the EXPERT WrtVari test.
2. Run the EXPERT Motion test.
If either EXPERT test fails, check the EXPERT trace log for causes and to
help determine the appropriate action to take.
Note:
October 1991
Refer to the EXPERT User’s Guide for more information on running
EXPERT tests.
13-3
13 Main Housing Replacement
Notes:
13-4
510204
Part 3
Performing Other Maintenance Procedures
14 Cleaning the EXB-8500
14 Cleaning the EXB-8500
The EXB-8500’s heads and tape path should be cleaned on a regular basis.
The only cleaning material authorized for use with the EXB-8500 is an
EXABYTE-manufactured 8mm cleaning cartridge.
IMPORTANT
Using cloth swabs, cotton swabs, cleaning agents, or non-EXABYTE
cleaning cartridges will void the warranty on the EXB-8500.
Use the following guidelines to determine how often to clean the EXB-8500:
October 1991
■
When using the EXB-8500 to read and write data in EXB-8500 format,
clean the tape heads and tape path once a month or after 60 GBytes of
data transfer, whichever occurs first. For planning purposes,
approximately 2 GBytes of data are transferred per hour of operation in
EXB-8500 mode.
■
When using the EXB-8500 to read and write data in EXB-8200 format,
clean the tape heads and tape path once a month or after 30 GBytes of
data transfer, whichever occurs first. For planning purposes,
approximately 1 GByte of data is transferred per hour of operation in
EXB-8200 mode.
14-3
14 Cleaning the EXB-8500
To use the cleaning cartridge, follow these steps:
1. Apply power to the EXB-8500. When the power-on self-test is
complete, press the unload button and remove any data cartridge in the
EXB-8500. Leave the door open.
2. Place the cleaning cartridge in the EXB-8500 and close the door.
The EXB-8500 automatically performs the remainder of the cleaning
cycle. When the cleaning cycle is complete, the cleaning cartridge is
unloaded and ejected from the EXB-8500. The average cleaning cycle is
15 seconds.
3. On the cleaning cartridge label, record the date you performed the
cleaning.
4. Store the cleaning cartridge for future use.
Note:
If the cleaning cartridge is ejected from the EXB-8500 without
performing a cleaning cycle (that is, before 15 seconds), the
cleaning cartridge has reached the end of its useful life and
should be discarded.
CAUTION
To prevent contamination of the EXB-8500, do not use the cleaning
cartridge for more than the number of cleaning cycles specified on the
cartridge label.
14-4
510204
15 Loading New Microcode to the EXB-8500
15 Loading New Microcode to the EXB-8500
When a new firmware release becomes available, you can download the
microcode to the EXB-8500 in one of three ways:
■
■
■
Using a microcode update tape (part number 180026)
Using the EXB-8500 Monitor program
Using the WRITE BUFFER (3Bh) SCSI command
This chapter contains guidelines to help you decide which is the most
appropriate method for updating your code.
15.1 Deciding Which Loading Method to Use
The loading method that you use to update your code depends on the state of
the EXB 8500’s existing code. Follow these guidelines to determine which
method is most appropriate for you:
■
If you replace a SYS card, you must use the EXB 8500 Monitor program.
■
If you are updating code on an existing SYS card, use either the
microcode update tape or the WRITE BUFFER command.
Note:
If you want to use the microcode update tape to update your code,
the existing code must be at level 85C-0040 or above. To determine
the level of the existing code, see the label on the top of the
EXB 8500. Or, if the code has been updated previously, issue an
INQUIRY (12h) command to the EXB 8500 (refer to the EXB 8500
8mm Cartridge Tape Subsystem User’s Manual).
15.2 Where to Find Code Loading Information
For information about the different methods for loading code, refer to the
manuals listed in the following table.
For information about the...
Refer to this manual
Microcode update tape
EXB-8500 8mm Cartridge Tape
Subsystem User’s Manual
WRITE BUFFER command
EXB-8500 Monitor program
October 1991
Monitor User’s Guide for the
EXB-8500 8mm Cartridge Tape
Subsystem
15-1
15 Loading New Microcode to the EXB-8500
Notes:
15-2
510204
16 Removing Tape from the Tape Path
16 Removing Tape from the Tape Path
This chapter describes how to remove a data cartridge and tape that is loaded
in the tape path of a nonfunctioning EXB-8500. Use this procedure only as a
last option when it is necessary to preserve the data on the tape. Removing a
data cartridge from a nonfunctioning EXB 8500 involves these steps:
1. Preparing the EXB-8500.
2. Preparing the data cartridge (taping open the data cartridge door).
3. Removing the erase head bracket.
4. Removing the tape guide.
5. Removing the tape from the tape path.
6. Removing the door and faceplate.
7. Winding the loose tape into the data cartridge and ejecting the cartridge.
Note:
Before using this procedure or if there are any questions about this
procedure, contact EXABYTE Technical Support. Technical Support
will attempt to provide alternate methods for recovering the data
cartridge.
16.1 Before Starting the Procedure
Before starting this tape removal procedure, make sure you read this section.
It contains important information about possible damage to the EXB-8500,
data cartridge, and data; describes a preliminary procedure to try before
performing the tape removal procedure; and lists the tools required for this
procedure.
IMPORTANT
EXABYTE Corporation does not assume responsibility for any
damage to the EXB-8500, the data cartridge, or the tape or for the loss
of any data resulting from this procedure. Any damage to the
EXB 8500 caused by this procedure will be repaired as a nonwarranty
repair and may void the existing warranty for the EXB-8500.
October 1991
16-1
16 Removing Tape from the Tape Path
Preliminary Procedure
Before attempting the tape removal procedure, power the EXB-8500 off and
back on again to attempt to clear a possible hang condition.
If the green LED is lit, indicating Ready status, press the unload button or
issue a LOAD/UNLOAD (1Bh) SCSI command to unload the data cartridge.
If the green LED is not lit, continue with the instructions in this chapter.
Required Tools
To perform the tape removal procedure, you need the following tools:
✓
#1 flat-blade screwdriver
✓
Tweezers
✓
#0 Phillips screwdriver
✓
Torque limiting screwdriver, 3.4 to 5.0 inch-pounds (3.9 to 5.8 kg-cm)
✓
T-10 TORX bit
✓
T-8 TORX bit
✓
Adhesive tape
✓
Nonconductive tool, such as a molded potentiometer adjustment tool
16.2 Preparing the EXB-8500
To remove a data cartridge from a non-functioning EXB-8500, first remove
these parts in the following order:
Top cover
Deck hanger
16-2
Chapter 4
Chapter 8
510204
16 Removing Tape from the Tape Path
16.3 Preparing the Data Cartridge
To avoid damaging the tape with the data cartridge door during this
procedure, you must tape open the data cartridge door.
To tape the door open, follow these steps:
1. Obtain two pieces of adhesive tape, each approximately 2 inches (5 cm)
long.
2. Position the two pieces of tape as shown in Figure 16-1 and press them
gently to the data cartridge.
Figure 16-1
October 1991
Taping Open the Data Cartridge Door
16-3
16 Removing Tape from the Tape Path
16.4 Removing the Erase Head Bracket and Tape Guide
The erase head bracket, shown in Figure 16-2, is a molded black plastic part
mounted onto two posts. The erase head is attached to the bracket where the
wires emerge and lead to the connector on the SYS card.
The tape guide, also shown in Figure 16-2, is the molded black plastic part
that looks like the boom on a crane. The tape guide is mounted on three posts.
The largest post is the primary mounting post and the other two posts are
guides for correct positioning of the tape guide.
To remove the erase head bracket and tape guide, follow these steps:
1. Use a #0 Phillips screwdriver to remove the small screw that holds the
erase head bracket in place (see Figure 16-2).
Figure 16-2
16-4
Location of Screw for Erase Head Bracket
510204
16 Removing Tape from the Tape Path
2. With your thumb and forefinger, lift the erase head bracket straight up at
the base. You do not need to remove the connector and wires from the
SYS card since there is sufficient slack in the connector wires to allow
the erase head bracket to be removed.
3. Position the erase head bracket so that it is hanging over the side of the
EXB-8500 and away from the tape path.
4. Gently lift the tape guide straight up at the primary mounting post, so
that it is removed from all three posts at the same time.
5. Set the tape guide aside so that you can replace it later.
October 1991
16-5
16 Removing Tape from the Tape Path
16.5 Removing the Tape from the Tape Path
CAUTION
EXABYTE considers this procedure to have a high potential for
damage to the tape and the heads on the EXB-8500. Use extreme
caution when attempting to remove the tape using this procedure.
Determining Which Side of the Tape to Touch
When removing the tape from the guide posts and rollers, use a
nonconductive tool, such as a molded potentiometer adjustment tool. Avoid
touching the side of the tape where data is recorded. If you are unsure of
which side of the tape to touch with the tool, carefully inspect the tape path
before starting this procedure. The side of the tape that comes in direct contact
with the head assembly is the side where data is recorded. The data side of the
tape is duller in color than the back of the tape.
Removing the Tape
To remove the tape from the tape path, follow these steps:
1. Using the nonconductive tool, loosen the tape at point 1, shown in
Figure 16-3, by positioning the tool between the tape and the rotating
head and moving the tool toward the rear of the EXB-8500. This pulls
the tape off of the takeup reel and makes a loose loop in the tape.
2. Using your finger, move the pinch roller flange toward the left side of
the EXB-8500 and hold it in this position. This releases the pinch roller
from the capstan and provides a gap between the pinch roller and the
pinch roller flange.
CAUTION
After starting to remove the tape, do not release the pinch roller until
the tape is completely removed from around the pinch roller and
capstan. If the pinch roller is released before the tape is clear of these
components, the tape will be damaged.
16-6
510204
16 Removing Tape from the Tape Path
3. Insert the tool in the tape loop at point 2 and gently lift the tape up from
around the pinch roller and capstan.
4. After the tape is completely clear of the pinch roller and the capstan,
release the pinch roller flange.
Figure 16-3
EXB-8500 with Tape Loaded (Tape Guide and Erase Head Bracket Removed)
5. Remove the tape from around the guide posts and rollers at points 3 and
4, shown in Figure 16-3. Be sure to place the tool inside the tape loop to
avoid touching the tape recording surface or the head assembly.
October 1991
16-7
16 Removing Tape from the Tape Path
6. Position the tool between points 4 and 5 inside the tape loop. Point 5,
shown in Figure 16-3, is an “L” shaped molded black plastic part. The
“L” is mounted upside-down and prevents the tape from riding up over
the rotating drum. Gently move the tape up so that it passes between the
“L” and the edge of the head assembly.
Note:
Be careful that the tape is not creased or damaged in any way
when removing it from this point.
7. Lift the tape from around the guide posts and roller at point 6, shown in
Figure 16-3. Be sure to place the tool inside the tape loop.
16.6 Removing the Door and Faceplate
IMPORTANT
When opening the door as described in Chapter 5, hold the door so
that it opens more slowly than normal. This will prevent the data
cartridge from being moved quickly and damaging the tape.
The door and faceplate must be removed to allow access to the data cartridge.
To remove the door and faceplate, follow these steps:
1. Remove the door by following the instructions in Chapter 5.
2. Remove the faceplate by following the instructions in Chapter 6.
3. Once the faceplate is removed, leave the door frame open to allow
access to the data cartridge.
16-8
510204
16 Removing Tape from the Tape Path
16.7 Winding the Loose Tape and Ejecting the Data
Cartridge
With the door and faceplate removed and the door frame open, you can
rewind the tape. To wind the loose tape and eject the data cartridge, follow
these steps:
1. Position the EXB-8500 so that it is resting on the left side of the main
housing with the door facing to your left.
2. Insert the #1 flat-blade screwdriver between the bottom edge of the door
and the edge of the EXB-8500.
3. Insert the blade of the screwdriver into the hub of the takeup reel (the
top hub with the EXB-8500 in the current position).
4. Slowly turn the screwdriver counterclockwise to wind any loose tape
onto the data cartridge.
Note:
As you are rewinding the tape manually, you may hear a
ratcheting sound. This sound is normal and does not indicate
that the tape is being damaged.
While turning the screwdriver, watch the tape loop to ensure that it does
not get caught on any of the components. If the tape gets caught, free it
and continue turning the screwdriver.
CAUTION
Make sure that all of the loose tape in the tape loop has been wound
into the data cartridge. If all of the tape is not wound in the data
cartridge, the tape will be damaged by the cartridge door. In addition,
once the loose tape has been wound onto the takeup reel, do not
overwind the tape into the cartridge. Overwinding will damage the
tape.
5. When all of the loose tape has been wound into the data cartridge,
remove the screwdriver.
6. Remove the adhesive tape that is holding open the door of the data
cartridge.
October 1991
16-9
16 Removing Tape from the Tape Path
7. Carefully close the door on the data cartridge, checking to ensure that
the door does not contact the exposed tape. Then, remove the data
cartridge.
8. Replace the tape guide. Ensure that it fits onto all three guide posts
starting with the primary post.
9. Replace the erase head bracket, attaching it with the screw that you
removed earlier. Tighten the screw to 5.0 inch-pounds (5.8 kg cm) of
torque.
16.8 Reassembling the EXB-8500
To reassemble the EXB-8500, replace these parts in the following order:
Faceplate
Door
Deck hanger
Top cover
16-10
Chapter 6
Chapter 5
Chapter 8
Chapter 4
510204
17 Adjusting the Head Sync Timing
17 Adjusting the Head Sync Timing
This chapter describes how to use the EXABYTE automatic head sync tape to
adjust the head sync timing on the EXB-8500. The head sync adjustment is
performed automatically when the automatic head sync tape is loaded into the
EXB-8500. Use the automatic head sync tape whenever you replace a SYS
card or a deck.
17.1 Required Equipment
To adjust the head sync timing using the automatic head sync tape, you need
the following:
✓
Automatic head sync tape for the EXB 8500, part number 180025
✓
Boot PROM code level 8 or higher
✓
Microcode level 85C-0050 or higher
To determine the levels of the boot PROM code and microcode, see the label
on the top of the EXB-8500. If you do not have code at the required levels,
you can order a free upgrade from EXABYTE.
IMPORTANT
To ensure accurate results, replace the automatic head sync tape after
using it 150 times. If you have problems at any time adjusting the
head sync with the head sync tape, get a new head sync tape.
October 1991
17-1
17 Adjusting the Head Sync Timing
17.2 Using the Head Sync Tape
When a head sync tape is inserted into the EXB-8500, the EXB-8500
automatically detects its presence and adjusts the head sync as required. No
operator intervention is needed other than inserting the tape into the
EXB-8500.
To set the head sync timing with the automatic head sync tape, follow these
steps:
1. Apply power to the EXB-8500 and wait for it to complete its power-on
self-test.
2. Press the unload button on the EXB-8500 and wait for the door to open.
3. Insert the head sync tape in the EXB-8500 and close the door.
4. Wait approximately one minute while the EXB-8500 loads the tape and
resets the head sync timing. The green and amber LEDs will flash
during this time.
5. After the head sync timing has been reset, the EXB-8500 automatically
rewinds, unloads, and ejects the tape and turns both LEDs off. If the
EXB-8500 Monitor program is running and the head sync timing
adjustment was successful, the following message is displayed:
a: Head sync set successfully!
6. Remove the head sync tape from the EXB-8500 and store it for future
use.
Note:
17-2
If an error occurs during the head sync timing adjustment, the
EXB-8500 will not eject the tape and both LEDs will flash. Press the
unload button to remove the tape and repeat the procedure with a
new tape.
510204
18 Adjusting the Servo Read Amplitude
18 Adjusting the Servo Read Amplitude
When you replace the KRW card, you must adjust the servo read amplitude.
Two potentiometers on the KRW card control the servo read amplitude.
IMPORTANT
This procedure needs to be performed only on EXB-8500s whose
main housing is black. This procedure cannot be performed correctly
on EXB-8500s with main housings of any other color.
Adjusting the servo read amplitude for the EXB-8500 involves the following
steps:
■
Connecting the EXB-8500 whose amplitude needs adjusting to an
oscilloscope.
■
Using EXPERT to write a 50-MByte file to tape.
■
Adjusting the potentiometers on the KRW card to the correct servo read
amplitude. You must adjust one potentiometer for EXB-8200 format and
another potentiometer for EXB-8500 format.
18.1 Required Tools and Equipment
To adjust the servo read amplitude, you need the following:
October 1991
✓
EXPERT software, version 6.50 or later, and equipment required to run
EXPERT (refer to the EXPERT User’s Guide)
✓
Blank EXATAPE 8mm data cartridge (or equivalent)
✓
Oscilloscope
✓
Potentiometer adjustment tool
18-1
18 Adjusting the Servo Read Amplitude
18.2 Preparing the EXB-8500
To prepare the EXB-8500 for adjusting the servo read amplitude, follow these
steps:
1. Connect the EXB-8500 whose amplitude needs adjusting to the power
source and to the SCSI bus of your personal computer.
2. Connect the oscilloscope to the power source and turn it on.
3. Insert one of the oscilloscope probes through the EXB-8500’s top cover
and connect it to the servo test point (labeled SV) near the left edge of
the KRW card. Figure 18-1 shows the location of the servo test point.
4. Insert the other oscilloscope probe through the EXB-8500’s top cover
and connect it to the head sync test point (labeled HSYN) near the right
edge of the KRW card. Figure 18-1 shows the location of the head sync
test point.
Figure 18-1
18-2
Location of Test Points on KRW Card
510204
18 Adjusting the Servo Read Amplitude
5. Connect any two of the four ground terminals from the oscilloscope to
the ground points (springs) on the KRW card. Attach one ground
terminal to each ground point. Figure 18-2 shows the locations of the
ground points.
You are now ready to adjust the servo read amplitude for both EXB-8200 and
EXB-8500 formats.
Figure 18-2
October 1991
Location of Ground Points on the KRW Card
18-3
18 Adjusting the Servo Read Amplitude
18.3 Adjusting the Servo Read Amplitude for EXB-8200
Format
To adjust the servo read amplitude for EXB-8200 format, follow these steps:
1. Start EXPERT and load the blank data cartridge into the EXB-8500.
2. Using the EXPERT Short test in EXB-8200 format, write a 50-MByte
file to tape.
3. Once the write operation is complete, rewind the data cartridge.
4. After you have set up the EXB-8500 and oscilloscope as described in
Section 18.2, set the oscilloscope to the following:
Volts/division = 200 millivolts
Time/division = 2 milliseconds
5. Locate the potentiometer labeled R15 at the top of the KRW card near
the left edge.
6. While reading the 50-MByte, EXB-8200 format file using the EXPERT
Short test, use the potentiometer adjustment tool to adjust the R15
potentiometer so that the amplitude for the servo zones displayed on the
oscilloscope is 800 millivolts ±50 millivolts.
Note:
Turn the potentiometer clockwise to raise the amplitude and
counterclockwise to lower the amplitude.
Figure 18-3 shows the oscilloscope reading for the proper adjustment.
7. Once the amplitude is adjusted, disconnect the oscilloscope from the
KRW card and eject the data cartridge.
18-4
510204
18 Adjusting the Servo Read Amplitude
Figure 18-3
Oscilloscope Reading for EXB-8200 Format Servo Read Amplitude
18.4 Adjusting the Servo Read Amplitude for EXB-8500
Format
To adjust the servo read amplitude for EXB-8500 format, follow these steps:
1. If you have not already done so, start EXPERT and load the blank data
cartridge into the EXB-8500.
2. Using the EXPERT Short test in EXB-8500 format, write a 50-MByte
file to tape.
3. Once the write operation is complete, rewind the data cartridge.
4. After you have set up the EXB-8500 and oscilloscope as described in
Section 18.2, set the oscilloscope to the following:
Volts/division = 200 millivolts
Time/division = 2 milliseconds
B delay to the falling edge of head sync = 100 µsec.
Figure 18-4 shows the oscilloscope reading with no delay during a Short
read operation.
October 1991
18-5
18 Adjusting the Servo Read Amplitude
Figure 18-4
Oscilloscope Reading with No Delay (8500 format)
5. Locate the potentiometer labeled R37 at the top of the KRW card near
the right edge.
6. While reading the 50-MByte, EXB-8500 format file using the EXPERT
Short test, use the potentiometer adjustment tool to adjust the R37
potentiometer so that the amplitude for the servo zones displayed on the
oscilloscope is 800 millivolts ±50 millivolts.
Note:
Turn the potentiometer clockwise to raise the amplitude and
counterclockwise to lower the amplitude.
Figure 18-5 shows the oscilloscope reading for the proper adjustment.
18-6
510204
18 Adjusting the Servo Read Amplitude
Figure 18-5
Oscilloscope Reading for EXB-8500 Format Servo Read Amplitude
4. Once the amplitude is adjusted, disconnect the oscilloscope from the
KRW card and eject the data cartridge.
October 1991
18-7
18 Adjusting the Servo Read Amplitude
Notes:
18-8
510204
19 Replacing the Boot PROM
19 Replacing the Boot PROM
This chapter describes how to remove and replace the boot PROM on the
EXB-8500’s SYS card.
WARNING
Before starting any replacement procedures, make sure that the
EXB-8500 is not in use, as follows:
1.
Make sure that any current operation has completed and that
tape motion has stopped.
2. Unload the data cartridge by pressing the unload button or issuing
a LOAD/UNLOAD (1Bh) command to the EXB-8500.
3.
Disconnect the power cord from the EXB-8500.
4. Disconnect the SCSI cable from the EXB-8500.
5. Move the EXB-8500 to the maintenance area.
19.1 Required Tools
To replace the boot PROM, you need the following tools:
October 1991
✓
Torque limiting screwdriver, 3.4 to 5.0 inch-pounds (3.9 to 5.8 kg-cm)
✓
T-10 TORX bit
✓
T-8 TORX bit
✓
PROM removal tool, such as Emulation Technology’s “Pull-A-PLCC”
19-1
19 Replacing the Boot PROM
19.2 Preparing the EXB-8500
To access the boot PROM, first remove these parts in the following order:
Top cover
Card retainers
KCD card
SIF or DIF card
Note:
Chapter 4
Chapter 7
Chapter 9
Chapter 9
You do not need to remove the KRW card, which is the card closest
to the front of the EXB-8500.
IMPORTANT
When removing or inserting a card, hold the card on the edges. To
avoid damaging the card, do not hold the components or connectors
mounted on the card. After removing the card, hold and place it on its
edges whenever possible.
19-2
510204
19 Replacing the Boot PROM
19.3 Removing and Replacing the Boot PROM
After removing the edge-mounted cards, you can replace the boot PROM.
The boot PROM is the socket-mounted chip in the right rear corner of the
SYS card (or motherboard).
Removing the Existing Boot PROM
To remove the existing boot PROM, follow these steps:
1. Locate the boot PROM in the right rear corner of the SYS card (see
Figure 19-1).
2. Using the PROM removal tool, carefully extract the PROM from the
card and set it aside.
Figure 19-1
October 1991
Location of Boot PROM on the SYS Card
19-3
19 Replacing the Boot PROM
Installing a New Boot PROM
To install the new boot PROM, follow these steps:
1. Locate the notch on the corner of the PROM as shown in Figure 19-2.
Figure 19-2
Location of Notch in Boot PROM
2. Using your thumb and forefinger, insert the PROM into the socket on
the SYS card. Ensure that the notch on the corner of the PROM is
aligned with the notch on the socket and that the label side of the PROM
faces up. This ensures that pin 1 of the PROM is aligned with pin 1 on
the socket.
3. Place both of your thumbs on top of the PROM and gently press it into
the socket. Be careful to provide even pressure on the top of the PROM
so that all pins are inserted at the same time. Uneven pressure can result
in the PROM being only partially inserted and in bent pins on the
PROM.
19-4
510204
19 Replacing the Boot PROM
4. Visually inspect the PROM to ensure that all of the pins have been
correctly inserted. If the PROM is not fully seated in the socket, apply
additional pressure to ensure that all pins on the PROM are completely
inserted.
5. If any of the pins are bent, remove the PROM, straighten the pins, and
reattempt the procedure.
Note:
If the pins are badly bent or broken, do not use the PROM.
Begin the procedure with a new PROM.
19.4 Reassembling the EXB-8500
To reassemble the EXB-8500, replace these parts in the following order:
SIF or DIF card
KCD card
Card retainers
Top cover
October 1991
Chapter 9
Chapter 9
Chapter 7
Chapter 4
19-5
19 Replacing the Boot PROM
Notes:
19-6
510204
Glossary
Glossary
October 1991
µm
Micrometer (0.00003937 inches).
µs or µsec
Microsecond.
address
A unique identifier assigned to each device or
subsystem on the SCSI bus. Also referred to as the
SCSI ID.
bus devices
Initiator or target devices connected to the SCSI bus.
byte
Eight bits or one character.
card retainers
The small plastic pieces that sit on top of the
installed printed circuit cards and the deck hanger.
These pieces keep the cards and the deck hanger
from touching each other. The EXB 8500 contains a
left and a right card retainer.
cm
Centimeter (0.3937 inches).
CSA
Canadian Standards Association.
deck
The portion of the EXB 8500 that contains the drum
assembly, data cartridge loader, and tape path.
deck hanger
The plastic and copper piece that separates the
printed circuit card section from the deck section of
the EXB 8500.
DIF card
The printed circuit card that controls the differential
interface (SCSI) operations of the EXB 8500. See
also SIF card.
drum assembly
The portion of the deck assembly that contains the
EXB 8500’s five heads (two write heads, two read
heads, and servo head). Also called the head
assembly.
edge mounted
cards
The three cards (DIF/SIF, KCD, and KRW) that are
mounted on edge into the SYS card.
EEPROM
Electrically erasable programmable read only
memory.
EPROM
Erasable programmable read only memory.
G-1
Glossary
G-2
EXB-8500
The EXB-8500 8mm Cartridge Tape Subsystem.
The EXB-8500 can store up to 5.0 gigabytes of data
on a single 8mm data cartridge.
FCC
Federal Communications Commission.
faceplate
The portion of the front of the EXB 8500 that frames
the door.
FRU
Field replaceable unit.
GByte
Gigabyte or one billion bytes.
head sync
The adjustment that ensures that the drum assembly
is rotating at the correct speed. Proper head sync
adjustment provides for write/read interchangeability
between different EXB-8500s and EXB-8200s.
host
The computer system that acts as the initiator of an
operation.
ID
Identification.
IEC
International Electrotechnical Commission.
initiator
A host computer system that requests an operation to
be performed by a target.
KByte
Kilobyte or 1,024 bytes.
KCD card
The printed circuit card that controls the clocking
and detection operations of the EXB 8500.
kg
Kilogram (2.2 pounds).
KRW card
The printed circuit card that controls the read and
write operations of the EXB 8500.
MByte
Megabyte or one million bytes.
mm
Millimeter (0.03937 inches).
ms or msec
Millisecond.
NSTA
National Safe Transit Association.
SCSI
Small Computer System Interface.
SCSI ID
A unique identifier assigned to each device or
subsystem on the SCSI bus. Also referred to as the
address.
510204
Glossary
October 1991
SIF card
The printed circuit card that controls the
single-ended interface (SCSI) operations of the
EXB 8500. See also DIF card.
SYS card
The main printed circuit card, or motherboard, at the
bottom of the EXB-8500. This card controls servo
operations as well as the operations of the other
printed circuit cards in the EXB 8500.
SYS card cover
The bottom cover of the EXB 8500 that fits over the
SYS card.
target
A bus device (usually a controller) that performs an
operation requested by an initiator. The EXB-8500 is
a target.
UL
Underwriters Laboratories.
VDE
German Association of Electrotechnical Engineers
(Verband Deutscher Elektrotechniker).
G-3
Glossary
Notes:
G-4
510204
Index
Index
A
agency certification of EXB-8500
1-5
amplitude
See servo read amplitude
automatic head sync tape, using
17-1 – 17-2
B
bezel
See faceplate
boot PROM, replacing
bottom
See SYS card cover
F
19-1 – 19-6
C
card retainers, replacing
7-1 – 7-4
cards
handling
9-2, 11-2
KRW card connector 9-4
replacing edge mounted
9-1 – 9-8
SYS card removal and replacement 11-1 – 11-10
chassis
See main housing
cleaning cartridge 14-3
cleaning the EXB-8500
accepted products for 14-3
frequency of
14-3 – 14-4
instructions for
14-4
code, loading from tape 15-1 – 15-2
cover
See SYS card cover
See top cover
D
deck assembly, replacing 12-1 – 12-4
deck hanger, replacing
8-1 – 8-6
DIF card, replacing
9-1 – 9-8
door
opening manually
5-1
replacing
5-1 – 5-4
downloading microcode from tape 15-1 – 15-2
E
edge mounted cards, replacing 9-1 – 9-8
electrostatic discharge requirements
2-4
erase head bracket, removing
16-4
October 1991
EXB-8500
agency certification of
1-5
approaches to maintaining
2-1 – 2-8
cleaning
14-3 – 14-4
list of FRUs for
1-3
removing tapes from
16-1 – 16-10
testing
2-4
tools for maintaining
2-1
EXPERT
using to test EXB-8500
2-3
faceplate, replacing
6-1 – 6-4
firewall
See deck hanger
firmware, loading from tape 15-1 – 15-2
frame
See main housing
front bezel
See faceplate
H
hanger
See deck hanger
head sync timing
equipment for adjusting
17-1
procedure for adjusting 17-1 – 17-2
housing, replacing 13-1 – 13-4
K
KCD card, replacing
9-1 – 9-8
KRW card
connections on 9-4
location of ground points on
18-3
location of head sync test point on 18-2
location of servo test point on
18-2
replacing
9-1 – 9-8
M
main housing, replacing 13-1 – 13-4
maintenance
approaches to 2-1 – 2-8
preliminary procedures
2-5
static protection requirements for 2-4
test software for
2-3
test tapes for 2-3
testing after
2-6
testing before
2-4
tools required for 2-1
microcode, loading from tape 15-1 – 15-2
I-1
Index
P
preliminary maintenance procedures
2-5
PROM (boot PROM), replacing
19-1 – 19-6
R
R-packs, replacing 3-3 – 3-6
read amplitude
See servo read amplitude
S
safety standards met by EXB-8500
1-5
servo read amplitude
adjusting
18-1 – 18-8
tools required to adjust
18-1
SIF card, replacing
9-1 – 9-8
software required for testing
2-3
static protection requirements
2-4
SYS card cover, replacing
10-1 – 10-4
SYS card, replacing
11-1 – 11-10
T
tape guide, removing 16-4
tapes
for testing EXB-8500 2-3
removing from EXB-8500 manually
testing
after FRU replacement
2-6
before FRU replacement
2-4
EXB-8500
2-4
manuals for
2-3
software for
2-3
tapes for
2-3
tools for
2-3
tools
for maintaining EXB-8500
2-1
for removing tape manually 16-2
top cover, replacing 4-1 – 4-6
I-2
16-1 – 16-10
510204