1
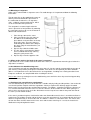
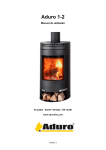
Aduro 1 / Aduro 1SK
User Manual
Ecolabel - Sintef 110-0239 - EN 13240
www.aduro.dk
Good luck with your new wood burning stove!
In order to get the best possible pleasure and benefit from your new Aduro wood burning stove, it is
important that you read this User Manual thoroughly before you install your wood burning stove and start to
use it.
1.0 General
1.1 Compliance
Aduro 1 complies with the EN 13240 European standards, as well as the NS 3058 Norwegian standard and
is thereby approved for installation and use in Europe. The product documentation for Norway has Sintef
number 110-0239 and can be downloaded from our website at www.aduro.no or from www.nbl.sintef.no. At
the same time, the manufacturing process is subject to external quality control. Aduro 1 also carries the
Nordic Swan Eco-label, which guarantees that the wood burning stove complies with the most stringent
environmental requirements and has been manufactured in an environmentally correct manner.
1.2 Technical data
Nominal power:
6 kW
Chimney draught
12 Pa
Maximum combustion amount per hour:
- Wood approx.
3.4 kg
Heat rating in buildings with:
Optimum insulation:
150 m
2
Average insulation:
100 m
2
Inadequate insulation:
60 m
Flue outlet, diameter:
2
150 mm
Weight: Aduro 1 with drawer 93 kg, Aduro 1 with wood tray 85 kg and Aduro 1SK with soapstone 150 kg.
1.3 Transportation
When taking your wood burning stove home, please ensure that it travels in an upright position. If you wish
to lay it flat, it is important that you remove the soapstone sides, dowels and metal brackets (Aduro 1SK)
from the combustion chamber and loose parts from the combustion chamber (cast iron grate and loose
fireproof tiles) and remove the ash drawer. Alternatively you could also fill the combustion chamber with
excess packaging so the cast iron grate and loose fireproof tiles are kept in place.
1.4 Serial number
The wood burning stove has a serial number on the rating plate on the back of the valve below the door.
Please write this number in the space below. For the purposes of the guarantee and for other enquiries, it is
important that you are able to quote this number.
Serial number
-2-
2.0 Mounting of soapstone
Aduro 1SK is mounted with a soapstone cover. To avoid damages it is important to follow the following
instructions:
The top stone lies on the wood burning stove at
delivery and is lifted off before placement. In
the combustion chamber lies six soapstone
sides, 12 dowels and 4 metal brackets, which
are also removed before placement.
The soapstone is mounted again when the
stove is placed at its final position. By mounting
the soapstone you have to use the enclosed 12
dowels and metal brackets.
1. Place the top stone on the stove.
2. Place carefully the first side stone on
the dowels on the bottomplate and
place dowels in the two holes at the top
of the side stone. Then the stone are
fixed through the dowels to the body of
the stove using the metal brackets (see
illustration).
3. Repeat step 2 with the middle stone.
4. The last stone is placed on the dowels
and assembled with the top stone by
lifting this gently on one side.
5. Repeat step 2-4 on the opposite side
2.1 When smoke outlet at the back of the stove is requested
If you choose to use the smoke outlet at the back of the stove, it is important to mount the pipes before the
soapstone is mounted.
3.0 Installation of the wood burning stove
You are welcome to install your wood burning stove yourself – but we strongly recommend that you consult
your chimney sweep before you begin the installation. Your dealer can also provide you with installation
advice. It is important to ensure that all local rules and regulations, including ones relating to national and
European standards, are complied with when installing this device.
Please note: You may not begin to use the wood burning stove until it has been inspected and approved by
your local chimney sweep.
3.1 Position of the stove/distance requirements
The new wood burning stove must be installed in a suitable and physically possible position. You need to be
sure that the position complies with local regulations. Distance requirements will only apply if the wood
burning stove is to be placed close to flammable materials. The Aduro 1 should be installed at a distance of
17,5 cm from flammable materials at the rear and at a distance of 40 cm from the side. When placing in a
corner, there must be 25 cm to each side. All furniture must be kept at least 100 cm away from the front of
the stove (see illustrations below).
If the stove is positioned against a brick wall or other non-flammable material, there is no minimum distance
requirement. To facilitate cleaning and for the best use of the convection air, we recommend that you leave a
distance of approximately 5–10 cm to the wall. The Aduro 1 is built as a convection stove. This means that
air from the room circulates between the inner stove and the outer covering. As a result, the heated air is
distributed evenly throughout the room.
-3-
Behind stove
17,5
25
40
40
25
100
100
Please note: that the Aduro 1 must be installed on a floor with the adequate load-bearing capacity. If the
existing construction does not meet this requirement, appropriate adaptation measures must be taken (e.g. a
load-distributing plate).
If the wood burning stove is to be placed close to flammable material, such as a wooden floor or carpet, it
must be placed on a non-flammable base. The floor plate should extend for at least 30 cm in front of the
wood burning stove, and 15 cm on each side.
3.2 Pipe connection
Aduro 1 leaves the factory with the flue outlet mounted on the top. If you require the flue outlet on the back,
remove the round circle from the rear cover at the upper rear of the stove and then exchange the exhaust
connector (located on the top outlet above the stove) with the cover plate (that covers the rear outlet). The
top outlet is finished with the plate that lies in the ash drawer. A flue pipe with an internal diameter of 150 mm
should be used for Aduro stoves.
3.3 Connection to a brick chimney
If the stove is being connected to a brick chimney, the rear outlet should be used, or a curved flue pipe via
the top outlet. After measurement, a hole is made in the chimney in which the pipe sleeve is placed and
fireplace mortar is used to seal it in place. The stove is placed in position and the flue pipe is put in place. A
thin gasket is placed between the flue pipe and the pipe sleeve to seal the joints. The flue pipe should
protrude 5–10 cm into the pipe sleeve, but must not block the opening in the chimney (see the illustration
below).
X
The wood burning stove can be connected to a chimney to which other heat sources are connected.
-4-
4.0 Lighting a fire in the wood burning stove
4.1 Important safety information
•
•
•
•
•
The wood burning stove will become warm during use and therefore it should be treated with all
necessary caution.
Never keep easily combustible fluids such as petrol in the vicinity of the wood burning stove – and
never use easily combustible fluids to light the fire in the wood burning stove.
Never empty the ash drawer when the wood burning stove is warm. Embers may still be found in the
ash drawer for up to 24 hours after the fire has gone out. Please wait to empty the ash drawer until
you are sure that there are no embers in the ash.
The door should be kept closed while the wood burning stove is in use. While lighting the fire, the
door can stand ajar for the first few minutes.
In the event of a chimney fire: Close all the dampers on the wood burning stove and call the firefighting service.
4.2 Recommended fuels?
We recommend the use of split hardwood that has been stored outdoors under cover for at least 1 year.
Wood that has been stored indoors has a tendency to become too dry and will burn too quickly. The
wood should preferably be felled in the winter, when a lot of the moisture in the wood will have been
drawn down into the roots. In order to achieve optimum combustion, the wood’s moisture level should not
exceed 18 %, which roughly corresponds to storing the wood under cover outdoors for one year. The
moisture level of the wood can be measured using a moisture meter or by applying washing up liquid to
one end of the log and blowing air in the other end. If the wood is dry enough, soap bubbles will appear.
The wood should be chopped into logs with a diameter of approx. 10 cm and a log length of max. 36 cm.
Correct firing provides optimal heat output and maximum economy. At the same time, correct firing
prevents environmental damage in the form of smoke and malodorous fumes and also reduces the risk of
chimney fires. Well seasoned wood fuel is essential for correct use. Make sure your fuel is kept dry. If the
fuel is wet, a large proportion of the heat will be used to vaporize the water, and this energy will
disappear up the chimney. It is clearly not only uneconomical to fire with wet fuel but also, as mentioned
above, increases the risk of producing soot, smoke and other environmentally damaging by-products.
Burning varnished wood, impregnated wood, chipboard, paper and other waste is strictly forbidden. Burning
these materials will damage the environment, the wood burning stove and your own health.
4.3 How do I light a fire in the wood burning stove?
The fire lighting method is very important for starting combustion quickly and efficiently.
1) Open the primary air intake/damper under the door and open the secondary air intake behind the
door. The primary damper is used at the start to get the fire going, while the secondary air intake
keeps the fire burning evenly. The secondary air intake is closed when the damper is pushed all the
way to the left and open when the damper is pushed to the right. To open the primary air intake the
damper should be pulled out. The illustration below shows the stove seen from the front with the
dampers indicated.
2) Place a log of wood crosswise in the combustion chamber and put 2 firelighters close to the log.
Light the firelighters and quickly put a new log close to the firelighters and several small logs at an
angle above it. Air must be able to reach the firelighters, but the logs should be touching to “warm”
each other.
3) Keep the door approx. 1 cm ajar, until the glass is too hot to touch. Then close the door. When there
are distinct, visible flames and the fire has taken hold, close the primary air intake/damper.
Important: The control handle will get warm when the wood burning stove is being used. Please use the
glove provided when you operate the wood burning stove.
-5-
Secondary air intake
Primary air intake
4.4 The first time a fire is lit
The first few times the wood burning stove is used, there may be some smoke and unpleasant odours from
the wood burning stove, which is fairly normal. This is caused by the heat-resistant paint hardening. Make
sure there is sufficient ventilation during this stage. It is also important not to let the fire burn too fiercely the
first 2–3 times, so that the wood burning stove has time to expand slowly. You should also be aware that the
stove may make clicking sounds as it heats up and cools down – rather like pouring boiling water into a sink.
These are caused by the great differences in temperature to which the materials are being exposed.
During the first firing, which should be carried out using approximately 1 kg of wood, the stoking door must
be left slightly open and must not be closed until the stove is cold. This is to prevent the sealing rope sticking
to the stove.
4.5 How should I use my wood burning stove?
The wood burning stove is intended for intermittent combustion. This means that each stoking should burn
down to embers before new logs are added.
In order to obtain the best possible combustion, you should regulate the effect/heat output with the fuel.
Burning small logs provides more powerful combustion than burning large logs as the surface area is greater
and more gas is released. The amount of wood in the combustion chamber is another factor that affects
combustion. In normal circumstances, you should not place more than two logs in the stove. If you want an
enhanced effect, you can add more logs. The nominal heat output is reached by burning approx. 2 kg per
hour.
4.6 Secondary damper
The secondary damper behind the door should always be open while the wood burning stove is in use. This
damper allows you to adjust the wood burning stove to the chimney draft and the heat output you require. In
normal circumstances, the wood burning stove should be working with this damper open between 60 % and
100 %. You should never close the air intake so far that the flames are extinguished. There should always be
visible flames in order to achieve clean and efficient combustion.
Aduro Key: provides easier control of the secondary damper. The key
is fitted onto the control handle, so you can more easily adjust the
airflow from side to side. Turning to the left decreases the airflow, and
turning to the right increases the airflow. When the key is not in use, it
can hang on the edge of the drawer.
-6-
4.7 Primary damper
When you add a new log, the primary air intake/damper should be opened until the fire is burning properly. In
order to utilize the fuel to the fullest extent, the embers should have burnt for so long that it is necessary to
open the primary air intake for approx. 2 minutes to get the new log to burn.
In order to reduce the risk of ash falling from the stove when the door is opened to add more fuel, it is a good
idea to open the primary air intake/damper for approx. 1 minute before the door is opened. This increases
the draught through the stove and reduces the risk that ash will drop on the floor.
Please note: if you overload the wood burning stove and burn more than approx. 3.4 kg wood/hour, there is
a risk that the lacquered surface of the stove will become discoloured and eventually fall off. The stove can
be resurfaced, but this is not covered by the manufacturer’s guarantee. In the same way, any other damage
to the stove caused by overloading will not be covered by the guarantee.
4.8 Aduro-tronic
The patent-applied Aduro-tronic is designed to operate the stove for you. All you have to
do is put dry wood in the stove, and activate the control system - Aduro-tronic does the
rest, leaving you to enjoy the flames and the benefits of efficient combustion. Aduro-tronic
is a patent-applied mechanical solution, which works without the use of electricity.
Please note: Use of dry wood of the right size is important to achieve optimum
combustion.
4.8.1 How to operate Aduro-tronic
Aduro Key
When lighting
When lighting a fire in the wood burning stove for the first time, the
maximum amount of primary air will be needed to light the fire. For
that reason, the primary damper can be kept “forcibly open”. This
is done by pulling the primary damper forward as far as possible
and then fixing it with the Aduro Key. When the stove is warm and
a layer of embers has been created on the bottom of the
combustion chamber, the Aduro-tronic can be set to the automatic
position, i.e. the Aduro Key can be removed.
Alternatively, you can leave the door ajar the first minutes during
lighting the fire (without the key).
When stoking
Each time fresh wood is put in the stove, a precise amount of primary air will be allowed in for the first few
minutes. What’s more important is that the primary air is not allowed in for too long. This is to ensure
optimum combustion. The Aduro-tronic control will ensure intake of primary air at the right tempo. The
automatic is activated by pulling the primary damper out each time fresh wood is put in the stove. The
automatic closes then the primary air gradually.
Regulation of the Aduro-tronic control
The control is pre-set to allow primary air intake for the first 5 minutes. This setting has been used during
testing at the Danish Technological Institute using ‘standard’ sized logs and with optimum moisture content
of 17-20%. Standard size logs are approx. 30 cm long and 10 x 10 cm in thickness. A standard chimney was
also used for testing. In practice, such circumstances can differ, which is why the Aduro-tronic control can be
adjusted to your circumstances. If you want a slower intake of primary air: (e.g. for a slower flue draught,
larger sized wood or for longer intervals between stoking) Adjust the screw on the front of the control level
using a small screwdriver to slow closure rate. If the screw is turned to the right closing time is increased and
if turned to the left closing time is reduced.
4.9 Ventilation/fresh air supply
In order for the wood burning stove to function at optimum efficiency, air is needed for the combustion
process. There must be sufficient fresh air coming into the room containing the wood burning stove. In very
well-insulated houses, or houses with powerful cooker hoods and/or air conditioning systems, a vacuum can
-7-
be created around the stove, leading to smoke leakage and poor combustion. In these circumstances, it
might be necessary to open a window to provide air for combustion and to equalize the vacuum.
Alternatively, you could fit an air vent in the room containing the wood burning stove.
5.0 The chimney
Data for chimney calculation:
Flue temperature at [20 °C]
Chimney draught at testing power
[mbar]/[Pa]
Flue gas mass flow [g/s]
Wood
270
0.12/12
7.1
The optimum combustion is achieved at a constant chimney draught of 0.10 to 0.14 mbar measured in the
flue pipe above the stove. There are many factors that affect the chimney draught, including the outside
temperature, wind strength and surrounding buildings. If it is impossible to establish a sufficiently natural
chimney draught, the chimney can be fitted with a smoke extractor. If the chimney draught is too strong, a
damper can be fitted to regulate the chimney draught. Contact your local chimney sweep for more advice.
5.1 Inadequate draught in the chimney
If the chimney is too short, leaks or is inadequately insulated, there may be problems with the chimney
draught (let the chimney sweep assess this). The draught should be approx. 0.10–0.14 mbar in order to
provide satisfactory combustion and prevent smoke leakage.
If the chimney sweep judges the draught to be satisfactory, but you still have problems lighting a fire, try
extending the fire lighting phase/using more thin pieces of kindling, so that the chimney gets thoroughly
warm. The chimney will not draw at optimum effect until it is warm. The fire lighting phase can be prolonged
by using a lot of kindling and 1-2 firelighters. When a layer of embers has been formed, add 2–3 dry logs.
6.0 Maintaining and cleaning your wood burning stove
Gaskets
With time, the gaskets will wear, and, in order to avoid wild combustion, they must be replaced as required.
Glass
If the wood you burn is too moist, you will get soot stains on the glass pane. They can be easily removed
using a damp cloth that you dip in cold ash and rub on the sooty glass. Special cleaning agents are also
available to remove soot from glass.
Combustion chamber
The yellow tiles in the combustion chamber eventually wear out and they should be replaced when the
cracks are more that 0.5 cm. The durability of the tiles will depend on how often and how intensively the
stove is used. You can change the tiles yourself. They are available as a ready-to-use set. You can also buy
one-piece tiles that you can cut to the size of the worn plates yourself. Please consult your dealer.
Ash
Empty the ash drawer before it becomes completely full. Always leave a layer of ash on the bottom of the
stove, as this insulates the combustion chamber and makes lighting a fire easier.
Cleaning the wood burning stove
The stove’s surface is treated with a heat-resistant Senotherm® paint, which will stay at its best just by being
vacuumed with a small, soft mouthpiece or dusted with a soft, dry cloth. Do not use spirit or other solvents
which will remove the paint.
The inside of the wood burning stove and the flue pipe can be cleaned via the door and the cleaning
aperture in the flue pipe/chimney. The upper fireproof tile (the exhaust deflector) can be removed, allowing
access to the top of the wood burning stove. Cleaning of the inside of the wood burning stove and the flue
pipe should be undertaken at least once a year, or more frequently if necessary, depending on how often the
wood burning stove is used. This work can also be carried out by the chimney sweep.
-8-
Soapstone
You can clean your soapstone by wiping it with a soft moist cloth.
Repairing the surface
If the surface of your wood burning stove gets scratched or worn, it can easily be refaced/renewed using the
original Senotherm® paint in an aerosol can. It is available in black or grey from your local dealer.
Please note: All maintenance and cleaning of the wood burning stove should be carried out when it is cold.
Spare parts and unauthorized alterations
You may only use original spare parts in the wood burning stove. Consult your dealer for advice and when
purchasing spare parts. All forms of unauthorized alterations to the wood burning stove are strictly forbidden,
as the wood burning stove will no longer comply with the approved specifications.
7.0 Accessories
There is a wide product range of accessories for Aduro stoves:
•
•
•
•
•
Aduro Sweeper fireplace set
Glass floor plates
Aduro Robust steel chimney
Flue pipe
Gaskets and other spare parts
8.0 Product liability and warranty
In accordance with the Danish Sale of Goods Act, product liability will exist for two years from the date of
purchase of the wood burning stove. The dated receipt will be sufficient proof. Product liability will not cover
damage caused by incorrect installation and use of the wood burning stove. Likewise, product liability will not
cover loose parts and wear parts (fireproof tiles, glass, gaskets, rails, cast iron grate and control), as they are
worn by ordinary use. These parts can be purchased as spare parts.
8.1 Free online warranty registration
Aduro will give you the opportunity to extend the above warranty on your wood burning stove from two to five
years. All you need to do is to access our website at www.aduro.dk and register your new wood burning
stove in our warranty database. The warranty will only come into force once you have entered the required
information in all the data fields. The deadline for registering your wood burning stove is one month from the
date of purchase.
9.0 FAQ
If you need more information, please go to www.aduro.dk.
Enjoy your stove!
-9-