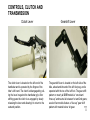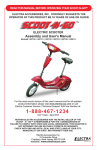
1
On the covers: SR150R at Milestone Ranch MX Park (Riverside, CA), ridden by professional racer Jeff Willoh,
a member of the SSR Motorsports competition team
SSR MOTORSPORTS PIT BIKE OWNER’S MANUAL
Congratulations on choosing an SSR Motorsports pit bike, and welcome to our powersports family. Your
new SSR Motorsports pit bike is designed, engineered and manufactured to be the best in its class.
We have prepared this manual to acquaint you with the proper procedures for operating, caring for and
maintaining, and, if necessary, troubleshooting your new pit bike. This manual also contains important
safety information. We recommend you follow these instructions and recommendations to obtain maximum
performance from your SSR pit bike and to maximize your enjoyment and biking safety.
Thoroughly read this manual before riding your SSR pit bike for the first time. Be certain that you understand how to operate the bike and that you are familiar with the locations of each control, what it does
and how it operates. This Owner’s Manual contains operations and minor maintenance instructions. Major
repairs may require the attention of a skilled technician and/or special tools and equipment.
While enjoying your SSR Motorsports pit bike please be sure to ride safely and defensively. Always wear
an approved helmet, proper safety eyewear and protective clothing appropriate for the conditions and terrain. Never ride under the influence of alcohol or drugs.
Thank you for selecting an SSR Motorsports pit bike. We wish you fun miles and years of enjoyable riding.
PLEASE NOTE! SSR Motorsports offers over 30 distinct models of pit bikes, from entry level to full race.
Photographs in this manual are of representative examples and show various levels of equipment.
Photographs of a specific component may differ from the component on your bike, but will function the
same way. In instances where certain components on various models operate differently, we show the
different types of components.
3
CONTENTS
FORWARD................................................................................................................................................3
TABLE OF CONTENTS.............................................................................................................................4
COMPONENT LOCATIONS......................................................................................................................8
CONTROLS, BRAKES
Front Brake Lever, Rear Brake Pedal...................................................................................................10
CONTROLS, CLUTCH AND TRANSMISSION
Clutch Lever, Gearshift Lever................................................................................................................11
CONTROLS, MISCELLANEOUS AND HANDLEBAR
Kick-Starter...........................................................................................................................................13
Manual Choke and Fuel Petcock..........................................................................................................13
Throttle. . ...............................................................................................................................................14
Engine On/Off Switches ......................................................................................................................15
Side Stand............................................................................................................................................16
4
OPERATION
Before Riding, Riding Safely.................................................................................................................17
Pre-Ride Inspection..............................................................................................................................19
Tires, Wheels and Spokes....................................................................................................................19
Leaks...................................................................................................................................................20
Engine Oil.............................................................................................................................................21
Fuel......................................................................................................................................................22 Drive Chain..........................................................................................................................................23
Cables..................................................................................................................................................24
Nuts and Bolts......................................................................................................................................25
Spark Plug and Ignition Wire................................................................................................................25
Throttle.................................................................................................................................................26
Brakes..................................................................................................................................................27
Starting and Riding...............................................................................................................................28
Starting the Engine...............................................................................................................................28
Shifting Gears.......................................................................................................................................30
Braking.................................................................................................................................................30
Stopping and Parking...........................................................................................................................32
Post-Ride Inspection............................................................................................................................32
SERVICE MAINTENANCE, LUBRICATION AND ADJUSTMENTS
Why Proper Maintenance Is Important.................................................................................................33
Breaking-in the Engine.........................................................................................................................33
Safety Precautions...............................................................................................................................34
Recommended Service and Maintenance Schedule...........................................................................35
Fuel Recommendations.......................................................................................................................37
Engine Oil, Checking and Adding, Changing, Recommendations.......................................................38
Throttle Control Free Play....................................................................................................................41
Engine Idle Speed................................................................................................................................42
Air Filter................................................................................................................................................43
Spark Plug; Specifications, Removing and Replacing.........................................................................44
5
CONTENTS
(cont.)
Suspension Inspection, Front and Rear...............................................................................................46
Suspension Adjustments, Front and Rear............................................................................................48
Brakes, Front and Rear........................................................................................................................50
Brakes, Wear, Inspections and Lubrication..........................................................................................51
Wheels, Inspection...............................................................................................................................52
Wheel Removal, Front.........................................................................................................................53
Tires and Tubes, Air Pressure, Inspection, Replacing..........................................................................53
Side Stand............................................................................................................................................56
Drive Chain, Inspection and Adjustment...............................................................................................57
Drive Chain, Lubrication, Removal, Cleaning and Re-installing, and Replacement.............................60
Cleaning Your Pit Bike...........................................................................................................................63
Transporting Your Pit Bike.....................................................................................................................65
Storing Your Pit Bike..............................................................................................................................66
TROUBLESHOOTING
Engine Does Not Start, Is Hard to Start................................................................................................68
Engine Starts, Runs Erratically or Misses, Spark Plug Fouled..............................................................68
Engine Detonates (Pings or Knocks), Overheats..................................................................................69
Engine Vibrates Excessively, Leaks Oil.................................................................................................69
Transmission Shifts Hard or Jumps Out of Gear, Clutch Slips..............................................................70
Clutch Drags or Does Not Release, Chatters.......................................................................................70
Brakes Do Not Stop or Hold Properly....................................................................................................70
6
YOU AND THE ENVIRONMENT..............................................................................................................71
BEING PREPARED FOR THE UNEXPECTED
General Guidelines................................................................................................................................72
If Your Engine Quits or Won’t Start........................................................................................................73
If You Get a Flat Tire..............................................................................................................................73
If You Crash...........................................................................................................................................74
If a Part Fails.........................................................................................................................................74
TECHNICAL INFORMATION
Vehicle Identification Numbers...............................................................................................................75
High Altitude Carburetor Adjustment.....................................................................................................76
Emission Control Systems....................................................................................................................76
Warranty Compliance............................................................................................................................76
Sources of Emissions............................................................................................................................77
Exhaust Emission Control System.........................................................................................................77
Crankcase Emission Control System....................................................................................................77
Noise Emission Control System.............................................................................................................77
Problems That May Affect Motorcycle Emissions..................................................................................78
Oxygenated Fuels and Your SSR Pit Bike.............................................................................................79
7
COMPOMENT LOCATIONS
LEFT SIDE
(1) Clutch Lever
(2) Carburetor
(3) Fuel Petcock
(4) Air Filter
(5) Drive Chain
8
(6) Rear Sprocket
(7) Chain Adjuster Block
(8) Chain Guide
(9) Chain Slider
(10) Chain Roller
(11) Foot Peg
(12) Engine and Stator Cover
(13) Gearshift Lever
(14) Engine Skidplate
(15) Front Brake Caliper
(16) Front Brake Rotor
COMPOMENT LOCATIONS
RIGHT SIDE
(1) Rear Brake Rotor
(2) Rear Brake Caliper
(3) Muffler
(4) Fuel Filler Cap
(5) Breather Tube and Breather Cap
(6) Throttle
(7) Front Brake Lever
(8) Front Brake Master Cylinder
(9) Auxiliary Oil Cooler
(10) Exhaust Pipe
(11) Rear Brake Pedal and Lever
(12) Foot Peg
(13) Oil Filler Cap and Dipstick
(14) Kick Starter
(15) Rear Swing Arm
9
CONTROLS, BRAKES
Front Brake Lever
The front brake lever is located on the right side of
the handlebar and operates the front brake only. It
is operated by the fingers of the right hand, by pulling the lever to the rear.
10
Rear Brake Pedal
The brake pedal, which is located on the right side
a few inches forward and slightly inboard of the
right foot peg, operates the rear brake only, by
pressing downward with the right foot. Apply the
front and rear brakes smoothly to prevent locking
up a wheel.
CONTROLS, CLUTCH AND
TRANSMISSION
Clutch Lever
The clutch lever is located on the left end of the
handlebar and is operated by the fingers of the
rider’s left hand. The clutch is disengaged by pulling the lever in against the handlebar grip. After
shifting gears the clutch is re-engaged by slowly
releasing the lever and allowing it to return to the
outward position.
Gearshift Lever
The gearshift lever is located on the left side of the
bike, ahead and inboard of the left foot peg, and is
operated with the toe of the left foot. The gear shift
pattern on nearly all SSR models is “one down/
three up” and neutral is between 1st and 2nd gears;
a select few models feature a “four-up” gear shift
pattern with neutral below 1st gear.
>>>
11
CONTROLS, CLUTCH AND
TRANSMISSION
(cont.)
To start any “one down/three up” bike from a full
stop, pull the clutch lever in against the grip and
push the gearshift lever firmly all the way down. To
upshift from 1st to 2nd, 2nd to 3rd, or 3rd to 4th,
pull the clutch lever back against the grip, place the
toe of the left boot beneath the shifter peg and lift
firmly upward until it stops, then release the gearshift lever, and re-engage the clutch while gradually
opening the throttle. Repeat this for each upshift. To
downshift, from 4th to 3rd, 3rd to 2nd, or 2nd to 1st,
place the toe of the left boot on top of the shifter
peg disengage the clutch by pulling the clutch
lever against the grip, press the gearshift lever
firmly downward, release the gearshift lever and
re-engage the clutch. Do not fully close the throttle
between downshifts; this will help eliminate engine
drag and smooth the transition to lower gears. Repeat this procedure for each downshift. Remember,
lifting the gearshift lever upward always engages a
higher gear and pushing the gearshift lever down
engages a lower gear. Neutral is ½ stroke up from
12
1st or down from 2nd.
Bikes with a “four up” gear shift pattern are operated the same as “one down/three up” models except
for the 1st gear location being above neutral in the
shift pattern.
WARNING! Always fully disengage the clutch before shifting gears. Shifting gears without the clutch
fully disengaged can cause severe clutch and/or
transmission damage. When shifting to lower gears
with the bike in motion, do not downshift with the
engine running at high speeds; doing so can cause
severe damage to the transmission and/or engine,
and can cause the rear wheel to lock up, lose traction and lead to loss of control which could cause
serious injury or death.
CONTROLS, HANDLEBAR &
MISCELLANEOUS
Manual Choke and Fuel Petcock
Kick-Starter
All SSR pit bikes are kick-start only, with the exception of the SR125-AUTO model, which is equipped
with an electric start and continuously variable automatic transmission. The kick-start lever is located
on the right side of the engine case, just to the rear
of the right foot peg. The kick-start lever features a
peg that rotates 90-degrees, from a front-to-back
position when the bike is running or at rest to pointing outward to the right for kick-starting the bike.
All SSR pit bikes utilize carburetors with manual
chokes to assist cold starts. On most models the
choke lever is attached to the left side of the
carburetor and has two-positions (fully “ON” or fully
“OFF”), the choke on several models is attached to
the right side of the carburetor and features three
positions (fully “ON,” “DETENT,” a halfway position,
and fully “OFF”). Fuel feed to the carburetor from
the fuel tank is controlled by use of a manuallyoperated, three-position petcock, or regulator valve,
that is located on the left side. The three positions
are “ON,” “OFF” AND “RES” (reserve).
13
CONTROLS, HANDLEBAR &
MISCELLANEOUS
(cont.)
Throttle
Throttle Closed
Throttle Open
The throttle controls the engine speed (RPM) and is
operated by rotating the hand grip on the right side
of the handlebar. To increase engine speed, the
grip is rotated rearward toward the rider;
to reduce engine (and vehicle) speed rotate the grip
forward away from the rider. The throttle is springloaded and will, unless improperly adjusted, return
to the closed (engine idle) position when released.
14
Engine ON/OFF Switches
Engine OFF (Kill) Switch
Two Position ON/OFF Switch
SSR pit bikes are equipped with one of two types
of on/off or engine-off switches. The first is a simple
momentary-style engine stop (ignition kill) switch, a
button that is pressed to stop the engine.
The second type of switch is a two-position ON/
OFF rocker-style switch; the engine can be started
only in the “run” position and to shut off the engine,
the switch is pushed into the “off” position.
15
CONTROLS, HANDLEBAR &
MISCELLANEOUS
(cont.)
Side Stand
Side Stand Up
The side stand is used to support the bike in an
upright, slightly leaning position while parked. The
side stand is located on the left side of the bike
either directly behind or, on select models,
16
Side Stand Down
below the left foot peg. The side stand is raised or
lowered with the left foot.
NOTE: Some competition models are not equipped
with a side stand.
OPERATION
Before Riding
Before each ride be certain that both you and your
SSR pit bike are ready to ride. Make sure that you
are in good physical and mental condition, that you
are not under the influence of alcohol or drugs,
and that you are wearing proper safety gear. We
want to keep you as a customer so for your safety
we strongly urge you to wear an approved helmet,
high-quality eye protection, and protective clothing
that includes, at a minimum, motorcycle gloves and
boots, durable long pants and a long-sleeved shirt.
A helmet reduces the possibility of serious
head injury or death in a crash. An open-face
helmet offers good protection, but a full-face
helmet offers much more. Always be certain
that any helmet has a DOT (Department of
Transportation) certification sticker. For even
better protection get a helmet that is both DOT
and Snell (Snell Memorial Foundation, which
has more rigorous standards than the DOT)
certified. A helmet should fit your head
comfortably but snuggly and have an
adjustable chinstrap that can be tightened
securely.
To maximize your safety when riding you
should wear a face shield or, preferably, high
quality goggles designed for off-road use. Offroad motorcycle boots will provide better protect your feet, ankles and lower legs than boots
intended for street riding. The same holds true
for gloves. For the utmost protection also wear
riding pants with knee and hip pads, a riding
shirt or jersey with padded elbows, and a chest
or shoulder protector.
Before each ride, thoroughly inspect your bike
and if you discover any problems, correct them.
Off-road riding is very tough on any vehicle
and you don’t want to experience a mechanical
problem miles from help. Using an improperly
maintained bike or failing to correct a problem
can cause a crash in which the rider could be
seriously injured or killed. Always perform a
pre-ride inspection!
17
OPERATION
(cont.)
Before Riding (cont.)
A safe and enjoyable ride begins with good planning and preparation. It’s safest – and usually the
most fun – to ride with at least one other person.
If one of you has a problem the other person can
help. Always let someone know where you’re going
and when you expect to return. Before riding in an
unfamiliar area find out if any permits are needed,
get maps so you can familiarize yourself with the
terrain, and talk to other riders who may know the
area. The U.S. Forest Service, Bureau of Land
Management, state and regional natural resources
and parks departments, riding clubs and off-road
magazines are all good sources of information.
It’s a good idea to take some tools, spare parts
(including a drive chain and master link, control
levers, cables, a spark plug, wire, duct tape and
rope) and supplies along with your pit bike and riding gear. See “Troubleshooting” for tips about what
sorts of difficulties you might encounter. You should
always take lots of water, food, a first aid kit and
this owner’s manual. Other items you should take
18
include a tool kit, tire repair material and tools, and
spare front and rear tire and tubes. Naturally, bring
along an extra, approved can or two of gasoline.
What you take along on the ride depends on the
kind of terrain, how long you expect to ride, how
far you might go from your starting point, and how
experienced you and/or your companions are at
making repairs. If you do decide to take some tools,
spare parts and other supplies on the ride, plan
ahead of time on how you will carry them safely,
and know how to use them. Do not exceed the
bike’s maximum weight capacity and pack your
load carefully so it doesn’t negatively affect riding
safely.
Pre-Ride Inspection
Check the following items before every ride:
Tires. Use a quality tire pressure gauge to check
the air pressure when the tires are cold (before
riding) and add or remove air as necessary to meet
the manufacturer’s recommended cold tire air pressure. Also inspect both tires for any sign of excessive wear or damage. If a tire is damaged or
excessively worn, replace it with a new tire of the
correct size and type.
Wheels and spokes. Inspect the wheel rims for
damage. Do not use if the rim is cracked or bent.
With the bike on a stand rotate each wheel; if a
wheel appears to wobble it is either out of round
or not “true.” If the wheel wobble is noticeable see
your dealer. Also make sure the spokes are tight.
19
OPERATION
(cont.)
Pre-Ride Inspection (cont.)
Engine Oil Drain Plug
Leaks. Inspect the engine/transmission case and
the fuel tank for leaks. Look beneath the bike for
signs of leaking fluids. If the bike has an auxiliary oil
cooler check lines and fittings to be sure that there
is no leakage. If there is any leakage, clean and
tighten fittings as necessary.
20
Auxiliary Oil Cooler
Dipstick Location
Engine oil. Check oil level using the dipstick on
the right side of the engine/transmission case, and
add oil if necessary. Be sure to use the correct type
and weight oil as specified in this manual. Be sure
the dipstick is properly and securely refitted into the
engine/transmission case.
For more information see “Engine Oil, Checking
and Adding” in the “SERVICE MAINTENANCE,
LUBRICATION AND ADJUSTMENTS” section.
21
OPERATION
(cont.)
Pre-Ride Inspection (cont.)
Filler Neck & Fuel Cap
Fuel. Check the fuel level and add more if necessary, filling to the bottom of the filler neck. Be sure
to use 90 (or higher) octane unleaded pump gasoline.
22
Fuel Cap, Breather Tube & Cap
Make certain that the fuel filler cap is securely fastened and that the breather tube is properly seated
on the cap and in good condition.
Drive Chain
Chain Slider & Roller
Drive Chain. Check the chain for condition and
correct tension (“slack”). The chain may break if too
tight (not enough “slack”); excessive chain “slack”
can cause accelerated wear, kinked or binding
links, loose pins, and/or damaged rollers.
Check the chain slider (located on the forward portion of the left side of the swing arm) for excessive
wear and replace if necessary.
23
OPERATION
(cont.)
Pre-Ride Inspection (cont.)
Clutch Cable at Handlebar
Throttle Cable
Cables. The clutch and throttle are actuated by
cables from the handlebar levers. Check the cable
housings for wear and the fittings for looseness,
and replace or tighten as necessary.
24
Clutch Cable at Transmission Case
If a cable does not operate freely it may need to be
lubricated.
Nuts and bolts. Using appropriate-size wrenches,
be sure that all accessible nuts and bolts are tight.
And tighten if necessary.
Spark Plug
Spark plug and ignition wire. Make sure that
spark plug is not loose in cylinder head; tighten if
necessary.
Spark Plug
Be certain that the ignition wire terminals fit securely onto the spark plug and ignition coil.
25
OPERATION
(cont.)
Pre-Ride Inspection (cont.)
Throttle Closed
Throttle. Check the throttle control for free play and adjust if necessary.
26
Throttle Open
Front Brake Control
Brakes. Test front and rear brake controls for normal operation. If either feels soft check the appropriate master cylinder fluid reservoir and add DOT
3 or 4 fluid as needed to fill.
Rear Brake Control
Adjust mechanical free play in front and rear levers
and linkages, if necessary.
27
OPERATION
(cont.)
Starting and Riding
Starting the engine. Be sure the transmission is
in neutral and that (if applicable) the two-position
on/off switch is in the ride (on) position. Turn the
three position fuel petcock to the “ON” position. If
the bike’s engine is cold, lift the choke lever up to
the fully “ON” position. Next, shift the transmission
into neutral and, for added safety pull the clutch in
against the handlebar grip to disengage the clutch,
then hold the throttle slightly open and follow the
following directions to operate the kick-starter.
28
Petcock ON
Petcock RESERVE
Petcock OFF
approximately 15 seconds after it starts then push
the choke lever all the way down to the fully “OFF”
position. If the bike has the three-position choke
on the right side of the carburetor push the choke
lever down part way to the “DETENT” position immediately after the engine starts and, after about 15
seconds, push the choke lever the rest of the way
down to the fully “OFF” position. If the bike’s idle
is unstable, open the throttle slightly until the idle
evens out.
Choke Lever
If the air temperature is between 50- and 90-degrees F, swing the kick-start lever’s foot peg out
from its stored position and with your right foot rotate the lever down and to the rear until you feel resistance. Then, with a rapid and continuous motion,
“kick” the lever down through its stroke until it stops
at the bottom. Do not allow the kick-starter to return
or snap back freely as it can damage the engine/
transmission case. If your bike has the two-position
choke on the left side allow the engine to run for
If the air temperature is below 50-degrees F follow
the same steps outlined above and warm up the
engine by slightly opening and closing the throttle
until it responds smoothly with the choke fully
“OFF.” If the air temperature is over 90 F or the bike
is fully warmed up do not use the choke.
If the engine will not start after several tries it may
be “flooded” with excess fuel. To clear the engine
on bikes with the two-position off/ride switch, turn
the switch to the “off” position, push the choke lever
all the way down (fully “OFF”), hold the throttle fully
open and turn the engine over several times with
the kick-starter. Then, turn the off/run switch to the
“run” position and follow
>>>
29
OPERATION
(cont.)
Starting and Riding (cont.)
the instructions for a warm engine or high temperature start.
WARNING! Do not start or run the bike in an enclosed area or any area without good ventilation.
The exhaust contains carbon monoxide and other
toxic gases which can collect quickly in confined
areas and cause illness and even death.
WARNING! Running the engine for an extended
period with the choke open may cause damage to
piston and cylinder walls, which could necessitate
rebuilding or replacing the engine.
Shifting gears. See the “Gearshift Lever” in the
“CONTROLS, CLUTCH AND TRANSMISSION”
section of this manual, pages 11-12.
30
Braking. To slow or stop the bike apply the front
and rear brakes smoothly while downshifting to
match the engine speed to the bike’s forward
speed. Gradually increase braking pressure as you
slow down. As the bike slows to a stop put your left
foot down then, when you are through using the
rear brake, put your right foot down.
For maximum braking close the throttle and firmly
apply the front (lever) and rear (pedal) controls to
the threshold of wheel lock-up. Applying the front
and/or rear brakes too hard may cause the wheel
to lock-up and slide, reducing or eliminating control
of the bike. If this happens, momentarily release the
brake controls, steer straight ahead until regaining
control, and reapply the brakes with less pressure.
Beginning or novice riders should always apply the
brakes as evenly and smoothly as possible. Slightly
more pressure on the front brake than on the rear
gives better control for less experienced riders;
more rear brake pressure can cause a loss of rear
tire traction and result in losing control of the bike.
Experienced, skilled riders can vary the proportions
of front-to-rear brake pressure to compensate for
riding conditions and speeds.
All riders except those who are experienced, with
expert-level skills, should reduce speed and finish
braking before entering a turn. Riders should avoid
braking or closing the throttle abruptly while turning;
either action can cause one or both wheels to lose
traction, and a loss of traction at either wheel will
cause a reduced or complete loss of control.
Riding on wet or loose surfaces reduces the ability
to maneuver and stop. All control inputs must be
smooth under these conditions. Hard acceleration,
braking or turning may cause loss of control. Always exercise extreme caution when accelerating,
braking or turning on slippery or loose surfaces.
When descending long, steep grades, or any
grades with loose or slippery surfaces, use engine
compression braking by downshifting to the lowest
applicable gear and applying the brakes gently and
intermittently.
Hand & Foot Brake Controls
31
OPERATION
(cont.)
Starting and Riding (cont.)
Stopping and parking. After coming to a complete stop lower the side stand. Shut off the engine.
Depending on how your specific bike is equipped
this is accomplished by either pressing the button
on the momentary-style engine stop (ignition kill)
switch or, if equipped with a two-position, rockerstyle switch, from the “run” to the “off” position. If
the bike is not going to be run again within a few
minutes also turn the fuel petcock to the “OFF”
position.
32
Post-ride inspection. After completing a day of
riding clean the bike as thoroughly as conditions
allow. Remove all dirt, mud, brush, rocks and/or
other objects that you may have picked up along
the ride. After cleaning, carefully inspect the bike
for any damage or leaks. Repair any damage that
might affect the safe operation of the bike before its
next use. Be sure to lubricate the drive chain if
possible before the bike’s next use.
SERVICE MAINTENANCE,
LUBRICATION AND
ADJUSTMENTS
Why Proper Maintenance is Important
Keeping your pit bike well maintained is essential to
your safety as well as being a good way to protect
your investment, realize its maximum performance,
avoid breakdowns and have fun.
To help you keep your new pit bike in top condition
this section includes a Service Intervals Schedule,
simple and easy-to-follow instructions for specific
maintenance work, safety precautions, information
and recommendations for oils, plus tips to keep
your bike looking its best.
Breaking-in the engine. While the engine in your
new SSR pit bike does not require a formal “breakin” procedure, we recommend you follow the following tips to get the best performance and longevity
from your bike. Note: None of the pit bikes covered
in this manual are equipped with speedometers or
odometers so you will need to “guesstimate” both
your speed and miles traveled.
1) Start your engine and let it idle for four- to fiveminutes, blipping the throttle occasionally. Shut off
the engine and allow it to cool completely. Repeat
this “heat cycle” process four more times.
2) Warm up the engine again and ride the bike for
about five-minutes at an easy pace. Vary the rpm,
do not ride at more than 1/3 of maximum throttle or
rpm. Let the engine cool completely and repeat the
cycle two more times.
3) Ride the bike for five- to ten-minutes at a moderate pace, varying the rpm and not going over ¾
throttle or rpm. Let the engine cool completely and
repeat this secondary break-in two more times.
4) Complete the break-in by riding aggressively for
about 15-minutes. Ride hard without revving the
engine fully, vary the rpm and do not “cruise” at part
throttle. By the time you completed the break-in
process you will probably have used at least one
and maybe as much as two gallons of gasoline.
In addition, for the first five hours do not use the
bike to climb steep slopes, do not ride more than
two hours at a time without shutting the engine off
and allowing it to cool, and vary the engine speed
regularly.
>>>
33
SERVICE MAINTENANCE,
LUBRICATION AND
ADJUSTMENTS
(cont.)
Why Proper Maintenance
is Important (cont.)
Allow the engine to warm up for three- to five-minutes before each ride; this gives all internal components a chance to become fully and thoroughly
lubricated. For the first five hours try to observe
a maximum speed no more than 25 mph, and not
more than 35 mph during the second five hours.
Safety Precautions
The engine must be off before beginning any service, maintenance or repair operation, unless the
instructions specifically state that it is to be running.
Do not run the engine in an enclosed area or any
area without adequate ventilation. The exhaust
contains carbon monoxide and other toxic gases
which can collect quickly in confined areas and can
cause illness and even death. Hot engine parts can
34
cause serious and painful burns – let the engine
and exhaust cool before touching.
Read all instructions before beginning any maintenance or adjustment procedures. Be sure you have
the necessary tools, skills and experience to successfully complete whatever work you start.
To help prevent the bike from falling over, which
can cause damage to the bike and injure any persons hit by it, park it on a solid and level surface
and use the bike’s side stand or a maintenance
lift/stand designed specifically for motorcycles to
provide proper support.
Always be careful when working around gasoline
to reduce the possibility of a fire or explosion. Use
only a non-flammable (high flashpoint) solvent such
as kerosene or a specially-prepared cleaning product for washing parts. Keep all fuel system-related
parts away from any sources of heat, sparks or
flame. Never smoke around gasoline or other flammable materials.
Recommended Service & Maintenance Schedule
SERVICE OPERATION**
Valve Adjustment
Engine Oil
Engine Oil Strainer Screen
Drive Chain
Brake Fluid Reservoir Levels
Brake Fluid Condition
Brake Lines
Brake Pads
A – Adjust
R – Change or replace
Every 3 Hours
INTERVALS*
Every 5 Hours Every 10 Hours Every 15 Hours
X
R
R
L/A
I
R
I
I – Inspect and, if necessary, clean, correct, fill or replace
T – Tighten to proper torque
I
L – Lubricate
X -- Perform
*Inspect and service your SSR Pit Bike more frequently if ridden hard or in dusty, hot, or other extreme conditions. Regardless of hours of riding, always perform all service operations prior to storage or annually.
**Unless the owner is an experienced and skilled mechanic and has a good selection of the proper tools
and equipment he or she should never attempt to perform these service operations. In all other instances,
service operations should only be performed by your dealer or by a qualified
powersports technician.
>>>
35
Recommended Service & Maintenance Schedule (cont.)
SERVICE OPERATION**
Carburetor, Idle Speed
Air Filter
Spark Plug
Clutch and Throttle Cables
Wheel Spokes, Tightness
Wheel Bearings
Fasteners
Suspension Fluids
A – Adjust
R – Change or replace
Every 3 Hours
(as needed)
I
INTERVALS*
Every 5 Hours Every 10 Hours Every 15 Hours
(as needed)
(as needed)
(as needed)
I
A/I/L
I
L
I
I – Inspect and, if necessary, clean, correct, fill or replace
T – Tighten to proper torque
R
L – Lubricate
X -- Perform
*Inspect and service your SSR Pit Bike more frequently if ridden hard or in dusty, hot, or other extreme conditions. Regardless of hours of riding, always perform all service operations prior to storage or annually.
**Unless the owner is an experienced and skilled mechanic and has a good selection of the proper tools
and equipment he or she should never attempt to perform these service operations. In all other instances,
service operations should only be performed by your dealer or by a qualified
powersports technician.
36
Fuel Recommendations. For optimum performance run unleaded pump gasoline with an R+M /2
(US standard) octane rating of at least 90. To meet
clean air standards, much of the gasoline used
in the United States and Canada is oxygenated,
meaning it’s blended with alcohol or ether compounds to help reduce exhaust emissions. Do not
use a gasoline with higher percentages of any of
the following oxygenates than listed as follows:
ETHANOL (ethyl or grain alcohol) up to 10-percent
by volume.
MTBE (Methyl Tertiary Butyl Ether) up to 15-percent
by volume. Because of its extreme toxicity its use
has declined significantly in the US and Canada.
Use of a lower than recommended gasoline can
cause “pinging,” which is also called “spark knock”
or “pre-ignition,” (an occasionally loud rapping or
rattling noise) which can, if severe or persistent,
can lead to extensive engine damage. Light pinging
experienced under a heavy load, such as climbing a steep hill, is not a cause for concern. If pinging occurs at steady speeds under normal loads,
change brands of fuel. If the pinging persists, see
your dealer.
WARNING! Gasoline is highly flammable and
explosive. You can be severely burned or injured
when handling fuels. Always stop the engine and
keep gasoline away from sources of heat, sparks
and flame. Only handle gasoline outdoors. Wipe
up spills immediately. Do not use as a solvent or
cleaner.
METHANOL (methyl or wood alcohol) up to 5-percent by volume. Do not use gasoline oxygenated
with methanol if does not also contain co-solvents
and corrosion inhibitors to protect the fuel system.
37
SERVICE MAINTENANCE,
LUBRICATION AND
ADJUSTMENTS
(cont.)
Safety Precautions (cont.)
Engine oil. Using the proper oil, plus regularly
checking the oil level, adding additional oil if needed, and changing the oil as recommended will all
help extend the life of your bike’s engine. Remember, the engine in this pit bike is cooled by outside
air flowing over the engine, and the oil circulating
within the engine. Even the best oil gradually wears
out, reducing its lubricity. It also picks up dirt and
other contaminants from the inside of the engine
and becomes more and more contaminated as the
miles of use add up. Old and/or dirty oil can damage your engine or cause accelerated wear on
moving parts; running the engine with insufficient
oil can cause serious damage to the engine and
transmission.
38
Oil Recommendation
API Classification SF or SG
Viscosity (weight) SAE 10W-40*
Suggested Oil
4-stroke oil (USA &
Canada) or equivalent**
*For continued use with ambient air temperatures
above 90-95-degrees F, and not dropping below
50-degrees F, use SAE 20W-50 viscosity SF or SG
oil for air- cooled motorcycles.
**Be sure to use oil manufactured specifically for
use in air-cooled motorcycle engines. Do not use
oils with graphite or molybdenum additives as such
additives can have an adverse affect on clutch operation and clutch life.
Checking & Adding Oil
Dipstick / Oil Filler Cap Location
Park your motorcycle on a firm, level surface. Remove the oil cap/dipstick and check the oil level.
If the oil is at or near the upper level mark (see
photo) you do not have to add oil.
Lower (1) and Upper (2) Oil Level Marks
If the oil is below or near the lower level mark (see
photo) add oil of the recommended specifications
until it reaches the upper level mark. Do not overfill.
Insert the dipstick and screw it in tightly. Check for
oil leaks.
39
SERVICE MAINTENANCE,
LUBRICATION AND
ADJUSTMENTS
(cont.)
Changing Engine Oil
1. If the engine is cold, start it and let it idle for
three- to five-minutes. Turn the engine off and
wait two- to three-minutes for the oil to settle.
2. Park your motorcycle on a firm, level surface.
40
3.
4.
5.
6.
Remove the oil filler cap/dipstick.
Place a drain pan under the crankcase.
Remove the oil drain bolt.
After most of the oil is drained, gently tilt the
motorcycle from side to drain the remaining oil.
7. Pour the drained oil into a suitable container
and dispose of it in an environmentally-safe
manner. Most auto parts stores accept used
engine oil for recycling.
8. Remove the old sealing washer from the drain
bolt and install a new sealing washer.
9. Install the oil drain bolt and tighten it to the
specified torque, 18 lb-ft.
10. Pour approximately 0.6 US quart (0.57 liter) of
the recommended oil into the crankcase.
11. Install the oil filler cap/dipstick securely.
12. Start the engine. Let it idle for two- to threeminutes, then turn it off.
13. With the motorcycle held upright on a level
surface, check the oil level. If needed, add oil
until it reaches the upper level mark on the
dipstick. Do not overfill!
14. Check for oil leaks.
More About Engine Oil
Whenever you buy oil for your bike, check the label
on the container to make sure it matches recommended specifications.
Engine oil has a major influence on both the performance and the service life of the engine.
Non-detergent, vegetable or castor-based racing
oils are not recommended. Aftermarket oil additives
are not needed and can negatively affect the bike’s
engine Use the recommended oil.
Throttle Control Free Play
Inspection
Check free play. Free play is the amount the
throttle control will move before starting to
open the throttle on the carburetor. Free play
should be between 5/64 and 5/32-inch (2.0mm to
4.0mm) movement at the grip. Adjust, if necessary,
to bring free play within the specified rang using the
following instructions.
Adjustment
1. Slide the rubber dust cover off of and away from
the locknut.
2. Loosen the locknut (1) on the throttle cable
mechanism.
3. Turn the adjuster (2) to reduce or increase
throttle free play.
4. Tighten the lock nut. Return the dust cover to its
normal position.
5. After making the necessary adjustments, check
the throttle grip to ensure it rotates smoothly
from fully closed to open at any steering
(handlebar) position.
*If you cannot adjust throttle free play within the
specified range contact your dealer.
41
SERVICE MAINTENANCE,
LUBRICATION AND
ADJUSTMENTS
(cont.)
Engine Idle Speed
The engine must be at normal operating temperature in order to make accurate idle speed adjustments. Ten-minutes of stop-and-go riding should be
sufficient. Do not attempt to compensate for faults
in other systems by adjusting idle speed. See your
dealer for regularly scheduled adjustments and
services.
42
1. Warm up the engine, shift into neutral and rest
the bike securely on its side stand.
2. Connect a tachometer, following the tachometer
manufacturer’s instructions.
3. Adjust the idle speed using the throttle stop
screw (arrow). Idle speed should be 1400 rpm,
plus/minus 100 rpm.
Note: SSR pit bikes are equipped with a variety of
different carburetors depending on the models. The
photos are representative of what is on your bike.
Air Filter
Inspect the air filter regularly. When it becomes
dirty or contaminated discard it and replace with
an equivalent new part. If the air filter is a reusable
washable type, wash the dirt out with a mild detergent, rinse thoroughly and dry with a clean towel.
Soak the filter element in foam/paper filter oil or
clean machine oil (15W/40Q is recommended),
squeeze out excess oil in an absorbent cloth and
re-install the filter element.
43
SERVICE MAINTENANCE,
LUBRICATION AND
ADJUSTMENTS
(cont.)
Spark Plug
Spark Plug Recommendation
The recommended standard spark plug is satisfactory for most riding conditions. However, If you
plan to ride for extended periods at high speeds or
near maximum power (high engine rpm) in
hot climates, or plan extended riding in cold climates, a “colder” or “hotter” heat range plug may
be recommended.
NOTICE: Using spark plugs with an improper heat
range can cause engine damage.
Use only the recommended type of spark plugs in
the recommended heat range.
44
(1) Side electrode
(2) Sparkplug gap
(3) Center electrode
Removing or Replacing the Spark Plug
1. Before removing the spark plug clean any dirt
from around the spark plug base.
2. Carefully disconnect the spark plug wire cap.
Do not pull on the wire as this may damage the
conductor within the wire causing high resistance
and reduced firing voltage.
3. Remove the spark plug with a spark plug
wrench.
4. Inspect the spark plug electrodes for wear. The
center electrode (1) should have square edges.
The side electrodes (2) should not be eroded.
The insulator should not be cracked or chipped.
5. Check the spark plug gap (3), using a wire-type
feeler gauge. If an adjustment is necessary,
bend the side electrode carefully to open or close
the gap, which should be 0.024- to 0.028-in.
(0.60 to 0.70mm). Make sure the plug washer is
in good condition. If you need to install a new
spark plug check and, if necessary, adjust the
gap.
6. With the plug washer attached, thread the spark
plug in by hand (to prevent cross-threading).
Do not force-fit the plug.
7. Tighten the spark plug about 1/8 to1/4 turn after
it seats, if the old plug is good, or about 1/2
turn after it seats if installing new plug.
NOTICE
Improperly tightened spark plugs can cause damage to the engine. A loose plug can cause a burned
piston; over-tightening the plug can damage or strip
the threads in the cylinder head.
45
SERVICE MAINTENANCE,
LUBRICATION AND
ADJUSTMENTS
(cont.)
Suspension
Loose, worn, or damaged suspension components
may adversely affect the handing and stability of
your motorcycle. If any suspension components appear worn or damaged, see your dealer for further
inspection. Your dealer is qualified to determine
whether or not replacement parts or repairs are
needed.
46
Front Suspension Inspection
1. Check fork operation. Pull the front brake lever in
to lock the brake. Then push up and down
on the fork legs several times. The suspension
should function smoothly. There should be no
oil leakage.
2. Check to be sure that the fork mounting bolts
and handlebar riser mounting nuts are tight. If
any front suspension components appear worn
or damaged, see your dealer for further
inspection.
Rear Suspension Inspection
(1) Swing arm bushing
1. Place the bike on a maintenance stand. Either
strap securely in place or have a helper hold the
bike while you push hard against the side of the
rear wheel and feel for any free play which
indicates worn swing arm bushings (1). Do not
ride with worn swing arm bushings.
2. Check that the fasteners for the shock absorber
attachment points (2) are secure.
(2) Shock absorber attachment points
(3) Shock absorber bushing
3. Check that the shock absorber bushings (3) are
not worn, check for oil leaks in the shock
absorber. If any rear suspension components
appear worn or damaged, see your dealer for
further inspection.
>>>
47
SERVICE MAINTENANCE,
LUBRICATION AND
ADJUSTMENTS
(cont.)
This adjustment is made using a knob on the top of
each fork leg, turning toward (-) for “slower”
rebound towards the (+) for “faster” rebound.
Rear Suspension Inspection (cont.)
Shock absorber bushings
Front Suspension Adjustments
Some SSR pit bikes are equipped with adjustable
front and/or rear suspensions.
The simplest adjustable front suspensions are forks
that are adjustable for rebound.
48
Double or two-way adjustable front forks are adjusted for rebound at the top of the fork and compression at the bottom. To increase compression
turn the screw inward (clockwise); to decrease
compression turn the adjusting screws outward
(counter-clockwise).
Rear Suspension Adjustments
The suspension on “entry level” pit bikes uses a
coilover shock absorber with adjustable preload.
This shock absorber will have a notched collar that
allows the rider to adjust the rear suspension from
soft to firm.
One-Way Adjustable Shock Absorber
Adjustable Preload Shock Absorber
The simplest truly adjustable rear suspension uses
a one-way or single adjustable coilover shock and
allows the rider to reset the rebound from “faster”
or “slower”. This is usually done at the bottom
(swing arm end) of the shock with a either a handturned knob or wheel. “Faster” rebound allows the
shock to extend or open more quickly after being
compressed (closed); “slower” retards the shock’s
extension after being compressed.
Two-way or double-adjustable coilover shocks
have separate adjustments for both compression
and rebound. Rebound is usually reset in the same
manner as a one-way (single-adjustable) shock.
Compression is generally reset at the top of a twoway shock. Most two-way shocks use a pressurized
inert gas like nitrogen as the compression adjusting
medium, and adjustments are made from “soft” to
“hard” using a knob on the pressurized gas reservoir that is externally mounted on the top of the
shock.
Two-Way Adjustable Shock Absorbers
49
SERVICE MAINTENANCE,
LUBRICATION AND
ADJUSTMENTS
(cont.)
Brakes
Front Brake Lever Free Play
50
(1) Front Brake Lever Free Play
1. Check free play by pulling in slowly on the front
brake lever (1) until the brake starts to engage.
Free play should be between approximately 3/8to 13/16-inch (10-20mm).
2. If necessary, adjust to the specified range. To do
this find the brake adjusting nut on the lower
portion of the brake caliper. Using a hex-head
wrench turn the bolt clockwise to increase free
play or counter-clockwise to reduce free play.
Brake Caliper Free Play Adjusting Nut
Rear Brake Pedal Free Play
Brake Wear Inspection
The front and rear brakes should be checked for
wear after every 15-hours of riding. We recommend
that this inspection be performed by your dealer.
Other Inspections & Lubrication
Check that the front lever and rear pedal assemblies are positioned properly and that all fasteners
are tight.
Rear Brake Pedal Free Play
1. Rest the bike securely on its side stand.
2. Check free play by slowly depressing the brake
pedal (1) until the brake starts to engage.
Free play should be between 3/8- to 13/16-inch
(10-20mm). If necessary, adjust to the specified
range. To do this, find the adjusting nut at the
bottom of the rod connecting the rear brake
pedal and linkage to the master cylinder.
Turn the nut clockwise to reduce free play, or
counter-clockwise to increase free play.
Check the front brake hydraulic fluid line for kinks
or signs of wear or abrasion that could cause
sticking or failure.
Front: Make sure the front brake lever, spring, and
fasteners are in good condition.
Rear: Make sure the rear brake pedal arm, spring,
and fasteners are in good condition.
51
SERVICE MAINTENANCE,
LUBRICATION AND
ADJUSTMENTS
(cont.)
Wheels
Maintaining correct spoke tension and trueness
(roundness) of the wheels is critical to safe motorcycle operation.
During the first hour or two, spokes will loosen
rapidly due to the initial “seating” of the parts. Excessively loose spokes may result in instability at
moderate and high speeds leading to a
possible loss of control. It’s also important that the
rim locks are secure to prevent tire slippage.
It is not necessary to remove the wheels to perform
the recommended services in the
Maintenance Schedule. However, information for
wheel removal is provided for emergency
situations.
1. Inspect the rims and spokes for damage.
52
2. Tighten any loose spokes.
3. Rotate the wheel slowly to check for signs of
wobble. If the wheel appears to wobble, the rim
is out of round or not “true.” If the wobble is
noticeable, see your dealer for inspection.
FRONT WHEEL REMOVAL
Removal
1. Raise the front wheel off the ground by placing a
maintenance stand or support block under
the engine. Secure the rear of the motorcycle
with tie-down straps.
2. Remove the front axle nut and front axle.
3. Remove the wheel. Do not get any grease, oil or
dirt on the brake pad surfaces. This can
cause poor or erratic brake performance, or
rapid brake pad wear after reassembly.
Installation
1. Reverse the removal procedure.
2. Torque the axle to 35 Ib-ft.
3. Check front brake adjustment.
If a torque wrench was not used to re-install the
wheel, have your dealer inspect the bike as soon
as possible to verify proper assembly. Improper reassembly may lead to loss of front braking function.
TIRES and TUBES
To safely operate your pit bike, the tires must be of
the proper type (for off-road use only) and size, in
good condition with adequate tread, no cuts or other visible signs of damage, and correctly inflated.
WARNING! Using a tire that is excessively worn
or improperly inflated can lead to a loss of control
which could result in serious injury or death. Follow
all instructions in this owner’s manual regarding tire
inflation and maintenance.
Tire Air Pressure
Properly inflated tires provide the best combination
of handing, tread life and riding comfort.
Under-inflated tires wear unevenly which adversely
affects handling. Under-inflated tires are more likely
to fail from overheating. Under-inflated tires may
also cause wheel damage in rocky terrain.
Over-inflated tires will make your motorcycle ride
more harshly, are more prone to being damaged by
surface hazards and wear unevenly.
>>>
53
SERVICE MAINTENANCE,
LUBRICATION AND
ADJUSTMENTS
(cont.)
Tire Air Pressure
been ridden for a few miles. If you let air out of
warm or hot tires to match the recommended cold
air pressures, the tires will be under-inflated. Make
sure the valve stem caps are secure. If a cap is
damaged or missing install a new cap.
Front
Rear
25 psi (1.8 kgf/cm 2)
25 psi (1.8 kgf/cm 2)
Recommended Tire Pressure, COLD
If you decide to adjust tire pressure for a particular
riding condition, make changes a little at a time.
Inspection
A flat tire is inconvenient at best and may cause an
accident.
Check Tire Pressure Cold
Always check tire air pressure when the tires are
cold. Tire pressure measurements will be inaccurate, inconsistent and always higher if the air pressure is checked when the tires are warm or hot,
which happens even if the motorcycle has only
54
Carefully inspect your bike’s tires and wheels
every time before you ride. Look for bumps or
bulges in the tire sidewall and tread. Replace any
tire that has a bump or bulge.
Look closely for cuts, slits, or cracks in the tires.
Replace the tire if you can see any fabric or cord
anywhere on the tire. Check for rocks or other
objects embedded in the tire or tread. Remove any
objects.
Measure the tread depth. Replace the tire before
tread depth at the center is 1/8- inch (3mm) or less,
or any time you begin to notice a reduction in traction.
Check the position of the valve stems on both
wheels. A tilted valve stem indicates the tube is slipping inside the tire or the tire is slipping on the rim.
See your dealer.
Tube Replacement
If a tube is punctured or damaged, you should replace it as soon as possible. A repaired tube
may not be as reliable as a new one, and it could
fail while you are riding. For information on making
a temporary repair, see page 73.
Always use a replacement tube that is equivalent to
the original. We recommend that tubes be replaced
by your dealer. Replacing a tube requires removing and re-installing the wheel. Any time a tube is
replaced, carefully inspect the tire.
Tire Replacement
The tires that came on your pit bike were engineered to provide the optimum combination of
handling, braking, durability, and comfort
Use a replacement tire equivalent to the original.
Replace the tube any time you replace a tire. The
old tube will probably be stretched and,
if installed in a new tire, could fail.
We recommend that tires and tubes be replaced by
your dealer.
WARNING! Installing improper tires can negatively
affect handling and stability. This can lead to a
loss of control which could cause serious injury or
death. Always use the size and type of tires recommended in this owner’s manual.
55
SERVICE MAINTENANCE,
LUBRICATION AND
ADJUSTMENTS
(cont.)
Side Stand
1. Check the side stand spring (1) for damage and
loss of tension.
2. Check the side stand assembly to be sure it
moves freely
3. If the side stand is stiff or squeaky, clean the
pivot area and Iubricate the pivot bolt with a few
drops of clean engine oil.
NOTE: Most SSR Motorsports competition model
pit bikes are NOT equipped with a side stand.
(1) Side Stand
(2) Side Stand Spring
56
Drive Chain
The service life of the chain depends on proper
lubrication and adjustment. Poor maintenance
can cause premature wear or damage to the drive
chain or sprockets.
If it isn’t, some links may be kinked and binding.
Lubricating the chain will often eliminate binding
and kinking.
Under severe usage, or when the motorcycle is ridden in unusually dusty or muddy areas, more
frequent maintenance will be necessary.
Before servicing the drivechain, turn the engine
OFF, lower the side stand and make sure that the
transmission is in neutral. It is not necessary to
remove or replace the drive chain to perform
the recommended service in the Maintenance
Schedule.
Drive Chain Inspection
With the bike’s wheels on the ground, check slack
in the lower drive chain approximately halfway
between the sprockets. Correct drive chain slack
(vertical free play) at the midpoint of the lower chain
should be between 9/16- and 1-inch when moved
by hand.
Next, check drivechain slack at several points along
the chain. The slack should remain constant.
>>>
57
SERVICE MAINTENANCE,
LUBRICATION AND
ADJUSTMENTS
(cont.)
Drive Chain Inspection (cont.)
NOTICE! Excessive chain slack may allow the
drive chain to damage the engine cases.
(1) Pin (2) Roller (3) Link
58
Inspect the drive chain for damaged rollers, dry
or rusted links, excessive wear, kinked or binding
links, or loose pins.
If the drive chain has damaged rollers, loose pins,
or kinks that cannot be freed the chain should be
replaced. Lubricate the drive chain if it appears to
be dry or shows signs of rust. Lubricate any
kinked or binding links and work them free. Adjust
chain slack if needed (see “Replacing the Drive
Chain” immediately following).
Chain Slider
Check the chain slider for wear. If the ridge in the
center of the slider is worn, have your dealer
replace the chain slider.
Adjusting the Drive chain
3. Turn the adjusting nuts (1) on the right and left
chain adjusters an equal number of turns to
increase or decrease chain slack.
4. Torque the rear axle nut to: 35 lb-ft. If a torque
wrench was not used for this installation, have
your dealer inspect the bike as soon as possible
to verify proper assembly. Improper re-assembly
may lead to premature chain and/or sprocket
wear, chain or sprocket failure, damage to the
bike, and loss of control which could result in
injury or death.
5. Tighten the adjusting nuts lightly. Then, while
holding the adjusting nuts with a wrench, tighten
the lock nuts.
6. Recheck drive chain slack.
(1) Adjusting nut (2) Lock nuts (3) Rear axle nut
1. Loosen the rear axle nut (3).
2. Loosen the lock nuts (2) on both sides of the
swing arm.
7. Check rear brake pedal free play and adjust as
necessary. Free play may be affected when the
rear wheel is repositioned to adjust drive chain
slack.
59
SERVICE MAINTENANCE,
LUBRICATION AND
ADJUSTMENTS
(cont.)
Lubricating the Drive Chain
Lubricate the drive chain after every three hours
of riding, sooner if the chain appears dry. Raise
the rear wheel off the ground using a maintenance
stand. Slowly turn the rear wheel by hand and saturate each drive chain link joint so that the lubricant
penetrates between the link plates, pins, bushings
and rollers. Drive chain lubricant for motorcycle use
should be available at your dealer and most powersports shops.
Removing, Cleaning and Re-installing
the Drive Chain
When the drive chain becomes extremely
dirty, it should be removed and cleaned prior
to lubricating.
60
(1) Master Link Retaining Clip
1. Remove the master link retaining clip (1) with
pliers. Do not bend or twist the clip. Remove the
master link, then remove the drive chain.
2. Clean the drive chain with a non-flammable
(high flash point) solvent such as kerosene and
allow it to dry.
3. Inspect the drive chain for possible wear or
damage. Replace the drive chain if it has dam
aged rollers, loose fitting links, or otherwise
appears unserviceable.
4. Inspect the sprocket teeth for wear or damage.
We recommend replacing the sprocket
whenever a new chain is installed.
5. Lubricate the drive chain.
To check the chain’s service limit, remove the drive
chain. Then measure the distance between a span
of 100 pins, from pin center to pin center. If the
distance exceeds the service limit, the drive chain
is worn out and should be replaced.
6. Pass the chain over the sprockets and join the
ends of the chain with the master link. For ease
of assembly, hold the chain ends against
adjacent rear sprocket teeth while inserting the
master link. Install the master link retaining clip
so that the closed end of the retaining clip faces
the direction of forward wheel rotation.
Replacing the Drive Chain
If the drive chain slack exceeds specifications when
the rear axle is moved to the farthest limit of adjustment the drive chain must be replaced. Excessive
slack indicates the chain is worn beyond its service
limit.
Measure a span of 100 pins
New Chain: 25 - inches (638mm)
Service Limit: 25.4 - inches (648mm)
>>>
61
SERVICE MAINTENANCE,
LUBRICATION AND
ADJUSTMENTS
(cont.)
Replacing the Drive Chain (cont.)
NOTICE! Use of a new chain with worn sprockets
will cause rapid chain wear
Inspect the front and rear sprocket teeth for
excessive wear or damage. If necessary, have your
dealer replace a worn sprocket.
62
More About the Drive Chain
The master link is the most critical element of drive
chain security. Master links are reusable,
as long as they remain in excellent condition. We
recommend installing a new master link
retaining clip whenever the drive chain is disassembled and reassembled.
You may find it easier to install a new chain by connecting it to the old chain with a master link
and pulling the old chain to position the new chain
on the sprockets.
Cleaning Your Pit Bike
Frequent cleaning and polishing will keep your new
pit bike looking like new for a long time.
Avoid all products that contain harsh detergents
chemical solvents or abrasives; these cleansers
could damage the metal, paint, and plastic finishes
on your bike.
Frequent cleaning also identifies you as an owner
who values your bike and keeps it well-maintained.
If your pit bike is still warm from recent usage, give
the engine and exhaust system time to cool off.
A pit bike that is kept clean is easier to clean up after usage, and a clean bike is also easier to inspect
and more pleasant to service.
We recommend the use of a garden hose to wash
your motorcycle. High pressure washers
(like those at coin-operated car washes) can damage certain parts of your motorcycle. If you
must use a high pressure washer, avoid spraying
the wheel hubs, muffler outlet, the under-seat area
and the engine off or off/run switch.
While you’re cleaning the bike, be sure to look for
damage, worn parts, and gasoline or oil leaks.
General Recommendations
To clean your motorcycle, you may use
- water only
- a product made specifically for washing cars and
motorcycles
- a mild neutral detergent, such as a dish washing
liquid, and water
- a mild spray-and-wipe cleaner/polisher
- a mild spray-and-rinse cleaner/degreaser and
water
Always cover or plug the end of the muffler, and
cover the air filter if it is exposed.
NOTICE! High pressure water (or air) can damage
certain parts of your pit bike.
63
SERVICE MAINTENANCE,
LUBRICATION AND
ADJUSTMENTS
(cont.)
Washing Your Motorcycle
with a Mild Detergent
1. Rinse your motorcycle thoroughly with cool
water to remove loose dirt. Do not wash it in
direct sunlight.
2. Fill a bucket with cool water. Mix in a mild,
neutral detergent, such as dish washing liquid or
a product made especially for washing motor
cycles or automobiles. We strongly recommend
you use a car- and motorcycle-specific product.
3. Wash your motorcycle with a sponge or a soft
towel. As you wash, check for heavy grime. If
necessary, use a mild cleaner/degreaser to
remove the grime.
4. After washing, rinse your motorcycle thoroughly
with plenty of clean water to remove any
residue.
64
5. Thoroughly dry your motorcycle with a chamois
(real or synthetic) or a soft towel.
6. Lubricate the drive chain to prevent rusting.
7. Start the engine and let it idle for several
minutes. The engine heat will help dry moist
areas.
8. As a precaution, ride at a low speed and apply
the brakes several times. This will help dry the
brakes and restore normal braking performance.
Transporting Your Pit Bike
If you use a truck or a motorcycle trailer to transport
your motorcycle, we recommend that you
follow these guidelines:
1. Use a loading ramp.
2. Make certain that the fuel petcock is in the
“OFF” position.
3. Secure the motorcycle in an upright position,
using motorcycle tie-down straps. Do not use
rope, which can loosen and allow the motorcycle
to fall over. To secure your motorcycle, brace
the front wheel against the front of the truck bed
or trailer rail; a wheel chock, avail at many
motorcycle and powersports shops as well as
RV and towing equipment parts suppliers, works
better but must be bolted to the truck bed or
trailer floor.
5. Check that the tie-down straps do not contact
any control cables or electrical wiring.
6. Tighten both straps until the front suspension is
compressed about half-way.
7. Use one or two additional tie-down straps to
keep the rear of the motorcycle from moving.
8. Do not transport your bike on its side. This can
damage the bike and leaking gasoline or oil can
create hazardous conditions.
4. Attach the lower ends of two straps to the tiedown hooks on your vehicle. Attach the upper
ends of the straps, one on each side of the
handlebar close to the fork and handlebar risers.
65
SERVICE MAINTENANCE,
LUBRICATION AND
ADJUSTMENTS
(cont.)
Storing Your Pit Bike
If you won’t be riding your bike for an extended period, such as during the winter, thoroughly inspect
your bike and correct any problems before storing
it. That way, needed repairs won’t be forgotten,
and it will be easier to put your motorcycle back in
service come riding season.
We suggest you perform the following procedures
to keep your motorcycle in top condition.
These storage procedures will reduce the deterioration that can occur during storage.
Preparation for Storage
1. Change the engine oil.
2. Be absolutely certain that the fuel petcock is in
the “OFF” position.
66
3. Drain the carburetor into an approved gasoline
container and dispose of it in an approved
manner or pour into the fuel tank.
4. Fill the fuel tank and make certain that the cap is
properly fitted and completely closed. If the
bike is going to be stored for more than one
month, drain the carburetor. This will help assure
the bike performs well when it’s time to ride
again.
WARNING! Gasoline is highly flammable and
explosive. You can be burned or seriously
injured when handing fuel. Stop the engine
and keep heat, sparks and flame away. Do not
handle fuel indoors. Wipe up any spills immediately.
5. Wash and dry your motorcycle.
Removal from Storage
6. Lubricate the drive chain.
1. Uncover and clean your motorcycle.
7. Inflate the tires to the recommended air
pressure.
2. If your motorcycle has been stored for more
than four months, change the engine oil.
8. Store your motorcycle in an unheated area, free
of dampness, away from sunlight, with a
minimum of temperature variation.
3. If your motorcycle has been stored for more
than two months, drain and replace the fuel.
9. Cover your motorcycle with a porous material.
Avoid using plastic or similar non-breathable,
or coated materials that restrict air flow and
allow heat and moisture to accumulate.
5. Check tire inflation and add air, if needed, to
return inflation to specifications.
4. Lubricate the drive chain.
6. Perform a pre-ride inspection, then test-ride your
motorcycle at low speeds.
67
TROUBLESHOOTING
Engine Does Not Start
1. Fuel tank is empty.
3. Carburetor is not adjusted correctly.
4. Fuel tank vent is plugged or the fuel line to the
carburetor is closed off, restricting fuel flow.
2. Fuel petcock is turned off.
5. Carburetor flooded by excessive “pumping” of
hand throttle.
3. Fuel petcock is clogged.
6. Water or dirt in the fuel system and/or carburetor
4. Fouled spark plug
5. Spark plug cable connectors loose or in bad
condition and are shorting.
6. Engine flooded with fuel from over-enrichening
(excessive use of the choke).
7. Throttle held too open when using the choke.
Engine Starts But Runs Irregularly
or Misses
1. Spark plug is in bad condition or partially fouled.
2. Spark plug cable is in bad condition.
3. Spark plug gap is too close or too wide.
Engine Starts Hard
4. Intermittent short circuit due to damaged wire
insulation.
1. Spark plug is in bad condition, has improper gap
or is partially fouled.
5. Water or dirt in the fuel system or carburetor.
2. Spark plug cable is in bad condition.
6. Fuel system vent is plugged or the fuel line to
the carburetor is partially obstructed.
68
Spark Plug Fouls Repeatedly
1. Excessive use of choke.
2. Fuel mixture is too rich.
3. Incorrect spark plug.
Pre-ignition or Detonation
(Knocks or Pings)
1. Incorrect fuel (not high enough octane rating or
blend of additives incorrect for bike engine)
2. Incorrect spark plug (heat range) for type of
usage.
Overheats
1. Insufficient oil supply or the oil is not circulating
properly.
2. Heavy carbon deposits from “lugging” the
engine. See your dealer.
3. Insufficient air flow over cylinder head from
idling too long or obstructed by mud and debris.
Engine Leaks Oil
1. Loose parts. Check for loose bolts and nuts, or
see your dealer.
2. Bad seal(s) and/or gaskets.
Excessive Vibration
1. Engine mounting bolts loose.
2. Broken frame. See your dealer.
3. Drive chain and/or sprocket badly worn, or links
tight from insufficient lubrication.
4. Wheel(s) and/or tire(s) damaged. See your
dealer.
5. Bike is not properly aligned. See your dealer.
69
TROUBLESHOOTING (cont.)
Transmission Shifts Hard or Jumps Out
of Gear
1. Clutch controls not adjusted correctly.
2. Shifter forks (inside transmission) are worn.
See your dealer.
3. Worn shifter “dogs” in transmission. See your
dealer.
Clutch Slips
Brakes Do Not Hold Normally
1. Front or rear master cylinder(s) low on fluid.
Check for visible leaks. Add fluid if no leaks
found.
2. Brake line contains air bubbles. Bleed brakes or
see your dealer for service.
3. Front or rear master cylinder piston worn. See
your dealer.
4. Brake pads contaminated with grease or oil.
Replace pads and clean rotors before using.
1. Clutch controls not adjusted correctly.
2. Worn friction discs. See your dealer.
5. Brake pads badly worn. Replace or see your
dealer for service.
3. Insufficient clutch spring tension.See your dealer
6. Brake rotor badly worn or warped. Replace or
see your dealer for service.
Clutch Drags or Does Not Release
1. Clutch controls not adjusted correctly.
2. Insufficient clutch spring tension. See your
dealer.
3. Clutch disc(s) warped. See your dealer.
Clutch Chatters
1. Clutch discs worn or warped.
70
7. Brakes fade because of heat build-up.
Excessively hard use of brakes or brake pads
are dragging. If brake pads are dragging see
your dealer for service.
8. Brake pads drag due to insufficient hand lever
free play. Adjust free play or see your dealer
for service.
You & The Environment
Owning and riding a motorcycle can be enjoyable,
but you must do your part to protect nature.
When you show respect for the land, wildlife, and
other people, you also help preserve the sport of
off-road riding.
Following are tips on how you can be an environmentally-responsible motorcycle owner.
Tread Lightly. Stay on existing roads and trails,
avoid surfaces that are easily damaged and ride
only in areas approved for off-road vehicles.
Keep the Noise Down. Loud motorcycles can be
offensive. Ride as quietly as possible.
Don’t remove your spark arrester, and don’t modify
the muffler or any other part of your air intake and
exhaust systems. Such modifications not only increase noise, they also reduce engine performance
and may be illegal.
Choose Sensible Cleaners. Use a biodegradable
detergent when you wash your motorcycle. Avoid
aerosol spray cleaners that contain chlorofluorocarbons (CFCs) which damage the atmosphere’s
protective ozone layer. Don’t throw cleaning solvents away, see the following guidelines for proper
disposal.
Recycle Wastes. It’s illegal and thoughtless to put
used engine oil in the trash, down a drain, or on the
ground. Used oil, gasoline and cleaning solvents
contain poisons that can hurt refuse workers and
contaminate our drinking water, lakes, rivers, and
oceans. Before changing your oil, make sure you
have the proper containers. Put oil and other toxic
wastes in separate sealed containers and take
them to a recycling center. Call your local or state
office of public works or environmental services to
find a recycling center in your area and get instructions on how to dispose of non-recyclable wastes.
71
Being Prepared For The
Unexpected
With all the challenges you can encounter off-road,
there’s always a chance that something may go
wrong. This section gives practical advice to help
you deal with a wide range of problems. Take time
to read this section before you ride. Also review the
tips in ‘Preparing for a Ride’ pages17-18.
General Guidelines
If something goes wrong during a ride, the first
thing to do is stop as soon as you safely can. Do
not continue riding if you have a flat tire, or you
hear an unusual noise, or your motorcycle just
doesn’t feel right. If you continue riding, you could
cause more damage and endanger your own
safety.
After a stop, take time to assess the situation.
Carefully inspect your motorcycle to identify the
problem, then consider your options before you
decide what to do.
If a problem is relatively minor and you have the
tools, supplies, and skills to make a permanent
72
repair, you may be able to fix it on the trail and continue riding. Or, you may be able to make a temporary repair that allows you to slowly ride back to
your base where you can make a permanent repair
or get help.
When a problem is more serious -- or you don’t
have the tools, supplies, experience, or time to
deal with it, you need to choose the safest way to
get yourself and your motorcycle back to base. For
example, if you are close enough, you (or you and
another person) might be able to push it back.
Whatever the problem, the most important rules
are:
* Always put personal safety first.
* If the problem is relatively minor and you have
the tools, supplies and skills to make a temporary
repair, be sure to have permanent repairs made
as soon as possible.
* Do not continue riding if you are hurt or your
motorcycle is not in safe riding condition.
Additional recommendations for specific problems
follow.
Being Prepared For The
Unexpected
(cont.)
If Your Engine Quits or Won’t Start
If the engine wasn’t making any unusual noises
before it quit running, and it feels normal when
you operate the kick-starter, you can probably rule
out a major mechanical problem.
The next area to check is the fuel system. See
‘Troubleshooting’ pages 68-69.
If the fuel system appears to be okay, check the
ignition system (this requires a spark plug
wrench):
* Check that the spark plug cap isn’t loose or
disconnected. Disconnect the spark plug cap and
remove the spark plug. Connect the spark plug
cap to the spark plug and ground the threaded
portion of the spark plug on the cylinder head.
Operate the kick-starter while you watch the
spark plug. If it sparks, the C.D.I (ignition system)
is probably working. If there is no spark, install a
new spark plug, if you have one with you. If there
is still no spark, there is a problem in the
ignition system. Also see ‘Troubleshooting’
page 68-69.
If you cannot identify or correct the problem, you
will have to push your motorcycle back to
your base or get some help.
If You Get a Flat Tire
How you handle a flat tire on the trail depends on
how serious the tube or tire damage is, and what
tools and supplies you have with you.If you have a
slow leak or a minor puncture there are two ways to
try making a temporary repair:
* Use an aerosol tire sealer to seat the puncture
and inflate the tube. (This can be done
without removing the tire or wheel.)
* Use a tube patch kit to repair the puncture. (This
requires removing the tire and wheel.)
If the leak is more serious, or a temporary repair
doesn’t work, the inner tube must be replaced. The
tire will also need to be replaced if it is damaged).
Replacing a tube or tire involves removing and
re-installing the wheel, see pages 53-55.
73
If you are unable to repair a flat tire on the trail, you
will need to push the motorcycle back to your base
or send for help. We strongly recommend that you
do not try to ride with a flat tire.The motorcycle will
be hard to handle, and if the tire comes off the rim it
may lock up the wheel and can cause you to crash.
If You Crash
Personal safety is your first priority after an
accident. If you or anyone else has been injured,
take time to assess the severity of the injuries and
whether it is safe to continue riding. If you cannot
ride safely, send someone for help. Do not ride if
you will risk further injury.
If you decide you are capable of riding safely, carefully inspect your motorcycle for damage and
determine if it is safe to ride. Check the tightness
of critical nuts and bolts securing such parts as the
handlebar, control levers, brakes, and wheels.
If there is minor damage, or you are unsure about
possible damage but decide to try riding the
motorcycle back to your base, ride slowly and cautiously.
Sometimes, crash damage is hidden or not immediately apparent. When you get home, thoroughly
check your motorcycle and correct any problems
74
you find. Also, be sure to have your dealer check
the frame and suspension after any serious crash.
If a Part Fails
The drive chain, master link, brake lever or pedal,
control cables, and other components can be
damaged as you ride in dense brush or over rocky
terrain. Making a trailside repair depends on how
serious the damages is and what tools and supplies
you have with you.
If the drive chain comes off because the master
link clip gets knocked off, you may be able to put
the chain back on with a new master link. However,
if the chain breaks or does other damage when it
comes off, you may not be able to make a trailside
repair.
If any component of the front brake system is damaged, you may be able to ride carefully back to your
base using the rear brake for slowing or stopping.
If you damage a throttle cable or other critical
component, your motorcycle may be unsafe to ride.
Carefully assess the damage and make any repairs
that you can. If there is any doubt, it’s best to be
conservative and safe.
Technical Information
The engine number is stamped on the left side of
the engine.
This section contains dimensions, capacities, and
other technical data, plus information on
government requirements and how to break-in your
motorcycle.
Vehicle Identification Numbers
The frame (PIN - Product Identification Number, or
VIN - Vehicle Identification Number) and engine
serial numbers are required when you register
your motorcycle. They
may also be required
when ordering replacement parts. You can
record these numbers in
the back of the manual.
(1) VIN on Steering Head
(2) Engine Number
The frame number is
stamped on the right side
of the steering head, or
on an etched or stamped
tag riveted to the steering
head.
75
Technical Information (cont.)
Emission Control Systems
Break-in Guidelines
Exhaust Emission Requirements
Your motorcycle will comply with applicable exhaust
emissions standards during its useful life,
when operated and maintained according to the
instructions provided.
Help assure your motorcycle’s future reliability and
performance by paying extra attention to how you
ride during the first five- to 10-hours of operation.
During this period, avoid full-throttle starts and rapid
acceleration. See pages 33-34 for detailed break-in
guidlines.
High Altitude Carburetor Adjustment
When operating this motorcycle at high altitude, the
air-fuel mixture becomes overly rich. Above 6,500
feet (2,000m), drivability and performance may be
reduced and fuel consumption increased. The carburetor can be modified to compensate for this high
altitude richness. However, the carburetor must be
returned to standard factory specifications when
lower altitude riding is desired. See your dealer for
high altitude modification.
NOTICE: Sustained operation at altitudes below
5,000 feet (1,500m) with high altitude carburetor
modifications may cause engine overheating and
damage.
76
Noise Emission Requirements
The EPA also requires that motorcycles built after
January 1, 1983 comply with applicable
noise emission standards for one year or 1,865
miles (3,000km) after the time of sale to the
ultimate purchaser, when operated and maintained
according to the instructions provided.
Warranty Compliance
Compliance with the terms of the SSR
Motorsports Factory Limited Warranty for the
Motorcycle Emission Control Systems is necessary
in order to keep the warranty in effect. The Vehicle
Emission Control Information Label is attached to
the inside of the left fuel tank shroud.
Sources of Emissions
The combustion process produces carbon monoxide and hydrocarbons. Control of hydrocarbons is
very important because under certain conditions,
they react to form photochemical smog when subjected to sunlight. Carbon monoxide does not react
in the same way, but it is toxic. SSR Motorsports
utilizes very exacting carburetor jetting and other
systems to make your pit bike emissions legal and
to reduce carbon monoxide and hydrocarbon emissions.
Exhaust Emission Control System
The exhaust emission control system is composed
of precise carburetor jetting and fuel mixture, and
no adjustment should be made except idle speed
adjustment with the throttle stop screw.
The exhaust emission control system is separate
from the crankcase emission control system.
Crankcase Emission Control System
The engine is equipped with a closed crankcase
system to prevent discharging crankcase vapors
into the atmosphere. Blow-by gas is returned to the
combustion chamber through the air cleaner and
the carburetor.
Noise emission control system
TAMPERING WITH THE NOISE CONTROL SYSTEM IS PROHIBITED: Federal law strictly prohibits,
and Canadian provincial laws may prohibit, the
following acts or the causing thereof:
(1) The removal or rendering inoperative by any
person, other than for purposes of
maintenance, repair or replacement, of any
device or element of design incorporated into
any new vehicle for the purpose of noise
control prior to its sale or delivery to the
ultimate purchaser or while it is in use; or...
(2) The use of the vehicle after such device or
element of design has been removed
or rendered inoperative by any person.
>>>
77
Technical Information (cont)
Emission Control Systems (cont.)
AMONG THOSE ACTS PRESUMED TO CONSTITUTE TAMPERING ARE THE ACTS LISTED
BELOW:
(1) Removal of or puncturing the muffler, baffles,
header pipes, or any other component which
conducts exhaust gases.
(2) Removal of or puncturing of any part of intake
system.
(3) Lack of proper maintenance.
(4) Replacing any moving parts of the vehicle, or
parts of the exhaust or intake system, with
parts other than those specified by the
manufacturer.
78
Problems That May Affect Motorcycle
Emissions
If you are aware of any of the following symptoms,
have the vehicle inspected and repaired by
your local Motorcycle Dealer:
(1)
(2)
(3)
(4)
Hard starting or stalling after starting.
Rough idle
Misfiring or backfiring during acceleration.
Backfiring or popping through the muffler on
deceleration
(5) Poor performance (driveability) and poor fuel
economy.
Oxygenated Fuels and
Your SSR Pit Bike
MTBE (Methyl Tertiary Butyl Ether) 15% by volume.
You may use gasoline containing up to 15% MTBE
by volume.
Some conventional gasolines are being blended
with alcohol or an ether compound. These
gasolines are collectively referred to as oxygenated fuels to help reduce emissions. If you use an
oxygenated fuel, be sure it is unleaded and meets
the minimum octane rating requirement. Before
using an oxygenated fuel, try to confirm the fuel’s
contents. Some states and/or provinces require this
information to be posted on the pump.
METHANOL (methyl or wood alcohol) 5% by
volume. You may use gasoline containing methanol
containing up 5% methanol by volume as long as it
contains co-solvents and corrosion inhibitors to
protect the fuel system. Gasoline containing more
than 5% methanol by volume may cause starting
and/or performance problems. It may also damage
metal, rubber, and plastic parts of your fuel system.
The following are the EPA-approved percentages of
oxygenates:
ETHANOL (ethyl or grain alcohol) 10% by volume.
You may use gasoline containing up to 10% ethanol by volume. Gasoline containing ethanol may be
marketed under the name ”Gasohol”.
79