1
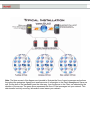
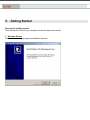
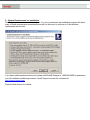
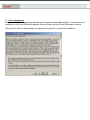
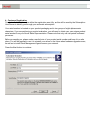
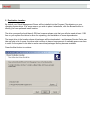
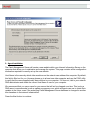
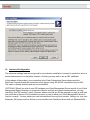
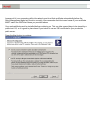
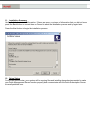
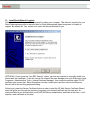
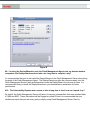
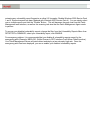
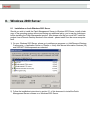
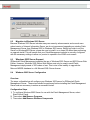
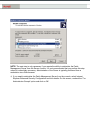
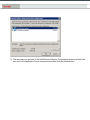
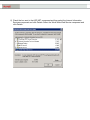
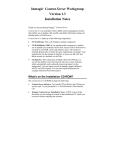
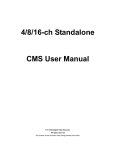
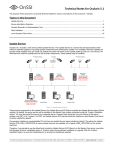
Novell ZENworks Patch Management ® ® Powered by PatchLink Corporation V6.0 Installation Guide Novell, Inc. 404 Wyman Street, Suite 500 Waltham, MA 02451 © 2004 Novell, Inc. All Rights Reserved. http://www.novell.com 0 1. 2. 3. 4. 5. 6. 7. 8. 9. Introduction Typical Installation Operating Requirements Pre-Install Quick Checklist Getting Started Patch Management Initialization Technical Notes Windows 2000 Server Revision History 2 5 7 10 11 26 38 45 55 1. Introduction Novell® ZENworks® Patch Management, powered by PatchLink Corporation, requires an evaluation serial number in order to run. To obtain an evaluation serial number, send an e-mail request to [email protected] with the subject Eval License Request. You will then be sent a serial number for a 90-day, 10-device license. Please make a note of the serial number. You will need this number during the installation of the Patch Management software. ZENworks Patch Management is provided to you on a product CD that contains the Patch Management Server software along with full help documentation. Once the Patch Management Server has been installed, the product also contains Patch Management Agent software for your client computers that can be installed by using the Deployment Wizard. Once installed onto your workstations, the Patch Management Agents gather a list of software, hardware, services and patches installed on each computer within your network. The returned information can be viewed at any time in the Inventory section of the product, even if the workstation is disconnected from your network. With this detailed information, the Patch Management Server creates a complete analysis of your network profile that determines the patches, hot fixes, service packs and updates that are significant to your network. Based on this analysis, your subscription service will automatically download a series of Patch Reports. The function of each Patch Report is to provide a detailed listing of the computers that require a specific patch as well as those that already have the patch. While viewing the report results, you have the option to schedule a patch rollout. PLEASE NOTE: as recommended with all patches, you should first deploy the patch within your test environment before rolling it out into production. Patch rollout is simple. Use the report to view the list of computers that do not have a particular patch update. Next, select the computers that should receive the patch and schedule the date and time for the rollout to occur. Once a rollout schedule has been created, a detail report shows you the status of the update – how many computers are downloading the patch, how many completed successfully as well as delivery error codes should there have been any failure conditions. Once installed, your Patch Management Server will stay current with the latest patches and fixes by communicating with the Subscription Host Server via its subscription connection. Anytime a newly released patch matches your stored network profile you will receive a proactive email notification. The next time you access the Patch Management Server, a new report will show you the description and business impact of the patch as well as the list of computers that require it. At this time you can choose to rollout the patch or disregard it. Unlike most other management software, the system is also virtually maintenance free; the Patch Management Server is a completely self-sufficient unit that does not require backup or tedious database archival. For disaster recovery merely reinstall the server again using the same serial number and all of your installed Patch Management Agent computers will automatically re-register. As illustrated, the Patch Management Server has been designed to fit into your current administration job functions and proactively notify you as new patches and fixes become available. There are no new tools to install and learn; everything can be done using your web browser. Because it is so automated, this solution can also help greatly reduce the window of opportunity for patch-related server and workstation vulnerabilities. Overview of the ZENworks® Patch Management System The ZENworks Patch Management Server has the following main components: Agents are installed on every computer you wish to manage under the ZENworks Patch Management system. They access a collection of report messages that detect security holes and other vulnerabilities. The Agent is then capable of implementing corrective actions received from the Patch Management Server. In most cases, the agent operates silently, without any direct intervention from the end user. However, the Patch Management Server also allows the administrator to provide active feedback for those actions that require user input. The Patch Management Server is a collection of interacting services, including executable programs, a web server and a database server. It coordinates the flow of information to and from individual computers and stores the results in the Patch Management database. The Server components operate quietly in the background, without any direct intervention from the administrator. Patchlink Distribution Point Servers (PDP) increase the efficiency of the system. Instead of forcing each networked computer to directly access the Patch Management Server, DPS spreads the burden. Dozens of Agents can point to a DPS for downloads, which in turn makes only a single request of the server. A DPS does not need to be a dedicated computer – the software can be installed on any windows client. As soon as you deploy a DPS, you can then deploy clients that will connect thru that DPS module. FastPatch is a utility which allows an agent to dynamically locate its closest distribution point, using TraceRoute, enabling mobile computers to be patched with maximal bandwidth efficiency. The Patch Management Web Console ties all these components together to provide a system-wide view of all the computers on your network, along with their vulnerabilities and suggested remedies. The Web Console allows an authorized user to quickly and simply distribute fixes to each computer that needs them without impacting any other networked computers. The Patch Management Web Console can be run on any computer in your network regardless of platform. 2. Typical Installation A typical installation of 10,000 or fewer Agents resembles the diagram below. There is a single Patch Management Server that gathers report messages from the Internet where they can be viewed by the Web Console and distributed to the Agents thru the distribution point servers, which pass the data on to locally connected agents. Each Agent inspects its local computer and reports any relevant vulnerability back to the Server. The Web Console oversees this activity. It connects to the Patch Management Server and periodically updates its display to reflect changes or new knowledge about your network. When vulnerabilities are discovered, the admin can then target patches or other fixes to the appropriate computers. The progress of the fixes can be followed in near real-time as they spread to all the relevant computers and, one by one, eliminate their vulnerabilities. Note: The blue arrows in this diagram are intended to illustrate the flow of report messages and actions throughout the enterprise. Agents post small amounts of information to the Patch Management Server as well, but the bulk of the bandwidth goes the other way, from the Server to the Client, as indicated by the direction of the arrows. The green arrow represents the flow of Fixlet messages into your network. This data transfer is strictly one-way; information never leaves your network. 3. Operating Requirements 3.1 Install the Patch Management Server software System Requirements for Evaluation Purposes To install the server software you will need a server, desktop or laptop computer model with 512 MB of RAM and at least 5 GB of free disk space. A 500 MHz or better CPU is recommended for minimal system operation. The evaluation software can be loaded on Windows 2000 Professional and Windows XP as well as Windows 2000 Server and Advanced Server. It is recommended that the Patch Management software be evaluated in a small environment dedicated for testing software. If you plan to test in an isolated environment, please build your server somewhere outside the test environment – allowing it to obtain its subscription and download all critical packages via its internet connection- and only then move it into your testing environment. The Patch Management Server software comes with Microsoft SQL Server 2000 Desktop Engine (MSDE 2000). This version of SQL Server is limited to 8 concurrent database connections and is NOT intended to be deployed in a production environment. Windows 2000 Service Pack 2 or higher is also required. Please install it from http://www.microsoft.com/windows2000 before continuing on. PLEASE NOTE: Do not under any circumstances attempt to install on a computer that has personal firewall products, popup killer, web server security tools, domain policy restrictions or any version of Microsoft SQL Server product installed on it. You may lock down your configuration AFTER installation of the software, if so desired. Hardware Requirements for Production Environments The hardware requirements for production environments vary depending upon the number of clients that are being updated by the Patch Management Server. • For an installation of up to 100 Patch Management Agents it is recommended that a dedicated server with minimum of a Pentium III class, 700 MHz+ CPU and 512MB+ of RAM with 5 GB of free disk space • • • For an installation of over 100 Patch Management Agents it is recommended that a dedicated server with minimum of a Pentium IV class 1.4 GHz+ CPU and 1GB+ of RAM with 5 GB of free disk space An additional 1 GB of RAM is recommended for each additional 1000 Patch Management Agents Additional disk space may be needed as the number of patch packages in the local cache increases. Allocating at least 20 GB of disk storage would allow for this growth. Operating System Requirements for Production Environments The operating system must be a clean install of Windows 2000 Server. For enterprise solutions requiring load-balancing and other advanced features, Windows 2000 Advanced Server should be installed, to save time with the server installation and increase the security of the server during installation, all the latest service packs, security updates and hot fixes should be installed immediately after installing the operating system. The Internet Information Server (IIS) must be installed along with the operating system. Should you need to add Internet Information Server to your server, merely go to the Start Menu and click Settings > Control Panel, then run the Add/Remove Programs application and click on Add/Remove Windows Components. If Internet Information Services is not checked, check that option and press Next> to install it. If you are using Windows Server 2003, refer to section 8 of this document for special instructions to prepare your server to run ZENworks® Patch Management software. Your computer must also have a browser connection to the Internet. Without an Internet connection you will be unable to obtain your patch subscription and patch packages from novell.patchlink.com and storage12.patchlink.com. If necessary, the Patch Management Server can access the Internet through an un-authenticated proxy server, since the various replication tasks run as services on the machine when there is no user actually logged in. If you are currently using an authenticated proxy, we recommend that you perform your evaluation in a different environment (test lab, home PC, etc) to avoid having to configure additional proxy rules for your corporate Internet gateway. Be sure to allow access to both subscription servers through your firewall: https://novell.patchlink.com https://storage12.patchlink.com 204.138.167.5 216.205.112.66 Port 443 Port 443 Once these steps are completed, make sure that you are logged into your computer as the local computer Administrator account, who MUST have rights to install software onto the local system, and then begin the install process outlined in the next few pages. PLEASE NOTE: Installation onto a Primary Domain Controller (PDC) is not supported in this release of software; however this is also not a recommended configuration for the system. Please install the product on a member server within your domain or Active Directory environment. The product also installs on any stand-alone workgroup server. Although it is only necessary to have Service Pack 2 installed on your server for the Patch Management software to work, it is recommended that you install all the latest service packs, security updates and hot fixes to ensure that your server is protected from attack while the patch packages are being downloaded to the server. SQL Server Requirements for Production Environments The Patch Management Server software comes with Microsoft SQL Server 2000 Desktop Engine (MSDE 2000). This version of SQL server is limited to 8 concurrent database connections and is NOT intended to be deployed in a production environment. To deploy the Patch Management Server in a production environment you MUST upgrade the MSDE 2000 SQL Server to a fully licensed SQL Server 2000. 4. Pre-Install Quick Checklist Be sure that you know the following information before starting the Patch Management Server installation process: [ [ [ [ [ [ [ [ [ [ [ ] Target hardware meets or exceeds the system requirements ] Windows 2000 Server or Advanced Server has been freshly installed ] Internet Information Server option was installed and is running (default option) ] Default policies are currently in effect ] Service packs, security updates and hotfixes have been installed on the computer ] Your computer DNS host name is ______________ (e.g.: myserv.acme.com) ] The local SMTP mail host name is ______________ (e.g.: mail.acme.com) ] Serial number for use during install _________-___________ ] System is connected to the Internet, or can be connected for a few hours ] SSL web server certificate has been obtained (optional) ] Proxy server is not used, or proxy server IP address and port are known 5. Getting Started Running the install program Place the product CD into your computer and launch the product install. 1. Welcome Screen Press the Next button to begin the installation process 2. System Requirements for Installation Details the system requirements listed above. For your convenience the installation program will check many of these requirements automatically and will not allow you to continue on if the minimum requirements are not met. If you have install questions at this point, please call Novell® Support at 1-800-858-4000 for assistance or a full installation walkthrough session. Novell Support can also be contacted at http://support.novell.com. Press the Next button to continue. 3. License Agreement Please read the license agreement between your company and Novell® carefully. It covers terms and conditions for both your Patch Management Server software and your Patch Subscription Service. Press the Yes button to acknowledge the agreement or press No to cancel the installation. 4. Customer Registration Complete all of the information within the registration area fully, as this will be used by the Subscription Host Server to identify you through your automatic subscription. Your serial number is located on your product packaging and is two groups of eight alphanumeric characters. If you are performing a product evaluation, you will need to obtain your own unique product serial number from your Novell Sales Representative. Please note that only one trial period is allowed per server. Before proceeding on, please make a careful note of your product serial number and keep it in a safe place. You will be required to use it to reinstall your server in the future when hardware upgrades occur, as well as to install Patch Management Agents across your network. Press the Next button to continue. 5. Destination Location By default your Patch Management Server will be installed into the Program Files directory on your operating system drive. If for some reason you wish to place it elsewhere, click the Browse button to identify your new preferred install location. The drive you specify should have 4 GB free, however please note that you will also need at least 1 GB free on your system boot drive to allow for unpacking, and installation of some dependencies. The target drive is the location where all packages will be downloaded – and because Service Packs can take up quite a lot of space, the drive must continue to have a large amount of available space over time in order for the system to be able to cache new critical packages as they become available. Press the Next button to continue. 6. Email Information Proactive email notification from your Patch Management Server is a very valuable feature that you can configure at this point during the installation. In the Email Address field enter the person who will be used as the primary contact person to receive email notifications from the Patch Management Server once it is completely installed. SMTP Mail Host is the name of your Internet mail server, usually mail.company.com or similar, which must have SMTP relay capability enabled. This mail server will be used to distribute email notifications from the system to one or more network administrators who use the system. If you don’t know this information you can leave it blank: however no email notifications can be sent until this information is completed after installation. Press the Next button to continue. 7. Administrative User Enter the password for the Patch Management user, which will be automatically created, and can be used to log into this machine to manage patch updates to all computers. Please ensure that the password chosen meets your current effective policy restrictions for Local Computer user accounts. Please make a note of your password at this time. Once the product is installed, login with user name PatchLink and your password in order to start managing your networks patch configuration. Press the Next button to continue 8. Proxy Server and Firewall Configuration If your local area network makes use of a proxy server to access the Internet, you should see the “Web browsing requires proxy server” option already checked and your proxy server address and port number pre-filled. This information must be supplied correctly at this time so that your Patch Management Server can communicate to the Patch Subscription Server correctly. Should you have any questions about proxy configuration settings, talk to your network security administrator. Should your Internet connection be using the Auto-Proxy feature, you will need to enter the static IP address and port of a valid proxy server before continuing on. Once again, discuss with your network security administrator if you are not sure. Firewall authentication agents must be disabled for this computer, as there will be nobody logged onto the server overnight when it is time for subscription replications to occur. PLEASE NOTE: the product does not support Authenticated Proxy access to the Internet – specifically to the site https://novell.patchlink.com. This feature is used to control user access to the Internet; however the server services that are used to download your subscription must be able to run when there is no user logged on. Press the Next button to continue. 9. Agent Installation The Patch Management Server will create a new website within your Internet Information Server on the computer that allows you to administer and manage the system. This page contains all the configuration information required to correctly set up the new website. Host Name is the name by which other machines on the network can address this computer. By default, this field is filled out for you. However please go to at least one other computer and use the PING utility to verify that the name supplied really does resolve to your computer. If it does not, talk to your network DNS administrator and obtain the correct Host Name to use for your computer. We recommend that you use a name for your server that will not be changed over time. This is why a DNS name is recommended, such as update.mycompany.com, which all agents can use to obtain their updates in the future, even if the underlying Patch Management Server hardware is changed to another box elsewhere in the network infrastructure. Press the Next button to continue. 10. Advanced Configuration The advanced settings area can be ignored for an evaluation installation; however for production use in a secure environment or on the public Internet, it is likely you may wish to use an SSL certificate. In this release of the product, your connection to the Patch Subscription Server always points to PatchLink Corporation and the connection is fully secure using 128-bit SSL connections on port 443. This option is always checked and can not be modified. (OPTIONAL) Should you wish to use SSL between your Patch Management Server and all of your Patch Management Agent computers to guarantee authentic and fully encrypted communications, you may check the “Use SSL security” option. However please note that you will be required to supply a valid web site certificate at the end of this installation process in order to allow your Patch Management Server to function correctly. You may obtain your web site certificate from any trust provider, Verisign Inc, your own Enterprise PKI system such as Entrust or even the Microsoft Certificate Server built into Windows2000 – however all of your computers within the network must trust that certificate automatically before the Patch Management Agent will function correctly. Also remember that the issued name of your certificate MUST match the DNS Host Name you provided above. Your web certificate must be installed before continuing on. This can take several days to be issued by a public trust CA, so it is good to plan ahead if you intend to use an SSL certificate for your production patch server. Press the Next button to continue. 11. Installation Summary Verify all of the basic install information. If there are errors, or pieces of information that you did not know press the Back button to correct them or Cancel to abort the installation process and try again later. Press the Next button to begin the installation process. 12. Setup Status For the next few minutes, your system will be copying files and installing dependencies needed to make your Patch Management Server function properly and communicate with the Patch Subscription Server at novell.patchlink.com. 13. InstallShield Wizard Complete At the end of installation you will be prompted to restart your computer. This reboot is required for your Patch Subscription service to start and also for Patch Management Agent computers to be able to register. By default the “Yes, restart now” option will be pre selected for you. (OPTIONAL) If you chose the “Use SSL Security” option, you are now required to manually install your trusted web site certificate. To do this, launch the Internet Services Manager from your Start menu (click Programs > Administrative Tools > Internet Services Manager). Now locate the website called “PLUS” and then right mouse click. Select Properties from the context menu and then choose the Directory Security tab in the resulting properties dialog. At this point, press the Server Certificate button in order to start the IIS Web Server Certificate Wizard which will guide you through the process of importing your trusted certificate into the web site. As mentioned before you should install your EXISTING server authentication certificate at this time – don’t request a new certificate at this time. Note that this step is NOT OPTIONAL if you have chosen to employ SSL security, since absolutely no socket level communications can occur with your newly installed Patch Management Server until a trusted certificate has been installed. If you don’t have a certificate, you should abort installation at this time and re-install without checking the SSL security option. Press the Finish button to restart your computer and complete the installation process. Please log into your computer immediately after it restarts, as a brief registration process will then run that installs the Patch Management Agent on this computer, starts the web server and initiates your patch subscription. PLEASE NOTE: the Patch Management Agent is automatically installed on this computer. DO NOT modify its configuration or remove it from the Patch Management Server, as all subscription activities will then cease. 14. Lock Down the Patch Management Server Once installation has completed and you have verified the Patch Management Server is fully operational, you should consider carefully how you plan to secure it. Since the product uses Microsoft Internet Information Server, Microsoft SQL Server 2000 Desktop Edition (MSDE), Microsoft Data Access Components (MDAC), Microsoft Windows Scripting Host and other operating system components you are strongly encouraged to: o Lock down unnecessary TCP/UDP ports, as described in the Server Optimization sections of the Support Forum AND/OR o Apply all currently available patches and hotfixes for the aforementioned Microsoft components. AND/OR o Turn off all unnecessary Windows services (Remote Registry and so forth) as described in the Server Optimization section of the Support Forum. AND/OR o Disable network services that are no longer needed such as Microsoft File & Print Sharing PLEASE BE VERY CAREFUL when performing these types of changes to your Patch Management Server, since turning off the wrong services or applying patches incorrectly can of course prevent your server from operating correctly. 6. Patch Management Initialization Your system is now ready for use. Just click the shortcut located on your desktop in order to access the Patch Management Server administration interface and online documentation. During the first ten or fifteen minutes of use, you will notice a high level of disk activity as your subscription information and all critical packages are downloaded from novell.patchlink.com. For security reasons you will be prompted for your username and password. Please use the username of the local system Administrator – as that person has automatically been granted rights to administrate the Patch Management Server. You can quickly add additional trusted individuals to the system using the “Users” section of the product. Once you have installed the Server, it is recommended that you lock the box down, meaning, secure and protect it. Refer to the ZENworks® Patch Management User Manual for instructions. 6.1 Deploy the Patch Management Agent for Windows Overview Once you have installed the Patch Management Server software, you will immediately want to start the process of deploying agents to other computers within your company that are to be monitored by the system. The Patch Management Agent is installed one time, and thereafter is completely maintenance free. Better still, it can be quickly and easily deployed to many computers at once. There are three basic approaches to deploying the agent: o Single Agent Install can be done on any Windows computer within your network one machine at a time using the Deployment Wizard. o Multiple Agent Rollout can be performed using the Deployment Wizard to many computers within a domain at one time. Computers that are to be rolled out must be WindowsNT or Windows2000 with ADMIN$ shares currently enabled. o Network Login Script distribution can be used to force all computers that log into the network to have the Patch Management Agent automatically loaded onto them. This approach provides the highest degree of automation, since even a brand new computer can now be automatically inventoried and patched by the system. The following information describes each of these three approaches in turn: System Requirements The Patch Management Agent Deployment Wizard requires that your Windows computers have any of the following minimum operating system configurations: o o o o o o Windows XP Windows 2000 (any version) Windows Millennium Edition Windows 98 Windows NT 4.0 with Service Pack 4 and Internet Explorer 4.01 Windows 95 OSR2 with Internet Explorer 4.01 Installation of the Patch Management Agent onto a target computer requires approximately 20MB of free disk space on the target machine, although the agent itself only requires fewer than 2MB of free disk space once installed. 6.2 Using the Single Agent Installer for Windows – Local Machine Agent Installation can be launched from any computer within your network. First log into the Patch Management Server administration interface, then click Computers, and press the Add button. At this point, select the Single Agent Installer for Windows hyperlink to start downloading. Depending upon your bandwidth constraints this will take between a couple of seconds and a few minutes. You may also be presented with a screen indicating that the executable you are downloading was created and digitally signed by PatchLink Corporation. Once downloaded, run UPDATEAGENT.EXE to actually start the process of agent installation. The steps are as follows: Initialization Step Please wait while the deployment wizard is initialized on this computer. Welcome Screen Press the Next button to begin the agent deployment process License Agreement Please read the license agreement carefully, this is the same agreement provided during server installation, but must be acknowledged by all administrators of the system. Once you have read the agreement, select the “I accept the terms” or “I do not accept the terms” option. Press the Next button to continue the deployment process or the Cancel button to abort. Agent Registration In the Host URL field, enter the URL that you use to access your Patch Management Server from your web browser, including its protocol prefix (http:// or https:// for a secure server). The serial number entry field must be filled out completely with the SAME serial number that you used when your Patch Management Server was installed. It is extremely important that you use the same serial number – if you provide any other valid serial number or evaluation serial number, your newly installed agents will be unable to communicate at all. If your Local Area Network configuration requires the use of a proxy server to access the Patch Management Server, you can enter the proxy connection string in the third entry field, otherwise just leave it blank. Please be sure to enter a valid proxy server name and port – e.g.: http://myproxy.mycompany.com:8080. PLEASE NOTE: for environments where a proxy server is required to access the Internet, you may be wondering whether to enter proxy information or not. However please be sure to ONLY enter proxy information if your agents will be required to talk via the proxy server in order to communicate with your Patch Management Server. In most LAN environments, “Proxy Bypass” is used to access web servers within the corporate network – so that the proxy server only has to deal with outbound access to the World Wide Web. Install Summary If you selected Local Machine install, this is the last step of the install procedure before copying files. Press Begin to start the installation process onto this computer. Setup Complete The final wizard screen will confirm that the Patch Management Agent was successfully installed onto this computer. Any errors that occurred will be shown in red text, please recheck your serial number and Host URL and try again. 6.3 Using the Domain-Wide Deployment Wizard for Windows – Multi-Agent Domain-Wide Deployment must be launched from a Windows2000 or Windows XP machine which has been logged on to the network with a domain administrator equivalent account. This will allow agents to be remotely deployed to other computers within the network. First log into the Patch Management Server administration interface, then click Computers, and press the Install button. On the Agent installers’ screen, select the Domain-Wide Agent Deployment Wizard for Windows hyperlink and the Deployment Wizard will start downloading. Depending upon your bandwidth constraints this will take between a couple of seconds and a few minutes. You may also be presented with a screen indicating that the executable you are downloading was created and digitally signed by PatchLink Corporation. Once downloaded, run DEPLOYWIZARD.EXE to install the application which will allow you to run remote agent deployment. Installation Step A simple InstallShield wizard is used to install the Agent Deployment Wizard for Windows onto your computer. Merely accept the license agreement and allow the setup program to complete. Note that this only has to be done one time – and then the wizard can be run over and over again. To run the Agent Deployment Wizard again, merely click on the desktop shortcut that is created by the setup program. The wizard steps are as follows: Welcome Screen Press the Next button to begin the agent deployment process License Agreement Please read the license agreement carefully, this is the same agreement provided during server installation, but must be acknowledged by all administrators of the system. Once you have read the agreement, select the “I accept the terms” or “I do not accept the terms” option. Press the Next button to continue the deployment process or the Cancel button to abort. Agent Registration In the Host URL field, enter the URL that you use to access your Patch Management Server from your web browser, including its protocol prefix (http:// or https:// for a secure server). The serial number entry field must be filled out completely with the SAME serial number that you used when your Patch Management Server was installed. It is extremely important that you use the same serial number – if you provide any other valid serial number or evaluation serial number, your newly installed agents will be unable to communicate at all. If your Local Area Network configuration requires the use of a proxy server to access the Patch Management Server, you should see the “Use proxy server” option checked. Should you have any unusual proxy server requirements, please check this box and make sure your proxy server address and port are correct before continuing. Next choose the “Domain Wide Installation” option to install onto multiple computers within your domain. Should this option be grayed out, make sure that you are logged in with an administrator equivalent account and also that ADMIN$ shares are available on your domain controller and the local computer you are rolling out from. In order to have the agent successfully deployed using this technique, the target computer must be a current member of the domain, be currently powered on and also have its ADMIN$ shares available. Specifically this excludes all Windows ME, Windows 98 and Windows 95 computers that do not provide administrative shares on the network. PLEASE NOTE: for environments where a proxy server is required to access the Internet, you may see the “Use Proxy Server” option checked. However please be sure to only leave the option checked if your agents will be required to talk via the proxy server in order to communicate with your Patch Management Server. In most LAN environments, “Proxy Bypass” is used to access web servers within the corporate network – so that the proxy server only has to deal with outbound access to the World Wide Web. Click Next to specify the user account under which the agent will be installed. Domain Administrator Information Enter the username and password of the currently logged in administrative user within your domain. The installation program will be installing the agent using this name and password on the remote computers, and there should be no domain policies in place forbidding this user from logging on as a service (SeLogonAsService right). Specify Computers In this version you can either select the computers to receive the agent from a graphical list that shows the machine type, installed status and so forth – or alternatively just specify the names of machines separated by commas. We recommend that you use the graphical list of computers to select machines under virtually all circumstance. Should you wish to roll out only one known computer within a very large domain, and you know the exact computer name, you may find the alternate method useful. Once you have selected the computers to be installed with the Patch Management Agent, press Next in order to initiate the deployment process. At this time the Deployment Wizard will map drives to each computer in turn, copy over the installation files and then attempt to start the setup process using a system task. For WindowsNT computers, you may need to shutdown and restart the computer for the Agent install process to complete on that machine. Install Summary If you selected Local Machine install, this is the last step of the install procedure before copying files. Press Begin to start the installation process onto this computer. Deployment Complete The final wizard screen will confirm that the Patch Management Agent was successfully installed onto this computer. Any errors that occurred will be shown in red text, please recheck your serial number and Host URL and try again. As the deployment process continues, a ROLLOUT.LOG file is generated within the \Program Files\PatchLink\Update Agent sub-directory. At the end of installation you will be notified if all computers were deployed to successfully. If any problems occurred, check the ROLLOUT.LOG in order to identify which computers were unable to be reached by the deployment wizard. This may be because the computer was powered off, the domain information is corrupt or outdated, or because ADMIN$ shares have temporarily been disabled on that computer. It is also possible that you may be out of disk space on the target computer or other install-related errors could have occurred: in this case you will be referred to the INSTALL.LOG file on the target system. For any computer within the domain that is unable to receive the agent via rollout, you can always opt to install that node via a local machine installation. In larger multi-domain environments, the use of Network Login Scripts is strongly encouraged. Refer to the product documentation for more details. 6.4 Using the Silent Installer for Windows - Login Script Windows 95, Windows 98 and Windows ME computers do not share resources automatically on the network, and therefore it is not possible to automatically install the agent remotely from another computer to any generic workstation. In practice the best deployment method for these types of workstations – and indeed for your Windows2000 Professional workstations – is to use a Network Login Script command to launch the agent installer. Should you opt to use Network Login Script as your exclusive mechanism of deploying the agent to all workstations and servers, you will gain the added benefit of having any new machine that logs into the network automatically inventoried and patched by the system. This means that fresh machines straight from the manufacturer can now be added to your network and then brought up to the latest patch level in a matter of minutes using the Patch Management technology. To setup the Patch Management Agent software to be installed automatically as computers log in to your network, you will need to first copy the installation files onto the network and then use a simple batch file to run the install with the appropriate options from the network login script. The \WINNT\PatchLink\Update Agent\ directory and its subdirectories contain a complete installable image of the Patch Management Agent, including the associated Windows Installer (MSI) dependencies. This directory can be copied out to any NT, NetWare or UNIX server that your workstations can access and that is normally available during the network login process. For example, use the command: XCOPY “c:\winnt\patchlink\update agent” \\serv\share\update /s To copy the whole install configuration from your Patch Management Server box over to a network share \\serv\share. Once the code is out on the network, your next step is to call a simple batch file that runs the setup program with the appropriate arguments. This can be done merely by calling the file NetInstall.BAT which is included with the agent installation files – or you may wish to customize that Batch File to meet your particular network / workstation configuration. In the previous example, your Network Login Script would just need the following additional lines added to it: CD \\serv\share\update \\serv\share\update\netinstall.bat Please refer to the documentation for your own network operating system for specific instructions on calling batch file programs and shell commands for the exact syntax that should be used. It is also possible just to run the installation program directly using setup.exe -s …this will run the setup program in silent mode using the SETUP.ISS silent response file. Be sure to copy SETUP.BAK to SETUP.ISS before using this technique for the first time, and edit the URL and Serial Number if necessary to make the silent install work from all locations (e.g. substitute a DNS name instead of the IP address of the Patch Management Server). 6.5 Automatic Discovery Process At this point, the system will start discovering the inventory of hardware and software on your local network. Depending upon the frequency of users logging in and the number of computers involved, we recommend allowing between one hour and a few days for system to scan all your computers and download the appropriate reports in the background. During the discovery process, you can of course always view the current reports results as the results come in – however remember that you are not complete until all reports indicate 100% completion for your currently installed agent computers. 6.6 Rollout Patches and Updates Once discovery is complete, it is very likely that you will wish to roll out some patches based upon the information that the report and inventory scan process has revealed. To actually perform the rollout, we recommend the following procedure: Backup Data Generate backups if applicable of any critical server or workstation data before applying any patch or update. This is normal practice for any live system update. Test the Patch PatchLink provides vendor patches automatically. However, it is still your own responsibility to test the patch on a representative sample of your computer network before rolling it out en-masse. To test a patch package on a test computer: i. Access the menu option for “Packages” ii. Select the patch iii. Select the button for “Deploy Patch” iv. From the wizard, select the test computers v. Select time and date for rollout Rollout the Patch Once you are completely satisfied with the stability and quality of the patch in question, it is time to roll it out to the other computers within your computer network. It is strongly recommended that most patch rollout operations should be done during off hours and scheduled down time. If you intend to distribute patches during normal business hours, please ensure that users are notified to logout or that the particular patch does not cause any reboot or other interruption of work for the end user. Follow these steps to complete the rollout: i. From the menu option for “Reports”, access the reports result page by selecting the report and selecting the button for “View” ii. Select the appropriate tab to get a list of computers that require the patch iii. Select the computers that you wish to rollout the patch to iv. Select the button for “Deploy Patch” v. From the wizard, select the time and date for rollout 6.7 Getting to a Steady State With installation and agent deployment completed, the system can now help you move your network to a stable patch configuration. In other words provide you a way to guarantee that all machines within your network are running a known set of good patches and vulnerability fixes. Locking a Report To assist in the process of keeping your network patched, the system allows a known report state to be locked by the system so that any deviations can be quickly detected and repaired. Say for example that a given patch has been rolled out to 100 of the 110 computers that require it and the other 10 computers are currently inaccessible due to a mobile workforce situation. At this point, you can push the Lock button on the report to set a baseline state from which all deviations will be quickly alerted by the system. To lock a report state: i. Access menu option for “Reports” ii. Select the report that is in a steady state iii. Push the “Lock Report ” button Once locked, a report will instantly show up highlighted if its state suddenly changes from the known baseline state that was saved by the system. New Patches – (not available for evaluation) When you receive email notification for new patch reports that have become available, use a browser to access the Patch Management Server. All new reports are displayed with bold text, along with their business impact and the number of computers that need the patch. Note that you can quickly sort the report results by total number of computers that need each patch or the business impact of the problem it corrects, making it easier to choose the order in which to deploy the new patches. To deploy the new patch, follow the steps 3.5, 3.6 and 3.7. To disregard a new patch report: i. Select the report ii. Push the “Disable” button 6.8 Automate Maintenance of your Patches Novell® ZENworks® Patch Management allows for the creation of Enterprise-Wide patch policies that can automatically apply one or more patches to any computer in the network that is found to need them. The Groups section of the product allows for an arbitrary group of computers to be created, and then certain patches can be indicated as Mandatory for that group to allow for automatic deployment. In addition to being able to mandate patches for your own custom group of computers, you can use the same functionality to mandate a set of patches on a pre-defined operating system group. For example, all computers running Windows 2000 can now be auto-patched with Service Pack 3. Remember that when mandating patches to a group, it is important to set the hours of operation for the agents within the group. This is done using a Group Policy. Automatic deployment is a very powerful feature, and as always you are cautioned to thoroughly test your group configurations and mandatory patch selections on a limited number of test computers before assigning the rest of your enterprise network. 7. Technical Notes #1: What are the meanings of the Vulnerability Report Status codes? Each patch report classifies a computer into one of the following categories: a) Patched - Computer has the patch b) Not Patched - Computer does not have the patch c) Detecting - The report result is inconclusive (unable to determine whether the computer has the patch or not) d) Error - Error running the report (unable to run the report on the remote computer) Inconclusive Results The report result is inconclusive when the report is unable to determine if the computer has the patch or not. Example of such case is when a program is installed into a network drive or removable drive. In that case some portions of the program and/or the patch does not reside on the remote client computer, which makes the result questionable. In such cases, you should contact the end user or research the matter further to determine if a patch rollout is required. Error Running the Report It is possible that the agent or one of its components encounter a problem while running the report on the remote client computer. Examples of such cases are when a hardware/software conflict exists or if the remote computer is disconnected from the network or rebooted while the agent is running the report. Such errors are grouped into two categories: o Recoverable errors – In such cases, the problem is fixed by the system itself. For example, the network connection is resumed or the computer has booted up again, which allows the agent to resume its task and finish the report. o Unrecoverable errors – In such cases, the problem will require the user intervention. For example, a memory conflict issue may have to be resolved for the agent to be able to run reports properly. How to fix the errors a) Access the menu option for “Computers” and select the computer that generates the error. b) Select the button for “View” to see the details of the computer c) The “Last Reported” data indicates the date and time for last successful connection between the Patch Management Server and the remote client computer. d) If the “Last Reported” date continues to remain recent, it means that the remote computer is online but the agent cannot run the report due to a conflict. e) If the “Last Reported” gets older, it means that the remote computer is offline and either the network are disconnected or the computer itself is turned off and maybe removed from the network. #2: Why can’t my users Add/Remove the Patch Management Agent? When using the multiple agent rollout capabilities of the Deployment Wizard as detailed above, remember that the Patch Management Agent is being rolled out and installed by the domain administrator. That means that the ordinary workstation user will typically not be able to add or remove the software. Normally this would be the desired behavior. In most installations the Patch Management Agent should run completely in the background and never interact with the user in any way: the Patch Management system is designed for exclusive used by the trained network administrator. #3: HTTP Error code 401 (Unauthorized) occurs when I install a Patch Management Agent. It is very important that you use the same serial number when installing an agent that you originally used to install the Patch Management Server that it is to talk to. If you supply a different serial number, you will get a 401 (bad username or password) failure during agent registration. Also verify that the local account PLUS_AGENT is not locked out or disabled on the local Patch Management Server. The Patch Management Agents use this local account to authenticate onto the Patch Management Web Server. If the Patch Management Server is a member of a domain, please verify that the PLUS ADMINS Group has “Allow Log on Locally” Security Policy. This can be verified by going to Local Security Setting => Local Policies => User Rights Assignment. #4: HTTP Error code 403 (Forbidden) occurs when I install a Patch Management Agent. On the Patch Management Server => Event Viewer => Application Log => Check for any events coming from the source License Service. If you configured your Windows 2000 Server for a default 5 Per Server License configuration, IIS will start rejecting new agent registrations when you install more than 5 Patch Management Agents. Increase the number of Per Server Connections or change the license options from Per Server to Per Seat. You can use a 5 Per Seat License with ZENworks® Patch Management. You may also encounter this error when your Patch Management Server has been configured for https agent communication. Please verify that during the Patch Management Agent install, you specify an https URL path. #5: How do I install the Patch Management Agent? There are two different install programs that can be used: Single Agent Install – less than 2 Mb of code that is the actual agent software to be installed on the system. This should always be left on your computer(s) for as long as they are in use by the system. Domain-Wide Agent Deployment Wizard – Is the Deployment Wizard program that walks you through the single agent or multi agent installation process. Once you have completed the process of rolling out agents to your domain, you can actually uninstall this package from Add/Remove Programs and still leave the Patch Management Agent itself running on the system using its very minimal disk footprint. #6: I deployed a patch from my Patch Management Server; the deployment is a “successful” but my Vulnerability Reports shows as not-patched. Why? Please keep in mind that the Patch Management Server uses pull technology. It will always wait for the Agent communication. After a successful deployment, you need to allow the Patch Management Agent to run its vulnerability scan to verify if the patch was installed. After every successful deployment, the Patch Management Server will schedule a vulnerability scan for the Update Computer as the next check in so a little patience is required. If you can’t wait, you can always force the Agent to run its vulnerability scan by going to the Windows Control Panel => Novell® Patch Management control panel applet => Detection Agent Tab => Detect Now. You can also visit Novell® ZENworks® Patch Management online forums at http://support.novell.com/forums/2zw.html and search for instructions on running the vulnerability scan remotely. #7: I don’t think my Patch Management Server has registered with novell.patchlink.com. How can I verify this? Log into the Patch Management Web Interface, OPTIONS, SUBSCRIPTION SERVICE, Subscription Service History, verify that your replication jobs = TRUE. If replication = FALSE, please launch the event viewer, Application Log, look for any events coming from the source WSH (Windows Scripting Host). Look at the error description and verify if you see an event referencing “HTTP ERROR 407” The connection is being blocked by your proxy or firewall, please verify that a rule is created that allows your Patch Management Server to bypass proxy authentication. #8: How can I debug patch deployment failures? You can perform a search on the most common deployment error codes at http://support.novell.com/forums/2zw.html. Choose the ZENworks Patch Management product and perform a search on the return code. As a common practice, use the flag [-pldebug] (See Figure A.) to configure the Patch Management Agent to write details of the deployment in debug mode. On the target computer, launch the event viewer => Application Log => look up the source WSH (Windows Scripting Host). Look at the Error Description in each event source and look for the following: PLUS Deployment: Post-Script=DEPLOY: Executing the patch. Return Code=3010. Error=(0) The return code from Windows was “3010”, if you look at the following Microsoft Website http://msdn.microsoft.com/library/default.asp?url=/library/en-us/debug/base/system_error_codes.asp, you can get the return message according to Microsoft. (See Figure B.) Figure A Figure B #9: I’m using the DeployWizard to push the Patch Management Agent onto my domain member computers; the Deploywizard seems to take a too long time to complete, why? It’s recommended that you do not install the DeployWizard on the Patch Management Server when doing the push of the Patch Management Agent. The DeployWizard may take the resources away from the Patch Management Server’s daily activities which cause the DeployWizard to look slow at times. It’s recommended that you install the DeployWizard onto your Administration workstation for better performance. #10: The Vulnerability Reports menu seems to take a long time to load, how can I speed it up? By default, the Patch Management Server will detect for security vulnerabilities that were released back in 1999 and 2000. These old patches will be flagged as critical-05 and it is recommended that you disable any report that you are never going to deploy using Patch Management Server. Start by reviewing any vulnerability report flagged as a critical -05 (example: Disable Windows 2000 Service Pack 1 and 2, this service pack has been replaced with Windows 2000 Service Pack 4). You can simply select one or multiple reports and click the “Disable” Button. This will decrease the page load from the Patch Management web interface, as well as the scanning task size that the Patch Management Agent needs to perform. To recover your disabled vulnerability reports, change the filter from the Vulnerability Reports Menu from DETECTED to DISABLED, select your vulnerability report, click ENABLE. For emergency patches, it is recommended that you disable all vulnerability reports except for the emergency patch (Example: MS03-026 : Buffer Overrun In RPC Interface Could Allow Code Execution). Your Patch Management Server will patch detect and deploy at an extremely high rate. Once the emergency patch has been deployed, you can re-enable your disabled vulnerability reports. 8. Windows 2000 Server 8.1 Installation on fresh Windows 2003 Server Should you wish to install the Patch Management Server to Windows 2003 Server, install a fresh copy of the operating system without performing any additional policy, port or service lockdowns before installing the Patch Management product. Also please note that you must NOT install the product from a Remote Desktop session in this release - please install from the server computer itself. 1) On your Windows 2003 Server, please go to add/remove programs => Add/Remove Windows Components => Application Server => Details => Verify that Internet Information Services (IIS) and ASP.NET Subcomponents are selected. 2) Follow the installation instructions in section 2.1 of this document to install the Patch Management Server software on a Windows 2003 Server. 3) Once the Windows 2003 Server is restarted, please log on locally and right mouse click on My Computer => Manage => Groups => Make the ASPNET and IWAM_COMPUTERNAME local account members of the PLUS ADMINS Group. Click OK to save your settings. 4) Once the two local accounts have been added to the PLUS ADMINS Group, open run prompt and type “iisreset’ and “OK” button to restart the Web Server so the changes can take affect. 8.2 Migration to Windows 2003 Server Because Windows 2003 Server includes many new security enhancements and a much more robust version of Internet Information Server, we do not recommend upgrading an existing Patch Management Server from Windows 2000 to Windows 2003 server. Should you wish to run the Server on Windows2003 Server, please be sure to install it on a clean OS rather than performing an upgrade install. This will ensure that your Patch Management website is correctly configured with the necessary settings to allow our product to operate in the W2K3 environment. 8.3 Windows 2003 Server Support ZENworks® Patch Management supports the use of Windows 2003 Server and 2003 Server Web Edition. However, Windows 2003 Server Web Edition must only be used in small Patch Management deployments of 300 nodes or less. This is due to the inability to upgrade the Microsoft MSDE database to a full Microsoft SQL Server license. 8.4 Windows 2003 Server Configuration Overview The steps outlined below will configure your Windows 2003 server for ZENworks® Patch Management Server. These steps should be performed before installing the Patch Management Server and are necessary to ensure a successful install. Configuration Steps 1) To configure Windows 2003 Server for use with the Patch Management Server, select Start/Control Panel. 2) Then select Add/Remove Programs 3) Then select Add/Remove Windows Components NOTE: The next step is only necessary if you require the ability to administer the Patch Management Server from the Server console. It is not recommended that you perform this step unless it is absolutely necessary. Administration of the Server is typically performed from a workstation via a Web browser. 4) If you need to administer the Patch Management Server from the console, select Internet Explorer Enhanced Security Configuration and click details. On this screen, uncheck the “For Administrator Groups” option and click on OK. 5) The next step is to go back to the Add/Remove Windows Components screen and check the box next to the Application Server component and then click the Details button. 6) Check the box next to the ASP.NET component and then select the Internet Information Services component and click Details. Select the World Wide Web Service component and click Details. 7) Check the box next to Active Server Pages and click OK, OK, OK. 8) Click Next and insert your Windows 2003 Server CD if prompted. 9) Click Finish This completes the configuration for Windows 2003. 9. Revision History Version Revision Date Change Description Author 1.0 07/09/04 J. Burkett Initial Document