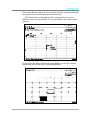
1
The eMate: Learning the Basics
Teaching Transparencies Included
by
Irene Smith
Sharon Yoder
© International Society for Technology in Education, 1998
A Note From the Authors
This book is made available for your personal use by SKyIES
Publishing of Eugene, Oregon at the request of members of the
Macintosh community. This book is no longer available from the
original publisher and the manuscript was given back to us to be used
in whatever way we felt was appropriate. Since we wrote this book in
an effort to provide assistance to others that believe in the Macintosh
world and the eMate in particular, we are making the book available
at no charge to any of you that would find the material useful.
We ask that you keep the manuscript in complete format, either
electronically or in print. In addition, please respect the fact that the
content of the book is copyrighted and acknowledge this fact when
using it.
You can find other books available on our web site at
www.skyiespublishing.com
and hope that you find others of equal interest. Meantime, good winds
follow your efforts as you enjoy the words on these pages.
Sharon and Irene
The Instant Success Series
The eMate: Learning the Basics is one of a number of books in the
Instant Success book series published by the International Society for
Technology in Education (ISTE). ISTE recognizes that in our busy
world filled with constantly changing software and hardware there is a
need for short, to-the-point sources of information. The Instant Success
books let the reader experience immediate success in learning new
skills.
Each book in this series is divided into small, manageable chunks.
Readers can learn new ideas or skills quickly by spending a short
amount of time on each section of the book. Upon completing the book,
the reader will have acquired enough introductory knowledge to apply
the ideas in a meaningful manner. The Instant Success books are
usable by students, teachers, parents—or anyone wanting to learn
more about software or hardware.
ISTE’s Instant Success series consists of “how to” books designed
for a variety of audiences. Some of the books—like this one—are
designed for beginners. Others are designed for those with more
experience. In all cases these books include some instructions for using
the software or hardware, but assume that the reader has access to a
manual or online help for more detailed assistance. In the Preface of
each Instant Success book are found suggestions for further study.
Whether you are a student or a teacher, a parent, or a senior citizen,
the Instant Success series will let you quickly start mastering new
software and hardware as well as enjoying both the learning and the
success you experience.
Copy Editor
Joel Southern, Southern Design
Production
Sharon Yoder and Irene Smith
Book Design
Sharon Yoder and Irene Smith
Cover Design
Sharon Yoder and Irene Smith
© International Society for Technology in Education, 1998
Administrative Office
1787 Agate Street
Eugene, Oregon 97403-1923
phone: 541-346-4414
Fax: 541-346-5890
Internet:[email protected]
Customer Service Office
480 Charnelton Street
Eugene, Oregon 97401-2626
Order Desk: 800-336-5191
Order Fax: 541-302-3778
Internet:[email protected]
World Wide Web: http://www.iste.org
ISBN 1-56484-120-0
From the Publisher
The International Society for Technology in Education (ISTE)
promotes appropriate uses of technology to support and improve
learning, teaching, and administration. As part of that mission, ISTE's
goal is to provide individuals and organizations with high quality and
timely information, materials, and services that support technology in
education.
Our Books and Courseware Department works with educators to
develop and produce classroom-tested materials and resources that
support ISTE's mission. We look for content that emphasizes the use of
technology where it can make a difference—easing the teacher's job;
saving time; motivating students; helping students with various
learning styles, abilities, or backgrounds; and creating learning
environments that are new and unique or that would be impossible
without technology.
We develop products for students, classroom teachers, lab teachers,
technology coordinators, and teacher educators, as well as for parents,
administrators, policy makers, and visionaries. All of us face the
challenge of keeping up with new technologies and the research about
their educational applications while we are learning about and
implementing appropriate applications in our teaching/learning
situations. Please help us in our efforts to help you by providing
feedback about this book and other ISTE products and by giving us
your suggestions for further development.
Jean Hall, Director of Publishing
Phone:
541-302-3775;
Internet: [email protected]
Anita Best, Editor
Phone:
541-346-2400;
Internet: [email protected]
International Society for Technology in Education
Books and Courseware Department
480 Charnelton Street
Eugene, OR 97401-2626
About the Authors
Dr. Sharon Yoder has taught mathematics and computer science
at the junior high and high school level for 15 years. Her most recent
public school experience was as a secondary computer science teacher
and computer coordinator involved in developing system-wide
computer curriculum and planning teacher inservice training.
In addition, she has taught mathematics, computer science, and
computer education at a number of universities in northeastern Ohio,
including Kent State University, the University of Akron, and
Cleveland State University. She worked closely with the Cleveland
State University's College of Education to develop the college's
computer programming courses for teachers. After a year as an
education specialist for Logo Computer Systems, Inc., For the last ten
years, Sharon has taught a variety of computer education courses at
the University of Oregon. At present she focuses her time on teaching
technology courses for the new elementary and secondary education
courses at the University of Oregon.
For the past several years, she has conducted workshops and
presented papers at conferences nationwide and has been involved in a
number of book-publishing projects, including the Nudges series,
Introduction to Programming in Logo Using LogoWriter, and
Introduction ClarisWorks. In addition, she has been a frequent
contributor to The Computing Teacher. She is a frequent presenter at
regional and national technology in education conferences.
Dr. Irene Smith has been a high school and junior high educator
for 20 years. She has taught academic mathematics programs, coached
a number of varsity sports, and served as a counselor in the public
school system in British Columbia. She earned her Ph.D. in computer
education from the University of Oregon and has works as a
technology consultant and teaching assistant in Eugene, Oregon. Irene
has taught courses at the University of Oregon and is a frequent
presenter at regional and national computer conferences. She currently
works with the International Society for Technology in Education's
Intel project The Journey Inside: The Computer conducting training
workshops, developing training material, and editing The Journey
Inside newsletter. She is also a consultant and instructor for ISTE's
Distance Education program.
Acknowledgments
This book, like many others, reflects the combined efforts of many
people. As authors, we would like to express our thanks for the
welcome assistance we received that helped us make the book a
reality.
Thanks to Apple Computer Incorporated, Joe Bishop in particular
for providing us with the eMates used to research and produce this
document. Having immediate help in finding answers to our many
questions made the task of writing much more fun.
Thanks to Landware Software Company that provided the excellent
software used to do the screen shots included in this book. The
software, X-Port, made the task of transferring all the images from the
eMate into the manuscript on our Macintosh desktop computers simple
and convenient. Landware can be located at their Web site by going to
www.landware.com. Landware’s phone number is 800-526-3977.
Thanks also to Joel Southern of Southern Design in Eugene,
Oregon for fitting our manuscripts into his busy schedule and doing an
excellent job with the copyediting. His suggestions were very helpful in
producing the final version of this book.
Sharon and Irene
Table of Contents
Table of Contents
Preface..............................................................................................1
1 • Let’s Get Started...........................................................................3
The eMate Keyboard............................................................................................... 4
The Special Keys ................................................................................................. 4
And Now the Screen ............................................................................................ 6
2 • Exploring Notes ..........................................................................11
Starting Notes........................................................................................................ 11
Creating Your First Note....................................................................................... 12
Filing and Routing................................................................................................. 14
Understanding the Given Information................................................................... 16
Text or Drawing?................................................................................................... 17
Notes, Notes and More Notes................................................................................ 19
Saving Documents................................................................................................. 21
Time to Practice..................................................................................................... 21
Summary ............................................................................................................... 22
Icons ..................................................................................................................22
Keyboard Shortcuts.............................................................................................24
3 • Exploring Dates..........................................................................25
The Dates Screen................................................................................................... 25
Getting Started with Dates .................................................................................... 26
Modifying Your First Meeting.............................................................................. 27
So What Else Can I Enter?.................................................................................... 30
Getting Around in Your Calendar......................................................................... 32
i
The eMate: Learning the Basics
Agendas and To Do Tasks..................................................................................... 34
Time For Some Practice........................................................................................ 37
Summary ............................................................................................................... 38
Icons ..................................................................................................................38
Keyboard Shortcuts.............................................................................................39
4 • Exploring Names and More.........................................................41
Creating New Names............................................................................................. 42
Making a Phone Call ............................................................................................. 45
The eMate Talks.................................................................................................... 46
Getting Set Up....................................................................................................... 46
And Now to Print .................................................................................................. 48
Faxing and Beaming.............................................................................................. 49
Time For Some Practice........................................................................................ 50
Summary ............................................................................................................... 50
Icons ..................................................................................................................50
Keyboard Shortcuts.............................................................................................51
5 • Extras and Customization...........................................................53
Where Is It? ........................................................................................................... 54
Making It Mine...................................................................................................... 56
Owner Information..............................................................................................56
Preferences.........................................................................................................57
Time Zones ........................................................................................................59
Clock .................................................................................................................61
Styles .................................................................................................................61
Helpful Applications ............................................................................................. 61
Calls ..................................................................................................................61
Calculator...........................................................................................................62
Using the Clipboard ............................................................................................63
Formulas ............................................................................................................64
Dock and InOut Box ...........................................................................................64
Some Final Words................................................................................................. 65
Appendix 1 • Handwriting Recognition .............................................67
Setting the Preferences .......................................................................................... 67
Teaching the eMate ............................................................................................... 69
The Dictionary....................................................................................................... 71
Appendix 2 • Transparency Masters.................................................73
Index ............................................................................................ 113
ii
Preface
Preface
This book is one of two designed to get you started using the eMate
computer. This first book explores the basics of the operating system,
how to use menus, how to use the built in applications, and how to
change settings. The second book. The eMate: Learning Works explores
the components of the integrated software, Works, that comes installed
on all eMates.
The eMate is an example of the first generation of small
productivity computers. The eMate is not a full-featured multimedia
machine, but rather a tool that can be used for day-to-day work. The
eMate is unique in that it has been designed specifically for
education—although many people who are not educators will
undoubtedly prefer the eMate to a standard laptop.
The eMate’s unique design protects the machine from damage.
Unlike most portable computers, the eMate does not have a hard drive,
a floppy disk drive, or a CD-ROM drive. Instead, all of the information
is stored in memory chips in the machine. While the eMate user can
print directly to their printer, more often they will move information to
a desktop machine for final manipulation or permanent storage.
Whether you are a Macintosh user or a Windows user, the eMate
will seem both familiar and different. When you start the eMate, you
are greeted with menus that seem somewhat familiar. Much of the
keyboard is familiar—if a bit smaller. However, on closer inspection,
there are some quite unexpected keys and a pen! Obviously the eMate
is different—a pen instead of a mouse.
This book will assume that you have used a computer that has a
standard graphical user interface operating system—such as the
Macintosh OS or Windows. The book will explain how all of those
strange keys will help and you will learn how and when to use the pen.
1
The eMate: Learning the Basics
You will learn the capabilities of the eMate step-by-step. In addition,
the book includes a set of transparency masters for your use as you
instruct others. These provide an excellent way to do group instruction
with students of all ages.
So join us in our adventure with this new and exciting piece of
technology!
2
Let’s Get Started
1
Let’s Get Started
Ready? Here we go! Open the top of your eMate. In a few seconds
your eMate should come on automatically. If you see nothing on the
screen, press the Power button on the upper right corner of the
keyboard. If you still see nothing, try adjusting the contrast and
brightness sliders that are above the keyboard on the left. If you still
aren’t successful, it’s time for some troubleshooting.
Troubleshooting Tip: Is the eMate battery charged? Or, is your
eMate plugged in? Do you need to reset your eMate? (Before you
contact Apple for any help, check the reset information in your
eMate manual.) Are you in the wrong kind of lighting—bright,
outside light or very dim inside lighting?
As you work with this book and your eMate, you may look over to
find your eMate is taking a rest. Just like yourself, the eMate is
programmed to conserve energy and so the screen may once again be
gray. To get the eMate back into action, you can use the power switch
on the keyboard or close and reopen the lid. Later in the book, you will
be given some help in instructing your eMate to rest at your discretion
rather than its own. For now, don’t let it bother you. The eMate is
always willing to wake up and work with you.
3
The eMate: Learning the Basics
The eMate Keyboard
Now we are ready to explore. Before you do anything else, examine
the keyboard.
You see a standard keyboard with letters, numbers, and symbols. You
also see such keys as Shift, Tab, Delete and Caps Lock. You also see a
Return key and an Enter key.
Windows users: Note that the Enter key on the eMate is not the
same as the Enter key on your PC. The Enter key on the eMate
sometimes has a different function.
At the bottom of the keyboard are the Modifier keys. Note that there
are two Option keys. There are also two keys with the ⌘ symbol on
them. This symbol is the Command symbol so these keys are referred
to as the Command keys. You will learn how to use these keys as we
move through this book.
Windows users: The Option key has many of the same functions
as the Alt key on PC keyboards. The Command key performs
many of the same functions as the Control key on the PC
keyboard.
The Special Keys
Take a few moments to become familiar with the Special keys along
the top edge of the keyboard. They are grouped in such a way that keys
that are close to each other have related functions. Starting on the left
you see two keys:
4
Let’s Get Started
The Close key is used to close windows on the eMate. As we begin
exploring various applications on the eMate you will see the Close
symbol in the corner of many windows.
Macintosh users: This Close key is similar to the Close box in
the upper left corner of windows on the Macintosh.
The Extras button accesses the “Extras Drawer.” The Extras
Drawer is where icons for different applications are stored. In this
book, the terms Extras and Extras Drawer are used interchangeably
and refer to the many options that you see in the Extras Drawer. A
touch of this key always returns you to a choice of applications.
The next group of keys is used to communicate with other
computers. The Dock key sets up the communication. The Send and
Receive keys tell the eMate which direction the data is to go.
You will learn later that you can send information to a printer or a
desktop computer by connecting the eMate to these devices. You will
also learn that you can use infrared connections to beam information to
other computers or eMates.
The next group of keys allows you to see more of the screen that is
currently visible. The Scroll keys let you move up and down when the
display extends beyond the top or bottom of the screen.
The Overview key changes the view of many applications. That is, the
Overview key lets you switch between a close up view of a document
and a more detailed view of your documents.
Next come some keys that can be helpful no matter what
application you are using. The Undo key reverses the last action—this
can be very useful if you make an error. You can also press ⌘-Z to undo
an action. The Find key or ⌘-F allows you to search for particular
words or phrases. The Assist key accesses the Help files.
5
The eMate: Learning the Basics
Finally the Light key allows you to turn on backlighting while the
Power key allows you to turn your eMate on and off.
Note that backlighting reduces the time your battery will last, but will
help you to see the screen in areas where the lighting is low.
And Now the Screen
Most likely will see a screen somewhat like the one shown below
when you start your eMate for the first time. (If your eMate has been
used by others you may see a somewhat different screen. No need to
worry. We will end up at the same place.) At the top of the screen you
see a line. This is referred to as the separator bar. Along the bottom of
the screen you see a similar area called the status bar.
6
Let’s Get Started
Press the Extras key. Most likely you hear a whish sound and the
screen changes. You then see something like the screen below.
The icons you see represent the items in the Extras Drawer. (If you see
a list instead of these icons press the Overview button once.)
Notice that you can still see the document behind the Extras
Drawer screen that was visible when you turned on your eMate. At the
top of the set of icons you see a small tab—much like the tab on a file
folder. There is a small Diamond (◆) next to the words Unfiled Icons.
This symbol indicates that there is a menu of choices available.
What now? Pick up the pen—you know you’ve been curious about
using that pen. Tap once gently on the Diamond. A menu drops down
that looks something like the one shown below.
Word of Warning: Do not use a regular pen or pencil on your
eMate screen. Use only the pen that came with your eMate.
Anything else can damage your eMate screen.
You see a list of the folders that can be used to file items stored in your
Extras Drawer. You will learn more about storing items later in the
book. For now, simply note that there is a checkmark next to the
current folder.
7
The eMate: Learning the Basics
Just for fun, tap the pen on All Icons. The screen changes to show
all available icons.
Now press the Overview key or press ⌘-O. The screen changes to show
you a list of the items. Notice that the list on the right shows in which
folder each item is stored.
Most likely you can see only some of the items. Press the right Scroll
key on the keyboard. The screen changes to show more items.
Experiment a bit with the Scroll keys.
8
Let’s Get Started
The list of all of the items stored in the Extras Drawer can be a bit
overwhelming. Return to the small Diamond in the upper right corner
of the screen and tap it. When the menu drops down, select the original
folder you were using.
Summary
In this chapter you have learned
• How to turn your eMate on;
• What the special keys on the keyboard mean;
• How to use the pen;
• How to access the Extras Drawer;
• How to see different folders.
Be sure you are comfortable with these topics before you move to the
next chapter.
You have also seen that there are key combinations that you can
use instead of using the pen. You can see these shortcuts at any time
by holding down the Command () key for a couple of seconds.
Editing
Copy
⌘C
Cut
⌘X
Paste
⌘V
Paste Copy Option ⌘ V
Select All ⌘ A
Styles Shift ⌘ S
Filing
File Shift ⌘ F
Folder Shift ⌘ T
General
Assist
⌘~
Help ⌘ ?
Close
⌘,
Find
⌘F
Undo ⌘ Z
Print
⌘P
Routing ⌘ R
Rotate Shift ⌘ R
Routing
Viewing
Close
⌘W
Overview ⌘ O
9
Exploring Notes
2
Exploring Notes
Now it’s time to see how you might actually use your eMate. There
are three built in applications on your eMate that you may find useful:
Notes, Dates, and Names. These three applications are included to
help you manage personal information. The documents you create with
these applications are informal and intended to help you stay
organized. In this chapter we will examine the Notes application. This
flexible Notepad provides you with three distinct types of
stationery—Notes, Checklists, and Outlines.
Starting Notes
Open the Extras Drawer. Locate the Notes icon. If you do not see
the Notes icon, stay calm. Your eMate may be set-up slightly
differently. If the Notes icon doesn’t show in the Unfiled Icons, try
looking in All Icons. It is also possible that Notes has been placed in
some other folder such as an Applications folder.
There are two ways you can select the Notes icon. You can use the
keyboard to enter the word “notes.” Actually, you will probably only
have to enter “n” or perhaps “no” because entering text on the
keyboard in the Extras Drawer causes the eMate to locate the correct
application. When the icon is highlighted—turns darker—press the
Return key. The notes screen appears.
11
The eMate: Learning the Basics
You can also tap the Notes icon with your pen. When you tap the
icon, you don’t need to press any key. You immediately see the Notes
screen.
Let’s take a moment to explore this screen.
In the top left corner of the screen you see the date and time. If you
see something else, just relax. You will learn how to set them later in
this book. At the top right you see the same kind of file folder tab that
you saw when you were exploring the Extras Drawer.
If you tap on the Diamond (◆) on the folder tab, you will see a menu
that shows the names of the available folders. It might look something
like this:
Remember that the check mark is next to the currently selected folder.
To close this menu you can select one of the folders or simply tap
outside of the menu.
Creating Your First Note
Before exploring the Notes screen further, take some time to create
your first note. In the upper left part of the screen you see a symbol
that looks a lot like the point of an arrow. This is called the caret. The
caret indicates where the text you enter will appear. You can place the
12
Exploring Notes
caret by tapping the pen once anywhere on the Note screen or change
its position by using the Space bar, Tab key or Return key.
When you have placed the caret, enter some text using the
keyboard. Entering text in this manner on the eMate is just like
entering text on any computer.
Now that you have your first note, we will take some time to learn
about the other information that you see on your Notes screen.
At the top left side of the Note document, just below the current
date and time, you see a day and date. This represents the day and
date that the note was created. The eMate automatically saves this
and other information about your note. If you want to see more of the
information, tap on the Picture button to the left of the day.
You see a slip that gives detailed information about the note that is
currently on the screen. A slip is a box with a border around it.
Usually, a slip is used for you to enter information. You will encounter
many slips as you use your eMate.
13
The eMate: Learning the Basics
You can close this slip by pressing the Close key. Or you can use the
pen to tap on the Close box or press ⌘-W.
Note that this Close box has black lines above and below it. When
you see an icon such as the Close box with these extra lines, you can
use the Return key to activate it. Thus you can also close this box of
information about your first note by pressing Return.
Filing and Routing
When you look at your first note, you see several buttons at the top
and at the bottom of the screen. You have learned that the button at
the top left is called the Picture button and accesses a slip. Let’s learn
about the other icons and buttons.
At the upper right side of the note you see two buttons that appear
in most eMate applications. The button on the left is the Folder button.
If you tap on this button, you see this slip.
If you are sharing your eMate with someone else the list of
folders for storing notes may be longer.
You can then file your note in the folder of your choice or create a new
folder. To select a folder, tap on the small circle to the left of the folder
name.
If you want to create a new folder, tap on New. A second slip
appears on top of the first. You can then use the keyboard to enter the
name of a new folder.
14
Exploring Notes
Note that you can decide whether you want this folder name to appear
only in the Notepad application or whether you want it to appear
everywhere on your eMate. If the folder can appear everywhere, any
kind of document you create can be placed there. Otherwise, it will
only be available for storing notes.
After you have named your folder, it appears with the other folder
names. If you wish, you can Edit the folder name by tapping on the
Edit Folder button. Note that you can’t edit the built in folder names,
however.
While we are looking at slips, did you notice that at the center top
of each slip is a small triangle? This triangle is called a picture hanger.
With your pen touch the picture hanger. You’ll hear a click sound. Hold
the pen on the picture hanger and move it slowly. You should see the
slip move. Moving a slip takes a little practice, so don’t be discouraged
if it doesn’t work the first time. In a short time you will have them
slipping and sliding exactly as you want them to do.
You will see picture hangers on all slips. Often you will want to
move a slip so that you can see the document behind it. For example, if
you move the New Folder Title slip, you can see the names of the
folders that are already there. This means you can quickly check to see
if the name you intend to enter is already being used.
The other button at the top right of your first note is the Routing
button.
If you tap on this button or press ⌘-R, you see a menu of choices that
may look like this.
The choices that you see on the top part of this menu allow you to move
your note from your eMate to another computer or device. The choices
below the dotted line allow you to make a copy or delete your note. The
contents of the menu associated with the routing button will vary
depending on the application you are using.
15
The eMate: Learning the Basics
Understanding the Given Information
At the bottom right corner of your note you see a Close box. Earlier
you learned that you used a Close box to close a slip. This one will close
the Notepad. Notice that this Close box functions a bit different than a
close box in the window on a desktop computer. On your desktop
computer, using the close box merely closes the document. Here, using
the close box moves you out of the application. To get back to Notes,
press the Extras key and tap on the Notes icon. Did you need to move
to All Icons to find it?
At the bottom left side of your Notes screen you see four buttons.
We will examine what each of these buttons does. At the far left is the
Information button. When you tap on this button a menu appears. One
of the choices on this menu is Help. If you tap on Help, you see a slip
that displays a list of topics to consult to help you use your eMate.
You can tap on any topic to see more information.
The Information button appears in almost all eMate applications.
The items on the list that appear when you tap on the button varies.
When you are in the Notepad, you see only Help and Pref. If you
choose Pref you can set the preferences for the Notepad application.
Generally preferences for any application are found by tapping the
Information button.
16
Exploring Notes
Text or Drawing?
The second button at the bottom left of the screen is the Recognizer
button.
When you tap this button, the list that appears allows you to choose
how you want pen strokes on your note to be interpreted.
Note that when you are in a menu like this, you can use the Arrow
keys to move up and down among the choices. You can also use the
Command () key with the first letter or so of the choice. When a
choice is highlighted, you can press the Return key.
The top two choices refer to the handwriting recognition capabilities
of your eMate. The Text choice is used when you want to have the
eMate recognize your handwriting; the Ink Text choice is used when
you want the eMate to store the handwriting “as is.”
In this book we won’t be exploring the handwriting feature of the
eMate because the handwriting works best when the eMate is used by
the same person all of the time. For handwriting recognition to work
really well, you have to train the eMate to understand your
handwriting. However, a short introduction to handwriting is included
as an appendix so you can explore the concept.
For now, tap on the Text choice, pick up the pen and give it a try.
Go ahead. The eMate is very patient, and although you may find the
eMate translates your handwriting into gibberish, you won’t hear it
complaining. To use handwriting efficiently, consult your User’s
Manual. Plan on taking several hours to thoroughly train your eMate.
Your reward for the time spent will be an eMate that happily and
accurately reads your handwriting.
17
The eMate: Learning the Basics
The next two choices refer to drawings. The Shapes choice tries to
turn your drawings into regular shapes. The Sketches choice simply
records your drawing. So, pick up your pen and give them both a try.
You don’t have to be an artist to have fun.
The above screen shows the difference between the two settings. By
selecting Shapes you can get the eMate to smooth the lines. This is
especially satisfying when drawing circles. Every pen should be so well
trained. When Sketches is selected, the lines are left almost exactly the
way they are drawn.
Note that even though you can select Shapes in Checklist and
Outline stationery, your drawings will not be smoothed out as
they are here.
The last choice from this menu is again the Preferences settings.
Since the handwriting feature is a very useful application of your
eMate, we encourage you to explore the option. Just remember not to
expect the eMate to master your handwriting in a few minutes.
The third button in the group is the Keyboard button. When you tap
on this button a small keyboard appears.
18
Exploring Notes
You can enter text using your pen to activate keys in the image—but
most often this keyboard is used with handwriting recognition. If you
want to know more about using this keyboard—and the dictionary
button in the lower left corner of the keyboard—see your User’s
Manual.
Notes, Notes and More Notes
The fourth button, New, lets you create a new note. Tap on the
button and you see a menu of three choices of available stationery.
Each type satisfies a particular need. The kind of document we have
been examining is the first choice on the menu, a Note.
If you select Checklist, then your screen looks like this:
A checklist lets you make lists and the checkboxes that are
automatically generated can then be used to check off items as you
complete them.
At the bottom of each Checklist you see three buttons that allow
you to select the position of the next item in your checklist.
19
The eMate: Learning the Basics
The first button puts a new item directly under the current one. The
second button indents the next item. The third button outdents the
next item.
Note that when you indent list items, they become sub-items. Thus, if
you check-off the first item, the sub-items are automatically checked
off for you.
The third kind of note is an Outline. The outline screen looks
almost exactly like the checklist screen. The only difference is the lack
of checkboxes.
20
Exploring Notes
You indent and outdent items in the list in exactly the same way that
you insert new items in checklist notes.
When you create an outline with sub-points,
you can collapse the outline by tapping on a main entry.
When a part of an outline is collapsed, the dot next to it is solid. You
can have many levels in an outline and you can collapse or expand any
part of the outline at any level.
Saving Documents
Have you used the eMate enough to realize that when the eMate is
turned off, the eMate “remembers” exactly what it was doing when you
turned it off? Further, you may have noted that when you turn the
eMate off and then turn it on again, any Notes that you have created
are still there without your actively saving them.
The eMate differs from a standard computer in that it has no disk
drive or other storage device. All of the information is stored
automatically. In fact, information will stay in the eMate unless you
delete it. This means that instead of having to remember to save your
work, you need to remember to delete it. Anything you enter into the
eMate will be there for the next person who uses the eMate to see.
Time to Practice
If you haven’t been taking time along the way to practice using the
Notepad, you should stop reading now and spend some time creating
different kinds of notes. Experiment with checklists and outlines. Try
filing your notes in different folders.
To make your exploration easy, you might want to use the
Overview key on the keyboard so you see all the notes you made
21
The eMate: Learning the Basics
appear in a list. Sure, we know you did more than just one as you
worked. Now select a note and route it to Delete. Wasn’t that fun? If
you just can’t resist, go ahead, create a few more notes just for the fun
of removing them.
You also learned a lot of new terms. Take a few minutes to review
the names and functions of all of the buttons on the screen. You will
see most of these buttons in other applications. You need to be
comfortable with them in order to quickly learn the other applications
on your eMate.
Summary
Icons
Notepad application; found in Extras
◆
Tap on this Diamond to see a list of choices
Picture icon (top left in Notepad); opens a slip with
information about the Note you created
Close box (with bars indicating Return key may be used)
Folders icon; used to file items
Routing icon; used to send items “outside” of the eMate
Picture tab; used to move slips
Print—in Routing menu
Fax—in Routing menu
Beam—in Routing menu
Duplicate—in Routing menu
Delete—in Routing menu
Information button; location of Help, Preferences, and
other information about currently open application
Keyboard; used to tap information into eMate using the
pen
New note document; select from Note, Checklist, and
Outline
Recognition button; used to set form of handwriting or
graphics recognition.
Recognizes handwriting and converts it to printed text
Stores handwriting exactly as it appears on the screen
when written
Shapes; translates drawings into straight lines and
l
i l
22
Exploring Notes
polygons or circles
23
The eMate: Learning the Basics
Sketches; stores drawings as they appear on the screen
when drawn
Information button
Note style in Notepad
Checklist in Notepad
Outline in Notepad
Level buttons for adding and formatting entries to
Outlines or Checklists
Keyboard Shortcuts
Creating
New
⌘N
Title ⌘ E
Copy
⌘C
Paste Copy Option ⌘ V
Cut
⌘X
Paste
⌘V
Editing
Select All ⌘ A
Styles Shift ⌘ S
Filing
File Shift ⌘ F
Folder Shift ⌘ T
General
Assist
⌘~
Help ⌘ ?
Close
⌘,
Undo ⌘ Z
Find
⌘F
Print
⌘P
Routing
Routing ⌘ R
Viewing
24
Close
⌘W
Overview
⌘O
Overview ⌘ O
Exploring Dates
3
Exploring Dates
The Dates application is a Date Book consisting of a calendar and a
daily To Do list. When you view the calendar, you can schedule
appointments, meetings and events such as birthdays and
anniversaries. The Dates application will also sound alarms to remind
you of appointments and meetings. In addition, you can add To Do lists
to your calendar.
The Dates Screen
To explore the Dates application, go to Extras—remember you can
just press the Extras key. Tap on Dates or enter Dates on the
keyboard. If you didn’t find the Dates icon in the Unfiled Icons, look in
All Icons. You see a screen that looks something like this:
25
The eMate: Learning the Basics
If your screen is presented in a list format, press the Overview key on
the keyboard.
At the top of the screen you see the day of the week, date, and a
calendar showing the current month. There are arrows next to the
name of the month that lets you go to the previous and next month. At
the bottom right you see the Routing button and the close box. There is
no Folder button because you “file” items in the calendar by attaching
them to particular dates. At the left of the screen you see the usual
buttons for Information, Recognition, Keyboard, and New. There are
two new buttons as well, a small Clock and a Show button. If you tap
on the clock, you see the current date and time and the status of the
eMate battery. We’ll examine the Show button later.
Getting Started with Dates
To begin, tap on the New button. You see a list of choices for kinds
of information you can enter into the Dates Book.
Tap on Meeting. You see a slip that allows you to enter information
about your meeting. For now, just enter some text so that you can
identify your meeting.
26
Exploring Dates
When you close the slip, your Meeting appears on your calendar.
The bar at the left indicates the length of the meeting. The Meeting
icon tells you that this is a meeting rather than, say, an Event.
Modifying Your First Meeting
You frequently want to change entries in your Dates application.
Tap on the icon that represents the item, in this case your first
meeting. A slip appears that contains the details of the entry. Notice
that each of the items on the slip has a Diamond next to it indicating
that there is a list of choices available. If you tap on the Diamond next
to Date, you see a small calendar. You can tap on the date you want to
use.
If you want a different month, tap on the small arrows at the top of the
calendar. If you want to move further than one month, tap on the Year
at the top of the calendar. When you have made your selections, be
sure that you tap on the Close box on the small calendar, not the Close
box on the Meeting slip.
27
The eMate: Learning the Basics
To set the time for your meeting, tap on the Diamond next to Time.
You see a clock. You set the time by tapping on the top or bottom of the
numbers. You can also tap on AM and PM to change them.
Note that you can set the Start time and then select a duration for the
meeting using the Diamond at the bottom. Again, be sure that you tap
on the Close box within the area where you set the time, not the Close
box on the Meeting slip.
You can also adjust the time and length of a meeting directly
without opening the meeting slip. To move the time of a meeting, click
and drag the icon representing the meeting and move it to a new time.
Be careful. Do not tap—a tap will open the slip. Press and hold the pen
to move the item where you want it.
To change the length of a meeting, click and drag on the bar to the
left of the meeting icon. The length of the bar will adjust to represent
the time duration for your meeting.
28
Exploring Dates
The Invitees and Locations menus are directly connected to your
Names file. Invitees are those you want to attend your meeting and
Locations tells where the meeting is to be held. If you have this
information in your Names file, the Date Book will let you
automatically use them. Names will be discussed in the next chapter.
If you tap on Alarm, you can select the alarm setting to go with
your Meeting. This auditory reminder is helpful on a busy day when
you are likely to forget a meeting.
Note that you can select Other and set up the specific amount of time
before the meeting that you want the alarm to sound.
You can also have your Meetings repeated. You can select from the
list given.
Or you can personalize the repeat in an almost unlimited number of
ways. For example, if you had a meeting or a class that occurred every
Monday and Wednesday, you tap on Every Week. Then select the days
of the week that you want to use.
Each of the repeat choices displays a different submenu. Take a few
minutes to explore the possibilities.
29
The eMate: Learning the Basics
In addition you can add extensive notes to a meeting notice in your
calendar. Note the arrows on the right side of the Meeting Notes slip.
These can be used to scroll up and down if your notes are longer than
you can display on the slip at one time.
When you close the Notes slip, the button changes from Add Notes to
Edit notes.
So What Else Can I Enter?
There are a number of other kinds of items that you can enter into
the Dates application. You have already explored one type of
Meeting—Meetings that occur on a specific date and for a specific
amount of time. You can then repeat this item—an appointment, a
class, a meeting—in whatever manner you wish.
Another type of Meeting is the weekly meeting. The icon
representing a weekly meeting looks much like the icon representing a
meeting item. There is a vertical line on the left side of a weekly
meeting.
30
Exploring Dates
When you enter a Weekly Meeting time, instead of a Repeat choice,
you have a Dates choice. The meeting is automatically set to weekly.
You can then set the number of weeks using the calendar that pops up
when you tap the Diamond next to Dates.
As you move through the monthly calendar, the number of weeks
appears at the bottom. You can also set the number of weeks by
tapping the Diamond next to Ongoing.
In addition to the two kinds of meetings, there are three types of
Events. Events differ from Meetings in that Events don’t have specific
times associated with them. A simple event is represented by a single
flag icon.
To the name of the Event you can add Dates, Alarms, and a variety of
options for repeating the Event.
A Multi-Day Event is automatically set up to occur over a series of
days. A Multi-Day event is represented by the two-flag icon.
When you select Dates, you see a starting and ending date calendar
that lets you adjust the range on your entry.
31
The eMate: Learning the Basics
The third kind of event is an Annual Event. This event is designed
for such entries as birthdays and holidays. It is represented by a small
calendar.
Like the other kinds of events, in addition to giving names to the items
and setting dates, you can add Notes as well as set alarms.
Take some time to practice creating different kinds of meetings and
Events. Explore the options in each of the Meeting or Event slips.
Getting Around in Your Calendar
Now that you have added several items to your calendar, you need
to learn to get around in the calendar. First, note the arrows at the
right side of the Dates screen. You can scroll up and down to see
various items scheduled during the particular day at which you are
looking.
Note that if there are items on the current day that are not visible on
the screen, the appropriate arrow turns black.
or
32
or
or
Exploring Dates
Notice that Events appear at the top of the calendar and that meetings
are attached to the particular time of the meeting.
The Show button at the bottom of the screen allows you to see
different views of your calendar. If you select Week, the current week
appears.
If you tap on the Show button and select Month, you see the current
month with the current day or week highlighted.
33
The eMate: Learning the Basics
Note that events show up as icons and meetings show up as horizontal
bars at the appropriate place on the day.
If you select Year from the Show list, you see the entire year
starting with the month before the current month.
The other options on the Show menu will be more meaningful after we
explore To Do lists.
Agendas and To Do Tasks
In addition to adding Meetings and Events to your calendar, you
can add To Do items. To Dos are represented by a black oval. If
unchanged, this oval appears with an exclamation point in it.
34
Exploring Dates
When you choose To Do, a slip appears. You can enter the item, the
date, how often the item should be repeated and when you want to be
reminded about the To Do task. In addition, you can select a priority
for the item.
To Do tasks move from day to day unless they are checked as
completed, so you don’t need to set a Repeat if you simply want the To
Do item to appear the next day if it is not completed.
Rather, use the repeat if you want to be reminded to complete a
task every so often, such as once a week or once a month. You might
set a weekly To Do reminder to remember a piano lesson or a monthly
reminder to clean a furnace filter.
35
The eMate: Learning the Basics
When you create a To Do task, the view switched from the regular
calendar view to the To Do list. You can always tap the Show button
and select the To Do list to see this view. The numbers displayed
beside the item indicate the priority rating you gave the item when you
created it.
Notice that these numbers no longer occur in order. If you have several
items on your list and you check an item to indicate the item is
completed, the item will be moved to the bottom of the list. Items that
are not completed automatically move to the next day. The items that
still need your attention will simply be carried along in time until you
finally check them off as completed. Checked items remain on the day
on which they were checked. These changes only appear after you
move from the To Do list and them come back to the list.
36
Exploring Dates
If you switch back to the Day view, the To Do tasks will not be
visible. However, if you select Agenda from the Show menu, you see
both your To Do Tasks and your Meetings and Events.
Note that the meetings appear with the time range and the name of
the meeting as well as the appropriate icon, while events appear with
the appropriate icon and the name of the event.
Time For Some Practice
There are many alternatives for creating a combination of calendar
entries and a list of things to do. You should take some time to be sure
that you understand the differences and similarities among Meetings,
Events, and To Do tasks. Then be sure you understand the differences
between Meetings and Weekly Meetings as well as the differences
among the three kinds of events.
Take the time to practice setting different kinds of reminders and
alarms. Try different kinds of repeats. Examine the calendar you have
created in a variety of views. The calendar application will only be
useful to you if you become comfortable with all of its features.
You will also need to delete items from your Date Book. For
Meetings and Events, it is easiest to delete items if you are in the Day
view. Go to Overview and put a check mark in the box to the left of the
item. Then route the selected items to Delete. For items on the To Do
list, move first to the To Do List view and press the Overview key on
the keyboard. Tap the checkbox for any item you want to remove and
route them to Delete. Of course, if you use Agenda view, all of the
items in the Date Book for any given day will appear. You can select
and route unwanted items to Delete.
37
The eMate: Learning the Basics
Before you can make the best use of the features you have learned,
you will need to think about your organization style. Keep trying
things until the settings are working for you. Customizing the Date
Book to meet your needs is essential for you to easily and quickly make
effective use of it.
Summary
Icons
Meeting; set name, time range, date, repeats and alarms
as well as add Notes
Weekly Meeting; set name, time range for weekly
meetings, date, repeats and alarms as well as add notes
Event; set name, date, repeats, and alarms as well as
notes
Multi-day Event; set name, date range, repeats, and
alarms as well as notes
Annual Event; set name, date for a yearly event, repeats,
and alarms as well as notes
To Do Task; set name, date, reminder, repeat and
priority; To Dos move to the next day unless marked
completed.
38
Exploring Dates
Keyboard Shortcuts
Creating
New
⌘N
Copy
⌘C
Cut
⌘X
Paste
⌘V
Editing
Paste Copy Option ⌘ V
Select All ⌘ A
Styles Shift ⌘ S
General
Assist
⌘~
Help ⌘ ?
Close
⌘,
Undo ⌘ Z
Find
⌘F
Print
⌘P
Routing
Routing ⌘ R
Viewing
Close
⌘W
Overview
⌘O
Show ⌘ S
Other
New Left
⌘[
New Right
⌘]
New Topic ⌘ =
39
Exploring Names and More
4
Exploring Names and More
As mentioned earlier, the Dates application can directly make use
of the Names application. This built-in eMate application is a small
database that lets you store information such as names, addresses, and
telephone numbers. The Name File is an electronic address book or
Rolodex file.
Press the Extras key and choose the Names application. Look in the
Unfiled Icons or All Icons to find it. Remember, you can either tap on
Names with your pen or enter “names” on the keyboard. When the
application opens, you see a list of names and phone numbers. If this
application does not appear to be present, check to see if your eMate is
set in Classroom Mode. When in this setting, the Names application
may not be available.
41
The eMate: Learning the Basics
If you do not see a list of names as shown, press the Overview
button on the keyboard. The Overview button toggles you back and
forth between the list of names and a selected entry. If you still don’t
see the start of the names in your Name file, try tapping the first tab
in the screen. This will move you to the beginning of your Name list. In
addition, choose All Names from the menu at the top right of the slip.
All Names displays all of the names that are filed in any of the other
folders, including Unfiled names.
Take a moment to examine the Names screen. The Names screen is
quite small and you will still see a screen visible in the background. At
the top of the Names screen, you see a tab with a Diamond next to the
name of the current folder. If you tap on the Diamond, you see the
available folders, just as you did in Notes. At the bottom right you see
the Folder, Routing, and Close buttons. These work exactly as they did
in the Notepad. At the left you see an Information button. This button
lets you access Help or Preferences. The Names preferences let you
establish the way in which items in the Names file are sorted. For
details about sorting, see your eMate User Manual.
Lets take a look at the items in the Names application that are not
like Notes. You’ll notice that there are Check boxes next to each name.
These Check boxes are used when you want to route part or all of your
Names file to another computer or a printer. The All button at the
bottom of the screen allows you to select or deselect all of the names in
your Names file.
At the top of the screen are tabs containing letters of the alphabet.
If you have a long list of names, these tabs let you go to the correct
part of your file quickly. If you tap on the tabs with a short list like the
one shown above, you may not see any change.
You can also access different parts of your Names file using the
eMate keyboard. The keyboard letters will activate the corresponding
tab in the Names list. Just press the first letter of the name of the
entry you want to see. The eMate will move to the corresponding part
of the list of names.
Creating New Names
When you add names to your Names file, there are many options
that you can use to make your Names file easier to use. Until you have
used your Names file on a regular basis, you may not know just what
options will work best.
Tap on the New button. You see a menu that lets you choose a
category for your entry.
42
Exploring Names and More
To begin your exploration, tap on Person—or press the “p” key on the
keyboard and then press Return. A screen appears that allows you to
enter information about your person.
Enter some information into this person-entry—perhaps your own
name and address. You can use the pen and the keyboard on the
screen or you can use the eMate keyboard. (And, if you have your
eMate trained, you can write with the pen and let the eMate translate
it for you.) Note that there are Diamonds next to the last three entries.
If you tap on these Diamonds, you have a number of options from
which to choose. You can change the title and the kind of phone
number—office, home, car, fax, etc.
When you are finished entering information, tap on the Close
button. You see a screen like this.
43
The eMate: Learning the Basics
If your screen doesn’t look like this, then tap on the Show button and
choose All Info. You see the information you entered, with icons to the
left of each item. At the bottom of the list is an entry called Card Style.
Tap on Card Style. You see a series of possible styles, similar to the
many designs of business cards you might see, for the Card-view of
your Name File. The current style is the one with the black rectangle
around it.
Tap on the style of your choice. Then tap on the Close box. Then tap on
the Show button and choose Card. You see the card associated with
your entry.
You can use Card Styles as well as categories—person, business or
group—to organize or classify your Names file. For example, you might
want to use one Card Style for business contacts and a different Card
Style for your personal contacts.
To move back to the list of names from this single card view, use
the Overview key or tap one of the tabs visible at the top of the card.
You can edit any entry in a Names entry. Simply tap on it and a
slip will appear so that you can change information. In addition, you
can add many different kinds of information to each card in your
Names file. If you tap on Add, you see a list of choices.
44
Exploring Names and More
You can add addresses and a variety of phone numbers in a Names
entry. Each of these choices brings up a slip that allows you to enter
information using either the keyboard or the pen. The Notes choice
allows entry of any kind of information you want to add. The Custom
choice allows you to design and add your own special category.
Phoning From the Names List
Once you have entered phone information into an entry in the
Names file, you can use this entry to make a phone call. To explore this
capability you can either tap on the phone icon next to the phone
number or you can tap on the phone number if you are looking at the
overview of the Names list.
Next, tap on the phone number next to the name. A Routing Slip
appears.
To experiment with this feature, make sure you have selected Speaker
at the bottom of the slip. Also, uncheck Log. Now tap the Call button,
or press the Return key.
A slip appears indicating the time until dialing will start. Then
another slip appears indicating that the eMate is dialing. You hear
telephone tones. Then this slip appears.
Tap on Hang Up or press Return to close this slip.
45
The eMate: Learning the Basics
Now that you see that your eMate can dial a phone number for you,
you can use it to make calls. You can connect it directly to a modem, or
you can simply hold the phone close to the eMate speaker.
Note that if you did not uncheck the Log box, when you make a
phone call you are taken to a record of phone calls. To get back
to the Names File, just tap the Close box.
The eMate Talks
Have you added your name and other information to the Names file
in the eMate you are using? If not, do so now by creating a card entry
containing your own information. Then we’ll use your name entry to
explore sending information from your eMate to other devices.
Since the number of choices for connecting is vast, this book will not
attempt to describe every possibility. Instead, the general steps will be
addressed. Complete details can be found in your eMate manual.
Getting Set Up
One of the handiest features of the eMate is its ability to easily
send information to other devices such as Fax machines, other eMates,
desktop computers and printers. The way you connect your eMate
depends on the device with which you are communicating. If you have
never connected your eMate to another device, take a few minutes now
to look at the diagram below.
To connect an eMate to another device, you will most likely use the
Serial cable port or the Newton Interconnect port. The Newton
46
Exploring Names and More
Interconnect port requires a special cable or adapter that looks like
this:
A serial cable looks like the diagram below and has 8 small wires in
the end of the cable, called pins.
See your eMate manual for information about which printers you can
use with your eMate. You may need to see your printer manual to
learn how connect to your printer.
It is also possible to connect your eMate to a network. If you want
to do so, you may need to see your Network Administrator for details of
how to access other devices using the network.
47
The eMate: Learning the Basics
And Now to Print
First, locate the card in the Names File with your name on it. Tap
on the Routing button. You see a menu of choices.
Select Print Name. You can tap on the printer icon or press CommandP on the keyboard. A routing slip appears. If necessary, tap on the
Diamond next to the printer name to select the printer you want to
use.
Notice that you can preview your printed document before you actually
print it by tapping on the Preview button. Also note that you can
change the format that you want printed. You can then print by
tapping on the Print button or by pressing the Return key. Your
document should then appear on the printer. If you have trouble
printing, see the Troubleshooting section of your manual.
48
Exploring Names and More
Faxing and Beaming
If instead of printing, you want to send your documents as a Fax,
choose Fax from the Routing menu. You can then select a Fax number
from your Names file.
If you tap the Assist button, you can enter a Fax number to be used.
You can also select a cover page or add notes to the cover page by
tapping on the Notes button.
When you are satisfied with the document you wish to
send—remember you can tap the Preview button to see how your Fax
will look—tap the Fax button or press Return. If your eMate is
connected directly to a Fax machine, the Fax will be sent. If you check
Manually connect, instructions will appear on the screen to help you
complete the sending of your document.
Beaming requires that you have another device that has infrared
beaming capabilities. That might be another eMate, a Newton, or a
computer equipped with beaming capabilities. You must have the
devices lined up so that their infrared sensors can “see” each other. See
the manuals that came with your infrared devices for details such as
where the sensor is located or how close the devices must be.
When your other device is set to receive beamed items, tap on
Beam. You see a dialog box indicating that your eMate is looking for a
receiver.
49
The eMate: Learning the Basics
If your eMate locates a receiver, then another dialog box appears
indicating that your item is being sent.
You can set your eMate so that it will receive items by using the InOut
application in Extras. This application will be discussed in the next
chapter.
Time For Some Practice
Using the Names application is not very difficult, but there are
many features available. Deciding which of the features you want to
use and how you want to enter your information will take some effort.
Take time to become comfortable with the available features.
Learning to transfer information from your eMate to other devices
is an important part of mastering your eMate. Take some time now to
practice transferring information to a printer and to another computer.
You may need to get some assistance from someone familiar with the
cables and the software needed by the printer or the other computer.
Practice until you become comfortable. Don’t let all of the cables and
cords overwhelm you. It’s not as complex as it seems at first. It is
mostly a matter of taking your time to recognize what type of
connector is needed to complete the pathway from one device to
another.
Summary
Icons
Meeting; set name, time range, date, repeats and alarms
as well as add notes
Weekly Meeting; set name, time range for weekly
meetings, date, repeats and alarms as well as add notes
Event; set name, date, repeats, and alarms as well as
notes
Serial cable
Newton Interconnect Adapter
50
Exploring Names and More
Keyboard Shortcuts
Creating
Add
Shift ⌘ +
New
⌘N
Copy
⌘C
Cut
⌘X
Paste
⌘V
Title ⌘ E
Editing
Paste Copy Option ⌘ V
Styles Shift ⌘ S
Filing
File
Shift ⌘ F
Folder Shift ⌘ T
General
Assist
⌘~
Help ⌘ ?
Close
⌘,
Undo ⌘ Z
Find
⌘F
Print
⌘P
Routing ⌘ R
Check all
⌘A
Overview ⌘ O
Close
⌘W
Show ⌘ S
Routing
Viewing
51
Extras and Customization
5
Extras and Customization
You have now examined three of the major built-in applications in
your eMate. These three applications are intended to help you store,
organize, and use personal information. They are designed to store
small amounts of information. To create longer documents, you will
want to learn the Works application that is included on the eMate. The
Works application is discussed in the companion book to this one, The
eMate: Learning Works.
At this point, you have learned a great deal about your eMate. You
have seen that there are many similarities among the applications.
You have learned to move around the eMate and quickly locate the
applications you want to use. You have navigated in and out of the
Extras Drawer. You have been able to have your eMate communicate
with other devices.
The Extras Drawer contains many items that we have not
examined. In this chapter we will examine some of the applications
that are stored in the Extras Drawer. Some of these applications are
used to personalize your eMate. Others are powerful, special purpose
applications.
53
The eMate: Learning the Basics
Where Is It?
When you open the Extras Drawer—remember, you can press the
Extras key or, if Extras is running in the background, close other
applications. You might see a screen that looks something like this:
When you arrive at the Extras Drawer, you may end up in a different
folder. The screen display will depend on what you were using the last
time you accessed the Extras Drawer.
Look at the upper right corner of the screen. What do you see on the
Folder tab? In the sample above, you see Unfiled Icons. If you tap on
the Diamond next to Unfiled Icons, you see the list of available folders.
If you tap on one of the names in the list, the folder will open to display
the available items. For example, you might tap on Help and see a
screen like this:
54
Extras and Customization
It is helpful to put items from the Extras Drawer into folders
making them easier to locate. Moving things from one place to another
is not difficult. The hard part might be deciding on an organizational
scheme that is easy to remember.
Let’s learn to place icons where you want them to be stored. First,
select an item you want to file. We’ll begin with Notes. Remember you
can enter the first few letters of the name of the item to select it.
With Notes selected, tap on the Folder button and then tap on the
New button. Give your new folder a name—we called ours
Applications. Close the slip. You should see Notes still highlighted
although the name is now white on black instead of black on white.
Select the File button in the slip. The next time you want to use Notes,
you will find the icon visible in the Applications folder.
If you want to delete a folder, you must first have something
selected—it doesn’t matter which icon you choose. When the slip
appears, use the Edit Folder selection and you can now delete the
folder.
If you have more than one icon with part of the name common, such
as Works and Works Practice, it is easiest to select the item using the
pen rather than entering the first few letters of the name. To select the
item you want, put the pen on the icon and hold the pen down.
Assuming the sound is turned on, you will hear a squeak sound and
the icon will highlight rather than open. Using this technique, you can
select as many icons as you want, one after the other.
There are other options for selecting multiple icons that you might
find easier and faster to use. Click and hold the pen down until you
hear the squeak. A thick black line will appear. Recall that this is
called the highlighting mark. Suppose you want to file both Dates and
55
The eMate: Learning the Basics
Names in the Applications folder. Draw a circle around the icons you
want to select.
When you lift the pen, the circle will close and the icons that you
surrounded will be highlighted. Or, instead of drawing a circle, you can
simply move the mark across the icons and achieve the same result.
With both icons selected, you can file them at the same time.
As we examine new items in Extras, you may want to take this
opportunity to file each item into folders of your choice. Making use of
the folders on your eMate makes using the eMate much easier whether
you are in the Extras Drawer, Notes, Dates or any other application.
Making It Mine
The eMate functions best when it becomes your personal assistant.
Special features in Extras let you personalize the eMate to work the
way you want it to work. In this section we’ll explore some of these
features.
Owner Information
To begin, locate and open Owner Information. Owner Information
allows you to include personal information that helps you when
beaming information from the eMate to various destinations. In
addition, you can have several worksites defined for any particular
user. So, you can work with the eMate personalized for school in a
different way than you have it personalized for use at home.
56
Extras and Customization
Select the New button and you can enter your name and other
information. There can be several owners if the eMate is being shared
say by students in a classroom. If you want to remove an owner, tap on
the name of the owner. When the slip opens, select the Routing button
and delete the information. Make sure you are using the Routing
button inside the Owner Info screen and not the Extras Drawer.
If you have entered a new owner or new worksite, the list of all
names may no longer be visible. If you simply close the application and
reopen it, the complete list of names will be displayed.
Preferences
Find the Prefs icon and open the application.
This item allows you to adjust various settings for your eMate. You see
a list something like the one below.
57
The eMate: Learning the Basics
We will examine some of these in detail. Others you can explore with
the help of your eMate manual.
Sounds are a familiar part of our world and the eMate offers some
special uses of sound. Select Sound by tapping on the application name
or the icon. You see a slip that lets you adjust the way in which sound
is used on your eMate.
Generally, you will want your sound to come from the internal speaker,
but it is possible to plug the eMate into other speakers or ear-phones.
The Alert sound menu lets you choose from a long list of sounds.
You can test each sound by tapping on it. You cannot change the Alert
volume but you can decide whether you want to hear sound effects as
with Actions and with the Pen. Action sound effects are attached to
such things as closing slips and deleting items. Pen sound effects are
associated with pen actions.
If you select Alarms from the Pref list, you see a slip that lets you
adjust the way you want alarms to work in Dates.
You can choose the sound you want to use for alarms and, in Alarms,
you can adjust the sound volume. On the bar next to Alarm Volume,
just click and drag on the Diamond to sound level of sound you want to
use. You may also check persistent alarms. This causes the eMate to
sound the alarm several times in case you don’t hear it the first time.
58
Extras and Customization
At the beginning of the book, you learned that your eMate is set up
so that it will automatically save battery power. You can adjust the
way energy is conserved by adjusting the settings in the Sleep item in
Pref. The slip lets you adjust the length of idle time before the eMate
sleeps or until the backlight goes off.
You can also set the eMate so that it doesn’t go to sleep when it is
plugged in.
Time Zones
Earlier you were made aware of the time and date being displayed
on your eMate screen. There is a small application that can be used to
adjust the time and date settings. Select Time Zones in your Extras
Drawer. A slip appears with a map of the world. The entry at the top
should be set to your home location or a city that occurs in the same
time zone. Tap on the Diamond to access the list of included cities.
Here the original entry of San Francisco, California will be changed by
selecting Portland, Oregon.
At the bottom of the slip is a similar listing. In this example, Tokyo,
Japan is highlighted and a small white box is visible on the map
showing the location of the city. If you use the Show button, you can
obtain detailed information about the city of Tokyo. For example, did
you know that Tokyo has a Latitude of 35 42 N and a Longitude of 139
46 E.
The Time Zone can be a lot of fun to explore. The city at the bottom
is indicated by a small square on the map. You then see the time and
59
The eMate: Learning the Basics
date in that city and the distance from your location to the marked
city. By working with the available menus, the selection was changed
from the country of Japan to New Zealand. The city of Auckland was
selected. And once again, you have access to detailed information about
the city and the rectangle highlights the area of the map where the city
is located.
You can also tap anywhere on the map and see a list of cities in that
area of the world. Can you decide where on the map the tapping was
done to produce the list of cities displayed in the previous image?
In addition to displaying city and country information, the Show
button lets you change from the map to Two Clocks. The time and
dates in the two cities highlighted in the map slip are then displayed.
Tap on the Close button to move back to the map.
You can also add cities to the list of available cities. Select the New
button at the bottom of the screen. Then enter information into the slip
that appears.
Spend some time exploring. There is a lot of information contained
in this small application. For example, tap in the middle of the ocean
and see what it says.
60
Extras and Customization
One note of caution. When you select the routing button, your
only choice is to Delete an item. If you select Delete, whatever
city is currently at the bottom of the window is
deleted—permanently.
Clock
Choose the Clock application in the Extras Drawer. A clock
displaying the time appears. You can set a daily alarm, a Minute
Timer, and the Time/Date or switch the clock from a 12-hour to a 24hour display. Activate the Set button and choose Time/Date.
You can then adjust the date and time just as you did in the Dates
application.
Styles
Yet another way you can personalize your eMate is to adjust the
way in which text appears. Select Styles in the Extras Drawer. Here
you can adjust the typeface by changing the font, the font size, and the
font style.
The last choice in Styles allows you to set the width of the pen. This
allows you to draw lines or write with the pen width you prefer.
Other Helpful Applications
In addition to having many applications that are intended to make
your eMate a world suited to your work style, the Extras Drawers
contains a set of applications intended as work tools.
Calls
When you were learning how to use the Names application to make
phone calls, you may have seen the Calls application that is stored in
61
The eMate: Learning the Basics
the Extras Drawer. The Calls application lets your record information
about phone calls, make current calls, and set up future calls.
You can even add names that you enter in the Calls application to your
Names file. Tap on the icon at the bottom of the screen,
and you will be asked if you want to add the information on the current
screen to your Names file.
Calculator
Did you stop and explore the calculator? The Calculator gives you
access to a standard 4-function calculator. You use the application by
tapping on the symbols you want to use or by entering them on the
keyboard.
62
Extras and Customization
Using the Clipboard
You can use your pen to copy the result that appears on your
calculator if you wish. Tap and hold the pen to the left of the number
you want to copy. When the eMate squeaks, move the pen across the
number until it is highlighted. Then tap on the highlighted number
and drag it to the edge of the screen. Take your time with this move
and make sure you take the number right to the very edge of your
screen. You can place only one item at a time this way. This function is
like the clipboard you use on a Macintosh desktop computer.
With the number sitting on the side of the screen, you can move to
another application. The number will still be visible on the edge of the
screen. Now you can just drag the number into your new document.
Nifty, huh? This takes practice, so don’t be discouraged if it doesn’t
work the first time.
63
The eMate: Learning the Basics
Formulas
While we are experimenting with mathematical tools, let’s take a
look at formulas. Now don’t panic. You do not need to be a rocket
scientist. In fact, this little helper means you don’t need to hire a
rocket scientist to help. When you select Formulas, you see a list of
categories. Select the category you need. Then enter the number you
wish to convert.
Notice that we dragged our number from the calculator right into the
Feet box and got an immediate conversion to meters. Handy little tool,
don’t you agree?
Dock and InOut Box
The Dock and InOut Box items are used when you are connecting to
another device. The dock application lets you connect to another device
such as your desktop computer. You might do this at the beginning of a
work session when you know you are going to be sending information
back and forth between two computers a number of times. Of course,
you can connect from the Routing button in almost any application at
any time you wish.
The InOut Box application stores information sent to or from your
eMate. Any items not sent immediately to another place—printer or
computer—are stored in the Out box until you choose to send them.
Items sent to your eMate are stored in the InBox until you are ready to
file them.
Again, remember that there are shortcuts available on your
keyboard. Go back to the first chapter to review the options available
to you in the extras drawer. Once you master the shortcuts, you will
find that your speed is easily increased as the eMate becomes more
familiar and comfortable to use.
64
Extras and Customization
Some Final Words
There are many other features of the eMate to explore. However, at
this point, you have learned enough about an eMate to make an eMate
a very useful addition to your life. For the eMate to be truly effective,
you do need to master the options that let you customize the eMate to
suit your lifestyle. As with other computers you may be using, the
eMate offers an ongoing opportunity to learn more. The eMate manual
is an excellent resource for further work.
One of the primary tools included in the software on your eMate is
the Works application. You may have noticed the icon as you explored
the Extras Drawer. Since Works will provide you with a comprehensive
set of tools for producing a variety of formal documents, your authors
have produced a separate book to introduce to the basic features of the
Works application. This integrated software provides many of the
features you rely on when using your desktop computer. Works is
intended to help you begin formal documents but you will frequently
move such documents to your desktop computer for completion.
The book, The eMate: Learning Works, is also published by ISTE,
and is a companion to this introductory book.
Thanks for being such a willing student and working along with us.
Good luck in using your eMate. With patience and practice, you will
soon find your eMate serves you in an increasingly efficient manner.
And best of all, your eMate is always willing to do whatever task you
are wanting to do. The eMate is a portable computer with a
tremendous amount of flexibility. Carry it along, make it a constant
companion, and enjoy the benefits in all aspects of your life.
65
Appendix 1—Handwriting Recognition
Appendix 1 • Handwriting Recognition
Handwriting recognition is one of the most publicized, yet one of the
most misunderstood characteristics of the eMate (and the Newton).
The Newton Operating System used on the eMate recognizes
handwriting—and it can do it very well. However, people often pick up
a pen, write a word or two, and then declare the handwriting
recognition feature a failure.
To get true recognition of handwriting requires that you train your
eMate. The best advice the authors got when they started with the
eMate was to spend 6 to 8 hours training it. Those hours of training
paid off—and if you want handwriting recognition to work for you, you
need to take the time to train your eMate.
Setting the Preferences
Locate Prefs in the Extras Drawer. Once you have opened the
Preferences application, select Handwriting Recognition. The first
thing you need to tell the eMate is the relative spacing of your
handwriting. In the slip, you see a horizontal bar that ends with a
white Diamond. Click and drag this symbol to adjust the spacing. You
will see your change applied to the “one two 123” text that is visible in
the slip.
67
The eMate: Learning the Basics
To guess at the appropriate spacing for you, think about your own
handwriting in comparison with the writing you were taught in school.
Think of the “standard” style of formal school writing as average and
adjust the setting accordingly.
The next settings you need to consider can be found by clicking on
Options in the lower left of the slip. Doing so reveals a menu with
three items.
The first choice, Text Editing Settings, applies only to Ink Text so
you probably don’t want to change it. This setting is used when you
decide you will have the eMate store your written entries as
handwriting rather than converting them to printed computer text.
It is often useful to have the eMate scale the size of your writing so
that it can fit more text on any given screen. The second choice, Fine
Tuning, tells the eMate how fast to transform your handwriting into
computer-generated text. You will need to experience the result of
changing this setting before you decide just what setting works best for
you. The final choice in the menu reverts the decisions to the defaults
built-in to your eMate—spacing set halfway through the available
scale, ink text scaled to 75%, and transforming speed set at about half
the possible speed.
The second button available at the bottom of the slip is Align Pen.
This is probably the most important setting to consider at this point.
68
Appendix 1—Handwriting Recognition
Think of the pen alignment setting as your opportunity to teach the
eMate the way you hold your pen and the angle of the pen relative to
the screen. If your pen taps frequently miss their target, then you
should realign the pen so the eMate can recognize your personal style
of holding the pen.
Also notice that in the dialog box there is a place to check for Guest
users. If you have your own eMate and others want to use your eMate
to try the handwriting recognition, you should check this box. Once
this is checked, the eMate knows that the handwriting being entered is
not to be interpreted as if you were doing the writing.
Note that if you do not check the Guest user option, the
handwriting of your “guests” will be transformed as if it were
your writing. The eMate will incorporate any corrections they
make into your handwriting rules. As a result, the eMate is less
accurate when reading you entries.
Teaching the eMate
Teaching the eMate to read your writing is time consuming, but
essential to having your eMate recognize your handwriting quickly and
accurately. The eMate comes equipped with a patient and ever-willing
tutor for your handwriting lessons. Remember, you aren’t the
student—the eMate is. You simply write. The eMate will gradually
learn to understand you and will transform your handwriting with
greater and greater accuracy.
Locate the Writing Practice icon. You may have to look in other
folders than the Untitled folder. Perhaps the easiest way to locate the
icon is to display All Icons.
69
The eMate: Learning the Basics
When you tap on the icon, you see a dialog box that provides a wide
variety of practice opportunities. If you open the menu by tapping the
Diamond that appears next to Practice writing you will see the
following:
Start slowly and simply by beginning with the easy words. The
eMate will suggest a word for you to enter using your own usual
handwriting. The eMate evaluates how well your handwriting was
recognized and displays the results in the slip. Unless your
handwriting is very standard, do not expect to get good recognition
immediately.
Practice the same word several times, but even so, don’t expect to get
perfect recognition right away. Remember, the eMate is in the process
of learning your handwriting and that will take time.
You should practice all of the categories that are available and
practice them until you are achieving fairly good recognition. You’ll
discover that there are subtle ways that you can change your
handwriting to achieve good recognition. After all, writing on a screen
feels different than writing with a pencil or pen on paper. You and your
eMate need to get used to each other. In time you should be able to get
quite good recognition.
You may find that adjusting the spacing just slightly from your first
setting gives the eMate better information. You may even want to try
70
Appendix 1—Handwriting Recognition
using a different speed for the transformations. Write evenly and
without pause. Keep your writing fairly large and on the line. Finish
your word and don’t go back to make changes unless you are done.
Write simply and neatly without unnecessary embellishments. When
you cross the letter “t” keep the line horizontal and don’t take it across
other letters. The dot over the “I” needs to be kept close to the letters in
your word. You might make a slightly larger space between words than
usual but do not adjust spacing between letters in any way. Make sure
capital letters and tall letters do look taller than your small letters.
Above all, allow time for your eMate to learn your handwriting by
repeating practice sessions on a regular basis.
The Dictionary
As you start using handwriting recognition the eMate will
gradually build a dictionary of recognized words. Tap on the dictionary
icon on the electronic keyboard to see the words in your personal
dictionary. The eMate remembers words that you correct that don’t
match words in its built-in dictionary. You can choose to add these
words to your dictionary or delete them.
The eMate will flash an icon at the top of the screen when its
temporary dictionary is full. Tap on this flashing icon and you will see
the list of words that you have recently written and then corrected.
Remember, teaching your eMate to understand your handwriting is
an ongoing process. Whenever your handwriting is not recognized
correctly, the eMate remembers your corrections and adds the new
information to its knowledge base. That means that you should always
correct your eMate when it makes a mistake. It’s just like a small child
learning something new, isn’t it? You do not want the eMate, or a
child, learning the “wrong” information.
71