1
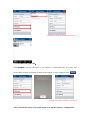
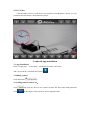
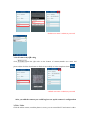
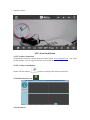
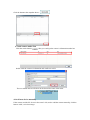
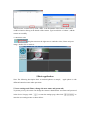
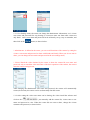
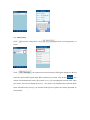
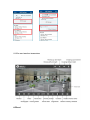
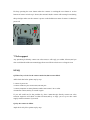
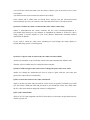
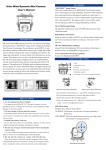
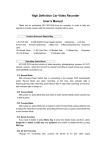
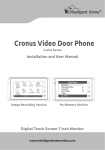
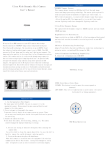
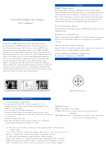
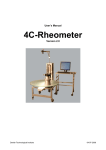
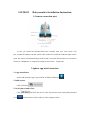
LW-M102
Baby monitor Installation Instruction
1.Camera connection port
At first, pls install the antenna,connect the netcable with your local router’s lan
port ,connect the adapter with the camera, after around 30 seconds,the indicator lights will be
green, the camera will automatically pan/tilt around 30 seconds, after that,the user can use the
camera by smartphones or computer according to below brief instructions.
2.Iphone app brief instruction
2.1.App installation
Search and install free app "AnyvueSCR" in iPhone APP Store
2.2Add camera
Click add button“
2.3 Add camera under Lan
Click
click
and click the device in the list,enter the user name and password
,the the camera will be online as below snapshots show:
*default user name is admin,no password
2.4 Add camera by QR code:
click
scan the QR code on the bottom of camera,enter the user name and
password,the click the done button to finish it successfully as below snapshots show.“
”
*default user name is admin,no password
After you add the camera,you could begin to set up the camera’s configuration
2.5 Live Video
Click the online camera, visit the device user interface, touch the phone’s screen, you can
control the PT and camera’s other function as below:
3.Android App installation
3.1 App Installation
In the “Google play” “ 91 Assistant” “360 Mobile Assistant” and search
APP “AnyvueSCR”, download and install it
3.2Adding camera
Click add button“
”
3.3 Adding camera under Lan:
Click
click "
and click the device in the camera list,enter the user name and password
,the the camera will be online as below snapshots show:
*default
user name is admin,no password
3.4 Add camera by QR code:
click
scan the QR code on the bottom of camera,enterthe user name and
password,the click the done button to finish it successfully as below snapshots show.“
*default user name
”
is admin,no password
After you add the camera,you could begin to set up the camera’s configuration
3.5Live Video
Click the online camera, touch the phone’s screen, you can control the PT and camera’s other
function as below:
4.PC client installation
4.1.PC software download
download and install the software from our official websit www.e-longwin.com
get the software “Anyvue App for SCR-PC”from download zone.
4.2 PC software installation:
double click the software
4.3 Double click the icon
4.4 Add camera
install it according to the software instruction.
you could
Click the buttonas the snapshot shows:
4.5 Add camera under Lan
Click the search button“
then you could get the camera’s information under lan:
double click the camera’s information and confirm to add it
The new added camera will show on the down left corner of the main:
4.6 Add new device manually
If the camera and the PC do not in the same LAN, need to add the camera manually, click the
button “Add”, see below image:
“Device name” could be set by client, “DID” is the ID number of the camera, the number
could be found on the tag at the bottom of the camera. Type in and click “Confirm”, add the
camera successfully.
4.7 Watch the video
drag the camera to the right area to watch the video, if there only one
image, double click to watch it:
5.Basic application
Note: The following description basic on Android phones as sample,
different button but same other operations.
Apple phone is with
5.1 user settings and Share (change the user name and password)
To protect privacy, the owner can change the camera's administrator user name and password
in the device list page click "
" to enter the settings page, then click "
enter the user settings menu as shown below:
" to
5.1.1 User Settings menu, the owner can change the administrator information, set 3 visitors
user names and passwords for easy sharing (a visitor user name can share other visitors not
only limit 1 vistor), user name and password can be arbitrarily set up, easy to remember, and
then click on the "
" button, as shown below:
* Administrator: is defined as the owner, you can set all functions of the camera by setting the
visitors a user name and password to share with friends and family. When you do not want to
share, you can change the user name and password in the user settings munu;
* Visitor: Watch the video obtained by the owner to share the camera ID, user name and
password, only to watch the video and some of the basic operation of the camera, but can not
enter the camera settings menu;
After changing the administrator user name and password, the camera will automatically
restart (40 seconds), the camera can be used normally after the restart.
5.1.2 After setting the visitor user name can be sharing, the visitor install the software and
click on the "
", just manually add the camera ID, visitors enter a user
name and password to view. When the owner did not want to share, change the visitors
username and password, as shown below:
5.2 WIFI setting
Click“
”and enter setting menu, click“
below::
Click "
”and enter wifi setting menu, as
", the camera will search for nearby WIFI signal, and then in the list,
select the desired WIFI signal input WIFI connection password, click on the "
", the
camera will automatically restart (40 seconds or so), you can unplug the network cable when
you restart , but can not unplug the power,
the camera will automatically restart the WIFI
mode. After the above process, you can turn off the power to replace the camera placement, as
shown below:
5.3 The user interface instructions
6.Reset
Pls keep pressing the reset button when the camera is working,the reset button is on the
bottom of camera as below pic shows,after around 10s,the camera will restart,pls note,during
this period,pls make sure the camera is power on.the default user name of camera is admin,no
password.
7.Tech support
Any questions,pls directly contact our sales team,we will reply you within 24 hours,and you
also could download the user manual,apps.from our official website www.e-longwin.com
8.FAQ
Q:When I try to look for the camera under lan,but it seems failed.
A:Pls check the below points step by step:
1.camera is power on.
2.camera connects your local router,with lan port.
3.camera,computer or smart phoneare under same router’s lan or wlan.
4.restart the camera,and try to search it again.
If you still could not fix the problem by above instruction,pls directly contact our sales
team,our engineers will check it within 24 hours,and try to reply you a.s.a.p.we also could
supply remote assistance if you need.
Q:why the camera is offline.
A:pls check it by blow points step by step:
1.pls restart the camera,and make sure the camera connects your local router’s lan or wlan
successfully.
2.pls make sure the router connects the internet successfully.
If the camera still is offline after you finish above steps,pls reset the camera,and restart
it,meanwhile,pls give me your camera’s user name and password to us for remote check.
Q:when I watch the live demo via internet,the video will be a little delay.
A:that is normal,because the camera transfers the live video stream(640*480pixels or
less,around 25fps) directly to your computer or smartphone by internet or 3G.the live video’s
image quality is mostly depend on your local internet situation.the minimum internet
requirement is 4Madsl.
If you want to watch live video more smoothly,you could change the image quality be
QVGA,that image pixels is 320*240 pixels.
Q:After I set up the wlan of camera,why the camera becomes offline
A:After you finish the set up of wifi,the camera will restart automatically within 2 mins
Then the wifi is workable,and you could pull out the netcable.
Q:Why I could not login in the camera after I change the password or user name
A;after you change the information,you need to login in again with new user name and
password in camera device edit interface.
Q:How to shart the camera’s live video with friends
A:pls set up the user name and password for visitor in user set up,after you finish it,you could
give the camera’s DID,user name,and password to your friends.the visitor only could watch
the live video and could not change the camera’s configuration.
Q:TF card is unworkable.
A:Up to 32G TF card supported with FAT32 form,when you insert the card,pls make sure the
camera is power off.