1
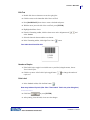
Tutorial
The tutorial is divided into seven lessons, many building on techniques and processes learned
in a previous lesson. For the first time user, it is important to perform the lessons in order, from
first to last.
Each lesson provides step-by-step instructions on how to complete the task, often suggesting
multiple ways to reach the same result. A preferred media part number is indicated in most
lessons. For best results, follow these guidelines.
In the introduction to each lesson you are provided with an overview of the techniques and
functions you will learn, as well as a cross reference to the areas of the User’s Manual
addressing the specific lesson topics.
The following lessons are contained in this tutorial.
Lesson 1. Create and Formatting a 2-Line Label . . . . . . . . . . . . . . . . . . . 3
Lesson 2. Adding Images and Working With Graphics . . . . . . . . . . . . . . 5
Lesson 3. Save and Open a File . . . . . . . . . . . . . . . . . . . . . . . . . . . . . . . . 8
Lesson 4. Data Bound Objects . . . . . . . . . . . . . . . . . . . . . . . . . . . . . . . . . 9
Lesson 5. Barcodes . . . . . . . . . . . . . . . . . . . . . . . . . . . . . . . . . . . . . . . . . 14
Lesson 6. Adding Serialization . . . . . . . . . . . . . . . . . . . . . . . . . . . . . . . . 16
Lesson 7. Managing Job Files . . . . . . . . . . . . . . . . . . . . . . . . . . . . . . . . . 22
7/2/10
LableMark 5.1-Tutorial
Lesson 1. Create and Formatting a 2-Line Label
Lesson 1. Create and Formatting a 2-Line Label
This lesson shows you how to create a simple 2-line label, adding formatting attributes, and
previewing the label before printing. For more information on the techniques used in this
lesson, refer to the Getting Started section (starting on page 9) and the Formatting section
(starting on page 29) of the User’s Manual.
Entering text
1. From the Create New/Open dialog box, select part number: CPT-1.0
Note
To locate the part number quickly, in the By Part Name field (to the left of the parts
list), enter: CPT. The list will immediately jump to those part names starting with
CPT.
2. In the Action toolbar, click the Text tool
and click anywhere on the first label.
3. On the first line in the text element, enter the word: HOT
4. Press [Enter].
5. On the second line in the text element, enter the word: WATER
Formatting Text
1. Double click the first line of text (the word HOT).
In the Properties box to the right:
2. In the Font field, click the down arrow and select: Arial MT.
3. In the Font Size field, click the down arrow and select: 20
4. Click Bold.
In the Text Element:
5. Double click the second line of text (the word WATER).
In the Properties box to the right:
6. In the Font field, click the down arrow and select: Arial
7. In the Font Size field, click the down arrow and select: 16
LabelMark 5.1-Tutorial
3
4
Lesson 1. Create and Formatting a 2-Line Label
In the Text Element:
8. Position the mouse at the beginning of the word HOT and drag to the end of the word
WATER.
In the Properties box to the right:
9. In the Horizontal Justification field, click the down arrow and select: Center
Moving an Element
1. Click anywhere on the label to get out of the text element.
2. To get handles on the text (necessary for moving the object), with the selection tool, click
the text on the label.
The text displays with eight small dots surrounding the element. These are called “handles”
and indicate the element is selected.
3. Place the mouse directly over the text. (The mouse displays as a cross.)
4. Drag the text to the upper right side of the label.
Center Element
1. Click the text on the label to display handles (if not already displayed).
2. Using the menus, choose Format>Center Vertically.
3. Using the menus, choose Format>Center Horizontally.
Your label should look like this:
Note
The contents of this lesson are used in Lesson 2. DO NOT CLEAR THE
CONTENTS OF THIS LESSON!
LabelMark 5.1-Tutorial
Lesson 2. Adding Images and Working With Graphics
Lesson 2. Adding Images and Working With Graphics
In this lesson you will learn how to add images, resize and rotate the graphics, and add a frame
(border) to the label. For more information on the techniques used in this lesson, refer to the
Formatting section (starting on page 29) of the User’s Manual.
Note
This exercise uses the label created in Lesson 1. Please complete Lesson 1 before
continuing.
Add an Image
HINT: To perform this lesson you should have access to the graphics supplied with the
LabelMark 5.0 program. Unless otherwise changed, these graphics can be found in a default
directory. Use Tools>Options>File Paths to determine the directory containing the image files.
1. In the Action toolbar, click the Image tool
.
2. Place the mouse to the left of the first line of text (HOT) and drag diagonally to create a
box (picture frame).
3. In the open dialog box, click a left pointing arrow.
4. Click Open
or press [ENTER].
Copy, Resize, and Rotate
If the arrow is too large (or too small) resize it to the approximate height of the first line of
text.
1. Click the symbol to display handles (if handles are not already displayed).
2. Position the mouse on a corner (green) handle and drag diagonally to resize the element.
(Drag away from the symbol to enlarge it; drag toward the symbol to decrease its size.)
3. With the handles still on the symbol, in the Standard toolbar, click Copy
immediately click Paste
, then
.
LabelMark 5.1-Tutorial
5
6
Lesson 2. Adding Images and Working With Graphics
A duplicate copy resides over the original. With the handles displayed on the copy:
4. Position the mouse in the middle of the copy and drag to the right side of the word HOT.
With the handles still on the repositioned copy:
5. In the Formatting toolbar, click Rotate Right
or Rotate Left
, twice.
The duplicate arrow should be facing the opposite way from the first arrow.
Alignment
1. Click one of the arrows to display handles.
2. Holding the [CTRL] key, click the other arrow.
3. Using the menus, choose Format>Align>Middle.
To get the text element (HOT WATER) more precisely centered between the arrows:
4. Click the text, to display the handles on the text element.
5. Holding the [CTRL] key, press the right or left arrow to move the text element in
increments.
Lasso Technique
To center the entire label contents on the label:
1. Position the cursor to the upper left of the left arrow (NOT on the arrow).
2. Drag the mouse to below the word WATER, far enough to the right to cover the right
pointing arrow.
A dashed rectangle will surround the label contents (arrows and text). When you release the
mouse, all elements are selected (displaying handles).
3. In the Formatting toolbar, click Center Object Vertically
4. In the Formatting toolbar, click Center Object Horizontally
LabelMark 5.1-Tutorial
button.
button.
Lesson 2. Adding Images and Working With Graphics
Framing a Label
To place a border around the label:
1. In the Action toolbar, click the Rectangle tool
.
2. Starting in the upper left corner of the label, drag the mouse to the lower right corner of the
label.
3. With the handles on the rectangle, in the Properties box to the right, highlight the Line
Thickness field.
4. Type: 0.1, and press [ENTER].
Your label should look like this:
LabelMark 5.1-Tutorial
7
8
Lesson 3. Save and Open a File
Lesson 3. Save and Open a File
This lesson shows you how to save labels as a file, for use at a later date. You also learn how to
clear labels from the screen and open saved documents. For more information on the
techniques used in this lesson, refer to the Job File Management section (starting on page 93)
of the User’s Manual.
Note
This lesson saves the labels created in Lesson 2. Please complete that lesson before
continuing.
Save Data
1. In the Standard toolbar, click Save
.
2. Enter the name: WATER
3. Click Save
or press [ENTER].
Close the File
1. Click the X on the label tab.
Open a File
1. In the Standard toolbar, click Open
.
2. Choose WATER.
3. Click Open
or press [ENTER].
4. Close the file again to clear the screen.
LabelMark 5.1-Tutorial
Lesson 4. Data Bound Objects
Lesson 4. Data Bound Objects
In this lesson you learn how to create new labels from existing labels, link label objects across
multiple labels, and change the label part number after creating data. You also learn how to
work with the Errors and Information window to automatically adjust the placement and fit of
data on multiple labels. For more information on the techniques used in this lesson, refer to the
Formatting, Command Multiplier section (starting on page 40), the Formatting, Data Bound
section (starting on page 70), and the Formatting, Check Label Errors section (starting on
page 78) of the User’s Manual.
Make sure your screen is clear of all other data before preceding with this lesson.
Add Labels
1. In the Standard toolbar, click New
.
2. Choose part number: LAT-10
Note
To locate the part number quickly, in the By Part Name field (to the left of the parts
list), enter: LAT. The list will immediately jump to those part names starting with
LAT.
3. Using the Quick Zoom
in the lower right corner, zoom in to
400%.
1. On Label 1, in the Action toolbar, click the Text tool
and enter the word:
FLAMMABLE
2. On Label 2, using the Text tool, enter word: TOXIC.
3. On Label 3, enter the word: HAZARD
4. On Label 4, enter the word: WARNING
5. Using Quick Zoom, zoom out to125%.
6. Click the word on Label 1. (Handles display.)
7. Holding the [CTRL] key, click the word on Label 2, Label 3, and Label 4.
LabelMark 5.1-Tutorial
9
10
Lesson 4. Data Bound Objects
Handles are displayed on all words. In the Properties box displayed at the right:
8. Change the Font to: Impact
9. Change the Font Size to: 16
The words display in red, indicating they do not fit on the label.
Errors and Information Window
In the Errors and Information window, located at the bottom of the workspace:
1. Click Check Label Errors
button.
LabelMark lists the labels containing errors.
2. Click Auto Fit All
button.
The words on all labels are resized to fit.
3. Click the word on one of the labels.
What is the font size of the text? (Hint: View the Properties box at the right.)
______________
4. Click anywhere to remove the handles.
Change Label Part
To use a different part number after labels have already been created:
1. Using the menus, choose Edit>Change Label Part.
2. Select part number: DAT-4
3. If there are errors on the label again, use the Errors and Information window buttons to
correct the fit.
4. Re-select the words on Label 1, Label 2, Label 3, and Label 4.
5. In the Formatting toolbar, click Center Object Vertically
Horizontally
and Center Object
buttons.
6. On Label 5, enter the words: NO SMOKING
7. In the Action toolbar, select the Image tool
and draw an image frame to the left of the
text.
8. From the list of graphics, select a No Smoking graphic.
LabelMark 5.1-Tutorial
Lesson 4. Data Bound Objects
9. Select the Image tool and draw an image frame to the right of the text.
10. From the list of graphics, select a Fire symbol.
11. Resize the images so they do not overlap the text.
12. Select all three elements on the label. (Use [CTRL+Click] or the lasso technique.)
13. In the Formatting toolbar, click Align Text Middle
button.
14. With the elements still selected, using the menus, choose Format>Center Vertically and
Format>Center Horizontally.
Label 5 should look something like this:
Command Multiplier
1. Use [CTRL+CLICK] to select the two image elements on Label 5. (Do not select the text
element.)
2. Using the menus, choose Edit>Command Multiplier.
3. Click Copy Object(s).
4. In the Apply to field, click the down arrow and select Custom List.
5. In the Custom List entry box, enter: 1, 3, 4 (Be sure to enter the comma between the
numbers.)
6. Click OK.
7. Adjust the font size on any of the labels where the text runs into the images.
HINT: Double click the word on the specific label you want to change and enter a new font
size for that particular text element.
LabelMark 5.1-Tutorial
11
12
Lesson 4. Data Bound Objects
Create New Label from Existing Label
1. On Label 2, using the Image tool, draw a frame to the left of the text element.
2. From the list of graphics, select a “toxic” symbol.
3. Move the text element to the right side of the label.
4. Change the Font Size to: 24
5. If the text does not fit, use the Errors and Information window to auto fit the text on the
label.
6. Select both elements on the label.
7. Using the menus, choose Format>Align>Middle.
8. In the Formatting toolbar, click Center Object Vertically and Center Object Horizontally.
Label 2 should look something like this:
9. Select Label 2 (not the elements on Label 2).
10. Using the menus, choose Edit>Copy Label to New Label.
11. Select Label 1 (not the elements on Label 1).
12. Using the menus, choose Edit>Command Multiplier.
13. Click Copy Label (if not already selected).
14. In the Apply to field, select Every Label (if not already selected).
15. In the Start at label number field, enter: 7
16. In the Number of times to repeat field, enter: 4
To what label numbers will the data be applied? _________________________
17. Click OK.
LabelMark 5.1-Tutorial
Lesson 4. Data Bound Objects
Linked Objects
1. Click Label 8.
2. Move the “smoking prohibited” symbol to the upper left corner of the label.
3. Move the “Fire” symbol to the lower right corner of the label.
Notice how the images on all the labels linked to this label (through the Command Multiplier)
move to the same position.
Label 8 should look something like this:
Print Preview
1. In the Standard toolbar, click Print Preview
2. When finished viewing, click Close
.
.
Delete Labels with Linked Objects
1. Select Label 2 and Label 3 (the “Toxic” labels).
2. In the Standard toolbar, click Delete
or press [DELETE].
3. Click Yes.
How many labels remain? ________________
Save the File
1. In the Standard toolbar, click Save
.
2. Enter the name: Warnings
3. Click Save
or press [ENTER].
4. Click the X on the label tab to close the document.
LabelMark 5.1-Tutorial
13
14
Lesson 5. Barcodes
Lesson 5. Barcodes
This lesson shows you how to add and edit a barcode. For more information on the techniques
used in this lesson, refer to the Formatting, Barcode section (starting on page 65) of the User’s
Manual.
Barcode Setup
1. In the Standard toolbar, click New
.
2. Select Part Number: CPT-2.5
3. In the Action toolbar, click the Barcode tool
and draw a barcode frame on Label 1.
4. In the Value field of the Properties box, enter: Y123456
5. Change the Font to: Letter Gothic MT
6. Change the Font Size to: 16
7. In the Height field of the Properties box, enter: 0.75 pouce (19.05 mm)
Notice how the barcode itself becomes larger.
8. Click the barcode element on the label, to display handles.
9. Move the barcode to the upper middle portion of the label.
10. Using the Text tool
, underneath the barcode, enter the words: Y123456 - Tool Kit
11. Change the Font of the text to: Arial
12. Change the Font Size of the text to: 16
13. Click the barcode element.
14. In the Barcode Properties box, in the Text Location field, click the down arrow and select:
None
15. Select both the barcode and text element.
16. In the Formatting toolbar, click Align Text Left
LabelMark 5.1-Tutorial
button.
Lesson 5. Barcodes
Edit Text
1. Double click the text element to access the typing line.
2. Click the mouse to the immediate left of the word Tool.
3. Press [BACKSPACE] three times to remove the dash and spaces.
4. With the cursor just to the left of the word Tool, press [ENTER].
5. Highlight both lines of text.
6. From the Formatting toolbar, click the down arrow on the Alignment tool
and
select: Center.
7. Select the barcode element and the text element.
8. In the Formatting toolbar, click Align Text Center
button.
Your label should look like this:
Number of Copies
1. If the Label Copies toggle is not visible next to your label, using the menus, choose
View>Label Copies.
2. Click the up arrow of the Label Copies toggle button
to change the number of
copies to 4.
Print Label
1. In the Standard toolbar, click the Print button
.
How many labels will print? (Hint: View “Total Labels” field in the print dialog box.)
______________
2. Click Print
or press [ENTER].
3. After printing, close the label, do not save the changes.
LabelMark 5.1-Tutorial
15
16
Lesson 6. Adding Serialization
Lesson 6. Adding Serialization
This lesson shows you how to apply serialization to labels, redefine the sequence numbering,
and add saved serialization schemes. For more information on the techniques used in this
lesson, refer to the Serialization section (starting on page 83) and the Formatting, Data Bound
Objects section (starting on page 70) of the User’s Manual.
Simple Serialization
1. In the Standard toolbar, click New
.
2. Choose Part Number: DAT-100
3. Using Quick Zoom, zoom in to 400%
4. Select Label 1.
5. Using menus, choose Insert>Serialized Data.
6. Click Do a quick serialization with minimal options radio button (if not already selected),
then click Next.
7. In the Sequence Type: field, click the down arrow and select Numeric (if not already
selected).
8. In the Start field, enter: 1
9. In the End: field, enter 25
10. In the Step field, click the up arrow of the toggle to reach: 4
11. Click Prefix, then in the entry box provided, enter the word: Port
12. Click Finish.
13. Using Quick Zoom, zoom out to 125%.
How many labels have data? ____________
Your labels should look like this:
LabelMark 5.1-Tutorial
Lesson 6. Adding Serialization
Delete Simple Serialization
1. Press [CTRL+SHIFT+A] to select data on all labels.
2. Click Delete
, or press [DELETE], then click Yes.
Complex Serialization
1. Click Label 1.
2. Using menus, choose Insert>Serialized Data.
3. Click Use advanced options to serialize data radio button, then click Next twice.
4. On the Select object type screen, click Text radio button (if not already selected), then click
Next.
5. On the Set number of components screen, click Two counters radio button, then click Next.
6. On the first component string screen, set the Sequence Type to Numeric.
7. Set the Start value to 1 and the End value to 10, with the Step value of 4.
8. In the Priority field, click the up arrow of the toggle box to indicate: 1
9. Click Next
10. On the second component string screen, set the Sequence Type to Alpha.
11. Set the Start value to A and the End value to D, with the Step value of 3.
12. Leave the Priority at 0, and click Next.
13. On the Review composite string screen, in the Number of Labels field, enter: 10
Observe the Data Preview field to determine how the serialization is applied.
14. While still on the Review composite string screen, click the Alpha row in the table/grid at
the top of the screen.
15. Click Up, to move the Alpha row to the top position.
Observe the Data Preview field to view the change in serialization.
16. Click Next, twice.
LabelMark 5.1-Tutorial
17
18
Lesson 6. Adding Serialization
17. On the Save serialization scheme screen, click Yes.
18. In the File Name field, enter the name: Alpha
19. Click Finish.
How many labels have data? ____________
Your labels should look like this:
Data Bound Object
1. Click the serialization data on Label 1.
2. Drag this data to the lower right corner of the label.
Notice how the data moves to the different position on all the labels.
3. Click Label 1 to select it. (Do not click any element Label 1.)
4. Using menus, choose Insert>Date/Time Data.
5. In the Use predefined format field, click the down arrow and select a format that indicates
the day of the week, along with the date. (E.g., Friday, August 14, 2009)
6. In the Number of times to repeat: field, enter: 10
7. Click OK.
8. Use the Quick Zoom to zoom in on the date.
Your labels should look like this:
LabelMark 5.1-Tutorial
Lesson 6. Adding Serialization
Edit Data Bound Objects
1. On Label 1, click the serialized data (A1).
2. In the Properties box at the right, click Edit Data Bound Objects
button.
3. Click the Back
button twice, to return to the first component screen.
4. In the Sequence Type field, click the down arrow and select Custom.
5. In the Custom Text: field, enter: WHITE
6. Change the Start value to W, change the End value to E, and change the Step value to 1.
7. Click Finish.
Your labels should now look like this:
Use a Scheme
1. Click Label 11.
2. Using menus, choose Insert>Serialized Data.
3. Click Use one of the saved serialization schemes from below radio button.
4. Click Alpha.lms (the scheme you previously saved).
5. Click FINISH.
6. On Label 11, move the serialized data to the lower middle of the label.
7. On Label 10, click the date element.
8. In the Properties box, click Edit Data Bound Objects
button.
9. Change the Number of times to repeat to: 20
10. Click OK.
11. On Label 10, click the serialized data.
12. In the Properties box, in the Rotation field, enter: 90
13. On Label 10, click the date.
14. In the Properties box, in the Rotation field, enter: 270
LabelMark 5.1-Tutorial
19
20
Lesson 6. Adding Serialization
Notice how the date is changed on all the labels (because they are all linked), but the serialized
data is only changed on the first 10 labels. The serialized data displayed on Label 11 through
20 is a different link.
15. Use the Errors and Information window to correct the fit.
16. Move the date to the left side of Label 10.
17. Move the serialized data to the right side of Label 10.
18. On Label 10, select both the date element and the serialized data element then, using
menus, choose Format>Align>Middle.
Label 10 should look like this:
LabelMark 5.1-Tutorial
Lesson 6. Adding Serialization
Command Multiplier
1. Click Label 11.
2. In the Action toolbar, click the Rectangle tool
, draw a box around the serialized data.
3. Click the drawn rectangle to display handles (if handles are not already visible).
4. Using the menus, choose Edit>Command Multiplier.
5. Click Copy Object(s).
6. In the Start at label number field, enter: 12
7. In the Number of times to repeat field, enter: 9
8. Click OK.
Label 11 should look like this:
Preview the Labels
1. Click Print Preview
.
2. When finished viewing, click Close
.
Save File
1. Click Save
.
2. Enter the name: Double serial
3. Click Save
or press [ENTER].
4. Close the file.
LabelMark 5.1-Tutorial
21
22
Lesson 7. Managing Job Files
Lesson 7. Managing Job Files
A Job file is a collection of related label files. Creating job files is way to group commonly
used label files and store them in one main document. It provides an efficient use of time when
printing big or repetitive jobs, as the individual files in a job file can be directed to different
printers, allowing you to dedicate printers to use specific label media or ribbon colors. For
more information on the techniques used in this lesson, refer to the Job Files (starting on
page 99) of the User’s Manual.
Create a Job File
1. In the Standard toolbar, click New
.
2. On the Create New/Open dialog box, click A new Job File radio button.
3. Click OK.
Add Label Files to the Job File
To add label files to the Job File,
1. Click Add Label File
button.
If not in the directory where you saved the files from the previous lessons, use standard
Windows Browser procedures to locate the directory.
2. In the Open dialog box, select the files: Double Serial, Water, and Warnings
Note
Use [Ctrl+Click] to select multiple label files at one time.
3. Click Open
or press [ENTER].
Save the Job File
1. Click Save
.
2. In the File name field, enter a name: Special Applications.
3. Click Save
LabelMark 5.1-Tutorial
or press [ENTER].
Lesson 7. Managing Job Files
Print a Job File
1. Click the label file: Water.
2. In the Printer field of the selected file, click the drop down arrow and select a printer.
3. Click Print
.
4. Click the X on the label name tab to close the Job File.
5. Click Yes in the confirmation box to save the file.
Open the Job File
1. Using menus, choose Tools>Manage Jobs.
2. In the directory tree on the left side, click the directory name containing the files that you
want to use (if the files are not already displayed).
3. Click Job File: Special Applications.
4. Click Edit Job
.
The selected job file displays as a tabbed window element in the Workspace.
Add Details
Details are specific comments, instructions, etc. that can be added to each label file in the Job
File for easy identification.
1. With the Special Applications job file open, click the Details tab.
2. Click the mouse in the Description field and enter: These can be printed on continuous
or die cut labels.
Delete a Label File from a Job File
1. Click the Job tab of the open Job File.
2. Click label file: Double Serial.lsf
3. Click Remove
button, then click OK to confirm the deletion.
4. To update the Job File, click Save
.
5. Click the X on the Special Applications document tab.
LabelMark 5.1-Tutorial
23
24
Lesson 7. Managing Job Files
Add to Favorites
1. Click Manage Jobs document tab (if not already active).
2. In the list of Job files, click: Special Applications.lmj.
3. Click Add to Favorites
, then click OK to confirm.
4. Click the X on the Manage Jobs document tab to close the Job Files.
Access Favorites
To open the Favorite Job Files:
1. Using the menus, choose Tools>Manage Jobs.
2. Click the Favorites tab on the Manage Jobs document.
3. Click Special Applications, then click Edit Job.
Close the Job File
1. Click the X on the Special Applications document tab to close the file.
2. Click the X on the Manage Jobs document tab to close the Job File.
LabelMark 5.1-Tutorial


![LM 4.0_QuickStart_EURO [7] Languages.fm](http://vs1.manualzilla.com/store/data/006170771_1-f471c6a60f770fa9f17213cbf88d66dd-150x150.png)