Download PRAGUE - Shopify
Transcript
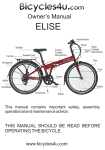
Owner’s Manual
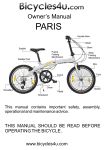
PRAGUE
Handle Bars
Saddle
Frame
Folding
Mechanism
Saddle Post
Stem
Rim
Crank
Fork
Spoke
Derailleur
Chain
Pedal
This manual contains important safety, assembly,
operational and maintenance advice.
THIS MANUAL SHOULD BE READ BEFORE
OPERATING THE BICYCLES.
www.bicycles4u.com
User Security
1) Do not operate the bike before reading this user manual thoroughly. The manufacturer will not be held
responsible for any damage or accident due to improper use.
2) For your safety and others please follow the traffic regulations. This bicycle is not suitable for children
under thirteen and the physically challenged. This bicycle is not recommended for competition, stunts or
off-road riding.
3) Do not lubricate the brakes.
4) The braking length of a dry state surface/road is 4 meters at 25km/h, while 15 meters in wet state. So
move slowly, keep a safe distance from other vehicles/objects around you and brake in advance where
necessary while riding downhill, in rain, snow & wet road.
5) To ensure your safety please use helmets, check the brakes & tyres, handlebars and rims before riding.
6) Maximum rider weight : 125 Kg.
Maximum carrier weight : 15 Kg.
7) Improper use could cause harm, please check the connection of the frame, stem and suspension
periodically. Every mechanical part has friction and pressure, different materials and parts have different
frictions and pressures. If a mechanical part has exceeded its service life, resultant damage could hurt the
user.
Regular check’s for safety before riding
1) Check if the handlebar stem and saddle post are safely inserted.
2) Check the brake shoes for excess wear, If there is you should replace them before riding.
3) Check if the nuts on the front and rear axis are securely fixed.
4) Check pedals and other fixtures for any signs of damage. Check if rotary parts move freely
6) Check the tyre pressure in accordance with the markings and check for ample treads on the tyre. If they
are excessively worn replace them immediately.
7) Make sure that you know how to operate the bike and clearly know all the traffic regulations.
Step by Step instructions for folding and assembling
Steps to fold the bike
1) Loosen the screw that is shown below using an allen key (for handlebar stem).
2) Remove the handlebars.
3) Pull the trigger of the pedal and fold it downwards simultaneously.
4) Loosen the quick release then pull it backwards and pull it up to release the lock mechanism.
5) Fold the bicycle inwards
6) Finished
1-2
3
4
5-6
Steps to unfold the bike
1) Unfold the front and rear frame.
2) Lock the frame folding mechanism.
3) Place the handlebars inside the tube and tight them in securely.
4) Pull the trigger of the pedal and unfold the pedal upwards simultaneously.
5) Finished.
General Maintenance Remarks
Adjusting the height of the saddle
In order to adjust the height of the saddle you’ll have to unlock the lever that can be seen in the
pictures below, adjust the saddle height to the desired position without
exceeding the mark carved onto the saddle’s tube. Lock the lever in place and you’re done.
The saddle’s height must be set so that you can place your feet at the ground comfortably.
Cleaning and Maintenance
Regular maintenance guarantees you a longer durability and road worthy state of your bike.
Maintenance includes cleaning, lubricating and ride setting adjustments. Regular maintenance work
is required to sustain a warranty claim. This applies to special corrosion (surface rust) and other
damages, which by non-observance, would not be undertaken by us. Thus, please read through the
following section thoroughly.
Frequency
Weekly
Monthly
Every Six Months
Yearly
Lubrication
Component
Chain
Derailleur Pulleys
Derailleurs
Brake Calipers
Brake Levers
Shift Levers
Freewheel
Brake Cables
Bottom Bracket
Pedals
Derailleur Cables
Wheel Bearings
Headset
Seat Post
Lubricant
Chain Lube or Light Oil
Chain Lube or Light Oil
Oil
Oil
Oil
Lithium Based Grease
Oil
Lithium Based Grease
Lithium Based Grease
Lithium Based Grease
Lithium Based Grease
Lithium Based Grease
Lithium Based Grease
Lithium Based Grease
How to Lubricate
Brush On or Squirt
Brush On or Squirt
Oil Can
3 drops from oil can
2 drops from oil can
Disassemble
2 squirts from oil can
Disassemble
Disassemble
Disassemble
Disassemble
Disassemble
Disassemble
Disassemble
Chain
The chain must be regularly (especially after riding in the rain) lubricated with a standard chain-caring product.
Physical stretching of the chain requires checking procedures to be carried out to ensure that the tension is
adequate. Examine the chain tension by positioning the bike on its kickstand and test whether the chain, while
being pushed upwards or downwards has a maximum gap of 10-15 mm in between. If this is not the case
please proceed to the following steps:
!) Loosen the axle nuts on both sides of the wheel and the brake counter - bracket (for the back pedalling
brake) on the left side of the rear - end stay. Where a gearbox removal is required please see the
manufacturer’s instruction manual
.
2) Subsequently, adjust the chain’s tension by turning the tension screw nuts on both the left and the right
sides.
3)Before tightening of the axle nuts, check whether the wheel stands in the centre and adjust if needed.
4) Tightly screw the axle nuts and the tension screw nuts. (Tightening Torgue not less than 30N-M)
5) Recheck the chain tension
An over-tightened chain can cause pops during riding.
Adjust the derailleur
Adjust the Fine-tuning nut or screw when the derailleur makes some abnormal sound. The way to adjust the
brake of the bike is the same as adjusting the gears. The most important thing is effective braking and
releasing of the brake pads and the power brake function work well together. Friction between road and tyre
is reduced when raining, so every rider should brake gently in order to avoid danger. Please follow the
several bits of advice given, every screw and nut should be tightened properly to make sure the wheel is
running freely with no resistance
Brakes
The brake-shoes which are fixed on the V-brake and Roller-brake wear out in time causing
gap widening between the brake-shoes and the rim flank. This is indicated by the increase
of the leeway of the brake lever
The left brake lever controls the rear and
the right brake lever controls the front brake.
You can modify by adjusting the brake system
through the following steps:
Simply turn the adjusting screw on the brake
lever until the gap between the brake shoes and
the rim flank averages about 1.5-2 mm.
Adjust the brakes correctly by tightening or loosening
the crosshead screws on the side of the brake arms, until the brake shows are centered to
the rim. Through tightening of the screws, the spring will be prestressed and the brake-shoe
will move away from the rim.
Warranty
NAME
Frame
Front Fork
Handlebar, Stem and
Accessories
Spindle and Parts
Seat Post
Transmission, Shift Lever
and Brake Lever
Rim
Shaft skin, Flywheel, Gear,
and Crank
Chains, Mudguard, Hanger
and Kickstand
FAULT
Fracture, sealing off, or
open solder
Fracture, sealing off, or
open solder
Fracture
WARRANTY PERIOD
one year
Heat treatment parts
damaged or broken
Fracture
Fracture, broken
one year
Cracking
Fracture
one year
one year
Fracture
one year
one year
one year
one year
one year
When does the warranty not apply?
?
When the bicycle is used negligently or has damage resulting from a traffic accident.
?
Normal wear and tear.
?
Poor maintenance or modifications that no longer comply with regulations or original specifications.
?
Damage due to external causes.
?
When the bicycle is used for rental.
?
Compensatory costs arising from damages or accidents, or cost incurred by loss of the bicycle’s
usage.
?
Bulbs, brake blocks, tyres etc. - Are regarded consumables, therefore when replacements are
required, these need to be purchased from your local cycle shop or store.


