1
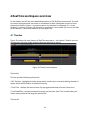
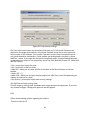
Introduction to the LSX Living User Manual
Skip to the Table Of Contents
Thank you for visiting the LSX living user manual. Here you can find help, ask questions
using ‘comments’ in the upper right, and when you get an answer, you can fill in that part of
the user manual to the detail you are satisfied with for the use of other users. By coming here
to ask questions about LSX, it’s easy to check the relevant part of the user manual first and,
when you get an answer, to fill it in as part of the manual. Any comments or questions you
have that aren’t already in this document you can enter using the ‘comments’ button in the top
right. When you do this, I and everyone who subscribes to notifications will see your question
via email and can respond to it.
I can recall, when learning a certain software or way of doing things, thinking “if only there
were a manual written by people first learning, so at least all the easy first questions can be
quickly answered.” If you’ve thought that, too, this is your chance to help make it happen. All
manual changes will be logged, so feel free to make revisions because reversions can be made
if necessary and proper credit can go to whomever works on this manual. Thank you all who
contribute!
First of all, a big THANK YOU to dzodzo for starting the manual in the first place. His efforts
and those who helped him seeded this project to where it can stand on its own and begin
growing.
TOOLS:
Easy Screen Captures, Images:
For readability, please make all program screen captures using the ‘none’ theme (/theme
none) shortcut switch when you run RealTime. For easy screencaps, you can use the Cropper
tool:
1) http://cropper.codeplex.com/
2) Set the output format to png by right-clicking the copper window, and click ‘browse’ to open
the folder for your captured images.
3) Simply size the box over the area you want to capture and press enter.
4) Then, drag the newly captured image from the folder in step 2 into the desired location in
this manual and it will be embedded (Tested with Chrome browser).
1
LSX Living User Manual
By the Users and Software Author, for the Users
This manual describes the elements of LSX lasershow software. Thanks to dzodzo for
his originating work, drlava, swamidog, csshih, heroic, j4cbo, colouredmirrorball, lulighttec,
laserco ... for valuable additional information, tips and grammar help.
2
Table Of Contents:
Table Of Contents:
1 Introduction
Waiver of Liability
2 Installation
3 Making your first show
3.1 First look
3.2 Basic configuration
3.3 Creating a show
3.4 Adding your own effect
4 RealTime workspace overview
4.1 Timeline
Status bar
Timescale
Audio envelope graph
Timeline slots
Split timeline
4.2 Titlebar
4.3 Menu
File
Edit
Run
View
Scanner
Module
Audio
DMX
Live
Help
4.4 Timeline selector
4.5 Upper row of icons
4.6 Left column of icons
4.7 Bottom row of icons
5 DAC and projector setup
5.1 DAC selection and assignment
5.2 DAC compatibility
5.2.1 DACs supported by LSX
5.3 Scanner optimization
6 Pre-programmed shows
6.1 Adding and editing events
6.1.1 Animation
6.1.2 RunText
6.1.3 Lissajou
6.1.4 Bitmap
6.1.5 Beam
3
6.1.6 Transform Events
7 Live-controlled show
8 PicEdit
9 ShowPlayer
10 Tutorials
11 Notes
4
1 Introduction
Thank you for purchasing the LSX laser show software package. LSX is THE tool to give
laser artists the freedom they need to create dynamic laser art for preprogrammed and live
shows. But you’re here, so you probably already realize this. While you will learn the basic
functionality quickly, some advanced features may take time to discover and master. Part
of the goal of this document is to facilitate the discovery and learning process and to allow
you to unlock the full potential of LSX software. As you discover features and tricks, feel free
to document them here for others to find. This manual describes the Pro version with full
features, so some features may be unavailable in lower versions.
Waiver of Liability
Any liability to property or person that arises from the use or misuse of this software is
solely the responsibility of you, the operator. By using this software, you agree to discharge
Nautilus Integration, LLC, its partners, subsidiaries, employees, and all authors of this manual
from all liabilities, claims, damages, and costs, which arise either directly or indirectly or
in any way may be connected with the use of Nautilus Integration software, LSX, or this
manual. It is possible to incorrectly enter values in the software, and it is possible for the
software to malfunction, so it is good practice to check all of your work in via preview before
displaying it on a scanner system, and always test shows with hardware before performance.
This software is provided without any warranty expressed or implied. You must follow your
local restrictions on the operation of lasers and follow all applicable regulations and safety
precautions when operating a laser radiation source. You as the operator are at all times
responsible for the safe operation of your equipment. Before using this software to project
laser light, you should read this guide to familiarize yourself with the relevant projection and
safety features.
5
2 Installation
If you have received your LSX package with the LSX DVD and dongle, please send an email to
[email protected] confirming your receipt so that your one-time activation file can
be emailed to you.
Minimum system requirements for installation are the following:
• Windows XP/Vista/7
• 1.2GHz CPU or better
• 512MB free physical RAM
• OpenGL accelerated graphics for best quality preview
• Free USB port for dongle
• Virtual environments not supported
Performance notes:
The LSX preview window is opengl accelerated. If your hardware or
environment does not support OpenGL aceleration, preview performance may
be degraded and you may want to switch to the non-OpenGL preview mode.
LSX is a multithreaded application. If your system has multiple cores or
logical CPUs, LSX threads will be distributed to make best use of your CPU
resources. Multiple cores can be helpful when running many DACs/Timelines at
once.
Normally you will have received a package which contains the installation DVD and a dongle.
You also need to receive a personal license file from drlava. You can install LSX as many times
as you want on different computers, though the license file needs to be in the installation
folder and the dongle needs to be inserted so there can only be one program active at a time.
The LSX software package consists of these tools: Realtime, PicEdit and Showplayer.
Depending on your LSX version, you may have obtained ILD SOS, InkScape and LaserCam
Demo as well.
To install LSX, run the LSX_Installer.exe found on the disk. This will install the program and
create the installation folder in the Program Files folder, where you have to place the license
file. With the license file you should also have obtained a link where you can download
updates. Whenever drlava releases an update, download the .zip file and extract it into the
installation folder (or when Windows doesn't allow you to do that: extract it somewhere else
and copy the files into the installation folder).
Important: do not change any drivers (.dll-files) in the installation folder as some drivers are
modified. If you want to use other versions of the drivers however, you must contact drlava.
The software will also create directories in the public and user documents folders. In Public
documents (for example C:/Users/Public/Documents/Global LSX Files) is a folder named Global
LSX Files placed which contains the following subfolders:
6
• Abstracts
• Ani Files
• AnimatorPresets
• Audio - contains audio files that came with the software, they usually play only first and
last few seconds due to copyright reasons but you will find here a list of the songs and which
versions they are so you can get them yourself
• Cat Files
• Curves
• DMX
• ILDA Files
• OpenGL Settings
• Palettes
• Pic Files - directory with .PIC files that can be used into animation events
• PicEdit Scripts
• RasterFrames - directory with bitmap files you can use for the bitmap raster projection event.
• ScriptEffects
• Shows - shows that come with the software are stored here separated in subdirectories for
basic preprogrammed shows and live shows
• link to My LSX Files
Private documents are in “My LSX Files” and contain following folders:
• Audio - place audio for shows that you create here
• Autoload Settings - contains directories and files with saved settings that are automatically
loaded next time you start the software
• Cat Files
• Clipboard
• Modules
• Shows - directory for shows that you create, this is also the place where LSX will store
captured videos of lasershow preview window
• Workspaces
• link to global LSX files
7
8
3 Making your first show
This section describes how to make a very simple first show for a single DAC without going
into too many details. It should give you a kickstart into learning about other features on your
own. A more detailed overview is covered in the next chapter.
3.1 First look
When you first start the timeline editor, you might get confused by the number of controls.
If you previously used entry-level software like Moncha, the interface is more complicated
because LSX offers more possibilities. Figure 1 shows the Realtime workspace (1). Title bar
(2) shows your software level (Pro, Basic, Lite), user to which LSX is licensed and version.
Underneath is menu (3), selectors for timeline (4) and a set of icons (5). There is a column with
icons on left side (6) and a row of icons on the bottom (7) as well. Some of them are shortcuts
to what you can find in text menu. The lower part of screen is used to show some statistics of
the program (8).
Figure 1: Realtime Workspace
1) Timeline Workspace
2) Title Bar
3) Main Menu
9
4) Timecode Source
5) Main Toolbar
6) View Toolbar
7) Play Toolbar
8) Status Bar
Each of the toolbars can be moved and customized, and your customizations are saved at exit,
to be reloaded the next time you run Realtime.
3.2 Basic configuration
Start by configuring your DAC. In the menu choose Edit -> Edit DAC/Controller Timeline
Assignments. This will display a window with unassigned DACs on the left and each timeline
to which you can assign a DAC. Note that you can only assign one DAC to each timeline.
Drag'n'drop the DAC you wish to use to Timeline 1 as shown on Figure 2.
Figure 2: DAC to Timeline Assignment Dialog
Now it's time to configure DAC settings. From the menu select Scanner -> Scanner Setting ->
Edit global parameters for active Scanner/Projector... In the window displayed in the container
TimeLine/DAC select number 1 if it's not already selected. First expand Timeline Settings ->
Optimization from the navigation menu as shown on Figure 3. There on the right, you'll find
PointRate in kilopoints per second as shows Figure 4. Set this accordingly to your galvo speeds
so you don't damage them. To test the output at any time you can toggle the Display Test
Frame button on the left side shown on Figure 3. You can select from various test frames to
optimize all aspects of projection but more on that will be explained in further parts of the
text.
10
Figure 3: Navigation, TimeLine/DAC assignment and Test Frame selector
Figure 4: PointRate modifier
Next, expand DAC Settings. The very basic you'd want to set are Size/Scale and Color
Mapping. Size/Scale allows you to set the position and scale of projected picture as shown on
Figure 5. Position is controlled in the Move XY container with values from -1 to 1 where -1 is the
leftmost/topmost and 1 is the rightmost/lowermost position. Scale is controlled in the Size XY
container with 1 for scale as big as full scan angle of your projector.
11
Figure 5: Size and Scale settings
Proceed to next item in DAC Settings -> Color Mapping. Here you can assign modulation of
each diode to balance the color output or decrease intensity of beams as highlighted on Figure
6. This concludes the very basic setting of your DAC.
Figure 6: Color mapping settings
3.3 Creating a show
You are now done setting up the software, so it's time to create a show. By default show
duration is set to ten seconds. You can adjust this length but for this tutorial, keep it that way.
See Figure 7 and notice when you move over the timeline with mouse, you can see current
position in time down in the status window. To add an event to the timeline, double-click into
the line you wish to use for event. An Event panel will be displayed, where you can choose
various sources for events. Let's add type Animation as highlighted on Figure 8. An event will
be created, symbolized by a filled stripe on the line as shown in Figure 9. You can move it by
dragging and dropping it to intended position. Let's move it to the very beginning of the show.
12
By default the event duration is set to one second. You can extend this duration by moving
your cursor over to the very end of the event. The cursor will change and you can adjust it by
dragging it. Set it to five seconds for this tutorial.
Figure 7: Mouse position in time
Figure 8: Select Animation as source event
Figure 9: Event placed in timeline
Now you have your first event in the timeline and you need to choose the animation to be
played. Double-click the event to open Animation/TrickFilm panel. From the upper tabs,
choose the Picture tab as highlighted on Figure 10. Click Load picture... button and open
the file named “Arrow” from the list. Now you'll see preview of this picture as is shown on
Figure 11. A preview will also be shown in the small square at the beginning of event stripe in
timeline. To preview output from laser click the 3rd icon
13
on the left side toolbar.
Figure 10: Select Picture tab
Figure 11: Picture preview
Press the Edit button
in the lower icon menu to start editing preview of the show. Figure
12 shows the preview window. The laser should now project a red arrow for five seconds. It
will then stop projecting for five seconds, and repeat.
14
Figure 12: Laser output preview window
Let's add some more events that will affect the arrow. For example scale and rotation around
Z-axis. Double-click on an empty slot in the timeline to bring up Event panel. Notice that you
don't have to stop editing the preview to add more events so you can see the transformations
in real-time. Select SizeXY event from the panel. Adjust the position and duration to match the
animation event. Notice if you get close to the endtime of the animation event, the mouse will
snap-align with it so that both events have the same duration.
Double-click the event and panel to edit properties of SizeXY event will be displayed. It has two
sliders that allow you to set lower and upper limits for event. In this case these would affect
the X and Y size at the same time. You can set the limits by typing in the numbers as well.
Change the upper limit to 0,5 as highlighted in Figure 13. Notice how immediately the arrow
starts to transform to 50% of its original size.
Figure 13: Changing upper limit of the SizeXY event
Double-click to empty line and from the event panel select RotateZ transformation. You'll see
immediately that the arrow will make a 360-degree turn in one second. If you now adjust
the event to last five seconds aligned with previous two effects, you'll see the arrow rotating
slowly around while getting smaller. Double-click the event to bring up RotateZ properties. It
already has set lower limit to 0 and upper limit to 1. Let's leave that as it is and focus on other
aspects of properties. From the Type of animation drop-down menu select Cosine-Waveform
as shown on Figure 14. The arrow will now rotate half-circle counter-clockwise and half-circle
15
back clockwise while getting smaller.
Figure 14: Changing type of animation for RotateZ event
3.4 Adding your own effect
Double-click into timeline after our first animation and select animation again. Move it right
after the first event, you can again take advantage of snap-align to put it directly after first
animation. Stretch the duration to five seconds. That should be until the end of show marked
by red line. Now we want to use something we draw ourselves. For start let it be just a simple
line. From the menu select View -> Switch to Quick PicEdit. This will bring you to simplified
interface of the PicEdit tool.
Figure 15 shows simplified PicEdit layout. It consists of editing workspace (1), menu (2) and
sets of icons (3). On the left, there stays menu from Realtime (4) and on the right there is color
palette (5). Status bar (6) is on the bottom.
16
Figure 15: Quick PicEdit interface
Click green color number 25 on the palette. From menu select the Line icon
. Create a line
along the X axis in the editing workspace by clicking the position of the first point, then the
second as illustrated on Figure 16. You'll see a green line along the X axis. From menu select
View -> Switch to RealTime to get back to Realtime tool.
17
Figure 16: Drawing a green line in PicEdit workspace
Double-click the second animation in timeline and from the Picture card click Load from
PicEdit... button. This will open Frame Selector panel where you should see frame with the
green line you just created in PicEdit. Double-click to select it. Now you will see that after
playing the red arrow animation a green line is displayed.
Add a new event by double-clicking on the free space in timeline and select ShiftY
transformation. Adjust it to fit the five seconds with green line animation. It will now play
green line slowly falling from top to bottom of the screen. Double-click the event and set the
properties according to Figure 17. Switch the upper and lower limits - set lower limit to 0,5 and
upper limit to -0,5. The line will now rise from bottom to top. Increase the number of Repeats
to 5 and notice that the line will rise five times.
Figure 17: Changing properties for ShiftY event
Your very first lasershow is done! To play it click the Show Play icon
18
on the bottom.
4 RealTime workspace overview
In this chapter you will find more detailed description of LSX RealTime environment. It's used
to create pre-programmed, live shows or combination of both. Workspace consists of more
elements as shown in Figure 1 in previous section. As described in subsection 3.1 it is the
timeline (1), title bar (2), menu (3), selectors for timeline (4), icons toolbar (5), icons on left side
(6) and bottom (7) and finally statistics of the program (8).
4.1 Timeline
Figure 18 displays the main element of RealTime workspace -- the timeline. Timeline consists
of status bar, timescale, audio analyzer spectrum and slots for events.
Figure 18: Timeline on workspace
Status bar
This line provides following information:
• Edit Timeline - highlighted number shows which timeline you're currently editing. Number in
square shows which timeline is selected as overlay.
• Total Time - displays the total runtime of pre-programmed show in format h:mm:ss.ms
• TimeCodeOffset - the delay between the music and the laser show. This is useful when you
have a latency between the program and the DAC.
Timescale
19
Depending on the zoom of timeline, this shows significant time entries (seconds, half-seconds,
up to 1/100ths of seconds). On maximum zoom-out, it will show BeginTime and EndTime
information. These mark the beginning and ending of the show. It's marked by dark blue
borderline for beginning and cyan line for ending of the show. Current position on timeline
is marked by white line - the TimeCursor. You can zoom in/out the timeline by holding Shift
+ scrolling the mouse wheel or Shift + “+”/”-” sign. You can also use menu items by selecting
View -> ZoomIn TimeLine length / ZoomOut TimeLine length but this is not very convenient.
Alternatively you can use the icons on lower part of screen. Time marks for better syncing with
audio are also shown here when used.
Audio envelope graph
By default this space is pitch black. By double-clicking to this area you will bring up the Audio
panel. Alternatively you can use menu item Audio -> Setting... to display this panel. If you
create a show that uses some media file (audio, video) as Time Code Source, you can visualize
the audio track. Audio graph will become visible in this area. This can help you for example
adjust the events to notable parts of the track like beats or sudden high volume sections.
Timeline slots
Main portion of timeline are the slots where you can insert events. It's represented
by numbered Lines from 000 up to 130. This means you can have up to 130 events or
transformations playing in one timeline at a time. Each line display statistics on number
of Events used in that line. Events are displayed as various colored bars with small picture
preview depending on their type. Transformations are displayed as blue lines with the process
of function selected for transformation and small icon representing the type.
Split timeline
It is possible to show more than one timeline at a time in split screen mode. You can split the
screen by dragging the borders you see in lower right section of the timeline next to scrollbars.
Alternatively you can use the menu item View -> Adjust Timeline Split.. to switch to positioning
mode for split screen. Figure 19 shows split screen editing. Upper right section is designed for
PicEdit workspace. More about PicEdit will be covered in chapter 5.
20
Figure 19: Split timeline
Have a look at lower left part of the figure. Here you will see that timeline 2 is the one being
edited in this window. Timeline 1 overlays this timeline, you can see effects from timeline 1
shown in left upper window but you can't edit them. It's useful for aligning effects in multiple
timelines when creating show for more scanners.
4.2 Titlebar
Titlebar shows the level of your version (Lite, Basic, Pro), the username to which software is
licensed and version.
4.3 Menu
Many features of the program are available through sets of icons. Usually they are available
as item in menu as well. They're grouped in several submenus depending on their functions.
Combination of keys in the brackets after menu item displays the hotkey shortcut. Some menu
items don't have hotkeys.
File
21
This section contains functions for manipulating with show files, opening, saving them and
the show protection. It also contains list of most recently opened files for faster opening of
frequently used shows.
New show (Ctrl+N)
Opens new show for editing with default preset values. If you have any unsaved changes in
currently edited show, the program asks if you want to save changes first.
Open show... (Ctrl+O)
Opens dialog where you can navigate and select show for opening.
Save this show (Ctrl+S)
Saves current show. If it doesn't have name yet, you'll be prompted to select a filename to
save. Ctrl+S is a useful combination of keys to remember. The best protection for data loss is
to save them, so save often.
Save As...
Saves current show with given filename.
Print... (Ctrl+P)
Print the show (?). Opens dialog, where you can select printer.
Print Preview
Displays preview page for the printout. (blank page?)
Print Setup...
Opens dialog for printer selection and configuration.
Send this show as mail...
Sends currently opened shows using default mail client. (?)
Protection...
Opens dialog for setting up show security. Figure 20 shows the settings, you can either set the
password for full access to the show or for reduced access, where only certain features are
available.
22
Figure 20: Show security settings
The Clear Keys button clears any access keys that were set (?). Full Access Password sets
the access to manage whole security of the show. Reduced access can be set to particular
serial number of the software. This is useful if you want to send show to someone so that
only he will be able to manipulate it. Serial number can be displayed in the Help -> About
RealTime... menu. If you check the No Specific SerialCode option, show will be available with
set permissions to anyone. The permissions are to Play, Edit, Make AVI, Export CAT, Make ILDA
and Edit Security.
• Play - permission to play the show
• Edit - permission to edit the show
• Make AVI - allows you to create .AVI file of the show via the Record feature of Preview
window
• Export CAT - (?)
• Make ILDA - allows you to export timeline output into ILDA file or more files depending on
number of timelines in a show
• Edit Security - permission to edit these security settings
Exit RealTime and stop running show
This will stop any running show, shutdown laser output and quit the application. If you had
any unsaved changes, a dialog with option to save will appear.
Edit
Offers various editing options regarding the timeline.
Timeline Undo (Ctrl+Z)
23
Undo action done in timeline like changing position in timeline or the length of event. Depth of
undo is set to ten actions by default. This function is not available if enable Backup is off.
Timeline Redo
Redo action in timeline, opposite of undo. This function is not available if enable Backup is off.
enable Backup (Undo)
When checked, this will enable the Undo/Redo functions.
Edit DAC/Controller Timeline Assignments
This will bring up the panel for assigning your available DAC's, refer to Figure 2 in chapter 3.2.
Delete all selected events (Del)
Deletes all events that you have currently selected.
Cut all selected events (Ctrl+X)
Cuts out all selected events and stores them in a clipboard for pasting elsewhere (in another
timeline or another position in timeline).
Copy all selected events at current TimeCursor position to clipboard (Ctrl+C)
Copies all selected events to clipboard for pasting.
Paste events from clipboard to current TimeCursor position (Ctrl+V)
Pastes events in clipboard to the timeline at position of the TimeCursor.
Move forward all selected events (Right arrow)
Moves selected events forward in timeline.
Move back all selected events (Left arrow)
Moves selected events back in timeline.
Move all selected events up (Up arrow)
Moves selected events up one slot in timeline.
Move down all selected events (Down arrow)
Moves selected events down one slot in timeline.
Step Timecursor Forward (Shift+Right arrow)
Moves the Timecursor line forward in timeline.
Step Timecursor Backward (Shift+Left arrow)
Moves the Timecursor line back in timeline.
Select All (Ctrl+A)
Selects all events in current timeline.
Deselect All (Ctrl+D)
Deselects all events in current timeline.
24
Invert current selection of events
Inverts selection of events. This is useful if you want to edit more events, so that you can just
select those you don't want to edit if it's less and then invert the selection.
Search for event/command in active TimeLine...
This will search for selected event or transformation. Useful if you have zoomed in and look
only for particular event or transformation. When found it will be scrolled to the very left of
the timeline.
Search again for event
This will search for same event or transformation as previously.
Run
Deals with options for running the show. Based on runtime status of the show, some options
may be unavailable.
Play show (F5)
This will play the show from beginning to end. If the show is already running in edit mode it
will act as pause/resume show button.
Edit show (F6)
This will loop the show from beginning to end. If the show is already running in edit mode, this
option is not available.
Stop (F7)
Stops the playback of either playing or editing the show. This option is not available if the
show is already stopped.
Pause (F8)
Pauses/resumes the playback. In edit mode F5, F8 and Space hotkeys will act the same. This
option is not available if the show is stopped.
Backward TimeCursor (F9)
Rewinds the position of TimeCursor five seconds backwards. This option is not available if the
show is stopped.
Fastbackward TimeCursor
Rewinds the position of TimeCursor ten seconds backwards. This option is not available if the
show is stopped.
Forward TimeCursor (F10)
Fast forwards the position of TimeCursor by five seconds. This option is not available if the
show is stopped.
Fastforward TimeCursor
25
Fast forwards the position of TimeCursor by ten seconds. This option is not available if the
show is stopped.
Loop PlayBack (F11)
Toggles looping of playback of the show. When entering edit mode, loop is enabled
automatically.
Restart from BeginTime (F12)
This will restart playback of the show from set BeginTime marker.
Begin (F2)
This will set the BeginTime marker to the current position of TimeCursor.
End (F3)
This will set the EndTime marker to the current position of TimeCursor. Note: if you set
TimeCursor before actually marked BeginTime and try to set EndTime, this will become the
new BeginTime and the former BeginTime will become EndTime marker.
BeginEnd (F4)
This will reset BeginTime and EndTime markers to the beginning and end of show.
Laser output
Toggles laser output. You can use the Escape key to quickly disable output.
Add new TimeMark (Space)
This will add a time mark on the timescale. It is represented by a purple line ended with a
triangle. To be able to add TimeMarks you must uncheck the Play/Pause Spacebar or Add time
mark checkbox in View -> View Settings... panel. In case this field is checked, Spacebar will act
as pause/resume key.
Clear all TimeMarks
This will clear all time marks on the timescale. Before doing so, a confirmation dialog is
displayed if you really want to clear all TimeMarks.
AutoScroll to current TimeCursor
(?) This should disable scrolling of timecursor to gain some performance?
GoTo next Event (Tab)
Skips to next event in timeline.
GoTo previous Event (Tab+Shift)
Skips back to previous event in timeline.
Execute not only Selected Events
Toggles output of only selected events. If this option is toggled, it will play all events. If it's off,
it will play only Selected Events.
GoTo TimeCursor
26
This will jump to the position of TimeCursor. It's useful in case you have the show zoomed in
and it's currently playing so after a while TimeCursor might scroll out of view.
Mouse to Laser
(?) Live feature?
Show Player...
Displays LDS Show Player (?)
View
Allows adjusting various viewing related functions and switching between RealTime and
PicEdit.
Switch to Quick PicEdit
Switches the interface to simplified version of PicEdit. This function will basically adjust
Workspace to have PicEdit icons enabled and selects the PicEdit view for whole screen. In split
timeline mode one viewport is for PicEdit so it's this one.
Switch to RealTime
Switches the interface to RealTime view. It will adjust the sets of icons and timeline view.
Adjust Timeline Split..
Allows you to split the timeline by moving cursor and adjusting the dividing cross for multiple
screens.
Show Windows...
Allows you to toggle various workspace elements:
• RealTime Tools - displays the upper set of icons, see (5) on Figure 1. This is turned on by
default.
• Quick PicEdit Tools 1, Quick PicEdit Tools 2 - displays the set of icons for PicEdit. These are
unavailable for use while you're switched to RealTime.
• RealTime Control - displays the lower set of icons for playing the show, see (7) on Figure 1.
This is turned on by default.
• Quick PicEdit Palette - displays the color palette for PicEdit on the right part of the screen.
• MIDI Virtual Keyboard - displays MIDI keyboard for live control to use with MasterBeam.
• DMX Input Monitor - displays the DMX Monitor (?) Left-click displays next line, right-click
displays previous line.
• Audio Control Bar - displays the bar for adjusting volume and the AutoMute checkbox on the
upper set of icons. This is turned on by default.
• Time Display - toggles display of elapsed time in the show. This is turned on by default.
• Timecode Source - displays the TimeCode Source selector, see (4) on Figure 1. This is turned
on by default.
• Preview Toolbar - displays the set of icons on the left part of the screen, see (6) on Figure 1.
This is turned on by default.
• Preview Window - displays the preview window.
27
• Show Statusbar - displays the statusbar at the bottom of workspace, see (8) on Figure 1. This
is turned on by default.
• Show Audio Visualization - displays the audio envelope graph. You can either turn it off by
selecting None or display Mono or Stereo channel spectrum. Mono is selected by default.
• Show Laser Preview Window... - same as Preview Window (duplicate item?).
• Old Windows - Show DMX Monitor, Show Controlbar, Show Rebar, Show Viewbar, Show
PicEdit Tools, Show Color Palette, Show AudioBar, Show Timebar - these are duplicates to
previous menu items just with another names
View Settings...
As shown on Figure 21 this displays various settings to adjust the timeline.
Figure 21: Timeline settings
TimeLineViewColor... button allows you to change the color of timeline slots where you put
events and transformations. TimeLine-LineColor... button changes the color of lines separating
these slots. TimeLineCaptionColor... button changes the background of timeline status bar.
ViewSize of TimeLine in pixels determines the width of timeline in pixels. If you set it to a
number that is higher than your actual monitor width, it will basically zoom-in the timeline.
Vice versa if you set this number to something low it will zoom-out. This number changes
depending on what zoom of the timeline you have set. ViewTrackHeight in pixels allows you
to adjust the height of timeline slots. It's useful to increase this value if you have some high
resolution monitor and the events are hard to manipulate with. Default value is 32 pixels.
Right Click Edits (?). Play/Pause Spacebar or Add time mark - in case this field is unchecked,
Spacebar will act as key to add time marks into the timeline. Disable show load Messages (?
). Default new event duration (ms) will set the default duration of new events you placei into
timeline in miliseconds. Default is 1000 miliseconds.
Line height
This will basically set height of slots in timeline. Possible options are Small, Medium (default)
and Large. These will basically change the TrackHeight parameter in timeline settings panel.
Show Pictures of TrickFilm events in TimeLine
Toggles displaying of little picture previews for events in timeline. It is enabled by default.
28
Show Icons of events in TimeLine
Toggles displaying of little icons for events and transformations in timeline. It is enabled by
default.
Reset View Settings
This will display confirmation dialog if you really want to reset View settings to default values.
Restart of LSX is necessary after this action.
ZoomIn TimeLine length (Shift+Add)
Zooms in the timeline. Alternatively you can use combination of Shift key and scroll
mousewheel up. This option is not available if the timeline is already zoomed in to maximum
possible extend.
ZoomOut TimeLine length (Shift+Subtract)
Zooms out the timeline. Alternatively you can use combination of Shift key and scroll
mousewheel down. This option is not available if the timeline is zoomed out to minimum
possible view.
Minimum TimeLine length
Zooms out the timeline so that it fits whole to the width of your screen.
Maximum TimeLine length
Zooms in the timeline to set maximum level. Note that after zooming to this extend it is still
possible to zoom in more.
Scanner - 1-8
Switches to the number of timeline/scanner.
Overlay - 1-8
Switches to the number of overlay timeline/scanner.
Open SFX Browser
Opens panel for selecting saved effects. Useful if you create a set of effects for preprogrammed show then just double-click to the timeline to add them.
Open Frame Catalog Browser
Opens browser for selecting catalog frames. (?) Double-click to the timeline to add selected
frame.
Scanner
Controls the projectors.
Preview -> 1-8
Toggles preview of scanners 1 to 8 in the preview window.
Simulate Beamshow -> 1-8
29
Toggles beamshow simulation of scanners 1 to 8 in the preview window.
Simulate Screen -> 1-8
Toggles graphic simulation of scanners 1 to 8 in the preview window.
Scanner Setting
Allows you to edit scanner settings:
• Edit global parameters for active Scanner/Projector... - opens dialog to edit scanner settings.
Setting up the scanner will be covered in chapter 4.2.
• New - resets all scanner settings to default
• Open Workspace... - opens a previously saved workspace with scanner settings
• Save Workspace As... - save current settings for scanner
View -> 1-8
Switches to the number of timeline. Similar to menu View -> Scanner -> 1-8
Module
(?)
Open...
(?)
Save As...
(?)
Audio
Offers options to work with audio source for LSX show.
Setting...
Opens panel that allows you to edit various options for LSX show such as source audio,
TimeCursor precision, generate a waveform analysis etc.
Visualization
Displays the audio envelope graph. You can either turn it off by selecting None or display
Mono or Stereo channel spectrum. Mono is selected by default. This is shorter path of
displaying it than going through the View -> Show Windows... -> Show Audio Visualization item
in menu.
DMX
Manipulates DMX settings.
30
Show DMX Monitor
Displays the DMX Monitor (?) Left-click displays next line, right-click displays previous line.
Live
Accesses live control functions of LSX such as mouse control, DMX input or MIDI keyboard.
MasterBeam...
Opens MasterBeam live touchscreen controller. More about this feature will be covered in
chapter 4.4. It is possible to have multiple touchscreen windows opened
Open new Slider dialog for live control...
Opens Slider panel for DMX control (?). It is possible to have multiple slider windows opened.
Enable DMX input
Toggles DMX input.
Show MIDI KeyBoard for live control
Toggles virtual MIDI keyboard for live control of switching the effects.
Run Text...
Opens a panel shown on Figure 22 to quickly edit a projecting running text. Note that you have
to have the laser output enabled first to see the projection.
Figure 22: Live RunText panel
31
You can type in a text you wish to display. Then select a font you would like to use. If you tick
the TTF checkbox, it will project from TrueType fonts that can be browsed via the TTF... button.
Time in seconds specifies how long will it take to project a complete message. After that, it
will repeat from beginning. You may choose a color from the palette you use. It's possible to
shift the text up or down. Currently, negative number shifts the text up, and positive shifts
the text down (?). Display Letters specifies how many letters will be displayed in one moment
on whole screen. The higher the number, the more flicker you may observe depending on
the scanspeed of your galvos. Letter Size will adjust the size of singular letter. If you set this
value too high, letters may start to overlap each other. Underneath is a set of parameters
for scanner. Scan Parameter chooses preset that should be used for this projection. Target
defines projection zone from the preset and Color Buffer allows you to select optional color
palettes (?). Start button will star the projection, stop will stop projection.
Help
Displays the help items of the menu.
Timeline Help
Shows a comprehensive text how to manage timeline. This is the first you should read after
opening the program and not sure what to do.
Keyboard Shortcuts
Displays a cheatsheet to various useful keyboard and mouse shortcuts. Getting a grip of these
makes you work easier and smarter.
Tip of the day...
Shows various tips on how to use the program. Tip: You can write your own tips if you edit the
Tips.txt file in the directory where RealTime executable is located.
About RealTime...
Displays the About LSX panel where you can see your serial code, level of software license,
number of processors (?) and username. Clicking Legal button will show the EULA (End User
License Agreement).
4.4 Timeline selector
This bar contains the selector for active and overlay timeline selector. You can choose which
timeline is currently selected for editing and which timeline is overlaying it.
4.5 Upper row of icons
This toolbar contains various icons to work with LSX faster and more conveniently.
32
Easy start show
Opens up a list of every show the software can find in relevant
directories. Either it could be shows that come with the program or your own shows. Just
select one and it will load and start to play immediately.
New show
show.
Resets the timeline so that you can edit new show. Same as menu File -> New
Open new RTD show
File -> Open show...
Displays browsing dialog to select a show to open. Same sa menu
Save this show to RTD
Protect this show
Saves currently open show. Same as menu File -> Save this show.
Displays the security settings panel. Same as menu File -> Protection...
Delete
Deletes selected event(s) from the timeline. Same as menu Edit -> Delete all
selected events.
Cut selected events
Cuts selected events and stores them in clipboard. Same as menu
Edit -> Cut all selected events
Copy selected events
Copies selected events and stores them in clipboard. Same as
menu Edit -> Copy all selected events at current TimeCursor position to clipboard.
Paste events to TimeLine
Pastes events from clipboard to timeline in position at cursor.
Same as menu Edit -> Paste events from clipboard to current TimeCursor position.
Undo last action
Undo.
Redo
Undoes last action up to ten actions. Same as menu Edit -> Timeline
Redoes last action. Same as menu Edit -> Timeline Redo.
Prevent edits for now
Disables any editing on the timeline.
33
Edit Geometric Correction and Target World Properties
Opens window to edit
geometric correction for the scanner. Same as menu Scanner -> Scanner Setting -> Edit global
parameters for active Scanner/Projector...
Edit Color Palettes
Opens window to edit color palettes for the scanner.
Edit Scanning Optimizations
Browse Current Frame Catalog
Opens window to edit optimization for the scanner.
Opens the frame catalog browser.
Reload CAT File Frames
Reloads frames in catalog from an external file, if one is
specified. This is useful if you’re editing the frames using external PicEdit.
Edit Static Effects
Audio Settings
Opens window to edit DMX and TTL Control settings (?)
Opens window for audio settings. Same as menu Audio -> Setting...
No Visualization
, Mono
, Stereo
Controls displaying of the audio visualization
bar. It can show either mono, stereo or no visualization at all. Same as menu Audio ->
Visualization -> None, Mono, Stereo.
MIDI Keyboard
Displays the MIDI keyboard for simulating external keybord control.
Same as menu Live -> Show MIDI KeyBoard for live control.
Live Control Touchscreen
Opens the MasterBeam Live control touchscreen window.
Same as menu Live -> MasterBeam...
Fast Laser Text
Opens a panel shown on Figure 22 to quickly edit a projecting running
text. Same as menu Live -> Run Text...
Record to ILDA file
By enabling this button, playing the show will produce one or
more .ILD files to the directory with show.
Event Search
This will search for selected event or transformation. Same as menu Edit ->
Search for event/command in active TimeLine...
34
Event Search Next
This will search for same event or transformation as previously. Same
as menu Edit -> Search again for event.
About RealTime
Displays the About LSX panel where you can see your serial code, level
of software license, number of processors (?) and username. Same as menu Help -> About
RealTime...
Adjust audio volume
Allows you to control the overall volume from
workspace so you don't have to click outside the application for volume control.
Check to mute system between shows
between shows (?).
This will automatically mute the system
Timebar
This displays current position in time in the format h:mm:ss.ms.
Digits are red if the show is stopped, yellow if it's paused and green while show is running. You
can drag this toolbar off the docking pane and resize it to suit your needs.
TimeCode source
various sources you can use:
As for Time Code Source, there are
• Time [internal clock] - uses internal clock of the software to drive through the show. It will
play the show from set beginning to set end.
• CD-Audio
• Wave
• SMPTE [Midiman]
• Windows Media
• Live [variable speed]
• WinAmp
• Audio File (MP3,FLAC,OGG,WAV)
4.6 Left column of icons
This toolbar controls features related to DAC and scanner setup.
Timeline Editor
Switch to RealTime.
Switches to RealTime interface if you're in PicEdit. Same as menu View ->
35
Quick Picture Editor
Switches to PicEdit interface if you're in RealTime. Same as menu
View -> Switch to Quick PicEdit. Note: this quick picture editor is separate from PicEdit.exe.
Enable/Disable Monitor Preview
Toggles preview window for projection. This window
offers some options as shown on Figure 23. In the title bar you can see some statistics
regarding to show. Elapsed and remaining time of the show, threads (?), moving scanner (?),
current local time and time to wait (?).
Figure 23: Scanner output preview
Scanner menu item opens a submenu with following items:
• Enable Scanner Preview -> 1-8 - toggles preview for scanner with given number. Same as
menu Scanner -> Preview -> 1-8.
• Beamshow simulation of scanner number -> 1-8 - toggles beamshow preview for scanner
with given number. Same as menu Scanner -> Simulate Beamshow -> 1-8.
• Graphic simulation of scanner number -> 1-8 - toggles graphic preview for scanner with given
number. Same as menu Scanner -> Simulate Screen -> 1-8.
Capture menu gives you possiblity to create:
• Screenshot small - stores picture you can use for SFX or Loop event (?).
36
• Screenshot - will produce screenshot of actual output and store it in clipboard so you can
paste it in some graphical editor.
• Record - It will record show to AVI format in given resolution. You can either choose to
record whole show or record the part between begin and end time marks. Then you are asked
to select compression format for the video and it is created in the directory with your show.
Useful if you want to send someone a preview of your show but don't have a camera.
Options menu controls settings for the preview window:
• Settings... - opens window with various settings for the preview window as shown on Figure
24. You can use the File menu to create new settings, save them or open preset you previously
stored.
Figure 24: Preview window settings
Here you can toggle the simulation of either beams or graphics. Alpha value determines the
opacity of element going from zero as completely opaque to one as completely solid. Width
determines the thickness of drawn elements. Blend source (?). Blend destination (?). Fog (?).
Smooth will soften the edges of drawn graphics. SizeXY fields determine the ratio on screen.
X value of 0.5 would mean width of 50% of whole window. Y value set to -1 turns the picture
upside down. Enable best quality checkbox (?).
• Screen Persistence - offers following options:
• Off (Lowest CPU) - this will turn off this feature
• Short (Bright Room) - (?)
• Medium (Darkened Room) - This is the default setting (?).
• Long (Abstract Designer)
37
Reset positions (?).
Use OpenGL for preview
This toggles OpenGL functions for preview window. It will
produce nicer and softer effects but can take some of the system resources. However
nowadays most computers and laptops have OpenGL capable graphic cards so it shouldn't be
a big concern. This feature is enabled by default.
Enable/disable laser output
Toggles laser output. Same as menu Run -> Laser output.
This functions only on the active timeline in the editor.
E-Stop (Esc)
Stops the laser output.
Edit timeline DAC assignments
Displays the DAC assignment window as shown on
Figure 2. Here you can assign available DAC to the timeline.
DAC Settings
Opens the DAC setting window that allows you to change size, scale, color
mapping, color linearity and safety zones of DAC. More on this will be covered in chapter 4.2.
Open SFX Browser
Opens SFX browser that lets you quickly add effects to timeline (?).
Same as menu View -> Open SFX Browser.
View frame picker
Opens frame catalog browser that lets you quickly add frames to
timeline (?). Same as menu View -> Open Frame Catalog Browser.
Preview scanner # as beamshow
Toggles beamshow preview of scanner with number
indicated next to icon. All scanners are enabled by default.
Preview scanner # as graphics
Toggles graphics preview of scanner with number
indicated next to icon. All scanners are enabled by default.
4.7 Bottom row of icons
These control playback of the show and timeline settings.
38
Final playback of show
> Play show.
Plays whole show from beginning to end. Same as menu Run -
Playback show for editing and programming
Same es menu Run -> Edit show.
Loop running show from BeginTime to EndTime
menu Run -> Loop PlayBack.
Loops show from beginning to end.
Toggles looping of playback. Same as
Restart playback from BeginTime
Restarts playback of show from BeginTime mark.
Same as menu Run -> Restart from BeginTime.
Pause running show and stay at current TimeCursor position
Pauses/resumes the
playback. This button is not available if the show is stopped. Same as menu Run -> Pause.
Stop running show and stop output immediately
Stops the playback of either playing
or editing the show. This button is not available if the show is already stopped. Same as menu
Run -> Stop.
Fastbackward TimeCursor
Rewinds the position of TimeCursor ten seconds backwards.
This button is not available if the show is stopped. Same as menu Run -> Fastbackward
TimeCursor.
Backward TimeCursor
Rewinds the position of TimeCursor five seconds backwards. This
button is not available if the show is stopped. Same as menu Run -> Backward TimeCursor.
Forward TimeCursor
Fast forwards the position of TimeCursor by five seconds. This
button is not available if the show is stopped. Same as menu Run -> Forward TimeCursor.
Fastforward TimeCursor
Fast forwards the position of TimeCursor by ten seconds. This
button is not available if the show is stopped. Same as menu Run -> Fastforward TimeCursor.
39
Set begin time of lasershow to timecursor
Sets the BeginTime marker to the current
position of TimeCursor. Same as menu Run -> Begin. This is used to set the show looping
section in Edit/Play mode.
Set end time of lasershow to timecursor
Sets the EndTime marker to the current
position of TimeCursor. Same as menu Run -> End. This is used to set the show looping section
in Edit/Play mode.
Set begin time to 0 and end time to end
Resets BeginTime and EndTime markers to
the beginning and end of show. Same as menu Run -> BeginEnd.
Set TimeMark at current position of running LaserShow
timescale. Same as menu Run -> Add new TimeMark.
Clear all TimeMarks
Clear all TimeMarks.
Adds a time mark on the
Clears all time marks on the timescale. Same as menu Run ->
Delete TimeMark next to TimeCursor
nearest to the time cursor.
Deletes a time mark on the timescale that is
Enable/disable TimeLine TimeCursor AutoScroll
This disables scrolling of the timeline
view to keep up with the time cursor during show playback. Doing this reduced CPU load and
prevents screen redraws. Same as menu Run -> AutoScroll to current TimeCursor.
GoTo TimeCursor
TimeCursor.
Jump to the position of TimeCursor. Same as menu Run -> GoTo
ZoomMax TimeLine
Zooms in the timeline to set maximum level. Same as menu View > Maximum TimeLine length.
ZoomIn TimeLine
Zooms in the timeline. This button is not available if the timeline is
already zoomed in to maximum possible extend. Same as menu View -> ZoomIn TimeLine
length.
40
Zoom to selected Begin/End time
Resets zoom of the timeline to extend where you
can see both begin and end time marks.
ZoomOut TimeLine
Zooms out the timeline. This option is not available if the timeline is
zoomed out to minimum possible view. Same as menu View -> ZoomOut TimeLine length.
ZoomMin TimeLine
Zooms out the timeline so that it fits whole to the width of your
screen. Same as menu View -> Minimum TimeLine length.
5 DAC and projector setup
This chapter describes DAC and projector setup, the optimizations and configuration of
remote control.
5.1 DAC selection and assignment
Start by assigning the DAC or multiple DACs to timelines. Click the button on left column of
icons to display window for Laser Controller/DAC Assignment and drag'n'drop the DAC you
want to use to the timeline you want to use as shown on Figure 25.
41
Figure 25: Assign DAC to timeline
5.2 DAC compatibility
The author of LSX makes an attempt to support all quality DACs that are available. Some
DAC manufacturers disallow 3rd parties from supporting their DACs, and in these cases, if you
want to use LSX with your unsupported DAC, please email your DAC vendor and request that
they allow for support in LSX.
Not all DACs are made the same. When a DAC is used in LSX, there are two components
that are supplied by the DAC vendor that must work together with LSX to produce clean,
smooth output: the DAC hardware and the .dll interface, commonly referred to as the driver .dll.
LSX relies on the optimal functioning of both of these components to produce clean output.
Internal tests are carried out to ensure that each DAC type operates to the best of its abilities,
however there will be differences in performance between various DACs and these differences
should not be mistaken for differences in LSX performance.
5.2.1 DACs supported by LSX
• Etherdream
• Moncha
• Moncha .net
• Fiesta
• RIYA Multibus (and PCI)
• Mamba (via .mld interface)
• Easylase I and II
42
• NetLase
• LDS (USB DAC)
• QM2000 (.net should work, too)
• Lumax
5.3 Scanner optimization
After using the DAC assignemnt tool and pressing OK, the DACs are now assigned to your
desired timelines, so proceed to optimization to configure LSX for use with your scanners. Click
the button
in upper row of icons to edit scanner optimizations.
6 Pre-programmed shows
Realtime allows you to create pre-programmed shows that play specified queue of events.
These can be synchronized to time or music and can be also combined with live control.
6.1 Adding and editing events
Add event to the timeline by double-click or right click and Add new event to TimeLine at this
position... (n). Note the n-letter in brackets is not interpretation of number but a hotkey for
menu. This will display window with most common events you can use as shows Figure 26.
43
Figure 26: Add event
You can select from some basic source events as animation, run text, lissajou, bitmap and
beam. To these sources you can add various 3D transformations like move, rotate, scale in XYZ
axis, color transformations and other events. You can select event by clicking on it or by typing
its name to the textbox on the bottom and confirming with OK. To display all available events
click More... button. This displays full list of currently available events as shows Figure 27. Here
you can select the event by clicking or typing its name to textbox as well.
44
Figure 26: Add event
6.1.1 Animation
(?)
6.1.2 RunText
RunText event is used to create scrolling text message. This is similar to the quick runtext
message available from Live -> RunText... menu but offers more controls over the appearance
as displayed on Figure 28.
45
Figure 28: RunText message preprogrammed
In the textbox you can put text you want to display. Note that all changes you make are
immediately visible in the preview and laser output. Color selects the color of text from
available palette that you can change with the ColorBuffer option.
ScanParameter chooses the scanning optimization preset for runtext, default here is Graphics.
Target world is selected to Screen 1 by default. Size changes the size of text but it's not the
same for all fonts. Some font may start to overlap letters at lower size than the others.
Next is the path to font, if you're going to use laser fonts supplied with the product. There
are two types of fonts, navigate to the fonts directory and you will see directories with .OUTL
and .STIC suffix. OUTL is for outlined fonts, STIC for stick fonts. Stick fonts are generally better
for laser as they consume less points so they don't create such flicker. Outline fonts however
look nicer. Next you can choose following flags:
46
• SoftBlank - (?)
• SoftColor - (?)
• PreGeoNet - (?)
• PostGeoNet - (?)
Letters defines how many letters can be displayed on screen at one moment. Less letters
mean less points so again less flicker and generally smoother projection. Move defines
behaviour of the text:
• POST - this is the default option, it will move the text from left to right
• PRE - (?)
• PIVOT - here all the letters stay at one place overwriting each other, for example if you
choose only one letter to be displayed at a time, you can create nice countdown effect
• SHIFT - (?)
Surface defines number of layer if you use multiple runtext messages. Higher number overlays
lower. ShiftY option allows you to shift the text up or down on the screen. Positive values
shift the text downwards, negative upwards. SFX Animation selects from variety of predefined
animations that are applied to the text:
• VOID - default, no effect
• MOVE SINE Y - moves text up and down along Y-axis
• MOVE SINE Z - moves text front and back along Z-axis
• ROTATE SINE X - rotates text along X-axis
• ROTATE SINE Y - rotates text along Y-axis
• ROTATE SINE Z - rotates text along Z-axis
• SCALE SINUS XY - scales text up and down by both X and Y axes
• INTENSITY SINUS - increases and decreases intensity of the text
• HIDDEN SURFACE - (?)
• SURFACE - causes text to act like a surface. With combination of the Surface number you can
create multiple text lines that are overlapping each other as shows Figure 29.
47
Figure 29: RunText in multiple layers
DestinationPicture - frame catalog(?).
TTF set options for TrueType Fonts. First checkbox enables the use of TTF, next one enables
Chinese multibyte characters (?). Curve Fill defines the amount of extra points to fill into
curved parts of fonts and Line fill does the same for line parts. The higher the number is, the
more will the fonts flicker as scanners will need to extrapolate more points. Edit TTF Font...
button allows you to select font from the list of truetype fonts installed in your system.
6.1.3 Lissajou
Abstract generator - to be done. (?)
6.1.4 Bitmap
This allows you to project raster images in .BMP format. The output will depend on speed of
scanners. You can select to project either Bitmap, Flower or effect generated by the Formula
Editor. See Figure 30 for details. Width and height defines the resolution of bitmap, how many
points should be projected. You won't see them as points but rather lines. The lower the
height, the faster the projection and less flicker.
48
Figure 30: Bitmap raster frame
Show Bitmap (?). Select the bitmap you want to show with the Load Bitmap... button.
ScanParameter defines the scanner preset for projection, Target defines viewport preset.
With Formula Editor you can create live projection images (?).
6.1.5 Beam
Produces a static beam. You can select Target World for this beam and its color, see Figure 31.
Figure 31: Static beam event
6.1.6 Transform Events
This subsection describes the most common used transformations for manipulating the
object. These event use almost identic options as shown on Figure 32.
49
Figure 32: Transform event properties
The Edit menu offers you the possibility to either copy or paste animator to/from clipboard.
You can set lower and upper limits for an event. This usually means the percentage either of
size, position, rotation and other possible transformations. You can set the limits by specifying
number or moving the sliders. The button with “=” sign will lock the sliders together so both
upper and lower limit will change with the same value.
Random generator init is used with random expressions and defines a number that initiates
the random generator. With the same number the random generated graph will be the same.
The cube should be probably used to generate random number after clicking but this feature
is not available at the time.
Discrete steps define the amount of subdivisions of the interval. If this value is set to zero, the
produced output will be continuously smooth. With value set to 20, it will produce a output
that jumps subdivided into twenty values as shown on Figure 33. Discrete steps combined with
random expression can be used for randomly placed beam effects changing with machine-like
accuracy.
50
Figure 33: Discrete steps settings, upper set to 0, lower set to 20.
Repeats define how many repeats of this interval will be displayed. If you set it for example to
two it will repeat the transformation cycle twice. Phase defines at which phase of the interval it
should start. Exponent is used with exponential animation and sets the curve exponent. With
exponents over 1, the curve will be concave and with exponents under 1 it will be convex.
Type of animation specifies the interval for animation, there are more possibilities:
• Linear interpolation - this will make a linear transformation from the set lower limit to upper
limit, it's the default type of animation selected
• Exponential
• Random - random values for transformation
• Sine-Waveform
• Cosine-Waveform
• Expression - select this to be able to use the predefined or your own expressions for
transformations
• Square-Waveform
• Saw-Waveform
• Triangle-Waveform
• Spline interpolation
• Hermite
Below you will find a dropdown menu with some predefined expressions that can be used
to modify the output. In the bigger textbox below you can type in your own expression. With
either of those you need to select Expression as type of animation. Expr. Help button gives
immediate explanation for the expressions so it's highly recommended to read through it.
Perspective
Changes the perspective of an object. Value of 0 is for the highest perspective distortion or, in
other way, the lowest perspective correction. For 3D rotating objects it's good to use a little bit
of distortion to make it look more realistic to human eye. Value of 1 is a good start.
RotateX
Rotates the object around X axis. Value of 1 means full rotation of the object around the X axis.
RotateY
Rotates the object around Y axis. Value of 1 means full rotation of the object around the Y axis.
51
RotateZ
Rotates the object around Z axis. Value of 1 means full rotation of the object around the Z axis.
WorldRotateX
Rotates the target world around X axis (?)
WorldRotateY
Rotates the target world around Y axis (?)
WorldRotateZ
Rotates the target world around Z axis (?)
RotateXYZ
Allows rotation of the object along three axis at the same time. This transformation uses
different control mechanism as shown on Figure 34. Here you set the starting and ending
position and the Z-rotation. With default settings upper left corner means -1,-1,-1 rotation
and lower right corner 1,1,1, making the zero starting point 0,0,0 in the middle. By clicking left
mouse button you select starting position, right mouse button will select ending position and
mousewheel will set rotation of the object at that position. So if you set the starting position
at 0,0 and ending 1,0 on the grid it will rotate full turn around X axis. In the example below,
the object will rotate from -0.5, -0.5 to 0.5, 0.5 in X and Y axis making it a full turn. It will also
start at 0.25 rotation of Z axis and end with 0.75 making it a half turn around 180 degrees. This
interface is more suitable for playing around the grid to see what comes out. If you need more
accurate positioning use the RotateX, Y, Z transformations.
52
Figure 34: RotateXYZ control interface
ShiftX
Shifts the event along the X-axis. By default it will shift from -0.5 to 0.5 making the frame shift
from left to right starting at half of the frame visible. If you set these values from -1 to 1 it will
shift with the frame not visible at the beginning and end.
ShiftY
Shifts the event along the Y-axis. By default it will shift from -0.5 to 0.5 making the frame shift
from top to bottom starting at half of the frame visible. If you set these values from -1 to 1 it
will shift with the frame not visible at the beginning and end.
SizeX
Sets the size along X axis. In other words the width. By default this is set from 1 to 1. If you
change the upper value to 0 it will shrink the object from it's full width to none.
SizeY
Sets the size along Y axis. In other words the height. By default this is set from 1 to 1. If you
change the upper value to 0 it will shrink the object from it's full height to none.
53
SizeXY
Sets the size along both X and Y axis. In other word the scale. By default this is set from 1 to 1.
If you change the upper value to 0 it will shrink the object from it's full scale to none. This can
make the object look like flying away from the viewer.
TwistZ
Rotates the object along Z axis (?).
GeoNet
GeoNet manipulation (?).
PreMoveX
Moves a point by a certain distance in the X direction. Using expressions, you can move the
entire frame, or only a few specific points. You can use the functions X, Y, Z and Idx for this.
PreMoveY
Same as PreMoveX but for the Y axis.
PreMoveZ
Same as PreMoveX and Y but for the Z axis.
PostMoveX
(?).
PostMoveY
(?).
PostMoveZ
(?).
PreMoveXYZ
(?).
PostMoveXYZ
(?).
FadeIn
Fade in effect. Can be used as fade out as well if you exchange the upper and lower limit.
FadeOut
Fade out effect. Same as fade in but reversed.
Intensity
Allows you to change intensity. If you use Sine-Waveform type of animation with Repeats, you
can create nice effect of pulsating object. Basically all three (FadeIn, FadeOut and Intensity)
are the same effect but with different preset lower and upper limits.
54
Color
Re-colors the event with color index offset. You must use palette colors for the event for this
transformation to work. This transformation is similar to the Palette Color Offset in Animation
event setup but takes precedence if used.
ColorRotation
Morphs the colors from - to specified color index as shows Figure 35. You must use palette
colors for this transformation to work. Currently if you specify from color index different than
0, 1 or 2 it will just stay at that index color and not morph (bug?). Clicking the Color Animator...
button allows you to change transformations for this event.
Figure 35: Color rotation settings
ColorShift
Doesn't seem to have any effect (?).
RGB
Creates RGB color modulation set by the options shown in Figure 36. You can control
which channels should be active by ticking the checkbox. Modulation can be controlled by
predefined waveform interpolations, indicated by the < sign or if you choose Expression
pointing with > sign to the Expression button, you can write your own. Color modulation can
depend on more variables. You can change the X, Y, Z coordinates, that way it will move along
selected axis. Or you can choose Point number in which case the colors will be modified at
certain points of traced picture. If you then shift the separate channels it can create nice
rainbow pulsating effects. If you choose Point distance dependency, it will shift depending on
the center of the picture. Selecting Constant will display the color at all times.
Frequency button affects how many modulations will occur at one loop of the event.
Amplitude controls the intensity of color in one loop. By default lower and upper limits are
both set to 1. Try with values over one for interesting looking effects. Phase controls the
shifting of modulation according to dependency. Choose from 0 to 1 for full modulation loop.
Or you can set some other channel going from 1 to 0 so that the color will traverse in opposite
direction. Offset controls the shift of maximum value from current phase (?).
55
Figure 36: RGB transformation settings
PostRGB
(?).
7 Live-controlled show
8 PicEdit
9 ShowPlayer
10 Tutorials
Color change of a line
This effect will change the color of vertical line by linear modulation of RGB channels. Let’s
say you want to make line that slowly changes color from blue to cyan. That includes Blue and
Green color channels. Create a line and assign it the RGB color transform event.
56
Tick that you only want to have green and blue channel active. As this is linear change, select
Linear waveform and color depends on Y coordinate as vertical line will change all of its points
that are placed on the same Y-coordinate.
Set Frequency for both channels from 1 to 1. Set Amplitude of blue channel from 1 to 1 as you
want to have this one still on. Set it for green channel from 0 to 1 as you want to slowly add
green to make cyan. Set Phase for green channel from 0 to 1 and 1 to 0.9 for blue channel. It
won’t work if you set it from 1 to 1, so leave it just with this small difference (bug?). Leave Offset
on both channels from 0 to 0.
11 Notes
PointRange in kilopoints per second - what happens if you set rate higher than is your galvo
speed? Also will all effects obey this speed or try go above? What will happen is your galvos
will begin to distort graphics as you increase the DAC scan rate (kpps) above the galvo
capability. All frame source events will use the set speed in their scan parameter
(optimization) setting, unless a scan speed event is used, in which case the scan speed
will be derived from that event.
Color Mapping representation - C0 for reds, C1 green, C2 - blue (445?), C3 - bluray(?), C4 yellow, C5 - cyan (473?) - how will it be recognized by DAC? Internally, LSX uses 6-primarycolor palettes which means that it has independent control over 6 color channels so
long as the DAC supports it, and you are using palette mode for frame display. Not all
projectors have 6 colors, so the color mapping dialog allows you to map the 6 colors to 3
primary output colors R,G, and B which most projectors have. This will be expanded in
the future to support arbitrary mapping from all 6 input colors to all 6 DAC output color
channels.
Lower/Upper limit - switch the sliders would make more sense so Lower is in the lower slider,
Upper in the upper slider
In the lower status bar - Right mouse: Move event (doesn't work like that?) That text is from
the old style of manipulating events on the timeline only with right click edits. You can
get to this mode in the view settings. Generally, this mode of editing is not intuitive
and so the current default editing mode was implemented. I’ll update the text to fit the
new default mode.
Event waveforms preview not displayed when using Play show, have to click inside the timeline
to display them. The event timeline waveforms are not drawn during high quality show
playback in order to conserve system resources. High quality playback mode is for
performance to an audience that will not be seeing the GUI of LSX at the time. At the
end of playback, the waveforms are drawn at the next screen refresh, which can be the
next time you click inside the timeline.
After switching to Quick PicEdit and resizing, then switching back to Realtime and maximizing
the status window items are shifted.
Invert selection - Shift+Ctrl+I shortcut could be used.
57
Search for event - shortcut could be used
Menu Run -> GoTo previous Event (Tab+Shift) should have Shift+Tab shortcut as it might be
confusing if user first hits Tab, then Shift and is skipped to next event, not previous
Menu Run -> Execute not only Selected Events should be only Execute only Selected Events
and when toggled function like that, Execute not is confusing
Enter a number OK dialog is annoying.
Screenshot feature in preview will display the confirming window under preview window thus
making all other controls unavailable. This is effect of the Option -> On Top that is enabled by
default. It might be confusing for new users. This should be fixed with the newer releases
that have the dockable preview window.
Preview Scanner -> Grafic simulation of scanner number should be called Graphic?
Stop (Esc) button in toolbar - is it necessary? Escape key is already a good panic button. Maybe
it would be good idea to implement some button to toggle laser output (?).
How to create static RunText? Use the TTF event
Why is there copy/paste function in the transform event properties? Wouldn't it be faster to
just copy/paste the whole transform event in the timeline? When the event is embedded in
a ScriptFX Loop, these copy/paste functions come in handy.
What's the difference between RotateZ and TwistZ?
ColorRotation effect is buggy if From color index isn't 0, 1 or 2 (Fixed in recent update).
After AVI is created via Preview window, preview window doesn’t show any output nor
buttons, restart of RealTime is necessary.
58