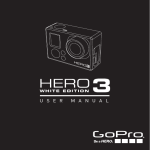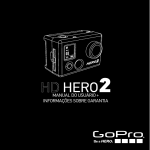
1
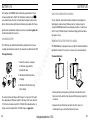
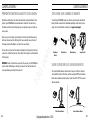
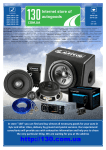
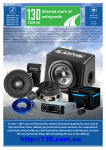
PHONES (044) 360-7-130 (050) 336-0-130 (063) 788-0-130 (067) 233-0-130 (068) 282-0-130 Internet store of autogoods ICQ 294-0-130 597-0-130 SKYPE km-130 CAR RECEIVERS — Receivers • Media receivers and stations • Native receivers • CD/DVD changers • FM-modulators/USB adapters • Flash memory • Facia plates and adapters • Antennas • Accessories | CAR AUDIO — Car audio speakers • Amplifiers • Subwoofers • Processors • Crossovers • Headphones • Accessories | TRIP COMPUTERS — Universal computers • Model computers • Accessories | GPS NAVIGATORS — Portable GPS • Built-in GPS • GPS modules • GPS trackers • Antennas for GPS navigators • Accessories | VIDEO — DVR • TV sets and monitors • Car TV tuners • Cameras • Videomodules • Transcoders • Car TV antennas • Accessories | SECURITY SYSTEMS — Car alarms • Bike alarms • Mechanical blockers • Immobilizers • Sensors • Accessories | OPTIC AND LIGHT — Xenon • Bixenon • Lamps • LED • Stroboscopes • Optic and Headlights • Washers • Light, rain sensors • Accessories | PARKTRONICS AND MIRRORS — Rear parktronics • Front parktronics • Combined parktronics • Rear-view mirrors • Accessories | HEATING AND COOLING — Seat heaters • Mirrors heaters • Screen-wipers heaters • Engine heaters • Auto-refrigerators • Air conditioning units • Accessories | TUNING — Vibro-isolation • Noise-isolation • Tint films • Accessories | ACCESSORIES — Radar-detectors • Handsfree, Bluetooth • Windowlifters • Compressors • Beeps, loudspeakers • Measuring instruments • Cleaners • Carsits • Miscellaneous | MOUNTING — Installation kits • Upholstery • Grilles • Tubes • Cable and wire • Tools • Miscellaneous | POWER — Batteries • Converters • Start-charging equipment • Capacitors • Accessories | MARINE AUDIO AND ELECTRONICS — Marine receivers • Marine audio speakers • Marine subwoofers • Marine amplifiers • Accessories | CAR CARE PRODUCTS — Additives • Washer fluid • Care accessories • Car polish • Flavors • Adhesives and sealants | LIQUID AND OIL — Motor oil • Transmission oil • Brake fluid • Antifreeze • Technical lubricant In store "130" you can find and buy almost all necessary goods for your auto in Kyiv and other cities, delivery by ground and postal services. Our experienced consultants will provide you with exhaustive information and help you to chose the very particular thing. We are waiting for you at the address http://130.com.ua a m .u co 0. 13 User Manual + Warranty Info Autogood products «130» table of contents to see what other GoPro owners are capturing with their GoPros. Share some of your own footage and 13 0. contribute to the GoPro movement! 2 4 Mounts 5 HD HERO2 Features 6 Firmware Update 8 co m .u a Join the GoPro party at facebook.com/goprocamera Accessories Basics 8 Camera Modes 11 Advanced Menu Settings 17 Additional Menu Settings 24 Storage/SD Cards 30 System Requirements 31 Transferring Files 32 Battery Life 34 Important Warning Messages 36 Camera Assembly 37 FCC Statement 43 Warranty 44 Customer Support 45 Autogood products «130» 3 WEAR it. mount it. love it. Premium ACcessories More at gopro.com Mounts Core ACcessories Floaty Backdoor Anti-Fog Inserts Lens Replacement Kit LCD BacPac™ Handlebar Seatpost Mount Surf HERO Mounting Kit HD Wrist Housing Head Strap Suction Cup Mount Vented Helmet Strap Roll Bar Mount Tripod Mount Military Helmet Mount Grab Bag of Mounts Curved Adhesive Mounts Flat Adhesive Mounts 13 Replacement HD Housing Chest Mount Harness co m .u a 3D HERO® System Helmet Front Mount 0. Rechargeable Li-Ion Battery HD Skeleton Housing 16GB SD Memory Card 32GB SD Memory Card Battery BacPac™ 4 Autogood products «130» 5 HD HERO2 Features 13 0. co m .u a HD HERO2 Features 1. LED Recording Lights 2. SHUTTER/SELECT Button 3. LCD Status Screen 4. HDMI Port (cable not included) 7. 2.5mm Composite Port (cable not included) 5. SD Card Slot 8. Microphone 12. Buzzer (located on camera bottom) 6. POWER/MODE Button 9. HERO Port 13. 3.5mm External Mic Input 11. Battery Door 10. USB Port (file transfer/charging) 6 Autogood products «130» 7 Firmware Update USING YOUR HD HERO2: BASICS DEFAULT SETTINGs SNAPSHOT GoPro releases new camera features through firmware updates. Visit gopro.com/firmware to download the latest updates. Out of the box, your HD HERO2 camera is configured with the following featured default settings: Getting started Before using the HD HERO2 for first time: 1. Insert a SD memory card into the SD card slot. Your HD HERO2 is compatible with SD + SDHC memory cards (Class 4 or higher rated cards are recommended). 2. Install the battery into your HD HERO2 camera. 0. ‣ See STORAGE/SD CARDS for more information. co m .u a USING YOUR HD HERO2: Basics Video Video Resolution: 960p-30fps Field of View: 170º Wide Still Photo Resolution: 11 Megapixels Time Lapse Interval: 1 second Power Up Mode: Video ‣ See SETTINGS MENU for more information on the camera’s default settings and instructions on how to change them. 13 3. Charge the battery. The lithium-ion battery included with your HD HERO2 ships only partially charged. For a full charge, use the USB cable to plug the camera into a power source such as a computer or USB charging device. No damage will occur to your battery if you are not able to charge it before using your camera. Camera Mode: ‣ See BATTERY LIFE for more information. 8 Autogood products «130» 9 USING YOUR HD HERO2: Basics USING YOUR HD HERO2: camera modes Powering ON and OFF overview PRO TIP: 13 To power OFF the HD HERO2: Press and hold for two seconds. The LED Recording Light times and the Buzzer will emit seven quick beeps. 0. To power ON the HD HERO2: Press and release . The LED Recording Light on the front of the camera will flash three times and the Buzzer will emit three short beeps. co m .u a Once the HD HERO2 is powered on, each press of will cycle through the camera’s recording modes and settings menu in the following order: video Record video photo Take single photos burst Take 10 photos in 1 second time lapse Take a photo every 0.5, 1, 2, 5, 10, 30, and 60 seconds self timer Take a single photo after a 10-second countdown Settings Change the camera’s configuration will flash seven You can change the HD HERO2 default settings to start in One Button Mode, which sets the camera to immediately begin recording once it is powered on. Each camera mode can be changed in the Settings menu. ‣ See ENTERING THE SETTINGS MENU for more information. ‣ See ONE BUTTON MODE for more information. 10 Autogood products «130» 11 USING YOUR HD HERO2: camera modes USING YOUR HD HERO2: camera modes Taking Single Photos Verify that the camera is in Photo Mode, indicated by on the LCD. If not, press repeatedly until the camera displays the Photo Mode icon. •T o begin recording video: Press and release . The camera will emit one beep and the LED Recording Light will flash while recording continues. • To stop recording: Press and release . The LED Recording Light will flash three times and the camera will emit three beeps to indicate recording has stopped. HD HERO2 will automatically stop recording when either the SD card is full or the battery runs out of power. Your video will be saved before the camera powers off. 13 0. While recording video, the LCD will display the currently selected video resolution, lens field of view (FOV), the elapsed time of the current recording, and the remaining recording time determined by the free space on your SD card. co m .u a Recording Video Verify that the camera is in Video Mode, indicated by on the LCD. If not, press repeatedly until the camera displays the Video Mode icon. When recording is stopped, the LCD shows the number of video files stored on the SD card in place of the elapsed recording time. PRO TIP: PRO TIP: To take a photo: Press and release . The camera will beep once and the LED Recording Light will flash once to indicate a photo has been taken. In Photo mode: The LCD screen will display your currently selected photo resolution (11MP, 8MP or 5MP), the number of photos stored on your SD card, and the number of photos that can be taken before the card is full. If you think your SD card will fill up before you are able to transfer your files, select the 5MP option under the Photo settings menu. 5MP files are smaller than 11MP files, allowing your SD card to store more photos. ‣ See PHOTO RESOLUTION MODES for more information. When the camera is set to One Button Mode, hold for two seconds to enter the Settings screen, where you can quickly turn OFF One Button Mode. ‣ See One Button Mode for more information. 12 Autogood products «130» 13 USING YOUR HD HERO2: camera modes USING YOUR HD HERO2: camera modes Photo Burst Mode Time Lapse Photo Mode In Photo Burst Mode, the camera will take 10 photos in 1 second. Time Lapse Photo Mode is used to take a series of photos at 0.5, 1, 2, 5, 10, 30 or 60 second intervals (when using 0.5 seconds, it is recommended to use a class 10 or higher SD card). • Verify the camera is in Burst Mode, indicated by on the LCD screen. If not, press repeatedly until the camera displays the Burst Mode icon. 14 • Press the button once to begin taking Time Lapse photos. The LED Recording Light will flash each time a photo is taken. Compared to single Photo Mode, Burst Mode gives you 10 times as many chances to capture that “can’t miss” moment. 13 PRO TIP: • Verify the camera is in Time Lapse Mode, indicated by on the LCD screen. If not, press repeatedly until the camera displays the Time Lapse Mode icon. 0. As in Photo Mode, the LCD screen will display your currently selected photo resolution (11MP, 8MP or 5MP), the number of photos stored on your SD card, and the number of photos that can be taken before the card is full. ‣ See TIME LAPSE PHOTO MODE in advanced settings for instructions on how to change the interval setting. co m .u a • Press and release once to take a photo burst of ten photos over one second. The LED Recording Light will flash and the camera will beep 10 times to indicate the photos have been taken. Autogood products «130» • Press once to stop taking Time Lapse photos. The LED Recording Light will flash three times and the camera will emit three beeps to indicate Time Lapse has stopped. As in Photo Mode, the LCD screen will display your currently selected photo resolution (11MP, 8MP or 5MP), the number of photos stored on your SD card, and the number of photos that can be taken before the card is full. 15 USING YOUR HD HERO2: camera modes ADVANCED Menu SETTINGS enterING the settings menu Self-Timer MODE In Self-Timer Mode, the HD HERO2 will take a single photo at the end of a 10-second countdown. Using the Settings Menu, many of the functions of the HD HERO2 can be customized based on your shooting needs. • Verify that the camera is in Self-Timer Mode, indicated by on the LCD. If not, press repeatedly until the camera displays the Self-Timer Mode icon. • To stop the countdown timer, press . To access your HD HERO2 settings: co m .u a • To take a photo, press and release . The camera will beep and the LED Recording Light will flash during the countdown, ending with a series of rapid beeps and flashes just before the photo is taken. 1. Make sure your camera is powered ON. 2. Cycle through camera modes using the SETTINGS icon. 3. To enter into the Settings Menu, press 4. Use 13 0. As in Photo Mode, the LCD screen will display your currently selected photo resolution (11MP, 8MP or 5MP), the number of photos stored on your SD card, and the number of photos that can be taken before the card is full. 16 until the LCD Status Screen shows . to toggle through each camera setting mode. 5. Every settings mode has a list of options. Press to enter into a specific mode. The option which is currently active will be highlighted. Press to toggle through the list. Press to select highlighted option and exit list. 6. Press to cycle to the next camera setting mode or press current option list again. Autogood products «130» to display 17 ADVANCED Menu SETTINGS ADVANCED Menu SETTINGS Video Resolution Modes : Cont’d Default Mode at Power Up Select which camera mode is active (or default) when you power on your camera. photo burst Your HD HERO2 camera shoots the following video resolutions: Resolution/ FPS Field of View Screen Resolution Best Use 1080-30 170º / 127º 1920x1080 Highest resolution. 960-48 170º wide angle 1280x960 This resolution provides the widest top-to-bottom and side-to-side viewing area. Great for slow motion. 960-30 170º wide angle 1280x960 This resolution provides the widest top-to-bottom and side-to-side viewing area. (Default) 720-60 170 wide angle 1280x720 For mounting on vehicles or gear when a max side-to-side wide angle is desired but vertical viewing area is not as important. Great for slow motion. 720-30 170º wide angle 1280x720 For mounting on vehicles or gear when a max side-to-side wide angle is desired but vertical viewing area is not as important. WVGA-120 170º wide angle 848x480 For smaller data files. This is standard definition resolution. Great for super slow motion. WVGA-60 170º wide angle 848x480 For smaller data files. This is standard definition resolution. Great for slow motion. 0. (Super slow motion) (Super slow motion) 13 (Slow motion) Best Use When you are using the camera in Video Mode, the currently selected video resolution appears on the LCD Status Screen beneath the Video mode icon. PRO TIP: 18 º (Slow motion) time Lapse Video Resolution Modes Field of View Screen Resolution co m .u a video (Default) Resolution/ FPS Autogood products «130» Consider using 960-48 when wearing camera on a helmet or a chest harness to see your handlebars when biking, or knees and skis when skiing. 19 ADVANCED Menu SETTINGS ADVANCED Menu SETTINGS Field of View Modes Time Lapse Modes When recording video in 1080p, you can set the camera to shoot in the default wide-angle (170º) or a medium-wide angle (127º) field of view. You can select a wide range of time intervals for your Time Lapse Mode photos. Choose between 0.5, 1 (Default), 2, 5, 10, 30 and 60 seconds. WIDE 170º (Default) MEDIUM 127º Photo Resolution Modes The HD HERO2 can take photos in either 11MP, 8MP or 5MP resolutions. Changing this setting effects photos taken in Photo, Burst, Self Timer and Time Lapse Modes. 5MP 0. 8MP (Default) When you are using the camera in one of the photo modes, the currently selected photo resolution appears on the LCD beneath the Photo Mode icon. Upside Down Video/Image Mode If you need to mount your camera upside down, you can set the camera to save the photo or video upside down so that it appears right side up when you review it on your computer or TV. This eliminates the need to “flip” the photo or video later on your computer. 13 11MP co m .u a ‣ See VIDEO RESOLUTION MODES for more information. (Default) Camera right side up Camera upside down Spot Meter Settings Turn on the Spot Meter when you are filming from a dark space into a brighter setting, like when filming outdside a windshield from inside a car. OFF (Default) ON Note: The Spot Meter icon is displayed in the upper-right corner of the LCD when Spot Metering is on. 20 Autogood products «130» 21 ADVANCED Menu SETTINGS ADVANCED Menu SETTINGS One Button Mode One Button Mode (Cont’d): One Button Mode forces the camera to automatically begin recording in its default power up mode once the camera is ON. When One Button Mode is ON, is disabled. To stop recording, you must turn your camera OFF. OFF co m .u a 2. Enter the settings menu by pressing 1. Access the Settings Menu more information.) 22 (‣ See ENTERING THE SETTINGS MENU for 3. Press to access the One Button Mode menu. 4. Press once to select ON and press 5. Press to cycle through settings menu. Select and press EXIT. 4. Press once to select OFF and press 5. Press to cycle through the settings menu. Select and press EXIT. to to confirm selection. 13 once to confirm selection. appears. Press 0. to cycle through the settings menus until the One Button Mode menu appears. for two seconds . 3. Use to cycle through the settings menu until enter One Button Mode menu. To turn One Button Mode ON: PRO TIP: 1. While the camera is ON and recording, press and hold until the settings icon appears. (Default) ON 2. Use To turn One Button Mode OFF: In One Button Mode, the camera is either “on and recording” or powered OFF. This simplifies camera operation when loaning the camera to a friend or when you know you only want to shoot in one mode. Autogood products «130» 23 ADditional Menu SETTINGS ADditional Menu SETTINGS More Menu Settings delete (Cont’d): To access additional settings, enter MORE settings are found in this subsection: menu. The following • LAST: To delete the last file saved, Press to select menu option. The LCD will display a confirmation menu. Within this menu you can toggle through the menu options using . delete cancel (Default) last all/Reformat To delete the last file saved: settings menu screen displayed, press to enter into • CANCEL: To cancel out of delete, Press settings menu. 24 to 13 2. Within the delete menu you can toggle through the list by using choose one of the following options: 0. 1. With the Delete the delete list. co m .u a The menu options are: Delete last file or delete all files and reformat SD card. and return to the main Autogood products «130» NO: Press YES: Press to cancel and return to the main settings menu. to select yes. The last file saved will be deleted. • ALL/Format SD Card: To delete all files on the SD Card, press to select menu. The LCD will display a confirmation menu. Within this menu you can toggle through the menu options using . The menu options are: No: Press to cancel and return to the main settings menu YES: Press to select yes. All files will be deleted. During the delete all process, the LED lights will continue to blink until formatting is complete. 25 ADditional Menu SETTINGS ADditional Menu SETTINGS ntsc / pal Camera Sound This setting controls both the video recording frame rate and playback of video from the camera when viewing on a TV. Select NTSC if viewing on a TV in North America. Choose PAL if viewing on a PAL TV (most televisions outside of North America) or if viewing on a PAL TV in any region. 100% (Default) OFF PAL On Screen Display (OSD) Select if you would like to display or hide the recording icons and information on your video screen (when displaying live video on a TV screen or using the LCD BacPac™). OFF will hide icons and ON will display icons. (Default) 0. OFF 13 ON LED Lights (Default) 70% co m .u a NTSC You can change volume level of the camera’s beep to be softer than the default or silent for stealth mode. Auto Power Off Program the camera to automatically turn OFF after a specific period of inactivity (when no videos or photos are being taken and no buttons have been pressed). If you set the camera to MANUAL, you will need to manually turn your camera OFF. MANUAL (Default) 60 sec 120sec 300 sec You can choose between having all 4 LED lights active, only 2 LED lights active (front and back) or turn OFF all the LED lights. 4 (Default) 2 OFF 26 Autogood products «130» 27 ADditional Menu SETTINGS ADditional Menu SETTINGS Exit Settings Menu Date / Time / Month From the EXIT screen, press Month / Day / Year 1. Press repeatedly until Date/Time/Month 2. Press to begin setting the date and time. Hour / Minute appears on the LCD. 5. Press to cycle through the list until the correct month is highlighted. to select the highlighted month. 13 4. Use 0. 3. The LCD will show the Date/Time/Month setting menu with the Month field highlighted. Press to access the list of months (1 to 12). to return to the camera’s default camera mode. co m .u a You can set the camera’s internal clock to ensure that your video and photo files are saved with the correct date/time information. You will need to adjust the date/time information if the battery is removed from the camera for an extended period of time. 6. The Date/Time/Month setting menu will appear on the LCD. Press once to highlight the Day field and press to access the list of days (1 to 31). 7. Again use to highlight the correct day and to select it. 8. Repeat this process for the Year, Hour and Minute. PRO TIP: 28 The Date/Time/Month fields are abbreviated. For example, the month is MM, day is DD, Year is YY, hour is HH, minute is MM. Autogood products «130» 29 STORAGE/SD CARDS System Requirements The HD HERO2 camera is compatible with 2GB, 4GB, 8GB, 16GB and 32GB capacity SD and SDHC memory cards. While all speed cards will work in the camera, GoPro recommends higher speed cards (labeled as Class 4 or higher) when shooting HD video. GoPro recommends using name brand SDHC cards for maximum reliability in high vibration activities. System Requirements for full High Definition 1080p and 720p 60fps playback: To remove a SD card: Windows Mac Microsoft Windows® Vista 7+ Mac OS® X 10.4.11 or later 3.2GHz Pentium 4 or faster 2.0GHz Intel Core Duo or faster co m .u a To insert a SD card: The HD HERO2 camera is compatible with Microsoft® Vista, 7 or later and Mac OS X 10.5 or later. DirectX 9.0c or later At least 2GB of system RAM Video card with at least 128MB of RAM Video card with at least 128MB of RAM At least 2GB of system RAM 1. Place your fingernail against the edge of the SD card and lightly press it further into the camera. 2. The SD card will click into place once it is fully inserted. 2. The card will spring out from the camera far enough for you to pull it out. 13 0. 1. Insert SD card into the SD card slot with the SD card label facing the front of the camera. 30 Autogood products «130» PRO TIP: If you are having problems achieving smooth playback on your computer, the HD HERO2 camera can also plug directly into a High Definition TV with an HDMI port using a mini-HDMI cable or via composite cable (not included). The HD HERO2 camera itself provides very smooth playback on an HDTV. 31 transferring files transferring files To transfer video and photo files to a computer to view Photos and Video on a TV or HDTV On a PC: 1. Connect the camera to a computer with the included USB cable. Using an HDMI cable (not included), plug your HD HERO2 camera into your TV. You can also use the composite port and a composite cable (not included). Once connected: . 4. Double click the “Removable Disk” icon. 5. Double click the “DCIM” folder icon. Within the playback menu, use to toggle through the menu list. Use select each item. The menu list options are: to Video: D isplays all video files on the SD card. During playback, volume adjustment can be made via the TV. Playback will begin automatically. 6. Double click the “100GOPRO” icon. Photo: Displays all photo files on the SD card. 7. Your photo and video files will be in the “100GOPRO” folder. On a Mac: 1. Plug the camera into your Mac with the included USB cable. 0. 8. Copy/Move files to the computers hard drive and then select video/photo for playback from desktop/hard drive. All (Default): Displays all photo and video files on the SD card. Exit: Exits the playback menu. PRO TIP: To Fast Forward, hold down 3. The Mac will recognize the camera as an external hard drive. Double click the icon for the external drive to access your video and photo files. To Reverse, press To Rewind, hold down To Exit playback at anytime, eject the To Navigate back to the menu list while in playback, 4. Copy/Move files to the computers hard drive and then select video/photo for playback from desktop/hard drive. HDMI/Composite cable from the camera hold down both . 13 To Forward, press 2. Turn on camera on by pressing IMPORTANT TIP FOR MAC USERS: When deleting files from your SD card you must empty the trash before removing the SD card or unplugging the camera. If you do not empty your trash the photo and video files will not be completely erased from your SD card. 32 With the camera powered ON, navigate to the Playback Setting using . Press to enter the Playback menu. co m .u a 2. Turn on the camera by pressing 3. On your PC, double click My Computer and locate the “Removable Disk” icon. If you do not see it, close the My Computer folder and then reopen it. The “Removable Disk” icon should appear. and together for 3 seconds NOTE: Make sure your camera is set to the correct NTSC (North America) or PAL (outside North America) video settings or your camera will not work properly with your TV. You must also have an SD card with recorded information loaded into your HD HERO2 camera. If there are no video or photo files stored on your SD card you will see a No Video, No Photo, or No Files message. ‣ See NTSC/PAL for more information. Autogood products «130» 33 Battery Life Battery Life Fully charged, the HD HERO2’s battery will provide approximately 2.5 hours of video recording time in 720p30. The LCD displays the battery meter in every camera mode so that you can monitor how much power remains in the battery. The battery meter will blink when the battery drops below 20% charge. Using the Camera While Charging You can charge the camera’s battery while recording video or taking photos. Simply plug the camera into any USB-based wall, car, or phone charger to charge the HD HERO2 camera while recording video or photos. It is best to use GoPro’s 1 amp (1000mAh) charger for maximum charging performance while the camera is in use. CHARGING BATTERY co m .u a Spare batteries and additional charging accessories are available at gopro.com and from authorized GoPro resellers. Removing the Battery From the Camera The LCD’s battery icon will blink when the battery drops below 20%. If you are recording when the battery reaches 0%, the camera will save the file and turn OFF. To charge the battery: The HD HERO2 battery is designed to have a very tight fit to maximize reliability in high vibration activities. In most cases it is not necessary to remove the battery. 13 2. LED remains ON while the battery is charging. 0. To remove the battery: 1. Connect the camera to a computer or USB power supply with the included USB cable. 3. LED will turn OFF when the battery is fully charged. The camera’s battery will charge to 80% charge in 1-2 hours and 100% in four hours (depending on USB power output). It will charge to 80% in one hour and 100% in two hours when using GoPro’s 1000mAh USB-compatible wall or car charger. Learn more about GoPro’s 1000mAh chargers at gopro.com. 34 1. Remove the battery door by placing your thumb on the indentation in the battery door (on the bottom of the camera) and firmly pressing it away from the camera. 2. Squeeze both sides of the battery and pull it out of the camera. It is intentionally not easy to do, but the battery will come out. Autogood products «130» 35 camera assembly IMPORTANT WARNING MESSAGES Assembling the Camera “NO SD” message on the LCD The HD HERO2 camera housing is waterproof to 197 feet / 60 meters and constructed of polycarbonate and stainless steel for ultimate durability. ‣ See STORAGE/SD CARDS for more information. To assemble the camera into the housing: File Repair Icon on the LCD If you see the File Repair icon, your video file was corrupted during recording for some reason. Press any button and the camera will repair the file. Temperature Warning Icon on the LCD 13 0. The Temperature Warning icon will appear on the LCD when the camera has become too hot and needs to cool down. Simply let it sit and cool before attempting to use it again. Your camera will not allow itself to overheat—so do not worry, as no damage has occurred. co m .u a “NO SD” indicates that there is no SD card present. The HD HERO2 requires an SD card to record video or take photos. 36 Autogood products «130» 1. Place the camera into the housing. 2. Close the housing door. 3. Hook latch under groove on the backdoor. 4. Push down on thumb latch until it locks into place. 37 camera assembly camera assembly Swapping housing doors Your HD HERO2 housing comes with two types of backdoors—waterproof and skeleton. To swap out a backdoor, click the door off its hinge. To attach the other backdoor, click it back on the hinge. Your HD HERO2 housing comes with two types of backdoors—waterproof and skeleton. PRO TIP: 38 Waterproof Backdoor 0. The waterproof backdoor makes the housing waterproof to 197 feet / 60 meters. Use this door when you need to protect the camera from water and other environmental hazards. 13 Skeleton Backdoor The Skeleton backdoor (non-waterproof) provides better sound quality by allowing more sound to reach the camera’s microphone. It also reduces wind noise at speeds up to 100mph when mounted on helmets, motorcycles, bike and other fast-moving vehicles. Use this backdoor only when water damage is not a risk. This backdoor is also recommended for use inside vehicles. co m .u a To swap out a backdoor: 1. Open the backdoor of the housing so that it is hanging downwards. 2. Pull downwards on the backdoor until it snaps free from the hinge. 3. Line up replacement backdoor into the hinge opening. 4. Push upwards on the backdoor until it clicks into place. Apply RAIN-X or a similar anti-beading solution to the housing lens to prevent water-spots from forming when using your camera in rain or water. When RAIN-X is not available, periodically licking your lens is a good backup solution. Autogood products «130» 39 camera assembly camera assembly Attaching your camera to Mounts To attach your HD HERO2 camera to a mount, you will need an attachment buckle, thumb screw and other hardware depending on the mount you are using. For more information on mounts, visit gopro.com/support. After every use in salt water, you will need to rinse the outside of the housing with non-salt water and dry. Not doing this can eventually cause corrosion of the hinge pin and salt buildup in seal, which can cause failure. To clean the seal, rinse it in fresh water and shake it dry (drying with a cloth can cause lint to compromise the seal). Re-install it into the grooves in the backdoor of the housing. 13 0. WARNING: Failure to follow these steps each time you use your HD HERO2 can result in leaks that damage or destroy your camera. Your warranty does not cover water damage resulting from user error. co m .u a Preventing Water Damage to Your Camera The rubber seal that lines the camera housing forms a waterproof barrier that protects your HD HERO2 in wet and underwater conditions. You must keep the rubber seal of the camera housing clean. A single hair or grain of sand can cause a leak. Attachment Buckle Thumb Screw Complete Unit Using Curved or Flat Adhesive Mounts The curved and flat adhesive mounts make it easy to attach the camera to curved and flat surfaces of helmets, vehicles and gear. With the attachment buckle the assembled camera housing can be clicked ON / OFF the secured adhesive mounts. Flat Adhesive Mount 40 Waterhousing Autogood products «130» Curved Adhesive Mount 41 camera assembly FCC STATEMENT PRO TIPS: Attaching Adhesive Mounts Only attach a mount in room temperature conditions. The mount’s adhesive will not bond properly if applied in cold or damp environments, though it is entirely safe to use in cold conditions. For best results, attach your mount 24 hours before use in cold environments to ensure the strongest hold. The user is encouraged to try to correct the interference by one or more of the following measures: 0. Surfaces. The adhesive mounts can only be mounted to a smooth surface. Porous or textured surfaces will not provide for a proper bond. When applying the mount, firmly press mount into place ensuring full contact over entire surface area. Allow at least 24 hours for full bond strength. co m .u a Clean the surface first. Be sure to carefully clean the surface where you will be attaching your adhesive mount. Wax, oil, dirt and other debris will reduce adhesion, which can result in a weak bond and the risk of losing your camera if the bond fails. Modifications not approved by the party responsible for compliance could void user’s authority to operate the equipment. This equipment has been tested and found to comply with the limits for Class B digital device, pursuant to part 15 of the FCC Rules. These limits are designed to provide reasonable protection against harmful interference in a residential installation. This equipment generates and can radiate radio frequency energy and, if not installed and used in accordance with the instructions, may cause harmful interference to radio or television reception, which can be determined by turning the equipment on and off. locking plug • Increase the separation between the equipment and the receiver. • Connect the equipment into an outlet on a circuit different from that to which the receiver is connected. • Consult the dealer or an experienced radio/TV technician for help. 13 Drying time. For best results, attach your mount at a minimum of 24 hrs before use. • Reorient or relocate the receiving antenna. This locking plug is designed for high impact sports like surfing or skiing where significant impact can occur. The locking plug locks the attachment buckle’s fingers in place, helping to prevent accidental housing release from mounts. 42 Autogood products «130» 43 Warranty Customer Support Support Team, visit: gopro.com/support 13 0. Visit gopro.com for more information. GoPro is dedicated to providing you with the best possible service. To contact GoPro’s Customer co m .u a This product is guaranteed against manufacturing defects for one (1) year from the original date of purchase. GoPro’s sole obligation in the event of such defects during this period is to repair or replace the defective part or product with a comparable part or product at GoPro’s sole discretion. Except for such replacement, the sale, or other handling of this product is without warranty, condition or other liability even though the defect or loss is caused by negligence or other fault. Damage resulting from use, accident, or normal wear and tear is not covered by this or any warranty. GoPro assumes no liability for any accident, injury, death, loss, or other claim related to or resulting from the use of this product. In no event shall GoPro be liable for incidental or consequential damages relating to or resulting from the use of this product or any of its parts. Because of possible user resealing error, this product is not warranted against water housing leakage or any resulting damage. 44 Autogood products «130» 45