1
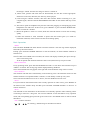
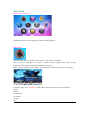
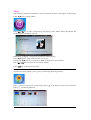
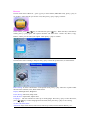
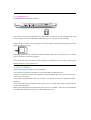
<,s'ϰϯD
USER MANUAL
Quick Reference
Language setting
Please choose your preferred language upon first using the portable device.
Thank you for purchasing our portable video game and media player. Before operating the unit,
please read this manual thoroughly. This user manual is compiled by the manufacturing company
and not Kogan, so we apologise for any print error or translation error, however Kogan is not
liable for any errors in the manual which may occur.
When the manual content is changed due to software update, no notice shall be given so please
check this manual regularly if you find the operation of your unit has altered.
Some pictures in this manual were designed in the development phase and may be different from
the final retail product, but the general customer experience will not be changed.
Notes
1, Keep this machine away from extreme climates. (eg cold, hot, dusty or moist environments.)
2, Do not leave it exposed to direct sunlight. (eg in a parked car out in the open, or on a beach.)
3, Keep this machine away from hard objects, otherwise the surface may be worn or other
hardware may be damaged.
4, Shut down unit before inserting or ejecting the SD card, to avoid unpredictable damage due to
heavy electric current which occurs during insertion or ejection.
5, Keep it out of reach of children when their use is not being supervised.
6, Charge the battery in the following cases:
A. the battery level is zero and the indicator flickers.
B. the system shuts down automatically and shuts down again soon after reboot.
7, Do not use unit in an excessively dry environment to avoid static electricity.
8, Do not disconnect the product when it is being formatted or uploading or downloading files to
avoid program error.
9, When it is used as a mobile disk, users should save and export files in correct file management
and operation procedure, and the important data must be backed up. Any faulty operation
may result in file loss and we shall not be responsible for that.
10, Do not disassemble this machine. Keep the charger as this machine can only be charged by
the charger. NOTE: unit does not charge it when it is turned on.
11, When video, pictures and music files are downloaded, save the files in their appropriate
directories on the unit; otherwise, the files may not be played.
12, After using the "Delete" function, shut down this machine before connecting it to your
computer again, otherwise the DCIM/100MEDIA file folder for the mobile disk may not be
found.
13, The built-in speak or headphone may become mute after plugging in and unplugging of the
headphones time after time. If this occurs, press "RESET" or press and hold "POWER ON/
OFF" to restart the machine.
14, When the product is used as a camera, hold unit with both hands to ensure the recording
quality.
15, When this machine is used, remember to protect the dust control glass (it is made of
nanometer materials) of the camera to ensure the recording quality.
Basic Operations
*Start
Press and hold "POWER ON/ OFF" button to start this machine. The start logo will be displayed,
followed by the main interface.
Prompt: press and hold ”POWER ON/OFF" to start the machine, no matter whether "HOLD" is
locked or not.
Note:①if SD card is added to this machine, the screen will display minimal jitter upon start-up
as the card is being read.
② do not operate this machine before the card is read ,otherwise keys may be invalid.
*Manual shutdown
In any operating mode, press and hold "POWER ON/ OFF" to close down this machine except if
"HOLD " is locked . The closing logo will be displayed during shutdown.
Note: Vertical black belts may appear at the right side of the shutdown image. This is normal.
*Auto shutdown
The machine will shut down automatically in the following cases: all functional modes are idle
and the machine is not operated within 3 minutes; or if the battery is used up in any state.
Note: if the auto shutdown time is set to "Never", the auto shutdown will not occur.
*Reset
For system halt or abnormal functions due to faulty operation or other causes, press "RESET" at
the bottom of the machine body and then press and hold "POWER ON/OFF" to reboot it to
resume normal use.
*Hold
Turn "HOLD" to lock the buttons on the machine to avoid faulty operation when watching videos
or listening to music for a long time. You can turn "HOLD" to lock the buttons in any operation
mode, and corresponding prompt will be given on the LCD. Put "HOLD" back in order to unlock
the buttons.
*OK→confirm and select.
*▲ ▼
◄ ► for choosing , detailed usage is introduced as follows.
Main Menu
Main Menu Interface
Detailed information on the operating modes are displayed below.
Play mode
Select the game menu, including “Classic games” and “Games on demand”.
Press [○] key to enter the list of games. Includes Action, Fighting, War games, Racing,
Exploration, Shooting, Developmental and Sports categories.
Press [○] key to enter the game category, select the game, and then press [○] key to start game .
During the game, press "SELECT". Game will be paused and a pop-up menu will appear:
Restart
Resume
Load Progress
Save Game
Options
Quit
Music
Push the Power ON/OFF and hold for a few seconds until the main menu appears on the display.
Press[◄][►] key to select “Music”
Press [▲] [▼] key to select : Now Playing, All playing, Artist, Album, Genre, My Playlist, Dir
list, Record List, My Rating, Tag List.
While music is playing,press[○] key to pause or resume playing.
Press [◄][►] key to jump to the previous or next song.
Short press[◄][►] key for 1-2 seconds, to REW (rewind) or FF (fast forward).
Press [▲] [▼] key to increase or decrease the volume.
Press [ⅹ] key to return to music menu .
Photo
In main menu select “Photo”, press [○] key to enter Image browsing interface.
Press [○] and you can browse to your image; Press [ⅹ] to go back go back to the main menu;
Press [□] to select the functions.
Cinema
In the main menu select “Cinema”. This menu includes 2 options: “Dir list” and “Tag List”..
When the Video is playing,
Press[○] key to pause or resume playing.
Press [□] key and you can select the functions .
Press [◄][►] key to jump to the previous or next Video.
Press [▲] [▼] key to increase or decrease the volume.
Press [ⅹ] key to return to music menu .
Press [ ○ ] key,the Video Setting menu appears on the display. To complete the set, Press [ⅹ]
key to go back to the video screen.
Press [ □ ] key,to pause or resume playing.
Press [ ⅹ ] or [ △ ] key,stop playing, and go back to playlist .
press [◄][►]key to jump to the previous or next video .
press [▲] [▼] key to increase or decrease the volume.
Camera
View-finding mode
This machine uses the LCD screen to display the view. On the main interface, press the direction
keys to highlight "Camera" icon, as shown in the following picture:
Camera:press [○] key to take photo. The photos will be saved in “Picture” browser.
DV:When you select “DV” operation,press [○] key to start video recording,and press [○] key
again to stop recording. Press [ⅹ] key to exit and go back to main menu . The video files are
automatically saved inside the folder of the video player.
Recorder
In main menu select “Recorder”, press key [○] to enter the sub-menu display, as photo below:
In “Record”, press key [○]to start recording audio. press key [○] again to stop recording ;
Press [ ⅹ] key] to go back to the menu , and the recorded file will be saved automatically .
Press key [□], you can select the functions.
Library
In main menu select “Library”, press key [○] key to enter “Library” menu, and select E-book file .
Tools
In main menu select “Tool”, press key [○] to enter. Tool options include:
Calculator, Calendar, Stopwatch, Recorder.
Browser
In main menu select “Browser ”, press [○] key to select folder (MINI SD Card), press [○] key to
see all files. Select the file you wish to view, then press [○] key to play, as below:
In the Folder, press [▲] [▼] key to select the file, press [□] key. When the file(s) selected are
ticked, press [○] key again. The Option interface will then show: ”Select All, Move, Copy,
Delete”, where you can select your option. Then press [○] key to confirm .
Settings
In main menu select “Settings” and press the [○] key to enter the system menu, as shown below.
Effect setting: To select “Personalize” in the option menu, press [○] key. There are 4 options under
this sub menu: Normal, Cube, Push and Overturn.
Display: Backlight Time, Brightness.
Power Saving: Idle Time, Sleep Time.
Date & Time: Adjust Date, Adjust Time.
Language :The user interface to select up to 24 languages. Press the [○] key to enter the menu,
press [▲] [▼] key to select language from the menu, then press the [○] key to save setting.
TV Out: Off, PAL,NTSC
Advanced: Player Information, Select Font, Select key Sound, Format Internal Memory, etc...
Use of MINI SD card
Put the MINI SD card into the machine
If you want to pull out the MINI SD card, please make sure the card is not loading/saving. Then
use your finger to press the MINI SD card inwards once. It will eject out automatically.
If the card does not slide out, hold the gap on the card as photo shows below and pull out from the
MINI SD card port directly.
Formatting: Please use this machine to format the MINI SD card, so that all files are in FAT32
format, which this system fully supports.
Note: please turn off your machine before pulling out the MINI SD card, in order to prevent files
damage, data loss or any system error
Connect to Computer
*The console supports Windows 7/Vista/XP/2000.
*To connect the console and computer, use the USB cable provided in the box. .
*After you connect the console and computer by using the USB Cable, a new icon will come out
which shows your player.
*On Windows desktop double click “my computer”, you will see a new driver /hardware which is
the player.
*To copy the file from the computer to the console, you can simply copy the file and paste the file
on the console hard disk.
Note: when exchanging data between the player and your computer , please do not disconnected
the USB cable, otherwise system error or file damage will occur.