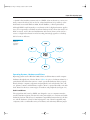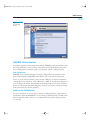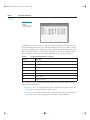
1
Cisco Networking Academy™ Program:
®
™
Fundamentals of UNIX : Solaris
and Linux Supplement
™
The Only Authorized Supplement for the Cisco Networking
Academy Program: Fundamentals of UNIX Companion Guide
This supplement provides students and instructors with the information they need to use
the Cisco Press Companion Guide with the Fundamentals of UNIX Version 2.0 course.
Course
Sponsored by
ciscopress.com
Cisco Systems, Inc.
Cisco Networking Academy Program
Dan Myers • Jim Lorenz
103xFMp.book Page i Monday, October 14, 2002 4:10 PM
Cisco Networking
Academy Program:
Fundamentals of
UNIX: Solaris and
Linux Supplement
Cisco Systems, Inc.
Cisco Networking Academy Program
Dan Myers
Jim Lorenz
Sponsored by:
Cisco Press
201 West 103rd Street
Indianapolis, Indiana 46290 USA
103xFMp.book Page ii Monday, October 14, 2002 4:10 PM
ii
Cisco Networking Academy Program: Fundamentals of UNIX:
Solaris and Linux Supplement
Cisco Systems, Cisco Networking Academy Program
Copyright© 2003 Cisco Systems, Inc.
Cisco Press logo is a trademark of Cisco Systems, Inc.
Published by:
Cisco Press
201 West 103rd Street
Indianapolis, IN 46290 USA
All rights reserved. No part of this book may be reproduced or transmitted in any
form or by any means, electronic or mechanical, including photocopying, recording, or
by any information storage and retrieval system, without written permission from the
publisher, except for the inclusion of brief quotations in a review.
ISBN: 1-58713-103-X
First Distribution October 2002
Warning and Disclaimer
This book is designed to provide information about the Linux operating system and
maintains compatibility with the latest revision of the Fundamentals of UNIX course.
It is to be used in conjunction with the existing Fundamentals of UNIX Companion
Guide and the online curriculum. Every effort has been made to make this book as
complete and as accurate as possible, but no warranty or fitness is implied.
The information is provided on an “as is” basis. The authors, Cisco Press, and Cisco
Systems, Inc. shall have neither liability nor responsibility to any person or entity with
respect to any loss or damages arising from the information contained in this book or
from the use of the discs or programs that may accompany it.
The opinions expressed in this book belong to the author and are not necessarily those
of Cisco Systems, Inc.
Feedback Information
At Cisco Press, our goal is to create in-depth technical books of the highest quality and
value. Each book is crafted with care and precision, undergoing rigorous development
that involves the unique expertise of members from the professional technical community.
Readers’ feedback is a natural continuation of this process. If you have any comments
regarding how we could improve the quality of this book, or otherwise alter it to better suit your needs, you can contact us through e-mail at [email protected].
Please make sure to include the book title and ISBN in your message.
We greatly appreciate your assistance.
103xFMp.book Page iii Monday, October 14, 2002 4:10 PM
iii
Publisher
Editor-In-Chief
Cisco Representative
Cisco Press Program Manager
Cisco Marketing Communications Manager
Cisco Marketing Program Manager
Executive Editor
Production Manager
Development Editor
Copy Editor
Team Coordinator
Book and Cover Designer
Production Team
Corporate Headquarters
Cisco Systems, Inc.
170 West Tasman Drive
San Jose, CA 95134-1706
USA
http://www.cisco.com
Tel: 408 526-4000
800 553-NETS (6387)
Fax: 408 526-4100
European Headquarters
Cisco Systems Europe
11 Rue Camille Desmoulins
92782 Issy-les-Moulineaux
Cedex 9
France
http://wwweurope.cisco.com
Tel: 33 1 58 04 60 00
Fax: 33 1 58 04 61 00
John Wait
John Kane
Anthony Wolfenden
Sonia Torres Chavez
Tom Geitner
Edie Quiroz
Carl Lindholm
Patrick Kanouse
Christopher Cleveland
Keith Cline
Sarah Kimberly
Louisa Adair
Mark Shirar
Americas Headquarters
Cisco Systems, Inc.
170 West Tasman Drive
San Jose, CA 95134-1706
USA
http://www.cisco.com
Tel: 408 526-7660
Fax: 408 527-0883
Asia Pacific Headquarters
Cisco Systems Australia,
Pty., Ltd
Level 17, 99 Walker Street
North Sydney
NSW 2059 Australia
http://www.cisco.com
Tel: +61 2 8448 7100
Fax: +61 2 9957 4350
Cisco Systems has more than 200 offices in the following countries. Addresses, phone numbers, and fax numbers are listed on
the Cisco Web site at www.cisco.com/go/offices
Argentina • Australia • Austria • Belgium • Brazil • Bulgaria • Canada • Chile • China • Colombia • Costa
Rica • Croatia • Czech Republic • Denmark • Dubai, UAE • Finland • France • Germany • Greece • Hong
Kong • Hungary • India • Indonesia • Ireland Israel • Italy • Japan • Korea • Luxembourg • Malaysia •
Mexico • The Netherlands • New Zealand • Norway • Peru • Philippines Poland • Portugal • Puerto Rico •
Romania • Russia • Saudi Arabia • Scotland • Singapore • Slovakia • Slovenia • South Africa • Spain Sweden
• Switzerland • Taiwan • Thailand • Turkey • Ukraine • United Kingdom • United States • Venezuela • Vietnam
• Zimbabwe
Copyright © 2000, Cisco Systems, Inc. All rights reserved. Access Registrar, AccessPath, Are You Ready, ATM Director, Browse with Me, CCDA, CCDE, CCDP, CCIE, CCNA,
CCNP, CCSI, CD-PAC, CiscoLink, the Cisco NetWorks logo, the Cisco Powered Network logo, Cisco Systems Networking Academy, Fast Step, FireRunner, Follow Me Browsing,
FormShare, GigaStack, IGX, Intelligence in the Optical Core, Internet Quotient, IP/VC, iQ Breakthrough, iQ Expertise, iQ FastTrack, iQuick Study, iQ Readiness Scorecard, The
iQ Logo, Kernel Proxy, MGX, Natural Network Viewer, Network Registrar, the Networkers logo, Packet, PIX, Point and Click Internetworking, Policy Builder, RateMUX,
ReyMaster, ReyView, ScriptShare, Secure Script, Shop with Me, SlideCast, SMARTnet, SVX, TrafficDirector, TransPath, VlanDirector, Voice LAN, Wavelength Router,
Workgroup Director, and Workgroup Stack are trademarks of Cisco Systems, Inc.; Changing the Way We Work, Live, Play, and Learn, Empowering the Internet Generation, are
service marks of Cisco Systems, Inc.; and Aironet, ASIST, BPX, Catalyst, Cisco, the Cisco Certified Internetwork Expert Logo, Cisco IOS, the Cisco IOS logo, Cisco Press, Cisco
Systems, Cisco Systems Capital, the Cisco Systems logo, Collision Free, Enterprise/Solver, EtherChannel, EtherSwitch, FastHub, FastLink, FastPAD, IOS, IP/TV, IPX, LightStream,
LightSwitch, MICA, NetRanger, Post-Routing, Pre-Routing, Registrar, StrataView Plus, Stratm, SwitchProbe, TeleRouter, are registered trademarks of Cisco Systems, Inc. or its
affiliates in the U.S. and certain other countries.
All other brands, names, or trademarks mentioned in this document or Web site are the property of their respective owners. The use of the word partner does not imply a partnership
relationship between Cisco and any other company. (0010R)
103xFMp.book Page iv Monday, October 14, 2002 4:10 PM
iv
Trademark Acknowledgments
All terms mentioned in this book that are known to be trademarks or service marks
have been appropriately capitalized. Cisco Press or Cisco Systems, Inc., cannot attest
to the accuracy of this information. Use of a term in this book should not be regarded
as affecting the validity of any trademark or service mark.
103xFMp.book Page v Monday, October 14, 2002 4:10 PM
v
About the Authors
Dan Myers, of Highlands Ranch, Colorado, is an international program manager for
the Cisco Networking Academy Program. He is responsible for the worldwide implementation of courses sponsored by leading IT vendors. Prior to joining Cisco, Dan was
the curriculum and operations manager for the Sun Microsystems Academic Initiative
Program that authorizes educational institutions to offer Solaris system administration
and Java programming courses. In addition to his program management responsibilities, Dan was asked by Sun to be the Subject Matter Expert in the development of the
Sun-sponsored Fundamentals of UNIX course.
As a technical instructor for 15 years, Dan taught Solaris system administration,
backup administration, Lotus Domino administration, and computer-aided design
courses at vendor-authorized education centers and the University of Colorado. He
earned his bachelor of science degree in technology education at Ohio State University
and his masters degree in technology education at Colorado State University. Dan has
15 years experience working with UNIX.
Jim Lorenz is a senior technical writer and curriculum developer for the Cisco
Networking Academy Program. He has more than 20 years of experience in
information systems and has held various IT positions in Fortune 500 companies,
including Honeywell and Motorola. He was also an IT manager and a UNIX system
administrator for Harcourt Brace publishing company. Jim has developed and taught
computer and networking courses for both public and private institutions for more
than 15 years. He is also the author of the Cisco Networking Academy Program: Lab
Companion, Volumes I and II. Jim is a Certified Novell NetWare Engineer (CNE), a
Microsoft Certified Trainer (MCT), and a Cisco Certified Academy Instructor (CCAI).
Jim earned his bachelor degree in computer information systems from Prescott College.
103xFMp.book Page vi Monday, October 14, 2002 4:10 PM
vi
Dedications
This book is dedicated to my wonderful wife, Jamie, and our kids, Daniel, Audrey, and
Grace, who endured my late nights and weekends as I worked on its completion. I
would also like to dedicate this book to my parents, Stephen and Margaret, who have
always had an endless supply of encouragement and love.
—Dan Myers
This book is dedicated to the three most important people in my life: my wife, Mary,
and my daughters, Jessica and Natasha. Thanks for your patience and support.
—Jim Lorenz
103xFMp.book Page vii Monday, October 14, 2002 4:10 PM
vii
Acknowledgments
Many thanks to Brad Johnson, who coordinated the project, providing input, excellent
support, and careful technical reviews of content at every step of the way. We worked
to an aggressive schedule, and it would not have been possible without the dedication
of Brad and the curriculum development support team.
Thanks to Vito Amato and Matthias Giessler from the Cisco Networking Academy
Program for providing leadership and management support. Thanks also to the Cisco
Press folks for their expertise and assistance in helping this book become a reality, and
to Sun Educational Services, Worldwide Education and Research, and the Solaris Marketing Group for their vision and support for the course.
—Dan and Jim
103xFMp.book Page viii Monday, October 14, 2002 4:10 PM
viii
Contents at a Glance
Introduction xxii
Chapter 1
The UNIX Computing Environment 3
Chapter 2
Accessing Your System and UNIX Graphical Interfaces 37
Chapter 3
Graphical User Applications 57
Chapter 4
Getting Help 71
Chapter 5
Accessing Files and Directories 87
Chapter 6
Basic Directory and File Management 97
Chapter 7
Advanced Directory and File Management 115
Chapter 8
Filesystems and File Utilities 133
Chapter 9
Using Text Editors 153
Chapter 10
File Security 171
Chapter 11
Printing 187
Chapter 12
Backing Up and Restoring 197
Chapter 13
System Processes 215
Chapter 14
Shell Features and Environment Customization 225
Chapter 15
Introduction to Shell Scripts 255
Chapter 16
Network Concepts and Utilities 183
Chapter 17
Career Guidance 309
Appendix A
Answers to Chapter “Check Your Understanding” Quizzes 312
103xFMp.book Page ix Monday, October 14, 2002 4:10 PM
ix
Table of Contents
Introduction xxii
Chapter 1
The UNIX Computing Environment 3
Overview of Changes 3
Objectives 3
Introduction 3
The Main Components of a Computer 4
CPU 4
RAM 5
I/O Devices 5
Hard Disks and Other Forms of Mass Storage 5
Peripheral Components 6
Keyboard and Mouse 6
Video Components 6
Audio Components 6
Printing Devices and Scanners 7
Networking Components 7
Computer Roles and Operating Systems 7
Single-User Desktop Systems 7
Workstation and Desktop Applications 8
Network Operating System Capabilities 9
Servers and the Network Environment 9
The OS and CPU Relationship 10
Operating Systems, Hardware, and Drivers 11
Overview of the UNIX Operating System 12
Brief History 12
UNIX Varieties 14
Overview of Linux 15
GNU/Linux 16
Open Source Software 16
Linux Distributions 17
Benefits of UNIX 17
Sun Solaris Benefits 18
Linux Benefits 18
103xFMp.book Page x Monday, October 14, 2002 4:10 PM
x
The UNIX Operating Environment 18
Solaris 19
Linux 19
The OS and the Kernel 19
UNIX Kernel Overview 20
The Linux Kernel 20
Kernel Functions 20
The OS Shell 21
The Filesystem 24
Filesystem Overview 24
The Directory Hierarchy 25
Common UNIX Directories 26
UNIX Commands 27
Graphical User Interface (GUI) Options 28
Common Desktop Environment (CDE) 28
Open Windows 28
GNU Network Object Model Environment (GNOME) 30
K Desktop Environment (KDE) 31
Summary 32
Key Terms 32
Check Your Understanding 34
Chapter 2
Accessing Your System and UNIX Graphical Interfaces 37
Overview of Changes 37
Objectives 37
Introduction 37
User Accounts 38
Login ID and Password Requirements 38
Introduction to GNOME and KDE in Linux 39
Choosing the Login Session 40
Primary Differences Between GNOME and KDE 40
General Differences 41
Window Managers 41
Virtual Desktops 42
103xFMp.book Page xi Monday, October 14, 2002 4:10 PM
xi
Panels 42
File Managers 42
Themes 42
Control Center 43
Introduction to GNOME and KDE Tutorials 43
Learning About GNOME 43
Learning About KDE 44
GNOME Customization 45
User Preferences 45
Adding to the GNOME Panel 45
Adding a Launcher to the GNOME Panel 46
Adding an Applet to the GNOME Panel 47
Adding and Filling a Drawer on the GNOME Panel 47
Creating a Floating Panel 47
Further Panel Customization 49
Adding to the GNOME Menus 49
Adding to Favorites from Another Menu 49
Adding to Favorites Using the Menu Editor 50
Summary 51
Key Terms 52
Check Your Understanding 52
Chapter 3
Graphical User Applications 57
Overview of Changes 57
Objectives 57
Introduction 57
GNOME and KDE Applications Overview 58
Web Browsers and Mail Clients 58
Calendar Managers 60
GNOME and KDE Applications and Utilities 61
GNOME Applications Programs 61
GNOME Utility Programs 61
Other GNOME Programs Menu Submenus 62
GNOME Applets 63
KDE Programs and Utilities 63
103xFMp.book Page xii Monday, October 14, 2002 4:10 PM
xii
UNIX Graphical Desktop Applications Comparison 64
Summary 65
Key Terms 66
Check Your Understanding 66
Chapter 4
Getting Help 71
Overview of Changes 71
Objectives 71
Introduction 71
Man Page Headings 72
Scrolling in man Pages 73
Searching man Pages by Section 73
Saving man Pages for Future Use 74
Obtaining Quick Help on Command Options 75
Linux HOWTOs 75
Where to Find the HOWTOs 76
The info Command 77
Starting Info 77
Navigating with info 77
info Access with a Browser 78
Summary 80
UNIX Command Summary 81
Key Terms 81
Check Your Understanding 81
Chapter 5
Accessing Files and Directories 87
Overview of Changes 87
Objectives 87
Introduction 87
Displaying File Types 88
Displaying a Long Listing 89
Summary 91
Key Terms 92
Check Your Understanding 92
103xFMp.book Page xiii Monday, October 14, 2002 4:10 PM
xiii
Chapter 6
Basic Directory and File Management 97
Overview of Changes 97
Objectives 97
Introduction 97
Directory and File Management Using GNOME 98
Nautilus File Manager 98
Creating New Folders 104
Changing Folders 105
Deleting and Recovering Files 108
Summary 109
Check Your Understanding 110
Chapter 7
Advanced Directory and File Management 115
Overview of Changes 115
Objectives 115
Introduction 116
Copying Files 116
Copying Files to a Floppy Disk Using the Solaris Command
Line 116
Copying Files to a Floppy Disk Using the Linux Command
Line 116
Input/Output Redirection 116
Advanced Directory and File Management Using GNOME
117
Moving and Copying Files Using Drag and Drop 117
File Menu Options (Rename and Link) 119
Edit Menu Options: Cut, Copy, and Paste 121
View Menu Options 123
Summary 127
UNIX Command Summary 128
Check Your Understanding 128
Chapter 8
Filesystems and File Utilities 133
Overview of Changes 133
Objectives 133
103xFMp.book Page xiv Monday, October 14, 2002 4:10 PM
xiv
Introduction 134
Partitions and Filesystems 134
Partitions 134
Filesystems 135
Mounting the Filesystem 137
Filesystem Statistics 138
Linux Partitions 139
The egrep and fgrep Commands 141
The egrep Command 141
The fgrep Command 142
File Editing with sed 142
Suppressing the Default Output 142
Finding Files Using GNOME and KDE 144
Search Tool - Quick Find (Locate) 144
Search Tool - Full Find 145
KDE - Find Files 146
Summary 147
UNIX Command Summary 148
Key Terms 148
Check Your Understanding 148
Chapter 9
Using Text Editors 153
Overview of Changes 153
Objectives 153
Introduction 153
Using Emacs 154
Advantages of Emacs 154
Two Strains of Emacs: GNU Emacs and XEmacs 155
Perceived Disadvantages of Emacs 157
Getting Safely In and Out of Emacs 158
Accessing the Emacs TUTORIAL 161
Getting Emacs Help 161
The GNOME gedit Text Editor 162
Opening Window 162
The File Menu 163
The Edit Menu 163
The Plugins Menu 164
The Settings Menu 164
103xFMp.book Page xv Monday, October 14, 2002 4:10 PM
xv
Summary 166
UNIX Command Summary 167
Key Terms 167
Check Your Understanding 167
Chapter 10
File Security 171
Overview of Changes 171
Objectives 171
Introduction 171
Standard UNIX Security Features 172
User Accounts and File Security 172
Remote Access Control 172
Security Check Tools 173
Changing Permissions with GNOME Nautilus 173
Identifying and Switching Users 175
Identifying Users with the who and finger Commands 175
Switching to Another User Account 176
User Account Information 177
Summary 179
UNIX Command Summary 180
Key Terms 181
Check Your Understanding 181
Chapter 11
Printing 187
Overview of Changes 187
Objectives 187
Introduction 187
The lp and lpr Print Spoolers 188
Sending Files to a Printer 189
Printing Banner Pages 189
Locating the User’s Printout 190
Printing Using the GNOME Printer Applet 190
Summary 191
Key Terms 192
Check Your Understanding 192
103xFMp.book Page xvi Monday, October 14, 2002 4:10 PM
xvi
Chapter 12
Backing Up and Restoring 197
Objectives 197
Introduction 197
Accessing Floppy Disks and CD Devices with Solaris 198
The Solaris Volume Management Feature 198
Working with Solaris Floppy Disks 199
Working with Solaris CD-ROMs 200
Linux Floppy and CD-ROM Access 201
Low-Level Formatting 201
Using gfloppy to Format and Put Filesystems on a Floppy
203
Mounting a UNIX Floppy Disk 203
Mounting and Unmounting in GNOME 204
Working with CD-ROMs in Linux 205
Backing Up Files with cpio 206
Creating and Viewing the Archive 206
Restoring Files 207
Summary 207
UNIX Command Summary 208
Key Terms 209
Check Your Understanding 210
Chapter 13
System Processes 215
Overview of Changes 215
Objectives 215
Introduction 216
UNIX System Process Overview 216
Identifying Processes to Terminate 217
The crontab Utility 218
Summary 220
UNIX Command Summary 221
Check Your Understanding 221
103xFMp.book Page xvii Monday, October 14, 2002 4:10 PM
xvii
Chapter 14
Shell Features and Environment Customization 225
Overview of Changes 225
Objectives 225
Overview 225
Review of the Shell 226
The Alias Shell Feature 227
Displaying Aliases 227
Removing an Alias in the Current Shell 227
Using the Shell History Feature and Repeating
Commands 229
Command History in the Korn Shell 229
Repeating Commands in the Korn Shell 230
Command History in the Bash Shell 230
Repeating Commands in the Bash Shell 231
Command-Line Editing in the Korn and Bash Shells 233
Filename and Command Completion in the Korn and Bash
Shell 234
Shell Variables 235
Local Variables 236
Environment Variables 238
Custom Prompts with the Korn and Bash Shells 239
Shell Initialization Files 241
System-Wide Initialization Files for Korn and Bash Shell
Users 242
User-Specific Initialization Files 243
Korn Shell User-Specific Initialization Files 244
The .profile File 244
The .kshrc File 246
Korn Shell Login Process 247
Bash Shell User-Specific Initialization Files 248
Summary 249
UNIX Command Summary 251
Key Terms 251
Check Your Understanding 251
103xFMp.book Page xviii Monday, October 14, 2002 4:10 PM
xviii
Chapter 15
Introduction to Shell Scripts 255
Overview of Changes 255
Objectives 255
Overview 255
Shell Script Basics 256
Overview of Shell Scripts 256
Creating a Simple Shell Script 256
Step 7: Executing a Script 259
Step 8: Debugging a Script 260
Shell Programming Concepts 262
Overview 262
Variables in Scripts 263
Positional Parameters 264
Interactive Input 265
Conditional Programming in Scripts 267
The if Command 267
Exit Status 268
The test Command 269
test Command Operators 271
The case Command 271
Flow Control 273
The for Loop 273
The while Loop 274
The until Loop 274
Summary 275
UNIX Command Summary 276
Key Terms 278
Check Your Understanding 278
Chapter 16
Network Concepts and Utilities 283
Overview of Changes 283
Objectives 283
Introduction 284
103xFMp.book Page xix Monday, October 14, 2002 4:10 PM
xix
Network and Remote Access Utilities 284
The Ping Utility 285
The Traceroute Utility 286
The Telnet Utility 287
The rlogin Command 289
The ftp Command 292
The rcp Command 295
Secure Shell (SSH) 295
Naming Services and Host Name Resolution 296
Name Services Overview 296
Centralized Administration 297
DNS 297
/etc/hosts File 298
Network Information Service (NIS) 299
The Network Information Service Plus (NIS+) 299
Network Resource Sharing 300
The Network Filesystem 300
Server Message Block (SMB) 302
Summary 302
UNIX Command Summary 303
Key Terms 304
Check Your Understanding 304
Chapter 17
Career Guidance 309
Overview of Changes 309
Objectives 309
Introduction 309
Linux Certifications 310
CompTIA Linux Certification 310
Vendor-Specific Linux Certification 310
Summary 311
103xFMp.book Page xx Monday, October 14, 2002 4:10 PM
xx
Appendix A
Answers to Chapter “Check Your Understanding” Quizzes 312
Answers to Chapter 1 “Check Your Understanding” Quiz 312
Answers to Chapter 2 “Check Your Understanding” Quiz 312
Answers to Chapter 3 “Check Your Understanding” Quiz 313
Answers to Chapter 4 “Check Your Understanding” Quiz 314
Answers to Chapter 5 “Check Your Understanding” Quiz 315
Answers to Chapter 6 “Check Your Understanding” Quiz 316
Answers to Chapter 7 “Check Your Understanding” Quiz 316
Answers to Chapter 8 “Check Your Understanding” Quiz 317
Answers to Chapter 9 “Check Your Understanding” Quiz 317
Answers to Chapter 10 “Check Your Understanding” Quiz 318
Answers to Chapter 11 “Check Your Understanding” Quiz 318
Answers to Chapter 12 “Check Your Understanding” Quiz 319
Answers to Chapter 13 “Check Your Understanding” Quiz 319
Answers to Chapter 14 “Check Your Understanding” Quiz 320
Answers to Chapter 15 “Check Your Understanding” Quiz 320
Answers to Chapter 16 “Check Your Understanding” Quiz 321
103xFMp.book Page xxi Monday, October 14, 2002 4:10 PM
xxi
Command Syntax Conventions
The conventions used to present command syntax in this book are the same conventions
used in the IOS Command Reference. The Command Reference describes these conventions as follows:
■
■
■
■
■
■
Vertical bars (|) separate alternative, mutually exclusive elements.
Square brackets [ ] indicate optional elements.
Braces { } indicate a required choice.
Braces within brackets [{ }] indicate a required choice within an optional element.
Boldface indicates commands and keywords that are entered literally as
shown. In actual configuration examples and output (not general command
syntax), boldface indicates commands that are manually input by the user
(such as a show command).
Italics indicate arguments for which you supply actual values.
103xFMp.book Page xxii Monday, October 14, 2002 4:10 PM
xxii
Introduction
This supplement provides additional information on the Linux operating system and
maintains compatibility with the latest revision of the Fundamentals of UNIX course.
It is to be used in conjunction with the existing Cisco Networking Academy Program:
Fundamentals of UNIX Companion Guide and online curriculum. The supplement
describes general Linux characteristics and covers some of the key basic objectives of
the Computer Technology Industry Association (CompTIA) Linux+ exam. The
remaining Linux+ objectives are covered in the Networking Academy course: IT
Essentials – Network Operating Systems version 2.0 (targeted for January of 2003).
The majority of the existing Cisco Networking Academy Program: Fundamentals of
UNIX Companion Guide textbook content applies to all versions of UNIX, including
Solaris and Linux. However, this supplement adds Linux-specific sections to most
chapters to enhance the existing text and broaden their scope. In addition, it provides
some new generic UNIX information on subjects such as the Emacs editor and shell
scripting. It also includes new labs that were added to the curriculum. Cross-references
are provided between the supplemental chapter information and the companion guide.
This supplement is available to all holders of the current Cisco Networking Academy
Program: Fundamentals of UNIX Companion Guide and the PDF can be viewed or
downloaded from the Cisco Press website (www.ciscopress.com).
Guidelines for Use
Each chapter in the supplement starts with an overview of the changes made. The sections and subjects included are those that have either changed significantly or are new
to the course. New subjects are highlighted in the objectives, introduction, and summary at the end of the chapter supplement.
Start by scanning the main headings on the supplemental chapter and note the crossreferences to page locations in the Cisco Networking Academy Program: Fundamentals of UNIX Companion Guide. Make a note in the companion guide where the section of the supplement should be inserted. When reading the companion guide, if a
reference to the supplement is encountered, read the supplement section instead. Some
chapters have changed enough to be included in their entirety in this supplement and
these should be read instead of the chapter in the companion guide. E-Labs can be performed using the online curriculum or the CD that comes with the companion guide.
New hands-on labs that have been added to the course are referenced and are included
in the Cisco Network Academy Program: Fundamentals of UNIX: Solaris and Linux
Lab Companion Supplement. At the end of each chapter is a list of new commands
and key terms introduced and a new version of the quiz (“Check your Understanding”). Answers for all quizzes are provided at the end of this supplement. Instructions
for setting up the classroom using both Solaris or Linux are provided in the Instructor
Guide, which is available on the Cisco Networking Academy website from the Instructors toolbox.
103xFMp.book Page xxiii Monday, October 14, 2002 4:10 PM
xxiii
Summary of Chapter Changes
The following is a brief description of changes made to each chapter in the Fundamentals of UNIX course. This section is a general overview of the changes. Table I-1 at the
end of the Introduction provides a more detailed list of the subjects added and modified.
Chapter 1: The UNIX Computing Environment
A number of changes and additions were made throughout this chapter to introduce
Linux concepts and terminology. Although the basic content is approximately 80 percent the same as the book, this chapter is included in its entirety to avoid numerous
cross-references.
Chapter 2: Accessing Your System and UNIX Graphical Interfaces
Some changes were made in the “Login ID and Password Requirements” section. Two
new sections were added to cover the Linux GNOME and KDE graphical interfaces.
Chapter 3: Graphical User Applications
The chapter title was changed to be more generic and accommodate other graphical
applications such as those included with GNOME and KDE. A new section was added
to cover GNOME and KDE built-in graphical applications.
Chapter 4: Getting Help
This chapter includes additions to the “Command-Line Help” section on man page
headings. A new section on Linux HOWTOs and the info command has also been
added.
Chapter 5: Accessing Files and Directories
This chapter includes additions to the “Listing Directory Contents” section for file type
definitions and file type codes. The other sections of this chapter apply to most versions
of UNIX, including Solaris and Linux.
Chapter 6: Basic Directory and File Management
This chapter includes a new section on management of directories and files using
GNOME. The focus is on the use of the Nautilus file manager utility.
Chapter 7: Advanced Directory and File Management
This chapter adds information to the “Copying Files” section that describes the steps
necessary to copy a file to a disk for Solaris and Linux. A correction to the “Input/Output Redirection” section is provided. A new section has also been added on advanced
management of directories and files using GNOME.
Chapter 8: Filesystems and File Utilities
This chapter provides additional general information on partitioning and filesystems
and also covers specific information on Linux partitions and filesystem statistics. The
egrep and fgrep commands have been added to the section on searching for strings. A
new section on “File Editing with sed” has been added for searching and processing
103xFMp.book Page xxiv Monday, October 14, 2002 4:10 PM
xxiv
files. Another new section covers finding files using GNOME and KDE. Objectives and
utilities related to user identification and switching users have been moved to Chapter
10, “File Security.”
Chapter 9: Using Text Editors
This chapter adds a new section on the use of the powerful and flexible Emacs editing
tool. The new section on the use of the GNOME gedit application to create and edit
text files is also included.
Chapter 10: File Security
New information has been added to the “Standard UNIX Security” section pertaining
to remote access control and security check tools. This chapter includes a new section,
“Changing Permissions with GNOME Nautilus,” which covers the use of GNOME
Nautilus to view and change file properties. In addition, a section on identifying and
switching users was moved to this chapter from Chapter 8, “Filesystems and File Utilities.”
Chapter 11: Printing
New information has been added to the section “The lp and lpr Print Spoolers” pertaining to Linux and LRPng. This chapter also includes a new section called “Printing
Using the GNOME Printer Applet,” which covers the use of GNOME Printer applet.
Chapter 12: Backing Up and Restoring
This chapter includes a new section called “Accessing Floppy Disks and CD Devices
with Solaris and Linux.” The Solaris volume management feature and formatting and
mounting in both environments are discussed. Another new section called “Backing
Up Files with cpio” has also been added.
Chapter 13: System Processes
This chapter provides additional information on Solaris and Linux startup processes in
the “UNIX System Process Overview” section. The Linux GNU long options variations of the ps command are introduced in the section “Identifying Processes to Terminate.” In addition, a new section has been added on the use of the crontab utility. The
last section on memory management, which covered virtual memory and swap files,
was moved to Chapter 1, “The UNIX Computing Environment,” where these concepts were introduced.
Chapter 14: Shell Features and Environment Customization
A number of changes and additions were made throughout this chapter relating to
Linux and the BASH shell. Although the basic content is approximately 80 percent of
Chapters 14 and 15 from the original Cisco Networking Academy Program: Fundamentals of UNIX Companion Guide, this chapter is included in its entirety to avoid
numerous cross-references.
103xFMp.book Page xxv Monday, October 14, 2002 4:10 PM
xxv
Chapter 15: Introduction to Shell Scripts
This is a new chapter that has been added to the course. It builds on the basic shell
concepts and UNIX commands covered in previous chapters. It is intended to replace
the existing Chapter 15 in its entirety. The majority of the previous Chapter 15 was
moved to the new Chapter 14.
Chapter 16: Network Concepts and Utilities
This chapter provides new information on network and remote access utilities such as
Traceroute and Secure Shell (SSH). The “Naming Services and Host Name Resolution”
section includes expanded information on DNS, NIS, and NIS+. Also the SMB/CIFS
protocol has been added to the “Network Resource Sharing” section. The previous
sections on network infrastructure concepts and network protocols have been removed
from this chapter to avoid redundancy with other Cisco Networking Academy Program courses.
Chapter 17: Career Guidance
The major change to this chapter is the addition of information on Linux certification
options. These include proprietary certifications such as Red Hat and the more generic
Computer Technology Industry Association (CompTIA) Linux+ certification.
Summary of Course Content Changes
Table I-1 highlights the key changes and updates that are covered in this supplement.
TABLE I-1
Fundamentals of UNIX Supplement Revisions and Updates
Chapter No. and Title
Linux Additions/Other
Changes
Notes (3=maj chgs, 2=mod
chgs, 1=min chgs)
1 – The UNIX Computing Environment
Overview of Linux
including distributions,
filesystems, and kernel
development
(3)
Rewrite.
2 – Accessing Your System and UNIX Graphical Interfaces
Rewrite – Login ID and
Password Requirements,
Using the GNOME and
KDE in Linux,
GNOME Customization (added Linux)
(2)
Chapter title change, one
subject modified, two new
sections appended.
3 – Graphical User
Applications
3.4 – GNOME and
KDE Applications
(added Linux)
(2)
Chapter title change, one
new section appended.
continues
103xFMp.book Page xxvi Monday, October 14, 2002 4:10 PM
xxvi
TABLE I-1
Fundamentals of UNIX Supplement Revisions and Updates (Continued)
Chapter No. and Title
Linux Additions/Other
Changes
Notes (3=maj chgs, 2=mod
chgs, 1=min chgs)
4 – Getting Help
4.4 – Linux Info and
HOWTOs (added
Linux)
(2)
One subject modified, one
new subject inserted.
5 – Accessing Files and
Directories
Previously no Linux
information
Added new file type definitions
Added new file type
codes
(1)
No new subjects, minor
modifications.
6 – Basic Directory and
File Management
Basic Directory and File
Management Using
GNOME (added Linux)
(2)
One new section appended,
minor modifications.
7 – Advanced Directory
and File Management
Advanced Directory and
File Management Using
GNOME (added Linux)
(2)
One new section appended.
8 – Filesystems and
File Utilities
Added Linux filesystem
information
Added egrep, fgrep
commands
New – sed command
Finding Files with GUIs
- added GNOME
Identifying Users
(moved to Chapter 10)
(2)
Chapter title change, three
subjects modified, one section moved.
9 – Using Text Editors
Using Emacs (generic
UNIX)
The GNOME gedit Text
Editor
(2)
One new section inserted,
one subject inserted.
10 – File Security
Added new information
on remote access control and security check
tools
Changing permissions
with GNOME (added
Linux)
Identifying and Switching Users (moved from
Chapter 8)
(2)
Chapter title change, one
subject modified, one new
subject inserted and one section moved.
103xFMp.book Page xxvii Monday, October 14, 2002 4:10 PM
xxvii
TABLE I-1
Fundamentals of UNIX Supplement Revisions and Updates (Continued)
Chapter No. and Title
Linux Additions/Other
Changes
Notes (3=maj chgs, 2=mod
chgs, 1=min chgs)
11 – Printing
Added paragraph about
Linux supporting both
SV and BSD printing
commands.
Using GNOME to print
(added Linux)
(1)
One subject modified, one
new subject appended.
12 – Backing Up and
Restoring
Accessing removable
media (Solaris and
Linux)
Backing Up Files with
cpio (generic UNIX)
(2)
Two new subjects inserted.
13 – System Processes
Added new content
Added new Linux content
The crontab Utility
(generic UNIX)
Memory management
(removed)
(2)
Chapter title change, two
subjects modified, one new
subject appended, on section moved.
14 – Shell Features and
Environment Customization
Removed C shell features and replaced with
Bash shell features. Also
added one new feature.
Shell variable and customization -removed C
shell and replaced with
Bash.
C shell features
(removed)
Initialization files
(added)
(3) Rewrite
Chapter title change, merged
Chapters 14 and 15, one section added, one section
removed.
15 – Introduction to
Shell Scripts
New chapter
(3) All new subjects
103xFMp.book Page xxviii Monday, October 14, 2002 4:10 PM
xxviii
TABLE I-1
Fundamentals of UNIX Supplement Revisions and Updates (Continued)
Linux Additions/Other
Changes
Notes (3=maj chgs, 2=mod
chgs, 1=min chgs)
16 – Network Concepts
and Utilities
Network Infrastructure
Concepts (removed)
Networking Protocols
(removed)
The Traceroute Utility
(new)
Secure Shell (SSH)
(added)
Naming Services and
Host Name Resolution
(revised)
Network Resource
Sharing (added SMB)
(3)
Chapter title change, two
sections removed, two subjects inserted, two subject
modified.
17 – Career Guidance
Linux Certifications
(added)
(1)
One subject appended.
Chapter No. and Title
103xFMp.book Page xxix Monday, October 14, 2002 4:10 PM
103xFMp.book Page 2 Monday, October 14, 2002 4:10 PM
103xFMp.book Page 3 Monday, October 14, 2002 4:10 PM
Chapter 1
The UNIX Computing
Environment
Overview of Changes
A number of changes and additions were made throughout this chapter to introduce
Linux concepts and terminology. Although the basic content is approximately 80 percent
the same as the book, this chapter is included in its entirety to avoid numerous crossreferences.
New and changed information is highlighted in the following objectives, introduction,
and summary. The content sections included in this supplement are designated as either
new or updated.
Objectives
After reading this chapter, you will be able to
■
Describe the main components of a computer
■
Identify computer roles and compare operating systems
■
Describe the features common to all versions of the UNIX operating system
■
Describe the UNIX operating environment including Solaris and Linux
Introduction
This chapter discusses the history, the main components, and the capabilities of the UNIX
operating system. The chapter includes a review of operating systems in general and a
comparison of UNIX to other types of operating systems. This chapter introduces the Sun
Microsystems, Inc., version of the UNIX operating system, known as the Solaris Operating Environment or Solaris. An overview of the Linux operating system, which is based
on UNIX, is also provided. Most of the information presented here applies to all varieties
of UNIX, including Linux.
103xFMp.book Page 4 Monday, October 14, 2002 4:10 PM
Chapter 1
The UNIX Computing Environment
4
The Main Components of a Computer
As illustrated in Figure 1-1, the four main components of a computer are as follows:
■
The central processing unit (CPU)
■
Random-access memory (RAM)
■
Input/Output (I/O) devices
■
The hard disk or other mass storage devices
Figure 1-1
The main
components
of a computer.
!"# #$
CPU
The CPU is the computer logic microprocessor chip that processes instructions that are
received from the primary computer memory (RAM). These instructions are stored in
binary language. The CPU typically plugs into the motherboard of the computer. Modern CPUs have cache memory on board to speed up operation. Examples of CPUs
include the proprietary Sun UltraSPARC (Scalable Processor Architecture), which is
designed strictly for the Sun line of workstations and servers. The following list identifies better-known CPUs designed for microcomputers:
■
Intel x86, Pentium, Celeron, and Itanium
■
AMD K6 series, Athlon, and Duron
■
Power PC (PPC), which is a joint venture by Apple, IBM, and Motorola
■
Motorola 68000 Series
■
Compaq (formerly DEC) Alpha
103xFMp.book Page 5 Monday, October 14, 2002 4:10 PM
The Main Components of a Computer
5
RAM
RAM is physical memory in the form of microchips. It is normally located on either
the motherboard or the memory card of the computer. It is the main computer memory, often referred to as primary memory or working memory. Primary memory is the
part of memory in which the activity of the running system takes place. The phrase,
“The system has 128 MB (megabytes) of memory,” refers to primary memory (RAM).
Operating systems and software programs usually reside on the hard disk. When the
computer is booted, an image or copy of the operating system is loaded into RAM.
When a program is started, an image or copy of that program is loaded into RAM.
Images in RAM remain as long as they are needed. When these images are no longer
required, they are overwritten by other images. If power is lost or the system is rebooted, images in RAM disappear. RAM is available in many different form factors and
performance levels. It is common to add RAM in computers to increase the size of programs they can run and also to improve performance.
I/O Devices
The I/O portion of the computer accepts or reads input from a device into memory, or
it writes output from memory to a device. There are many types of I/O devices. For
example, the keyboard and the mouse are the primary user input devices. The monitor
and the printer are the primary output devices. Disk drives and tape drives are considered both input and output because they can be read from as well as written to. A normal CD-ROM drive is an input device, but a CD-R (recordable) and CD-RW (read/
write) are considered both input and output devices. A monitor can also be an input
device if it has a touch screen.
Hard Disks and Other Forms of Mass Storage
The hard disk is a magnetic storage device in which information is stored. All files,
including the operating system and applications or utilities, are stored on a hard disk.
The contents of the hard disk are managed by the filesystem, which is covered later.
Forms of optical storage, such as CD-ROMs, DVDs, and CD-Rs, are becoming standard components on many new computers. Tape drives are also very common as a
backup device used primarily on high-end workstations and servers.
Disk drives typically communicate with the computer using Enhanced Integrated Drive
Electronics (EIDE) or Small Computer Systems Interface (SCSI). CD-ROMs and tape
drives typically connect using the AT Attachment Packet Interface (ATAPI), which is
an extension to EIDE. ATAPI, EIDE, and SCSI are industry standards that are widely
supported on all modern operating systems.
103xFMp.book Page 6 Monday, October 14, 2002 4:10 PM
Chapter 1
The UNIX Computing Environment
6
Peripheral Components
Peripheral components are those that are independent of the CPU, RAM, and mass
storage. Some of the more common peripherals are discussed here. These include I/O
devices and other components such as video hardware, audio hardware, and networking devices found in most modern computers (see Figure 1-2).
Figure 1-2
Peripheral
components of
a computer.
Keyboard and Mouse
As previously mentioned, the keyboard and mouse are the primary input devices. The
keyboard and mouse typically interface to the computer using either a PS/2 or universal serial bus (USB) connection. USB is becoming more common.
Video Components
The primary video components are the video adapter and the monitor. The video
adapter provides the ability to display text and graphics. The amount of video memory
determines the resolution and number of colors that can be displayed. Video cards are
installed in an Accelerated Graphics Port (AGP) slot, Peripheral Components Interface
(PCI) slot, or can be built in to the motherboard. Most modern PC’s use an AGP interface for video.
Monitors are characterized by screen size, resolution capabilities, refresh rate, and display precision known as dot pitch. The monitor connects to the video card using a 15pin RGB connector. Flat-panel LCD displays are becoming increasingly popular. Video
components can also include motion video capture and editing systems.
Audio Components
Audio usually includes a sound card and speakers. In some cases, audio includes a
microphone. Sound cards typically use an Industry Standard Architecture (ISA) or PCI
slot on the motherboard. The microphone can be separate or built in to the monitor. In
either case, it plugs into the sound card. Multimedia, music, and voice-recognition
applications take advantage of the sound components.
103xFMp.book Page 7 Monday, October 14, 2002 4:10 PM
Computer Roles and Operating Systems
7
Printing Devices and Scanners
Printing devices are output-only and include printers and plotters. There are hundreds
of different kinds of printers, and they can be attached to a workstation, a server, or
directly to a network. Plotters are less common than printers and are primarily used
for large-scale drawings. Printing devices can be attached to the computer using various interfaces, such as parallel, serial, USB, and IEEE 1394 (FireWire). Scanners can
serve as copiers and fax machines as well as devices with which to capture high-resolution graphical color images. Scanners typically attach to the computer using a serial or
USB interface.
Networking Components
Many computers today come with an Ethernet network interface card (NIC) or
adapter. This adapter allows computers to communicate with each other through a
central hub device using a cabled or wireless connection. This connection forms a
local-area network (LAN). Most newer network adapters plug into a PCI slot on the
motherboard. Older network adapters use the ISA interface. Modems are also considered networking devices, which allow remote dial-up to private networks and Internet
service providers (ISPs). Modems can be either internal or external.
Computer Roles and Operating Systems
All computers require an operating system (OS) to manage their functions. This is true
regardless of the manufacturer of the computer or whether it is a microcomputer,
midrange computer, or mainframe computer. OSs can be divided into two major categories:
■
Single-user (desktop)
■
Multiuser (network)
Single-User Desktop Systems
Early desktop OSs were single-user systems. This means that they could track only one
user at a time and were designed to run on a personal computer (PC) desktop or laptop. DOS and Windows 3.x are examples of true single-user desktop OSs. The activities of only one user can be managed; so only one user can be logged in at a time.
Modern OSs such as Windows 9x, Windows NT Workstation, Windows 2000 Professional, Windows XP, and the Macintosh OS have some networking capabilities for
peer-to-peer workgroup networking. However, they are largely employed as singleuser desktop OSs (see Figure 1-3).
103xFMp.book Page 8 Monday, October 14, 2002 4:10 PM
Chapter 1
The UNIX Computing Environment
8
Figure 1-3
Single-user
desktop system.
Workstation and Desktop Applications
UNIX can serve as a desktop operating system but is most commonly found on highend computers known as UNIX workstations. Sun Microsystems Ultra and SunBlade
line of workstations are UNIX workstations that have powerful CPUs and ample
memory. These workstations are used in engineering and scientific applications, which
require dedicated high-performance computers.
Some of the specific applications that are frequently run on UNIX workstations
include the following:
■
Computer-aided design (CAD)
■
Electronic circuit design
■
Weather data analysis
■
Computer graphics animation
■
Medical equipment management
■
Telecommunications equipment management
Most current desktop OSs include networking capabilities and support multiuser
access. For this reason, it is becoming more common to classify computers and operating systems based on the types of applications they run. This classification is based on
the role or function that the computer plays, such as workstation or server. Typical
UNIX desktop or low-end workstation applications might include word processing,
spreadsheets, and financial management. On high-end UNIX workstations, the applications might include graphical design or equipment management and others (as previously listed).
The UNIX operating system can run on a PC. Any system that is running UNIX is
referred to as either a workstation or a server. A PC is a system running any of the
other popular OSs originally designed for the PC.
103xFMp.book Page 9 Monday, October 14, 2002 4:10 PM
Computer Roles and Operating Systems
9
Network Operating System Capabilities
All versions of UNIX and most other modern network operating systems support
advanced features:
■
Multiuser capability
■
Multitasking
■
Distributed processing
■
High level of security
Multiuser capability enables more than one user to access the same resources and provides support for many users simultaneously. The OS keeps track of each resource,
such as CPU, RAM, hard disk, and printers, and allows them all to be shared. Each
program or application that runs is referred to as a task or process. Multitasking
enables the OS to keep track of multiple processes simultaneously. This allows more
than one tool or application to be used at one time. Distributed processing enables the
use of resources across the network.
For example, a user at a workstation would be able to access files and applications on
the hard disk of another computer, or a printer, located on a remote part of the network (see Figure 1-4).
Figure 1-4
Distributed
computing
environment.
Network operating systems are also very secure. Beyond the basic username/password
security, they have many other security features. These features can be turned on or
off, depending on the function of the system and the level of security the user or
administrator desires.
Servers and the Network Environment
Network operating systems (NOSs) have additional network management tools and
features that are designed to support access by large numbers of simultaneous users.
103xFMp.book Page 10 Monday, October 14, 2002 4:10 PM
Chapter 1
The UNIX Computing Environment
10
On all but the smallest networks, NOSs are installed on powerful servers or central
host systems. The focus is on server-based or host-based NOSs. Servers are powerful
computers that run an NOS and applications. Many users, known as clients, share
these servers. Servers usually have high-capacity/high-speed disk drives, large amounts
of RAM, high-speed NICs, and in some cases multiple CPUs.
Server applications and functions include web services using Hypertext Transfer Protocol (HTTP), File Transfer Protocol (FTP), and Domain Name System (DNS). Standard e-mail protocols supported by network servers include Simple Mail Transfer
Protocol (SMTP), Post Office Protocol (POP3), and Internet Messaging Access Protocol (IMAP).
File sharing protocols include Sun Network Filesystem (NFS) and Microsoft Server
Message Block (SMB). Network servers, in conjunction with file services, also frequently provide print services. The UNIX print server is Line Printer Daemon (LPD).
A server can also provide the Dynamic Host Control Protocol (DHCP), which automatically allocates IP addresses to client computers. In addition to running services for
the clients on the network, servers can be set to act as a basic firewall for the network.
This is accomplished using a proxy or Network Address Translation (NAT), both of
which hide internal private network addresses from the Internet. Server applications
such as the following are not normally implemented on a home desktop or LAN workstation: HTTP, FTP, DNS, POP3, SMTP, IMAP), LPD, DHCP, and File sharing (NFS,
SMB).
The OS and CPU Relationship
In general, most OSs are designed to work with the CPUs of a particular manufacturer.
Some can run on CPUs from different manufacturers, and some can support multiple
CPUs of the same type. The various Windows OSs (9x/ME/NT/2000/XP) run primarily on Intel-based CPUs. Solaris and Linux run on several different manufacturers’
CPUs, including Intel. Server versions of the Windows OSs (NT and 2000) support
multiple CPUs, as do most versions of UNIX (including Solaris and Linux).
OSs and CPUs often are classified based on the number of bits they can manipulate.
The more bits they can manipulate, the more powerful the CPU and the OS are. Most
early NOSs and CPUs were 16-bit. Most modern NOSs and CPUs are 32-bit, with
some being 64-bit. The Intel x86 CPU architecture is 32-bit, and the Intel Itanium, or
IA-64 architecture, is 64-bit. Sun Microsystems SPARC CPU is 32-bit, and the UltraSPARC is 64-bit.
Examples of NOSs include UNIX, Windows NT/2000 Server, Novell NetWare, and
various mainframe NOSs (see Figure 1-5). Mainframe NOSs include Digital Equipment VMS, Hewlett-Packard MPE, IBM MVS, and several varieties of UNIX. Solaris
103xFMp.book Page 11 Monday, October 14, 2002 4:10 PM
Computer Roles and Operating Systems
11
or SunOS is the Sun Microsystems version of UNIX. A Sun workstation or server normally comes with Solaris, but can also be ordered with Linux. It is possible to order
Intel-based servers with Windows 2000, Novell NetWare, or Linux preinstalled.
Although UNIX is used frequently as a workstation OS for high-performance applications, it is not generally considered an end-user desktop OS. It is most often used as an
NOS on servers, and is often used with Internet web servers. Linux can be used as a
server or a high-end workstation and is becoming increasingly popular as a desktop
OS for home or office use.
Figure 9-5a
Network
operating
systems.
UNIX
VMS
Netware
Network
Operating
Systems
MVS
NT/2000
MPE
Operating Systems, Hardware, and Drivers
Operating systems such as Windows 2000, Solaris, and Linux interact with computer
hardware through the use of device drivers. A driver is a piece of software written for a
particular OS that allows the system to control a particular hardware device properly.
Nearly all major computer components and peripherals, such as keyboards, mice, videos, printers, scanners, and disk drives, require a driver to operate. Most OSs come with
basic drivers for the most common types of hardware and peripherals (see Figure 1-6).
Solaris and Drivers
The original Sun OS, based on UNIX, was designed to run on computers manufactured by Sun Microsystems. The Sun OS comes preinstalled on a consistent and stable
hardware platform. This allows for maximum compatibility between the OS, the drivers, and the hardware. Solaris for Intel is designed to run on Intel-compatible (x86)
computers, with a considerable variety of hardware, and with many different periph-
103xFMp.book Page 12 Monday, October 14, 2002 4:10 PM
Chapter 1
The UNIX Computing Environment
12
Figure 1-6
The role of the
device driver.
%$#& $(
!
"#$
eral manufactures. Either the OS or the hardware manufacturer provides drivers.
Drivers might not be available for all types of peripheral hardware.
Linux and Drivers
Linux was also developed to run on Intel-based computers. The OS may not support
some types of hardware, especially the latest peripherals. Linux, in the Intel-compatible environment, supports most CPUs (including Intel and AMD), most types of RAM,
and standard mass storage interfaces such as EIDE, ATAPI, and SCSI. Standard USB
and PS/2 keyboards and mice are also well supported. Other USB devices may not be
and will need to be checked. Most video card chipsets that are compatible with the
XFree86 graphics system, which comes with Linux, are not a problem. However, the
latest technology devices might not have drivers available yet. Network interface cards
and modems are generally well supported, except for some internal modems that may
require a special driver.
Overview of the UNIX Operating System
Even though the UNIX OS is the one of the oldest in existence, its popularity is still
increasing due to its stability, scalability, broad industry support, and continued
enhancements.
Brief History
In the mid-1960s, the UNIX OS was developed at AT&T Bell Labs with involvement
from General Electric and the Massachusetts Institute of Technology. UNIX was developed as a multiuser OS called Multiplexed Information and Computing Service (Multics). Multics was an interactive operating system written for a specific General Electric
computer. After several years of development, Multics proved to be too expensive and
Bell Labs withdrew from the project.
103xFMp.book Page 13 Monday, October 14, 2002 4:10 PM
Overview of the UNIX Operating System
13
Ken Thompson, a Multics programmer at Bell Labs, wrote a space-travel game for the
GE computer before the Multics project lost funding. With the help of another programmer, Dennis Ritchie, he rewrote the game to run on a Digital Equipment Corporation (DEC) PDP-7 computer that had a better graphics display. The DEC computer
was great for running the space-travel game, but it lacked a viable OS. In 1969,
Thompson got the urge to develop his own OS. Originally, Thompson called the new
OS that he had developed, with a colleague, Uniplexed Information and Computing
Service (UNICS). The name was eventually changed to UNIX. The space-travel game
later was modified to run under UNIX.
UNIX was first written in Assembly language, a primitive set of instructions that control the internal instructions of the computer. However, UNIX could run only on a specific computer. In 1971, Ritchie created the C language. In 1973, he and Thompson
rewrote the UNIX system programs in the C language. Because C is a higher-level language, UNIX could be moved (or ported) to another computer with far less programming effort. The decision to develop this portable OS proved to be the key to the
success of UNIX.
The early UNIX source code was made available to universities all over the United
States. Programmers at the University of California at Berkeley made significant modifications to the original source code and called it Berkeley Software Distribution
(BSD) UNIX. They sent this new version of the UNIX environment to other programmers around the United States. These programmers added tools and code as they saw
fit. Possibly the most important advance made to the software by the programmers at
Berkeley was the addition of networking software. The networking software allowed
the OS to function in a LAN. BSD UNIX became popular with computer manufacturers such as Hewlett-Packard, DEC, and Sun Microsystems.
The Sun Microsystems original version of UNIX, the Sun Operating System (SunOS),
was based on BSD UNIX version 4.2. At that time, the AT&T version of the UNIX
environment was known as System V (system 5). The Microsoft version of UNIX,
developed for PCs with Intel processors, was known as XENIX. In 1988, Sun OS/BSD,
AT&T System V Release 3, and XENIX were combined into what became System V
Release 4 (SVR4). This newest generation of the OS was an effort to combine the best
features of both BSD and AT&T UNIX and to create an industry standard for the OS.
This enabled the development of software for UNIX without consideration as to
whether it was System V or BSD 4.2. The new SVR4 became the basis for most of the
current varieties of UNIX. The timeline shown in Figure 1-7 lists some of the major
events in the evolution of the UNIX OS.
103xFMp.book Page 14 Monday, October 14, 2002 4:10 PM
Chapter 1
The UNIX Computing Environment
14
Figure 1-7
A brief history of
UNIX.
A Brief History of UNIX
1969 !" # $% &'' ()*!* !*! +',
-! - ! )" .
1973. - *-*!! /, ! *!)' *!, 0! )' ! *1 ##*! "1!*
19752* 3 !*)1! 1! # &'' ()
#*! & +* 4
5 -
*+ #* 23
19806"*#! !*1" 7
& )" -'0 1
1982$%8 . 0! 9*1 495 *' 0! : ! #*! 1)'"
*' 1! &'' ()
1984+*!0 # '#* ! &*/'0 *' 7
&: "'1 ;;
1" *
19842 0! 2 ' !*1"
$*!'0 : .
!''! *1 ! -*'
19867
& *': "'1, !*! *+*
19870! 2 ' 42 5 *'
$*!'0 <: .
!''! *1 ! -*'
1988. 0! 2 ' 7 42 75 *': 1#0, 0! 2: & 1991. 0! ()*!* 4(5 )" "0 = >*!0=- )0
$%
(1 *+' ), +'! # (1
1992( *' . 0! 2 ' 7
42 7
5
.+'' 1"
!! ! "?1* (
19937
7& ! #' *' #* &*/'0
.+'' "?1* (
1996 @ 9*1 #* *,* # @A @
1999. !1* (1 /*' *'
20012* # ! ,' . "#"! 1! ;@: @ 9*1
! 1!*0 ##*!
(1 7 /*' *'
The Open Group (www.opengroup.org) currently owns the UNIX standard and now
guides UNIX development using a set of standard operating interfaces called POSIX
(Portable Operating System Interface) and the Single UNIX Specification with the goal
of increasing the compatibility of the UNIX OS among vendors.
UNIX Varieties
The two main versions of UNIX are System V (SVR4) and BSD. Currently, a number
of varieties of UNIX exist. Most are similar because they are based on the industry
standard SVR4. The other varieties are based on BSD. The command used for printing
indicates whether the version of UNIX is System V-based or BSD-based. The command
used for System V-based systems is lp, and the command used for BSD-based systems
is lpr. The command used to determine what processes are running is also an indicator.
System V uses ps –ef, and BSD uses ps –aux. Other differences exist with system
administration commands.
UNIX is now a trademarked name owned by The Open Group, so each vendor called
its version of UNIX by a unique name. Sun’s version of UNIX is called Solaris and is
the most widely used version in networking today. The AT&T version is referred to as
UNIX, the IBM version is AIX, and the Hewlett-Packard version is HP-UX. Digital
103xFMp.book Page 15 Monday, October 14, 2002 4:10 PM
Overview of Linux
15
Equipment, which is now Compaq, has a version called Tru64 that was formerly
called Digital UNIX. These versions of UNIX are designed to run on the hardware
and CPUs made by the specific vendor. Solaris runs not only on Sun computers, but
also on Intel-based machines. Linux, another version of UNIX that is becoming
increasingly popular, also runs on different CPUs. By learning any one of these UNIX
varieties, it is fairly easy to move to one of the others. Figure 1-8 shows some of the
CPU manufacturers and the various UNIX versions and OSs that they can run.
Figure 1-8
UNIX varieties.
!! "#$%#&'
"( ")
*+!# ),-!
12-#,3
.&/0 !& $&24!-
2 #& !
2 #& 5!6#& 6x 5.
6
Overview of Linux
The latest version of UNIX to emerge is called Linux. Linux was developed in 1991 by
Linus Torvalds at the University of Helsinki, Finland. Torvalds posted it on the Internet and encouraged others to contribute to its development. It has features from both
SVR4 and BSD. Linux has become very popular among computer enthusiasts, those
looking for an alternative to traditional PC OSs, and companies looking for a stable,
low-cost OS. The icon for Linux, chosen by Linus Torvalds, is the little penguin shown
in Figure 1-9. The Linux website is www.linux.org and includes information on the following:
■
Applications—Programs written to run on Linux
■
Documentation—Linux documentation project and HOW-TOs
■
Distributions—Organizations providing Linux packages
■
Hardware—Compatible systems and components
■
Courses—Tutorial for new users getting started with Linux
■
Projects—General, hardware, software, and scientific projects
■
News—Linux news and articles
103xFMp.book Page 16 Monday, October 14, 2002 4:10 PM
Chapter 1
The UNIX Computing Environment
16
Figure 1-9
The Linux
penguin.
Linux was originally developed to run on the Intel x86 microprocessor (starting with
the 30386) as a workstation or server. The Linux kernel has since been modified to run
on several different CPUs in addition to the Intel x86. These CPUs include Intel IA-64,
DEC Alpha, SUN SPARC/UltraSPARC, Motorola 68000, MIPS, PowerPC, and even
the IBM mainframe S/390. In fact, Linux now runs on CPUs from a wider variety of
manufacturers than any other OS.
GNU/Linux
Many other components of the OS have been added through the efforts of independent
developers and the Free Software Foundation’s GNU (which means “GNU’s not
UNIX”) project (www.gnu.org). The GNU operating system uses the Linux kernel.
The kernel is the heart of the OS that controls interaction between the hardware and
applications. The GNU project refers to Linux as GNU/Linux, because many components of the OS are GNU applications. A good source of information and resources is
the Linux documentation website at www.linuxdoc.org.
Open Source Software
Linux is available at no expense under the GNU General Public License (GPL), as are
other versions of UNIX, such as FreeBSD and NetBSD. Linux is open source software,
which means that the source code is publicly available and can be modified to suit specific needs. It can also be distributed freely among users. This concept is the opposite
of commercial software, where the source code is not publicly available and each user
must pay a license fee. Commercial software is based on copyright laws, which seek to
limit what the user can do with respect to source code and distribution. Linux can be
downloaded at no cost from various websites.
103xFMp.book Page 17 Monday, October 14, 2002 4:10 PM
Benefits of UNIX
17
Linux Distributions
A number of for-profit companies and nonprofit organizations make Linux available
along with various combinations of applications, utilities, and other software. These
combinations of the OS and software are called distributions. As an example, Red
Hat, Inc., bundles the Linux CDs, source code, and manuals along with a collection of
applications and other products for a modest fee. These additional products include an
office suite, a choice of graphical desktops, web server software, and so on. A level of
customer support is also provided. Red Hat includes the Sun StarOffice suite of productivity software.
The primary component of any distribution is the Linux kernel itself. In addition to
the kernel and applications, other components in a distribution include installation
tools, the boot loader, and utility programs. Some distributions are more graphical and
oriented toward the new user. Others are more basic and focus on developers and people who are already familiar with UNIX. Some of the more common Linux distributions and their websites are as follows:
■
Caldera OpenLinux (www.caldera.com)
■
Corel Linux (linux.corel.com)
■
Debian GNU/Linux (www.debian.org)
■
Linux Mandrake (linux-mandrake.com/en)
■
Red Hat Linux (www.redhat.com)
■
Slackware Linux (www.slackware.com)
■
SuSE Linux (www.suse.com)
■
Turbo Linux (www.turbolinux.com)
Benefits of UNIX
UNIX is a standards-based OS, and although it varies somewhat from one version to
another, the basis of the system is still UNIX. Nearly all major computer manufacturers support some form of UNIX, which is a tribute to its importance as an OS. It is one
of the most powerful, flexible, and scalable OSs in the world. Most versions of UNIX
in use today are commercial versions, such as IBM AIX or Sun Solaris. The source
code is not modifiable by the end user, and there is a license fee for the OS. This is one
of the reasons for the increasing popularity of Linux, which is open source and has a
relatively low deployment cost. Nearly every computer manufacturer, in addition to
having their own commercial version of UNIX, now offers and supports the Linux OS.
These include Sun, HP, IBM, and others.
103xFMp.book Page 18 Monday, October 14, 2002 4:10 PM
Chapter 1
The UNIX Computing Environment
18
In general, UNIX in its various forms continues to advance its position as the reliable,
secure OS of choice for mission-critical applications that are crucial to the operation of
a business or other organization. UNIX is also tightly integrated with the Transmission
Control Protocol/Internet Protocol (TCP/IP). TCP/IP basically grew out of UNIX
because of the need for LAN and WAN communications. TCP/IP is the acknowledged
standard protocol of the Internet and many private networks. All workstations and
servers running the TCP/IP protocols are referred to as hosts and are given an IP
address and a host name. The IP address is what allows the host to be uniquely identified on the Internet. If a local translation file or a name server is available, the computer can be referred to by its name, which then is translated to its IP address. TCP/IP,
IP addresses, and name servers are covered in more detail in Chapter 16, “Network
Concepts and Utilities.”
Sun Solaris Benefits
The Sun Microsystems Solaris Operating Environment and its core OS, SunOS, is a
high-performance, versatile, 64-bit implementation of UNIX. Solaris runs on a wide
variety of computers, from Intel-based PCs to powerful mainframes and supercomputers. Solaris is currently the most widely used version of UNIX in the world for large
networks and Internet websites. Sun is also the developer of the “write once, run anywhere” Java technology. In summary, UNIX and Solaris provide the following benefits:
■
Industry standards–based OS
■
Powerful, flexible, scalable, and secure
■
Supported by various equipment manufacturers
■
Mature and stable OS
■
Tightly integrated with TCP/IP protocols
■
Widely used for mission-critical applications
Linux Benefits
In general, Linux includes the same benefits as UNIX. It is most often used for workstations and for small to medium servers. It is not currently widely implemented on
high-end servers, but this is changing. In addition to those listed, Linux has the added
benefit of being open source software and is available at very low cost. In addition, a
huge Internet user community supports and promotes Linux.
The UNIX Operating Environment
UNIX is a collection of components that together make up an operating environment.
Each version of UNIX varies somewhat from the others, but all share the same basic
characteristics.
103xFMp.book Page 19 Monday, October 14, 2002 4:10 PM
The OS and the Kernel
19
Solaris
The OS environment on Sun systems is called the Solaris Operating Environment. The
Solaris environment consists of the SunOS 5.x OS, the Open Network Computing
(ONC) protocols, and a graphical user interface (GUI). SunOS 5.x is a multiuser,
multitasking NOS that is based on the standard SVR4 UNIX OS. ONC is a family of
published networking protocols and distributed services that enable remote resource
sharing, among other things. The Solaris environment supports four graphical interfaces: Common Desktop Environment (CDE), Sun’s Open Windows (both of which
are bundled with the Solaris Operating Environment), GNU Network Object Model
Environment (GNOME), and the K Desktop Environment (KDE). This course introduces CDE, GNOME, and KDE. In summary, the key components of the Solaris Operating Environment are as follows:
■
SunOS 5.x UNIX OS
■
ONC protocols
■
GUI (CDE or Open Windows)
Linux
The Linux operating environment is similar to that of Solaris, but the components can
vary depending on the distribution. All distributions include, at a minimum, the Linux
kernel, standard TCP/IP networking protocols, an installation package, the GNOME
or KDE graphical desktop, and various configuration and management utilities.
The OS and the Kernel
The OS is a set of programs that manages all computer operations. It also provides a
link between the user and system resources, converting requests that come from the
mouse or the keyboard into computer operations. Most operating systems, including
UNIX, have four main components:
■
The kernel manages the operation of the computer.
■
The shell provides for interaction between the user and the computer.
■
The filesystem provides a way to organize and manage the information on the
computer’s hard disk(s).
■
The commands, or utilities, are used to instruct the computer to perform tasks.
Much of the following information applies to all varieties of UNIX, although some of
the information is Solaris- or Linux-specific.
103xFMp.book Page 20 Monday, October 14, 2002 4:10 PM
Chapter 1
The UNIX Computing Environment
20
UNIX Kernel Overview
The kernel is the core OS with the necessary basic capabilities to run the computer.
The kernel is the closest to the CPU and hardware. It is an executable file that gets
loaded when the computer boots and is conventionally named unix in System V-based
systems or vmunix in BSD-based systems. Solaris contains two kernel files: a platformindependent generic kernel file that is combined with a platform-specific kernel file for
a specific Sun system. These two combined files create the static core kernel that initializes and controls the system.
The Linux Kernel
The development process for the Linux kernel is interesting and somewhat unique.
Linus Torvalds maintains control of how the Linux kernel evolves, with input from
people all over the Internet. Periodically, a group of developers review and test the latest contributions and release a stable version of the OS kernel. The most current version of the kernel is 2.4.7. In this numbering sequence, the numeral 2 represents the
major version number, and the numeral 4 represents the minor version number. The
numeral 7 in the kernel number is a release or patch number.
If the minor version is even, this indicates a stable version of the OS that can be distributed to the Linux community. If the minor version is odd, then this is a development
version.
Kernel Functions
After the kernel loads, it performs the following functions (see Figure 1-10):
■
Manages devices, memory, and processes
■
Controls the functions, or transmission of information, between the system
programs and the system hardware
■
Manages functions such as swap space, daemons, and filesystems:
— Swap space is a reserved part of the hard disk that the kernel uses during
processing. Portions of running programs can be “swapped out” of RAM
into the hard disk and then brought back into RAM if necessary. This swap
space is actually on the hard disk, but it looks like additional memory to a
running program. Swap space is a raw slice, or disk file, that is set aside
during system installation. As previously mentioned, RAM is physical
memory. The swap space on the hard disk represents “virtual memory” and
is used to increase the size and number of programs that can be run. Most
UNIX systems set up a swap space of twice the amount of RAM, or a minimum of 32 MB. Swap space is not RAM, but the OS treats it like RAM to
provide extra memory to the programs that are running. In Figure 1-11, the
kernel is swapping programs in and out of the swap space on the hard disk.
103xFMp.book Page 21 Monday, October 14, 2002 4:10 PM
The OS and the Kernel
21
— Daemons are programs that perform a particular task or that monitor disks
and program execution. Daemons are special processes that begin after the
OS loads. Daemons then wait for something to do in support of the OS.
They can be started or stopped as necessary. An example is the printer daemon, line printer scheduler (lpsched). It starts when the system starts up
and then waits in the background until someone needs to print something.
Daemons in the UNIX world are similar to Services with Windows NT/
2000 and NetWare Loadable Modules (NLMs) with Novell NetWare.
— Filesystems are a hierarchy of directories, subdirectories, and files that
organize and manage the information on hard disks. Filesystems can be
either local or remote. Local filesystems are located on the hard disk of
your workstation. Remote filesystems are located on another computer,
which is usually a server.
Figure 1-10
The kernel
functions.
Hardware
CPU
Kernel
The OS Shell
A shell is an interface between the user and the kernel (see Figure 1-12). It acts as an
interpreter or translator. In other words, the shell accepts commands issued by the
user, interprets these commands, and executes the appropriate programs.
103xFMp.book Page 22 Monday, October 14, 2002 4:10 PM
Chapter 1
The UNIX Computing Environment
22
Figure 1-11
The kernel and
swap space.
#!$
! ! !"
% Figure1-12
The OS shell .
Hardware
CPU
Kernel
Shell
Shells can be command-line driven or graphical. Three command-line shells are available in the Solaris UNIX environment. It is possible to initiate or switch between these
shells when working on the computer. The process status (ps) or echo $SHELL commands are used to determine which shell is in use. The Solaris Operating Environment
103xFMp.book Page 23 Monday, October 14, 2002 4:10 PM
The OS and the Kernel
23
has six available shells that come with Solaris 8. The three primary command-line
shells that are available in all UNIX versions are as follows:
■
The Bourne shell
■
The Korn shell
■
The C shell
These are common to most commercial versions of UNIX. The other three shells—
Bash, Z shell, and TC shell—have been gaining in popularity among UNIX users. The
Bash shell is the default for most Linux distributions, although others are also supported. CDE, GNOME, and KDE are sometimes considered to be graphical shells.
The following list explains the different shells available within a UNIX environment:
■
The Bourne shell (/bin/sh) was the original shell program for UNIX. It is the
default shell for the Solaris computing environment. Stephen Bourne developed
the Bourne shell for the AT&T System V.2 UNIX environment. This shell does
not have aliasing or history capabilities (see Chapter 14, “Shell Features and
Environment Customization”). System administrators mostly use it. The
Bourne shell prompt is a dollar sign ($), which is similar to a DOS C:\>
prompt.
■
The Korn shell (/bin/ksh) is a superset of the Bourne shell and was developed
by David Korn at Bell Labs. It has many of the Bourne shell features, plus
added features such as aliasing and history. This is the most widely used shell
and is the industry standard for system users. The Korn shell prompt is also a
dollar sign ($).
■
The C shell (/bin/csh) is based on the C programming language. Similar to the
Korn shell, it has additional features such as aliasing and history. The C shell
was developed by Sun’s Bill Joy and is still widely used today. The C shell
prompt is a percent sign (%).
■
The Bourne-Again shell (Bash) has the feel of the Bourne and Korn shells and
incorporates features from the C and Korn shells. Bash is the most popular
shell with Linux and is the default for most distributions. Bash can be downloaded from GNU (www.gnu.org).
■
The TC shell (tcsh) is a popular variant of the C shell that supports commandline editing and command-line completion.
■
The Z shell closely resembles the Korn shell, but it has many other enhancements.
NOTE
Examples given in
this book are based
primarily on the
Korn and Bash
shells.
103xFMp.book Page 24 Monday, October 14, 2002 4:10 PM
Chapter 1
The UNIX Computing Environment
24
The Filesystem
The filesystem provides a way to separate and keep track of the information on a hard
disk. The filesystem determines the type, characteristics, and arrangement of files that
can be stored on disk.
Filesystem Overview
A filesystem is created on a disk partition using the formatting process. A partition can
occupy the entire hard disk or can be a subdivided segment of the disk. Partitions are
discussed further in Chapter 8, “Filesystems and File Utilities.” Formatting is similar
to putting up street signs in a new residential area. No one lives there yet, but the
streets and home locations are identified.
Many different types of filesystems are supported by various operating systems. Those
filesystems common in the Windows environment include the File Allocation Table 32bit (FAT32) and New Technology Filesystem (NTFS). Sun Solaris uses the UNIX Filesystem (UFS). Linux uses primarily the Second Extended Filesystem (ext2) or Third
Extended Filesystem (ext3). A hard disk may have one or more partitions or filesystems defined on it.
The filesystem provides for the definition of a file structure. The file structure is a hierarchy of directories, subdirectories, and files that are grouped together for a specific
purpose. Filesystem support is integrated with the kernel to provide an organizational
structure for your software and data (see Figure 1-13).
Figure 1-13
Filesystem
organization.
Directory
Folder
File
The file structure organizes the information on hard disks to make them more manageable, and it enables users to locate files. Hard disks can be divided into partitions with
filesystems, directories, subdirectories, and files. The filesystem organizes your data
similar to the way a file cabinet stores information. The filesystem is like the file cabinet, directories are like drawers, subdirectories are like folders, and files are like the
pages in a folder.
103xFMp.book Page 25 Monday, October 14, 2002 4:10 PM
The Filesystem
25
The Directory Hierarchy
A directory hierarchy looks like an inverted tree, with the root at the top
(see Figure 1-14).
Figure 1-14
The Filesystem
directory
hierarchy.
The following is the hierarchy of the UNIX filesystem:
■
The filesystem is a formatted structure set up on one or more partitions to store
files and directories. Partitions and the associated filesystems are similar to the
drive C: or D: in the Windows/DOS world or like volumes with Novell NetWare. Filesystems can be either local, meaning on the user’s computer, or
remote, meaning on another computer but accessed as if it were local.
■
The directory is a location for files and other subdirectories. The filesystem, or
directory structure, enables the user to create files and directories accessed
through a hierarchy of directories. A directory is like a file drawer in a file cabinet. The highest directory in the directory structure of a filesystem is the root
directory, which is designated as a single forward slash (/).
■
The subdirectory is any directory below another directory. For example, some
of the subdirectories under the root (/) directory are /usr, /etc, and /home.
■
The files are contained in directories and subdirectories. They are the lowest
level of the filesystem. There are usually thousands of files on a hard disk, and
there are several different types:
— Directories are considered a type of file under the UNIX filesystem.
— Plain American Standard Code for Information Interchange (ASCII) files
are pure text files, with no special formatting characters in them.
103xFMp.book Page 26 Monday, October 14, 2002 4:10 PM
Chapter 1
The UNIX Computing Environment
26
— Application files are created by an application such as a word processor,
spreadsheet, or database program.
— Executable programs are UNIX utility commands and application programs.
Common UNIX Directories
The topmost directory in a filesystem is called the root directory. It is the starting point
of the filesystem hierarchy. The root directory (/) is required for the OS to function,
and it contains critical system files such as the kernel. The list following Figure 1-15
contains some of the more important directories and their purposes. The slash in front
of these directories indicates that they are actually subdirectories of the root directory
(see Figure 1-15). UNIX directory structures such as directory names, locations, and
contents can vary from one version to another. Linux directory structures are relatively
consistent with most distributions adhering to the Linux Filesystem Standard
(FSSTND) or the Filesystem Hierarchy Standard (FHS).
Figure 1-15
Common Solaris
subdirectories.
&%
&%
!
"#
$ %
!%&
NOTE
The directories followed by a single
asterisk (*) are specific to Solaris.
Those followed by a
double asterisk (**)
are specific to Linux.
All others are common to both.
The following list of directories is not intended to be all-inclusive but does include
those most commonly found on UNIX systems:
■
The /bin (binary) directory contains many of the UNIX commands.
■
The /boot directory** contains most of the files necessary to boot a Linux
system.
■
The /dev (devices) directory contains files that are pointers to device filenames.
All devices in UNIX have standard filenames.
■
The /etc (etcetera) directory contains system administration files, such as the
password file. This directory is commonly referred to as et-cee.
103xFMp.book Page 27 Monday, October 14, 2002 4:10 PM
The Filesystem
27
■
The /export/home directory* contains the user home directories. Depending on
how the system has been set up by the administrator, the home directories
could be found in /home.
■
The /home directory contains the user home directories.
■
The /kernel directory* contains the basic operating system files, such as the
main UNIX kernel genunix.
■
The /lib (library) directory contains common library files used by programs in
the /bin and /sbin directories.
■
The /mnt (mount) directory** is the standard mount point for filesystems such
as the floppy disk and CD-ROM.
■
The /opt (optional) directory contains Sun’s unbundled software applications
and third-party applications. This directory is not always used with Linux.
■
The /proc (process) directory** contains files related to system information
used by the kernel.
■
The /root directory** is the superuser’s home directory.
■
The /sbin (single-user binaries) directory contains essential executables used in
the booting process and in system failure recovery. This directory also includes
some system administration utilities.
■
The /tmp (temp) directory contains temporary files placed by users. Occasionally, files in /tmp get deleted by an administrator or automatically are deleted as
part of system startup.
■
The /usr directory contains files and programs used by all users.
■
The /usr/bin (user) directory contains executable commands, system administration utilities, and library routines.
■
The /usr/src directory** contains the Linux source code.
■
The /usr/ucb directory contains commands originally developed under BSD
UNIX. They exist because some users prefer the BSD version of a command to
the System V version.
■
The /var (variable) directory contains dynamic and variable data, such as print
spooling and mail system error messages.
UNIX Commands
UNIX commands are key to maintaining the filesystem. The UNIX OS comes with
more than 350 commands and utility programs. These UNIX commands and utility
programs are used to perform the following functions:
■
File maintenance, such as creating, editing, copying, deleting, and so on
■
Administration, such as adding new users, printers, disks, and so on
103xFMp.book Page 28 Monday, October 14, 2002 4:10 PM
Chapter 1
The UNIX Computing Environment
28
■
Printing
■
Networking and communication
■
Programming
■
Obtaining help
Commands tell the shell what to do, such as “list the contents of a directory” or “copy
a file.” Some commands are built in to the shell program, such as cd (change directory)
and exit. Most commands reside on the hard drive in a directory named /bin, which is
short for binary code.
Graphical User Interface (GUI) Options
All modern operating systems include a GUI. This section covers a number of popular
ones, including Microsoft Windows, UNIX CDE, and several others.
Common Desktop Environment (CDE)
Sun Microsystems was the first company to use a windowing environment in conjunction with the UNIX OS. In 1993, a consortium of UNIX platform vendors was formed
to develop an integrated, standard, and consistent GUI desktop environment. The contributors included Hewlett-Packard, IBM, Novell, and Sun Microsystems. Many other
companies and members of the Open Software Foundation (OSF), X/Open, and the
X Consortium also contributed. CDE is Motif-based, and users of other UNIX and PC
desktops should be comfortable using CDE. Many of the features of CDE are common
to other desktop environments.
The CDE offers the following for users:
■
Provides a GUI between the user and the OS
■
Includes built-in menus for users to select and run utilities and programs without using Solaris Operating Environment commands
■
Provides more than 300 utility programs and tools
■
Enables users to control multiple documents or applications on the screen at
the same time
■
Controls activities in windows using both the mouse and the keyboard
Figure 1-16 shows a typical CDE screen. CDE is discussed in greater detail in subsequent chapters.
Open Windows
Open Windows is Sun’s original GUI developed for the Solaris Operating Environment
(see Figure 1-17). It is similar to CDE, but it is proprietary and not well supported.
The user has a choice when logging in to a Solaris workstation to select either CDE or
Open Windows.
103xFMp.book Page 29 Monday, October 14, 2002 4:10 PM
Graphical User Interface (GUI) Options
29
Figure 1-16
CDE GUI.
Figure 1-17
The Open
Windows GUI.
103xFMp.book Page 30 Monday, October 14, 2002 4:10 PM
Chapter 1
The UNIX Computing Environment
30
GNU Network Object Model Environment (GNOME)
The latest windowing system to emerge in the UNIX world is GNOME. GNOME is
part of the GNU open source software project. GNOME has an easy-to-use desktop
environment for the user, a powerful application framework for the software developer, and it is free. GNOME (gnome.org) is included in most BSD versions of UNIX
and with GNU/Linux distributions. GNOME also works with many other UNIX systems, including Solaris (www.sun.com/gnome).
GNOME combines advanced desktop organization and navigational features that
enable easy access to information (see Figure 1-18). It provides usability, appearance,
and personalization to match a user’s unique working style.
The GNOME desktop key features include the following:
■
Attractive, intuitive user interface
■
Personalization capabilities
■
Convenient front panel for rapid access to favorite programs
■
Full suite of powerful applications
■
Capability to run existing CDE and Java-based applications
Figure 1-18
GNOME GUI.
103xFMp.book Page 31 Monday, October 14, 2002 4:10 PM
Graphical User Interface (GUI) Options
31
K Desktop Environment (KDE)
KDE is a mature, full-featured desktop environment that is used primarily with Linux
(see Figure 1-19). As with GNOME, KDE is also open source software and is freely
available. KDE can run with several varieties of UNIX. Most distributions of Linux
come with KDE and with GNOME. The K does not stand for anything in particular. It
is just the first letter in the alphabet before L, which represents Linux. Solaris also supports KDE and is available on the Solaris Software Companion CD copackaged with
Solaris or downloaded from wwws.sun.com/software/solaris/freeware/.
Figure 1-19
KDE GUI.
Skill Builder
Lab 1.4.3
UNIX Computing Environment
This lab exercise reviews UNIX computing environment terminology and helps
reinforce the concepts introduced in this chapter. You can also investigate the
use of UNIX at your institution or another organization and research websites
to see what organizations are using Solaris UNIX. Refer to the Cisco Networking Academy Program: Fundamentals of UNIX Lab Companion.
103xFMp.book Page 32 Monday, October 14, 2002 4:10 PM
Chapter 1
The UNIX Computing Environment
32
Summary
Now that you have completed this chapter, you should have an understanding of the
following:
■
The main components of a computer are the CPU, RAM, I/O devices, and hard
disk. They are controlled by the OS.
■
Most desktop OSs are intended for use by a single user. Network operating systems such as UNIX are usually installed in servers that can support many users
and large networks.
■
UNIX originally was developed at Bell Labs, and significant improvements
were made at UC Berkeley, including the addition of networking capabilities.
The industry standard SVR4 led to the development of several current varieties
of UNIX, including Sun Microsystems Solaris.
■
The key pieces of the Solaris Operating Environment are the SunOS, the ONC
protocols, and the CDE GUI.
■
The main components of the UNIX OS are the kernel, the shell, the filesystem,
and commands. The kernel manages hardware, daemons, swap space, and the
filesystem. The shell is an interpreter that provides an interface between the
kernel and the user. The filesystem manages and organizes information on the
hard disk. Commands dictate what action the shell is to take.
■
Several graphical desktop shells are available for UNIX. CDE is used primarily
in the commercial environment. GNOME and KDE are open source desktops
used primarily with Linux.
Key Terms
The table that follows lists those key terms that are new for the supplementary material.
Term
Definition
GUI
Graphical user interface. An alternative to a command-line interface. A
GUI enables users to use a mouse to access programs, run commands, and
change configuration settings.
KDE
K Desktop Environment. A Windows-like GUI popular in Linux, similar
in function to GNOME.
SPARC
Scalable Processor Architecture. Sun Microsystems’ proprietary CPU chip
designed strictly for Sun’s line of workstations and servers.
103xFMp.book Page 33 Monday, October 14, 2002 4:10 PM
Key Terms
33
Term
Definition
tape drive
Common backup device used primarily on high-end workstations and
servers.
peripheral
components
Components independent of the CPU, RAM, and mass storage. Some of
the more common peripherals are keyboard, printer, audio, and video
components.
NIC
Network interface card. Allows computers to communicate with each
other through a central hub device using a cabled or wireless connection.
modem
Modulate/demodulate (modem). A device that allows remote dial-up to
private networks and ISPs.
ISP
Internet service provider. A company that provides Internet access and
other related services for a fee.
server
A computer that provides a service such as printing, file sharing, mail
routing, and so forth.
host
A computer or device in a network having a separate IP address.
NFS
Network Filesystem. A file sharing protocol developed by Sun Microsystems.
SMB
Server Message Block. A file sharing protocol developed by Microsoft.
firewall
A machine running special software to protect an internal network from
attacks from outside the network. Internal hosts connect to external networks and systems through the firewall. A firewall can be configured with
additional software to act as a proxy server.
proxy server
A server on the network that stands in for remote servers. Proxy servers
provide security and access control.
driver
A piece of software written for a particular OS to allow it to control a particular hardware device properly.
linux
Another version of UNIX that is becoming increasingly popular and runs
on different CPUs.
GNU
Pronounced ga-new and means “Gnu’s Not UNIX.” Mainly refers to the
components of the OS that have been added through the efforts of independent developers and the Free Software Foundation’s GNU project
(www.gnu.org). The GNU OS uses the Linux kernel.
open source
software
Software that can be modified and redistributed without a fee or restrictions.
103xFMp.book Page 34 Monday, October 14, 2002 4:10 PM
Chapter 1
The UNIX Computing Environment
34
Check Your Understanding
1. Which three of the following are CPUs?
A. Sun UltraSPARC
B. Itanium
C. Carnivore
D. Omega
E. Power PC
2. Most modern PCs use a(n) __________ interface for video.
3. Select four interfaces that can be used to directly attach a printer to a PC.
A. EIDE
B. SCSI
C. FireWire
D. RS-232 Serial
E. Parallel
F. USB
4. The capability of UNIX to track multiple processes concurrently is called
___________.
5. Match the proper term to the descriptions of the capabilities of the UNIX
operating system.
multiuser
1. an example would be : username / password
distributed processing
2. allows more than one tool or process to be used
at one time
multitasking
3. enables many users to access the same resources
security
4. allows the use of resources over the network
6. Operating systems such as Windows 2000, Solaris, and Linux interact with com-
puter hardware through the use of ____________ drivers.
7. Which UNIX operating system became the industry standard for many of today’s
varieties of UNIX, including Solaris?
A. AT&T System 3
B. SVR4
C. BSD 4.2
D. AIX
103xFMp.book Page 35 Monday, October 14, 2002 4:10 PM
Check Your Understanding
35
8. The GNU General Public License (GPL) is the licensing scheme used by Linux.
Which two of the following apply to the GPL?
A. Users must purchase a site license.
B. Users may modify the source code.
C. Users may install the software on any computer.
D. Programs are free but users must purchase the source code.
9. A user wants to refer to UNIX workstations by host name rather than by IP
address. Which two of the following enable the user to accomplish this?
A. DHCP server
B. Name server
C. Local host name translation file
D. SMTP server
10. The ____________ is the core of the OS with the necessary basic capabilities to
run the computer.
11. Which shell is the default shell in Solaris but lacks aliasing and history capabili-
ties?
A. Bash
B. Bourne
C. C
D. Korn
12. Which three of the following directories are commonly found on most UNIX sys-
tems, including Linux?
A. /etc
B. /swap
C. /bin
D. /deleted
E. /dev
103xFMp.book Page 36 Monday, October 14, 2002 4:10 PM
103xFMp.book Page 37 Monday, October 14, 2002 4:10 PM
Chapter 2
Accessing Your System and UNIX
Graphical Interfaces
Overview of Changes
Some changes were made in the “Login ID and Password Requirements” section. Two
new sections were added to cover the Linux GNOME and KDE graphical interfaces.
New and changed information is highlighted in the following objectives, introduction,
and summary. The content sections included in this supplement are designated as either
new or updated.
Objectives
After reading this chapter, you will be able to
■
Describe different types of UNIX user accounts
■
Use the Common Desktop Environment (CDE) windowing system
■
Customize the CDE workspace with Style Manager
■
Work with subpanels to add and remove applications
■
Use GNOME and KDE in Linux
■
Customize GNOME
Introduction
This chapter covers the requirements for user accounts and passwords and also covers the
procedure for logging in and out of the system using both the command-line and graphical login managers. You become familiar with the UNIX Common Desktop Environment
(CDE), including basic features and functions and how to use the Style Manager to customize your CDE workspace. You are also introduced to the GNOME and KDE graphical desktop managers and will work with GNOME panels and menus.
103xFMp.book Page 38 Monday, October 14, 2002 4:10 PM
Chapter 2
Accessing Your System and UNIX Graphical Interfaces
38
User Accounts
NOTE
This is an updated
section that replaces
the same section on
pages 30 and 31 of
the Cisco Networking
Academy Program:
Fundamentals of
UNIX Companion
Guide.
Login ID and Password Requirements
Login ID
For users to log in, they must have a user account that includes a login identification
(ID) and password. The login ID is the user’s public name and is commonly referred to
as the username. Depending on the system administrator, login IDs are usually some
combination of a user’s first and last names. For example, user Bob Wood’s login ID
might be bobw, bwood, woodb, or bw2. The login ID must be unique on the system,
and there are usually some limitations on the type and number of characters that can
be used. Login IDs on Solaris systems are limited to eight alphanumeric characters and
can be any combination of letters (uppercase or lowercase), numbers, and special characters (that is, !, $, -, _, and so on). Most versions of Linux limit the login ID to 32
alphanumeric characters or fewer. It is best to keep login IDs to eight or fewer alphanumeric characters and use special characters sparingly. Dashes and underscores are
recommended. When creating the user, the administrator can also include the user’s
full name. The login ID, user’s full name, and other account information are stored in
the password (/etc/passwd) file, which can be viewed by all users. User passwords, in
encrypted form, are stored in the /etc/shadow file.
Passwords
The user’s password protects the account from unauthorized access. Both Solaris and
Linux have specific rules for creating passwords to help ensure system security.
Solaris and Linux passwords have the following requirements/characteristics:
■
The password must be at least six characters in length.
■
The password must be different from the login ID.
■
The first six characters of the Solaris password must contain at least two alphabetic characters and at least one numeric or special character, such as a dollar
sign ($) or a semicolon (;).
■
Linux passwords can be any combination of characters (alphanumeric and special), and there is no requirement for what the first six must contain.
■
Passwords are case-sensitive, which means that they can be created with uppercase or lowercase letters and must be entered exactly the same way when logging in. The password ABc123 is different from the password ABC123, for
example.
103xFMp.book Page 39 Monday, October 14, 2002 4:10 PM
Introduction to GNOME and KDE in Linux
39
■
When changing Solaris passwords, the new password must differ from the previous password by at least three characters.
■
When changing Linux passwords, the new password must contain no more
than two successive characters from the previous one and cannot contain dictionary words.
■
Passwords may contain spaces and special characters. As an example, the password a9$B7 c5 is perfectly valid. The length is six or more characters. It also
has uppercase and lowercase letters, numbers, a special character, and a space.
Introduction to GNOME and KDE in Linux
Most distributions of the Linux operating system offer a choice of graphical user interfaces. The two most popular desktop managers are GNOME (GNU Network Object
Model Environment) and KDE (K Desktop Environment). Each offers a collection of
applications and software tools that have been customized to work with its respective
desktop control features. Both GNOME and KDE are easy to use and configurable.
It is possible to run most GNOME- and KDE-enabled software that is normally
launched from menus and panel buttons from either desktop manager. In GNOME, a
submenu leads to the KDE menus. Selecting items from these menus starts them under
GNOME, where they work fine, but without some of the features of KDE. It is also
possible to access most of the GNOME applications from the KDE menu.
The question of which desktop manager to use is a matter of personal preference. It is
possible to install both if desired and enough disk space is available. This allows the
choice of either one when logging in. Both GNOME and KDE are widely supported,
including releases by large commercial corporations.
With a future release of Solaris, GNOME will become the default desktop. However,
CDE will remain as an option, enabling users to choose either environment when they
log in. You can download GNOME for Solaris from www.sun.com/software/gnome.
NOTE
The preceding password requirements
do not apply to the
Solaris root account
password or to any
user password
assigned by the root
user. These rules
apply when a Solaris
user changes his
password. The Linux
root user password
follows the same
rules as a regular
user account.
NOTE
All text in this
section is new and
inserted after the
e-Lab Activity 2.4.2
on page 57 in the
Cisco Networking
Academy Program:
Fundamentals of
UNIX Companion
Guide.
103xFMp.book Page 40 Monday, October 14, 2002 4:10 PM
Chapter 2
Accessing Your System and UNIX Graphical Interfaces
40
NOTE
The following sections introduce both
GNOME and KDE.
However, after this
chapter, discussions
on topics dealing
with the graphical
user interface under
Linux center on
GNOME with Sawfish as the window
manager, as delivered with the Red
Hat distribution of
Linux.
Choosing the Login Session
When Red Hat Linux boots and starts graphics, its login window looks like the screen
shown in Figure 2-41.
Figure 2-41
A Linux login
window.
At the top of the login box is a series of labels that produce drop-down menus. First, if
your choice of language is not English, select the language you prefer from the Language menu.
The Session menu has choices labeled Last (selected by default), Failsafe, Default,
GNOME, and KDE.
■
Last uses whatever login environment you selected the last time the user logged
in.
■
If a user has never logged in before and makes no selection, the Default is
GNOME.
■
The user can explicitly designate either GNOME or KDE by selecting it,
assuming both are installed. If the choice made is not the normal default, a
window appears offering to let it be the default.
■
On occasion users make mistakes in configuring their login environments that
prevent them from being able to log in. As a defense against locking oneself
out, the Failsafe session logs the user in to a Terminal window, without
attempting to evaluate any startup files.
Primary Differences Between GNOME and KDE
Although the purpose and overall functionality of GNOME and KDE are similar, their
underlying basic architectures, technologies, and accompanying applications and tools
are quite different. Figure 2-42 shows the GNOME and KDE icons.
103xFMp.book Page 41 Monday, October 14, 2002 4:10 PM
Primary Differences Between GNOME and KDE
41
Figure 2-42
GNOME and KDE.
Beginning users are likely to be interested first in the differences in the look and feel
and the style of operation of the two user interface systems, which are covered in the
following paragraphs. Users interested in exploring an in-depth comparison can find a
comprehensive summary at www.info.cern.ch/pdp/as/linux/gnome/gnome_kde/
index.html.
General Differences
Some persons claim that KDE is similar to Windows, at least more so than GNOME.
GNOME advocates claim that the GNOME desktop is an improvement over what is
provided in KDE.
GNOME is more flexible than KDE and is easier to configure. On the other hand,
KDE has been around longer, and quite a few KDE-compliant applications exist.
Window Managers
KDE uses a single carefully integrated window manager.
GNOME allows selection from a variety of window managers. The default window
manager, presently best supported by GNOME, is Sawfish, which is programmable
and extensible in a dialect of Lisp called librep. Other window managers such as
Enlightenment, FVWM2, IceWM, and TWM are also available in Linux distributions
and work fine under GNOME but are less tightly integrated with GNOME.
103xFMp.book Page 42 Monday, October 14, 2002 4:10 PM
Chapter 2
Accessing Your System and UNIX Graphical Interfaces
42
Virtual Desktops
KDE allows a limit of eight virtual desktops, or workspaces as they are sometimes
called. Each virtual desktop can have its own background and look. The default number of workspaces available with KDE is four.
In GNOME the number of virtual desktops allowed is a function of the window manager selected. Under Sawfish there is no limit to the number that are allowed short of
what system memory can handle. Furthermore, Sawfish allows subdividing each workspace into a grid, with a user-definable number of columns and rows of viewports. All
workspaces and viewports inherit the same background and appearance. As with
KDE, the default number of workspaces available with GNOME is four.
Panels
Panels are like the taskbar in Windows: a place to locate menus, launch programs, and
store buttons and icons that serve many purposes. GNOME allows the creation, deletion, moving around, and complete customization of any number of panels of several
types: menu, edge, aligned, sliding, or floating, and also a special type of panel-withina-panel called a drawer. KDE’s implementation of panels is limited to one main panel
and a taskbar.
File Managers
KDE’s primary means of managing files is with Konqueror. In addition to acting as a
file manager, Konqueror also functions as a browser, although it does not support any
of the popular plug-ins used by Mozilla, Netscape, and Explorer (which is not available for Linux).
GNOME’s Nautilus is a graphical shell that enables users to explore files and also
browse the Internet. Like Konqueror, Nautilus does not support plug-ins. However, a
variety of browsers are available for Linux that do use plug-ins. Mozilla, the open
source version of Netscape, is now supplied as the default browser under GNOME
and may be run from KDE as well.
Note also that many veteran users of UNIX and Linux systems prefer to use a Terminal window and traditional UNIX shell-based commands as taught in this course to
manage files.
Themes
Themes make integrated visual and functional changes to the desktop. Theme support
under KDE is excellent and includes a theme manager. GNOME theme support is also
very good. The Sawfish window manager even enables you to define separate themes
for individual windows and groups of windows.
103xFMp.book Page 43 Monday, October 14, 2002 4:10 PM
Introduction to GNOME and KDE Tutorials
43
Control Center
Both KDE and GNOME enable configuration through well-designed graphical programs.
Introduction to GNOME and KDE Tutorials
Instruction is readily available in both GNOME and KDE. Sometimes the abundance
of information can seem bewildering to new users, but the documentation is generally
well indexed and quite readable.
Learning About GNOME
Upon logging in under GNOME for the first time, users are presented with a screen
that looks like that in Figure 2-43. The large window is the Nautilus graphical shell.
Figure 2-43
The GNOME
desktop with the
Nautilus window.
From here, there are several ways to start learning about GNOME.
1. On the panel at the bottom of the page, there is an icon with a question mark
inside a cartoon dialog balloon (see Figure 2-44).
Figure 2-44
The GNOME
documentation
icon.
103xFMp.book Page 44 Monday, October 14, 2002 4:10 PM
Chapter 2
Accessing Your System and UNIX Graphical Interfaces
44
Click the documentation icon to bring up another Nautilus window with the
GNOME HELP INDEX displayed. Below the title is a link that says GNOME
User’s Guide. Open that to go to the table of contents. From there you may begin
reading about GNOME.
2. Click the Help tab on the lower left of the sidebar in the Nautilus window. This
opens an index to several help documents, including the GNOME User’s Guide
and an Introduction to GNOME (see Figure 2-45). To locate detailed information on any subtopic, click the expansion arrow to the left of any subject.
Figure 2-45
The Nautilus
Help tab with
expanded index.
3. Help on Nautilus itself may also be accessed from the Help menus at the top.
Learning About KDE
The documentation icon on the KDE toolbar is a red-and-white-striped life preserver,
fifth from the left in Figure 2-46.
Figure 2-46
The KDE
documentation
icon.
Click the icon to access the KDE Help Center (see Figure 2-47). Notice the index in the
sidebar on the left, which you may use to help find information on specific topics of
interest. A book icon titled Tutorial provides an explanation of icons and an introduction to the KDE desktop (see Figure 2-47).
103xFMp.book Page 45 Monday, October 14, 2002 4:10 PM
GNOME Customization
45
Figure 2-47
The KDE Help
Center.
GNOME Customization
As with most graphical windowing environments, GNOME can be customized to meet
the needs and desires of various users. Customization includes modifying user preferences; adding applets, launchers, panels, and drawers; and also adding to menus.
User Preferences
GNOME and its window managers are highly configurable. Customization of the
most visible elements of GNOME’s environment, such as the screen background,
choice of colors and fonts, themes, and screensaver behavior, is simple and similar to
other graphical user interfaces, such as Windows or CDE. To change these elements of
your working environment, start Nautilus from the Start Here icon, select the Preferences icon, followed by whichever subgroup of options you want to change (see Figure
2-48). Just follow the onscreen guidance.
Adding to the GNOME Panel
You may add objects of various types to panels, including launchers, applets, menus,
and drawers. Click the GNOME foot icon to bring up the main menus, and then select
Panel, followed by Add to Panel to see a submenu that lists all the object types that
you can add.
103xFMp.book Page 46 Monday, October 14, 2002 4:10 PM
Chapter 2
Accessing Your System and UNIX Graphical Interfaces
46
Figure 2-48
GNOME Preferences icons.
In addition to adding objects to panels, you can add panels of various types. The sections that follow cover how to add a launcher, an applet, and a drawer and how to create a new panel.
Adding a Launcher to the GNOME Panel
A launcher starts an application when you click its icon. To add the GNOME CD
player to the panel, for example, click the GNOME foot icon and select Panel > Add
to Panel > Launcher from Menu > Multimedia > CD Player. The CD player icon
appears on the panel. The player appears when you click the icon (see Figure 2-49).
Figure 2-49
Adding a
launcher from
the menus.
103xFMp.book Page 47 Monday, October 14, 2002 4:10 PM
GNOME Customization
47
To add a launcher for something that is not in the menus, start as above and then
select Launcher. A dialog box asks for specifics. You may select an icon to use by clicking the blank box labeled No Icon. If you do not select an icon, GNOME inserts a
default placeholder.
Adding an Applet to the GNOME Panel
An applet is a small application that runs from within the panel, such as a clock or
mail-notification utility.
To add an applet that monitors system CPU and memory use, click the GNOME foot
icon and select Panel > Applets > Monitors > CPU/MEM Usage. The applet appears in
your panel and continues to update while you use the system.
In this case you did not need to select Add to Panel because an applet by definition
runs in the panel. Selecting an applet causes it to be installed in the panel automatically.
Adding and Filling a Drawer on the GNOME Panel
A drawer is a collapsible panel within a panel. To add a drawer to your main panel,
click the GNOME foot icon, and then click Panel > Add to Panel > Drawer. A drawer
icon appears on the panel with a small open arrow on the upper right.
Click the drawer one time to display an empty panel. To this you may add any sort of
panel object in the same way you would to the main panel.
To close or re-open the drawer, click the drawer icon or the arrow at the end of the
opened panel.
Figure 2-50 shows an opened drawer on the main panel populated by (from the top)
the following:
■
A menu
■
A screen lock button
■
A log out button
■
A run button
■
A launcher for GNU Emacs
■
Another drawer opened to reveal system toys and games
■
A final drawer opened to reveal several system resource monitor applets.
Creating a Floating Panel
The various panel types feature subtle differences in the way they are placed on the
desktop but are otherwise much the same. A simple example showing how to create a
floating panel is provided here.
103xFMp.book Page 48 Monday, October 14, 2002 4:10 PM
Chapter 2
Accessing Your System and UNIX Graphical Interfaces
48
Figure 2-50
A Drawer on the
main panel.
You may add any number of panels to your desktop. When you have time to explore
them, try creating one of each type to learn their differences and to find what best suits
your own requirements.
To create a floating panel, follow these steps:
Step 1
Click the GNOME foot icon and select Panel > Create Panel > Floating
Panel. An empty, vertically oriented panel with open and close arrows
appears at the upper left of your screen.
Step 2
Right-click the mouse on either arrow and select Panel > Properties > All
Properties. The Panel properties window appears, which is where you
customize such options as the panel’s size, orientation, position, and
background. Unlike other property-setting windows, these properties
apply as you type them in. There are no Apply, OK, or Cancel buttons.
Step 3
Click Close after customizing the panel.
Figure 2-51 shows the upper-left part of a screen where a panel has been created, with
the Panel properties window still open. Note that the panel’s orientation has been
changed to horizontal, the upper-left corner has been relocated so as not to overlap
desktop icons, and the background color has been set. An applet toy was added to give
the panel some content.
103xFMp.book Page 49 Monday, October 14, 2002 4:10 PM
Adding to the GNOME Menus
49
Figure 2-51
A new floating
panel.
Further Panel Customization
Objects on panels can be moved, configured, or deleted. These operations are all initiated by right-clicking with the cursor over the panel object, which brings up a menu.
To move some objects, such as a desk guide or a task list, the pointer must be over the
object’s handle. Upon selecting Move from the menu, drag the icon to where you want
it, including possibly to another open panel. Other icons automatically move over to
make room for it.
Objects that are configurable show a Properties submenu, where details concerning the
object’s use may be added. Use this feature also to select a custom icon for a program.
Adding to the GNOME Menus
GNOME allows its menu system to be customized. Menu items may be added,
deleted, reordered, and restructured. Unless you are logged in as the superuser (root);
however, the only menu you may change is the Favorites menu, because changes made
to the other GNOME menus affect all users on the system.
Adding to Favorites from Another Menu
Sometimes an item you use frequently is nested deep within the menu structure, requiring you to search for it every time. To add the KDE version of the game Mahjongg to
103xFMp.book Page 50 Monday, October 14, 2002 4:10 PM
Chapter 2
Accessing Your System and UNIX Graphical Interfaces
50
your Favorites menu, for example, start by clicking the GNOME foot icon, and then
select in turn Favorites > Add from Menu > KDE Menus > Games > Boardgames >
Mahjongg. This action duplicates the game on your Favorites menu.
Adding to Favorites Using the Menu Editor
To start the menu editor, select it by pressing the GNOME foot icon > Panel > Edit
Menus. Keep in mind that the only part of the menu system you can change, as nonroot, is the Favorites menu.
Notice on Figure 2-52 that there are buttons that enable you to create new submenus,
add menu items, delete items, and to re-order labels in a menu by moving them up or
down or by sorting them alphabetically.
To add a new item, for instance to launch a program that you have added to the system, click the New Item button. The item is added as untitled with the name highlighted. This is just a label. This example uses the GNOME version of the game
Mahjongg.
Step 1
In the Name box, type Mahjongg.
Step 2
In the Comment box, type GNOME Mahjongg game.
Step 3
In the Command box, type /usr/bin/mahjongg.
Step 4
Click the blank icon (labeled No icon), which opens another window
with a display of icons in the directory /usr/share/pixmaps.
Step 5
Scroll down and find gnome-mahjongg.png and click it, and then click
OK.
Step 6
Click Save at the bottom of the menu editor. The item you added now
appears as a selection in Favorites.
Your input should match what you see in Figure 2-53.
Figure 2-52
Adding a menu
item .
103xFMp.book Page 51 Monday, October 14, 2002 4:10 PM
Summary
51
Figure 2-53
The GNOME
Menu Editor
and Icon
Selection box.
Summary
Two types of accounts exist on a UNIX system: root and user. The root account has
access to the entire system and can perform system administration tasks such as creating new users, setting up printers, and installing software. All other users have a regular user account to access applications and personal files.
User accounts and passwords have specific rules that must be adhered to. These
include minimum and maximum length and which characters they can contain. Users
can change their passwords at the command line with the passwd command. Password
rules do not apply to the root account for Solaris.
You can log in through a GUI, from the command line, or using a Telnet program with
a valid username and password. You must log out or exit the system properly before
shutting it off. The init and shutdown commands are used to properly shut down a
UNIX system.
All current versions of UNIX provide a graphical desktop with a front panel, which is
the main user interface. You should be familiar with the front panel arrangements of
both CDE and GNOME and should know the buttons and options available.
The mouse and keyboard on a Sun Workstation differ somewhat from those of a typical PC. The Sun keyboard has extra keys, and the mouse has three buttons rather than
two, as with the PC mouse. You should be familiar with the functions of the left and
right mouse buttons.
The GUI desktop environment enables you to manage your windows by changing their
location, size, and position relative to other windows. CDE provides up to four work-
103xFMp.book Page 52 Monday, October 14, 2002 4:10 PM
Chapter 2
Accessing Your System and UNIX Graphical Interfaces
52
spaces, which are separate desktop environments. The front panel includes a button
for locking your workstation and buttons for changing between workspaces.
You can use CDE Style Manager to customize each of your workspaces by changing
things such as colors, fonts, screensavers, and mouse and keyboard settings. CDE subpanels are pull-up or pull-down menus that provide access to many desktop applications. You can add or remove icons or applications with subpanels.
GNOME and KDE are two graphical desktop packages that are popular with Linux.
Most distributions come with one or both. GNOME can also run on Solaris and will
be the default desktop in a future operating system release. As with CDE, GNOME
can be customized with user preferences and by adding applications to panels and
menus.
Key Terms
The table that follows lists those key terms that are new for the supplementary material.
Term
Definition
file manager
A graphical application used to manage files and directories. KDE’s primary means of managing files is with Konqueror. GNOME’s is with
Nautilus, which also enables users to browse the Internet.
virtual desktop
A separate workspace has its own background and look used to organize your applications. CDE, KDE, and GNOME all support the use of
multiple virtual desktops.
Check Your Understanding
1. Which two of the following are characteristics of the root account?
A. It can use only the command-line interface.
B. It is created automatically during installation.
C. Any user has access to it.
D. It is used for system administration tasks.
E. In Solaris, its password requirements are the same as for regular users.
2. User account names or login IDs must adhere to which one of these rules?
A. They cannot be fewer than eight characters in length.
B. They must be uppercase.
C. They must be unique for the system.
D. They must contain at least one numeric or special character.
103xFMp.book Page 53 Monday, October 14, 2002 4:10 PM
Check Your Understanding
53
3. A Solaris system user with the login ID of dsmith wants to change her password.
Her current password is set to Dbs-001. Match each of the following new passwords to the word Valid or Invalid.
Instructions: Put the words Valid or Invalid on the right. They may be used more
than once.
Password
Valid or Invalid?
1. ABC$123
2. Dbs-002
3. Dbs-1
4. Dbs 012
5. dsmith
4. When logging in at the CDE Login Manager, the Options menu has several
choices. What should you use to log in when troubleshooting or having possible
hardware problems?
A. Remote login
B. Failsafe session
C. Open Windows desktop
D. Reset Login screen
5. You currently are logged in and running CDE. You are ready to log out for the
day and go home. You should click the _____ button on the front panel to log
out.
6. The TCP/IP character-based utility that enables you to log in remotely to a com-
mand-line session is _____?
7. The _____ file contains the master list of user information.
8. If you perform several functions in your work, such as system administration and
project management as well as application program development, which solution
is the best choice if you need different applications and utilities available on the
desktop for each function?
A. Create a user account for each function, and create a custom desktop for
each user.
B. Define multiple desktops using the workspace buttons.
C. Log in as root and create multiple desktop arrangements using the desktop
management function.
D. Click the Style Manager button and select the desired workspace.
103xFMp.book Page 54 Monday, October 14, 2002 4:10 PM
Chapter 2
Accessing Your System and UNIX Graphical Interfaces
54
9. You need to leave your workstation for a while, and you are working on several
projects with multiple windows open. What should you do to prevent another
user from getting into your workstation and seeing your work?
A. Click the lock icon on the front panel.
B. Type suspend at the command line.
C. Click the Suspend button on the front panel.
D. Type lock at the command line.
10. The Workspace menu provides mouse access to all your applications, tools, and
files through cascading submenus. How is the Workspace menu activated?
A. Double-click the world icon on the front panel.
B. Right-click one of the workspace buttons.
C. Left-click the backdrop.
D. Right-click the backdrop.
11. Which of the following three desktop characteristics can be changed using the
Style Manager?
A. Screen resolution
B. Startup session options
C. Password
D. Screensaver options
E. Mouse settings
F.
Default printer
12. To add an application to a subpanel, you need to do which of the following?
A. Open a folder in Application Manager and drag the application’s icon to the
Install Icon option on the subpanel.
B. Click the Add Icon option in the front panel and select the desired subpanel
from the list.
C. Select the application’s icon from the front panel and drag it to the appropri-
ate subpanel.
D. Right-click the application’s icon and select Cut from the menu; then select
the subpanel and click Paste.
103xFMp.book Page 55 Monday, October 14, 2002 4:10 PM
103xFMp.book Page 56 Monday, October 14, 2002 4:10 PM
Chapter 2
56
Accessing Your System and UNIX Graphical Interfaces
103xFMp.book Page 57 Monday, October 14, 2002 4:10 PM
Check Your Understanding
57
103xFMp.book Page 56 Monday, October 14, 2002 4:10 PM
103xFMp.book Page 57 Monday, October 14, 2002 4:10 PM
Chapter 3
Graphical User Applications
Overview of Changes
The chapter title changed to be more generic and accommodate other graphical applications such as those included with GNOME and KDE. A new section was added to cover
GNOME and KDE built-in graphical applications.
New and changed information is highlighted in the following objectives, introduction,
and the summary. The content sections included in this supplement are designated as
either new or updated.
Objectives
After reading this chapter, you will be able to
■
Use the Mail tool
■
Use Calendar Manager
■
Use other built-in CDE applications
■
Use built-in GNOME and KDE applications
Introduction
This chapter introduces you to several useful applications that are included with the
Common Desktop Environment (CDE). You will work with the Mail tool to view and
manage e-mail messages and will use the Calendar Manager to manage dates and
appointments. CDE contains many other useful applications, such as Voice Notes and
Text Notes, Address Manager, Audio, Icon Editor, Image Viewer, Snapshot, Calculator,
and Clock. This chapter covers these applications and the use of a Terminal window in
CDE. The chapter also provides an overview of graphical applications that are available
with GNU Network Object Model Environment (GNOME) and K Desktop Environment (KDE).
103xFMp.book Page 58 Monday, October 14, 2002 4:10 PM
Chapter 3
Graphical User Applications
58
NOTE
This is a new section. Insert all following content for this
chapter after e-Lab
Activity 3.3.5 on
page 94 of the Cisco
Networking Academy Program: Fundamentals of UNIX
Companion Guide.
GNOME and KDE Applications Overview
The GNOME and KDE desktops both include many of the same types of applications
that are found in CDE. The names of the applications may vary from one desktop
operating environment to another, but they perform essentially the same function.
These applications include mail clients, browsers, schedulers, file managers, text editors, and helpful utility applications known as applets. Many open source applets are
included with GNOME and KDE. In some cases, they are common to both environments. GNOME applications can frequently be run from KDE menus and vice versa.
This section introduces some of the more useful GNOME and KDE applications and
provides a comparison to those of CDE (see Figure 3-49).
Figure 3-49
Linux applications
Web Browsers and Mail Clients
GNOME comes with three web browsers: Galeon, Mozilla, and Netscape. Netscape
and Mozilla also have mail capabilities built in. Mozilla is the default GNOME
browser, but the GNOME Nautilus file manager also has web-browsing functionality.
Netscape was covered previously under CDE mail and is widely used in Windows and
Macintosh in addition to UNIX environments. Mozilla is an open source web browser
that includes the following applications:
■
Navigator
■
Mail reader
■
Web page composer
■
Address book
You can access these functions from the Tasks menu or by using the buttons on the
lower-left corner of the screen. The Mozilla browser window is accessed by clicking
the red Mozilla head icon on the panel shown in Figure 3-50. This figure also shows
103xFMp.book Page 59 Monday, October 14, 2002 4:10 PM
GNOME and KDE Applications Overview
59
the browser while accessing the www.mozilla.org website. KDE comes with the Konqueror web browser (see Figure 3-51), which also serves as a file manager. It does not,
however, include an e-mail client.
Figure 3-50
GNOME Mozilla
web browser.
Figure 3-51
KDE Konqueror
web browser.
103xFMp.book Page 60 Monday, October 14, 2002 4:10 PM
Chapter 3
Graphical User Applications
60
Calendar Managers
GNOME includes a basic calendar manager tool called Gnome Calendar and a timetracking tool called GTimeTracker. These are accessible by clicking the Programs and
then the Applications menus in either GNOME or KDE. Figure 3-52 shows the Calendar and GTimeTracker windows. KDE also has a Calendar/Organizer tool known as
KOrganizer. Both include a task list (see Figure 3-53).
Figure 3-52
GNOME Calendar
and GTimeTracker.
Figure 3-53
KDE KOrganizer.
103xFMp.book Page 61 Monday, October 14, 2002 4:10 PM
GNOME and KDE Applications and Utilities
61
GNOME and KDE Applications and Utilities
Many open source applications and utilities are available from the main Programs
menu as shown in Figure 3-54.
Figure 3-54
GNOME Programs
menu.
GNOME Applications Programs
The programs available are determined by the standard installation routines and by
which options are chosen during installation. Not all applications and utilities are
available in all distributions. This section focuses on the Programs and Utilities menus.
The Applications submenu includes the following:
■
The Calendar
■
Address book
■
Time-tracking tools
■
A diagram editor
■
Gedit text editor
■
The Nautilus file manager
■
Gnumeric spreadsheet
■
Emacs editor
Figure 3-55 shows the GNOME Applications menu. Sun’s StarOffice is an application
suite, which includes a Windows-compatible word processor, spreadsheet, presentation software, and so on (similar to Microsoft Office). StarOffice is included at no cost
with some distributions of Linux, such as Red Hat.
GNOME Utility Programs
As Figure 3-56 shows, GNOME utility programs include the following:
■
GDict, the GNOME client for MIT Dictionary Server
■
A simple calculator
103xFMp.book Page 62 Monday, October 14, 2002 4:10 PM
Chapter 3
Graphical User Applications
62
Figure 3-55
GNOME Applications menu.
■
A character map
■
gfloppy, a floppy disk formatter
■
A font selector
■
GNOME search tool, which can be used to find files
Figure 3-56
GNOME Programs
Utilities menu.
Other GNOME Programs Menu Submenus
A number of other programs and utilities are available through the submenus of the
Programs menu. Some of those programs are as follows:
■
Games submenu—Contains several good games, and the Graphics menu contains ImageMagick for editing graphics. The Internet menu contains browsers
such as Galeon, Netscape, and Mozilla and also contains dialup configuration
options. Gaim is an AOL Instant Messenger client and gFTP is a graphical FTP
file transfer utility.
■
Multimedia submenu—Contains a sound recorder, audio mixer, CD player,
volume controls, and the GTV MPEG player.
■
Settings submenu—Contains desktop options for backgrounds and screen savers, a menu editor, and peripheral settings for the keyboard and mouse. The
System submenu provides access to a system monitor, system information, network, and printer configuration. It also enables users to create a boot disk and
change their password.
103xFMp.book Page 63 Monday, October 14, 2002 4:10 PM
GNOME and KDE Applications and Utilities
63
GNOME Applets
Several useful small programs known as applets are also available. You can access
these from the Applets menu off the GNOME main menu under the categories listed
here. Some of the more interesting ones on the Utilities submenu include Gnotes;
which can put sticky notes on your desktop; GNOME Weather, which enables you to
track the weather in many different cities; and ScreenShooter, a screen-capture program.
The GNOME categories for applets are as follows:
■
Amusements
■
Monitors
■
Multimedia
■
Network
■
Utility
KDE Programs and Utilities
KDE also includes many open source applications and utilities. Some of these are the
same as those included with GNOME. The logic is that whichever desktop the user
chooses, similar tools will be available. Figure 3-57 shows the KDE main menu.
Figure 3-57
KDE main menu.
103xFMp.book Page 64 Monday, October 14, 2002 4:10 PM
Chapter 3
Graphical User Applications
64
UNIX Graphical Desktop Applications Comparison
The chart in Table 3-1 compares some of the more useful graphical applications and
utilities that come with Solaris CDE, GNOME, and KDE. However, this is not a complete list. The entries for GNOME and KDE are based on the Red Hat Distribution of
Linux. The Sun StarOffice productivity suite is included with Solaris and Red Hat.
StarOffice applications are installed under KDE with Red Hat. Although StarOffice is
available, only the native GNOME and KDE applications are listed in the table. Note
that some of the applications listed for GNOME are also available from the KDE
menus and vice versa.
Table 3-1
UNIX GUI Desktop Applications Comparison
Feature or
Application
Solaris CDE
GNOME
KDE
E-mail
Mailer, Netscape
Mozilla, Netscape
Kmail, Netscape
Web browsers
and Internet
applications
Netscape
Galeon, Mozilla,
Netscape, gFTP
Konqueror,
Netscape
Word processor
StarOffice Writer
AbiWord
Kword
Spreadsheet
StarOffice Calc
Gnumeric
Kspread
Database
StarOffice Base
Installed separately
Installed separately
Slide presentation
StarOffice Impress
Installed separately
Kpresenter
Drawing and
graphics
StarOffice Draw
Installed separately
Paint, Kivio,
Kontour, Krayon
File management
File manager
Nautilus
Konqueror
Contact
information
Address manager
GnomeCard,
Mozilla Address
Book
Kmail,
KaddressBook
Schedules and
task lists
Calendar,
StarOffice Schedule
Calendar
KOrganizer
Finding files
File Find
Search Tool
Find Files
File compress
and archive
Files subpanel
options
Not present
Archiver
Text editors
Text Editor
Gedit
Kate
Notes
Voice Note,
Text Note
Gnotes
Popup Notes
103xFMp.book Page 65 Monday, October 14, 2002 4:10 PM
Summary
65
Table 3-1
UNIX GUI Desktop Applications Comparison (Continued)
Feature or
Application
Solaris CDE
GNOME
KDE
Screen capture
Image Viewer
SnapShot
Screen-shooter
KSnapshot
Image viewer
Image Viewer
GQview, xpdf,
Imagemagick, Gimp
Image Viewer,
ps/pdf
Voice/sound
Java Media Player
Sound recorder,
CD Player
KDE Media
Player, others
Calculator
Calculator
Calculator
Calculator
CPU and OS
information
System Info
System Info
System info
Icon editor
Icon Editor
Not present
Icon Editor
User administration
Admintool
Red Hat User Manager
Kuser, Red Hat
User Manager
System monitors/
meters
CPU, Disk
CPU, Disk,
Memory,
Network, Swap
CPU, Disk,
Memory,
Network, Swap
Summary
As you learned in this chapter, CDE is a standard graphical user interface for the commercial UNIX platform. CDE comes with several built-in productivity applications
such as the Mail tool and Calendar Manager. Several others also are included, such as
Voice Note, Text Note, Address Manager, Calculator, and Clock. You also can open a
Terminal window at any time to access the command line.
The Mail tool is a graphical e-mail application that can perform all normal e-mail
functions. It enables you to view e-mail and attachments, compose new e-mail with
attachments, and delete old messages. You can save and manage received messages by
filing them in alternate mailboxes.
The Calendar Manager manages scheduling and appointments through the use of a
powerful graphical interface that supports networking. You can view the calendar in
several formats by clicking icons. You can add new appointments and find existing
ones. You can set many calendar options. The calendar can be shared with others, and
a user can make appointments on other people’s calendars if they have given the user
permission to do so.
103xFMp.book Page 66 Monday, October 14, 2002 4:10 PM
Chapter 3
Graphical User Applications
66
Many other graphical applications are built in to the CDE. The ones that this chapter
focused on include Voice Note, Text Note, Address Manager, Calculator, Icon Editor,
Image Viewer, Snapshot, and Clock.
Opening a Terminal window from CDE starts a new shell. You have a command line
available in the Terminal window, which enables users to enter commands and run
command-line utilities. Entering the dtterm& command opens another Terminal window.
The GNOME and KDE desktops are included with most distributions of Linux. The
user can install either one or both of them. Both GNOME and KDE also run with
Solaris. These open source GUI desktops include applications and utilities that perform the same functions as CDE in the commercial UNIX environment.
Key Terms
The table that follows lists those key terms that are new for the supplementary material.
Term
Definition
applet
Useful small programs
Gaim
An AOL Instant Messenger client
gFTP
A graphical FTP file transfer utility
Konqueror
A web browser that comes with KDE
Mozilla
An open source web browser that is the default browser for GNOME
Nautilus
File manager for GNOME
StarOffice
Microsoft Office-compatible office suite software from Sun Microsystems
that comes free with most Linux distributions
Check Your Understanding
1. The Mail tool is a basic command-line e-mail application that cannot accommo-
date attachments. Is this statement true or false? _____
2. Marcia sends regular e-mail to the members of her project team. She would like
to be able to create a list to avoid having to specify each name when she sends
out memos. Which Mail tool feature would she use?
A. Distlist
B. Alien
C. Groupname
D. Alias
103xFMp.book Page 67 Monday, October 14, 2002 4:10 PM
Check Your Understanding
67
3. Which three of the following are customizable options with Mail tool?
A. Specifying how often you want the system to check for new messages
B. Setting the location for deleted messages
C. Creating a default forwarding address
D. Specifying autoreturn for junk mail
E. Setting a reply message to be sent when you are unavailable
F.
Creating a custom signature that can be attached to all outgoing e-mail
4. Which two options can be changed in the Calendar Manager Display Settings
menu?
A. Default view (day, week, and so on)
B. Printer settings
C. 12- or 24-hour clock
D. Date format
E. Screen resolution
5. Which three features are available with the Calendar’s Appointment Editor?
A. Frequency of the appointment
B. Number of times that a frequent appointment is to be added
C. Time zone
D. Appointment priority
E. Appointment reminders
6. Everyone can see your calendar unless you limit access rights. Is this statement
true or false? _____
7. With Address Manager, which of the following can be performed using electronic
cards?
A. Track job performance
B. Send e-mail
C. Play games
D. Put someone on hold
8. Calculator and Clock have which characteristic in common?
A. They can be run only as command-line utilities.
B. They are installed as optional components.
C. They are graphical utilities that are part of the CDE.
D. They are display utilities only and cannot accept input.
103xFMp.book Page 68 Monday, October 14, 2002 4:10 PM
Chapter 3
Graphical User Applications
68
9. Which two statements are true of Terminal windows?
A. Each Terminal window represents a new shell.
B. Terminal windows are initiated from a command-line session.
C. Terminal windows give a user access to the command line.
D. After a Terminal window has been opened, a user cannot use CDE GUI fea-
tures.
10. The UNIX command which performs the same function as the CDE Clock is
_____?
11. Which item is a category of GNOME applet?
A. Amusements
B. Printers
C. Appointments
D. Databases
12. Match each application with the desktop that includes it. The desktop names
may be used more than once.
Instructions: Put the words CDE, GNOME, and KDE on the right. They may be
used more than once.
Application
Mozilla
StarOffice
Kate
Voice Note
Krayon
Snapshot
Nautilus
Desktop
103xFMp.book Page 69 Monday, October 14, 2002 4:10 PM
103xFMp.book Page 70 Monday, October 14, 2002 4:10 PM
103xFMp.book Page 71 Monday, October 14, 2002 4:10 PM
Chapter 4
Getting Help
Overview of Changes
This chapter includes additions to the “Command-Line Help” section on man page headings. A new section on Linux HOWTOs and the info command has also been added.
New and changed information is highlighted in the following objectives, introduction,
and summary. The content sections included in this supplement are designated as either
new or updated.
Objectives
After reading this chapter, you will be able to
■
Use CDE Help
■
Reference Solaris HOWTO manuals (AnswerBook2)
■
Use command-line help
■
Use Linux HOWTOs and info Command
■
Perform basic troubleshooting
■
Compare DOS and UNIX commands
Introduction
This chapter introduces various forms of help provided by the Solaris and Linux environments. It covers graphical help available with the Common Desktop Environment (CDE)
including the Help Manager used for CDE and CDE application help, and AnswerBook2,
which contain online versions of the Solaris HOWTO manuals. This chapter also works
with command-line help known as the programmer’s manual, or man pages. These pages
provide character-based help with UNIX commands and utilities. The use of Linux
HOWTOs and the hypertext-based Info help utility are also explained. This chapter also
reviews some basic troubleshooting techniques and provides a DOS-to-UNIX crossreference table for those who have a background in DOS.
103xFMp.book Page 72 Monday, October 14, 2002 4:10 PM
Chapter 4
Getting Help
72
NOTE
This is an updated
section that replaces
the same-titled section on pages 108
and 109 of the Cisco
Networking Academy Program: Fundamentals of UNIX
Companion Guide.
Man Page Headings
A number of different headings or informational areas are in a typical man page. The
more common ones are the following:
■
NAME—Contains the name of the command and other commands that may
accomplish the same thing.
■
SYNOPSIS—Shows the syntax of the command with any allowable options
and arguments.
■
DESCRIPTION—Gives an overview of what the command does.
■
OPTIONS—Switches that can change the function or effect of the command.
They normally are preceded by a dash (-) or minus sign.
■
OPERANDS—The target of the command or what the command will take
effect on, such as a directory or a file.
■
SEE ALSO—Refers the user to other related commands and subjects, such as
name, synopsis, description, options, and operands.
These headings are displayed in the man page output in all capital letters. Depending
on the command and its purpose, the man page might not contain all headings. For
example, the pwd (print working directory) command does not have options or operands information headings because no options or operands can be used with the command. All commands have at least a name, a synopsis, and a description.
A common UNIX command is cd, which enables the user to change directories.
Figure 4-9 shows the results of the man page for the cd command. Notice the different
headings just discussed. Some of the output has been omitted because the output from
the cd man page is normally about nine pages long.
Figure 4-9
Man page output.
103xFMp.book Page 73 Monday, October 14, 2002 4:10 PM
Introduction
73
Scrolling in man Pages
The output from some man pages can be as many as 10 to 20 screens of output. Several keys are helpful in moving around in the man utility after the pages for a specific
command have been located. Use the keys shown in Table 4-1 to control the scrolling
capabilities while using the man command. This scrolling capability is the same as provided by the more command, used to view a long file page by page.
Table 4-1
Scrolling the man Pages
Key Command
What It Does
Spacebar
Scrolls one screen at a time
Enter
Scrolls one line at a time
b
Back—Move back one screen
f
Forward—Move forward one screen
q
Quit—Exit the main menu
/string
Search—Forward for information
n
Next—Find the next occurrence of the string
h
Help—Give a description of all scrolling capabilities
Searching man Pages by Section
The SEE ALSO part at the bottom of a man page lists alternate references that pertain
to the topic addressed. When a numeral other than 1 in parentheses follows these references, it indicates a section of the man pages that can be accessed using the -s option
with the man command.
For example, executing $ man passwd, as shown in Figure 4-10, displays information
on the passwd command and gives instructions on how to change a password. The
SEE ALSO section of this man page reads in part as follows:
SEE ALSO
finger(1),login(1),nispasswd(1),crypt(3C),passwd(4)
Executing $ man -s 4 passwd displays information on the /etc/passwd file. Executing
$ man -s 3C crypt displays information on password encryption. The other SEE ALSO
items listed, finger and login, are related but do not have a separate section that can be
searched.
UNIX vendors organize the man pages differently. Typically there are eight main sections of the UNIX manual broken down in any number of subsections (such as 3C).
Table 4-2 shows the basic manual sections for Solaris and Linux.
NOTE
This is an updated
section that replaces
the same-titled section on page 109 of
the Cisco Networking Academy Program: Fundamentals
of UNIX Companion
Guide.
NOTE
This is an updated
section that replaces
the same-titled section on pages 109
and 110 of the Cisco
Networking Academy Program: Fundamentals of UNIX
Companion Guide.
103xFMp.book Page 74 Monday, October 14, 2002 4:10 PM
Chapter 4
Getting Help
74
Figure 4-10
Searching the
man pages by
section.
Table 4-1
NOTE
This is an updated
section that replaces
the same-titled section on page 111 of
the Cisco Networking Academy Program: Fundamentals
of UNIX Companion
Guide.
Man Page Section Numbers for Solaris and Linux
Section Number
Topic (Solaris)
Topic (Linux)
1
User commands
User commands
2
Kernel system calls
Kernel system calls
3
Library functions
Library functions
4
Administrative file formats
Special files (/dev directory)
5
Miscellaneous
Administrative file formats
6
Games
Games
7
Special files (/dev directory)
Macro packages
8
Administration commands
Administration commands
Most commands used by a typical user are located in Section 1, User Commands. If no
section number is specified, the man command searches the manuals starting from Section 1. If the command specified is located in Section 1, it does not continue searching
even if the command exists in another section.
If the user knows which section a command is located in, she would use the man -s
command followed by the section as discussed previously.
Saving man Pages for Future Use
The student can save a man page to a text file for editing or e-mailing. For example,
use the following command:
$ man command_name | col -b > filename
103xFMp.book Page 75 Monday, October 14, 2002 4:10 PM
Linux HOWTOs
75
For example:
$ man intro | col -b > ~/unix-cmnds.
In this example, the intro command contains a list of all UNIX commands:
■
The vertical bar, or pipe (|), is covered in Chapter 7, “Advanced Directory and
File Management”.
■
col -b formats the man page output.
■
The greater-than sign (>) means to send the output of any command to a file.
■
~/unix-cmnds is the file (unix-cmnds) that gets created in the user’s home
directory. ~ represents the user’s home directory.
Obtaining Quick Help on Command Options
In addition to the man pages, you can also obtain help on command options by using
the command itself. With Solaris, type the command followed by -? An example is
Is -?. The question mark is an invalid option and, depending on the command, a list of
valid options may display. Commands requiring arguments, such as man, when
entered without any arguments result in the display of brief help information. With
Linux, type the command followed by two dashes and the word help (for example, ls
--help).
Skill Builder
Lab Activity 4.3.7
NOTE
This is a new section
that you should
insert after the
section “Saving
man Pages for
Future Use” on
page 111 of the
Cisco Networking
Academy Program:
Fundamentals of
UNIX Companion
Guide.
Using Command-Line Help
In this lab, you work with and access command-line help using the man command. The man pages are employed to determine the use of various UNIX commands as they work with the man pages and learn to navigate through them.
Refer to Lab 4.3.7 in the Lab Companion Supplement.
Linux HOWTOs
The UNIX and Linux man pages are excellent resources. However, they can be confusing to a user hoping to turn the information that the pages provide into getting some
work done. Consider, for example, the user who has just purchased a CD burner to
create CD-ROMs. Before the user can begin creating CDs, he must install and configure the device, learn what software is available, and how to use it. Or the user has a
need to set up an e-mail server but has no idea how to go about it. Both examples are
daunting tasks for any user who must start from the beginning.
NOTE
Insert all the following content after the
preceding new section and the section
“Saving man Pages
for Future Use” on
page 111 of the
Cisco Networking
Academy Program:
Fundamentals of
UNIX Companion
Guide.
103xFMp.book Page 76 Monday, October 14, 2002 4:10 PM
Chapter 4
Getting Help
76
For such projects, Linux users may consult a valuable library of HOWTO guides. Each
one provides detailed information in outline form on a given topic.
Where to Find the HOWTOs
The HOWTOs are not installed by default in most Linux distributions. Red Hat puts
the HOWTOs together with some Red Hat-specific extras on a CD that comes with
the packaged version of the operating system. These may be viewed directly from the
Documentation CD using Nautilus, a web browser, or even a text editor such as
Emacs. They may also be installed on the user’s system so that they are always handy.
However, the HOWTOs exist independently from any distribution. The single most
valuable source of documentation about Linux is the Linux Documentation Project,
which you can find on the Internet at www.tldp.org. If you visit this website, you will
see a front page like that shown in Figure 4-11a. Notice that a link to the HOWTOs is
prominently displayed at the very top. It is from here that the very latest version of the
HOWTO files may be viewed or downloaded.
Figure 4-11a
The Linux
Documentation
Project.
From the web page, follow the links to a number of indexes, organized by title and by
category. This leads ultimately to the HOWTOs themselves. For example, the
103xFMp.book Page 77 Monday, October 14, 2002 4:10 PM
The info Command
77
HOWTO named CD-Writing-HOWTO is likely to provide all the information one
needs to start creating CD-ROMs. The Mail-Administrator-HOWTO provides extensive background on all the ins and outs of administering an e-mail server.
In addition to the HOWTOs, there are links on the Linux Documentation Project leading to Guides, Frequently Asked Questions (FAQs), and even the master man pages.
The Guides are short books on such subjects as advanced Bash shell script writing, a
Linux system administrator’s guide, and kernel internals. FAQs are collections of frequently asked questions about a variety of topics.
The info Command
Another way to read documentation is with the info command. Users of the Emacs
and XEmacs editors will find the info command familiar, because Info-mode is built in
to them and works the same. These editors are covered in Chapter 9, “Using Text Editors.” As a standalone Linux command, info is nothing more than Info-mode from
Emacs in Terminal mode, together with a library of documentation.
Starting Info
The info command runs in Text mode on a Terminal window. The user does not need
to know exactly what is being looked for when starting info.
You will see a startup window like Figure 4-11b, with basic instructions at the top and
a menu consisting of a catalog of topics, when running info without command-line
options or arguments like this
$ info
Like many Linux commands, info has a help option that gives startup instructions (see
Figure 4-11c).
The info command may also be started with a subject as an argument. There is info
documentation on info itself. Run the following command to start with a window like
the one shown in Figure 4-11d:
$ info info
Navigating with info
Within info an abundance of simple commands enable the user to navigate within the
current page, to next or previous pages within the same document, or to info documentation on different topics. Press the question mark to produce a reference guide to
basic commands in info windows. Figure 4-11e displays the top few lines of this,
showing the most important commands.
103xFMp.book Page 78 Monday, October 14, 2002 4:10 PM
Chapter 4
Getting Help
78
Figure 4-11b
info started
without options
or arguments.
Figure 4-11c
The info help
message.
info Access with a Browser
You also can access info conveniently using the Help tab of the Nautilus graphical
interface in GNOME or using help in KDE. Hyperlinks are available when using the
browser interface. Figure 4-11f shows the Nautilus info screen while looking up information on the Bash shell.
103xFMp.book Page 79 Monday, October 14, 2002 4:10 PM
The info Command
79
Figure 4-11d
The first page of
info documentation on info itself.
Figure 4-11e
Basic info
command help
accessed with the
question mark.
103xFMp.book Page 80 Monday, October 14, 2002 4:10 PM
Chapter 4
Getting Help
80
Figure 4-11f
info access
with Nautilus.
Summary
The Sun Solaris Operating Environment has many different forms of help available to
users and administrators. With CDE help, you can use the Help Viewer window,
search for a particular help topic, and use item help. Each CDE window and application also has a help option in the upper-right corner. You can access the Help Viewer
window from the Workspace menu or the Help icon on the front panel.
AnswerBook2 is a useful online searchable version of the Solaris manuals. Several
book collections are presented, including information for administrators, users, and
developers.
Command-line help is available in the form of man pages and can be displayed using
the man command. man pages are installed with all forms of UNIX. They cover nearly
every UNIX command and provide a quick reference when you need to check the syntax or options available with a particular command. Several options are available with
the man command, including keyword and section search capabilities. The whatis
command provides a brief definition and purpose of the command. Linux HOWTOs
provide instruction on how to perform various common Linux tasks.
103xFMp.book Page 81 Monday, October 14, 2002 4:10 PM
Check Your Understanding
81
Linux distributions include command-line and a hypertext help utility called info that
is available for many UNIX commands and applications. Linux HOWTOs provide
instruction on how to perform various common Linux tasks. When problems occur,
narrow the possibilities by following a systematic approach to identifying and correcting the problem. Contact a system administrator or the service/help desk for problems
that you cannot resolve.
Users familiar with DOS commands will have an easier time learning UNIX because
many of the DOS commands were derived from UNIX. UNIX has hundreds of commands. These commands enable users to accomplish all the tasks that DOS users normally would need to do but in a UNIX environment.
UNIX Command Summary
The table that follows lists those commands that are new for the supplementary material.
Command
Definition and Example
info
Detailed and well-organized alternative to man pages. Uses an Emacstype interface. $info or $info date
Key Terms
The table that follows lists those key terms that are new for the supplementary material.
Term
Definition
FAQs
A collection of frequently asked questions about a variety of topics.
HOWTO
Online reference containing information and procedures on how
to perform a task using the operating system. The Solaris HOWTOs are referred to as AnswerBook2. Linux HOWTOs are not
installed by default in most Linux distributions.
Linux Documentation
Project
A valuable online source of documentation about Linux at
www.tldp.org.
Check Your Understanding
1. Which of the following is the primary help tool for CDE desktop?
A. AnswerBook2
B. Front Panel Help
C. Help Manager
D. On Item Help
103xFMp.book Page 82 Monday, October 14, 2002 4:10 PM
Chapter 4
Getting Help
82
2. Which of the following contains the Solaris online reference manuals?
A. AnswerBook2
B. Information
C. SunSolve Online
D. Solaris Support
3. Which command is used to access the UNIX Programmers Manual?
A. help
B. man
C. manual
D. progman
4. Which of the following is used to obtain a listing of all UNIX commands in
Solaris?
A. man all
B. man cmd
C. man intro
D. man man
5. Which three of the following are UNIX shells?
A. bsh
B. csh
C. ksh
D. sh
6. Match the man header with the correct description.
OPTIONS
1. Contains the name of the command and other commands that
may accomplish the same thing.
SEE ALSO
2. Shows the syntax of the command with any allowable options
and arguments.
DESCRIPTION
3. Gives an overview of what the command does.
OPERANDS
4. The target of the command or what the command will take effect
on, such as a directory or a file.
NAME
5. Are switches that can change the function or effect of the command. They normally are preceded by a dash (-) or minus sign.
SYNOPSIS
6. Refers you to other related commands and subjects, such as
name, synopsis, description, options, and operands.
103xFMp.book Page 83 Monday, October 14, 2002 4:10 PM
Check Your Understanding
83
7. Which of the following are valid variations of the man command? (Select three.)
A. man page-number
B. man command name
C. man keyword
D. man section-name
8. Which command displays extended system information such as workstation
name, OS version, and so on?
A. arp
B. domainname
C. hostname
D. uname - a
9. When troubleshooting an unresponsive Terminal window, which of the following
is the recommended sequence of keys to press to free up the Terminal window?
A. Ctrl+C, Ctrl+D, Ctrl+Q
B. Ctrl+D, Ctrl+Q, Ctrl+X
C. Ctrl+Q, Ctrl+C, Ctrl+D
D. Ctrl+X, Ctrl+Y, Ctrl+Z
10. Match the command with the correct description of what it does.
arp hostname
1. Displays the name of your workstation or host.
domainname
2. Displays expanded system information, including
the name of your workstation, the OS version, and
more.
prtconf | grep Memory
3. Displays the host name, IP address, and Ethernet
address.
hostname
4. Displays the domain that the workstation is in.
uname -a
5. Displays the amount of system memory.
11. Given the list of steps required for troubleshooting an unresponsive workstation,
organize them in the correct sequence.
Turn off the system.
Press the Stop+A keyboard sequence.
103xFMp.book Page 84 Monday, October 14, 2002 4:10 PM
Chapter 4
Getting Help
84
Go to another system and do a remote login and terminate the login shell
program.
1
2
3
12. What are the DOS equivalents to the following UNIX commands?
UNIX Command
cp
mv
ls
rm
mkdir
DOS Command
103xFMp.book Page 85 Monday, October 14, 2002 4:10 PM
103xFMp.book Page 86 Monday, October 14, 2002 4:10 PM
Chapter 4
86
Getting Help
103xFMp.book Page 87 Monday, October 14, 2002 4:10 PM
87
103xFMp.book Page 86 Monday, October 14, 2002 4:10 PM
103xFMp.book Page 87 Monday, October 14, 2002 4:10 PM
Chapter 5
Accessing Files and Directories
Overview of Changes
This chapter includes additions to the “Listing Directory Contents” section for file type
definitions and file type codes. The other sections of this chapter apply to most versions
of UNIX, including Solaris and Linux.
New and changed information is highlighted in the following objectives, introduction,
and summary. The content sections included in this supplement are designated as either
new or updated.
Objectives
After reading this chapter, you will be able to
■
Understand and describe the structure of the UNIX filesystem
■
Identify relative and absolute path names
■
Navigate the directory structure
■
List the contents of a directory
■
Define the function of the parts of the directory listing
■
Identify and use metacharacters
Introduction
This chapter reviews the concept of a filesystem and introduces path names to identify
locations of files and directories in the directory tree. You will work with the cd command to change directories and navigate the filesystem. The use of the ls command to list
the contents of directories also is covered, as is the meaning of various components of
directory listings. Metacharacters are introduced, and you will use several metacharacters
known as wildcards to list groups of related files. The majority of information presented
here is applicable to Solaris, Linux, and most other forms of UNIX. Exceptions are noted.
103xFMp.book Page 88 Monday, October 14, 2002 4:10 PM
Chapter 5
Accessing Files and Directories
88
NOTE
This is an updated
section that replaces
the same-titled section on pages 137
and 138 of the Cisco
Networking Academy program: Fundamentals of UNIX
Companion Guide.
Displaying File Types
When using the ls command by itself, you can obtain a listing of directory contents but
cannot tell which are files and which are directories. By using the ls command with the
-F (file type) option, you can display a listing with a symbol to indicate the file type.
The symbol, if shown, is found at the end of the file or directory name. Note that the
-F option an uppercase F. The list that follows shows the file types displayed using the
ls -F command. The last two are advanced file types and are covered in the Network
Operating Systems course.
■
Directory—A forward slash (/) after the name indicating that this is a directory
or subdirectory. A directory is considered a type of file with UNIX.
■
ASCII text file—If no symbol appears after the name, this indicates a plain
ASCII text file with no formatting characters. ASCII stands for the American
Standard Code for Information Interchange. An ASCII text file is similar to a
DOS text file.
■
Executable—An asterisk (*) after the name indicates that this is a command, an
application, or a script file that can be run or executed.
■
Symbolic link—An at sign (@) after the name indicates a symbolic link. This is
a way of giving a file an alternate name. Symbolic links allow a file to exist in
more than one place, for convenience. Links are covered in Chapter 7,
“Advanced Directory and File Management.”
■
Named pipe—A pipe symbol (|) after the name indicates a pipe. Pipes are used
for interprocess communication. One process opens the pipe for reading, and
the other opens it for writing, allowing data to be transferred. An example is
the transfer of data to and from a disk.
■
Socket—An equal sign (=) after the name indicates a socket. This is similar to a
named pipe but permits network and bidirectional links.
Figure 5-17 shows two examples using the ls -F command to see the file type when the
user is in his or her home directory, /home/user2. The first example shows only files
and directories. The second shows a symbolic link, an executable, an ASCII text file,
and a directory.
Figure 5-17
Using the ls -F
command.
ls -F
!
!
ls -F /etc
"#
$ %"&''
("'' ")*
103xFMp.book Page 89 Monday, October 14, 2002 4:10 PM
Introduction
89
Skill Builder
e-Lab Activity 5.6
Displaying File Types
In this media activity, you are logged in as user2 and your current working
directory is /home/user2/dir1. Refer to the Class File Tree Structure by clicking
the “’tree”’ button located on the menu bar and type the commands to accomplish the requested objectives. Note: Be sure to press Enter after each one. Click
Step 1 to begin.
Displaying a Long Listing
The previous versions of the ls command displayed only the names of directories and
files in a wide format that went across the screen. You can use the ls command with
the -l (long) option to see more detailed information on each file or directory. The ls -l
option also distinguishes between files and directories.
The ls -l command provides the file information shown in Figures 5-18 and 5-19. By
default, the ls command lists files in alphabetic order. Using the -t (time) option lists
files with the most recently modified at the top of the list. To get a detailed listing of
files sorted by time, with the most recent at the top, use the ls -lt command.
Figure 5-18
! "#" #$% !&'
Directory
information.
(&)
*)+
,-)
. /
*! &#$!) #! !)# &
)!&
#
-
-
!
!
0$ 1 21
0$ 2
#
NOTE
This is an updated
section that replaces
the same-titled section on pages 138
and 139 of the Cisco
Networking Academy program: Fundamentals of UNIX
Companion Guide.
NOTE
The -l option uses a
lowercase L.
103xFMp.book Page 90 Monday, October 14, 2002 4:10 PM
Chapter 5
Accessing Files and Directories
90
Figure 5-19
Detailed
information from
the ls -l command
As with ls -F, you can use the ls -l command to determine file type. The first character
in the ls -l listing indicates the type of file being displayed. The most common ones are
the dash (-) and the letter d. A dash represents a regular data file. The file may be a text
file, an applications file, or an executable. The letter d in the first position indicates a
directory. Other codes represent the other UNIX file types as shown in Table 5-1.
Table 5-1
File Type Codes Displayed by the ls -l Command
Code
Meaning
- (dash)
Data file
d
Directory
l
Symbolic link
p
Pipe
s
Socket
b
Block device
c
Character device
Two additional codes are represented with ls -l that are not with ls -F, the Character
device and the Block device.
■
Character device is a hardware device file for devices that transfer in units of 1
byte, such as a serial terminal or parallel printer.
■
Block device is a hardware device file for devices that transfer data in blocks of
more than 1 byte, such as floppy disks, hard disks, and CD-ROMs.
103xFMp.book Page 91 Monday, October 14, 2002 4:10 PM
Summary
91
Skill Builder
e-Lab Activity 5.7
Displaying a Long Listing
In this media activity, you are logged in as user2 and your current working
directory is /home/user2/dir2. Refer to the Class File Tree Structure by clicking
the “’tree”’ button located on the menu bar and type the commands to accomplish the requested objectives. Note: Be sure to press Enter after each one. Click
Step 1 to begin.
Summary
A UNIX filesystem is made up of directories, subdirectories, and files. The operating
system, application programs, system administrators, and end users can create directories.
You can specify the location of all files and directories in the filesystem using an absolute or relative path name. Absolute path names always start with the root directory
(/). Relative path names are specified based on where the users are in the directory
structure.
Users can tell where they are in the directory structure by using the pwd command.
They can move around or navigate the directory structure by using the cd command.
Shortcuts make navigating the directory structure easier.
You can use the ls command to display the contents of a directory, showing the files
and subdirectories present there. Many options are available with the ls command to
determine what is displayed and how.
Metacharacters are nonalphanumeric symbols that have special meaning to the shell.
Metacharacters, including the asterisk and question mark wildcards, can be used with
many UNIX commands for added flexibility. The use of metacharacters in directory
and filenames is not recommended.
103xFMp.book Page 92 Monday, October 14, 2002 4:10 PM
Chapter 5
Accessing Files and Directories
92
Key Terms
The table that follows lists those key terms that are new for the supplementary material.
Term
Definition
block device
A hardware device file for devices that transfer data in blocks of
more than 1 byte, such as floppy disks, hard disks, and CD-ROMs.
character device
A hardware device file for devices that transfer in units of 1 byte,
such as a serial terminal or parallel printer.
file type code
A one-letter character that identifies the file type. Appears in the first
character position of a long listing. Examples include d for a directory, - (dash) for a data file, B for a block device file, and so on.
named pipe
Pipes are special files used for interprocess communication. One
process opens the pipe for reading, and the other opens it for writing,
allowing data to be transferred. An example is the transfer of data
to and from a disk.
socket
Similar to a named pipe (see Named pipe) but permits network and
bidirectional links.
symbolic links
A pointer to another file allowing a file to exist in more than one
place for convenience and backward compatibility.
Check Your Understanding
1. Which of the following is a valid absolute path name?
A. \home\user02
B. /home/user02
C. home/user02
D. user02
2. The option portion in the command ls -l dir1 is ____________.
3. Which of the following shells have a $ for the prompt? (Select three.)
A. Bourne
B. C shell
C. Bash
D. Korn
103xFMp.book Page 93 Monday, October 14, 2002 4:10 PM
Check Your Understanding
93
4. Which three of the following commands are valid?
A. Ls -l;grep data
B. ls -l | grep data
C. pwd;ls -l
D. ls -l > data
5. What is the command to change your current directory to your home directory
and show your location in the tree? The command must be entered like you
would at the command prompt. The commands must be entered on one line.
__________________
6. Which character separates multiple commands issued on the same command
line?
A. Slash
B. Comma
C. Dash
D. Semicolon
7. Which three of the following statements are true?
A. UNIX commands are always uppercase.
B. UNIX commands are always lowercase.
C. The option in a command may be upper- or lowercase.
D. Options are usually preceded by a dash.
8. Which two of the following change your current directory to your home direc-
tory?
A. cd /
B. cd
C. cd ~
D. cd .
9. Enter the option that can be used with the ls command to display hidden files.
________
103xFMp.book Page 94 Monday, October 14, 2002 4:10 PM
Chapter 5
Accessing Files and Directories
94
10. Which UNIX command lists the files in the current directory, including subdirec-
tories?
A. ls -l
B. ls -al
C. ls -R
D. ls -r
11. Which of the following represents a directory when the command ls -F is issued?
A. d
B. C. D
D. /
12. Which of the following represents a directory when the command ls -l is issued?
A. B. d
C. D
D. /
103xFMp.book Page 95 Monday, October 14, 2002 4:10 PM
103xFMp.book Page 96 Monday, October 14, 2002 4:10 PM
Chapter 5
96
Accessing Files and Directories
103xFMp.book Page 97 Monday, October 14, 2002 4:10 PM
Check Your Understanding
97
103xFMp.book Page 96 Monday, October 14, 2002 4:10 PM
103xFMp.book Page 97 Monday, October 14, 2002 4:10 PM
Chapter 6
Basic Directory and File
Management
Overview of Changes
This chapter includes a new section on management of directories and files using
GNOME. The focus is on the use of the Nautilus file manager utility. New and changed
information is highlighted in the following objectives, introduction, and summary. The
content sections included in this supplement are designated as either new or updated.
Objectives
After reading this chapter, you will be able to
■
Manage directories and files using the command line
■
Manage directories and files using the graphical CDE File Manager
■
Manage directories and files using GNOME
Introduction
In this chapter, you will perform basic file and directory management tasks using the
command-line interface, CDE File Manager, and GNOME Nautilus. The importance of
learning command-line utilities is emphasized. We start with the command-line interface
and work with a number of file information commands to discover the characteristics
and contents of various file types. We cover the rules and procedure for creating files and
directories and then discuss how to remove them. CDE File Manager is introduced. This
is a utility that can perform many file and directory management functions through a
graphical user interface (GUI). The Nautilus file manager, the primary GUI desktop management utility for GNOME, is also introduced.
103xFMp.book Page 98 Monday, October 14, 2002 4:10 PM
Chapter 6
Basic Directory and File Management
98
NOTE
This is a new section. Insert all following content after eLab Activity 6.2.6 on
page 177 of the
Cisco Networking
Academy Program:
Fundamentals of
UNIX Companion
Guide.
Directory and File Management Using GNOME
The GNOME desktop provides several tools for managing files and directories. The
most commonly used of these is the Nautilus file manager.
Nautilus File Manager
Chapter 2, “Accessing Your System and UNIX Graphical Interfaces,” introduced Nautilus, a file and folder management utility that is a core component of the GNOME
desktop environment. With Nautilus you may initiate any task that you normally perform on a computer with folders and files. You may organize folders and files, rename
or delete them, control access levels to them, and view them, either with Nautilus itself
or by launching applications that you choose. Using Nautilus, you can also associate
notes, custom icons, and emblems with any folder or file. Emblems are icons used to
label and categorize objects, marking them as favorites, urgent, new, and so forth.
Nautilus may also be used to view system documentation and even as a web browser.
Nautilus is designed to be a useful tool to a user new to Linux or UNIX in general.
Nautilus’ operation is intuitive and easy to discover by exploration. Start at the Help
menu on the right end of the menu bar at the top of the Nautilus window. After that,
try the Help tab in the sidebar to the left. Figure 6-33 shows a Nautilus window with
the Help index open in the sidebar and the Nautilus User Manual in the main panel.
Note that the Help menu on the right is open, and the user is about to open the Nautilus Quick Reference guide.
Figure 6-33
A Nautilus
window showing
ways to
locate help.
103xFMp.book Page 99 Monday, October 14, 2002 4:10 PM
Directory and File Management Using GNOME
99
File and Folder Icons
Like most components of the GNOME desktop environment, Nautilus is highly configurable. Click the Preferences menu, the second from the right. You will see a choice
that says Edit Preferences. From the Preferences window, users may tailor the appearance and behavior of Nautilus to suit their needs. Figure 6-34 shows the Preferences
window, with a list of categories to select from in the left panel and the current settings
for a user’s view preferences on the right.
Figure 6-34
The Nautilus Preferences window.
With graphical desktop managers, a folder is a referred to as a directory, the term that
is commonly used by persons who work from a UNIX shell. The terms may be used
interchangeably. Folders or directories contain files and sometimes other folders.
The default view for folders is set initially to Icon view. When a folder is opened with
Icon view set, the user sees each object in it represented as an icon with its name and
up to three additional pieces of information under the name.
Some users have many folders with large collections of files and subdirectories. When
this is the case, the user might want to set the default view to List view. This List view
shows folder contents in a table form, prefixed with a small icon, followed by the
name, emblems, file size, file type, and date modified. Click the headers of any of these
columns to sort the display on that field, toggling between normal and reverse sort
order.
103xFMp.book Page 100 Monday, October 14, 2002 4:10 PM
Chapter 6
Basic Directory and File Management
100
Whether the user chooses Icon view or List view as the default, she can change the display of individual folders using the pull-down menu on the right end of the location
bar. Nautilus remembers the setting the next time the user visits it. Figures 6-35 and
6-36 show two Nautilus windows viewing the same directory of files, the first in List
view, and the second in Icon view. Some of the optional display features have been
turned off using the View menu. See “View Menu Options” in Chapter 7, “Advanced
Directory and File Management.”
Figure 6-35
Nautilus list view.
Figure 6-36
Nautilus Icon
view.
103xFMp.book Page 101 Monday, October 14, 2002 4:10 PM
Directory and File Management Using GNOME
101
File Menu Options
When Nautilus first starts, “start-here:” is in the location bar, the starting place for setting preferences. In real use, however, GNOME users often begin by navigating folders
and files. Click the Home icon on the toolbar to start this navigation. The user can
accomplish this more efficiently by double-clicking the Home icon at the top left of the
desktop. Figure 6-37 shows which one to click for a user whose login name is student.
Figure 6-37
The Home
icon selected.
You may select any of the options on the File menu while using Nautilus to manage
folders and files. When a choice on the menu is shadowed out, it means that it is not
valid at the moment. Upon first opening a folder, for instance, no files are selected, so
the menu options to open files are shadowed. If the Trash is empty, the Empty Trash
selection is shadowed. Figure 6-38 shows the complete File menu.
The sections that follow explain the functions of several File menu selections. Others
are discussed in Chapter 7.
103xFMp.book Page 102 Monday, October 14, 2002 4:10 PM
Chapter 6
Basic Directory and File Management
102
Figure 6-38
The Nautilus
File menu.
New Window. Another Nautilus window appears using the directory defined as the
Home Location in the Navigation section of the Edit Preferences window.
Open. Highlight a file or folder and select Open. Nautilus tries to present that object
to the user. With a folder, Nautilus opens it in the main panel within the current window, replacing what the user was looking at. With a plain-text file, Nautilus views the
file, optionally with an editor or viewer of the user’s choice. If Nautilus sees that it is
executable, it offers the user the choice of running it or displaying its contents. Graphic
images are viewed and applications are launched. Users can tell Nautilus what to do
with file types it does not recognize.
Open in New Window. If Nautilus is capable, the file or folder selected is presented to
the user in a new window. This happens the same way as if the user had clicked Open.
103xFMp.book Page 103 Monday, October 14, 2002 4:10 PM
Directory and File Management Using GNOME
103
Open With. If the user highlights a file, Open With offers a list of ways to open that
file. If the user selects an image file, Nautilus suggests opening it with the Electric Eyes
viewer or The Gimp, a graphics-editing program. Nautilus also gives the user the
opportunity to add to the list Nautilus does not already know about.
Highlight a folder and Open With gives the user the option to open it with Icons
Viewer, List Viewer, or with an application or viewer of their choice. The user must tell
Open With what works for that folder. For instance, it is not feasible to open a directory with a word processor.
Scripts. Nautilus passes the names of the files or folders the users have selected as
arguments to an executable script or program in any language. A list of available programs appears on the Scripts menu. The script chosen executes using the files highlighted. Exactly what actions those scripts perform is limited only by the programmer’s
imagination. No scripts are supplied with Nautilus, so the list is initially empty. Users
wanting to create scripts must put them in the directory $HOME/.GNOME/Nautilusscripts.
Close Window. As suggested by the label, Close Window closes only the currently
selected window.
Close All Windows. All open Nautilus windows work together within a single
GNOME session. If the user chooses Close All Windows, they all close. This happens
even if the user opened some windows from different invocations—for example, by
clicking his Home icon at different times in his session.
Show Properties. Click Show Properties on the Edit menu to display a Properties
window with three tabs in it. The primary property of a file is its name. The user may
change the name here if she wants. A second tab enables the user to select emblems
that display in List view. The third tab enables the user to set permissions on the
object.
Duplicate. Nautilus makes a copy of the user’s file or folder. The name given to the file
or folder is the user’s original name, plus a space and the word copy in parentheses.
For example, a Duplicate of myfile is called myfile (copy). This should be renamed
immediately. See “File Menu Options” in Chapter 7. Spaces and parentheses in filenames are difficult to manage in UNIX. The duplicate is a full, independent copy that
may be altered without affecting the original.
103xFMp.book Page 104 Monday, October 14, 2002 4:10 PM
Chapter 6
Basic Directory and File Management
104
Web Search. Selecting Web Search turns Nautilus into a web browser that opens on
the web search engine specified by the Search option from Edit Preferences. Note that
the Web Search icon on the toolbar accomplishes the same thing. The default is the
popular Google search engine, at www.google.com. From there the user may enter
words or phrases. Click Google Search and Google returns a list of links related to the
user’s request.
Creating New Folders
You can create folders within the GNOME desktop environment in the following three
primary ways:
■
Two from within Nautilus
■
One to create folders on the desktop itself
The sections that follow describe in greater detail how to to create folders within the
GNOME desktop environment using these methods
Creating New Folders Using Nautilus
NOTE
You should rename
the folder immediately, because the
default is untitled
folder, including the
space. Filenames
with spaces in them
are difficult to handle
To create a folder with Nautilus, the user must first view an existing folder. For example, click the Home icon on the toolbar to open the user’s home directory. Be sure View
as Icons is the current view type at the right end of the location bar. Then select New
Folder from the File menu. A new folder is created as a subdirectory of the user’s home
directory. The folder appears, selected with its default name in a box and in a different
color. Type in a new name and press Enter, or click the mouse anywhere else on the
desktop.
Figure 6-39 shows the newly created folder in the main panel while viewing the directory with View as Icons set. Notice the name is a different color and is waiting to be
changed.
Figure 6-39
A newly created
folder in Icon
view.
The operation is slightly different if the user has View as List set for the folder she is
viewing. If View as List is chosen, New Folder again creates the folder with the default
103xFMp.book Page 105 Monday, October 14, 2002 4:10 PM
Directory and File Management Using GNOME
105
name untitled folder but presents a Properties window with the name highlighted.
Within this window, the user may also set emblems and permissions if she wants to
do so. Generally the defaults are good enough on newly created folders. Figure 6-40
shows the new folder window that appears when selecting New Folder from the File
menu, with the main Nautilus window behind it.
Figure 6-40
New folder
window.
Creating New Folders on the Desktop
Making a new folder on the desktop is a simple operation. With the cursor over any
blank area of the desktop, right-click to bring up the Desktop menu and select New
Folder. It appears as a selected icon named untitled folder on the user’s desktop.
You will want to rename the folder right away. To do so, right-click the icon and select
Rename. The file’s name beneath the icon turns a different color, with a box around it,
and is selected. Type in the new filename and press Enter, or click the mouse elsewhere
on the desktop. Figure 6-41 shows a newly created folder with the Desktop menu open
and Rename selected.
Changing Folders
Nautilus provides several ways to navigate to different folders on the user’s computer:
■
Double-click folder icons
■
Back, Forward, and Up in the toolbar
■
Sidebar Tree
■
Sidebar History
103xFMp.book Page 106 Monday, October 14, 2002 4:10 PM
Chapter 6
Basic Directory and File Management
106
Figure 6-41
Renaming a newly
created desktop
folder.
As discussed in Chapter 5, “Accessing Files and Directories,” the files on a UNIX system are laid out in a tree-like structure, starting from the root (/) directory. Normally
you will be viewing and working with files within your home directory.
Navigation Using the Icons
The simplest way to get to a different folder is to double-click its icon. The display in
the main panel is replaced with whatever is found in the newly selected folder. This
technique works the same whether viewing folders as icons or as a list.
Navigation Using the Toolbar and Location Bar
You have just changed to a subdirectory within your home directory and now want to
return to where you were. Notice that the first three icons on the toolbar are arrows
labeled Back, Forward, and Up.
■
Clicking the Up button always takes you up one directory level, until you hit
the root directory. You can continue to explore the rest of the system from this
point. However, you may find that you do not have permission to view some
items and cannot make changes to files or folders outside your home directory.
103xFMp.book Page 107 Monday, October 14, 2002 4:10 PM
Directory and File Management Using GNOME
107
■
Clicking the Back button always takes you to the item you previously visited,
regardless of where it was, even if it was a website located on a computer on
the other side of the world.
■
If you previously clicked the Back button, the Forward button returns you to
the folder you just came back on.
■
The Home button on the Nautilus toolbar always returns you to your home
directory. This is helpful if you gets lost.
■
If you know the UNIX path name to a folder or file you want to visit, you can
type that name in.
Navigation Using the Tree
If you click the Tree tab in the sidebar, an overview of your whole computer system
displays. Click any folder icon and Nautilus will view it as long as you have permission
to view that folder. Use the small arrows to the left of the folder icons to expose and
hide the contents of any given subdirectory alternately. Figure 6-42 shows Nautilus
open to a user’s home directory, with the Tree tab open in the sidebar. By default the
Tree view shows only folders, not files.
Figure 6-42
A Nautilus
winhow with the
tree sidebar open.
Navigation Using History
Click the History tab in a Nautilus window to see a list of the files and folders you
have visited in the current GNOME session. The list is in sequential order, with the
most recent at the top. You can click any of these to revisit them, which also reorders
the history list. When you log out and log in again, thereby restarting GNOME, the
history record starts again from the beginning.
103xFMp.book Page 108 Monday, October 14, 2002 4:10 PM
Chapter 6
Basic Directory and File Management
108
Deleting and Recovering Files
Three selections on the File menu deal with deleting and recovering files. The method
Nautilus uses is essentially identical to that seen on Windows and Macintosh computers. The general idea is to move items to a Trash bin where they remain out of the way
but are still recoverable. When you are sure that you no longer need the files in the
Trash, you can empty it. This permanently destroys the files. The only way to retrieve
objects after emptying the Trash is if you have made backups.
Move to Trash
Highlight files or folders that you want to delete and select Move to Trash from the
File menu. Those objects are relocated to the Trash but are not deleted from the system
yet. If the Trash folder was previously empty, the appearance of the icon on the desktop changes to indicate that it has content (see Figure 6-43).
Figure 6-43
A full trash icon.
Show Trash
If you are unsure of what you have placed in the Trash, you might want to check it
before permanently deleting the contents. Click Show Trash in the Edit menu to get
what is just an ordinary folder view in either Icon or List mode. Figure 6-44 shows a
Trash folder with some content in it. Notice what it says in the location bar. The sidebar has been turned off.
If there are items in the Trash that the user thinks he needs to hold onto a little longer,
he can delay emptying the Trash or else move them elsewhere temporarily.
Empty Trash
When you click Empty Trash from the File menu, a window titled Delete Trash Contents? pops up and gives a last opportunity to confirm that you want to dispose of the
files in the Trash. Click the Empty button to continue, or click Cancel to stop. A
progress window appears briefly while the files are being deleted and then disappears.
103xFMp.book Page 109 Monday, October 14, 2002 4:10 PM
Summary
109
Figure 6-44
Viewing a
trash folder
with content .
Skill Builder
Lab 6.3.6
Basic GNOME File Management
In this lab, you will work with Nautilus and other GNOME file and directory
management tools. Refer to the Lab portion of the Cisco Network Academy
Program: Fundamentals of UNIX: Solaris and Linux Supplement for details.
Summary
Knowledge of UNIX commands provides a good foundation for understanding UNIX
and is critical to success as a power user or system administrator.
Control characters such as Ctrl+C, Ctrl+D, and Ctrl+U are used in the UNIX environment to perform special functions, such as interrupting command output, logging out,
and clearing screen entries.
A number of file information commands are available. These include the file, strings,
cat, more, head, tail, wc, and diff commands. You can use these to find out information about the type and characteristics of a file and also its contents.
When creating new files and directories, users should adhere to the naming conventions. These are the basic rules for naming files and directories, which include length
and recommended characters.
103xFMp.book Page 110 Monday, October 14, 2002 4:10 PM
Chapter 6
Basic Directory and File Management
110
New directories are created using the mkdir command, and new files are created using
the touch command. Files and directories can be removed or deleted using the rm command.
CDE File Manager is a graphical utility that can be used to perform many of the same
functions as the file and directory management commands entered at the command
line.
GNOME also provides a graphical tool for file management called Nautilus. Nautilus
performs many of the same tasks as CDE.
Check Your Understanding
1. Which two of the following are the two main reasons for learning to use the
UNIX command line?
A. It gives the user access to the many command options, providing more
flexibility.
B. It enables the user to perform file management on a remote system where a
graphical interface is not available.
C. The graphical interface is more complicated to use and is designed for
advanced users.
D.
It limits the number of commands a user can perform, thereby limiting user
confusion and user errors.
2. A user is using the cat command to view the contents of a large text file. Which
of the following sequences of keystrokes are used to pause screen output and
then resume it?
A. Ctrl+S and then Ctrl+Q
B. Ctrl+S and then Ctrl+Z
C. Ctrl+Q and then Ctrl+S
D. Ctrl+D and then Ctrl+Q
3. What is the function of the Ctrl+C keystroke?
A. Ctrl+C interrupts the current activity, returning the user to the command
prompt.
B. Ctrl+C resumes screen output.
C. Ctrl+C suspends execution of a foreground process, returning the user to the
command prompt. This process can later be restarted in the foreground or
background.
D. Ctrl+C copies the command line.
103xFMp.book Page 111 Monday, October 14, 2002 4:10 PM
Check Your Understanding
111
4. Given the following sequence of commands,
$bc
1200/4
300
Ctrl+d
What is the expected outcome after the Ctrl+D command has been executed?
A. Return to shell prompt
B. Reboot
C. Repeat last command
D. Copy answer to memory
5. Which of the following statements are true about the Bourne, Bash, or Korn
shell? (Select three.)
A. Ctrl+U erases the entire command line.
B. Ctrl+W erases the last word on the command line.
C. Ctrl+H erases the last character on the command line.
D. Ctrl+A clears the entire screen.
6. Which two of the following commands displays the entire contents of the text file
someoutput.txt to the screen?
A. cat someoutput.txt
B. wc someoutput.txt
C. more someoutput.txt
D. diff someoutput.txt
7. Which command displays the last 25 lines of the file sample.output?
A. tail -25 sample.output
B. head 25 sample.output
C. tail +25 sample.output
D. tail sample.output
8. Which command does a comparison of text1.txt and text2.txt while ignoring the
case of the letters?
A. diff -i text1.txt text2.txt
B. diff -c text1.txt text2.txt
C. cmp text1.txt text2.txt
D. wc text1.txt text2.txt
103xFMp.book Page 112 Monday, October 14, 2002 4:10 PM
Chapter 6
Basic Directory and File Management
112
9. What is the maximum length of a filename on a UNIX filesystem?
A. 8 alphanumeric characters plus a 3 alphanumeric file extension
B. 12 alphanumeric characters
C. 55 alphanumeric characters
D. 255 alphanumeric characters
10. Under the File menu of the CDE File Manager, what is the function of the Go To
item?
A. Go to the specified directory
B. Go to the specified line number in the selected text file
C. Go to the specified machine
D. Open the specified file
11. Using the GNOME Nautilus file manager, which menu option turns the file man-
ager into a web browser?
A. Web Search
B. Open With
C. Open in New Window
D. New Window
12. Which four of the following specify the ways in which a user can navigate to dif-
ferent folders using Nautilus?
A. Double-click folder icons
B. Single-click folder icons
C. Back, forward, and up in the toolbar
D. Sidebar tree
E. Sidebar history
103xFMp.book Page 113 Monday, October 14, 2002 4:10 PM
103xFMp.book Page 114 Monday, October 14, 2002 4:10 PM
103xFMp.book Page 115 Monday, October 14, 2002 4:10 PM
Chapter 7
Advanced Directory and
File Management
Overview of Changes
This chapter adds information to the “Copying Files” section that describes the steps necessary to copy a file to a disk for Solaris and Linux. A correction to the I/O redirection
section is provided. A new section has also been added on advanced management of
directories and files using GNOME.
New and changed information is highlighted in the following objectives, introduction,
and summary. The content sections included in this supplement are designated as either
new or updated.
Objectives
After reading this chapter, you will be able to
■
Perform advanced directory and file management using the command line
■
Use the cp (copy) command to copy files and directories
■
Create, remove, and rename links to files
■
Use the mv (move) command to rename and move files and directories
■
Redirect input/output to and from commands
■
Pipe output from one command to another
■
Perform advanced directory and file management using the Common Desktop
Environment (CDE) File Manager
■
Perform advanced directory and file management using GNOME
103xFMp.book Page 116 Monday, October 14, 2002 4:10 PM
Chapter 7
Advanced Directory and File Management
116
Introduction
NOTE
This is a new section. Insert all following content after eLab Activity 7.1 on
page 190 of the
Cisco Networking
Academy Program:
Fundamentals of
UNIX Companion
Guide.
NOTE
Copying files to a
floppy disk using
CDE and GNOME is
covered later in this
chapter. More information about accessing Solaris and
Linux removable
media devices is
covered in Chapter
12, “Backing Up and
Restoring.”
In this chapter, you work with some of the more advanced file and directory management tasks using the command-line interface and the CDE File Manager and
GNOME’s Nautilus. You start with the command-line interface and work with the
commands necessary to copy, link, move, and rename files and directories. You then
learn about command piping and input/output redirection. CDE File Manager and
Nautilus are used to perform some of the same tasks accomplished earlier using the
command line. Accessing the floppy disk is also discussed.
Copying Files
The cp (copy) command copies files and directories. This section focuses on copying
files.
Copying Files to a Floppy Disk Using the Solaris Command Line
The following steps enable you to copy a file or files to a 3.5” 1.44-MB disk with
Solaris:
Step 1
Insert the disk in the drive and type volcheck (volume check). This tells
Solaris to check the floppy drive, determine the disk type (UNIX or PC),
and temporarily places (“mounts”) the floppy disk under the /floppy
directory of the hard drive.
Step 2
Copy files to the floppy disk with Solaris using /floppy/floppy0 as the destination—for example, $cp dante /floppy/floppy0. The user can verify
his copy by entering $ls /floppy/floppy0.
Copying Files to a Floppy Disk Using the Linux Command Line
Copy files to the floppy disk with Linux using this format:
NOTE
This is an updated
section that replaces
the first two paragraphs of the sametitled section on
page 199 of the
Cisco Networking
Academy Program:
Fundamentals of
UNIX Companion
Guide.
$cp dante /mnt/floppy
The directory /mnt is the standard mount point for the floppy drive and the CD-ROM
with most distributions of Linux. Note: The concepts of mounting and mount points
are discussed in Chapter 8, “Filesystems and File Utilities.”
Input/Output Redirection
All central processing unit (CPU) operations have input or output (I/O). The keyboard,
for example, provides standard input, whereas the monitor displays standard output
and standard error, as shown in Figure 7-18. These operations are known to the operating system (OS) by their logical names of stdin, stdout, and stderr.
103xFMp.book Page 117 Monday, October 14, 2002 4:10 PM
Advanced Directory and File Management Using GNOME
117
Figure 7-18
Input, CPU,
and output.
Every UNIX command has a source for standard input and a destination for standard
output. For this chapter’s purpose, input and output are defined with respect to a
UNIX command. The input to a command normally comes from the keyboard,
although it also can come from a file. The output from a command normally goes to
the monitor or screen. Errors that might result from a command are another form of
output and also are displayed on the screen. Figure 7-19 shows input to a command
and the two types of output from it. Input is sending data to a command. Output is
receiving data from a command. Errors are generated when a command is entered
incorrectly.
Figure 7-19
Command
input /output .
Advanced Directory and File Management Using
GNOME
Moving and Copying Files Using Drag and Drop
Users often want to make copies of files and folders they work on and to move those
files and folders around. GNOME makes this task simple by means of the Nautilus file
manager. A technique called drag and drop enables you to copy and move files by
moving or pushing around their icons using the mouse.
Moving Files Using Drag and Drop
Suppose, for example, that you have a folder named Project in your home directory
that contains several files related to work you are doing. One of these files is named
NOTE
This is a new section. Insert all following content after the
e-Lab Activity 7.2.3
on page 210 of the
Cisco Networking
Academy Program:
Fundamentals of
UNIX Companion
Guide.
103xFMp.book Page 118 Monday, October 14, 2002 4:10 PM
Chapter 7
Advanced Directory and File Management
118
Notes, which you refer to constantly. If you want easier access to the Notes file, you
may move the Notes file to your desktop. Here you can click it anytime without having
to search through folders for it.
To move a file to your desktop, follow these steps:
Step 1
Click the file’s icon and continue to hold the mouse button.
Step 2
Move the pointer to some area on the desktop and release it.
The file’s icon and name disappear from the window and appear on the desktop. The
file has been moved and is no longer in its original location. Figure 7-31 shows the
Notes icon in the process of being moved to the desktop. The cryptic appearance of the
icon beneath the Trash is actually the beginning of the first three lines of this plain-text
file’s content.
Figure 7-31
Moving the Notes
file to the desktop.
Figure 7-32 shows the results of the move after releasing the mouse button. Notice
that the icon for Notes is no longer in the Nautilus window, only on the desktop, and
is highlighted.
Figure 7-32
The desktop after
moving notes
from projects
103xFMp.book Page 119 Monday, October 14, 2002 4:10 PM
Advanced Directory and File Management Using GNOME
119
Use the same technique to move files to another folder. When viewing a folder that has
a subdirectory within the folder, the user drags the file’s icon on top of the folder icon
and drops it in the folder icon. The file is now moved to that folder.
The simplest way to move a file to a folder that is not seen in the currently viewed folder
is to open a second window viewing the new folder. You then drag the file’s icon
between windows. Suppose, for example, that you have created another folder in your
home directory called Process and want to relocate materials that relate to dealing with
others, such as e-mail, reports, and status summaries. You would do the following:
Step 1
Open the folder called Project in the usual way.
Step 2
Select New Window from the File menu.
Step 3
In the new window, navigate to the directory called Process.
Step 4
In the window that shows the Project folder, click the icon for the file
called e-mail, and then drag it to the other window. The file now appears
in the new window, but disappears from the original one.
Step 5
Multiple files may be selected by pressing the Shift key while clicking the
file icons or by dragging a box around a group of icons in a window that
are together.
Step 6
To move the report and status files to the Process folder, click report, and
then Shift-click status, and finally drag the files to the other window.
Both files move at the same time.
Figure 7-33 shows two icons being dragged from one window to another, and Figure
7-34 shows the project and process windows after moving three files to the process
window.
Copying Files Using Drag and Drop
Sometimes a user wants to make a copy of a file instead of moving the original. Suppose, for example, that a user wants to use last week’s status report as a model for this
week’s, keeping the formatting, but changing the content. The technique described for
moving files is similar for copying files. When copying files, the user presses the Control key, marked Ctrl on many keyboards, while performing the drag-and-drop operation.
Upon completing the copy, the file’s icon shows up in both the original and new locations. These are independent but identical duplicates.
File Menu Options (Rename and Link)
Files and folders may be renamed and linked using selections from the Nautilus menu.
NOTE
Drag and drop applies to folders as
well as to files. When
you move a folder,
its entire contents,
including all subdirectories, move with
it.
103xFMp.book Page 120 Monday, October 14, 2002 4:10 PM
Chapter 7
Advanced Directory and File Management
120
Figure 7-33
Icons being
dragged across
windows
Figure 7-34
Projects and
process after
moving drag
and drop.
103xFMp.book Page 121 Monday, October 14, 2002 4:10 PM
Advanced Directory and File Management Using GNOME
121
Renaming from the File Menu
The Rename function appears on the File menu only when View as Icons is selected. If
you click a single icon, the File menu enables you to select Rename. The file’s name
beneath the icon turns a different color, with a box around it. Type in the new filename
and press Enter, or click the mouse elsewhere on the desktop.
Make Link from the File Menu
Symbolic links to files and folders may be created through Nautilus. If the original file
is deleted, a symbolic link to it remains but points to nothing. UNIX also makes hard
links, which are just new names for the same file. Hard links may be made very simply
from a shell. Review the section “Linking Files” earlier in this chapter if you are
unsure what a link is.
To make a link, highlight a file or folder and choose Make Link from the File menu.
Nautilus gives the newly created symbolic link the name link to filename, where filename is the name of the original. In View as Icons, a small arrow pointing to the upper
right attaches itself to the upper right of the icon. In List view, the arrow in the
Emblems column indicates that it is a link. Figure 7-35 shows two windows in the
same directory. The first window is shown with View as Icon. mode selected The second window is shown with View as List mode selected. In each window, a new link to
the file named status is seen and highlighted. Notice the small arrow on the upper corner of the icon above and in the Emblems column below. The file may safely be
renamed, and the arrow reminds you that it is a link.
Edit Menu Options: Cut, Copy, and Paste
The Nautilus Edit menu includes functions that work to copy and to move files. The
general sequence of operations is first to select a file or folder. Next select Copy or Cut,
move to the target location, and then select Paste.
Copying a File from the Edit Menu
To use the Edit menu to copy a file, follow these steps:
Step 1
Highlight the file’s icon by clicking it.
Step 2
Choose Copy Files from the Edit menu. The copy is not made yet.
Step 3
Open another Nautilus window viewing the folder where you want to
copy the file.
Step 4
In that window, choose Paste Files. If you are in a different folder from
the original, a copy by the same name as the original is made in that
folder.
Step 5
You may also copy within the same folder; in that case, the copied file is
given the name copy of filename, which you should rename.
NOTE
If you are in View as
List mode, you can
rename a file using
the Show Properties
window from the File
menu. Highlight a
file or folder and
choose Show Properties either from the
File menu or from
the pop-up menu
that appears when
you right-click.
NOTE
Rename the link
because of the
spaces in the filename. Names that
use characters other
than letters, numbers, periods (dots),
and underbars (_)
can cause problems
with the shell.
103xFMp.book Page 122 Monday, October 14, 2002 4:10 PM
Chapter 7
Advanced Directory and File Management
122
Figure 7-35
A link as seen in
icon and list view.
Figure 7-36 shows two windows, the top in a folder named mystuff and the bottom
one in a folder named morestuff. After highlighting e-mail in the first one, the sequence
Copy File in the top window followed by Paste Files in the bottom window shows a
copy of the file in each window.
Moving a File Using the Edit Menu
To use the Edit menu to move a file to another folder, follow these steps:
Step 1
Click the file’s icon to highlight it.
Step 2
Choose Cut Files from the Edit menu. The file is not yet deleted from the
folder.
Step 3
Open another window on the folder where you want to move the file and
click in it.
Step 4
In that window, choose Paste Files. The icon disappears from the first
window and appears in new window, indicating that the file has been
NOTE
Selecting Cut Files
followed by Paste
Files in the same
folder has no effect.
relocated.
103xFMp.book Page 123 Monday, October 14, 2002 4:10 PM
Advanced Directory and File Management Using GNOME
123
Figure 7-36
A copy
made using
the edit menu .
Figure 7-37 shows the result after highlighting the file called Status in the first window,
and then choosing Cut File in the top window, followed by Paste Files in the bottom
window. The file is no longer seen in the folder mystuff.
View Menu Options
Nautilus’ View menu has several convenience options that enhance your ability to
operate using the desktop manager. The most important options are covered here.
Refresh
If the actual contents of a folder appear inconsistent with the view that Nautilus presents, press Refresh from the View menu. This causes Nautilus to re-examine the
folder and present an updated view. Note that the same thing may be accomplished
with the Refresh button on the toolbar.
103xFMp.book Page 124 Monday, October 14, 2002 4:10 PM
Chapter 7
Advanced Directory and File Management
124
Figure 7-37
A move made
using the edit
menu.
The component parts of any Nautilus window take up screen space. Sometimes it is
desirable to hide away one or more parts. This allows more space for the main panel
itself. Select Hide from the View menu for any Nautilus feature you want to hide.
Move/Hide/Show Window Components
The following components can be moved or hidden:
■
Sidebar
■
Toolbar
■
Location bar
■
Status bar
After selecting Hide for any of these, the menu changes to say Show rather than Hide.
Choosing Show causes the relevant component to appear again.
103xFMp.book Page 125 Monday, October 14, 2002 4:10 PM
Advanced Directory and File Management Using GNOME
125
Notice that the menu bar, toolbar, and location bar all have handles on the left. Grab
one of these bars and drag it with the mouse. The bar detaches from the main panel
and may be placed anywhere on the desktop. Figure 7-38 shows a Nautilus window,
with the location bar and toolbar detached and moved below the main panel. The
sidebar has been hidden.
Figure 7-38
Detached
Nautilus location
bar toolbar, and
hidden sidebar.
Reset View to Match Preferences
Details of the view mode, including the fonts used, spacing, and sorting order, may be
set on a per-folder basis. Select Reset View to Match Preferences from the View menu
to return a folder to the conditions set by Edit Preferences.
Lay Out Items
When View as Icons is set on a folder, it is possible to show the contents of the folder
in a variety of ways. Lay Out Items on the File menu leads to a submenu with eight
choices. Select Manually and you may move icons around within a folder freely, without aligning them. Figure 7-39 shows a folder with its icons rearranged by hand
according to a scheme that suits its user. That layout remains in effect every time the
user visits the folder until he sets it to something else.
The choices that start with By are all sort options. By Name, By Size, By Type, By
Modification Date, and By Emblems can be useful in finding items easier in a large
directory. Suppose, for example, that you have a folder with more than 100 items in it.
You have recently been working on a file with a name that normally would appear far
down the list if sorted by name, the default option. Select By Modification Date and
the most recently modified files will appear first.
103xFMp.book Page 126 Monday, October 14, 2002 4:10 PM
Chapter 7
Advanced Directory and File Management
126
Figure 7-39
A folder with
icons arranged
manually.
Selecting Tighter Layout from Lay Out Items causes icons to be packed closer together,
bringing more of them into view in a given window. Finally, any layout other than
manual may be shown in reverse by selecting Reversed Order. For example, reversing
By Modification Date causes the least recently modified files to appear first.
Clean Up by Name
If a window’s icons are scattered in disarray, select Clean Up by Name to rearrange
them all neatly in a grid of rows and columns, ordered by name.
Zoom Control
The following controls allow viewing a folder:
■
Zoom In
■
Zoom Out
■
Normal Size
A folder may be viewed in a variety of sizes, in either Icon or List view. Select Zoom In
to make the contents larger, and Zoom Out to make them smaller, in a range from
103xFMp.book Page 127 Monday, October 14, 2002 4:10 PM
Summary
127
25 percent to 400 percent of a standard size. Normal size is the size that has been
selected from Edit Preferences. The normal size may be different for List and Icon view
modes.
Notice there is also a tool on the location bar with a minus sign on the left, a plus sign
on the right, and a number in the middle (see Figure 7-40). Click the minus and plus
symbols to shrink and increase the view size. Click the number to return to normal
size.
Figure 7-40
Notice the
plus and minus
signs on the
location bar.
Finally, the View menu enables the user to toggle between Icon and List view modes as
follows:
■
View as Icons
■
View as List
■
View As
Most users will find that it is simpler to use the pull-down menu on the right of the
location bar to do this.
The View As choice is an advanced option. That option enables users to fine-tune what
programs handle which file types when selected. Using it properly requires an understanding of MIME file types and a good knowledge of what UNIX programs are available on the user’s system to handle various types.
Summary
Now that you have completed this chapter, you should have a firm understanding of
the following:
■
The command-line interface provides several more advanced file and directory
manipulation commands to enable users to manage the filesystem.
■
Files and directories can be linked with the ln command, copied using the cp
command, and moved and renamed using the mv command. When these commands are used with the -i or interactive option, the user is prompted before
files are overwritten.
■
The workstation keyboard is the standard input device and the monitor or
screen is the standard output device. UNIX commands can receive input
(stndin) and produce output (stndout and stnderr). It is common to redirect
103xFMp.book Page 128 Monday, October 14, 2002 4:10 PM
Chapter 7
Advanced Directory and File Management
128
output from the screen to a file to capture the results of a command such as ls
or cat for future viewing or manipulating. The right-angle bracket (>) is used to
redirect command output.
■
Command piping uses the output of one command as input to the next command. This enables the user to create miniprograms or custom commands. The
pipe symbol (|) is used to separate commands to accomplish this. File Manager
has several advanced capabilities for manipulating files and folders. These
include moving by select+drag+drop. Copying by Ctrl+select+drag+drop. The
Selected menu allows files and folders to be preselected and then copied,
moved, renamed, or put in the Trash Can. File and directory permissions also
can be changed using the Properties option from the Selected menu. The File
Manager View menu can be used to customize the way File Manager displays
files and folders, which includes displaying the filesystem as a tree.
■
The Nautilus file manager that comes with GNOME in the Linux environment
also has many of the same capabilities of CDE and, in addition, can act as a
web browser.
UNIX Command Summary
The table that follows lists those commands that are new for the supplementary material.
Command
Definition and Example
volcheck
Volume check. Instructs Solaris to check the floppy drive, determine the
disk type (UNIX or PC), and temporarily places (“mounts”) the floppy
disk under the /floppy directory of the hard drive.
Check Your Understanding
1. Your current working directory is /home/user2/dir2. You want to copy the notes
file from your current directory to the /home/user2/dir3 directory. Which command should you use?
A. copy notes /dir3
B. cp notes ../dir3
C. copy notes ../dir3
D. cp /notes dir3
103xFMp.book Page 129 Monday, October 14, 2002 4:10 PM
Check Your Understanding
129
2. Your current working directory is /home/user2. You want to copy only the two
files fruit and fruit2 to /dir4. Which of the following commands should you use?
A. cp fruit fruit2 /dir4
B. cp fruit? /dir4
C. cp fru* /dir4
D. cp f??????? /dir4
3. Your current working directory is /home/user2/. You need to copy the directory /
home/user2/dir1 to another location as a backup. The new directory will be
named dir.bak and will reside in the same directory as dir1. Which command
should you use?
A. cp dir1 dir1.bak
B. B. cp dir1 ../dir1.bak
C. C. cp -r dir1 dir1.bak
D. D. cp -a dir1 dir1.bak
4. Your current working directory is /home/user2/backups/. You need to copy the
file backup052402 to the backups directory, but you do not want to overwrite
any existing files. Which command should you use?
A. cp –F backup052402 ../backups
B. cp –i backup052402 ../backups
C. cp –r backup052402 ../backups
D. cp –w backup052402 ../backups
5. To rename a directory, you should use the command ________.
6. You can use redirection to send the output of a command to a file rather than the
screen. Which command format is valid for output redirection?
A. command > filename
B. command < filename
C. filename > command
D. command << filename
7. When using the ksh shell, how can you prevent redirection from overwriting
existing files?
A. Use the interactive option.
B. Type the command set –o noclobber.
C. Use the right-angle bracket.
D. Set Overwrite to Off.
103xFMp.book Page 130 Monday, October 14, 2002 4:10 PM
Chapter 7
Advanced Directory and File Management
130
8. You are using the ksh shell with noclobber enabled. You want to send the output
of the ls command to the file mydir, overwriting it if necessary. Which command
should you use?
A. ls –a > mydir
B. ls –a >> mydir
C. ls –a 2> mydir
D. ls –a >| mydir
9. In ksh, which output redirection operator is used to send output to standard
error?
A. >
B. >
C. 2>
D. >|
10. The pipe is used to send the output of one command as input to another com-
mand. Which of the following displays a directory listing one screen at a time?
A. ls –l | more
B. ls –l > more
C. ls -l || more
D. ls –l >> more
11. Which three of the following are valid ways to copy a file in UNIX?
A. Use the cp command from the command line.
B. Use the CDE File Manager Selected menu.
C. Use the Ctrl+select and then the drag+drop technique with File Manager.
D. Use the copy command.
12. In which of the CDE File Manager menus is the tree display option available?
A. File
B. Selected
C. View
D. Options
103xFMp.book Page 131 Monday, October 14, 2002 4:10 PM
103xFMp.book Page 132 Monday, October 14, 2002 4:10 PM
103xFMp.book Page 133 Monday, October 14, 2002 4:10 PM
Chapter 8
Filesystems and File Utilities
Overview of Changes
This chapter provides additional general information on partitioning and filesystems and
also covers Linux partitions and filesystem statistics. The egrep and fgrep commands have
been added to the section “Searching for Strings.” A new section on “File Editing with
sed” has been added for searching and processing files. Another new section covers finding files using GNOME and KDE. Objectives and utilities related to user identification
and switching users have been moved to Chapter 10, “File Security.“
New and changed information is highlighted in the following objectives, introduction,
and summary. The content sections included in this supplement are designated as either
new or updated.
Objectives
After reading this chapter, you will be able to
■
Describe hard disks, partitions, and filesystems
■
Display filesystem utilization and free space
■
Locate files and directories using the find command
■
Use the grep, egrep, and fgrep commands to find character strings within files and
command output
■
Use sed to match patterns in files and perform processing
■
Sort the contents of files and command output using the sort command
■
Find files using graphical tools
■
Use commands such as who and finger to identify users who are logged on (moved
to Chapter 10’s “Identifying and Switching Users” section)
■
Assume the identity of another user using the su (switch user) command (moved
to Chapter 10’s “Identifying and Switching Users” section)
■
Determine your real and effective user ID using the who am I and id commands
(moved to Chapter 10’s “Identifying and Switching Users” section)
103xFMp.book Page 134 Monday, October 14, 2002 4:10 PM
Chapter 8
Filesystems and File Utilities
134
Introduction
This chapter covers hard drive technology, partitions, and filesystems in more detail
than in previous chapters. You will use the find utility to locate files and directories on
a hard drive. The grep, egrep, fgrep, and sed utilities are used to search for strings of
characters within files. The sort utility is used to sort file contents and command output. Various graphical search tools that are available with CDE and GNOME are also
covered.
NOTE
This is an updated
section that replaces
the same-titled
section on pages 219
through 223 of the
Cisco Networking
Academy Program:
Fundamentals of
UNIX Companion
Guide.
Partitions and Filesystems
Partitions and filesystems are the building blocks of the hard disk. This section defines
partitions and filesystems and gives examples of each relative to UNIX in general and
Solaris and Linux in particular.
Partitions
When the UNIX operating system was first developed, hard disks could store what is
now considered a very small amount of data. Disks larger than 300 MB were developed, and the operating system could not handle such a large amount of space. This
necessitated the partitioning of the hard drive to allow the kernel to access smaller,
addressable parts of the drive. Partitions are contiguous sections of the hard disk that
hold data.
Solaris hard drives can be divided into as many as eight partitions or slices. Linux supports a single extended partition that can hold multiple logical partitions. Each partition is treated by the operating system as an independent drive, similar to a drive letter
in the PC world or a volume with Novell NetWare. Most hard disks in today’s PCs are
one physical partition, which is referred to as drive C:.
A PC hard disk also can be divided into smaller partitions. In DOS or Windows, this is
referred to as drive C:, drive D:, drive E:, and so on. In UNIX, these partitions are also
referred to as slices. They are also associated with a directory name, referred to as a
mount point. Examples are / (root), /usr, and /home (see Figure 8-2). A UNIX partition or slice is referenced by the operating system using a cryptic-looking filename such
as /dev/dsk/c0t3d0s0 for the Solaris system or /dev/hda1 for the Linux system. The
next section describes the output of the df command, which you can use to see the partitions defined on a hard disk.
103xFMp.book Page 135 Monday, October 14, 2002 4:10 PM
Partitions and Filesystems
135
Figure 8-2
UNIX partitions on
a hard drive.
Current hard drives may have up to a terabyte (TB) or more of space on them, and the
kernel can access all available space. A TB equals a trillion bytes. Despite this, the convention of partitioning a hard drive has persisted for various reasons. Partitioning
enables an administrator to functionally organize data so that user files are on a different partition from the operating system, executables, or applications.
Filesystems
The term filesystem has two meanings. To the user of the UNIX operating system, a
filesystem is a hierarchy of directories and files. We have been calling this system the
directory tree. To the operating system, a filesystem is a structure created on a partition
consisting of tables defining the locations of directories and files.
A partition does not necessarily have to contain a filesystem. At least one partition is
used as a secondary memory location, the swap partition.
Before a disk partition can be used, a filesystem must be created to provide a structure
for organizing and accessing data on the partition.
103xFMp.book Page 136 Monday, October 14, 2002 4:10 PM
Chapter 8
Filesystems and File Utilities
136
For example, a Solaris system may be configured to have the partitions and filesystems
(see Table 8-1).
Table 8-1
Partition
(Slice) No.
Solaris Partitions and Filesystems
Filesystem
Description
0
root
Contains standard UNIX system files, plus empty
directories such as /home and /var that are used as
mount points for other system files.
1
Swap
Used for temporary memory storage. There is no
system created on the swap partition. Swap uses the
partition in its “raw” state.
2
Entire Disk
By backing up this partition, you back up all filesystems.
3
usr
Contains many user commands and utilities. Contents change very little, so there is no need to back
up frequently.
4
home
Contains a user’s home directories. Having it as a
separate filesystem allows for easy backup. Often
home directories are located on a server and are
mounted on /home of a workstation from over the
network.
5
Unassigned
6
Unassigned
7
Unassigned
Partitions on BSD systems are labeled using letters a to h rather than 0 to 7
One of the main advantages to partitioning is the ease with which daily backups can
occur. By partitioning a hard drive, daily backups can be done only to those partitions
on which the data changes frequently, without having to back up all information on
the disk. Partitioning also cuts down on seek time. When the disk is partitioned, a user
can specify a file to search for or a directory to change to. The name of the directory
gives the kernel information about where the data is stored. This prevents the system
from having to seek the information over the entire disk.
103xFMp.book Page 137 Monday, October 14, 2002 4:10 PM
Partitions and Filesystems
137
Other benefits of partitioning include security and reliability. For increased security,
partitions on servers can be shared or not shared to the network with read-only or
read/write properties. This means that a system administrator can make partitions
unavailable for workstations to access when desired and control the type of access.
Partitioning also makes a system more reliable. If a filesystem is corrupt, repair to the
filesystem can happen while the remaining filesystems are still accessible. If the entire
drive contains only the root filesystem and becomes corrupt, for example, users would
not be able to access the system while filesystem repairs were being made. Here are the
characteristics and benefits of partitions:
■
Subdivides a hard disk
■
Functionally organizes data
■
Must be mounted to be accessible
■
Can be mounted with read-only or read/write access
■
Facilitates daily backups
■
Reduces data access time
■
Provides security options
■
Improves reliability
■
Preserves user data during operating system upgrades
■
Examples include / (root), /usr, and /home.
■
Similar to PC drive letters and NetWare volumes
Mounting the Filesystem
After filesystems are created on disk partitions, all separate filesystems are combined to
form a single directory tree. This is accomplished by attaching, or mounting, the filesystem to an empty directory, the mount point, as shown in Figure 8-3. When the system boots, the root filesystem automatically is mounted by the kernel and contains
systems files, directories, and mount points for the other filesystems. After the root filesystem is mounted, a file referred to as the mount table is read to determine what additional filesystems are to be mounted and at what location or mount point. Filesystems
can be manually mounted and unmounted anytime by the root user.
The mounting of a filesystem is what gives the directory the capability to store files.
Directories and files on an unmounted filesystem are inaccessible. The size of the partition when the filesystem was created determines the capacity.
The partition name and filesystem name is typically the same as its mount point in the
directory structure. For example, /usr is the mount point for the user filesystem; this is
also referred to as the user partition.
103xFMp.book Page 138 Monday, October 14, 2002 4:10 PM
Chapter 8
Filesystems and File Utilities
138
Figure 8-3
Directory tree
with mounted
filesystems.
root file system
#"
$!%
#$
!"
!"
!"%
home file system
%#%
&#
#
usr file system
* Indicates an empty directory used as a mount point
Filesystem Statistics
Filesystem statistics can be displayed using the df (disk free) command. System V-based
systems list disk usage in 512-byte blocks (.5 KB), by default, rather than 1024-byte
blocks (1 KB). Use df -k on these systems to display usage in KB. Linux systems display
the same information as df -k using just the df command. Usage is shown in 1 KB
blocks by default. Figure 8-4 displays the output of the df -k command on a Solaris
system.
Figure 8-4
Using the df
(disk free)
command with
Solaris
filesystems.
$df -k
Filesystem
/dev/dsk/c0t3d0s0
/dev/dsk/c0t3d0s3
/dev/dsk/c0t3d0s4
swap
Kbytes
7608
6668
239855
73552
Used
6369
5458
179655
12
Avail
478
550
36214
73540
Capacity
93%
91%
83%
0%
Mounted on
/
/usr
/home
/tmp
The Filesystem column lists the device filename for the filesystem that is created when
the operating system is installed or created manually by the system administrator. Each
version of UNIX has a slightly different device file naming convention. The output in
Figure 8-4 is from a Solaris system with a SCSI disk and is interpreted as follows:
103xFMp.book Page 139 Monday, October 14, 2002 4:10 PM
Partitions and Filesystems
139
■
c0 (controller 0) is the number of the disk controller or interface. 0 is the first
controller.
■
t3 (target 3) is the SCSI target number for the hard drive.
■
d0 (disk 0) is the number of the disk installed. 0 is the first disk.
■
s0 (slice 0) is the slice or partition number. 0 is the first slice.
The Kbytes column reports the size of the filesystem in KB.
The Used and Avail columns report on the number of KB that the filesystem is currently using and how much space remains available.
The Capacity column enables the user to quickly see how full a filesystem is. Some filesystems remain static, so a capacity of more than 90 percent is not unusual.
The Mounted On column is the mount point and typically indicates the filesystem
name. The previous output shows that the capacity of the home filesystem is at 83 percent and has 36 MB (36,214,000) of available space remaining.
The df command shows capacity and availability from a filesystem level. The du command displays disk space used by files and subdirectories and is frequently used by a
user. The du command is similar to the DOS DIR command, which shows available
disk space at the end of the listing. Output is displayed in 512-byte blocks (.5 KB) by
default. Use du -k to display usage in kilobytes, as in $du -k or $du -k /usr. The -s displays only the summary.
Linux Partitions
Linux was originally developed for the Intel x86 architecture; therefore, it uses the PC
partitioning scheme. Hard drives, currently in use, frequently contain only one partition and therefore only one filesystem. Current x86 architecture allows dividing the
hard drive into four primary partitions or three primary partitions and one extended
partition. The extended partition can have multiple logical partitions defined within it.
When Linux is installed on other computer architectures, such as Sun’s SPARC or
IBM’s RISC, it uses the partitioning native to those architectures.
Linux refers to an x86 partition and associated filesystem by its device name. Primary
partitions 1 through 4 on an EIDE drive are numbered as /dev/hda1 through /dev/
hda4. Logical partitions are numbered starting with /dev/hda5. As an example, /dev/
hda1 would be the first partition of the master drive on the primary EIDE bus. Partition /dev/hdb2 would be the slave drive on the second EIDE bus. EIDE allows a primary and secondary bus and each can have a master and slave drive. SCSI drives are
numbered similarly. As an example, /dev/sda2 would be the second partition on the
NOTE
This is a new section. Insert this section before the
“Finding Files in the
Filesystem” section
on page 223 of the
Cisco Networking
Academy Program:
Fundamentals of
UNIX Companion
Guide.
103xFMp.book Page 140 Monday, October 14, 2002 4:10 PM
Chapter 8
Filesystems and File Utilities
140
first SCSI drive of the SCSI host adapter or chain. This partition naming scheme for
EIDE and SCSI drives is summarized in Table 8-2.
Table 8-2
Linux Partition Naming
EIDE Partitions
SCSI Partitions
Example: /dev/hda1
Example: /dev/sdb2
Name Element
Description
Name Element
Description
/dev
Device in the /dev
directory
/dev
Device in the /dev
directory
/hd
EIDE hard drive
/sd
SCSI hard drive
a
Master drive on
the primary EIDE
bus
b
Second physical
SCSI drive in the
chain
1
First primary partition on this drive
2
Second partition
on this drive
Linux Partition Requirements
Linux must have at least one partition which is the root (/) partition mounted at the
root directory. A standard workstation installation of Red Hat Linux creates a root
partition, a /boot partition, and a swap partition. The root and boot partitions are formatted for a particular filesystem such as ext2 or ext3. The swap partition is not formatted as a user-accessible partition but instead is used only by the operating system.
During installation, some administrators choose to divide the hard drive into multiple
logical partitions. The number and function of partitions created depends on administrative policies and the role the computer plays. Workstations typically have few partitions—two or three. Servers may have a greater number of partitions, three to six per
server. Some of the common Linux partitions are listed in Table 8-3. The partition
name and filesystem name is typically the same as its mount point in the directory
structure. For example, /usr is the mount point for the user filesystem; this is also
referred to as the user partition.
Table 8-3
Common Linux Partitions and Mount Points
Partition Name and Mount Point
Description
/
Root—includes all other partitions
/boot
Linux kernel and startup files
/home
User’s home directories
/mnt
Mount point for devices such as floppy and CDROM
103xFMp.book Page 141 Monday, October 14, 2002 4:10 PM
The egrep and fgrep Commands
141
Table 8-3
Common Linux Partitions and Mount Points (Continued)
Partition Name and Mount Point
Description
/opt
Third-party programs and data
/swap
Not mounted—Used by operating system for virtual
memory
/tmp
Temporary files
/usr
Linux programs and data
/var
Transient system files
NOTE
The egrep and fgrep Commands
Two commands, egrep and fgrep, have been added to complement the basic grep command and perform enhanced searches.
The egrep Command
The egrep (extended grep) command searches the contents of one or more files for a
regular expression using extended regular expression metacharacters in addition to
those used by grep. Table 8-4 lists the new regular expression metacharacters that you
can use with egrep.
Table 8-4
New Regular Expression Metacharacters with egrep
Metacharacter
Function
Example
Result
+
Matches one or
more occurrences
of the previous
character
egrep ’[a-z]+ing’ file
Displays all lines having one or more letters
followed by ing.
Examples: ring, learning, computing, and
so on
?
Matches zero or
one occurrence of
the previous character
egrep ’bel?ville’ file
Displays all lines containing belville or
bellville
x|y
Matches either x or
y
egrep ’bel?ville’ file
Displays all lines containing either 64 or
128
(|)
Matches multiple
patterns
egrep ’(computer|ing)’ file
Displays all lines containing either computer or computing
This is a new section. Insert this section after Figure 8-12
on page 228 of the
Cisco Networking
Academy Program:
Fundamentals of
UNIX Companion
Guide.
103xFMp.book Page 142 Monday, October 14, 2002 4:10 PM
Chapter 8
Filesystems and File Utilities
142
The fgrep Command
The fgrep (fast grep) command differs from grep and egrep in that it will not accept a
regular expression metacharacter as input. It recognizes only the literal meaning of
these characters. The fgrep command treats a $ as a dollar sign and a ^ as a caret.
Metacharacters have no special meaning.
The fgrep command searches for literal strings only. Therefore, it is considerably faster
than grep. Use fgrep rather than grep to search for a simple literal string in a file or a
string that includes a metacharacter symbol. For example,
$fgrep
’*’
/etc/system
searches all lines in the /etc/system file and will find those containing the “*” string.
File Editing with sed
Another pattern-matching utility with effective processing capabilities is sed (stream
editor). The sed utility reads lines of a text file one by one. It applies a set of editing
commands to the lines without opening the file in a text editor such as vi. Like grep,
sed makes no changes to the original file and sends the results to standard output. To
make the changes permanent, the user must redirect the output to a file. Similar to the
grep command, sed uses a number of special metacharacters to control pattern searching. Figure 8-12a shows the basic format of the sed command.
Figure 8-12a
The sed
command.
Suppressing the Default Output
By default sed always displays each line of input to the screen whether or not it gets
changed. However, it is possible to display only a specific range of lines from a file. The
-n option tells sed that the user does not want to print any lines unless directly told to
do so. This is done with the p command. By specifying a line number or range of line
numbers, the user can use sed to selectively print lines of text. The following example
shows how sed prints all lines to standard output by default, duplicating lines containing the Dante pattern in addition to all other lines in a file:
sed ’/Dante/p’ dante
To suppress this default action, use the -n option with the p command, as follows:
sed -n ’/Dante/p’ dante
This displays only lines containing Dante.
103xFMp.book Page 143 Monday, October 14, 2002 4:10 PM
File Editing with sed
143
sed is a very powerful and flexible command when used from the command line and in
shell scripts. See Chapter 15, “Introduction to Shell Scripts.” Table 8-5 shows more
examples of sed commands using regular expressions introduced with the grep command.
Table 8-5
Using the sed Command
Example
Result
sed -n ’20,25’ file
Displays only lines 20 through 25
sed ’5d’ file
Deletes line 5
ls -l | sed ’/ [Tt]est/d’ > newfile
Deletes all lines containing Test or test in the
ls -l output, placing the results in newfile
sed ’s/....//’ file
Deletes the first four (....) characters from
each line
sed ’s/....$//’ file
Deletes the last four (....) characters from each
line
ls -l | sed ’5,$d’ > newfile
Deletes lines 5 to the last line in the ls -l output, placing the results in newfile
sed -n ’/^$/d’ file > newfile
Deletes blank lines from file placing the results
in newfile
ls -l | sed ’s/ */:/g’
Searches (s) for at least one or more spaces
and globally (g) replaces them with a colon (:).
Note: without the g command sed would
replace only the first space on every line with
a colon and would not continue searching for
other occurrences of a space on the same line.
sed ‘1,10s/Windows/UNIX/g’ file
Search (s) for “Windows” and globally (g)
replace all occurrences of Windows on every
line wherever it appears in the first 10 (1,10)
lines.
ls -l |sed ‘s/$/EOL/’
Appends EOL at the end of every line
sed ‘s/^/
Searches for the beginning of each line (^) of
the file and adds spaces.
/’ file
sed -e ‘s/Dante/DANTE/g’ -e ‘s/poet/
POET/g’ dante >newdante
Performs two edits on the same command line
and places the results in the newdante file.
103xFMp.book Page 144 Monday, October 14, 2002 4:10 PM
Chapter 8
Filesystems and File Utilities
144
NOTE
This is a new section. Insert this section after Figure 8-14
on page 230 of the
Cisco Networking
Academy Program:
Fundamentals of
UNIX Companion
Guide.
Finding Files Using GNOME and KDE
GNOME also provides a way to locate files using the Search Tool. To access the Search
Tool, select the Programs and then the Utilities menu (see Figure 8-14a).
Figure 8-14a
GNOME menus
to access search
tool.
The GNOME Search Tool provides two options: Full find (full) and Quick find
(locate). You can choose either of these options by using the tabs on the Search Tool’s
initial screen.
Search Tool - Quick Find (Locate)
Click the Quick find (locate) tab as shown in Figure 8-14b to access the Quick find
option. Using Quick find is faster than using Full find. Quick find searches only a
special database of filenames instead of looking over the entire disk. Quick find is a
GUI interface to the UNIX locate command. Quick find is not as flexible as the Full
find option, because the search can be done only by filename. The database of files
is usually updated on a regular basis, but you may be searching for a file that was
not included in the last update. A user with root privileges must run the command
updatedb to update the locate database.
By entering a filename or string in the Locate field to find a file, you will find all the
files that contain the string in their full pathname. You can also limit the search to a
particular directory by specifying the path. It is important to remember that UNIX filenames are case-sensitive.
The Quick Search mode is actually a front end to the locate command. If you need
more detailed information on locate, read the appropriate manual (man) page.
103xFMp.book Page 145 Monday, October 14, 2002 4:10 PM
Finding Files Using GNOME and KDE
145
Figure 8-14b
Quick find
(locate) option.
Search Tool - Full Find
The Search Tool window defaults to the Full find tab. This enables you to specify additional criteria for a more advanced search. Full find can perform many of the functions
of the find command and also the grep command. The criteria can be either the name
of a folder or file or, in the case of a file, the contents. Wildcard characters can be used
when specifying the name of the file to find. Click the double-arrow button next to the
Add button to display a menu of criteria that you can use to search for files and directories. Figure 8-14c shows a search for all files ending with doc that were created or
modified in the past 14 days and that contain the string “Linux” within the file. Each
criterion can be enabled or disabled by using the Enable check box. The Remove button enables the user to remove a criterion. The following is a list of the most commonly used search criteria that can be used to find files on a system. Additional
information on these and more advanced criteria can be found using the Search Tool
help facility.
■
Filename—Matches a string in the filename.
■
Don’t search subdirectories—Limits the search to the current directory.
■
File owner—Looks for files based on the owner.
■
File owner group—Looks for files based on the primary group.
■
Last modification time—Finds files modified within the last # of days.
■
Don’t search mounted filesystems—Avoids the search of floppy disks, CDROMs, and so on.
103xFMp.book Page 146 Monday, October 14, 2002 4:10 PM
Chapter 8
Filesystems and File Utilities
146
NOTE
If the search is
started in the root
of the filesystem (the
/ directory), the find
operation might take
a considerable
amount of time to
■
Filenames except—Finds all filenames not matching the substring.
■
Simple substring search—Matches all files that contain a substring.
■
Regular expression search—Matches all files that contain a given regular
expression.
Figure 8-14c
Full find option.
complete
KDE - Find Files
Many KDE menu items are available from the GNOME main menu, including the
Find Files utility. To access this utility click on KDE menus and select Find Files. Similar options and criteria are available to those of the GNOME Search Tool Full find
option. Figure 8-14d shows the KDE Find Files window.
Skill Builder
Lab 8.5.2
Finding, Searching, and Sorting Files
In this lab, you use advanced UNIX commands to find files and specific strings
contained in files. You practice using the sort command with various options.
CDE File Manager also is used to locate files based on filename or file contents.
Refer to the Lab portion of the Cisco Networking Academy Program: Fundamentals of UNIX: Solaris and Linux Supplement for more details.
103xFMp.book Page 147 Monday, October 14, 2002 4:10 PM
Summary
147
Figure 8-14d
KDE Find Files.
Summary
Now that you have completed this chapter, you should have an understanding of the
following:
■
Hard drives consist of a multiple platters stacked on a common spindle that
spins at various speeds.
■
UNIX hard drives are divided into any number of sections, called partitions or
slices, with a filesystem to provide a structure for organizing and accessing data
on the partition.
■
At boot time, all filesystems are combined to form a single directory tree file
structure by mounting filesystems to an empty directory called a mount point.
■
To display the amount of available space on a filesystem, use the disk free (df)
command.
■
The find command can be used to find files and folders on the user’s local computer or on a remote computer such as a server. The grep, egrep, and fgrep
commands are used to search for strings of characters inside files or from the
output of other commands, such as ls and ps, when used with the pipe (|). The
CDE File Manager, the GNOME Search Tool, and KDE Find Files can perform
some of the functions of the find command and the grep command using a
graphical user interface. The sed command can be used to search for strings
and perform processing actions on files.
103xFMp.book Page 148 Monday, October 14, 2002 4:10 PM
Chapter 8
Filesystems and File Utilities
148
■
The contents of files and the output of commands can be sequenced using the
sort command. The sort command has a number of options, including what
field to start sorting, numeric or alpha sort, and reverse sorts.
UNIX Command Summary
The table that follows lists those commands that are new for the supplementary material.
Command
Definition and Example
egrep
Extended grep. Searches the contents of one or more files for a regular
expression using extended regular expression metacharacters in addition
to those used by grep.
fgrep
Fast grep. Differs from grep and egrep in that it will not accept a regular
expression metacharacter as input. It recognizes only the literal meaning of
these characters.
sed
Stream Editor. Provides many of the editing capabilities of a text editor but
through commands that can be entered at the command prompt or entered
in a script.
Key Terms
The table that follows lists those key terms that are new for the supplementary material.
Term
Definition
filesystem
To a user, a filesystem is a hierarchy of directories and files also referred to
as the directory tree. To the operating system, a filesystem is a structure
created on a partition consisting of tables defining the locations of directories and files.
mounting
The manual or automatic process of attaching a filesystem or device (floppy
disk, CD-ROM, and so on) to a mount point so that it can be accessed.
Check Your Understanding
1. The two most prominent hard drive types today are _____ and _____.
2. Hard drives can be divided into smaller, addressable parts. Each one of these
parts is called a _____.
3. Which UNIX partition contains standard UNIX system files and mount points?
A. swap
B. root
C. usr
D. home
103xFMp.book Page 149 Monday, October 14, 2002 4:10 PM
Check Your Understanding
149
4. Attaching a filesystem to an empty directory in the main filesystem is called
_____.
5. Which two of the following commands display filesystem statistics?
A. ds
B. df
C. dd
D. dv
E. du
6. Match each Linux mount point or directory with its description.
Mount Point
Description
/boot
1. Linux programs and data
/home
2. Third-party programs and data
/usr
3. Default for floppy and CD-ROM
/opt
4. Linux kernel and startup files
/mnt
5. User’s home directories
7. Your current directory is /home/user2. You need to find all files that start with
the letters pr in your /home/user2/projects subdirectory. Which command should
you type?
A. find projects -name ’pr*’
B. locate pr* in projects
C. find pr* -name projects
D. search projects -name pr*
8. Your current directory is /etc. You are looking for a text file in your home direc-
tory that contains the word resume, but you don’t remember the name of the file.
Which command will find it for you?
A. grep home “resume”
B. grep resume /*
C. grep resume ~/*
D. grep ./* resume
103xFMp.book Page 150 Monday, October 14, 2002 4:10 PM
Chapter 8
Filesystems and File Utilities
150
9. Which command displays a listing of all files in the current directory owned by
bsmith?
A. grep bsmith ./*
B. ls bsmith*
C. *ls -al | grep bsmith
D. grep bsmith | ls -al
10. Which command displays a directory listing sorted from largest to smallest?
A. ls -l | sort +4nr
B. sort +4nr | ls
C. ls +4nr | sort
D. ls -a | sort +4nr
11. In the CDE File Manager, the File menu Find option enables you to search for
files by filename as well as by the contents of the file. True or false. _____
12. Which three of the following utilities can perform the functions of both find and
grep?
A. CDE File Manager Find
B. GNOME Search Tool - Quick find
C. GNOME Search Tool - Full find
D. KDE Find Files
E. CDE Fgrep Tool
103xFMp.book Page 151 Monday, October 14, 2002 4:10 PM
103xFMp.book Page 152 Monday, October 14, 2002 4:10 PM
Chapter 8
152
Filesystems and File Utilities
103xFMp.book Page 153 Monday, October 14, 2002 4:10 PM
Check Your Understanding
153
103xFMp.book Page 152 Monday, October 14, 2002 4:10 PM
103xFMp.book Page 153 Monday, October 14, 2002 4:10 PM
Chapter 9
Using Text Editors
Overview of Changes
This chapter adds a new section on the use of the powerful and flexible Emacs editing
tool. The new section on the use of the GNOME gedit application to create and edit text
files is also included.
New and changed information is highlighted in the following objectives, introduction,
and summary. The content sections included in this supplement are designated as either
new or updated.
Objectives
After reading this chapter, you will be able to
■
Use the vi text editor to create and modify text files
■
Use the Emacs editor
■
Use the CDE Text Editor application to create and edit text files
■
Use the GNOME gedit application to create and edit text files
Introduction
This chapter covers text editing tools that are used in the UNIX environment. These
include the vi (pronounced vee eye) editor, the Emacs (pronounced ee-maks) editor, and
graphical text editors such as CDE Text Editor and GNOME’s gedit. In this course, text
editors primarily are used for creating and modifying files that customize the user’s work
environment and writing shell scripts to automate tasks. Both of these are discussed in
Chapter 14, “Shell Features and Environment Customization,” and Chapter 15, “Introduction to Shell Scripts.” They are also commonly used for editing HTML website files
and creating code for computer programs. System administrators use text editors to create and modify system files used for networking, security, application sharing, and so on.
Finally, this chapter includes a short discussion about UNIX word processor programs.
103xFMp.book Page 154 Monday, October 14, 2002 4:10 PM
Chapter 9
Using Text Editors
154
NOTE
This is a new section. Insert this entire
Emacs section after
the “Other Text Editors” section on
page 256 of the
Cisco Network Academy Program: Fundamentals of UNIX
Companion Guide.
Using Emacs
The Emacs editor is a powerful and flexible editing tool that is available for the UNIX
environment. Emacs stands for editing macros.
Advantages of Emacs
Emacs is one of the more capable editing programs available. At this time, there are
two versions of Emacs: GNU Emacs and XEmacs. See the next section for a comparison of the two. A partial list of Emacs features and advantages follows:
■
Free and open—Emacs is one of the original open source programs. It has been
developed since 1975, is free, and runs on every type of computer system you
are likely to encounter. This includes all newer versions of UNIX, Macintoshes,
and Windows.
■
Simple and easy—Powerful does not mean difficult. It is as easy to perform
simple operations in Emacs as with any other editing system.
■
Self-documenting—Extensive help is available at every keystroke in Emacs. The
ability to extend the help system is built in.
■
Customizable—Every feature of Emacs can be changed to make it work
according to your preferences.
■
Programmable—Emacs executes a command interpreter in a programming language called Emacs Lisp. A large and developed library of add-on programs
and modes is delivered with the standard implementations of Emacs.
■
Modes—Modes for every type of text editing process exist for Emacs. These
include special modes for any programming language the user can name. Programming languages such as C, C++, and Java; markup languages such as the
web’s HTML, XML, and SGML; powerful typesetting languages such as TeX
and LaTeX are also included.
■
Production-oriented—Some editing systems allow only one task at a time to be
performed. Emacs enables you to have as many files and windows open simultaneously as system memory allows. Each one can be in a different mode, size,
and appearance, if desired. Users typically leave the same Emacs session running for days at a time.
■
Graphic- or terminal-based—Emacs may be run either as a graphics program
or in a character terminal such as vi. The same Emacs process may even be run
both ways simultaneously, with some graphics windows and some Terminal
windows.
■
Desktop environment—With its directory editor and internally operated shells,
Emacs can also serve as a desktop manager like Nautilus.
103xFMp.book Page 155 Monday, October 14, 2002 4:10 PM
Using Emacs
155
■
E-mail—Emacs comes with a choice of e-mail tools such as VM for XEmacs.
■
News—Emacs also comes with a newsgroup reader, which can serve as a mail
tool.
■
Web browser—Emacs has its own basic web browser, although it is also able to
interact with standard external web browsers.
■
System integration—Emacs integrates with other processes being run on the
computer system it runs under.
Figure 9-15a shows a session of customized XEmacs in operation. It has several windows open on the desktop. The first shows an e-mail summary table with an e-mail
message displayed below it. Below the e-mail message is a source text program in the
Perl programming language. The window on the lower left is running a shell, like a
Terminal window. The upper-right window displays a piece of an Emacs Lisp program. Below that is a window showing the editing of an HTML file. On the bottom is
a window doing directory editing. It is not uncommon for Emacs users to this and
much more going at once.
Figure 9-15a
A single Emacs
invocation managing many tasks.
Two Strains of Emacs: GNU Emacs and XEmacs
The original version of Emacs is now called GNU Emacs. Richard M. Stallman,
founder of what is now called the GNU Project, wrote the original version in 1975.
Stallman still oversees its development. See www.gnu.org for more information on
GNU Emacs.
103xFMp.book Page 156 Monday, October 14, 2002 4:10 PM
Chapter 9
Using Text Editors
156
The first versions of Emacs ran only in character terminals. The first version was written well before graphical user interfaces and even before PCs. When graphics arrived
and became widespread in the UNIX world, development teams focused their efforts
on creating a graphical version of Emacs. The new version of Emacs came to be called
XEmacs. From the user’s standpoint, the differences between GNU Emacs and
XEmacs are small and primarily visual. The processes of opening, editing, and saving
files are the same.
Figure 9-15b shows XEmacs on the top and GNU Emacs on the bottom. Both having
been started for the first time in a new user’s environment.
Figure 9-15b
XEmacs on top,
GNU emacs on
the bottom.
Some differences between the versions follow:
■
GNU Emacs is slightly more widely circulated than XEmacs, but not significantly so. Some Linux distributions, such as Red Hat, include GNU Emacs by
default on a basic workstation installation, but XEmacs is also available as a
selectable option.
■
GNU Emacs demands fewer system resources than XEmacs, both in disk space
and processing power.
■
More work has been done in extending the underlying Emacs Lisp for XEmacs
than for GNU Emacs.
■
XEmacs has had more work done in its graphics support than GNU Emacs. As
a result XEmacs has a GUI look and feel.
103xFMp.book Page 157 Monday, October 14, 2002 4:10 PM
Using Emacs
157
■
The library of loadable and supported packages available for XEmacs is larger
than that available in a GNU Emacs distribution.
■
The system of maintaining and updating packages in XEmacs is more sophisticated and easier to use than for GNU Emacs.
Perceived Disadvantages of Emacs
Some users are reluctant to learn Emacs or have stopped using it after a while for some
of the following reasons:
■
For experts only—Although Emacs has extensive capabilities, new users can
become productive in performing basic tasks with it very quickly.
■
Not always available—UNIX or Linux systems that are designed as servers
rather than user systems are sometimes stripped down to the barest essentials.
Such systems do not have GUIs running on them either. Only administrators,
for the purpose of doing maintenance tasks, generally log in to those systems.
The vi editor is provided on almost every UNIX system, no matter how
sparsely built it is. Also Emacs is not delivered by default on all UNIX systems.
However, Emacs is a bundled with most Linux distributions and can be downloaded for free for most every commercial version of UNIX.
■
Keystroke-based editing—Computer users who are used to GUI-based editors,
for both text editing and word processing, are most comfortable performing
tasks such as copying, cutting, pasting, and pointing and clicking menus with a
mouse. Most commands in Emacs are traditionally accomplished with combinations of keys on the keyboard; however, recent versions of both GNU Emacs
and XEmacs have enabled the use of a mouse in the same way as any other
GUI-based program.
■
Size—Either version of Emacs consists not only of the executable editor program itself, but also a large library of Emacs Lisp. In contrast, vi and similar
editors are standalone single-file programs. With the hard-disk storage capabilities of modern computers, however, this is generally not a problem. However,
Emacs is too large to fit on a floppy disk (as with vi).
■
Speed and startup time—Typical users of vi editor run vi to open a file, make
quick edits, and then save and quit. The loading of vi and other small editors is
fast. Although an Emacs startup may take longer, a single invocation can be
run for days at a time. While running, Emacs can edit hundreds of files and perform a host of tasks, without having to be restarted. Emacs introduces the user
to a new way of thinking about editing.
103xFMp.book Page 158 Monday, October 14, 2002 4:10 PM
Chapter 9
Using Text Editors
158
Getting Safely In and Out of Emacs
The most important first steps in learning any editing tool are the following:
■
Starting up
■
Opening a file for edit
■
Inserting and changing text
■
Undoing mistakes
■
Moving around
■
Starting again
■
Saving work
■
Exiting
■
Exiting without saving
The steps for performing these operations are identical in GNU Emacs and XEmacs.
Everything may be accomplished through the menus. You can learn how to perform
these operations just by exploring the menus. We will demonstrate here how to perform the operations in the traditional Emacs way, using keyboard commands. This
operation, once learned, is much faster for many people.
Table 9-1 provides a brief primer to help in understanding a little about Emacs key
binding notation.
Table 9-1
NOTE
emacs starts GNU
Emacs, which is
used in this explanation. XEmacs is
started with the command xemacs.
Emacs Key Binding Notation Examples
Keys
Meaning
C-<chr>
Hold down the Ctrl key while typing the <chr> key. For instance, C-a means
Ctrl+A.
C-x C-f
C-x s
Some control keys, such as Ctrl+X, are prefixes to be followed by one or
more other keys. This can be another control character or a plain character.
M-<chr>
Hold the META key while typing <chr>. If there is no META key, or you do
not know where it is located, press Esc (Escape) followed by the <chr> key.
M-x
This is an important key that prompts you for a command to execute by
name. This is useful when you do not remember the key combination.
Starting Emacs
Start Emacs either by just launching the program or with one or more filename
arguments:
emacs
emacs myfile
103xFMp.book Page 159 Monday, October 14, 2002 4:10 PM
Using Emacs
159
Aborting Keyboard Entry
The single most important key in Emacs is the following:
C-g
C-g runs a command called keyboard quit. This enables you to back out of any operation when it becomes difficult or complicated. If in a situation that causes trouble, C-g
will almost always get the user out of it.
Opening a File
To open a file for edit, press the following combination:
C-x C-f
A prompt at the bottom of the screen asks for the name of the file. Respond with the
following:
junkfile
Alternatively, you may choose any name. The file does not have to exist.
In Emacs the user is always in Insert mode. This is unlike vi, in which the user toggles
between insert and command modes. Type in any text you would like to use.
Undoing Mistakes
To undo a mistake, press the following:
C-/
Repeat C-/ to undo more changes.
Cursor Movement
Movement of the cursor can be accomplished with the following keys:
C-a—Beginning of line
C-e—End of line
C-n—Next line
C-p—Previous line
C-f—Forward one character
C-b—Backward one character
Restarting Editing
To restart editing the file from the last time you saved it, press the following:
C-x C-v
Enter the same filename that is being edited in response to the prompt. Then you are
asked for verification; it reloads if you answer yes.
103xFMp.book Page 160 Monday, October 14, 2002 4:10 PM
Chapter 9
Using Text Editors
160
Killing Editing
To stop or kill the edit, leaving Emacs running, press the following:
C-x C-k
It prompts for the file buffer to kill, with the current file as default. Press Enter. If
Emacs knows the user has made changes since the last save, it prompts for verification.
Saving Work
To save the current file at any time, type the following:
C-x C-s
The student can still type C-x u (undo) anytime. Emacs continues to undo until it runs
out of things that it remembers to undo.
Exiting Emacs
To exit Emacs smoothly, type the following:
C-x C-c
If Emacs sees there are unsaved file buffers, it prompts the user whether to save each
one in return.
Aborting Emacs
If the operation gets difficult and you want to abort, type the following:
M-x kill-emacs
After typing M-x, the cursor occurs in what is called the echo area at the bottom of the
window. Type kill-emacs there. Emacs quits unconditionally, without prompting you
about saving work and so on. Figure 9-15c shows an XEmacs session about to be
killed.
Figure 9-15c
Killing XEmacs
unconditionally.
103xFMp.book Page 161 Monday, October 14, 2002 4:10 PM
Using Emacs
161
Accessing the Emacs TUTORIAL
The Emacs TUTORIAL is always available for access within Emacs, and you may use
it to experiment with. Every time you visit the TUTORIAL, Emacs makes a fresh copy.
To access the TUTORIAL at any time, press the following:
C-h t
The TUTORIAL is written in such a way that you can read it and do what it says,
using the TUTORIAL text itself to edit on. After completing the TUTORIAL, you will
know enough about Emacs to be comfortable using it. Figure 9-15d shows the beginning of the GNU Emacs version of the TUTORIAL.
Figure 9-15d
The XEmacs
tutorial.
Getting Emacs Help
Help is available in Emacs at every keystroke. The prefix key reserved for Help, logically, is as follows:
C-h
Type just C-h and the program will prompt you for further options. To see the options
available, type the following:
C-h ?
In GNU Emacs, a window displays with all the options explained. In XEmacs it shows
a list in the echo line of all the help options the user has available. Press the question
mark again to go to the detailed help screen in XEmacs. The descriptions differ slightly
in the two versions, but the basic functions available are the same.
103xFMp.book Page 162 Monday, October 14, 2002 4:10 PM
Chapter 9
Using Text Editors
162
Figure 9-15e displays an XEmacs window displaying a summary of help options after
pressing C-h ? ?.
Figure 9-15e
Emacs help has
many options.
Handy reference cards for both Emacs and XEmacs can be found at http://www.
refcards.com/
Skill Builder
Lab 9.2.6
Using Emacs
In this lab, you go through an example Emacs editing session step by step. Refer
to Lab 9.2.6 in the Cisco Network Academy Program: Fundamentals of UNIX:
Solaris and Linux Supplement.
NOTE
This is a new section. Insert this entire
section on gedit at
the end of the chapter prior to the summary on page 265 of
the Cisco Networking Academy Program: Fundamentals
of UNIX Companion
Guide.
The GNOME gedit Text Editor
The GNOME gedit text editor is a graphical editor that is comparable to the CDE
Text Editor. The insertion, deletion, and editing of text is very similar.
Opening Window
To access gedit, click the GNOME main menu, click Programs, and then select it from
the Applications menu. Figure 9-31 shows the initial gedit screen with some text typed
in. The upper portion of the window contains buttons that are used to create, open,
save, and print files as well as standard text editing buttons for cut, copy, and paste.
Undo and redo buttons are also available.
103xFMp.book Page 163 Monday, October 14, 2002 4:10 PM
The GNOME gedit Text Editor
163
Figure 9-31
GNOME gedit
window.
The File Menu
The options available with the buttons are also on the File menu along with additional
useful options such as Save As and Print Preview (see Figure 9-32).
Figure 9-32
The gedit File
menu.
The Edit Menu
The options available with the buttons are also on the Edit menu along with Go To
and Find/Replace (see Figure 9-33).
103xFMp.book Page 164 Monday, October 14, 2002 4:10 PM
Chapter 9
Using Text Editors
164
Figure 9-33
The gedit Edit
menu.
The Plugins Menu
The Plugins menu shown in Figure 9-34 provides links to other related and useful
functions. The Manager option allows the addition or removal of plugins. The standard plugins on the menu are as follows:
■
Browse—Invokes the Lynx browser.
■
Diff—Brings up a GUI front end to the UNIX diff command, which allows two
files to be compared.
■
Email—Allows the contents of the text created with gedit to be sent to an email recipient.
■
Shell Output—Brings up a shell prompt window and captures the results of any
command you issue into the text document.
■
Insert Time—Inserts the date and time.
The Settings Menu
The Settings menu provides access to the Preferences window shown in Figure 9-35,
which enables you to set preferences for the gedit session. These include various
options such as icons, documents, fonts, colors, printing, and paper.
103xFMp.book Page 165 Monday, October 14, 2002 4:10 PM
The GNOME gedit Text Editor
165
Figure 9-34
The gedit Plugins
menu.
Figure 9-35
The Preferences
window.
103xFMp.book Page 166 Monday, October 14, 2002 4:10 PM
Chapter 9
Using Text Editors
166
Summary
Now that you have completed this chapter, you should have an understanding of the
following:
■
The vi editor is a simple but powerful text editor that can be used to create system and script files. It is an integral part of all UNIX operating systems. Sometimes you find that a graphical text editor will not be available. The vi editor
might be the only available tool to perform administrative tasks and troubleshoot problems.
■
The vi editor has three main modes of operation: Command mode, Entry
mode, and Last Line mode.
■
Command mode is the starting point for the other modes and is used to edit
existing text. All commands are entered from Command mode. Pressing Esc
always returns you to Command mode. Entry or Insert mode is used for entering new text. Last Line mode primarily is used to save files and exit vi. Understanding the purpose of these modes and knowing how to switch between them
is key to working with the vi editor. Numerous positioning, editing, and other
commands also are available.
■
In addition to vi, other non-Windows-based text editors can be downloaded
for free and are considered easier to use. The two most popular editors are
Emacs and pico. Emacs is a powerful and extensible open source editor with
many features that is included with most distributions of Linux. It can downloaded for most other UNIX versions.
■
The CDE Text Editor is a graphical editor that performs a similar function to
vi. As with vi, you can create text files that do not have any formatting in them.
These can be user environment configuration files, script files, program files, or
notes. The CDE editor provides mouse support, making it easier to work with
existing text.
■
The GNOME graphical text editor, known as gedit, is comparable to the CDE
Text Editor and has the added feature of plugins.
103xFMp.book Page 167 Monday, October 14, 2002 4:10 PM
Check Your Understanding
167
UNIX Command Summary
The table that follows lists those commands that are new for the supplementary
material.
Command
Definition and Example
emacs
Editing macros (emacs). Starts the GNU emacs text editor.
xemacs
Starts the graphical version of the GNU emacs text editor.
Key Terms
The table that follows lists those key terms that are new for the supplementary
material.
Term
Definition
gedit
A GNOME graphical editor that is comparable to the CDE Text
Editor. The insertion, deletion, and editing of text is very similar.
Check Your Understanding
1. Which editor has been a part of the UNIX operating system nearly since its
inception in the early 1970s?
A. vi
B. Emacs
C. Wordpad
D. Notepad
2. Which three of the following are valid modes of the vi editor in the UNIX envi-
ronment?
A. Command
B. Entry
C. Last Line
D. Normal
3. What is the starting mode from which other modes can operate?
A. Command
B. Entry
C. Last Line
D. Normal
103xFMp.book Page 168 Monday, October 14, 2002 4:10 PM
Chapter 9
Using Text Editors
168
4. Which two of the following are ways that the vi editor can be invoked or started?
A. vi filename
B. vedit
C. viedit
D. vi filename1 filename2
Which of the following special key(s) will return the vi editor back to Command
mode?
A. Enter
B. Esc
C. Shift
D. Ctrl+Tab
5. Which is useful if the student wants to discard all the changes since the last write
or save and reedit the file?
A. :wq
B. :w
C. ZZ
D. :q!
6. Which three delete commands write to a buffer or memory?
A. dd
B. dw
C.
yy
D. put
7. Which key sequence saves a file when using the Emacs editor?
A. Ctrl+X, Ctrl+S
B. Ctrl+D, Ctrl+S
C. Ctrl+S
D. Ctrl+X
8. Which three of the following are advantages of the Emacs editor?
A. Free and open
B. Available on all UNIX platforms
C. Simple and easy to use
D. Customizable
103xFMp.book Page 169 Monday, October 14, 2002 4:10 PM
Check Your Understanding
169
9. Which of the following Emacs key combinations prompts a user for a command
to execute by name?
A. Meta+x
B. Ctrl+<chr>
C. Ctrl+x, then Ctrl+f
D. Meta+<chr>
10. Which keystroke combination calls the Emacs keyboard quit command?
A. Ctrl+X and then Ctrl+F
B. Ctrl+G
C. Ctrl+X
D. Ctrl+F
11. Which of the following key combinations can be used to access the Emacs
tutorial?
A. Ctrl+H and then T
B. Ctrl+T and then H
C. Ctrl+?
D. Ctrl+T