Download Quickstart - Overview UK
Transcript
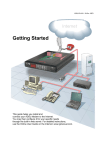
Quickstart - Overview UK
B
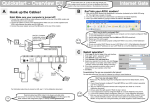
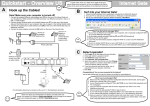
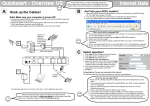
Hook up the Cables!
1. Wait until the ADSL Modem has established a connection (indicated by the WAN LED being
lit). This might take a couple of minutes.
2. Turn your PC on and start your web browser (i.e. Netscape or Internet Explorer).
3. Surf to your ADSL Modem by typing its default IP Address: 192.168.0.1
Note! Make sure your computer is turned off!
1. Connect the supplied Ethernet cable between port ET2 on the rear of the ADSL modem and
the Ethernet port on your computer.
2. Connect the supplied DSL filter and telephone adapter as shown in the diagram below.
3. Connect all cables as shown in the diagram below. Make sure you use the supplied round
ADSL cable between the filter and the LINE port.
4. Connect the power adaptor and push the ON switch on the rear of the modem.
I don’t see the built-in web page! Why?
1. Do you have an Ethernet card installed in your computer, and is it properly configured? Refer
to 3.2 of the Addendum document!
2.. Are the cables correctly connected? Both the WAN and ET2 LEDS should be lit.
3. Reboot your PC and try again!
4. Is your PC and web browser properly configured? Refer to 3.2 and 3.3 of the Addendum
document!
5. Do you run another DHCP Server on your LAN? Refer to 3.2.1 of the Addendum document!
6. Do you use static IP addresses on your LAN? Refer to 3.2.2 of the Addendum document!
Phones on
old analogue
telephone line
PHONE
LINE
Internet Gate
Surf into your ADSL modem!
DSL
MODEM
A
In most cases, the A, B, C steps on this page will get your
ADSL modem up and running. If you run into problems you find the
solution to the most common problems in the Addendum document.
Phone cable (flat)
ADSL cable (round)
ON
DC
USB
ET2
ET1
EXP
LINE PHONE
OR
Handset
adaptor
For information about how to connect a LAN, see 3.1 in the Addendum document.
Read more about your ADSL modem in the always up-to-date online user
manual. You access it by clicking on Online User Manual on the first page on the ADSL
modems web configuration pages, or directly at www.igmanual.com
C
Select operator!
Click Login on the first page of the web interface.
Enter login “admin”, password “admin”.
Click Network on the main menu.
Click Operator, PPP and Keep-alive.
Select operator of your country from the list
(for UK choose British Telecom), and click Change.
6. If you have received any service name, user or
password from your operator, enter them.
7. Click Save.
1.
2.
3.
4.
5.
Congratulations! You are now connected to the Internet!
You can start surfing now! You may for instance try surfing to: www.intertex.se
I don’t see any web pages! Why?
1. Reboot your PC, allowing it to get fresh configuration data from the ADSL Modem, and try
again!
2. Is your firewall properly configured? Press ALT CFG on your ADSL modem repeatedly
until “Hi” is displayed.
3. Test your Internet connection with the built-in diagnostic test. Refer to 3.4 of the
Addendum document!
4. Did you select the right operator? Refer to step C above.
5. Is your web browser properly configured? Refer to 3.3 of the Addendum document!
6. Is your ADSL Modem properly configured? Refer to 4.1 of the Addendum document!
7. Have you used your Internet connection before with some other ADSL-modem? In that
case, unhook that ADSL modem, and wait 3 hours before re-connecting your ADSL
Modem. It may take such a long time before your ADSL-supplier’s cache entries expire.
UK-ADSL-VGW 1.2
Package Details
The following items should be included in your box:
• Quickstart - Overview (this document)
• Addendum to the Quickstart - Overview Sheet
• IX66 Internet Gate (ADSL modem)
• 10 V DC power adaptor
• DSL filter (Z-420UK-A)
• Phone Y-adaptor
• ADSL cable (round)
• Phone cable (flat)
• Ethernet cable
• USB cable
• Headset
• Handset adaptor cable
• USB driver diskette
• Wireless upgrade note
SIP or IP Telephone Client
The headset or analogue telephone connected to the EXP port, acts as a general SIP client. You can
configure the SIP client by surfing to the built-in web-pages and select “Telephone Ports” under the
“Configuration” menu.
If any of the items above are damaged or missing, please contact your dealer.
The default SIP domain name for the gateway is ”localgw” and can be used with the SIP Switch software
addition. By default, just dialling *<telephone number> from any client using the product, will use this
gateway port to reach ordinary telephones.
Using a headset, you can also dial, answer and hang up on this page. Pressing the ATL CFG key will also
answer and hang up.
The default SIP user name is “hsphone” and it is registered to the internal SIP server of the Internet Gate
if not changed to a full SIP address like [email protected].
With the default configuration, you can directly use this SIP client to place SIP calls.
SIP PSTN Gateway
The telephone line connected to the FXO port of the Internet Gate acts as a gateway between SIP and
the ordinary telephone network (PSTN). You can configure the gateway by surfing to the built-in webpages and select ”Telephone Ports” under the ”Configuration” menu.
With the default configuration, incoming calls on the telephone line will be forwarded to the SIP client
connected to the EXP port.
Interface indicators:
On:
Interface is connected.
Off:
Interface is not used.
Flashing:
Data is sent or received.
AIR
USB
ET2
WAN
–
–
–
–
TXD
RXD
–
–
Wireless (Bluetooth or 802.11b) (option)
Universal Serial Bus
Ethernet (PC or LAN)
Internet connection. (Flashing = firewall
stopped a packet)
Data is sent to the Internet.
Data is received from Internet.
USB
Port to connect
a PC without a
network card.
ALT CFG
Press to select firewall
security profile.
Press to pick-up /
hang-up headset.
ON
SET
Press once to see
firmware version.
Keep pressed for 3
seconds to enter setup mode. Read more
about set-up mode in the
Addendum document.
SELECT
Press to toggle displayed options.
Press and hold for 2 seconds to
cancel any set-up.
Press SELECT to change between display modes:
Hi/Lo/AC Firewall security level
LQ
Line Quality (SNR-margin)
TS
ADSL connection transmission speed.
RS
ADSL connection reception speed.
(TS and RS only indicates the ADSL link physical speed. Your
ADSL supplier may limit the actual transfer speed.)
PHO/HS Incoming call to telephone/headset connected to
EXP port. Lift receiver or press ALT CFG to answer call.
RS/TS
Incoming/outgoing call in progress on PHONE port.
Read more about display in the Addendum document.
DC
USB
ET2
Ethernet port to
connect PC, SIPphone or local area
network (LAN).
ET2
ET1
LINE
Port to connect
ADSL signal
cable.
EXP
LINE
PHONE
WIRELESS
(optional)
Read the wireless
upgrade note
about how to
install a wireless
card, creating a
wireless access
point.
EXP
Port to connect headset or telephone adaptor
cable. (FXS port)
PHONE
Port to connect an ordinary telephone
line to. (FXO port)
You can connect the supplied headset to this
port and use it to make and receive SIP calls.
You can connect a line to the telephone
network to this port to allow your SIP
phones to make and receive ordinary
telephone calls through this local
gateway.
Or you can connect an ordinary telephone
to it using the telephone adaptor cable. The
connected telephone will then become a SIP
IP-phone.


