1
TOP
Back
Before Using the
Machine
Previous
Next
1
Document and Paper
2
Copying
Reference Guide
3
Sending and
Receiving
4
Printing and
Scanning
5
Network
6
Remote UI
7
System Manager
Settings
8
Maintenance
9
Troubleshooting
10
Appendix
11
Table of Contents
Index
Please read this guide before operating this product.
After you finish reading this guide, store it in a safe place
for future reference.
How to Use This Guide
TOP
Back
Before Using the
Machine
1
Document and Paper
2
●
Machine Set-Up
Software Installation
Starter Guide
3
Sending and
Receiving
4
Printing and
Scanning
5
Next
Manuals for the Machine
●
Copying
Previous
Basic Features
Maintenance
● Trouble Shooting
● Specifications
●
●
Basic Operation Guide
Network
6
Remote UI
7
System Manager
Settings
8
Total Operation Features
Network and Remote User Interface
● System Manager Settings
● Reports and Lists
● Trouble Shooting
●
●
●
Reference Guide
(This Document)
CD-ROM
Scanner Driver Guide
CD-ROM
Scanning Features
Maintenance
9
Troubleshooting
10
CD-ROM
Indicates the manual is supplied in PDF format in the accompanying CD-ROM.
Appendix
11
To view the manuals in PDF format, Adobe Reader/Acrobat Reader/Acrobat is required. If Adobe Reader/Acrobat
Reader/Acrobat is not installed on your system, please download it from the Adobe Systems Incorporated website
(http://www.adobe.com).
● Considerable effort has been made to make sure that the manuals for the machine are free of inaccuracies and
omissions. However, as we are constantly improving our products, if you need an exact specification, please
contact Canon.
● The machine illustration on the cover may differ slightly from your machine.
●
Table of Contents
Index
i
TOP
Back
Before Using the
Machine
1
Document and Paper
Previous
Next
Things You Can Do
2
Copying
3
Sending and
Receiving
Select a scan mode depending on
the type of image
Sort copies by page order
Send documents with diverse
sending methods
4
Printing and
Scanning
5
Network
Image Quality
→ p. 3-4
6
Remote UI
7
System Manager
Settings
Adjust the density level of scanned
images
Collate Copying
→ p. 3-7
Make two-sided copies
Fax, E-Mail, and File Server
→ Chapter 4
Send documents in a variety of file
formats
8
Maintenance
9
Troubleshooting
10
Density
→ p. 3-4
Enlarge or reduce copied images
Two-Sided Copy
→ p. 3-9
Copy two documents on one sheet
Appendix
Send Settings
→ p. 4-7
Specify a recipient with a single
key
11
Zoom Ratio
→ p. 3-5
2 on 1 Combination
→ p. 3-8
Sending with One-Touch Keys
→ p. 4-20
Table of Contents
Index
ii
TOP
Back
Before Using the
Machine
1
Document and Paper
2
Specify a recipient with a threedigit code
Retry sending documents
automatically
Previous
Next
Forward received documents
Copying
3
Sending and
Receiving
4
Printing and
Scanning
5
Network
Sending with Coded Dial Codes
→ p. 4-21
Specify multiple recipients as a
group
Auto Retry
→ p. 4-29
Send documents to multiple
recipients
Forwarding Documents
→ p. 4-41, 7-15
Receive faxes in memory without
printing out
6
Remote UI
7
System Manager
Settings
8
Sending to Group Addresses
9
Look up a particular recipient
→ p. 4-22
Broadcasting
→ p. 4-26
Memory Reception
→ p. 4-38
Maintenance
Recall the last three sending jobs
Send a fax from a PC
Troubleshooting
10
Appendix
11
Address Book Search
→ p. 4-23
Job Recall
→ p. 4-27
PC Faxing
→ Online Help
Table of Contents
Index
iii
TOP
Back
Before Using the
Machine
1
Document and Paper
Print a document from a PC
2
Previous
Next
Restrict the use of the machine
with department IDs
Copying
3
Sending and
Receiving
4
Printing and
Scanning
5
Network
Printing
→ Online Help
Department ID Management
→ p. 8-6
Specify detailed scanning options
to suit various images
6
Remote UI
7
System Manager
Settings
8
Scanning
→ Scanner Driver Guide
Maintenance
9
Troubleshooting
Access and manage the machine
from a PC
10
Appendix
11
Remote UI
→ Chapter 7
Table of Contents
Index
iv
TOP
Back
Before Using the
Machine
1
Document and Paper
Previous
Next
Table of Contents
2
Copying
3
Manuals for the Machine............................................................................................................... i
Things You Can Do .......................................................................................................................... ii
Sending and
Receiving
4
Printing and
Scanning
5
Network
6
How to Use This Guide ............................................................................................................ xxiv
Using the Top Page........................................................................................................... xxiv
Using the Chapter Topic List .......................................................................................... xxv
Legal Notices ............................................................................................................................. xxvii
Remote UI
7
System Manager
Settings
1 Before Using the Machine ........................................................................................................1-1
8
Machine Components ...............................................................................................................1-3
9
Operation Panel ...........................................................................................................................1-6
Maintenance
Troubleshooting
10
Main Operation Panel........................................................................................................1-6
Send/Fax Operation Panel ...............................................................................................1-9
Appendix
11
Table of Contents
Index
v
TOP
Back
Before Using the
Machine
1
Document and Paper
2
Copying
Sending and
Receiving
Printing and
Scanning
Previous
Next
LCD (Standby Mode) ............................................................................................................... 1-10
Copy Mode ......................................................................................................................... 1-10
Send/Fax Mode ................................................................................................................. 1-10
3
Scan Mode .......................................................................................................................... 1-10
4
Department/User ID Management ................................................................................... 1-12
5
Log In Mode ....................................................................................................................... 1-11
Procedure before Using the Machine ....................................................................... 1-12
Procedure after Using the Machine........................................................................... 1-12
Network
6
Toner Cartridge ......................................................................................................................... 1-13
Maintaining the Toner Cartridge ................................................................................ 1-14
Remote UI
7
System Manager
Settings
8
Maintenance
Checking the toner level ............................................................................................... 1-15
Timer Settings ........................................................................................................................... 1-16
Setting the Sleep Mode ................................................................................................. 1-16
9
Setting Auto Clear Time ................................................................................................. 1-17
10
Setting Daylight Saving Time ...................................................................................... 1-18
Troubleshooting
Setting Time Zone ........................................................................................................... 1-17
Appendix
11
Table of Contents
Index
vi
TOP
Back
Before Using the
Machine
1
Document and Paper
3
Scanning Area ..............................................................................................................................2-3
5
Network
Loading Documents ..................................................................................................................2-4
On the Platen Glass ............................................................................................................2-4
In the ADF ..............................................................................................................................2-5
Paper Requirements...................................................................................................................2-7
6
Printable Area ...............................................................................................................................2-9
7
Loading Paper ........................................................................................................................... 2-10
Remote UI
System Manager
Settings
2 Document and Paper................................................................................................................2-1
Document Requirements .........................................................................................................2-2
4
Printing and
Scanning
Next
2
Copying
Sending and
Receiving
Previous
Into the Multi-Purpose Tray .......................................................................................... 2-10
8
Maintenance
Setting Paper Size and Type ................................................................................................. 2-13
9
Troubleshooting
10
Appendix
11
Table of Contents
Index
vii
TOP
Back
Before Using the
Machine
1
Document and Paper
Printing and
Scanning
3 Copying .....................................................................................................................................3-1
Basic Copying Method ..............................................................................................................3-3
3
Scan Settings ................................................................................................................................3-4
Image Quality .......................................................................................................................3-4
4
Density ....................................................................................................................................3-4
5
Advanced Copy Features..........................................................................................................3-7
Network
6
Remote UI
7
System Manager
Settings
Next
2
Copying
Sending and
Receiving
Previous
Zoom Ratio ............................................................................................................................3-5
Collate Copy ..........................................................................................................................3-7
2 on 1 Combination ...........................................................................................................3-8
Two-Sided Copying ............................................................................................................3-9
Reserved Copy .................................................................................................................. 3-10
8
Printing a Sample Page .......................................................................................................... 3-11
9
Canceling Copy Jobs ............................................................................................................... 3-12
Maintenance
Troubleshooting
10
Checking and Deleting Jobs ................................................................................................ 3-13
Checking and Deleting Copy Jobs............................................................................. 3-13
Appendix
11
Table of Contents
Index
viii
TOP
Back
Before Using the
Machine
1
Document and Paper
Printing and
Scanning
Next
4 Sending and Receiving.............................................................................................................4-1
2
Basic Sending Method ..............................................................................................................4-5
3
Scan Settings ................................................................................................................................4-6
Copying
Sending and
Receiving
Previous
Image Quality (Fax) ............................................................................................................4-6
4
Density ....................................................................................................................................4-6
5
Storing/Editing Address Book ................................................................................................4-9
Network
6
Send Settings (E-Mail/File Server) .................................................................................4-7
Storing/Editing One-Touch Keys/Coded Dial Codes ........................................... 4-10
Storing/Editing Group Addresses .............................................................................. 4-15
Remote UI
7
System Manager
Settings
Specifying Destinations ......................................................................................................... 4-20
Using One-Touch Keys ................................................................................................... 4-20
8
Maintenance
Using Coded Dial Codes ................................................................................................ 4-21
Using Group Addresses ................................................................................................. 4-22
9
Using Address Book Key ................................................................................................ 4-23
10
Manual Sending (Fax) ............................................................................................................. 4-25
Troubleshooting
Appendix
11
Table of Contents
Index
ix
TOP
Back
Before Using the
Machine
1
Document and Paper
2
Copying
Sending and
Receiving
Printing and
Scanning
Next
Advanced Sending Features ................................................................................................ 4-26
Broadcasting ...................................................................................................................... 4-26
Job Recall ............................................................................................................................ 4-27
3
PC Faxing ..................................................................................................................................... 4-28
4
Customizing Sending Features ........................................................................................... 4-29
5
Setting Automatic Redialing (Fax) ............................................................................. 4-29
Network
6
Remote UI
7
System Manager
Settings
Previous
8
Maintenance
9
Setting Number of Retry Attempts (E-Mail/File Server) ..................................... 4-29
Setting Detail Information (E-Mail/File Server/USB Memory) ......................... 4-30
Fax Dialing Features ................................................................................................................ 4-32
Switching Temporarily to Tone Dialing .................................................................... 4-32
Checking Dialing Line .................................................................................................... 4-33
Dialing an Overseas Number (With Pauses) ........................................................... 4-33
Basic Receiving Method......................................................................................................... 4-35
Troubleshooting
10
Appendix
11
Table of Contents
Index
x
TOP
Back
Before Using the
Machine
1
Document and Paper
2
Copying
Sending and
Receiving
Printing and
Scanning
Previous
Next
Receiving Features................................................................................................................... 4-36
FaxTel: Optional Settings ............................................................................................... 4-36
DRPD: Optional Settings ............................................................................................... 4-37
3
Manual Reception............................................................................................................ 4-37
4
Memory Lock Reception ............................................................................................... 4-38
5
Remote Reception ........................................................................................................... 4-42
6
Canceling TX/RX Jobs ............................................................................................................. 4-46
7
Checking and Deleting Jobs ................................................................................................ 4-47
Network
Memory Reception .......................................................................................................... 4-38
Forwarding Received Documents ............................................................................. 4-41
Printing Received Documents..................................................................................... 4-44
Remote UI
System Manager
Settings
Checking Transmission/Reception Results ............................................................. 4-47
8
Maintenance
9
Checking the Arrival of I-Fax ........................................................................................ 4-47
Checking and Deleting Sending/Receiving Documents
Stored in Memory ............................................................................................................ 4-48
Troubleshooting
10
Appendix
11
Table of Contents
Index
xi
TOP
Back
Before Using the
Machine
1
Document and Paper
5 Printing and Scanning..............................................................................................................5-1
Printing Documents ...................................................................................................................5-2
3
Scanning to a Computer ..........................................................................................................5-3
4
Printing and
Scanning
Next
2
Copying
Sending and
Receiving
Previous
5
Network
6
Scanning to a USB Memory .....................................................................................................5-4
Scanning to a USB Memory.............................................................................................5-4
Scan Settings ........................................................................................................................5-6
Canceling Scan Jobs...................................................................................................................5-8
Canceling Scan Jobs to a Computer ............................................................................5-8
Canceling Scan Jobs to a USB Memory.......................................................................5-8
Remote UI
7
System Manager
Settings
8
Checking and Deleting Jobs ...................................................................................................5-9
Checking and Deleting Print Jobs ................................................................................5-9
Maintenance
9
Troubleshooting
10
Appendix
11
Table of Contents
Index
xii
TOP
Back
Before Using the
Machine
1
Document and Paper
2
Previous
Next
6 Network .....................................................................................................................................6-1
System Requirements................................................................................................................6-4
Printing or Sending a Fax from a Computer..............................................................6-4
Copying
3
Sending and
Receiving
Using E-Mail ..........................................................................................................................6-5
Sending Data to a File Server..........................................................................................6-5
4
Printing and
Scanning
5
Network
6
Remote UI
7
System Manager
Settings
8
Maintenance
9
Basic Network Settings .............................................................................................................6-6
Interface Settings ................................................................................................................6-6
Communication Environment Setup ...........................................................................6-8
Setting Up a Computer for Printing/Sending a Fax ..................................................... 6-11
Settings from the Operation Panel ............................................................................ 6-11
Machine Connection Method (LPD/Raw) ............................................................... 6-12
Print Server Settings ....................................................................................................... 6-15
Setting Up E-Mail ..................................................................................................................... 6-16
Settings from the Operation Panel ............................................................................ 6-16
Troubleshooting
10
Appendix
11
Table of Contents
Index
xiii
TOP
Back
Before Using the
Machine
1
Document and Paper
2
Copying
3
Sending and
Receiving
Previous
Next
Setting Up a Computer as a File Server............................................................................ 6-21
Settings from the Operation Panel ............................................................................ 6-21
Configuring a Shared Folder ........................................................................................ 6-23
Additional Network Settings................................................................................................ 6-35
TCP/IP Settings.................................................................................................................. 6-35
Printing and
Scanning
4
Startup Time Settings ..................................................................................................... 6-41
5
Checking Network Settings.................................................................................................. 6-43
Network
6
Remote UI
7
System Manager
Settings
8
Maintenance
9
Troubleshooting
10
Appendix
Machine Management ........................................................................................................... 6-44
Machine Management Using Web Browser (Remote UI) .................................. 6-44
Machine Management Using NetSpot Device Installer ..................................... 6-44
Machine Management Using NetSpot Console ................................................... 6-44
7 Remote UI ..................................................................................................................................7-1
System Requirements................................................................................................................7-3
Windows.................................................................................................................................7-3
Macintosh ..............................................................................................................................7-3
11
Table of Contents
Index
xiv
TOP
Back
Before Using the
Machine
1
Document and Paper
2
Previous
Next
Using the Remote UI ..................................................................................................................7-4
Starting the Remote UI .....................................................................................................7-4
Displaying Device Status and Information ........................................................................7-6
Copying
3
Sending and
Receiving
Printing and
Scanning
Job Management ........................................................................................................................7-7
4
Managing Print Jobs ..........................................................................................................7-7
5
Managing the Address Book ...................................................................................................7-9
6
Customizing System Settings .............................................................................................. 7-12
Viewing the Activity Log ..................................................................................................7-8
Network
Customizing System Information .............................................................................. 7-12
Remote UI
System Manager
Settings
7
Specifying Forwarding Settings.......................................................................................... 7-15
8
Managing the Department/User ID .................................................................................. 7-21
Maintenance
9
Troubleshooting
10
Appendix
11
Table of Contents
Index
xv
TOP
Back
Before Using the
Machine
1
Document and Paper
2
Copying
Sending and
Receiving
Printing and
Scanning
Previous
Next
Import/Export Function......................................................................................................... 7-27
Saving the Address Book .............................................................................................. 7-27
Loading an Address Book ............................................................................................. 7-28
3
Saving User Management Data in Files (Export) .................................................. 7-29
4
Saving Additional Functions Settings in Files (Export)....................................... 7-32
5
Device Custom Settings......................................................................................................... 7-35
Loading User Management Data Files (Overwrite/Import) .............................. 7-30
Loading Additional Functions Settings Files (Overwrite/Import) .................. 7-33
Network
6
Remote UI
System Manager
Settings
8 System Manager Settings ........................................................................................................8-1
7
Specifying the System Manager Settings...........................................................................8-3
8
Device Information Settings ...................................................................................................8-5
Maintenance
9
Troubleshooting
10
Appendix
11
Table of Contents
Index
xvi
TOP
Back
Before Using the
Machine
1
Document and Paper
2
Copying
Sending and
Receiving
Printing and
Scanning
Next
Department ID Management .................................................................................................8-6
Registering the Department ID, Password, and Page Limit.................................8-6
Changing the Password and Page Limit .....................................................................8-8
3
Erasing the Department ID and Password .............................................................. 8-10
4
Clearing Page Totals ........................................................................................................ 8-11
5
Accepting Print Jobs with Unknown IDs ................................................................. 8-12
Network
6
Remote UI
7
System Manager
Settings
Previous
Checking Counter Information ................................................................................... 8-10
Printing Counter Information (DEPT. INFO LIST) .................................................. 8-12
Managing User IDs................................................................................................................... 8-14
Handling Documents with Forwarding Errors............................................................... 8-15
Remote UI ................................................................................................................................... 8-16
8
Maintenance
9
Troubleshooting
10
Appendix
11
Table of Contents
Index
xvii
TOP
Back
Before Using the
Machine
1
Document and Paper
2
Copying
Sending and
Receiving
Printing and
Scanning
Previous
Next
Restricting Access to Destinations ..................................................................................... 8-17
Setting a Password for the Address Book ............................................................... 8-17
Restricting the New Address ....................................................................................... 8-18
3
Restricting PC Faxing ...................................................................................................... 8-18
4
Restricting Job Recall ..................................................................................................... 8-19
5
Checking the Job Log ............................................................................................................. 8-21
6
Restricting the USB Interface Port ..................................................................................... 8-22
7
9 Maintenance .............................................................................................................................9-1
8
Cleaning the Machine ...............................................................................................................9-2
Confirming Entered Fax Numbers ............................................................................. 8-19
Restricting Broadcasting ............................................................................................... 8-20
Network
Remote UI
System Manager
Settings
Exterior ...................................................................................................................................9-2
Maintenance
9
Troubleshooting
10
Interior ....................................................................................................................................9-2
Fuser Roller ............................................................................................................................9-6
Scanning area .......................................................................................................................9-6
Appendix
11
Table of Contents
Index
xviii
TOP
Back
Before Using the
Machine
1
Document and Paper
2
Copying
3
Sending and
Receiving
Previous
Next
Replacing the Toner Cartridge ............................................................................................ 9-10
Redistributing Toner ....................................................................................................... 9-10
Replacing the Toner Cartridge with a New One ................................................... 9-13
Recycling Used Cartridges .................................................................................................... 9-16
The Clean Earth Campaign ........................................................................................... 9-16
4
Printing and
Scanning
5
Network
U.S.A. PROGRAM ............................................................................................................... 9-17
CANADA PROGRAM-CANADA PROGRAMME ........................................................ 9-20
Transporting the Machine .................................................................................................... 9-22
6
Remote UI
7
System Manager
Settings
8
10 Troubleshooting ...................................................................................................................10-1
Clearing Jams ............................................................................................................................ 10-3
Document Jams................................................................................................................ 10-3
Paper Jams.......................................................................................................................... 10-5
Maintenance
9
LCD Messages..........................................................................................................................10-13
10
Error Codes ...............................................................................................................................10-21
Troubleshooting
Appendix
11
Table of Contents
Index
xix
TOP
Back
Before Using the
Machine
1
Document and Paper
2
Copying
Sending and
Receiving
Printing and
Scanning
Next
If <LOAD CORRECT PAPER> is displayed .......................................................................10-29
Re-Loading the Paper ...................................................................................................10-29
Changing the Paper Size Setting..............................................................................10-29
3
General Problems...................................................................................................................10-30
4
Paper Feeding Problems......................................................................................................10-32
5
Network
6
Remote UI
System Manager
Settings
Previous
Sending/Receiving Problems ............................................................................................10-33
Sending Problems .........................................................................................................10-33
Receiving Problems.......................................................................................................10-38
Copying Problems .................................................................................................................10-44
7
Printing Problems ..................................................................................................................10-47
8
Telephone Problems .............................................................................................................10-51
9
Network Problems .................................................................................................................10-52
Maintenance
Troubleshooting
10
If a Power Failure Occurs......................................................................................................10-55
Appendix
11
Table of Contents
Index
xx
TOP
Back
Before Using the
Machine
1
Document and Paper
2
Copying
3
Sending and
Receiving
4
Printing and
Scanning
Next
If You Cannot Solve a Problem ..........................................................................................10-56
Customer Support (U.S.A.) ..........................................................................................10-56
Customer Support (Canada) ......................................................................................10-56
11 Appendix ...............................................................................................................................11-1
Machine Settings ..................................................................................................................... 11-4
5
Printing USER’S DATA LIST ............................................................................................ 11-4
6
Setting Menu ............................................................................................................................. 11-6
Network
Remote UI
7
System Manager
Settings
Previous
8
Maintenance
9
Troubleshooting
10
Accessing the Setting Menu ........................................................................................ 11-4
PAPER SETTINGS ............................................................................................................... 11-6
VOLUME CONTROL .......................................................................................................... 11-6
COMMON SETTINGS ....................................................................................................... 11-7
COPY SETTINGS ................................................................................................................ 11-9
TX/RX SETTINGS .............................................................................................................11-11
ADDRESS BOOK SET. .....................................................................................................11-19
PRINTER SETTINGS.........................................................................................................11-23
Appendix
11
Table of Contents
Index
xxi
TOP
Back
Before Using the
Machine
Previous
Next
1
TIMER SETTINGS .............................................................................................................11-28
Document and Paper
ADJUST./CLEANING .......................................................................................................11-30
2
Copying
3
Sending and
Receiving
4
Printing and
Scanning
SYSTEM SETTINGS .........................................................................................................11-34
Summary of Reports and Lists...........................................................................................11-48
Printing Reports Automatically .........................................................................................11-49
5
TX REPORT ........................................................................................................................11-49
6
ACTIVITY REPORT ...........................................................................................................11-51
Network
Remote UI
7
System Manager
Settings
REPORT SETTINGS..........................................................................................................11-32
8
RX REPORT ........................................................................................................................11-50
Printing Reports and Lists Manually................................................................................11-53
Printing ACTIVITY REPORT ..........................................................................................11-53
Printing 1-TOUCH LIST, CODED DIAL LIST, and GROUP DIAL LIST ................11-54
Printing 1-TOUCH LIST 2, CODED DIAL LIST 2 ......................................................11-54
Maintenance
9
Troubleshooting
Checking and Deleting Jobs ..............................................................................................11-55
Checking and Deleting Report Jobs .......................................................................11-55
10
Appendix
11
Table of Contents
Index
xxii
TOP
Back
Before Using the
Machine
1
Document and Paper
Next
Checking Remaining Memory...........................................................................................11-56
2
Glossary .....................................................................................................................................11-57
3
Index ...........................................................................................................................................11-68
Copying
Sending and
Receiving
Previous
4
Printing and
Scanning
5
Network
6
Remote UI
7
System Manager
Settings
8
Maintenance
9
Troubleshooting
10
Appendix
11
Table of Contents
Index
xxiii
TOP
Back
Before Using the
Machine
1
Document and Paper
2
Copying
Previous
Next
How to Use This Guide
■
Using the Top Page
3
Sending and
Receiving
4
Printing and
Scanning
5
Network
6
Remote UI
7
System Manager
Settings
8
Maintenance
9
Troubleshooting
10
Appendix
11
Table of Contents
Index
xxiv
TOP
Back
Before Using the
Machine
1
■
Previous
Next
Using the Chapter Topic List
Document and Paper
2
Copying
3
Sending and
Receiving
4
Printing and
Scanning
5
Network
6
Remote UI
7
System Manager
Settings
8
Maintenance
9
Troubleshooting
10
Appendix
11
Table of Contents
Index
xxv
TOP
Back
Before Using the
Machine
1
Document and Paper
Previous
Next
The following symbols are used throughout the manuals for the machine and indicate the warnings, cautions and notes you should keep in
mind when using the machine.
2
Copying
Indicates a warning that may lead to death or serious injury if not observed.
3
Sending and
Receiving
4
Printing and
Scanning
5
Network
Explains how to avoid actions that could injure you or damage your machine.
Explains operating restrictions and how to avoid minor difficulties.
In addition, this guide uses distinctive notations to identify keys and information in the LCD:
6
Remote UI
– The keys you press appear in square brackets: [Stop/Reset].
– Information in the LCD appears in angle brackets: <LOAD PAPER>.
7
System Manager
Settings
– The items appears on the PC (Menus, Menu commands, buttons etc.) in angle brackets: [Save].
8
Maintenance
9
Troubleshooting
10
Appendix
11
Table of Contents
Index
xxvi
TOP
Back
Before Using the
Machine
1
Document and Paper
2
Copying
3
Sending and
Receiving
4
Printing and
Scanning
5
Network
6
Previous
Next
Legal Notices
Trademarks
Canon, the Canon logo, imageCLASS, and NetSpot are trademarks of Canon Inc.
Microsoft, Windows and Windows Server are registered trademarks of Microsoft Corporation in the United States and other countries.
Windows Vista is a trademark of Microsoft Corporation in the United States and other countries.
All other product and brand names are registered trademarks, trademarks or service marks of their respective owners.
Copyright
Copyright © 2007 by Canon Inc. All rights reserved. No part of this publication may be reproduced, transmitted, transcribed, stored in a retrieval system,
or translated into any language or computer language in any form or by any means, electronic, mechanical, magnetic, optical, chemical, manual, or
otherwise, without the prior written permission of Canon Inc.
Remote UI
7
System Manager
Settings
8
Maintenance
9
Disclaimer
The information in this document is subject to change without notice.
CANON INC. MAKES NO WARRANTY OF ANY KIND WITH REGARD TO THIS MATERIAL, EITHER EXPRESS OR IMPLIED, EXCEPT AS PROVIDED HEREIN,
INCLUDING WITHOUT LIMITATION, THEREOF, WARRANTIES AS TO MARKETABILITY, MERCHANTABILITY, FITNESS FOR A PARTICULAR PURPOSE OF USE OR
NON-INFRINGEMENT. CANON INC. SHALL NOT BE LIABLE FOR ANY DIRECT, INCIDENTAL, OR CONSEQUENTIAL DAMAGES OF ANY NATURE, OR LOSSES OR
EXPENSES RESULTING FROM THE USE OF THIS MATERIAL.
Troubleshooting
10
Appendix
11
Table of Contents
Index
xxvii
TOP
Back
Before Using the
Machine
1
Document and Paper
2
Copying
3
Sending and
Receiving
4
Printing and
Scanning
5
Network
6
Remote UI
7
System Manager
Settings
8
Maintenance
Previous
Next
1 Before Using the Machine
Machine Components ......................................................................................1-3
Operation Panel ...............................................................................................1-6
Main Operation Panel.................................................................1-6
Send/Fax Operation Panel ........................................................1-9
LCD (Standby Mode) ......................................................................................1-10
Copy Mode .................................................................................. 1-10
Send/Fax Mode .......................................................................... 1-10
Scan Mode ................................................................................... 1-10
Log In Mode ................................................................................ 1-11
9
Troubleshooting
10
Appendix
11
Table of Contents
Index
1-1
TOP
Back
Before Using the
Machine
1
Document and Paper
2
Copying
3
Sending and
Receiving
4
Printing and
Scanning
5
Network
6
Remote UI
7
System Manager
Settings
8
Previous
Next
Department/User ID Management ...............................................................1-12
Procedure before Using the Machine ................................ 1-12
Procedure after Using the Machine.................................... 1-12
Toner Cartridge ..............................................................................................1-13
Maintaining the Toner Cartridge ......................................... 1-14
Checking the toner level ........................................................ 1-15
Timer Settings ................................................................................................1-16
Setting the Sleep Mode .......................................................... 1-16
Setting Auto Clear Time .......................................................... 1-17
Setting Time Zone..................................................................... 1-17
Setting Daylight Saving Time ............................................... 1-18
Maintenance
9
Troubleshooting
10
Appendix
11
Table of Contents
Index
1-2
TOP
Back
Before Using the
Machine
1
Document and Paper
2
Copying
A
B
4
Printing and
Scanning
5
Network
6
C
D
E
F
Remote UI
7
System Manager
Settings
G
8
Maintenance
9
Next
Machine Components
3
Sending and
Receiving
Previous
H
ADF (Automatic Document Feeder)
Holds documents and feeds them automatically into the scanning
area.
Slide guides
Adjust to the width of the document.
Document feeder tray
Holds documents.
Document delivery tray
Receives documents.
Operation panel
Controls the machine.
USB memory port
Insert the USB memory when using scanning to USB memory
option.
Output tray
Receives copies, prints and faxes.
Paper cassette
Loads the paper supply.
Troubleshooting
10
Appendix
11
Table of Contents
Index
1-3
TOP
Back
Before Using the
Machine
1
I
Document and Paper
2
Copying
J
K
3
Sending and
Receiving
L
4
Printing and
Scanning
5
M
Network
6
Remote UI
7
System Manager
Settings
8
N
O
P
Q
Maintenance
9
Troubleshooting
10
R
Previous
Next
Scanning area
Scans documents from the ADF.
Platen glass
Place documents.
Output tray extension
Extends for the output tray.
Paper stopper
Prevents the paper from falling off the output tray.
Open the paper stopper from its original position for LTR/A4
paper. For LGL paper, pull out the output tray extension first, and
then open the paper stopper.
Slide guides for multi-purpose tray
Adjusts to the width of the paper.
Paper guide rail
Holds the paper supply.
Dust cover
Protects the paper supply in the paper cassette from the dirt and
dust.
Multi-purpose tray
Feeds paper when you insert one by one manually.
Scanning platform
Open this platform when replacing the toner cartridge or clearing
paper jams.
Main power switch
Turns the power on or off.
Appendix
11
Table of Contents
Index
1-4
TOP
Back
Before Using the
Machine
1
S
Document and Paper
2
Copying
T
U
3
Sending and
Receiving
4
Printing and
Scanning
5
V
W
X
Previous
Next
Ethernet port
Connect the network cable.
USB port
Connect the USB (Universal Serial Bus) cable.
Rear cover
Open this cover when clearing paper jams.
Power socket
Connect the power cord.
Telephone line jack
Connect the external telephone cable.
External device jack
Connect an external device.
Network
6
Remote UI
7
System Manager
Settings
8
Maintenance
9
Troubleshooting
10
Appendix
11
Table of Contents
Index
1-5
TOP
Back
Before Using the
Machine
1
Document and Paper
Previous
Next
Operation Panel
2
Copying
3
Sending and
Receiving
■
Main Operation Panel
4
Printing and
Scanning
5
Network
6
Remote UI
7
System Manager
Settings
8
Maintenance
9
Troubleshooting
10
Appendix
11
A
B
C
[System Monitor] key
Press to check fax transmission, print, copy, or report output
status.
[View Settings] key
Press to confirm settings of the copy function.
[COPY] key
Press to switch to the Copy mode.
D
E
F
G
[SEND/FAX] key
Press to switch to the Send/Fax mode.
[SCAN] key
Press to switch to the Scan mode.
[Additional Functions] key
Press to select or cancel the modes in Additional Functions.
[2-Sided] key
Press to set two-sided copying.
Table of Contents
Index
1-6
TOP
Back
Before Using the
Machine
Previous
Next
1
Document and Paper
2
Copying
3
Sending and
Receiving
4
Printing and
Scanning
5
Network
6
H
Remote UI
7
System Manager
Settings
I
J
8
Maintenance
9
Troubleshooting
10
K
L
[Enlarge/Reduce] key
Press to enlarge or reduce copy ratio.
[Density] key
Press to adjust the density for copy or documents you send.
[Image Quality] key
Press to select image quality for copy or fax.
[Collate/2 on 1] key
Press to collate copies, or press to set 2 on 1 copying.
Log In/Out key (ID key)
Press to operate the machine when the ID management is
activated. Also press to enable the ID management when
you finished using the machine.
M
N
O
P
[Energy Saver] key
Press to set or cancel the Sleep mode manually. The key
lights green when the Sleep mode is set, and goes off when
the mode is canceled.
[Stop/Reset] key
Press to stop a current job. Also, press to return the machine
to the standby mode.
Error indicator
Flashes when an error has occurred.
Processing/Data indicator
Flashes while sending or receiving faxes. Lights when the
machine has waiting jobs and stores the data in memory.
Appendix
11
Table of Contents
Index
1-7
TOP
Back
Before Using the
Machine
Previous
Next
1
Document and Paper
2
Copying
3
Sending and
Receiving
4
Printing and
Scanning
5
Network
6
Q
Remote UI
7
System Manager
Settings
R
S
8
Maintenance
9
Troubleshooting
10
Appendix
T
U
[Start] key
Press to start copying, scanning and sending faxes.
Numeric keys
Enter letters and numbers.
[Tone] key
Press to switch from rotary pulse to tone dialing.
[Clear] key
Press to clear entered alphanumeric characters.
[ ] key
Press to increase the value for various settings. Also press to
see the next item in the menu.
V
W
X
Y
[OK] key
Press to accept a set function or mode.
Also press and hold to print a sample page when you are in
the copy mode. For details, see “Printing a Sample Page,” on
p. 3-11.
[ ] key
Press to decrease the value for various settings. Also press to
see the previous item in the menu.
LCD display
Displays messages and prompts during operation. Displays
selection, text, and numbers when adjusting the settings.
[Toner Gauge] key
Press to check the toner remaining in the toner cartridge.
11
Table of Contents
Index
1-8
TOP
Back
Before Using the
Machine
1
■
Previous
Next
Send/Fax Operation Panel
Document and Paper
2
Copying
3
Sending and
Receiving
4
Printing and
Scanning
5
Network
6
Remote UI
A
7
System Manager
Settings
8
B
Maintenance
9
Troubleshooting
10
C
[Hook] key
Press when you want to dial without lifting up the handset of
the external telephone.
[Recall/Pause] key
Press to recall previously set send jobs, including the
destinations, scan settings, and send settings.
Press to enter a pause between or after the telephone/fax
number when dialing or registering numbers.
[Coded Dial] key
Press to specify destinations registered under coded dial
codes.
D
E
[Address Book] key
Press to search pre-registered destinations under one-touch
keys or coded dial codes by name, number, or address.
One-Touch keys
Press to specify destinations registered under one-touch
keys.
Appendix
11
Table of Contents
Index
1-9
TOP
Back
Before Using the
Machine
1
Document and Paper
Previous
Next
LCD (Standby Mode)
2
Copying
3
Sending and
Receiving
■
100%
5
B
LTR
TEXT/PHOTO
D
Network
6
Remote UI
7
System Manager
Settings
8
■
A
4
Printing and
Scanning
Copy Mode
E
C
Send/Fax Mode
FAX
O1
■
Scan Mode
SCANNING
A
B
C
D
E
MODE
Zoom ratio
Paper size
Quantity
Density
Image quality
Maintenance
9
Troubleshooting
10
Appendix
11
Table of Contents
Index
1-10
TOP
Back
Before Using the
Machine
1
■
Previous
Next
Log In Mode
Document and Paper
2
● For Department ID Management
ENTER
Copying
DEPT.ID
3
Sending and
Receiving
4
● For User ID Management
ENTER
Printing and
Scanning
USER
ID
:a
5
Network
6
Remote UI
7
System Manager
Settings
8
Maintenance
9
Troubleshooting
10
– Depending on your needs, you can change the standby display which
appears when the main power switch is turned on. For details, see
“Setting Menu,” on p. 11-6.
– When the main power switch is turned on, the LCD displays <PLEASE
WAIT> first, and then displays <INITIALIZING...> until the standby display
appears. It is also possible to see the standby display without having
<INITIALIZING...> shown.
– If the Auto Clear function is activated, the display returns to the standby
mode.
– Log in mode is displayed only when Department/User ID Management is
set to <ON> in <SYSTEM SETTINGS>. To log in or out, see “Department/
User ID Management,” on p. 1-12.
Appendix
11
Table of Contents
Index
1-11
TOP
Back
Before Using the
Machine
1
Document and Paper
2
Copying
3
Sending and
Receiving
Printing and
Scanning
If Department ID Management or User ID Management is set
to <ON> in <SYSTEM SETTINGS>, you must enter your ID and
password to be able to operate the machine. For details, see
Chapter 8, “System Manager Settings.”
■
5
1.
Enter the department ID or the user ID with the
numeric keys, then press [OK] or [Log In/Out
(ID)].
2.
If the password is set, enter the password with
the numeric keys, then press [OK] or [Log In/Out
(ID)].
Network
Remote UI
7
System Manager
Settings
Next
Department/User ID Management
4
6
Previous
■
1.
Procedure after Using the Machine
Be sure to press [Log In/Out (ID)].
Procedure before Using the Machine
The standby display appears.
8
Maintenance
9
Troubleshooting
10
Appendix
11
Table of Contents
Index
1-12
TOP
Back
Before Using the
Machine
1
Document and Paper
2
Copying
3
Sending and
Receiving
4
Printing and
Scanning
5
Network
6
Remote UI
7
System Manager
Settings
8
Maintenance
9
Previous
Next
Toner Cartridge
The lifetime of the Canon genuine starter toner cartridge which
comes with the machine is approximately 1,000 pages, the
Canon genuine replacement toner cartridge is approximately
2,000 pages. The page counts are on the basis of “ISO/ IEC
19752”* when printing A4 size paper with the default print
density setting. The level of toner consumption varies
depending on the type of documents printed. If your average
document contains a lot of graphics, tables, or charts, the life of
the toner cartridge will be shorter as they consume more toner.
To purchase the Canon genuine replacement toner cartridge,
contact your local Canon dealer or Canon Customer Care Center
(U.S.A.:1-800-828-4040, Canada:1-800-652-2666).
Model
Name
Supported Canon
Genuine Cartridge
Print Yield
Bundled
Canon Cartridge 104
Starter
Approx. 1,000
pages
Replacement
Canon Cartridge 104
Approx. 2,000
pages
Type
MF4690
* “ISO/IEC 19752” is the global standard related to “Method for
the determination of toner cartridge yield for monochromatic
electrophotographic printers and multi-function devices that
may contain printer components” issued by ISO (International
Organization for Standardization).
Toner Cartridge name:
Canon Cartridge 104
Troubleshooting
10
Appendix
11
Table of Contents
Index
1-13
TOP
Back
Before Using the
Machine
1
■
Maintaining the Toner Cartridge
Document and Paper
2
Copying
3
Previous
Next
● Always hold the toner cartridge by its handle to avoid
touching the drum protective shutter.
● Keep the toner cartridge away from computer screens,
disk drives, and floppy disks. The magnet inside the toner
cartridge may harm these items.
● Avoid locations subject to high temperature, high humidity,
● Do not stand the toner cartridge on end, and do not turn it
upside down. If toner becomes caked in the toner cartridge,
it may become impossible to free it even by shaking the toner
cartridge.
or rapid changes in temperature.
Sending and
Receiving
4
● If there is a toner powder leakage, make sure not to inhale or
● Do not expose the toner cartridge to direct sunlight or bright
light for more than five minutes.
Printing and
Scanning
5
Network
6
Remote UI
7
System Manager
Settings
8
Maintenance
9
Troubleshooting
10
Appendix
11
● Store the toner cartridge in its protective bag. Do not open
the bag until you are ready to install the toner cartridge in
the machine.
● Save the toner cartridge’s protective bag in case you need to
repack and transport the toner cartridge at a later date.
● Do not store the toner cartridge in a salty atmosphere or
where there are corrosive gases such as from aerosol sprays.
● Do not remove the toner cartridge from the machine
unnecessarily.
● Do not open the drum protective shutter on the toner
cartridge. Print quality may deteriorate if the drum surface is
exposed to light or is damaged.
touch the toner powder. If it comes in contact with your skin,
rinse with cold water using soap. If you feel an irritation on
your skin or inhale the powder, consult a doctor immediately.
● When removing the toner cartridge from the machine, make
sure to remove it carefully. If not removed with care, the
toner powder may scatter and come in contact with your eyes
and mouth. If this happens, rinse with water and consult a
doctor immediately.
● Keep the toner cartridge away from small children. If they
ingest the toner powder, consult a doctor immediately.
● Do not disassemble the toner cartridge. The toner powder
may scatter and come in contact with your eyes and mouth.
If this happens, rinse with water and consult a doctor
immediately.
Do not place the toner cartridge in fire. Toner powder is flammable.
Table of Contents
Index
1-14
TOP
Back
Before Using the
Machine
1
Document and Paper
2
Copying
3
Sending and
Receiving
4
Printing and
Scanning
5
Network
6
Remote UI
7
System Manager
Settings
■
Checking the toner level
You can check the amount of toner remaining in the toner cartridge
by pressing the [Toner Gauge] key. The toner level is displayed in
the LCD at four levels.
If the toner gauge indicates that the toner is empty, it is
recommended that the toner cartridge be replaced. (See “Replacing
the Toner Cartridge,” on p. 9-10.)
Previous
Next
Toner low
TONER
0%
GAUGE
100%
Toner empty
TONER
0%
GAUGE
100%
Toner full
TONER
0%
GAUGE
100%
To return to the standby mode, press [Stop/Reset].
Toner high
TONER
0%
GAUGE
100%
8
Maintenance
9
Troubleshooting
10
Appendix
11
Table of Contents
Index
1-15
TOP
Back
Before Using the
Machine
1
Document and Paper
Previous
Next
Timer Settings
2
Copying
3
Sending and
Receiving
4
Printing and
Scanning
■
When the machine remains idle for a certain period of time, it
automatically enters the Sleep mode.
1.
Press [Additional Functions].
5
2.
Press [
] or [
] to select <TIMER SETTINGS>,
then press [OK].
6
3.
Press [
] or [
] to select <AUTO SLEEP
TIME>, then press [OK].
7
4.
Press [
[OK].
8
5.
Press [
] or [
] to select the desired interval,
then press [OK].
Network
Remote UI
System Manager
Settings
Setting the Sleep Mode
Maintenance
9
Troubleshooting
] or [
] to select <ON>, then press
You can set the interval from 3 to 30 minutes (in one-minute
increments).
You can also enter values using numeric keys.
6.
Press [Stop/Reset] to return to the standby
mode.
– [Energy Saver] lights green when the machine enters the Sleep
mode.
– To resume the normal mode from the Sleep mode, press [Energy
Saver] on the operation panel.
– To enter the Sleep mode manually, press [Energy Saver] on the
operation panel.
– The machine will not enter the Sleep mode when:
• the machine is in operation
• the Processing/Data indicator lights or flashes
• a message appears on the display and the Error indicator flashes
• paper is loaded in the multi-purpose tray
• a paper jam occurs in the machine
• the handset of the external telephone is off the hook
– The machine will leave the Sleep mode when:
• you press [Energy Saver] on the operation panel
• a fax is received
• the handset of the external telephone is off the hook
• a print job is sent from a computer, and the print is started
10
Appendix
11
The default setting is 5 minutes.
Table of Contents
Index
1-16
TOP
Back
Before Using the
Machine
1
Document and Paper
2
Printing and
Scanning
Press [Additional Functions].
3
2.
Press [
] or [
] to select <TIMER SETTINGS>,
then press [OK].
4
3.
Press [
] or [
] to select <AUTO CLEAR
TIME>, then press [OK].
4.
Press [
[OK].
5
Network
6
Remote UI
5.
7
System Manager
Settings
Setting Auto Clear Time
If the machine remains idle for a certain period of time, the display
returns to the standby mode (Auto Clear function).
1.
Copying
Sending and
Receiving
■
8
Maintenance
9
] or [
Press [
] or [
] to select the desired interval,
then press [OK].
Press [Stop/Reset] to return to the standby
mode.
Next
Setting Time Zone
The standard time zones of the world are expressed globally in
terms of the difference in hours (± up to 12 hours) from GMT
(0 hours). A time zone is a region throughout which this time
difference is the same.
1.
Press [Additional Functions].
2.
Press [
] or [
] to select <TIMER SETTINGS>,
then press [OK].
3.
Press [
] or [
] to select <TIME ZONE
SETTING>, then press [OK].
4.
Press [
] or [
press [OK].
5.
Press [Stop/Reset] to return to the standby
mode.
] to select <ON>, then press
You can set the interval from 1 to 9 minutes (in one-minute
increments).
You can also enter values using numeric keys.
6.
■
Previous
] to select the time zone, then
The specified time zone setting becomes effective after the machine
is restarted.
Troubleshooting
10
Appendix
11
Table of Contents
Index
1-17
TOP
Back
Before Using the
Machine
1
Document and Paper
2
Copying
3
Sending and
Receiving
4
Printing and
Scanning
5
Network
■
In some countries or areas, time is advanced throughout the
summer season. This is called “Daylight Saving Time.”
7
System Manager
Settings
8
Next
6.
Press [
] or [
press [OK].
] to select <MONTH>, then
7.
Press [
] or [
press [OK].
] to select the month, then
1.
Press [Additional Functions].
2.
Press [
] or [
] to select <TIMER SETTINGS>,
then press [OK].
8.
Press [
[OK].
] or [
] to select <WEEK>, then press
3.
Press [
] or [
] to select <DAYLIGHT
SV.TIME>, then press [OK].
9.
Press [
[OK].
] or [
] to select the week, then press
4.
Press [
[OK].
10. Press [
] or [
] to select <DAY>, then press
] or [
] to select the day, then press
6
Remote UI
Setting Daylight Saving Time
Previous
5.
] or [
] to select <ON>, then press
Press [
] or [
] to select <START DATE/
TIME>, then press [OK].
[OK].
11. Press [
[OK].
12. Press [
] or [
] to select <END DATE/TIME>,
then press [OK].
Maintenance
9
Troubleshooting
10
Appendix
11
Table of Contents
Index
1-18
TOP
Back
Before Using the
Machine
1
Document and Paper
2
Copying
3
Sending and
Receiving
4
Printing and
Scanning
5
13. Press [
] to select <MONTH>, then
14. Press [
] to select the month, then
] or [
press [OK].
] or [
press [OK].
15. Press [
6
Remote UI
7
System Manager
Settings
8
] to select <WEEK>, then press
] or [
] to select the week, then press
] or [
] to select <DAY>, then press
] or [
] to select the day, then press
Next
[OK].
16. Press [
[OK].
17. Press [
Network
] or [
Previous
[OK].
18. Press [
[OK].
19. Press [Stop/Reset] to return to the standby
mode.
Maintenance
9
Troubleshooting
10
Appendix
11
Table of Contents
Index
1-19
TOP
Back
Before Using the
Machine
1
Document and Paper
2
Copying
3
Sending and
Receiving
4
Printing and
Scanning
5
Network
6
Previous
Next
2 Document and Paper
Document Requirements.................................................................................2-2
Scanning Area...................................................................................................2-3
Loading Documents .........................................................................................2-4
On the Platen Glass .....................................................................2-4
In the ADF .......................................................................................2-5
Paper Requirements ........................................................................................2-7
Remote UI
7
System Manager
Settings
8
Maintenance
9
Troubleshooting
10
Printable Area ...................................................................................................2-9
Loading Paper ................................................................................................2-10
Into the Multi-Purpose Tray ................................................... 2-10
Setting Paper Size and Type ..........................................................................2-13
Appendix
11
Table of Contents
Index
2-1
TOP
Back
Before Using the
Machine
1
Document and Paper
Copying
Sending and
Receiving
Type
4
Printing and
Scanning
5
Network
6
Remote UI
Size
(W x L)
Platen Glass
ADF
–
–
–
–
Plain paper
Thick documents
Photographs
Small documents (e.g.,
index cards)
– Special types of paper
(e.g., tracing paper*1,
transparencies*1, etc.)
– Book (Height: max. 1"
(24 mm))
Plain paper (Multipage
documents of the same
size, thickness and weight
or one page documents.)
Max. 8 1/2" x 11 5/8"
(Max. 216 x 297 mm)
Max. 8 1/2" x 14"
(Max. 216 x 356 mm)
Min. 4 1/8" x 5 7/8"
(Min. 105 x 148.5 mm)
– Coated paper
7
System Manager
Settings
8
Maintenance
9
Troubleshooting
10
Appendix
11
Next
Document Requirements
2
3
Previous
● Do not place the document on the platen glass or in the ADF
until the glue, ink or correction fluid on the document is
completely dry.
● To prevent document jams in the ADF, do not use any of the
following:
– Wrinkled or creased paper
– Carbon paper or carbon-backed paper
– Curled or rolled paper
– Torn paper
– Onion skin or thin paper
Weight
Max. 4.4 lb (2 kg)
11 to 28 lb bond
(40 to 105 g/m2)
– Documents with staples or paper clips attached
Quantity
1 sheet
Max. 35 sheets*2
(Max. 10 sheets for LGL
documents)
– Transparencies
– Paper printed with a thermal transfer printer
*1 When copying a transparent document such as tracing paper
or transparencies, use a piece of plain white paper to cover the
document after placing it face-down on the platen glass.
*2 21 lb bond (80 g/m2) paper
Table of Contents
Index
2-2
TOP
Back
Before Using the
Machine
1
Document and Paper
2
Copying
3
Sending and
Receiving
Previous
Next
Scanning Area
Make sure your document’s text and graphics fall within the
shaded area in the following diagram. Note that the margin
widths listed are approximate and there may be slight
variations in actual use.
4
Printing and
Scanning
5
Network
6
Remote UI
7
System Manager
Settings
8
Maintenance
9
Troubleshooting
10
Appendix
11
Table of Contents
Index
2-3
TOP
Back
Before Using the
Machine
1
Document and Paper
Previous
Next
Loading Documents
2
Copying
3
■
1.
Sending and
Receiving
On the Platen Glass
3.
Align the document with the appropriate paper
size marks.
Lift up the ADF.
4
Printing and
Scanning
5
Network
6
Remote UI
7
System Manager
Settings
2.
If your document does not match any of the paper size marks, align
the center of your document with the arrow mark.
Place your document face down.
8
Maintenance
9
Troubleshooting
10
Appendix
11
Table of Contents
Index
2-4
TOP
Back
Before Using the
Machine
1
Document and Paper
4.
Gently close the ADF.
2
■
Previous
Next
In the ADF
1.
Fan the document stack and even the edges.
2.
Adjust the slide guides to the width of the
documents.
Copying
3
Sending and
Receiving
4
Printing and
Scanning
5
Network
6
Remote UI
7
System Manager
Settings
8
The document is ready for scanning.
– When closing the ADF be careful not to get your fingers caught,
as this may result in personal injury.
– Do not press down the ADF forcefully, as this may damage the
platen glass and cause personal injury.
Remove the document from the platen glass when scanning is
complete.
Maintenance
9
Troubleshooting
10
Appendix
11
Table of Contents
Index
2-5
TOP
Back
Before Using the
Machine
1
Document and Paper
3.
Previous
Next
Neatly place the documents face up in the
document feeder tray.
2
Copying
3
Sending and
Receiving
4
Printing and
Scanning
5
The document is ready for scanning.
Network
6
Remote UI
7
System Manager
Settings
8
Maintenance
– Do not add or remove documents while they are being scanned.
– When scanning is complete, remove the documents from the
document delivery tray to avoid paper jams.
– Avoid using ADF to scan the same document more than 30
times. When scanned repeatedly, documents can become folded
or torn, which may cause paper jams.
– If the feeder rollers are soiled from scanning a document written
in pencil, clean them. (See “Cleaning the Machine,” on p. 9-2.)
9
Troubleshooting
10
Appendix
11
Table of Contents
Index
2-6
TOP
Back
Before Using the
Machine
1
Document and Paper
Paper cassette
Copying
Sending and
Receiving
Size
(W x L)
4
Printing and
Scanning
Weight
Multi-purpose tray
LTR, LGL, A4, B5, A5, Executive, Envelope (COM10,
Monarch, DL, ISO-C5 (6 3/8" x 9" (162 x 229 mm))), Oficio,
Brazil-Oficio, Mexico-Oficio, Folio, Government-LTR,
Government-LGL, Foolscap (3" x 5" to 8 1/2" x 14" (76 x
127 to 216 x 356 mm))
16 to 43 lb bond (60 to 163 g/m2)
5
Quantity
Max. 250 sheets
(Height: max. 1" (25 mm))
6
Type
Plain Paper, Plain Paper L, Heavy Paper, Heavy Paper H,
Transparency
Network
Max. 1 sheet
Remote UI
7
System Manager
Settings
8
Maintenance
Next
Paper Requirements
2
3
Previous
● To prevent paper jams, do not use any of the following:
– Wrinkled or creased paper
– Curled or rolled paper
– Coated paper
– Torn paper
– Damp paper
– Very thin paper
– Paper which has been printed on using a thermal transfer printer
(Do not copy on the reverse side.)
● The following types of paper do not print well:
The default paper size is LTR. If you use a different paper size, you must
change the paper size settings. (See “Setting Paper Size and Type,” on
p. 2-13.)
– Highly textured paper
– Very smooth paper
– Shiny paper
9
Troubleshooting
10
Appendix
11
Table of Contents
Index
2-7
TOP
Back
Before Using the
Machine
1
Document and Paper
2
Copying
3
Sending and
Receiving
4
Printing and
Scanning
Previous
Next
● Make sure the paper is free from dust, lint, and oil stains.
● Be sure to test paper before purchasing large quantities.
● Store all paper wrapped and on a flat surface until ready for
use. Keep opened packs in their original packaging in a cool,
dry location.
● Store paper at 64.4°F–75.2°F (18°C–24°C), 40%–60% relative
humidity.
● Use only the transparencies designed for laser printers.
5
Network
Canon recommends you to use Canon type transparencies
with this machine.
6
Remote UI
7
System Manager
Settings
8
Maintenance
9
Troubleshooting
10
Appendix
11
Table of Contents
Index
2-8
TOP
Back
Before Using the
Machine
1
Document and Paper
2
Copying
3
Sending and
Receiving
Previous
Next
Printable Area
The shaded area indicates the approximate printable area of
LTR paper and envelope. Note that the margin widths listed are
approximate and there may be slight variations in actual use.
4
Printing and
Scanning
5
Network
6
Remote UI
7
System Manager
Settings
8
Maintenance
9
Troubleshooting
10
Appendix
11
Table of Contents
Index
2-9
TOP
Back
Before Using the
Machine
1
Document and Paper
2
Copying
To load paper in the paper cassette, see “Set Up the Machine,” in
the Starter Guide.
■
4
Printing and
Scanning
Next
Loading Paper
3
Sending and
Receiving
Previous
1.
Spread the paper guides a little wider than the
actual paper width.
Into the Multi-Purpose Tray
Use the multi-purpose tray when you want to copy or print on
the different paper which is in the paper cassette. Load paper
one by one in the multi-purpose tray.
5
Network
6
Remote UI
7
System Manager
Settings
8
– The paper in the multi-purpose tray is fed prior to the paper in the paper
cassette.
– The recommended envelopes are COM10, MONARCH, DL, and ISO-C5.
Using other envelopes may affect the quality of the printout.
– Make sure to set the correct paper size in the printer driver. (See Online
Help.)
– When printing received documents, it is possible to feed paper only from
the paper cassette. If paper is loaded into the multi-purpose tray, <PAPER
IN MP TRAY/REMOVE PAPER> appears.
Maintenance
9
Troubleshooting
10
Appendix
11
Table of Contents
Index
2-10
TOP
Back
Before Using the
Machine
1
Document and Paper
2.
When setting paper, gently insert the paper into
the multi-purpose tray with the print side up.
2
Copying
Previous
Next
When setting an envelope, gently insert the
envelope into the multi-purpose tray with the
print side up and the right edge (i.e., closer to
the stamp) first.
3
Sending and
Receiving
4
Printing and
Scanning
5
Network
6
Remote UI
When you load paper with a logo on, position the paper with the
print side up (logo side) and insert it so that the top of the paper
feeds first in the multi-purpose tray.
7
System Manager
Settings
8
Maintenance
9
Troubleshooting
10
Appendix
11
Table of Contents
Index
2-11
TOP
Back
Before Using the
Machine
1
Document and Paper
3.
Previous
Next
Slide the paper guides so that they fit to both
sides of the paper.
2
Copying
3
Sending and
Receiving
4
Printing and
Scanning
5
Network
6
Remote UI
7
System Manager
Settings
8
If the paper guides are not adjusted correctly for the size of the
paper, the quality of your printouts may be adversely affected.
4.
Specify the size and the type of the paper you
load.
For details on how to specify the paper size and type, see “Setting
Paper Size and Type,” on p. 2-13.
Maintenance
9
Troubleshooting
10
Appendix
11
Table of Contents
Index
2-12
TOP
Back
Before Using the
Machine
1
Document and Paper
2
Copying
3
Sending and
Receiving
4
Printing and
Scanning
5
Network
6
Remote UI
7
System Manager
Settings
8
Previous
Next
Setting Paper Size and Type
The default setting is <LTR> and <PLAIN PAPER>. When you
place other sizes and/or types of paper, follow this procedure to
change the settings.
The procedure is same for the paper cassette and multipurpose tray except for selecting the paper cassette or multipurpose tray in step 3 and 6.
1.
Press [Additional Functions].
2.
Press [
] or [
] to select <PAPER SETTINGS>,
then press [OK].
3.
Press [
] or [
] to select <CASSETTE> or <MP
TRAY>, then press [OK].
4.
Press [
] or [
press [OK].
] to select <PAPER SIZE>, then
5.
Press [
] or [
press [OK].
] to select the paper size, then
You can select from the following paper sizes:
<LTR>, <LGL>, <A4>, <B5>, <A5>, <EXECUTIV>, <COM10>,
<MONARCH>, <DL>, <ISO-C5>, <OFICIO>, <BRAZIL-OFICIO>,
<MEXICO-OFICIO>, <FOLIO>, <G-LTR>, <G-LGL>, <FLSP>
The paper sizes available will vary depending on the country where
the unit was purchased.
6.
Press [
] or [
] to select < SELECT PAPER
TYPE>, then press [OK].
If you have selected <B5>, <A5>, <EXECUTIV>, <COM10>,
<MONARCH>, <DL> or <ISO-C5> for the paper size in step 5,
<SELECT PAPER TYPE> is not displayed. Skip to step 8.
Maintenance
9
Troubleshooting
10
Appendix
11
Table of Contents
Index
2-13
TOP
Back
Before Using the
Machine
1
Document and Paper
7.
2
3
4
Printing and
Scanning
6
] to select the paper type, then
*1 If paper curls excessively when printed with <PLAIN
PAPER> selected, select <PLAIN PAPER L>.
*2 If print fixing is not sufficient when printed with <HEAVY
PAPER> selected, select <HEAVY PAPER H>.
5
Network
Next
You can select from the following paper types:
<PLAIN PAPER> or <PLAIN PAPER L>*1 for Plain paper (17 lb to 24 lb
(64 g/m2 to 90 g/m2))
<HEAVY PAPER> or <HEAVY PAPER H>*2 for Heavy paper (Paper
cassette: 28 lb to 34 lb (105 g/m2 to 128 g/m2), Multi-purpose tray: 28
lb to 43 lb (105 g/m2 to 163 g/m2)) or Envelope
<TRANSPARENCY> for Transparency
Copying
Sending and
Receiving
Press [
] or [
press [OK].
Previous
8.
Press [Stop/Reset] to return to the standby
mode.
Remote UI
7
System Manager
Settings
8
Maintenance
9
Troubleshooting
10
Appendix
11
Table of Contents
Index
2-14
TOP
Back
Before Using the
Machine
1
Document and Paper
2
Copying
3
Sending and
Receiving
4
Printing and
Scanning
5
Network
6
Remote UI
7
System Manager
Settings
8
Maintenance
9
Troubleshooting
10
Previous
Next
3 Copying
Basic Copying Method .....................................................................................3-3
Scan Settings ....................................................................................................3-4
Image Quality ................................................................................3-4
Density .............................................................................................3-4
Zoom Ratio .....................................................................................3-5
Advanced Copy Features .................................................................................3-7
Collate Copy ...................................................................................3-7
2 on 1 Combination ....................................................................3-8
Two-Sided Copying .....................................................................3-9
Reserved Copy ........................................................................... 3-10
Printing a Sample Page ..................................................................................3-11
Appendix
11
Table of Contents
Index
3-1
TOP
Back
Before Using the
Machine
1
Document and Paper
2
Copying
3
Sending and
Receiving
Previous
Next
Canceling Copy Jobs ......................................................................................3-12
Checking and Deleting Jobs ..........................................................................3-13
Checking and Deleting Copy Jobs...................................... 3-13
4
Printing and
Scanning
5
Network
6
Remote UI
7
System Manager
Settings
8
Maintenance
9
Troubleshooting
10
Appendix
11
Table of Contents
Index
3-2
TOP
Back
Before Using the
Machine
1
Document and Paper
2
Copying
Sending and
Receiving
Printing and
Scanning
Follow this procedure to make a copy.
1.
4
2.
Press [COPY].
When you are in the copy mode and press and hold [OK], a sample
page will be printed. For details, see “Printing a Sample Page,” on
p. 3-11.
Network
6
3.
Use the numeric keys to enter the desired copy
quantity (1 to 99).
4.
Press [Start].
7
8
Set documents.
For documents you can copy, see “Document Requirements,” on
p. 2-2.
5
System Manager
Settings
Next
Basic Copying Method
3
Remote UI
Previous
Maintenance
9
Troubleshooting
10
Appendix
11
Table of Contents
Index
3-3
TOP
Back
Before Using the
Machine
1
Document and Paper
2
Copying
3
Sending and
Receiving
Printing and
Scanning
5
1.
Press [COPY].
2.
Press [Image Quality] repeatedly to select the
document type.
7
■
Density
You can adjust the density to the most appropriate level for the
document either automatically or manually.
Adjusting Automatically
Image Quality
Remote UI
System Manager
Settings
Before pressing [Start] to begin copying, you can adjust the
settings to better suit the document to be scanned. These
settings return to the default values if the Auto Clear function is
activated or if you press [Stop/Reset].
■
6
Next
Scan Settings
4
Network
Previous
<TEXT/PHOTO>: For documents that contain text and photos.
<TEXT/PHOTO+>: For documents that contain fine text and photos.
<TEXT>: For text documents.
<PHOTO>: For documents that contain fine text or photos.
1.
Press [COPY].
2.
Press [Density] repeatedly to select <AUTO
DENSITY>, then press [OK].
The image quality is automatically set to <TEXT>.
8
Maintenance
9
Copy density automatically changes to the manual mode when
<TEXT/PHOTO>, <PHOTO> or <TEXT/PHOTO+> is set.
Troubleshooting
10
Appendix
11
Table of Contents
Index
3-4
TOP
Back
Before Using the
Machine
1
Adjusting Manually
■
Previous
Next
Zoom Ratio
Document and Paper
2
1.
Press [COPY].
3
2.
Press [Density] repeatedly to select the manual
mode.
4
3.
Press [
] or [
] to adjust the copy density,
then press [OK].
Copying
Sending and
Receiving
Printing and
Scanning
5
Ex.
DENSITY
-LT
Network
6
Remote UI
Preset Zoom
[
[
DK+
]: to make dark documents lighter
]: to make light documents darker
7
System Manager
Settings
8
Maintenance
9
Troubleshooting
– To cancel all settings, press [Stop/Reset].
– When you switch the mode by pressing the mode keys such as
[SEND/FAX], all settings will be also canceled. If you want to keep
the settings, set the density as following;
[Additional Functions] → <COPY SETTINGS> → <STANDARD
SETTINGS> → <DENSITY> → <MANUAL>
(See “Setting Menu,” on p. 11-6.)
You can enlarge or reduce documents from one standard paper size
to another.
1.
Press [COPY].
2.
Press [Enlarge/Reduce].
3.
Press [
] or [
press [OK].
–
–
–
–
–
–
] to select the copy ratio, then
200% MAX.
129% STMT → LTR
100%
78% LGL → LTR
64%
50% MIN.
When <PAPER SIZE GROUP> in the <COPY SETTINGS> menu is set to
<A> or <AB>, the preset copy ratios change as follows:
A: 50%, 70%, 100%, 141%, 200%
AB: 50%, 70%, 81%, 86%, 100%, 115%, 122%, 141%, 200%
10
Appendix
11
Table of Contents
Index
3-5
TOP
Back
Before Using the
Machine
1
Previous
Next
Zoom Designation
Document and Paper
2
You can reduce or enlarge images by any copy ratio, in 1%
increments. The available copy ratios are from 50% to 200%.
3
1.
Press [COPY].
2.
Press [Enlarge/Reduce] twice.
3.
Enter the copy ratio with the numeric keys, then
press [OK].
Copying
Sending and
Receiving
4
Printing and
Scanning
5
Network
You can use [
] or [
] to adjust the zoom ratio. To increase the
zoom ratio, press [
]. To decrease the zoom ratio, press [
].
6
Remote UI
7
System Manager
Settings
To return the copy ratio to 100%, press [Enlarge/Reduce] repeatedly
to display <100%>, then press [OK].
8
Maintenance
9
Troubleshooting
10
Appendix
11
Table of Contents
Index
3-6
TOP
Back
Before Using the
Machine
1
Document and Paper
Previous
Next
Advanced Copy Features
2
Copying
3
Sending and
Receiving
4
Printing and
Scanning
5
Network
6
■
Collate Copy
You can copy documents collated into sets arranged in page order.
This feature can be used together with both “Two-Sided Copying”
(see p. 3-9) and “2 on 1 Combination” (see p. 3-8).
1.
5.
When the documents are loaded in the ADF, collate copying starts
and no further operation is required.
6.
Set documents.
Press [COPY].
Place the next page of the document on the
platen glass, then press [Start].
Repeat this step to scan all pages.
Place the first page on the platen glass if you are not using the ADF.
2.
Press [Start].
7.
Press [OK].
The machine prints the remaining sets of copies.
Remote UI
7
System Manager
Settings
8
If <COLLATE> is set to <ON> in <STANDARD SETTINGS> in <COPY
SETTINGS>, skip steps 3.
3.
Maintenance
If you want to use <COLLATE> with “2 on 1 Combination” (see p. 3-8)
at the same time, select <COLLATE+2 ON 1>, then press [OK].
If you want to use with “Two-Sided Copying” at the same time, go to
step 3 on p. 3-9.
9
Troubleshooting
10
Appendix
Press [Collate/2 on 1] repeatedly to select
<COLLATE>, then press [OK].
4.
– To cancel all settings, press [Stop/Reset].
– When you switch the mode by pressing the mode keys such as
[SEND/FAX], all settings will be also canceled. If you want to keep
the settings as the default, see “Setting Menu,” on p. 11-6.
– When scanning multiple page documents, <MEMORY FULL> may
appear in the LCD and scanning may be canceled. If this happens,
press [OK] to return to standby mode, and print, send, or delete
any documents stored in memory.
Use the numeric keys to enter the desired copy
quantity (1 to 99).
11
Table of Contents
Index
3-7
TOP
Back
Before Using the
Machine
1
Document and Paper
2
Copying
■
2 on 1 Combination
2 on 1 combination automatically reduces two documents to fit on
the selected paper size. This feature can be used together with both
“Collate Copy” (see p. 3-7) and “Two-Sided Copying” (see p. 3-9).
4
Printing and
Scanning
Network
6
System Manager
Settings
7
1.
8
2.
Press [COPY].
3.
Press [Collate/2 on 1] repeatedly to select <2 ON
1>, then press [OK].
Maintenance
9
Troubleshooting
10
4.
Use the numeric keys to enter the desired copy
quantity (1 to 99).
5.
Press [Start].
– If you press [OK] without scanning the second document, only
the first document will be printed on the left side of the paper.
– A maximum of 1/8" (4 mm) margin will be produced between the
two reduced documents in 2 on 1 combination copying.
– To cancel all settings, press [Stop/Reset].
– When you switch the mode by pressing the mode keys such as
[SEND/FAX], all settings will be also canceled. If you want to keep
the settings as the default, see “Setting Menu,” on p. 11-6.
5
Remote UI
Next
When you set the document on the platen glass, press [Start] for
each document. When scanning is complete, press [OK].
3
Sending and
Receiving
Previous
Set documents.
Place the first page on the platen glass if you are not using the ADF.
If you want to use <2 ON 1> with “Collate Copy” (see p. 3-7) at the
same time, select <COLLATE+2 ON 1>, then press [OK].
If you want to use with “Two-Sided Copying” at the same time, go to
step 3 on p. 3-9.
Appendix
11
Table of Contents
Index
3-8
TOP
Back
Before Using the
Machine
1
Document and Paper
2
Copying
3
Sending and
Receiving
■
Previous
Next
Two-Sided Copying
Two-sided copying enables you to make two-sided copies from
one-sided documents. This feature can be used together with both
“Collate Copy” (see p. 3-7) and “2 on 1 Combination” (see p. 3-8).
Paper used to make two-sided copies must conform to the following
specifications:
– Paper size: LTR and A4
– Paper weight: 17 to 21 lb (64 to 80 g/m2)
1.
Set documents.
Place the first page on the platen glass if you are not using the ADF.
Printing and
Scanning
4
2.
Press [COPY].
5
3.
Press [2-Sided] repeatedly to select
<1 > 2-SIDED>, then press [OK].
6
4.
Press [
] or [
] to select <BOOK TYPE> or
<CALENDAR TYPE>, then press [OK].
Network
Remote UI
7
System Manager
Settings
8
<BOOK TYPE>: The front and back sides of the copy will have the
same top-bottom orientation.
<CALENDAR TYPE>: The front and back sides of the copy will have
opposite top-bottom orientations.
Maintenance
9
Troubleshooting
10
For the landscape oriented documents, the front and back sides
of the copy will have the opposite top-bottom orientation when
<BOOK TYPE> is selected.
When <CALENDAR TYPE> is selected, the front and back sides of the
copy will have the same top-bottom orientation.
Appendix
11
Table of Contents
Index
3-9
TOP
Back
Before Using the
Machine
1
Document and Paper
2
Copying
3
5.
6.
Use the numeric keys to enter the desired copy
quantity (1 to 99).
■
Previous
Next
Reserved Copy
Press [Start].
You can make copy settings and scan documents even if the
machine is currently printing. The scanned documents are
processed after the current job is complete.
When you set the document on the platen glass, press [Start] for
each document. When scanning is complete, press [OK].
1.
Set documents.
Place the first page on the platen glass if you are not using the ADF.
Sending and
Receiving
4
Printing and
Scanning
5
Network
6
Remote UI
– To cancel all settings, press [Stop/Reset].
– When you switch the mode by pressing the mode keys such as
[SEND/FAX], all settings will be also canceled. If you want to keep
the settings as the default, see “Setting Menu,” on p. 11-6.
– Instead of performing step 4, you can just press [OK]. In this case,
the machine makes <BOOK TYPE> copies.
2.
Press [COPY].
3.
Set the desired copy mode and quantity (1 to
99), then press [Start].
You can reserve up to 5 copy jobs, with different settings for each
job.
When you set the document on the platen glass, press [Start] for
each document.
7
System Manager
Settings
8
Maintenance
9
Troubleshooting
10
Appendix
11
Table of Contents
Index
3-10
TOP
Back
Before Using the
Machine
1
Document and Paper
2
Copying
3
Sending and
Receiving
4
Printing and
Scanning
5
Network
6
Remote UI
7
System Manager
Settings
Previous
Next
Printing a Sample Page
This machine provides you to print a sample page. You can use
this function to test how the printouts will look with current
settings.
– The paper size must be LTR or A4.
– The paper type must be Plain Paper (17 to 21 lb (64 to 80 g/m2)).
– If the paper setting is not appropriate or the paper is not loaded
correctly, printing does not start without any error massages.
– You cannot cancel printing a sample page once printing has started.
– You cannot use this function while making copies, scanning documents,
or printing reports or lists.
1.
Press [COPY].
2.
Press and hold [OK].
The sample page will be printed on the both sides of the paper.
8
Maintenance
9
Troubleshooting
10
Appendix
11
Table of Contents
Index
3-11
TOP
Back
Before Using the
Machine
1
Document and Paper
2
Copying
3
Sending and
Receiving
4
Previous
Next
Canceling Copy Jobs
Cancel an ongoing job as follows.
1.
Press [Stop/Reset].
2.
When the <STOP KEY PRESSED> message
appears, press [OK].
● When scanning using the ADF:
Printing and
Scanning
5
Network
6
Remote UI
7
System Manager
Settings
8
Maintenance
9
Troubleshooting
STOP KEY
PRESS OK
PRESSED
KEY
● When scanning using the platen glass:
STOP
KEY
PRESSED
When the <CANCEL?> message appears, press
] to select <YES>.
[
CANCEL?
< YES
NO
>
10
Appendix
11
Table of Contents
Index
3-12
TOP
Back
Before Using the
Machine
1
Document and Paper
2
Copying
Previous
Next
Checking and Deleting Jobs
System monitor enables you to monitor the status of the copy
jobs currently being processed.
3
■
Sending and
Receiving
4
Printing and
Scanning
5
Network
1.
Press [System Monitor] repeatedly to select
<COPY STATUS>, then press [OK].
2.
Press [
] or [
] to scroll through the job list,
and check the status of the copy jobs.
6
If you want to delete the job, go to step 3. Otherwise, press [Stop/
Reset] to return to the standby mode.
Remote UI
System Manager
Settings
Checking and Deleting Copy Jobs
7
3.
Press [
] or [
] to select the desired job,
then press [OK].
8
4.
Press [
] or [
press [OK].
9
5.
Maintenance
Troubleshooting
10
Appendix
Press [
] to select <CANCEL>, then
] to select <YES>.
If you do not want to cancel the job, press [
6.
] to select <NO>.
Press [Stop/Reset] to return to the standby
mode.
11
Table of Contents
Index
3-13
TOP
Back
Before Using the
Machine
1
Document and Paper
2
Copying
3
Sending and
Receiving
4
Printing and
Scanning
5
Network
6
Remote UI
7
System Manager
Settings
8
Previous
Next
4 Sending and Receiving
Basic Sending Method .....................................................................................4-5
Scan Settings ....................................................................................................4-6
Image Quality (Fax)......................................................................4-6
Density .............................................................................................4-6
Send Settings (E-Mail/File Server) ..........................................4-7
Storing/Editing Address Book .........................................................................4-9
Storing/Editing One-Touch Keys/Coded Dial Codes .... 4-10
Storing/Editing Group Addresses ....................................... 4-15
Maintenance
9
Troubleshooting
10
Appendix
11
Table of Contents
Index
4-1
TOP
Back
Before Using the
Machine
1
Document and Paper
2
Copying
3
Sending and
Receiving
4
Printing and
Scanning
5
Network
6
Remote UI
7
System Manager
Settings
Previous
Next
Specifying Destinations .................................................................................4-20
Using One-Touch Keys ............................................................ 4-20
Using Coded Dial Codes ......................................................... 4-21
Using Group Addresses .......................................................... 4-22
Using Address Book Key ......................................................... 4-23
Manual Sending (Fax) ....................................................................................4-25
Advanced Sending Features ..........................................................................4-26
Broadcasting ............................................................................... 4-26
Job Recall ..................................................................................... 4-27
PC Faxing.........................................................................................................4-28
8
Maintenance
9
Troubleshooting
10
Appendix
11
Table of Contents
Index
4-2
TOP
Back
Before Using the
Machine
1
Document and Paper
2
Copying
3
Sending and
Receiving
4
Printing and
Scanning
5
Network
6
Remote UI
7
System Manager
Settings
8
Previous
Next
Customizing Sending Features .....................................................................4-29
Setting Number of Retry Attempts (E-Mail/
File Server) ................................................................................... 4-29
Setting Automatic Redialing (Fax) ...................................... 4-29
Setting Detail Information (E-Mail/File Server/
USB Memory) .............................................................................. 4-30
Fax Dialing Features .......................................................................................4-32
Switching Temporarily to Tone Dialing ............................. 4-32
Checking Dialing Line ............................................................. 4-33
Dialing an Overseas Number (With Pauses) .................... 4-33
Basic Receiving Method .................................................................................4-35
Maintenance
9
Troubleshooting
10
Appendix
11
Table of Contents
Index
4-3
TOP
Back
Before Using the
Machine
1
Document and Paper
2
Copying
3
Sending and
Receiving
4
Printing and
Scanning
5
Network
6
Remote UI
7
System Manager
Settings
8
Maintenance
9
Troubleshooting
10
Appendix
11
Previous
Next
Receiving Features .........................................................................................4-36
FaxTel: Optional Settings ........................................................ 4-36
DRPD: Optional Settings ........................................................ 4-37
Manual Reception ..................................................................... 4-37
Memory Reception ................................................................... 4-38
Memory Lock Reception ........................................................ 4-38
Forwarding Received Documents ...................................... 4-41
Remote Reception .................................................................... 4-42
Printing Received Documents .............................................. 4-44
Canceling TX/RX Jobs .....................................................................................4-46
Checking and Deleting Jobs ..........................................................................4-47
Checking Transmission/Reception Results ...................... 4-47
Checking the Arrival of I-Fax ................................................. 4-47
Checking and Deleting Sending/Receiving
Documents Stored in Memory ............................................. 4-48
Table of Contents
Index
4-4
TOP
Back
Before Using the
Machine
1
Document and Paper
2
Copying
3
Sending and
Receiving
4
Printing and
Scanning
6
Remote UI
7
System Manager
Settings
8
Next
Basic Sending Method
Follow this procedure to send faxes and e-mails, or to send
documents to a file server.
For network connection, see “Set the Machine for Network
Usage,” in the Starter Guide.
1.
2.
3.
Specify the fax number or e-mail address with
the numeric keys.
You can also specify the fax number or e-mail addresses with onetouch keys, coded dial codes, or [Address Book] key. (See “Specifying
Destinations,” on p. 4-20.)
Set documents.
Place the first page on the platen glass if you are not using the ADF.
If you want to send multipage documents as E-mail (Color), scan the
documents by the ADF. You can only send one page by the platen
glass.
5
Network
Previous
4.
Press [Start].
When you set the documents on the platen glass, press [
] or [
to select the document size, then press [Start] for each document.
When scanning is complete, press [OK] to start dialing.
]
Press [SEND/FAX] repeatedly to select the
sending method, then press [OK].
If you want to send document to a file server, you can specify the
file server addresses only with one-touch keys, coded dial codes, or
[Address Book] key. (See “Specifying Destinations,” on p. 4-20.) You
cannot specify a file server addresses with the numeric keys. Skip to
step 4.
Maintenance
9
Troubleshooting
10
Appendix
11
Table of Contents
Index
4-5
TOP
Back
Before Using the
Machine
1
Document and Paper
2
Copying
3
Sending and
Receiving
4
Printing and
Scanning
5
Remote UI
7
System Manager
Settings
8
Maintenance
9
Troubleshooting
10
Appendix
11
Next
Scan Settings
You can adjust the image quality (Fax) and density of the
document you send. The higher image quality you set, the
better the output will be, but the longer the transmission will
take.
When you send e-mail or send documents to a file server, you
can optionally set the file format, if multiple images are sent
as separate files or a single file, resolution, and original type
according to the type of document you are sending. (See “Send
Settings (E-Mail/File Server),” on p. 4-7.)
Network
6
Previous
■
Density
1.
Press [SEND/FAX] repeatedly to select the
sending method, then press [OK].
2.
Press [Density].
3.
Press [
] or [
press [OK].
] to adjust the density, then
Ex.
■
Image Quality (Fax)
1.
Press [SEND/FAX] to select <FAX>, then press
[OK].
2.
Press [Image Quality] repeatedly to select the
resolution, then press [OK].
<FINE>: for fine-print documents (the resolution is twice that of
<STANDARD>). (200 x 200 dpi)
<PHOTO>: for documents that contain photographs (the resolution
is twice that of <STANDARD>). (200 x 200 dpi)
<SUPER FINE>: for documents that contain fine print and images
(the resolution is four times that of <STANDARD>). (200 x 400 dpi)
<ULTRA FINE> for documents that contain fine print and images (the
resolution is eight times that of <STANDARD>). (400 x 400 dpi)
<STANDARD>: for most text-only documents. (200 x 100 dpi)
DENSITY
-LT
[
[
DK+
]: to make dark documents lighter.
]: to make light documents darker.
These settings return to the default values after all documents
are scanned. If you want to keep the settings, set the density as
following;
[Additional Functions] → <TX/RX SETTINGS> → <TX/RX COMMON
SET.> → <TX SETTINGS> → <SCANNING DENSITY>
(See “Setting Menu,” on p. 11-6.)
Table of Contents
Index
4-6
TOP
Back
Before Using the
Machine
1
Document and Paper
■
Send Settings (E-Mail/File Server)
2
You can optionally set the file format, if multiple images are sent
as separate files or a single file, resolution, and original type after
specifying the e-mail or file server address.
3
1.
Copying
3.
Set documents.
4
Printing and
Scanning
When you scan documents for E-mail (Color) using the platen
glass, you can only send one page for each job. If you want to send
multipage documents as E-mail (Color), scan the documents by the
ADF.
5
Network
6
Remote UI
7
System Manager
Settings
8
Maintenance
2.
Specify the destination.
You can specify the file server addresses only with one-touch keys,
coded dial codes, or [Address Book].
4.
Press [OK] repeatedly until <FILE FORMAT> is
displayed.
5.
Press [
] or [
press [OK].
] to select the file format, then
E-mail (B&W): <PDF>, <TIFF (B&W)>
E-mail (Color): <JPEG>, <PDF (COMPACT)>
File server (B&W): <PDF>, <TIFF (B&W)>
File server (Color): <JPEG>, <PDF (COMPACT)>
Press [SEND/FAX] repeatedly to select the
sending method, then press [OK].
To send documents to a file server, select any sending method.
6.
If you want to send color images to a file server or attached to an email message, select <E-MAIL: COLOR> as a sending method.
Next
For instructions on specifying destinations, see “Specifying
Destinations,” on p. 4-20.
Place the first page on the platen glass if you are not using the ADF.
Sending and
Receiving
Previous
Press [
] or [
] to select <ON> or <OFF> for
<DIVIDE INTO PAGES>, then press [OK].
<OFF>: Sends multiple images as a single file without dividing them.
<ON>: Separates multiple images and sends them as separate files.
9
Troubleshooting
10
If you have selected <JPEG> in step 5, this setting is not available.
<DIVIDE INTO PAGES> is automatically set to <ON> when sending
documents in JPEG format.
Appendix
11
Table of Contents
Index
4-7
TOP
Back
Before Using the
Machine
1
Document and Paper
7.
2
3
4
Printing and
Scanning
5
If <PDF (COMPACT)> is selected as the file format, only
<300X300dpi> can be selected for sending color images attached to
an e-mail message.
Network
6
Remote UI
7
System Manager
Settings
8
] to select the resolution, then
E-mail (B&W): <200X200dpi>, <300X300dpi>, <400X400dpi>,
<600X600dpi>, <150X150dpi>, <200X100dpi>
E-mail (Color): <200X200dpi>, <300X300dpi>, <100X100dpi>,
<150X150dpi>
File server (B&W): <200X200dpi>, <300X300dpi>, <400X400dpi>,
<600X600dpi>, <150X150dpi>,<200X100dpi>
File server (Color): <200X200dpi>, <300X300dpi>, <100X100dpi>,
<150X150dpi>
Copying
Sending and
Receiving
Press [
] or [
press [OK].
8.
9.
Previous
Next
Press [Start].
When you set the documents on the platen glass, press [
] or [
to select the document size, then press [Start] for each document.
When scanning is complete, press [OK] to start sending.
]
– When <TIME OUT> is set to <ON> in <TX SETTINGS> in <FAX
SETTINGS> in <TX/RX SETTINGS>, and if you have specified the
destination by any other method than using numeric keys, the
machine starts scanning automatically without pressing [Start],
after the preset time for this setting is elapsed.
– You can set the document’s name, a subject line, message body
text, and reply-to address, and e-mail priority common to all
sending jobs. For instructions, see “Setting Detail Information
(E-Mail/File Server/USB Memory),” on p. 4-30.
Press [
] or [
] to select the original type,
then press [OK].
<TEXT/PHOTO>: For documents that contain text and photos.
<TEXT>: For text documents.
<PHOTO>: For documents that contain fine text or photos.
Maintenance
9
Troubleshooting
If you have selected <PDF (COMPACT)> as the file format in step 5,
the original type is automatically set to <TEXT/PHOTO>. Skip to step
9.
10
Appendix
11
Table of Contents
Index
4-8
TOP
Back
Before Using the
Machine
1
Document and Paper
2
Copying
3
Sending and
Receiving
4
This machine provides you with various ways to specify the
destination besides using the numeric keys. You can register
fax numbers, e-mail addresses and file server addressed to the
Address Book. Once you have registered destinations using
these functions, you can specify the destinations by simply
pressing one or a combination of keys:
5
You can specify destinations by pressing one-touch keys. You can
register up to 8 one-touch keys, including group addresses.
6
● Using Coded Dial Codes (p. 4-21)
Network
Remote UI
7
System Manager
Settings
Next
Storing/Editing Address Book
● Using One-touch Keys (p. 4-20)
Printing and
Scanning
Previous
You can specify destinations by pressing [Coded Dial] followed
by three-digit code. You can register up to 192 coded dial codes,
including group addresses.
● Using Address Book key (p. 4-23)
You can specify destinations by pressing [Address Book] and
searching a destination from Address Book.
– If <ADD. BOOK PASSWORD> is set in <SYSTEM SETTINGS>, you must
enter your password to enter <ADDRESS BOOK SET.> menu. Enter the
password with the numeric keys, then press [OK].
– To send documents to a file server, the file server addresses must be
registered in one-touch keys or coded dial codes.
– Destinations stored in the Address Book can be exported to your
computer as a file, which can be imported into the machine. For
information on exporting the Address Book, see Chapter 7, “Remote UI.”
– For easy reference, print out the list of recipients registered in one-touch
keys or coded dial codes. (See “REPORT SETTINGS,” on p. 11-32.)
● Using Group Addresses (p. 4-22)
8
Maintenance
9
You can specify groups of destinations registered in one-touch keys
and coded dial codes. You can register up to 199 destinations in a
group.
Troubleshooting
10
Appendix
11
Table of Contents
Index
4-9
TOP
Back
Before Using the
Machine
1
■
Document and Paper
2
Storing/Editing One-Touch Keys/Coded
Dial Codes
Registering Fax Numbers
Copying
3
Sending and
Receiving
Printing and
Scanning
1.
Press [Additional Functions].
4
2.
Press [
] or [
] to select <ADDRESS BOOK
SET.>, then press [OK].
5
3.
Press [
] or [
] to select <1-TOUCH SPD
DIAL> or <CODED SPD DIAL>, then press [OK].
4.
Press [
] or [
] to select a one-touch key (01
to 08) or coded dial code (000 to 191) for which
you want to register the fax number, then press
[OK].
Network
6
Remote UI
7
System Manager
Settings
8
You can also select a one-touch key or coded dial code by pressing
the corresponding one-touch key, or [Coded Dial] followed by the
desired three-digit code.
Maintenance
9
Troubleshooting
5.
Press [
[OK].
] or [
] to select <FAX>, then press
Next
Previous
6.
Press [
] or [
] to select <TEL NUMBER
ENTRY>, then press [OK].
7.
Enter the fax number you register (max. 120
digits, including spaces and pauses) with the
numeric keys, then press [OK].
Ex.
TEL NUMBER
012XXXXXXX
ENTRY
8.
Press [
[OK].
9.
Enter the destination name (max. 16 letters,
including spaces) with the numeric keys, then
press [OK].
] or [
] to select <NAME>, then press
If you want to specify the following optional settings (<LONG
DISTANCE>, <TX SPEED>, and <ECM>) for the fax number you are
registering, proceed to the next step.
If you do not need to set these options, skip to step 18.
Ex.
NAME
Can
:a
10
Appendix
11
Table of Contents
Index
4-10
TOP
Back
Before Using the
Machine
1
Document and Paper
2
Copying
3
Sending and
Receiving
4
Printing and
Scanning
5
Network
6
Remote UI
7
System Manager
Settings
8
Maintenance
10. Press [
] or [
] to select <OPTIONAL
SETTING>, then press [OK].
11. Press [
] or [
] to select <ON>, then press
16. Press [
] or [
] to select <ON> to reduce
system and line errors while sending to or
receiving from other machines that support
ECM, then press [OK].
] or [
] to select <LONG DISTANCE>,
then press [OK].
<DOMESTIC>: Normally select this option.
<LONG DISTANCE 1-3>: Select one of these options when you make
an international call. If errors occur during fax transmissions, try the
setting from <LONG DISTANCE 1> through <LONG DISTANCE 3>.
14. Press [
] or [
press [OK].
] to select <TX SPEED>, then
15. Press [
] or [
] to select the sending speed
(33600 bps, 14400 bps, 9600 bps, or 4800 bps),
then press [OK].
9
] to select <ECM>, then press
17. Press [
12. Press [
] or [
] to select the most effective
transmission option, then press [OK].
Next
[OK].
[OK].
13. Press [
] or [
Previous
To register another one-touch key or coded dial code, repeat the
procedure from step 4.
18. Press [Stop/Reset] to return to the standby
mode.
Registering E-Mail Addresses
1.
Press [Additional Functions].
2.
Press [
] or [
] to select <ADDRESS BOOK
SET.>, then press [OK].
3.
Press [
] or [
] to select <1-TOUCH SPD
DIAL> or <CODED SPD DIAL>, then press [OK].
Troubleshooting
10
If transmission errors occur frequently, lower the speed.
Appendix
11
Table of Contents
Index
4-11
TOP
Back
Before Using the
Machine
1
Document and Paper
4.
2
Copying
Printing and
Scanning
4
5.
5
6.
Press [
] or [
] to select <E-MAIL ADDRESS>,
then press [OK].
6
7.
Enter the address you register (max. 120 digits)
with the numeric keys, then press [OK].
Network
Remote UI
7
System Manager
Settings
Press [
] or [
press [OK].
] to select <E-MAIL>, then
Ex.
E-MAIL ADDRESS
[email protected]_
m
Maintenance
Troubleshooting
10
8.
Press [
[OK].
] or [
Enter the destination name (max. 16 letters,
including spaces) with the numeric keys, then
press [OK].
Ex.
NAME
Can
:a
10. Press [Stop/Reset] to return to the standby
mode.
To register another one-touch key or coded dial code, repeat the
procedure from step 4.
8
9
9.
You can also select a one-touch key or coded dial code by pressing
the corresponding one-touch key, or [Coded Dial] followed by the
desired three-digit code.
3
Sending and
Receiving
Press [
] or [
] to select a one-touch key (01
to 08) or coded dial code (000 to 191) for which
you want to register the address, then press
[OK].
Next
Previous
:a
Registering File Server Addresses
1.
Press [Additional Functions].
2.
Press [
] or [
] to select <ADDRESS BOOK
SET.>, then press [OK].
3.
Press [
] or [
] to select <1-TOUCH SPD
DIAL> or <CODED SPD DIAL>, then press [OK].
] to select <NAME>, then press
Appendix
11
Table of Contents
Index
4-12
TOP
Back
Before Using the
Machine
1
Document and Paper
4.
2
Copying
You can also select a one-touch key or coded dial code by pressing
the corresponding one-touch key, or [Coded Dial] followed by the
desired three-digit code.
3
Sending and
Receiving
Printing and
Scanning
4
5.
Press [
[OK].
5
6.
Press [
] or [
] to select <HOST NAME>,
then press [OK].
Network
6
7.
Remote UI
7
System Manager
Settings
Press [
] or [
] to select a one-touch key (01
to 08) or coded dial code (000 to 191) for which
you want to register the address, then press
[OK].
] or [
] to select <SMB>, then press
Use the numeric keys to enter the name of the
file server on the network (up to 120 characters),
then press [OK].
HOST NAME
canon01
:1
Maintenance
9
8.
Press [
[OK].
10
9.
Use the numeric keys to enter the destination’s
name (up to 16 characters), then press [OK].
Troubleshooting
Appendix
] or [
press [OK].
Next
] to select <FILE PATH>, then
11. Use the numeric keys to specify the folder to
which the job is to be sent (up to 120characters),
then press [OK].
12. Press [
] or [
] to select <LOGIN NAME>,
then press [OK].
13. Use the numeric keys to enter the login name,
then press [OK].
You can enter up to 24 characters for the login name.
14. Press [
] or [
press [OK].
] to select <PASSWORD>, then
15. Use the numeric keys to enter the password,
Ex.
8
10. Press [
Previous
] or [
] to select <NAME>, then press
then press [OK].
You can enter up to 14 characters.
To register another one-touch key or coded dial code, repeat the
procedure from step 4.
16. Press [Stop/Reset] to return to the standby
mode.
11
Table of Contents
Index
4-13
TOP
Back
Before Using the
Machine
1
Editing One-Touch Keys/Coded Dial Codes
Document and Paper
Printing and
Scanning
7.
Enter a new number or character with the
numeric keys, then press [OK].
1.
Press [Additional Functions].
8.
3
2.
Press [
] or [
] to select <ADDRESS BOOK
SET.>, then press [OK].
Press [
[OK].
9.
4
3.
Press [
] repeatedly to go back to the
character you want to change, then press
[Clear].
5
4.
Network
6
7
5.
8
Troubleshooting
10
Appendix
Press [
] or [
] to select the one-touch key
(01 to 08) or coded dial code (000 to 191) you
want to edit, then press [OK].
Press [
] or [
] to select <TEL NUMBER
ENTRY> or <E-MAIL ADDRESS>, then press [OK].
] or [
] to select <NAME>, then press
To delete the entire entry, press and hold [Clear].
10. Enter a new character with the numeric keys,
then press [OK].
If you are editing a one-touch key or coded dial code under which a
fax number is registered, you can also change the optional settings.
For instructions, see “Registering Fax Numbers,” on p. 4-10.
11. Press [Stop/Reset] to return to the standby
mode.
You can edit <HOST NAME>, <NAME>, <FILE PATH>, <LOGIN NAME>,
and <PASSWORD> when you edit file server addresses.
Maintenance
9
Press [
] or [
] to select <1-TOUCH SPD
DIAL> or <CODED SPD DIAL>, then press [OK].
You can also select a one-touch key or coded dial code by pressing
the corresponding one-touch key, or [Coded Dial] followed threedigit code.
Remote UI
System Manager
Settings
Next
2
Copying
Sending and
Receiving
Previous
6.
Go back to the wrong digit with [
] when you
] repeatedly to
edit a fax number. Or press [
go back to a wrong number or character, then
press [Clear] when you edit an e-mail address.
To delete the entire entry, press and hold [Clear].
11
Table of Contents
Index
4-14
TOP
Back
Before Using the
Machine
1
Deleting One-Touch Keys/Coded Dial Codes
Document and Paper
2
1.
Press [Additional Functions].
3
2.
Press [
] or [
] to select <ADDRESS BOOK
SET.>, then press [OK].
4
3.
Press [
] or [
] to select <1-TOUCH SPD
DIAL> or <CODED SPD DIAL>, then press [OK].
5
4.
Press [
] or [
] to select the one-touch key
(01 to 08) or coded dial code (000 to 191) you
want to delete, then press [OK].
Copying
Sending and
Receiving
Printing and
Scanning
Network
6
You can also select a one-touch key or coded dial code by pressing
the corresponding one-touch key, or [Coded Dial] followed by the
desired three-digit code.
Remote UI
7
System Manager
Settings
8
Maintenance
9
Troubleshooting
5.
Press [
] or [
] to select <TEL NUMBER
ENTRY>, <E-MAIL ADDRESS> or <HOST NAME>,
then press [OK].
6.
Previous
Next
Press and hold [Clear] to delete the entire entry,
then press [OK].
If you delete the fax number, e-mail address or file server address,
the registered name is cleared automatically.
7.
■
Press [Stop/Reset] to return to the standby
mode.
Storing/Editing Group Addresses
The destinations must be registered in one-touch keys, or coded dial codes
beforehand.
Registering Group Addresses
1.
Press [Additional Functions].
2.
Press [
] or [
] to select <ADDRESS BOOK
SET.>, then press [OK].
10
Appendix
11
Table of Contents
Index
4-15
TOP
Back
Before Using the
Machine
1
3.
Press [
] or [
] to select <GROUP DIAL>,
then press [OK].
7.
Press [
[OK].
4.
8.
3
Press [
] or [
] to select an empty one-touch
key or coded dial code that you want to set as
the group address, then press [OK].
Enter the group name (max. 16 letters, including
spaces) with the numeric keys, then press [OK].
4
You can also select a one-touch key or coded dial code by pressing
the corresponding one-touch key, or [Coded Dial] followed by the
desired three-digit code.
Document and Paper
2
Copying
Sending and
Receiving
Printing and
Scanning
5
Network
6
Remote UI
7
System Manager
Settings
Next
Previous
8
5.
6.
Press [
] or [
] to select <SELECT ADD/TEL
NO>, then press [OK].
Select the destinations you want to register
in the group (max. 199 destinations) until all
destinations are registered, then press [OK].
To enter a destination stored under a one-touch key, press the
desired one-touch key.
To enter a destination stored under a coded dial code, press [Coded
Dial], then enter the three-digit code with the numeric keys. For
multiple entries, press [Coded Dial] between each entry.
Maintenance
9
Troubleshooting
] or [
] to select <NAME>, then press
To register another group, repeat the procedure from step 4.
Ex.
NAME
Canon
9.
:a
Group
Press [Stop/Reset] to return to the standby
mode.
Adding New Destination to Group
1.
Press [Additional Functions].
2.
Press [
] or [
] to select <ADDRESS BOOK
SET.>, then press [OK].
You can review the destinations which have been already entered
with [
] or [
].
10
Appendix
11
Table of Contents
Index
4-16
TOP
Back
Before Using the
Machine
1
Document and Paper
2
Copying
Printing and
Scanning
Press [
] or [
] to select <GROUP DIAL>,
then press [OK].
3.
Press [
] or [
] to select <GROUP DIAL>,
then press [OK].
4.
Press [
] or [
press [OK].
4.
Press [
] or [
press [OK].
] to select a group to edit, then
To select a group stored under the coded dial code, press [Coded
Dial], then enter the three-digit code using the numeric keys.
] to select a group to edit, then
To select a group stored under the coded dial code, press [Coded
Dial], then enter the three-digit code using the numeric keys.
4
5.
Press [
] or [
] to select <SELECT ADD/TEL
NO>, then press [OK].
5.
Press [
] or [
] to select <SELECT ADD/TEL
NO>, then press [OK].
5
6.
Select the destination you want to add to the
group, then press [OK].
6.
Press [
] or [
] to display the destination
you want to delete from the group, then press
[Clear].
Network
For details on specifying a destination from Address Book, see
“Registering Group Addresses,” on p. 4-15.
6
Remote UI
7
System Manager
Settings
Next
3.
3
Sending and
Receiving
Previous
8
Maintenance
9
Troubleshooting
10
7.
Press [Stop/Reset] to return to the standby
mode.
Deleting Destination from Group
1.
Press [Additional Functions].
2.
Press [
] or [
] to select <ADDRESS BOOK
SET.>, then press [OK].
Repeat this step if you want to delete another destination.
7.
Press [OK].
8.
Press [Stop/Reset] to return to the standby
mode.
Appendix
11
Table of Contents
Index
4-17
TOP
Back
Before Using the
Machine
1
Changing Group Name
Document and Paper
2
1.
Press [Additional Functions].
3
2.
Press [
] or [
] to select <ADDRESS BOOK
SET.>, then press [OK].
4
3.
5
4.
Copying
Sending and
Receiving
Printing and
Scanning
Network
Remote UI
7
System Manager
Settings
8
5.
6.
Maintenance
Next
Press [Stop/Reset] to return to the standby
mode.
Deleting Group Addresses
1.
Press [Additional Functions].
Press [
] or [
] to select <GROUP DIAL>,
then press [OK].
2.
Press [
] or [
] to select <ADDRESS BOOK
SET.>, then press [OK].
Press [
] or [
press [OK].
3.
Press [
] or [
] to select <GROUP DIAL>,
then press [OK].
4.
Press [
] or [
] to select a group to delete,
then press [OK].
] to select a group to edit, then
To select a group stored under the coded dial code, press [Coded
Dial], then enter the three-digit code using the numeric keys.
6
8.
Previous
Press [
[OK].
] or [
] to select <NAME>, then press
Press [
] repeatedly to go back to a wrong
character, then press [Clear].
To select a group stored under the coded dial code, press [Coded
Dial], then enter the three-digit code using the numeric keys.
5.
Press [
] or [
] to select <SELECT ADD/TEL
NO>, then press [OK].
To delete the entire name, press and hold [Clear].
9
Troubleshooting
7.
Enter a new character with the numeric keys,
then press [OK].
10
Appendix
11
Table of Contents
Index
4-18
TOP
Back
Before Using the
Machine
1
Document and Paper
6.
Previous
Next
Press [Clear] repeatedly until all destinations are
deleted, then press [OK].
2
Copying
When you delete all destinations, the registered name is cleared
automatically.
3
Sending and
Receiving
4
Printing and
Scanning
7.
Press [Stop/Reset] to return to the standby
mode.
5
Network
6
Remote UI
7
System Manager
Settings
8
Maintenance
9
Troubleshooting
10
Appendix
11
Table of Contents
Index
4-19
TOP
Back
Before Using the
Machine
1
Document and Paper
2
Copying
Printing and
Scanning
Follow the procedure below to send documents to registered
recipients.
4
To send documents to a file server, you can specify the file server addresses
only with one-touch keys, coded dial codes, or [Address Book].
5
■
Using One-Touch Keys
You can specify up to 8 destinations using one-touch keys.
Network
3.
7
System Manager
Settings
If you pressed a wrong key, press [Clear] and try again.
If you want to adjust the image quality and density, see “Scan
Settings,” on p. 4-6.
8
Troubleshooting
Set documents.
Place the first page on the platen glass if you are not using the ADF.
2.
9
Ex.
TEL=0123XXXXXX
[05]CANON USA
4.
Press [Start].
]
To use this feature, you must register destinations in one-touch keys
beforehand. (See “Storing/Editing Address Book,” on p. 4-9.)
1.
Maintenance
Press the desired one-touch key (01 to 08).
When you set the documents on the platen glass, press [
] or [
to select the document size, then press [Start] for each document.
When scanning is complete, press [OK] to start sending.
6
Remote UI
Next
Specifying Destinations
3
Sending and
Receiving
Previous
Press [SEND/FAX] repeatedly to select the
sending method, then press [OK].
When <TIME OUT> is set to <ON> in <TX SETTINGS> in <FAX
SETTINGS> in <TX/RX SETTINGS>, and if you have specified the
destination by any other method than using numeric keys, the
machine starts scanning automatically without pressing [Start], after
the preset time for this setting is elapsed.
To send documents to a file server, select any sending method.
10
Appendix
11
Table of Contents
Index
4-20
TOP
Back
Before Using the
Machine
1
Document and Paper
2
■
Using Coded Dial Codes
4.
You can specify up to 192 destinations using coded dial codes.
Sending and
Receiving
4
Printing and
Scanning
5
1.
7
System Manager
Settings
8
If you entered a wrong code, press [Clear], then try again from step 3.
If you want to adjust the image quality and density, see “Scan
Settings,” on p. 4-6.
Set documents.
Place the first page on the platen glass if you are not using the ADF.
2.
Press [SEND/FAX] repeatedly to select the
sending method, then press [OK].
To send documents to a file server, select any sending method.
Remote UI
Enter the desired three-digit code (000 to 191)
with the numeric keys.
TEL=0123XXXXXX
[*001]CANON
To use this feature, you must register destinations in coded dial code
beforehand. (See “Storing/Editing Address Book,” on p. 4-9.)
Network
6
Next
Ex.
Copying
3
Previous
3.
5.
Press [Start].
When you set the documents on the platen glass, press [
] or [
to select the document size, then press [Start] for each document.
When scanning is complete, press [OK] to start sending.
]
Press [Coded Dial].
When <TIME OUT> is set to <ON> in <TX SETTINGS> in <FAX
SETTINGS> in <TX/RX SETTINGS>, and if you have specified the
destination by any other method than using numeric keys, the
machine starts scanning automatically without pressing [Start], after
the preset time for this setting is elapsed.
Maintenance
9
Troubleshooting
10
Appendix
11
Table of Contents
Index
4-21
TOP
Back
Before Using the
Machine
1
■
Using Group Addresses
Document and Paper
3
Sending and
Receiving
4
Printing and
Scanning
5
Network
6
Remote UI
7
System Manager
Settings
Next
Press [Start].
When you set the documents on the platen glass, press [
] or [
to select the document size, then press [Start] for each document.
When scanning is complete, press [OK] to start sending.
2
Copying
4.
Previous
]
To use this feature, you must register destinations in a group address
beforehand. (See “Storing/Editing Address Book,” on p. 4-9.)
1.
Set documents.
Place the first page on the platen glass if you are not using the ADF.
2.
Press [SEND/FAX].
3.
Press the one-touch key or [Coded Dial] followed
by the three-digit code under which the desired
address group is registered.
When <TIME OUT> is set to <ON> in <TX SETTINGS> in <FAX
SETTINGS> in <TX/RX SETTINGS>, and if you have specified the
destination by any other method than using numeric keys, the
machine starts scanning automatically without pressing [Start], after
the preset time for this setting is elapsed.
If you pressed a wrong key or code, press [Clear], and perform step 3
again.
If you want to adjust the image quality and density, see “Scan
Settings,” on p. 4-6.
8
Maintenance
9
Troubleshooting
10
Appendix
11
Table of Contents
Index
4-22
TOP
Back
Before Using the
Machine
1
Document and Paper
2
Copying
3
Sending and
Receiving
4
Printing and
Scanning
Using Address Book Key
6
2.
Press [SEND/FAX].
3.
Press [Address Book] repeatedly to select
<NAME SEARCH> or <ADD/TEL SEARCH>, then
press [OK].
7
8
Maintenance
9
Enter the first letter of the recipient’s name or
the first part of the fax number/address with the
numeric keys.
For example, if you want to search for a name that starts with the
letter “C”, press [2] (ABC).
Entries starting with the letter you entered are displayed if any
entries are registered.
Press [ ] to switch between input modes:
[:A]: Letter mode
[:1]: Number mode
To use this feature, you must register destinations in Address Book
beforehand. (See “Storing/Editing Address Book,” on p. 4-9.)
5
Remote UI
4.
[Address Book] search enables you to search for a recipient
registered in the machine. This is useful when you forget which onetouch key or coded dial code the recipient you want is registered
under.
1.
Network
System Manager
Settings
■
Ex.
Set documents.
NAME SEARCH
CANON
Place the first page on the platen glass if you are not using the ADF.
If no recipient is registered in Address Book, <NOT REGISTERED> is
displayed.
<NAME SEARCH>: searches a destination by name
<ADD/TEL SEARCH>: searches a destination by address or fax
number
Next
Previous
:A
Ex.
ADD/TEL SEARCH
[email protected]
5.
Press [
[
[
] or [
:A
] to search for the recipient.
]: displays recipients in alphabetical order.
]: displays recipients in reverse order.
Troubleshooting
10
Appendix
11
Table of Contents
Index
4-23
TOP
Back
Before Using the
Machine
1
Document and Paper
6.
2
Copying
3
Sending and
Receiving
4
Printing and
Scanning
5
Network
6
Previous
Next
When the recipient’s name is displayed, press
[OK].
If you want to adjust the image quality and density, see “Scan
Settings,” on p. 4-6.
7.
Press [Start].
When you set the documents on the platen glass, press [
] or [
to select the document size, then press [Start] for each document.
When scanning is complete, press [OK] to start sending.
]
When <TIME OUT> is set to <ON> in <TX SETTINGS> in <FAX
SETTINGS> in <TX/RX SETTINGS>, and if you have specified the
destination by any other method than using numeric keys, the
machine starts scanning automatically without pressing [Start], after
the preset time for this setting is elapsed.
Remote UI
7
System Manager
Settings
8
Maintenance
9
Troubleshooting
10
Appendix
11
Table of Contents
Index
4-24
TOP
Back
Before Using the
Machine
1
Document and Paper
2
Copying
3
Sending and
Receiving
4
Printing and
Scanning
5
Use manual sending when you want to talk to the recipient
before sending a document, or if the recipient does not have a
fax machine that can receive automatically.
1.
Maintenance
9
Press [Hook] or pick up the handset of your
external telephone.
5.
Dial the recipient’s fax/telephone number.
Connect an external telephone to the machine if
you want to talk to the recipient before sending
a document.
Make sure to confirm the dial tone before entering a fax number. If
you enter the number before the dial tone can be heard, the call may
not connect, or the wrong number may be dialed.
6.
For details on how to connect an external telephone to the machine,
see “Set Up the Machine,” in the Starter Guide.
Remote UI
8
4.
– You cannot use the platen glass for manual sending.
– You cannot use group dialing for manual sending.
6
System Manager
Settings
Next
Manual Sending (Fax)
Network
7
Previous
2.
Load the document in the ADF.
3.
Press [SEND/FAX] repeatedly to select <FAX>,
then press [OK].
If you want to adjust the image quality and density, see “Scan
Settings,” on p. 4-6.
Talk through the handset to the recipient.
If you press [Hook] in step 4, you can pick up the handset when you
hear the recipient’s voice.
If you hear a high-pitched signal instead of the recipient’s voice, go
to step 8.
7.
Ask the recipient to set their fax machine to
receive faxes.
8.
When you hear a high-pitched signal, press
[Start], then hang up the handset.
Troubleshooting
10
Appendix
11
Table of Contents
Index
4-25
TOP
Back
Before Using the
Machine
1
Document and Paper
2
Copying
The machine provides the following additional fax modes:
broadcasting and job recall.
■
4
Printing and
Scanning
2.
Broadcasting
Broadcasting enables you to send the same document to multiple
recipients.
6
Remote UI
7
System Manager
Settings
8
Maintenance
9
Troubleshooting
10
– A maximum of 201 destinations can be specified at the same time. (Out
of the 201 destinations, a number or address can be specified with
the numeric keys.) If you specify a group, which is made up of several
destinations, each destination in the group is counted as a separate
address.
– If you frequently send documents to multiple destinations, it is
recommended that you store those destinations as a group.
– When <REST. MULTI DEST> is set to <PROHIBIT>, you cannot send the
documents to multiple recipients. (See “Restricting Broadcasting,” on
p. 8-20.)
– You cannot send color images to multiple recipients using broadcasting.
If you want to send color images to multiple recipients, send documents
one by one, or otherwise, send documents as black and white images.
(See “Send Settings (E-Mail/File Server),” on p. 4-7.)
1.
Set documents.
Press [SEND/FAX] repeatedly to select the
sending method, then press [OK].
If you are specifying destinations registered in Address Book, you can
skip this step.
3.
Specify the destination.
Use the numeric keys, one-touch keys, coded dial codes or [Address
Book] key to specify destinations.
5
Network
Next
Advanced Sending Features
3
Sending and
Receiving
Previous
Only one destination can be specified using the numeric keys.
4.
Repeat step 3 to enter all required recipients.
– If you want to enter a fax number or e-mail address using the
numeric keys in the middle of the procedure, press [SEND/FAX],
select the sending method, and then enter the number or
address.
– To check all the specified destinations, press [
] or [
] to
scroll the display.
– If e-mail addresses and file server addresses are included in the
destinations, you can enter the send settings by pressing [OK]
after specifying destinations. All the addresses without fax will
use the same send settings. For details, see “Send Settings (EMail/File Server),” on p. 4-7.
Place the first page on the platen glass if you are not using the ADF.
Appendix
11
Table of Contents
Index
4-26
TOP
Back
Before Using the
Machine
1
Document and Paper
5.
Press [Start].
When you set the documents on the platen glass, press [
] or [
to select the document size, then press [Start] for each document.
When scanning is complete, press [OK] to start sending.
2
Copying
3
Sending and
Receiving
When <TIME OUT> is set to <ON> in <TX SETTINGS> in <FAX
SETTINGS> in <TX/RX SETTINGS>, and if you have specified the
destination by any other method than using numeric keys, the
machine starts scanning automatically without pressing [Start], after
the preset time for this setting is elapsed.
4
Printing and
Scanning
5
■
Network
6
Remote UI
Job Recall
8
Maintenance
9
Next
2.
Press [SEND/FAX].
3.
Press [Recall/Pause].
4.
Press [
] or [
] to select <1 BEFORE>, <2
BEFORE>, or <3 BEFORE>, then press [OK].
5.
Confirm that the desired recipient is displayed.
You can change the recalled scan and send settings if necessary.
6.
Press [Start].
When you set the documents on the platen glass, press [
] or [
to select the document size, then press [Start] for each document.
When scanning is complete, press [OK] to start sending.
]
You can recall the last three destinations, scan settings, and send
settings which have been set, and then send your documents.
7
System Manager
Settings
]
Previous
When <REST. REDIAL/CALL> is set to <ON>, [Recall/Pause] is not available.
(See “Restricting Job Recall,” on p. 8-19.)
1.
When <TIME OUT> is set to <ON> in <TX SETTINGS> in <FAX
SETTINGS> in <TX/RX SETTINGS>, and if you have specified the
destination by any other method than using numeric keys, the
machine starts scanning automatically without pressing [Start], after
the preset time for this setting is elapsed.
Set documents.
Place the first page on the platen glass if you are not using the ADF.
Troubleshooting
10
Appendix
11
Table of Contents
Index
4-27
TOP
Back
Before Using the
Machine
1
Document and Paper
2
Copying
3
Sending and
Receiving
4
Printing and
Scanning
5
Network
System Manager
Settings
Follow this procedure to send a fax from your computer.
Make sure that the fax driver is installed. To check if the driver
is installed, see “Installing/Uninstalling Software,” in the Starter
Guide.
For details on the fax driver settings, see Online Help.
How to display the print screen or items on the screen may vary depending
on your application and/or OS.
From an open document on an application, click
[File] > [Print].
7
2.
Select the fax icon ([Canon MF4600 Series
(FAX)]), then click [Print] or [OK].
8
3.
Specify the name and fax number in [Sending
Settings], then click [Add to Recipient List].
9
4.
Click [OK] in the Fax Sending Settings.
Remote UI
Next
PC Faxing
1.
6
Previous
Maintenance
Troubleshooting
10
Appendix
11
Table of Contents
Index
4-28
TOP
Back
Before Using the
Machine
1
Document and Paper
Previous
Next
Customizing Sending Features
2
Copying
Sending and
Receiving
Printing and
Scanning
■
4
You can set how many times the machine automatically resends
data when the data cannot be sent because the receiver is busy
sending or receiving, or when an error occurs.
5
1.
Press [Additional Functions].
6
2.
Press [
] or [
] to select <TX/RX SETTINGS>,
then press [OK].
7
3.
Press [
] or [
] to select <TX/RX COMMON
SET.>, then press [OK].
8
4.
Press [
] or [
] to select <TX SETTINGS>,
then press [OK].
Network
Remote UI
System Manager
Settings
Setting Number of Retry Attempts (E-Mail/
File Server)
3
Maintenance
9
Troubleshooting
10
5.
Press [
] or [
] to select <RETRY TIMES>,
then press [OK].
6.
Use [
], [
], or numeric keys to enter the
number of retry attempts (0 to 5 times) the
machine will make, then press [OK].
7.
Press [Stop/Reset] to return to the standby
mode.
■
Setting Automatic Redialing (Fax)
Automatic redialing enables the machine to automatically redial
the recipient’s fax number if the recipient cannot be reached due to
a busy line, or if a sending error occurs. Auto Redial can be turned
<ON> or <OFF>. If you set <AUTO REDIAL> to <ON>, you can set
how many times the machine redials the number, and the redial
interval.
1.
Press [Additional Functions].
2.
Press [
] or [
] to select <TX/RX SETTINGS>,
then press [OK].
Appendix
11
Table of Contents
Index
4-29
TOP
Back
Before Using the
Machine
1
Document and Paper
2
Copying
3
Sending and
Receiving
4
Printing and
Scanning
3.
Press [
] or [
] to select <FAX SETTINGS>,
then press [OK].
11. Press [
4.
Press [
] or [
] to select <TX SETTINGS>,
then press [OK].
12. Press [
5.
Press [
] or [
] to select <AUTO REDIAL>,
then press [OK].
6.
Press [
[OK].
7.
Press [
] or [
] to select <REDIAL TIMES>,
then press [OK].
8.
Use [
], [
], or numeric keys to enter the
number of redials (1 to 10 times) the machine
will make, then press [OK].
9.
Press [
] or [
] to select <REDIAL
INTERVAL>, then press [OK].
5
Network
6
Remote UI
7
System Manager
Settings
8
Maintenance
9
Troubleshooting
10
10. Use [
] or [
Next
] or [
] to select <TX ERROR
REDIAL>, then press [OK].
] or [
] to select <ON> or <OFF>,
then press [OK].
<ON>: Resends all pages if an error occurs during transmission.
<OFF>: Does not redial even if an error occurs during transmission.
13. Press [Stop/Reset] to return to the standby
mode.
] to select <ON>, then press
], [
], or numeric keys to enter
the time (2 to 99 minutes, in one-minute
increments) between redials, then press [OK].
Previous
■
Setting Detail Information (E-Mail/File
Server/USB Memory)
You can set the document’s name, a subject line, message body
text, and reply-to address, and e-mail priority common to all
sending jobs. The following settings will be effective when sending
documents depending on the sending method you select:
– E-mail: <TX FILE NAME>, <SUBJECT>, <MESSAGE TEXT>, <REPLYTO>, <E-MAIL PRIORITY>
– File server (SMB): <TX FILE NAME>, <MESSAGE TEXT>
– USB: <TX FILE NAME>, <MESSAGE TEXT>.
Appendix
11
Table of Contents
Index
4-30
TOP
Back
Before Using the
Machine
1
Press [Additional Functions].
10. Press [
2
2.
Press [
] or [
] to select <TX/RX SETTINGS>,
then press [OK].
11. Use the numeric keys to enter the message body
3
3.
Confirm that <TX/RX COMMON SET.> is selected,
then press [OK].
4
4.
Press [
] or [
] to select <TX SETTINGS>,
then press [OK].
5
5.
Press [
] or [
] to select <SEND SETTINGS>,
then press [OK].
14. Press [
Press [
] or [
] to select <TX FILE NAME>,
then press [OK].
15. Press [
Copying
Printing and
Scanning
Network
6
Remote UI
7
System Manager
Settings
Next
1.
Document and Paper
Sending and
Receiving
Previous
8
Maintenance
9
Troubleshooting
10
6.
7.
Use the numeric keys to enter the document’s
name (up to 24 characters), then press [OK].
8.
Press [
] or [
press [OK].
9.
Use the numeric keys to enter the subject (up to
40 characters), then press [OK].
] to select <SUBJECT>, then
] or [
] to select <MESSAGE TEXT>,
then press [OK].
text (up to 140 characters), then press [OK].
12. Confirm that <REPLY-TO> is displayed, then
press [OK].
13. Use the numeric keys to enter the reply-to
address (up to 120 characters), then press [OK].
] or [
] to select <E-MAIL PRIORITY>,
then press [OK].
] or [
] to select the priority
(<NORMAL>, <LOW> or <HIGH>), then press
[OK].
16. Press [Stop/Reset] to return to the standby
mode.
Appendix
11
Table of Contents
Index
4-31
TOP
Back
Before Using the
Machine
1
Document and Paper
Previous
Next
Fax Dialing Features
2
Copying
3
Sending and
Receiving
4
Printing and
Scanning
5
Network
If your machine is set for pulse dialing, use the procedure below to
switch to tone dialing to use information services (e.g., banks, airline
reservations, and hotel reservations).
Use the numeric keys to dial the required
information service.
5.
When the recorded message of the information
service answers, press [Tone] to switch to tone
dialing.
To talk to the other party, you will need to connect an external telephone
to the machine.
6.
Use the numeric keys to enter the numbers
requested by the information service.
7.
If you want to receive faxes, press [Start].
Switching Temporarily to Tone Dialing
6
1.
Press [SEND/FAX].
7
2.
Press [SEND/FAX] repeatedly to select <FAX>,
then press [OK].
8
3.
Press [Hook].
Remote UI
System Manager
Settings
4.
■
If you are using the external telephone, hang up the handset after
pressing [Start].
Maintenance
9
Troubleshooting
10
Make sure to confirm the dial tone before entering a fax number. If
you enter the number before the dial tone can be heard, the call may
not be connected, or the wrong number may be dialed.
Appendix
11
Table of Contents
Index
4-32
TOP
Back
Before Using the
Machine
1
Document and Paper
2
Copying
3
Sending and
Receiving
4
Printing and
Scanning
5
Network
■
7
System Manager
Settings
8
Maintenance
9
Troubleshooting
10
■
Next
Dialing an Overseas Number (With Pauses)
Checking dialing line function enables you to configure the setting
on whether to check for a dial tone.
When you dial or register an overseas number, you may need to
insert a pause within the number.
1.
Press [Additional Functions].
1.
2.
Use [
] or [
] to select <TX/RX SETTINGS>,
then press [OK].
2.
Press [SEND/FAX] repeatedly to select <FAX>,
then press [OK].
3.
Use [
] or [
] to select <FAX SETTINGS>,
then press [OK].
3.
Use the numeric keys to dial the international
access code.
4.
Use [
] or [
press [OK].
5.
Use [
] or [
] to select <DIALING LINE
CHCK>, then press [OK].
6
Remote UI
Checking Dialing Line
Previous
Set documents.
Place the first page on the platen glass if you are not using the ADF.
] to select <TX SETTINGS>, then
For details on international access codes, contact your local
telephone company.
4.
If necessary, press [Recall/Pause] to insert a
pause.
Ex.
6.
Use [
[OK].
7.
Press [Stop/Reset] to return to the standby
mode.
] or [
] to select <ON>, then press
FAX NUMBER
TEL=123p12XXXX
– The letter <p> is displayed between the numbers.
– You can enter successive pauses within the fax number to make
the pause time longer.
– You can change the length of a pause inserted within the fax
number in the <PAUSE TIME> menu. The default setting is two
second. (See “TX/RX SETTINGS,” on p. 11-11.)
Appendix
11
Table of Contents
Index
4-33
TOP
Back
Before Using the
Machine
1
Document and Paper
5.
Use the numeric keys to dial the country code,
the area code, and the fax/telephone number of
the recipient.
6.
If necessary, press [Recall/Pause] to enter a
pause at the end of the number.
2
Copying
3
Sending and
Receiving
5
Network
6
Next
– The letter <P> appears at the end of the fax number.
– Pauses entered at the end of fax numbers are always 10 seconds
long.
4
Printing and
Scanning
Previous
7.
Press [Start].
When you set the documents on the platen glass, press [
] or [
to select the document size, then press [Start] for each document.
When scanning is complete, press [OK] to start sending.
]
Remote UI
7
System Manager
Settings
8
When <TIME OUT> is set to <ON> in <TX SETTINGS> in <FAX
SETTINGS> in <TX/RX SETTINGS>, and if you have specified the
destination by any other method than using numeric keys, the
machine starts scanning automatically without pressing [Start], after
the preset time for this setting is elapsed.
Maintenance
9
Troubleshooting
10
Appendix
11
Table of Contents
Index
4-34
TOP
Back
Before Using the
Machine
1
Document and Paper
2
Copying
3
Sending and
Receiving
5
Network
6
Next
Basic Receiving Method
Follow this procedure to set the machine for receiving faxes.
1.
Press [Additional Functions].
2.
Press [
] or [
] to select <TX/RX SETTINGS>,
then press [OK].
3.
Press [
] or [
] to select <FAX SETTINGS>,
then press [OK].
4.
Press [
] or [
press [OK].
4
Printing and
Scanning
Previous
5.
Press [
] or [
] to select the receive mode,
then press [OK].
<FaxOnly>: Answers all calls as faxes.
<FaxTel>: Switches between fax and voice calls automatically if
an external telephone is connected to the machine. For optional
settings, see “FaxTel: Optional Settings,” on p. 4-36.
<AnsMode>: Receives faxes automatically and records voice
messages.
<DRPD> (Distinctive Ring Pattern Detection): Distinguishes between
fax and voice calls using distinctive ring patterns. Select the ring
pattern assigned by your telephone company. For optional settings,
see “DRPD: Optional Settings,” on p. 4-37.
<Manual>: Does not answer any calls. You have to manually receive
faxes. See “Manual Reception,” on p. 4-37.
] to select <RX MODE>, then
Remote UI
7
System Manager
Settings
– For <FaxTel> or <Manual>, make sure an external telephone is
connected to the machine.
– For <AnsMode>, make sure an answering machine is connected
to the machine.
– For <DRPD>, subscription to a DRPD service is required. Contact
your telephone company for availability.
8
Maintenance
9
Troubleshooting
10
6.
Press [Stop/Reset] to return to the standby
mode.
Appendix
11
Table of Contents
Index
4-35
TOP
Back
Before Using the
Machine
1
Document and Paper
2
Copying
3
Sending and
Receiving
4
Printing and
Scanning
5
Previous
Next
Receiving Features
You can set the fax receive mode to suit your needs, set the
machine to receive fax documents into memory (memory
lock), forward received fax documents to other machines or
file servers, and use the external telephone connected to the
machine to receive faxes manually (remote reception). You can
also set how the received documents are printed.
■
FaxTel: Optional Settings
7.
Use [
], [
], or the numeric keys to specify
the duration (0 to 30 seconds) for which the
machine attempts to detect the fax tone before
it starts ringing, then press [OK].
If the machine receives a fax, the machine does not ring and switches
to the receive mode automatically.
8.
Press [
] or [
] to select <F/T RING TIME>,
then press [OK].
9.
Use [
], [
], or the numeric keys to specify
the duration (15 to 300 seconds) of ringing, then
press [OK].
If required, change the optional settings as follows:
Network
6
Remote UI
7
System Manager
Settings
1.
Press [Additional Functions].
2.
Press [
] or [
] to select <TX/RX SETTINGS>,
then press [OK].
8
3.
9
4.
Press [
] or [
] to select <FAX SETTINGS>,
then press [OK].
Maintenance
Troubleshooting
10
5.
11
6.
Appendix
Press [
] or [
] to select <RX SETTINGS>,
then press [OK].
Press [
] or [
] to select <FAX/TEL OPT.
SET>, then press [OK].
Press [
] or [
] to select <RING START TIME>,
then press [OK].
10. Press [
] or [
] to select <F/T SWITCH
ACTION>, then press [OK].
11. Press [
] or [
] to select the action the
machine will take after the ringing ends, then
press [OK].
<RECEIVE>: Receives a fax.
<DISCONNECT>: Disconnects the call.
12. Press [Stop/Reset] to return to the standby
mode.
Table of Contents
Index
4-36
TOP
Back
Before Using the
Machine
1
Document and Paper
2
Printing and
Scanning
7.
Select the ring pattern assigned by your telephone company.
Press [Stop/Reset] to return to the standby
mode.
Press [Additional Functions].
3
2.
Press [
] or [
] to select <TX/RX SETTINGS>,
then press [OK].
4
3.
Press [
] or [
] to select <FAX SETTINGS>,
then press [OK].
1.
When the telephone rings, pick up the external
telephone.
5
4.
Press [
] or [
] to select <RX SETTINGS>,
then press [OK].
2.
Confirm that the modem’s connecting sound is
heard, then press [Start].
6
5.
3.
Hang up the external telephone.
7
Press [
] or [
] to select <DRPD:SELECT
FAX>, then press [OK].
6.
Press [
] or [
press [OK].
Network
Remote UI
System Manager
Settings
DRPD: Optional Settings
Next
1.
Copying
Sending and
Receiving
■
Previous
8
Maintenance
9
Troubleshooting
■
Manual Reception
When you select <Manual> in <RX MODE>, follow the procedure
below to receive a fax.
] to select a ring pattern, then
<DOUBLE RING>
<SHORT-SHORT-LONG>
<SHORT-LONG-SHORT>
<OTHER RING TYPE>
<NORMAL RING>
10
Appendix
11
Table of Contents
Index
4-37
TOP
Back
Before Using the
Machine
1
Document and Paper
2
Copying
3
Sending and
Receiving
4
Printing and
Scanning
5
Network
6
Remote UI
7
System Manager
Settings
8
Maintenance
■
Memory Reception
The machine automatically receives faxes in memory when printing
is disabled under certain conditions (e.g., toner or paper has run
out).
When the problem is cleared, the machine automatically prints the
fax which was stored in the memory.
– The machine memory can store up to 512 fax jobs or approximately 512
pages.*
* Based on the condition that the other party sends the fax by the
imageCLASS MF4690 with ITU-T Standard Chart No. 1, standard mode.
The maximum number of pages that the machine’s memory can store
differs depending on the other party’s machine.
– Once the pages are printed, they are deleted from the memory.
– If the memory becomes full, you will not be able to receive the remaining
pages. Contact the other party and ask them to resend the remaining
pages of the fax.
■
Previous
Next
Memory Lock Reception
You can also set the machine to store all documents in memory
without automatically printing them.
You can also forward the documents received in memory to other
destinations. (See “Forwarding Documents Received in Memory,” on
p. 4-41.)
1.
Press [Additional Functions].
2.
Press [
] or [
] to select <SYSTEM
SETTINGS>, then press [OK].
If the System Manager ID and System Password have been set, enter
the System Manager ID and System Password using the numeric
keys, then press [Log In/Out (ID)].
3.
Press [
] or [
] to select
<COMMUNICATIONS>, then press [OK].
4.
Press [
] or [
] to select <MEMORY LOCK>,
then press [OK].
If the memory lock password has already been set, enter the
password, then press [OK].
9
Troubleshooting
10
Appendix
11
Table of Contents
Index
4-38
TOP
Back
Before Using the
Machine
1
Document and Paper
5.
Press [
[OK].
] or [
] to select <ON>, then press
2
Printing and
Scanning
5
6.
Press [
] or [
press [OK].
7.
Use the numeric keys to enter the memory lock
reception password (up to seven digits), then
press [OK].
Network
6
PASSWORD
1234567
7
8
] to select <PASSWORD>, then
Ex.
Remote UI
System Manager
Settings
Press [
] or [
] to select <ON> or <OFF>,
then press [OK].
When you select <OFF>, the machine starts to print the received
documents in memory.
3
4
Next
<OFF>: Does not print a RX report.
<ON>: Prints a RX report.
Copying
Sending and
Receiving
9.
Previous
<RX REPORT> should also be set to <ON> so that RX reports are
automatically printed when documents are received in memory. For
instructions, see “RX REPORT,” on p. 11-50.
10. Press [
] or [
] to select <MEMORY RX
TIME>, then press [OK].
If you do not need to set the timer for memory lock, skip to step 16.
11. Press [
] or [
] to select <ON>, then press
[OK].
12. Press [
8.
Press [
] or [
] to select <REPORT PRINT>,
then press [OK].
] or [
] to select <MEM RX START
TIME>, then press [OK].
Maintenance
9
Troubleshooting
10
Appendix
11
Table of Contents
Index
4-39
TOP
Back
Before Using the
Machine
1
Document and Paper
13. Use the numeric keys to enter the start time (in
Ex.
MEM
Copying
RX
3
Sending and
Receiving
4
Printing and
Scanning
5
Network
6
START TIME
00:00
14. Press [
] or [
] to select <MEM. RX END
TIME>, then press [OK].
15. Use the numeric keys to enter the end time, then
press [OK].
Next
2.
Press [
] or [
] to select <MEMORY LOCK>,
then press [OK].
3.
Use the numeric keys to enter the memory lock
reception password, then press [OK].
4.
Press [
[OK].
24-hour format), then press [OK].
2
Previous
] or [
] to select <OFF>, then press
The received documents are printed.
5.
Press [Stop/Reset] to return to the standby
mode.
16. Press [Stop/Reset] to return to the standby
mode.
Remote UI
7
System Manager
Settings
8
Maintenance
Printing All Documents Stored in Memory
1.
Perform step 1 to 3 in “Memory Lock Reception,”
on p. 4-38.
9
Troubleshooting
10
Appendix
11
Table of Contents
Index
4-40
TOP
Back
Before Using the
Machine
1
Document and Paper
2
Copying
■
Forwarding Received Documents
You can set the machine to forward received documents to other
machines or file servers. If a received document matches the
forwarding conditions, it is forwarded to the specified destination.
Forwarding settings can be made using the Remote UI.
4
Printing and
Scanning
5
Press [
] or [
press [OK].
4.
Specify the destination, then press [OK].
Network
6
Remote UI
7
System Manager
Settings
9
You can specify only one destination registered in a one-touch key or
coded dial code.
Forwarding Documents with Forwarding Errors
1.
Press [System Monitor] repeatedly to select <TX/
RX STATUS>, then press [OK].
1.
Press [System Monitor] repeatedly to select
<FORWARD ERR. STATUS>, then press [OK].
2.
Press [
] or [
] to select the desired
document, then press [OK].
2.
Press [
] or [
] to select the desired
document, then press [OK].
3.
Press [
] or [
press [OK].
8
Maintenance
] to select <FORWARD>, then
The machine starts to send the selected document.
For instructions on forwarding settings and how to turn on and off the
forward mode, see “Specifying Forwarding Settings,” on p. 7-15.
Forwarding Documents Received in Memory
Next
3.
3
Sending and
Receiving
Previous
You can transfer only the documents received in memory, which
appears with the message <RX STNDBY> in the system monitor.
] to select <FORWARD>, then
Troubleshooting
10
Appendix
11
Table of Contents
Index
4-41
TOP
Back
Before Using the
Machine
1
Document and Paper
4.
Specify the destination, then press [OK].
4.
The machine starts to send the selected document.
– You can specify only one destination registered in a one-touch
key or coded dial code.
– The document is erased from memory if transferring is
successful.
3
Sending and
Receiving
4
Printing and
Scanning
5
Network
6
Remote UI
System Manager
Settings
Printing or Erasing Documents with Forwarding
Errors
1.
Press [System Monitor] repeatedly to select
<FORWARD ERR. STATUS>, then press [OK].
Next
] to select <YES>.
If you do not want to print or erase the job, press [
<NO>.
2
Copying
Press [
Previous
5.
■
] to select
Press [Stop/Reset] to return to the standby
mode.
Remote Reception
Remote reception enables you to use an external telephone
connected to the machine to receive faxes manually. This can be
useful when the machine is not nearby or is being used by someone
else.
Registering Remote Reception ID
7
2.
Press [
] or [
] to select the desired
document, then press [OK].
Follow this procedure if you want to change the default remote
reception ID of 25.
8
3.
Press [
] or [
] to select <PRINT> or
<CANCEL>, then press [OK].
1.
Press [Additional Functions].
2.
Press [
] or [
] to select <TX/RX SETTINGS>,
then press [OK].
Maintenance
9
Troubleshooting
10
If <MEMORY LOCK> is <ON> in <COMMUNICATIONS> in <SYSTEM
SETTINGS>, the documents cannot be printed.
Appendix
11
Table of Contents
Index
4-42
TOP
Back
Before Using the
Machine
1
Document and Paper
2
Copying
3
Sending and
Receiving
4
Printing and
Scanning
3.
Press [
] or [
] to select <FAX SETTINGS>,
then press [OK].
4.
Press [
] or [
] to select <RX SETTINGS>,
then press [OK].
5.
Press [
] or [
press [OK].
] to select <REMOTE RX>, then
6.
Press [
[OK].
] to select <ON>, then press
5
Network
7.
Press [Clear] twice to delete the default remote
reception ID of 25.
8.
Use the numeric keys to enter a new remote
reception ID (a combination of two characters
using 0 to 9, and #), then press [OK].
9.
Press [Stop/Reset] to return to the standby
mode.
6
Remote UI
7
System Manager
Settings
8
Maintenance
] or [
Previous
Next
Receiving a Fax Remotely
1.
When you receive a call, pick up the external
telephone.
2.
Use the numeric keys to enter the two-digit
remote reception ID to start reception.
If the machine is set for pulse dialing, press [Tone] to switch to tone
dialing before pressing the remote reception ID.
3.
When the reception is complete, hang up the
telephone.
9
Troubleshooting
10
Appendix
11
Table of Contents
Index
4-43
TOP
Back
Before Using the
Machine
1
Document and Paper
2
Copying
3
■
Printing Received Documents
The machine provides the following printing features: two-sided
printing and received image reduction.
4
Printing and
Scanning
5
Network
You can print the received documents on both sides of the paper only
when <PAPER SIZE> is set to <LTR> or <A4>. The received documents are
printed on one side of the paper when <PAPER SIZE> is not set to <LTR> or
<A4>. (See “Setting Paper Size and Type,” on p. 2-13.)
1.
Press [Additional Functions].
7
2.
Press [
] or [
] to select <TX/RX SETTINGS>,
then press [OK].
8
3.
Press [
] or [
] to select <TX/RX COMMON
SET.>, then press [OK].
9
4.
Press [
] or [
] to select <RX SETTINGS>,
then press [OK].
10
5.
Press [
] or [
] to select <TWO-SIDED
PRINT>, then press [OK].
System Manager
Settings
Maintenance
Troubleshooting
Appendix
Press [
[OK].
7.
Press [Stop/Reset] to return to the standby
mode.
] or [
] to select <ON>, then press
Received Image Reduction
You can print received documents in a reduced size.
6
Remote UI
Next
6.
Two-Sided Printing
You can print received documents on both sides of the paper.
Sending and
Receiving
Previous
1.
Press [Additional Functions].
2.
Press [
] or [
] to select <TX/RX SETTINGS>,
then press [OK].
3.
Press [
] or [
] to select <TX/RX COMMON
SET.>, then press [OK].
4.
Press [
] or [
] to select <RX SETTINGS>,
then press [OK].
5.
Press [
] or [
] to select <RECEIVE
REDUCTION>, then press [OK].
6.
Press [
[OK].
] or [
] to select <ON>, then press
11
Table of Contents
Index
4-44
TOP
Back
Before Using the
Machine
1
Document and Paper
7.
2
Copying
3
Sending and
Receiving
4
Printing and
Scanning
5
Network
6
Remote UI
7
System Manager
Settings
8
Maintenance
9
Previous
Next
Press [
] or [
] to select <RX REDUCTION>
or <REDUCE DIRECTION>, then press [OK].
If you select <REDUCE DIRECTION>, skip to step 11.
8.
Press [
] or [
] to select <AUTO> or <FIXED
REDUCTION>, then press [OK].
If you select <AUTO>, adjust the image reduction automatically. Skip
to step 10.
9.
Press [
] or [
] to select a preset reduction
ratio (90%, 95%, 97 %, or 75%), then press [OK].
10. Press [
] or [
] to select <REDUCE
DIRECTION>, then press [OK].
11. Press [
] or [
] to select <VERTICAL ONLY>
or <HORIZ & VERTICAL>, then press [OK].
<VERTICAL ONLY>: Reduces the document vertically only.
<HORIZ & VERTICAL>: Reduces the document both horizontally and
vertically.
12. Press [Stop/Reset] to return to the standby
mode.
Troubleshooting
10
Appendix
11
Table of Contents
Index
4-45
TOP
Back
Before Using the
Machine
1
Document and Paper
2
Copying
3
Sending and
Receiving
4
Previous
Next
Canceling TX/RX Jobs
Cancel an ongoing job (sending or receiving) as follows.
1.
Press [Stop/Reset].
2.
When the <STOP KEY PRESSED> message
appears, press [OK].
● When scanning using the ADF:
Printing and
Scanning
5
Network
6
Remote UI
7
System Manager
Settings
8
Maintenance
9
Troubleshooting
STOP KEY
PRESS OK
PRESSED
KEY
● When scanning using the platen glass:
STOP
KEY
PRESSED
When the <CANCEL?> message appears, press
] to select <YES>.
[
CANCEL?
< YES
NO
>
10
Appendix
11
Table of Contents
Index
4-46
TOP
Back
Before Using the
Machine
1
Document and Paper
2
Copying
3
Sending and
Receiving
4
Printing and
Scanning
5
System monitor enables you to view the transmission and
reception results, monitor the status of the send and receive
jobs currently being processed.
■
1.
6
■
Checking the Arrival of I-Fax
The machine regularly checks for the arrival of I-fax. However,
you can check for the arrival of I-fax at any time using the System
Monitor key.
Checking Transmission/Reception Results
Press [System Monitor] repeatedly to select <TX/
RX LOG>, then press [OK].
If you set <CHECKING THE LOG> to <OFF> in <SYSTEM SETTINGS>,
transmission/reception result does not appear in the LCD.
Remote UI
7
2.
Press [
] or [
] to view the required
transmission/reception result.
8
3.
Press [Stop/Reset] to return to the standby
mode.
Maintenance
Next
Checking and Deleting Jobs
Network
System Manager
Settings
Previous
To be able to check the arrival of I-fax using the System Monitor key, you
must first set <POP> (Post Office Protocol) to <ON>, so that you can receive
documents using POP. (See “Setting Up E-Mail,” on p. 6-16.)
1.
Press [System Monitor].
2.
Press [
[OK].
3.
Press [
] or [
] to select <CHECK RX I-FAX
JOB>, then press [OK].
] or [
] to select <I-FAX>, then press
The machine starts checking the arrival of I-fax and receives them.
9
Troubleshooting
10
Appendix
11
Table of Contents
Index
4-47
TOP
Back
Before Using the
Machine
1
■
Checking and Deleting Sending/Receiving
Documents Stored in Memory
1.
Press [System Monitor] repeatedly to select <TX/
RX STATUS>, then press [OK].
Document and Paper
2
Copying
3
Sending and
Receiving
2.
4
Printing and
Scanning
] or [
] to scroll through the job list.
3.
Press [
] or [
] to select the desired
document, then press [OK].
6
4.
Press [
] or [
press [OK].
7
5.
Press [
8
6.
Remote UI
Maintenance
Next
If you want to delete the job, go to step 3. Otherwise, press [Stop/
Reset] to return to the standby mode.
5
Network
System Manager
Settings
Press [
Previous
] to select <CANCEL>, then
] to select <YES>.
If you do not want to cancel the job, press [
] to select <NO>.
Press [Stop/Reset] to return to the standby
mode.
9
Troubleshooting
10
Appendix
11
Table of Contents
Index
4-48
TOP
Back
Before Using the
Machine
1
Document and Paper
2
Copying
3
Sending and
Receiving
4
Printing and
Scanning
5
Network
6
Remote UI
7
System Manager
Settings
8
Maintenance
9
Troubleshooting
Previous
Next
5 Printing and Scanning
Printing Documents .........................................................................................5-2
Scanning to a Computer ..................................................................................5-3
Scanning to a USB Memory .............................................................................5-4
Scanning to a USB Memory......................................................5-4
Scan Settings .................................................................................5-6
Canceling Scan Jobs .........................................................................................5-8
Canceling Scan Jobs to a Computer .....................................5-8
Canceling Scan Jobs to a USB Memory ................................5-8
Checking and Deleting Jobs ............................................................................5-9
Checking and Deleting Print Jobs..........................................5-9
10
Appendix
11
Table of Contents
Index
5-1
TOP
Back
Before Using the
Machine
1
Document and Paper
2
Copying
3
Sending and
Receiving
5
Network
6
Remote UI
7
System Manager
Settings
8
Maintenance
Next
Printing Documents
Follow this procedure to print a document from your computer.
Make sure that the printer driver is installed. To check if the
driver is installed, see “Installing/Uninstalling Software,” in the
Starter Guide.
For details on the printer driver settings, see Online Help.
3.
How to display the print screen or items on the screen may vary depending
on your application and/or OS.
1.
From an open document on an application, click
[File] → [Print].
2.
Select the printer icon for the machine ([Canon
MF4600 Series UFRII LT], [Canon MF4600 Series
PCL5e], [Canon MF4600 Series PCL6]), then click
[Preferences] or [Properties] to open the dialog
box.
After finished setting, click [OK].
When you use [Canon MF4600 Series PCL5e] and set the paper size
as the custom size paper in the printer driver or the application, you
need to set the machine settings as follows:
Press [Additional Functions] → <PRINTER SETTINGS> → <PCL
SETTINGS> → <CUSTOM PAPER>. Select <ON> and set <Y
DIMENSION> and <X DIMENSION> values identical to those set in
the printer driver or the application.
4
Printing and
Scanning
Previous
4.
Click [Print] or [OK].
Printing speed may be slower when sending an e-mail.
9
Troubleshooting
10
Appendix
11
Table of Contents
Index
5-2
TOP
Back
Before Using the
Machine
1
Document and Paper
2
Copying
3
Sending and
Receiving
4
Printing and
Scanning
5
Network
6
System Manager
Settings
Next
Scanning to a Computer
Follow this procedure to scan a document to your computer.
Make sure that the scanner driver is installed. To check if the
driver is installed, see “Installing/Uninstalling Software,” in the
Starter Guide.
For details on the scanner driver settings, see the Scanner
Driver Guide (in the User Software CD).
1.
Set documents.
2.
Press [SCAN].
3.
Start MF Toolbox, then drag mark over the
button you want to select.
Remote UI
7
Previous
The mark will be displayed above the button you select.
4.
Press [Start].
8
Maintenance
9
Troubleshooting
10
Appendix
11
Table of Contents
Index
5-3
TOP
Back
Before Using the
Machine
1
Document and Paper
2
Sending and
Receiving
4
Printing and
Scanning
5
Network
6
Remote UI
7
System Manager
Settings
Next
Scanning to a USB Memory
Follow this procedure to scan a document to your USB memory.
Copying
3
Previous
■
1.
– Do not connect anything other than USB memory to the USB memory
port.
– Supported file systems of USB memory are FAT16 and FAT32.
– Supported maximum sizes of a USB memory are as follows;
FAT32: 8GB
FAT16: 2GB
– USB memory with security function or card readers are not supported.
– USB memory used with an extension cable is not supported.
– Use of a USB memory through a USB hub is not supported.
– A USB memory that does not comply with USB specifications is not
supported.
– In other cases not mentioned above, images may not be saved correctly
due to the type of USB memory used.
Scanning to a USB Memory
Connect a USB memory into the USB memory
port.
Insert the USB memory straight into the USB memory port. Inserting
a USB memory at an angle or inserting a USB memory that does not
comply with USB specifications may damage the USB memory port.
2.
Set documents.
3.
Press [SEND/FAX] repeatedly to select <USB
MEMORY: B&W> or <USB MEMORY: COLOR>,
then press [OK].
8
Maintenance
9
Troubleshooting
10
Appendix
11
Table of Contents
Index
5-4
TOP
Back
Before Using the
Machine
1
Document and Paper
2
Copying
3
Sending and
Receiving
4
Printing and
Scanning
5
Network
6
Remote UI
7
System Manager
Settings
8
Maintenance
9
4.
Press [Start].
If you want to set the optional settings, press [OK] instead of pressing
[Start]. (See “Optional Settings,” on p. 5-6.)
When you set the documents on the platen glass, press [
] or [
]
to select the document size, then press [Start].
You can remove the USB memory when <USB STORE COMPLETE/OK
TO REMOVE USB> message appears.
To scan another document, press [OK] or [Clear], and then repeat the
procedure from step 2.
– The default file format is <PDF>.
– If you want to scan multipage documents, scan the documents
by the ADF.
– The scanned images will be saved with serial numbers from
0001_0001.
– You can set the document’s name and message body text. For
instructions, see “Setting Detail Information (E-Mail/File Server/
USB Memory),” on p. 4-30.
– When scanning multiple page documents, <MEMORY FULL>
or <USB MEMORY FULL> may appear in the LCD and scanning
may be canceled. If this happens, press [OK] to return to standby
mode. When <MEMORY FULL> is displayed, print, send, or delete
any documents stored in memory. When <USB MEMORY FULL> is
displayed, delete any documents stored in USB memory.
Previous
Next
– For a USB memory formatted with the FAT16 file system, the
maximum number of files that can be saved in the root directory
(the top level of the directory tree in the USB memory) is only
255. It is recommended that you use a computer to organize
the root directory of your USB memory beforehand by moving
existing files to a newly created folder or by deleting unnecessary
files. If all files in the USB memory are unnecessary, formatting
the USB memory to FAT32 is also recommended.
– If the destination folder of the scanned images contains many
files, the time it takes to save will increase. It is recommended
that you use a computer to organize your destination folder
beforehand by moving existing files to a newly created folder or
by deleting unnecessary files.
– If you are using a USB memory that show multiple drives on a
computer instead of just one, saving scanned images to a specific
drive is not possible. To find and check where they are saved, use
your computer to open and check each drive or search them by
their file names or the date modified.
Troubleshooting
10
Appendix
11
Table of Contents
Index
5-5
TOP
Back
Before Using the
Machine
1
Document and Paper
2
Copying
3
Sending and
Receiving
4
Printing and
Scanning
5
Network
6
■
1.
Connect a USB memory into the USB memory
port.
2.
Set documents.
3.
Press [SEND/FAX] repeatedly to select <USB
MEMORY: B&W> or <USB MEMORY: COLOR>,
then press [OK].
4.
Press [Density].
Maintenance
5.
Press [
] or [
press [OK].
9
Troubleshooting
10
[
[
Next
Press [Start].
When you set the documents on the platen glass, press [
[
] or
] to select the document size, then press [OK] or [Start].
These settings return to the default values after all documents
are scanned. If you want to keep the settings, set the density as
following;
[Additional Functions] → <TX/RX SETTINGS> → <TX/RX COMMON
SET.> → <TX SETTINGS> → <SCANNING DENSITY>
(See “Setting Menu,” on p. 11-6.)
Density
7
8
6.
You can adjust the scanning density and optionally set the file
format, if multiple images are sent as separate files or a single file,
resolution, and original type according to the type of document you
are scanning.
Remote UI
System Manager
Settings
Scan Settings
Previous
Optional Settings
] to adjust the density, then
]: to make dark documents lighter.
]: to make light documents darker.
1.
Connect a USB memory into the USB memory
port.
2.
Set documents.
3.
Press [SEND/FAX] repeatedly to select <USB
MEMORY: B&W> or <USB MEMORY: COLOR>,
then press [OK].
4.
Press [OK] to select the optional settings.
Appendix
11
Table of Contents
Index
5-6
TOP
Back
Before Using the
Machine
1
Document and Paper
5.
2
Copying
3
Sending and
Receiving
Press [
] or [
press [OK].
] to select the file format, then
8.
USB Memory (B&W): <TIFF (B&W)>, <PDF>
USB Memory (Color): <PDF (COMPACT)>, <JPEG>
6.
Next
Press [
] or [
] to select the original type,
then press [OK].
<TEXT/PHOTO>: For documents that contain text and photos.
<TEXT>: For text documents.
<PHOTO>: For documents that contain fine text or photos.
Press [
] or [
] to select <ON> or <OFF> for
<DIVIDE INTO PAGES>, then press [OK].
<OFF>: Sends multiple images as a single file without dividing them.
<ON>: Separates multiple images and send them as separate files.
4
Previous
If you have selected <PDF (COMPACT)> as the file format in step 5,
this setting is not available. The original type is automatically set to
<TEXT/PHOTO>.
Printing and
Scanning
5
If you have selected <JPEG> in step 5, this setting is not available.
<DIVIDE INTO PAGES> is automatically set to <ON> when sending
documents in JPEG format.
Network
6
Remote UI
7
System Manager
Settings
8
7.
Press [
] or [
press [OK].
] to select the resolution, then
9.
Press [Start].
When you set the documents on the platen glass, press [
] or [
]
to select the document size, then press [Start].
You can remove the USB memory when <USB STORE COMPLETE/OK
TO REMOVE USB> message appears.
USB Memory (B&W): <200X200dpi>, <300X300dpi>, <400X400dpi>,
<600X600dpi>, <150X150dpi>, <200X100dpi>
USB Memory (Color): <200X200dpi>, <300X300dpi>, <100X100dpi>,
<150X150dpi>
Maintenance
9
Troubleshooting
10
If you have selected <PDF (COMPACT)> as the file format in step 5,
<300x300dpi> can be selected for sending color images attached to
an e-mail message.
Appendix
11
Table of Contents
Index
5-7
TOP
Back
Before Using the
Machine
1
Document and Paper
2
Cancel an ongoing job as follows.
3
■
4
Printing and
Scanning
Press [Stop/Reset].
2.
When the <STOP KEY PRESSED> message
appears, press [OK].
Network
STOP KEY
PRESS OK
6
7
System Manager
Settings
Canceling Scan Jobs to a Computer
1.
5
Remote UI
Next
Canceling Scan Jobs
Copying
Sending and
Receiving
Previous
PRESSED
KEY
■
Canceling Scan Jobs to a USB Memory
1.
Press [Stop/Reset].
2.
When the <STOP KEY PRESSED> message
appears, press [OK].
● When scanning using the ADF:
STOP KEY
PRESS OK
PRESSED
KEY
● When scanning using the platen glass:
3.
Click [OK] on the computer screen.
STOP
KEY
PRESSED
8
Maintenance
9
Troubleshooting
The scanned pages might be saved to the USB memory even if you
pressed [Stop/Reset] while scanning the document. If you want to
delete the files from the USB memory, delete them from a computer.
10
Appendix
11
Table of Contents
Index
5-8
TOP
Back
Before Using the
Machine
1
Document and Paper
2
Copying
4
Printing and
Scanning
System monitor enables you to monitor the status of the print
jobs currently being processed.
Make sure that the Processing/Data indicator is turned on. When the
Processing/Data indicator is turned off, all print jobs are erased from the
memory.
5
■
6
1.
Press [System Monitor] repeatedly to select
<PRINT STATUS>, then press [OK].
7
2.
Press [
] or [
] to scroll through the job list,
and check the status of the print jobs.
Network
Remote UI
System Manager
Settings
8
Maintenance
9
Next
Checking and Deleting Jobs
3
Sending and
Receiving
Previous
4.
Press [
] or [
press [OK].
5.
Press [
] to select <CANCEL>, then
] to select <YES>.
If you do not want to cancel the job, press [
6.
] to select <NO>.
Press [Stop/Reset] to return to standby mode.
Checking and Deleting Print Jobs
If you want to delete the job, go to step 3. Otherwise, press [Stop/
Reset] to return to the standby mode.
3.
Press [
] or [
] to select the desired job,
then press [OK].
Troubleshooting
10
Appendix
11
Table of Contents
Index
5-9
TOP
Back
Before Using the
Machine
1
Document and Paper
2
Copying
3
Sending and
Receiving
4
Printing and
Scanning
5
Network
6
Remote UI
7
System Manager
Settings
8
Maintenance
9
Troubleshooting
10
Previous
Next
6 Network
System Requirements ......................................................................................6-4
Printing or Sending a Fax from a Computer.......................6-4
Using E-Mail ...................................................................................6-5
Sending Data to a File Server...................................................6-5
Basic Network Settings ....................................................................................6-6
Interface Settings .........................................................................6-6
Communication Environment Setup ....................................6-8
Setting Up a Computer for Printing/Sending a Fax .....................................6-11
Settings from the Operation Panel ..................................... 6-11
Machine Connection Method (LPD/Raw) ........................ 6-12
Print Server Settings ................................................................ 6-15
Appendix
11
Table of Contents
Index
6-1
TOP
Back
Before Using the
Machine
1
Document and Paper
2
Copying
3
Sending and
Receiving
4
Printing and
Scanning
Next
Setting Up E-Mail............................................................................................6-16
Settings from the Operation Panel ..................................... 6-16
Setting Up a Computer as a File Server ........................................................6-21
Settings from the Operation Panel ..................................... 6-21
Configuring a Shared Folder ................................................. 6-23
6
Additional Network Settings .........................................................................6-35
TCP/IP Settings ........................................................................... 6-35
Startup Time Settings .............................................................. 6-41
7
Checking Network Settings ...........................................................................6-43
5
Network
Remote UI
System Manager
Settings
Previous
8
Maintenance
9
Troubleshooting
10
Appendix
11
Table of Contents
Index
6-2
TOP
Back
Before Using the
Machine
1
Document and Paper
2
Copying
3
Sending and
Receiving
4
Printing and
Scanning
Previous
Next
Machine Management ...................................................................................6-44
Machine Management Using Web Browser
(Remote UI) ................................................................................. 6-44
Machine Management Using NetSpot Device
Installer ......................................................................................... 6-44
Machine Management Using NetSpot Console ............ 6-44
5
Network
6
Remote UI
7
System Manager
Settings
8
Maintenance
9
Troubleshooting
10
Appendix
11
Table of Contents
Index
6-3
TOP
Back
Before Using the
Machine
1
Document and Paper
2
Copying
This section describes the system environments with which the
machine is compatible.
Printing and
Scanning
5
Printing or Sending a Fax from a Computer
The following system environments are compatible when printing
or sending a fax from a computer:
6
● Protocol
– TCP/IP
● OS
– Microsoft Windows 98/98SE
Network
● Computers
– Windows; IBM PC/compatibles
■
4
Next
System Requirements
3
Sending and
Receiving
Previous
If you are using Windows 2000, you need to install Service Pack 4 or later.
– Microsoft Windows Me
– Microsoft Windows 2000 Server
Remote UI
7
System Manager
Settings
– Microsoft Windows 2000 Professional
– Microsoft Windows XP Professional
8
Maintenance
– Microsoft Windows XP Home Edition
– Microsoft Windows Server 2003
9
– Microsoft Windows Vista
Troubleshooting
10
Appendix
11
Table of Contents
Index
6-4
TOP
Back
Before Using the
Machine
1
Document and Paper
2
Copying
■
Using E-Mail
The following system environments are confirmed for using the
e-mail functions.
● Mail forwarding server software
3
Sending and
Receiving
4
Printing and
Scanning
5
Network
6
Remote UI
7
System Manager
Settings
8
Maintenance
9
Troubleshooting
10
– Sendmail 8.93 or later (UNIX)
– Microsoft Exchange Server (Windows) (Microsoft Exchange
Server 5.5 + Service Pack 1 or later)
■
Previous
Next
Sending Data to a File Server
The following system environments are compatible when sending
data from the machine to a file server, depending on the type of
network used:
● Servers
– Microsoft Windows 98/98SE
– Microsoft Windows Me
– Lotus Domino R4.6 or later (Windows)
– Microsoft Windows 2000 Server
● Mail receiving server software
– Microsoft Windows 2000 Professional
– Qpopper 2.53 or later (UNIX)
– Microsoft Windows XP Professional
– Microsoft Exchange Server (Windows) (Microsoft Exchange
Server 5.5 + Service Pack 1 or later)
– Microsoft Windows XP Home Edition
– Lotus Domino R4.6 or later (Windows)
– Microsoft Windows Vista
– Microsoft Windows Server 2003
● Protocol
– The machine sends e-mail to mail servers using SMTP.
– The machine can receive incoming messages from a mail server using
the POP3 protocol or directly using the machine’s own SMTP receiving
function. If the latter method is used, it is not necessary for the mail
server to support the POP3 protocol.
– The machine can receive I-fax images and plain text e-mails, but not any
other type of e-mail.
– NetBIOS over TCP/IP (NetBT)
If you are using Windows 2000, you need to install Service Pack 4 or later.
Appendix
11
Table of Contents
Index
6-5
TOP
Back
Before Using the
Machine
1
Document and Paper
2
Copying
3
Sending and
Receiving
4
Printing and
Scanning
5
Previous
Next
Basic Network Settings
Basic Network Settings are required in order to use the
following functions of the machine.
2.
● Printing or sending a fax from a computer
Preparation for Protocol Settings (See “Set the
Machine for Network Usage,” in the Starter
Guide.)
Specify the machine’s IP address so that the machine and the
network computer can communicate before making protocol
settings. Any of the following can be used to specify the settings.
– Machine’s operation panel (Additional Functions menu)
– NetSpot Device Installer (Canon utility software included in the
User Software CD)
● Using e-mail
● Sending data to a file server
Before making basic network settings, confirm that the
following procedures are performed.
Network
6
Remote UI
7
System Manager
Settings
8
Maintenance
■
It is recommended that the network administrator perform the following
procedures.
1.
Network Cable Connection (See “Set the
Machine for Network Usage,” in the Starter
Guide.)
Connect the machine to your network using the network cables.
Interface Settings
Ethernet Driver
You can specify the communication method and Ethernet
connection type.
1.
Press [Additional Functions].
9
Troubleshooting
10
Appendix
11
Table of Contents
Index
6-6
TOP
Back
Before Using the
Machine
1
Document and Paper
2.
2
If the System Manager ID and System Password have been set, enter
the System Manager ID and System Password using the numeric
keys, then press [Log In/Out (ID)].
Copying
Sending and
Receiving
Printing and
Scanning
3
3.
Press [
] or [
] to select <NETWORK
SETTINGS>, then press [OK].
4
4.
Press [
] or [
] to select <ETHERNET
DRIVER>, then press [OK].
5.
Confirm that <AUTO DETECT> is displayed, then
press [OK].
5
Network
6
Remote UI
7
System Manager
Settings
Press [
] or [
] to select <SYSTEM
SETTINGS>, then press [OK].
8
Maintenance
6.
Previous
Next
7.
Press [
] or [
] to select <COMMUNICATION
MODE>, then press [OK].
8.
Press [
] or [
] to select the desired
communication method, then press [OK].
<HALF DUPLEX>: Sends and receives alternately.
<FULL DUPLEX>: Sends and receives simultaneously.
9.
Press [
] or [
] to select <ETHERNET TYPE>,
then press [OK].
10. Press [
] or [
] to select the desired Ethernet
connection type, then press [OK].
<10 BASE-T>: Establish a 10Base-T network connection.
<100 BASE-TX>: Establish a 100Base-TX network connection.
Press [
] or [
] to select the desired
detection method, then press [OK].
11. Press [Stop/Reset] to return to the standby
<AUTO>: Automatically determines the communication mode (Half
duplex/Full duplex) and Ethernet type (10Base-T/100BaseTX). Skip to
step 11.
<MANUAL>: You have to manually specify the communication mode
and Ethernet type.
12. Restart the machine.
mode.
9
Troubleshooting
10
Appendix
If you reconnect the network cable (for example, reconnect the cable
to a different Ethernet hub) with the power on, the Auto Detect
function will not work even if you set <AUTO DETECT> to <AUTO>.
(Connect the cable with the power off.)
11
Table of Contents
Index
6-7
TOP
Back
Before Using the
Machine
1
Document and Paper
2
Copying
3
Sending and
Receiving
4
Printing and
Scanning
5
Network
6
Remote UI
7
System Manager
Settings
8
Maintenance
9
■
Communication Environment Setup
To set up a configuration for communication between the machine
and computers on your network, use the following procedure.
1.
Press [Additional Functions].
2.
Press [
] or [
] to select <SYSTEM
SETTINGS>, then press [OK].
If the System Manager ID and System Password have been set, enter
the System Manager ID and System Password using the numeric
keys, then press [Log In/Out (ID)].
Next
3.
Press [
] or [
] to select <NETWORK
SETTINGS>, then press [OK].
4.
Press [
] or [
] to select <SNMP SETTINGS>,
then press [OK].
5.
Press [
] or [
press [OK].
6.
Press [
] or [
] to select <ON> or <OFF>,
then press [OK].
SNMP
SNMP helps monitor the state of the machine and collects
information on it. The following two items can be set:
<COMMUNITY NAME>:
Sets the SNMP community name. You can specify up to two
community names.
<SNMP WRITABLE>:
Enables the computers on the network to access the machine and
modify its settings if this item is activated. You can specify this
setting for each community separately.
Previous
] to select <USE SNMP>, then
<ON>: When you set or browse each item of the machine with utility
that uses SNMP to obtain information.
<OFF>: When you do not use an SNMP utility.
– If you want to use a Canon printer driver or utility, select <ON>
for both <USE SNMP> and <DEDICATED PORT>.
– You can restrict the IP addresses of computers on which items
can be set or browsed. If you restrict the IP addresses, it is
not possible to use the Remote UI to set or browse detailed
information on computers other than those whose IP addresses
are allowed, even if both <USE SNMP> and <DEDICATED PORT>
are <ON>. For details, see “IP Address Range Settings,” on p. 6-39.
Troubleshooting
10
Appendix
11
Table of Contents
Index
6-8
TOP
Back
Before Using the
Machine
1
Document and Paper
2
Copying
7.
8.
3
Sending and
Receiving
4
Printing and
Scanning
5
Network
6
14. Press [
Use the numeric keys to enter the desired
community name other than “public,” then press
[OK].
15. Press [Stop/Reset] to return to the standby
Press [
] or [
] to select <COMMUNITY
NAME 2>, then press [OK].
10. Use the numeric keys to enter the desired
7
System Manager
Settings
8
Maintenance
9
Troubleshooting
] or [
] to select <ON>, then press
[OK].
mode.
16. Restart the machine.
Dedicated Port
To set or browse detailed information on the machine with a Canon
printer driver or utility, set <DEDICATED PORT> to <ON>.
community name, then press [OK].
11. Press [
Remote UI
Next
Press [
] or [
] to select <COMMUNITY
NAME 1>, then press [OK].
If you do not need to specify <COMMUNITY NAME 2>, skip to step
11.
9.
Previous
] or [
] to select <SNMP WRITABLE
1>, then press [OK].
12. Press [
] or [
] to select <ON>, then press
[OK].
If you do not need to specify <SNMP WRITABLE 2>, skip to step 15.
– If you want to use a Canon printer driver or utility, select <ON> for both
<USE SNMP> and <DEDICATED PORT>.
– You can restrict the IP addresses of computers on which items can be set
or browsed. If you restrict the IP addresses, it is not possible to use the
Remote UI to set or browse detailed information on computers other
than those whose IP addresses are allowed, even if both <USE SNMP>
and <DEDICATED PORT> are <ON>. For details, see “IP Address Range
Settings,” on p. 6-39.
13. Press [
] or [
] to select <SNMP WRITABLE
2>, then press [OK].
10
Appendix
11
Table of Contents
Index
6-9
TOP
Back
Before Using the
Machine
1
Document and Paper
2
1.
Press [Additional Functions].
2.
Press [
] or [
] to select <SYSTEM
SETTINGS>, then press [OK].
Copying
Printing and
Scanning
4
3.
Press [
] or [
] to select <NETWORK
SETTINGS>, then press [OK].
5
4.
Press [
] or [
] to select <DEDICATED
PORT>, then press [OK].
6
5.
Press [
] or [
] to select <ON> or <OFF>,
then press [OK].
Network
Remote UI
<ON>: If you want to set or browse detailed information on the
machine with a Canon printer driver or utility.
<OFF>: If you are not using a Canon printer driver or utility.
7
System Manager
Settings
Next
If the System Manager ID and System Password have been set, enter
the System Manager ID and System Password using the numeric
keys, then press [Log In/Out (ID)].
3
Sending and
Receiving
Previous
8
6.
Press [Stop/Reset] to return to the standby
mode.
9
7.
Restart the machine.
Maintenance
Troubleshooting
10
Appendix
11
Table of Contents
Index
6-10
TOP
Back
Before Using the
Machine
1
Document and Paper
2
Copying
3
Sending and
Receiving
Previous
Next
Setting Up a Computer for Printing/Sending a Fax
This section describes procedures for Setting Up a computer for
printing/sending a fax.
Before setting up a computer for printing/sending a fax, it is
necessary to perform the following setup procedures.
3.
It is recommended that the network administrator perform the following
procedures.
■
Basic Network Settings
Set up the basic network settings between the machine and
computers on your network. To specify the settings, use:
– Machine’s operation panel
– Web browser (Remote UI)
4
Printing and
Scanning
5
Network
1.
6
Remote UI
Network Cable Connection (See “Set the
Machine for Network Usage,” in the Starter
Guide.)
Connect the machine to your network using the network cables.
7
System Manager
Settings
8
Maintenance
9
Troubleshooting
10
2.
Preparation for Protocol Settings (See “Set the
Machine for Network Usage,” in the Starter
Guide.)
Specify the machine’s IP address so that the machine and the
network computer can communicate before making protocol
settings. Any of the following can be used to specify the settings.
– Machine’s operation panel (Additional Functions menu)
– NetSpot Device Installer (Canon utility software included in the
User Software CD)
Settings from the Operation Panel
You can select the printing method over a TCP/IP network.
1.
Press [Additional Functions].
2.
Press [
] or [
] to select <SYSTEM
SETTINGS>, then press [OK].
If the System Manager ID and System Password have been set, enter
the System Manager ID and System Password using the numeric
keys, then press [Log In/Out (ID)].
3.
Press [
] or [
] to select <NETWORK
SETTINGS>, then press [OK].
4.
Press [
] or [
] to select <TCP/IP SETTINGS>,
then press [OK].
Appendix
11
Table of Contents
Index
6-11
TOP
Back
Before Using the
Machine
1
Document and Paper
2
Copying
5.
6.
3
Sending and
Receiving
Printing and
Scanning
7.
5
8.
Network
System Manager
Settings
8
Maintenance
9
Troubleshooting
10
Press [
] or [
] to select <ON> or <OFF>,
then press [OK].
Press [
] or [
press [OK].
9.
] to select <RAW PRINT>, then
Press [
] or [
] to select <ON> or <OFF>,
then press [OK].
Confirm that <USE BIDIRECTIONAL> is
displayed, then press [OK].
10. Press [
] or [
■
Next
Machine Connection Method (LPD/Raw)
● Connecting to a TCP/IP Network:
<ON>: Uses Raw as the print application.
<OFF>: Does not use Raw.
6
7
] to select <LPD PRINT>, then
<ON>: Uses LPD as the print application.
<OFF>: Does not use LPD.
4
Remote UI
Press [
] or [
press [OK].
Previous
All computers that use the machine must have TCP/IP client
software installed and must be enabled for TCP/IP network use. For
details, see the manuals provided with the operating system.
● Installing the Printer Driver and Specifying the Machine
Destination Setting:
To print from a computer, you must install a printer driver and
specify a setting for the machine destination. The machine
destination setting differs depending on the print application used
for printing. Use the following information as a guide to determine
the print application you are using, and then perform the necessary
operations.
– LPD: This is the print application generally used with TCP/IP.
– Raw: This is a print application used with Windows 2000/XP/
Server 2003/Vista. It can print at higher speeds than LPD.
] to select <ON>, then press
[OK].
<ON>: Establishes bidirectional communication using Port 9100.
<OFF>: Does not establish bidirectional communication using Port
9100.
In the following procedures, items displayed on the screen for Windows XP
are used; items might differ depending on your operating system.
11. Press [Stop/Reset] to return to the standby
mode, then restart the machine.
Appendix
11
Table of Contents
Index
6-12
TOP
Back
Before Using the
Machine
1
Document and Paper
1.
– For Windows Vista, click [Start] on the Windows task bar →
[Control Panel] → [Printer] under [Hardware and Sound].
– For Windows 2000, click [Start] on the Windows task bar →
[Settings] → [Printers].
– For Windows XP Professional/Server 2003, click [start] on the
Windows task bar → [Printers and Faxes].
– For Windows XP Home Edition, click [start] on the Windows
task bar → [Control Panel] → [Printers and Other Hardware] →
[Printers and Faxes].
2
Copying
3
Sending and
Receiving
4
Printing and
Scanning
5
Network
6
Open the printer properties dialog box.
2.
Right-click the icon of the printer you installed
→ select [Properties].
3.
Display the [Ports] sheet by clicking the [Ports]
tab.
Previous
Next
4.
Open the [Printer Ports] dialog box by clicking
[Add Port].
5.
From [Available ports types], select [Standard
TCP/IP Port] → click [New Port].
The Add Standard TCP/IP Printer Port Wizard starts.
6.
Click [Next].
7.
In [Printer Name or IP Address], enter the
machine IP address or machine host name →
click [Next].
Remote UI
7
System Manager
Settings
8
Maintenance
9
Troubleshooting
10
Appendix
After the computer has confirmed that there is a machine in
which the entered IP address is assigned, the [Completing the Add
Standard TCP/IP Printer Port Wizard] window appears.
11
Table of Contents
Index
6-13
TOP
Back
Before Using the
Machine
1
Document and Paper
8.
Copying
Sending and
Receiving
Printing and
Scanning
3
9.
4
10. In the printer properties dialog box, click
Click [Close] to close the [Printer Ports] dialog
box.
5
[Configure Port] → Click [LPR] under [Protocol]
→ enter a print queue in [Queue Name] under
[LPR Settings].
6
If you want to use Raw, confirm [Raw] under [Protocol] is selected,
and proceed to step 11.
Network
Next
Click [Finish].
If the dialog box displays [Additional Port Information Required],
follow the instructions on the screen to search again, or click
[Standard] → click [Canon Network Printing Device with P9100] from
the pull-down list → click [Next].
2
Previous
You can specify a print queue in [Queue Name]. The following three
print queues are available:
LP: The machine prints according to its spool settings. Normally
select this option.
SPOOL: The machine prints only after spooling a print job on the
hard disk, regardless of its spool settings.
DIRECT: The machine prints without spooling a print job on the hard
disk, regardless of its spool settings.
11. Click [OK].
12. Click [Close].
Remote UI
7
System Manager
Settings
8
Maintenance
9
Troubleshooting
10
Appendix
11
Table of Contents
Index
6-14
TOP
Back
Before Using the
Machine
1
Document and Paper
2
Copying
3
Sending and
Receiving
4
Printing and
Scanning
■
If Windows 2000/XP/Server 2003/Vista is on your network, the
following procedure enables you to set up a print server for more
efficient management of network printers. Once a print server is set
up, print jobs can be managed by the print server. Also, by setting
up an alternate driver for the print server, printer drivers can be
installed in each computer via the network.
1.
Network
6
Remote UI
System Manager
Settings
9
Troubleshooting
Select [Share this printer] (Windows 2000:
[Shared as]) and enter a share name.
5.
If this machine is shared with users running
different versions of Windows, click [Additional
drivers].
When the alternate driver is installed, additional windows will open
for entering the location of the file containing the printer driver.
Follow the instructions in these windows.
To install the printer driver on another computer, use the [Printer
Wizard] window for selecting the printer destination → select
[Network printer] → select the shared printer for the computer
selected in the print server.
6.
Click [OK].
The shared printer settings are complete.
2.
Right-click the icon of the printer you installed
→ select [Sharing].
3.
For Windows Vista, click [Change sharing
options]
8
Maintenance
Next
4.
Open the printer properties dialog box.
– For Windows Vista, click [Start] on the Windows task bar →
[Control Panel] → [Hardware and Sound] → [Printers]
– For Windows 2000, click [Start] on the Windows task bar →
[Settings] → [Printers].
– For Windows XP Professional/Server 2003, click [start] on the
Windows task bar → [Printers and Faxes].
– For Windows XP Home Edition, click [start] on the Windows task
bar → [Control Panel] → [Printers and Other Hardware] → Printers
and Faxes].
5
7
Print Server Settings
Previous
For other operating systems, skip to step 4.
10
Appendix
11
Click [Continue] to proceed if the [User Account Control] dialog box
appears.
Table of Contents
Index
6-15
TOP
Back
Before Using the
Machine
1
Document and Paper
2
Copying
3
Sending and
Receiving
4
Printing and
Scanning
5
This section describes procedures for setting up e-mail.
Before setting up e-mail, it is necessary to perform the
following setup procedures.
It is recommended that the network administrator perform the following
procedures.
1.
6
7
System Manager
Settings
8
Maintenance
9
Troubleshooting
Next
Setting Up E-Mail
Network
Remote UI
Previous
Network Cable Connection (See “Set the
Machine for Network Usage,” in the Starter
Guide.)
Connect the machine to your network using the network cables.
2.
Preparation for Protocol Settings (See “Set the
Machine for Network Usage,” in the Starter
Guide.)
Specify the machine’s IP address so that the machine and the
network computer can communicate before making protocol
settings. Any of the following can be used to specify the settings.
– Machine’s operation panel (Additional Functions menu)
– NetSpot Device Installer (Canon utility software included in the
User Software CD)
3.
Basic Network Settings
Set up the basic network settings between the machine and
computers on your network. To specify the settings, use:
– Machine’s operation panel
– Web browser (Remote UI)
■
Settings from the Operation Panel
You may need to specify the DNS Settings to resolve the host names of
the SMTP and POP servers in order to send e-mail. For details, see “DNS
Settings,” on p. 6-35.
1.
Press [Additional Functions].
2.
Press [
] or [
] to select <SYSTEM
SETTINGS>, then press [OK].
If the System Manager ID and System Password have been set, enter
the System Manager ID and System Password using the numeric
keys, then press [Log In/Out (ID)].
10
Appendix
11
Table of Contents
Index
6-16
TOP
Back
Before Using the
Machine
1
Document and Paper
2
Copying
3
Sending and
Receiving
4
Printing and
Scanning
3.
Press [
] or [
] to select <NETWORK
SETTINGS>, then press [OK].
4.
Press [
] or [
] to select <E-MAIL/l-FAX>,
then press [OK].
5.
Press [
] or [
press [OK].
6.
Press [
] or [
] to select <ON> or <OFF>,
then press [OK].
5
6
Remote UI
7
System Manager
Settings
– The machine can receive I-fax images and communication error
notices only.
– You must register the host name of the machine with the DNS
server if you want to receive e-mail using the machine’s own
SMTP receiving function.
8
Maintenance
9
Troubleshooting
10
7.
Use the numeric keys to enter the SMTP server
name, then press [OK].
– Enter the SMTP server name if the SMTP server name is already
registered in the DNS server.
– Enter the IP address of the SMTP server if the SMTP server name
is not registered in the DNS server.
] to select <SMTP RX>, then
<OFF>: Does not receive e-mail/I-fax using the machine’s own SMTP
receiving function. If you want to receive e-mail/I-fax using a POP
server, select <OFF>.
<ON>: Receives e-mail/I-fax using the machine’s own SMTP receiving
function.
Network
8.
Next
Previous
Ex.
SMTP SERVER
smtp.company.com
9.
Press [
[OK].
] or [
:a
] to select <POP>, then press
10. Press [
] or [
] to select <ON> or <OFF>,
then press [OK].
<OFF>: Does not receive e-mail/I-fax using a POP server. If you want
to receive e-mail using the machine’s own SMTP receiving function,
select <OFF>.
<ON>: Receives e-mail using a POP server.
The machine can receive I-fax images and plain text e-mails only.
Press [
] or [
] to select <SMTP SERVER>,
then press [OK].
Appendix
11
Table of Contents
Index
6-17
TOP
Back
Before Using the
Machine
1
Document and Paper
2
Copying
3
Sending and
Receiving
4
Printing and
Scanning
5
Network
6
Remote UI
7
System Manager
Settings
8
Maintenance
9
11. Press [
] or [
] to select <AUTH/ENC
SETTINGS>, then press [OK].
12. Press [
] or [
] to select <POP BEFORE
SEND>, then press [OK].
13. Press [
Previous
Next
16. Use the numeric keys to enter the user name,
then press [OK].
– Enter the user name used for logging in to the SMTP server if the
SMTP server name is already registered in the DNS server.
– Enter the IP address of the SMTP server if the SMTP server name
is not registered in the DNS server.
] or [
] to select <ON> or <OFF>,
then press [OK].
17. Press [
<OFF>: Does not use an SMTP server that requires POP before SMTP.
<ON>: Uses an SMTP server that requires POP before SMTP (method
for authenticating users who have logged in the POP server before
sending e-mail).
18. Use the numeric keys to enter the password
14. Press [
] or [
press [OK].
] to select <SMTP AUTH>, then
<OFF>: Does not use an SMTP server that requires SMTP
Authentication. Skip to step 19.
<ON>: Uses an SMTP server that requires SMTP Authentication
(method for authenticating users who have logged in the SMTP
server before sending e-mail).
15. Press [
] or [
] or [
press [OK].
] to select <PASSWORD>, then
used for logging in to the SMTP server. then
press [OK].
19. Press [
] or [
] to select <E-MAIL ADDRESS>
is displayed, then press [OK].
] to select <USER>, then press
[OK].
Troubleshooting
10
Appendix
11
Table of Contents
Index
6-18
TOP
Back
Before Using the
Machine
1
Document and Paper
2
Copying
3
Sending and
Receiving
4
Printing and
Scanning
5
Network
20. Use the numeric keys to enter the e-mail address
your machine will use, then press [OK].
– Enter the e-mail address as follows when you receive e-mail
using a POP server.
Ex.
E-MAIL ADDRESS
:a
[email protected]
– Enter the e-mail address as follows when you receive e-mail
using the machine’s own SMTP receiving function.
Ex.
E-MAIL ADDRESS
:a
[email protected]
7
System Manager
Settings
8
Maintenance
21. Press [
] or [
] to select <POP SERVER>,
then press [OK].
22. Use the numeric keys to enter the POP server
name, then press [OK].
– Enter the POP server name if the POP server name is already
registered in the DNS server.
– Enter the IP address of the POP server if the POP server name is
not registered in the DNS server.
Ex.
POP SERVER
pop.company.com
:a
23. Press [
6
Remote UI
Next
Previous
] or [
] to select <POP ADDRESS>,
then press [OK].
– You can specify any user name (the part of the address located in
front of the @ symbol).
– Enter the host name after the “@” symbol in the e-mail address.
(In this example, the host name of the machine registered with
the DNS server is “host_name.company.com”.)
24. Use the numeric keys to enter the login name for
access to the POP server, then press [OK].
Ex.
POP ADDRESS
account1
:1
9
Troubleshooting
10
Appendix
11
Table of Contents
Index
6-19
TOP
Back
Before Using the
Machine
1
Document and Paper
2
Copying
3
Sending and
Receiving
4
Printing and
Scanning
5
Previous
Next
25. Press [
] or [
] to select <POP PASSWORD>,
then press [OK].
26. Use the numeric keys to enter the password for
access to the POP server, then press [OK].
27. Press [
] or [
] to select <POP INTERVAL>,
then press [OK].
28. Use [
], [
], or numeric keys to set the
interval at which you want to check the POP
server for incoming e-mail, then press [OK].
Network
6
Remote UI
7
System Manager
Settings
8
If the interval is set to 0, the POP server is not checked automatically.
For instructions on how to manually check the POP server, see
“Checking the Arrival of I-Fax,” on p. 4-47.
29. Press [Stop/Reset] to return to the standby
mode.
30. Restart the machine.
Maintenance
9
Troubleshooting
10
Appendix
11
Table of Contents
Index
6-20
TOP
Back
Before Using the
Machine
1
Document and Paper
2
Copying
3
Sending and
Receiving
Previous
Next
Setting Up a Computer as a File Server
This section describes procedures for setting up a computer as
a file server.
Before setting up a computer as a file server, it is necessary to
perform the following setup procedures.
3.
It is recommended that the network administrator perform the following
procedures.
■
Basic Network Settings
Set up the basic network settings between the machine and
computers on your network. To specify the settings, use:
– Machine’s operation panel
– Web browser (Remote UI)
4
Printing and
Scanning
5
Network
1.
6
Remote UI
Network Cable Connection (See “Set the
Machine for Network Usage,” in the Starter
Guide.)
Connect the machine to your network using the network cables.
7
System Manager
Settings
8
Maintenance
9
Troubleshooting
10
2.
Preparation for Protocol Settings (See “Set the
Machine for Network Usage,” in the Starter
Guide.)
Specify the machine’s IP address so that the machine and the
network computer can communicate before making protocol
settings. Any of the following can be used to specify the settings.
– Machine’s operation panel (Additional Functions menu)
– NetSpot Device Installer (Canon utility software included in the
User Software CD)
Settings from the Operation Panel
You may need to specify the WINS Settings to resolve the NetBIOS name
in order to send data to the file server. For details, see “WINS Settings,” on
p. 6-37.
1.
Press [
] or [
] to select <SYSTEM
SETTINGS>, then press [OK].
If the System Manager ID and System Password have been set, enter
the System Manager ID and System Password using the numeric
keys, then press [Log In/Out (ID)].
2.
Press [
] or [
] to select <NETWORK
SETTINGS>, then press [OK].
Appendix
11
Table of Contents
Index
6-21
TOP
Back
Before Using the
Machine
1
Document and Paper
2
Copying
3
Sending and
Receiving
4
Printing and
Scanning
3.
Press [
] or [
] to select <USE SMB CLIENT>,
then press [OK].
4.
Press [
[OK].
5.
Press [
] or [
press [OK].
6.
Use the numeric keys to enter the NetBIOS name
of the machine, then press [OK].
5
] or [
] to select <ON>, then press
– Be sure to enter a unique name that does not exist as a name for
another computer or printer on the same network.
– You cannot enter a character string that includes blanks.
Remote UI
8
Maintenance
9
Use the numeric keys to enter the name of the
workgroup the machine belongs to, then press
[OK].
9.
Press [
] or [
press [OK].
] to select <COMMENT>, then
10. Use the numeric keys to enter a comment if
necessary, then press [OK].
6
System Manager
Settings
Next
– You cannot enter the domain name as the workgroup name.
– You cannot enter a character string that includes blanks.
] to select <SERVER>, then
Network
7
8.
Previous
7.
Press [
] or [
] to select <WORKGROUP>,
then press [OK].
11. Press [
] or [
] to select <LM ANNOUNCE> is
displayed, then press [OK].
12. Press [
] or [
] to select <ON> or <OFF>,
then press [OK].
<OFF>: Does not notify the LAN Manager of its existence on the
network.
<ON>: Notifies the LAN Manager of its existence on the network.
Troubleshooting
10
Appendix
11
Table of Contents
Index
6-22
TOP
Back
Before Using the
Machine
1
Document and Paper
2
Copying
3
Sending and
Receiving
4
Printing and
Scanning
13. Press [Stop/Reset] to return to the standby
mode.
14. Restart the machine.
■
Configuring a Shared Folder
1.
Previous
Next
Specify the NetBIOS settings.
– Right-click the [Network Neighborhood] icon displayed on the
desktop → click [Properties].
– In [The following network components are installed], confirm
that both [Client for Microsoft Networks] and [File and printer
sharing for Microsoft Networks] appear. If these components do
not appear, click [Add] to install.
To send data from the machine to a computer on your network, you
need to specify the settings of the computer for receiving data. You
can send data over a NetBIOS network to a Windows shared folder.
5
Network
6
Remote UI
7
System Manager
Settings
The following procedures describe a sample shared folder configuration.
Depending on your environment, the actual configuration procedure may
differ.
Windows 98/Me
8
Maintenance
9
Troubleshooting
10
– If a suitable Windows 2000/XP/Server 2003/Vista machine is available on
your network, it is recommended that you configure that machine as a
file server instead of using a Windows 98/Me machine.
– In the following procedures, items displayed on the screen for Windows
98 are used; items might differ depending on your operating system.
Appendix
11
Table of Contents
Index
6-23
TOP
Back
Before Using the
Machine
1
Document and Paper
2
Copying
– Click [File and Print Sharing] → click [I want to be able to give
others access to my files] → click [OK].
– To specify the access control method, click the [Access Control]
tab → select the level of access control. If you select [User-level
access control], specify a domain in which a list of users and
groups is saved.
Previous
Next
– In the [Network] dialog box, click the [Identification] tab to
display the [Identification] sheet. Confirm the computer name.
3
Sending and
Receiving
4
Printing and
Scanning
5
Network
6
Remote UI
7
System Manager
Settings
8
Maintenance
– Click [OK] to close the [Network] dialog box.
9
Troubleshooting
10
Appendix
11
Table of Contents
Index
6-24
TOP
Back
Before Using the
Machine
1
Document and Paper
2
Copying
3
Sending and
Receiving
2.
Set up file sharing.
● If [Share-level access control] is selected:
– Right-click the folder you want to share using Explorer → click
[Sharing].
– On the [Sharing] sheet, click [Shared As] → enter the share name
in [Share Name].
Previous
Next
● If [User-level access control] is selected:
– Right-click the folder you want to share using Explorer → click
[Sharing].
– On the [Sharing] sheet, click [Shared As] → enter the share name
in [Share Name].
4
Printing and
Scanning
5
Network
6
Remote UI
7
System Manager
Settings
8
Maintenance
9
Troubleshooting
10
Appendix
11
– For [Access Type], select either [Full] or [Depends on Password].
– Enter a password. If [Depends on Password] is selected, enter
a password not longer than 8 alphanumeric characters for full
access.
– Confirm the settings you entered → click [OK].
– Click [Add] to open the [Add Users] dialog box on the screen.
– From the left list select the users to whom you want to give
access to the shared folder → add them to the right list.
For details on this dialog box, see the Windows 98/Me
documentation.
– Confirm the settings you entered → click [OK].
– Click [OK] to close the properties dialog box of the shared folder.
Table of Contents
Index
6-25
TOP
Back
Before Using the
Machine
1
Document and Paper
2
Copying
3.
Set a destination address using the machine’s
operation panel.
● Sample destination setting:
– Server side settings:
3
Sending and
Receiving
Printing and
Scanning
[Computer name]:
[Share Name]:
4
Create a folder called Images within share, and then specify Images
as the destination for sending.
– The machine’s destination settings:
5
The server protocol:
<NAME>:
<HOST NAME>:
<FILE PATH>:
<LOGIN NAME>:
Network
6
Remote UI
7
System Manager
Settings
swan
share
<PASSWORD>:
<SMB>
The destination’s name
\\swan\share
\Images
(Not required if you have selected [Sharelevel access control] in step 1)
Password entered in step 2.
Previous
Next
– A maximum of 120 alphanumeric characters can be entered
for <HOST NAME> on the operation panel. A maximum of 120
alphanumeric characters can be entered for <FILE PATH>, and
a maximum of 24 alphanumeric characters can be entered for
<LOGIN NAME>. Enter each of these items on the server using no
more than their allowable number of characters.
– If you change the language of the LCD display, <HOST NAME>
and <FILE PATH> may not be displayed correctly, or you may not
be able to browse the directories.
– If the language of the LCD display differs from the computer
on your network, <HOST NAME> and <FILE PATH> may not
be displayed correctly, or you may not be able to browse the
directories.
– You can send data using the following formats. A DNS server is
required for the latter case:
\\192.168.2.100\share
\\host_name.organization.company.com\share
– For instructions on how to specify destination address settings,
see “Specifying Destinations,” on p. 4-20.
8
Maintenance
9
Troubleshooting
10
Appendix
11
Table of Contents
Index
6-26
TOP
Back
Before Using the
Machine
1
Windows 2000/XP/Server 2003/Vista
Document and Paper
2
Copying
3
Sending and
Receiving
4
Printing and
Scanning
5
Network
6
– It is recommended that the file server be configured by the network
administrator.
– The number of users or clients that can access a server running Windows
2000 Server/XP/Server 2003/Vista is limited. After this number of users or
clients is reached, it is not possible to send to a server running Windows
2000/XP/Server 2003/Vista.
– In the following procedures, items displayed on the screen for Windows
XP are used; items might differ depending on your operating system.
1.
Log on to Windows as Administrator.
2.
Confirm the file sharing settings.
Remote UI
Previous
Next
● For Windows 2000:
– Right-click the [My Network Places] icon on the desktop → click
[Properties] to open the [Network and Dialup Connections]
window.
– Confirm that [Client for Microsoft Networks], [File and Printer
Sharing for Microsoft Networks], and [Internet Protocol (TCP/IP)]
are all selected. If any of these functions is not selected, select it
now.
● For Windows XP:
– Click [start] on the Windows taskbar → right-click [My Network
Places] → click [Properties] to open the [Network Connections]
window.
– Confirm that [Client for Microsoft Networks], [File and Printer
Sharing for Microsoft Networks], and [Internet Protocol (TCP/IP)]
are all selected. If any of these functions is not selected, select it
now.
● For Windows Server 2003:
7
System Manager
Settings
8
Maintenance
9
Troubleshooting
10
Appendix
For Windows Vista, click [Continue] to proceed if the [User Account
Control] dialog box appears.
● For Windows Vista:
– Click [Start] on the Windows task bar → right-click [Network]
→ [Properties] → [Manage network connections] → right-click
[Local Area Connection] → [Properties]
– Confirm that [Client for Microsoft Networks], [File and Printer
Sharing for Microsoft Networks], and [Internet Protocol Version
4 (TCP/IPv4)] are all selected. If any of these functions is not
selected, select it now.
– Click [Start] on the Windows taskbar → [Control Panel] →
[Network Connections] → Right-click the [Local Area Connection]
icon → click [Properties] to open the [Local Area Connection
Properties] dialog box.
– Confirm that [Client for Microsoft Networks], [File and Printer
Sharing for Microsoft Networks], and [Internet Protocol (TCP/IP)]
are all selected. If any of these functions is not selected, select it
now.
11
Table of Contents
Index
6-27
TOP
Back
Before Using the
Machine
1
Next
● For Windows 2000/XP/Server 2003
Document and Paper
– Double-click [Internet Protocol (TCP/IP)] to open the [Internet
Protocol (TCP/IP) Properties] dialog box → in the [General] sheet,
click [Advanced].
– In the [Advanced TCP/IP Settings] dialog box, click the [WINS] tab
→ in the [WINS] sheet, click [Enable NetBIOS over TCP/IP].
– Click [OK] until all the dialog boxes are closed.
– Restart the computer if prompted.
2
Copying
3
Sending and
Receiving
Previous
4
Printing and
Scanning
5
Network
6
Remote UI
7
System Manager
Settings
8
Maintenance
9
Troubleshooting
10
Appendix
3.
Specify the NetBIOS settings
● For Windows Vista
– Double-click [Internet Protocol Version 4 (TCP/IPv4)] to open the
[Internet Protocol Version 4 (TCP/IPv4) Properties] dialog box →
in the [General] sheet, click [Advanced].
– In the [Advanced TCP/IP Settings] dialog box, click the [WINS] tab
→ in the [WINS] sheet, click [Enable NetBIOS over TCP/IP].
– Click [OK] until all the dialog boxes are closed.
– Restart the computer if prompted.
11
Table of Contents
Index
6-28
TOP
Back
Before Using the
Machine
1
Document and Paper
4.
Confirm the computer name.
2
Copying
3
Sending and
Receiving
4
Printing and
Scanning
5
Network
6
Remote UI
For Windows Vista, click [Continue] to proceed if the [User Account
Control] dialog box appears.
● For Windows Vista:
– Click [Start] on the Windows taskbar → right-click [Computer] →
[Properties] → [Advanced system settings]
– Click the [Computer Name] tab to display the [Computer Name]
sheet.
– Click [Change] → [More] in the [Computer Name Changes] dialog
box.
– In the [DNS Suffix and NetBIOS Computer Name] dialog box,
confirm [NetBIOS computer name].
– Click [Cancel] until all the dialog boxes are closed.
Previous
Next
● For Windows XP/Server 2003:
– Click [start] or [Start] on the Windows taskbar → right-click [My
Computer] → click [Properties].
– Click the [Computer Name] tab to display the [Computer Name]
sheet.
– Click [Change] → [More] in the [Computer Name Changes] dialog
box.
– In the [DNS Suffix and NetBIOS Computer Name] dialog box,
confirm [NetBIOS computer name].
– Click [Cancel] until all the dialog boxes are closed.
● For Windows 2000:
7
System Manager
Settings
8
Maintenance
9
Troubleshooting
– Right-click the [My Computer] icon on the desktop → click
[Properties].
– Click the [Network Identification] tab to display the [Network
Identification] sheet.
– Click [Properties] → [More] in the [Identification Changes] dialog
box.
– In the [DNS Suffix and NetBIOS Computer Name] dialog box,
confirm [NetBIOS computer name].
– Click [Cancel] until all the dialog boxes are closed.
10
Appendix
11
Table of Contents
Index
6-29
TOP
Back
Before Using the
Machine
1
Document and Paper
5.
Open the [Computer Management] window.
For Windows XP Home Edition, skip step 7.
2
Copying
3
Sending and
Receiving
6.
Previous
Next
Set up the users and passwords for access to the
shared folder.
– Under [System Tools], double-click [Local Users and Groups] →
right-click the [Users] folder → click [New User].
For Windows Vista, click [Continue] to proceed if the [User Account
Control] dialog box appears.
● For Windows Vista:
4
Printing and
Scanning
5
Network
6
Remote UI
7
System Manager
Settings
Click [Start] on the Windows taskbar, right-click [Computer] → click
[Manage] to open the [Computer Management] window.
● For Windows 2000:
Right-click the [My Computer] icon on the desktop → click [Manage]
to open the [Computer Management] window.
● For Windows XP/Server 2003
Click [start] or [Start] on the Windows taskbar, right-click [My
Computer] → click [Manage] to open the [Computer Management]
window.
8
Maintenance
9
Troubleshooting
10
Appendix
11
Table of Contents
Index
6-30
TOP
Back
Before Using the
Machine
1
Document and Paper
2
– In the [New User] dialog box, enter the user name in [User name]
→ enter the password in [Password] → re-enter the password in
[Confirm password].
3
Configure the shared folder.
● For Windows Vista:
– Right-click the folder you want to share using Explorer → click
[Properties].
– On the [Sharing] sheet, click [Advanced Sharing]
– On the [Advanced Sharing] dialog box, select [Share this folder]
→ enter the share name in [Share name].
4
Printing and
Scanning
Next
For Windows Vista, click [Continue] to proceed if the [User Account
Control] dialog box appears.
Copying
Sending and
Receiving
7.
Previous
5
Network
6
Remote UI
7
System Manager
Settings
8
Maintenance
9
Troubleshooting
– Enter a user name not longer than 20 alphanumeric characters,
and a password not longer than 14 alphanumeric characters. If
[User must change password at next logon] is selected, any new
users added must change their passwords in order to send data
from the machine. (You cannot change the password from the
operation panel.)
– Confirm the settings → click [Create].
– Close the [Computer Management] window.
10
Appendix
11
Table of Contents
Index
6-31
TOP
Back
Before Using the
Machine
1
Document and Paper
2
Copying
3
Sending and
Receiving
● For Windows 2000/XP/Server 2003:
– Right-click the folder you want to share using Explorer → click
[Properties].
– On the [Sharing] sheet, click [Share this folder] → enter the share
name in [Share name].
8.
Previous
Next
Set security.
● To create a shared folder on a FAT or FAT32 format disk
(If the [Security] tab is not displayed):
– Click [Permissions] → select or add the users or groups to whom
you want to give access to the shared folder.
4
Printing and
Scanning
5
Network
6
Remote UI
7
System Manager
Settings
8
Maintenance
9
Troubleshooting
10
– Under [Permissions], select both [Change] and [Read] → click
[OK].
Appendix
11
Table of Contents
Index
6-32
TOP
Back
Before Using the
Machine
1
Document and Paper
2
Previous
Next
– In the [Security] sheet, select or add the users or groups to whom
you want give access to the shared folder.
– Under [Permissions], select both [Write] and [Read & Execute],
or a higher access authority. For data in the folder, check both
[Write] and [Read], or a higher access authority.
– Click [OK] → close the properties dialog box of the shared folder.
● To create a shared folder on an NTFS format disk:
– Click [Permissions] → select or add the users or groups to whom
you want to give access to the shared folder.
Copying
3
Sending and
Receiving
– To display the [Security] tab in Windows XP, follow the
procedures below. For details about the settings, see the
documentation provided with Windows XP.
– Windows XP Professional: Open Folder Options → deselect [Use
simple file sharing]. However, you can share folders and files with
[Use simple file sharing] selected. Select or deselect [Use simple
file sharing] to suit your environment.
– Windows XP Home Edition: Start Windows in safe mode → select
[Safe Mode with Networking] in the Windows Advanced Options
Menu. After logging on to Windows, you can find a [Security] tab
by opening the properties dialog box of the shared folder.
4
Printing and
Scanning
5
Network
6
Remote UI
7
System Manager
Settings
9.
8
Maintenance
9
Troubleshooting
10
Appendix
Set a destination address using the operation
panel.
● Sample destination setting:
– Under [Permissions], select both [Change] and [Read] → click
[OK].
– For Windows Vista, click [OK] to close the [Advanced Sharing]
dialog box
– Click the [Security] tab.
– Server side settings:
[NetBIOS computer name]:
[Share name]:
swan
share
Create a folder called Images within share, and then specify Images
as the destination for sending.
11
Table of Contents
Index
6-33
TOP
Back
Before Using the
Machine
1
Document and Paper
2
Copying
3
Sending and
Receiving
4
Printing and
Scanning
5
Network
6
Remote UI
7
System Manager
Settings
8
Maintenance
9
Troubleshooting
Previous
Next
– The machine’s destination settings:
The server protocol:
<NAME>:
<HOST NAME>:
<FILE PATH>:
<LOGIN NAME>:
<PASSWORD>:
<SMB>
The destination’s name
\\swan\share
\Images
User name entered in step 6.
Password for the above user.
– A maximum of 120 alphanumeric characters can be entered
for <HOST NAME> on the operation panel. Also, a maximum of
120 alphanumeric characters can be entered for <FILE PATH>.
Enter each of these items on the server using no more than their
allowable number of characters.
– If you change the language of the LCD display, <HOST NAME>
and <FILE PATH> may not be displayed correctly, or you may not
be able to browse the directories.
– If the language of the LCD display differs from the computer
on your network, <HOST NAME> and <FILE PATH> may not
be displayed correctly, or you may not be able to browse the
directories.
– You can send data using the following formats. A DNS server is
required for the latter case:
\\192.168.2.100\share
\\host_name.organization.company.com\share
– For instructions on how to specify destination address settings,
see “Specifying Destinations,” on p. 4-20.
– For Windows XP Home Edition, <LOGIN NAME> and
<PASSWORD> are not required.
10
Appendix
11
Table of Contents
Index
6-34
TOP
Back
Before Using the
Machine
1
Document and Paper
2
Copying
4
Printing and
Scanning
5
Network
6
Remote UI
7
System Manager
Settings
8
Maintenance
9
Troubleshooting
10
Next
Additional Network Settings
Depending your network environment, additional network
settings may be required.
3
Sending and
Receiving
Previous
3.
Press [
] or [
] to select <NETWORK
SETTINGS>, then press [OK].
4.
Press [
] or [
] to select <TCP/IP SETTINGS>,
then press [OK].
5.
Press [
] or [
] to select <DNS SETTINGS>,
then press [OK].
6.
Press [
] or [
] to select <PRIM. DNS
SERVER>, then press [OK].
7.
Use the numeric keys to enter the IP address of a
primary DNS server, then press [OK].
It is recommended that the network administrator perform the following
procedures.
■
TCP/IP Settings
DNS Settings
DNS (Domain Name Service) is a service used for associating a host
name (which is a name of a computer or a printer on a TCP/TCP/IP
network) with a unique IP address.
1.
Press [Additional Functions].
2.
Press [
] or [
] to select <SYSTEM
SETTINGS>, then press [OK].
If the System Manager ID and System Password have been set, enter
the System Manager ID and System Password using the numeric
keys, then press [Log In/Out (ID)].
If you do not need to specify secondary DNS server, skip to step 10.
8.
Press [
] or [
] to select <SECOND DNS
SERVER>, then press [OK].
9.
Use the numeric keys to enter the IP address of a
secondary DNS server, then press [OK].
Appendix
11
Table of Contents
Index
6-35
TOP
Back
Before Using the
Machine
1
Document and Paper
2
Copying
3
Sending and
Receiving
4
Printing and
Scanning
5
Network
6
Remote UI
7
System Manager
Settings
8
10. Press [
14. Press [
11. Use the numeric keys to enter the desired host
15. Press [
] or [
] to select <HOST NAME> is
displayed, then press [OK].
name, then press [OK].
Ex.
HOST
host
NAME
name
:a
12. Press [
] or [
] to select <DOMAIN NAME>,
then press [OK].
13. Use the numeric keys to enter the network
domain name, then press [OK].
Ex.
DOMAIN NAME
org.company.com
:a
Previous
Next
] or [
] to select <DNS DYNA.
UPDATE>, then press [OK].
] or [
] to select <ON> or <OFF>,
then press [OK].
<OFF>: Does not use the DNS server dynamic update function.
<ON>: Use the DNS server dynamic update function.
– The DNS dynamic update function enables the machine to
register its IP address, host name, and domain name to the DNS
server automatically. This function is available in the environment
where there is a dynamic DNS server.
– To use the DNS dynamic update function, enter the IP address
of a DNS server, and the host name and domain name of the
machine.
16. Press [Stop/Reset] to return to the standby
mode.
17. Restart the machine.
Maintenance
9
Troubleshooting
10
Appendix
11
Table of Contents
Index
6-36
TOP
Back
Before Using the
Machine
1
WINS Settings
Document and Paper
2
Copying
3
Sending and
Receiving
4
Printing and
Scanning
WINS (Windows Internet Name Service) is a service used for
associating a NetBIOS name (which is a name of a computer or a
printer on a NetBIOS network) with a unique IP address.
1.
Press [Additional Functions].
2.
Press [
] or [
] to select <SYSTEM
SETTINGS>, then press [OK].
Network
6
3.
Press [
] or [
] to select <NETWORK
SETTINGS>, then press [OK].
7
4.
Press [
] or [
] to select <TCP/IP SETTINGS>,
then press [OK].
8
5.
Press [
] or [
] to select <CONFIGURE
WINS>, then press [OK].
9
6.
Press [
] or [
] to select <WINS
RESOLUTION>, then press [OK].
Remote UI
Maintenance
Troubleshooting
Next
Press [
] or [
] to select <ON> or <OFF>,
then press [OK].
<OFF>: Does not resolve the name with WINS. Skip to step 10.
<ON>: Resolves the name with WINS.
8.
Press [
] or [
press [OK].
9.
Use the numeric keys to enter the IP address of a
WINS, then press [OK].
] to <WINS SERVER>, then
If the System Manager ID and System Password have been set, enter
the System Manager ID and System Password using the numeric
keys, then press [Log In/Out (ID)].
5
System Manager
Settings
7.
Previous
If DHCP determines the IP address, the IP address obtained from
a DHCP server is overwritten with the IP address of a WINS server
(obtained from the DHCP server), whenever possible.
10. Press [Stop/Reset] to return to the standby
mode.
11. Restart the machine.
10
Appendix
11
Table of Contents
Index
6-37
TOP
Back
Before Using the
Machine
1
HTTP Settings
Document and Paper
2
Copying
3
Sending and
Receiving
5
1.
Press [Additional Functions].
2.
Press [
] or [
] to select <SYSTEM
SETTINGS>, then press [OK].
If the System Manager ID and System Password have been set, enter
the System Manager ID and System Password using the numeric
keys, then press [Log In/Out (ID)].
3.
Press [
] or [
] to select <NETWORK
SETTINGS>, then press [OK].
4.
Press [
] or [
] to select <TCP/IP SETTINGS>,
then press [OK].
5.
Press [
] or [
press [OK].
6.
Press [
] or [
] to select <ON> or <OFF>,
then press [OK].
Network
6
Remote UI
7
System Manager
Settings
8
Maintenance
9
Troubleshooting
Next
7.
Press [Stop/Reset] to return to the standby
mode.
8.
Restart the machine.
You can restrict the use of Remote UI.
4
Printing and
Scanning
Previous
] to select <USE HTTP>, then
Port Number Settings
Depending on your network environment, you can change the port
number for each protocol.
1.
Press [Additional Functions].
2.
Press [
] or [
] to select <SYSTEM
SETTINGS>, then press [OK].
If the System Manager ID and System Password have been set, enter
the System Manager ID and System Password using the numeric
keys, then press [Log In/Out (ID)].
3.
Press [
] or [
] to select <NETWORK
SETTINGS>, then press [OK].
<ON>: Uses the Remote UI.
<OFF>: Does not use the Remote UI.
10
Appendix
11
Table of Contents
Index
6-38
TOP
Back
Before Using the
Machine
1
Document and Paper
2
Copying
3
Sending and
Receiving
4.
5.
Press [
] or [
press [OK].
6.
Press [
] or [
] to select the protocol of
which you want to change the port number
(LPD, RAW, HTTP, SMTP RX, POP3 RX, SMTP TX or
SNMP), then press [OK].
4
Printing and
Scanning
] to select <PORT NO.>, then
5
7.
6
Use the numeric keys to enter the port number,
then press [OK].
8.
Press [Stop/Reset] to return to the standby
mode.
9.
Restart the machine.
Network
Remote UI
7
System Manager
Settings
Press [
] or [
] to select <TCP/IP SETTINGS>,
then press [OK].
8
Maintenance
Previous
Next
IP Address Range Settings
You can restrict the machine access from the computers on the
network by specifying the range of IP addresses allowed/ forbidden
to access the machine.
1.
Press [Additional Functions].
2.
Press [
] or [
] to select <SYSTEM
SETTINGS>, then press [OK].
If the System Manager ID and System Password have been set, enter
the System Manager ID and System Password using the numeric
keys, then press [Log In/Out (ID)].
3.
Press [
] or [
] to select <NETWORK
SETTINGS>, then press [OK].
4.
Press [
] or [
] to select <TCP/IP SETTINGS>,
then press [OK].
5.
Press [
] or [
] to select <SET IP ADD
RANGE>, then press [OK].
9
Troubleshooting
10
Appendix
11
Table of Contents
Index
6-39
TOP
Back
Before Using the
Machine
1
Document and Paper
2
Copying
3
Sending and
Receiving
6.
Press [
[OK].
7.
Press [
] or [
] to select <PERMIT/REJECT>,
then press [OK].
8.
4
Printing and
Scanning
5
Network
6
Remote UI
7
System Manager
Settings
9.
] or [
] to select <ON>, then press
] or [
] to select <END IP ADDRESS>,
then press [OK].
14. Use the numeric keys to enter the end IP
address, then press [OK].
15. Press [Stop/Reset] to return to the standby
<Reject>: Restricts the access to the machine (printing/PC faxing/
Remote UI) from the computers with certain IP addresses.
<Permit>: Permits the access to the machine (printing/PC faxing/
Remote UI) from the computers with certain IP addresses.
16. Restart the machine.
Confirm that <SET IP ADDRESS> is displayed,
then press [OK].
10. Press [
] or [
] to select from <IP ADDRESS
1> through <IP ADDRESS 4>, then press [OK].
9
12. Use the numeric keys to enter the start IP
10
13. Press [
To enter another IP address range, repeat step 10 to 14.
8
Troubleshooting
Next
Press [
] or [
] to select <REJECT> or
<PERMIT>, then press [OK].
11. Press [
Maintenance
Previous
] or [
] to select <START IP
ADDRESS>, then press [OK].
address, then press [OK].
mode.
RX MAC Address Settings
You can restrict the machine access from the computers on the
network by specifying the MAC addresses of the computers
allowed/forbidden to access the machine.
1.
Press [Additional Functions].
2.
Press [
] or [
] to select <SYSTEM
SETTINGS>, then press [OK].
If the System Manager ID and System Password have been set, enter
the System Manager ID and System Password using the numeric
keys, then press [Log In/Out (ID)].
Appendix
11
Table of Contents
Index
6-40
TOP
Back
Before Using the
Machine
1
Document and Paper
2
Copying
3
Sending and
Receiving
4
Printing and
Scanning
3.
Press [
] or [
] to select <NETWORK
SETTINGS>, then press [OK].
4.
Press [
] or [
] to select <TCP/IP SETTINGS>,
then press [OK].
5.
6.
5
Press [
] or [
] to select <PERMIT RX MAC
ADD>, then press [OK].
Press [
] or [
] to select <ON> or <OFF>,
then press [OK].
<OFF>: Disables a MAC address filter.
<ON>: Enables a MAC address filter.
Network
6
Remote UI
If you select <ON>, you will be unable to access from MAC addresses
which have not been specified.
7
System Manager
Settings
8
Maintenance
9
7.
Press [
] or [
] to select from <PERMIT RX
ADD1> through <PERMIT RX ADD5>, then press
[OK].
8.
Previous
Next
Use the numeric keys to enter the MAC address
of the computer allowed to access the machine,
then press [OK].
Repeat step 7 and 8 to specify other MAC addresses.
9.
Press [Stop/Reset] to return to the standby
mode.
10. Restart the machine.
■
Startup Time Settings
If you connect the machine to a switching hub, it may not be able
to connect to a network even though your network settings are set
correctly.
This occurs because the spanning tree process performed between
switching hubs prevents them from communicating with each
other immediately after the machine connects to a switching hub.
In this case, use the following procedure to delay the startup of
network communication.
1.
Press [Additional Functions].
Troubleshooting
10
Appendix
11
Table of Contents
Index
6-41
TOP
Back
Before Using the
Machine
1
Document and Paper
2.
2
Printing and
Scanning
3.
Press [
] or [
] to select <NETWORK
SETTINGS>, then press [OK].
4
4.
Press [
] or [
] to select <STARTUP TIME
SET.>, then press [OK].
5.
6
Use [
], [
], or numeric keys to set the time
period required to delay the startup of network
communications for the machine, then press
[OK].
7
You can enter the value from 0 to 300 (seconds).
Network
Remote UI
System Manager
Settings
Press [
] or [
] to select <SYSTEM
SETTINGS>, then press [OK].
3
5
6.
Press [Stop/Reset] to return to the standby
mode.
7.
Restart the machine.
8
Maintenance
9
Next
If the System Manager ID and System Password have been set, enter
the System Manager ID and System Password using the numeric
keys, then press [Log In/Out (ID)].
Copying
Sending and
Receiving
Previous
Troubleshooting
10
Appendix
11
Table of Contents
Index
6-42
TOP
Back
Before Using the
Machine
1
Document and Paper
2
Copying
3
Sending and
Receiving
You can check the current network settings as follows.
1.
Press [Additional Functions].
2.
Press [
] or [
] to select <SYSTEM
SETTINGS>, then press [OK].
If the System Manager ID and System Password have been set, enter
the System Manager ID and System Password using the numeric
keys, then press [Log In/Out (ID)]. Press [
] or [
] to select
<NETWORK SETTINGS>, then press [OK].
5
Network
6
3.
Press [
] or [
] to select <NETWORK
SETTINGS>, then press [OK].
7
4.
Press [
] or [
] to select <VIEW IP
ADDRESS>, then press [OK].
8
5.
Press [
] or [
] to select <IP ADDRESS>,
<SUBNET MASK>, or <GATEWAY ADDRESS> for
displaying the setting you want to check, then
press [OK].
6.
Press [Stop/Reset] to return to the standby
mode.
Remote UI
System Manager
Settings
Maintenance
9
Troubleshooting
10
Next
Checking Network Settings
4
Printing and
Scanning
Previous
Appendix
11
Table of Contents
Index
6-43
TOP
Back
Before Using the
Machine
1
Document and Paper
2
Copying
3
Sending and
Receiving
Printing and
Scanning
■
– Web browser (Remote UI)
NetSpot Device Installer is utility software for specifying the initial
settings of Canon devices connected to a network. Available on the
CD-ROM, NetSpot Device Installer can be accessed directly without
installation, enabling network users to quickly and easily specify the
initial settings of network devices.
For instructions on how to use NetSpot Device Installer, see the
online help for NetSpot Device Installer.
5
– NetSpot Console (via a web browser) (Canon utility software)
Network
The utility software of the NetSpot Console is not included in the User
Software CD. To use the NetSpot Console, please download it from the
Canon website.
7
System Manager
Settings
■
8
Maintenance
9
Troubleshooting
10
Machine Management Using NetSpot
Device Installer
The machine enables you to use any of the following software
to check the status and to specify the settings on your
computer.
– NetSpot Device Installer (Canon utility software included in
the User Software CD)
Remote UI
Next
Machine Management
4
6
Previous
Machine Management Using Web Browser
(Remote UI)
You can use Remote UI installed in the machine to manage it on a
web browser.
For using Remote UI, see “Using the Remote UI,” on p. 7-4.
■
Machine Management Using NetSpot
Console
NetSpot Console is utility software capable of managing devices
connected to a network. This software enables network users to
set or view various types of information about network devices
using a web browser, such as list or map display of devices, detailed
protocol settings, display and notification of device status, and job
manipulations.
For instructions on how to use NetSpot Console, see the online help
for NetSpot Console.
Appendix
11
Table of Contents
Index
6-44
TOP
Back
Before Using the
Machine
1
Document and Paper
2
Copying
3
Sending and
Receiving
4
Printing and
Scanning
5
Network
6
Remote UI
7
System Manager
Settings
8
Maintenance
9
Troubleshooting
Previous
Next
7 Remote UI
System Requirements ......................................................................................7-3
Windows..........................................................................................7-3
Macintosh .......................................................................................7-3
Using the Remote UI ........................................................................................7-4
Starting the Remote UI ..............................................................7-4
Displaying Device Status and Information ....................................................7-6
Job Management..............................................................................................7-7
Managing Print Jobs ...................................................................7-7
Viewing the Activity Log ...........................................................7-8
Managing the Address Book ...........................................................................7-9
10
Appendix
11
Table of Contents
Index
7-1
TOP
Back
Before Using the
Machine
1
Document and Paper
2
Copying
3
Sending and
Receiving
4
Printing and
Scanning
5
Network
6
Remote UI
7
System Manager
Settings
8
Maintenance
9
Troubleshooting
10
Appendix
11
Previous
Next
Customizing System Settings ........................................................................7-12
Customizing System Information ....................................... 7-12
Specifying Forwarding Settings....................................................................7-15
Managing the Department/User ID ..............................................................7-21
Import/Export Function.................................................................................7-27
Saving the Address Book........................................................ 7-27
Loading an Address Book ...................................................... 7-28
Saving User Management Data in Files (Export) ........... 7-29
Loading User Management Data Files
(Overwrite/Import) ................................................................... 7-30
Saving Additional Functions Settings in Files
(Export) ......................................................................................... 7-32
Loading Additional Functions Settings Files
(Overwrite/Import) ................................................................... 7-33
Device Custom Settings .................................................................................7-35
Table of Contents
Index
7-2
TOP
Back
Before Using the
Machine
1
Document and Paper
Previous
Next
System Requirements
2
Copying
3
Sending and
Receiving
4
Printing and
Scanning
5
The Remote UI has been confirmed to work in the following
system environments.
■
Macintosh
● OS
■
Windows
– Mac OS 8.6 or later, until Mac OS X Classic
● OS
● Web Browser
– Microsoft Windows 98/98SE
– Microsoft Internet Explorer 5.01 SP1 or later
– Microsoft Windows Me
Network
6
– Microsoft Windows 2000 Professional
– Microsoft Windows XP
Remote UI
7
System Manager
Settings
– Microsoft Windows Vista
● Web Browser
8
– Microsoft Internet Explorer 5.01 SP1 or later
9
– Netscape Communicator/Navigator 6.0 or later, except Netscape
Communicator 6
Maintenance
Troubleshooting
10
Appendix
11
Table of Contents
Index
7-3
TOP
Back
Before Using the
Machine
1
Document and Paper
2
Copying
3
Sending and
Receiving
4
Printing and
Scanning
5
Remote UI
7
System Manager
Settings
8
Maintenance
9
Next
Using the Remote UI
The Remote UI software enables you to access and manage the
machine connected to a network using a web browser.
● Check the machine status from a network computer
● Set and control the machine from a computer
■
3.
Enter the ID and password.
– For No Management mode: Select [Administrator Mode] or [EndUser Mode] → enter the password or owner name.
– For Department ID Management mode: Enter the department ID
and password.
– For User Management mode: Enter the User ID and password.
Starting the Remote UI
For details on the ID and password, see “Managing the Department/
User ID,” on p. 7-21.
Network
6
Previous
Before you start the Remote UI, select <VIEW IP ADDRESS> in <NETWORK
SETTINGS> located in the <SYSTEM SETTINGS>, and verify the IP address of
the machine. If you do not know the IP address, consult with your network
administrator. (See “Checking Network Settings,” on p. 6-43.)
1.
Start the web browser.
2.
Enter the IP address of the machine in [Address]
or [Location] → press [Enter] on the keyboard.
The Remote UI screen appears.
Troubleshooting
10
Appendix
11
Table of Contents
Index
7-4
TOP
Back
Before Using the
Machine
1
Document and Paper
4.
Click [OK].
2
Previous
Next
A
Displays the current status of the machine,
etc.
B
Takes you to the Remote UI top page.
C
Updates (refreshes) the currently displayed
screen with the latest information.
D
Displays the online help for the Remote UI.
E
Displays the current status of print jobs, etc.
F
Takes you back to the top of a current page.
G
Displays a list of settings for the machine, etc.
H
Displays the Address Book data (one-touch
keys, etc.) registered on the machine.
Copying
3
Sending and
Receiving
4
Printing and
Scanning
5
Network
6
Remote UI
Takes you back to the previous page.
7
System Manager
Settings
8
[Device] - [Status] page is displayed when you logon the Remote UI.
Maintenance
9
Troubleshooting
10
Appendix
11
Table of Contents
Index
7-5
TOP
Back
Before Using the
Machine
1
Document and Paper
2
Copying
3
4
Printing and
Scanning
5
Network
6
You can view the current status of the machine and also
information about the administrator in charge of the machine,
the installation location and various machine settings.
Click [Device] → select the item you want to
display from the menu that appears under
[Device].
[Status]
Displays the current status of the
machine and any error messages.
To check details of errors, click [Error
Information].
[Information]
Displays information related to the
machine, such as the system manager’s
information and the location of the
machine.
[Features]
Displays the functions that are available
with the current system configuration.
[Network]
Displays information about the network
interface and any network protocols
that are enabled. If you are using
Administrator Mode, you can also adjust
these settings.
[Counter Check]
Displays the total number of pages that
have been output for printing, copying,
and received job printing.
Remote UI
7
System Manager
Settings
8
Maintenance
9
Next
Displaying Device Status and Information
1.
Sending and
Receiving
Previous
Troubleshooting
10
Appendix
11
If you are changing the Network Settings, the machine must be
restarted to enable the settings. Turn off the main power switch of
the machine, wait at least 10 seconds, and turn the power back on.
Table of Contents
Index
7-6
TOP
Back
Before Using the
Machine
1
Document and Paper
2
Copying
3
Sending and
Receiving
4
Printing and
Scanning
5
Previous
Next
Job Management
The Remote UI enables you to manage print jobs. It also
enables you to view the sending and receiving results of fax
jobs.
■
1.
Click [Job Status] → select [Print Job] from the
menu that appears under [Job Status].
Managing Print Jobs
You can use the Remote UI to manage print jobs that are being
processed by the machine, or are held in the print queue.
Network
6
Remote UI
7
System Manager
Settings
8
If [Permit End-user’s Job Operation] is not selected in [Register
ID and Password] or [Register Password] in [Edit] in [System
Settings] under [Add.Func.], you cannot delete any print jobs when
the machine is in the End-User Mode. If [Permit End-user’s Job
Operation] is selected, you can delete print jobs for which you have
owner privileges. (See “Customizing System Settings,” on p. 7-12.)
A list of print jobs being waiting or processed by the machine appear
Maintenance
9
Troubleshooting
10
Appendix
11
Table of Contents
Index
7-7
TOP
Back
Before Using the
Machine
1
Document and Paper
2
2.
To delete a print job, select the [Select] check
box next to the desired job → click [ ].
■
Previous
Next
Viewing the Activity Log
The Remote UI enables you to view the [Activity Log] of send jobs.
The [Activity Log] shows up to 40 recent transactions.
Copying
3
Sending and
Receiving
If you set <CHECKING THE LOG> to <OFF> in <SYSTEM SETTINGS>, the
[Activity Log] does not appear. (See “Checking the Job Log,” on p. 8-21.)
4
Printing and
Scanning
1.
Click [Job Status] → select [Activity Log] from
the menu that appears under [Job Status].
5
Network
6
Remote UI
7
System Manager
Settings
You cannot recover the job once it is deleted.
8
Maintenance
9
Troubleshooting
The [Activity Log] appears displaying information about fax jobs that
have already been processed by the machine.
10
Appendix
11
Table of Contents
Index
7-8
TOP
Back
Before Using the
Machine
1
Document and Paper
2
Copying
3
Sending and
Receiving
4
Printing and
Scanning
5
Network
Previous
Next
Managing the Address Book
The Remote UI enables you to view and modify the Address
Book data.
● To view/edit the registered addresses:
Click the number or the name to display the current address
information.
You can also access these setting menus from the operation panel of the
machine. For details, see “Machine Settings,” on p. 11-4.
1.
Click [Address] → [One-touch Speed Dial] or
[Coded Dial] from the menu that appears under
[Address].
6
Remote UI
7
System Manager
Settings
8
Maintenance
9
Troubleshooting
10
Appendix
11
Table of Contents
Index
7-9
TOP
Back
Before Using the
Machine
1
Document and Paper
Previous
Next
To edit the information, click [Edit] → make the necessary changes
on the Change Address screen → click [OK].
Specify the type of address from [Type] → enter the necessary
information → click [OK].
● To register a new address:
For group dialing, select [Group] from [Type] → enter a group name
in [Group Name] → click [Address Book] under [Members List].
2
Copying
3
Sending and
Receiving
4
Printing and
Scanning
5
Network
6
Remote UI
7
System Manager
Settings
Click [None] or any number for which [None] is displayed as the
name.
8
Maintenance
9
Troubleshooting
10
Appendix
11
Table of Contents
Index
7-10
TOP
Back
Before Using the
Machine
1
Document and Paper
2
Select [One-touch Speed Dial] or [Coded Dial] from the drop-down
list → select the check box next to the number to register for the
group dialing → click [OK].
Previous
Next
● To delete the registered addresses:
Select the check box next to the number to delete → click [
].
Copying
3
Sending and
Receiving
4
Printing and
Scanning
5
Network
6
Remote UI
7
System Manager
Settings
Make sure that the registered addresses are displayed in [Members
List] → click [OK].
You cannot recover the address once it is deleted.
8
Maintenance
9
Troubleshooting
10
Appendix
11
Table of Contents
Index
7-11
TOP
Back
Before Using the
Machine
1
Document and Paper
Previous
Next
Customizing System Settings
2
Copying
3
Sending and
Receiving
4
Printing and
Scanning
5
Network
6
Remote UI
■
Customizing System Information
2.
Enter the necessary information → click [OK].
The Remote UI enables you to specify the machine’s system
settings.
You can also access the system settings from the operation panel of the
machine. For details, see “Machine Settings,” on p. 11-4.
1.
Click [Add.Func.] → [System Settings] from the
menu that appears under [Add.Func.] → click
[Edit].
7
System Manager
Settings
8
Maintenance
9
Troubleshooting
10
Appendix
11
Table of Contents
Index
7-12
TOP
Back
Before Using the
Machine
1
Document and Paper
Previous
Next
● To protect the Restrict New Addresses:
● To set the System Manager ID and password:
Click [Restrict Access to Destinations].
Click [Register ID and Password].
Specify the necessary fields → click [OK].
Specify the necessary fields → click [OK].
2
Copying
3
Sending and
Receiving
4
Printing and
Scanning
5
Network
6
Remote UI
7
System Manager
Settings
8
Maintenance
9
Troubleshooting
10
Appendix
11
Table of Contents
Index
7-13
TOP
Back
Before Using the
Machine
1
Set ID and Password:
Sets the System Manager ID and
Password to protect the contents
of <SYSTEM SETTINGS>. Once
the System Manager ID and
Password is set, they must be
entered when you access the
<SYSTEM SETTINGS> menu from
the operation panel, or when you
logon the Remote UI.
System Manager ID:
Sets the System Manager ID (seven
digits maximum).
Set/ Change Password:
Select this check box to set a
password for the System manager
ID.
System Manager
Password:
Enter a number (seven digits
maximum).
Confirm:
Enter the password again. If the
number you enter here is different
from the number entered for
[System Manager Password], an
error dialog box appears.
Permit End-user’s Job
Operation:
Select this check box to permit
deleting print jobs for which you
have owner privileges when the
machine is in the End-User Mode.
Document and Paper
2
Copying
3
Sending and
Receiving
4
Printing and
Scanning
5
Network
6
Remote UI
7
System Manager
Settings
8
Maintenance
9
Troubleshooting
10
Previous
Next
Appendix
11
Table of Contents
Index
7-14
TOP
Back
Before Using the
Machine
1
Document and Paper
2
Copying
3
Sending and
Receiving
4
Printing and
Scanning
5
Previous
Next
Specifying Forwarding Settings
The Remote UI enables you to automatically forward received
documents to specified addresses. To use this function, you
need to specify the forwarding settings in two ways, and
depending on the settings the function will work differently:
1.
Click [Add.Func.] → [Forwarding Settings] from
the menu that appears under [Add.Func.].
● Forwarding conditions are set: the machine will forward only
documents that meet specified conditions.
● Forwarding conditions are not set: the machine will forward
all received documents.
Network
6
Remote UI
7
System Manager
Settings
– [Forwarding Settings] is displayed only when you are in the
Administrator Mode.
– You can store 10 forwarding settings with specific conditions.
– You can store the forwarding settings without conditions one at a time,
according to the Receive Type of the received document.
8
Maintenance
9
Troubleshooting
10
Appendix
11
Table of Contents
Index
7-15
TOP
Back
Before Using the
Machine
1
Document and Paper
2
● To forward only documents that meet specified
Previous
Next
Specify the necessary fields → click [OK].
forwarding conditions:
Click [
] (Add New Conditions).
Copying
3
Sending and
Receiving
4
Printing and
Scanning
5
Network
6
Remote UI
7
System Manager
Settings
8
Maintenance
9
Troubleshooting
10
Appendix
Receive Type:
Select [Fax] or [I-Fax] for the receiving
mode.
Condition Name:
Enter a name for the forwarding
condition. If you select [Enable This
Forwarding Condition], this forwarding
condition will be enabled.
Forwarding Conditions:
The settings here enable you to specify
the forwarding conditions that the
received documents must meet in order
to be forwarded.
The setting items differ depending on
the type of the receiving mode:
11
Table of Contents
Index
7-16
TOP
Back
Before Using the
Machine
1
Items for Fax:
Document and Paper
[disregarded]:
Disregards the Fax Number information
as a forwarding condition.
[does not exist]:
2
Copying
3
Sending and
Receiving
4
Printing and
Scanning
[equals]:
Network
Remote UI
Forwards the document if the Fax
Number information does not exist.
Disregards the Destination, From, or
Subject information as forwarding
conditions.
[equals]:
Forwards the document if the Fax
Number information matches all of the
characters entered.
Forwards the document if the From or
Subject information matches all of the
characters entered.
[differs from]:
Forwards the document if the
Destination, From, or Subject
information differs from the characters
entered.
[begins with]:
Forwards the document if the
Destination, From, or Subject
information begins with the characters
entered.
[ends with]:
Forwards the document if the
Destination, From, or Subject
information ends with the characters
entered.
[contains]:
Forwards the document if the
Destination, From, or Subject
information contains the characters
entered.
[begins with]:
Forwards the document if the Fax
Number information begins with the
characters entered.
[ends with]:
Forwards the document if the Fax
Number information ends with the
characters entered.
7
System Manager
Settings
[disregarded]:
Forwards the document if the Fax
Number information differs from the
characters entered.
6
8
[contains]:
9
[does not contain]: Forwards the document if the Fax
Number information does not contain
the characters entered.
Maintenance
Troubleshooting
10
Appendix
11
Next
Items for I-Fax:
[differs from]:
5
Previous
Forwards the document if the Fax
Number information contains the
characters entered.
[does not contain]: Forwards the document if the
Destination, From, or Subject
information does not contain the
characters entered.
Table of Contents
Index
7-17
TOP
Back
Before Using the
Machine
1
Forwarding Destination:
Document and Paper
Specify an address from the Address
Book by clicking [Address Book] → select
the desired address from the displayed
list → click [OK].
2
Copying
3
Sending and
Receiving
4
Printing and
Scanning
5
Previous
Next
● To forward all received documents without specific
conditions:
Click [Forwarding without Conditions].
Forwarding Settings:
If you are forwarding documents to an email address or a file server, you can set
their file format to [TIFF] or [PDF].
If you select [Divide into Pages], you can
forward files as divided pages.
Network
6
Specify the necessary fields → click [OK].
Remote UI
7
System Manager
Settings
8
Maintenance
9
Troubleshooting
10
Appendix
11
Table of Contents
Index
7-18
TOP
Back
Before Using the
Machine
1
Document and Paper
2
Copying
3
Sending and
Receiving
2.
Previous
Next
Select the receiving mode from [Receive Type].
● To delete the registered forwarding settings:
If you select [All], all the forwarding settings stored in the machine
are displayed.
Select the check box next to the forwarding condition to delete →
click [ ] (Delete the Selected Conditions).
● To view/change the registered forwarding settings:
Click the condition name to display the current forwarding setting.
4
Printing and
Scanning
5
Network
6
Remote UI
7
System Manager
Settings
To change the setting, make the necessary changes → click [OK].
You cannot recover the setting once it is deleted.
8
Maintenance
9
Troubleshooting
10
Appendix
11
Table of Contents
Index
7-19
TOP
Back
Before Using the
Machine
1
Document and Paper
Previous
Next
● To print a list of the registered forwarding settings:
Click [Print Forwarding Conditions List].
2
Copying
3
Sending and
Receiving
4
Printing and
Scanning
5
Network
6
Remote UI
7
System Manager
Settings
8
Maintenance
9
Troubleshooting
10
Appendix
11
Table of Contents
Index
7-20
TOP
Back
Before Using the
Machine
1
Document and Paper
2
Copying
3
Sending and
Receiving
4
Printing and
Scanning
Previous
Next
Managing the Department/User ID
By registering a department/user ID and password for each
department/user, you can manage the machine by limiting its
use to only those who enter the correct department/user ID
and password. Department/user IDs and passwords for up to 30
departments/users can be registered. You can also set the page
limit for each department to copy, print, and scan for sending
documents.
1.
Click [Add.Func.] → [Department ID/User
Management] from the menu that appears
under [Add.Func.] → click [Settings].
5
Network
6
Remote UI
7
System Manager
Settings
8
Maintenance
9
Troubleshooting
10
Appendix
– You can also access these setting menus from the operation panel of the
machine. For details, see “Machine Settings,” on p. 11-4.
– [Department ID/User Management] is displayed only when you are in the
Administrator Mode.
– When you use Department ID Management, you need to set both the
System Manager ID and password to restrict the access to the <SYSTEM
SETTINGS> menu from the operation panel, or using the Remote UI.
Otherwise, all users will be considered as System Manager, and anyone
can access the <SYSTEM SETTINGS> menu from the operation panel,
or use the Remote UI without restriction. (See “Customizing System
Information,” on p. 7-12.)
– When you use User ID Management, you need to register a user ID
with the administrator privilege to restrict the access to the <SYSTEM
SETTINGS> menu from the operation panel, or using the Remote UI.
Otherwise, all users will be considered as System Manager, and any one
can access the <SYSTEM SETTINGS> menu from the operation panel, or
use the Remote UI without restriction.
11
Table of Contents
Index
7-21
TOP
Back
Before Using the
Machine
1
Document and Paper
2.
2
Click [Department ID Management Settings] or
[User Management Settings] to register a new
department or user.
Copying
3
Sending and
Receiving
5
Network
6
Remote UI
7
System Manager
Settings
]
3.
Next
Department ID:
Enter the Department ID number (seven
digits maximum).
Set Password:
Select this check box to set a password
for the Department ID.
Password:
Enter a number (seven digits maximum).
Confirm:
Enter the password again. If the number
you enter here is different from the
number entered for [Password], an error
dialog box appears.
Page Limits:
You can restrict the number of pages by
the total of prints, copies, scan and color
scan mode, or by limiting each function
separately. Select the item, then use the
numeric keys to enter the number of
pages.
4
Printing and
Scanning
Previous
Specify the necessary fields → click [OK].
8
Maintenance
9
Troubleshooting
10
Appendix
11
Department ID registration screen
Table of Contents
Index
7-22
TOP
Back
Before Using the
Machine
1
Enter the Department ID number the
user belongs to (seven digits maximum).
If the Department ID Management mode
is set, be sure to assign the user to a
department. Otherwise, the user cannot
log on to the machine.
Set Password:
Select this check box to set a password
for the Department ID.
Password:
Enter a number (seven digits maximum).
Confirm:
Enter the password again. If the number
you enter here is different from the
number entered for [Password], an error
dialog box appears.
User Type:
Classify the user in two categories [User]
(End-User Mode) or [Administrator]
(Administrator Mode).
Display Name:
Enter the user name.
E-mail Address:
Enter the e-mail address of the user.
2
Copying
Sending and
Receiving
4
Printing and
Scanning
5
Network
Enter a log-on name (32 characters
maximum).
Set Password:
7
Select this check box to set a password
for the User ID.
Password:
Enter a character (32 characters
maximum).
8
Confirm:
Enter the password again. If the character
you enter here is different from the
character entered for [Password], an error
dialog box appears.
6
Remote UI
System Manager
Settings
User ID registration screen
User ID:
Maintenance
9
Next
Department ID:
Document and Paper
3
Previous
Troubleshooting
10
Appendix
11
Table of Contents
Index
7-23
TOP
Back
Before Using the
Machine
1
Document and Paper
2
4.
Click [Settings].
5.
Previous
Next
Select [Enable Department ID Management]
or [Enable User Management] → click [OK] to
activate the management mode.
Copying
3
Sending and
Receiving
4
Printing and
Scanning
5
Network
6
Remote UI
7
System Manager
Settings
8
Maintenance
9
Troubleshooting
10
[Enable Department ID
Management]
When this check box is selected,
Department ID Management
becomes enabled. When enabled,
the user must enter the Department
ID and password in order to execute
jobs, perform operations on Remote
UI, and use functions such as Copy,
Fax, and Scan. (This enables you
to keep track of the total number
of prints by department and set
impression limits.)
Appendix
11
Table of Contents
Index
7-24
TOP
Back
Before Using the
Machine
1
Document and Paper
[Enable User
Management]
When this check box is selected,
User Management becomes
enabled. When enabled, the
user must enter the User ID and
password in order to execute jobs,
perform operations on Remote UI,
and use functions, such as Copy, Fax,
and Scan. (This enables you to keep
track of the total number of prints
by User and set impression limits.)
When you enable both Department
ID Management and User ID
Management, you need to assign a
Department ID for each user. A user
without a Department ID cannot
use the machine.
[Accept Print Jobs with
Unknown Ids]
Select the check box to permit print
jobs with unknown IDs.
[Clear All Counts]
Click this button to reset the counter
to zero for all departments.
2
Copying
3
Sending and
Receiving
4
Printing and
Scanning
5
Network
6
Remote UI
7
System Manager
Settings
8
Previous
Next
● To view/edit the registered department/user ID:
Click [ ] or the user name to display the current department or user
information.
– You can click [Change List View] to switch the management list
between department and user ID.
– [Change List View] appears when both the department ID
management and user ID management are activated.
– You need to activate both the department ID management and
user ID management to view or edit the user ID.
To edit the information, make the necessary changes → click [OK].
Maintenance
9
Troubleshooting
10
Appendix
11
Table of Contents
Index
7-25
TOP
Back
Before Using the
Machine
1
Document and Paper
2
Copying
3
Sending and
Receiving
4
Printing and
Scanning
Previous
Next
● To delete the registered department/user ID:
Select the check box next to the department/user ID to delete →
click [ ] (Delete).
– You can click [Change List View] to switch the management list
between department and user ID.
– [Change List View] appears when both the department ID
management and user ID management are activated.
– You need to activate both the department ID management and
user ID management to delete the user ID.
5
Network
6
Remote UI
7
System Manager
Settings
8
Maintenance
9
Troubleshooting
10
Appendix
11
Table of Contents
Index
7-26
TOP
Back
Before Using the
Machine
1
Document and Paper
2
Copying
3
Sending and
Receiving
4
Printing and
Scanning
5
Network
6
Previous
Next
Import/Export Function
The Remote UI enables you to save the Address Book and other
settings information, such as a file that can be loaded into the
machine when needed. This function is useful when you want
to use the same settings on another machine, and for backing
up. The Import/Export function is intended for data exchange,
and is available only through the Remote UI.
■
Saving the Address Book
You can store the Address Book as a file in your computer.
1.
Click [Add.Func.] → select [Import/Export] from
the menu that appears under [Add.Func.] → click
[Address Book].
The Import/Export operation may take more than a few minutes to
complete. Do not turn the machine’s main power off until the operation is
complete. Otherwise, the machine may malfunction.
Remote UI
7
System Manager
Settings
8
Maintenance
9
– If the machine is in the Sleep mode, press [Energy Saver] on the
operation panel to cancel the Sleep mode before performing an Import
operation.
– During an Export operation, the screen display does not change until the
operation is complete. Do not click [Start Export] while the hourglass or
pointer indicates that the operation is still being processed.
– [Import/Export] is displayed only when you are in the Administrator
Mode.
Troubleshooting
10
Appendix
11
Table of Contents
Index
7-27
TOP
Back
Before Using the
Machine
1
Document and Paper
2.
Click [Start Export].
■
Previous
Next
Loading an Address Book
You can load address books into the machine from saved files.
2
Copying
– If the machine is in the Sleep mode, press [Energy Saver] on the
operation panel to cancel the Sleep mode before performing an Import
operation.
– When you register the contents of a new file, the currently registered
addresses are overwritten by the new address list.
– You can register up to 200 addresses in the Address Book. Each address is
treated as a separate item.
– You cannot import the settings in <OPTIONAL SETTING> in <ADDRESS
BOOK SET.> (See “Registering Fax Numbers,” on p. 4-10.)
– You cannot import the group dialing information which contains another
group dialing.
3
Sending and
Receiving
4
Printing and
Scanning
5
Network
6
Remote UI
7
System Manager
Settings
3.
Follow the instructions on the screen to specify
the location where you want to save the file.
The file is saved in the specified location.
1.
Click [Add.Func.] → select [Import/Export] from
the menu that appears under [Add.Func.] → click
[Address Book].
8
Maintenance
9
Troubleshooting
10
Appendix
11
Table of Contents
Index
7-28
TOP
Back
Before Using the
Machine
1
Document and Paper
2.
Click [Import].
2
■
Previous
Next
Saving User Management Data in Files
(Export)
You can store User Management Data as a file in your computer.
Copying
3
Sending and
Receiving
User type of all exported data is the End-User Mode.
1.
4
Printing and
Scanning
Click [Add.Func.] → [Import/Export] from the
menu that appears under [Add.Func.] → click
[User Management Data].
5
Network
6
Remote UI
3.
Click [Browse] → select the file to import → click
[OK].
7
System Manager
Settings
8
Maintenance
9
Troubleshooting
10
Appendix
11
Do not import any files while the machine is executing other jobs.
Table of Contents
Index
7-29
TOP
Back
Before Using the
Machine
1
Document and Paper
2.
Click [Start Export].
2
■
Previous
Next
Loading User Management Data Files
(Overwrite/Import)
You can load User Management Data into the machine from saved
files.
Copying
3
Sending and
Receiving
Printing and
Scanning
4
– If the machine is in the Sleep mode, press [Energy Saver] on the
operation panel to cancel the Sleep mode before performing an Import
operation.
– Imported user data is registered or overwritten as the End-User Mode.
5
1.
Network
6
Remote UI
7
System Manager
Settings
3.
Follow the instructions on the screen to specify
the location where you want to save the file.
Click [Add.Func.] → [Import/Export] from the
menu that appears under [Add.Func.] → click
[User Management Data].
The file is saved in the specified location.
8
Maintenance
9
Troubleshooting
10
Appendix
11
Table of Contents
Index
7-30
TOP
Back
Before Using the
Machine
1
Document and Paper
2.
Click [Import].
3.
Previous
Next
Click [Browse] → select the file to import click
[OK].
2
Copying
3
Sending and
Receiving
4
Printing and
Scanning
5
Network
6
Remote UI
7
System Manager
Settings
8
– Do not import any files while the machine is executing other jobs.
– If overlapped User IDs are registered in imported data, those IDs
will be registered in the machine as being overlapped. Among
those overlapped data, the last registered one is available.
Maintenance
9
Troubleshooting
10
Appendix
11
Table of Contents
Index
7-31
TOP
Back
Before Using the
Machine
1
■
Document and Paper
2
You can store Additional Functions settings as a file in your
computer.
3
1.
Copying
Sending and
Receiving
4
Printing and
Scanning
Saving Additional Functions Settings in
Files (Export)
Previous
Next
2.
Click [Start Export].
3.
Follow the instructions on the screen to specify
the location where you want to save the file.
Click [Add.Func.] → select [Import/Export] from
the menu that appears under [Add.Func.] → click
[Additional Functions].
5
Network
6
Remote UI
7
System Manager
Settings
The file is saved in the specified location.
8
Maintenance
9
Troubleshooting
10
Appendix
11
Table of Contents
Index
7-32
TOP
Back
Before Using the
Machine
1
■
Document and Paper
2
Copying
Loading Additional Functions Settings
Files (Overwrite/Import)
2.
Previous
Next
Click [Import].
You can load Additional Functions settings into the machine from
saved files.
3
Sending and
Receiving
4
Printing and
Scanning
5
If the machine is in the Sleep mode, press [Energy Saver] on the operation
panel to cancel the Sleep mode before performing an Import operation.
1.
Click [Add.Func.] → select [Import/Export] from
the menu that appears under [Add.Func.] → click
[Additional Functions].
Network
6
Remote UI
7
System Manager
Settings
8
Maintenance
9
Troubleshooting
10
Appendix
11
Table of Contents
Index
7-33
TOP
Back
Before Using the
Machine
1
Document and Paper
3.
Previous
Next
Click [Browse] → select the file to import → click
[OK].
2
Copying
3
Sending and
Receiving
4
Printing and
Scanning
5
Network
6
Remote UI
7
System Manager
Settings
8
Maintenance
9
Troubleshooting
10
– When Additional Functions settings are imported, the System
Manager ID, and Network Settings are automatically overwritten.
– The machine must be restarted to enable the imported
Additional Functions settings. After importing, turn off the main
power switch of the machine, wait at least 10 seconds, and turn
the power back on.
– After importing Additional Functions settings, the Remote UI
cannot be used to perform other operations until the machine is
restarted.
– Do not import any files while the machine is executing other
jobs.
Appendix
11
Table of Contents
Index
7-34
TOP
Back
Before Using the
Machine
1
Document and Paper
2
Copying
Previous
Next
Device Custom Settings
The Remote UI enables you to edit the machine’s custom
settings.
2.
Specify all the necessary fields → click [OK].
3
Sending and
Receiving
4
Printing and
Scanning
5
Network
6
You can also access these setting menus from the Operation Panel of the
machine. For details, see “Machine Settings,” on p. 11-4.
1.
Click [Add.Func.] → select [Common Settings]
from the menu that appears under [Add.Func.]
→ click the type of custom setting that you want
to specify.
Remote UI
7
System Manager
Settings
The above screen shot shows [Common Settings].
8
Maintenance
9
Troubleshooting
10
Appendix
11
Table of Contents
Index
7-35
TOP
Back
Before Using the
Machine
1
Document and Paper
2
Copying
3
Sending and
Receiving
4
Printing and
Scanning
5
Network
6
Remote UI
7
System Manager
Settings
8
Maintenance
9
Troubleshooting
10
Previous
Next
8 System Manager Settings
Specifying the System Manager Settings ......................................................8-3
Device Information Settings ...........................................................................8-5
Department ID Management ..........................................................................8-6
Registering the Department ID, Password, and Page
Limit ..................................................................................................8-6
Changing the Password and Page Limit ..............................8-8
Erasing the Department ID and Password ....................... 8-10
Checking Counter Information ............................................ 8-10
Clearing Page Totals ................................................................. 8-11
Printing Counter Information (DEPT. INFO LIST) ........... 8-12
Accepting Print Jobs with Unknown IDs .......................... 8-12
Appendix
11
Table of Contents
Index
8-1
TOP
Back
Before Using the
Machine
1
Document and Paper
3
Remote UI........................................................................................................8-16
5
Network
6
Remote UI
7
System Manager
Settings
Managing User IDs .........................................................................................8-14
Handling Documents with Forwarding Errors .............................................8-15
4
Printing and
Scanning
Next
2
Copying
Sending and
Receiving
Previous
8
Maintenance
9
Restricting Access to Destinations ................................................................8-17
Setting a Password for the Address Book......................... 8-17
Restricting the New Address................................................. 8-18
Restricting PC Faxing ............................................................... 8-18
Confirming Entered Fax Numbers ...................................... 8-19
Restricting Job Recall............................................................... 8-19
Restricting Broadcasting ........................................................ 8-20
Checking the Job Log .....................................................................................8-21
Restricting the USB Interface Port ................................................................8-22
Troubleshooting
10
Appendix
11
Table of Contents
Index
8-2
TOP
Back
Before Using the
Machine
1
Document and Paper
2
Copying
3
Sending and
Receiving
4
Printing and
Scanning
5
Network
6
Remote UI
7
System Manager
Settings
8
Maintenance
9
Troubleshooting
10
Appendix
Previous
Next
Specifying the System Manager Settings
You can set an ID and a password for the System Manager. Once
the System Manager ID/password is set, restrictions can be
placed on storing or changing the System Settings.
– When you use Department ID Management, you need to set both the
System Manager ID and password to restrict the access to the <SYSTEM
SETTINGS> menu from the operation panel, or using the Remote UI.
Otherwise, all users will be considered as System Manager, and anyone
can access the <SYSTEM SETTINGS> menu from the operation panel, or
use the Remote UI without restriction.
1.
Press [Additional Functions].
2.
Press [
] or [
] to select <SYSTEM
SETTINGS>, then press [OK].
If the System Manager ID and System Password have been set, enter
the System Manager ID and System Password using the numeric
keys, then press [Log In/Out (ID)].
3.
Press [
] or [
] to select <SYS. MANAGER
INFO>, then press [OK].
– You can enter a maximum of 32 characters for the System
Manager’s name.
4.
Press [
] or [
] to select <SYS. MANAGER
ID>, then press [OK].
– The maximum number of digits that you can store for the System
Manager ID and System Password is seven. If you enter fewer
than seven digits for either setting, the machine stores them with
leading zeros.
Example: If <321> is entered, <0000321> is stored.
5.
Use the numeric keys to enter a number, then
press [OK].
You must set both a System Manager ID and password to manage
the operations of the machine.
– If you enter a number that begins with zeros, the leading zeros
are ignored.
Example: If <02> or <002> is entered, <0000002> is stored.
– If you make a mistake when entering a number, press [Clear] to
clear the entire number → enter the correct number.
11
Table of Contents
Index
8-3
TOP
Back
Before Using the
Machine
1
Document and Paper
2
Copying
3
Sending and
Receiving
4
Printing and
Scanning
5
6.
Press [
] or [
] to select <SYSTEM
PASSWORD>, then press [OK].
7.
Use the numeric keys to enter a number, then
press [OK].
8.
Press [
] or [
] to select <SYSTEM
MANAGER>, then press [OK].
9.
Use the numeric keys to enter the System
Manager’s name, then press [OK].
Previous
Next
10. Press [Stop/Reset] to return to the standby
Network
6
mode.
Remote UI
7
System Manager
Settings
8
Maintenance
9
Troubleshooting
10
Appendix
11
Table of Contents
Index
8-4
TOP
Back
Before Using the
Machine
1
Document and Paper
2
Copying
Sending and
Receiving
Printing and
Scanning
You can set a name for the machine, and enter information
regarding its location.
1.
Press [Additional Functions].
4
2.
Press [
] or [
] to select <SYSTEM
SETTINGS>, then press [OK].
If the System Manager ID and System Password have been set, enter
the System Manager ID and System Password using the numeric
keys, then press [Log In/Out (ID)].
5
6
3.
Press [
] or [
] to select <DEVICE INFO>,
then press [OK].
7
4.
Press [
] or [
] to select <DEVICE NAME>,
then press [OK].
Remote UI
System Manager
Settings
Next
Device Information Settings
3
Network
Previous
5.
Use the numeric keys to enter a name (up to 32
characters), then press [OK].
6.
Press [
] or [
press [OK].
7.
Use the numeric keys to enter the location of the
machine (up to 32 characters), then press [OK].
8.
Press [Stop/Reset] to return to the standby
mode.
] to select <LOCATION>, then
8
Maintenance
9
Troubleshooting
10
Appendix
11
Table of Contents
Index
8-5
TOP
Back
Before Using the
Machine
1
Document and Paper
2
Copying
3
Sending and
Receiving
4
Printing and
Scanning
5
Network
6
Remote UI
7
System Manager
Settings
Previous
Next
Department ID Management
You can register a Department ID and password for each
department, and manage the machine by limiting its use to
only those who enter the correct Department ID and password.
This is called Department ID Management. Use Department ID
Management to keep track of the copy, scan, and print totals
for each department.
With Department ID Management, the following settings can
be specified:
– Turn Department ID Management ON or OFF.
– Register the Department ID and password.
– Set page limits for scans, prints, and copies.
– Accept or reject print jobs from computers with unknown IDs.
– When you use Department ID Management, you need to set both the
System Manager ID and password to restrict the access to the <SYSTEM
SETTINGS> menu from the operation panel, or using the Remote UI.
Otherwise, all users will be considered as System Manager, and anyone
can access the <SYSTEM SETTINGS> menu from the operation panel,
or use the Remote UI without restriction. (See “Specifying the System
Manager Settings,” on p. 8-3.)
– The pages of received fax/I-fax documents and automatically printed
reports are not counted as prints.
– The maximum number of digits that you can store for the Department
ID and password is seven. If you enter fewer than seven digits for either
setting, the machine stores them with leading zeros.
Example: If <321> is entered, <0000321> is stored.
– If you enter a number that begins with zeros, the leading zeros are
ignored.
Example: If <02> or <002> is entered, <0000002> is stored.
8
– If you make a mistake when entering a number, press [Clear] to clear the
entire number → enter the correct number.
– You can set the page limit from 0 to 999,999 pages.
9
■
Maintenance
Troubleshooting
10
Appendix
1.
Registering the Department ID, Password,
and Page Limit
Press [Additional Functions].
11
Table of Contents
Index
8-6
TOP
Back
Before Using the
Machine
1
Document and Paper
2.
2
Copying
Sending and
Receiving
Printing and
Scanning
If the System Manager ID and System Password have been set, enter
the System Manager ID and System Password using the numeric
keys, then press [Log In/Out (ID)].
9.
Use the numeric keys to enter the password,
then press [OK].
Press [
] or [
] to select <MANAGE DEPT.
ID>, then press [OK].
10. Press [
4
4.
Press [
[OK].
11. Press [
5.
Press [
] or [
] to select <REGISTER DEPT.
ID>, then press [OK].
6.
Press [
] or [
] to select the number to
which department will be designated, then
press [OK].
6
Remote UI
7
System Manager
Settings
Press [
] or [
press [OK].
3.
Network
8
Maintenance
7.
Next
8.
Press [
] or [
] to select <SYSTEM
SETTINGS>, then press [OK].
3
5
Previous
] or [
] to select <ON>, then press
Use the numeric keys to enter the Department
ID, then press [OK].
] to select <PASSWORD>, then
] or [
] to select <PAGE LIMIT SET.>,
then press [OK].
] or [
] to select the desired
function, then press [OK].
You can select <TOTAL PRINT LIMIT>, <COPY LIMIT>, <BLACK SCAN
LIMIT>, <COLOR SCAN LIMIT>, or <PRINT LIMIT>.
<TOTAL PRINT> is the sum of <COPY LIMIT> and <PRINT LIMIT>.
12. Press [
] or [
] to select <ON> or <OFF>,
then press [OK].
<OFF>: Does not set a page limit restriction. Skip to step 15.
<ON>: Set a page limit restriction.
9
Troubleshooting
10
If you do not want to set a password, you can use the machine by
entering only the Department ID.
Appendix
11
Table of Contents
Index
8-7
TOP
Back
Before Using the
Machine
1
Document and Paper
2
Copying
3
Sending and
Receiving
4
Printing and
Scanning
13. Press [
] or [
] to select <PAGE TOTALS>
(when <TOTAL PRINT LIMIT> is selected), then
press [OK].
The message displayed will vary depending on which function you
selected in step 11.
Example: <COPY LIMIT> appears when <COPY LIMIT> is selected.
14. Use the numeric keys to enter the maximum
6
Remote UI
7
System Manager
Settings
– You can set the page limit from 0 to 999,999 pages. Once a page
limit is reached, copying, scanning, or printing is not possible.
– The page limit refers to the number of printed surfaces. Therefore,
a two-sided print is counted as two pages.
15. Press [Stop/Reset] to return to the standby
mode.
8
Next
Changing the Password and Page Limit
You can change the password and page limit settings that you have
registered.
1.
Press [Additional Functions].
2.
Press [
] or [
] to select <SYSTEM
SETTINGS>, then press [OK].
number of pages that can be made by the
registered Department ID, then press [OK].
5
Network
■
Previous
If the System Manager ID and System Password have been set, enter
the System Manager ID and System Password using the numeric
keys, then press [Log In/Out (ID)].
3.
Press [
] or [
] to select <MANAGE DEPT.
ID>, then press [OK].
4.
Press [
[OK].
5.
Press [
] or [
] to select <REGISTER DEPT.
ID>, then press [OK].
] or [
] to select <ON>, then press
Maintenance
9
Troubleshooting
10
Appendix
11
Table of Contents
Index
8-8
TOP
Back
Before Using the
Machine
1
Document and Paper
6.
Press [
] or [
] to select the Department
ID whose password and page limit you want to
change, then press [OK] twice.
12. Press [
7.
Press [
] or [
press [OK].
13. Press [
8.
Press [Clear] to clear the current password.
2
Copying
3
Sending and
Receiving
4
Printing and
Scanning
5
9.
] to select <PASSWORD>, then
Use the numeric keys to enter the new
password, then press [OK].
Remote UI
7
System Manager
Settings
8
Maintenance
9
Next
] or [
] to select <ON> or <OFF>,
then press [OK].
<OFF>: Does not set a page limit restriction. Skip to step 16.
<ON>: Set a page limit restriction.
] or [
] to select <PAGE TOTALS>
(when <TOTAL PRINT LIMIT> is selected), then
press [OK].
The message displayed will vary depending on which function you
selected in step 11.
Example: <COPY LIMIT> appears when <COPY LIMIT> is selected.
14. Press [Clear] to clear the current number of page
Network
6
Previous
limit restriction.
You cannot change the Department ID.
10. Press [
] or [
] to select <PAGE LIMIT SET.>,
then press [OK].
11. Press [
] or [
] to select the desired
function, then press [OK].
15. Use the numeric keys to enter the maximum
number of pages that can be made by the
registered Department ID, then press [OK].
16. Press [Stop/Reset] to return to the standby
mode.
You can select <TOTAL PRINT LIMIT>, <COPY LIMIT>, <BLACK SCAN
LIMIT>, <COLOR SCAN LIMIT>, or <PRINT LIMIT>.
Troubleshooting
10
Appendix
11
Table of Contents
Index
8-9
TOP
Back
Before Using the
Machine
1
Document and Paper
2
Copying
3
Sending and
Receiving
■
You can erase the Department ID and password that you have
registered.
5
Network
6
Remote UI
7
System Manager
Settings
9
Troubleshooting
10
Press [
] or [
press [OK].
8.
] to select <ERASE>, then
Press [Additional Functions].
Press [
] or [
] to select <YES> or <NO>,
then press [OK].
2.
Press [
] or [
] to select <SYSTEM
SETTINGS>, then press [OK].
<NO>: Does not erase the selected Department ID and all of its
settings.
<YES>: Erase the selected Department ID and all of its settings.
If the System Manager ID and System Password have been set, enter
the System Manager ID and System Password using the numeric
keys, then press [Log In/Out (ID)].
3.
4.
Press [
] or [
] to select <MANAGE DEPT.
ID>, then press [OK].
Press [
[OK].
] or [
] to select <ON>, then press
5.
Press [
] or [
] to select <REGISTER DEPT.
ID>, then press [OK].
6.
Press [
] or [
] to select the Department ID
that you want to erase, then press [OK] twice.
8
Maintenance
7.
Next
1.
4
Printing and
Scanning
Erasing the Department ID and Password
Previous
9.
■
Press [Stop/Reset] to return to the standby
mode.
Checking Counter Information
You can check how much paper was used by the each department.
1.
Press [Additional Functions].
2.
Press [
] or [
] to select <SYSTEM
SETTINGS>, then press [OK].
If the System Manager ID and System Password have been set, enter
the System Manager ID and System Password using the numeric
keys, then press [Log In/Out (ID)].
3.
Press [
] or [
] to select <MANAGE DEPT.
ID>, then press [OK].
Appendix
11
Table of Contents
Index
8-10
TOP
Back
Before Using the
Machine
1
Document and Paper
2
Copying
3
Sending and
Receiving
4.
5.
6.
4
Printing and
Scanning
5
Network
6
7.
System Manager
Settings
8.
8
Maintenance
9
] or [
] to select <ON>, then press
Press [
] or [
] to select <PAGE TOTALS>,
then press [OK].
■
9.
Next
Clearing Page Totals
You can clear the page totals made for all departments.
1.
Press [Additional Functions].
2.
Press [
] or [
] to select <SYSTEM
SETTINGS>, then press [OK].
Press [
] or [
] to select <VIEW PAGE
TOTALS>, then press [OK].
If the System Manager ID and System Password have been set, enter
the System Manager ID and System Password using the numeric
keys, then press [Log In/Out (ID)].
If you select <CLEAR ALL TOTAL>, the counter information is deleted.
3.
Press [
] or [
] to select the desired
function, then press [OK].
Press [
] or [
] to select <MANAGE DEPT.
ID>, then press [OK].
4.
Press [
[OK].
5.
Press [
] or [
] to select <PAGE TOTALS>,
then press [OK].
6.
Press [
] or [
] to select <CLEAR ALL
TOTAL>, then press [OK].
You can select <TOTAL PRINT>, <COPY>, <SCAN>, <COLOR SCAN>
or <PRINT>.
Remote UI
7
Press [
[OK].
Previous
Press [
] or [
] to display the desired
Department ID, and check the counter
information.
Press [Stop/Reset] to return to the standby
mode.
] or [
] to select <ON>, then press
Troubleshooting
10
Appendix
11
Table of Contents
Index
8-11
TOP
Back
Before Using the
Machine
1
Document and Paper
7.
2
Copying
3
Sending and
Receiving
4
Printing and
Scanning
5
Network
6
Remote UI
7
System Manager
Settings
8.
■
Next
5.
Press [
] or [
] to select <PAGE TOTALS>,
then press [OK].
<NO>: Does not clear the page totals.
<YES>: Clear the page totals.
6.
Press [Stop/Reset] to return to the standby
mode.
Press [
] or [
press [OK].
7.
Press [
Press [
] or [
] to select <YES> or <NO>,
then press [OK].
] to select <PRINT LIST>, then
] to select <YES>.
Printing starts, and the screen automatically returns to the standby
mode.
If you do not want to print the counter information, press [
] to
select <NO>.
Printing Counter Information (DEPT. INFO
LIST)
You can print a list of how much paper was used by the each
department.
■
Accepting Print Jobs with Unknown IDs
1.
Press [Additional Functions].
You can specify whether to accept or reject print jobs from
computers that do not correspond with a registered Department ID.
2.
Press [
] or [
] to select <SYSTEM
SETTINGS>, then press [OK].
1.
Press [Additional Functions].
If the System Manager ID and System Password have been set, enter
the System Manager ID and System Password using the numeric
keys, then press [Log In/Out (ID)].
2.
Press [
] or [
] to select <SYSTEM
SETTINGS>, then press [OK].
8
Maintenance
9
3.
Press [
] or [
] to select <MANAGE DEPT.
ID>, then press [OK].
10
4.
Press [
[OK].
Troubleshooting
Appendix
Previous
] or [
] to select <ON>, then press
If the System Manager ID and System Password have been set, enter
the System Manager ID and System Password using the numeric
keys, then press [Log In/Out (ID)].
3.
Press [
] or [
] to select <MANAGE DEPT.
ID>, then press [OK].
11
Table of Contents
Index
8-12
TOP
Back
Before Using the
Machine
1
Document and Paper
2
Copying
3
Sending and
Receiving
4.
Press [
[OK].
5.
Press [
] or [
] to select <PDL JOBS W/OUT
ID>, then press [OK].
6.
Press [
] or [
] to select <ON> or <OFF>,
then press [OK].
4
Printing and
Scanning
6
Next
] to select <ON>, then press
<ON>: The machine accepts print jobs from computers that do not
correspond with a registered Department ID.
<OFF>: The machine does not accept print jobs from computers that
do not correspond with a registered Department ID.
5
Network
] or [
Previous
7.
Press [Stop/Reset] to return to the standby
mode.
Remote UI
7
System Manager
Settings
8
Maintenance
9
Troubleshooting
10
Appendix
11
Table of Contents
Index
8-13
TOP
Back
Before Using the
Machine
1
Document and Paper
2
Copying
3
Sending and
Receiving
4
Printing and
Scanning
5
Network
6
Remote UI
7
System Manager
Settings
8
Maintenance
9
Troubleshooting
10
Appendix
Previous
Next
Managing User IDs
You can set whether or not to use the User ID Management.
The User ID Management function enables you to register up to
30 User IDs.
– When you use User ID Management, you need to register a user ID
with the administrator privilege to restrict the access to the <SYSTEM
SETTINGS> menu from the operation panel, or using the Remote UI.
Otherwise, all users will be considered as System Manager, and anyone
can access the <SYSTEM SETTINGS> menu from the operation panel, or
use the Remote UI without restriction. (See “Managing the Department/
User ID,” on p. 7-21.)
– The User ID and password can be registered only from the Remote UI. For
details about the User ID Management, see “Managing the Department/
User ID,” on p. 7-21.
– You need to register the User ID and password before you set this mode
to <ON>.
– One Department ID can be registered for each User ID.
1.
Press [Additional Functions].
2.
Press [
] or [
] to select <SYSTEM
SETTINGS>, then press [OK].
3.
Press [
] or [
] to select <MANAGE USER
ID>, then press [OK].
4.
Press [
] or [
] to select <ON> or <OFF>,
then press [OK].
<ON>: User ID Management is enabled.
<OFF>: User ID Management is disabled.
5.
Press [Stop/Reset] to return to the standby
mode.
If the System Manager ID and System Password have been set, enter
the System Manager ID and System Password using the numeric
keys, then press [Log In/Out (ID)].
11
Table of Contents
Index
8-14
TOP
Back
Before Using the
Machine
1
Document and Paper
2
Copying
4
Printing and
Scanning
5
Network
You can set how the machine handles the documents that failed
to be forwarded.
If a forwarding error occurs when both <PRINT> and <STORE TO MEMORY>
are set to <OFF>, the received document will be lost.
1.
Press [Additional Functions].
2.
Press [
] or [
] to select <SYSTEM
SETTINGS>, then press [OK].
6
5.
System Manager
Settings
8
Maintenance
9
3.
Press [
] or [
] to select <FORWARD ERR.
SET.>, then press [OK].
4.
Press [
[OK].
] or [
Press [
] or [
] to select <ON> or <OFF>,
then press [OK].
<ON>: The machine prints received documents when document
forwarding fails.
<OFF>: The machine does not print the image.
6.
Press [
] or [
] to select <STORE TO
MEMORY>, then press [OK].
7.
Press [
] or [
] to select <ON> or <OFF>,
then press [OK].
If the System Manager ID and System Password have been set, enter
the System Manager ID and System Password using the numeric
keys, then press [Log In/Out (ID)].
Remote UI
7
Next
Handling Documents with Forwarding Errors
3
Sending and
Receiving
Previous
<ON>: The machine stores received documents in memory when
document forwarding fails.
<OFF>: The machine does not store the image.
8.
Press [Stop/Reset] to return to the standby
mode.
] to select <PRINT>, then press
Troubleshooting
10
Appendix
11
Table of Contents
Index
8-15
TOP
Back
Before Using the
Machine
1
Document and Paper
2
Copying
Sending and
Receiving
Printing and
Scanning
You can set whether to enable the Remote UI to operate the
machine and change settings.
1.
Press [Additional Functions].
4
2.
Press [
] or [
] to select <SYSTEM
SETTINGS>, then press [OK].
6
3.
Press [
] or [
press [OK].
7
4.
Press [
] or [
] to select <ON> or <OFF>,
then press [OK].
Remote UI
8
Maintenance
9
5.
Press [Stop/Reset] to return to the standby
mode.
The Remote UI is enabled only after you restart the machine.
(the main power switch is turned off, and then back on.)
If the System Manager ID and System Password have been set, enter
the System Manager ID and System Password using the numeric
keys, then press [Log In/Out (ID)].
5
System Manager
Settings
Next
Remote UI
3
Network
Previous
] to select <REMOTE UI>, then
<ON>: You can specify settings and operate the machine through
the Remote UI.
<OFF>: You cannot specify settings and operate the machine
through the Remote UI.
Troubleshooting
10
Appendix
11
Table of Contents
Index
8-16
TOP
Back
Before Using the
Machine
1
Document and Paper
2
Copying
3
Sending and
Receiving
4
Printing and
Scanning
5
Network
You can send the documents with following restrictions or
settings.
System Manager
Settings
8
– Restricting PC Faxing
Troubleshooting
10
Appendix
11
Press [
] or [
] to select <SYSTEM
SETTINGS>, then press [OK].
If the System Manager ID and System Password have been set, enter
the System Manager ID and System Password using the numeric
keys, then press [Log In/Out (ID)].
– Restricting the New Address
3.
Press [
] or [
] to select <ACCESS TO DEST.>,
then press [OK].
4.
Press [
] or [
] to select <ADD. BOOK
PASSWORD>, then press [OK].
5.
Press [
[OK].
6.
Use the numeric keys to enter a password (up to
seven digits), then press [OK].
7.
Use the numeric keys to enter the password for
confirmation, then press [OK].
– Confirming Entered Fax Numbers
– Restricting Broadcasting
■
Setting a Password for the Address Book
If you set a password, the screen for entering the password appears
when you attempt to edit the Address Book.
Maintenance
9
2.
– Setting a Password for the Address Book
Remote UI
7
Next
Restricting Access to Destinations
– Restricting Job Recall
6
Previous
If you want to cancel password protection, select <OFF> in step 5.
1.
] or [
] to select <ON>, then press
If you enter a wrong password, you have to start over from the first
entry.
Press [Additional Functions].
8.
Press [Stop/Reset] to return to the standby
mode.
Table of Contents
Index
8-17
TOP
Back
Before Using the
Machine
1
Document and Paper
2
Copying
Sending and
Receiving
Printing and
Scanning
■
This mode enables you to restrict the entering of new destinations.
When you set <RESTRICT NEW ADD.> to <ON>, the following are
restricted:
3
– Specifying a destination using the numeric keys.
4
– Registering new destinations.
5
Network
1.
Press [Additional Functions].
2.
Press [
] or [
] to select <SYSTEM
SETTINGS>, then press [OK].
If the System Manager ID and System Password have been set, enter
the System Manager ID and System Password using the numeric
keys, then press [Log In/Out (ID)].
Remote UI
7
8
Maintenance
9
Next
5.
Press [
] or [
] to select <ON> or <OFF>,
then press [OK].
6.
Press [Stop/Reset] to return to the standby
mode.
– Changing registered destinations.
6
System Manager
Settings
Restricting the New Address
Previous
3.
4.
Press [
] or [
] to select <ACCESS TO DEST.>,
then press [OK].
Press [
] or [
] to select <RESTRICT NEW
ADD.>, then press [OK].
■
Restricting PC Faxing
You can specify whether or not to allow sending faxes from
computers using the fax driver.
1.
Press [Additional Functions].
2.
Press [
] or [
] to select <SYSTEM
SETTINGS>, then press [OK].
If the System Manager ID and System Password have been set, enter
the System Manager ID and System Password using the numeric
keys, then press [Log In/Out (ID)].
3.
Press [
] or [
] to select <ACCESS TO DEST.>,
then press [OK].
Troubleshooting
10
Appendix
11
Table of Contents
Index
8-18
TOP
Back
Before Using the
Machine
1
Document and Paper
2
Copying
3
Sending and
Receiving
5
Network
6
Remote UI
7
System Manager
Settings
Press [
] or [
] to select <FAX DRIVER TX>,
then press [OK].
4.
Press [
] or [
] to select <CONFIRM FAX
NO.>, then press [OK].
5.
Press [
] or [
] to select <ON> or <OFF>,
then press [OK].
5.
Press [
] or [
] to select <ON> or <OFF>,
then press [OK].
6.
Press [Stop/Reset] to return to the standby
mode.
■
Confirming Entered Fax Numbers
Press [Stop/Reset] to return to the standby
mode.
You can specify whether or not to confirm the entered fax numbers
each time you send a fax.
■
1.
Press [Additional Functions].
You can specify whether or not to allow using [Recall/Pause].
2.
Press [
] or [
] to select <SYSTEM
SETTINGS>, then press [OK].
If the System Manager ID and System Password have been set, enter
the System Manager ID and System Password using the numeric
keys, then press [Log In/Out (ID)].
Maintenance
Troubleshooting
<OFF>: The confirmation screen does not appear.
<ON>: The confirmation screen appears when you enter a fax
number using the numeric keys.
6.
8
9
Next
4.
4
Printing and
Scanning
Previous
3.
Press [
] or [
] to select <ACCESS TO DEST.>,
then press [OK].
Restricting Job Recall
1.
Press [Additional Functions].
2.
Press [
] or [
] to select <SYSTEM
SETTINGS>, then press [OK].
If the System Manager ID and System Password have been set, enter
the System Manager ID and System Password using the numeric
keys, then press [Log In/Out (ID)].
10
Appendix
11
Table of Contents
Index
8-19
TOP
Back
Before Using the
Machine
1
Document and Paper
2
Copying
3
Sending and
Receiving
4
Printing and
Scanning
Press [
] or [
] to select <ACCESS TO DEST.>,
then press [OK].
3.
Press [
] or [
] to select <ACCESS TO DEST.>,
then press [OK].
4.
Press [
] or [
] to select <REST. REDIAL/
CALL>, then press [OK].
4.
Press [
] or [
] to select <REST. MULTI
DEST>, then press [OK].
5.
Press [
] or [
] to select <ON> or <OFF>,
then press [OK].
5.
Press [
] or [
] to select <OFF>, <PROHIBIT>
or <CONFIRMATION>, then press [OK].
6.
Press [Stop/Reset] to return to the standby
mode.
Network
Remote UI
7
System Manager
Settings
8
Maintenance
9
Troubleshooting
Next
3.
5
6
Previous
■
<OFF>: Allows sending the documents to multiple recipients.
<CONFIRMATION>: The message appears after pressing [Start] to
confirm whether or not to send documents to multiple recipients.
The message only appears when fax numbers are included in the
recipients.
<PROHIBIT>: Does not allow sending the documents to multiple
recipients.
Restricting Broadcasting
You can specify whether or not to allow sending the documents to
multiple recipients.
1.
Press [Additional Functions].
2.
Press [
] or [
] to select <SYSTEM
SETTINGS>, then press [OK].
6.
Press [Stop/Reset] to return to the standby
mode
If the System Manager ID and System Password have been set, enter
the System Manager ID and System Password using the numeric
keys, then press [Log In/Out (ID)].
10
Appendix
11
Table of Contents
Index
8-20
TOP
Back
Before Using the
Machine
1
Document and Paper
2
Copying
3
Sending and
Receiving
4
Printing and
Scanning
5
Network
6
Remote UI
7
System Manager
Settings
8
Previous
Next
Checking the Job Log
You can specify whether or not to check the job log. When you
set <CHECKING THE LOG> to <ON>, you can check the job log
using the System Monitor screen. When you set <CHECKING
THE LOG> to <OFF>, the job log does not appear on the System
Monitor screen.
When you set <CHECKING THE LOG> to <OFF>, the Activity Report will not
print automatically.
1.
Press [Additional Functions].
2.
Press [
] or [
] to select <SYSTEM
SETTINGS>, then press [OK].
3.
Press [
] or [
] to select <CHECKING THE
LOG>, then press [OK].
4.
Press [
] or [
] to select <ON> or <OFF>,
then press [OK].
5.
Press [Stop/Reset] to return to the standby
mode.
If the System Manager ID and System Password have been set, enter
the System Manager ID and System Password using the numeric
keys, then press [Log In/Out (ID)].
Maintenance
9
Troubleshooting
10
Appendix
11
Table of Contents
Index
8-21
TOP
Back
Before Using the
Machine
1
Document and Paper
2
Copying
Previous
Next
Restricting the USB Interface Port
You can specify whether to accept or reject jobs by restricting
the connection to the USB port.
3
Sending and
Receiving
Printing and
Scanning
4
The only USB port to which you can restrict the connection is the one on
the back of the machine. You can use a USB memory connected to the USB
port on the front of the machine regardless of this setting.
5
1.
Press [Additional Functions].
2.
Press [
] or [
] to select <SYSTEM
SETTINGS>, then press [OK].
Network
6
If the System Manager ID and System Password have been set, enter
the System Manager ID and System Password using the numeric
keys, then press [Log In/Out (ID)].
Remote UI
7
System Manager
Settings
8
Maintenance
9
3.
Press [
] or [
] to select <USE DEVICE USB>,
then press [OK].
4.
Press [
] or [
] to select <ON> or <OFF>,
then press [OK].
<ON>: The machine accepts jobs through the USB port.
<OFF>: The machine does not accept jobs through the USB port.
Troubleshooting
10
Appendix
5.
Press [Stop/Reset] to return to the standby
mode.
6.
Restart the machine.
11
Table of Contents
Index
8-22
TOP
Back
Before Using the
Machine
1
Document and Paper
2
Copying
3
Sending and
Receiving
4
Printing and
Scanning
5
Network
6
Remote UI
7
System Manager
Settings
8
Maintenance
9
Troubleshooting
10
Appendix
11
Previous
Next
9 Maintenance
Cleaning the Machine ......................................................................................9-2
Exterior.............................................................................................9-2
Interior .............................................................................................9-2
Fuser Roller .....................................................................................9-6
Scanning area ................................................................................9-6
Replacing the Toner Cartridge ......................................................................9-10
Redistributing Toner ................................................................ 9-10
Replacing the Toner Cartridge with a New One ............ 9-13
Recycling Used Cartridges .............................................................................9-16
The Clean Earth Campaign .................................................... 9-16
U.S.A. PROGRAM ........................................................................ 9-17
CANADA PROGRAM-CANADA PROGRAMME ................. 9-20
Transporting the Machine .............................................................................9-22
Table of Contents
Index
9-1
TOP
Back
Before Using the
Machine
1
Document and Paper
Cleaning the Machine
Note the following before cleaning your machine:
■
3
– Make sure no document is stored in memory, then turn off the
main power switch and disconnect the power cord.
1.
Turn off the main power switch and disconnect
the power cord.
2.
Wipe the machine’s exterior with a clean, soft,
lint-free cloth dampened with water or diluted
dishwashing detergent solution.
3.
Wait for the machine to dry, then reconnect the
power cord and turn on the main power switch.
– Use a soft cloth to avoid scratching the components.
4
Printing and
Scanning
5
– Do not use tissue paper, paper towels, or similar materials for
cleaning; they can stick to the components or generate static
charges.
Network
6
Remote UI
Never use volatile liquids such as thinners, benzene, acetone, or any other
chemical cleaner to clean the machine. These can damage the machine
components.
7
System Manager
Settings
Next
2
Copying
Sending and
Receiving
Previous
8
Maintenance
9
Troubleshooting
■
When you turn off the main power switch, the documents stored in
memory will be erased. To check the jobs stored in memory, see the
following:
– Checking and Deleting Copy Jobs on p. 3-13
– Checking and Deleting Sending/Receiving Documents Stored in Memory
on p. 4-48
– Checking and Deleting Print Jobs on p. 5-9
Exterior
Interior
Clean the machine’s print area periodically to prevent toner powder
and paper dust from accumulating inside.
1.
Turn off the main power switch and disconnect
the power cord.
10
Appendix
11
Table of Contents
Index
9-2
TOP
Back
Before Using the
Machine
1
Document and Paper
2.
Lift the scanning platform until it is locked (A).
(You will hear an audible “click.”)
3.
Open the toner cover (B), using the knob which
covers over on dent (A).
4.
Previous
Next
Remove the toner cartridge.
2
Copying
3
Sending and
Receiving
4
Printing and
Scanning
5
Network
6
Remote UI
7
System Manager
Settings
8
– To avoid exposing the toner cartridge to light, place it in its
protective bag or wrap it in a thick cloth.
– Do not open the drum protective shutter on the toner cartridge.
Print quality may deteriorate if the drum surface is exposed to
light or is damaged.
Always hold the toner cartridge by its handle.
Maintenance
9
Troubleshooting
10
Appendix
11
Table of Contents
Index
9-3
TOP
Back
Before Using the
Machine
1
Document and Paper
2
5.
Use a clean, soft, dry, lint-free cloth to remove
any toner or paper debris from the machine’s
interior.
6.
Previous
Next
Hold the toner cartridge by its handle.
The arrow (A) on the toner cartridge should be facing away from you
and pointing down.
Copying
3
Sending and
Receiving
4
Printing and
Scanning
– Do not touch the fixing assembly (A) as it becomes very hot
during use.
– Do not touch the transfer roller (B) as this can damage the
machine.
5
Network
7.
6
Remote UI
7
System Manager
Settings
8
Insert the cartridge so that the protrusion on
the right side of the toner cartridge (A) fits into
the guide (B) located on the right side of the
machine and slide it down parallel to the guide.
– If loose toner comes into contact with your skin or clothing, wash
with cold water. Warm water will set the toner.
Maintenance
9
Troubleshooting
10
Appendix
11
Table of Contents
Index
9-4
TOP
Back
Before Using the
Machine
1
Document and Paper
8.
Push the toner cartridge to make sure it is
properly set in the machine.
9.
Close the toner cover using the tab.
Previous
Next
10. Lower the scanning platform.
2
Copying
3
Sending and
Receiving
4
Printing and
Scanning
5
Network
6
Remote UI
7
System Manager
Settings
Be careful not to get your fingers caught.
11. Reconnect the power cord and turn on the main
power switch.
8
Maintenance
9
Troubleshooting
10
Appendix
11
Table of Contents
Index
9-5
TOP
Back
Before Using the
Machine
1
Document and Paper
2
Copying
3
Sending and
Receiving
4
Printing and
Scanning
■
If black streaks appear with printing, the fuser roller in the main
unit may be dirty. Should this occur, clean the fusing roller in the
following procedure. The roller should also be cleaned each time
the toner cartridge is replaced. Load a sheet of blank LTR paper into
the multi-purpose tray and start cleaning.
1.
Press [Additional Functions].
6
2.
Press [
] or [
] to select <ADJUST./
CLEANING>, then press [OK].
7
3.
Load a sheet of blank LTR paper in the multipurpose tray.
Remote UI
8
Next
4.
Press [
] or [
] to select <FIX. UNIT
CLEANING>, then press [OK].
5.
Press [
] to select <YES>.
Cleaning starts. When finished, press [Stop/Reset] to return to the
standby mode.
– Use standard paper as the cleaning paper.
– Throw away the cleaning paper after use.
– Cleaning the roller takes approximately 130 seconds.
– When some jobs are stored in memory, this function is not available.
5
Network
System Manager
Settings
Fuser Roller
Previous
■
Scanning area
Keep the scanning area clean to avoid dirty copies or faxes to be
sent.
Platen glass
1.
Open the ADF.
Maintenance
9
Troubleshooting
10
Appendix
11
Table of Contents
Index
9-6
TOP
Back
Before Using the
Machine
1
Document and Paper
2
2.
Clean the platen glass and the underside of the
ADF with a cloth dampened with water. Then,
wipe the area with a soft, dry cloth.
3.
Previous
Next
Close the ADF.
Copying
3
Sending and
Receiving
4
Printing and
Scanning
5
Be careful not to get your fingers caught.
Network
6
Remote UI
7
System Manager
Settings
8
Maintenance
9
Do not dampen the cloth too much, as this may tear the document
or damage the machine.
ADF
If your documents have black streaks or appear dirty after copying
them using the ADF, this may be caused by pencil lead rubbing off
the documents and onto the roller. Clean the ADF scanning area
and roller.
1.
Turn off the main power switch and disconnect
the power cord.
Troubleshooting
10
Appendix
11
Table of Contents
Index
9-7
TOP
Back
Before Using the
Machine
1
Document and Paper
2.
Open the ADF cover.
3.
Clean the rollers (A) inside the ADF with a cloth
dampened with water. Then wipe the area with a
soft, dry cloth.
4.
Previous
Next
Close the ADF cover.
2
Copying
3
Sending and
Receiving
4
Printing and
Scanning
5
Network
6
Be careful not to get your fingers caught.
5.
Open the ADF.
Remote UI
7
System Manager
Settings
8
Maintenance
9
Troubleshooting
10
Appendix
Do not dampen the cloth too much, as this may tear the document
or damage the machine.
11
Table of Contents
Index
9-8
TOP
Back
Before Using the
Machine
1
Document and Paper
6.
Clean the ADF scanning area (on the left side of
the platen glass) with a cloth dampened with
water. Then wipe the area with a soft, dry cloth.
7.
Close the ADF.
2
8.
Previous
Next
Reconnect the power cord and turn on the main
power switch.
Copying
3
Sending and
Receiving
4
Printing and
Scanning
5
Network
6
Remote UI
7
System Manager
Settings
8
Maintenance
9
Troubleshooting
10
Be careful not to get your fingers caught.
Appendix
11
Table of Contents
Index
9-9
TOP
Back
Before Using the
Machine
1
Document and Paper
2
Copying
3
Sending and
Receiving
4
Printing and
Scanning
5
Previous
Next
Replacing the Toner Cartridge
When the LCD displays <TONER LOW/PREPARE NEW TONER>,
the machine will not print and stores all documents in memory
if it receives data. In this case, redistribute toner in the toner
cartridge. If the message persists, replace the toner cartridge.
If you want to print out the documents without replacing the
toner cartridge, set <CONT. PRINTING> to <KEEP PRINTING>
in <RX SETTINGS> of <TX/RX COMMON SET.> in <TX/RX
SETTINGS>. (See “Setting Menu,” on p. 11-6.)
■
Redistributing Toner
1.
Lift the scanning platform until it is locked (A).
(You will hear an audible “click.”)
2.
Open the toner cover (B), using the knob which
covers over on dent (A).
Network
6
Remote UI
7
System Manager
Settings
– When <CONT. PRINTING> is set to <KEEP PRINTING>, the printed
documents may be light or blurred because of lack of toner. The data is
erased when the documents are printed out, so you can not print the
same documents again.
– Do not touch the rollers and parts which have labels “CAUTION! Hot
surface avoid contact” on. They become very hot during use.
8
Maintenance
9
When the toner level is low by pressing [Toner Gauge], replace the
toner cartridge.
Troubleshooting
10
Appendix
11
Table of Contents
Index
9-10
TOP
Back
Before Using the
Machine
1
Document and Paper
3.
Remove the toner cartridge.
5.
Previous
Next
Hold the toner cartridge by its handle.
The arrow (A) on the toner cartridge should be facing away from you
and pointing down.
2
Copying
3
Sending and
Receiving
4
Printing and
Scanning
5
Network
6
Remote UI
7
System Manager
Settings
8
4.
Gently rock the toner cartridge five or six times
to distribute toner evenly.
Do not open the drum protective shutter on the toner cartridge.
Print quality may deteriorate if the drum surface is exposed to light
or is damaged.
Always hold the toner cartridge by its handle.
Maintenance
9
Troubleshooting
10
Appendix
11
Table of Contents
Index
9-11
TOP
Back
Before Using the
Machine
1
Document and Paper
6.
2
Copying
Insert the cartridge so that the protrusion on
the right side of the toner cartridge (A) fits into
the guide (B) located on the right side of the
machine and slide it down parallel to the guide.
Previous
Next
8.
Close the toner cover using the tab.
9.
Lower the scanning platform.
3
Sending and
Receiving
4
Printing and
Scanning
5
Network
6
Remote UI
7.
Push the toner cartridge to make sure it is
properly set in the machine.
7
System Manager
Settings
8
Maintenance
9
Troubleshooting
10
Be careful not to get your fingers caught.
Appendix
11
Table of Contents
Index
9-12
TOP
Back
Before Using the
Machine
1
■
Replacing the Toner Cartridge with a New
One
1.
Lift the scanning platform until it is locked (A).
(You will hear an audible “click.”)
Document and Paper
2
Copying
3
Sending and
Receiving
Previous
Next
3.
Remove the toner cartridge.
4.
Remove the new toner cartridge from the
protective bag.
4
Printing and
Scanning
5
Network
6
Remote UI
7
System Manager
Settings
2
Open the toner cover (B), using the knob which
covers over on dent (A).
8
Maintenance
9
Troubleshooting
10
Appendix
Save the protective bag. You may need it later when you remove the
toner cartridge from the machine.
11
Table of Contents
Index
9-13
TOP
Back
Before Using the
Machine
1
Document and Paper
5.
Gently rock the toner cartridge five or six times
to distribute toner inside.
2
7.
Previous
Next
Hold the toner cartridge by its handle.
The arrow (A) on the toner cartridge should be facing away from you
and pointing down.
Copying
3
Sending and
Receiving
4
Printing and
Scanning
5
Network
6
6.
Hold the toner cartridge with one hand, and pull
the seal completely out.
Do not open the drum protective shutter on the toner cartridge.
Print quality may deteriorate if the drum surface is exposed to light
or is damaged.
Remote UI
7
System Manager
Settings
8
Always hold the toner cartridge by its handle.
Maintenance
9
Troubleshooting
10
Do not pull the seal out at an angle.
Appendix
11
Table of Contents
Index
9-14
TOP
Back
Before Using the
Machine
1
Document and Paper
8.
2
Copying
Insert the cartridge so that the protrusion on
the right side of the toner cartridge (A) fits into
the guide (B) located on the right side of the
machine and slide it down parallel to the guide.
Previous
Next
10. Close the toner cover using the tab.
3
Sending and
Receiving
4
Printing and
Scanning
5
11. Lower the scanning platform.
Network
6
Remote UI
9.
Push the toner cartridge to make sure it is
properly set in the machine.
7
System Manager
Settings
8
Maintenance
9
Troubleshooting
10
Be careful not to get your fingers caught.
Appendix
11
Table of Contents
Index
9-15
TOP
Back
Before Using the
Machine
1
Document and Paper
Canon has instituted a worldwide recycling
program for cartridges called “The Clean
Earth Campaign”. This program preserves
precious natural resources by utilizing
a variety of materials found in the used
cartridges that are of no further use, to
remanufacture new cartridges which, at the
same time, keeps the environment cleaner
by reducing landfill waste. Complete details
concerning this program are enclosed in
each PC Cartridge box.
Copying
3
4
Printing and
Scanning
5
Network
6
Remote UI
7
System Manager
Settings
8
Maintenance
9
Troubleshooting
10
Appendix
11
Next
Recycling Used Cartridges
2
Sending and
Receiving
Previous
■
The Clean Earth Campaign
THE Canon CARTRIDGE RECYCLING PROGRAM
The remaining “Clean Earth” initiatives are supported in the U.S.
through sponsorships of the National Park Foundation, the National
Wildlife Federation, and The Nature Conservancy and in Canada
through donations to the World Wildlife Fund Canada and The
Nature Conservancy of Canada.
Since its inception, The Canon Cartridge Recycling Program has
collected millions of cartridges that otherwise would have been
discarded into landfills or similar facilities. Instead, this rapidly
growing program returns used cartridges to the manufacturing
process, thus conserving an array of resources.
Becoming a part of this worthwhile program is easy. When your
cartridge is of no further use, simply follow the instructions detailed
for U.S. or Canadian residents.
We appreciate your support of The Canon Cartridge Recycling
Program.
Working together we can make a significant contribution to a
cleaner planet.
The Canon Cartridge Recycling Program fulfills the first initiative
of Canon’s Clean Earth Campaign, which supports four critical
environmental areas:
– Recycling in the Workplace
– Conserving Environmental Resources
– Scientific Research and Education
– Encouraging Outdoors Appreciation
Table of Contents
Index
9-16
TOP
Back
Before Using the
Machine
1
Document and Paper
2
– Cartridges collected through this program are not refilled.
– You are not entitled to a tax deduction or rebate for the return of
empty cartridges.
– This program may be modified or discontinued without notice.
Copying
3
Sending and
Receiving
4
Printing and
Scanning
■
Previous
Next
U.S.A. PROGRAM
Packaging
Option A-1: Single Box Return
– Repackage the empty cartridge utilizing the wrapper and pulp
mould end-blocks from the new cartridge’s box.
– Place the empty cartridge in the box of your new cartridge. Seal
the box.
5
Network
6
Remote UI
7
System Manager
Settings
8
Maintenance
9
Option B: Volume Box Return
We encourage you to use this option as a more efficient way to ship
cartridges.
Troubleshooting
10
Appendix
11
Table of Contents
Index
9-17
TOP
Back
Before Using the
Machine
1
Document and Paper
2
Copying
3
Sending and
Receiving
– Place as many cartridges as possible into one box.
Carefully seal the box with tape;
or
– Call 1-800-OK-Canon to receive your free eight cartridge
collection box.
4
Printing and
Scanning
Network
6
7
System Manager
Settings
Maintenance
Please be sure that the shipment does not exceed UPS
specifications.
Maximum weight = 70 lb. (31.8 kg)
Maximum length = 108 in. (2,743 mm)
Maximum girth (length + 2 x width + 2 x height) = 130 in. (3,302
mm)
If your shipment exceeds the above limits, please call 1-800-OKCanon for special shipping information.
Shipping
Option A-2: Multiple Box Return
We encourage you to use this option as a more efficient way to ship
cartridges.
– Complete Option A-1.
8
Next
Please Note:
Do not send defective cartridges for replacement.
Defective cartridges under warranty should be exchanged by an
authorized dealer or service facility as provided in the warranty.
5
Remote UI
Previous
– Bundle multiple cartridge boxes together securely with tape.
Apply the UPS authorized returning label provided in this guide.
Residents of Alaska and Hawaii: Do not use the UPS authorized
returning label. For Alaska and Hawaii Canon set up alternative mail
service with the U.S. Postal Service.
Please call 1-800-OK-Canon to receive U.S. Postal Service
merchandise returning label.
9
Troubleshooting
10
Appendix
11
Table of Contents
Index
9-18
TOP
Back
Before Using the
Machine
1
Document and Paper
2
Copying
3
Sending and
Receiving
Option A: UPS Pick-up
– Give the shipment to your UPS driver when you receive your next
regular delivery;
Previous
Next
Option B: MBE Drop off
Take the shipment to a participating MBE (Mail Boxes, Etc.) Center.
For location, please call 1-800-949-6660.
or
– Take the shipment to your local UPS receiving point.
4
Printing and
Scanning
5
Network
6
Remote UI
7
System Manager
Settings
8
Maintenance
9
By using either of the above methods of shipment, your
used cartridge (s) will be forwarded to the Canon Cartridge
Collection Center at no charge to you.
For further information about the Clean Earth Campaign in the
United States, please call: 1-800-OK-Canon
Troubleshooting
10
Appendix
11
Table of Contents
Index
9-19
TOP
Back
Before Using the
Machine
1
Document and Paper
2
Copying
3
Sending and
Receiving
4
Printing and
Scanning
5
Network
6
Remote UI
7
System Manager
Settings
■
CANADA PROGRAM-CANADA
PROGRAMME
Option A: Single Box Return
– Repackage the empty cartridge utilizing the wrapper and pulp
mould end-blocks from the new cartridge’s box.
– Place the empty cartridge in the box of your new cartridge. Seal
the box.
– Apply the Canon Canada Inc./Canada Post label provided in this
brochure. Canon’s labels are specially marked so that Canon pays
the postage.
– Deposit your empty cartridge in any full size street mailbox or
take it to your local Canada Post outlet or franchise.
Previous
Next
Option B: Volume Box Return (eight or more cartridges)
We encourage you to use this option as a more efficient way to ship
cartridges.
– Call 1-800-667-2666 to receive your free Canon collection box
kit.
– The collection box can accommodate eight individual cartridge
boxes.
– Place your eight individually packaged boxes of empty cartridges
into the Canon collection box. Seal the box.
– Apply the Canon Canada Inc./Canada Post label provided in this
brochure.
– Canon’s labels are specially marked so that Canon pays the
postage.
– Deliver to any local Canada Post outlet or franchise. Customers
who hold a Commercial pick-up agreement with Canada Post
may have their collection box picked up.
8
Maintenance
9
Troubleshooting
10
Appendix
11
Table of Contents
Index
9-20
TOP
Back
Before Using the
Machine
1
Next
– For further information about The Clean Earth Campaign in
Canada, please call or write to Canon.
Document and Paper
2
1-800-667-2666
Canon Canada Inc.
Corporate Customer Relations
6390 Dixie Road
Mississauga, ON L5T 1P7
Copying
3
Sending and
Receiving
Previous
4
Printing and
Scanning
5
Network
6
Remote UI
7
System Manager
Settings
8
Maintenance
9
Working to preserve endangered species is a long-standing Canon
interest.
To this end, for every cartridge collected, Canon Canada donates $1,
shared equally between World Wildlife Fund Canada and the Nature
Conservancy of Canada. This donation is utilized in Canada.
Troubleshooting
10
Appendix
11
Table of Contents
Index
9-21
TOP
Back
Before Using the
Machine
1
Document and Paper
2
Copying
Sending and
Receiving
Printing and
Scanning
Turn off the main power switch.
4
2.
Disconnect the power cord and all the cables
from the back of the machine.
5
3.
If you are using the output tray extension, fold
the paper stopper, and then push the output
tray extension into the machine.
Remote UI
7
System Manager
Settings
Follow this procedure to avoid vibration damage to the
machine when transporting it over a long distance.
1.
6
Next
Transporting the Machine
3
Network
Previous
4.
Lift the scanning platform until it is locked (A).
(You will hear an audible “click.”)
5.
Open the toner cover (B), using the knob which
covers over on dent (A).
8
Maintenance
9
Troubleshooting
10
Appendix
11
Table of Contents
Index
9-22
TOP
Back
Before Using the
Machine
1
Document and Paper
6.
Remove the toner cartridge.
Previous
Next
7.
Close the toner cover using the tab.
8.
Lower the scanning platform.
2
Copying
3
Sending and
Receiving
4
Printing and
Scanning
5
Network
6
Remote UI
7
System Manager
Settings
8
– To avoid exposing the toner cartridge to light, place it in its
protective bag or wrap it in a thick cloth.
– Do not open the drum protective shutter on the toner cartridge.
Print quality may deteriorate if the drum surface is exposed to
light or is damaged.
Always hold the toner cartridge by its handle.
Maintenance
9
Troubleshooting
10
Be careful not to get your fingers caught.
Appendix
11
Table of Contents
Index
9-23
TOP
Back
Before Using the
Machine
1
Document and Paper
9.
Remove the dust cover from the paper cassette.
Previous
Next
11. Remove the paper from the paper cassette.
2
Copying
3
Sending and
Receiving
4
Printing and
Scanning
5
Network
6
10. Open the front panel of the paper cassette.
12. Remove the paper cassette by lifting up the
front-end of the paper cassette and pulling it
forward.
Remote UI
7
System Manager
Settings
8
Maintenance
9
Troubleshooting
10
Appendix
11
Table of Contents
Index
9-24
TOP
Back
Before Using the
Machine
1
Document and Paper
Previous
Next
13. Detach the Document feeder tray.
2
Copying
3
Sending and
Receiving
4
Printing and
Scanning
5
Network
6
Remote UI
14. Make sure all the covers are closed.
15. Grip the handles on both sides of the machine
and lift it carefully, as shown in the illustration
below.
7
System Manager
Settings
8
Maintenance
9
Troubleshooting
10
Appendix
11
– Do not lift the machine by any of its attachments. Dropping the
machine can cause personal injury.
– If you have a back problem, make sure to check the weight of this
machine before carrying. (See Chapter 13, “Appendix,” in the Basic
Operation Guide.)
Table of Contents
Index
9-25
TOP
Back
Before Using the
Machine
1
Document and Paper
2
Copying
Printing and
Scanning
10 Troubleshooting
4
5
LCD Messages .............................................................................................. 10-13
Network
6
Remote UI
7
System Manager
Settings
Next
Clearing Jams..................................................................................................10-3
Document Jams ......................................................................... 10-3
Paper Jams................................................................................... 10-5
3
Sending and
Receiving
Previous
8
Maintenance
9
Troubleshooting
Error Codes .................................................................................................. 10-21
If <LOAD CORRECT PAPER> is displayed ................................................... 10-29
Re-Loading the Paper ............................................................10-29
Changing the Paper Size Setting .......................................10-29
General Problems ........................................................................................ 10-30
Paper Feeding Problems ............................................................................. 10-32
10
Appendix
11
Table of Contents
Index
10-1
TOP
Back
Before Using the
Machine
1
Document and Paper
2
Copying
3
Sending and
Receiving
Printing and
Scanning
Previous
Next
Sending/Receiving Problems ..................................................................... 10-33
Sending Problems...................................................................10-33
Receiving Problems ................................................................10-38
Copying Problems ....................................................................................... 10-44
4
Printing Problems ....................................................................................... 10-47
5
Telephone Problems ................................................................................... 10-51
Network
6
Network Problems....................................................................................... 10-52
If a Power Failure Occurs ............................................................................. 10-55
Remote UI
7
System Manager
Settings
8
Maintenance
9
If You Cannot Solve a Problem ................................................................... 10-56
Customer Support (U.S.A.) ...................................................10-56
Customer Support (Canada) ...............................................10-56
Troubleshooting
10
Appendix
11
Table of Contents
Index
10-2
TOP
Back
Before Using the
Machine
1
Document and Paper
2
Copying
3
Sending and
Receiving
4
Printing and
Scanning
5
Network
6
Remote UI
Previous
Next
Clearing Jams
When <CHECK DOCUMENT>, <PAPER JAM/LIFT PANEL
TO OPEN>, <FEEDER PAPER JAM/CHECK THE FEEDER> or
<DOCUMENT TOO LONG> appears on the LCD display, remove
jammed paper from the machine first, then from the paper
cassette or multi-purpose tray if necessary. Check the following
if you experience repeated paper jams:
– Fan and tap the paper stack on a flat surface before loading it in
the machine.
– When removing jammed paper or when inspecting the inside of
the machine, do not allow necklaces, bracelets, or other metal
objects to touch the inside of the machine, as this may result in
burns or electrical shock.
– If you tear the paper, remove any torn pieces to avoid further
jams.
– If loose toner comes into contact with your skin or clothing, wash
with cold water. Warm water will set the toner.
– Check that the paper you are using meets the requirements for
use. (See “Paper Requirements,” on p. 2-7.)
– Make sure you have removed any scraps of paper from the inside
of the machine.
Do not force a jammed document or paper out of the machine. Contact
Canon Customer Care Center if needed.
7
System Manager
Settings
■
8
Maintenance
9
– When removing jammed documents or paper, take care not to
cut your hands on the edges of the document or paper.
Document Jams
When <CHECK DOCUMENT>, <FEEDER PAPER JAM/CHECK THE
FEEDER> or <DOCUMENT TOO LONG> appears on the LCD display,
remove a jammed document from the ADF.
Troubleshooting
10
Appendix
11
Table of Contents
Index
10-3
TOP
Back
Before Using the
Machine
1
Document and Paper
Previous
Next
1.
Open the ADF cover.
3.
Hold both sides of any jammed documents and
gently pull them out.
2.
Hold both sides of any jammed documents and
gently pull them out straight upward.
4.
Close the ADF cover.
2
Copying
3
Sending and
Receiving
4
Printing and
Scanning
5
Network
6
Remote UI
7
System Manager
Settings
8
Maintenance
9
Troubleshooting
Do not pull the document forcefully as it may tear.
Be careful not to get your fingers caught.
10
Appendix
11
Table of Contents
Index
10-4
TOP
Back
Before Using the
Machine
1
Document and Paper
5.
Open the ADF and then hold both sides of any
jammed documents and gently pull them out.
Next
Paper Jams
2
When <PAPER JAM/LIFT PANEL TO OPEN> appears on the LCD
display, remove jammed paper from the inside of the machine first,
then from the paper cassette or multi-purpose tray if necessary.
3
1.
Lift the scanning platform until it is locked (A).
(You will hear an audible “click.”)
2.
Open the toner cover (B), using the knob which
covers over on dent (A).
Copying
Sending and
Receiving
■
Previous
4
Printing and
Scanning
5
Network
6.
Close the ADF.
6
Remote UI
7
System Manager
Settings
8
Maintenance
9
Troubleshooting
Be careful not to get your fingers caught.
10
Appendix
11
Table of Contents
Index
10-5
TOP
Back
Before Using the
Machine
1
Document and Paper
3.
Previous
Next
Remove the toner cartridge from the machine.
2
Copying
3
Sending and
Receiving
4
Printing and
Scanning
5
– Do not touch the fixing assembly (A) as it becomes very hot
during use.
– Do not touch the transfer roller (B) as this can damage the
machine.
Network
6
Remote UI
7
System Manager
Settings
8
– Remove watches and any bracelets or rings when touching the
inside of the machine. These items might be damaged if they
come into contact with the parts inside of the machine.
– To avoid exposing the toner cartridge to light, place it in its
protective bag or wrap it in a thick cloth.
– Do not open the drum protective shutter on the toner cartridge.
Print quality may deteriorate if the drum surface is exposed to
light or is damaged.
4.
Hold both sides of the jammed paper and gently
pull it out.
Maintenance
9
Always hold the toner cartridge by its handle.
Troubleshooting
10
Appendix
11
Table of Contents
Index
10-6
TOP
Back
Before Using the
Machine
1
Document and Paper
2
5.
Gently pull the jammed paper between the
fixing assembly (A) and transfer roller (B) until
the leading edge emerges from the machine.
6.
Previous
Next
Hold both sides of the jammed paper and
carefully pull it out.
Copying
3
Sending and
Receiving
4
Printing and
Scanning
5
Network
6
Remote UI
7
System Manager
Settings
– Do not touch the fixing assembly (A) as it becomes very hot
during use.
– Do not touch the transfer roller (B) as this can damage the
machine.
8
Maintenance
9
Troubleshooting
10
Appendix
11
Table of Contents
Index
10-7
TOP
Back
Before Using the
Machine
1
Document and Paper
2
7.
Hold the toner cartridge by its handle.
Previous
Next
8.
Insert the cartridge so that the protrusion on
the right side of the toner cartridge (A) fits into
the guide (B) located on the right side of the
machine and slide it down parallel to the guide.
9.
Push down the toner cartridge to make sure it is
properly set in the machine.
The arrow (A) on the toner cartridge should be facing away from you
and pointing down.
Copying
3
Sending and
Receiving
4
Printing and
Scanning
5
Network
6
Remote UI
7
System Manager
Settings
8
Do not open the drum protective shutter on the toner cartridge.
Print quality may deteriorate if the drum surface is exposed to light
or is damaged.
Always hold the toner cartridge by its handle.
Maintenance
9
Troubleshooting
10
Appendix
11
Table of Contents
Index
10-8
TOP
Back
Before Using the
Machine
1
Document and Paper
10. Close the toner cover using the tab.
Previous
Next
12. Remove the dust cover from the paper cassette.
2
Copying
3
Sending and
Receiving
4
Printing and
Scanning
5
Network
11. Lower the scanning platform.
13. Open the front panel of the paper cassette.
6
Remote UI
7
System Manager
Settings
8
Maintenance
9
Troubleshooting
10
Be careful not to get your fingers caught.
Appendix
11
Table of Contents
Index
10-9
TOP
Back
Before Using the
Machine
1
Document and Paper
14. Remove the paper in the paper cassette.
Previous
Next
– When feeding paper from the multi-purpose tray:
2
Copying
3
Sending and
Receiving
4
Printing and
Scanning
5
Network
6
16. Load the paper into the paper cassette.
15. Hold both sides of the jammed paper and slowly
pull it out in the direction of the arrow.
– When feeding paper from the paper cassette:
Remote UI
7
System Manager
Settings
8
Maintenance
9
Troubleshooting
10
Appendix
11
Table of Contents
Index
10-10
TOP
Back
Before Using the
Machine
1
Document and Paper
17. Close the front panel of the paper cassette.
Previous
Next
19. Open the rear cover.
This operation is required only when <OPEN REAR COVER> appears
on the LCD display.
2
Copying
3
Sending and
Receiving
4
Printing and
Scanning
5
Network
18. Set the dust cover on the paper cassette.
6
Remote UI
7
System Manager
Settings
8
Maintenance
9
Troubleshooting
10
Appendix
11
Table of Contents
Index
10-11
TOP
Back
Before Using the
Machine
1
Document and Paper
2
Copying
20. Hold both sides of the jammed paper and gently
pull it out upward.
This operation is required only when <OPEN REAR COVER> appears
on the LCD display.
Previous
Next
21. Close the rear cover.
This operation is required only when <OPEN REAR COVER> appears
on the LCD display.
3
Sending and
Receiving
4
Printing and
Scanning
5
Network
6
Remote UI
If the jammed paper is badly folded, similar to the folds of an
accordion, ease the jammed paper loose and then pull it out from
the machine.
Be careful not to get your fingers caught.
7
System Manager
Settings
8
To reset the machine, open the toner cover and then close it.
Maintenance
9
Troubleshooting
10
Appendix
11
Table of Contents
Index
10-12
TOP
Back
Before Using the
Machine
1
Document and Paper
2
Copying
3
Sending and
Receiving
Printing and
Scanning
See the following when the LCD displays error and status
messages.
CANNOT PRINT RX DATA
FIX ERROR TO PRINT
AVAILABLE MEMORY
nn%
Description
This message shows the percentage of the
memory currently available.
5
Action
If you need more space, wait for the machine to
send any documents in memory. Also print, send,
or delete any documents stored in memory.
Description
The machine temporarily received the fax in
memory because an error of some kind has
occurred in the machine.
This error message appears with one of the
messages below.
– <TONER COVER OPEN/CLOSE COVER>
– <LOAD CORRECT PAPER>
– <PAPER IN MP TRAY/REMOVE PAPER>
– <CHANGE REG’D SIZE/-> PAPER SETTINGS>
– <TONER LOW/PREPARE NEW TONER>
– <TONER IS NOT SET/INSERT TONER>
– <PAPER JAM/LIFT PANEL TO OPEN>
– <LOAD PAPER>
Action
This error message appears with another
message. When the error is resolved, the received
data will be printed out. For how to solve the
problem, see the action for the messages
displayed with it.
6
Remote UI
7
System Manager
Settings
8
Maintenance
9
Troubleshooting
10
Next
LCD Messages
4
Network
Previous
Appendix
11
Table of Contents
Index
10-13
TOP
Back
Before Using the
Machine
1
Document and Paper
CANNOT SEND
CHECK SETTINGS
You have specified the group dialing when the
line is off the hook.
Description
The paper size is not appropriate for printing a
report or list.
3
Action
Specify the recipient other than group dialing.
Action
Description
You have specified the one-touch key or coded
dial code that has registered with other than fax
number when the line is off the hook.
Set the paper size to <LTR>, <LGL>, <A4>,
<OFICIO>, <BRAZIL- OFICIO>, <MEXICO-OFICIO>,
<FOLIO> or <FLSP>, and then load paper of the
same size.
Action
Make sure that the line is disconnected.
Description
The paper ran out while printing a received
document, report or list.
Description
The registered group is already nested for three
levels of subgroups (e.g., a group registered in a
group in a group in a group).
Action
Load paper in the paper cassette.
Description
The size of the paper in the paper cassette or
multipurpose tray is different from that of the
paper specified in <CASSETTE> or <MP TRAY> of
the <PAPER SETTINGS> menu.
Action
Change the paper size in <CASSETTE> or <MP
TRAY> of the <PAPER SETTINGS> menu. For
more information, see “If <LOAD CORRECT
PAPER> is displayed,” on p. 10-29.
5
Network
6
Action
Remote UI
7
System Manager
Settings
CHANGE REG’D SIZE
→ PAPER SETTINGS
Description
4
Printing and
Scanning
Next
2
Copying
Sending and
Receiving
Previous
8
Maintenance
CHANGE PAPERSIZE
Description
The paper size is not appropriate for a two-sided
copy.
Action
Set the paper size to <LTR> or <A4>, then load
paper of the same size.
9
Troubleshooting
10
You cannot register a group to contain more
than three levels of subgroups. Modify the group
so that it contains three levels of groups or less.
Appendix
11
Table of Contents
Index
10-14
TOP
Back
Before Using the
Machine
1
Document and Paper
Description
A document jam may have occurred in the ADF.
Action
Remove the jammed document.
3
CHECKING MEDIA...
PLEASE WAIT
4
Printing and
Scanning
Description
Action
5
Network
System Manager
Settings
Reduce the length of the document to within 24
7/8" (630 mm), then try again.
Some kind of error occurred in the machine
when you are scanning a document to a USB
memory (e.g., the USB memory is disconnected
from the machine.).
Action
Make sure that the USB memory is inserted
correctly to the machine.
Press [OK] and try again.
Action
When using a color sending, you can specify only
one recipient. Send one by one, or use black and
white sending.
10
Action
Description
7
Troubleshooting
Scan the document on the platen glass.
Wait until the message disappears.
You have specified multiple recipients when
using a color sending.
9
Action
FAILED TO WRITE
Description
Maintenance
The document fed from the ADF is longer than
24 7/8" (630 mm), or is not feeding correctly.
Checking the media connected to the USB
memory port.
6
8
Description
COLOR MODE IS SET
CANNOT MULTI DEST TX
Remote UI
Next
DOCUMENT TOO LONG
2
Copying
Sending and
Receiving
CHECK DOCUMENT
Previous
DATA ERROR
PRESS START KEY
Description
The machine may have trouble.
Action
Press [Start] to restore all settings to the default.
If the message persists, contact Canon Customer
Care Center.
Appendix
11
Table of Contents
Index
10-15
TOP
Back
Before Using the
Machine
1
Document and Paper
FAILED TO WRITE
CHECK MEDIA
Sending and
Receiving
Printing and
Scanning
Description
USB memory locked or with security function is
connected to the USB memory port.
3
Action
Release the lock on the USB memory or use a USB
memory without security function.
4
Description
The type of the USB memory connected to the
USB memory port is not supported.
5
Action
Use a USB memory with a file system FAT16 or
FAT32.
Description
The USB memory is full of data or the number of
file limit has reached.
Network
6
Action
Remote UI
7
System Manager
Settings
8
Maintenance
9
Next
INITIALIZING...
PLEASE WAIT
2
Copying
Previous
Get enough space in the USB memory or
organize your destination folder from your
computer.
Description
This message appears when turning on the main
power switch, or when the machine is not ready
for printing.
Action
Wait until the message disappears.
LOAD CORRECT PAPER
Description
The size of the paper in the paper cassette or
multipurpose tray is different from that of the
paper specified in <CASSETTE> or <MP TRAY> of
the <PAPER SETTINGS> menu.
Action
Load the correct size paper or change the paper
size in <CASSETTE> or <MP TRAY> of the <PAPER
SETTINGS> menu. For more information, see
“If <LOAD CORRECT PAPER> is displayed,” on
p. 10-29.
FEEDER PAPER JAM
CHECK THE FEEDER
Description
A document jam may have occurred in the ADF.
Action
Remove the jammed document.
Troubleshooting
10
Appendix
11
Table of Contents
Index
10-16
TOP
Back
Before Using the
Machine
1
Document and Paper
2
Copying
3
Sending and
Receiving
LOAD PAPER
Printing and
Scanning
No paper is loaded in the paper cassette or multipurpose tray when copying or printing.
Action
Load paper correctly. Then press [OK] when
using the paper cassette.
Description
No paper is loaded in the paper cassette or
multi-purpose tray when printing a received
document.
Or, when printing a report or list, this massage
appears if the paper size is not appropriate for
printing a report or list even if paper is loaded.
This error message appears with one of the
messages below.
<CHANGE REG’D SIZE→PAPER SETTINGS>
<CANNOT PRINT RX DATA/FIX ERROR TO PRINT>
5
Network
6
Remote UI
7
System Manager
Settings
8
Maintenance
9
Troubleshooting
10
Action
Next
MEMORY FULL
Description
4
Previous
Load paper correctly. Then press [OK] when
using the paper cassette.
For report or list, set the paper size to <LTR>,
<LGL>, <A4>, <OFICIO>, <BRAZIL- OFICIO>,
<MEXICO-OFICIO>, <FOLIO> or <FLSP>, and
then load paper of the same size.
Description
The machine is full of jobs.
Action
Print, send, or delete any documents stored in
memory.
Action
Divide the document stack or data into a few
parts and try again one by one.
Action
Send the document with low resolution.
Action
When this message appears during using the
ADF, the scanning document stops halfway. In
this case, clear the paper jam from the ADF.
Description
The number of TX/RX jobs that can be stored in
memory reached the maximum.
Action
The maximum numbers of jobs that can be
stored in memory are as follows (Based on the
condition that the other party sends the fax by
the imageCLASS MF4690 with ITU-T No.1 Chart
standard mode); Up to 70 jobs for sending or 90
jobs for receiving, 95 fax jobs including sending
and receiving, or 75 e-mail and I-fax jobs for
receiving. Wait for the machine to send any
documents in memory. Also print, send, or delete
any documents stored in memory.
Appendix
11
Table of Contents
Index
10-17
TOP
Back
Before Using the
Machine
1
Document and Paper
2
NO USB MEMORY
INSERT USB MEMORY
Description
Copying
3
Sending and
Receiving
4
Printing and
Scanning
Action
Network
6
7
System Manager
Settings
8
Troubleshooting
10
Insert the USB memory correctly.
You pressed the one-touch key or coded dial
code that has already been registered, when you
are registering group addresses.
Description
You pressed the group dialing that has already
been registered, when you are registering a onetouch or coded dial address.
Action
Register the one-touch key or coded dial code
that is not used.
Description
You cannot print because the page limit has
been reached.
Action
Contact your system manager.
PAPER IN MP TRAY
REMOVE PAPER
Description
Paper is loaded in the multipurpose tray.
Action
Remove the paper from the multi-purpose
tray. The machine will not print faxes,
reports, or lists when paper is loaded in the
multipurpose tray. They will be stored in
memory.
PAPER JAM
LIFT PANEL TO OPEN
Description
Paper jams have occurred in the machine.
<OPEN PRINTER COVER> or <OPEN REAR
COVER> appears alternately.
Action
Clear the paper jam (See “Paper Jams,” on
p. 10-5.) and reload paper in the paper cassette
or multipurpose tray. The cover must be opened
and closed to resume the current job.
NOT REGISTERED
Description
Maintenance
9
A USB memory is not inserted correctly into
the USB memory port when you are scanning a
document to a USB memory.
Description
Remote UI
Action
Next
OVER PAGE LIMIT
NOT AVAILABLE NOW
5
Previous
No destination is registered for the one-touch
key or coded dial code you pressed.
Register the destinations before using the
Address Book function.
Appendix
11
Table of Contents
Index
10-18
TOP
Back
Before Using the
Machine
1
Document and Paper
2
Copying
3
Sending and
Receiving
Printing and
Scanning
Next
START AGAIN
Description
The external telephone is off the hook.
Action
Hang up the external telephone.
PLATEN GLASS DIRTY
CLEAN PLATEN GLASS
Description
A transmission error has occurred because the
line condition was poor.
Action
Check the line condition, then try again.
STOP KEY PRESSED
PRESS OK KEY
4
Description
The ADF scanning area on the left side of the
platen glass may be dirty.
Description
[Stop/Reset] has been pressed while scanning
the document using the ADF.
5
Action
Clean the ADF scanning area, then press [OK].
Action
Press [OK], then set the document again.
Network
6
PREPARING SCANNER...
PLEASE WAIT
Description
The machine is not ready for scanning.
7
Action
Wait until the machine is ready.
8
Description
The same file name exists when you are scanning
a document to a USB memory.
Action
Press [OK] and rename the file.
Remote UI
System Manager
Settings
PHONE OFF HOOK
HANG UP PHONE
Previous
Maintenance
9
Troubleshooting
10
SYSTEM ERROR
Description
Some kind of error has occurred in the machine.
Action
Turn off the main power switch, wait for more
than 10 seconds, then turn it on again. If the
message persists, turn off the main power switch,
disconnect the power cord, and contact Canon
Customer Care Center.
SAME FILE NAME
TONER COVER OPEN
CLOSE COVER
Description
A cover is open.
Action
Check the cover, and make sure that it is
completely closed.
Appendix
11
Table of Contents
Index
10-19
TOP
Back
Before Using the
Machine
1
Document and Paper
2
Copying
3
Sending and
Receiving
The toner is running low.
Action
Prepare a new toner cartridge.
UNKNOWN USB DEVICE
5
Action
Do not connect anything other than a USB
memory.
6
USB MEMORY FULL
Remote UI
7
System Manager
Settings
Description
A USB device which is not supported (e.g., USB
mouse, USB keyboard) is connected to the USB
memory.
Network
8
Next
USB/USB PORT ERROR
TURN POWER OFF → ON
Description
4
Printing and
Scanning
TONER LOW
PREPARE NEW TONER
Previous
Description
The USB memory is full of data or the number of
file limit has reached.
Action
Get enough space in the USB memory or
organize your destination folder from your
computer.
Description
A USB memory error or USB memory port error
has occurred.
Action
Disconnect the USB memory from the USB
memory port, turn off /on the main power
switch, and connect the USB memory again.
If the message appears after connecting the
USB memory to the USB memory port, the USB
memory may have problem.
If the message persists after turning on the main
power switch, the USB memory port may have
problem. In this case, turn off the main power
switch, disconnect the power cord, and contact
Canon Customer Care Center.
Maintenance
9
Troubleshooting
10
Appendix
11
Table of Contents
Index
10-20
TOP
Back
Before Using the
Machine
1
Document and Paper
Previous
Next
Error Codes
2
An error code is a four-digit code shown on an ERROR TX REPORT or an ERROR RX REPORT when an error occurs.
Copying
3
Sending and
Receiving
4
Printing and
Scanning
5
Network
6
Remote UI
7
System Manager
Settings
8
Maintenance
9
For details on reports, see “Printing Reports Automatically,” on p. 11-49.
See the following for individual error codes.
Troubleshooting
10
Appendix
11
Table of Contents
Index
10-21
TOP
Back
Before Using the
Machine
1
Document and Paper
Printing and
Scanning
Description
A document may be jammed.
Action
Remove the jammed document.
3
#0003
Description
The other fax machine did not respond within 35
seconds.
Action
Send the document again. Contact the other
party and have them check their fax machine. If
you are making an overseas call, add a pause to
the number.
Description
4
An attempt was made to send a document of 24
7/8” (630 mm) or longer from the ADF.
Action
Divide the document into smaller parts and send
from the platen glass.
Description
The other party may not be using a G3 fax
machine.
5
Description
A document takes a long time to send because it
contains too much data.
Action
6
Action
Reduce the scanning resolution before sending.
Description
A document takes a long time to receive.
Check with the other party and send the
document to a G3 fax machine. If the other party
does not have a G3 fax machine, try sending your
document using a transmission mode the other
party’s fax machine supports.
Action
Contact the other party and ask them to reduce
their scanning resolution or divide the document
into smaller parts for sending.
Network
Remote UI
7
System Manager
Settings
Next
#0005
2
Copying
Sending and
Receiving
#0001
Previous
8
Maintenance
9
#0009
Description
The paper has run out or the paper cassette is
not set properly.
Action
Load the paper or reset the paper cassette
properly.
Troubleshooting
10
Appendix
11
Table of Contents
Index
10-22
TOP
Back
Before Using the
Machine
1
Document and Paper
2
Copying
3
Sending and
Receiving
#0012
Description
You could not send because the recipient’s
machine is out of paper.
Description
The same file name exists when you are scanning
a document to a USB memory.
Action
Contact the recipient and ask them to load the
paper.
Action
Press [OK] and rename the file.
4
Description
5
There is no reply when you redial. You could not
send, because your fax signal was not returned as
the recipient’s line was engaged.
Action
Check that the recipient’s line is not engaged and
try again from the beginning.
Network
6
Remote UI
7
System Manager
Settings
8
Maintenance
10
#0406
Description
Some kind of error has occurred in the machine
when you are scanning a document to a USB
memory (e.g., the USB memory is disconnected
from the machine, or file system is not
supported).
Action
Make sure that the USB memory is inserted
correctly to the machine, or file system is
supported.
Press [OK] and try again.
#0037
Description
The memory is full.
Action
Print, send, or delete any documents stored in
memory.
#0703
Description
The memory for image data is full when sending
documents.
Description
The USB memory is full of data or the number of
file limit has reached.
Action
Wait a few moments, and then try sending again
after other send jobs are complete.
Action
Get enough space in the USB memory or
organize your destination folder from your
computer.
Action
Erase documents stored in memory. If the
machine still does not operate normally, turn the
main power OFF, and then back ON.
#0401
9
Troubleshooting
Next
#0403
#0018
Printing and
Scanning
Previous
Appendix
11
Table of Contents
Index
10-23
TOP
Back
Before Using the
Machine
1
Document and Paper
2
#0705
Description
Copying
3
Sending and
Receiving
Printing and
Scanning
5
Network
6
Remote UI
7
System Manager
Settings
8
Maintenance
Next
#0752
The send operation was interrupted because the
size of the image data is larger than that specified
in <MAX TX DATA SIZE> in <E-MAIL/I-FAX> in
<COMMUNICATIONS> in <SYSTEM SETTINGS>.
Action
Change the setting for <MAX TX DATA SIZE>
in <E-MAIL/I-FAX> in <COMMUNICATIONS> in
<SYSTEM SETTINGS>.
Action
Select a lower resolution.
Action
Set <DIVIDE INTO PAGES> to <ON> in send
settings.
4
Previous
Description
Some kind of error occurred in the machine
when sending a color e-mail.
Action
Try sending again before checking the network
conditions or settings.
Description
The SMTP server name or POP server name
for e-mail is not correct, or the server is not
functioning.
Action
Check the SMTP server name, domain name, POP
server name, and e-mail address in <E-MAIL/IFAX> in <NETWORK SETTINGS> in <SYSTEM
SETTINGS>.
Description
The domain name or e-mail address may not be
set.
Action
Check that the SMTP server is operating properly.
Description
The network is down.
Action
Check the network status.
9
Troubleshooting
10
Appendix
11
Table of Contents
Index
10-24
TOP
Back
Before Using the
Machine
1
Document and Paper
2
Copying
3
Sending and
Receiving
4
Printing and
Scanning
5
Network
6
Remote UI
7
System Manager
Settings
#0753
Maintenance
9
Troubleshooting
Next
#0801
Description
A TCP/IP error occurred while sending an e-mail
message. (Socket, Select error, etc.)
Action
Check the network cables and connectors. If the
machine still does not operate normally, turn the
main power OFF, and then back ON.
#0755
Description
You cannot send jobs because TCP/IP is not
functioning correctly.
Action
Check <TCP/IP SETTINGS> in <NETWORK
SETTINGS> in <SYSTEM SETTINGS>.
Description
The IP address is not set.
Action
Check <TCP/IP SETTINGS> in <NETWORK
SETTINGS> in <SYSTEM SETTINGS>.
Description
When the machine was turned ON, an IP address
was not assigned to the machine by the DHCP,
RARP, or BOOTP server.
Action
Check <TCP/IP SETTINGS> in <NETWORK
SETTINGS> in <SYSTEM SETTINGS>. Or wait a
while, and then try sending again.
8
Previous
Description
A timeout error occurred while the machine was
communicating with the SMTP server to send an
e-mail message.
Action
Check that the SMTP server is functioning
normally, or check the network status.
Description
The SMTP server returned an error while trying to
connect. The destination is not correct. An error
occurred on the server side during transmission
to a file server.
Action
Check that the SMTP server is functioning
normally. Check the network status. Check the
destination setting. Check the status and setting
of the file server.
10
Appendix
11
Table of Contents
Index
10-25
TOP
Back
Before Using the
Machine
1
Document and Paper
Sending and
Receiving
Printing and
Scanning
2
Description
The name of the SMTP server or POP server in
<E-MAIL/I-FAX> in <NETWORK SETTINGS> in
<SYSTEM SETTINGS> is incorrect.
3
Action
4
Check the name of the SMTP server or POP server
in <E-MAIL/I-FAX> in <NETWORK SETTINGS> in
<SYSTEM SETTINGS>.
Description
The DNS server name in <DNS SETTINGS> in
<TCP/IP SETTINGS> in <NETWORK SETTINGS> in
<SYSTEM SETTINGS> is incorrect.
5
7
System Manager
Settings
8
Maintenance
9
Troubleshooting
An incorrect user name or password was
specified for the sending of a file to a file server.
Action
Change the user name or password.
Description
An incorrect destination was specified for the
sending of an e-mail message.
Action
Check the e-mail address.
#0810
Check the DNS server name in <DNS SETTINGS>
in <TCP/IP SETTINGS> in <NETWORK SETTINGS>
in <SYSTEM SETTINGS>.
The POP server returned an error during the
connection.
Description
A timeout error occurred on the server while
connecting to the POP server.
Description
Connection to the DNS server failed.
Action
Action
Check that the DNS server is functioning
normally.
Check the POP Server name in <E-MAIL/I-FAX> in
<NETWORK SETTINGS> in <SYSTEM SETTINGS>.
Confirm that the POP server is functioning
normally. Check the network status.
6
Remote UI
Description
Description
Action
Network
Next
#0806
#0802
Copying
Previous
#0804
Description
You have no permission to access the folder.
Action
Change the setting on the server to enable
access to the folder.
10
Appendix
11
Table of Contents
Index
10-26
TOP
Back
Before Using the
Machine
1
Document and Paper
2
Copying
#0812
#0821
The POP password setting is incorrect.
Description
Action
Check the POP Server password in <E-MAIL/IFAX> in <NETWORK SETTINGS> in <SYSTEM
SETTINGS>.
You have received data that cannot be processed
(TIFF analysis error).
Action
Check the settings, and then ask the sender to
resend the data.
#0813
4
Printing and
Scanning
#0827
Description
The POP Server name setting is incorrect.
Action
Check the POP Server name in <E-MAIL/I-FAX> in
<NETWORK SETTINGS> in <SYSTEM SETTINGS>.
5
#0819
Network
6
Description
You have received data that cannot be processed
(MIME information is incorrect).
7
Action
Check the settings, and then ask the sender to
resend the data.
Remote UI
System Manager
Settings
8
Troubleshooting
10
Description
You have received data that cannot be
processed (contains MIME information that is not
supported).
Action
Check the settings, and then ask the sender to
resend the data.
#0828
Description
You have received HTML data.
Action
Ask the sender to use a file format other than
HTML, and then resend the data.
#0820
Description
Maintenance
9
Next
Description
3
Sending and
Receiving
Previous
Action
You have received data that cannot be processed
(BASE 64 or uuencode is incorrect).
Check the settings, and then ask the sender to
resend the data.
#0829
Description
Data containing more pages that the machine
can hold in the memory is received.
Action
Print the received documents, and ask the sender
to resend the remaining pages.
Appendix
11
Table of Contents
Index
10-27
TOP
Back
Before Using the
Machine
1
Document and Paper
2
Copying
3
Sending and
Receiving
4
Printing and
Scanning
Previous
Next
#0839
Description
The user name or password for the SMTP
authentication in <SMTP AUTH> is incorrect.
Action
Check the user name and password for <SMTP
AUTH> in <AUTH/ENC SETTINGS> in <E-MAIL/IFAX> in <NETWORK SETTINGS> in <SYSTEM
SETTINGS>. (See “SYSTEM SETTINGS,” on
p. 11-34.)
5
Network
6
Remote UI
7
System Manager
Settings
8
Maintenance
9
Troubleshooting
10
Appendix
11
Table of Contents
Index
10-28
TOP
Back
Before Using the
Machine
1
Document and Paper
2
Copying
3
Sending and
Receiving
4
Printing and
Scanning
When <LOAD CORRECT PAPER> appears on the LCD display,
the size of the paper in the paper cassette or multipurpose tray
is different from that of the paper specified in <CASSETTE> or
<MP TRAY> of the <PAPER SETTINGS> menu. You need to load
the correct size paper or change the paper size in <CASSETTE>
or <MP TRAY> of the <PAPER SETTINGS> menu.
For print jobs, you need to specify the paper size from your computer.
6
■
3.
Press [
] or [
] to select <CASSETTE> or <MP
TRAY>, then press [OK].
4.
Press [
] or [
press [OK].
5.
Press [
] or [
] to select the paper size same
as paper loaded into the machine, then press
[OK].
6.
Press [Stop/Reset] to return to the standby
mode.
Network
7
System Manager
Settings
1.
Re-Loading the Paper
8
Changing the Paper Size Setting
9
1.
Press [Additional Functions].
10
2.
Press [
] or [
] to select <PAPER SETTINGS>,
then press [OK].
Appendix
7.
Press [OK] to resume the job.
No further operation is required.
■
Troubleshooting
] to select <PAPER SIZE>, then
For a fax job, go to step 7.
For a copy job, or report print or list print job, go to step 8.
Load the correct size paper as shown on LCD
display, then press [OK] to resume the job.
The machine re-starts printing.
Maintenance
Next
If <LOAD CORRECT PAPER> is displayed
5
Remote UI
Previous
8.
Cancel the job on the system monitor.
For a copy job, you can also cancel the job by pressing [Stop/Reset].
For details on how to cancel the copy job, see “Checking and
Deleting Copy Jobs,” on p. 3-13.
For details on how to cancel the report or list print job, see “Checking
and Deleting Report Jobs,” on p. 11-55.
Now ready to resume the job.
11
Table of Contents
Index
10-29
TOP
Back
Before Using the
Machine
1
Document and Paper
Previous
Next
General Problems
2
Copying
3
Sending and
Receiving
4
Printing and
Scanning
The machine has no power.
Q
Is the power cord plugged in securely?
A
Check that the power cord is securely plugged into
the machine and into the wall outlet. If the machine is
plugged into a power strip, make sure the power strip
is plugged in and turned on.
5
The Error indicator flashes.
Q
Does the machine feed paper correctly, or is there
paper in the paper cassette or multi-purpose tray?
A
Clear the paper jam, or load paper in the paper
cassette or multi-purpose tray. (For instructions on
clearing paper jam, See “Clearing Jams,” on p. 10-3.
For instructions on loading paper, see “Set Up the
Machine,” in the Starter Guide.)
A
If the machine has no paper jam, or paper is loaded
in the paper cassette or multi-purpose tray, turn off
the main power switch and wait for more than 10
seconds, then turn it on again. If the problem is fixed,
the Error indicator will turn off, and the LCD will return
to the standby mode. If the Alarm indicator remains
flashing, unplug the machine, and contact your local
authorized Canon dealer.
Network
6
Remote UI
Q
Is the power cord supplying power?
A
Use a different power cord, or test the cord for
continuity using a voltmeter.
Q
Is the main power switch turned on?
A
Turn on the main power switch.
7
System Manager
Settings
8
Maintenance
9
Troubleshooting
10
Appendix
11
Table of Contents
Index
10-30
TOP
Back
Before Using the
Machine
1
Previous
Next
Nothing appears in the LCD.
Document and Paper
2
Copying
3
Sending and
Receiving
Q
Is the power cord plugged in securely?
A
Check that the power cord is securely plugged into
the machine and into the wall outlet. If the machine is
plugged into a power strip, make sure the power strip
is plugged in and turned on.
Q
Is the main power switch turned on?
A
Turn on the main power switch.
Q
Is the machine in the Sleep mode?
A
Press [Energy Saver] on the operation panel to cancel
the Sleep mode.
4
Printing and
Scanning
5
Network
6
Remote UI
7
System Manager
Settings
8
Maintenance
9
Troubleshooting
10
Appendix
11
Table of Contents
Index
10-31
TOP
Back
Before Using the
Machine
1
Document and Paper
Previous
Next
Paper Feeding Problems
2
Copying
3
Sending and
Receiving
Printing and
Scanning
Paper does not feed properly.
Q
Q
Are different types of paper loaded in the
machine?
A
Load only one type of paper.
A
Make sure you load paper that meets the
requirements for use. (See “Paper Requirements,” on
p. 2-7.)
A
Let the paper run out before refilling the machine.
Avoid mixing new stock with paper already loaded.
Is the paper loaded correctly?
4
A
5
Q
Does the machine contain too many sheets?
A
Make sure you load the correct quantity. (See “Paper
Requirements,” on p. 2-7.)
Make sure the paper is correctly loaded. (See “Set Up
the Machine,” in the Starter Guide.)
Network
6
Remote UI
7
System Manager
Settings
8
Maintenance
Multiple sheets feed together into the machine.
Q
Is the paper loaded correctly?
Q
Is the correct type of paper loaded in the machine?
A
Make sure the paper is correctly loaded. (See “Set Up
the Machine,” in the Starter Guide.)
A
Make sure you load paper that meets the
requirements for use. (See “Paper Requirements,” on
p. 2-7.)
Q
Does the machine contain too many sheets?
A
Make sure you load the correct quantity. (See “Paper
Requirements,” on p. 2-7.)
9
Troubleshooting
10
Appendix
Repeated paper jams occur.
11
Table of Contents
Index
10-32
TOP
Back
Before Using the
Machine
1
Document and Paper
Previous
Next
Sending/Receiving Problems
2
Copying
3
Sending and
Receiving
4
Printing and
Scanning
5
■
Document cannot be sent to an e-mail address, or file server.
Q
Did you just turn on the main power switch?
A
Wait for a while. After turning on the main power
switch, the machine cannot send documents
immediately.
Network
6
Remote UI
Q
Is the e-mail address you entered, or the e-mail or
file server address registered in the Address Book
correct?
A
Make sure the e-mail address you entered, or the
e-mail or file server address registered in the Address
Book is correct.
7
System Manager
Settings
8
Maintenance
9
Sending Problems
Q
If you are sending an e-mail message are the SMTP
Server and DNS Server settings correct?
A
Check the SMTP Server and DNS Server settings.
Q
If you are sending to a file server, are the user and
password settings correct?
A
Check the user and password settings, and send the
document again.
Q
If you are sending to a file server, are the shared
folder settings correct?
A
Check the shared folder settings. (See “Configuring a
Shared Folder,” on p. 6-23.)
Troubleshooting
10
Appendix
11
Table of Contents
Index
10-33
TOP
Back
Before Using the
Machine
1
Cannot send a fax.
Copying
3
Sending and
Receiving
4
Printing and
Scanning
5
Q
Did you just turn on the main power switch?
A
Wait for a while. After turning on the main power
switch, the machine cannot scan documents
immediately.
Q
Is the machine set for the correct telephone line
type?
A
Network
6
Remote UI
7
System Manager
Settings
8
Make sure the machine is set for the correct telephone
line type. (See “Set the Machine for Sending Faxes,” in
the Starter Guide.)
Q
Is your machine in the fax mode?
A
Press [SEND/FAX] repeatedly to select <FAX>, then
press [OK] to show the fax standby display.
Q
Is the document loaded correctly?
9
A
Make sure the document is correctly loaded. (See
“Loading Documents,” on p. 2-4.)
10
A
Make sure the scanning platform and rear cover are
fully closed. (See “Paper Jams,” on p. 10-5.)
Maintenance
Troubleshooting
Appendix
Next
Q
Is the one-touch key or coded dial code you
entered registered correctly?
A
Check that the Address Book settings are registered
correctly. (See “Storing/Editing Address Book,” on
p. 4-9.)
Q
Did you dial the correct number?
A
Check that you have the correct number.
Q
Is the machine in the Sleep mode?
A
The machine does not scan documents if it is in the
Sleep mode. To take the machine out of the Sleep
mode, press [Energy Saver] on the operation panel.
Q
Is the recipient’s machine out of paper?
A
Ask the recipient to make sure paper is loaded in the
machine.
Document and Paper
2
Previous
11
Table of Contents
Index
10-34
TOP
Back
Before Using the
Machine
1
Q
Are there other documents being sent from
memory?
A
Allow time for the documents to finish sending.
Q
A
Document and Paper
2
Copying
3
Sending and
Receiving
4
Printing and
Scanning
5
A
6
Q
Is the recipient’s machine a G3 fax machine?
A
Make sure the recipient’s machine is compatible with
your machine.
Has an error occurred during transmission?
Q
Is BUSY/NO SIGNAL shown on the ERROR TX
REPORT?
Check the LCD for an error message. (See “LCD
Messages,” on p. 10-13.)
A
The fax number you dialed is busy. Try sending the
document later.
Print an Activity Report and check for an error.
(See “ACTIVITY REPORT,” on p. 11-51.)
A
The recipient’s machine is not working. Ask the
recipient to check the machine.
Q
Did the recipient’s machine answer within 35
seconds (after all automatic redialing attempts)?
System Manager
Settings
A
Ask the recipient to check the machine. For an
overseas call, add pauses to the registered number.
(See “Dialing an Overseas Number (With Pauses),” on
p. 4-33.)
8
Maintenance
9
Q
Is the Processing/Data indicator lit?
Troubleshooting
10
A
The external phone is busy. Please wait until the
external phone becomes free.
Is the telephone cable connected properly?
A
Make sure the cable is connected properly. (See “Set
Up the Machine,” in the Starter Guide.)
Q
Is the telephone line working properly?
A
Make sure there is a dial tone when you press
[Hook] or when you lift the handset of any external
telephone connected to the machine. If there is no
dial tone, contact your local telephone company.
7
Next
Q
Network
Remote UI
Previous
Appendix
11
Table of Contents
Index
10-35
TOP
Back
Before Using the
Machine
1
Q
Is the machine overheated?
A
Unplug the machine and let it cool for about 5
minutes. Then plug in the machine and try sending
again.
Previous
Next
Faxes sent from the machine are spotted or dirty.
Document and Paper
2
Copying
3
Sending and
Receiving
4
Printing and
Scanning
Q
Are you sending with the resolution set to <SUPER
FINE> or <ULTRA FINE>?
A
If you want to keep your document quality, divide the
document into some parts and send them separately.
6
A
If your document does not contain fine text or
photographs, set the resolution to <STANDARD>.
A
If your document contains fine text or photographs,
send it directly rather than using a memory
transmission.
Network
Remote UI
System Manager
Settings
8
Maintenance
9
Is the recipient’s machine working properly?
A
Check the machine by making a copy. If the copy is
clear, the problem may be in the recipient’s machine.
If the copy is spotted or dirty, clean the scanner
components. (See “Scanning Area,” on p. 2-3.)
Q
Is the document loaded correctly?
A
Make sure the document is correctly loaded. (See
“Loading Documents,” on p. 2-4.)
Memory fills up immediately when you try to send.
5
7
Q
The documents you sent are too light.
Q
Is the density setting changed to be lighter?
A
Adjust the density for light documents to be darker.
(See “Density,” on p. 4-6.)
Q
Is a document stored in memory, leaving little
memory available?
Q
Are the scanning components of the machine
clean?
A
Print, send, or delete any documents stored in
memory.
A
If the received document is spotted or dirty, clean
the scanning components. (See “Scanning Area,” on
p. 2-3.)
Troubleshooting
10
Appendix
11
Table of Contents
Index
10-36
TOP
Back
Before Using the
Machine
1
Sending of documents is too slow.
Previous
Next
Errors occur frequently while sending.
Document and Paper
2
Q
Is the resolution set to <FINE>, <PHOTO>, <SUPER
FINE>, or <ULTRA FINE>?
Q
Are the telephone lines in poor condition, or do
you have a bad connection?
3
A
Setting the resolution to <STANDARD> reduces the
sending time.
A
Check if there is a device nearby that interferes with
signal transmission (e.g., microwave oven).
4
Q
Is Error Correction Mode (ECM) set to <ON>?
A
Lower the transmission speed. (See “SYSTEM
SETTINGS,” on p. 11-34.)
A
Because ECM corrects errors during a transmission,
any problems on the line can mean that the
transmission will take extra time. Set <ECM TX> to
<OFF>. (See “TX/RX SETTINGS,” on p. 11-11.)
Copying
Sending and
Receiving
Printing and
Scanning
5
Network
6
Remote UI
Cannot send using Error Correction Mode (ECM).
7
System Manager
Settings
8
Maintenance
9
Troubleshooting
10
Q
Does the recipient’s machine support ECM?
A
If the recipient’s machine does not support ECM,
the document is sent in normal mode without error
checking.
Cannot redial with [Recall/Pause].
Q
Is <REST. REDIAL/CALL> set to <ON>?
A
When <REST. REDIAL/CALL> is set to <ON>, Redialing
is not available. (See “Restricting Job Recall,” on
p. 8-19.)
Entering the fax number is required again after pressing [Start].
Q
Is <CONFIRM FAX NO.> set to <ON>?
A
When <CONFIRM FAX NO.> is set to <ON>, you need
to enter the fax number again after pressing [Start].
(See “Confirming Entered Fax Numbers,” on p. 8-19.)
Appendix
11
Table of Contents
Index
10-37
TOP
Back
Before Using the
Machine
1
Cannot send the documents to multiple recipients.
Previous
Next
Cannot receive a fax automatically.
Document and Paper
2
Copying
3
Sending and
Receiving
4
Printing and
Scanning
5
Q
Is <REST. MULTI DEST> set to <ON>?
Q
Is the machine set to receive automatically?
A
When <REST. MULTI DEST> is set to <ON>, you cannot
send the documents to multiple recipients. (See
“Restricting Broadcasting,” on p. 8-20.)
A
For the machine to receive faxes automatically, the
receive mode must be set to <FaxOnly>, <FaxTel>,
<AnsMode>, or <DRPD>. If you have set <AnsMode>,
confirm that an answering machine is connected to
the machine and that it is turned on with an outgoing
message properly recorded. (See “Basic Receiving
Method,” on p. 4-35.)
Q
Are documents stored in memory, leaving little or
no memory available?
A
Print, send, or delete any documents stored in
memory.
Q
Has an error occurred during reception?
A
Check the LCD for an error message. (See “LCD
Messages,” on p. 10-13.)
A
Print an Activity Report and check for an error. (See
“ACTIVITY REPORT,” on p. 11-51.)
■
Receiving Problems
The machine does not receive documents (e-mail, or file server).
Network
6
Remote UI
7
System Manager
Settings
8
Maintenance
Q
Are network settings specified?
A
Documents cannot be received if the appropriate
network settings are not specified. Confirm this with
your system administrator.
9
Troubleshooting
10
Appendix
11
Table of Contents
Index
10-38
TOP
Back
Before Using the
Machine
1
Previous
Next
Q
Is paper loaded in the machine?
Q
Has an error occurred during reception?
2
A
Make sure paper is loaded in the machine. (See “Set
Up the Machine,” in the Starter Guide.)
A
Check the LCD for an error message. (See “LCD
Messages,” on p. 10-13.)
3
Q
Is the telephone cable connected properly?
A
Print an Activity Report and check for an error. (See
“ACTIVITY REPORT,” on p. 11-51.)
A
Make sure the cable is connected properly. (See “Set
Up the Machine,” in the Starter Guide.)
Q
Is paper loaded in the machine?
A
Make sure paper is loaded in the machine. (See “Set
Up the Machine,” in the Starter Guide.)
Q
Can the sender’s machine send the CNG signal,
which tells your machine that the incoming call is
a fax call?
A
Some machines cannot send this signal. In such cases,
receive the fax manually.
Document and Paper
Copying
Sending and
Receiving
4
Printing and
Scanning
5
Network
No automatic switching between telephone and fax calls.
Q
6
Remote UI
A
7
System Manager
Settings
8
Maintenance
9
Troubleshooting
Q
10
Appendix
A
11
Is the machine set to switch automatically between
telephone and fax calls?
For the machine to switch between fax and telephone
calls automatically, the receive mode must be set to
<FaxTel>, <AnsMode>, or <DRPD>. If you have set
<AnsMode>, confirm that an answering machine is
connected to the machine and that it is turned on
with an outgoing message properly recorded. (See
“Basic Receiving Method,” on p. 4-35.)
Are documents stored in memory, leaving little or
no memory available?
Print, send, or delete any documents stored in
memory.
Cannot receive a document manually.
Q
Is the machine set to receive manually?
A
For the machine to receive faxes manually, the receive
mode must be set to <Manual>. (See “Basic Receiving
Method,” on p. 4-35.)
Table of Contents
Index
10-39
TOP
Back
Before Using the
Machine
1
A
Document and Paper
2
Copying
Sending and
Receiving
Printing and
Scanning
3
Q
4
A
Always press [Start] or dial the remote reception ID
before hanging up. Otherwise you will disconnect the
call.
Q
Are documents set on the ADF?
A
After removing the document from the ADF, please
attempt manual receiving again. If you press [Start]
when documents are set on the ADF, it automatically
switches to manual sending.
5
Network
6
Remote UI
7
System Manager
Settings
If you set <MANUAL/AUTO> to <ON>, the machine
will receive faxes automatically even when the receive
mode is set to <Manual>. (See “TX/RX SETTINGS,” on
p. 11-11.)
8
Maintenance
9
Troubleshooting
10
Did you hang up the external telephone before
pressing [Start] or dialing the remote reception ID?
Is the toner low or unevenly distributed?
A
Redistribute the toner inside the toner cartridge. If
the problem persists, replace the toner cartridge. (See
“Replacing the Toner Cartridge,” on p. 9-10.)
Next
Q
Is the correct type of paper loaded in the machine?
A
Make sure you load paper that meets the
requirements for use. (See “Paper Requirements,” on
p. 2-7.)
Q
Is the sender’s machine functioning properly?
A
Ask the sender to check that the scanning
components of the machine are clean.
Q
Is the machine in the toner saver mode?
A
Set <TONER SAVER MODE> to <OFF>. (See “COMMON
SETTINGS,” on p. 11-7.)
Faxes do not print.
Q
Have you removed the plastic seal from the toner
cartridge?
A
Make sure you remove the seal from the cartridge.
(See “Set Up the Machine,” in the Starter Guide.)
Print quality is poor.
Q
Previous
Appendix
11
Table of Contents
Index
10-40
TOP
Back
Before Using the
Machine
1
Previous
Next
Q
Is the toner cartridge installed properly?
Q
Is the sender’s machine functioning properly?
2
A
Make sure the toner cartridge is installed properly.
(See “Set Up the Machine,” in the Starter Guide.)
A
Ask the sender to check that the scanning
components of the machine are clean.
3
Q
Is the cartridge out of toner?
A
Replace the toner cartridge. (See “Replacing the Toner
Cartridge,” on p. 9-10.)
Q
Are the slide guides of the paper cassette set to
the size of the paper?
Q
Is the correct size of paper loaded in the machine?
A
Adjust the guides of the paper cassette to the size of
the paper.
A
Make sure you load paper that meets the
requirements for use. (See “Paper Requirements,” on
p. 2-7.)
Q
Have you specified the correct paper size for the
paper cassette?
Change <PAPER SETTINGS>. (See “Setting Paper Size
and Type,” on p. 2-13.)
A
Specify the correct paper size for the paper cassette.
Q
Is the toner low or unevenly distributed?
A
Redistribute the toner inside the toner cartridge. If
the problem persists, replace the toner cartridge. (See
“Replacing the Toner Cartridge,” on p. 9-10.)
Document and Paper
Copying
Sending and
Receiving
4
Printing and
Scanning
5
Network
6
Part of the documents you receive are cut off.
Remote UI
7
System Manager
Settings
8
Maintenance
9
Troubleshooting
10
Appendix
A
Received faxes print blotched or unevenly.
Q
Is <ECM RX> set to <ON>?
A
ECM (Error Correction Mode) should eliminate such
problems. (See “TX/RX SETTINGS,” on p. 11-11.)
However, if the telephone lines are in poor condition,
ask the sender to send faxes again.
11
Table of Contents
Index
10-41
TOP
Back
Before Using the
Machine
1
Cannot receive using Error Correction Mode (ECM).
Previous
Next
You cannot get documents from information services.
Document and Paper
2
Copying
3
Sending and
Receiving
4
Printing and
Scanning
5
Network
Q
Does the sender’s machine support ECM?
Q
Is your machine set to the tone dialing type of the
telephone line?
A
If the sender’s machine does not support ECM, the
document is received in normal mode without error
checking.
A
Press [Tone] to set the tone dialing.
Q
Do you receive messages from the information
services such as to press [Start] after the beep to
receive?
A
When you hear the beep sound, press [Start].
Receiving of documents is too slow.
Q
A
6
Remote UI
7
System Manager
Settings
8
Maintenance
9
Q
A
Is ECM (Error Correction Mode) set to <ON>?
Because ECM corrects errors during a transmission,
any problems on the line can mean that the
transmission will take extra time. Set <ECM RX> to
<OFF>. (See “TX/RX SETTINGS,” on p. 11-11.)
Errors occur frequently while receiving.
Q
Are the telephone lines in poor condition, or do
you have a bad connection?
Is the resolution of the sender’s machine set
higher?
A
Check if there is a device nearby that interferes with
signal reception (e.g., microwave oven).
Contact to the sender and make sure the resolution of
the sender’s machine has been set properly.
A
Lower the reception speed. (See “SYSTEM SETTINGS,”
on p. 11-34.)
Troubleshooting
10
Appendix
11
Table of Contents
Index
10-42
TOP
Back
Before Using the
Machine
1
Q
Is the sender’s machine functioning properly?
A
Ask the sender to check that the machine is
functioning properly.
Previous
Next
Document and Paper
2
Copying
3
Sending and
Receiving
4
Printing and
Scanning
5
Cannot print received documents on both sides of the paper.
Q
Is <TWO-SIDED PRINT>, set to <ON>?
A
Make sure that <TWO-SIDED PRINT> is set to <ON>.
(See “Two-Sided Printing,” on p. 4-44.)
Network
6
Remote UI
7
System Manager
Settings
8
Maintenance
9
Troubleshooting
10
Appendix
11
Table of Contents
Index
10-43
TOP
Back
Before Using the
Machine
1
Document and Paper
Previous
Next
Copying Problems
2
Copying
3
Sending and
Receiving
Blank paper comes out from the machine.
Q
Have you removed the plastic seal from the toner
cartridge?
A
Make sure you remove the seal from the cartridge.
(See “Set Up the Machine,” in the Starter Guide.)
Q
Is the toner cartridge installed properly?
6
A
Make sure the toner cartridge is installed properly.
(See “Set Up the Machine,” in the Starter Guide.)
7
Q
Is the cartridge out of toner?
A
Replace the toner cartridge. (See “Replacing the Toner
Cartridge,” on p. 9-10.)
4
Printing and
Scanning
5
Network
Remote UI
System Manager
Settings
8
Maintenance
9
Troubleshooting
10
Copy is too light or has uneven density.
Q
Is the toner low or unevenly distributed?
A
Redistribute the toner inside the toner cartridge. If
the problem persists, replace the toner cartridge. (See
“Replacing the Toner Cartridge,” on p. 9-10.)
Copy has vertical white streaks.
Q
Is the toner low or unevenly distributed?
A
Redistribute the toner inside the toner cartridge. If
the problem persists, replace the toner cartridge. (See
“Replacing the Toner Cartridge,” on p. 9-10.)
Copy is spotted or dirty.
A
If the copy is spotted or dirty, clean the scanning
components and machine’s interior (See “Cleaning the
Machine,” on p. 9-2.)
Appendix
11
Table of Contents
Index
10-44
TOP
Back
Before Using the
Machine
1
Paper jams occur.
Previous
Next
Copy is not clear.
Document and Paper
2
A
Make sure the scanning platform and rear cover are
fully closed. (See “Paper Jams,” on p. 10-5.)
3
Q
Is the paper loaded correctly?
A
Q
Is the correct type of paper loaded in the machine?
A
Make sure you load paper that meets the
requirements for use. (See “Paper Requirements,” on
p. 2-7.)
Make sure the document is correctly loaded. (See “Set
Up the Machine,” in the Starter Guide.)
Q
Are you copying on the wrong side of the paper?
Q
Is the correct type of paper loaded in the machine?
A
A
Make sure you load paper that meets the
requirements for use. (See “Paper Requirements,” on
p. 2-7.)
Some papers have a “right” side for copying. If the
copy quality is not as clear as you think it should be,
try copying on the other side of the paper.
Copying
Sending and
Receiving
4
Printing and
Scanning
5
Network
6
Remote UI
7
System Manager
Settings
8
Maintenance
Copy is skewed.
Q
Is the paper loaded correctly?
A
Make sure the paper is correctly loaded in the
machine. (See “Set Up the Machine,” in the Starter
Guide.)
A
Make sure the paper delivery slot is free of
obstructions.
9
Troubleshooting
10
Documents are copied in < CALENDAR TYPE> even if <BOOK TYPE> is
selected (or vice versa).
Q
Are you copying the landscape oriented
documents?
A
For the landscape oriented documents, the front and
back sides of the copy will have the opposite topbottom orientation when <BOOK TYPE> is selected.
When <CALENDAR TYPE> is selected, the front and
back side of the copy will have the same top-bottom
orientation. (See “Two-Sided Copying,” on p. 3-9.)
Appendix
11
Table of Contents
Index
10-45
TOP
Back
Before Using the
Machine
1
Document and Paper
2
Copying
3
Sending and
Receiving
Previous
Next
The alarm sounds or <MEMORY FULL> appears in the LCD when
making copies.
Q
Is the machine’s memory full?
A
Check remaining memory. (See “Checking Remaining
Memory,” on p. 11-56.)
4
Printing and
Scanning
5
Network
6
Remote UI
7
System Manager
Settings
8
Maintenance
9
Troubleshooting
10
Appendix
11
Table of Contents
Index
10-46
TOP
Back
Before Using the
Machine
1
Document and Paper
Previous
Next
Printing Problems
2
Copying
3
Sending and
Receiving
Blank paper comes out from the machine.
Q
Have you removed the plastic seal from the toner
cartridge?
A
Make sure you remove the seal from the cartridge.
(See “Set Up the Machine,” in the Starter Guide.)
Q
Is the toner cartridge installed properly?
6
A
Make sure the toner cartridge is installed properly.
(See “Set Up the Machine,” in the Starter Guide.)
7
Q
Is the cartridge out of toner?
A
Replace the toner cartridge. (See “Replacing the Toner
Cartridge,” on p. 9-10.)
4
Printing and
Scanning
5
Network
Remote UI
System Manager
Settings
8
Maintenance
9
Troubleshooting
10
Printout is too light or has uneven density.
Q
Is the toner low or unevenly distributed?
A
Redistribute the toner inside the toner cartridge. If
the problem persists, replace the toner cartridge. (See
“Replacing the Toner Cartridge,” on p. 9-10.)
Printout has vertical white streaks.
Q
Is the toner low or unevenly distributed?
A
Redistribute the toner inside the toner cartridge. If
the problem persists, replace the toner cartridge. (See
“Replacing the Toner Cartridge,” on p. 9-10.)
Printout is spotted or dirty.
A
If the copy is spotted or dirty, clean the scanning
components and machine’s interior (See “Cleaning the
Machine,” on p. 9-2.)
Appendix
11
Table of Contents
Index
10-47
TOP
Back
Before Using the
Machine
1
Paper jams occur.
Previous
Next
Printout is not clear.
Document and Paper
2
A
Make sure the scanning platform and rear cover are
fully closed. (See “Paper Jams,” on p. 10-5.)
3
Q
Is the document loaded correctly?
A
Q
Is the correct type of paper loaded in the machine?
A
Make sure you load paper that meets the
requirements for use. (See “Paper Requirements,” on
p. 2-7.)
Make sure the document is correctly loaded. (See “Set
Up the Machine,” in the Starter Guide.)
Q
Are you printing on the wrong side of the paper?
Q
Is the correct type of paper loaded in the machine?
A
A
Make sure you load paper that meets the
requirements for use. (See “Paper Requirements,” on
p. 2-7.)
Some papers have a “right” side for printing. If the
printout quality is not as clear as you think it should
be, try printing on the other side of the paper
Copying
Sending and
Receiving
4
Printing and
Scanning
5
Network
6
Cannot print two-sided documents
Remote UI
7
System Manager
Settings
8
Maintenance
Printout is skewed.
Q
Is the paper loaded correctly?
A
Make sure the paper is correctly loaded in the
machine. (See “Set Up the Machine,” in the Starter
Guide.)
9
Q
Is the printer driver settings correctly set for twosided printing?
A
Make sure that the printer driver is correctly set. (See
Online Help.)
Cannot print documents from a computer.
Troubleshooting
10
Appendix
A
Make sure the Output tray is free of obstructions. (See
“Machine Components,” on p. 1-3.)
Q
Is the printer driver properly installed?
A
Make sure that the printer driver is properly installed.
11
Table of Contents
Index
10-48
TOP
Back
Before Using the
Machine
1
Q
Are the printer driver settings (Paper Size, Output
Size) correct?
A
Make sure that the printer driver settings (Paper Size,
Output Size) are correct. (See Online Help.)
Q
Is the USB cable properly connected to the
machine and the computer?
A
Make sure that the USB cable is properly connected
to the machine and the computer. Try a different USB
cable.
Q
Does the USB port you are using properly work?
A
Restart your computer and the machine. If the
computer has other ports, connect the USB cable to
others.
Q
Are there any jobs remaining in the print queue?
A
A print job may be stuck in the print queue when it
could not be finished due to an expected interruption.
When this happens, follow this procedure to
delete any remaining print jobs, and then print the
documents again.
Document and Paper
2
Copying
3
Sending and
Receiving
4
Printing and
Scanning
5
Network
6
Remote UI
7
System Manager
Settings
8
Maintenance
9
Troubleshooting
10
Previous
Next
For Windows 2000/XP/Server 2003/Vista:
1. Double-click the icon of the printer you installed.
– For Windows Vista
Click [Start] on the Windows task bar → [Control
Panel] → [Printer] under [Hardware and Sound].
– For Windows 2000:
Click [Start] on the Windows task bar → [Settings]
→ [Printers].
– For Windows XP Professional/Server 2003:
Click [start] on the Windows task bar → [Printers
and Faxes].
– For Windows XP Home Edition:
Click [start] on the Windows task bar → [Control
Panel] → [Printers and Other Hardware] →
[Printers and Faxes].
2. Delete the print job.
– For deleting all the print jobs:
Click [Printer] → [Cancel All Documents]
– For the specified job:
Right-click the specified print job → [Cancel]
Appendix
11
Table of Contents
Index
10-49
TOP
Back
Before Using the
Machine
1
Document and Paper
2
Copying
3
Sending and
Receiving
4
Printing and
Scanning
Previous
Next
For Windows 98/Me:
1. Click [Start] on the Windows task bar → [Settings] →
[Printers] → double-click the icon of the printer you
installed.
2. Delete the print job.
– For deleting all the print jobs:
Click [Printer] → [Purge Print Documents]
– For the specified job:
Right-click the print job you want to delete →
[Cancel Printing]
5
Network
6
Remote UI
7
System Manager
Settings
8
Maintenance
9
Troubleshooting
10
Appendix
11
Table of Contents
Index
10-50
TOP
Back
Before Using the
Machine
1
Document and Paper
Previous
Next
Telephone Problems
2
Copying
3
Sending and
Receiving
Printing and
Scanning
Cannot dial.
Telephone disconnects while you are talking.
Q
Is the telephone cable connected properly?
4
A
Make sure the cable is connected properly. (See “Set
Up the Machine,” in the Starter Guide.)
5
Q
Is the power cord plugged in securely?
A
Check that the power cord is securely plugged into
the machine and into the wall outlet. If the machine is
plugged into a power strip, make sure the power strip
is plugged in and turned on.
Network
6
Remote UI
7
System Manager
Settings
Q
Is the main power switch turned on?
A
Turn on the main power switch.
9
Q
Is the machine set for the correct telephone line
type?
10
A
Make sure the machine is set for the correct telephone
line type. (See “Set the Machine for Sending Faxes,” in
the Starter Guide.)
8
Maintenance
Troubleshooting
Appendix
11
Q
Is the telephone cable connected properly?
A
Make sure the cable is connected properly. (See “Set
Up the Machine,” in the Starter Guide.)
Q
Is the telephone cable defective?
A
Use another cord.
Calls do not connect, or the wrong number is dialed.
Q
Did you confirm the dial tone before entering the
telephone number?
A
Make sure to confirm the dial tone before entering a
telephone number. If you enter the number before
the dial tone can be heard, the call may not connect,
or the wrong number may be dialed.
Table of Contents
Index
10-51
TOP
Back
Before Using the
Machine
1
Document and Paper
Previous
Next
Network Problems
2
Copying
3
Sending and
Receiving
4
Printing and
Scanning
Unable to print from a TCP/IP network.
Q
Are the machine and cable properly connected?
A
Check that the machine is connected to the network
using the proper cable, then restart the machine. (See
“Set the Machine for Network Usage,” in the Starter
Guide.)
Q
Is the TCP/IP network properly set up?
A
Make sure the IP addresses are properly set up. If
the IP addresses are set using DHCP, BOOTP, or RARP,
make sure they are operating.
5
Q
Is the name of the file being printed too long?
A
Rename the file with a shorter name. Normally LPR (or
the Microsoft TCP/IP Printer, if you are using Windows
2000/XP/Server 2003/Vista) sends jobs either under
the name of the application software used for
printing, or the file name. However, a job name longer
than 255 bytes cannot be sent to the machine.
Network
6
Remote UI
7
System Manager
Settings
8
Maintenance
9
Q
Is the computer that is printing properly set up?
A
Make sure the proper printer driver is installed. (See
“Installing/Uninstalling Software,” in the Starter
Guide.)
Troubleshooting
10
Appendix
11
A
Make sure the correct machine is set as the output
destination for the computer that is printing in
[Printers and Faxes] or Print Manager.
The printer port name is not displayed in [Print to the following port
(s)].
Q
Are the machine and cable properly connected?
A
Check that the machine is connected to the network
using the proper cable, then restart the machine. (See
“Set the Machine for Network Usage,” in the Starter
Guide.)
Q
Is the computer that is printing properly set up?
A
Make sure the proper printer driver is installed. (See
“Installing/Uninstalling Software,” in the Starter
Guide.)
Table of Contents
Index
10-52
TOP
Back
Before Using the
Machine
1
A
Document and Paper
2
Copying
3
Sending and
Receiving
Printing and
Scanning
4
Q
Does the dial-up router send packets via
broadcast?
5
A
If the dial-up router does not have to send packets via
broadcast, change the router settings to ensure that
it sends packets via a method other than broadcast.
If dial-up router has to send packets via broadcast,
check that the settings are correct.
6
Remote UI
7
8
Maintenance
9
Troubleshooting
10
Q
A
Dose the file or mail server’s host name or IP
address set on the machine exist on the network?
Check that the file or mail server’s host name or IP
address set on the machine is correct.
Next
Q
Does the DNS server exist on an external network?
A
If you attempt to access a device on the network to
which the machine is connected, with the DNS server
on an external network, set the destination using an
IP address, not a host name.
Q
Is the device’s information set on the DNS server
on the network to which the machine is connected
correct?
A
If information about a device on an external network
is set on the DNS server on the network to which the
machine is connected, check the settings.
The machine automatically connects to a destination other than the
intended destination via its dial-up access (when a dial-up router is
connected to your network).
Network
System Manager
Settings
Make sure the correct machine is set as the output
destination for the computer that is printing in
[Printers and Faxes] or [Printers].
Previous
Detailed information concerning the machine cannot be set or
browsed using the Remote UI or utility.
Q
Are the settings for <SET IP ADD RANGE> correct?
A
If the settings for [IP Address Range Settings] do
not permit the IP address of a computer on which
the Remote UI or utility is used, you cannot set the
machine setting items or browse information on the
machine. Check the settings for <SET IP ADD RANGE>.
(See “IP Address Range Settings,” on p. 6-39.)
Appendix
11
Table of Contents
Index
10-53
TOP
Back
Before Using the
Machine
1
Q
Are the settings for <PERMIT RX MAC ADD>
correct?
A
If the MAC address of a computer specified in
<PERMIT RX MAC ADD> is not correct, you cannot set
the machine setting items or browse information on
the machine. Check the settings for <PERMIT RX MAC
ADD>. (See “RX MAC Address Settings,” on p. 6-40.)
Document and Paper
2
Copying
3
Sending and
Receiving
4
Printing and
Scanning
Q
Is <USE SNMP> or <DEDICATED PORT> is to
<OFF>?
A
Set <USE SNMP> and <DEDICATED PORT> to <ON>.
(See “SNMP,” on p. 6-8.)
Q
Does the SNMP community name match?
A
If you use an SNMP community name different from
the one stored in the machine to access the machine
from a utility, the utility will not detect the machine.
In this case, check the SNMP community name. (See
“SNMP,” on p. 6-8.)
5
Network
6
Remote UI
7
System Manager
Settings
8
Maintenance
9
Troubleshooting
10
Previous
Next
Unable to send data/share files (Windows File Sharing).
Q
Are File sharing settings for the shared folder
correct?
A
Check the following settings:
– On the computer you are using, go into Windows
Explorer → double-click [Entire Network] → check
that the computer you want to share is listed there.
You can also check for the computer as follows: On
the [Start] menu, point to [Find] → [Computer] →
enter the name of the computer you want to share
→ check that the computer is on the network.
– If the computer you want to share is listed, doubleclick its icon to see whether the shared name of the
folder you want to share is listed.
– If the shared name does not appear, see
“Configuring a Shared Folder,” on p. 6-23 and then
check the shared folder settings.
Q
Is an error message or code displayed on the LCD
of the machine?
A
After confirming the error message, see “LCD
Messages,” on p. 10-13 and perform the necessary
operations according to the error message displayed.
Appendix
11
Table of Contents
Index
10-54
TOP
Back
Before Using the
Machine
1
Document and Paper
2
Sending and
Receiving
Printing and
Scanning
3
4
– You cannot send, receive, copy, scan, or print documents.
5
Network
6
Next
If a Power Failure Occurs
If power is suddenly lost due to an outage or accidental
unplugging, a built-in battery retains the user data settings
and the Address Book settings. Any sent or received documents
stored in memory are backed up for about 30 minutes.
During a power cut, functions are limited as follows:
Copying
Previous
– You may not be able to make telephone calls using an external
telephone, depending on the type of telephone you use.
– You can receive telephone calls using an external telephone
depending on the type of telephone you use.
Remote UI
7
System Manager
Settings
8
To fully charge the built-in battery, it takes approximately 12 hours after
when the main power switch is on. If the built-in battery is not fully
charged, the data may not be saved properly.
Maintenance
9
Troubleshooting
10
Appendix
11
Table of Contents
Index
10-55
TOP
Back
Before Using the
Machine
1
Document and Paper
Previous
Next
If You Cannot Solve a Problem
2
Copying
3
Sending and
Receiving
4
Printing and
Scanning
5
■
Customer Support (U.S.A.)
If you cannot solve the problem after having referred to the
information in this chapter, contact Canon Customer Care Center
at 1-800-828-4040 between the hours of 8:00 A.M. to 8:00 P.M. EST
Monday through Friday and 10:00 A.M. to 8:00 P.M. on Saturday. Online support for 24 hours is also available at the website.
http://www.canontechsupport.com/
Network
Please have the following information ready when you contact
Canon:
– Product name (imageCLASS MF4690)
– Serial number (On the label located at the back of the machine)
– Place of purchase
– Nature of problem
– Steps you have taken to solve the problem and the results
6
Remote UI
7
System Manager
Settings
8
■
Customer Support (Canada)
Canon Canada Inc., offers a full range of customer technical support
options*:
– For step-by-step troubleshooting, e-mail technical support, the
latest driver or document downloads, and answers to frequently
asked questions, visit
If the machine makes strange noises, emits smoke or odd odor, turn off the
main power switch immediately, disconnect the power cord, and contact
Canon Customer Care Center. Do not attempt to disassemble or repair the
machine yourself.
http://www.canon.ca/
Maintenance
9
Troubleshooting
10
Appendix
– Free live technical support 9 A.M. to 8 P.M. EST Monday through
Friday (excluding holidays) for products still under warranty 1800-652-2666
Attempting to repair the machine yourself may void the limited warranty.
– For the location of the authorized service facility nearest you, visit
http://www.canon.ca/ or 1-800-652-2666
11
– If the problem cannot be corrected by using one of the above
technical support options, repair options are available at the time
of your call to the live technical support number above or via the
website at http://www.canon.ca/
* Support program specifics are subject to change without notice.
Table of Contents
Index
10-56
TOP
Back
Before Using the
Machine
1
Document and Paper
2
Copying
3
Sending and
Receiving
4
Printing and
Scanning
5
Network
6
Remote UI
7
System Manager
Settings
8
Maintenance
9
Troubleshooting
10
Previous
Next
11 Appendix
Machine Settings ............................................................................................11-4
Printing USER’S DATA LIST ..................................................... 11-4
Accessing the Setting Menu ................................................. 11-4
Setting Menu ..................................................................................................11-6
PAPER SETTINGS ........................................................................ 11-6
VOLUME CONTROL ................................................................... 11-6
COMMON SETTINGS ................................................................ 11-7
COPY SETTINGS ......................................................................... 11-9
TX/RX SETTINGS ......................................................................11-11
ADDRESS BOOK SET. ..............................................................11-19
PRINTER SETTINGS..................................................................11-23
Appendix
11
Table of Contents
Index
11-1
TOP
Back
Before Using the
Machine
1
3
4
Summary of Reports and Lists ................................................................... 11-48
5
Printing Reports Automatically ................................................................. 11-49
TX REPORT .................................................................................11-49
RX REPORT .................................................................................11-50
ACTIVITY REPORT ....................................................................11-51
2
Copying
Printing and
Scanning
Network
6
Remote UI
7
System Manager
Settings
Next
TIMER SETTINGS ......................................................................11-28
ADJUST./CLEANING ................................................................11-30
REPORT SETTINGS...................................................................11-32
SYSTEM SETTINGS...................................................................11-34
Document and Paper
Sending and
Receiving
Previous
8
Maintenance
9
Troubleshooting
10
Printing Reports and Lists Manually ......................................................... 11-53
Printing ACTIVITY REPORT ...................................................11-53
Printing 1-TOUCH LIST, CODED DIAL LIST, and
GROUP DIAL LIST.....................................................................11-54
Printing 1-TOUCH LIST 2, CODED DIAL LIST 2 ...............11-54
Appendix
11
Table of Contents
Index
11-2
TOP
Back
Before Using the
Machine
1
Document and Paper
2
Copying
3
Sending and
Receiving
4
Printing and
Scanning
Previous
Next
Checking and Deleting Jobs ....................................................................... 11-55
Checking and Deleting Report Jobs ................................11-55
Checking Remaining Memory .................................................................... 11-56
Glossary ....................................................................................................... 11-57
Index............................................................................................................. 11-68
5
Network
6
Remote UI
7
System Manager
Settings
8
Maintenance
9
Troubleshooting
10
Appendix
11
Table of Contents
Index
11-3
TOP
Back
Before Using the
Machine
1
Document and Paper
2
Copying
3
Sending and
Receiving
4
Printing and
Scanning
5
Network
6
Remote UI
7
System Manager
Settings
You can adjust the machine settings from the Setting Menu
to customize the way the machine works. To see the list of the
current settings, print out USER’S DATA LIST.
■
Printing USER’S DATA LIST
1.
Press [Additional Functions].
2.
Press [
] or [
] to select <REPORT
SETTINGS>, then press [OK].
3.
Press [
] or [
press [OK].
4.
Press [
] or [
] to select <USER DATA LIST>,
then press [OK].
5.
9
Troubleshooting
Next
Machine Settings
8
Maintenance
Previous
Press [
] to select <LIST PRINT>, then
■
Accessing the Setting Menu
1.
Press [Additional Functions].
2.
Press [
] or [
] to select the menu you want
to access, then press [OK].
<PAPER SETTINGS>
<VOLUME CONTROL>
<COMMON SETTINGS>
<COPY SETTINGS>
<TX/RX SETTINGS>
<ADDRESS BOOK SET.>
<PRINTER SETTINGS>
<TIMER SETTINGS>
<ADJUST./CLEANING>
<REPORT SETTINGS>
<SYSTEM SETTINGS>
] to select <YES>.
Printing starts, and the screen automatically returns to the standby
mode.
If you do not want to print the list, press [
] to select <NO>.
10
Appendix
11
Table of Contents
Index
11-4
TOP
Back
Before Using the
Machine
1
Document and Paper
3.
Press [
] or [
press [OK].
Previous
Next
] to select a submenu, then
2
Copying
For details on the submenu, see “Setting Menu,” on p. 11-6.
Sending and
Receiving
Printing and
Scanning
3
4.
To register the settings or go to a submenu item,
press [OK].
4
5.
When finished, press [Stop/Reset] to return to
the standby mode.
5
Network
6
Remote UI
– If you press [Stop/Reset] before pressing [OK], the setting will not
be registered.
– Press [Additional Functions] to return to the previous display.
7
System Manager
Settings
8
Maintenance
9
Troubleshooting
10
Appendix
11
Table of Contents
Index
11-5
TOP
Back
Before Using the
Machine
1
Document and Paper
Previous
Next
Setting Menu
2
Copying
3
Sending and
Receiving
Depending on the country of purchase, some settings may not be available.
PAPER SETTINGS
4
Printing and
Scanning
5
Network
6
Remote UI
Setting Item
Description
1. CASSETTE
Sets the paper size and type on the paper cassette. (See “Setting Paper Size and Type,” on
p. 2-13.)
2. MP TRAY
Sets the paper size and type on the purpose tray. (See “Setting Paper Size and Type,” on p. 2-13.)
VOLUME CONTROL
7
Setting Item
Description
1. MONITOR VOLUME
Sets the volume for monitor tone during the fax transmission. (1-3)
– ON (1-3)
– OFF
2. RING VOLUME
Sets the volume of the ring produced when the machine detects a call. (1-3)
9
3. ENTRY TONE
Beeps when pressing the keys on the operation panel.
– ON (1-3)
– OFF
10
4. ERROR TONE
Beeps when an error (e.g., TX error) occurs.
– ON (1-3)
– OFF
System Manager
Settings
8
Maintenance
Troubleshooting
Appendix
11
Table of Contents
Index
11-6
TOP
Back
Before Using the
Machine
1
Document and Paper
2
Sending and
Receiving
5. TX JOB DONE TONE
Beeps when a document is sent.
– ERROR ONLY (1-3)
– OFF
– ON (1-3)
6. RX JOB DONE TONE
Beeps when a document is received.
– ERROR ONLY (1-3)
– OFF
– ON (1-3)
7. SCAN DONE TONE
Beeps when scanning is completed.
– ERROR ONLY (1-3)
– OFF
– ON (1-3)
8. PRINT DONE TONE
Beeps when printing is completed.
– ERROR ONLY (1-3)
– OFF
– ON (1-3)
4
Printing and
Scanning
5
Network
6
Remote UI
7
System Manager
Settings
Next
VOLUME CONTROL
Copying
3
Previous
8
COMMON SETTINGS
9
1. INITIAL FUNCTION
Selects which standby display appears when turning on the power.
– COPY
– SEND
– SCAN
2. AUTO CLEAR SET.
Selects which standby display appears after the Auto Clearing function is activated.
Setting Item
Maintenance
Troubleshooting
10
Appendix
11
INITIAL FUNCTION
Description
Sets to return standby display that is selected in <INITIAL FUNCTION>.
Table of Contents
Index
11-7
TOP
Back
Before Using the
Machine
1
Document and Paper
2
COMMON SETTINGS
SELECTED FUNCTION
4. PRINTER DENSITY
Recalibrates the density adjustment scale if differences between the image in the document
and the print occur. (1-9)
* This function is not effective for print jobs. (See “PRINTER SETTINGS,” on p. 11-23.)
5. DISPLAY LANGUAGE
Selects the language on the display. (See Chapter 13, “Appendix,” in the Basic Operation Guide.)
6
6. ADF DIRTY ERROR
Sets whether the error message will appear when the ADF is dirty.
– DO NOT DISPLAY
– DISPLAY
7
7. INIT. COMMON SET.
Restores all <COMMON SETTINGS> to the default except for <DISPLAY LANGUAGE>.
Press [ ] to select <YES>.
If you do not want to restore all settings, press [ ] to select <NO>.
4
5
Network
Remote UI
System Manager
Settings
Sets to return standby display of the current mode.
Sets whether to reduce toner consumption.
– OFF
– ON
* This function is not effective for print jobs. (See “PRINTER SETTINGS,” on p. 11-23.)
3
Printing and
Scanning
Next
3. TONER SAVER MODE
Copying
Sending and
Receiving
Previous
8
Maintenance
9
Troubleshooting
10
Appendix
11
Table of Contents
Index
11-8
TOP
Back
Before Using the
Machine
1
Document and Paper
2
Sending and
Receiving
Setting Item
1. IMAGE QUALITY
Sets the document type for copying.
– TEXT/PHOTO
– TEXT/PHOTO+
– TEXT
– PHOTO
5
2. DENSITY
Sets the density for copying.
– MANUAL (1-9)
– AUTO
6
3. ZOOM RATIO
Sets the zoom ratio for copying.
4
Printing and
Scanning
Network
Remote UI
PRESET RATIO
Selects the zoom from the preset ratios.
(100%, 115% B5→A4, 122% A5→B5, 129% STMT→LTR, 141% A5→A4, 200% MAX., 50% MIN., 64%,
70% A4→A5, 78% LGL→LTR, 81% B5→A5, 86% A4→B5)
ZOOM 50-200%
Enters the zoom ratio by 1% increments. (50%–200%)
7
System Manager
Settings
Description
Sets the default setting for copying.
3
8
Maintenance
9
Troubleshooting
Next
COPY SETTINGS
1. STANDARD SETTINGS
Copying
Previous
4. COPIES
Sets the number of copies. (1-99)
5. COLLATE
Sets whether to collate the copies automatically.
– OFF
– ON
10
Appendix
11
Table of Contents
Index
11-9
TOP
Back
Before Using the
Machine
1
Document and Paper
2
Sending and
Receiving
6. 2-SIDED
5
Network
6
Sets whether to make the two-sided copies automatically.
– OFF
– 1 > 2-SIDED
2. SHARPNESS
Adjusts the sharpness of the copied image. (1-9)
3. PAPER SIZE GROUP
Selects a paper size group for your machine.
– INCHES
– A
– AB
4. INIT. COPY SET.
Restores all <COPY SETTINGS> to the default.
Press [ ] to select <YES>.
If you do not want to restore all settings, press [
4
Printing and
Scanning
Next
COPY SETTINGS
Copying
3
Previous
] to select <NO>.
Remote UI
7
System Manager
Settings
8
Maintenance
9
Troubleshooting
10
Appendix
11
Table of Contents
Index
11-10
TOP
Back
Before Using the
Machine
1
Document and Paper
2
Copying
3
Sending and
Receiving
TX/RX SETTINGS
Setting Item
1. TX/RX COMMON SET.
1. TX SETTINGS
Description
Sets the features common to the fax and send functions.
Sets the transmission features.
Registers your name/company name (max. 24 characters, including spaces). (See “Set the
Machine for Sending Faxes,” in the Starter Guide.)
2. DATA COMPRESSION
Sets the compression ratio for color scanned data. A high compression ratio reduces the
amount of memory used for the document, but results in low quality images. On the contrary,
a low compression ratio increases the amount of memory used for the document, but results in
high quality images.
– NORMAL
– HIGH RATIO
– LOW RATIO
7
3. RETRY TIMES
Sets the number of retry attempts for sending jobs to an e-mail or file server address. (0-5) (See
“Setting Number of Retry Attempts (E-Mail/File Server),” on p. 4-29.)
8
4. SCANNING DENSITY
Adjusts the scanning density for sending documents. (1-9)
5. STANDARD SETTINGS
Sets the default settings for sending documents.
5
Network
6
Remote UI
System Manager
Settings
Next
1. UNIT NAME
4
Printing and
Scanning
Previous
Maintenance
9
Troubleshooting
10
1. DENSITY
Sets the default density for the document you send.
– STANDARD
– DK
– LT
Appendix
11
Table of Contents
Index
11-11
TOP
Back
Before Using the
Machine
1
Document and Paper
2
Copying
3
Sending and
Receiving
2. RESOLUTION
Sets the default Resolution for the document you send. (200X200dpi, 200X400dpi, 300X300dpi,
400X400dpi, 600X600dpi, 100X100dpi, 150X150dpi, 200X100dpi)
3. IMAGE FORMAT
Sets the default file format for the document you send.
– PDF
– TIFF (B&W)
– PDF (COMPACT)
– JPEG
4. ORIGINAL TYPE
Sets the default original type for the document you send.
– TEXT/PHOTO
– TEXT
– PHOTO
5. DIVIDE INTO PAGES
Sets whether to use <DIVIDE INTO PAGES> as default.
– OFF
– ON
5
Network
6
Remote UI
7
System Manager
Settings
Next
TX/RX SETTINGS
4
Printing and
Scanning
Previous
6. SEND SETTINGS
Sets the options for sending documents to an e-mail address, or file server.
8
1. TX FILE NAME
Sets the name of the document you send to an e-mail address, or file server. (max. 24 characters,
including spaces.)
9
2. SUBJECT
Sets the subject for your e-mail message. (max. 40 characters, including spaces.)
3. MESSAGE TEXT
Sets the message body text for your e-mail message. (max. 140 characters, including spaces.)
10
4. REPLY-TO
Sets the reply-to address for your e-mail message. (max. 120 characters, including spaces.)
Maintenance
Troubleshooting
Appendix
11
Table of Contents
Index
11-12
TOP
Back
Before Using the
Machine
1
Document and Paper
2
Sending and
Receiving
Printing and
Scanning
5. E-MAIL PRIORITY
7. TX TERMINAL ID
Sets the priority for your e-mail message.
– NORMAL
– LOW
– HIGH
Sets the options for sender information.
4
1. PRINTING POSITION
Selects where the sender information is printed in small type at the top of each page.
– OUTSIDE IMAGE
– INSIDE IMAGE
5
2. TELEPHONE # MARK
Prefixes your number with the abbreviations FAX or TEL in your sender information.
– FAX
– TEL
Network
6
Remote UI
8. COLOR TX GAMMA
Sets the gamma value for color scanned data. If the set value corresponds to the gamma value
at the recipient’s machine, the scan exposure of the output data at the recipient’s machine
is automatically adjusted to the level best suited to the quality of the original. (GAMMA 1.8,
GAMMA 2.2, GAMMA 1.0, GAMMA 1.4)
9. SHARPNESS
Sets the contrast of the images you scan. (1-7)
10. LOG USB MEM.STORE
Sets whether to leave the log of saving images to the USB memory.
– OFF
– ON
11. INIT STANDARD SET
Sets whether to restore <STANDARD SETTINGS> in <TX SETTINGS> to the default.
Press [ ] to select <YES>.
If you do not want to restore all settings, press [ ] to select <NO>.
7
System Manager
Settings
Next
TX/RX SETTINGS
Copying
3
Previous
8
Maintenance
9
Troubleshooting
10
Appendix
11
Table of Contents
Index
11-13
TOP
Back
Before Using the
Machine
1
Document and Paper
2
Copying
4
Printing and
Scanning
5
Network
2. RX SETTINGS
Sets whether the machine prints received documents on both sides of the paper. (See “TwoSided Printing,” on p. 4-44.)
– OFF
– ON
2. RECEIVE REDUCTION
Sets whether the received images print out at a reduced size. (See “Received Image Reduction,”
on p. 4-44.)
ON
Image reduction is turned on.
1. RX REDUCTION
Selects the reducing type.
– AUTO
– FIXED REDUCTION (90%, 95%, 97%, 75%)
2. REDUCE DIRECTION
Selects the reducing direction.
– VERTICAL ONLY
– HORIZ & VERTICAL
7
System Manager
Settings
8
Maintenance
OFF
10
Image reduction is turned off.
3. RX PAGE FOOTER
Sets whether to insert the machine’s fax number and the sender information on received faxes.
– OFF
– ON
4. CONT. PRINTING
Selects how the machine responds when the <TONER LOW/PREPARE NEW TONER> message
appears.
9
Troubleshooting
Sets the reception features.
1. TWO-SIDED PRINT
6
Remote UI
Next
TX/RX SETTINGS
3
Sending and
Receiving
Previous
Appendix
11
Table of Contents
Index
11-14
TOP
Back
Before Using the
Machine
1
Document and Paper
2
Copying
3
Sending and
Receiving
4
Printing and
Scanning
RX TO MEMORY
The machine stores all documents in memory.
KEEP PRINTING
The machine does not store documents in memory if the toner runs out. Reset to <RX TO
MEMORY> after replacing the toner cartridge.
2. FAX SETTINGS
Selects the receive mode. (See “Set the Machine for Receiving Faxes,” in the Starter Guide.)
– FaxOnly
– FaxTel
– AnsMode
– DRPD
– Manual
2. USER SETTINGS
Specifies the basic operation settings in the fax mode.
1. UNIT TELEPHONE #
Registers your fax number (max. 20 characters, including spaces). (See “Set the Machine for
Sending Faxes,” in the Starter Guide.)
2. TEL LINE TYPE
Selects the telephone line type. (See “Set the Machine for Sending Faxes,” in the Starter Guide.)
– TOUCH TONE
– ROTARY PULSE
3. OFFHOOK ALARM
Sets whether the alarm sounds when the handset of the external telephone is off the hook.
– ON
– OFF
7
System Manager
Settings
8
Maintenance
9
Troubleshooting
10
Sets the fax features.
1. RX MODE
Network
Remote UI
Next
TX/RX SETTINGS
5
6
Previous
3. TX SETTINGS
Sets the transmission features.
Appendix
11
Table of Contents
Index
11-15
TOP
Back
Before Using the
Machine
1
Document and Paper
2
Sending and
Receiving
1. ECM TX
Sets whether the ECM (Error Correction Mode) transmission is activated.
– ON
– OFF
2. PAUSE TIME
Sets the pause time when you insert pause into the dialing sequence. (1SEC–15SEC)
3. AUTO REDIAL
Sets whether to redial automatically when the other line is busy or a transmission error occurs.
(See “Setting Automatic Redialing (Fax),” on p. 4-29.)
4
ON
Printing and
Scanning
5
Network
6
Customizes the redial operation.
1. REDIAL TIMES
Sets the number of retries. (1TIMES–10TIMES)
2. REDIAL INTERVAL
Sets period of time before redialing. (2MIN.–99MIN.)
3. TX ERROR REDIAL
Sets whether the machine redials automatically when transmission error occurs.
– ON
– OFF
Remote UI
7
System Manager
Settings
8
OFF
Sets whether to scan a document automatically after specifying the destination.
* This function is not available when you dial with the numeric keys.
– OFF
– ON
5. DIALING LINE CHCK
Sets whether to check the telephone line condition.
– OFF
– ON
9
10
After the first attempt at dialing fails, redialing is not attempted.
4. TIME OUT
Maintenance
Troubleshooting
Next
TX/RX SETTINGS
Copying
3
Previous
Appendix
11
Table of Contents
Index
11-16
TOP
Back
Before Using the
Machine
1
Document and Paper
2
Copying
4
Printing and
Scanning
5
4. RX SETTINGS
Sets whether the ECM (Error Correction Mode) reception is activated.
– ON
– OFF
2. FAX/TEL OPT. SET
Sets the optional items in the <FaxTel> mode. (See “FaxTel: Optional Settings,” on p. 4-36.)
1. RING START TIME
Sets the time the machine takes to check whether a call is a fax or a voice call. (0SEC–30SEC)
2. F/T RING TIME
Selects the ring length for voice calls. (15SEC–300SEC)
3. F/T SWITCH ACTION
Selects whether the machine switches to the receive mode after the ring time has elapsed, or
whether if disconnects the call.
– RECEIVE
– DISCONNECT
6
Remote UI
System Manager
Settings
3. DRPD:SELECT FAX
Selects the ring pattern for fax calls.
– DOUBLE RING
– SHORT-SHORT-LONG
– SHORT-LONG-SHORT
– OTHER RING TYPE
– NORMAL RING
4. INCOMING RING
Sets whether the external telephone rings when the machine receives a fax. This function is only
available when the <RX MODE> is set to <FaxOnly> or <FaxTel>.
8
Maintenance
9
Troubleshooting
10
Sets the reception features.
1. ECM RX
Network
7
Next
TX/RX SETTINGS
3
Sending and
Receiving
Previous
ON
The telephone rings when the machine receives a fax if an external telephone is connected.
Appendix
11
Table of Contents
Index
11-17
TOP
Back
Before Using the
Machine
1
Document and Paper
2
Copying
3
Sending and
Receiving
4
Printing and
Scanning
5
Network
6
Remote UI
7
System Manager
Settings
8
Maintenance
Previous
Next
TX/RX SETTINGS
RING COUNT
OFF
5. REMOTE RX
ON
Sets the number of incoming rings before the machine answers. (1TIMES–99TIMES)
The telephone does not ring when the machine receives a fax. (In the Sleep mode, the
telephone may ring one or two times.)
Sets whether to use remote receiving. (See “Remote Reception,” on p. 4-42.)
The machine enables remote receiving.
REMOTE RX ID
OFF
6. MANUAL/AUTO
You can dial a code on remote extension to start receiving a document.
A combination of two characters using 0 to 9, * and # is possible.
The machine disables remote receiving.
Sets whether the machine switches to the document receive mode after the external telephone
rings for a specified length of time in the manual receive mode.
OFF
The external telephone keeps ringing until someone answers the call manually.
ON
The machine switches to the document receive mode after the external telephone rings for a
specified time.
F/T RING TIME
Sets the length of time to elapse before the machine switches to document receiving. (1SEC–
99SEC)
9
Troubleshooting
10
Appendix
11
Table of Contents
Index
11-18
TOP
Back
Before Using the
Machine
1
Document and Paper
2
Copying
3
Sending and
Receiving
Printing and
Scanning
Setting Item
1. 1-TOUCH SPD DIAL
FAX
Description
Registers the destinations on one-touch keys. Up to 8 destinations can be registered. (See
“Storing/Editing One-Touch Keys/Coded Dial Codes,” on p. 4-10.)
Registers fax numbers.
1. TEL NUMBER ENTRY
Registers the recipient’s fax number (max. 120 digits, including spaces).
2. NAME
Registers the recipient’s name (max. 16 characters, including spaces).
5
3. OPTIONAL SETTING
Sets the optional settings for sending faxes.
6
Remote UI
OFF
The optional setting is not set.
ON
The optional setting is set.
1. LONG DISTANCE
Selects a mode for documents you are sending.
– DOMESTIC
– LONG DISTANCE 1
– LONG DISTANCE 2
– LONG DISTANCE 3
(See “Registering Fax Numbers,” on p. 4-10.)
2. TX SPEED
Selects the transmission speed.
(33600bps, 14400bps, 9600bps, 4800bps)
3. ECM
Selects whether to use ECM (Error Correction Mode).
– ON
– OFF
7
8
Maintenance
9
Troubleshooting
10
Appendix
Next
ADDRESS BOOK SET.
4
Network
System Manager
Settings
Previous
11
Table of Contents
Index
11-19
TOP
Back
Before Using the
Machine
1
Document and Paper
2
Copying
3
4
Printing and
Scanning
5
Network
6
Remote UI
7
System Manager
Settings
8
Maintenance
9
Next
ADDRESS BOOK SET.
E-MAIL
Registers e-mail addresses.
1. E-MAIL ADDRESS
Registers the recipient’s e-mail address (max. 120 digits).
2. NAME
Registers the recipient’s name (max. 16 characters, including spaces).
SMB
Sending and
Receiving
Previous
Registers SMB addresses.
1. HOST NAME
Registers the name of the file server (max. 120 characters).
2. NAME
Registers the recipient’s name (max. 16 characters, including spaces).
3. FILE PATH
Registers the path to the file server (max. 120 characters).
4. LOGIN NAME
Registers the login name to access the file server (max. 24 characters).
5. PASSWORD
Registers the password to access the file server (max. 14 characters).
2. CODED SPD DIAL
FAX
Registers the destinations for coded dial codes. Up to 192 destinations can be registered. (See
“Storing/Editing One-Touch Keys/Coded Dial Codes,” on p. 4-10.)
Registers fax numbers.
1. TEL NUMBER ENTRY
Registers the recipient’s fax number (max. 120 digits, including spaces).
2. NAME
Registers the recipient’s name (max. 16 characters, including spaces).
Troubleshooting
10
Appendix
11
Table of Contents
Index
11-20
TOP
Back
Before Using the
Machine
1
Document and Paper
2
Copying
3
Sending and
Receiving
3. OPTIONAL SETTING
The optional setting is not set.
ON
The optional setting is set.
Network
6
Remote UI
1. LONG DISTANCE
Selects a mode for documents you are sending.
– DOMESTIC
– LONG DISTANCE 1
– LONG DISTANCE 2
– LONG DISTANCE 3
(See “Registering Fax Numbers,” on p. 4-10.)
2. TX SPEED
Selects the transmission speed.
(33600bps, 14400bps, 9600bps, 4800bps)
3. ECM
Selects whether to use ECM (Error Correction Mode).
– ON
– OFF
7
8
Maintenance
9
Sets the optional settings for sending faxes.
OFF
5
System Manager
Settings
Next
ADDRESS BOOK SET.
4
Printing and
Scanning
Previous
E-MAIL
Registers e-mail addresses.
1. E-MAIL ADDRESS
Registers the recipient’s e-mail address (max. 120 digits).
2. NAME
Registers the recipient’s name (max. 16 characters, including spaces).
Troubleshooting
10
Appendix
11
Table of Contents
Index
11-21
TOP
Back
Before Using the
Machine
1
Document and Paper
2
Printing and
Scanning
SMB
2. NAME
Registers the recipient’s name (max. 16 characters, including spaces).
3. FILE PATH
Registers the path to the file server (max. 120 characters).
4
4. LOGIN NAME
Registers the login name to access the file server
(max. 24 characters).
5
5. PASSWORD
Registers the password to access the file server
(max. 14 characters).
Network
6
Remote UI
7
System Manager
Settings
Registers SMB addresses.
Registers the name of the file server (max. 120 characters).
3
8
Next
ADDRESS BOOK SET.
1. HOST NAME
Copying
Sending and
Receiving
Previous
3. GROUP DIAL
Registers destinations in group addresses. Up to 199 destinations can be registered in a group.
(See “Storing/Editing One-Touch Keys/Coded Dial Codes,” on p. 4-10.)
1. SELECT ADD/TEL NO
Registers the recipient’s numbers and addresses by specifying the one-touch keys or coded dial
codes.
2. NAME
Registers the group name (max. 16 characters, including spaces).
Maintenance
9
Troubleshooting
10
Appendix
11
Table of Contents
Index
11-22
TOP
Back
Before Using the
Machine
1
Document and Paper
2
Copying
3
Sending and
Receiving
5
Setting Item
Remote UI
7
System Manager
Settings
8
Maintenance
9
Troubleshooting
Description
1. DEFAULT PAPERSIZE
Sets the default paper size when no paper source is specified.
(LTR, EXECUTIV, ISO-C5, COM10, MONARCH, DL, A4, B5, A5, LGL)
2. DEFAULT PAPERTYPE
Sets the default paper type for print jobs. This machine has internally defined optimal print
modes for each specified paper type.
(PLAIN PAPER, PLAIN PAPER L, HEAVY PAPER, HEAVY PAPER H, TRANSPARENCY)
3. COPIES
Sets the number of documents printed. (1-999)
4. 2-SIDED PRINTING
Sets whether to activate two-sided printing.
– OFF
– ON
5. PRINT QUALITY
Sets the image quality, density or toner saving mode for printing.
Network
6
Next
PRINTER SETTINGS
4
Printing and
Scanning
Previous
1. IMAGE REFINEMENT
Sets whether to print smoothly the jagged outlines of characters and graphics.
– ON
– OFF
2. DENSITY
Adjusts the print density. (1-9)
3. TONER SAVER
Sets whether the toner saving mode is enabled.
– OFF
– ON
10
Appendix
11
Table of Contents
Index
11-23
TOP
Back
Before Using the
Machine
1
Document and Paper
2
Copying
6. PAGE LAYOUT
Sets the binding position for two-sided printing.
– LONG EDGE
– SHORT EDGE
2. MARGIN
Sets the page margin in inches or millimeters.
– INCHES (-01.90INCHES–01.90INCHES)
– mm (-50.0mm–50.0mm)
5
7. COLLATE
Sets whether to collate the printouts automatically.
– OFF
– ON
6
8. ERROR TIME OUT
Sets the length of time before the machine returns an error when no data is received from the
computer.
Network
Remote UI
7
System Manager
Settings
Sets the printing layout.
1. BINDING
4
Printing and
Scanning
Next
PRINTER SETTINGS
3
Sending and
Receiving
Previous
8
ON
Sets the error time out period. (5SEC–300SEC)
OFF
The error time out is off.
9. INIT. PRINTER SET
Maintenance
9
Troubleshooting
10
Appendix
10. PCL SETTINGS
1. PAPER SAVE
Restores all <PRINTER SETTINGS> to the default.
Press [ ] to select <YES>.
If you do not want to restore all settings, press [
] to select <NO>.
Sets the PCL printer setting.
Sets whether to save blank pages.
– OFF
– ON
11
Table of Contents
Index
11-24
TOP
Back
Before Using the
Machine
1
Document and Paper
PRINTER SETTINGS
Sets the paper orientation.
– PORTRAIT
– LANDSCAPE
3
3. FONT NUMBER
Sets the default font typeface for the printer function using the corresponding font numbers.
(0-54)
4
4. POINT SIZE
Specifies a point size for the default font. This item appears when the number in <FONT
NUMBER> is that of a proportionally spaced scalable font. (4.00–999.75)
5
5. PITCH
Specifies the pitch for the default font. This item appears when the number in <FONT NUMBER>
is that of a fixed pitch scalable font. (00.44–99.99)
6
6. FORM LINES
Sets the number of lines to be printed on a page. (5-128)
7. SYMBOL SET
Selects the symbol set most suited to the needs of the host computer.
(PC8, PC850, PC852, PC858, PC8DN, PC8TK, PC1004, PSTEXT, ROMAN8, ROMAN9, WIN30,
WINBALT, WINL1, WINL2, WINL5, DESKTOP, ISO4, ISO6, ISO11, ISO15, ISO17, ISO21, ISO60, ISO69,
ISOL1, ISOL2, ISOL5, ISOL6, ISOL9, LEGAL, MCTEXT, PC775)
8. CUSTOM PAPER
Sets whether to use a custom paper size.
Copying
Printing and
Scanning
Network
Remote UI
7
System Manager
Settings
Next
2. ORIENTATION
2
Sending and
Receiving
Previous
8
Maintenance
9
Troubleshooting
10
OFF
Disables you to specify a custom paper size.
ON
Enables you to specify a custom paper size.
1. UNIT OF MEASURE
Selects the unit of measurement to specify a custom paper size.
– INCHES
– MILLIMETERS
Appendix
11
Table of Contents
Index
11-25
TOP
Back
Before Using the
Machine
1
Document and Paper
Copying
3
4
Printing and
Scanning
5
Network
6
2. Y DIMENSION
Specifies the horizontal size of the custom paper.
(05.00–14.00" (127–356 mm))
3. X DIMENSION
Specifies the vertical size of the custom paper.
(03.00–08.50" (76–216 mm))
9. APPEND CR TO LF
Sets whether to append a carriage return (CR) when line feed code (LF) is received.
NO
The print head moves down to the next line when line feed code is received, and the margin
does not change (such as the beginning of the next line).
YES
The print head moves to the beginning of the next line when line feed code is received.
10. ENLARGE A4
Remote UI
System Manager
Settings
Next
PRINTER SETTINGS
2
Sending and
Receiving
Previous
Sets whether to expand the printable area of A4 size paper to that of Letter size in width.
* This setting is applicable for A4 paper and portrait orientation for the PCL5 printing only. The
PCL6 printing is not supported.
7
OFF
All the area on a page 1/8" (4.23 mm) from the top, bottom, left, and right edges is available for
printing on A4 paper.
8
ON
All the area on a page 1/8" (4.23 mm) from the top and bottom edges and 1/8" (3.30 mm) from
the left and right edges is available for printing on A4 paper. Only the width increases.
Maintenance
9
11. HALFTONES
Specifies the display pattern of subtle gradation (medium gradation) for black-and-white data
for each text part, graphics part and image part.
Troubleshooting
10
Appendix
11
Table of Contents
Index
11-26
TOP
Back
Before Using the
Machine
1
Document and Paper
2
Copying
3
Sending and
Receiving
4
Printing and
Scanning
5
1. TEXT
System Manager
Settings
8
Maintenance
9
Enables this function to text parts.
RESOLUTION
Prints precisely so that the lines of text data appear clearly. This setting is appropriate for
printing data that contains text or thin lines.
TONE
Prints with a stable texture and distinct gradation, by enhancing the contrast of tone. This
setting is appropriate for printing image data such as photographic images.
GRADATION
Prints with a smooth gradation and fine outline quality combined. This setting is appropriate for
printing diagrams or graphs in which gradation is used.
2. GRAPHICS
Enables this function to graphics parts such as diagrams and graphs.
– TONE
– GRADATION
– RESOLUTION
3. IMAGE
Enables this function to image parts such as picture images.
– TONE
– GRADATION
– RESOLUTION
6
7
Next
PRINTER SETTINGS
Network
Remote UI
Previous
11. RESET PRINTER
Clears all print jobs in progress and resets the printer function.
Press [ ] to select <YES>.
If you do not want to restore all settings, press [ ] to select <NO>.
Troubleshooting
10
Appendix
11
Table of Contents
Index
11-27
TOP
Back
Before Using the
Machine
1
Document and Paper
2
Copying
3
Sending and
Receiving
5
Setting Item
Sets the current date and time. (See “Set Up the Machine,” in the Starter Guide.)
2. TIME ZONE SETTING
Sets the time zone of your machine’s location. (See “Setting Time Zone,” on p. 1-17.)
3. DATE TYPE SELECT
Sets the date format.
– MM/DD/YYYY
– DD/MM YYYY
– YYYY MM/DD
4. AUTO SLEEP TIME
Sets the auto sleep mode when the machine remains idle for a certain period of time. (3MIN.–
30MIN.) (See “Setting the Sleep Mode,” on p. 1-16.)
– ON
– OFF
5. AUTO CLEAR TIME
Sets the auto clear mode when the machine has no operation idle for a certain period of time.
(1MIN.–9MIN.) The machine returns to the standby mode. (See “Setting Auto Clear Time,” on
p. 1-17.)
– ON
– OFF
6. DAYLIGHT SV.TIME
Sets the daylight saving time mode. (See “Setting Daylight Saving Time,” on p. 1-18.)
6
7
System Manager
Settings
8
Maintenance
9
Troubleshooting
Description
1. DATE&TIME SETTING
Network
Remote UI
Next
TIMER SETTINGS
4
Printing and
Scanning
Previous
ON
Activates the daylight saving time mode.
OFF
Deactivates the daylight saving time mode.
10
Appendix
11
Table of Contents
Index
11-28
TOP
Back
Before Using the
Machine
1
Document and Paper
2
Sending and
Receiving
4
Printing and
Scanning
Next
TIMER SETTINGS
1. START DATE/TIME
Sets the start date.
– 1. MONTH
– 2. WEEK
– 3. DAY
2. END DATE/TIME
Sets the end date.
– 1. MONTH
– 2. WEEK
– 3. DAY
Copying
3
Previous
5
Network
6
Remote UI
7
System Manager
Settings
8
Maintenance
9
Troubleshooting
10
Appendix
11
Table of Contents
Index
11-29
TOP
Back
Before Using the
Machine
1
Document and Paper
2
Copying
3
Sending and
Receiving
5
Network
6
Remote UI
7
System Manager
Settings
8
Maintenance
Next
ADJUST./CLEANING
Setting Item
Description
1. FIX.UNIT CLEANING
Cleans the fuser roller. (See “Fuser Roller,” on p. 9-6.)
2. SPECIAL MODE T
Sets whether to prevent blur from appearing on the printouts for copying, receiving info, and
reports.
When this setting is set to <ON>, the density of printouts may become light.
– OFF
– ON
3. SPECIAL MODE U
Select to improve print quality in high temperature and high humidity conditions or in low
temperature and low humidity conditions.
4
Printing and
Scanning
Previous
OFF
Select in normal condition.
MODE1
Select to improve print quality in low temperature and low humidity conditions, or when using
thick paper or an envelope.
MODE2
Select to improve print quality in high temperature and high humidity conditions.
4. SPECIAL MODE V
Sets whether to prevent small size paper (B5, A5, EXECUTIV, etc) from being curled.
– OFF
– ON
9
Troubleshooting
10
Appendix
11
Table of Contents
Index
11-30
TOP
Back
Before Using the
Machine
1
Document and Paper
2
Copying
3
Sending and
Receiving
4
Printing and
Scanning
6
Remote UI
7
System Manager
Settings
Next
ADJUST./CLEANING
5. SPECIAL MODE W
Sets whether to prevent blur from appearing on the printouts for PDL (PCL/BDL) jobs.
OFF
Selects in normal conditions.
MODE1
Sets the density of printouts becomes two-levels lighter than normal condition.
MODE2
Sets the density of printouts becomes four-levels lighter than normal condition.
6. SPECIAL MODE X
Sets whether to prevent blur from appearing on the printouts for print jobs from PCL driver.
When this setting is set to <ON>, the density of printouts may become light.
– ON
– OFF
7. SPECIAL MODE Y
Sets to enhance the fixing characteristics of toner under the conditions of a low temperature
environment.
When this setting is set to <ON>, first copy time and the time to resume from the sleep mode
may take longer.
– OFF
– ON
5
Network
Previous
8
Maintenance
9
Troubleshooting
10
Appendix
11
Table of Contents
Index
11-31
TOP
Back
Before Using the
Machine
1
Document and Paper
2
Copying
3
4
Printing and
Scanning
5
Network
6
Setting Item
1. SETTINGS
1. TX REPORT
REPORT WITH TX IMAGE
OUTPUT YES
REPORT WITH TX IMAGE
Remote UI
7
System Manager
Settings
OUTPUT NO
10
Appendix
Sets the report functions. (See “Printing Reports Automatically,” on p. 11-49.)
Sets whether the transmission report prints out.
Prints a report only when a transmission error occurs.
Sets whether to print the first page of the document under the report.
– OFF
– ON
Prints a report every time you send a document.
Sets whether to print the first page of the document under the report.
– OFF
– ON
No report is printed.
Sets whether the reception report prints out.
– OUTPUT NO
– PRINT ERROR ONLY
– OUTPUT YES
3. ACTIVITY REPORT
Sets whether to automatically print the transaction report and selects its type.
1. AUTO PRINT
Sets whether an activity report is printed automatically every 40 transactions.
– OUTPUT YES
– OUTPUT NO
Maintenance
Troubleshooting
Description
2. RX REPORT
8
9
Next
REPORT SETTINGS
PRINT ERROR ONLY
Sending and
Receiving
Previous
11
Table of Contents
Index
11-32
TOP
Back
Before Using the
Machine
1
Document and Paper
2
Sending and
Receiving
2. TX/RX SEPARATE
2. LIST PRINT
5
2. SPEED DIAL LIST
Prints the list of destinations registered in Address Book.
– 1. 1-TOUCH LIST
– 2. CODED DIAL LIST
– 3. GROUP DIAL LIST
Press [ ] to select <YES>.
If you do not want to print the list, press [ ] to select <NO>.
3. ADD BOOK DETAILS
Prints the details of Address Book.
– 1. 1-TOUCH (DETAILS)
– 2. CODED (DETAILS)
Press [ ] to select <YES>.
If you do not want to print the list, press [
6
Remote UI
System Manager
Settings
8
Maintenance
9
Troubleshooting
10
Prints reports/lists.
Prints the transaction report (max. last 40 transactions) manually.
Press [ ] to select <YES>.
If you do not want to print the list, press [ ] to select <NO>.
Network
7
Sets whether an activity report is printed separately for sending and receiving or not.
– OFF
– ON
1. ACTIVITY REPORT
4
Printing and
Scanning
Next
REPORT SETTINGS
Copying
3
Previous
4. USER DATA LIST
] to select <NO>.
Prints the setting list registered in the menu. (See “Printing USER’S DATA LIST,” on p. 11-4.)
Press [ ] to select <YES>.
If you do not want to print the list, press [ ] to select <NO>.
Appendix
11
Table of Contents
Index
11-33
TOP
Back
Before Using the
Machine
1
Document and Paper
2
Copying
4
Printing and
Scanning
5
Network
6
Remote UI
7
System Manager
Settings
8
Maintenance
9
Troubleshooting
10
Next
SYSTEM SETTINGS
Setting Item
1. SYS. MANAGER INFO
3
Sending and
Receiving
Previous
Description
Sets the system manager information to protect the contents of <SYSTEM SETTINGS>. Once the
system manager ID and system password is set, they must be entered every time you access the
<SYSTEM SETTINGS> menu.
1. SYS. MANAGER ID
Sets the system manager ID (seven digits).
2. SYSTEM PASSWORD
Sets the system manager password (seven digits).
3. SYSTEM MANAGER
Sets the system manager name (max. 32 characters, including spaces).
2. DEVICE INFO
Sets device information.
1. DEVICE NAME
Registers the machine name (max. 32 characters, including spaces).
2. LOCATION
Registers the machine location (max. 32 characters, including spaces).
3. MANAGE DEPT. ID
Sets if the department ID management is used.
OFF
The department ID management is not used.
ON
The department ID management is used.
1. REGISTER DEPT. ID
Registers the department ID. (0001-0030)
1. PASSWORD
Registers the department ID management password.
2. PAGE LIMIT SET.
Sets page limits for scans, prints, and copies from 0 to 999,999 pages.
Appendix
11
Table of Contents
Index
11-34
TOP
Back
Before Using the
Machine
1
Document and Paper
Sets if the total page limit is used.
– OFF
– ON (000000-999999)
3
2. COPY LIMIT
4
Sets if the copy limit is used.
– OFF
– ON (000000-999999)
3. BLACK SCAN LIMIT
Sets if the scan limit is used.
– OFF
– ON (000000-999999)
4. COLOR SCAN LIMIT
Sets if the color scan limit is used.
– OFF
– ON (000000-999999)
5. PRINT LIMIT
Sets if the print limit is used.
– OFF
– ON (000000-999999)
Copying
Sending and
Receiving
Printing and
Scanning
5
Network
6
Remote UI
7
System Manager
Settings
8
3. ERASE
Maintenance
9
Next
SYSTEM SETTINGS
1. TOTAL PRINT LIMIT
2
Previous
2. PAGE TOTALS
Erases the department ID and password.
Press [ ] to select <YES>.
If you do not want to erase all settings, press [
] to select <NO>.
Displays, clears, and prints counter information.
Troubleshooting
10
Appendix
11
Table of Contents
Index
11-35
TOP
Back
Before Using the
Machine
1
Document and Paper
2
1. VIEW PAGE TOTALS
Displays how much paper was used by each department.
– 1. TOTAL PRINT
– 2. COPY
– 3. SCAN
– 4. COLOR SCAN
– 5. PRINT
2. CLEAR ALL TOTAL
Clears counter information.
Press [ ] to select <YES>.
If you do not want to clear the settings, press [
3
4
Printing and
Scanning
5
Network
3. PRINT LIST
6
Remote UI
3. PDL JOBS W/OUT ID
7
System Manager
Settings
8
] to select <NO>.
Sets if print jobs from computers with unknown IDs are accepted or rejected.
Accepts print jobs from computers with unknown IDs.
OFF
Rejects print jobs from computers with unknown IDs.
4. MANAGE USER ID
Sets if the user ID management is used.
– OFF
– ON
5. NETWORK SETTINGS
Sets the network setting. (See Chapter 6, “Network.”)
9
10
Prints counter information.
Press [ ] to select <YES>.
If you do not want to print the list, press [
] to select <NO>.
ON
Maintenance
Troubleshooting
Next
SYSTEM SETTINGS
Copying
Sending and
Receiving
Previous
1. TCP/IP SETTINGS
Sets TCP/IP network.
Appendix
11
Table of Contents
Index
11-36
TOP
Back
Before Using the
Machine
1
Document and Paper
2
Copying
4
Printing and
Scanning
5
Network
6
Remote UI
7
System Manager
Settings
8
Maintenance
9
Troubleshooting
10
Next
SYSTEM SETTINGS
1. IP ADDRESS AUTO.
Sets whether to automatically set an IP address.
ON
Enables an IP address to the machine automatically.
– 1. DHCP (ON/OFF)
– 2. BOOTP (OFF/ON)
– 3. RARP (OFF/ON)
OFF
Allocates an IP address to the machine manually.
3
Sending and
Receiving
Previous
2. IP ADDRESS
Registers a fixed IP address to the machine. (See “Set the Machine for Network Usage,” in the
Starter Guide.)
3. SUBNET MASK
Registers a fixed subnet mask to the machine.
4. GATEWAY ADDRESS
Registers a fixed gateway address to the machine.
5. DNS SETTINGS
Sets the DNS server settings.
1. PRIM. DNS SERVER
Registers the primary server address.
2. SECOND DNS SERVER
Registers the secondary server address.
3. HOST NAME
Registers the host name of the DNS server.
4. DOMAIN NAME
Registers the domain name of the DNS server.
5. DNS DYNA. UPDATE
Sets whether to use the DNS server dynamic update function.
– OFF
– ON
Appendix
11
Table of Contents
Index
11-37
TOP
Back
Before Using the
Machine
1
Document and Paper
2
Copying
4
Printing and
Scanning
5
Network
6
6. CONFIGURE WINS
Sets whether to resolve a name with WINS.
– OFF
– ON
2. WINS SERVER
Registers the IP address of a WINS server.
7. LPD PRINT
Sets whether to use LPD as the print application.
– ON
– OFF
8. RAW PRINT
Sets whether to use RAW as the print application.
ON
Enables to use RAW.
7
System Manager
Settings
8
OFF
Disables to use RAW.
Sets whether to activate HTTP (HyperText Transfer Protocol) for the Remote UI.
– ON
– OFF
10. PORT NO.
Sets the port number settings.
9
10
Sets whether to use bidirectional communication.
– ON
– OFF
9. USE HTTP
Maintenance
Troubleshooting
Sets the WINS settings to resolve a name with WINS.
1. WINS RESOLUTION
USE BIDIRECTIONAL
Remote UI
Next
SYSTEM SETTINGS
3
Sending and
Receiving
Previous
1. LPD
0~65535 (default:515)
Appendix
11
Table of Contents
Index
11-38
TOP
Back
Before Using the
Machine
1
Document and Paper
Sending and
Receiving
2. RAW
0~65535 (default:9100)
3. HTTP
0~65535 (default:80)
3
4. SMTP RX
0~65535 (default:25)
5. POP3 RX
0~65535 (default:110)
6. SMTP TX
0~65535 (default:25)
7. SNMP
0~65535 (default:161)
4
Printing and
Scanning
5
Network
6
11. SET IP ADD RANGE
System Manager
Settings
8
Maintenance
9
Troubleshooting
10
Sets whether to restrict the range of IP addresses.
OFF
Disables restriction of IP address of computers.
ON
Enables restriction of IP address of computers from which data (print/fax jobs) can be sent to
the machine.
Remote UI
7
Next
SYSTEM SETTINGS
2
Copying
Previous
1. PERMIT/REJECT
Selects whether to permit or reject access from a specified IP address.
– REJECT
– PERMIT
2. SET IP ADDRESS
Specifies the IP address range. <START IP ADDRESS> and <END IP ADDRESS> must be entered
for each setting.
– 1. IP ADDRESS 1
– 2. IP ADDRESS 2
– 3. IP ADDRESS 3
– 4. IP ADDRESS 4
Appendix
11
Table of Contents
Index
11-39
TOP
Back
Before Using the
Machine
1
Document and Paper
2
Copying
3
Sending and
Receiving
5
Network
6
Remote UI
System Manager
Settings
12. PERMIT RX MAC ADD
Sets whether to activate a MAC address filter.
OFF
Disables MAC address filter.
ON
Specifies a MAC address filter to access. MAC address must be entered for each setting.
– 1. PERMIT RX ADD1
– 2. PERMIT RX ADD2
– 3. PERMIT RX ADD3
– 4. PERMIT RX ADD4
– 5. PERMIT RX ADD5
2. USE SMB CLIENT
Sets the SMB settings to use the machine on a NetBIOS network.
OFF
SMB client is not used.
ON
SMB client is used.
7
1. SERVER
Enters the NetBIOS name of the machine.
2. WORKGROUP
Enters the name of the workgroup the machine belongs to.
8
3. COMMENT
Enters a comment about the printer.
4. LM ANNOUNCE
Sets if the machine notifies the LAN Manager of its existence.
– OFF
– ON
Maintenance
9
Next
SYSTEM SETTINGS
4
Printing and
Scanning
Previous
Troubleshooting
10
Appendix
11
Table of Contents
Index
11-40
TOP
Back
Before Using the
Machine
1
Document and Paper
2
Copying
4
Printing and
Scanning
5
3. SNMP SETTINGS
Sets whether to activate SNMP.
– ON
– OFF
2. COMMUNITY NAME 1
Sets SNMP community name 1 (default: public).
3. COMMUNITY NAME 2
Sets SNMP community name 2.
4. SNMP WRITABLE 1
Enables computers on the network to access the machine and modify its settings.
– ON
– OFF
5. SNMP WRITABLE 2
Enables computers on the network to access the machine and modify its settings.
– OFF
– ON
Remote UI
7
System Manager
Settings
8
Maintenance
9
Troubleshooting
10
Sets detailed information about SNMP.
1. USE SNMP
Network
6
Next
SYSTEM SETTINGS
3
Sending and
Receiving
Previous
4. DEDICATED PORT
Sets or browses detailed information on the machine with a Canon printer driver or utility.
– ON
– OFF
5. ETHERNET DRIVER
Specifies the type of network connection.
1. AUTO DETECT
AUTO
Selects the detection method of Ethernet driver.
Sets the machine to determine the communication mode (Half duplex/Full duplex) and
Ethernet type (10Base-T/100Base-TX) automatically.
Appendix
11
Table of Contents
Index
11-41
TOP
Back
Before Using the
Machine
1
Document and Paper
2
Copying
MANUAL
Selects the communication mode.
– HALF DUPLEX
– FULL DUPLEX
2. ETHERNET TYPE
Selects the Ethernet type.
– 10 BASE-T
– 100 BASE-TX
5
6. VIEW IP ADDRESS
1. IP ADDRESS
Checks the IP address.
6
2. SUBNET MASK
Checks the subnet mask.
3. GATEWAY ADDRESS
Checks the gateway address.
Network
Remote UI
7
System Manager
Settings
Sets the communication mode and Ethernet type manually.
1. COMMUNICATN MODE
4
Printing and
Scanning
7. E-MAIL/I-FAX
9
Troubleshooting
10
Checks the current network settings.
Sets detailed settings for e-mail/I-fax.
1. SMTP RX
Sets whether to receive e-mail/l-faxes using the machine’s own SMTP receiving function.
– OFF
– ON
2. SMTP SERVER
Registers the host name of the machine with the DNS server.
3. POP
Sets whether to receive e-mail/l-faxes using a POP server.
– OFF
– ON
8
Maintenance
Next
SYSTEM SETTINGS
3
Sending and
Receiving
Previous
Appendix
11
Table of Contents
Index
11-42
TOP
Back
Before Using the
Machine
1
Document and Paper
2
Copying
4
Printing and
Scanning
5
Network
4. AUTH/ENC SETTINGS
7
System Manager
Settings
8
Maintenance
9
Troubleshooting
10
Appendix
11
Specifies authenticating method before sending e-mail.
1. POP BEFORE SEND
Sets whether to use the SMTP server requires POP before SMTP (method for authenticating
users who have logged in the POP server before sending e-mail).
– OFF
– ON
2. SMTP AUTH
Sets whether to use the SMTP server requires SMTP Authentication (method for authenticating
users who have logged in the POP server before sending e-mail).
OFF
Disables SMTP Authentication.
ON
Enables SMTP Authentication.
– 1. USER
– 2. PASSWORD
6
Remote UI
Next
SYSTEM SETTINGS
3
Sending and
Receiving
Previous
5. E-MAIL ADDRESS
Enters the e-mail address your machine will use (max. 64 characters).
6. POP SERVER
Enters the POP server IP address or name (max. 48 characters).
7. POP ADDRESS
Enters the login name for access to the POP server (max. 32 characters).
8. POP PASSWORD
Enters the password for access to the POP server (max. 32 characters).
9. POP INTERVAL
Sets the interval you want the POP server to check for incoming e-mail. If the interval is set to 0,
the POP server is not checked automatically (0MIN.–99MIN.).
8. STARTUP TIME SET.
6. COMMUNICATIONS
1. E-MAIL SETTINGS
Sets the time period required to delay the startup of network communications for the machine
(0SEC–300SEC).
Sets the fax and e-mail communication.
Sets the e-mail communications.
Table of Contents
Index
11-43
TOP
Back
Before Using the
Machine
1
Document and Paper
2
Copying
3
Sending and
Receiving
4
Printing and
Scanning
Next
SYSTEM SETTINGS
1. MAX TX DATA SIZE
Sets the maximum data size for outgoing e-mail messages. If the e-mail message exceeds this
data size limit, it is split up into several e-mail messages before being sent (0MB-99MB).
2. DIVIDED OVER MAX
Sets whether to divide a document into separate files when it is sent if its size exceeds the data
size you specify.
– OFF
– ON
2. FAX SETTINGS
Sets the facsimile communication.
5
1. TX START SPEED
Sets the transmission start speed for faxes. (33600bps, 2400bps, 4800bps, 7200bps, 9600bps,
14400bps)
6
2. RX START SPEED
Sets the reception start speed for faxes. (33600bps, 2400bps, 4800bps, 7200bps, 9600bps,
14400bps)
Network
Remote UI
7
System Manager
Settings
Previous
8
Maintenance
9
Troubleshooting
10
3. MEMORY LOCK
Sets whether to receive and store all documents in memory and not to print automatically. (See
“Memory Lock Reception,” on p. 4-38.)
OFF
Disables memory lock reception.
ON
Enables memory lock reception.
1. PASSWORD
Registers the password that protects the authority for accessing to memory.
2. REPORT PRINT
Sets whether to print a report on memory lock reception.
– OFF
– ON
Appendix
11
Table of Contents
Index
11-44
TOP
Back
Before Using the
Machine
1
Document and Paper
2
3. MEMORY RX TIME
3
4
Printing and
Scanning
5
Disables setting a period of memory lock reception.
ON
Enables setting a period of memory lock reception.
– 1. MEM RX START TIME
– 2. MEM. RX END TIME
7. FORWARD ERR. SET.
System Manager
Settings
Sets whether to print out the image if forwarding fails.
– ON
– OFF
2. STORE TO MEMORY
Sets whether to store the image in memory if forwarding fails.
– OFF
– ON
8. REMOTE UI
Sets whether to activate the Remote UI function to operate the machine and change the
settings from a network computer using a web browser.
– ON
– OFF
9. ACCESS TO DEST.
Sets restriction of the access to destinations.
8
Maintenance
9
Troubleshooting
10
Sets the machine to print and/or store received documents when document forwarding fails.
1. PRINT
Remote UI
7
Sets whether to set a period for memory lock reception.
OFF
Network
6
Next
SYSTEM SETTINGS
Copying
Sending and
Receiving
Previous
1. ADD. BOOK PASSWORD
Sets a password to restrict editing the Address Book.
(7 digits maximum)
– OFF
– ON
Appendix
11
Table of Contents
Index
11-45
TOP
Back
Before Using the
Machine
1
Document and Paper
2
2. RESTRICT NEW ADD.
Sets whether to restrict registering or changing destinations for one-touch keys and coded dial
codes*1. Sets whether to restrict making calls to the destinations not registered in Address Book.
– OFF
– ON*2
*1 Registration of group addresses is not restricted.
*2 You can still make calls using an external phone.
3. FAX DRIVER TX
Sets whether to restrict sending faxes from a computer using the fax driver.
– ON
– OFF
4. CONFIRM FAX NO.
Sets whether to confirm the entered fax numbers each time you send a fax.
– OFF
– ON
5. REST. REDIAL/CALL
Sets whether to disable the redial function of the [Recall/Pause] key.
– OFF
– ON
6. REST. MUTI DEST
Sets whether to disable the broadcasting function.
3
4
Printing and
Scanning
5
Network
6
Remote UI
7
System Manager
Settings
8
Maintenance
9
Troubleshooting
Next
SYSTEM SETTINGS
Copying
Sending and
Receiving
Previous
OFF
The restrict broadcast setting is not set.
CONFIRMATION
Sets whether to confirm to enable the broadcasting function each time you send a fax.
PROHIBIT
Disables the broadcasting function.
10
Appendix
11
Table of Contents
Index
11-46
TOP
Back
Before Using the
Machine
1
Document and Paper
2
Copying
3
Sending and
Receiving
4
Printing and
Scanning
5
Previous
Next
SYSTEM SETTINGS
10. CHECKING THE LOG
Sets whether to allow displaying the log.
ON
Enables confirmation of logs using [System Monitor].
OFF
Disables confirmation of logs using [System Monitor]. Activity Report will not be printed
automatically.
11. USE DEVICE USB
Sets whether to restrict jobs through the USB interface.
– ON
– OFF
12. UPDATE FIRMWARE
This function is used only when the printer firmware needs to be updated.
Network
6
Remote UI
7
System Manager
Settings
8
Maintenance
9
Troubleshooting
10
Appendix
11
Table of Contents
Index
11-47
TOP
Back
Before Using the
Machine
1
Document and Paper
2
Previous
Next
Summary of Reports and Lists
The machine can generate the following reports and lists.
Copying
3
Sending and
Receiving
Lists the recipient addresses registered to all the one-touch keys.
1-TOUCH LIST 2
Lists the detailed data of [1-TOUCH LIST].
CODED DIAL LIST
Lists the recipient addresses registered to all the coded codes.
CODED DIAL LIST 2
Lists the detailed data of [CODED DIAL LIST].
GROUP DIAL LIST
Lists groups registered for group addresses.
USER’S DATA LIST
Lists all the current settings and registered sender information.
7
DEPT. INFO LIST
Lists the Department IDs, page totals of scans, prints, and copies that have been processed by each
department, and page limits of scans, prints, and copies that can be processed.
8
ACTIVITY REPORT
Shows the last 40 transactions performed by the machine.
TX REPORT
Shows the transmission result. Can be set to print automatically.
RX REPORT
Shows the reception result. Can be set to print automatically.
FORWARDING CONDITIONS LIST
Lists the forwarding conditions.
5
Network
6
Remote UI
System Manager
Settings
Description
1-TOUCH LIST
4
Printing and
Scanning
Report/List
Maintenance
9
Troubleshooting
10
Appendix
11
Table of Contents
Index
11-48
TOP
Back
Before Using the
Machine
1
Document and Paper
2
Copying
TX REPORT, RX REPORT, and ACTIVITY REPORT can be set to
print automatically.
■
Printing and
Scanning
5.
1.
Press [Additional Functions].
5
2.
Press [
] or [
] to select <REPORT
SETTINGS>, then press [OK].
6
3.
Press [
] or [
press [OK].
] to select <SETTINGS>, then
7
4.
Press [
] or [
press [OK].
] to select <TX REPORT>, then
Remote UI
6.
9
Confirm that <REPORT WITH TX IMAGE> is
] or [
] to select <ON> to
displayed, use [
print the first page of the documents under the
report, then press [OK].
<OFF>: Does not print the first page.
<ON>: Prints the first page.
When forwarding the received documents, the machine does not
print the first page of the documents under the report even if
<REPORT WITH TX IMAGE> is set to <ON>.
8
Maintenance
Press [
] or [
] to select the setting you
want, then press [OK].
<PRINT ERROR ONLY>: Prints a report only when a transmission error
occurs.
<OUTPUT YES>: Prints a report every time you send a document.
<OUTPUT NO>: Does not print a report. Skip to step 7.
TX REPORT
4
Network
System Manager
Settings
Next
Printing Reports Automatically
3
Sending and
Receiving
Previous
7.
Press [Stop/Reset] to return to the standby
mode.
Troubleshooting
10
Appendix
11
Table of Contents
Index
11-49
TOP
Back
Before Using the
Machine
1
Report Items
■
Previous
Next
RX REPORT
Document and Paper
2
The following items are displayed in the Transmission Report:
3
● TX/RX NO: Transaction number
Copying
Sending and
Receiving
● Transaction description
● DEPT. ID: If Department ID Management is set, the
4
Printing and
Scanning
Department ID is printed.
● RECIPIENT ADDRESS: Destination fax/telephone number
5
Network
Remote UI
7
System Manager
Settings
8
● ST. TIME: Transmission time
9
Troubleshooting
10
Appendix
11
2.
Press [
] or [
] to select <REPORT
SETTINGS>, then press [OK].
3.
Press [
] or [
press [OK].
] to select <SETTINGS>, then
4.
Press [
] or [
press [OK].
] to select <RX REPORT>, then
5.
Press [
] or [
] to select the setting you
want, then press [OK].
<OUTPUT NO>: Does not print a report.
<PRINT ERROR ONLY>: Prints a report only when a reception error
occurs.
<OUTPUT YES>: Prints a report every time you receive a document.
● TIME USE: Transmission duration
● PAGES SENT: Number of pages sent
● RESULT: Result of transaction
– OK: Transmission successful
Maintenance
Press [Additional Functions].
● DESTINATION ID: Destination name registered in Address
Book
6
1.
6.
Press [Stop/Reset] to return to the standby
mode.
– NG: Transmission failed
– STOP: Transmission manually canceled before completion
– BUSY/NO SIGNAL: The line is busy or the recipient does not
answer your call
● Error code: For descriptions of error codes, See “Error Codes,”
on p. 10-21.
Table of Contents
Index
11-50
TOP
Back
Before Using the
Machine
1
Report Items
■
Previous
Next
ACTIVITY REPORT
Document and Paper
2
The following items are displayed in the Reception Report:
3
● TX/RX NO: Transaction number
Copying
Sending and
Receiving
● Transaction description
● RECIPIENT ADDRESS: Recipient’s fax/telephone number
4
Printing and
Scanning
address
● DESTINATION ID: Sender’s name registered in Address Book
5
Network
6
Remote UI
7
System Manager
Settings
Maintenance
Press [Additional Functions].
2.
Press [
] or [
] to select <REPORT
SETTINGS>, then press [OK].
3.
Press [
] or [
press [OK].
4.
Press [
] or [
] to select <ACTIVITY
REPORT>, then press [OK].
5.
Press [
] or [
] to select <AUTO PRINT>,
then press [OK].
6.
Press [
] or [
] to select the setting you
want, then press [OK].
● ST. TIME: Transmission time
● TIME USE: Transmission duration
● PGS.: Number of pages received
● RESULT: Result of transaction
– OK: Reception successful
8
1.
– NG: Reception failed
] to select <SETTINGS>, then
<OUTPUT YES>: Prints a report after every 40 transactions.
<OUTPUT NO>: Does not print a report. Skip to step 9.
– STOP: Reception manually canceled before completion
9
Troubleshooting
● Error code: For descriptions of error codes, see “Error Codes,”
on p. 10-21.
10
Appendix
11
Table of Contents
Index
11-51
TOP
Back
Before Using the
Machine
1
Document and Paper
2
Copying
7.
8.
3
Sending and
Receiving
Printing and
Scanning
5
Network
6
9.
Next
Press [
] or [
] to select <TX/RX SEPARATE>,
then press [OK].
● MODE: Transaction, Error correction mode
Use [
] or [
] to select the setting you want,
then press [OK].
● RESULT: Result of transaction, transaction duration
<OFF>: Prints a report with the transmission and reception results
listed chronologically.
<ON>: Prints a report with the transmission and reception results
separated in a report.
4
Previous
● PGS.: Number of pages sent
– OK: Transaction successful
– NG: Transaction failed
Press [Stop/Reset] to return to the standby
mode.
Report Items
The following items are displayed in the Activity Report:
Remote UI
7
System Manager
Settings
8
Maintenance
9
● DEPT. ID: If Department ID Management is set, the
Department ID is printed. Transmission logs are listed
according to Department ID.
● ST. TIME: Transmission time
● DESTINATION TEL/ID: Destination name and fax number/
address
Troubleshooting
10
● NO: Transaction number
Appendix
11
Table of Contents
Index
11-52
TOP
Back
Before Using the
Machine
1
Document and Paper
2
Copying
3
Sending and
Receiving
4
Printing and
Scanning
System Manager
Settings
■
Printing ACTIVITY REPORT
– 1-TOUCH LIST
1.
Press [Additional Functions].
– CODED DIAL LIST
2.
Press [
] or [
] to select <REPORT
SETTINGS>, then press [OK].
3.
Press [
] or [
press [OK].
4.
Press [
] or [
] to select <ACTIVITY
REPORT>, then press [OK].
5.
Press [
You can print the following report and lists manually.
– ACTIVITY REPORT
– GROUP DIAL LIST
– 1-TOUCH LIST 2
6
– USER’S DATA LIST
7
– FORWARDING CONDITIONS LIST
Remote UI
8
Maintenance
9
Troubleshooting
10
Next
Printing Reports and Lists Manually
5
Network
Previous
– CODED DIAL LIST 2
– DEPT. INFO LIST
– To print USER’S DATA LIST, see “Printing USER’S DATA LIST,” on p. 11-4.
– For information on each report or list, see “Summary of Reports and Lists,”
on p. 11-48.
– To print DEPT. INFO LIST, see “Printing Counter Information (DEPT. INFO
LIST),” on p. 8-12.
– To print FORWARDING CONDITIONS LIST, see “Specifying Forwarding
Settings,” on p. 7-15.
– Reports can be printed on LGL or LTR paper. (plain or recycled paper)
] to select <LIST PRINT>, then
] to select <YES>.
Printing starts, and the screen automatically returns to the standby
mode.
If you do not want to print the report, press [
] to select <NO>.
Appendix
11
Table of Contents
Index
11-53
TOP
Back
Before Using the
Machine
1
■
Document and Paper
2
Printing and
Scanning
Printing 1-TOUCH LIST 2, CODED DIAL
LIST 2
Press [Additional Functions].
1.
Press [Additional Functions].
3
2.
Press [
] or [
] to select <REPORT
SETTINGS>, then press [OK].
2.
Press [
] or [
] to select <REPORT
SETTINGS>, then press [OK].
4
3.
Press [
] or [
press [OK].
3.
Press [
] or [
press [OK].
5
4.
Press [
] or [
] to select <SPEED DIAL
LIST>,then press [OK].
4.
Press [
] or [
] to select <ADD BOOK
DETAILS>, then press [OK].
5.
Press [
] or [
press [OK].
5.
Press [
] or [
press [OK].
Network
6
Remote UI
7
System Manager
Settings
■
Next
1.
Copying
Sending and
Receiving
Printing 1-TOUCH LIST, CODED DIAL LIST,
and GROUP DIAL LIST
Previous
8
Maintenance
9
Troubleshooting
] to select <LIST PRINT>, then
] to select the desired list, then
<1-TOUCH LIST>: Prints 1-TOUCH LIST.
<CODED DIAL LIST>: Prints CODED DIAL LIST.
<GROUP DIAL LIST>: Prints GROUP DIAL LIST.
6.
Press [
] to select <YES>.
Printing starts, and the screen automatically returns to the standby
mode.
If you do not want to print the list, press [
] to select <NO>.
] to select <LIST PRINT>, then
] to select the desired list, then
<1-TOUCH (DETAILS)>: Prints 1-TOUCH LIST 2.
<CODED (DETAILS)>: Prints CODED DIAL LIST 2.
6.
Press [
] to select <YES>.
Printing starts, and the screen automatically returns to the standby
mode.
If you do not want to print the list, press [
] to select <NO>.
10
Appendix
11
Table of Contents
Index
11-54
TOP
Back
Before Using the
Machine
1
Document and Paper
2
Copying
Previous
Next
Checking and Deleting Jobs
System monitor enables you to monitor the status of the report
jobs currently being processed.
3
■
Sending and
Receiving
4
Printing and
Scanning
5
Network
1.
2.
7
System Manager
Settings
Press [System Monitor] repeatedly to select
<REPORT STATUS>, then press [OK].
Press [
] or [
] to scroll through the job list.
When you delete the report job, press [OK] twice, then press [
select <YES>.
6
Remote UI
Checking and Deleting Report Jobs
3.
] to
Press [Stop/Reset] to return to the standby
mode.
8
Maintenance
9
Troubleshooting
10
Appendix
11
Table of Contents
Index
11-55
TOP
Back
Before Using the
Machine
1
Document and Paper
2
Copying
3
Sending and
Receiving
Previous
Next
Checking Remaining Memory
You can check the remaining memory according to the status of
the machine.
1.
4
Press [System Monitor] repeatedly to select
<AVAIL.MEMORY>, then press [OK] to confirm
the remaining memory.
Ex.
Printing and
Scanning
AVAILABLE
75%
5
MEMORY
Network
6
Remote UI
2.
Press [Stop/Reset] to return to the standby
mode.
7
System Manager
Settings
8
Maintenance
9
Troubleshooting
10
Appendix
11
Table of Contents
Index
11-56
TOP
Back
Before Using the
Machine
1
Document and Paper
Previous
Next
Glossary
2
Numeric
Copying
3
Sending and
Receiving
The Ethernet standard supporting data transfer rates a maximum of
10 Mbps, which utilizes a twisted-pair cable.
100B-TX
6
Remote UI
Automatic Document Feeder (ADF)
The Ethernet standard supporting data transfer rates a maximum of
100 Mbps, which utilizes two pairs of high grade twisted-pair cables.
5
Network
ASCII (American Standard Code for Information Interchange) is
a set of standardized codes used to represent letters, numbers,
punctuation marks, a few symbols, and control characters. A seven
digit (or seven bit) binary number can represent one of 128 distinct
codes.
10Base-T
4
Printing and
Scanning
ASCII code
The device included in the machine that feeds the document being
sent or copied, or scanned into the machine.
A
Automatic redialing
When the recipient’s machine is busy or does not answer, or when an
error occurs while sending, the machine waits a specified time and
then automatically redials the number. If the receiving fax is still busy
or does not answer, the machine waits the specified time and dials
again.
Activity Report
A journal of the machine’s transactions, both sent and received.
7
System Manager
Settings
8
Maintenance
9
Address Book
The Address Book is a feature used for storing fax, e-mail, I-fax, and
file server destinations. The Address Book is divided into one-touch
keys and coded dial codes. You can register multiple destinations
of various types in a group address, and assign a one-touch key
or coded dial code to this group. Registering a destination in the
Address Book saves you the effort of entering that destination’s
address each time you send a job.
B
bps
Bits per second. Refers to the speed with which a fax machine sends
and receives data.
Troubleshooting
10
Appendix
11
Table of Contents
Index
11-57
TOP
Back
Before Using the
Machine
1
BOOTP
2
Copying
3
Sending and
Receiving
Printing and
Scanning
Cookie
A file left on a user’s computer when the user visits a web site. A
cookie allows the web site to recognize the user on subsequent visits.
Cookies are generally used to enable a user to automatically sign on
to certain web sites and to customize the features offered by such
sites.
Transmitting documents to more than one location (through the
machine’s memory).
Buffer size
The size of a data area, or buffer, shared by devices or programs
working at different speeds or with different priorities. The buffer is
designed to prevent one device or process from being held up by
another. For this to be possible, the buffer must be set up correctly.
5
Network
6
An identification keyword for SNMP (Simple Network Management
Protocol).
Broadcasting
4
C
Cursor
The underline symbol you see on the LCD when you register
numbers and names in the machine.
D
DHCP
Remote UI
7
System Manager
Settings
8
Maintenance
Dynamic Host Configuration Protocol. A protocol that automatically
specifies the network settings of a client on a TCP/IP network. Many
of the settings required to set up TCP/IP, which is the standard
protocol of the Internet, can be made automatically.
CNG
Calling Tone. This is a signal sent by fax machines to identify the call
as an incoming document. When the receiving fax detects this signal,
it automatically starts to receive the fax transmission. The majority of
fax machines in use today can send and detect CNG signals.
Coded Dial Codes
9
Next
Community Name
BOOTstrap Protocol. A protocol that enables a client machine to
automatically obtain network setup information from a server over a
TCP/IP network. BOOTP enables a client to automatically locate such
information as the host name, domain name, and IP address, so that
it is not necessary to create these items manually.
Document and Paper
Previous
DNS
Domain Name System. The system that associates the IP address
assigned to a computer with the domain name.
A method to specify a destination registered in Address Book. Press
[Coded Dial] and a three-digit code using the numeric keys.
Troubleshooting
10
Appendix
11
Table of Contents
Index
11-58
TOP
Back
Before Using the
Machine
1
DNS server
2
Copying
3
Sending and
Receiving
4
Printing and
Scanning
System Manager
Settings
7
DRPD
9
Troubleshooting
An industry-standard local area network (LAN) system for connecting
together multiple computers. Data is sent from one computer
to another by breaking it into packets, and a packet reaches its
destination smoothly without any collision with other packets.
A management concept that divides large scale networks into
groups for identifying individual computers and users. The internet is
managed by classifying domains according to geographical location
or type (business, organization, educational institution, etc.).
dpi
Maintenance
Ethernet
Domain
6
8
Error Correction Mode. The ability of your machine to reduce system
and line errors when sending or receiving from another fax with ECM
capability. ECM is most effective in areas where the telephone lines
are in poor condition or there is frequent interference on the line.
The sheet of paper containing the data that you send to, or receive
from a machine.
Network
Remote UI
ECM
Document
5
Dots per inch. A machine of measurement for indicating a machine’s
resolution.
This receive mode allows the machine to distinguish fax and voice
calls depending on the distinctive ring patterns assigned to different
numbers. Subscription to a DRPD service offered by some telephone
companies is required.
Next
E
Domain Name System server. A server which maintains a database
that translates the domain names of Internet servers, such as www.
w3.org, into Internet Protocol (IP) addresses, such as “18.176.0.26”.
This enables clients to connect to a server with a host name rather
than a numeric IP address.
Document and Paper
Previous
Extension
A telephone connected to the machine that is used in place of the
handset. You can use the extension telephone to activate incoming
reception of documents manually.
F
FAX/TEL switching
This option allows you to set the machine to automatically detect
whether a call is from a fax or telephone. If the call is from another
fax, the transmission is automatically received. If the call is from a
telephone, the machine rings to let you know, so you can pick up the
handset. With this feature, one telephone line can be shared by both
the telephone and the fax.
10
Appendix
11
Table of Contents
Index
11-59
TOP
Back
Before Using the
Machine
1
File formats
2
3
Sending and
Receiving
4
Printing and
Scanning
5
Network
6
Remote UI
7
System Manager
Settings
8
Maintenance
9
Troubleshooting
10
G3, Group 3 fax machine
File server
Defined by CCITT/ITU-T. Uses encoding schemes to transmit image
data while reducing the amount of data that needs to be transmitted,
thus reducing transmission time. G3 fax machines can transmit one
page in less than one minute. Encoding schemes for G3 fax machines
are Modified Huffman (MH), Modified READ (MR), Modified Modified
READ (MMR), and Joint Bi-level Image expert Group (JBIG).
A personal computer or workstation to which two or more users on
client personal computers can gain access via a local area network
(LAN) in order to share and use its hard disk drive.
Copying
FINE
The resolution setting for documents with very small characters and
lines.
Gateway Address
Forwarding
The default address of a network or Web site. It provides a single
domain name and point of entry to the site.
The process of sending a received fax/I-fax document to another
destination. For example, if your machine at work receives a
document, you can have the machine forward the document to a
machine at your home.
Group Addresses
A method of specifying destinations that enables you to specify
multiple destinations registered in Address Book as a group. This
means that you can press just a single one-touch key or coded dial
code to specify destinations when sending the same document to
many destinations.
FQDN
Fully Qualified Domain Name. A full domain name, consisting of
its local host name and its domain name. An FQDN is sufficient to
ascertain a specific Internet address for any host on the Internet. This
(name resolution) process uses DNS (Domain Name System).
Next
G
File formats are used to save image data (e.g. JPEG, PDF, TIFF).
Document and Paper
Previous
H
HP-GL/2
A graphics language that allows computer applications to draw
graphic images using printers. Images in HP-GL/2 are represented
as vector graphics. Vector objects describe an image in terms of
geometric shapes, such as lines and polygons, and fills. HP-GL/2 is
supported by your Canon machine.
Appendix
11
Table of Contents
Index
11-60
TOP
Back
Before Using the
Machine
1
HTTP
2
Copying
3
The underlying set of networking rules that describes how data is
transmitted across the Internet. Internet Protocol allows data from
one computer to be split into packets to be sent to another computer
with a specific IP address.
I
IP address
Internet Protocol address. A 32-bit numeric address used by IP
(internet protocol) to specify a computer on the Internet. The IP
address is usually written as four numbers separated by periods. An
example is 128.121.4.5.
I-fax
Sending and
Receiving
4
Printing and
Scanning
5
I-fax (Internet fax) enables you to send and receive a scanned original
converted to TIFF (Tagged Image File Format) or PDF (Portable
Document Format) image data as an e-mail attachment to/from any
I-fax compatible facsimile or personal computer with Internet e-mail
functionality.
ITU-T
A committee created to set international standards for
telecommunications.
Interface
Network
6
Remote UI
7
System Manager
Settings
8
Maintenance
9
Next
Internet Protocol (IP)
Hypertext Transfer Protocol. The client-server TCP/IP protocol used
on the World Wide Web for the transfer of HTML (Hypertext Markup
Language) documents across the Internet.
Document and Paper
Previous
The connection between two devices that makes it possible for
them to communicate with each other. The machine features a USB
interface, which makes it compatible with IBM and similar personal
computers.
Interface cable
The cable used to create the interface between a printer and a
computer.
Interface port
The machine comes with one USB port, located on the back of the
machine. You attach the cable that connects your computer and
machine to this port.
J
JBIG
Joint Bi-level Image Experts Group. An experts group file specification
that defines a standard for compressing (reducing the size of )
image files without any loss in image information. Files containing
photographic images in Web pages are generally compressed so they
can be transferred across the Internet more quickly. JPEG, the format
currently used, causes some loss in image data after compression,
and so reduces image quality. JBIG compression overcomes this
shortcoming.
Troubleshooting
10
Appendix
11
Table of Contents
Index
11-61
TOP
Back
Before Using the
Machine
1
Job Recall
2
3
Sending and
Receiving
Joint Photographic Experts Group. An experts group file specification
that defines a standard for compressing (reducing the size of )
photographic and photorealistic image files. The image compression
method used involves some loss of information, and so reduces
image quality. Files containing photographic images in Web pages
are generally compressed by using the JPEG format so they can be
transferred across the Internet more quickly.
4
Printing and
Scanning
5
Network
6
MAC address
Media Access Control address. The hardware address of the network
adapter of a computer connected to a local area network.
Manual receiving
A method of receiving faxes in which you answer all incoming calls
using the external telephone. If you hear a slow beep it indicates an
incoming fax transmission from another machine. Just press [Start] to
receive the incoming fax.
L
Modem
LAN
A device that converts (MOdulates) digital data for transmission
over telephone lines. At the receiving end, this device converts the
modulated data (DEModulates) to digital format that the computer
understands.
Local Area Network. It is a network system formed by linking a server,
workstations, and computers, which are all located in the same
building or some other relatively limited area.
Remote UI
7
System Manager
Settings
Line Printer Remote. A UNIX command used to print a file via a TCP/IP
network.
M
JPEG
Copying
Log in
Entering a password as a means of user authentication to start a
computer session or access to a service.
8
Maintenance
LPD
9
Troubleshooting
10
Next
LPR
A method to specify the same destination you have specified before.
You can recall the destinations, scan settings, and send settings
which have been set, and then send your documents.
Document and Paper
Previous
N
NetBIOS
Line Printer Daemon. A daemon is a program that runs, without
human intervention, to accomplish a given task. The Line Printer
Daemon controls the flow of print jobs to a printer.
Network Basic Input Output System. A program that enables
applications on different computers to communicate within a LAN
(Local Area Network). NetBIOS is used in Ethernet, Token Ring, and
Windows 2000/XP/Server 2003/Vista networks.
Appendix
11
Table of Contents
Index
11-62
TOP
Back
Before Using the
Machine
1
NetSpot
Network management software that enables the setup and
management of multiple printers connected to a network from
one central location. A network manager can monitor conditions
of network printers, ascertain online/offline status, error status, the
amount of paper in paper cassette, verify information on mounted
fonts, and other readings. All the functions that are conventionally
conducted through the operation panel of the respective machines
can be performed from one location.
Document and Paper
2
Copying
3
Sending and
Receiving
4
Printing and
Scanning
The round, numbered keys on the operation panel marked the same
as a standard telephone keypad.
Network
6
Press them to perform regular dialing or to specify the e-mail
Remote UI
addresses not stored in Address Book. You also use the
numeric keys to enter characters and numbers during
registration, and for entering coded dial codes.
7
System Manager
Settings
8
Maintenance
Troubleshooting
10
Refers to guiding a sheet of paper into the machine’s paper path.
Paper feeder
The device in the machine that feeds recording media into the
machine for printing copied or sent documents.
Pause
A timing entry required for registering certain long distance
numbers and for dialing out through some telephone systems or
switchboards. Pressing [Pause] enters a pause between digits of a
telephone number.
PDF
Portable Document Format. The page description language used
in Adobe Systems’ Acrobat document exchange system, which is
restricted neither by device nor resolution. PDF displays documents
in a way that is independent of the original application software,
hardware, and operating system used to create those documents. A
PDF document can contain any combination of text, graphics, and
images.
PHOTO
O
One-Touch keys
9
Paper feed
A Web browser based version of NetSpot. It can be used to browse
and manage network devices.
Numeric keys
Next
P
NetSpot Console
5
Previous
The numbered keys on the operation panel that may be registered
as single or a group of destinations. Once a destination or group of
destinations is registered, you press one key to specify the entire
number/address or group.
The document setting you use for sending or copying documents
with intermediate tones, such as photographs.
Protocol
A set of rules that govern the transmission of data across a network.
Examples of protocols are FTP, DHCP, BOOTP, RARP, and TCP/IP.
Appendix
11
Table of Contents
Index
11-63
TOP
Back
Before Using the
Machine
1
Proxy server
A server that provides a cache of files available on remote servers
that are slow or expensive to access. The term “proxy server” normally
refers to a World Wide Web server that, on receiving a URL, tries to
supply the requested file from its cache. If it cannot locate the file
there, the proxy server would bring it from the remote server and
also save a copy in its cache so that the next request can be obtained
locally.
Document and Paper
2
Copying
3
Sending and
Receiving
Pulse
4
See Rotary pulse.
Previous
Next
Recall
See Job Recall.
Receiving
Receiving transmission is also defined as RX or Reception. The
machine can be customized to receive fax documents in several
ways.
Reception
See Receiving.
Redialing-automatic
See Automatic redialing.
Printing and
Scanning
5
R
Registering
RARP
Network
Reverse Address Resolution Protocol. A protocol that associates a
network adapter address (MAC address) with an Internet Protocol (IP)
address.
6
Remote UI
7
System Manager
Settings
Raster
Raster graphics describes an image as a pattern of dots, compared to
vector graphics which represents an image as a geometrical formula.
Each row of color dots in the mosaic of color dots constitutes one
raster graphic. In a printer, a raster graphic is used as the master
image from which a page is printed, because the image can be
transferred to paper by printing one raster at a time.
8
Maintenance
9
Troubleshooting
10
Raw
This is a print application used with Windows 2000/XP/Server 2003/
Vista. It can print at higher speeds than LPD.
A process by which you place destination’s information (such as the
name, fax number, e-mail addresses, etc.) in the machine’s memory,
so that you save time specifying destinations you send documents
frequently.
Regular dialing
Pressing the individual numeric keys to dial a fax or telephone
number.
Remote reception ID
The two-digit code that enables you to manually activate fax
reception using an external telephone.
Remote reception
Activating fax reception by answering an external telephone that is
not located near the machine. You need to dial a remote receiving ID
number to start remote reception.
Appendix
11
Table of Contents
Index
11-64
TOP
Back
Before Using the
Machine
1
Remote UI
Remote User Interface (UI) allows you to remotely perform machine
functions from a computer connected to the network using web
browser software. Many functions that are done physically at the
Canon machine’s operation panel can be done via software at a
networked computer using a web browser, such as Microsoft Internet
Explorer.
Document and Paper
2
Copying
3
Report
Sending and
Receiving
Scope ID
The Scope ID is a character string value that is appended to
the NetBIOS name, and is used for all NetBIOS over TCP/IP
communications. It provides a way for a computer to communicate
only with others sharing the same Scope ID.
Sending
Sending documents is also defined as TX or Transmit. The machine
can scan and send documents via fax, or e-mail, or send them to a file
server.
Resolution
Printing and
Scanning
5
The density of dots for any given output device. Expressed in terms
of dots per inch (dpi). Low resolution causes font characters and
graphics to have a jagged appearance. Higher resolution means
smoother curves and angles as well as a better match to traditional
typeface designs. Resolution values are represented by horizontal
data and vertical data, for example, 600 x 600 dpi.
Network
6
Remote UI
7
System Manager
Settings
8
RIP (Raster Image Processor)
The hardware and/or software functions of a printer that convert
vector graphic descriptions from a computer into raster graphic
images that can be printed.
Rotary pulse
Maintenance
A telephone dialing system where a dial is rotated to send pulses to
the telephone switching system. In pulse dialing, you hear clicks. In
touch-tone dialing, the most common dialing system, you hear tones.
Rotary pulse dialing requires certain setting adjustments.
9
Troubleshooting
10
Appendix
RX
Next
S
A document printed by the machine and containing information
about the documents it has sent or received.
4
Previous
Sending speed
The rate at which faxes are transmitted through the phone line. See
also bps (bits per seconds).
SMB
Server Message Block. A protocol that provides file and printer
sharing over a network for Windows computers.
SMTP
Simple Mail Transfer Protocol. A TCP/IP protocol for sending
messages from one computer to another on a network.
SNMP
Simple Network Management Protocol. The network management
protocol of TCP/IP.
In SNMP, agents, which can be hardware as well as software, monitor
the activity of the various devices on the network and report to the
network console workstation.
See Receiving.
11
Table of Contents
Index
11-65
TOP
Back
Before Using the
Machine
1
Document and Paper
2
Copying
3
Sending and
Receiving
4
Printing and
Scanning
5
Network
Source Routing
Remote UI
7
System Manager
Settings
8
Maintenance
9
Troubleshooting
T
TCP/IP
Acronym for Transmission Control Protocol/Internet Protocol. The
protocol used to connect to the Internet and to wide-area networks.
Standby
Subnet
6
A network connection box to which a number of computers can
be connected. The switching hub forwards a data packet from the
network to the appropriate computer according to the packet’s
address. Conventional hubs simply send every packet to every
connected computer. Since a switching hub forwards packets only to
their intended recipients, it provides greater efficiency.
Spool
The mode in which the machine is on and ready to use.
TIFF
Tagged Image File Format. A file format that saves images as highdensity bitmaps, and is suitable for large amounts of image data. The
information field (tag) at the start of each image data record indicates
the type of data represented.
A portion of a network, which may be a physically independent
network segment, that shares a network address with other portions
of the network, and is distinguished by a subnet number.
For example, all devices with IP addresses that start with 100.100.100.
would be part of the same subnet.
Subnet Mask
SUBNETwork mask. The method used to determine which subgroup,
or subnet, an IP address belongs to on TCP/IP networks, all devices
whose IP addresses have the same prefix would belong to the same
subnet. Dividing a network into subnets is useful for both security
and performance reasons.
Next
Switching hub
Normally, a host has no control over the route taken by a packet it
sends. Source routing is a technique whereby the sender of a packet
can specify the route that a packet should take through the network
to its destination.
Simultaneous Peripheral Operations On-Line. Spooling means
putting jobs in a buffer, which is a special area in memory or on
a disk. Because devices access data at different rates, the buffer
provides a waiting station where the data can wait until the device
for which it is meant is ready to access it.
Previous
Tone
A key that allows you to temporarily switch to touch-tone from pulse
dialing. In some countries, on-line data services may require that you
use tone dialing.
Tone/pulse setting
The ability to set the machine to match the telephone dialing system
your telephone line uses: touch-tone or rotary pulse.
10
Appendix
11
Table of Contents
Index
11-66
TOP
Back
Before Using the
Machine
1
Toner
A black, resin coated powder contained in the toner cartridge. The
machine applies the toner to the surface of the photosensitive drum
inside the machine via an electrophotographic mechanism.
Document and Paper
2
Toner saver
Copying
3
Sending and
Receiving
The feature that extends cartridge life by reducing toner
consumption rate at a slight decrease in print quality.
Transmit
4
Printing and
Scanning
See Sending.
Previous
Next
W
WAN
Wide Area Network. A geographically widespread network. A WAN
can be one large network, or it can consist of a number of linked
LANs (Local Area Networks).
WINS
Windows Internet Name Service. A service for associating a NetBIOS
name, which is a computer name or printer name on a NetBIOS
network, with an IP address. To use WINS, a WINS server is required.
TX
See Sending.
5
U
Network
6
URL
Uniform Resource Locator. A standard way of specifying the location
of an object, usually a web page, on the Internet. The URL for a web
page would look something like this:
“http://www.w3.org/default.html”. Here, “http:” indicates that a web
page is being accessed, “http://www.w3.org” is the address of the
server containing the web page, and “default.html” is the file name
under which the web page is stored on the server.
Remote UI
7
System Manager
Settings
8
Maintenance
9
Troubleshooting
10
V
Vector Graphics
See Raster.
Appendix
11
Table of Contents
Index
11-67
TOP
Back
Before Using the
Machine
1
Document and Paper
Previous
Next
Index
2
Copying
Symbols & Numerics
ADJUST./CLEANING 11-4, 11-30
1-TOUCH LIST 11-54
Advanced sending features 4-26
1-TOUCH LIST 2 11-54
AnsMode 4-35
4
2-Sided key 1-6
Auto clear time 1-17
2 on 1 combination 3-8
Automatic document feeder 1-3
5
A
3
Sending and
Receiving
Printing and
Scanning
Network
Accepting print jobs with unknown IDs 8-12
6
Checking dialing line 4-33
B
Checking network settings 6-43
Back button 7-5
Checking the log 8-21
7
ACTIVITY REPORT
Printing automatically 11-51
Printing manually 11-53
Add. Func. button 7-5
Basic network settings 6-6
Clean Earth Campaign 9-16
Basic receiving method 4-35
8
Additional Functions key 1-6
9
Address Book
Deleting an address 7-11
E-mail addresses 4-11
Editing and address 7-9
Fax numbers 4-10
File server addresses 4-12
Registering an address 7-10
Setting the password 8-17
Storing/Editing 4-9
Viewing an address 7-9
Address Book key 1-9
Using 4-23
ADDRESS BOOK SET. 11-4, 11-19
Cleaning machine
Exterior 9-2
Fuser roller 9-6
Interior 9-2
Scanning area 9-6
Clearing jams 10-3
Document jams 10-3
Paper jams 10-5
Clearing page totals 8-11
Maintenance
Troubleshooting
10
Appendix
11
Table of Contents
Auto retry 4-29
Accessing the setting menu 11-4
Remote UI
System Manager
Settings
Automatic redialing 4-29
Checking
Copy job 3-13
Documents stored in memory 4-48
Print job 5-9
Reception result 4-47
Report job 11-55
Transmission result 4-47
Checking counter information 8-10
Additional network settings 6-35
Address button 7-5
Basic sending method 4-5
Before using the machine 1-1
Broadcasting 4-26
C
Canceling
Copy job 3-12
Scan job 5-8
TX/RX job 4-46
CHANGE TONER message 9-10
CHECK DOCUMENT message 10-3
Clear key 1-8
Coded dial codes
Deleting 4-15
Editing 4-14
Registering 4-10, 4-11, 4-12
Storing/Editing 4-10
Using 4-21
Coded Dial key 1-9, 4-21
CODED DIAL LIST 11-54
ADF 1-3, 2-5
Index
11-68
TOP
Back
Before Using the
Machine
1
Document and Paper
2
CODED DIAL LIST 2 11-54
Collate/2 on 1 key 1-7
Collate copy 3-7
COMMON SETTINGS 11-4, 11-7
Copying
3
Sending and
Receiving
4
Printing and
Scanning
5
Network
Components 1-3
Copying 3-1
Copy job
Canceling 3-12
Checking 3-13
Deleting 3-13
COPY key 1-6
Copy mode 1-10
6
COPY SETTINGS 11-4, 11-9
7
Customer support
Canada 10-56
U.S.A. 10-56
Customizing sending features 4-29
Remote UI
System Manager
Settings
8
Maintenance
9
Troubleshooting
10
Appendix
11
Table of Contents
Department ID Management
Accepting print jobs with unknown IDs 8-12
After using the machine 1-12
Before using the machine 1-12
Checking counter information 8-10
Clearing page totals 8-11
Printing counter information 8-12
Department IDs
Managing 7-21
Device button 7-5
Device information settings 8-5
Document
Jams 10-3
Loading 2-4
Printing 5-2
Receiving 4-1
Requirements 2-2
Scanning area 2-3
Sending 4-1
Document and paper 2-1
Previous
Envelopes 2-10
Error codes 10-21
Error indicator 1-7
Ethernet port 1-5
External device jack 1-5
F
Fax dialing features 4-32
Fax numbers
Registering in Address Book 4-10
FaxOnly 4-35
FaxTel 4-36
File server addresses
Registering in Address Book 4-12
Forwarding 4-41, 7-15
Forwarding errors
Setting how to handle 8-15
D
Document delivery tray 1-3
G
Daylight saving time 1-18
Document feeder tray 1-3
Glossary 11-57
Deleting
Copy job 3-13
Documents stored in memory 4-48
Print job 5-9
Report job 11-55
Density
Copying 3-4
Scanning 5-6
Sending 4-6
Density key 1-7
Document requirements 2-2
Dust cover 1-4
Group addresses
Adding destination 4-16
Changing name 4-18
Deleting destination 4-17
Deleting group 4-18
Registering group 4-15
Using 4-22
GROUP DIAL LIST 11-54
E
H
Department ID
Erasing 8-10
Registering 8-6
E-mail addresses
Registering in Address Book 4-11
Energy Saver key 1-7
Help button 7-5
Documents stored in memory
Checking 4-48
Deleting 4-48
Forwarding 4-41
DRPD 4-37
Next
Hook key 1-9, 4-25
Enlarge/Reduce key 1-7
Index
11-69
TOP
Back
Before Using the
Machine
1
Document and Paper
2
3
Sending and
Receiving
4
Printing and
Scanning
5
Network
6
Remote UI
7
System Manager
Settings
8
Maintenance
9
Troubleshooting
10
Appendix
11
Legal 2-7
O
ID key 1-7
Letter 2-7
OK key 1-8
If a power failure occurs 10-55
Loading
Document 2-4
Envelopes 2-10
Paper 2-10
Log In/Out key 1-7
One-Touch keys 1-9
Deleting 4-15
Editing 4-14
Registering 4-10, 4-11, 4-12
Storing/Editing 4-10
Using 4-20
Operation panel 1-3, 1-6
Main operation panel 1-6
Send/Fax operation panel 1-9
Output tray 1-3
Image quality
Copying 3-4
Faxes 4-6
Image Quality key 1-7
Import/Export function
About the Import/Export function 7-27
Exporting the Additional Functions settings
7-32
Exporting the Address Book 7-27
Exporting the User Management Data 7-29
Importing the Additional Functions settings
7-33
Importing the Address Book 7-28
Importing the User Management Data 7-30
J
Jams
Document 10-3
Paper 10-5
Job management
About the job management 7-7
Activity log 7-8
Print jobs 7-7
Job recall 4-27
Job status button 7-5
L
Table of Contents
Index
Next
I
If you cannot solve a problem 10-56
Copying
Previous
LCD
Display 1-8
Messages 10-13
Standby mode 1-10
Log in mode 1-11
M
Machine
Checking status 7-6
Customizing settings 7-35
Machine components 1-3
Machine management 6-44
Machine settings 11-4
Main operation panel 1-6
Main power switch 1-4
Maintaining the toner cartridge 1-14
Maintenance 9-1
Manual reception 4-37
Manual sending 4-25
Memory lock reception 4-38
Memory reception 4-38
Menu
Accessing 11-4
Setting 11-6
Multi-purpose tray 1-4, 2-10
N
Network 6-1
Output tray extension 1-4
Overseas number 4-33
P
Page limit
Changing 8-8
Registering 8-6
Page top button 7-5
Paper
Jams 10-5
Loading 2-10
Printable area 2-9
Requirements 2-7
Size and type 2-13
Paper cassette 1-3
Paper guide rail 1-4
PAPER JAM message 10-5
Paper requirements 2-7
PAPER SETTINGS 11-4, 11-6
Paper stopper 1-4
Numeric keys 1-8
11-70
TOP
Back
Before Using the
Machine
1
Document and Paper
2
Copying
3
Password
Changing 8-8
Erasing 8-10
Registering 8-6
PC faxing 4-28
Platen glass 1-4, 2-4
Power failure 10-55
Sending and
Receiving
4
Printing and
Scanning
5
Network
Power socket 1-5
Printable area 2-9
PRINTER SETTINGS 11-4, 11-23
Printing 5-1
Printing counter information 8-12
6
Remote UI
7
System Manager
Settings
8
Maintenance
9
Troubleshooting
10
Appendix
11
Printing lists
1-TOUCH LIST 11-54
1-TOUCH LIST 2 11-54
CODED DIAL LIST 11-54
CODED DIAL LIST 2 11-54
GROUP DIAL LIST 11-54
USER’S DATA LIST 11-4
Printing reports
ACTIVITY REPORT 11-51, 11-53
RX REPORT 11-50
TX REPORT 11-49
Print job
Checking 5-9
Deleting 5-9
Processing/Data indicator 1-7
Pulse dialing 4-32
R
Rear cover 1-5
Recall/Pause key 1-9, 4-27
Table of Contents
Index
Received image reduction 4-44
Previous
Next
Receive mode
AnsMode 4-35
DRPD 4-37
FaxOnly 4-35
FaxTel 4-36
Manual 4-37
Receiving documents
Basic receiving method 4-35
Receiving features 4-36
Receiving features 4-36
S
Recycling cartridge 9-16
CANADA PROGRAM 9-20
U.S.A. PROGRAM 9-17
Redistributing toner 9-10
Remote reception 4-42
Scan settings
Copying 3-4
Scanning to a USB memory 5-6
Sending 4-6
SEND/FAX key 1-6
Remote reception ID 4-42
Send/Fax mode 1-10
Remote UI 7-1, 8-16, 11-65
Send/Fax operation panel 1-9
Replacing the toner cartridge 9-10
Sending and receiving 4-1
Report job
Checking 11-55
Deleting 11-55
Reports and lists 11-48
Sending documents
Address Book 4-9
Advanced sending features 4-26
Basic sending method 4-5
Customizing sending features 4-29
Fax dialing features 4-32
Manual sending 4-25
PC faxing 4-28
Scan settings 4-6
Specifying destinations 4-20
Send settings
Customizing sending features 4-30
Scan settings 4-7
REPORT SETTINGS 11-4, 11-32
Reserved copy 3-10
Restricting access to destinations
Address Book password 8-17
Broadcasting 8-20
Confirm entered fax numbers 8-19
Job Recall 8-19
New address 8-18
PC faxing 8-18
RX REPORT
Printing automatically 11-50
SCAN key 1-6
Scan mode 1-10
Scanning 5-1
Scanning area 1-4, 2-3
Scanning documents
Computer 5-3
USB memory 5-4
Scanning platform 1-4
11-71
TOP
Back
Before Using the
Machine
1
Document and Paper
2
Copying
3
Sending and
Receiving
4
Printing and
Scanning
5
Network
6
Remote UI
7
System Manager
Settings
8
Maintenance
9
Troubleshooting
10
Appendix
11
Index
Next
Setting up a computer as a file server 6-21
T
Troubleshooting
Clearing jams 10-3
Copying 10-44
Error codes 10-21
General 10-30
If a power failure occurs 10-55
If you cannot solve a problem 10-56
LCD messages 10-13
Network 10-52
Paper feeding 10-32
Printing 10-47
Sending/Receiving 10-33
Telephone 10-51
Two-sided copying 3-9
Setting up a computer for printing/sending a fax
6-11
Telephone line jack 1-5
Two-sided printing 4-44
TIMER SETTINGS 11-4, 11-28
TX/RX SETTINGS 11-4, 11-11
Setting up e-mail 6-16
Timer settings 1-16
Sleep mode 1-16
Time zone 1-17
TX REPORT
Printing automatically 11-49
Slide guides 1-3, 2-5
Tone dialing 4-32
Slide guides for multi-purpose tray 1-4
Tone key 1-8, 4-32
Specifying destinations 4-20
Toner cartridge 1-13
Checking the toner level 1-15
Maintaining 1-14
Recycling 9-16
Redistributing 9-10
Replacing 9-13
Toner Gauge key 1-8
Setting menu
ADDRESS BOOK SET. 11-19
ADJUST./CLEANING 11-30
COMMON SETTINGS 11-7
COPY SETTINGS 11-9
PAPER SETTINGS 11-6
PRINTER SETTINGS 11-23
REPORT SETTINGS 11-32
SYSTEM SETTINGS 11-34
TIMER SETTINGS 11-28
TX/RX SETTINGS 11-11
VOLUME CONTROL 11-6
Setting paper size and type 2-13
Standby mode
Copy 1-10
Log in 1-11
Scan 1-10
Send/Fax 1-10
Starting Remote UI 7-4
Start key 1-8
Stop/Reset key 1-7
Table of Contents
Previous
Storing/Editing
Address Book 4-9
Coded dial codes 4-10
Group addresses 4-15
One-touch keys 4-10
System Manager ID 8-3
System Manager settings 8-1
System monitor 3-13, 4-47, 5-9, 11-55
System Monitor key 1-6
System Password 8-3
System requirements
Network 6-4
Remote UI 7-3
SYSTEM SETTINGS 11-4, 11-34
System settings
Customizing 7-12
Toner level 1-15
TONER LOW message 9-10
To Top page button 7-5
Transporting the machine 9-22
U
Update button 7-5
USB memory 5-4
USB memory port 1-3
USB port 1-5
USER’S DATA LIST 11-4
User IDs
Managing 7-21
Turning ON/OFF 8-14
Use USB device 8-22
Using
Address Book key 4-23
Coded dial codes 4-21
Group addresses 4-22
One-touch keys 4-20
11-72
TOP
Back
Before Using the
Machine
1
Document and Paper
2
Copying
3
Sending and
Receiving
4
Printing and
Scanning
Previous
Next
V
View Settings key 1-6
VOLUME CONTROL 11-4, 11-6
Z
Zoom ratio
Preset zoom 3-5
Zoom designation 3-6
5
Network
6
Remote UI
7
System Manager
Settings
8
Maintenance
9
Troubleshooting
10
Appendix
11
Table of Contents
Index
11-73
TOP
Back
Before Using the
Machine
1
Document and Paper
2
Copying
3
Sending and
Receiving
CANON INC.
4
Printing and
Scanning
5
Network
6
Remote UI
30-2, Shimomaruko 3-chome, Ohta-ku, Tokyo 146-8501, Japan
CANON U.S.A., INC.
One Canon Plaza, Lake Success, NY 11042, U.S.A.
CANON CANADA INC.
6390 Dixie Road Mississauga, Ontario L5T 1P7, Canada
CANON EUROPA N.V.
Bovenkerkerweg 59-61 1185 XB Amstelveen, The Netherlands
CANON FRANCE S.A.S.
7
System Manager
Settings
17, quai du Président Paul Doumer 92414 Courbevoie Cedex, France
CANON COMMUNICATION & IMAGE FRANCE S.A.S.
12, rue de I’Industrie 92414 Courbevoie Cedex, France
8
CANON (U.K.) LTD.
9
CANON DEUTSCHLAND GmbH
Maintenance
Troubleshooting
10
Appendix
Woodhatch, Reigate, Surrey, RH2 8BF, United Kingdom
Europark Fichtenhain A10, 47807 Krefeld, Germany
CANON ITALIA S.p.A.
Via Milano, 8 20097 San Donato Milanese (MI) Italy
CANON ESPAÑA, S.A.
c/ Joaquín Costa 41, 28002 Madrid, Spain
11
CANON LATIN AMERICA, INC.
703 Waterford Way Suite 400, Miami, Florida 33126 U.S.A.
CANON AUSTRALIA PTY. LTD
1 Thomas Holt Drive, North Ryde, Sydney, N.S.W. 2113, Australia
CANON CHINA CO., LTD
15F Jinbao Building No.89 Jinbao Street, Dongcheng District, Beijing 100005, China
CANON SINGAPORE PTE. LTD.
Table of Contents
1 HarbourFront Avenue #04-01 Keppel Bay Tower, Singapore 098632
Index
USRM1-1483-01
© CANON INC. 2007
Previous
Next
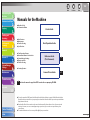
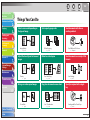
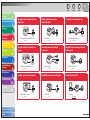
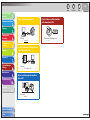

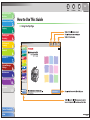
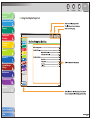

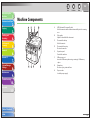
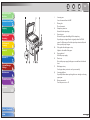
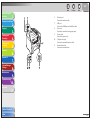
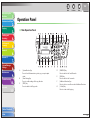
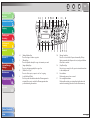
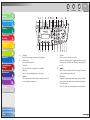
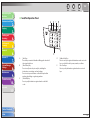
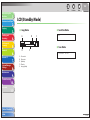
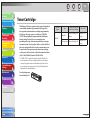


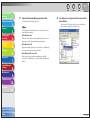
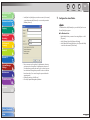
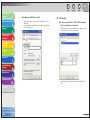
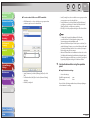


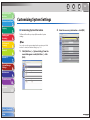
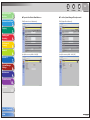
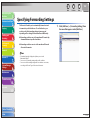

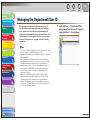
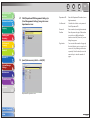
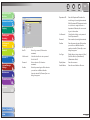
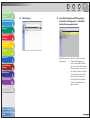


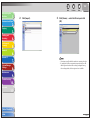
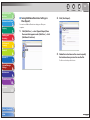
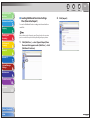
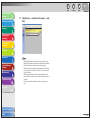
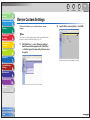


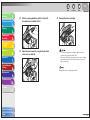
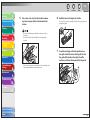
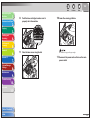
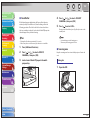
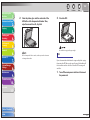
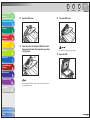
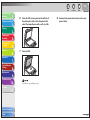
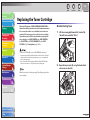
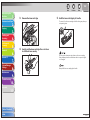
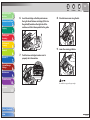
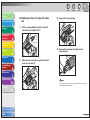


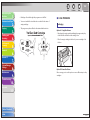
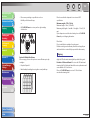
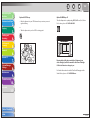
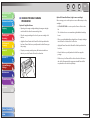
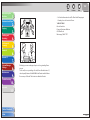
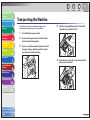


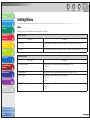


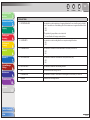
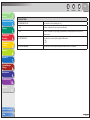
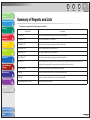
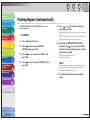


![User`s Guide [Printer/Copier/Scanner]](http://vs1.manualzilla.com/store/data/005987700_1-4ebf6f5f2843ec6fc8ace3e9735a6825-150x150.png)