1
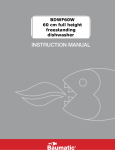
CONGRATULATIONS ON THE PURCHASE OF YOUR NEW DISHWASHER.
WE TRUST YOU WILL BE DELIGHTED WITH IT
Please read this instruction book carefully.
It will give you the information you need to:
• care for, and
• use your dishwasher.
Contact your nearest Authorised Service Centre if you need
advice. You will find their addresses in the Warranty and
Service Address Card supplied with your dishwasher.
Your retailer can also tell you the name of your nearest
service agent.
1
Contents
Introduction
Page No.
3
Section A: Using your dishwasher
102 Model
a. Control panel
b. Program selection guide
5
6
302 Model
a. Control panel
b. Program selection guide
8
9
403 Model
a. Control panel
b. Program selection guide
11
12
Section B: Loading your dishwasher
a. Points to remember
b. The baskets
c. Basket features
13
14
15
Section C: Using the detergent and rinse aid dispensers
a. Detergents
b. Detergent and rinse aid dispensers
c. Filling the detergent dispenser
d. Use of detergent tablets
d. Filling the rinse aid dispenser
e. Adjusting the rinse aid dispenser
16
16
17
17
18
18
Section D: Maintaining your dishwasher
a. General cleaning
b. Light globe replacement
c. Cleaning the wash filters
19
19
20
Section E: Help guide
a. Helpful hints
b. Fault display indications
2
21
21
Introduction
Before you use your dishwasher for the first time, check that the installer has:
• plugged in the power cord
• connected the hoses to the taps
• turned on the power
• tested the dishwasher
Warnings
•
Dishwasher detergents are very alkaline and extremely
dangerous if swallowed. Be careful to:
keep them away from your eyes and skin.
keep children away from the dishwasher when the
door is open.
only put detergent in the dispenser when you are
ready to use the dishwasher.
•
The Door should not be left open as this can present
a tripping hazard.
•
Knives and other utensils with sharp points must be
loaded in the basket with their points down or placed
in a horizontal position.
•
This appliance is not intended for use by young
children or infirm persons without supervision.
•
Young children should be supervised to ensure that
they do not play with the appliance.
•
If the supply cord is damaged, it must be replaced by
the manufacturer or its service agent or a similarly
qualified person in order to avoid a hazard.
3
Control panel features
4
102 Model
Section A: Using Your Dishwasher
102 Model
a.
Control Panel
1
Door Latch
The latch is under the control panel at the top of the door.
• Lift the latch handle forward to open door.
Please note: The machine will not start until the door is properly closed and latched.
2
Wash Program Selector
This knob controls the wash cycle
•
Push knob in and let it “POP” out to show program selection.
•
Rotate knob to select a program.
•
Push knob in again after program has been selected
(See diagrams below)
Wash Programs
These are designated as on the diagram below:
3
•
RINSE
•
POTS WASH
•
REGULAR WASH
•
ECO WASH
Power On/Off button
•
Push to start or interrupt a program.
5
6
Rinse, hot wash, rinse,
hot rinse, hot dry
Rinse, warm wash, rinse,
warm rinse, warm dry
To wash a mixed load of
normally soiled dishes with
maximised performance.
To wash normally soiled
dishes with energy
usage minimised.
Regular 65 Wash
Regular Eco Wash
Wash and Rinse temperatures will vary depending on the incoming water.
The above descriptions are based on cold water connection (Recommended).
Warm prewash, rinse, hot wash,
rinse, hot rinse, hot dry
To wash heavily soiled dishes
and utensils eg. saucepans
Pots Wash
*
Cold rinse
To rinse a partial load
*
Rinse
Program Description
Level of Soiling
102 Model
Suggested Wash Program
b. Program Selection Guide
Control panel features
302 Model
7
302 Model
a.
Control Panel
1
Door Latch
The latch is under the control panel at the top of the door.
• Lift the latch handle forward to open door.
Please note: The machine will not start until the door is properly closed and latched.
2
Power on Button
• Press the power button to supply power to the dishwasher.
3
Program/Clear Button
• Press the button repeatedly to select the program you want.
• (See below for program cancellation.)
4
Program Indicator Lights
• The program indicator light for the program you selected will be on.
5
Start/Pause Button
• Press the start/pause button to commence the selected program.
• Pressing the start/pause button again during a wash program will pause the machine,
and a “P” will flash in the display.
6
Delay Start Option Button
• Press this button repeatedly for a delayed program start of 1 to 19 hours. The selected
program will start when the delayed time has expired.
7
Progress Indicator Lights
• The progress indicator lights show the progress and position in the program.
8
Digital LED Display Window
• This display will show the approximate wash time or the delayed start time.
PROGRAM END
• The “ready” light will be on.
• The buzzer will beep for 2 seconds. The digital display will show “O” until you open/close
the door.
PROGRAM CANCELLATION
• A program can be cancelled during the wash cycle by pressing the program/clear button
for 3 seconds.
CHANGING PROGRAMS
• The selected program can be changed after starting that program by pressing the program
button for 3 seconds to cancel that program, then select another program and press start.
PROGRAM INTERRUPTION/PAUSING
• A wash program can be interrupted by the following actions.
• Pressing the start/pause button.
• Opening the door.
• Pressing the power button.
• The wash program will resume from the point where it was interrupted.
CHILD LOCK ACTIVATION
• The child lock can only be set or reset in the program selection stage.
• To activate the child lock, simultaneously hold the Program/Clear and Start/Pause
buttons down for 5 seconds
• The child lock can be temporarily bypassed at any stage of the program by holding any
key for five seconds. It will remain bypassed for fifteen seconds after the last key is pressed.
• CL is displayed when a button is pressed while the child lock is activated.
• To deactivate, press the Program/Clear and Start/Pause for another 5 seconds.
8
9
Cold rinse, warm wash,
warm rinse, warm dry
Cold rinse, hot wash,
rinse, hot rinse, hot dry
Hot rinse, warm wash,
hot wash, rinse, hot rinse, hot dry
To wash normally soiled dishes with
energy usage minimised.
To wash a mixed load of
normally soiled dishes with maximised
performance.
To wash heavily soiled dishes
and utensils
Regular Eco Wash
Regular 65 Wash
Intense 70 Wash
Wash and Rinse temperatures will vary depending on the incoming water.
The above descriptions are based on cold water connection (Recommended).
Warm wash, warm rinse, warm dry
To wash glassware or
lightly soiled dishes
Fragile 45 Wash
*
Cold rinse
To rinse a partial load
*
Rinse/Hold
Program Description
Level of Soiling
302 Model
Suggested Wash Program
b. Program Selection Guide
Control panel features
10
403 Model
403 Model
a.
Control Panel
1
Door Latch
The latch is under the control panel at the top of the door.
• Lift the latch handle forward to open door.
Please note: The machine will not start until the door is properly closed and latched.
2
Power on Button
• Press the power button to supply power to the dishwasher.
3
Program/Clear Button
• Press the button repeatedly to select the program you want.
• (See below for program cancellation.)
4
Program Indicator Lights
• The program indicator light for the program you selected will be on.
5
Start/Pause Button
• Press the start/pause button to commence the selected program.
• Pressing the start/pause button again during a wash program will pause the machine, and a “P”
will flash in the display.
6
Delay Start Option Button
• Press this button repeatedly for a delayed program start of 1 to 19 hours. The selected program
will start when the delayed time has expired.
7
Progress Indicator Lights
• The progress indicator lights show the progress and position in the program.
8
Digital LED Display Window
• This display will show the approximate wash time or the delayed start time.
9
Sensor Program
• This program will determine the cleanliness of the wash load and adjust the wash conditions
for that load automatically.
10
Anti-Bacterial Option Button
• If this option is selected by pressing the anti-bac button, the final rinse temperature and time will be boosted
to sanitise the wash load. This option can only be selected or cancelled at the program selection stage.
Note: At the completion of the program the “sanitised” light will come on. The sanitise criteria may
not be satisfied if there is an interruption of the cycle or power failure. The sanitise criteria are
designed to meet residential dishwasher requirements and are NOT intended for licensed food
establishments.
PROGRAM END
• The program indicator light of the completed program or the “ready” light will be on.
• The buzzer will beep for 2 sectons. The digital display will show “0” until you open/close the door.
PROGRAM CANCELLATION
• A program can be cancelled during the wash cycle by pressing the program button for 3 seconds.
CHANGING PROGRAMS
• The selected program can be changed after starting that program by pressing the program
button for 3 seconds to cancel that program, then select another program and press start.
PROGRAM INTERRUPTION/PAUSING
• A wash program can be interrupted by the following actions.
• Pressing the start/pause button.
• Opening the door.
• Pressing the power button.
• The wash program will resume from the point where it was interrupted.
CHILD LOCK ACTIVATION
• The child lock can only be set or reset in the program selection stage.
• To activate the child lock, simultaneously hold the Program/Clear and Start/Pause buttons
down for 5 seconds.
• The child lock can be temporarily bypassed at any stage of the program by holding any key
for five seconds. It will remain bypassed for fifteen seconds after the last key is pressed.
• CL is displayed when a button is pressed while the child lock is activated.
• To deactivate, press the Program/Clear and Start/Pause for another 5 seconds.
11
12
Yes
Yes
Yes
Cold rinse, warm wash, rinse,
warm rinse, warm dry
Cold rinse, hot wash, rinse,
hot rinse, hot dry
Hot rinse, warm wash, hot wash,
rinse, hot rinse, hot dry
To wash normally soiled dishes
with energy useage minimised.
To wash a mixed load of normally
soiled dishes with maximised
performance
To wash heavily soiled
dishes and utensils
Regular Eco Wash
Regular 65 Wash
Intense 70 Wash
**
This option boosts the final rinse temperature and time.
(Refer to description of anti-bac on page 11.)
Wash and Rinse temperatures will vary depending on the incoming water.
The above descriptions are based on cold water connection (Recommended).
No
Warm wash, warm rinse,
warm dry
To wash all glassware or lightly
soiled dishes.
Fragile 45 Wash
*
Yes
To wash all types of loads
Sensor
Anti-bac Option
The program adjusts
temperatures and number of
rinses depending on load and
soil level.
*
Program Description
Level of Soiling
403 Model
Suggested Wash Program
b. Program Selection Guide
**
Section B: Loading Your Dishwasher
a.
Points to Remember:
•
Always make sure that nothing is stopping the spray arms from moving. Spin
them by hand before closing the door.
•
Do not put large articles at the front of the lower basket. They could stop the
detergent dispenser from operating.
•
Your dishwasher is not a waste disposal unit so please take care to remove
all large food scraps from your dishes before loading in the dishwasher.
•
Carefully place bowls, etcetera, so that water can drain away.
•
Place crockery and glassware so that they do not touch. This will stop them
chipping.
•
Place cutlery in the basket, some up, some down to get the best wash. Separate
cutlery of different materials, e.g. stainless steel and silver, into different
compartments. Load sharp pointed knives with the point down for safety
reasons.
•
Do not use your dishwasher for cutlery with wooden or bone handles. Do not
wash items that have glued parts. Long periods in hot water will damage them.
•
You can wash most good quality plastics in dishwashers. However, do not
force them into racks or they will change shape. Do not put items that soften
at temperatures of 65 degrees centigrade and over into the dishwasher.
•
You can wash most family breakfast, lunch and dinner dishes in one load. We
suggest that you turn on your dishwasher just before you go to bed every night.
•
Make sure that there are no particles of steel wool scouring pads on your
dishes. These may cause rust marks on stainless steel.
•
Some models will have fold down racks in the bottom basket.
- To lay the racks down, lift as shown from the catch holding them upright.
13
b.
The Baskets
•
Note: Load your dishwasher correctly to obtain the best results.
•
Practise with your crockery and utensils until you find the method that suits you
best.
•
Follow the photographs on this page for the best results.
•
Use the lower basket for items that are difficult to clean.
•
Use the upper basket for fragile or less soiled items.
•
The top two photographs show a normal 12 place setting loaded
in accordance with Australian standard AS/NZS 2007.1.
•
The bottom two show a general mixed load of a typical household.
BASKET LOADING PATTERNS
NOTE:- Ensure both baskets are fully pushed into the rear of the dishwasher
before closing the door.
14
c.
Basket Features
Cup racks
•
Use the one or two cup racks in the top basket to hold extra cups and glasses.
(See photographs (1) below.)
•
Swing the top cup rack upwards and clip it back when the basket is in the
lower position. (See photograph (2) below.)
(2)
(1)
Adjusting the height of the upper basket
• To adjust the basket position without “EASYLIFT”
- Make sure the basket is empty.
- Remove the end clip on each rail (See photograph 3 below).
- Reposition the basket on its lower set of wheels.
- Replace the clips
• If your dishwasher has an “EASYLIFT” feature
- Grasp the handles on both sides of the basket.
- Lift the basket evenly to the upper position as shown in photographs (4).
- To put it back to the normal position lift it again and lower evenly.
• Some models will have a utensil rack. This can be used for cutlery and/or cooking
utensils as shown in photograph (5).
(3)
(4)
(5)
15
Section C: Using the Detergent and
the Rinse Aid Dispensers
Warning
Dishwasher detergents are very alkaline and extremely dangerous if
swallowed. Be careful to:
• keep them away from your eyes and skin
• keep children away from the dishwasher when the door is open
• not fill the dispenser until you are ready to use the dishwasher.
a.
Detergents
•
Use the amount of detergent needed, depending on:
- the softness or hardness of the water
- the soil level of the dishes
•
Soft water and lightly soiled dishes generally require 10 to 20 grams of
powdered detergent; hard water and heavily soiled dishes 20 to 30 grams.
•
Note: Fill only compartment 15 if you use concentrated detergents.
•
Try using different amounts to get best results from the water in your
area. This may vary from the quantities suggested above.
•
For testing to Australian standard AS/NZS 2007.1, place 20 grams of
detergent in the dispenser compartment and 10 grams of detergent
in the depression of the door.
AS/NZS 2007.1 Testing Program.
102 Model - use Regular Eco
302 Model - use Regular Eco
403 Model - use Regular Eco
•
b.
16
A white film or scale may build up in your dishwasher pump housing
and filters over time, especially in hard water conditions. If this
happens, use a descaler every six months to reduce these deposits.
Contact your local service centre if you need more information.
Detergent and Rinse Aid Dispensers
•
The detergent and rinse aid dispensers are in a combined unit on the
inside of the dishwasher door.
•
They automatically dispense detergent and rinse aid at the correct time
in the dishwasher program.
c. Filling the Detergent Dispenser
•
Do not use normal hand washing up detergents in your dishwasher. They will
cause severe foaming.
•
Always use fresh, good quality machine dishwashing detergent.
•
Fill the detergent compartment labelled 25, or compartment 15 when you use a
concentrate. (See photograph below.)
•
Use extra detergent if the local water supply is very hard.
•
Fill both detergent compartments (numbers 15 and 25) if the load is large and greasy.
Rinse
Aid
Outlet
Detergent
Compartments
15
Detergent
Dispenser Lid
Rinse Aid
Level
Indicator
25
Turn Filling Plug
Anti -Clockwise
and Lift
Closed
Position
for Plug
d. Use of “3 in 1”/ Combi Detergent Tablets
General Advice
These products are tablets with combined detergent(s) and rinse-aid functions.
1. Use strictly according to the detergent manufacturers instructions.
2. Do not place the tablets in the tub or in the cutlery basket as this will result in poorer
wash results. The tablets should be placed in the detergent doser.
3. If you encounter problems using “3 in 1” products for the first time then please contact
the detergent manufacturers care line (the telephone number is given on the product
packaging).
Special Advice
1. When using combination products, you may need to reduce the amount of rinse aid
dispensed (see e.f. “Adjusting the Rinse Aid Dispenser”).
2. Detergent Tablets from different manufacturers dissolve at different rates. For this
reason some tablets cannot develop their full cleaning power during short or low
temperature programs. Therefore, when using tablets, best results will be obtained
on “Sensor”, “Regular 65” or “Pots/Intense 70” wash programs.
17
e. Filling the Rinse Aid Dispenser
•
Rinse Aid is a wetting agent which is essential for good drying performance.
It also helps stop streaks and spots showing on your dishware.
•
The Rinse Aid Dispenser should always contain Rinse Aid, unless you are using
combination tablets. It will dispense a measured amount every time you
wash your dishes.
•
The dispenser can hold enough rinse aid (125 ml) for many washes. The
level indicator will turn clear when you need to refill it.
•
To fill the dispenser:
- unscrew the round cap anticlockwise, and
- fill it with a good quality rinse aid
•
Do not overfill the dispenser
•
Make sure that you close the cap firmly after you fill the dispenser.
f. Adjusting the Rinse Aid Dispenser
•
If your local water is harder or softer than normal, you can change how much
rinse aid you use in the following ways: (See photographs below)
- Choose a higher number if there are drops of water or fog that looks like
chalk on the glassware.
- Choose a lower number if the glassware is smeared at the end of a program.
4
1
2
18
3
Section D: Maintaining Your Dishwasher
a. General cleaning
•
When you want to clean your dishwasher:
- use a soft cloth dampened with soapy water
- rinse it with a clean cloth
- dry it.
b. Light Globe Replacement
Your dishwasher may be fitted with an interior light in
the rear top right corner. In the event of the light globe
requiring replacement please follow these instructions:
• Switch off your dishwasher and disconnect the
dishwasher power cord from the power supply.
• Unscrew the lens anticlockwise from within the
dishwasher.
• Remove the globe and replace with a maximum 15
Watt bayonet globe no larger than 26 mm in diameter
and 56 mm long (or manufacturer's approved spare
part).
• Ensure seal is correctly fitted to the lens, then replace
lens by screwing it firmly into place.
The plastic lens must be secured before reconnecting
power to the dishwasher, failing to do this may
potentially cause an unsafe operating environment.
19
c. Cleaning the Wash Filters
The filters should be checked and cleaned
regularly. Blocked filters will give poor wash
results.
1.
Open the door, remove the lower basket.
2.
The dishwasher filter system comprises
a coarse/fine filter, microfilter and a flat
filter. Unlock the filter system using the
handle on the microfilter.
3.
Turn the handle about 1/4 a turn
anticlockwise and remove.
4.
Take hold of the coarse/fine filter (1) by
the handle with the hole and remove from
the microfilter (2).
5.
Clean all filters thoroughly under running
water.
6.
Remove the flat filter (3) from the base of
the washing compartment and clean both
faces thoroughly.
7.
Put the flat filter back in the base of the
washing compartment.
8.
Place the coarse/fine filter in the microfilter
and press together.
9.
Put the filter combination in place and
lock by turning the handle clockwise to
the stop. During this process ensure that
the flat filter does not protrude above the
base of the washing compartment.
1
2
The dishwasher must not be used without
filters under any circumstances.
3
NOTE - ALL MODELS
Do not let any foreign objects (e.g. Broken Crockery, Glass,
etc.) fall in the pump beneath the filters before they are refitted.
20
Section E: Help Guide
a. Helpful Hints
• We recommend that you buy kitchen equipment which is dishwasher safe.
• Using your dishwasher over a long time may discolour or fade some types of
dishes (e.g. ones with the pattern on top of the glaze) and aluminium saucepans.
• If you often wash lead crystal glass, they will become opaque (not clear).
• If you take more than one day to fill the dishwasher, rinse your dishes by using
the “Rinse” program at the end of the first day.
• Do not use steel wool, aerosol or solvent cleaners on any part of your dishwasher.
• Do not use lumpy or stale detergent. It will give you a poor wash.
• If you do not intend using your dishwasher for several weeks:
1. open the door a little
2. switch off the power
3. turn off the water supply.
b. Problem Solving
Please refer to your Warranty card for a full description of problems and Solutions
For the 302 and 403 models, if your dishwasher stops during a cycle, a fault condition
will be indicated on the display and the controller will “beep” every two seconds.
Once the fault has been rectified, press the ON/OFF button. The wash program
will continue.
FAULT
BEEPER
DISPLAY
WHAT TO DO
Not filling
Repeating single beep
“
Check water supply and tap.
Check inlet hose filter.
Not Draining
Repeating double beep
“
Check drain hose for kinks.
Check sink trap spigot for blockage.
Check filters and clean if dirty.
Overfill
Repeating triple beep
“
Turn off water tap and power.
Call service.
“
Turn off water tap and power.
Call service.
Electrical Fault Repeating 5 beeps
I 10
” Displayed
I20” Displayed
I30” Displayed
I50” Displayed
21
• Should you require further instructions in the use and care of your dishwasher or
advice with washing please contact:-
AUSTRALIA
Customer Care Centre Ph: 1300 363 640
(Centre is open 8.00am - 5pm Mon. - Fri. Eastern Standard Time).
NEW ZEALAND
Customer Care Centre Ph: (09) 573 2384
(Centre is open 8.00am - 5.00pm Mon. - Fri).
If you have a warranty or spare parts enquiry, you should call the number listed on the
warranty card.
22
–
Notes
–
23
–
24
Notes
–
–
Notes
–
25
Electrolux Home Products Pty. Ltd. ABN 51 004 762 341
616-400-369 C/N 02R058A July. 03