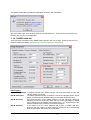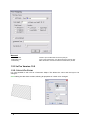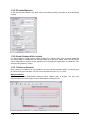
1
Release Notes
IRRICAD Pro Version 11
By Lincoln Ventures Ltd
This manual was produced using ComponentOne Doc-To-Help.™
Contents
1 Release Notes Pro V11
1
1.1 In Pro Version 11.0 .............................................................................................1
1.1.1 Tools Menu Changes...........................................................................1
1.1.2 Contour Generation .............................................................................2
1.1.3 DEM Improvements .............................................................................2
1.1.4 Zone Pressure Map
.......................................................................4
1.1.5 Control Valve Selection and Specification Improvements .....................5
1.1.6 Pipe Reduction Symbols......................................................................5
1.1.7 User Attributes are Enabled For Pipes, Tapes and Spraylines..............6
1.1.8 Database Editor – What’s New ............................................................6
1.1.9 Language Compatibility .....................................................................14
1.2 Previous Additions and Bug Fixes .....................................................................17
1.2.1 In Pro Version 10.5............................................................................17
1.2.2 In Pro Version 10.0............................................................................32
1.2.3 In Pro Version 9.5..............................................................................38
1.2.4 In Pro Version 9.................................................................................45
1.3 Hot off the Press – New Patch Additions to Pro Version 11................................54
2 Index
Release Notes IRRICAD Pro Version 11
55
Contents · iii
1 Release Notes Pro V11
1.1 In Pro Version 11.0
1.1.1 Tools Menu Changes
The Tools menu has now been split between the new Modify menu and the Tools menu. The items
now found in the Modify menu are:
The items in the Tools menu are:
Release Notes IRRICAD Pro Version 11
Release Notes Pro V11 · 1
1.1.2 Contour Generation
Contours can now be calculated from spot heights using the Calculate Contours tool (Tools|Calculate
Contours). The tool allows the contour interval and the properties of the calculated contours to be set.
1.1.2.1 CONTOUR PROPERTIES
Contour Interval:
The elevation difference between contours
Minimum Elevation: the minimum elevation based on the exiting spot height elevations
Maximum Elevation: the maximum elevation based on the exiting spot height elevations
No. of Contour Levels:Based on the contour interval and the range of elevation, the number of
contours to be produced will be calculated.
Note: Calculated contours are for display purposes only and their elevations cannot be edited. They
are classed as secondary sources of elevation data and do not form inputs to the elevation
interpolation functions.
1.1.3 DEM Improvements
The DEM (Digital Elevation Model) used by Irricad has been greatly improved with the implementation
of an ABOS system (Approximation Based On Smoothing). The ABOS method is much faster than
the old AEI method, and is much better at representing likely topography, especially when based on a
low number of height points. It does not show the artefacts sometimes generated by the old method.
The images below show a height map generated from five spot heights by both DEM methods
Old AEI Method
2 · Release Notes Pro V11
New ABOS method
Release Notes IRRICAD Pro Version 11
The ABOS method also provides an interpolation summary after calculation:
Also note that the grid lines are off by default in the 3D DEM view. These can be turned back on by
pressing the <G> key on the keyboard.
1.1.3.1 ABOS PARAMETERS
There are three parameters to the ABOS method that the user may change. These are found on the
Designs Parameters dialog (Design|Design Parameters|Analysis Parameters).
D.E.M. Options
Interpolation Method: The ABOS method is the default, but the user may switch back to using the
old AEI method if required.
D.E.M. Resolution:
The ABOS method internally represents contours as individual points. These
points are automatically generated along contour lines at this resolution.
D.E.M. Accuracy:
The target precision of the ABOS method. It is the maximum difference
between the source height point data and the surface generated by ABOS
and is defined as a percentage of the height range – i.e., a percentage of the
difference between the maximum and minimum heights.
D.E.M. Grid Size:
If this value is set to 0 then IRRICAD will choose a suitable grid size.
However this may result in a large number of grid points and consequently
slow the generation and loading of the 3D DEM.
Release Notes IRRICAD Pro Version 11
Release Notes Pro V11 · 3
1.1.4 Zone Pressure Map
A graphical representation of the pressures in a zone can now be created using the Reports|Show
Zone Pressure Map function.
Select a control valve (Design / Analyse needs to have been completed for the zone) and choose
Reports|Show Zone Pressure Map|Selected Valve.
Map Info:
The pressure map dialog shows the pressure limits
for the zone, as well as the actual maximum and
minimum emitter pressures in the zone.
Map Properties:
The pressure map can be created using the zone
pressure limits or custom limits may be specified on
the dialog. Custom limits could be used to show
the range within a smaller tolerance if required e.g:
14m – 20m (as seen below in the Tape Block
image).
Individual markers on connected spraylines:
Individual circular fills can be placed at the location
of each emitter by enabling the check box (as
below in the Spray Block image). This can cause
slow redrawing at higher numbers of emitters,
uncheck the “Individual markers on connected
spraylines” check box.
Spray Block
Tape Block
The pressure map symbol is colour coded as follows:
Emitter pressure is below the minimum allowable pressure.
Emitter pressure is within 10% of the lower pressure limit.
Emitter pressure is within the allowable pressure range
Emitter pressure is within 10% of the higher pressure limit.
Emitter pressure is above the maximum allowable pressure.
Note: The pressure map can only be shown for one zone at a time.
4 · Release Notes Pro V11
Release Notes IRRICAD Pro Version 11
1.1.5 Control Valve Selection and Specification Improvements
1.1.5.1 SELECTING CONTROL VALVES
The flow range of each control valve has been
added to valve combo box. This assists with the
selection of the correct valve.
1.1.5.2 VALVE SPECIFICATION SUMMARY
A new valve specification summary dialog has been added (Design|Valve Specification Summary).
After running Valve Analysis, open this dialog to see the valves and their design flows. Valves that
have flows outside of their specified range will be displayed in red. The “Valve Type” can be changed
in this dialog. The drop down shows the available valves and their flow ranges. Valve Analysis is rerun
automatically when the dialog is closed.
List suitable valves:
List all valves:
Only valves which have flow ranges appropriate for the zone flow will be
listed as well as the currently selected valve.
All valves enabled in the database will be listed.
1.1.6 Pipe Reduction Symbols
Pipe reduction symbols can be automatically placed on the design to show the location, and direction,
of changes in pipe size.
To place the symbols on the plan:
1. Select Draw|Pipe Reductions.
2. Select the type of item or items to be labelled with pipe reduction symbols.
3. Click the [OK] button.
The items which are labeled with pipe reduction symbols can also be controlled by using Select tools.
Both pipe sizes need to be selected for the smaller pipe to be labelled with the pipe reduction symbol.
Release Notes IRRICAD Pro Version 11
Release Notes Pro V11 · 5
If no items are selected, then all items of the types specified in the “Tool Options” will be labeled (i.e.
this is equivalent to a Select All).
Drawing Properties
Layer:
Symbol Name:
Symbol Size:
The default layer is IRRICAD.
The default symbol is PipeReduction but can be replaced by any other
symbol.
The default symbol size is 5.
Tool Options
Symbol Spacing:
The spacing in ‘symbol size’ from the junction i.e 1 is the same length as the
symbol itself at the current “Base Database Symbol Size”: if the symbol
measures 2m in length on the plan, then the symbol will be placed 2m from
the junction at symbol size 1.
Mainline items:
Check this option to place reduction symbols on Mainline items.
Zone items:
Check this option to place reduction symbols on Zone items.
Include hydraulic items: Any reduction occurring at a valve, pump or other hydraulic item will not
produce a reduction symbol unless this option is checked.
Use pipe colours:
When checked, the reduction symbols will be the same colour as the smaller
pipe. When unchecked all reduction symbols will be black.
1.1.7 User Attributes are Enabled For Pipes, Tapes and Spraylines
See User Guide – Enhancing the Presentation of Plans – Automatic Labeling.
1.1.8 Database Editor – What’s New
In response to requests for improvements we have made significant changes, including introducing
standard Windows functions for navigation and editing. Details below :-
1.1.8.1 WAREHOUSE CODE – 32 CHARACTERS ALLOWED
The maximum number of length of Warehouse codes has been increased from 12 to 32 characters.
Note that databases created, or edited, in the Pro Version 11 Database Editor cannot be used with
older versions of IRRICAD unless the warehouse code field is converted to 12 characters. For
information on how to accomplish this contact your local Irricad support agent
6 · Release Notes Pro V11
Release Notes IRRICAD Pro Version 11
1.1.8.2 WHAT’S NEW IN THE FILE MENU
Close
To close the currently viewed database without saving any changes:
1. Select File|Close.
2. Select [Yes] to close all databases, saving changes or [No] to close all databases without
saving or [Cancel] to not close the Database Editor.
Save Copy As
To save a copy of the database under a different name:
1. Select File|Save Copy As.
2. Change the name of the database.
3. Click the [Save] button.
1.1.8.3 EDITING FUNCTIONS
The Database Editor has incorporated standard windows functions for manipulating and finding text
and specific record based methods for copying and pasting groups of, and individual, components.
The functions below are found in the Edit menu.
Undo
Select to undo the last action.
Redo
Repeats the last action which was undone (see above).
Undo Record
Undoes multiple changes to the same record, e.g., description, warehouse code and supplier.
Cut
Cuts out part of a description, warehouse, supplier code, etc on to the clipboard to be used at a later
time. This function will only copy the highlighted text.
Copy
Copies a description, warehouse, supplier code, etc on to the clipboard to be used at a later time.
This function will only copy the highlighted text.
Paste
Pastes from the clipboard (after copying) into the currently selected field.
Release Notes IRRICAD Pro Version 11
Release Notes Pro V11 · 7
Copy Component and Paste Component
Complete components can now be copied and pasted into the current database or other databases.
Multiple components can be copied and pasted in one action.
To copy a component(s) to be pasted into another open database:
1. Select the component(s) to be copied by clicking on the grey box the left of the component
name. This will highlight the whole line associated with the component.
2. Select Edit|Copy Component.
3. Open or select the required database from the Window menu.
4. Place the cursor where required for the new record(s), in the required component group.
5. Select Edit|Paste Component.
Notes:
The Copy Component function differs from Copy in that it will completely copy all the fields of
a component, including assembly items or nozzles.
The copied component, or groups of components, will be pasted into the correct component
group regardless of the current group.
You can copy a component into the same database. This is useful if you need to create an
item, or set of items, very similar to an existing one.
To maintain uniqueness between records, IRRICAD will automatically add a ~ to the name of
each copied item. The combination of name and warehouse code will then be able to be
differentiated from other similar items in IRRICAD and the Database Editor.
Find
Searches the database for particular word or phrase. Find only looks in the current field (column) and
tab.
1. Select the required component group to search.
2. Select Edit|Find and type in the required word or phrase.
3. Click the [Find Next] button until the required entry is found.
Note:
“Match Case” and “Up” or “Down” options may be selected as required.
Find Next:
Cancel:
Match Case:
Direction:
This action will move to the next record which contains the keyword.
[Cancel] will stop the search and close the Find dialog.
If checked, the only items which the search will find will be those with the
correct case e.g. ANGLE if typed in upper case in the “Find” field.
The direction of the search can be specified as above the current cursor
position (“Up”) or below the current cursor position (“Down”).
Replace
Searches and replaces specific words or phrases with a new word or phrase. Replace only looks in
the current field (column) and tab.
1.
2.
3.
4.
Select the required component group to search.
Select Edit|Replace and type in the required keyword to find and the required word to replace.
Click the [Find Next] button until the required entry is found.
Click the required action button for the current record.
Replace:
Replace All:
Cancel:
Clicking this button will replace the keyword or phrase in the “Find what” field
with the word or phrase in the “Replace with” field for the current record.
Clicking this button will replace the keyword or phrase in the “Find what” field
with the word or phrase in the “Replace with” field for all records containg the
keyword or phrase as per the “Find what” field.
[Cancel] will stop the search and close the Replace dialog.
8 · Release Notes Pro V11
Release Notes IRRICAD Pro Version 11
Match Case:
If “Match Case” is checked, the only items which the sercah will find will be
those with the correct case e.g. ANGLE if typed in upper case in the “Find”
field.
Find Next
Continues the search as per the current Find dialog settings.
Find Previous
Finds the previous records found in the search one at a time.
1.1.8.4 IMPROVEMENTS TO CURVE FITTING
A vast improvement to the Curve Fitting utility is the introduction of a button that will copy the
calculated constant, index and intercept into the relevant fields on the current record.
The calculated curve is now shown below the curve fit grid.
Select the required curve fitting type from the drop down box.
The Curve Fitting utility can be turned off via View|Curve Fit. This window will appear on the righthand side but can be floating.
Release Notes IRRICAD Pro Version 11
Release Notes Pro V11 · 9
1.1.8.5 IMPROVEMENTS TO THE GRID VIEW
Many improvements have been made to the Database Editor, giving it a new look and fast editing
functions. Major improvements are:
-
Pipes and tapes now show the line types and colours in the grid.
Double-clicking on an item will bring up the item dialog.
A right-click menu allows adding, editing, and deleting items as well as assembly actions
and editing nozzles on outlets.
Double-clicking on the column names (i.e. Description, Warehouse Code, Supplier Code
or Usage) will sort the items alphabetically. To return to the default order, click on
another tab and then return to the group.
Adding, editing or deleting components are now actioned on the toolbar through the
buttons shown below or via the Component menu.
Some functions have changed slightly, in that they need to be put into editing mode before adding or
removing can be actioned. This applies to assemblies and nozzles.
Edit Assembly
When in edit mode, double clicking on an item in the assembly grid will allow editing of the number of
items.
This tool needs to be actioned before adding items to or removing items from an existing assembly.
To edit an assembly:
1. Select the assembly in the component group by clicking on the name.
2. Select Component|Edit Assembly.
3. Now select Component|Add to Assembly or Component|Remove from Assembly.
Add to Assembly
For adding items to an existing assembly:
1.
2.
3.
4.
Select Component|Edit Assembly.
Select Component|Add to Assembly.
Add components as required to the assembly.
Select Component|Finish Assembly.
Remove From Assembly
Used to remove the selected item from an existing assembly.
1.
2.
3.
4.
Select Component|Edit Assembly.
Click on the item to be removed from the assembly.
Select Component|Remove from Assembly.
Select Component|Finish Assembly.
Finish Assembly
Select Component|Finish Assembly to finish creating, adding to or removing items from an assembly.
10 · Release Notes Pro V11
Release Notes IRRICAD Pro Version 11
Edit Nozzles
This tool is to be actioned before adding nozzles to or removing nozzles from an existing outlet.
To edit an outlet:
1.
2.
3.
4.
Select the outlet in the outlet component group by clicking on the name.
Select Component|Edit Nozzles.
Now select Component|Add Nozzles or Component|Remove Nozzles.
To finish adding or removing nozzles, select Component|Edit Nozzles.
Add Nozzles
Used to add existing nozzles to an outlet. After invoking this tool, the view is taken to the nozzles
component group.
After adding a new outlet to the database, select the Component|Edit Nozzles and then
Component|Add Nozzles to select existing nozzles for the new outlet. This will open the nozzle tab.
1.
2.
3.
4.
Click on the required Outlet.
Select Component|Edit Nozzles.
Now select Component|Add Nozzles and select the required nozzles.
To finish adding nozzles, select Component|Edit Nozzles.
Remove Nozzles
Used to remove selected nozzles from an existing outlet. Highlight the required nozzle in the Nozzles
area at the bottom of the Outlets group dialog.
1.
2.
3.
4.
Click on the required Outlet and then the required nozzle to be deleted.
Select Component|Edit Nozzles.
Now select Component|Remove Nozzles.
To finish removing nozzles, select Component|Edit Nozzles.
1.1.8.6 QUERIES
The Query function allows low level access to Irricad databases via Microsoft® Jet SQL. Using this
facility could cause corruption of databases and therefore creating new queries shouldn’t be
attempted without a reasonable knowledge of both SQL and the structure of Irricad databases.
IRRICAD Pro Version 11 does come equipped with pre-set queries, which can be used to view or
update various database tables. Examples include:- showing the Pipe Table (this also allows you to
add or edit pipe codes); and an example of increasing pipe prices for a particular supplier.
Release Notes IRRICAD Pro Version 11
Release Notes Pro V11 · 11
The Query tab is only visible if “Show Query tab” is checked in Tools|Options.
The tools are available from the Query menu or short cut icons on the toolbar:
Execute Query
This option executes the current query (the SQL code for this is shown in bottom pane of the query
tab). Results of the query are shown in the main grid pane of the Query tab.
An option is available (Tools|Options) that will execute SELECT queries automatically when they are
selected.
To execute a query:
1. Choose the required query from the dropdown list on the tab.
2. Select Execute Query from the menu or toolbar.
Save Query
This saves the current query with the title as specified in the “Query name” combo box. Note that all
queries are saved in a text file, Queries.irq, located in the main Irricad Pro folder.
If a query with that name already exists, the user will be prompted to over-write it.
Delete Query
This option removes the current query from the query configuration file.
To delete a query:
1. Select the query to be deleted.
Reload Query
Select this option to reload all queries and redisplay the current query. This is useful if the user wishes
to “undo” the modification to a query, or if the query file has been updated externally.
1.1.8.7 WINDOW OPTIONS
These options control how the open databases can be displayed. These are detailed below.
Cascade
An option for displaying multiple databases in a cascading fashion i.e. each next window displayed
below the previous title bar.
Tile
An option for displaying two database one below the other on the screen.
Arrange Icons
In the event that many windows are open but minimised, Arrange Icons will arrange the minimized
window icons in the left-hand corner.
Open Databases List
Lists all databases that are open and indicates which one currently has the input focus. Found in
Window|Open Database List.
12 · Release Notes Pro V11
Release Notes IRRICAD Pro Version 11
1.1.8.8 TOOLS MENU
This menu includes the Clean Fields and Delete Orphan Nozzles that were originally in the Utilities
menu.
Setup Options have moved from the Help menu and have been renamed Options. New options have
been added to this dialog and are detailed below.
Units are now accessed from this menu.
Units
These settings control the units used for display and entry for each type of quantity.
To set units:
1. Select Settings|Units.
2. Edit each measurement as required.
3. Click [OK].
Note: The units set here will also change the default units in IRRICAD.
Options
Tools|Options contains the original Setup Options which were in the Help menu previously. Additions
are:
Maximize application on start-up
When checked, the database editor will open full screen.
Maximize database window on open
When checked databases will open full screen within the main pane of the Editor.
Open database on start-up
When checked, select the default database or last opened database to open on start-up.
Show Query tab
When checked, the Query tab will be visible after the Nozzles component tab.
Execute SELECT queries automatically
When checked, the query will run automatically when selected.
Customize
Toolbars can be customized and their viewing controlled through the View|Toolbars menu. A shortcut
is also available by right-clicking on any toolbar. The operation of this facility is described below.
Toolbars Tab
The display of individual Toolbars may be toggled using the check boxes provided. At any time when
the Toolbar “Customize” dialog is open buttons may be ‘dragged’ from one toolbar to another,
dragging a button onto the main view area or any other area that is not a Toolbar will remove a button.
New Button:
Reset Button:
Delete Button:
Show ToolTips:
Cool Look:
IRRICAD contains a set of default Toolbars (Design, Dimension, Drawing,
Electric, File, Hydraulic, Modify, Select, Snap, Tool, and Zoom). It is possible
to add new blank Toolbar by clicking the [New] button.
When one of the default IRRICAD toolbars is highlighted the reset button is
available. Clicking this will repopulate the current Toolbar with its default
buttons. If any buttons have been previously moved to other Toolbars then
copies of these buttons will be retained in those Toolbars.
User defined Toolbars (created with [New]) can be removed by selected the
desired Toolbar and clicking the [Delete] button which will be available. Note
that it is not possible to remove the default IRRICAD Toolbars although they
can be depopulated or hidden.
Controls whether tooltips are displayed when the mouse cursor is paused
above a Toolbar button.
This check box changes the appearance of the Toolbars to a ‘flat’ style.
Release Notes IRRICAD Pro Version 11
Release Notes Pro V11 · 13
Large Buttons:
This button will increase the size of the buttons on the screen.
Commands Tab
This tab contains the commands that can be represented by a button; they are grouped in a way that
matches the default Toolbars. Clicking on a category shows the buttons that are available; these
buttons can then be dragged onto any existing Toolbar (default or user defined). Note that the same
command/button can exist in more than one Toolbar.
Winicad.ini
The current Toolbar configuration for IRRICAD is stored in an initialization file called Winicad.ini in the
main Windows folder (normally C:\WINDOWS or C:\WINNT).
Supplementary Character set
This accesses the same setting as in IRRICAD and needs to be set to enable Left to Right languages
or East Asian languages to display correctly in the “grid” views. For more information see the section
entitled Language Compatibility.
1.1.8.9 CHANGES TO THE HELP MENU
The Help menu no longer contains the Setup Options. These can now be found in Tools|Options.
1.1.9 Language Compatibility
Pro Version 11 has added support for the supplementary character set which enables IRRICAD to
display fonts from other language sets.
This, in conjunction with the Windows "Language for Non-Unicode Programs" setting (found in Control
Panel | Regional and Language Options | Advanced tab), enables non-western character sets to be
displayed correctly.
1. Ensure the Control Panel | Regional and Language Options | Advanced tab has the required
“Language for non-unicode programs” selected.
2. In Settings|Miscellaneous select the matching language from the “Supplementary character
set” dropdown. Note this setting is not design specific and will be retained between designs.
In some cases you may not need to set the above settings as in the case of having a Windows
Operating System in your language.
Note: As Visual Cadd only has western fonts, use Truetype fonts in IRRICAD.
1.1.9.1 EXPORTING TO DXF AND DWG FILES
In addition this setting also controls the "Codepage" used when exporting DWG and DXF files
(R2004/2006 and older formats). It is necessary to do this so that the codepage in the exported DXF
and DWG files is set which means your ‘foreign’ characters will be displayed correctly.
14 · Release Notes Pro V11
Release Notes IRRICAD Pro Version 11
To export with a non-western character set to DXF or DWG files:
1. Set the Supplementary character set in Settings|Miscellaneous.
2. Use a Truetype font that supports the character set you want (e.g. Arial or one of the
specialized fonts e.g. “David”).
3. Go to Settings|Import/Export Settings.
4. Select the “Export to AutoCAD version” as R2004/2006 or older. The newer formats of
Autocad don’t support the “codepage” property that this method relies on.
5. If you know that the target machine will NOT have an Autocad font (.SHX) of the same name
loaded then check the “Ignore font map…” checkbox.
6. If the font used does have a corresponding Autocad font (or you are not sure – note that an
Arial .SHX file does seem to be installed with Autocad by default) then make sure the
checkbox in 5. above is UNCHECKED. Add a mapping under the “DWG Font Export” tab to
map the TT font explicitly to the appropriate .TTF file as below.
7. To do this enter the name of the TTF font file in the dialog box that corresponds to the TT font
chosen. Click [Add], now select the font in the “Visual Cadd” column then the .TTF file in the
“AutoCAD” column and then click the [->] button. Your set of mappings can be saved or
loaded via the [Save Map] or [Load Map] buttons. Note the correct .ttf file name can be found
by looking in Control Panel | Fonts. Some things to note are:
- There is a limit of 12 characters for the Visual CADD part of the map: for example if you
try to map “Traditional Arabic” to itself (Trado.ttf) this will fail because ”Traditional
àTRADO.TTF” will appear in the Map (as Traditional_ is 12 characters) and the resulting
text style will be exported as TXT.
Release Notes IRRICAD Pro Version 11
Release Notes Pro V11 · 15
8. Exporting to both DWG and DXF works with these methods but our experience is that DXF
gives a better result in terms of the position and size of text.
16 · Release Notes Pro V11
Release Notes IRRICAD Pro Version 11
1.2 Previous Additions and Bug Fixes
All additions and bug fixes for each version can be found in the Readme.txt file, commonly found in
the C:\Program Files\AEI Software\IRRICAD Pro 11\Help folder.
1.2.1 In Pro Version 10.5
1.2.1.1 AUTOCAD COMPATIBILITY
Compatibility between AutoCAD and IRRICAD has been significantly improved. IRRICAD now
supports importation of DXF and DWG up to Autocad vR2007/2009. The settings for AutoCAD import
and export can be found through Settings|Import/Export Settings. IRRICAD can now import AutoCAD
files that contain layouts (note that only the model space is imported, but the application will not hang
if a paper space is encountered, previously files had to have the layouts removed before importing).
1.2.1.2 DWG SETTINGS TAB
Import Settings
Base Import Unit:
Selects the unit of measurement in which the AutoCAD drawing
was created. This is the same setting as the “Imported” unit in
Settings|Units.
Xref Conversion:
Set this as “Keep as DWG”.
Symbol Conversion:
Scale Placement:
Scale Symbol:
Ignore Font Map:
Release Notes IRRICAD Pro Version 11
Specifies that during AutoCAD import/export, when converting to
a unit other than inches, the current placement scale is used and
the symbol definition remains unchanged. This is the default
setting.
Specifies that during AutoCAD import/export, when converting to
a unit other than inches, the symbol definition is scaled and the
placement is left at 1:1.
When checked, current font mapping in DWG Font tabs is
overridden. All fonts are mapped to the existing fonts of the same
name. If the font of the same name does not exist, IRRICAD will
map the font to the default font.
Release Notes Pro V11 · 17
Default Import Font:
During import, specifies the font name to be used when no
mapping exists for a font.
Export Settings
Base Export Unit:
Selects the unit of measurement in which the AutoCAD drawing
was created. This is the same setting as the “Imported” unit in
Settings|Units.
Export to Autocad Version:
Selects whether an exported DWG is saved in R12, R13, R14 or
R2000/R2002, R2004/2006 or R2007/2009.
Ignore Font Map:
When checked, current font mapping in DWG Font tabs is
overridden. All fonts are mapped to the existing fonts of the same
name. If the font of the same name does not exist, IRRICAD will
map the font to the default font.
Default Export Font:
During export, specifies the font name to be used when no
mapping exists for a font.
1.2.1.3 DWG FONT IMPORT TAB
This tab allows the user to control how fonts in translated AutoCAD drawings are imported into
IRRICAD. The Import AutoCAD Font Mapping options display list boxes of AutoCAD font names,
IRRICAD font names, and a list box showing which AutoCAD fonts have been mapped to which
IRRICAD fonts.
To map AutoCAD fonts to IRRICAD fonts
1. Click the name of an AutoCAD font the user wishes to translate to a specific IRRICAD font.
2. Click the name of the IRRICAD font the user wishes to substitute for the specified AutoCAD
font.
3. Click the right arrow button.
The pair of font names will appear in the map table list box.
To delete a mapped pair of fonts from the map list
1. Click and highlight the pair of mapped font names the user wishes to delete from the map list.
2. Click the left arrow button.
The font pair will be deleted from the map list.
18 · Release Notes Pro V11
Release Notes IRRICAD Pro Version 11
1.2.1.4 DWG FONT EXPORT TAB
This tab allows the user to control how fonts will be translated when IRRICAD drawings are exported
into AutoCAD .dwg format. The “Export AutoCAD Font Mapping” options display list boxes of
IRRICAD/Visual CADD font names, AutoCAD font names, and a list box showing which IRRICAD
fonts have been mapped to which AutoCAD fonts.
To map IRRICAD fonts to AutoCAD fonts
1. Click the name of an IRRICAD font the user wishes to translate to a specific AutoCAD font.
2. Click the name of the AutoCAD font the user wishes to substitute for the specified IRRICAD
font.
3. Click the right arrow button.
The pair of font names will appear in the map table list box.
To delete a mapped pair of fonts from the map list
1. Click and highlight the pair of mapped font names the user wishes to delete from the map list.
2. Click the left arrow button.
The font pair will be deleted from the map list.
Tips: IRRICAD will not map one source font to more than one destination font.
The user can save font maps and then load them for later conversions.
The user can add new fonts and delete fonts from the AutoCAD font list in both Import and
Export to be used in mapping.
1.2.1.5 AUTOCAD COLOR IMPORT
IRRICAD/Visual CADD and AutoCAD have very different color indexes. Because AutoCAD maps
colors to pen width for printed output, it is often important to retain these colors on drawings that the
user imports and then must export back to consultants or others the user shares drawing files with.
Color mapping provides the ability to match to other color indexes.
Default maps are provided for both AutoCAD Windows’s colors and a default of 1-to-1 (DWG color 0
to VCD color 0, DWG color 1 to VCD color 1, etc.). It is however possible to create maps, for
AutoCAD DOS or any other combination of colors. Line widths can also be mapped to colors or color
mapping ignored on import and all colors forced to a designated color.
To Create a New Color Import Map:
1. Select the “Use Custom Map” radio button.
2. Press the [New Map] button.
Release Notes IRRICAD Pro Version 11
Release Notes Pro V11 · 19
3. Enter a name for the new color map and press [OK].
The new name is shown as current in the dialog dropdown list.
4. In the edit boxes, make changes to IRRICAD colors to correspond with each DWG color. If
the user wants to include line width mapping, uncheck the “Ignore” box and type a line width
to correspond with each DWG color.
5. Press [OK] to save the new map.
Alternatively, check the “All Colors to:” checkbox and type a color number in the right hand edit box to
force all DWG colors to the one IRRICAD color.
1.2.1.6 AUTOCAD COLOR EXPORT
IRRICAD/Visual CADD and AutoCAD have very different color indexes. Because AutoCAD maps
colors to pen width for printed output, it is often important to retain these colors on drawings that the
user imports and then must export back to consultants or others the user shares drawing files with.
Color mapping provides the ability to match to other color indexes.
Default maps are provided for both AutoCAD Windows colors and a default of 1-to-1 (DWG color 0 to
VCD color 0, DWG color 1 to VCD color 1, etc.). It is however possible to create maps, for AutoCAD
DOS or any other combination of colors. Line widths can also be mapped to colors, color mapping
ignored on import and all colors forced to a designated color.
To Create New Color Export Map
1.
2.
3.
4.
5.
6.
7.
Select the “Use Custom Map” radio button.
Press the [New] button.
Enter a name for the new color map and press [OK].
The new name is shown as current in the dialog dropdown list.
Decide whether to convert color to color or IRRICAD line width to DWG color.
In the edit boxes, make changes to IRRICAD line width and/or DWG colors.
Press [OK] to save the new map.
20 · Release Notes Pro V11
Release Notes IRRICAD Pro Version 11
1.2.1.7 IMAGE IMPROVEMENTS
Image handling in IRRICAD has been extensively updated, and a number of new image functions are
available. These are outlined below:
· The image import dialog now includes a preview window (select “Show Preview”), making image
selection easier:
· “Save Current Path” can now be set when importing
· A [Settings] button allows individual settings to be made
To import an Image file into IRRICAD select Import Image from the File menu. Choose the format
required from the “Files of Type” dropdown box, allowable formats are:·
·
·
·
·
·
BMP
JPEG
TIFF
Windows Metafile
Paintbrush
PNG
For an explanation of the merits and features of the various image formats see the manual Section
5.2.10 - Export Image_D2HLink_2589. Now select the file from the file explorer window (or type the
name into the “File Name” dialog box). For ease of finding images, “Recent Folders” can be selected
for browsing.
Image Settings
Release Notes IRRICAD Pro Version 11
Release Notes Pro V11 · 21
Each image has the following individual settings:Embed Image:
Embeds (saves) the image directly into the design
Image Path:
Relative Path:
A link to the image file is inserted into the design rather than
embedding the entire image. When “Use relative path” is
checked, the link (i.e., folder path) will be relative to the location
of the IRRICAD design. This feature is very useful if the design is
shifted to another computer, drive or folder. As long as the image
file is located in the same place relatively then the link will be
intact and the image displayed. Note that all images are inserted
using a “Relative Path” if possible. Relative paths cannot be used
if the design has not been saved or if the image is on a different
drive to the design. In these cases, the absolute path is used
instead.
Lock Aspect Ratio:
If this item is checked, the image rectangle will be constrained to
the aspect ratio (height/width) of the original image during
placement. If unchecked then the image can drawn so that it is
distorted compared to the original. Once the Image file has been
selected (by clicking the [Open] button) the image can be placed
on the screen using the mouse or keyboard entry. The lower left
corner is located first (with a left mouse click or keyboard
coordinates), a rectangle is then drawn out (when using the
mouse the left button should NOT be depressed during this
stage) and then the upper right corner is placed. Note that in
previous versions the upper left, and then lower right, corners of
the image were specified.
Rotation:
A rotation angle cannot be entered before placement, but the
orientation (rotation) of the image may be set after it has been
inserted into the design.
Flip Horizontal:
When checked, the image is mirrored horizontally.
Flip Vertical:
When checked, the image is mirrored.
Show Image as Grayscale:
Can be shown as grayscale only (black and white).
Display a border around the image:
A border around the image can be turned on or off. Once
inserted, the color and line style of this border can be set by
editing the image.
Display Image:
Each image can now be individually turned on or off.
Tips: If an image is embedded this will increase the design file size dramatically. Though this may
be a preferred option if sending designs from branch to branch, it may not be the best option.
Borders can now be turned on or off by the “Show Border” check box. The user may want to
turn off the borders when tessellating or overlapping multiple images.
Images can be individually turned off for display by unchecking the “Show Image” option. If
the image is turned off in “Show Image” the border automatically displays.
Images can now be added to symbols, including plot layouts (e.g., adding logos).
After an image has been imported, the settings can be edited by double-clicking on the image when in
Select Object mode, or by using Change. Note the previous settings for Images in the Settings menu
no longer exists.
22 · Release Notes Pro V11
Release Notes IRRICAD Pro Version 11
Old style images are automatically converted to new style images when a design is opened in v10.5.
New style images are also automatically converted back to old style images when exporting as a
previous version. Note that this may result in some loss of information (e.g., rotation), which is not
supported by the old image format.
To import an image:
1.
2.
3.
4.
5.
6.
Select File|Import Image.
Type in the name of the image file to import or search for the file.
Click [Open] or double-click on the highlighted file.
Left click to place the bottom left corner.
Draw the rectangle to the required size and click again to place the top right corner.
If required, trace over features in the image using any drawing tools.
Tips: When prompted for the bottom left corner, the user may type in coordinates e.g. 0,400 (in
world units).
When prompted for the top right corner, the user may type in coordinates e.g. 300,0, or the
user may type in a distance (diagonal distance from top left corner) in world units.
The user may simply place the bottom left and top right at any scale and resize using
Tools|Scale Image.
If the image is not placed using the ‘bottom-left, top right’ order, then it can be flipped
horizontally and/or vertically as appropriate.
1.2.1.8 SCALE IMAGE TOOL
Changes have been made to the Adjust Image tool in the Tools menu – it has been replaced by
Scale Image tool. This tool (Tools|Scale Image) allows an image to be scaled using a feature in
image of a known size. Select the tool, then the image you want to scale (or vice versa). You
then be prompted to define a feature in the image with a line. Following this a dialog will show
length of the marked feature.
The actual length of the feature can then be typed in.
Release Notes IRRICAD Pro Version 11
Release Notes Pro V11 · 23
the
the
will
the
The image will then be resized so that the marked feature has the newly specified length. Note that
the image is resized around its center-point and may need to be moved after scaling.
Scale
Marked Length:
The current length of the defined feature.
Scaled Length:
Scale:
The actual known length of the defined feature – enter length.
IRRICAD calculates the change in scale.
1.2.1.9 LAYER MANAGER
The new, dockable, layer manager can be access through the main View menu (View|Layer Bar),
through the Right-click|Layers menu or can be toggled with the shortcut key combination Ctrl+L. The
layer manager has three panes:
· Layers – this tab displays information about the layers in the current design. It allows the user to
see whether a layer is visible, whether it will print and whether it contains data.
Layers may be added and/or removed and all items on a given layer may be
selected. Any selection of items can be easily moved to any layer.
· Groups – layer groups define sets of visible layers that may be associated under a single name
and provide a quick way to access these. A group may relate to different aspects
of the design – an ‘Electrical’ layer group, for instance, could show topography
and electrical items while hiding hydraulic items. A default set of layer groups can
be defined and saved to the registry. These defaults will be included in any new
designs and can be ‘loaded’ into existing designs.
· Views – named views are shortcuts to different views of a design. They can be used to move
quickly between different areas of a design, and might typically be defined for
each stage of a multi-stage development, or for each hole of a golf course, for
example. Views can be linked with layer groups (views and groups with identical
names are automatically linked). When a view with a linked group is activated, that
layer group is also activated.
Layers Tab
· IRRICAD layers are displayed in blue, extra layers in black.
·
- this column indicates the visibility of the layers.
·
- this column indicates whether a layer will print.
· These check boxes can be toggled individually, by making
a multiple selection with the mouse or by selecting the full
column by clicking the icon. The selection can also be
toggled by pressing the space bar.
·
- indicates an empty layer.
·
- indicates that the layer has data.
· The lower panel shows the color, line type and line width
associated with the selected layer.
· The bottom edit box and buttons ( and ) can be used
to add or remove layers. Layers may also be deleted by
selecting them and pressing the <Delete> or <Backspace>
key.
· Layers can be renamed in situ by clicking in the name
column and typing the new name. Use the <Esc> key to
cancel an edit.
· A context menu allows layers to be deleted, all entities on a
layer to be selected and a selection to be moved to a layer.
24 · Release Notes Pro V11
Release Notes IRRICAD Pro Version 11
Groups Tab
· The top panel shows the name of the group, the bottom
panel shows the list of visible layers that belong to the
selected group.
· Groups can be created and deleted using the edit box and
buttons under the top panel ( … ).
· Layers can be added and removed from groups using the
combo box and buttons under the bottom panel ( … ).
·
- indicates an unlinked group.
·
- indicates a group with a linked view.
·
- indicates an empty layer.
·
- indicates that the layer has data.
·
- this button will save the currently defined groups as
the default set. These groups will also be automatically
added to new designs.
·
- this button will load the default set of groups.
· Layer groups can be activated by double-clicking the group
name in the top panel, or selecting it and hitting <Enter>.
· Groups can also be deleted by selecting and pressing
delete or backspace in the top panel.
· Layers can be removed from groups by selecting and
pressing delete or backspace in the bottom panel.
· Functions are also accessible through context menus:
· The Goto View command switches the focus to the linked
view on the Views tab.
To create a Layer Group:
Turn on or off the required layers in the main tab.
Go to the Group tab and type in a name in the blank middle field (or overwrite the name in this
field) and click the [Add Group] icon.
To activate a Layer Group:
Go to the Groups tab.
Double-click on the Group Name or highlight, then right-click and select Activate Group.
To make changes to a Layer Group:
In the Visible Layers In Group section highlight the layer that you wish to remove.
Right-click and select Remove from Group.
Release Notes IRRICAD Pro Version 11
Release Notes Pro V11 · 25
Views Tab
· Views can be created and deleted using the edit box and
buttons under the top panel ( … ).
·
- indicates an unlinked view.
·
- indicates a view with a linked group.
· Checking the “Auto sync layer groups” option will
automatically create a group to go with new named views.
· Views can be activated by double-clicking the name in the
panel, or selecting it and hitting <Enter>. If a view has a
linked layer group, the group will also be activated.
· Views can also be deleted by selecting and pressing delete
or backspace in the top panel.
· Functions are also accessible through context menus:
· The Goto Group command switches the focus to the linked
group on the Groups tab.
To create a Layer View:
Go to a required view on the main screen (e.g. zoom in).
Go to the Views tab and type in a name in the blank bottom field (or overwrite the name in this
field) and click the [Add Views] icon.
To activate a Layer View:
Go to the Views tab.
Double-click on the View Name or highlight, then right-click and select Activate View.
1.2.1.10 DATABASE ITEM DISPLAY
The currently selected item is now shown in bold
font in the component list.
26 · Release Notes Pro V11
Release Notes IRRICAD Pro Version 11
If a database component is not found in the
external database, IRRICAD will now display the
correct item description in combo boxes instead
of defaulting to the first item in the list. The
description will show in a red font to indicate to
the user that it was not found in the database.
If a database component is found in the external
database, but it is switched off (usage code ‘N’),
IRRICAD will display the item description in a
green font.
Assemblies are now marked in the database lists
with a much more visible icon.
1.2.1.11 CONNECT OUTLETS TOOL
This new tool (Tools|Connect Outlets) is analogous to the
existing Connect Valves tool and automatically connects outlets
to the nearest piece of mainline or zone pipe, depending on the
outlet type.
Release Notes IRRICAD Pro Version 11
Release Notes Pro V11 · 27
Connection Properties
Match nearest pipe:
Maximum length of connecting pipe:
If this option is checked then the properties of the pipe selected
to join outlets to the pipe will be taken from the pipe that is
closest to each of the outlets.
This field controls whether an outlet will be automatically
connected to the pipe. If the distance from the closest pipe
exceeds this value then no connecting pipe will be placed.
If “Match nearest pipe” is not checked then the remaining pipe property fields are available. In this
case outlets will be connected to the closest pipe with a pipe that has the properties specified in the
fields.
Note: If the outlet is very close to the nearest pipe, then the outlet will be connected directly to the
pipe.
1.2.1.12 HATCH PREVIEW
The hatch dialog now displays a preview of the selected hatch using the current screen background
colour and the appropriate hatch line colour, style and thickness. The preview scale is based on the
current zoom state and is automatically calculated from the hatch pattern. This means that what is
shown in the preview is directly reflected on screen when the hatch is drawn, provided that the user
does not change the zoom state.
Drawing Properties
Layer:
Color:
Line Type:
Line Width:
The layer the symbol will be stored in. The <DEFAULT> layer is
DRAWING.
The colour of the hatch.
Line type of the hatch.
Width of all lines in the hatch.
Hatch Properties
Name:
Scale:
Auto Scale:
Angle:
Show Boundary:
28 · Release Notes Pro V11
This is the name of the style of hatch to use. Select from the
dropdown list to change the current style.
Sets the size of the hatch pattern. If the hatch tool seems to be
unsuccessful, increase the scale.
Automatically calculated from the hatch pattern and based on the
current zoom state.
Type in an angle from 0o to 360o to rotate the hatch pattern as
required.
Displays hatch boundaries as a line on the screen.
Release Notes IRRICAD Pro Version 11
1.2.1.13 SYMBOL PREVIEW
The symbol dialog now also has a preview pane, and symbols may be inserted at an angle.
Drawing Properties
Layer:
Use Placement Color:
The layer the symbol will be stored in. The <DEFAULT> layer is
DRAWING_SYMBOLS.
Check to draw the symbol in the current drawing color. Leave
unchecked to draw the symbol in its definition color i.e., the color
used when the symbol was created.
Symbol Properties
Name:
Width:
Height:
Orientation:
Dynamically Size:
Maintain Shape:
The name of the currently selected symbol. Symbols available in
the dropdown list have been previously loaded (see Load
Symbol, Section 5.5.12.2).
The width of the symbol in the defined units.
The height of the symbol in the defined units.
The orientation (rotation) of the symbol.
Check to drag the symbol to any size using a rubberband
rectangle. Uncheck to enter a size.
Check to maintain a ratio of the width and height at which the
symbol was created. Uncheck to stretch or squash the symbol in
one direction.
Tips: The user can replace all instances of one symbol in the drawing with another by lassoing the
items and choosing Tools|Change Type.
The user can create a symbol in the drawing by highlighting (selecting) the existing entities to
be included in the symbol and then selecting Tools|Create Symbol. This also saves the
named symbol to a file for use in other designs.
The user can divide a symbol into its individual component entities by first selecting it, and
then selecting Tools|Explode.
1.2.1.14 GRADELINE DIALOG EXPORT
It is now possible to export the graphing information from the hydraulic gradeline dialog direct to Excel
files, tab or comma delimited text files. Click the [Export] button on the dialog and chose a location to
save the file.
Note: To get gauge pressure results of just the pipes / outlets turn off elevations by clicking the
[Elevation] button before exporting.
Release Notes IRRICAD Pro Version 11
Release Notes Pro V11 · 29
1.2.1.15 CLEAR MANAGEMENT
A new option in the Design menu (Design|Clear Management) deletes all the current zone and water
supply management information.
1.2.1.16 ROTATE TOOL IMPROVEMENTS
The rotate tool now ghosts the selection so that it is easier to control. Once the center of rotation has
been selected the angle may be typed in directly (hit <Enter> to accept).
Use the Rotate tool to rotate a selection around an axis.
To rotate a selection:
1. Select Tools|Rotate.
2. Select the object to be rotated.
3. Place a point to serve as the center of rotation.
The selection will rotate as the cursor moves around the axis point.
4. Place a point when the object is rotated to the correct orientation.
5. Repeat steps 2 to 4 as required.
If a single point hydraulic item (e.g., an outlet) is selected then step 3 is omitted; the reference point is
automatically taken to be the center of the symbol.
Note: Some objects like continuous line are treated as a single object and a segment cannot be
rotated on its own unless the object is first exploded.
To rotate a group of objects reverse Steps 1 and 2 above i.e., select the objects first then the
Rotate tool.
30 · Release Notes Pro V11
Release Notes IRRICAD Pro Version 11
1.2.1.17 FILE STAMP
The file stamping functionality has been moved on the Print dialog and now all settings, including “Add
Stamp” are to be found by clicking on the [File Stamp] button.
To include a file stamp on your print job:
Select File|Print.
Select the [File Stamp] button.
Check the “Add Stamp” check box.
Edit the criteria for the required File Stamp.
Click [OK] and print the job.
File/Date Stamp
Add Stamp:
Font:
Font Height:
Date Format:
Location:
When checked, the requested File Stamp including the file name
and path will be printed in the selected location.
Select the required font of the File Stamp.
Select the required font height of the File Stamp.
Select the required date format option.
Select the required location option.
1.2.1.18 WATERMARKING
The File Stamping functionality (accessed through the Print dialog) has been extended to include a
text watermark for the printed output.
To include a watermark on your print job:
Select File|Print.
Select the [File Stamp] button.
Check the “Use Watermark” check box.
Enter required “Watermark Text”.
Move the slide for the required “Text Density”.
Click [OK] and print the job.
The watermark text will be written across the print job on a diagonal.
Release Notes IRRICAD Pro Version 11
Release Notes Pro V11 · 31
Watermark
Use Watermark:
Watermark Text:
Text Density:
Check to print a watermark across the print job.
Type in the required text – this will be printed in Courier font.
Move the slide to control how dark the watermark is printed.
1.2.2 In Pro Version 10.0
1.2.2.1 HATCH & FILL EDITING
It is now possible to edit a fill as a Geometric Object. This allows the colour and the layer to be
changed.
Hatch editing has also been enabled, allowing all properties of a hatch to be changed.
32 · Release Notes Pro V11
Release Notes IRRICAD Pro Version 11
1.2.2.2 TEXT DIALOG IMPROVEMENTS
The text dialog now displays using the font and text
properties specified (for non-vector fonts). This
enables the user to better judge how the text will
actually look when rendered on the design. This is
particularly useful for labels and when using monospaced fonts.
1.2.2.3 KEYWORD COMBO
A keyword dropdown box has also been added to the Label text dialog. This displays and briefly
describes the label keywords, and allows them to be easily inserted.
Release Notes IRRICAD Pro Version 11
Release Notes Pro V11 · 33
1.2.2.4 LABELS
The current label text settings are shown in a button tooltip on the Label Settings dialog.
Update Labels no longer resets the position of labels that have been manually moved. The new
location is now retained.
New Keywords
More comprehensive hydraulic labeling has been enabled with the introduction of several new label
keywords:
#DEPTH#
#DEPTHUNIT#
#HY_ELVCHG#
#HY_ELVPCHG#
#HY_FLOW#
#HY_HL#
#HY_MAX_F#
#HY_MAX_HL#
#HY_MAX_P#
#HY_MAX_PABS#
#HY_MAX_V#
#HY_MIN_F#
#HY_MIN_HL#
#HY_MIN_P#
#HY_MIN_PABS#:
#HY_MIN_V#
#HY_PRESS#
#HY_PABS#:
#HYN_MAX_F#
#HYN_MAX_HL#
#HYN_MAX_P#
#HYN_MAX_V#
#HYN_MIN_F#
#HYN_MIN_HL#
#HYN_MIN_P#
#HYN_MIN_V#
#SCOPE#
#VELUNIT#
Depth of object
Unit of Depth as per Settings|Units
Elevation change in elevation units
Elevation change in pressure units
Flow
Head loss
Maximum flow
Maximum head loss
Maximum pressure
Maximum absolute pressure
Maximum velocity
Minimum flow
Minimum head loss
Minimum pressure
Minimum absolute pressure
Minimum velocity
Pressure
Absolute Pressure
System flow with maximum flow
System flow with maximum head loss
System flow with maximum pressure
System flow with maximum velocity
System flow with minimum flow
System flow with minimum head loss
System flow with minimum pressure
System flow with minimum velocity
Object Scope – Design + BOM, Design Only or BOM Only
Velocity unit
Added new Label keywords for Irrigation Blocks: (See Appendix J, Section 6.10 1 for the list of
keywords and where they can be used).
#FLOWUNIT#
#FLOWPERAREA#
#GRPSPACE#
#GRPLATS#
#H2OQUANT#
#MAXINTENS#
#NOMFLOW#
#NOMPRESS#
#NUMEMIT#
#NUMROW#
#PRESSUNIT#
#ROWSPACE#
#TOTLATLEN#
#VALVEPRESS#
Current large (sys flow/zone) flow unit
Flow per unit area
Group Spacing
Number laterals per group
Water requirements either volume or depth
Maximum allowable intensity
Block flow based on nominal SDR from database
Nominal Inlet pressure of Tape laterals
Number of emitters in a block entity
Number rows or laterals
Current pressure unit
Row spacing (= lateral spacing if no groups)
Total 3D length of laterals (calculated with slope method)
The calculated downstream pressure for the control valve attached to the
block
34 · Release Notes Pro V11
Release Notes IRRICAD Pro Version 11
1.2.2.5 USER ATTRIBUTES AND USER KEYWORD
A ‘User Attributes’ text field has been added to control valves, water supplies, block entities and
miscellaneous hydraulic items. It allows the user to attach any textual information to these items, that
can be subsequently displayed in labels and reports. (See the User Manual, User Attributes and User
Keyword, Section 2.7.11.11 for instructions on using keywords to achieve the desired result).
Using the correct keywords will produce the desired results:
1.2.2.6 GO TO COORDINATES
The automatic pasting of coordinates into Go To Coordinates and into the Settings|Grid / Origin
dialogs has been enabled. This means that a coordinate string copied from the Object Info screen
which includes both X and Y coordinates, units and descriptors (e.g. x = 25.28 m, y = 8.46 m) can be
inserted in one action into the appropriate fields in these dialogs..
1.2.2.7 HYDRAULIC ITEM CREATION
All hydraulic and electrical items can now be created from relevant drawing items. By simply
highlighting a drawing item you can turn it into an Area, Outlet, Pipe, Control Valve, Pump, Irrigation
Block, Light, Controller, Wire, Misc. Electrical, Misc. Hydraulic, Sprayline or Tape. The behavior of
creating hydraulic items from drawing items is listed in the User Manual, Converting Drawing Items
into Hydraulic Entities, Section 2.4.3.
Release Notes IRRICAD Pro Version 11
Release Notes Pro V11 · 35
1.2.2.8 NAMES
Holding the <Shift> key down when placing a zone valve, mainline outlet or mainline spraylines now
doesn't show the “Name” dialog but accepts the default name.
1.2.2.9 UNCONNECTED SPRAY BLOCK ENTITY
It is now possible to specify that a sprayline block entity be ‘unconnected’ – that is, to created a
sprayline block consisting of individual pipes and outlets.
1.2.2.10 DOCUMENT SUMMARY INFO
Design details are now copied to the design file properties summary information section, allowing
specific designs to be more readily identified in Windows Explorer.
36 · Release Notes Pro V11
Release Notes IRRICAD Pro Version 11
1.2.2.11 MERGE DESIGNS
IRRICAD designs may now be merged together using the Merge… option in the File menu. This
function will merge drawing and hydraulic objects, as well as fittings selection, Management and
Design information.
1.2.2.12 STATUS BAR – INFO PANEL
Added the z-coord to the Info panel. This displays the elevation, calculated from the DEM, at the
current mouse position. If the DEM has not been created then ‘No Elevation’ is displayed.
1.2.2.13 ZONE DESIGN CONFIGURATION
Improvements have been made to the sizing of the Zone Design Configuration dialog – it can now be
dragged to a larger size. In addition the space bar can now be used to toggle check boxes.
The minimum/maximum emitter pressures from the zone design configuration dialog are now copied
to the clipboard as two tab-separated numbers. This means that when values from the table are
pasted into Excel, separate columns will be created for each of these values.
1.2.2.14 DESIGN PARAMETERS
In Design Parameters the last visited tab is now remembered.
1.2.2.15 REPORT TEMPLATES
Added the ability to create report templates that save directly to a file, this is accomplished by adding
keywords to the Report Options in the report template editor. Possible keywords are:- #CSV# - Excel
comma separated values; #TSV# - Tab separated values; #TXT# - standard text file; #XML# - text file
where all leading and trailing blanks are removed also blank lines.
1.2.2.16 SAVING TO PREVIOUS VERSIONS OF IRRICAD
A more generic 'Save As' functionality has been Implemented. Designs can now be saved in the
format of all previous versions of IRRICAD (to Version 7). See File|Export – “Save as type”
Release Notes IRRICAD Pro Version 11
Release Notes Pro V11 · 37
1.2.2.17 NEW TOOLBARS
New toolbars with many new icons, including large icons and popup menus, have been added. In
addition, the currently enabled tool and snap is indicated on toolbars.
Any toolbar docking area can now be customized by right-clicking on any icon or toolbar. This is
simply a short cut to the View|Toolbars option and allows immediate customization.
1.2.2.18 ZONE PRESSURE LIMITS NOW EDITABLE
The format of the minimum/maximum zone pressure label can now be edited.
Reports|Report Settings and click on the [Text] button.
Go in to
1.2.2.19 SYMBOL COLORS
Multi-colored symbols may be selected for Valves etc. If a symbol is specified with the "Use symbol
colour(s)”, in the database editor, then the symbol will be displayed using the colors contained in the
symbol definition.
1.2.2.20 CHANGES TO IMPORTING CONTOURS
Drawing and elevation data from CSV and ESRI SHP files can now be directly imported into
IRRICAD.
Elevation data is entered via File|Import Contours while File|Import is used for normal drawing
information.
See the User Manual, Importing a DXF, VCD, DWG, GCD, SHP MIF or CSV File, Section 2.4.1.1 for
importing tips and instructions.
1.2.2.21 TRIM ELEVATIONS
A Trim Elevations tool has been added to the Tools menu.
1.2.2.22 NEW COPY TOOLS
Mirror and Offset copy tools have been added to the Tools|Copy menu. All Copy tools have been
enabled for use with hydraulic objects.
1.2.2.23 MULTIPLE WATER SUPPLY SYSTEMS
Designs with multiple but separate water supplies can now be fully analyzed (and LP Design used
where appropriate) directly. It is no longer necessary to ‘join’ the separate systems with notional
pipes. When the systems are completely separate, no pressure or flow information needs to be
entered. However if more than one water supply is feeding the same system, at least the pressures
need to be entered as before.
1.2.2.24 NEW TOOLS
Trim and Extend are now available as are Move to Front and Move to Back Z-Order tools.
1.2.2.25 BACK UP FOLDER SPECIFICATION
The location of the Backup folder can now be specified in Settings|Miscellaneous.
1.2.3 In Pro Version 9.5
1.2.3.1 DONGLE SERIAL NUMBER
The serial number of the Irricad dongle is now displayed in the program title.
38 · Release Notes Pro V11
Release Notes IRRICAD Pro Version 11
1.2.3.2 INSERT OLE CHANGES
Bitmap data on the clipboard can now to be inserted/pasted into Irricad. This enables copy and paste
of HGL charts.
1.2.3.3 BLOCK PIPE STUBS
The pipe stub functionality of irrigation block entities has been extended. The block now supports
three stub lengths, one for the submain and two for the valve:
1. The Submain Stub
2. The Valve Submain Stub
3. The Valve Stub
1.2.3.4 BLOCK VALVE POSITIONING
Control valve placement in block entities can now be entered as a percentage distance along the
submain.
Release Notes IRRICAD Pro Version 11
Release Notes Pro V11 · 39
1.2.3.5 FLUSHING MANIFOLDS
A new tab has been added to the block entity tools allowing flushing manifolds to be automatically
created.
1.2.3.6 LABEL ROUNDING & ROLL LENGTHS
It is now possible to round numeric values in labels to a ‘nearest value’. New keywords (#ROLLS#
and #ROLLS3D# cf. #LENGTH# and #LENGTH3D#) have also been added, such that pipe lengths
can be displayed as a number of ‘rolls’ (based on the roll length of the pipe type in the database – see
the Pipe Fitting Matching Table).
1.2.3.7 HYDRAULIC GRADELINE
After a design is completed it is now possible to view the hydraulic gradeline (HGL) of mainline pipes
as well as zone pipes and tapes. The tool can be accessed from the Reports menu.
Mainline Gradelines
The HGL tool cannot automatically determine which mainline ‘path’ to analyze. The user must
therefore select the mainline pipes to be included before invoking the tool.
40 · Release Notes Pro V11
Release Notes IRRICAD Pro Version 11
Gradeline Toolbar
Some new functions have been add to the HGL dialog and are accessible using the toolbar.
The y-axis on HGL graphs has been changed to elevation rather than pressure units (converts
pressures to equivalent hydrostatic elevation).
Toggling the elevation in the Hydraulic Gradeline dialog now adds or removes elevations from the
data sets, as opposed to just showing or hiding the elevation series.
1.2.3.8 STATUS BAR
Three new panels have been added to the status bar. All the panel options can be selected by rightclicking the panel to access a popup menu, or left clicking to cycle through the available options.
Info Panel
This panel displays a variety of information
about the currently selected objects. This
includes UID, connections, selected item
count, cumulative length of selected items,
elevation and depth, cumulative area and
cumulative nominal flow. The menu also
allows the user to select the items connected
to the current item.
Snap Panel
This panel shows the currently selected default snap mode (Connect,
Place or Grid) and, through the popup menu, allows quick access to
the Snap and Grid settings.
Selection Filter Panel
This panel shows the status of the selection filter - a red panel indicates
that the filter is active. The user can also access the filter settings through
the popup menu and flip the filter status using Ctrl+Shift+F
When active, a summary of the current filter settings is shown in the tooltip for this panel:
1.2.3.9 SELECT TOOL
The select tool now has the following features:
-
The tool defaults to selecting a single object at a time. Multiple selections can be made by
holding the Shift key. Permanent multi-select can be enabled from the Settings|Mouse
menu.
In the single select mode clicking nothing (empty space) will clear the current selection.
Window-select mode can be entered by holding down the left button and dragging the
mouse.
Release Notes IRRICAD Pro Version 11
Release Notes Pro V11 · 41
-
A block may be automatically selected from a block sub-item (e.g., a lateral) by holding
down the <Alt> key when selecting. The block outline (irrigation area) must be visible for
this to work.
Pressing the <Esc> key twice in quick succession will now clear the current selection and
return the user to the default Select tool.
1.2.3.10 SNAPS
Snaps are now enabled for the Move tool.
1.2.3.11 LAYERS MENU
A dynamic layers menu has been added to the
default right-click context menu. This provides a
quick way for the user to enable or disable layers.
It also includes two shortcut functions 'Hide
Layer' (Ctrl+Shift+H) hides the layer of the
currently selected item, while 'Show Layer'
(Ctrl+Shift+L) re-shows the last hidden layer (the
menu shows which layer will be hidden or
restored).
1.2.3.12 CONVERTING DRAWING ITEMS INTO HYDRAULIC ITEMS
Irrigated Areas can now be created from polylines and curves (in the same way as the block entity
tools).
1.2.3.13 OBJECT INFO
The display of hydraulic and debug object info can now be controlled directly from the object info
dialog.
42 · Release Notes Pro V11
Release Notes IRRICAD Pro Version 11
1.2.3.14 GO TO COORDINATES
The Go To Coordinates dialog now retains the last set of coordinates.
1.2.3.15 IRRIGATED AREAS
In a similar manner to block entities, irrigated areas can now be created from existing geometric
entities, including curves.
1.2.3.16 ZONE PRESSURE MINIMUM AND MAXIMUM
When creating Min/Max pressure labels for selected valves labels for other valves are no longer
cleared. Note that any existing labels for the selected valves are also not cleared and need to be
deleted manually before operating the tool.
1.2.3.17 OBJECT SCOPE FLAG
A 'scope' flag has been added to many hydraulic items. This allows for 'BOM only' items which are
included in BOM / Costing reports but not included in hydraulic design. The user may also specify
'Design Only' items, which are treated normally in the design process but do not feature in the BOM /
Costing reports (can be used to specify existing irrigation equipment).
Added the ability to globally change scope (Design + BOM etc.) for all hydraulic items at one time. To
do this select the items required and then use the Change tool (not Change Type) and adjust the
"Scope" field. Note that objects that do not have scope (drawing items, junctions etc.) are unaffected
by changes to this field.
1.2.3.18 REPORTS
Added keywords to costing reports for the coordinates of unconnected pipes and spraylines. This
means that a report can be created listing the locations of all unconnected items in a design.
Release Notes IRRICAD Pro Version 11
Release Notes Pro V11 · 43
1.2.3.19 UNIFORMITY
The design process now calculates a number of zone uniformity parameters, which are available in
the zone reports.
1.2.3.20 HELP MENU
The dongle version number is now shown in Help|Help About.
Added a link to the Irricad web site in the Help menu.
1.2.3.21 RECENT FILES
Increased the number of recent files shown in the File menu to 8.
1.2.3.22 DATABASE
Made a change to the database editor so that fractional numbers of items can be added to
assemblies.
Fittings are now selected for two-ended items (e.g. Misc Hydraulic) that are only connected on one
side.
Irricad databases can now be edited and save in newer versions of Microsoft Access. Additional
versions now supported are 2000, XP (2002), 2003 and 2007. Note that once a database has been
converted to the newer format it will no longer be able to be used in previous versions of Irricad (i.e.
earlier than V9.50).
In the database editor increased the limit for "% above" flow/pressure tolerance for Outlets to 2000%.
1.2.3.23 EMITTER COEFFICIENT OF VARIATION (COV)
A new field for the COV (CVM) has been added to the database
editor for Tapes and Nozzles. This is simply entered as a number,
in the following example the COV is 0.03 (3%).
44 · Release Notes Pro V11
Release Notes IRRICAD Pro Version 11
1.2.4 In Pro Version 9
1.2.4.1 NEW VISUAL CADD ENGINE
This version upgrades the version of VisualCadd Dlls to V5.06.137.
1.2.4.2 INSERTING OLE DATA
OLE Functionality
Items such as Irricad reports, spreadsheets, documents etc. can now be inserted into the Irricad
design.
Edit|Paste:
Tools|Insert OLE:
Edit|Open OLE Item:
This option allows only a single instance of the object to be inserted.
Allows multiple instances of the object to be inserted.
OLE items that have previously been added can be opened and altered in the
appropriate application.
OLE objects print first in PDF files, so that they don't obscure the design.
1.2.4.3 AREAS
The maximum number of Irrigation Areas has been increased to 1001.
The maximum number of areas that can be enclosed by another has been increased to 1000.
The maximum number of Areas a Zone can span has been increased to 25.
Zones may now span multiple Irrigation Areas (e.g. a zone made up of multiple block entities) when
calculating area and water requirements. Note that the V7 style reports (if enabled) still only allow for
zones being in one area.
1.2.4.4 TAPE AND SPRAY IRRIGATION BLOCKS
This version introduces the concept of ‘Block Entities’ which are essentially an extension of the
current block tools. Bock Entities retain the drawn boundary of the block tools as an Irrigation Area
and ‘group’ the laterals contained by them. They also facilitate the automatic placement of submains,
creation of block labels, and simplify the process of changing the type, spacing etc. of laterals.
At present blocks of tapes or blocks of Spraylines can be treated in this way they can be created by
selecting Tape Irrigation Blocks or Spray Irrigation Blocks from the Zone menu. Note that you may
need to add these to your Toolbar by selecting the View|Toolbars menu item (on the Commands tab
select Hydraulic Tools and then dragging the button onto the desired toolbar).
Most of the items on this dialogs are self-explanatory. The fields on the Lateral tab have exactly the
same function as those on the Tape Block or Sprayline Block tool dialogs. Similarly those on the Area
tab are identical to those on the Irrigation Area tool dialog.
Any line can be used when specifying the submain direction (i.e. not just block boundaries).
See the Tool and Command Reference or User Manual for more information.
1.2.4.5 LABELS
Added "Check Label Length" and "Label Length Allowance" fields to the Label settings tab. These
values were previously only available by editing the registry. They are now saved for each design.
Now Irrigation Areas can be labeled using the Irrigation block label settings.
When labeling pipes, with the "Combine Pipes" option set, Zone and Mainline pipes are now
considered independently. This means, for example, that submain connected to an inline valve
doesn't force multiple labels in the mainline pipes at that point.
Release Notes IRRICAD Pro Version 11
Release Notes Pro V11 · 45
The text colour for labels can now be specified in Settings|Labels [Text].
New Keywords
ROLLS:
ROLLS3D:
2D pipe lengths as a number of rolls based on the roll length of the pipe type
in the Pipe Fitting Matching Table
3D pipe lengths as a number of rolls based on the roll length of the pipe type
in the Pipe Fitting Matching Table
Added new Label keywords for Irrigation Blocks:
AREA:
Total plan area within block boundary
AREAUNIT:
Current area unit
ACTFLOW:
The flow for the block as calculated during the design process. If the design
is incomplete, then the nominal flow is displayed.
SHIFT:
Lists the system flows that the block operates in.
MINEMITPRESS:
The minimum emitter pressure in the block, from design.
MAXEMITPRESS:
The maximum emitter pressure in the block, from design.
MEANPRESS:
The mean tape inlet pressure in the block.
If the label does not currently have a value then ‘NA’ is displayed.
1.2.4.6 PLOT TEMPLATES KEYWORDS ADDED
More keywords have been enabled for Plot Templates:#DDES#:
#CLSN#:
#CLAD#:
#CLHP#:
#CLPH#:
#CLFA#:
#CLCO#:
#EDATE#:
#SDATE#:
#ADATE#:
#REPCO#:
#REPNM#:
#LHRS#:
#MILE# :
#ICOST#:
#SIGNT#:
#SIGTL#:
#LCOST#:
#MCOST#:
#TAXR#:
#COSN#:
#COLN#:
#BRCO#:
#BRNM#:
#BRPH#:
#BRFX#:
#BRAP#:
#BRCT#:
Design Details Description
Client Details Short Name
Client Details Address
Client Details Home Phone
Client Details Work Phone
Client Details Fax
Client Details Code (3 chars only)
End Date,
Start Date,
Acceptance date,
Rep Code,
Rep Name,
Labour Hours,
Mileage,
Installation Cost,
Signitary,
Signitary Title,
Labour Cost,
Mileage Cost,
Tax Rate,
Company Short Name,
Company Full Name,
Branch Code,
Branch Name,
Branch Phone,
Branch Fax,
Branch After Hours Phone,
Branch Contact
1.2.4.7 RUNNING SNAPS CHANGES
Running Snaps have now been enabled for hydraulic tools.
1.2.4.8 SNAPS CHANGES
Standard drawing snaps have now been enabled for hydraulic tools.
46 · Release Notes Pro V11
Release Notes IRRICAD Pro Version 11
1.2.4.9 UNDO VERTEX
Added Undo Vertex to the Right-click menu when drawing polyline items (applies to all hydraulic and
drawing ‘Polyline’ tools).
1.2.4.10 CHANGE MATCH DIALOG CHANGES
The Change/Match dialog has been changed to a grid format.
1.2.4.11 VALVE CONNECTOR TOOL
IRRICAD has a tool that automatically connects control valves to the nearest mainline. To run this
select Connect Valves from the Tools menu.
1.2.4.12 DESIGN PARAMETERS CHANGES
In Design Parameters changed the recommended minimum for velocity to 0.1 m/s and recommended
minimum/maximum for lateral length to 1.0 and 100.0 m respectively.
1.2.4.13 NEW TAPE CALCULATION METHOD
This version includes a new method of
analyzing tapes where the elevation
at each emitter (or virtual emitter) is
used in the calculations. To enable
this method select DEM Elevations in
the “Elevation Calculation Method”
dropdown box of the Analysis tab
under the Design|Design Parameters
menu item.
1.2.4.14 CONNECTIVITY CHECK
The Connectivity check has been improved.
Unconnected outlets, tapes, spraylines and
valves are indicated on screen by a special
symbol. The coordinates of the unconnected
items are no longer displayed in warning
messages but are logged to the error log file
and can be viewed with View Errors under the
Reports menu.
1.2.4.15 CLEAR CONNECTIVITY MARKS
The Clear Connectivity Marks menu item will remove all connectivity symbols, any existing symbols
are also removed as part of the connectivity check.
Release Notes IRRICAD Pro Version 11
Release Notes Pro V11 · 47
1.2.4.16 SUBDIVISION TOOL
The Subdivision tool allows existing Irrigation Block entities to be subdivided into smaller sub blocks. It
can be selected from the Tools menu. In common with the majority of Irricad tools it can be applied to
an existing selection or, if no items are selected, applied to a particular object by clicking on that
object.
1.2.4.17 NEW MANAGEMENT OPTIONS
The management options in the Design menu have been rearranged and a new graphically based
option added.
The new option is called Assign System Flows to Zones.
48 · Release Notes Pro V11
Release Notes IRRICAD Pro Version 11
1.2.4.18 MANAGEMENT SYMBOL
The graphical management process automatically creates a symbol, representing the current
management arrangement, that can be subsequently drawn onto the plan (see figure below).
This symbol is accessed from Draw|Management Symbol, a symbol dialog is displayed that contains
the normal symbol placement and creation options.
1.2.4.19 CONVERT TO ELEVATIONS CHANGES
Made changes to the Convert to Elevations tool so that only items on visible layers are considered
when attempting to join lines to create contours.
1.2.4.20 IMPORT CONTOURS
Import Contours now allows for multiple entities sections and also for LWPOLYLINE DXF entities.
Extra information about the number of contour segments found during Import Contours has been
included. The number of raw and simplified segments is now shown.
1.2.4.21 CONTOUR SIMPLIFICATION
Irricad has an internal limit for the number of contour segments that can be used during the elevation
interpolation process. If contours are imported from a DXF file it is occasionally possible for this limit
to be exceeded due to a combination of the ‘smoothness’ (i.e. the number of small line segments
making up the line) and the number of contours lines that are imported. It is also possible for a similar
situation to arise when using the Convert to Elevations tool.
In this version a facility has been added to ‘simplify’ any curves and polylines, that are imported as
contours (or selected by the Convert to Elevations tool), to avoid exceeding the allowable number of
contour segments. Two new items have been added to the Irrigation Items option of the Settings
menu ( see figure below) to control the behavior of this option.
Release Notes IRRICAD Pro Version 11
Release Notes Pro V11 · 49
1.2.4.22 ELEVATION COLOUR CODING
The new Highlight Elevations tool colour codes contours and spot heights based on their elevation
making any anomalies much easier to locate and correct.
The tool is activated by simply selecting Highlight Elevations from the Tools menu. When the tool is
selected the range of elevation is displayed on the dialog.
1.2.4.23 3D DEM VIEW
If DEM Elevations has been selected for the “Elevation Calculation Method” in the Analysis
Parameters tab of Design Parameters then it is also possible to view a 3D representation of the
resulting ground surface. The advantage of this 3D view is that small inconsistencies in elevations,
that are not apparent with colour coding, can located visually.
This facility is available by selecting 3D DEM View from the Reports menu. Elevations of the DEM
points are colour coded in a similar fashion to contours – from red through yellow green and then
blue.
50 · Release Notes Pro V11
Release Notes IRRICAD Pro Version 11
1.2.4.24 RE-INTERPOLATE ELEVATIONS
Re-interpolate Elevations on the Design menu now re-interpolates all elevations (not just new
Hydraulic Items).
1.2.4.25 IMPROVED ZONE DESIGN CONFIGURATION TABLE
The menu item for this option has been moved to immediately above Zone Design and many
improvements have been made to the functionality of the dialog.
1.2.4.26 ZONE PRESSURE MINIMUM AND MAXIMUM
A reporting function has been added that indicates the position and pressure value of the minimum
and maximum pressure emitters for a zone (control valve).
Settings for the minimum and maximum zone pressure labels can be found in Reports|Report
Settings.
1.2.4.27 REPORTS VIEWER
Incorporated a new version of the report writing/viewing engine. Only minor cosmetic changes
including enabling the mouse wheel in the report viewer.
1.2.4.28 ZONE REPORTS
A new brief tabular report has been added entitled Zone CV Table.
The Zone Design Summary report has been re-titled Zone Design Summary (Pressure Variation).
Release Notes IRRICAD Pro Version 11
Release Notes Pro V11 · 51
A revised Zone Design Summary report now includes flow variations and the location of the emitters
having the minimum and maximum pressures.
Added ZoneArea field to Zone Design Reports. Note this only allows for zones being in one area at
the moment and will only be populated when a zone is inside an Irrigation Area or Irrigation Block.
The Zone Design Summary and Zone CV Table reports are now ordered by Zone name. In addition
the calculation of percentage pressure and flow ranges has been changed to 100*(Max - Min)/Max
rather than 100*(Max - Min)/Nominal or 100*(Max-Min)/((Max+Min)/2).
1.2.4.29 MAINLINE REPORTS
A version of the Mainline Pipe Report that lists nodes rather than coordinates has been added.
Normally this would be used in conjunction with labelling using the ‘UID’ keyword to identify junctions
on the plan.
A Water Supply elevation field has been added to the mainline reports (Sysflow->WSElevation).
Zones are now sorted by name in the Mainline Summary Report and ML Design Pipe Report –
Nodes.
Added an ‘OutletFlow’ field for mainline reports.
The headloss through a control valve is now available in the MLItem->Outloss mainline report field.
1.2.4.30 CONVERTING DRAWING ITEMS INTO HYDRAULIC ENTITIES
It is now possible to convert drawing items, both those drawn in IRRICAD or imported via a DXF/DWG
file, to hydraulic items. This is achieved by selecting the required drawing items and then the
appropriate hydraulic tool. Currently tapes and all block tools (including Tape Block entities) can
operate this way.
1.2.4.31 HYDRAULIC GRADELINE
After a design is completed it is now possible to view the hydraulic gradeline of submain, spraylines
and tapes. The tool can be access from the Reports menu.
52 · Release Notes Pro V11
Release Notes IRRICAD Pro Version 11
1.2.4.32 HYDRAULIC DIALOG SETTINGS
The last values entered or database items selected in all the dialogs for Hydraulic Items are now
retained with each individual design. Previously they would revert to the default values.
1.2.4.33 UNDO VERTEX
This command allows you to sequentially ‘undo’ placement of the line segments while running the
Continuous Polyline. You can correct a misplaced segment without having to erase then redraw the
entire line. If desired, Right-click|Undo Vertex can be repeated over and over again until the current
line is completely undone.
1.2.4.34 PIPE LEGEND
If placeholder lines in the pipe legend templates have a line width, IRRICAD now allows for that line
width to be used when pipe legends are created as part of Draw|Plot Layout.
1.2.4.35 MOUSE WHEEL
Panning via the mouse wheel button (by clicking and dragging the mouse wheel) has been added.
1.2.4.36 DATABASE CHANGES
A utility to ‘clean’ fields in databases has been added to the database editor. This utility is used to
correctly format fields, in the database, after directly importing data via Access. It is not necessary to
use this if data has been entered via the Irricad database editor.
1.2.4.37 SELECTION
Any selected entities on invisible layers are now deselected.
Release Notes IRRICAD Pro Version 11
Release Notes Pro V11 · 53
1.3 Hot off the Press – New Patch Additions to Pro
Version 11
Currently there are no other additions to Pro Version 11.
54 · Release Notes Pro V11
Release Notes IRRICAD Pro Version 11
2 Index
window 12
Database Changes 53
Database Item Display 26
Design Parameters 37
Design Parameters Changes 47
Document Summary Info 36
Dongle Serial Number 38
DWG Font Export Tab 19
DWG Font Import Tab 18
DWG Settings Tab 17
E
.
. 14
3
3D DEM View 50
A
ABOS Parameters 3
Add Nozzles .. (database button) 11
Add to Assembly .. (database button) 10
Areas 45
Assemblies
modifying 10
Autocad Color Export 20
Autocad Color Import 19
AutoCAD Compatibility 17
B
Back Up Folder Specification 38
Block Pipe Stubs 39
Block Valve Positioning 39
C
Change Match Dialog Changes 47
Changes to Importing Contours 38
Changes to the Help Menu 14
Clear Connectivity Marks 47
Clear Management 30
Connect Outlets Tool 27
Connectivity Check 47
Contour Properties 2
Contour Simplification 49
Convert to Elevations Changes 49
Converting Drawing Items into Hydraulic
Entities 52
Converting Drawing Items into Hydraulic Items
42
D
Database 44
file menu 14
Release Notes IRRICAD Pro Version 11
Editing Functions 7
Elevation Colour Coding 50
Emitter Coefficient of Variation (COV) 44
Execute Query 11
Exporting to DXF and DWG Files 14
F
File Menu
database 14
File Stamp 31
Finish Assembly .. (database button) 10
Flushing Manifolds 40
G
Go To Coordinates 35, 43
Gradeline Dialog Export 29
H
Hatch & Fill Editing 32
Hatch Preview 28
Help Menu 44
Hydraulic Dialog Settings 53
Hydraulic Gradeline 40, 52
Hydraulic Item Creation 35
I
Icons
arrange 12
Image Improvements 21
Import Contours 49
Improved Zone Design Configuration Table 51
Improvements to Curve Fitting 9
Improvements to the Grid View 10
Insert OLE Changes 39
Inserting OLE Data 45
Irrigated Areas 43
K
Keyword Combo 33
L
Label Rounding & Roll Lengths 40
Labels 34, 45
Language Compatibility 14
Index · 55
Layer Manager 24
Layers Menu 42
Status bar - Info Panel 37
Subdivision Tool 48
Supplementary Character set 13
Symbol Colors 38
Symbol Preview 29
M
Mainline Reports 52
Management Symbol 49
Menu
file (database) 14
Merge Designs 37
Mouse Wheel 53
Multiple Water Supply Systems 38
T
Tape and Spray Irrigation Blocks 45
Text Dialog Improvements 33
Tools Menu 13
Trim Elevations 38
N
U
Names 36
New Copy Tools 38
New Management Options 48
New Tape calculation method 47
New Toolbars 38
New Tools 38
New Visual CADD Engine 45
Unconnected Spray Block Entity 36
Undo Vertex 47, 53
Uniformity 44
Unit settings 13
User Attributes and User Keyword 35
O
Valve Connector Tool 47
Valve Specification Summary 5
V
Object Info 42
Object Scope Flag 43
W
Queries 11
Warehouse Code - 32 Characters Allowed 6
Watermarking 31
What's New in the File Menu 7
Window
arrange icons 12
cascade 12
tile 12
Window Options 12
R
Z
Recent Files 44
Re-interpolate Elevations 51
Reload Query 11
Remove Nozzle .. (database button) 11
Report Templates 37
Reports 43
Reports Viewer 51
Rotate tool 30
Rotate Tool Improvements 30
Running Snaps Changes 46
Zone Design Configuration 37
Zone Pressure Limits now Editable 38
Zone Pressure Minimum and Maximum 43, 51
Zone Reports 51
P
Pipe Legend 53
Plot Templates Keywords Added 46
Q
S
Save Query 11
Saving To Previous Versions of IRRICAD 37
Scale Image Tool 23
Select Tool 41
Selecting Control Valves 5
Selection 53
Settings
units 13
Snaps 42
Snaps Changes 46
Status Bar 41
56 · Index
Release Notes IRRICAD Pro Version 11