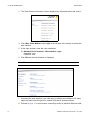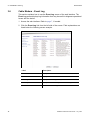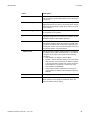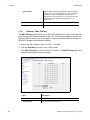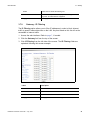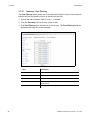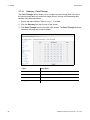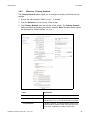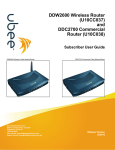
1
Ubee DDW3612 Wireless Cable Modem Gateway Firmware Version: 8.9.1002 Subscriber User Guide version 10/14/10 www.ubeeinteractive.com 8085 S. Chester Street, Suite 200 Englewood, CO 80112 1.888.390.8233 Sales (email): [email protected] Support (email) [email protected] Notices and Copyrights Copyright ©Ubee 2010. All Rights Reserved. This document contains proprietary information of Ubee and is not to be disclosed or used except in accordance with applicable agreements. This material is protected by the copyright laws of the United States and other countries. It may not be reproduced, distributed, or altered in any fashion by any entity (either internal or external to Ubee), except in accordance with applicable agreements, contracts, or licensing, without the express written consent of Ubee and the business management owner of the material. This device is Wifi Alliance Certified: Contents 1 Introduction. . . . . . . . . . . . . . . . . . . . . . . . . . . . . . . . . . . . . . . . . . . . . . . . . . . . . . . . 1 1.1 Device Overview . . . . . . . . . . . . . . . . . . . . . . . . . . . . . . . . . . . . . . . . . . . . . . . . . . . . 1.1.1 Application Diagram . . . . . . . . . . . . . . . . . . . . . . . . . . . . . . . . . . . . . . . . . . . . 1.1.2 Physical Specifications, Standards, Firmware Operations . . . . . . . . . . . . . . . 1.1.3 Default Values . . . . . . . . . . . . . . . . . . . . . . . . . . . . . . . . . . . . . . . . . . . . . . . . 1.1.4 LED Operational Summary . . . . . . . . . . . . . . . . . . . . . . . . . . . . . . . . . . . . . . 1 2 2 4 5 2 Installation Instructions . . . . . . . . . . . . . . . . . . . . . . . . . . . . . . . . . . . . . . . . . . . . . . 7 2.1 2.2 2.3 Complete Prerequisite Tasks/Connect the Device. . . . . . . . . . . . . . . . . . . . . . . . . . . 7 Access the Web Interface . . . . . . . . . . . . . . . . . . . . . . . . . . . . . . . . . . . . . . . . . . . . . 7 Validate Connectivity/Connect Devices to the Network . . . . . . . . . . . . . . . . . . . . . . 10 2.3.1 Connect/Validate Wireless Clients . . . . . . . . . . . . . . . . . . . . . . . . . . . . . . . . 10 2.3.2 Additional Troubleshooting Information . . . . . . . . . . . . . . . . . . . . . . . . . . . . 11 3 Web User Interface Instructions . . . . . . . . . . . . . . . . . . . . . . . . . . . . . . . . . . . . . . 12 3.1 3.2 3.3 3.4 3.5 3.6 3.7 3.8 Cable Modem - Information . . . . . . . . . . . . . . . . . . . . . . . . . . . . . . . . . . . . . . . . . . . Cable Modem - Status . . . . . . . . . . . . . . . . . . . . . . . . . . . . . . . . . . . . . . . . . . . . . . . Cable Modem - Downstream . . . . . . . . . . . . . . . . . . . . . . . . . . . . . . . . . . . . . . . . . . Cable Modem - Upstream . . . . . . . . . . . . . . . . . . . . . . . . . . . . . . . . . . . . . . . . . . . . Cable Modem - Operation Config . . . . . . . . . . . . . . . . . . . . . . . . . . . . . . . . . . . . . . Cable Modem - Event Log . . . . . . . . . . . . . . . . . . . . . . . . . . . . . . . . . . . . . . . . . . . . Gateway . . . . . . . . . . . . . . . . . . . . . . . . . . . . . . . . . . . . . . . . . . . . . . . . . . . . . . . . . . 3.7.1 Gateway - Information . . . . . . . . . . . . . . . . . . . . . . . . . . . . . . . . . . . . . . . . . 3.7.2 Gateway - Setup. . . . . . . . . . . . . . . . . . . . . . . . . . . . . . . . . . . . . . . . . . . . . . 3.7.3 Gateway - DHCP . . . . . . . . . . . . . . . . . . . . . . . . . . . . . . . . . . . . . . . . . . . . . 3.7.4 Gateway - Static Lease . . . . . . . . . . . . . . . . . . . . . . . . . . . . . . . . . . . . . . . . 3.7.5 Gateway - DDNS . . . . . . . . . . . . . . . . . . . . . . . . . . . . . . . . . . . . . . . . . . . . . 3.7.6 Gateway - Time . . . . . . . . . . . . . . . . . . . . . . . . . . . . . . . . . . . . . . . . . . . . . . 3.7.7 Gateway - Options . . . . . . . . . . . . . . . . . . . . . . . . . . . . . . . . . . . . . . . . . . . . 3.7.8 Gateway - Mac Filtering . . . . . . . . . . . . . . . . . . . . . . . . . . . . . . . . . . . . . . . . 3.7.9 Gateway - IP Filtering. . . . . . . . . . . . . . . . . . . . . . . . . . . . . . . . . . . . . . . . . . 3.7.10 Gateway - Port Filtering . . . . . . . . . . . . . . . . . . . . . . . . . . . . . . . . . . . . . . . . 3.7.11 Gateway - Forwarding . . . . . . . . . . . . . . . . . . . . . . . . . . . . . . . . . . . . . . . . . 3.7.12 Gateway - Port Triggering . . . . . . . . . . . . . . . . . . . . . . . . . . . . . . . . . . . . . . 3.7.13 Additional Information - Port Triggering . . . . . . . . . . . . . . . . . . . . . . . . . . . . 3.7.14 Gateway - Pass Through . . . . . . . . . . . . . . . . . . . . . . . . . . . . . . . . . . . . . . . 3.7.15 Gateway - DMZ Host . . . . . . . . . . . . . . . . . . . . . . . . . . . . . . . . . . . . . . . . . . Wireless . . . . . . . . . . . . . . . . . . . . . . . . . . . . . . . . . . . . . . . . . . . . . . . . . . . . . . . . . . 3.8.1 Wireless - Radio . . . . . . . . . . . . . . . . . . . . . . . . . . . . . . . . . . . . . . . . . . . . . . 3.8.2 Wireless - Primary Network . . . . . . . . . . . . . . . . . . . . . . . . . . . . . . . . . . . . . 3.8.3 Wireless - Access Control . . . . . . . . . . . . . . . . . . . . . . . . . . . . . . . . . . . . . . 3.8.4 Wireless - Advanced . . . . . . . . . . . . . . . . . . . . . . . . . . . . . . . . . . . . . . . . . . 3.8.5 Wireless - Bridging . . . . . . . . . . . . . . . . . . . . . . . . . . . . . . . . . . . . . . . . . . . . 3.8.6 Wireless - Wifi Multimedia . . . . . . . . . . . . . . . . . . . . . . . . . . . . . . . . . . . . . . DDW3612 Subscriber User Guide • July, 2010 12 13 14 15 16 18 19 19 21 22 24 25 26 27 28 29 30 31 34 35 36 37 39 39 41 44 45 48 49 i Ubee Interactive 3.9 3.10 3.11 ii 3.8.7 Additional Information - WiFi MultiMedia (WMM) . . . . . . . . . . . . . . . . . . . . . Wireless Network Deployment and Troubleshooting . . . . . . . . . . . . . . . . . . . . . . . . 3.9.1 Wireless Speeds and Performance . . . . . . . . . . . . . . . . . . . . . . . . . . . . . . . Parental Control . . . . . . . . . . . . . . . . . . . . . . . . . . . . . . . . . . . . . . . . . . . . . . . . . . . . 3.10.1 Parental Control - User Setup . . . . . . . . . . . . . . . . . . . . . . . . . . . . . . . . . . . 3.10.2 Parental Control - Basic Settings . . . . . . . . . . . . . . . . . . . . . . . . . . . . . . . . . 3.10.3 Parental Control - Tod Filter . . . . . . . . . . . . . . . . . . . . . . . . . . . . . . . . . . . . . 3.10.4 Parental Control - Event Log . . . . . . . . . . . . . . . . . . . . . . . . . . . . . . . . . . . . Tools . . . . . . . . . . . . . . . . . . . . . . . . . . . . . . . . . . . . . . . . . . . . . . . . . . . . . . . . . . . . 3.11.1 Tools - Ping . . . . . . . . . . . . . . . . . . . . . . . . . . . . . . . . . . . . . . . . . . . . . . . . . 3.11.2 Tools - Trace Route . . . . . . . . . . . . . . . . . . . . . . . . . . . . . . . . . . . . . . . . . . . 3.11.3 Tools - Client List . . . . . . . . . . . . . . . . . . . . . . . . . . . . . . . . . . . . . . . . . . . . . 3.11.4 Tools - Password . . . . . . . . . . . . . . . . . . . . . . . . . . . . . . . . . . . . . . . . . . . . . 3.11.5 Tools - Factory Default . . . . . . . . . . . . . . . . . . . . . . . . . . . . . . . . . . . . . . . . . 50 52 52 57 57 59 60 61 62 62 63 64 65 66 DDW3612 Subscriber User Guide • July, 2010 1 Introduction Welcome to the Ubee family of data networking products. This guide is specific to the DDW3612 Wireless Cable Modem Gateway. This document serves the following purposes: To define all relevant device compliance standards and physical specifications. To provide user level instructions and explain device features. To provide installation instructions and troublehsooting information. 1.1 Device Overview This section contains the following subsections: Application Diagram (p. 2). Physical Specifications, Standards, Firmware Operations (p. 2). Default Values (p. 4). LED Operational Summary (p. 5). Note: Some features described in this document may not be fully tested and supported in your specific firmware release version. Where possible, features supported only by specific versions are indicated in this document. See the Release Notes/Letter of Operational Considerations accompanying your firmware for further details. DDW3612 Subscriber User Guide • July, 2010 1 1.1 Device Overview Ubee Interactive 1.1.1 Application Diagram The following graphic depicts the general connection topology and use of the DDW3612. Ubee DDW3612 Up to 4 Ethernet LAN Connections Cable Desktop PCs, Router, Hub Laptop PCs (Wireless Connection) 1.1.2 WiFi Phone Physical Specifications, Standards, Firmware Operations The following list provides the features and specifications of the DDW3612 Wireless Cable Modem Gateway. Interfaces Cable: F-Connector, Female LAN: 4 10/100/1000 Mbps RJ-45 Ports USB: 1 USB 2.0 Port Standards/Certifications DOCSIS 3.0/Euro DOCSIS 3.0 Certified DOCSIS/Euro DOCSIS 1.0/1.1/2.0 Certified CE/ FCC Class B Downstream* Maximum Data Rate per Channel (up to 8 channels): DOCSIS = 30 Mbps (64 QAM), 42 Mbps (256 QAM), EuroDOCSIS = 41 Mbps (64 QAM), 55 Mbps (256 QAM) Total Max Bandwidth (8 Channels): DOCSIS = 343 (304) Mbps, EuroDOCSIS 444 (400) Mbps Symbol Rate: 6952 Ksps 2 DDW3612 Subscriber User Guide • July, 2010 Ubee Interactive 1.1 Device Overview RF Input Power: -15 to +15dBmV (64 QAM), -15 to +15dBmV (256 QAM) Input Impedance: 75 Ω Upstream* Frequency Range: 5MHz ~ 65MHz Modulation A-TDMA: QPSK, 8, 16, 32, 64QAM, S-CMDA: QPSK, 8, 16, 32, 64, 128QAM Max B/W of 4 Channels = 122.88 (108) Mbps, B/W Per Channel (up to 4 channels) = [QPSK 0.32 ~ 10.24 Mbps, 8 QAM 0.48 ~ 15.36 Mbps, 16 QAM 0.64 ~ 20.48 Mbps, 32 QAM 0.80 ~ 25.60 Mbps, 64 QAM 0.96 ~ 30.72 Mbps, 128 QAM/TCM 30.72 Mbps] Symbol Rate: 160, 320, 640, 1280, 2560, 5120 Ksps RF Output Power: TDMA/ATDMA: +8dBmV to +54dBmV (32/64 QAM). ATDMA Only: +8dBmV to +55dBmV (8/16 QAM), +8dBmV to +58dBmV (QPSK). SCDMA: +8dBmV to +53dBmV (all modulations) *Actual speeds can vary based on factors including network configuration and speed. Security VPN Pass-Through (IPSec/L2TP/PPTP) NAT Firewall, MAC/IP/Port Filtering, Parental Control Stateful Packet Inspection (SPI), DoS Attack Protection WPS/ WPA/ WPA2/ WPA-PSK& 64/128-bit WEP Encryption TACACS or RADIUS Authentication Wireless and Network Supports 4 SSIDs, 802.11b/g/n compliant with speeds up to 300 Mbps DHCP Client/Server / Static IP network assignment RIPv1/ v2 Ethernet 10/100/1000 BaseT / full-duplex auto-negotiate functionality, IPv4 to IPv6 support. Device Management Customer premises equipment (CPE) Supports IEEE 802.11e Wi-Fi Multimedia (WMM) and UAPSD (power savings) Web-Based Configuration Telnet Remote Management Secure Firmware Upgrade via TFTP Configuration Backup and Restore SNMP Support Interoperability with main CMTS products Physical and Environmental Dimensions: 172.2(W) x 254(D) x 42(H) mm Weight: 500 g Power: 12V/1.5A DDW3612 Subscriber User Guide • July, 2010 3 1.1 Device Overview Ubee Interactive Operating Temperature: 0°C ~ 40°C Humidity: 5~90% (non-condensing) 1.1.3 Default Values This device is pre-configured with the following parameters: Local Port Address: 192.168.0.1, Web Interface: http://192.168.0.1 Operation Mode: NAT Mode (WAN setting) Subnet Mask: 255.255.255.0 Wireless Defaults: Primary SSID (subscriber-managed) = DDW3612 plus last 2 characters of the cable modem’s MAC Address (UPPER case, if letters). Example: DDW3612BE Note: If the subscriber changes the SSID, the device does not revert to this default SSID upon any reset of the device, except in the case of a manual reset to restore factory default settings. The device MAC address can be found on the device label, or refer to Cable Modem - Information (p. 12). WPA Pre-shared Key = DDW3612 plus the last 6 characters (3 octets) of the cable modem’s MAC address. Example: DDW36127CD4BE WPS PIN = 12345670 Device Name = UbeeAP Web Interface Logins (also used for telnet access): Standard User/Consumer Web Interface Login: Username: user Password: user 4 DDW3612 Subscriber User Guide • July, 2010 Ubee Interactive 1.1 Device Overview 1.1.4 LED Operational Summary The following table describes what the device LEDs indicate. LED Position LED1 LED2 LED3 LED4 LED5 LED6 LED7 LED8 LED9 LED10 LED11 LED Color Green Green/ Blue Green/ Blue Green/ Blue Green/ Blue Green Green Green Green/ Blue Green/ Blue Green LED Label: USB Host Eth-4 Eth-3 Eth-2 Eth-1 WPS Wi-Fi Online US DS Power Power ON On On On On On Off Off On On On On 2 Load Image Off On, if connects On, if connects On, if connects On, if connects Off Off Off Off Off Off 3 H/W Check Off On, if connects On, if connects On, if connects On, if connects Off On Flash Flash Flash On 4 DS Locked and Sync OK Off On, if connects On, if connects On, if connects On, if connects Off On Flash Flash 1) On, Blue with channel bonding 2) On, Green without channel bonding On 5 US Ranging Off On, if connects On, if connects On, if connects On, if connects Off On Flash Flash 1) On, Blue with channel bonding 2) On, Green without channel bonding On 6 US Ranging OK Off On, if connects On, if connects On, if connects On, if connects Off On Flash 1) On, Blue with channel bonding 2) On, Green without channel bonding 1) On, Blue with channel bonding 2) On, Green without channel bonding On 7 Registration OK Off On, if connects On, if connects On, if connects On, if connects Off On On 1) On, Blue with channel bonding 2) On, Green without channel bonding 1) On, Blue with channel bonding 2) On, Green without channel bonding On 8 NACO Enable Off On, if connects On, if connects On, if connects On, if connects Off On On 1) On, Blue with channel bonding 2) On, Green without channel bonding 1) On, Blue with channel bonding 2) On, Green without channel bonding On On, if connects On, if connects On, if connects On, if connects Off On Off 1) On, Blue with channel bonding 2) On, Green without channel bonding 1) On, Blue with channel bonding 2) On, Green without channel bonding On On, if connect, Blue (same as explained to left). On, if connects, Blue (same as explained to left). On, if connects, Blue (same as explained to left). On On On 1) On, Blue with channel bonding 2) On, Green without channel bonding 1) On, Blue with channel bonding 2) On, Green without channel bonding On Flash, if connects Flash, if connects Flash Flash On 1) On, Blue with channel bonding 2) On, Green without channel bonding 1) On, Blue with channel bonding 2) On, Green without channel bonding On CM 1 Initialization (network access) CM Operation 9 NACO Disable Off 1 Attached CPE On Green On Green, if connect, Blue if speed linked at 1000 mbps (gibabit ethernet) 2 CPE Data Tx/Rx Flash, if connects Flash DDW3612 Subscriber User Guide • July, 2010 5 1.1 Device Overview 6 Ubee Interactive DDW3612 Subscriber User Guide • July, 2010 2 Installation Instructions This chapter explains how to setup the device and access the web interface for the DDW3612 Wireless Cable Modem Gateway. 2.1 Complete Prerequisite Tasks/Connect the Device Complete the following tasks to install the DDW3612 Wireless Cable Modem Gateway and access the web interface. Important: Subscribers must contact their service provider to enable internet access. Typically, the service provider initially connects and configures the device. These steps are also provided below. If you wish to confirm the setup, or add devices to your network, refer to “Validate Connectivity/Connect Devices to the Network” on page 10. Remove all contents from the device packaging. Have a Windows PC available and powered on. The Windows PC must have an ethernet network adapter/ethernet port. The PC must also have an internet browser installed (Netscape or Internet Explorer). Connect the power adapter that is included with the product package to the DDW3612 Wireless Cable Modem Gateway and to the power outlet. Do not use any other power adapter except the one included with the product package. Connect a coaxial cable to the cable wall outlet. Connect the other end to the Cable/RF port on the back of the cable modem. Connect one end of a network cable to your computer’s Ethernet port. Connect the other end to one of the LAN ports on the cable modem. 2.2 Access the Web Interface Use the following procedure to access the web interface using Internet Explorer from a Windows computer. 1. From the computer, launch an internet browser (Internet Explorer or Netscape). 2. In the internet browser, enter the following address and press <Enter/Return>: http://192.168.0.1 DDW3612 Subscriber User Guide • July, 2010 7 2.2 Access the Web Interface Ubee Interactive 3. The Cable Modem Information Screen displays key information about the device. 4. Click Ubee Cable Modem under Login to the left side of the screen to access the web interface. 5. At the login window, enter the user credentials: Standard User/Consumer - Web Interface Login: Username: user Password: user 6. Click OK and the web interface is displayed. Note: The username and password must be entered in lower case letters. 7. Accessing the web interface is an initial way to validate the installation. No extra steps are required at this point for a basic LAN and/or wireless network. 8. Proceed to page 10 to test network connectivity and/or to add both Ethernet LAN 8 DDW3612 Subscriber User Guide • July, 2010 Ubee Interactive 2.2 Access the Web Interface devices and wireless devices to the network. Note: The web interface allows you to customize the configurations and capabilities the device. For full explanation of all web interface functions, refer to page 12. DDW3612 Subscriber User Guide • July, 2010 9 2.3 Validate Connectivity/Connect Devices to the Network 2.3 Ubee Interactive Validate Connectivity/Connect Devices to the Network To confirm network/internet operations, or to connect an Ethernet device to the network (for example, a computer, gaming console, etc.), do the following: 1. Make sure the Ethernet device (computer, gaming console) to add to the network is connected to the cable modem and powered on. Refer to page 7, if needed. 2. Use the device LEDs to confirm operations. The PWR, DS, US, Online, and Wifi LEDs are solidly lit in normal operations, as is the LAN LEDs that have devices connected to their associated ports. Refer to “LED Operational Summary” on page 5 for more detailed information. 3. Open a web browser and go to any web site to validate network connectivity (for example, http://www.wikipedia.org). 4. If the connected device is a gaming console, perform any online task supported by the console (for example, log into gaming server, play online game, download content, etc.). 5. Refer to page 11 for troubleshooting information if needed. 2.3.1 Connect/Validate Wireless Clients To confirm operations or to connect wireless devices to the network (for example, a laptop computer), do the following: 1. Use the device LEDs to confirm operations. The WiFi LED must be solidly lit. The PWR, DS, US, and Online LEDs are also solidly lit in normal operations. Refer to “LED Operational Summary” on page 5 for more detailed information. 2. Connect a wireless device to the cable modem (for example, a laptop computer). Use the following steps: Access the wireless networking feature on your wireless device. On a Windows computer, for example, double-click the Wireless Networking icon in the system tray (lower-right side of the Windows desktop). Click View Wireless Networks. The device is shipped with a default SSID. The SSID is the name of the wireless network broadcast from the device so that wireless clients can connect to it. 3. Double-click your SSID in the wireless networks window. The default SSID = DDW3612 plus the last 2 characters of the cable modem’s MAC Address (UPPER case, if letters). Refer to the device’s bottom label to view the MAC address or refer to “Cable Modem - Information” on page 12. Example: DDW3612BE Note: If the subscriber changes the SSID, the device does not revert to this default SSID upon any reset of the device, except in the case of a manual reset to restore factory default settings. The device MAC address can be found on the device label, or refer to “Cable Modem - Information” on page 12. 10 DDW3612 Subscriber User Guide • July, 2010 Ubee Interactive 2.3 Validate Connectivity/Connect Devices to the Network 4. When prompted, enter the Network Key. The Network Key = DDW3612 plus the last 6 characters (3 octets) of the cable modem’s MAC address (upper or lower case). Example: DDW36127CD4BE The device MAC address can be found on the device label, or refer to “Cable Modem - Information” on page 12. 5. Confirm connectivity by opening a web browser and going to any web site (for example, http://www.wikipedia.org). Note: If having wireless issues or questions, refer to “Wireless Network Deployment and Troubleshooting” on page 52. 2.3.2 Additional Troubleshooting Information Use the following tips for troubleshooting the installation. None of the LEDs are on when I power on the Wireless LAN Cable Modem. Check the connection between the power adapter and the cable modem. Power off cable modem and wait for 5 seconds and power on the modem again. If the problem still exists, there may have a hardware problem. The Ethernet 1, 2, 3, or 4 LED on the cable modem is not lit. Try restarting the computer so that is could re-establish a connection with the cable modem. Check for a resource conflict (Windows users only). To do this: (1) Right-click on the My Computer icon on your desktop and choose Properties. (2) Click the Device Manager tab and look for a yellow exclamation point or red X over the NIC in the Network Adapters field. If you see either one, you may have an IRQ conflict. Refer to the manufacturers documentation or you cable service provider for further assistance. Verify that TCP/IP is the default protocol for your network interface card (NIC). Power cycle the cable modem by removing the power adapter from the electrical outlet and plugging it back in. Wait several minutes for the cable modem to re-establish communications with your cable service provider. General Connectivity Issues: If your PC is connected to a hub or gateway, try connecting the PC directly into an Ethernet port on the cable modem. If you are using a cable splitter, try removing the splitter and connect the cable modem directly to the cable wall outlet. Wait several minutes for the cable modem to re-establish communications with the cable service provider. The Ethernet cable may be damaged. Try another cable. If none of these suggestions work, contact your cable service provider for further assistance. DDW3612 Subscriber User Guide • July, 2010 11 3 Web User Interface Instructions 3 Ubee Interactive Web User Interface Instructions This chapter explains how to use all web interface functions for the device. 3.1 Cable Modem - Information This section explains how to use the Information screen of the web interface. The Information screen displays the device’s core software configuration. 1. Access the web interface. Refer to page 7, if needed. 2. Click the Information link from the left side of the screen. Field explanations are listed below the following screen example. Label 12 Description Cable Modem The current DOCSIS standard of the device. MAC Address The unique Media Access Control (MAC) hardware address of cable modem. Serial Number The unique manufacturer serial number of the device. Boot Code Version The boot software code version of the device. Software Version The general software version of the device. Hardware Version The internal version number that identifies the hardware design. CA Key The device installs a Certificate Authority (CA) key that is transferred from the service provider’s server after the cable modem is authenticated. The key is used to secure communication between the service provider and the cable modem. DDW3612 Subscriber User Guide • July, 2010 Ubee Interactive 3.2 3.2 Cable Modem - Status Cable Modem - Status This section explains how to use the Status screen of the web interface. The Status screen displays the device’s general connection information. 1. Access the web interface. Refer to page 7, if needed. 2. Click the Status link from the left side of the screen. Field explanations are listed below the following screen example. Label Description Acquired Downstream Channel Displays a Downstream channel that the cable modem is trying to lock to and the progress. Ranged Upstream Channel Displays an Upstream channel that the device is trying to range with and the progress. CM Provisioning State After the physical initialization, the cable modem will be configured by a DHCP server from the service provider. Once the cable modem obtains an IP address, the cable modem’s status is OK. The Status column also shows the connection progress. The Comments column displays the messages indicating connection error information, if errors occur. Refresh Click to refresh the status information. DDW3612 Subscriber User Guide • July, 2010 13 3.3 Cable Modem - Downstream 3.3 Ubee Interactive Cable Modem - Downstream This section explains how to use the Downstream screen of the web interface. The Downstream screen displays detailed information on the device’s connection to downstream channels from the service provider. 1. Access the web interface. Refer to page 7, if needed. 2. Click the Downstream link from the left side of the screen. Field explanations are listed below the following screen example. Label Frequency Displays the downstream channel frequency on which the cable modem is scanning. Lock Status Displays if the cable modem succeeded in locking to a downstream channel. Channel ID Displays the downstream channel ID. Modulation Displays the modulation method that’s required for the downstream channel to lock on to by the cable modem. This method is determined by the service provider. Symbol Rate Displays the symbol rate. The current cable modem downstream symbol rates are: QAM64 is 5056941 sym/sec, QAM256 is 5360537 sym/sec. Interleave Depth Displays the current cable modem downstream Interleave depth (4/8/16/32/64/128/other). Power Level 14 Description Displays the receiver power level after ranging process. DDW3612 Subscriber User Guide • July, 2010 Ubee Interactive 3.4 Cable Modem - Upstream Label 3.4 Description RxMER The Receiver Modulation Error Ratio is used to quantify the performance of a digital radio receiver in a communications system using digital modulation. Correctable Codewords Displays the quantity of codewords which are correctable. Uncorrectable Codewords Displays the quantity of codewords which are not correctable. Cable Modem - Upstream This section explains how to use the Upstream screen of the web interface. The Upstream screen displays detailed information on the device’s connection to upstream channels to the service provider. 1. Access the web interface. Refer to page 7, if needed. 2. Click the Upstream link from the left side of the screen. Field explanations are listed below the following screen example. Label Description US-1 to US-4 Upstream Channels. Channel Type Displays the channel type. Channel ID Displays the current cable modem upstream channel ID. Frequency Displays the current cable modem upstream frequency (Hz). Ranging Status Displays the upstream ranging status. DDW3612 Subscriber User Guide • July, 2010 15 3.5 Cable Modem - Operation Config Label 3.5 Ubee Interactive Description Modulation Displays the current cable modem upstream modulation type (QPSK/ QAM8 /QAM16/ QAM32/ QAM64/ QAM128/ QAM256). Symbol Rate Displays the symbol rate (Ksym/sec). Upstream Mini-Slot Size Displays the current cable modem upstream mini-slot size in Timebase Ticks of 6.25. Power Level Displays the current cable modem upstream transmit power (dBmV). T-1 through T-4 Timeouts T-1-Displays DHCP time expiration, T-2-Displays DHCP time expiration, T-3-Displays RNG-RSP time expiration, T4-Displays RNG time expiration. Cable Modem - Operation Config This section explains how to use the Operation Config screen of the web interface. The Operation Config screen displays general information on the device’s active operational capabilities. 1. Access the web interface. Refer to page 7, if needed. 2. Click the Operation Config link from the left side of the screen. Field explanations are listed below the following screen example. 16 DDW3612 Subscriber User Guide • July, 2010 Ubee Interactive 3.5 Cable Modem - Operation Config Label Description Network Access Displays the status of cable modem, Denied means no connectivity is established. Allowed means connectivity is established to Internet. Maximum Number of CPEs Displays the maximum number of Ethernet devices that can be connected (LAN side) to access the network/internet at the same time. Baseline Privacy Displays highlighted device configurations, like PHS Enabled and the other examples shown in the screen example. DOCSIS Mode Displays the DOCSIS version used in the device. Primary Downstream Service Flow SFID Displays the frequency ID of the downstream service flow. Priority Displays the use priority of the frequency ID. Max Traffic Rate Displays the max data rate as enabled by the service provider. Max Traffic Burst Displays the max data rate as enabled by the service provider for downstream data bursts. Max Concatenated Burst Displays the max data rate per downstream burst. Primary Upstream Service Flow SFID Displays the frequency ID of the upstream service flow Priority Displays the use priority of the frequency ID. Max Traffic Rate Displays the max data rate as enabled by the service provider. Max Traffic Burst Displays the max data rate as enabled by the service provider for upstream data bursts. Min Traffic Rate Displays the minimum data rate as enabled by the service provider. Max Concatenated Burst Displays the max data rate per upstream burst. Scheduling Type Displays the data scheduling type. DDW3612 Subscriber User Guide • July, 2010 17 3.6 Cable Modem - Event Log 3.6 Ubee Interactive Cable Modem - Event Log This section explains how to use the Event Log screen of the web interface. The Event Log screen displays log information that may be useful to diagnose operational issues with the device. 1. Access the web interface. Refer to page 7, if needed. 2. Click the Event Log link from the left side of the screen. Field explanations are listed below the following screen example. Label 18 Description First Time Displays the time of the event. Last Time Displays the last time of the event. Priority Displays the event log severity. Description Displays a detailed description of the event log. Refresh Refreshes the event log record. DDW3612 Subscriber User Guide • July, 2010 Ubee Interactive 3.7 3.7 Gateway Gateway This chapter explains how to use the Gateway functions of the web interface. The Gateway functions provide the majority of configuration for the device including WAN IP addresses, LAN IP addresses, DHCP, and DDNS. Also, advanced setting like DMZ, MAC filtering, and port forwarding are provided. 3.7.1 Gateway - Information 1. Access the web interface. Refer to page 7, if needed. 2. Click the Gateway link from the top of the screen. Then select Information. 3. The Information fields are defined following this screen example. Label Description Internet Settings Gateway MAC Address Displays the Media Access Control (MAC) address of the residential gateway. Internet IP Address Displays the Internet IP address obtained from the service provider. Subnet Mask Displays the subnet mask of the Internet IP address. Default Gateway Displays the default gateway IP address. DNS Displays the DNS server IP address. DHCP Remaining Time Displays the remaining DHCP lease time before expiration Refresh Click to refresh the information. DDW3612 Subscriber User Guide • July, 2010 19 3.7 Gateway Ubee Interactive Label Description Local Settings 20 Gateway IP Address Displays the local IP address of the LAN interface. Subnet Mask Displays the subnet mask value. DHCP Server Displays the status of the DHCP sever feature (Enabled/Disabled). NAT Displays the status of the NAT feature (Enabled/Disabled). Wireless Status Displays the status of the wireless feature (Enabled/Disabled). Operating Mode Displays what mode the router is working in (Bridge, NAT, Router, or NAT Router). Note: Firewall menu options are not available when the device is in Bridge mode. Firewall options are available only when the device is in NAT, NATRoute, or Route modes. Private IP Range Displays the private IP address assigned to DHCP client. Public IP DHCP Server Range Displays the Public IP DHCP Server Range. Public IP Total Range Displays the Public IP DHCP Server Range. System Up-Time Displays the accumulated time since the last power cycle. DDW3612 Subscriber User Guide • July, 2010 Ubee Interactive 3.7 Gateway 3.7.2 Gateway - Setup The Setup option allows you to make basic configurations to the device. 1. Access the web interface. Refer to page 7, if needed. 2. Click the Gateway link from the top of the screen. 3. Click Setup from the left side of the screen. The Setup fields are explained following this screen example. Label Description LAN IP Address Defines the local IP address, which will be the default gateway address for all wired LAN hosts that connect to the DDW3612 Wireless Cable Modem Gateway. LAN MAC Address Displays the LAN interface’s hardware address. WAN IP Address Displays the current WAN public IP address that is obtained from the service provider. WAN MAC Address Displays the WAN interface’s hardware address. Duration Displays the accumulated time since successfully acquiring a WAN public IP address. Expires Displays the remaining time before the expiration of the WAN IP address, if applicable. Release WAN Lease Click to release the WAN public IP address. Renew WAN Lease Click to renew the WAN IP address. Refresh Click to refresh the status of this page. DDW3612 Subscriber User Guide • July, 2010 21 3.7 Gateway Ubee Interactive Label 3.7.3 Description WAN Connection Type Select the WAN connection type. For each type, different data entry is required, as explained below: 1. DHCP: The WAN interface is set to be a DHCP client, and the IP address is assigned by the service provider’s DHCP server. 2. Static IP: For Static IP, you must manually enter the IP address for the WAN interface. 3. PPTP (DHCP): For Point to Point Tunneling Protocol (PPTP), you must enter a username, password, and the PPTP server’s IP address. Host Name Enter the host name for the router. This may be required by some service providers. Domain Name Enter the domain for the router. This may be required by some service providers. MTU Size Enter the Maximum Transmission Unit size, which defines the largest size of the packet or frame that the device can transfer (256-1500). If this is not given by the Service Provider, leave it as is using 0 for the default. Apply Click to save all changes made in the screen. Gateway - DHCP The DHCP option allows you to configure DHCP-specific behavior on the device. 1. Access the web interface. Refer to page 7, if needed. 2. Click the Gateway link from the top of the screen. 3. Click DHCP from the left side of the screen. The DHCP fields are explained following this screen example. 22 DDW3612 Subscriber User Guide • July, 2010 Ubee Interactive 3.7 Gateway Label Description DHCP Server Select Yes to enable or No to disable DHCP on the device. If No is selected, all of the static DHCP rules in this screen are ignored. Private Starting Address Define the starting private IP address for the pool of IP addresses that may be used by connecting clients. Private addresses are translated to public IPs in order to be used on the network. Public Starting Address Define the starting public IP address. Public addresses can be recognized on the network. Number of CPEs Define the maximum number of Customer Premises equipment (CPE) that can connect to the network, via the DDW3612 Wireless Cable Modem Gateway. Lease Time Enter the time in minutes between 1 and 71582788. This field defines the DHCP lease time duration. A DHCP user's PC gets an IP address with a lease time. When the lease time expires, the PC must connect to the DHCP server and be reissued another, unused IP address. DHCP Clients This list to shows all DHCP clients currently connected to the wireless router, either via Ethernet link, or via wireless connection. Each client is also listed with the following information: MAC Address / IP Address / Subnet Mask Duration / Expires: Duration displays the accumulated time since the client acquired the IP address. Expires is the time until the IP expires and must be recycled. If the IP address is reserved to a certain host, it will show "STATIC IP ADDRESS." Select: Click the Select radio button to reserve the current private IP address to be assigned to this host statically. Apply Click Apply to save all changes. Force Available Click Force Available to activate a selected rule in the DHCP Clients List and assign IP addresses. Note: The Select checkbox must be clicked. DDW3612 Subscriber User Guide • July, 2010 23 3.7 Gateway Ubee Interactive 3.7.4 Gateway - Static Lease The Static Lease option allows you to assign static IP addresses to clients on your network within a range. 1. Access the web interface. Refer to page 7, if needed. 2. Click the Gateway link from the top of the screen. 3. Click Static Lease from the left side of the screen. The Static Lease fields are explained following this screen example. Label 24 Description Index Index number of the each client that connects to your network. MAC Address This field is populated with the MAC address of the client that you may want to assign a static IP address to. IP Address Enter a specific IP address to assign to the specific client/host. Enabled Click Enabled to activate this rule. Clear Click Clear to delete the rule. Apply Click Apply to save all screen changes. DDW3612 Subscriber User Guide • July, 2010 Ubee Interactive 3.7 Gateway 3.7.5 Gateway - DDNS The Dynamic Domain Name Service (DDNS) option allows you to configure your registered Domain Name with a dynamic IP address. 1. Access the web interface. Refer to page 7, if needed. 2. Click the Gateway link from the top of the screen. 3. Click DDNS from the left side of the screen. The DDNS fields are explained following this screen example. Label Description DDNS Service Select the service provider used for your DDNS Service or Disabled. www. DyDNS.org www.no-ip.com User Name Input your DDNS account username as subscribed to the service provider. Password Enter your password for the above account. Host Name Input the host name, as specified by the DDNS service provider. IP address/Status These fields are automatically populated once the User Name and Password are entered. Apply Click Apply to save all screen changes. Refresh Click to refresh the page. DDW3612 Subscriber User Guide • July, 2010 25 3.7 Gateway Ubee Interactive 3.7.6 Gateway - Time The Time option allows you to configure the system time obtained from network servers via Simple Network Time Protocol (SNTP). The device must be reset for any changes to take effect. 1. Access the web interface. Refer to page 7, if needed. 2. Click the Gateway link from the top of the screen. 3. Click Time from the left side of the screen. The Time fields are explained following this screen example. Label 26 Description Enable SNTP Click Yes to enable SNTP (Network Time Protocol). Click No to disable the feature. SNTP is a protocol for synchronizing the clocks of computing devices over networks. Current Time Displays the current system time. System Start Time Displays the accumulated time since system was started. Time Server 1 Defines the Time server IP address or Domain name. Use the one provided, or enter an alternative choice. Time Server 2 Defines the Time server IP address or Domain name. Use the one provided, or enter an alternative choice. Time Server 3 Defines the Time server IP address or Domain name. Use the one provided, or enter an alternative choice. Time Zone Offset If needed, define the time zone offset in Hours and Minutes. For example: 8 means GMT + 08, -1 means GMT -01. Apply Click Apply to save all screen changes Reset Values Click Reset Values to reset the screen to factory defaults. DDW3612 Subscriber User Guide • July, 2010 Ubee Interactive 3.7 Gateway 3.7.7 Gateway - Options The Options selection allows you to define what networking protocols are enabled or disabled on the device. 1. Access the web interface. Refer to page 7, if needed. 2. Click the Gateway link from the top of the screen. 3. Click Options from the left side of the screen. The Options fields are explained following this screen example. Label Description WAN Blocking Select Enable to block connection requests initialized from Internet users. Ipsec PassThrough If Internet users initialize an IPSec VPN request to a host located behind the router, NAT makes this attempt fail. Select Enable to force the router to redirect the IPSec request to the local host. PPTP PassThrough If Internet users initialize a PPTP VPN request to a host located behind the router, NAT will make this attempt fail. Select Enable to force the router to redirect the PPTP request to the local host. Multicast Enable Multicast optimizes the bandwidth utilization compared with unicast especially video streaming applications. Select Enable to enable multicast. DDW3612 Subscriber User Guide • July, 2010 27 3.7 Gateway Ubee Interactive UPnP Enable Select Enable to activate Universal Plug and Play (UPnP). A UPnP device can dynamically join a network, obtain an IP address, convey its capabilities, and learn about other devices on the network. In turn, a device can leave a network smoothly and automatically when it is no longer in use. DNS Relay Apply 3.7.8 Click Apply to save all screen changes. Gateway - Mac Filtering The MAC Filtering option allows you to filter MAC addresses in order to block internet traffic from specific network devices on the LAN. This filtering establishes a black list. Any host listed on this list will not be able to access the network/internet through the DDW3612 Wireless Cable Modem Gateway. 1. Access the web interface. Refer to page 7, if needed. 2. Click the Gateway link from the top of the screen. 3. Click MAC Filtering from the left side of the screen. The MAC Filtering fields are explained following this screen example. Label 28 Description Index The Index number of the rule. MAC Address Enter the MAC address to block. DDW3612 Subscriber User Guide • July, 2010 Ubee Interactive 3.7 Gateway Clear Select Clear to delete the filtering rule. View Additional Rules: Select from the pull-down to display the remaining 10 rules, if they exist. 20 rules total are supported. Apply Click Apply to save all screen changes. 3.7.9 Gateway - IP Filtering The IP Filtering option allows you to filter IP addresses in order to block internet traffic to specific network devices on the LAN. Any host listed on this list will not be accessible to internet traffic. 1. Access the web interface. Refer to page 7, if needed. 2. Click the Gateway link from the top of the screen. 3. Click IP Filtering from the left side of the screen. The IP Filtering fields are explained following this screen example. Label Description Start Address Enter the start IP address. End Address Enter the end IP address. Enabled Select Enabled to activate the rule. Apply Click Apply to save all screen changes. DDW3612 Subscriber User Guide • July, 2010 29 3.7 Gateway Ubee Interactive 3.7.10 Gateway - Port Filtering The Port Filtering option allows you to configure port filters in order to block specific internet services on specific ports to all devices on the LAN. 1. Access the web interface. Refer to page 7, if needed. 2. Click the Gateway link from the top of the screen. 3. Click Port Filtering from the left side of the screen. The Port Filtering fields are explained following this screen example. Label 30 Description Start Port Enter the start port. End Port Enter the end port. Protocol Select the protocol type, or select Both for UDP and TCP. Enabled Select Enabled to active the rule and filter out all traffic on the specified ports. Apply Click Apply to save all screen changes. DDW3612 Subscriber User Guide • July, 2010 Ubee Interactive 3.7 Gateway 3.7.11 Gateway - Forwarding Port forwarding settings may be required to resolve issues where data is sent out from a local host to the internet but the return path of expected data is not being received by your local host. Or, you have an application or service running on your local network (on a local host) that cannot be accessed from the internet directly (e.g. a request to a local audio server). Port forwarding simply tells the cable modem to which computer on the local area network to send the data. Here are some examples: XBOX/PlaySation—Some games/applications may require port forwarding. Home Security Systems—Some security systems that use the internet may require port forwarding. Audio Servers/VOIP—Port forwarding may be required to fully enable these applications/services. Note: If your host system(s)/applications do not have communications issues with the internet, Forwarding is not needed. You will need two major pieces of information to setup forwarding: IP address(s) of local host systems (e.g. XBOX) for which you need to setup a port forwarding rule. See the continuing discussion below for how to obtain the IP address(s). The port numbers that a local host’s application listens to for incoming requests/data (e.g. a game or other service). These port numbers should be available in the documentation associated with the application. You can also refer to http://portforward.com for more information. The following tasks are recommended to support the setup of forwarding rules: Enable UPNP (Universal Plug and Play). This may resolve the issue you have without the need to set forwarding rules. Access the web interface of the cable modem, see page 7. Select Gateway from the top menu, then Options from the left menu. Select the option to enable UPNP. Test your local host/application (e.g. XBOX) to determine correct functionality. If it is still not properly communicating, continue with forwarding. “Tools - Client List” on page 64—Use this option to obtain the MAC and IP address of the internal host for which you are setting up a forwarding rule. You will also need these for the following task. “Gateway - Static Lease” on page 24—Before setting up forwarding, you are recommended to assign a Static IP lease to the client/host to which you are setting up forwarding. This way, the IP does not change and disrupt your forwarding rules. For example, if you are hosting a web server in your internal network and you wish to setup a forwarding rule for it, you should assign a static IP lease to that system to keep the IP from renewing and disrupting the forwarding rule. DDW3612 Subscriber User Guide • July, 2010 31 3.7 Gateway Ubee Interactive Setup Port Forwarding (XBOX example): To setup Port Forwarding, use the following procedure: 1. Access the web interface. Refer to page 7, if needed. 2. Click the Gateway link from the top of the screen. Click Forwarding from the left side of the screen. The Forwarding fields are explained following this screen example. 3. The example below shows how to setup an XBOX running Modern Warfare 2. Since multiple ports are used for XBOX and this particular game, a separate forwarding rule is setup for each port. Multiple ports and forwarding rules may not be the case for other applications, however. Note the following: The XBOX IP is entered in the Local IP field. Notice how the IP is entered in 4 rows, one row for each port used by the XBOX. The ports used by the XBOX are defined in the Internal Port field. The same ports used by the XBOX are also defined in the External Port Start and End fields. Keep in mind that you may want to setup some applications/services to listen on one internal port, while external internet users who want to access that application address it using another port, such as an Audio server. Using the screen example below, Internal Ports are the ports that local servers listen to. External Ports are the ports that the cable modem listens to from the WAN. Port Forwarding rules are created per port. So a rule set up for port 53 will only work for port 53. A port can only be used by one program at a time. For detailed information on port forwarding, including how to set it up for specific applications using specific network devices (for example, cable modems), refer to: http://portforward.com or consult your host device or application user manual. 32 DDW3612 Subscriber User Guide • July, 2010 Ubee Interactive 3.7 Gateway Label Description Index Displays the Index number of the rule. Local IP Enter the last digits of the IP address of the server for which to setup the forwarding rule. Internal Port Enter the port number listened to by the server host located in your LAN. Public Interface IP Normally, this field is not modified unless you wish to designate another router on the network to forward data through. Ext. Start Port Define the port number to start the range of ports to publish to the Internet. Ext. End Port Define the port number to end the range of ports published to Internet. Note: Be very careful with ranges. Ports within a range will not be usable by other applications that may require them. It is common and safer to enter the same port number as the start and end of the range. Protocol Select the protocol type, UDP, TCPIP, or Both. Enabled Select to enable this rule. Apply Click to save. Port Map Click to show a list of common applications and their ports. DDW3612 Subscriber User Guide • July, 2010 33 3.7 Gateway Ubee Interactive 3.7.12 Gateway - Port Triggering The Port Triggering option allows you to configure dynamic triggers to specific devices on the LAN. This allows for special applications that require specific port numbers with bi-directional traffic to function properly. Applications such as video conferencing, voice, gaming, and some messaging program features may require these special settings. Refer to page 35 for more information on how to setup Port Triggering. 1. Access the web interface. Refer to page 7, if needed. 2. Click the Gateway link from the top of the screen. 3. Click Port Triggering from the left side of the screen. The Port Triggering fields are explained following this screen example. Label 34 Description Trigger Range The trigger port is a port (or a range of ports) that triggers the router to record the IP address of the LAN computer that sent the traffic to a server on the WAN. Start Port Enter a port number or the starting port number in a range of port numbers. End Port Enter a port number or the ending port number in a range of port numbers. Target Range Target Range is a port (or a range of ports) that a server on the WAN uses when it responds to service requests. The router forwards the traffic with this port (or range of ports) to the client computer on the LAN that requested the service Start Port Enter a port number or the starting port number in a range of port numbers. DDW3612 Subscriber User Guide • July, 2010 Ubee Interactive 3.7 Gateway End Port Enter a port number or the ending port number in a range of port numbers. Protocol Define the protocol type for this rule, UDP, TCP, or Both. Enable Click to activate this rule. Apply Click to save. 3.7.13 Additional Information - Port Triggering Some services use a dedicated range of ports on the client side and a dedicated range of ports on the server side. With regular port forwarding you set a forwarding rule to forward a service to the IP address of a LAN side host. The problem is that port forwarding forwards a service to a single LAN IP address. With port triggering, we define 2 kinds of ports: Trigger Port and Target Port. Trigger port is defined as the service request with a specific destination port number sent from a LAN side host. Target Port is defined as the ports this specific application requires a LAN host to listen to. Thus, the server returns responses to these ports. Example: 1. John requests a file from the Real Audio server (port 7070). Port 7070 is a “trigger” port and causes the wireless router to record John’s computer IP address. The DDW3612 Wireless Cable Modem Gateway associates John's computer IP address with the "target" port range of 6970-7170. 2. The Real Audio server responds to a port number ranging between 6970-7170. 3. The DDW3612 Wireless Cable Modem Gateway forwards the traffic to John’s computer IP address. 4. Only John can connect to the Real Audio server until the connection is closed or times out. DDW3612 Subscriber User Guide • July, 2010 35 3.7 Gateway Ubee Interactive 3.7.14 Gateway - Pass Through The Pass Through option allows you to configure a pass through table. Devices in the pass through table are treated as bridge devices, storing and forwarding data between LAN interconnections. 1. Access the web interface. Refer to page 7, if needed. 2. Click the Gateway link from the top of the screen. 3. Click Pass Through from the left side of the screen. The Pass Through fields are explained following this screen example. Label 36 Description Index Index number of the pass through rule. MAC Address Input the host’s MAC address. Clear Select the box to delete this rule. Apply Click to save. DDW3612 Subscriber User Guide • July, 2010 Ubee Interactive 3.7 Gateway 3.7.15 Gateway - DMZ Host The DMZ Host option allows you to configure a host IP address to be exposed or visible to the WAN (public internet). This may be used when applications do not work with port triggers, or for other networking strategies. 1. Access the web interface. Refer to page 7, if needed. 2. Click the Gateway link from the top of the screen. 3. Click DMZ Host from the left side of the screen. The DMZ Host fields are explained following this screen example. Label Description DMZ Address Enter the DMZ host IP address. Apply Click to save. DDW3612 Subscriber User Guide • July, 2010 37 3.7 Gateway 38 Ubee Interactive DDW3612 Subscriber User Guide • July, 2010 Ubee Interactive 3.8 3.8 Wireless Wireless This chapter contains instructions for all wireless configuration settings. 1. Access the web interface. Refer to page 7, if needed. 2. Click the Wireless link from the top of the screen. Note: If having wireless issues or questions, refer to “Wireless Network Deployment and Troubleshooting” on page 52. 3.8.1 Wireless - Radio The Radio option allows you to configure the wireless radio including the current country, channel number, and bandwidth control. 1. Access the web interface. Refer to page 7, if needed. 2. Click the Wireless link from the top of the screen. 3. Click Radio from the left side of the screen. The Radio fields are explained following this screen example. Label Description Wireless Interfaces Displays the Wireless name / MAC address. Wireless Displays the wireless radio’s status, Enabled or Disabled. Country Select the country where you use this device. Output Power Set the percent of the Output Power for the radio. 802.11 Band You can choose 2.4Ghz or 5 Ghz. Note: The distance coverage for 5Ghz is less than 2.4Ghz. DDW3612 Subscriber User Guide • July, 2010 39 3.8 Wireless 40 Ubee Interactive 802.11 n-Mode Select Auto to use 802.11 n mode when possible. This mode has a significant increase in the maximum raw OSI physical layer data rate from 54 Mbit/s to a maximum of 600 Mbit/s with the use of four spatial streams when at a channel width of 40 MHz. Bandwidth You have the options of 20Mhz and 40Mhz. If choosing 20Mhz, the sideband label should not be set. And if choosing 40 Mhz, the sideband should set to lower or upper 20Mhz. 40 MHz channels doubles the channel width. This allows for a doubling of the PHY data rate over a single 20 MHz channel. Sideband for Control Channel (40 Mhz only) Only when using 40Mhz Bandwidth, should you choose the Lower or Upper 20Mhz. Control Channel Select a specific channel 1-11 to deploy the wireless network. This allows you to set the operating frequency/channel depending on your particular region. Channel selection can have an impact on wireless networking performance. For more information, refer to “Wireless Channel Selection” on page 55. Apply Click to save. Restore Wireless Defaults Click to restore the factory default settings for wireless configurations. DDW3612 Subscriber User Guide • July, 2010 Ubee Interactive 3.8 Wireless 3.8.2 Wireless - Primary Network The Primary Network option allows you to configure a variety of wireless security settings. 1. Access the web interface. Refer to page 7, if needed. 2. Click the Wireless link from the top of the screen. 3. Click Primary Network from the left side of the screen. The Primary Network fields are explained following this screen example. Note: Wireless default values are discussed in “Default Values” on page 4. Label Description Primary Network Select to Enable or Disable the primary network. Network Name Enter the unique SSID of the cable modem, or accept the default. Refer to page 4 for more information on the SSID. Closed Network If Enable is selected, the selected SSID is hidden and is undiscoverable by wireless clients unless manually setup on the client. If Disabled, the SSID is discoverable. DDW3612 Subscriber User Guide • July, 2010 41 3.8 Wireless Ubee Interactive Label 42 Description WPA Wi-Fi Protected Access (WPA) is a subset of the IEEE 802.11i standard. Key differences between WPA and WEP are user authentication and improved data encryption. WPA-PSK If you don't have an external RADIUS server you should use WPA-PSK (WPA Pre-Shared Key) that only requires a single (identical) password entered into wireless gateway and wireless client. As long as the passwords match, a client will be granted access to the wireless LAN. WPA2 Advanced protocol, certified through Wi-Fi Alliance's WPA2 program, implements the mandatory elements of 802.11i. In particular, it introduces a new AES-based algorithm, CCMP, that is considered fully secure. WPA2-PSK If you don't have an external RADIUS server you should use WPA2-PSK (WPA Pre-Shared Key) that only requires a single (identical) password entered into wireless gateway and wireless client. As long as the passwords match, a client will be granted access to the wireless LAN. WPA/WPA2 Encryption Switch to enable or disable WPA/WPA2 encryption. WPA Pre-Shared Key The encryption mechanisms used for WPA and WPA-PSK are the same. The only difference between the two is that WPA-PSK uses a simple common password, instead of user-specific credentials. Refer to page 4 for the default value of the shared key. RADIUS Server Input the IP address of RADIUS server, if used. RADIUS Port Enter a RADIUS port number when WPA or 802.1x network authentication is selected. RADIUS Key Enter the RADIUS Key when WPA or 802.1x network authentication is selected. Group Key Rotation Interval Allows the wireless router to generate the best possible random group key and update all the key-management capable stations periodically. WPA/WPA2 Re-auth Interval Wireless router (if using WPA-PSK key management) or RADIUS server (if using WPA key management) sends a new group key out to all clients. The re-keying process is the WPA equivalent of automatically changing the WEP key for a wireless access point and all stations in the WLAN on a periodic basis. Setting of the WPA Group Key Update Timer is also supported in WPA-PSK mode. DDW3612 Subscriber User Guide • July, 2010 Ubee Interactive 3.8 Wireless Label Description WEP Encryption If you don’t have WPA(2)-aware wireless clients, then use WEP key encrypting. A higher bit key offers better security. WEP encryption scrambles the data transmitted between the wireless stations and the DDW3612 Wireless Cable Modem Gateway to keep network communications private. It encrypts unicast and multicast communications in a network. Both the wireless stations and the DDW3612 Wireless Cable Modem Gateway must use the same WEP key. Data Encryption can be set to WEP 128-bit, 64-bit, or Disable. Shared Key Authentication Shared Key is an authentication method used by wireless LANs, which follow the IEEE 802.11 standard. Wireless devices authenticate each other by using a secret key that is kept by both devices. 802.1x Authentication Enable to have the DDW3612 Wireless Cable Modem Gateway authenticate wireless clients. Network Key 1-4 You can pre-define up to 4 keys for 64-bit or 128-bit (64bit keys require 10 hexadecimal digits) (128-bit key require 26 hexadecimal digits). Current Network Key You can select one of the four pre-defined keys as the current network key. Passphrase You can set WEP encryption key by entering a word or group of printable characters in the Passphrase box and click Generate WEP keys. These characters are case sensitive. Generate WEP Keys Force the wireless router to generate 4 WEP keys automatically. Apply Click to save the wireless configurations. Automatic Security Configuration Use this feature to setup WPS (Wifi Protected Setup) for devices connecting to the wireless network. Device Name Enter a name for this wireless cable modem for WPS. PIN Enter the Personal Identification Number for this wireless cable modem. Configure Click this button to apply the WPS-Device Name/PIN Setup. WPS Add Client/Push Button/PIN Select which method to have connecting wireless clients connect to the wireless network, Push Button or PIN. If PIN is selected, clients are required to enter the PIN in order to access the wireless cable modem. For push button, a client pushes a button, either on the device or in software on the device, and then on the wireless cable modem to establish secure communications. Apply Click Apply to save WPS configurations. DDW3612 Subscriber User Guide • July, 2010 43 3.8 Wireless Ubee Interactive 3.8.3 Wireless - Access Control The Access Control option allows you to configure what clients can access your wireless network. 1. Access the web interface. Refer to page 7, if needed. 2. Click the Wireless link from the top of the screen. 3. Click Access Control from the left side of the screen. The Access Control fields are explained following this screen example. Label 44 Description Wireless Interface Select the wireless interface in order to set access control parameters. MAC Restrict Mode Use this feature to control wireless access to your network by MAC address. Select Disable to turn off MAC Restrictions and allow any wireless client to connect to this wireless router. Note, however, if you use other security mechanisms for access to the wireless network, clients must still adhere to those restrictions. Select Allow to create a list of wireless clients that can connect to the wireless network. Enter the MAC Addresses of these clients in the MAC Addresses fields. All MAC addresses not on the list, will not be allowed access to your wireless network. Select Deny to create a list of wireless clients that you do not want to have access to your wireless network. Enter the MAC Addresses of these clients in the MAC Addresses fields. DDW3612 Subscriber User Guide • July, 2010 Ubee Interactive 3.8 Wireless 3.8.4 MAC Addresses Input the MAC addresses. You may consider cutting and pasting MAC addresses from the connected clients list at the bottom of the screen. Apply Click to save. Connected Clients List of current connected Wireless client listed by MAC address. Fields definitions are: Age(s)—The duration since the wireless client’s polled values were sent to the wireless router. The values include all information shown on this screen. The lower the number, the more current its data. RSSI(dBm)—Received signal strength from the device to the wireless cable modem. This value is commonly used to assist in troubleshooting wireless performance issues. A signal strength of -30dBm to -67dBm is considered optimal. Levels of -67dBm and lower (e.g. -70, -80, etc.) will have a downward impact on wireless data throughput. Refer to “Wireless Network Deployment and Troubleshooting” on page 52 for more information. IP Address—The IP address assigned to this wireless client. Host Name—The host name of the wireless client. Wireless - Advanced The Advanced option allows you to configure data rates and WiFi thresholds. Note: This feature is available when logged into the device using the MSO user login. Refer to page 4 for more information. 1. Access the web interface. Refer to page 7, if needed. 2. Click the Wireless link from the top of the screen. 3. Click Advanced from the left side of the screen. The Advanced fields are explained following this screen example. DDW3612 Subscriber User Guide • July, 2010 45 3.8 Wireless Ubee Interactive Label 46 Description 54g™ Network Mode This field can only be set if 802.11-n Mode to set to Off in the Radio screen as discussed on page 39. Select which network mode in which to run DDW3612 Wireless Cable Modem Gateway. The options are listed below: 54g auto, for self adaptive connection 54g performance, highest speed 54g LRS, for limited speed 802.11b, for connections to 11b clients only. Basic Rate Set Select the Basic Rate Set which is the rate that all wireless clients must support in order to connect to the DDW3612 Wireless Cable Modem Gateway. The options are All and Default. 54g™ Protection In Auto mode, the DDW3611 will use RTS/CTS to improve 802.1 1g performance in mixed 802.11 b/g networks. Turn protection Off to maximize 802.11g throughput under most conditions. XPress™ Technology XPress™ is a standards-based frame-bursting approach to improve 802.11g wireless LAN performance developed by Broadcom. Select to Enable or Disable this feature. Additional Information: When Xpress is turned on, aggregate throughput can improve by up to 27% in 802.11g-only networks, and up to 75% in mixed networks comprised of 802.11g and 802.11b standard equipment. Rate Select Auto or select a specific data rate to limit the connection rates of wireless clients. Beacon Interval Specify the Beacon Interval from 100 to 6553 5ms. This value indicates the frequency interval of the beacon. A beacon is a packet broadcast by the DDW3611 to keep the network synchronized. A beacon includes information regarding the wireless networks service area, the access point address, the broadcast destination addresses, a time stamp, delivery traffic indicator maps, and the Traffic Indicator Message (TIM). DTIM Interval Specify the DTIM interval from 3 to 255ms. This value indicates how often the DDW3611 sends out a Delivery Traffic Indication Message (DTIM). Lower settings result in more efficient networking, while preventing your wireless clients from dropping into power-saving sleep mode. Higher settings allow your wireless clients to enter sleep mode, thus saving power, but interferes with wireless transmissions. Fragmentation Threshold Specify the fragmentation threshold packet size between 2562346 bytes. Fragmentation takes place when a packet’s size exceeds the fragmentation threshold. RTS Threshold Specify the RTS threshold from 0 to 2347ms. This setting determines how large a packet can be before the DDW3611 coordinates transmission and reception to ensure efficient communication. This value should remain at its default setting of 2347 bytes. If you encounter inconsistent data flow, minor modification to this setting is recommended. DDW3612 Subscriber User Guide • July, 2010 Ubee Interactive 3.8 Wireless NPHY Rate Set the Physical Layer (NPHY) rate. These rates are only applicable when the 802.11n mode is configured as Automatic. 802.11n Protection If you select Auto, the DDW3611 will use Request to Send/Clear to Send (RTS/CTS) to improve the performance in 802.11 mixed environments. If you select Off, the 802.11 performance will be maximized under most conditions, while the other 802.11 modes (802.11b, etc.) will be secondary. Multicast Rate Specify the rate at which multicast packets are transmitted and received on your wireless network. Apply Click to submit changes. DDW3612 Subscriber User Guide • July, 2010 47 3.8 Wireless Ubee Interactive 3.8.5 Wireless - Bridging The Bridging option allows you to configure the DDW3612 Wireless Cable Modem Gateway to act as a wireless network bridge and establish wireless links with other wireless access points. To establish a bridge, you need to know the MAC address of the peer device, which must also be in wireless bridging mode. The DDW3612 Wireless Cable Modem Gateway can establish up to four wireless links with other wireless access points. When wireless devices are in wireless bridging mode, they form a WDS (Wireless Distribution System) allowing the computers in one LAN to connect to the computers in the other LAN. Note: Be careful to avoid bridge loops when you enable bridging devices. Bridge loops cause broadcast traffic to circle the network endlessly, resulting in possible throughput degradation and disruption of communications. Note: This feature is available when logged into the device using the MSO user login. Refer to page 4 for more information. Also, Firewall menu options are not available when the device is in Bridge mode. Firewall options are available only when the device is in NAT, NATRoute, or Route modes. 1. Access the web interface. Refer to page 7, if needed. 2. Click the Wireless link from the top of the screen. 3. Click Bridging from the left side of the screen. The Bridging fields are explained following this screen example. Label 48 Description Wireless Bridging Select Enabled to enable bridging. Select Disabled to disable bridging. Remote Bridges Enter the MAC address(es) of other wireless access points that you want to establish a bridge to and from. Keep in mind that these access points must also have bridging enabled. Apply Click to save all changes. DDW3612 Subscriber User Guide • July, 2010 Ubee Interactive 3.8 Wireless 3.8.6 Wireless - Wifi Multimedia The Wifi Multimedia option allows you to configure QoS (Quality of Service) to ensure the quality of service in wireless networks. Wifi Multimedia controls WLAN transmission priority on packets to be transmitted over the wireless network. WMM QoS prioritizes wireless traffic according to the delivery requirements of the individual user and applications. Refer to page 50 for more information on Wifi Multimedia. Note: This feature is available when logged into the device using the MSO user login. Refer to page 4 for more information. 1. Access the web interface. Refer to page 7, if needed. 2. Click the Wireless link from the top of the screen. 3. Click Wifi Multimedia from the left side of the screen. The Wifi Multimedia fields are explained following this screen example. Label Description WMM Support Select On or Off to turn on or off WMM support. No Acknowledgement Select On or Off to turn on or off the acknowledgement of data frames. In QoS mode, frames to send can have two values: QosAck and QosNoAck. Frames with QosNoAck are not acknowledged, thus avoiding the retransmission of highly timecritical data. DDW3612 Subscriber User Guide • July, 2010 49 3.8 Wireless Ubee Interactive 3.8.7 Power Save Support Select On or Off to turn on or off power savings. WMM Power Save increases the efficiency and flexibility of data transmission. Specifically, the wireless client device can "doze" between packets to save power, while the wireless access point buffers downlink frames. The application chooses the time to wake up and receive data packets to maximize power conservation without sacrificing Quality of Service. EDCA-AP Parameters Enhanced Distributed Channel Access - Access Point. In this area of the screen, four Access Categories (ACs) are listed to prioritize wireless network traffic. Refer to the next row below. AC-BE AC-BK AC-VI AC-VO The Wi-Fi Multimedia feature prioritizes traffic according to four access categories (ACs): AC-BE—Best Effort, medium throughput and delay. Most traditional IP data is sent to this queue. AC-BK—Background, high throughput. Bulk data that requires maximum throughput and is not time-sensitive is sent to this queue (for example, FTP data). AC-VI—Video AC-VO—Voice CWmin/CWmax/AIFSN For each AC, set the following fields: CWmin/CWmax AIFS—Interframe Space Back off Counter TXOP (b) Limit (usec)/TXOP (a/g) Limit (usec)/Discard Oldest First Enter a TXOP limit. Each AC is assigned a Transmit Opportunity (TXOP). A TXOP is a bounded time interval during which a station can send as many frames as possible (as long as the duration of the transmissions does not extend beyond the maximum duration of the TXOP). If a frame is too large to be transmitted in a single TXOP, it should be fragmented into smaller frames. The use of TXOP reduces the problem of low rate stations gaining an inordinate amount of channel time in the legacy 802.11 DCF MAC. A TXOP time interval of 0 means it is limited to a single MSDU or MMPDU. EDCA STA Parameters These settings are used for receiving terminals. CWmin/CWmax/AIFSN TXOP (b) Limit (usec)/TXOP (a/g) Limit (usec) Refer to the rows above for definitions of these fields. Apply Click to save all changes. Additional Information - WiFi MultiMedia (WMM) WMM QoS is a part of the IEEE 802.11e QoS enhancement to certified WiFi wireless networks. On wireless access points without WMM QoS, all traffic streams are given the same access priority to the wireless network. If the introduction of another traffic stream creates a data transmission demand that exceeds the current network capacity, then the new traffic stream reduces the throughput of the other traffic streams. A WMM QoS capability in a network may assign access categories (ACs) to various streams of packets. The assigned AC of a stream of packets may depend on the packets' priority, for example, as assigned by an application, and may be referred 50 DDW3612 Subscriber User Guide • July, 2010 Ubee Interactive 3.8 Wireless to as a user priority (UP). An AC may include a common set of enhanced distributed channel access (EDCA) parameters that may be used by QoS to contend for a channel in order to transmit packets with certain priorities. Different ACs may be associated with different power saving parameters. One such power saving parameter may be, for example, the delivery mechanism used by an access point (AP) to deliver packets to a station (STA) that is operating in a reduced power mode. For example, one delivery mechanism may be the “legacy” power save mechanism of the IEEE 802.11 standard: “ANSI/IEEE Std. 802.11, Information technology—Telecommunications and information exchange between systems—Local and metropolitan area networks—Specific requirements—Part 11: Wireless LAN Medium Access Control (MAC) and Physical Layer (PHY) Specifications” (published 1999; reaffirmed June 2003). Another delivery mechanism may be the automatic power save delivery (APSD) mechanism, e.g., unscheduled APSD (UAPSD) or scheduled APSD (S-APSD), as defined in 802.11e. A QoS station (QSTA) may define all or some of the ACs as trigger-enabled and/or delivery-enabled. A trigger- and delivery-enabled AC may use UAPSD as the default delivery mechanism, whereas an AC that is neither trigger- nor delivery-enabled may use the “legacy” power save delivery mechanism. DDW3612 Subscriber User Guide • July, 2010 51 3.9 Wireless Network Deployment and Troubleshooting 3.9 Ubee Interactive Wireless Network Deployment and Troubleshooting This section provides the following information which may be useful in understanding, deploying, and troubleshooting wireless environments: “Wireless Speeds and Performance” on page 52 “Received Signal Strength” on page 52 “Estimating Wireless Cable Modem to Wireless Client Distances” on page 53 “Wireless Channel Selection” on page 55 3.9.1 Wireless Speeds and Performance This section provides various topics on managing wireless speeds and performance: “Received Signal Strength” on page 52 “Estimating Wireless Cable Modem to Wireless Client Distances” on page 53 “Wireless Channel Selection” on page 55 3.9.1.1 Received Signal Strength Received signal strength (RSSI) is measured from connected wireless client devices to the wireless cable modem. This value can significantly impact wireless speeds/performance. It is determined by: materials (e.g. open air, concrete, trees, etc.) distance between wireless clients and the wireless cable modem wireless capabilities of the client devices To determine the received signal strength, refer to “Wireless - Access Control” on page 44 and review the RSSI value. A signal strength of -30dBm to -67dBm is considered optimal. Levels of -67dBm and lower (e.g. -70, -80, etc.) will have a downward impact on wireless data throughput. See the following sections for more information: 52 DDW3612 Subscriber User Guide • July, 2010 Ubee Interactive 3.9 Wireless Network Deployment and Troubleshooting 3.9.1.2 Estimating Wireless Cable Modem to Wireless Client Distances This section provides some guidelines on how far a wireless cable modem can be placed in varying environments from wireless client devices. These variances include the capabilities of wireless clients and the types of material through which the wireless signal must pass. When the wireless cable modem and wireless clients reach the distance threshold between each other, network performance degrades. 1. Connect a wireless client to the wireless cable modem. Refer to “Connect/Validate Wireless Clients” on page 10 if needed. 2. Place the wireless client at around one meter (three feet) away from the wireless cable modem. 3. Obtain the RSSI value for the connected client. Refer to “Wireless - Access Control” on page 44. This value will be used in the formula further below. 4. Use the table below to determine what materials the wireless signal must travel through in order to reach the desired wireless coverage distance. Attenuation Considerations at 2.4GHz Material Attenuation Connector/Cable 3.5dB Free Space .24dB / foot Interior Drywall 3dB to 4dB Cubicle Wall 2dB to 5dB Wood Door (Hollow/Solid) 3dB to 4dB Brick, Concrete Wall (Note 1) 6dB to 18db Glass Window (not tinted) 2dB to 3dB Double Pane Coated Glass 13dB Bullet Proof Glass 10dB Steel / Fire Exit Door 13dB to 19dB Human Body 3dB Trees (Note 2) .15dB / foot Note 1: Different types of concrete materials are used in different parts of the world and the thickness and coating differ depending on whether it is used in floors or interior or exterior walls. Note 2: The attenuation caused by trees varies significantly depending upon the shape and thickness of the foliage. 5. Using the attenuation value from the materials table above, enter it in the following formula. Additional explanation is provided further below. DDW3612 Subscriber User Guide • July, 2010 53 3.9 Wireless Network Deployment and Troubleshooting Ubee Interactive Formula: (Transmit Power, use -30dBm) – (Receiver Sensitivity, use RSSI value) = Allowable Free Space Loss Allowable Free Space Loss ÷ Materials Attenuation Value = Optimal Distance in Feet Between the Cable Modem and a Wireless Client Example: (-30dBm) - (-67dBm) = 37dBm (allowable free space loss for a 54Mbps connection) 37dBm ÷ .24db/foot (for open space) = 154.16 feet 6. Once you know the optimal feet distance between individual wireless clients and the wireless cable modem, you can resolve and prevent some performance issues. 7. To check the wireless signal strength and speed, use the following steps for a Windows computer connected wirelessly to the wireless cable modem. If the wireless computer is not connected, refer to “Connect/Validate Wireless Clients” on page 10. Double-click the Wireless networking icon in the system tray. Review the speed and signal strength in the Status window. 54 DDW3612 Subscriber User Guide • July, 2010 Ubee Interactive 3.9 Wireless Network Deployment and Troubleshooting 3.9.1.3 Wireless Channel Selection In some environments, it may be necessary to change the wireless channel on which the wireless cable modem operates. This may especially be the case in computing environments, test environments, and other environments where they may be several wireless access points operating in the 2.4Ghz range. In some cases, you may want to segment your wireless traffic where a group of devices operates on one channel and another group operates on another channel, and so on. This is done by configuring the channel on each wireless access point individually (if you have multiples). If you only have control over one wireless device in an environment where they may be several, you can change the wireless channel on your device to one that is not heavily used. Note: To change the wireless broadcast channel, refer to “Wireless - Radio” on page 39. The diagram below show the channels available for selection in the Americas. Each available channel is 22Mhz wide. Since channels overlap, it is always best to choose channels that have the least overlap (typically 1, 6, and 11 in the Americas, and 1, 5, 9, and 13 in Europe). Overlapping channels are one possible source for wireless network performance issues. Source: Wikipedia.org, and IEEE article IEEE 802.11n-2009 DDW3612 Subscriber User Guide • July, 2010 55 3.9 Wireless Network Deployment and Troubleshooting 56 Ubee Interactive DDW3612 Subscriber User Guide • July, 2010 Ubee Interactive 3.10 3.10 Parental Control Parental Control This chapter provides instructions for controlling the internet access of users on the DDW3612 Wireless Cable Modem Gateway network. These parental control features include defining user/password access, defining the what times users are allowed to access the internet, blocking certain web sites, and blocking certain sites by keywords. 1. Access the web interface. Refer to page 7, if needed. 2. Click the Parental Control link from the top of the screen. 3.10.1 Parental Control - User Setup The User Setup option allows the configuration of user accounts that can or cannot connect to your wireless or wired network, and the parameters of the connection. 1. Access the web interface. Refer to page 7, if needed. 2. Click the Parental Control link from the top of the screen. 3. Click User Setup from the left side of the screen. The User Setup fields are explained following this screen example. Note: To enable Parental Control, refer to page 59. DDW3612 Subscriber User Guide • July, 2010 57 3.10 Parental Control Ubee Interactive Label 58 Description User Configuration/Add User/Remove User/Enable Select an existing user account to edit from the User Settings pop-up menu. Or, enter a new user name and click the Add button. To activate the user, click the Enable button. To remove a user, select a user from the pop-up menu and click the Remove button. Password Enter the password for this user. It is required when this user tries to access the Internet via the wireless router. Re-Enter Password Re-enter the password as required. Trusted User Click the Enable checkbox to allow the selected user to be trusted user. That means the user is now limited to timing and content when visiting Internet, as defined in the following fields. Content Rule Select from the pop-up menu an existing content rule that defines what kind of websites the user can visit or not. White List Access Only If you have created a content rule which defines a black list and white list, then you can select the White List Access Only checkbox to force the wireless modem to execute the policy for the selected user Time Access Rule Select a defined time access rule to apply to the selected user. Session Duration Enter a time in minutes for the user’s session expiration. Upon expiration, the user can log back in for the same session duration. Inactivity Time Enter the time out value when a user has no activity on the Internet. When the time expires, the user interface to the internet cancelled. Apply Click to save all changes. Trusted Computers Define the trusted hosts that will bypass the Parental Control Process. Add Enter the trusted host’s MAC address and click the Add button to save. Remove To remove a trusted computer, highlight it from the list and click the Remove button. DDW3612 Subscriber User Guide • July, 2010 Ubee Interactive 3.10 Parental Control 3.10.2 Parental Control - Basic Settings The Basic option allows basic selection of rules which block certain Internet content and certain Web sites. When you change your Parental Control settings, you must click on the appropriate "Apply," "Add," or "Remove" button for your new settings to take effect. Refresh your browser's display to see the currently active settings. 1. Access the web interface. Refer to page 7, if needed. 2. Click the Parental Control link from the top of the screen. 3. Click Basic from the left side of the screen. The Basic fields are explained following this screen example. Label Description Enable Parental Control Click the Enable checkbox to activate the Parental Control feature. Apply Click to save all changes in the screen and activate Parental Control, if enabled. Content Policy Configuration This part of the screen allows you to configure the internet content access policy. Add New Policy Enter a policy name and click Add New Policy to create a new policy. Content Policy List/Remove Policy Select from the list an existing policy to edit or remove. If removing a policy, select it from the list and click the Remove Policy button. DDW3612 Subscriber User Guide • July, 2010 59 3.10 Parental Control Ubee Interactive Keyword List/ Add Keyword/ Remove Keyword Enter keywords to use in order to filter out web site addresses (URLs) containing those words. Enter a keyword and click the Add Keyword button. To remove a keyword, select it from the list and click Remove Keyword. Blocked Domain List/ Add Domain/ Remove Domain Enter web domains (for example, unwanted.com) to use in order to filter out access to those domains. Enter a domain and click the Add Domain button. To remove a domain, select it from the list and click Remove Domain. Allowed Domain List This list allows users to visit specific sites. This list restricts users to these sites only. Add Allowed Domain Enter a domain name and click Add Allowed Domain. Remove Allowed Domain To remove a domain, highlight it from the list and click Remove Allowed Domain. 3.10.3 Parental Control - Tod Filter The Tod Filter option allows the configuration of time-based access policies to block all internet traffic at specified times. 1. Access the web interface. Refer to page 7, if needed. 2. Click the Parental Control link from the top of the screen. 3. Click Tod Filter from the left side of the screen. The Tod Filter fields are explained following this screen example. Label Add New Policy Time Access Policy List 60 Description Enter a policy name and click the Add New Policy button. Select a policy to edit from the drop-down list. DDW3612 Subscriber User Guide • July, 2010 Ubee Interactive 3.10 Parental Control Enable/Remove Select the Enabled checkbox to activate this policy. If the checkbox is unselected, the policy is not active. To remove a policy, select the policy from the drop-down list and click the Remove button. Days to Block Select the days to block Internet access. The internet access times for the days selected to block are defined in the following fields. Time to Block All Day Select All Day to eliminate all access during the days selected to block. Or, enter a specific time range in the Start and End fields. Apply Click to save all changes. 3.10.4 Parental Control - Event Log The Event Log option displays Parental Control event log reporting. 1. Access the web interface. Refer to page 7, if needed. 2. Click the Parental Control link from the top of the screen. 3. Click Event Log from the left side of the screen. The Event Log fields are explained following this screen example. Label Description Last Occurrence Displays the time when the last event occurred. Action Displays what is done by parental control, including dropping or permitting access requests. Target Displays the destination IP address of a certain access request. User Displays the user who triggered this event log. Source Displays the source IP address of this event. Refresh/Clear Log Click Refresh to update the log with the most currently recorded events. Click Clear to empty the displayed log entries. DDW3612 Subscriber User Guide • July, 2010 61 3.11 Tools 3.11 Ubee Interactive Tools This chapter contains instructions for using a variety of tools to evaluate and diagnose the DDW3612 Wireless Cable Modem Gateway. 1. Access the web interface. Refer to page 7, if needed. 2. Click the Tools link from the top of the screen. 3.11.1 Tools - Ping The Ping option provides a Ping utility to test connectivity. 1. Access the web interface. Refer to page 7, if needed. 2. Click the Tools link from the top of the screen. 3. Click Ping from the left side of the screen. The Ping fields are explained following this screen example. Label 62 Description Ping Target Enter the IP address to which you want to send a ping. A ping tests the network connectivity between devices by sending a test message to a specific device. You can also confirm the size of data sent is the same as received. Ping Size Enter the packet size to send for the ping operation. No. of Pings Enter the number of ping commands to send to the ping target. DDW3612 Subscriber User Guide • July, 2010 Ubee Interactive 3.11 Tools Ping Interval Define the interval between ping operations in milliseconds. Start Test/Abort Test/Clear Results Click Start to start the ping test. Click Abort Test to cancel the test. Click Clear Results to clear the displayed ping results. Results/Refresh The Results area of the screen displays the ping results. Click Refresh to update the screen with on-going ping tests. 3.11.2 Tools - Trace Route The Trace Route option is a utility to test the route that data is taking to and from the DDW3612 Wireless Cable Modem Gateway. 1. Access the web interface. Refer to page 7, if needed. 2. Click the Tools link from the top of the screen. 3. Click Trace Route from the left side of the screen. The Trace Route fields are explained following this screen example. Label Description Tracert Target Enter the specific IP address or domain (e.g. yahoo.com) to which you want to trace a route. MAX Hops Define the MAX hops. Hops is the number routers that the trace route traverses. DDW3612 Subscriber User Guide • July, 2010 63 3.11 Tools Ubee Interactive Time Out Enter the expiration time for this trace route operation. Start Test/Abort Test/Clear Results Click Start to start the trace route test. Click Abort Test to cancel the test. Click Clear Results to clear the displayed trace route results. Results/Refresh This Results area of the screen displays the trace route results. Click Refresh to update the screen with on-going trace route tests. 3.11.3 Tools - Client List The Client List option displays connected computers to the DDW3612 Wireless Cable Modem Gateway. 1. Access the web interface. Refer to page 7, if needed. 2. Click the Tools link from the top of the screen. 3. Click Client List from the left side of the screen. The Client List fields are explained following this screen example. Label 64 Description Hostname/IP Address/MAC Address DHCP Clients currently connected to the DDW3612 Wireless Cable Modem Gateway are displayed in this list and are identified by the hostname, IP address, and MAC address of the connected devices. Interface The method that clients are connected to the device is displayed (for example, ethernet LAN, Wireless). Refresh Click to refresh the client list. This may be useful when testing network connectivity between connecting clients and the DDW3612 Wireless Cable Modem Gateway. DDW3612 Subscriber User Guide • July, 2010 Ubee Interactive 3.11 Tools 3.11.4 Tools - Password The Password option allows you to change the password for the user login on the DDW3612 Wireless Cable Modem Gateway. This login is used to access this web interface. 1. Access the web interface. Refer to page 7, if needed. 2. Click the Tools link from the top of the screen. 3. Click Password from the left side of the screen. The Password fields are explained following this screen example. Label Description Master New Password/Confirm Password N/A for end users. End User New User Name/Password/Confirm Password Enter a new user name, if desired for the user account to the web interface of the DDW3612 Wireless Cable Modem Gateway. See page 4 for more information. Enter the new Password. Re-enter the password to Confirm. Click Apply to save the changes. DDW3612 Subscriber User Guide • July, 2010 65 3.11 Tools Ubee Interactive 3.11.5 Tools - Factory Default The Factory Default option allows you to restore factory defaults to the system. All parameters set in the device will be reset. Select the items to reset and select the option to Reset the System. Note: Restoring factory defaults to the system resets the user and mso logins to the device. Refer to page 4 for the default values. 1. Access the web interface. Refer to page 7, if needed. 2. Click the Tools link from the top of the screen. 3. Click Factory Default from the left side of the screen. The Factory Default fields are explained following this screen example. Label 66 Description Restore Factory Defaults Select Yes to have the wireless router reset all configured options in the device to factory default settings. Restore User Factory Defaults Select Yes to restore the wireless router to default settings for the firewall and content filter settings. This operation does not require a reset of the system, discussed below. Reset The system Select Yes to power cycle and rest the wireless router. Apply Click Apply to complete the options selected in this screen. DDW3612 Subscriber User Guide • July, 2010