1
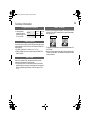
GD-463D10U_EN.book Page 0 Monday, June 8, 2009 4:20 PM
GD-463D10U
GD-463D10E
3D LCD MONITOR
Contents
First things first!
z Safety Precautions ............................ 1
Getting started
z Remote control.................................. 6
z Names and functions of parts ........... 7
z Getting started................................... 9
Let’s try it out
z Viewing 3D images ......................... 11
z Watching videos / DVDs ................. 13
INSTRUCTIONS
Try the advanced features z Useful functions .............................. 14
Just the way you like it
z Configuring your remote control......
z Customising your monitor ...............
Picture ............................................
Features (sub menu)......................
Sound.............................................
Features .........................................
Set Up ............................................
When you have trouble
z Troubleshooting .............................. 23
z Technical information ...................... 25
z Specifications .................................. 26
15
17
17
18
19
20
21
LCT2574-001A-H
GD-463D10U_EN.book Page 1 Monday, June 8, 2009 4:20 PM
Safety Precautions
CAUTION
RISK OF ELECTRICAL SHOCK
DO NOT OPEN
CAUTION: To reduce the risk of electric shock. Do
not remove cover (or back). No user
serviceable parts inside. Refer servicing
to qualified service personnel.
1
The lightning flash with arrowhead
symbol, within an equilateral triangle is
intended to alert the user to the presence
of uninsulated “dangerous voltage”
within the product’s enclosure that may
be of sufficient magnitude to constitute a
risk of electric shock to persons.
Note for United Kingdom power cord only
The plug of United Kingdom power cord has a built-in fuse. When
replacing the fuse, be sure to use only a correctly rated approved type,
re-fit the fuse cover. (Consult your dealer or
qualified personnel.)
The exclamation point within an
equilateral triangle is intended to alert
the user to the presence of important
operating and maintenance (servicing)
instructions in the literature
accompanying the appliance.
How to replace the fuse
Open the fuse compartment with the blade
screwdriver, and replace the fuse.
WARNING: TO REDUCE RISK OF FIRE OR ELECTRIC SHOCK, DO NOT
EXPOSE THIS APPARATUS TO RAIN OR MOISTURE. NO
OBJECTS FILLED WITH LIQUIDS, SUCH AS VASES, SHALL
BE PLACED ON THE APPARATUS.
IMPORTANT SAFEGUARDS
Electrical energy can perform many useful functions. This unit has been
engineered and manufactured to assure your personal safety. But
IMPROPER USE CAN RESULT IN POTENTIAL ELECTRIC SHOCK OR
FIRE. In order not to defeat the safeguards incorporated into this product,
observe the following basic rules for its installation, use, and service. Please
read these “IMPORTANT SAFEGUARDS” carefully before use.
z All the safety and operating instructions should be read before the product
is operated.
z The safety and operating instructions should be retained for future reference.
z All warnings on the product and in the operating instructions should be
adhered to.
z All operating instructions should be followed.
POWER CONNECTION
The power supply voltage rating of this product is AC 100 V – 240 V.
z This product should be operated only with the type of power source
indicated on the label. If you are not sure of the type of power supply of
your home, consult your product dealer or local electric power
company.
Fuse
z Before connecting other products such as VCR’s and personal
computers, you should turn off the power of this product for protection
against electric shock.
z Do not use attachments not recommended by the manufacturer as they
may be hazardous.
z When replacement parts are required, be sure the service technician
has used replacement parts specified by the manufacturer or
equivalents. Unauthorized substitutions may result in fire, electric
shock, or other hazards.
z Upon completion of any service or repairs to this product, ask the
service technician to perform safety checks to determine that the
product is in proper operating condition.
Under the following conditions,
1. Turn off the power.
2. Unplug this product from the wall outlet.
3. Refer service to qualified service personnel.
a) When the product emits smoke or unusual smell.
b) When the product exhibits a distinct change in performance—for
example, no picture or no sound.
c) If liquid has been spilled, or objects have fallen on the product.
d) If the product has been exposed to rain or water.
e) If the product has been dropped or damaged in any way.
f) When the power supply cord or plug is damaged.
GD-463D10U_EN.book Page 2 Monday, June 8, 2009 4:20 PM
CAUTION:
Changes or modifications not approved by JVC could void the user’s
authority to operate the equipment.
NOTE:
This equipment has been tested and found to comply with the limits for a
Class B digital device, pursuant to Part 15 of the FCC Rules. These limits
are designed to provide reasonable protection against harmful interference
in a residential installation. This equipment generates, uses and can radiate
radio frequency energy and, if not installed and used in accordance with the
instructions, may cause harmful interference to radio communications.
However, there is no guarantee that interference will not occur in a particular
installation. If this equipment does cause harmful interference to radio or
television reception, which can be determined by turning the equipment off
and on, the user is encouraged to try to correct the interference by one or
more of the following measures:
– Reorient or relocate the receiving antenna.
– Increase the separation between the equipment and receiver.
– Connect the equipment into an outlet on a circuit different from that to
which the receiver is connected.
– Consult the dealer or an experienced radio/TV technician for help.
TROUBLE?
z Make enough room for inserting or removing the power plug. Place the
product as close to an AC outlet as possible. The main power supply for
the product is controlled by inserting or removing the power plug.
z When the product is left unattended and unused for a long period of
time, unplug it from the wall outlet and disconnect the cable system.
z Do not overload wall outlets, extension cords, or convenience
receptacles on other equipment as this can result in a risk of fire or
electric shock.
FCC NOTICE (U.S.A. only)
SETTING
z Do not use the product for a long time if the sound is distorted.
z Never listen to headphones at high volume, it may damage your
hearing.
U.S.A. only
USE
Do not attempt to service this product yourself, as opening or removing
covers may expose you to dangerous voltages and other hazards. Refer
all service to qualified service personnel.
z Slots and openings in the cabinet are provided for ventilation. These
ensure reliable operation of the product and protect it from overheating.
These openings must not be blocked or covered.
z Never push objects of any kind into this product through openings as
they may touch dangerous voltage points or short-circuit the parts,
which could result in a fire or electric shock.
z Never spill liquid of any kind on the product.
z Never place anything on the product. (Placing liquids, naked flames,
cloths, paper, etc. on the product may cause a fire.)
z Do not apply any strong shock to the LCD panel. (Do not hit any object
against it or push it with a sharp-pointed tool.)
z Do not put heavy objects on the product.
z Do not step on or hang on the product.
IMPORTANT PREPARE
z Do not install this product in the following places:
– in a damp or dusty room
– where the product is exposed to soot or steam, such as near the
cooking counter or a humidifier
– near heat sources
– where condensation easily occurs, such as near the window
z Do not place this product on an unstable cart, stand, or table. The
product may fall, causing serious injury to a child or adult, and serious
damage to the product.
The product should be mounted according to the manufacturer’s
instructions, and should use a mount recommended by the
manufacturer.
z Do not use this product near water.
z Be sure to install the product in the place where proper temperature and
humidity are kept (See “Operating conditions” on page 26).
This product becomes hot during its use. Take enough care when
handling the product.
2
GD-463D10U_EN.book Page 3 Monday, June 8, 2009 4:20 PM
Safety Precautions
U.S.A. only
IMPORTANT RECYCLING INFORMATION
This product has a fluorescent lamp that contains mercury. Disposal of
these materials may be regulated in your community due to environmental
considerations. For disposal or recycling information, please contact your
local authorities or for USA, the Electronic Industries Alliance:
http://www.eiae.org
IMPORTANT SAFETY INSTRUCTIONS
1)
2)
3)
4)
5)
6)
7)
Read these instructions.
Keep these instructions.
Heed all warnings.
Follow all instructions.
Do not use this apparatus near water.
Clean only with dry cloth.
Do not block any ventilation openings. Install in accordance with the
manufacturer’s instructions.
8) Do not install near any heat sources such as radiators, heat registers,
stoves, or other apparatus (including amplifiers) that produce heat.
9) Do not defeat the safety purpose of the polarized or grounding-type plug.
A polarized plug has two blades with one wider than the other. A
grounding type plug has two blades and a third grounding prong. The
wide blade or the third prong are provided for your safety. If the provided
plug does not fit into your outlet, consult an electrician for replacement of
the obsolete outlet.
10) Protect the power cord from being walked on or pinched particularly at
plugs, convenience receptacles, and the point where they exit from the
apparatus.
11) Only use attachments/accessories specified by the manufacturer.
12) Use only with the cart, stand, tripod, bracket, or table
specified by the manufacturer, or sold with the
apparatus. When a cart is used, use caution when
moving the cart/ apparatus combination to avoid injury
from tip-over.
13) Unplug this apparatus during lightning storms or when
unused for long periods of time.
14) Refer all servicing to qualified service personnel. Servicing is required
when the apparatus has been damaged in any way, such as powersupply cord or plug is damaged, liquid has been spilled or objects have
fallen into the apparatus, the apparatus has been exposed to rain or
moisture, does not operate normally, or has been dropped.
15) Apparatus shall not be exposed to dripping or splashing and no objects
filled with liquids, such as vases, shall be placed on the apparatus.
16) Batteries shall not be exposed to excessive heat such as sunshine, fire or
the like.
17) When discarding batteries, environmental problems must be considered
and the local rules or laws governing the disposal of these batteries must
be followed strictly.
18) Avoid improper installation and never position the unit where good
ventilation is impossible. When installing this monitor, distance
recommendations must be maintained between the set and the wall, as
well as inside a tightly enclosed area or piece of furniture. Keep to the
minimum distance guidelines shown for safe operation.
200 (7 7/8)
150 (6) 50 (2)
150 (6)
50 (2)
Unit: mm (inch)
19) When this monitor is connected to the wall outlet, it is always on standby
even when all the LED lamps are not lit. To shut down the monitor, unplug
the monitor from the wall outlet.
3
GD-463D10U_EN.book Page 4 Monday, June 8, 2009 4:20 PM
European Union only
Information for Users on Disposal of Old Equipment
and Batteries
Products
The sign Pb below
the symbol for
batteries indicates
that this battery
contains lead.
[Other Countries outside the European Union]
These symbols are only valid in the European Union.
If you wish to dispose of these items, please do so in accordance
with applicable national legislation or other rules in your country for
the treatment of old electrical and electronic equipment and batteries.
SETTING
Notice:
[Business users]
If you wish to dispose of this product, please visit our web page
http://www.jvc-eu/ to obtain information about the take-back of
the product.
USE
Battery
[European Union]
These symbols indicate that the electrical and electronic equipment
and the battery with this symbol should not be disposed of as
general household waste at its end-of-life. Instead, the products
should be handed over to the applicable collection points for the
recycling of electrical and electronic equipment as well as batteries
for proper treatment, recovery and recycling in accordance with your
national legislation and the Directive 2002/96/EC and 2006/66/EC.
By disposing of these products correctly, you will help to conserve
natural resources and will help to prevent potential negative effects
on the environment and human health which could otherwise be
caused by inappropriate waste handling of these products.
For more information about collection points and recycling of these
products, please contact your local municipal office, your household
waste disposal service or the shop where you purchased the product.
Penalties may be applicable for incorrect disposal of this waste, in
accordance with national legislation.
IMPORTANT PREPARE
Dear Customer,
This apparatus is in conformance with the valid European directives and
standards regarding electromagnetic compatibility and electrical safety.
European representative of Victor Company of Japan, Limited is:
JVC Technical Services Europe GmbH
Postfach 10 05 04
61145 Friedberg
Germany
TROUBLE?
4
GD-463D10U_EN.book Page 5 Monday, June 8, 2009 4:20 PM
Safety Precautions
Maintenance
Unplug this product from the wall outlet before cleaning.
Screen
To avoid irreparable change in appearance of the screen such as uneven
color, discoloration, scratches, be careful about the following:
z Do not paste or stick anything using any glues or adhesive tapes.
z Do not write anything on the screen.
z Do not strike the screen with a hard object.
z Avoid condensation on the screen.
z Do not wipe the screen with any liquid such as water. In addition, wiping
the screen with water-diluted neutral detergent or solvent such as alcohol,
thinner, or bezine may affect the anti-reflection treatment of the screen.
z Do not wipe the screen forcefully.
If the screen gets stained, wipe it with a soft dry cloth.
Cabinet
To avoid the deterioration or damages of the cabinet such as its paint's
peeling away, be careful about the following:
z Do not wipe the cabinet using solvent such as alcohol, thinner, or benzine.
z Do not expose the cabinet to any volatile substance such as insecticides.
z Do not allow any rubber or plastic in contact for a long time.
z Do not wipe the cabinet forcefully.
Wipe stains off the cabinet with a soft cloth. If the cabinet gets heavily
stained, wipe it with a soft cloth soaked in water-diluted neutral detergent and
wrung well, then wipe with a soft dry cloth.
See “Handling the glossy finish of the monitor” (P. 8) on how to handle the
glossy finish.
Ventilation openings
Use a vacuum cleaner to get rid of the dust around the intakes (all the
openings). If a vacuum cleaner is not available, use a cloth and wipe it off.
Leaving the dust around the intakes may prevent proper temperature control
and cause damage to the product.
Glasses
If the glasses get stained, wipe it with a soft dry cloth.
5
GD-463D10U_EN.book Page 6 Monday, June 8, 2009 4:20 PM
Remote control
Mute
Turn on / off (standby) the monitor
2%452.
Turn on “Clear SD” (P. 18)
#LEAR 3$
Switch between “TV / STB / DVD / AUDIO” (P. 15)
Switch between VIDEO devices
Color buttons
STB
AU
D
IO
466)$%/
CH
Display on-screen menu (P. 17)
Select and confirm settings in menus
VOL
TOP MENU
$)30,!9
VOL
Display current input information
CH
USE
Change external input
Volume control / Turn off muting
IMPORTANT PREPARE
Enter number
To the previous screen
MODE
ZOOM
Select a 3D mode (P. 12)
Turn on “Sound Effect” (P. 14)
Select a picture mode (P. 14)
LCD
Note
z For buttons that can be used to operate other devices, refer to
“Configuring your remote control” (P. 15).
z Buttons that are not explained in this manual does not function
with this monitor.
TROUBLE?
z If the remote control doesn’t
work, confirm that the mode is
set to “TV”.
SETTING
Change the aspect ratio (P. 14)
6
GD-463D10U_EN.book Page 7 Monday, June 8, 2009 4:20 PM
Names and functions of parts
7
Touch sensor panel operation
Change external
input.
Remote control
sensor
Power lamp
ON: Lit (Blue)
OFF: Unlit
z When “Power Lamp” is set to “Off”,
the power lamp will not light up.
g“Power Lamp” (P. 20)
Volume
Turn on / off (standby)
the monitor.
Menu operation.
Switch to an external input. (P. 13)
z Touching
and
monitor to 3D mode.
simultaneously switches the
Touch on the function name to operate the function
Note
Peel off the protection films pasted on the glossy finish of the monitor after
the monitor has been placed properly. (P. 8)
z You will hear a beep if you have touched
the button correctly.
VOL
Change the direction of monitor
Operate the menus
Use as “MENU” button or “OK” button.
CH
Use as “
” and “
” buttons.
VOL
Use as “
” and “
” buttons.
z For details on menu operations, refer to “Customising your monitor”
(P. 17).
GD-463D10U_EN.book Page 8 Monday, June 8, 2009 4:20 PM
Attach the stand to the monitor
1
Note
Handling the glossy finish of the monitor
2
USE
To prevent scratches on the panel, lay a piece of soft cloth on an even
platform and place the monitor onto it.
Be careful when handling the glossy finish of the monitor
The glossy finish of the monitor scratches easily.
z Protection films have been pasted onto the glossy finish of the monitor to
prevent scratches. Peel off the films after the monitor has been placed
properly.
z If the glossy finish gets dirty, clear the dust off the glossy finish first. Then
wipe softly with the cleaning cloth provided. If you do not clear the dust
first, or you wipe the glossy finish too hard, or a cleaning cloth other than
the one provided is used, the glossy finish may be scratched.
IMPORTANT PREPARE
z When the stand is not used:
Seal up the two holes at the bottom of the TV using
the plates provided. Peel off the protection films on
the plates. Then peel the plates from the paper and
stick them on the holes.
SETTING
Glossy finish
TROUBLE?
8
GD-463D10U_EN.book Page 9 Monday, June 8, 2009 4:20 PM
Getting started
9
Please read P. 10 of this manual to set up your monitor.
Check accessories
Remote control
Cleaning cloth
(For details on using the
cleaning cloth, see P. 8.)
“AAA/R03” Batteries
(For confirming the
monitor works)
WARNING:
Batteries shall not be exposed to
excessive heat such as direct
sunshine, fire or the like.
Circular polarizing glasses
(x2)
(For viewing 3D images)
z Stand, stand cover, screws and plates are also included. For details, refer
to page 8.
Install your monitor
Follow the instructions on page 8 to attach the stand provided to the monitor.
z Place the monitor on a flat and stable location.
Power requirements
z Connect the power cord only to a 100 - 240 V, 50/60 Hz AC outlet.
Installation requirements
z To prevent the monitor from falling, thread the belt through the hole on the
back of the stand and secure it to the rack, etc.
Hole
Belt and screw (not provided)
Insert the batteries
Use two “AAA/R03” dry cell batteries. Insert the batteries from the - end,
making sure the + and - polarities are correct.
GD-463D10U_EN.book Page 10 Monday, June 8, 2009 4:20 PM
VIDEO-1 Watching videos
Connecting your external devices
Output j
g: signal direction
Component input
Composite input
VIDEO-2 Watching videos
Output j
Headphones
HDMI
HDMITM Connector
HDMI-1 HDMI-2 HDMI-3
Game
Video
consoles camera
VCR
A
C
Pb
Y
R
L
V
R
R
L
V
R
L
V
PC AUDIO
PC
Note
z To reduce noise, use a VGA cable with core filters.
PC IN
(D-SUB)
To VIDEO-2
z “HDMI-1 Audio Setting” g (P. 21)
z HDMI-2 and HDMI-3 inputs do not support
analog sound.
OUTPUT
DVD player
Game
consoles
Input h
• HDMI signal (P. 27)
Video
camera
C
JV
Video and sound signals of a monitor channel
you are viewing output from these terminals
Output j
• Composite signal
• Sound L / R
DVI devices
g“Connect DVI devices”
(P. 25)
TROUBLE?
OUTPUT
PC input line in
S-VIDEO
Digital Satellite
broadcast tuner
VIDEO-2
Pr
VIDEO-1
HD Video
camera
L
DVD player
(HDMI compatible)
Output j
SETTING
HDMI-1
Not available.
(For service adjustments)
Connecting HDMI
devices
USE
DVD Player
HDMI-1
HDMI-2
HDMI-3
B
C
JV
Input h
• Composite signal /
S-VIDEO
• Sound L / R
z If both composite and S-VIDEO cables
are connected, S-VIDEO input takes
priority over composite inputs.
IMPORTANT PREPARE
Input h
• Composite signal /
Component signal
(P. 27)
• Sound L / R
z Use component signal
g “VIDEO Setting” (P. 21)
Make sure all the devices and the monitor are turned off.
You can connect many different devices to the rear panel of the monitor.
Please read the user manuals of each device before setting up.
(Connecting cables are not supplied with this monitor.)
HDMI, the HDMI Logo and High-Definition Multimedia
Interface are trademarks or registered trademarks of
HDMI Licensing LLC.
10
GD-463D10U_EN.book Page 11 Monday, June 8, 2009 4:20 PM
Viewing 3D images
11
This product is a 3D LCD Monitor which adopts the Xpol circular polarizing
method. You can enjoy 3D stereoscopic content by using the supplied
circular polarizing glasses.
*1
: Xpol® is a registered trademark of Arisawa Manufacturing Co., Ltd.
®*1
Basic 3D principle
By having a filter of different polarization on every alternate scan line on the
monitor, and projecting the left eye image (left circular polarization) and the
right eye image (right circular polarization) through the filters, users can
enjoy a realistic three dimensional view by viewing the left and right images
simultaneously through the circular polarizing glasses.
As the left and right images are always displayed together on the screen,
users can view flicker-free 3D images.
When viewing in 3D
z To view in 3D, input the 3D images and press the “3D” button to change to
a suitable mode before putting on the circular polarizing glasses to view
the 3D images.
z Every individual will have a different experience when viewing 3D images.
Viewing at a close distance may cause disorders and discomfort; it is
recommended to view at a distance of about 2 m (6 feet) from the front of
the screen.
z The 3D effects may differ when viewing the screen from different angles.
z Stop using the product and rest immediately if you experience eyestrain,
dizziness, vomiting, headaches or any other discomforts. Take periodic
breaks and rest even if you do not experience any discomfort.
z If the symptoms persist even after resting, please consult a doctor.
z For users with past experiences of PSS (Photo Sensitive Seizure) or users
with heart problems, please consult a doctor before using this monitor.
z For infants still in the visual development stage, please consult a doctor
and have an adult guardian accompany the child.
Cautions on using the circular polarizing glasses
z Use the circular polarizing glasses only when viewing 3D images.
z Use only the circular polarizing glasses provided.
z For users who wear spectacles, cover the spectacles with the circular
polarizing glasses.
z Do not use the circular polarizing glasses as sunglasses.
z Please consult a doctor if allergies appear on the areas that come into
contact with the circular polarizing glasses.
Note
z For purchase of additional circular polarizing glasses, please contact the
dealer where you purchased your monitor.
GD-463D10U_EN.book Page 12 Monday, June 8, 2009 4:20 PM
To view 3D images
For non-compressed side-by-side
3D input
SIDE BY SIDE 2
This monitor supports LINE BY LINE and SIDE BY SIDE 3D signals. To view
3D images, input a compatible 3D signal to enjoy the 3D effects.
OR
Press the “3D” button on remote control. (P. 6)
SIDE BY SIDE 1
SIDE BY SIDE 2
LINE BY LINE
LINE BY LINE
For line-by-line 3D input and normal
2D input.
Left screen
Right screen
Input signal
HDMI
1080p
HDMI,
Component
1080i
SIDE BY SIDE 1/2
Zoom Mode (P. 14)
Full Native
Full Native
z If double vision occurs when viewing in 3D using the component inputs,
set the following items.
“Sharpness”: Minimum (P. 17)
“Clear SD”, “Digital VNR”, “DigiPure”, “MPEG Noise Reduction”: “Off”
(P. 18)
TROUBLE?
Left screen
Right screen
Input signal
For horizontally compressed sideby-side 3D input.
3D Mode
LINE BY LINE,
SIDE BY SIDE 1/2
SETTING
SIDE BY SIDE 1
Monitor screen
Format
USE
Note
z 2D to 3D image conversion function is not available.
z When using SIDE BY SIDE to view 3D images, screen displays such as
menu screen will appear either on the left or right side of the screen. If you
cannot see the screen clearly, remove your circular polarizing glasses.
z Set the 3D/ZOOM mode to the following setting when viewing in 3D.
Input
Input signal
Monitor screen
IMPORTANT PREPARE
You can activate the 3D mode using the following method.
Touch
and
on the touch sensor panel (P. 7)
simultaneously.
Monitor screen
12
GD-463D10U_EN.book Page 13 Monday, June 8, 2009 4:20 PM
Watching videos / DVDs
1
13
Select the video source
AV Select
AV Select
1
2
3
4
5
6
TV/VIDEO
2
VIDEO-1
VIDEO-2
HDMI1
HDMI2
HDMI3
PC
A select
B watch
E.g. For VIDEO-1
Operate the connected device and play a video
To operate using the monitor’s touch sensor panel
TV/VIDEO
1 Touch
2 Touch
3 Touch
LCD
and
to select
GD-463D10U_EN.book Page 14 Monday, June 8, 2009 4:20 PM
Useful functions
Zoom
Sound Effect
Change the aspect ratio
Enjoy the sound setting that you like
1
Sound Effect
A select
Zoom
Auto
Regular
Panoramic
14:9 Zoom
16:9 Zoom
16:9 Zoom Subtitle
Full
Full Native
Slim
Panoramic Zoom
CH
3
Panoramic
Cinema Surround
Off
MaxxBass
Off
Cinema Surround (P. 19)
Enjoy ambient sound.
z “Cinema Surround” does not work with headphones.
B set
MaxxBass (P. 19)
Compensates low frequencies to widen the frequency band.
z “MaxxBass” does not work with headphones.
16:9 Zoom
You can select a preset picture setting according to the
brightness of your room or when playing video games.
TROUBLE?
Note
z Depending on the signal formats, some zoom modes will be
displayed in black and will not be selectable.
z If an image is displayed in an aspect ratio that differs from its
original aspect ratio, the image will be distorted or portions of
the image will be cut off.
Picture Mode (P. 17)
SETTING
LCD
z When “Slim” is selected, a 4:3 image stretched out to 16:9 will
revert back to its original aspect ratio with black bands.
z When “Panoramic Zoom” is selected, a 4:3 image with black
bands will be stretched out to 16:9.
z “Full Native” g “What is “Full Native”?” (P. 25)
z Using “Auto” g “Auto in “Zoom”” (P. 25)
USE
Move the picture with S or T while this bar is displayed
CH
IMPORTANT PREPARE
2 Select the aspect ratio
14
GD-463D10U_EN.book Page 15 Monday, June 8, 2009 4:20 PM
Configuring your remote control
15
You can configure your monitor’s remote control to operate your
other devices.
4
Set the remote control code.
Configure your remote control.
1
Turn on the device manually.
2
Switch the remote control mode to a mode that
matches your device. Refer to the table below to
select an appropriate mode.
Press and hold
TV
STB
AUDIO
DVD
z The indicator lights for 3 seconds each time the remote
control is operated.
3
Find the remote control code for your JVC device
from the table below.
MODE
TV
STB
DVD
Applicable devices
Remote control codes
This monitor only
Not in use
DVD
0503, 0539, 0623, 1241, 1550,
1602, 1701, 1860, 1863, 1940
DVD/DVD-R
1164, 1275, 1597
Home Theater in Box 0623, 1701, 1860, 1863, 1940
LCD
AUDIO
Receiver/Home
Theater in Box
0074,1374,1676, 2000, 2001
5
Enter four digit
number
Release the button
Point the remote control at your device, press
and confirm that your device is turned off. If your
device does not respond, try entering another
available code.
Note
z If none of the code works, refer to “Using the search code
function” (P. 16).
GD-463D10U_EN.book Page 16 Monday, June 8, 2009 4:20 PM
Button functions
Using the search code function
Change the remote control mode
1
Turn on the device manually.
2
Switch the remote control mode to a mode that matches
your device.
Press
IMPORTANT PREPARE
This function searches through the codes one by one, beginning from the
first code in the list.
Turn on/off the device
Navigate the menus
Select
to select the mode.
Display menu
OK
Activate the search code function.
until the mode indicator blinks.
Playback / Record, etc.
Select a
chapter
TOP MENU
DISPLAY
Play
MODE
Forward
MODE
Rewind
Stop
Pause
Record
Press
to register the code.
The code is now set. Confirm that the mode indicator goes
out.
”
”
Select a surround mode g Press “
LCD
”
z Depending on your device, some functions may not
be operable with this remote control.
TROUBLE?
VOL
If your monitor’s remote control still does not work even after using the
search code function, use your device’s own remote control. Some
models of JVC devices cannot be operated with this remote control.
Mute g Press “
Volume g Press “
VOL
5
SETTING
Point the remote control at your device and press
. If
there is no response, try the next code by pressing and
press
again. Repeat the process until your device
turns off.
VOL
4
and
Back to
previous menu
DISPLAY
USE
Hold down
VOL
3
Display top
menu
16
GD-463D10U_EN.book Page 17 Monday, June 8, 2009 4:20 PM
Customising your monitor
1
2
Display the menu bar
Picture
Picture
Picture Mode
Backlight
Contrast
Brightness
Sharpness
Color
Tint
White Balance
Features
Display the desired menu
select
Picture
3
17
Change or adjust the setting
Standard
Cool
z The menu disappears
after one minute of
inactivity.
To the previous
screen
g
select
Cool
change / adjust
To enter an item’s menu
select
(E.g. Features)
Close the menu
Features
Clear SD
Digital VNR
DigiPure
Pull Down
Color Management
Picture Management
Smart Picture
Dynamic Backlight
MPEG Noise Reduction
Color System
Zoom
You can select a preset picture setting according to the
brightness of your room or when playing video games.
Bright
: in a fairly bright room
Soft
: in a dark room
Standard
: in a room with standard brightness
Game Mode
: when playing video games
You can make further adjustments to the selected preset
“Picture Mode” to your liking.
LCD
4
Note
z “Sharpness” is not
available during HDMI
input.
Picture Mode
Picture
Picture Mode
Backlight
Contrast
Brightness
Sharpness
Color
Tint
White Balance
Features
Note
z Depending on the
situation (video
signal formats,
external inputs,
etc.), some items
will be displayed in
black color and will
not work. You will
not be able to
change their
setting as well.
Standard
Off
Off
Off
Auto
On
On
On
On
On
Backlight
Backlight brightness (Darker l Brighter)
Contrast
Contrast (Lower l Higher)
Brightness
Brightness (Darker l Brighter)
Sharpness
Sharpness (Softer l Sharper)
Color
Color (Lighter l Deeper)
Tint
Tint (Reddish l Greenish) (NTSC only)
White Balance Color temperature (Warm / Mid / Cool)
To return to the default adjustments g
Features
(blue)
g “Features (sub menu)” (P. 18)
GD-463D10U_EN.book Page 18 Monday, June 8, 2009 4:20 PM
Features (sub menu)
Clear SD
Off
Off
Off
Auto
On
On
On
On
On
Note
z “Clear SD”, “Digital VNR”, “DigiPure”
and “MPEG Noise Reduction” are not
available during HDMI input.
z “Smart Picture” is not available when
“Picture Mode” is set to “Bright” (P. 17).
z “Clear SD”, “Digital VNR”, “DigiPure”,
“Pull Down”, “MPEG Noise Reduction”
and “Color System” are not available
when “AV Select” is set to “PC”. (P. 13)
MPEG Noise
Reduction
Color System
Off
: Function is turned off
For smooth cinema film
: Function is turned off
Auto : Turn on / off the function automatically
Color Management Maintain a natural color balance (On / Off)
Zoom
Auto
Regular
Panoramic
14:9 Zoom
16:9 Zoom
16:9 Zoom Subtitle
Full
Full Native
Slim
Panoramic Zoom
Select a default aspect ratio for Auto in
“Zoom” (P. 14)
Panoramic
Regular
14:9 Zoom
16 : 9
4:3
14 : 9
Panoramic
TROUBLE?
Off
z Select “Auto” when watching videos etc.
: Function is turned off
For natural-looking outlines
: Function is always on
When there is no color, change the color
system (PAL / SECAM / NTSC3.58 /
NTSC4.43 / Auto)
PAL
Zoom
Off
Reduce MPEG video noise (On / Off)
SETTING
On
Color System
Reduce noise
: When the picture loses
sharpness
Pull Down
Make it easier to view white areas (On / Off)
the screen is dark (On / Off)
For clearer picture (Off / Mode-1 / Mode-2)
: Maintain constant effect
level
DigiPure
On
Smart Picture
USE
On
Make it easier to view bright / dark pictures
(On / Off)
Dynamic Backlight Reduce the brightness of the backlight when
z When “Mode-1” or “Mode-2” is selected, “Digital VNR”, “DigiPure”,
“MPEG Noise Reduction” and “Picture Management” settings are not
available.
Digital VNR
Picture
Management
IMPORTANT PREPARE
Features
Clear SD
Digital VNR
DigiPure
Pull Down
Color Management
Picture Management
Smart Picture
Dynamic Backlight
MPEG Noise Reduction
Color System
Zoom
18
GD-463D10U_EN.book Page 19 Monday, June 8, 2009 4:20 PM
Customising your monitor
Sound
Sound
Bass
Treble
Balance
Cinema Surround
Auto Volume Control
MaxxBass
Off
Off
Off
Bass
Low tones (Weaker l Stronger)
Treble
High tones (Weaker l Stronger)
Balance
Speaker balance (Left stronger l Right
stronger)
Cinema Surround
Ambient sound (High / Low / Mono / Off)
z “Cinema Surround” does not work with headphones.
Auto Volume
Control
Turns down the volume automatically when
an excessive sound signal is input. (On / Off)
z “Auto Volume Control” does not work with headphones.
MaxxBass
Compensates low frequencies to widen the
frequency band (Low / High / Off)
z “MaxxBass” does not work with headphones.
MaxxBass is a registered trademark of Waves Audio Ltd. in the USA,
Japan and other countries.
19
GD-463D10U_EN.book Page 20 Monday, June 8, 2009 4:20 PM
Features
Features
Blue Back
Control Lock
Power Lamp
On
Off
On
Displays a blue screen and mutes the sound
when the signal is weak or absent (On / Off)
z “Blue Back” does not function when the 3D mode is set to
“SIDE BY SIDE 2”. (P. 12)
Disable the front control buttons on the
monitor. (On / Off)
Power Lamp
Lights the power lamp (P. 7) while the monitor
is on (On / Off)
USE
Control Lock
IMPORTANT PREPARE
Blue Back
SETTING
TROUBLE?
20
GD-463D10U_EN.book Page 21 Monday, June 8, 2009 4:20 PM
Customising your monitor
Set Up
Adjust the position of the PC image
A select “PC Position”
Set Up
Video Setting
HDMI-1 Audio Setting
HDMI Mode Setting
PC Setting
PC Position
Auto
Note
z “PC Setting” is only available when
“AV Select” is set to “PC”. (P. 13)
B enter
VIDEO Setting
g “Setting video terminals” (P. 22)
A adjust
HDMI-1 Audio
Setting
Set to “Digital” or “Auto” for HDMI devices,
or “Analog” or “Auto” for DVI devices. (Not
available for HDMI-2 and HDMI-3.)
B set
HDMI Mode Setting For setting the HDMI input
HDMI Mode Setting
HDMI- 1
Mode
HDMI- 2
Mode
HDMI- 3
Mode
1
2
2
PC Setting
PC Setting
PC Position
Phase
Pixel
If there is no picture displayed on the
screen, set “Mode” to “1” or “2”.
For setting the PC input
PC Position:
Adjust screen position
Phase:
Sets the focus of the screen.
Pixel:
Adjusts the horizontal feature of the screen.
z Reset position g (blue)
21
GD-463D10U_EN.book Page 22 Monday, June 8, 2009 4:20 PM
Switch between component and composite input
(
Pr/Pb/Y, V)
Setting video terminals
1
Display the “VIDEO Setting” menu
Select “Set Up”
A select
A Select “VIDEO-1”
Select “VIDEO Setting”
A select
B next
2
B next
Select an input, and then proceed with setting
B Set to component input
select
VIDEO Setting
VIDEO-1
DVD
VIDEO-2
SAT
(yellow)
VIDEO Setting
VIDEO-1
DVD
VIDEO-2
SAT
Pr/Pb/Y
V
Return to composite input g Press “
” (yellow) in B again.
IMPORTANT PREPARE
Display the menu
bar
VIDEO Setting
select
USE
VIDEO-1
DVD
VIDEO-2
SAT
Edit names of connected devices (ID LIST)
(blue)
B Select a name from the list
A select
Clear the name g Select the blank space in the list
TROUBLE?
B set
SETTING
A Show the name list
22
GD-463D10U_EN.book Page 23 Monday, June 8, 2009 4:20 PM
Troubleshooting
23
Problem
Basics
I can’t turn it on!
Screen
z Is the power cord
connected to the AC
outlet correctly?
The remote
control
doesn’t work!
Picture
z Are the batteries
LCD
flat?
z Are you more than 7
meters (23 feet) away
from the monitor?
z Is the “MODE (TV, STB, DVD,
AUDIO)” set to “TV”?
Actions
Remote control stops z Unplug monitor, several minutes later plug it
working
in again.
Aspect ratio changes
unintentionally
z Press “
PC screen alignment
is off
z Adjust “PC Setting”. (P. 21)
” to return to your settings. (P. 14)
z LCD panels use fine dots (“pixels”) to display
images.
While more than 99.99% of these pixels
Black or white dots
function properly, a very small number of
appear on the screen
pixels may not light, or may light all the time.
Please understand that this is not a
malfunction.
Poor picture quality
z Change the “Picture Mode” setting. (P. 17)
z Unnatural color >>>
Adjust “Color” and “Backlight”. (P. 17)
Check your “Color System”. (P. 18)
z Noise >>> Set to the following functions.
Picture Mode: Standard (P. 17)
Digital VNR: On (P. 18)
DigiPure: Off (P. 18)
z Dull picture >>> Set to the following
functions.
Picture Mode: Bright (P. 17)
Digital VNR: Off (P. 18)
DigiPure: On (P. 18)
GD-463D10U_EN.book Page 24 Monday, June 8, 2009 4:20 PM
Problem
Actions
z Audio signals received from HDMI-1, HDMI-2
and HDMI-3 cannot be sent to the OUTPUT
terminal.
Some functions do
not work
z It is not a malfunction. Depending on the
situation, some function items will be
displayed in black color and will not work.
(P. 17)
Wrong screen size
z Read the user manual of the connected
device and perform the following:
g Check if the output setting of the device is
correct.
g Change the signal format of the device to
other format.
No picture, no sound
z Wait a little for the signal to stabilize when
switching the signal format for an HDMI
device.
Images do not appear z Set to the 3D mode or ZOOM mode. (P. 12)
z If the images are not displayed properly even
as 3D or double
after switching the 3D/ZOOM mode, the 3D
vision
signal may not be supported.
z Use the cable marked with HDMI logo.
z Set “HDMI Mode Setting” to “1” or “2”. (P. 21)
TROUBLE?
Picture noise or no
picture
Green and distorted
screen
SETTING
No sound from the
audio component
No sound
z Check if the device is compliant with HDMI.
z Set “HDMI-1 Audio Setting” to “Digital” or
“Auto” for HDMI devices, or “Analog” or
“Auto” for DVI devices.
(Not available for HDMI-2 and HDMI-3.)
(P. 21)
USE
HDMI
z Adjust “Bass” and “Treble”. (P. 19)
3D
Functions
Poor sound
Actions
IMPORTANT PREPARE
Sound
z If the top of the image is distorted, check the
video signal quality itself.
z If movement appears unnatural when
receiving a signal from a DVD player etc.,
with 576p, change the output setting of the
external device to 576i.
HDMI
Picture
Strange picture when
using an external
device
Problem
24
GD-463D10U_EN.book Page 25 Monday, June 8, 2009 4:20 PM
Technical information
25
What is “Full Native”?
PC signals that can be displayed
z If the signal doesn’t
appear, check that the
vertical frequency on the
PC is set to “60Hz”.
Resolution
Vertical frequency (Hz)
640 x 480
(VGA)
1024 x 768
(XGA)
60.0
60.0
z With the full HD LCD display and “Full Native”, you can enjoy full native HD
resolution of 1920 x 1080. It exposes flaws in the video that were hidden
when viewing on “Full”.
Full
Full Native
Connect DVI devices
Connect a DVI device to HDMI-1 using DVI-HDMI conversion cable. Connect
analog sound output of the DVI device to L and R terminals in HDMI-1 (DVI
ANALOG AUDIO).
z Set “HDMI-1 Audio Setting” to “Analog” or “Auto” g (P. 21)
z HDMI-2 and HDMI-3 inputs do not support analog sound (HDMI-1 (DVI
ANALOG AUDIO)).
Auto in “Zoom”
When “Auto” is selected in Zoom, the aspect ratio will turn to the ratio
obtained from the information the monitor received.
z The aspect ratio will turn to the ratio obtained from WSS (Wide Screen
Identification Signal), video signal, or control signal of the external devices.
Without receiving the aspect information, it will be the setting in “Zoom”.
(P. 18)
* The illustrations are emphasised to make clear differences between “Full”
and “Full Native”.
z Dark bar or noise may appear at the edges of the screen when viewing in
“Full Native” for some videos. This is resulted from the signal itself, not due
to monitor malfunction.
GD-463D10U_EN.book Page 26 Monday, June 8, 2009 4:20 PM
Specifications
Main unit
Model
AC 100 V - 240 V, 50 Hz / 60 Hz
Audio output (Rated power output) 10 W + 10 W
210 W
[0.5 W]
Screen size (visible area size
measured diagonally)
116.8 cm
Headphone jack
Stereo mini jack (3.5 mm in diameter) x 1
Operating conditions
Temperature: 0°C – 40°C (32°F – 104°F)
Relative humidity: 20% – 80% (non-condensation)
(Slightly variable depending on ambient conditions for installation.)
Dimensions (W x H x D)
[without stand]
1071 mm (42 1/4") x 725 mm (28 5/8") x 275 mm (10 7/8")
[1071 mm (42 1/4") x 680 mm (26 7/8") x 74.5 mm (3")]
Weights
[without stand]
26.9 kg (59.18 lbs)
[22.9 kg (50.38 lbs)]
Accessories
(See “Check accessories”, P. 9)
Color systems
PAL, SECAM, NTSC 3.58/4.43 MHz
Aspect ratio
16:9 (Wide format)
46 inch wide, active matrix TFT
Effective screen size (W x H)
1018 mm (41") x 573 mm (23")
Number of pixels displayed (panel) 1920 (H) x 1080 (V)
Number of colors displayed
16.7 million
Contrast ratio (typ.)
2000:1
TROUBLE?
LCD panel type
SETTING
(4.5 cm x 13 cm) x 2
Power consumption
[standby]
USE
Speakers
IMPORTANT PREPARE
Power requirements
GD-463D10U / GD-463D10E
26
GD-463D10U_EN.book Page 27 Monday, June 8, 2009 4:20 PM
Specifications
Terminals / Connectors
Terminal name
Terminal type
VIDEO-1
RCA connectors x 6
VIDEO-2
RCA connectors x 3
S-VIDEO connector x 1
HDMI-1
Input terminals
HDMI-2
HDMI connector x 1
HDMI-3
Output terminals
Signal type (IN)
Signal type (OUT)
Composite video,
Analog component
480/60i, 576/50i, 480/60p, 576/50p,
720/60p, 720/50p, 1080/60i, 1080/50i
Audio L / R
Composite video, S-Video, Audio L / R
HDMI
480/60i, 576/50i, 480/60p, 576/50p,
720/60p, 720/50p, 1080/60i, 1080/50i,
1080/60p, 1080/50p, 1080/24p
HDMI-1 (DVI
RCA connectors x 2
ANALOG AUDIO)
Audio L / R
PC INPUT
D-SUB (15 pins) x 1
Analog PC signal
VGA/60, XGA/60
PC AUDIO
Stereo mini-jack x 1 (3.5 mm in
diameter)
Audio L / R
OUTPUT
RCA connectors x 3
Composite video, Audio L / R
Headphone
Stereo mini-jack x 1 (3.5 mm in
diameter)
Headphone output
z We may change the design and specifications without notice.
27
GD-463D10U_EN.book Page 28 Monday, June 8, 2009 4:20 PM
Dimensions
Unit: mm (inch)
<Front view>
<Side view>
<Rear view>
74.5 (3)
USE
450 (17 3/4)
400 (15 3/4)
281 (11 1/8) 200 (7 7/8)
725 (28 5/8)
680 (26 7/8)
39.5 (1 5/8)
IMPORTANT PREPARE
1071 (42 1/4)
VESA mounting holes
(Size: 4-M6,
depth: 15 mm)
275 (10 7/8)
SETTING
Note
z The adjustable angle of the monitor screen from side to side is 20 degrees.
TROUBLE?
28
GD-463D10U_EN.book Page 29 Monday, June 8, 2009 4:20 PM
GD-463D10U_EN.book Page 30 Monday, June 8, 2009 4:20 PM
GD-463D10U_EN.book Page 31 Monday, June 8, 2009 4:20 PM
© 2009 Victor Company of Japan, Limited
0509SKH-SW-MT