1
Getting Started Guide
© 1999-Present Kryptronic, Inc. All rights reserved worldwide. Kryptronic, the Kryptronic logo and all Kryptronic
software names and logos are trademarks of Kryptronic, Inc. All Kryptronic software is copyrighted and the intellectual
property of Kryptronic, Inc. All Kryptronic software is developed and distributed under license by Kryptronic, Inc.
Application Information is available online at http://www.kryptronic.com/.
1
Getting Started Guide
Table of Contents
Welcome To ClickCartPro/EuropaCart ............................................................................................................................... 3
Running The Management Interface For The First Time .................................................................................................... 3
The Introductory Navigation Menu ...................................................................................................................................... 3
A Note About Passwords: ................................................................................................................................................ 4
Management Interface Selection .............................................................................................................................. 6
The Expanded Navigation Menu ......................................................................................................................................... 7
Where Else Can I Get Help......................................................................................................................................... 8
How Do I Audition My Web Page? ............................................................................................................................ 9
The Quick Start Guide- Building A House .......................................................................................................................... 9
The Nickel Tour ................................................................................................................................................................... 9
The Quick Start Guide- Let’s Do It!.................................................................................................................................... 11
Quick Start- Setting Up Your Categories........................................................................................................................... 13
Quick Start- How Do I Remove The Example Categories? ............................................................................... 20
Quick Start- Setting Up Your Product Options .................................................................................................................. 22
Quick Start- Adding Products ............................................................................................................................................ 25
Quick Start- Concerning Product Photos....................................................................................................................... 27
Quick Start- Any Spotlight Categories For This Product? ............................................................................................. 29
Quick Start- Declining Balance Inventory ...................................................................................................................... 31
Quick Start- Delivery Of Products To Your Customers ................................................................................................. 31
Quick Start- Bring On The Categories and Product Options! ........................................................................................ 34
Quick Start- Who Can View Your Products? ................................................................................................................. 35
Quick Start- Inserting Your Spreadsheets Back Into ClickCartPro/EuropaCart ............................................................ 36
Quick Start- Adding Additional Columns To Your Spreadsheet .................................................................................... 38
Quick Start- Setting Up Your Shipping Companies ....................................................................................................... 40
Quick Start- Setting Up Customer Payment Options..................................................................................................... 41
Quick Start- Setting Up Your State/Province/Country ................................................................................................... 43
What If I Have To Deal With City Taxes? ...................................................................................................................... 44
Quick Start- Your New Skin............................................................................................................................................... 45
Quick Start- How Big Is My Current Logo? ....................................................................................................................... 46
Quick Start- Skinning Basics ............................................................................................................................................. 47
Quick Start- Changing The Home Page............................................................................................................................ 49
Changing The Company Info At The Bottom Of The Home Page ............................................................................. 51
Quick Start- Using The Cool New Banner System............................................................................................................ 51
Quick Start- Adding Videos To ClickCartPro/EuropaCart ................................................................................................. 60
Quick Start- Search Engine Optimization.......................................................................................................................... 66
Google Analytics ........................................................................................................................................................ 66
QuickStart- Turning SEO On ............................................................................................................................................. 68
Quick Start-The XMODS ................................................................................................................................................... 73
Sales Amplifier XMODs ................................................................................................................................................. 73
Googlebase ................................................................................................................................................................ 73
AutoGC Auto Gift Certificate ...................................................................................................................................... 73
The Extension XMODs ............................................................................................................................................... 73
THUB: The T-HUB Software Connector .................................................................................................................... 74
Shipworks ................................................................................................................................................................... 74
Store Productivity XMODs ........................................................................................................................................ 74
BOM Batch Order Management................................................................................................................................. 74
Communications XMODS .......................................................................................................................................... 74
NewsRss .................................................................................................................................................................... 74
Custom Design Needed? .................................................................................................................................................. 74
2
Getting Started Guide
Welcome To ClickCartPro/EuropaCart
You have purchased an incredibly powerful tool. You will have infinite power to control virtually
every aspect of your customer’s online experience. This is the second stop on your tour of our
extensive and comprehensive collection of manuals that support this software. This is where the
rubber meets the road. You’ll find out how to use the software, set up your complete store and
even begin designing the look and feel you desire.
•
•
•
Installation: Installing the software on your server
Quick Getting Started Guide: Easy to use first steps…create a fully working store
quickly and painlessly. We’ll walk you through the setup of your software as well as help
you create your first categories, products, etc. We’ll even show you how to make basic
adjustments to the look and feel of your site. We’ll also help you get your products
loaded in, set up your shipping, billing and other customer interaction and have a fully
working backbone that you could put online. Also, through this guide, you’ll start to get
an idea how we do things in ClickCartPro/EuropaCart. Eventually, you’ll understand that
most of the tables in the product work in a very similar manner.
ClickCartPro/EuropaCart User’s Guide: This handy reference guide covers every
aspect of this software. Each screen and menu item is examined and explained. After
you’ve learned the basics, learn the details behind them.
Running The Management Interface For The First Time
Accessing the Admin.php
You’ve now finished running the installer script and you have accessed the Management
Interface to configure your administrator account and work with ClickCartPro/EuropaCart. The
install automatically launches this interface. In the future, when you want to access the
Management Interface, simply open your web browser and browse to the location of the
'admin.php' script you uploaded earlier. Example:
http://www.yourdomain.com/admin.php
The admin.php controls the “Back-end” administrative tasks for your site. Here you will create
the backbone of the system as well as the look and feel that your users will see when they
access your site.
The Introductory Navigation Menu
3
Getting Started Guide
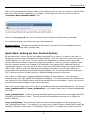
When launching Admin.php, you will be presented with the Introductory Navigation Menu and
simple login information center screen. The upper menu will grow once you’ve logged into the
system, but for now, it provides PDF document information as well as support information. To
continue, simply type in the email address (or the word “admin”) and the installer password you
set up during installation.
Important Note:
If you’ve forgotten the password you assigned to this account, simply click on the blue link to
receive that password via your registered email address.
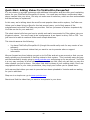
A Note About Passwords:
If you become “locked out” of your account…and your system’s “email me a password” doesn’t
seem to be working…how can you access your Admin? Let’s go through a quick password primer
so you know how things are laid out.
You have a few passwords in ClickCartPro/EuropaCart.
1. Your installer password (hopefully written down when you installed the product or
saved when we installed it for you). This installer password also becomes your first
Account password. Your installer password is located in 2 places…both are config.php
files. ClickCartPro/Europacart has 2 config.php files…one in your public directory…you’ll
find it with your other ClickCartPro/EuropaCart php files (admin.php, installer.php and
index.php). The second location is the private ClickCartPro/EuropaCart directory. If you
followed our advice on the install, you’ll have this located in the /core-private directory.
The first line item in both of these config.sys files will look like this:
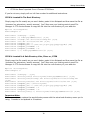
$config['core.password'] = '71b751dbcd73fb99e86458b1362d2ffd'; (Public)
$config['core.password_copy'] = '71b751dbcd73fb99e86458b1362d2ffd' (Private)
That long string of characters is an MD5 Hash version of your installer password. In order to
change your installer password, you must replace both of these strings of characters. If you
contact Kryptronic, we can send you a temporary MD5 hash so that you can change an installer
password. To access these 2 files, you’ll simply use your FTP client software or your hosting
control panel File Manager.
2. Your account password (your normal everyday log in to the admin). Every account for
administrators or users is stored in your MYSQL database. This is also set up during your
install and ClickCartPro/EuropaCart automatically populates this database every time you
4
Getting Started Guide
make a change or a new customer signs in. If you are ‘locked out’ of your admin, you’ll
need to access database, key in a new encrypted password and then use it to access your
account. Again…contact Kryptronic and we’ll provide you with a temporary password.
To access your database, you’ll need to fire up your Hosting Control Panel. This is the control
panel provided by your host to help you set up emails, add aliases, domain forwards,
and…manage your MSQL databases. If you don’t remember how to access this, contact your
host…it’s usually pretty easy. Once you gain access, look for and Icon that says “Databases” or
“PHPMyAdmin”. Once you navigate to that location, you’ll find a database that normally is
named with “store”, “shop”, “ccp”, “khxc”, or something that lets you know you’re looking at
your store.
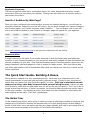
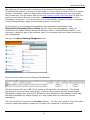
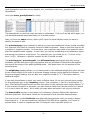
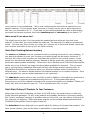
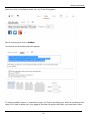
Click on the database to open it and you’ll see a list of tables on the left of the page…these are
all of the tables where everything is stored for ClickCartPro/EuropaCart. You’ll find products,
categories, users, states…you name it. Navigate to the core_users file. You should see a
screen that looks like this:
5
Getting Started Guide
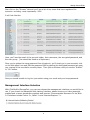
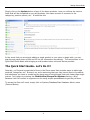
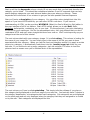
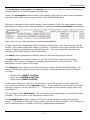
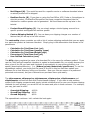
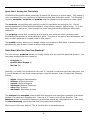
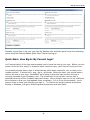
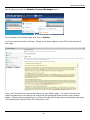
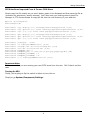
Now click on the “Browse” tab and you’ll see a list of any users that have registered for
accounts…including…most importantly…YOU!
It will look like this:
Here, you’ll see the email of the account holder, their username, the encrypted password, and
the user group. (You should be listed as a Superuser).
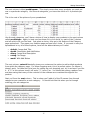
Once you’ve gotten the temp password from Kryptronic, you’ll simply go to your account, click
on the little pencil icon and Edit the password field by pasting the encrypted password we gave
you overtop of the one that’s currently there. Then just scroll down until you see the “Submit”
or “Go” button.
Now you should be able to log into your admin using your email and your temp password.
Management Interface Selection
With ClickCartPro/EuropaCart, you can now choose the management interface you would like to
use. If you choose the Advanced Multi-tasking Interface, please be sure you have javascript
enabled and a newer standards compliant web browser. Recommended browsers for the Web
2.0 Interface include Firefox 2+, Safari 3+ and Internet Explorer 7+.
6
Getting Started Guide
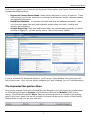
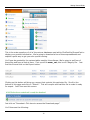
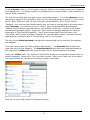
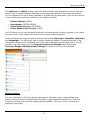
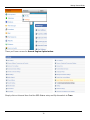
Once you’ve logged in, you’ll see the full Kryptronic Menu system and System Dashboard, which
includes the following items:
•
•
•
Kryptronic Central Server News: News articles delivered to you by Kryptronic. These
news articles provide tips and tricks on running the software as well as important update
and upgrade information.
Dashboard Statistics: A collection of useful stats that are updated continually. Here,
you’ll find both page view and order statistics broken down into daily, monthly and
monthly denominations.
Graphic Reporting: Page view and recent orders are represented graphically, so within
seconds of logging in, you can quickly scan a “state of the world” update.
If you’ve activated the Advanced interface, you’ll see your Open Window menu along the left
side of the screen. Here you can quickly navigate your open windows (up to 10 simultaneously).
The Expanded Navigation Menu
Once you’ve entered ClickCartPro/EuropaCart, the Navigation tool will expand to include menus
for ClickCartPro/EuropaCart System, the ClickCartPro/EuropaCart Website (CMS) and of
course, ClickCartPro/EuropaCart Store. Each one of these products is covered in excruciating
detail in the User’s guide, but we will probably visit each one during the course of this Getting
Started Guide to help you get your feet wet.
7
Getting Started Guide
Where Else Can I Get Help
Before we do anything, it’s important that you know all of the various Help avenues that are
available to you. A shopping cart like this one is unlike any other software product you’ve
purchased. Because it’s open-ended framework gives you the power to support virtually any
dream you may have for your web site, it also means that you can’t possibly cover every
conceivable avenue in one manual. That is why our support network is varied and open to all.
Be sure to visit the areas we’ve named below because Kryptronic has a robust and talented
community of designers and site owners who share their knowledge and help support each
other.
Account And Support
This menu is similar to the Account and Support Menu in the Introductory Navigation Menu, you
can simply launch PDF user manuals and support help for the products. From here you can also
launch an identical online version of the Software License that also resides at the end of this
manual. It’s an exciting read…don’t miss it! This menu also includes a secondary approach to
switching between the Advanced Management Interface and the Standard Management
Interface.
Support
This menu item launches the various online support options presented for
ClickCartPro/EuropaCart. They include a Community Support Forum, a software Wiki, and of
course, the Kryptronic website itself. A product with the power and magnitude of
ClickCartPro/EuropaCart simply cannot be supported with one singular method. It takes a
thorough user manual, thoughtful programming, and a community of users with practical
experience to make ClickCartPro/EuropaCart the best it can be for you.
Community Support Forum
This robust bulletin board is a great place to land if you have questions about your
ClickCartPro/EuropaCart and you need more than the manual can give. This bustling forum is
hosted and attended by experts who use this product daily and are usually very willing to offer
answers to your questions. You’ll also find additional information from the programmers and
special announcements regarding your product.
forum.kryptronic.com
Kryptronic Software Wiki
This is a great way to learn about different methods for using your software. Again, like the
Forum, various experts have tackled certain processes and provided the code you need to make
them happen. Even if you don’t have a wealth of knowledge about HTML and PHP coding, there
are still helpful hints that can help you get the most out of your e-commerce experience.
wiki.kryptronic.com
8
Getting Started Guide
Kryptronic Corporate
The main Kryptronic Web site is an excellent source for news, downloads and other current
information that may not make your manual. Clicking here will whisk you to the site and you
can browse from there.
How Do I Audition My Web Page?
Once you have configured your administrator account and started setting up, you will want to
view the content as visitors to your site will view it. As you work through your various Category
and Product pages, you’ll notice a column called “Audition…”. You can simply click on this link
and a new audition window of your Product or Category page will appear for your approval.
Your www.yoursite.com/index.php is the site your customers will see online.
Important Note:
It might make your life easier if you create shortcuts to both the Admin.php and Index.php
locations in your Internet browser so you can quickly and easily navigate to them throughout the
process of setting up your site. Most Internet browsers have a Favorites section where you can
assign frequently used web pages to a link or button for faster access. Both your Admin.php
and Index.php locations will be frequented often while you setup your new site, so quick access
will be important.
The Quick Start Guide- Building A House
We’re about to embark on a very important journey. Each step is an important part in the
overall presentation of your web site and your corporate image. If there is only one piece of
advice that you retain from this Quick Start guide, it is this: Until you’re absolutely certain
what you’re doing…take baby steps and check yourself along the way. Before you add
1000 products…start with one and make sure it’s set up the way you want it. Don’t try to do 10
things at one time and then…if there’s a problem, be forced to wade through the various layers
to find your mistake. Like building a house…let’s make sure the foundation is solid before we
start slapping up the walls. That is all…grasshopper.
The Nickel Tour
In the chapters that follow, we’re going to show you ways to add large numbers of products and
categories to ClickCartPro because we assume that you’re just setting things up and adding a
bunch of stuff all at once…but before we start our major uploads, let’s take a quick peek at all of
the various options available in the admin of ClickCartPro/EuropaCart.
9
Getting Started Guide
Certainly on your first time in, you’re likely concerned with adding a product. Because we’re
going to really get into this in a few pages…let’s just view the highlights.
Simply start your product buy clicking on the link we provided in your Welcome email that ends
in “admin.php”
Use the provided name and password to enter and you should now see the basic menus we
described earlier.
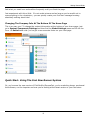
Go to the Store Menu, then select Catalog and then select Products.
On the page that follows you’ll see several headings…one that looks like this:
When you are adding a new single item to your store, you’ll simply click on Create: Add a new
item.
You’ll also see a list of all of the demo products listed in the software.
10
Getting Started Guide
Simply click on the Update button of any of the demo products…here you will see the various
fields that will be completed as you add products…this same scenario is common to the
categories, product options, etc. It looks like this:
In the event that you are simply adding a single product to your store to begin with, you can
step through each phase of this and fill out the information accordingly. The next section of our
Quick Start Guide deals with bringing a multi-product store online as fast as possible.
The Quick Start Guide- Let’s Do It!
Normally, you’ll spend a great deal of time in the Store menu that provides ways to add single
products, categories, etc. But early on, we’re assuming that you may have a bunch of products
and categories you want to create and we have ways of doing things that work faster than single
entries. Let’s begin by entering the ClickCartPro/EuropaCart System directory. Why?
Because it will let us start to organize our site using simple spreadsheets to get the job done.
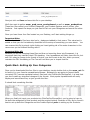
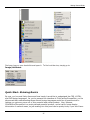
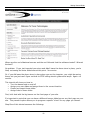
To access the files we’ll need, simply click on System/Database/Raw Database Admin menu
(Pictured Below)
11
Getting Started Guide
This is the main repository of all of the various databases used within ClickCartPro/EuropaCart to
display your product information. We’re going to download a few of these spreadsheets and
explain a quick way to get your site up and running.
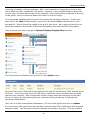
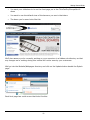
You’ll now be greeted by the various tables used by this software. We’re going to pull four of
these files and have a look at them. First up will be ecom_cat; this is our Category file. Just
find this file and click on the Export button.
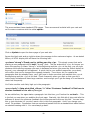
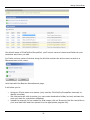
Clicking on this button will bring up a screen that controls this particular file. Scroll to the
bottom of this page and click on “Submit”. This will compile and load this file to make it ready
for export. You’ll then see this screen:
Just click on “Download: Click here to access the Downloads page”.
You’ll then see the following:
12
Getting Started Guide
Now just click on Save and save this file to your desktop.
We’ll also want to gather ecom_prod, ecom_prodoptionsel as well as ecom_prodoptions.
These four files control your Product Categories, your Product Options and of course, your
Products. Just repeat the steps you just used to fish out your Categories and secure the other
three.
Once you have these four files located on your Desktop, we’ll start setting things up.
Important Note:
You’ll notice that the files have also had a _dataexport added to their name. This extra text is
added so that you don’t mistakenly download a file overtop of something you care about. You
can rename this file by simply right clicking on it and getting rid of the extra characters in the
name once you’ve finished working with it.
Important Note #2:
Because you will be changing these files and then re-importing them into Europacart, it is
important that they maintain their CSV standing. Your spreadsheet will likely open this file, but
ask if it’s okay to change to its format of choice…you don’t want to do this…when you save,
maintain the CSV formatting or The Core will not allow you to import that file.
Quick Start- Setting Up Your Categories
Once you’ve downloaded the four files to your desktop, simply double click on the ecom_cat file
to launch it in your favorite spreadsheet software. Because you are going to Import these
corrected CSV (comma separated values) files back into ClickCartPro/EuropaCart, it is best that
you don’t make any structural changes to the format. Most popular spreadsheets will easily
display and save these files, so just go with the flow.
It should look something like this:
When you finally do input your products into ClickCartPro/EuropaCart, you’re going to have to
list both the categories for that product and the product options. Because of this, we’ve found it
best to set up both the Categories and the Product Options prior to setting up the Products.
13
Getting Started Guide
Now that you can see the various columns and the example files that are contained in
ClickCartPro/EuropaCart, it should be a little easier for you to figure out how to fill in the various
columns. Remember, when you begin this process and start importing your own information
into the web site, you can always refer to the http://www.yoursite.com/index.php link that you
made in your Internet Browser to compare what you’re seeing in the spreadsheet to how it
translates to the screen. You can also just click on the Audition Category link that is accessible
via the Catalog/Category page we talked about earlier in this guide.
All of the items in your Categories spreadsheet are explained in great detail in the
ClickCartPro/EuropaCart User’s Guide, but let’s look at our spreadsheet. Again, for
clarification, this spread sheet matches the Category editor in ClickCartPro/EuropaCart. You
may want to have this part of the software open in your browser while you mess around with
your spreadsheet.
Just go to the Store/Catalog/Categories menu.
Let’s look at the columns of the Category Spreadsheet:
The first column you’ll see is id. This is simply an ID name for your category. This should
typically be a one-word lower cased id tag. If you do not choose to use any Search Engine
Optimization, please note, that this ID will be the name displayed in the browser for this page
and also be available for search engines, so it only makes sense to make this title self
explanatory.
The next column you’ll arrive at is the name heading. For this, you’ll want to fill out the entire
name of a particular category exactly as you want your customers to see the name.
14
Getting Started Guide
Next up will be the keywords column…simply fill out any words that you feel best describe the
category you’ve listed. This should be somewhere between 5 and 10 keywords that can help
search engines categorize your web site and better place you where you belong. These
keywords will be the start of our mission to get you the best possible Internet exposure.
Now you’ll enter a description of your category. You can either enter straight text into this
space or if you have XHTML abilities, you can enter XHTML code here. If you have no
understanding of HTML, we do provide a WYSIWYG (What You See Is What You Get) editor in
the user interface of all of our editors. Basic HTML simply allows you to add Bold, Italic,
Underline, bullet points, numbering, etc. to your text. It’s the same text, just more interesting
to look at for your customers. But for the spreadsheet entry…let’s just pretend that you don’t
understand HTML and we’ll enter straight text here from now on. We’ll revisit sprucing up your
categories at the end of this tutorial.
The next column deals with your category image. It is called catimg. This column is looking for
the name of your image file. You can simply type in the name of the file you want to have
associated with this category. When you use the front-end interface and tell it to apply a certain
picture to a category, it automatically loads them into the /media/ecom/cat folder on your
web site. If you choose to set up many categories…just use a simple FTP editor to load the
pictures here en masse once you’ve finished work on the spreadsheet.
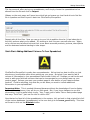
The next column you’ll see is called splashdisp. This simply tells the software if you plan on
this category being displayed on the front page of your web site. You basically have 2 choices in
the category department; sub categories and main categories. Sub categories are not displayed
on the main page and are only displayed when the category that they are assigned to is clicked
on by the user. Main categories are displayed like this:
15
Getting Started Guide
Main categories are labeled with a “1” in this column. A sub category is labeled with a “0”.
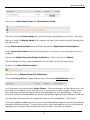
The next column you’ll see is subdispnum. This tells the software how many sub categories
you would like to see displayed per row on a category page. You have the choice of 1-4
subcategories per page. Sub categories appear like this on your Main category page (this
example category is set to display 2 sub categories per row):
Now you’ll tell ClickCartPro/EuropaCart how you’d like your sub categories displayed by using
the subdistype column. You’ll have several choices. These are listed with the abbreviation
you’ll need for the spreadsheet.
•
•
•
Default (default) – Image and title displayed
Image And Description (imgdesc)- Title, image and description displayed
No Image (noimg)- Title and description displayed
To audition these spreadsheet changes, you have to re-import this spreadsheet into
ClickCartPro/EuropaCart. Generally, for quick checks, the Category editor within
ClickCartPro/EuropaCart is the fastest way to poke around and try things. The spreadsheet
method is best for importing large amounts of stuff.
16
Getting Started Guide
The next column is titled proddispnum. This simply covers how many products you want per
row in a particular category. Like the sub categories, you have the choice of 1-4 products per
row.
This is the rest of the picture of your spreadsheet:
Like the sub categories, you’ll have a choice of how to display your products in the next column
called proddistype. Again, to best see how these fit in your world, try each of the 5 choices
and see which one you like best. Just select a choice, then go to the bottom of the Category
page and submit. Then open your Audition page and see how it looks. If you want to use your
spreadsheet to try all of these options, here are the abbreviations you’ll need:
•
•
•
•
•
default: Image And Title
dsadd: Description And Add Button
dsimg: Image And Description
noimg: No Image
wadd: With Add Button
The next column; catmulti basically gives your customers the option to add multiple products
from within the category page. For some shopping carts, this is a perfect option…for others it
doesn’t work. In these early trial runs for setting up your shopping cart, try it and see if you like
it. A “0” in this column turns it off and a “1”, turns it on. You should be seeing a pattern here
and also seeing that many of the controls for the software are consistent throughout the
product.
Next you’ll see the xcat column. This is where you’ll add all of the ID names from the sub
categories you created for a main category. It should look like this when you’re through
entering your sub categories.
17
Getting Started Guide
In the sortorder column, you can assign a specific order for your categories and sub categories
to be displayed in. You simply number your categories from lowest number (most important) to
highest (least important).
The next column deals with who gets to see a particular category. It is called catview and you
can assign a category to be viewed by Everyone (A), Selected groups of people (L) or No one at
all (N). Both “Everyone” and “No one” are pretty self explanatory, but if you do choose
“Selected”, then you must also define exactly who you want to see the page in the next column
called catviewg. You have the choice of “admin” which means backend administrators,
“affiliate” which means a page designed for your affiliate clients only, “reports” which means
administrative backend reports, “superuser” which means a category designed for backend
superusers of ClickCartPro/EuropaCart, “users” which means basic front end users, and
“wholesale”, which means a category designed for your wholesale clients. Just use a commaseparated list for special cases or in most cases…the “A” for everyone.
The next column datetimestamp is designed to automatically log the last time this category
was updated.
Your next columns deal with Search Engine Optimization. The metatitle field contains the
meta title entry for this category. The metadescription field holds your meta description for
this page and the seourl field will house the exact url you want assigned to this page.
Finally, the nofilter field. This version of ClickCartPro allows you to activate a product filter for
certain categories. When set to True, this filter is active. When set to False, this is not active.
The product filters are created in the admin by going to this page:
Once set up…your product filters will appear this way:
18
Getting Started Guide
You have now finished entering in your Categories. Now let’s see what we’ve done. First we’re
going to have to import this altered spreadsheet back into ClickCartPro/EuropaCart. Save the
file and make sure you maintain the CSV format. Now go back into the Core and once again
click on System/Database/Raw Database Admin.
But this time, we’ll find the ecom_cat line and click on Import.
19
Getting Started Guide
Scan down on this page until you see the CSV File Entry, browse your hard disk to find the one
you’ve just edited, enter it and then hit the Submit button.
If you’ve done your job well and maintained the correct format, you’ll see this pleasing green
message to let you know that you’ve accomplished your task.
Now you can audition your site-wide changes live by going to your live audition at
http://www.yoursite.com/index.php
How does it look?
Probably looks fine, but it is mixed together with all of the demo Categories and Products that
were there when you started. No problem…read on…
Quick Start- How Do I Remove The Example Categories?
Because ClickCartPro/EuropaCart is very database-like, it will take a spreadsheet like the one
you just completed and add those contents to the ones that were already in the database. Even
if you erased the examples in your spreadsheet, they haven’t disappeared from view.
The examples are excellent examples of the correct way to do things. They’re sort of like
training wheels until you get up to speed. Once you know what you’re doing, you can get rid of
them.
Let’s take care of that now.
Return again to System/Database/Raw Database Admin.
20
Getting Started Guide
This time, we’re going to click on SQL Statement: Submit A Raw SQL Statement
Now scroll down to the SQL Statement heading and click in the text box that is provided. Here
we will enter an XHTML command that tells the Core to erase the file that exists for Categories
and allow you to reenter your new Category file as the reference.
Simply type in “delete from ecom_cat” and hit the Submit button.
21
Getting Started Guide
Now you have erased the Category table of the software and you can re-input your altered table.
Now you’ll only see the categories you created. From where you are now, just click on the
“Overview: Raw Database Admin” link.
Return to the ecom_cat line, click on Import and re-import the altered ecom_cat table.
Your web site should now reflect only your new categories.
Important Note: This same procedure will be used to remove all of the examples from the
Options, Products and other example files.
Quick Start- Setting Up Your Product Options
As we said earlier, before we can start adding products to our store, it is best to take care of
Categories, which we just finished and Product Options. Only you will know if you need to cover
Product Options for your store. Product options are additional or complimentary items that
present themselves when a customer is scanning a product. Let’s say you sell computers and
when a customer selects your Miswap 3000 computer, you want to offer additional items to
upgrade the Miswap. You may want to offer 3 choices of DVD ROM Drivers or several flavors of
video cards. When a customer upgrades the standard computer, you want the software to
compensate with additional pricing and shipping weights, etc., to accommodate the new items.
This is where we set all of that up prior to actually adding products to the store.
This is also an ideal area to suggest additional products to the customer. Let’s say that a
customer buys your high quality Cow Evaluation software. You might also sell cow makeup and
cow clothing…this is a great time to offer those as additions to the software. Again, only you will
know if Product Options apply to your particular store.
Now we’ll need to begin work on 2 of the 4 spreadsheets that we downloaded earlier. We’ll need
ecom_prodoptionsel and ecom_prodoptions. Let’s explain what each of these spreadsheets
will cover:
ecom_prodoptionsel- These are actual individual products and the price and weight that they
will add to the customer’s order. This will be the first spreadsheet we work on in relation to
Product Options.
ecom_prodoptions- This sheet deals with the more broad categories of the products in the
ccp0_prodoptionsel sheet. For example, you may have a Product Option called Video Cards that
contains 5 different video cards. The Heading “Video Cards” is created here, while the actual
22
Getting Started Guide
cards themselves and their prices, weights, etc., are listed in the ecom_prodoptionsel
spreadsheet.
Let’s open ecom_prodoptionsel to clarify:
This spreadsheet is mercifully small and easy to understand. First you’ll see id, which again, is a
one word abbreviated lowercased name for a certain product.
Next you’ll see the name column, where you’ll input the actual display name you want to
identify the product with.
The pricechangreg column basically is asking you how much additional money should be added
to a customer’s bill when a customer chooses to add this product. Keep in mind that this can be
a positive or negative number. In some cases, your customer may select a less powerful option
than the standard model supplies. In this case, you may be substituting a less expensive option
and saving the customer a few bucks. For cases like this, you would put a (-) in front of the
price (-8.00). Otherwise, a positive number like 84.00 would be used.
The pricechangrec, pricechangwhl, and afflcommchang headings all deal with various
wholesale, affiliate and recurring pricing options that are provided in ClickCartPro/EuropaCart,
but beyond the scope of this getting started guide. Just ignore them for the purpose of this
demonstration.
The weightchng heading allows you to compensate for the additional weight this option will add
to the overall weight of the order so accurate shipping charges can be applied at checkout. Like
the pricechangreg heading, this can also be a negative number or “0” if the option adds no
additional weight.
If you want the software to track your stock of Option items, fill out your current stock number
for this particular item in the inventory column. Just remember, if you fill in anything but “0”
here, ClickCartPro/EuropaCart will not offer this option to the customer when supply reaches “0”.
If you do want this option to be active, you also need to make sure that the product you attach
it to is set to track the stock. We’ll revisit this topic when we begin to set up your products.
The downloadfile column is used when you’re allowing a Product Option that requires a
software download. We’ll leave it blank for the purpose of this particular demonstration.
The next column is called fieldorder and deals with the particular order you want to display
these options in. If you are presenting 3 different DVD ROM drive upgrades, you’ll want to
present these in order of importance with #1 being the most important and so on.
23
Getting Started Guide
The taxstateprov, taxcountry, and taxclass columns all deal with tax issues and whether or
not they apply to the various options you enter here.
Finally, the loyaltypoints column allows you to assign loyalty points to each item purchased as
part of the new loyalty points program within ClickCartPro/EuropaCart 8.
Once we’ve created all of the various product option products, we’ll now create categories and
descriptions of these product option groupings by opening the ecom_prodoptions spreadsheet.
Again, this is a very small and easy to understand spreadsheet.
As with most of the spreadsheets within ClickCartPro/EuropaCart, you’ll first encounter the id
column. You’ll want to name the category of options. If we stick to our prior example, we may
want to create an id called dvdrom_add and vga_add. These two categories represent our
selection of DVD ROM options or VGA card options.
The name column represents the display name for this particular group of options.
The description column gives a chance to jot down a few lines to describe the group of
products you’ve chosen to present as a possible product option for your customer. This
description can also contain XHTML tags.
The fieldtype column allows you to choose how your Product Options will be displayed. You
have various display types to choose from, but three in particular deal with lists of products.
You have:
•
•
•
Selection Box (SELECT-CUSTOM)
Check box (CHECKBOX-CUSTOM)
Radio Button (RADIO-CUSTOM)
Is this option required in order for your customer to order the product it’s associated with?
You’ll make that decision in the required column. If your customer must choose one of these
options to continue, set this column to “1”. If the product is truly optional, simply leave it at
the default “0”.
The next field is called fieldinclude. This is for advanced programming to override the default
formfield. This is not likely to be changed by a novice user.
The xprodoptionsel column is where you’ll list the products that are within this particular
option. If the option is VGA cards, this is where you’ll list the various choices. You’ll simply use
the ID numbers that you created in the ecom_prodoptionsel spreadsheet.
24
Getting Started Guide
The next column for the ecom_prodoptions spreadsheet is the useinventory column. Like the
previous spreadsheet we worked on, ClickCartPro/EuropaCart is happy to track the stock of your
options, but you must make sure that the product they’re associated with is set to track the
stock.
The next column is called fieldorder and allows you to choose the order with which your
product options are presented within a product. Like all ranking items within
ClickCartPro/EuropaCart, the lower the number, the earlier it’s presented in the order.
The final column is called section and is there so that you can group like options together. This
field allows you to create additional groupings. If you look below, you’ll see a group called Item
Options, you can either change this default title or create additional groupings that you could fit
your options into.
Quick Start- Adding Products
So now we’ve prepared our Categories and our Product Options. We’re finally ready to put a few
new products into our store. Now when our Product spreadsheet asks us about which category
we want the product in or the options it needs, we’ll already have those IDs handy.
Let’s open the ecom_prod spreadsheet.
Of course, our product entries will be more complex than the Categories and Product options,
but most of these are pretty simple once you get rolling.
Here is what the first columns of the Product spreadsheet look like:
By now, the id column should be child’s play. If you aren’t using any sort of Search Engine
Optimization (SEO) then you may want to consider using a fairly accurate representation of your
product here, as this ID will show up in your web page’s URL and will be seen by the search
engines.
The name column, much like its predecessors is the full name of the product. This will be
displayed so it should be the full name and full capitalization.
25
Getting Started Guide
The prodnum column allows you to assign a number to a product. This may or may not work
with your common standard practice…it can be left blank if you choose not to use it.
The pricestatus column allows you to choose from:
•
•
•
•
•
•
R for regular pricing
S for sale pricing
N for option based pricing
V for volume based pricing
C for recurring pricing
D for not for sale
Most folks will just use regular pricing…especially when setting up the store, so just make sure
you have an “R” in this field.
Your regprice column is where you plug in the customer price for the product.
The saleprice, volprice (volume pricing), recurprice (recurring price) and affilcomm (affiliate
commission) columns are designed for different types of pricing and are explained in explicit
detail in the full ClickCartPro/EuropaCart User’s Manual.
The keywords column is where you’ll list the various keywords you want associated with this
product. What words would a potential customer think of when in search of this product? Just
think of 5 or 10 words and separate them with a comma.
The descshort column is the short description of this product that will show up on category
pages and other places where the product is listed along with other products. It should be 3
sentences that provide basic details on the product.
As the ecom_prod spreadsheet is a long one, we’ll now refresh the artwork to deal with the
next subjects.
The desclong column contains the nitty gritty details on your product. This can be input as
standard text or by using HTML tags. If you would like to spice up your text, but aren’t an
expert in HTML, you may want to revisit the Admin product page and use the WYSIWYG editor,
which will automatically turn your plain text into HTML and allow you to add bold, italic,
underline, bullets and numbering to your pages.
The descmobile column contains the long description for mobile displays.
The lgdisp column deals with how you want your product details displayed. You have 3 choices
to choose from. Here they are with their spreadsheet codes:
26
Getting Started Guide
•
•
•
Centered Image Display (center)
Default Format (default)
No Image Displayed (noimg)
There are pictures of each of these selections in the full manual, but for the purpose of this
demonstration, simply go with the default.
The next column we’ll deal with is called prodmulti. Would you like your customers to have the
option of purchasing related products directly from this product page? If this feature works with
your store’s format, just set this box to “1”. If you don’t want to activate this feature, just put a
“0” in this box.
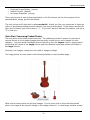
Quick Start- Concerning Product Photos
The next three entry fields concern pictures. The software provides 3 spaces for pictures of
various flavors on your product pages plus the ability to add one or more images for each
category. You have small thumbnail photos that will go into the imgsm column; large product
photos that will reside in the imglg column and then detailed extra large photos will reside in
the imgxl column.
Normally, the imagsm images are only used in category listings.
The imglg photos are now used in the following displays on each product page.
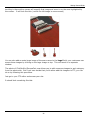
What you’re seeing above are all large images. If your users click on the small thumbnails
below, the image at the top will change to the image clicked on. In that larger window, simply
27
Getting Started Guide
scrolling in there with a mouse will magnify that image and zoom in on the area highlighted by
the mouse. It will look like this: (notice the left image is now zoomed)
You can also add an extra large image of the same name to the imgxl field, your customers can
access those images by clicking on the large image on top. This will launch in a separate
window.
The admin of ClickCartPro/EuropaCart now allows you to add numerous images to each category
from the admin side. But if you ever decide that you’d rather add this images via FTP, you can
do so by following this procedure.
Just go to your FTP editor and access your site.
It should look something like this:
28
Getting Started Guide
Now access the /media subdirectory and then click on /ecom.
Your FTP editor should now reflect something that looks like this:
Once glance clears everything up. You have folders called prodlg, prodsm, and prodxl. All
you need to do is import your thumbnail small photos into the prodsm folder, your large
product photos into the prodlg folder and of course, your extra large detailed photos into the
prodxl folder.
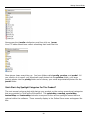
Quick Start- Any Spotlight Categories For This Product?
The next several columns deal with placing your product on the various promotional categories
that are provided in ClickCartPro/EuropaCart. The splashdisp, newdisp, specialdisp,
bestselldisp and featuredisp columns correspond to the various spotlight menus that are
optional within the software. These normally display in the Online Store menu and appear like
this:
29
Getting Started Guide
The splashdisp column lets you determine if this product is crucial enough that you want it
displayed on the front page of your web site. This is the ideal place to push the products that
mean the most to your store. A “0” means “don’t list it there”. A “1” means “list it there”.
If a product is new to your site, you may want to list it in the newdisp column. Repeat
customers to your site may only peruse this link because they only want to know about the new
stuff that you have to offer. It’s always wise to keep this section as up to date as possible.
Another favorite of many customers is the sale area. You can mark “1” on all of the products
where you have a special limited price in the specialdisp column. Folks love to get a bargain
and the Internet is no exception. It is also important to keep this area current.
The bestselldisp column is next and deals with products you view as best sellers. The “best
seller” moniker may convince a customer who is choosing between 2 different versions of a
product on your site. Best sellers mean that you have tacit “lemming” approval.
The featuredisp columns allow you to pick the slot where you want this product featured.
These are your core products and the ones you wish to push the hardest when a customer
arrives at your store.
What is the difference between Home and Store Home?
As you begin working and auditioning your changes, you may notice that you’ll see references to
Home, Splash and Store Home in both headings and background. Basically, there are 2 "landing
pages" within ClickCartPro/EuropaCart. The first is the page that, by default, one sees when
they hit a site that hasn't been changed from the initial installation. That is the HTML page you
see in Web Page Management with the identifier of Splash. The second page is the Store Home
(landing) page, which is what you normally get when you click on the Store Home link in the
default skin.
30
Getting Started Guide
Let’s continue in our spreadsheet. We’re now configuring the stock and tax options for your
specific products. If your specific state, province or country require you to apply sales tax to
this item, you would set it to “1”. If you plan on just setting standard tax ratios to both states,
provinces and various countries, then leave taxstateprov and taxcountry at the default “0”.
When would I care about this?
This might come into play if you have state tax enabled but are selling an item that is tax
exempt. In that case, you would disable the state tax. The taxcountry is used for international
stores. Tax rules vary from country to country so if you are not in the United States, check with
your local tax authorities to set up your tax fields correctly.
Quick Start- Declining Balance Inventory
The useinv and invlevel columns represent inventory tracking and levels for your products. If
you want the software to track your inventory you would simply set the useinv column to “1”
and then fill in the current inventory for that particular product in the invlevel column. Some
people love the declining balance inventory because it always gives their customers up to date
information about product availability. Others don’t like it because once ClickCartPro/EuropaCart
thinks you’re out of stock it no longer lists the product available for shipment. This can cause
pain if you also have a telephone sales staff and they ship things without reporting them to
ClickCartPro/EuropaCart or customers leave your store to purchase similar products from a
different store. You have to decide whether this feature benefits you or causes confusion. Once
you’ve decided this, you can either implement or not implement.
The addemtext column refers to text you’d like to add in addition to the thank you email that is
generated when a customer purchases anything from you. If this product has special
instructions or you’d like a special message to be conveyed alongside your standard “Thank you”
email, then this is the place to type it in. This is standard text only…no html.
Quick Start- Delivery Of Products To Your Customers
When most of us think of shipping, we think of the UPS driver, the postal carrier or other big
trucks filled with packages. In fact, most products are probably delivered in this exact manner.
But if you’re a software company or provide some sort of service, you may deliver nothing at all
to a customer via shipping. Other businesses present various unusual shipping demands and
ClickCartPro/EuropaCart is set to support them all.
The delmethod column deals with your specific plans for delivery of this particular product. You
have several choices: (just put the letter in parenthesis in your spreadsheet)
31
Getting Started Guide
•
Not Shipped (N)- This would be used for a specific service or software download where
no actual product will be shipped.
•
Realtime Carrier (R)- If you plan on using the Post Office, UPS, Fedex or Intershipper to
ship this product, ClickCartPro/EuropaCart has these companies integrated into the
checkout so realtime quotes can be generated. We’ll set these carriers up later in the
tutorial.
•
Product-Based Shipping (P)- You can simply assign a total shipping amount for a
specific product and bypass the realtime quotes.
•
Custom Shipping Method (C)- You can base your shipping charges on a number of
factors that you set up in the next column.
The customship column provides you with a list of custom shipping methods that you can apply
to a particular product at customer checkout. Simply plug in the abbreviation that shows in the
parenthesis:
•
•
•
•
•
Calculation On Total Item Cost (cst)
Calculation On Total Item Quantity (quan)
Calculation On Total Item Weight (wgt)
Percentage Of Total Item Cost (pct)
User Defined Calculation (user)
The dlfile column contains the name of a download file in the case of a software product. If you
use the ClickCartPro/EuropaCart interface to upload a downloadable file, you simply browse your
drive, show it the file you want and it uploads it automatically to your secure directory in a
special /download subdirectory. (i.e. /htdocs/private/downloads/yourfile.exe) To use the
spreadsheet method, you simply put the name of the file in this box and then upload your
software file to that directory using your ftp editor. Now your files are secure in a passwordprotected environment, but your customers can purchase them quite easily.
The shiponename, shiponeprice, shiptwoname, shiptwoprice, shipthreename and
shipthreeprice columns all deal with Product based shipping. If you want to skip realtime
quotes from shipping companies and simply include a blanket price for your own chosen shipping
methods for each product, you would fill out the name and price in these columns. For example,
you may just want to offer:
•
•
•
Overnight Shipping:
$12.00
Second Day Shipping: $9.00
Ground Shipping:
$6.00
This spreadsheet continues…Let’s refresh the look again:
32
Getting Started Guide
The shiplocal and shipint columns deal with both domestic and international carriers that you
prefer if you’ve chosen Realtime Shipping as your shipping method for this particular product.
You can choose one or all of these methods on a product-by-product basis: (just use the content
in the parenthesis to add this method to your shipping choices)
•
•
•
•
Federal Express (FEDEX)
Intershipper (INTERSHIPPER)
United Parcel Service (UPSTOOLS)
United States Postal Service (USPS)
You’ll fill these out for both domestic (shiplocal) and international (shipint) shipping if you intend
to provide both. We’ll explain later how to set up these realtime shippers.
Product dimensions occupy the next 4 columns and include shiplength, shipwidth, shipheight
and shipweight. You will simply type in length, width and height in inches and weight in lbs.
The system defaults to US standards, but if you need centimeters and kilograms for a non-US
company, you can simply go to the System/Component/Settings menu and choose
Currency, Weight and Dimensional Settings to change to the non-US standards.
Important Note:
It is very important to fill out all shipping dimensions, especially when using Realtime and
Custom carriers because this additional information helps guarantee that both you and your
customers get the most accurate shipping quotes possible. Saving you from overpaying or
explaining over billing.
33
Getting Started Guide
The shipnumbox column let’s you state the number of boxes a particular product requires. You
can select “0” boxes to have this product packed in a box with other products in the order or
select from “1” to “6” if this product requires it’s own box or boxes.
The next three fields: shipstateprov, shipcountry and shipzip all deal with the location you
plan on shipping the products from and is imperative for most background shipping operations.
If you ship everything from one business location, you can leave these fields blank and
ClickCartPro/EuropaCart will default to the business state, country and zip code you list for the
business. If you have various products shipping from various warehouses in several states, then
you’ll need to fill in these fields with the correct state, country and zip code for the products this
affects.
The shipemail column deals with any products that you may have drop-shipped by another
company. Every time an order is confirmed that is drop shipped, your drop-shipper receives an
email with simple customer shipping instructions. No price or other account information is
provided.
Quick Start- Bring On The Categories and Product Options!
We finally can see the light at the end of the tunnel on this very lengthy spreadsheet. Finally we
get to use the Category and Product Option information that we started early in this tutorial.
This would probably be a good time to print both the ecom_cat and ecom_prodoption
spreadsheets, as you will be referring to them to fill out your next columns.
The xcat column contains the category id name for the categories that you want this product to
be listed in. If you have more than one category for this product, simply separate the various
names by a comma. The ID names for this column will come directly from the ecom_cat
spreadsheet that you just printed out.
The xprod column is where you’ll list any products that you feel are related to this product.
Again, a pair of shoes might have related products like shoe strings, shoe polish, etc. You will
have to wait to fill out this particular column until you have a full list of products and product IDs
finished.
The xupsell is a listing of products that you’ll attempt to upsell to clients perusing a certain
product.
The xprodoptions column will contain the various product options that you created. The id
names for this column will come right from the ecom_prodoptions spreadsheet that you just
printed out.
This is our next slice of of the spreadsheet.
34
Getting Started Guide
Quick Start- Sorting Out The Details
ClickCartPro/EuropaCart allows customers to search for products in various ways. This makes it
more convenient for your customers to find the way that best suits their needs. The following 3
columns, sortorder, sortprice and prodidx help the software sort according to those needs.
The sortorder column deals with sorting in order of importance according to you. Like all
sorting capabilities in ClickCartPro/EuropaCart, a low number means a higher rating. “0” is the
most important, and so on. Here you set the order that products are displayed within their
categories.
The sortprice column let’s you assign a price that is only pertinent when a customer tells
ClickCartPro/EuropaCart to sort according to price. This price is not part of any calculations, but
lets you place products in a certain order in that search.
The prodidx column allows you to assign a letter to a product so that when a customer searches
alphabetically, this product comes up at the letter assigned.
Quick Start- Who Can View Your Products?
The next column, prodview allows you to say exactly who can view this particular product. You
may have products that are viewed by:
•
•
•
Everyone (A)
Specific User Groups (L)
No One (N)
Normally, you want your products to carry the “A” moniker so that everyone can view them, but
if you do decide you only want certain groups to see this product, then you have the following
choices:
•
•
•
•
•
•
admin- Backend Administration
affiliate- Affiliate Accounts
reports- Backend Reports
superuser-Backend Superuser
users-Basic Account
wholesale- Wholesale Account
The minquan and maxquan columns deal with minimum and maximum quantities of products
allowed in a customer’s shopping cart. Just use a “0” here to turn off this function. The
taxclass column is provided in case your product has special tax rules applied to it. And finally,
the datetimestamp reports the last time this product was modified.
We’re now in the home stretch! This is the final slice of spreadsheet pie.
35
Getting Started Guide
First, we’ll deal with some Search Engine Optimization for the products. If you read our
Category tutorial earlier, you’ll recognize the metatitle, metadesc and seourl fields. These
fields allow you to set the meta title, meta description and SEO-friendly URL for each product.
Next, we’ll deal with reviews. The reviewsavg and reviewsnum fields will show you the
average score for this product’s reviews and the number of reviews submitted on this product.
The notifystock field is a comma-delimited list of customer email addresses. These customers
have applied to be notified when a product is back in stock or can be entered manually by the
store owner. Once an inventory-controlled product again has inventory, these emails will be
generated automatically and sent by the system.
The next few columns we’ll deal with are called xprodfilter fields. These allow you to assign
product filter elements to each product.
The loyaltypoints field is next. It allows you to assign an amount of loyalty points to each
product to help entice your customers to purchase.
Finally, additional information tabs have been added so that you can really enhance the
information you provide to your customers. You will simply name the tab and then include the
html info in that field. These are 4 sets of tabs called tabname and tabcontent.
The tabs look like this:
Quick Start- Inserting Your Spreadsheets Back Into ClickCartPro/EuropaCart
So, we’ve finished our introductory work on the Categories, Products and Product Options
spreadsheets, so now it’s time to reinsert the 4 sheets we’ve worked on back into the software.
First, we’ll want to remove the example files that are there. Simply refer back to the tutorial
36
Getting Started Guide
How Do I Remove The Example Categories and lather, rinse and repeat with your Product
Options, Product Option Selection Items and Product headings.
Now we’ll reinsert all 4 spreadsheets.
To do that we’ll re-enter the System/Database/Raw Database Admin
Now we’ll see the four spreadsheets we’ve worked on one at a time from this list:
37
Getting Started Guide
This time around, after saving our spreadsheets, we’ll simply choose the spreadsheet we’ve
altered from the list and click on Import.
Midway on the next page, we’ll see a box which lets us browse our local hard drive to find the
file in question and then import it back into ClickCartPro/EuropaCart.
Repeat with all four files. Now you can go to your link to audition the site (it has index.php in
the title) and see what you’ve added. It’s starting to look like your own web site now. Again,
we’re not too worried about look and feel…more about accurate products, pictures, descriptions
and the business backend starting to take shape.
Quick Start- Adding Additional Columns To Your Spreadsheet
ClickCartPro/EuropaCart is pretty darn comprehensive. We’ve tried our best to offer you just
about every conceivable option when setting up your store. But what if you want to add a
column of information to your spreadsheet that we didn’t think of? Perhaps you sell trucks and
want to add some field test columns that can be incorporated by your design team on your
product page? Perhaps you want your product page to offer demos of your latest software
product? Could be anything, but what do you do when you want to include additional
information in your spreadsheet?
Important Note: This is marked Advanced because without the knowledge of how to display
these additional columns, they will do you little good. But, if you hire a designer to use this
information, it will be quite handy to say, “Hey, I want you to add a Tab on each product page
that says “Field Test”…just use the info in column MM.”
Now that we’ve fixed all of the spreadsheets in the system, let’s go back to that original list of all
of the various databases (spreadsheets) in the core and go to the ecom_prod listing. This time
we’ll want to click on the Maintain button.
38
Getting Started Guide
Let’s click on Add A New Column To This Database Table
First we’ll enter the Column Name (this should be lower-cased letters a-z and the _ sign only).
Next we’ll enter the Display Name of the column…as usual, this should be the full wording that
you want to see.
In the Column Section Name enter the following phrase “Keywords and Descriptions”.
In the Column Description enter the instructions for the column so you remember why you
created it.
Then set the Guided Overview Display Indicator to “False” and click on Submit.
This will change the ecom_prod spreadsheet, but only after you do one more thing.
Go back to the Raw Database Admin.
This time click on Submit A Raw SQL Statement
Go to the ecom_prod entry again and this time, click on the Guided Select button.
You’ll then see a long listing called Select Clause. This has nothing to do with Santa, but if you
scroll down to the bottom, you’ll see the entry or entries that you just created. Simply check
them and these columns will now be active and updateable via your spreadsheet. Simply go
through the process of downloading the product spreadsheet again to begin adding the new info.
You may also notice that this has changed the order of your spreadsheet. That is why.
You’ve now added an additional row to your Product Spreadsheet and you can add the additional
information that was missing. This won’t show up on your store audition yet, but it will now be
available when the person who creates the look and feel of your web site needs it.
39
Getting Started Guide
Even if you don’t understand one fact about skins, CSS, and XHTML, the preparation you do for
your web site can save you thousands of dollars and lots of time setting up your site.
Quick Start- Setting Up Your Shipping Companies
As we said earlier, you have the choice of using UPS, FedEx, Intershipper and the United States
Postal Service to not only deliver your packages, but also to quote your customers online with
free realtime shipping rates that coincide with the weight and dimensions of their order.
All of these free services require you to have an account setup with the organization in question.
To set these up, just go to ClickCartPro/EuropaCart, go to the Store/Shipping menu and select
the carrier you wish to set up.
Most of these require you to sign up on the web site of the shipper in question, get some sort of
account number, register your company and then plug the numbers into
ClickCartPro/EuropaCart. It’s a fairly simple process and should take more than a few minutes
per shipper to complete.
40
Getting Started Guide
Quick Start- Setting Up Customer Payment Options
Like shipping companies, setting up your credit card processing and customer checkout is a
fairly straightforward process. There are numerous payment gateways supported right out of
the gate, you simply have to plug in the information provided by those gateways to begin
shipping your customer information to them and processing their payments.
We’ll assume that if you already have access to a gateway, that you’ll be able to read your way
through the basic instructions included in ClickCartPro/EuropaCart and get things setup.
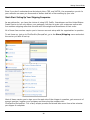
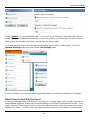
Just go to your Store/Commerce menu and select Processing Gateways.
You’ll now see a list of options displayed. You’ll notice the Active Status column here. This just
tells you what payment options are currently active for your customers.
41
Getting Started Guide
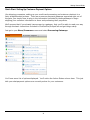
To make any option available to your customers at checkout, simply click on Update and once
you begin working with any option, you have to set the Active Status flag to “True” as you see
below.
Here are some of highlights of the list you see above:
•
•
•
•
•
Contact Customer- This approach is ideal for those customers who are a bit squeamish
about plugging their credit card numbers into the Internet. It simply provides them an
option to have someone from your company call them for their credit card information.
You just have to judge whether or not you have the resources to follow up each customer
who chooses this option.
Offline (Credit Card)- This is a great option to use if you can’t always ship your
customers’ products on the day that they order them. If you have to order in products
and have a few days down before shipping, this is great because the system verifies that
you have a good credit card, but you can then run it at your leisure when you’re ready to
ship.
Check Payment- If you have customers who prefer paying by Check, this will allow them
to print their invoice and send a check for payment in advance.
Purchase Order Payment- Does your business accept purchase orders? If so, activate
this field and you’re up and running.
Paypal Payment Options- The software supports 3 different flavors of PayPal. Simply
activate the one that you have set up in advance. If you don’t currently accept PayPal,
here are the current options:
o Standard- Pass items in a shopping cart to PayPal where customers complete their
payment. PayPal authorizes payments and returns customers to your website.
42
Getting Started Guide
o
o
Pro Express- Provide a seamless checkout for PayPal account holders via an APIbased integration. Customers select payment method and shipping address on
PayPal, then return to your website to finalize their purchase. (Recommended by
Paypal.com)
Pro Direct- Accept payments via phone, fax, mail and in-person payments. Add
this optional service for a low monthly fee.
After these options, you’ll have numerous different payment gateway companies to choose from.
Quick Start- Setting Up Your State/Province/Country
ClickCartPro/EuropaCart allows you to set up the system to automatically charge taxes when
necessary. If you are in the United States, normally, you only charge taxes to customers who
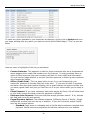
live in your particular state. To set this up, just go to System/Locations.
Select States and Provinces…
You’ll then see a list of all of the states in the United States on page one and provinces of
Canada and various Armed Forces locations all over the world.
43
Getting Started Guide
Select “Update” on your particular state. You’ll then see a field which asks about the rate of
taxes. This is not updated automatically, so you may want to visit this area from time to time.
Once you’ve set the rate, you’ll then want to turn on the tax rates.
You’ll now want to turn on the tax rates in areas that you’ll need to collect them. Go to the
System/Settings menu and click on the Tax Settings menu.
If you scroll down, you can then select applicable states or countries for taxes to be charged.
What If I Have To Deal With City Taxes?
If you have multiple cities that also are requiring you to collect taxes, have no fear, this can be
accomplished using the States and Provinces settings in ClickCartPro/EuropaCart as well. You’ll
simply use the Clone button in front of your local state and clone it as many times as you have
different city taxes. In effect, you’ll be making several versions of your state to accommodate
44
Getting Started Guide
the amount of cities you have to charge taxes for. Then just change the IDs and tax rates to
reflect that.
For example, you may have California (Los Angeles), California (Sacramento), etc…each with the
correct tax rate.
Quick Start- Your New Skin
Version 8 has done away with third party skins and now provides a skin that allows you to have
a more direct influence on the look and feel of your site.
Let’s go to the following menu: System/Settings
Once in there, let’s find the Display Skins menu.
This new menu allows you to Set Color scheme of your menu bars, set logos for your skin, mail
messages, mobile and your print skin.
This is a good place to play around a bit and experiment with colors. See what looks best to
you.
As far as logos…if you look at the various logo input areas, the interface will tell the width that is
acceptable for each area. Again…a little experimentation is a good thing. If you’re not sure how
big your current logo is, there is a Quick Start entry following this one that explains how to find
that out.
45
Getting Started Guide
Probably a good idea to lay your logo into the desktop skin and then spend some time matching
colors using the Skinning Basics Quick Start Tutorial coming up.
Quick Start- How Big Is My Current Logo?
You’ll notice that all of the logo entries expect you to know the size of your logo. Before you can
resize it to fit the skin, email, or whatever other need you have, you’ll have to know your size…
You probably already have a logo in mind that has either been created for you, or that you’ve
created yourself. It should be in .png, .jpg or .gif format. Before we start…you should make a
note on the size of your logo. Essentially, we’re going to plug this logo into the slot that is
currently occupied by the Company Logo. The current skin is set up with a cutout that is
essentially the size of the Company logo that is there. We’re going to have to cut out a different
slice of space so that your logo appears there completely. For us to do this accurately, you’re
going to have to know just how big your logo is. To find this out quickly without any special
training in Windows, just go to Start/Programs/Accessories and open Paint.
46
Getting Started Guide
Find your logo on your hard disk and open it. To find out the size, simply go to
Image/Attributes.
Quick Start- Skinning Basics
By now, you’ve most likely discovered how handy it would be to understand the CSS, XHTML,
and PHP design languages. As you’ve perused the interface of ClickCartPro/EuropaCart, you’ve
discovered that understanding these almost foreign languages would be of great service to
helping you get even more out of this powerful and robust product. Also, because
ClickCartPro/EuropaCart is a pretty darned powerful product, we’ve had to house display
information in several areas, so just wading into this pond can be pretty tricky if you don’t have
47
Getting Started Guide
a working knowledge of these languages. Well…a full explanation is beyond the scope of this
user’s guide and more importantly…this author. However, if you are determined to tackle this
on your own, and don’t want to pay for the expertise of our Custom Shop (explained at the end
of this guide), then you should at least know where to look for things.
You hear people speaking about Look and Feel when they talk about web sites. In the most
basic terms, the Look is determined by your all.css file and the Feel is determined by your
skin.php file. Most of these files reside in the skin of your store. We’re going to give all of our
instructions based on the default ClickCartPro/EuropaCart skin that ships with the product.
First, to access your skins, just go to System/Displays/Display Skins directory
You’ll then select the Desktop skin and click on the Update button.
Now you’ll see a list of files that include both the skin.php file we discussed (feel) and the all.css
file (look). You’ll notice that there are CSS files to match the various themes we’ve provided
with the color schemes. Each of these files contain contain override information to the main
all.css, so before you start poking the bear, make sure that you back up by following the
instructions listed below:
First…let’s to a little preventative maintenance. Go to the skin.php file and click on Update.
You’ll now see a little preliminary text and then a box that says File Contents and lots of foreign
computer speak. Just drag your mouse to highlight everything in that box. Then go to Edit in
48
Getting Started Guide
your browser and click on Copy. Now open up a text editor (Microsoft Word, WordPad, Note
pad) and paste this entire chunk of text into it. Save it as backupskinphp. Then go back into
ClickCartPro/EuropaCart and do the same procedure with any CSS files you’re going to play with.
This is just in case we mess something up and want to go back. In the reverse, we can just
highlight everything in our word processor and paste it back into the appropriate sections of the
skin. Better to be safe than really really sad.
Lots of CSS files to choose from:
Quick Start- Changing The Home Page
We’ve now looked at PHP, CSS…might as well complete the trifecta…let’s do a little HTML. If you
want to change the wording in the opening body of your home page, there’s no better time than
the present. Again…it is beyond the scope of this demo to teach you HTML…there are books
dedicated to such things. What we will do is teach you how to sneak around in there…change a
few things…and get out before anyone notices.
Important Repetitive Nagging
Whenever we delve into a new block of code that we really don’t understand, it’s always good to
copy the whole mess and drop it into a text editor to save it. That way…when the sky falls, we
have a nice clean backup that takes us to square one.
We’re now going to enter the Website directory and work on a standard HTML page. Not every
page in ClickCartPro/EuropaCart has to be a standard store sales page. This powerful product is
designed to help you create your entire store from top to bottom. When you have pages that
just contain information…this is where you’ll begin. First, click on Website/Content and then
Web Pages.
49
Getting Started Guide
This area contains these standard HTML pages. There are several included with your cart and
we’ll concern ourselves with the called splash:
Click on Update to open the home page of your web site.
Ignore the html code and go right to where the message to the customers begins. As we stated
before, all HTML display text will have the following look:
<p class="strong">Thank you for visiting our site.</p> This simply means that we’re
starting a new paragraph with a bold (“strong”) font. The line ends with a </p> As long as you
leave the opening <p class=”strong”> at the beginning and the </p> at the end…you can type
whatever bold opening message you want in between and when you press the Submit button at
the end, your message will be captured. A quick visit to your audition page after you submit,
will confirm that you’ve changed the message instantly. From there…as you replace the
paragraphs that are already there, you’ll just have to make sure that you maintain the <p> at
the beginning and the </p> at the end. Check frequently when you start so that you don’t
make major mistakes and have large rewrites…soon enough you’ll get the hang of it and have to
check less frequently.
You’ll also see this code fairly high up in the paragraph:
<p><a href="<?php print $link_cfform; ?>" title="Customer Feedback">Click here to
send us feedback on our site.</a></p>
As we said before, the <p> starts a paragraph…but this time, you’ll notice the <a href=… This
is the link you see when you audition the front page. Basically, this little bit of php code tells the
software to launch the customer feedback form when someone clicks on this link. You can keep
this or just eliminate it if you don’t want a link in this first paragraph. And if you change your
mind? No problem. Remember that we copied and pasted this into a standard text editor before
we started messing with it. You can always go back.
50
Getting Started Guide
Add what you need here and audition frequently until you finish the page.
Just experiment with this a little. It’s not rocket science and as long as you’re careful not to
erase anything in the <brackets>, you can quickly create your first html message knowing
absolutely nothing about html.
Changing The Company Info At The Bottom Of The Home Page
This is an easy one! To change the contact information at the bottom of your home page, just
go to System/Component/Settings/and then find the Global Settings menu and fill out the
form. Hit Submit and voila…you’ve got a new accurate footer on your front page.
Quick Start- Using The Cool New Banner System
So, you’ve seen the new version of ClickCartPro/EuropaCart, you’ve made the plunge, purchased
the software, run the importer and now you’re looking at the latest version of your new store.
51
Getting Started Guide
Where are the cool slideshow banners and the cool little ads that the software touted? Where’s
the beef?
No problem. If you just imported your store and didn’t leave the demo store in place, you’re
likely not seeing the extra slideshows at this point. No worries.
Or…if you did leave the demo store in place when you ran the importer, you might be seeing
these, but you just can’t figure out how to STOP selling electric guitars and amps. Again…no
worries.
This tutorial will show you how to:
• Turn the banner ads on and off
• Assign your own slides and assign them to the correct location
• Create and import those slides
• Assign links to those slides
First, let’s deal with the big banner on the front page of your site.
It’s important to note that you can have a different banner slideshow on any html page on your
site. This powerful option allows you to program a specific “show” for any page you choose.
Step One of this tutorial assumes the following:
52
Getting Started Guide
•
You want your slideshow to be on the front page, as in the ClickCartPro/EuropaCart 8
demo
•
You want to use the default sizes of the banners you see in that demo
•
The demo you’ve seen looks like this:
We’ll also assume you’re currently working on your new store in a hidden sub-directory so that
any changes we’re making during this tutorial will not be seen by your customers.
Well go into the Website/Webpages directory and click on the Update button beside the Splash
page.
Each html page has a side menu that looks like this:
53
Getting Started Guide
Note the Banner Advertisements entry at the bottom and click on it.
If it’s not already there, type in “splash”
Now look at the front page of your store and you should see the banner ads alive and well and
selling guitars to your customers. Note this procedure because you have this option on every
single html page you create…this can be a powerful ally.
Next, we’re going to go into the Website directory and choose the Content and then “Banner
Advertisements” menu.
This area is where you can manage all of your banner advertisement slides. You’ll notice both
the Splash banners as well as the side banners. You’ll also notice a Functions Menu, which
allows you to search the entries or create a new one. As this first segment is dealing with the
banner on the Splash page, let’s select the first example and just peruse it a bit.
Click on the Update link beside DEMO-CONTENT-SPLASH-1
54
Getting Started Guide
Like all edit areas of ClickCartPro/EuropaCart, you’ll have a series of menus and fields set up to
customize each item you edit.
You’ll also notice a series of choices along the left that contain this active menu as well as a
Placement and a Link menu.
Let’s start with the Banner Advertisement page.
It will allow you to:
•
•
•
Assign an ID and name to a banner (only used by ClickCartPro/EuropaCart internally to
identify the slide)
Set that particular slide to active (you can create hundreds of slides, but only activate the
ones you want for a particular slideshow)
Upload the artwork you’ve created for that image (click on Browse to find the new slide on
your local hard disk and then upload it to the appropriate program file)
55
Getting Started Guide
Now let’s click on the Placement side menu.
This tiny menu allows you to:
•
•
•
Assign the slide to a section (you really have 2 choices…Content Section, which means “an
html page” or Skin Widget, which means a smaller margin banner)
Assign the slide to a group (remember, you can create a large number of groups, with
each being assigned to a certain html page or you can create collections for seasonal
Front Page advertisements…i.e., Christmas, Summer, etc.)
Assign the slide an order in the slide show (like all things ClickCartPro/EuropaCart, the
lower the number the earlier the slide shows)
Finally, we’ll find the Link side Menu.
This deals with linking a particular slide to something when a user clicks on it.
You basically choose the type of link and the location.
56
Getting Started Guide
For the type of link, you can choose from the following:
•
•
•
•
Html page
Store Category
Store Product
External URL.
If you choose an inner store link, simply put the identifier of whatever particular page you’ve
chosen in this space, or with an external link, simply copy the entire URL to it.
Now that you know how the system works, let’s create a slide.
If you’re using the default size of the banners in the existing store, you’ll find that they are
665px × 250px. If you have an agency doing graphics for you or simply want to use an art
program to create your slides, this is the size you’re shooting for.
Not sure how to create a properly sized graphic? How about just copying that demo store logo,
by right clicking on it and copying it? Then paste it into your art program and create a graphic
to match it.
Important:
This applies to the default sizes of the demo store skin. If you are using a Custom skin on your
site, you might have to adjust accordingly. How do you know what size best fits your store?
Simply create one slide that resembles what you “think” you need and try it…remember, we’re
working in an offline sub-directory, so you can experiment a bit until you find a graphic size that
perfectly fits your particular store.
57
Getting Started Guide
Now let’s briefly cover the side menu slideshow ads.
58
Getting Started Guide
Managing and creating these ads is almost identical to the larger banner ads except that they
are always active in the left margin of your store. Unlike the banner ads, which can be assigned
to any particular html page, the side margin ads are either on or off.
They are only managed in the Banner Advertisement section of the Web Pages directory.
Let’s look at one so we can see the slim differences in management.
Again, go into the Banner Advertisements directory by click on the Web Pages/Banner
Advertisements menu.
Find the item called DEMO-SKINWIDGET-SIDEMENU1-1 and click on Update.
This is exactly the same as your banner ad for the Splash page save for one tiny item. Click on
the side menu called Placement and then look at the Placement heading there.
You’ll see that you have 2 choices…Skin Widget or Content section.
Your Splash page ad lived in the Content section and was the assigned in each HTML page as we
showed you.
But these side ads are stored as Skin Widgets and are either on or off.
Again, just follow the procedure we outlined before to create your side slides and then assign
them to whatever group you choose, set up links to either internal or external as per the
previous demonstration using the management system and you can be creating ads and
promoting products like never before in your store. The only difference in creation would be size
of the artwork. In this case, the demo banner artwork is sized to 195px X 195px.
59
Getting Started Guide
Quick Start- Adding Videos To ClickCartPro/EuropaCart
It is our mission to provide customers with additional information and also offer good marketing
advice for your ClickCartPro/EuropaCart 8 stores. You could pay and have a customized video
player inserted into your store. But why not make use of resources, which are free and available
and darned easy to implement?
In this case, we’re talking about the world’s most popular video archive system, YouTube.com.
Unless you’ve been living on Mars for the last several years, you’re likely aware of the
entertainment value that YouTube.com provides. But are you aware of what an important ally
YouTube can be for your web site?
This short tutorial will show you how to quickly and easily incorporate YouTube videos into your
Kryptronic stores. You won’t need to be a programmer or an expert in skins, PHP or CSS. You
just have to be able to read and follow some simple directions.
This tutorial assumes the following:
•
•
You have ClickCarPro/EuropaCart 8 (though this would really work for any version of our
software)
You have promotional videos that you want to use to promote sales or support
information
We won’t spend any time helping you get on to YouTube and set up an account so that you can
easily upload your promotional or training videos to their system. This is actually easy and very
well documented by simply going to www.youtube.com and signing up for an account. YouTube
is a very easy company to work with and their services are free…they only ask that you own the
video content you put up there. One other little hint for those of your creating video…Don’t use
copyrighted music in your video productions, they simply won’t allow you to upload them.
Let’s assume that videos you want to promote have been uploaded to Youtube and are waiting
for you to add them.
Step one is a simple one…go to www.youtube.com
Search and find the video that you want to incorporate in your store.
60
Getting Started Guide
It should look something like this:
If you look at the image above, you’ll see the video player as we described it, some other
details, but most importantly, right below the number of views of a particular video, you’ll see a
little gray menu that has a few choices.
We’re going to concern ourselves with the Share menu.
61
Getting Started Guide
Once you click on the Share menu link, you’ll see this appear:
We’re now going to click on Embed.
You should see something like this appear:
To simply embed a player in a particular page, YouTube is providing you with the necessary html
code you’ll need to paste into your page to activate the player that plays your particular video.
62
Getting Started Guide
You can also choose various sizes, etc., but for the sake of this demonstration, let’s just choose
the defaults. This will give you a player that plays your video and use the exact same size as
YouTube uses by default.
Simply copy that code that’s highlighted in blue.
Now let’s open our ClickCatPro/EuropaCart 8.
Let’s say that we want to add a new video commercial in the area right above where the page
says “AudioCenter: Special Event Announced”
We’re going to simply go into our ClickCartPro/EuropaCart 8 admin.php and launch our admin
panel.
63
Getting Started Guide
We’re going to go into the Website/Content/Webpages menu
Let’s navigate to the Splash page and click on Update.
You’ll now see the familiar interface. Simply scroll down slightly to the HTML Content area of
this page:
Here, you’ll see the html content that makes up your Splash page. You don’t have to be an
expert programmer to be able to see where the first paragraph ends and the next headline
begins. We said that we wanted our YouTube ad to be placed right above the heading that says,
<h2>AudioCenter Special Event PC Announced </h2>
64
Getting Started Guide
Important Note:
Just to be safe, let’s copy this entire block of code and paste it into a simple notepad file. Why
do we do this? Even though this should be a simple change…on the off chance you mess
something up, you always can paste this known “good” code back in and be back at square one.
Now, we simply paste the 3 lines of code right above that line so it looks like this:
Notice that this was actually just one line of code? It just looked like 3 lines in the YouTube grab
area.
Click on Submit to save your changes.
65
Now let’s look at the results:
How easy was that?
Keep in mind, every product, category and html page in ClickCartPro/EuropaCart 8 has a space
just like the one above to add HTML content. You can really use video on virtually every page in
your store. It’s a powerful process that can be indispensable for your marketing efforts.
Quick Start- Search Engine Optimization
Once you get the site up and running, your number one priority is probably going to be the free
advertising you receive via the search engines. ClickCartPro/EuropaCart is designed with this in
mind. The product ships with SEO features built in and brings all the tools you’ll need to market
yourself via the search engines with the most robust SEO system on the market.
Google Analytics
66
Getting Started Guide
For Google Analytics code placement, we’ll stay in the System/Component directory and go to
the Settings menu.
If you scroll down you’ll find the following entry:
Click on Search Engine Optimization Settings.
You’ll see a listing for Google Analytics…if you’ve signed up for Google Analytics, you can post
your account number here so that you can track all of your site action via this powerful free
analytical tool.
You also have a space for your Google Adwords Conversion ID, if you are currently using Google
Adwords.
67
Getting Started Guide
Google Analytics is a great way to get accurate tracking information on the customers who
attend your site, where they enter your site, your best pages, keywords, etc. This is a free
service and well worth setting up on your site. To find out more about Google Analytics, just go
to Google.com and follow the signs.
QuickStart- Turning SEO On
One of the coolest new features in ClickCartPro/EuropaCart 8 is the ability to specify the exact
URL you want for each page within your store. This built-in ability requires just a quick bit of
setup on your part before you can reap the rewards of having direct specific marketing in each
and every URL your store generates.
What do we mean by high-powered URLs?
Simple…you can now make your URL exactly what you want it to be.
If you have a page that sells goat-flavored chewing gum, your URL probably used to look
something like this:
http://www.billygoats.com/index.php?app=ecom&ns=prodshow&ref=gt-flav-gm
Now, using our built in SEO URL generator, you simply add the name you want the URL to reflect
and your new SEO friendly URL looks like this.
http://www.billygoats.com/goat-flavored-gum
There are really 3 steps in order to get this high-powered marketing tool up and running on your
local copy of ClickCartPro/EuropaCart 8.
•
•
•
Use the admin pages of ClickCartPro/EuropaCart 8 to define the actual URLs you want in
your store
Set up an .htaccess file on your web site
Flip the switch to turn this feature on
Well walk you through each of these steps so that you can easily get started on this.
Setting things up in the ClickCartPro/EuropaCart Admin
If you click on the Update button for any product, catetgory, html page or other indexed pages
in ClickCartPro/EuropaCart, you’ll find a left menu that looks like this:
68
Getting Started Guide
You’ll want to click on the Search Engine Optimization button to reveal the powerful SEO tools
that are part of each ClickCartPro/EuropaCart Installlation.
At the very bottom of each SEO page, you’ll find an entry that looks like this:
You simply type in the exact URL you want and the software will take care of the rest for you.
You can create cool new SEO friendly URLs that are devoid of any pesky PHP gobbledygook.
Also, if you have links from previous stores that you don’t want to change you could simply copy
the old URL title into this field to maintain exact URL matches to your popular old site.
Next, we’re going to set up an .htaccess file.
For simplicity, think of a .htaccess file as a little traffic cop that lives in the root directory of your
web site. It’s a little collection of variables that are picked up by browsers and other software
when your site is accessed. It simply quickly relates information, redirects traffic and other
simple instructions.
This file can be created in a simple text editor like Notepad and then uploaded to the root
directory of your web site.
The root directory normally has a name like /public_html, /www, /httpdocs, etc. If you’re not
sure, ask your host what the public root directory is called.
Depending on your previous setup of ClickCarPro/EuropaCart or your current installation
location, you may have to use one of 3 different choices of .htaccess files.
•
•
CCP8 Is Located In The Root Directory
CCP8 Is Located In a Sub-directory like /store or /ccp8
69
Getting Started Guide
•
CCP8 Has Been Imported From A Former CCP6 Store
If you’re not sure, simply call our toll free number for additional instructions.
CCP8 Is Located In The Root Directory
Simply copy the file exactly as you see it below, paste it into Notepad and then save the file as
.htaccess (no extensions…exactly as seen) You’ll then use your hosting control panel File
Manager or FTP client software to copy this file into the root directory of your web site.
Options +FollowSymLinks
RewriteEngine on
RewriteRule
RewriteRule
RewriteRule
RewriteRule
RewriteCond
RewriteCond
RewriteCond
RewriteCond
RewriteRule
^index.php - [L,PT]
^/$ index.php?COREseourl=/ [L,PT]
^sitemap\.xml utilities/sitemap.xml [L,PT]
^rss\.xml utilities/rss.xml [L,PT]
%{REQUEST_URI} ^/
%{REQUEST_URI} !\.(xml|css|js|gif|jpg|jpeg|png|pdf)$ [NC]
%{REQUEST_FILENAME} !-f
%{REQUEST_FILENAME} !-d
^(.*) index.php?COREseourl=/$1 [L,PT]
CCP8 Is Located In A Sub-Directory Like /Store or /CCP8
Simply copy the file exactly as you see it below, paste it into Notepad and then save the file as
.htaccess (no extensions…exactly as seen) You’ll then use your hosting control panel File
Manager or FTP client software to copy this file into the root directory of your web site.
Options +FollowSymLinks
RewriteEngine on
RewriteRule
RewriteRule
RewriteRule
[L,PT]
RewriteRule
RewriteCond
RewriteCond
RewriteCond
RewriteCond
RewriteRule
^index.php - [L,PT]
^directoryname/$ directoryname/index.php?COREseourl=/ [L,PT]
^directoryname/sitemap\.xml directoryname/utilities/sitemap.xml
^directoryname/rss\.xml directoryname/utilities/rss.xml [L,PT]
%{REQUEST_URI} ^/directoryname/
%{REQUEST_URI} !\.(xml|css|js|gif|jpg|jpeg|png|pdf)$ [NC]
%{REQUEST_FILENAME} !-f
%{REQUEST_FILENAME} !-d
^directoryname/(.*) directoryname/index.php?COREseourl=/$1 [L,PT]
Important Note:
Please remember to replace the word directoryname with the actual sub-directory name you’re
using. It needs to be replaced in 9 locations.
70
Getting Started Guide
CCP8 Has Been Imported From A Former CCP6 Store
Simply copy the file exactly as you see it below, paste it into Notepad and then save the file as
.htaccess (no extensions…exactly as seen) You’ll then use your hosting control panel File
Manager or FTP client software to copy this file into the root directory of your web site.
Options +FollowSymLinks
RewriteEngine On
RewriteRule ^ccp0-display/(.*)\.html$app=cms&ns=display&ref=$1 [L,PT]
RewriteRule ^ccp0-dynform/(.*)\.html$ index.php?app=cms&ns=dynform&ref=$1 [L,PT]
RewriteRule ^ccp0-(.*)/(.*)\.html$ index.php?app=ecom&ns=$1&ref=$2 [L,PT]
RewriteRule ^gbu0-display/(.*)\.html$app=cms&ns=display&ref=$1 [L,PT]
RewriteRule ^gbu0-dynform/(.*)\.html$ index.php?app=cms&ns=dynform&ref=$1 [L,PT]
RewriteRule ^gbu0-(.*)/(.*)\.html$ index.php?app=ecom&ns=$1&ref=$2 [L,PT]
RewriteRule
RewriteRule
RewriteRule
RewriteRule
RewriteCond
RewriteCond
RewriteCond
RewriteCond
RewriteRule
^index.php - [L,PT]
^/$ index.php?COREseourl=/ [L,PT]
^sitemap\.xml utilities/sitemap.xml [L,PT]
^rss\.xml utilities/rss.xml [L,PT]
%{REQUEST_URI} ^/
%{REQUEST_URI} !\.(xml|css|js|gif|jpg|jpeg|png|pdf)$ [NC]
%{REQUEST_FILENAME} !-f
%{REQUEST_FILENAME} !-d
^(.*) index.php?COREseourl=/$1 [L,PT]
Important Note:
This assumes that you are running your new CCP8 store from the root. Call if that is not the
case.
Turning On SEO
Finally, we’re going to flip the switch in Admin to turn this on.
Simply to go System/Component/Settings:
71
Getting Started Guide
There you’ll see a menu for Search Engine Optimization:
Simply click on this and then find the SEO Status entry and flip the switch to True:
72
Getting Started Guide
Test your site and you should see your new URLs appearing.
If you have any issues, please contact our support.
Quick Start-The XMODS
ClickCartPro/EuropaCart is quite a robust experience. You won’t find a more complete solution
to address your shopping cart needs. How do you make it better? You provide specific support
for certain activities that may not be required by all store owners, but are critical for those who
need them. The XMODs are powerful plug-in modules that will enhance the production and
operation of your shopping cart.
Sales Amplifier XMODs
The Sales Amplifiers are designed to offer additional sales features for storeowners to make a
customers’ visit to the store more productive and intuitive.
Googlebase
The GoogleBase XMOD is an advanced module, which exports an XML product feed file to
GoogleBase, allowing you to list your products in GoogleShopping. Automated daily FTP transfers
of feeds is supported.
AutoGC Auto Gift Certificate
This simply allows a storeowner to quickly and easily provide gift certificates for their customers
that are generated as part of their checkout procedure. The Auto GC allows the creation of one
or more denomination of gift certificates that simply appear as products on the store. At
checkout, a customer receives the correct codes to redeem these certificates in the future. This
is an ideal feature to add to shopping cart as the holidays approach and the gift-buying season
draws near.
The Extension XMODs
The Extension XMODs are designed to offer convenience and speed to the backend work that a
typical storeowner experiences each and every day. These XMODs offer an extra set of hands to
help ease the burden of day-to-day work that takes time away from product creation, important
marketing and other profit centers of the storeowners’ business.
73
Getting Started Guide
THUB: The T-HUB Software Connector
The T-HUB Pro software from Atandra is a great innovation for business owners in that it
seamlessly allows them to work with new orders in ClickCartPro/EuropaCart, their Quickbooks
accounting software and the three major shippers (FedEx, UPS, USPS), all under one intuitive
interface. This can be an incredible time saver…again freeing the storeowners for more
important revenue generating work. The T-HUB Software Connector XMOD helps transfer orders
from ClickCartPro/EuropaCart into Quickbooks and the shipping companies and then accepts
shipping information to display it for customers in ClickCartPro/EuropaCart.
Shipworks
The Shipworks XMOD for ClickCartPro/EuropaCart is a module that simply allows you to export
your orders directly to your Shipworks software. It is designed to help you move quickly
through your daily orders so that you can spend your time on more productive endeavors.
ShipWorks is for people who sell online. It connects to your online store or seller account. It
downloads your orders and makes it easy to create shipping labels, manage customers and
emails, and update the online status of each order.
Store Productivity XMODs
These simply make your life easier with day-to-day operations.
BOM Batch Order Management
The Batch Order Management (BOM) XMOD is an advanced module, which provides a battery of
new order-specific functions which speed up processing of orders, increase customer satisfaction
through enhanced communication, and help convert failed and abandoned orders into sales.
Communications XMODS
These help you make contact with the outside world and help you boost the content on your site.
NewsRss
The NewsRSS XMOD is a module that provides a full blown news publishing service using the
content management system in our software. Search engine placement can be determined by
the freshness of your content. With the NewsRSS module, your content can always be fresh.
News articles can be published to an article list, skin widget and/or RSS feed. Additionally,
recently updated HTML pages, store products and categories may be included in the article list,
skin widget and/or RSS feed. Works perfectly with the SiteMap and HDSEO extension modules.
Use as a news service, a way to broadcast store product updates, or both.
Custom Design Needed?
This guide was designed to help get a store up and running as quickly as possible. When you’re
finished, you should be able to get your store online. Every shopping cart has a different set of
requirements. ClickCartPro/EuropaCart is designed to help you get pretty close, but if you have
special modifications necessary to bring the deal home, you should try calling or emailing our
Custom Shop to finish the job. We’ll get all of the information to give you an accurate quote on
providing the special modifications or design work you need to complete the job and we’ll
respond throughout the process so that you always know exactly what’s going on. Receiving a
74
Getting Started Guide
completed quote doesn’t cost you a cent, but let’s you know what kind of investment you’re
looking at to make your site ‘perfect’.
To contact our Custom shop, either email [email protected] with the requirements you
need or call us toll free at 800 704 4160.
That’s the end of our Getting Started Guide.
75