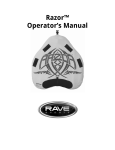
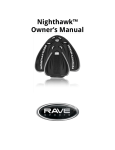
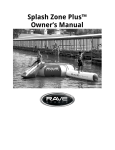
1
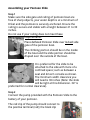
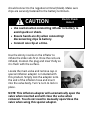
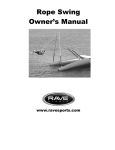
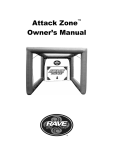
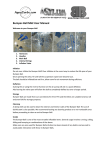
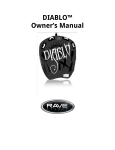
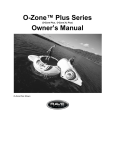
Pontoon Slide Owner’s Manual Introduction Water sports can be safe and fun for all levels of enthusiasts. The Owner’s Manual is presented to enhance your enjoyment of the sport. It is intended to alert you to some of the potentially dangerous conditions that can arise in all water sports. Please take a few minutes to read this manual before assembling and using the product. Although the product is simple to use, this manual contains important safety information that you and all users must understand to safely enjoy the Pontoon Slide. If you have any questions regarding this product, please call RAVE Sports at 1-800-659-0790, or visit www.ravesports.com. Please have the serial number from your product ready when you call. ! WARNING UNSAFE USE OF THE PONTOON SLIDE CAN RESULT IN PERSONAL INJURY OR DEATH. To reduce the risk of injury, read and follow all instructions and warnings in this manual. Do not use this product unless you understand and accept the risk of injury involved with this activity. Safety Rules and Information • Read and understand all of the information contained in this owner’s manual before assembling and using your product. • Make sure that everyone who uses the product is provided with and understands these safety rules and information. • The Pontoon Slide is designed to be used only on pontoon boats in large bodies of water with depths of at least 8 feet of water. Do not use or allow anyone else to use the product on Runabouts, Deck Boats, fishing boats, etc. Also, do not use on land or any other hard surface or in swimming pools. • Choose a location for your product that is most protected from wind, of sufficient water depth, and free of obstructions above and below the water for at least 20 feet in all directions. • Always mount Pontoon Slide to side gate areas. Never mount slide off the front of the Pontoon. Make sure gate is closed and locked securely. • Always wear a U.S. Coast Guard approved Type III (PFD) personal floatation device when using the product. • Never use the product after sunset, before dawn, or any other time in poor lighting conditions. • Never use the product in rough surface water conditions, during storms, or when there is lightning. If an unexpected storm arises while using the product, seek shelter on shore. Do not stay on the product. • Never use the product under the influence of alcohol or drugs. • Always stay under control while using the product. • Always make sure water near slide entry is clear of swimmers or other obstructions. • Never swim or play under the Pontoon Slide. • This product is not a towable. Stop motor when ready to use Pontoon Slide. Never have slide inflated and/ or attached while motor is running or boat is in motion. • Do not allow more than one person (up to 200 lbs.) to slide and/or climb on the slide at one time. Exceeding this may result in injury. • Never slide down the Pontoon Slide head first or attempt other acrobatic maneuvers on the product. • No pushing or shoving persons while on Pontoon Slide. • Do not climb up the Pontoon Slide to exit the water. Use boarding ladder on the pontoon. • Never jump from top of Pontoon Slide, stay in a seated position at all times. • Never use the product while tired or fatigued. Use extreme caution while swimming around the pontoon boat. • Always inspect the areas around and under the product before each use to ensure the water is deep enough and free of all rocks, logs, sand bars, and underwater obstructions and that the product is a safe distance from above water hard objects. Ask about local water conditions before using the product in unfamiliar water. • When not in use, deflate Pontoon Slide and store in a secure area. Never leave slide inflated and unattended. • Inspect your product for any worn, defective, or missing parts and replace or repair before using. • Use the Pontoon Slide only under mature, knowledgeable adult supervision. IMPORTANT: FOR PONTOON BOAT USE ONLY. DO NOT ATTEMPT TO USE ON DECKBOATS, RUNABOUTS, FISHING BOATS OR OTHER CRAFT. BEFORE ASSEMBLING OR USING YOUR SLIDE, MAKE SURE YOUR PONTOON MEETS THE FOLLOWING CRITERIA: 1. A secure side railing with a height of 21-30 inches from the deck to the top of railing. 2. Vertical rail supports that are 16-54 inches on both sides of the intended slide mounting location. 3. Minimum 30 inches width clearance so the slide can rest squarely on the pontoon deck. NOTE: The gate itself can be smaller than this. See page 6 for further explanation. These criteria must be met in order for the pontoon slide to be securely fastened to the pontoon. If your boat does not meet these criteria, do not attempt to use the product. Assembling your Pontoon Slide Step 1 Make sure the side gate and railing of pontoon boat are free of sharp objects, your water depth is at a minimum of 8 feet and the pontoon is securely anchored. Ensure the railing is secure and stable with a height between 21 to 30 inches. Do not use if your railing does not meet these requirements. Place deflated Pontoon Slide over locked side gate of the pontoon boat. The climbing portion should be on the inside of the boat and the slide portion should be draped over the outside of the boat. It is preferred for the slide to be attached to the side with more of a confined space; such as between a seat and driver’s console as shown. The minimum width clearance you will need is 30 inches (Note: the slide will be tight at this dimension. 34” is preferred for normal clearance). Step 2 Connect the pump provided with the Pontoon Slide to the battery of your pontoon. The red clip of the pump should connect to the positive terminal (red); the black clip should connect to the negative terminal (black). Make sure clips are securely fastened to the battery terminals. • ! CAUTION Electric Shock Hazard • Use caution when connecting inflator to battery to avoid sparks or shock. • Ensure hands are dry when connecting/ disconnecting clips to battery. • Connect one clip at a time. Use the skinny nozzle on the inflator to inflate the slide rails first. Once the rails are inflated, moisten the plug and insert fully so it is flush with the surface. Locate the main valve and remove cap. A special inflation adaptor is included with this product. Simply lock the adaptor onto the end of the inflation hose and insert into the valve body. Turn ¼ turn to lock in place. NOTE: This inflation adaptor will automatically open the valve when inserted and will close the valve when removed. You do not need to manually open/close the valve when using this special adaptor. Inflate the main chamber of the slide until it is firm. Properly inflated, the slide will be firm and will not buckle during use. ! CAUTION DO NOT OVER-INFLATE. Do not exceed 2 PSI if filling with compressed air. Excessive pressure can cause the tube to rupture with potentially damaging force to eyes, ears, skin and limbs. Use of an air compressor or over-inflation can rupture the tube beyond repair, thus voiding the warranty. To manually open valve, depress the stem and rotate clockwise. To close valve, depress the stem and rotate counter-clockwise. Note: It is normal for the air pressure within the tube to fluctuate depending on air and water temperatures. It may be necessary to increase or decrease the air pressure in your product accordingly. To avoid damage on extremely hot days it may be necessary to check and release the air pressure from your product throughout the day. Step 3 Attach the upper black straps to the top of pontoon side rail. The strap should run straight down from the side of the slide to the rail. Wrap the strap around railing, up through the center of the buckle and then back down through the front of the buckle. Loosely attach both buckles then pull tight on both sides so the slide is secure and cannot rock side to side. Attach the lower straps of the slide through the nearest vertical bar on railing. The bar should be a maximum of 54 inches and a minimum of 16 inches away from the side of the slide. Wrap end of long strap around vertical bar on railing and then back through the buckle. Repeat for each side and pull taught. Ensure the slide is firm and stable before using. If necessary, add air or adjust straps. To Slide Before sliding, wet slide surface with water. Sliding on a dry surface can cause burns to the skin. Climb up slide using hand and foot holds. Use top handles when transitioning from the climbing position to a seated position. Always slide feet first. Ensure water is clear of obstructions and other people before going down slide. Deflating your Pontoon Slide Step 1 Loosen all connection straps from railing. Step 2 Tip slide into boat, or leave draped over side gate. Deflate slide by moving the hose to the deflation port on the side of the air pump. Once all air is removed, make sure slide is completely dry for storage. Make sure to disconnect inflator from battery after use. Deflation port Roll up slide and stow under seat or other storage compartment. When stowing the slide, be sure to avoid any sharp edges that could potentially puncture the material. Cleaning and Storage When the inflatable product is not being used, store it in a covered, shaded area. This will help protect it against ultraviolet (UV) rays and extend the life of the product. Clean the inflatable completely with a mild soap and fresh water. NEVER USE PETROLEUM BASED PRODUCTS OR SOLVENTS FOR CLEANING. NEVER USE A POWER WASHER SINCE THE HIGH PRESSURE WATER WILL DAMGE THE TUBE BEYOND REPAIR. For storage, roll the product loosely and place in a container, preferably one that rodents can’t chew through. Secure against unauthorized and unsupervised use. Store in a cool, dry location. Do not store product directly on concrete surface. Place mothballs around stored inflatable to keep mice and insects away. Troubleshooting Air chambers won’t hold air: • Check to make sure all valves are completely closed. • Check for holes in the slide following the procedures in the “Repairs” section. Repairs For Minor Holes or Tears: Inflate the slide and locate the leak by spraying the tube with soapy water. Bubbles will appear where there is a leak. Determine the hole size and cut a circular patch ½ - 1 inch wider than the hole. Remove air from the tube and dry tube completely where the patch is to be applied. Peel off paper back from patch, apply repair patch to area and work out any air bubbles from beneath the patch. Apply weight to the patched area for one hour before reinflating. RAVE Sports Raft Water Sports