1
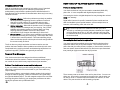
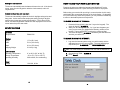
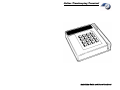
Online Timekeeping Terminal
Installation Guide and Users Handbook
Table of Contents
Introduction ............................................................ Page 2-3
How to setup your new Clock Terminal .................. Page 4-7
How to use your new Clock System ....................... Page 8-9
Clock Functions ...................................................... Page 10
Hardware Troubleshooting................................. Page 11-13
-1-
Problem: “PROGRAMMING ERR” Message
If you see this message, this means that the terminal has experienced
power line fluctuations which may have altered its built-in memory.
INTRODUCTION
Thank you for purchasing the Electronic Time and Attendance Card
Reader Terminal from your service provider. The service and clock
terminal will save you time and money as you operate your business.
Caution: Contact your service provider in order to resolve this
Note: Read the installation instructions before you begin using the
issue as soon as possible! In order to safeguard any punches in the
memory, do not press any keys on the keypad.
Message: NO ANSWER
•
Try transmitting again.
Tip: You can manually transmit data at any time by pressing the 9
TRANSMIT key.
•
unit or attempt to connect the system to its power source and phone
line.
The clock terminal is very simple to setup and should have already been
activated by your payroll provider or your payroll/accounting firm. This
guide will show you how to start using the system immediately. Once the
clock is installed and activated, there is rarely a need for additional
maintenance.
Your system should include the following:
•
•
•
•
•
Plug in a regular telephone handset and listen in on the call. Check
to see if the phone call that your clock terminal places goes through,
or if you receive a telephone company error recording.
Message: TRANSMIT ENDED, LOST COMM W/HOST, NO ENQ FROM
HOST, BAD RX/TX COMMUN, CANNOT CONNECT
•
Try transmitting again.
•
Ensure that nobody is trying to use the phone line while the clock is
transmitting.
The Card Reader Terminal
An AC Power Adapter
A Telephone Cord
Mounting Instructions and Hardware
This Manual and a “READ ME FIRST” instruction sheet
Time Saver: Once your clock is connected to the power supply and
phone line, press the 9 key on the keypad. This will force your clock
to connect to the server and receive its initial setup information.
.
Problem: “BAD CARD / INVALID MGR CARD” Message
These messages are displayed when the card reader cannot recognize
the card being used. For example, you will receive this message if you
try to “swipe” a credit card or some other time card that is not compatible
with the system. If you receive the message INVALID MGR CARD, this
means that the clock is expecting you to swipe a manager’s card.
OTHER CLOCK TERMINAL ERROR MESSAGES
If you see other messages, please contact your payroll provider for
support.
-13-
SAFETY RECOMMENDATIONS
Follow these guidelines to ensure general safety:
•
•
Keep the clock area clear and dust-free during and after
installation.
Keep the unit away from moisture and do not perform any action
that creates a hazard to people or makes equipment unsafe.
Warning To avoid electric shock, ensure that an adequate surge
suppressor is used as part of the units’ installation to the power
source and that telephone cables are disconnected when removing
power from the unit. The telecommunications lines must be
disconnected before unplugging the main power connector.
-2-
Preventing Electrostatic Discharge Damage
Electrostatic discharge (ESD) can damage equipment and impair
electrical circuitry. It occurs when electronic printed circuit cards are
improperly handled and can result in complete or intermittent failures. To
properly guard against ESD damage and shocks, a grounding device
such as a water pipe or other properly grounded device can be used by
touching the metal prior to using the unit.
Required Tools and Equipment
You need the following tools and equipment to mount the unit and/or
connect it for functional use:
•
•
•
•
Number 1 Phillips screwdriver or small flat-blade screwdriver
ESD-preventive wrist strap (optional)
A nearby power source (with optional surge suppressor)
A standard telephone line (Make sure it is not a digital line!)
Tip: When mounting the unit to a wall, don’t forget to leave room
above the clock for phone and power cables. The cables may also
require some mounting to ensure an uninterrupted connection.
You were provided 2 screws and 2 drywall anchors.
If mounting on drywall, you’ll want to use both the anchors and the
screws. If mounting on wood, you’ll only need the screws.
Mounting Instructions (optional)
1. Place the template on your wall where the clock will be mounted
with the markings facing towards you.
2. Mark the location of your screws on the wall by poking holes
through each of the three crosses located on this sheet.
3. Drill your screws or anchors through the markings on your wall.
4. Unscrew the screws enough so that the clock can hang on them
without its rubber feet getting in the way. The screws should
stick out of the wall approximately 1/4”.
5. Mount your clock by placing it so the two screws match the two
mounting holes on the back, then gently press down until the
clock clicks in place.
6. Pull on the clock lightly to ensure it won’t fall off the wall.
If you are continually receiving error messages when “swiping” the card
such as PLEASE TRY AGAIN and UNREADABLE CARD, the first step
would be to see if you are having problems with just one card or with all
the badge cards.
If you are having problems with one card, that card may be worn or
damaged and need to be replaced.
If all of the badge cards are causing problems, you may need to clean the
heads on the card reader. Contact your service provider to order a
special single-use head-cleaning card. This special card is premoistened and is designed to pick up any stubborn debris in the card
reader mechanism without scratching the heads or leaving behind
harmful substances.
Problem: The clock terminal cannot transmit
If your clock cannot transmit, there may be several reasons. Check the
error message and try the following to correct the problem:
Message: WAITING FOR LINE
•
Ensure that a working phone line is connected.
•
Make sure the line is not a digital line.
•
Make sure the line is available (not in use).
•
Plug in a regular telephone handset and see if you can hear a dial
tone.
•
Make sure no configuration changes have occurred (such as newly
added “dial 9” or switch from analog to digital signal).
The system requires an analog (standard) phone line to operate properly.
The best method for testing your line is to plug a standard phone into the
back of the unit (using the spare port) and simply dial the number the unit
is trying to reach.
Tip: If you need to see what phone number is being dialed to
transmit your data, press the FUNC/ENTER key 2 and then 3.
To change the dialing prefix, enter FUNC/ENTER key 1.
If this does not produce favorable results, try taking the unit to another
location which may have a different phone line configuration (example:
take the unit home and try it using your regular home phone line).
-12-
-3-
HOW TO SETUP YOUR NEW CLOCK TERMINAL
TROUBLESHOOTING
How do you determine why something isn't working, even if it worked
before? Some basic steps you can take during the process of
troubleshooting require that the problem first be identified before it is
fixed. But how can the problem be identified when there may be so many
variables involved?
1. Problem definition - Define the problem as precisely as possible.
What specifically is happening when the problem occurs and
what is the overall problem? Is it a problem with the clock,
computer system or browser software? Is it Internet related?
2. Gather information - When did the problem occur? Did anything
change? What error messages are you receiving, if any? What
software and operating system is involved? Were you doing
anything when the problem occurred? Is the problem
reproducible? Does it happen intermittently or all the time?
3. Narrow it down - Try to remove some variables in the equation by
the process of "dividing and conquering", a technique often used
in electronics to resolve problems. This means breaking things
down into bite-size pieces until the piece is small enough that the
fix can more easily be found.
The fix is often very simple and takes a minute to resolve once the
problem has been identified. Other problems can obviously be far more
complicated but by applying the basic troubleshooting steps above in a
systematic approach, problems can generally be resolved.
Finding an analog phone line
Your clock terminal can only be connected to a standard (ANALOG)
phone line. It is not compatible with digital telephone systems.
Connecting the clock to a digital telephone line may damage the unit and
VOID your warranty.
Digital office lines are for specific “networked” phone models and can
often be identified by their special features, such as multiple lines, an
intercom, call forwarding, hold, and voice mail.
Tip: To tell if a phone line is suitable for use with your clock
terminal, try connecting an analog telephone handset (not a digital
multi-line phone) to the line. If you hear a dial tone and can place
an outbound call, then you have found a line that is compatible with
the clock terminal
Connecting the clock terminal to a phone line
Your clock terminal has multiple ports on the back for telephone lines,
expansion cables, and an AC power adapter. The clock can share a
phone line with your office phones, computer, or fax machine, because it
does not answer inbound calls and will only dial-out at a pre-determined
time (usually at night) to transmit the day’s punches.
Terminal Error Messages
Your clock terminal has been designed such that no additional
maintenance should be needed. However, sometimes events beyond
our control do occur and this may require some of your attention.
Problem: The clock terminal cannot read the badge card
If your card reader is having trouble reading the badge cards, you may
either have a card that is worn or the heads on your card reader may
require cleaning.
To correct the problem, ensure that the badge cards are being swiped
through the machine properly. Notice, the machine has a guide along
the right side labeled “Stripe”. The dark magnetic stripe on the card must
be facing this guide. Observing your employees procedures can often
identify this process as the problematic issue.
-11-
There are two ports on the back of the unit for phone lines. You can use
either one. One must be connected to the phone line, and the other can
be used to “chain” in another telephone handset, fax machine, or other
device. This port can also be used for testing purposes.
-4-
Obtaining Technical Assistance
For all customers, partners, resellers, and distributors who hold valid
service contracts, the Technical Assistance Center (TAC) provides
award-winning technical support services, both online and over the
phone. Contact the person who provided you this unit for more
information on where to call.
Accessing an outside line when a prefix is required
Some phone systems require callers to dial a “9” (or some other prefix)
before placing an outbound call. The same situation may apply to your
clock terminal. You can cause your clock terminal to dial extra “prefix”
digits by entering the following commands once your clock is connected
to a power supply and displaying the time and date:
1. Press the FUNC/ENTER key, then press 1 on the keypad.
2. When prompted to enter the password, enter: 123662 then press
the FUNC/ENTER key.
3. When prompted to enter the new prefix enter the digit(s) (such as
9) that must be dialed to access an outside line, then press the
FUNC/ENTER key.
Note: When programming a dial prefix, you can insert a two-second
pause between the dial prefix and the number to be dialed by adding
a hyphen (-) character to the dial prefix. To add this character, press
the 0 key followed by the ALPHA key after you have entered the
digit(s) that must be dialed to access an outside line.
CLOCK FUNCTIONS
Making the clock transmit manually
The clock stores in its memory all of the punches during a single day, and
sends them to the server by automatically placing a phone call at a
predefined time (usually around midnight). Because of this, you will not
be able to view employee activity online until the server has received the
information from the clock terminal.
Note: You will not loose punches if the clock was unable to transmit
the prior day’s events or if the power is temporally disabled. All
punches will accumulate until they are transmitted. Pressing the
FUNC/ENTER 2 key will display the clock’s current memory.
It is possible to force the clock to dial the server and transmit punches
that are currently in the terminal’s memory. You can do this at any time
by pressing the 9 TRANSMIT key on the keypad. Once the terminal has
successfully transmitted, the punches can be viewed online.
Using clock prompts
You may activate custom prompts to appear on your clock terminal to
request information from employees at clock-in or clock-out. These
prompts must be setup by your service provider. Prompts can be used
for collecting information.
Quick reference guide to clock functions
Tip: If you wish to remove the dialing prefix, simply press the
FUNC / ENTER key when prompted to enter the new prefix.
To change the dialing prefix ........................................................ FUNC 1
To view the terminal’s memory ................................................... FUNC 2
“Will connecting the clock terminal cause me to incur any long distance
fees?”
No. Your clock terminal connects to the server by means of a toll-free
number. You should not incur any toll charges from the use of your clock
terminal. The costs for using the toll-free number are included in the
monthly service fee.
-5-
To view the site name ............................................................... FUNC 21
To view the dialing schedule ..................................................... FUNC 22
To view the number being dialed .............................................. FUNC 23
-10-
TO CLOCK OUT USING THE TERMINAL:
1. Press the OUT key (which is also the 2 key on the keypad). The
clock will display: “CLOCK OUT”.
2. Slide your card through the slot. Or, if you have forgotten your
card, you can enter your 9-digit Social Security number on the
keypad. Then press ENTER.
3. The clock will display: “CLOCK OUT” followed by the date and
time at which you clocked out.
TO CLOCK OUT USING THE INTERNET:
1. Follow the same procedure as used when clocking in. Use the
address given to you by your provider for accessing the page.
Remember, you will need your “ID NUMBER” and “WEB
PASSWORD”.
Transmitting your clock terminal for the first time
You must force the clock terminal to transmit to the server at least once
before actual use of the unit. This gives the clock terminal the opportunity
to receive your account information and dialing schedule. The time and
date will also be set automatically when you connect. To accomplish this
use the following procedure:
1. Verify that you have connected your clock terminal to an analog
phone line and the power supply is delivering power to the unit.
2. Press the 9 key.
3. The clock terminal will display the message TRANSMIT BATCH
and begin placing a call to the server. The progress of the call
will be displayed on the clock terminal.
You will see one of the following messages:
FINISHED. This means your clock has successfully reached the server
and received the appropriate setup information.
NOT SETUP, CALL CUST SERV. This means your account has not
been setup. Please contact your service provider for assistance.
Have the serial number of your terminal ready (located on the back of
the unit).
WAITING FOR LINE. This means that either the phone line is
disconnected, or the phone line that is connected is currently in use.
The clock will wait for an available line.
NO ANSWER, LOST COMM W/HOST, NO CONNECT, NO ENQ FROM
HOST, TRANSMIT ENDED. Check to make sure the terminal can
place an outbound call on the phone line that it is connected to, and
make sure that any necessary dialing prefixes have been
programmed into the clock terminal.
UNKNOWN SITE. If you receive this message, it means that there are
punches saved in the terminal’s memory, but the server does not
recognize the terminal’s serial number. As a safety precaution, the
clock will not setup, and the punches will not be deleted. Contact
your payroll provider for assistance.
Tip: You can monitor the status of a call by listening in on the other
port with a telephone connected to the extension.
-9-
-6-
Setting the date and time
HOW TO USE YOUR NEW CLOCK SYSTEM
The server automatically sets the date and time on the unit. If the time is
wrong, press 9 on the keypad to make the clock transmit, and it will
resynchronize.
Punching in and out on either the internet based WebClock™ or the
hardware based terminal is a quick and easy process for employees.
Daylight savings time and leap years
The server automatically adjusts the clock for daylight savings time and
leap years. It also ensures that employees working during a daylight
savings time-change are properly accounted for. This is done by the
server, and works regardless of what time was displayed on the clock’s
screen when the punch was made.
SPECIFICATIONS
Hardware
Microprocessor
Physical
Height
Width
Depth
Shipping Weight
Z80® CPU
Before using your terminal for punching in, ensure that the clock is ready
and displays the correct date and time on the clock display. If it is waiting
for input or other keys have been pressed, you can press the CLEAR key
to return to the default (date and time) screen.
TO CLOCK IN USING THE TERMINAL:
1. Press the IN key (which is also the 1 key on the keypad). The
clock will display: “CLOCK IN”.
2. Slide your card through the slot. Or, if you have forgotten your
card, you can enter your 9-digit Social Security number on the
keypad. Then press ENTER. (needs to be configured first)
3. The clock will display: “CLOCK IN” followed by the date and time
at which you clocked in.
TO CLOCK IN USING THE INTERNET:
1.5 in (38.1 mm)
5.6 in (142.2 mm)
6.0 in (152.4 mm)
2.2 lbs (1.0 kg)
1. Log onto the internet system using your web browser and the
address given to you by your provider. The page will display a
request for your “ID NUMBER” and “WEB PASSWORD”.
Note: You must already be established for use with the WebClock™
Environmental
Operating Temperature
Storage Temperature
Operating Humidity
0° to 40° C (32° to 104° F)
-18° to 70° C (0° to 158° F)
20% to 90%, non-condensing
Power
Voltage
120 VAC, 60 Hz
.
2. Choose the ACTION: “CLOCK IN”
3. Click “Submit”.
-7-8-