
1
Manual Athletics Manager Version: 2015v1 AthleticsManager Manual 2015v1 Preface Welcome to the AthleticsManager user manual. We recommend you to first gently leaf through the manual, to get an initial idea on how this document is structured. This is because it is impossible to explain every detail at the same time. The included pictures and screenshots serve as examples and may differ from the user interface of your version of AthleticsManager. Inform yourself before buying one of our products. AthleticsManager's functionality is extended by the software products PostgreSQL and LibreOffice, property of PostgreSQL Global Development Group and The Document Foundation respectively. AthleticsManager uses icons of the Silk and Fugue icon sets. If, after reading this document, you still have further questions concerning the inner working or user control of this or other TimeTronics equipment, please contact your local TimeTronics distributor. This can be achieved by e-mail: [email protected], or by phone on 0032 14 23 19 11. Also, if you have any comments or advice on this user manual, you may contact us through the previously given contact details. Good luck with AthleticsManager and thanks for putting your trust in TimeTronics’ products and services. The authors. ---------------------------------------- 2 AthleticsManager Manual 2015v1 Index: 1. Introduction ................................................................................................... 6 1.1. 1.2. 1.3. 1.4. 1.5. 2. Overview ................................................................................................ 6 Used terminology .................................................................................... 7 Scope of the application.......................................................................... 7 Overview of the interface elements ........................................................ 8 Printing settings ..................................................................................... 8 AthleticsManager Setup ............................................................................... 10 2.1. 2.2. 2.2.1. 2.2.2. 2.2.2.1. 2.2.2.2. 2.2.2.3. 2.2.2.3.1. 2.2.2.3.2. 2.2.2.4. 2.2.2.4.1. 2.2.2.4.2. 2.2.3. 2.2.4. 2.2.5. 2.2.6. 2.3. 2.4. 2.5. 2.6. 3. 4.1. 4.1.1. 4.1.2. 4.1.3. 4.1.4. 10 10 10 11 11 11 11 11 11 12 12 12 12 13 14 15 15 16 16 17 AthleticsManager general info: .................................................................... 18 3.1. 3.1.1. 3.1.2. 3.1.3. 3.1.4. 3.1.5. 3.1.5.1. 3.1.5.2. 3.1.5.3. 3.1.5.3.1. 3.1.5.3.2. 3.2. 3.2.1. 3.2.2. 3.2.3. 3.2.4. 4. System requirements ............................................................................ AthleticsManager installer .................................................................... Installer ................................................................................................ Options of the AthleticsManager Installer............................................. Choose Install Language ....................................................................... Prerequisites ........................................................................................ Choose Which Products to install .......................................................... AthleticsManager server ....................................................................... AthleticsManager client ........................................................................ Choose the extra features to install ...................................................... XML Creator .......................................................................................... Serial to MacFinish 6.x .......................................................................... Installation Windows for AthleticsManager server ............................... Installation Windows for AthleticsManager client ................................. Installation Windows for AthleticsManager XML Creator ...................... Installation Windows for AthleticsManager to MacFinish 6.x Serial ...... Database............................................................................................... Firewall ................................................................................................. Client / Server environment ................................................................. Uninstall ............................................................................................... AthleticsManager Server ....................................................................... Start AthleticsManager server .............................................................. Name of AthleticsManager server ......................................................... License code ......................................................................................... Advanced .............................................................................................. Database actions .................................................................................. Make a backup of current meet ............................................................. Load an earlier copy of a meet .............................................................. Load a model competition ..................................................................... Load a model competition (with server layout “federation” ................. Load a model competition (with server layout “others”) ...................... AthleticsManager client ........................................................................ Start AthleticsManager client ................................................................ User Profile ........................................................................................... Advanced .............................................................................................. Modifying interface ............................................................................... 18 18 18 19 19 20 20 20 20 20 21 22 22 22 23 23 AthleticsManager Preliminary administration: ............................................. 26 Competition properties ......................................................................... General ................................................................................................. Sessions ............................................................................................... Call rooms ............................................................................................. Teams ................................................................................................... 26 26 27 28 29 3 AthleticsManager Manual 2015v1 4.1.5. 4.1.6. 4.2. 4.2.1. 4.2.2. 4.3. 4.3.1. 4.3.2. 4.3.3. 4.3.4. 4.3.5. 4.4. 4.5. 4.6. 5. 5.1. 5.2. 5.3. 5.4. 5.5. 5.6. 5.7. 5.8. 5.9. 5.10. 5.11. 5.12. 5.13. 5.14. 6. 6.1. 6.1.1. 6.1.2. 6.1.3. 6.1.4. 6.1.5. 6.1.6. 6.1.7. 6.1.8. 6.1.9. 6.1.10. 6.2. 6.2.1. 6.2.2. 6.3. 6.4. 7. 7.1. 7.2. 7.3. 7.4. 7.5. 7.6. 7.7. 7.8. 7.9. Default settings .................................................................................... Advanced .............................................................................................. Competition events ............................................................................... General ................................................................................................. Rounds ................................................................................................. Participations ....................................................................................... Creating athletes .................................................................................. Athlete participation ............................................................................. Adding an athlete to a team .................................................................. Enrol an athlete in to an event .............................................................. Editing participation categories ............................................................ Heat composition .................................................................................. Assigning start ID’s .............................................................................. Taking along competition files .............................................................. 31 31 32 33 34 37 37 41 41 42 43 44 44 46 Import Athletes and Participants in AthleticsManager ................................. 47 Description ........................................................................................... About the Text file ................................................................................ Start the Import ................................................................................... Select the Text File and Its Properties .................................................. Define the Unique Constraint ................................................................ Translating Category Names to Birthdates............................................ Inspect the Feedback............................................................................ Feedback on the Athletes ...................................................................... Feedback on the Clubs .......................................................................... Feedback on the Events ........................................................................ Feedback on the Competition Teams .................................................... Finally Execute the Import .................................................................... Remark 1: relay teams .......................................................................... Remark 2: Application note: Inschrijven.nl ........................................... 47 47 47 48 49 50 51 51 51 52 52 52 53 53 Administration during the meet ................................................................... 54 Entering performances ......................................................................... Adding wind measurement ................................................................... Entering hand times.............................................................................. Adding photofinish results .................................................................... Adding reaction times ........................................................................... Entering electronic times manually ....................................................... Entering electronic times automatically ................................................ Entering metric performances: Best performances vs All attempts ....... Entering multiple distance attempts ..................................................... Entering multiple height attempts ........................................................ Entering invalid performances .............................................................. Point calculation ................................................................................... Individual points ................................................................................... Team points .......................................................................................... Qualification rounds ............................................................................. Personalized menu ............................................................................... 54 55 55 55 55 55 56 56 56 57 57 57 57 57 58 58 Global settings ............................................................................................. 59 Event types ........................................................................................... Categories ............................................................................................ Clubs..................................................................................................... Point calculation ................................................................................... Correction factors ................................................................................. User profiles ......................................................................................... Federations ........................................................................................... Nationalities ......................................................................................... Languages ............................................................................................ 59 62 63 63 64 64 65 66 67 4 AthleticsManager Manual 2015v1 7.10. 7.11. 7.12. Seeding methods .................................................................................. 67 Qualification methods ........................................................................... 68 Teampoint calculationmethods ............................................................. 68 Appendix A: Personalised Menu ................................................................................ 70 Appendix B: Entering categories ............................................................................... 71 Appendix C: Methods of heat composition ................................................................ 73 Appendix D: Entering electronic times automatically................................................ 74 Appendix E: Formula for point calculation ................................................................ 77 ---------------------------------------- 5 AthleticsManager Manual 2015v1 1. Introduction The administration during an athletics meet can rapidly extend to immense proportions. To simplify this, a first version of the computer application MeetManager was developed in 1995. Meanwhile, that application has been fully rewritten from the ground up, and therefore renamed to AthleticsManager, to make athletics administration even faster, handier, and more optimal for you, the user. This manual starts off by listing the different steps you have to carry out to prepare AthleticsManager for use in the field. Next, we take a look at preliminary administration, in which you will learn how to set up correctly a meet, and how to add events. In the chapter after that, you will learn how you can easily add competitors to the meet, and how you can enter event results. To prepare for these tasks, the introduction chapter briefly shows you how AthleticsManager fits in between other TimeTronics products, which terms are used in AthleticsManager (and their meanings), and to finalize a short overview of the main interface elements. 1.1. Overview AthleticsManager can receive data from other TimeTronics products, like MacFinish. These data are first processed, and then saved in AthleticsManager. The data can then be exported or viewed on different outputs: csv, html, and in the future on equipment like ScoreBoard or on television screens. Figure: Data is being entered in input equipment (left), then processed by AthleticsManager (center) and next exported to output equipment (right). 6 AthleticsManager Manual 2015v1 1.2. Used terminology It is very important to agree on a uniform terminology when processing large quantities of data. The figure should provide an explanation of which terms AthleticsManager uses internally, and how these relate to each other. The table below should provide clarity on the used terms. English Description Meet Collection of events. Event Part of a meet in which competitors can participate. Combined events Collection of track and field events. Heat Collection of participants that compete to each other in 1 heat, e.g. to divide participants over an event with limited lanes. Group Collection of participants that compete to one another in 1 group, e.g. to divide participants over a field event with limited places OR Collection of teams. Club Organization of athletes OR grouping of athletes from 1 region. Team Collection of athletes competing in this meet, often based on clubs. Session Purely logical grouping of events, for easier event management. Category Classification of an athlete OR classification of a participation OR classification-restriction of an event. Table: used terminology - description 1.3. Scope of the application AthleticsManager is all about the management of a single meet, through manipulation of its events, and subdivision in sessions, categories, heats and teams. The rectangle with the bold blue border in figure shows which athletics elements are managed in AthleticsManager. Figure: Terminology and structure in AthleticsManager. 7 AthleticsManager Manual 2015v1 1.4. Overview of the interface elements The interface of AthleticsManager consists of 5 main interface elements: the superuser bar, the athlete’s panel, the events panel, the team’s panel and the events manager. Figure: Elements of the AthleticsManager interface. Attention: The interface might be set up differently on your system, but all the displayed interface elements are present. 1.5. Printing settings Throughout the application are buttons to print the corresponding list (usually next to or below the button). You can print through the menu File > Print, or by clicking on the different print icons in the different panels. A special printing dialogue opens up with a list of settings specifically for AthleticsManager. Depending on the content that is to be printed and your print order, the listed settings will vary. Figure: Example of a printing dialogue. 8 AthleticsManager Manual 2015v1 Template The printing template that you wish to use for this print. You can create print templates yourself if you have background knowledge of AthleticsManager and LibreOffice. We have hidden this function behind a password to avoid mistakes. If you are interested in this option please send a contact request to [email protected] If you have a license which is part of a national purchase organised by your federation please contact your federation helpdesk. Enable Show all templates to display all installed printing templates, not just the compatible ones. Settings – Round Select the round you wish to print, or <all> for all of them. Settings – Heat Select the heat you wish to print, or <all> for all of them. Settings – Session Select the session you wish to print, or <all> for all of them. Settings – Sort by Select the field by which you would like to sort. This function is only visible if you give the print order through the menu File > Print. If you print by using the print icons in the different windows, you will not have this possibility. Save to this file The location where the printing file will be saved. During printing, the data will be filled in at the correct fields in the print template, which results in a new file. This file will be saved on the location you indicate here. ADVANTAGE; If desired, you can use this “Opendoc” file to make late changes to the layout, by adding or removing or changing some elements, before you send this file to the printer. Just open the file in Openoffice or Libreoffice, make the changes, and print the modified file. Printer A list of the selected printers to which you would like to send the print order. Use the buttons on the right side above the list to add or remove printers. You can set the number of copies as well. ---------------------------------------- 9 AthleticsManager Manual 2015v1 2. AthleticsManager Setup A few simple installation steps have to be followed to get AthleticsManager ready for use. After that, the application needs a connection with an AthleticsManager database, by which the user profiles have to be set correctly (in the database). 2.1. System requirements Minimum specifications: Operating system Windows XP SP3 or later* CPU Single Core (1 GHz) Memory 512 MB RAM Disk space 16 GB Screen size 15,4” (800 x 600 px) Recommended specifications: Operating system Windows XP SP3 or later* CPU Dual Core (2 GHz) Memory 2 GB RAM (800 MHz) Disk space 100 GB SATA (7200 rpm) Screen size 15,4” (1280 x 1024 px) Ideal specifications: Operating system Windows 7 (Professional or Ultimate)* CPU Quad Core (2,4 GHz) Memory 4 GB DDR3 RAM (1333 MHz) Disk space 100 GB SSD Screen size 17” (1280 x 1024 px) * AthleticsManager is a 32-bits application, but works also on a 64-bits platform. 2.2. AthleticsManager installer 2.2.1. Installer We have 2 types of installers, a standard version which includes all components and a LITE version AthleticsManager installer contains: - AthleticsManager Server - AthleticsManager Client - AthleticsManager PostgresSQL Database Engine - LibreOffice - XML Creator - Serial to MacFinish 6.x 10 AthleticsManager Manual 2015v1 AthleticsManager installer LITE contains: - AthleticsManager Server - AthleticsManager Client - AthelticsManager PostgresSQL Database Engine A window opens up, where you can choose which parts you wish to install. For further detailed information please jump to paragraph 2.2.2 Note: Neither PostgreSQL nor LibreOffice are products of TimeTronics NV. We are not responsible for any internal problems that might arise due to PostgreSQL or LibreOffice or AthleticsManager. 2.2.2. Options of the AthleticsManager Installer 2.2.2.1. Choose Install Language 2.2.2.2. Prerequisites LibreOffice will be installed when you check this box. AthleticsManager needs LibreOffice for printing services. 2.2.2.3. Choose Which Products to install 2.2.2.3.1. AthleticsManager server If you plan on using the server-client functionality, you will need the AthleticsManager Server. Just one computer in the network needs an AthleticsManager Server. By selecting this option, you also automatically mark the PostgreSQL database software for installation. 2.2.2.3.2. AthleticsManager client The AthleticsManager Client can be installed on multiple computers. They need to be in the same local network as the AthleticsManager Server, please mark LibreOffice for installation. 11 AthleticsManager Manual 2015v1 2.2.2.4. Choose the extra features to install 2.2.2.4.1. XML Creator Please note that this feature is not available in the LITE version. XML Creator will allow you to build your own feeds. All information is send through this feature in a structured way. Please note that this option is for more advanced users only. 2.2.2.4.2. Serial to MacFinish 6.x Please note that this feature is not available in the LITE version If you use MacFinish 6.x software you can exchange information with AthleticsManager (results and start list) using this feature. Please note that MacFinish 7.x and 8.x are using a network connection for a link to AthleticsManager, and therefore do NOT need this option. 2.2.3. Installation Windows for AthleticsManager server 12 AthleticsManager Manual 2015v1 2.2.4. Installation Windows for AthleticsManager client 13 AthleticsManager Manual 2015v1 2.2.5. Installation Windows for AthleticsManager XML Creator Please note that this feature is not available in the LITE version. 14 AthleticsManager Manual 2015v1 2.2.6. Installation Windows for AthleticsManager to MacFinish 6.x Serial Please note that this feature is not available in the LITE version. 2.3. Database A correct database is automatically loaded in the database service after installation of the server. If you wish to use the server-client environment, be sure the server’s database service is running when starting the AthleticsManager Client. Starting or stopping the database service can be done through the appropriate button in the AthleticsManager Server (as administrator). Note: The database can be emptied using an AthleticsManager Client, through the menu item Clear in the menu File. You need to be logged in as a user (profile) with sufficient privileges for this though (e.g. superuser). 15 AthleticsManager Manual 2015v1 2.4. Firewall When you use a client – server setup you have to configure your firewall. Clients have to authenticate to the server first, and are only then able to communicate with the database of the PostgreSQL server. If you are using the default Windows Firewall, you will receive a notification at the first start of one of the applications (client or server). Simply click on Allow access, and the correct firewall rules will be added to Windows Firewall. The same principle will probably apply for other firewall software. If no message requesting access appears, you will need to enter the correct firewall rules manually. To do this, please refer to your firewall software’s manual. The required firewall rules for correct functionality of AthleticsManager are listed the table here below. The rules in italic are defaults on most firewalls and will probably not need to be set explicitly. Application AthleticsManager AthleticsManager PostgreSQL AthleticsManager AthleticsManager PostgreSQL Server Client Server Client Protocol / Port Direction UDP/1217 UDP/1218 TCP/5432 */* */* */* In In In Out Out Out Table: Required firewall rules for AthleticsManager. 2.5. Client / Server environment The server application coordinates the traffic between the clients and the database. Multiple clients (both AthleticsManager Client and for example MacFinish) communicate with the AthleticsManager Server for exchanging data. This communication happens over a local area network. If all clients and the server are present on one system, a local area network is not required, as all the pieces of software communicate over the loopback interface (IP 127.0.0.1). The status of the database service is displayed in the AthleticsManager Server interface. When active, the AthleticsManager database can be backed up and restored quickly and easily (file format .amb). You can also automatically zip this backup database or load a zipped database direct into the AthleticsManager Server. The zipped .amb file takes only approx. 10% of the standard .amb files By minimizing the AthleticsManager Server window, it will remain active in the system tray. Because the server application manages the back-end database, this application needs administrator privileges. This should be set up correctly during installation, but if this is not the case, you can change this very easily: right-click an AthleticsManager Server shortcut (like one on your desktop), and select Properties from the context menu. The properties window appears. Click on the Advanced-button and check Run as administrator. Press OK in all windows you have opened. The client application works by simply choosing a server or a local database from the combo box. Update this list by pressing [F5]. Running multiple clients is possible, up to 16 AthleticsManager Manual 2015v1 a maximum that your license key allows. These can then communicate with the server over a local area network. 2.6. Uninstall You can use ‘Windows’ default program management utility available in the control panel. You have to search for the following programs: - AthleticsManager Server - AthleticsManager Client - AthleticsManager PostgresSQL Database Engine ---------------------------------------- 17 AthleticsManager Manual 2015v1 3. AthleticsManager general info: On your desktop you will find now different icons depending on the options you have chosen to install. 3.1. AthleticsManager Server 3.1.1. Start AthleticsManager server Click on the following icon to start the server: The first initialization will take several minutes, you will see different messages. 3.1.2. Name of AthleticsManager server Here you can change the name of your server. Later you will need this name to see to which server you want to connect with the client. 18 AthleticsManager Manual 2015v1 3.1.3. License code If you connect a valid dongle (=USB-license key) to your computer or type the correct license number in case of federation contract then the “Licensecode” field will be shown in white color. 3.1.4. Advanced If you click on “advanced” some new options will be shown. You can choose between the different national federations or if your federation is not listed, choose others in the layout dropdown list. In this case most common used IAAF setting will be used. 19 AthleticsManager Manual 2015v1 3.1.5. Database actions 3.1.5.1. Make a backup of current meet Using the AthleticsManager Server, you can make backups of the meet’s database. These backups can then later be restored in this or another AthleticsManager Server. The Undo-button (the one with the turning arrow), restores the database to the status just before the last restored database. So, if you were using My competition v1.amb first, and then restore My competition v2.amb, possibly make some changes, and press the Undo-button, the database will be back to right before you loaded My competition v2.amb, so the database will contain My competition v1.amb again. 3.1.5.2. Load an earlier copy of a meet With this functionality you can load the backup meet database of the previous step 3.1.5.3. Load a model competition 3.1.5.3.1. Load a model competition (with server layout “federation” You will get a choice of model competitions which are specially defined by/for your federation. Please choose the right competition you want to prepare. 20 AthleticsManager Manual 2015v1 3.1.5.3.2. Load a model competition (with server layout “others”) To start a new competition you have to load a model competition. The list of model competition you can choose from is depending on the “Layout” you have selected under advanced. If you have chosen general than you will get 2 options. You can chose International meet in case you do not IPC (Paralympics). You will get a warning message. If you want to start a new meet you can click yes. If not please make first a backup of your meeting before continuing. It will take a few minutes to install the model competition so please be patient till you get following message. (You will not have any progression feedback) Be sure that you click on ok before continuing otherwise you will not have the right settings in your client afterwards 21 AthleticsManager Manual 2015v1 3.2. AthleticsManager client 3.2.1. Start AthleticsManager client Click on the following icon to start the AM Client: Choose the server to which your client has to connect. 3.2.2. User Profile A user profile is a combination of a user (name), a password, and a collection of user privileges to certain parts of functionality in an AthleticsManager Client. When logging into a database, you need to provide the client with valid user login credentials. By default, three users exist: Default password User privileges (description) Superuser superuser All privileges, can do anything. advanced user advanced Can manage the meet, but cannot change any global settings. User name beginner user Can only change results. Table: Description of user profiles. These three user profiles are always available and cannot be removed. The password of the logged in user can be modified through the info-window in the 22 AthleticsManager Manual 2015v1 menu Help > About. It is recommended to change all default passwords. Profiles and their passwords are saved when making a backup. The superuser can add new and modify existing user profiles through the Userswindow. More info about this can be found in the chapter 7.6 User profiles. 3.2.3. Advanced If you click on advanced, you will see info at the print path. This means that all your settings are ok to print from the Client. If you see an empty field please go to the complete manual to get this setting properly done. If you click on ok you will see the standard startup screen of the AthleticsManager Client. 3.2.4. Modifying interface The interface of the client can be modified considerably, by moving around panels. By 'panel', we mean: a group of interface elements that are on one interface plane. Examples are the athlete’s panel, the team’s panel, etc. A panel can be moved around (by dragging its title bar) and scaled (by dragging the borders of a panel). Panels can also be grouped together, by moving them over each other. To switch grouped panels, simply switch between their tabs (below). To split them, you just have to drag a panel to another location. 23 AthleticsManager Manual 2015v1 Panels can be hidden and shown through the menu Window > Panels and enabling (show) or disabling (hide) a panel. The events manager and superuser bar are exceptions to this rule. The events manager is always visible (it takes up the leftover space), and the superuser bar can only be made visible by rightclicking on the menu bar and clicking Superuser. It can be hidden the same way. There are different kinds of panels, each with their function and own way to move around: • Most panels can be moved around by dragging the title bar of the panel, and dragging the panel to a desired location in the interface. • The superuser bar is a special panel that can be moved by holding it on the left-hand side and then dragging it. This panel can be placed everywhere in the application, but we recommend you to place it on top or at the bottom of the application. • The events manager is a panel that automatically adapts itself to fit in the leftover space not used by the other panels. As a result, it cannot directly be moved around. Figure: Possible point for dragging the athlete’s panel. Figure: Possible locations of a 'regular' panel (blue and green). Figure: Dragging the superuser bar. 24 AthleticsManager Manual 2015v1 Figure: Possible location of the events manager. Another possibility of modifying the look of the user-interface is by hiding/showing certain columns. AthleticsManager is host to a lot of tables, which might cause a bit of a visual data overflow. If that is the case, you can right-click the header of a column, and choose which columns you want to have shown (checked) or hidden (unchecked). Figure: Possible columns in the Start lists-tab. ---------------------------------------- 25 AthleticsManager Manual 2015v1 4. AthleticsManager Preliminary administration: Before you start entering results, a lot of properties need to be set. When using model meets, these properties should be correctly set in advance. No harm on checking up though. The meet properties are specific options for your meet. One of the tabs in the meet properties are the default properties for events. The options set here are copied as settings for NEWLY added events (not existing ones!). After all events have been added, and have the correct properties, you may start processing the registrations. Add athletes, in teams or not, as participant for one or more events. 4.1. Competition properties We define a meet as a collection of events over a specific time span. This is used as a starting point for athletics administration. The meet properties window can be opened by clicking left top: File – Meeting General Properties. You may find it in the events panel, next to the name of the meet, recognizable by a pencil icon. A new window with 6 tabs appears. 4.1.1. General The tab General contains a list of general properties. Figure: Meeting General Properties Name The name of the meet. (Required) Federation The federation that hosts this meet. (Required) Country The country that hosts this meet. (Required) Place The place that hosts this meet. (Required) 26 AthleticsManager Manual 2015v1 Code An identifier code for this meet, for example the federation’s unique ID for this meet, or an international ID code. Type of location Define if this is an Outdoor, Indoor or Outside of stadium meet. Dates The starting and ending dates of the meet. The input format depends on your system’s locale. By clicking on the arrow on the right side, a pop-up calendar appears that aids you in easily selecting a date. It is very important that you set the correct dates, for the reference date can calculate the age categories with the correct dates. (Required) Reference date Calculates the age categories of the athletes, based on the dates of the meet. Info Extra information you wish to save, like a description of the meet. Header image Add an image to be printed in the header. By double-clicking with the left mouse button in the grey zone, you can browse your pc and select the image. To remove the image, double- click with the right mouse button in the grey zone. Footer image Add an image to be printed in the footer. By double-clicking with the left mouse button in the grey zone, you can browse your pc and select the image. To remove the image, double- click with the right mouse button in the grey zone. 4.1.2. Sessions For big meets, it is a pain to search a single event in the list of all the events of all days and all categories. That is why the concept of sessions was introduced in AthleticsManager. Essentially, sessions are nothing more than logical subdivisions of the events of a meet. They have no influence whatsoever on the point calculation. Some examples on how you can classify events into sessions: • A meet for men and women, can be classified into two sessions: Men and Women. • A meet that lasts two days, can be classified into two sessions: Competition Day 1 and Competition Day 2. • A meet for two categories (e.g. Masters and Juniors), can be classified into two sessions: Masters and Juniors • A meet that lasts two days, for two categories (ex. Masters and Juniors), and divided by gender (men and women), can be classified into eight sessions: MM-D1, MM-D2, MW-D1, MW-D2, JM-D1, JM-D2, JW-D1 and JW-D2 (Masters Men – Day 1 / Juniors Women – Day 2). 27 AthleticsManager Manual 2015v1 The manner in which you wish (or do not wish) to use sessions, is entirely up to you. The model meets already have some sessions sets, which we think will be the most useful for the average user experience and for that meet. Figure: Modifying the sessions of an event. Sessions A list of sessions for this meet. You can add and remove sessions using the buttons below the list. Session info – Name The name of the selected session. Do not leave this empty! (Required) Session info – Date The date when this session is to start. This can be useful for meets that last multiple days, and you wish to subdivide the meet into sessions by day. It is this value that will be used in the printing templates. (Required) Session info – Time The time when this session is to start. This can be useful to subdivide the meet into the morning, the afternoon, the evening, ... (Required) Note: Keep an eye out that there are no sessions with an 'empty' name in your session list. You may recognize them by trying to click the entry right below your lowest session. If an empty field gets selected, remove it. Empty vertical spaces between sessions also indicate empty-named sessions. Although empty-named sessions work just fine, they may be confusing in your interface. 4.1.3. Call rooms 3.1.3 Call rooms An optional, for now purely administrative function in AthleticsManager, is the use of call rooms. Before an event officially starts, an athlete can report to a call 28 AthleticsManager Manual 2015v1 room. In future versions of AthleticsManager, this data can probably be exported to an external display device, like a screen, so competitors know where to report. Figure: Example of call rooms. Call rooms A list of call rooms for this meet. You can add and delete call rooms by using the buttons at the bottom. Call room info – Name The name of the concerning call room. (Required) 4.1.4. Teams Here you make the teams, for meets in teams. There are some guidelines that have to be taking into account, to simplify the later processing. A group is a collection of teams. Groups are, just as sessions, a purely logical category, but this time of teams instead of events. Every team that you create, must have a group to associate with. If you do not want to use separate groups, you can use a default name for the group (for example an empty name) and work with this. A team is not the same as a club. One club can send multiple teams to a meet. Therefore it is important to add in the group name a category and possibly even an increasing team number. This will be comprehensible through the examples. A final important option to note are the standard categories. These are used in two ways: a correct listing of possible events where an athlete can participate in, and an automatic team assignment of an athlete according to the club and category. This is explained in the note underneath subsection 3.3.4 Enrol an athlete into an event. 29 AthleticsManager Manual 2015v1 Figure: Change teams in a meet Groups A list of groups for this meet. You can add and delete groups by using the buttons at the bottom. Number of points (in correct order) The number of points that the teams get assigned, according to place, starting from the first place, and separated by semicolons. Example: 12;11;10;9;8. In case of a tie take If there is a tie, is it the maximum or the average of the points associated with these places that has to be used? Example: two teams both have the second place, will then either 11 (maximum) or 10,5 (average) points be used. Teams A list of teams for this meet. You can add or delete teams by using the buttons at the bottom. Team info – Name The name of the concerning team. Team info – Abbreviation The abbreviation that is given to this team. Team info – Info Extra field where you can add information about the team, for example a definition of the team. Team info – Code Identification code for for example heat classification. This is used to pass parameters to methods that require these. Team info – Group The group where this team belongs to. Team info – Default club The club from where the team is sent. If the Name-field matches with another club, then this club will automatically be selected. Team info – Default categories 30 AthleticsManager Manual 2015v1 The categories that the members of this team should have. Do not forget to click on the plus-button after selecting a category. For several examples of entering the categories, see Appendix B. 4.1.5. Default settings The values in the tab Default settings are used as predefined properties when adding new events. They have no effect on existing events! In other words, the values that you set here will be copied to the properties of new events, but not to the existing events. These default properties are extensively discussed in section 3.2 Competition events. Figure: Default settings for new events. 4.1.6. Advanced The tab Advanced contains some various options that are applicable to the meet. Figure: Advanced settings of the meet. 31 AthleticsManager Manual 2015v1 4.2. Maximal number of participants for each team – in whole competition Limiting value for the number of team members who can participate in the meet. (0 for infinite) Maximal number of participants for each team – in only one event Limiting value for the number of team members who can participate in one (single) event. (0 for infinite) Maximal number of events for each participant Limiting value for the number of events in which one participant can take part. (0 for infinite) Default print format for the participant name When adding athletes as participants, their displayed name is adjusted to this size (for print-outs etc). Click on the buttons to switch between variables. Use the text fields to modify the separations (space, commas etc). Competition events A meet consists of multiple events. With events, there is a difference between a 'single event' (for example multiple rounds) and 'combined events', consisting of multiple events (where the rounds are individual events). The figure here below shows how this works internally in AthleticsManager. This is to let the database function more optimally. Figure: List of events in the Events panel. You can find the events of the meet in the events panel, which is always present in the interface. The buttons on the left-hand side in the events panel are used to modify the events. Their functions should speak for themselves: New event, Event properties, Open event (in the event administrator), Delete event, Print list of events. Next to this you also have the meet buttons, which we have already discussed in a previous chapter. The table that stands underneath this, consists a lot of columns. An explanation: No An administrative number of the event. This number is an administrative help for anyone who is involved with the administration of the meet. 32 AthleticsManager Manual 2015v1 Name The Name-field contains the name of the event. For a single event with multiple rounds, the round name stands between brackets. For combined events, the event name stands between brackets. Event time planned The time when this event or this round is scheduled. Official The time when this event or round is made official. Session The session to which this event belongs. Event The event to which this round belongs OR the combined events to which this event belongs. Number of participants The number of participants that is registered for this event or this round. Number of heats The number of heats for track events or the amount of groups for field events, into which this event or this round is divided. Background colour The background colour of a row symbolizes the status of the event or the round. White : Waiting for participants. Grey : Waiting for results. Light blue : Event has started. Yellow : Results are available. Green : Results are official. Red : Results are corrected after making official. Note: When all sessions are shown, and you have sorted by Event time planned, then first the date and time of the sessions are taken into account, and secondly the time of Event time planned. 4.2.1. General When you add a new event, or you modify an existing event, a window with two tab pages will open: The event properties. This window consists of two tab pages: General and Rounds. The General-tab applies for all types of events and contains general settings for this event. 33 AthleticsManager Manual 2015v1 Figure: General properties of an event. Name The name of the event. (Required) Abbreviation The abbreviation of the event. Info An info field for the event. This field can contain for example a definition of the event. Type The event type. This list contains all event types that are determined in section 7.1 Event types. (Required) Categories The categories which this event is meant for. This way incorrect participations can be noticed more quickly. When no categories are listed, then all the categories are permitted. Use the check boxes on the left of the combo box to filter the listed categories. Note: The check boxes Show all for both Type as Categories show or hide extra choices in the combo box next to it. 4.2.2. Rounds With combined events this tab page contains a list of the combined events. In the other case you will find here a list of the rounds of a “normal” event. By default, one round is created by the software: with the default name “*”. This is useful for meets of which the events contains no rounds. Note; The name “*” will never be printed on a participant or result sheet. Any other round name will be printed, if used in the print layout. If you would like to change the number of rounds or the name of the round(s), you can add, delete and reorder the rounds here, by using the buttons at the bottom of the list. For EACH round you can separately modify a lot of properties (Details). 34 AthleticsManager Manual 2015v1 Figure: Modifying the round properties of an event. General – Name The name of the round. (Required) General – Abbreviation The abbreviation of the round. With combined events, the abbreviation is used as the heading of the results table. General – Info An info field for the round. This field can for example contain a definition of the round, or the starting height of a high-jump competition. General – Session The session that belongs to this round. This list is filled with sessions defined in subsection 4.1.2 Sessions. (Required) General – Start time The start time of this round. This value is shown in the list of events in the events panel. Teams – Maximal number of participants for each team Limiting value for the number of team members that is allowed to participate in this event. Teams – Number of participants for point calculation Limiting value for the number of team members of whom the points will count as team points. In other words: the points of the -n- highest scoring (according to place and result) participants from the same team count for team points. Teams – Method for point calculation The method how the team points are calculated. There are two possible methods by default. This list can be expanded by the personal methods of your federation. On place: Team points are assigned according to the values in the field Amount of points in order and the chosen option for In case of 35 AthleticsManager Manual 2015v1 a tie take, on the tab page Teams of the meet properties (see 4.1.4 Teams). On performance: Team points are assigned according to the individual points, based on the performance. The possible correction factors are hereby also taken into account. <not assigned>: No team points will be assigned, in other words, team points are not in effect here. Field event – Start height (depending on event type) The start height of high jump-events. This function is only visible for vertical length events. Format: 0.00m. Field event – Interval (depending on event type) The default value for the interval of sequential heights. This function is only visible for vertical length events. Format: 0.cm. Field event – Number of attempts (depending on event type) The number of attempts that can be done for this event. This function is only visible for events with multiple attempts. Heat composition – Number of places The number of available places in a heat or group. This is used for automatic heat or group composition. Heat composition – Used lanes (only events that make use of lanes) Only the selected lanes are used in the heat composition. Click to use (red) or to not use (grey) a lane. Heat composition – Method The way how the composition will be executed. There are two possible methods by default. This list can be expanded by the personal methods of your federation. Heat composition – Parameter A possible parameter that can be included in the heat composition method. Heat composition – Time for each heat An estimated duration per heat. With this the start time of every heat is automatically adjusted to the time of the last added heat, increased by the duration that is entered. For the first added heat, the start time of the round is used. Qualification – Method The way how the qualifications can be calculated by the AMsoftware. There is one possible method by default. This list can be expanded by the personal methods of your federation. [On place];[on time]; <not assigned> First on place, then on time. The given parameters for this method are the number of participations that are qualified on place, and next the number on time, separated by a semicolon ( ; ). Qualification – Parameter A parameter that has to be given with the chosen qualification method mentioned above. For example: 2;3. In this case, every 1 st and 2nd athlete of 36 AthleticsManager Manual 2015v1 each heat will be qualified, as well as 3 other athletes that have the fastest time over all heats. This parameter is used for track events. 4.3. Point calculation – Method The method for (individual) point calculation. There are four possible methods by default. This list can be expanded by the personal methods of your federation. IPC; IAAF RACE; IAAF JUMP; IAAF THROW; <not assigned> Point calculation – Apply correction factor for following categories A list of the categories for which a correction factor should be applied to the performance, which will then be processed by the point calculation formula to form the total amount of points. The role of the correction factor in the point calculation formula is explained in subsection 6.2.1 Individual points. Participations In this section it is important to make a difference between an athlete, a participant and a participation • An athlete is the person as he/she is stored in the database. • A participant is an athlete who takes part in the meet. • A participation is a link between the participant(s) and an event of the meet. – Usually this is a single participation, so a participation is 1 participant – In case of relays this is a multiple participation, for example 4 participants is 1 participation. Also the difference between a category of an athlete, team, event and participation is important. Depending on the event type, check-ups happen based on either the date of birth, or the year of birth. • The category of an athlete depends on his/her age. • The category of a team is adjustable per team and is especially for automatic addition of athletes as members. • The category of an event is adjustable per event and makes sure that participants can only participate under certain categories. Only for the permitted categories (in other words the categories of an event), points are calculated. • The category of a participation (below referred to as 'participation category') is the category that is used to process the participation in an event. With this terminology in mind, you can get started with participation administration. 4.3.1. Creating athletes You can create new athletes in the athlete’s panel. On top of the panel you see different buttons to create or modify athletes. The plus-button on the left-hand 37 AthleticsManager Manual 2015v1 side can be used to create new athletes. If you click hereupon, you will open a new window with three tabs: General, This competition and Personal bests. The General-tab contains three parts: General, Licenses and License details. Figure: Tab New athlete – General General – First name / Middle name / Name The first name, possible middle name(s) and last name of the athlete. General – Gender The gender of the athlete. General – Nationality The nationality of the athlete. General – Date of birth The date of birth of the athlete. Licenses This field shows you the licenses of this athlete. To add a license, you first have to fill in the license details in the License details-part, after which you click on the plus-button under the licenses field. To delete any licenses, select the license in question and click on the trash- button. License details – Start date / End date The start date and end date of the athlete's license. License details – Federation / Team The federation and team to which the athlete belongs. License details – License number The license number of the subscription to the federation. This is thus the license number that was assigned during the subscription. License details – Start ID The fixed start ID that belongs to the subscription of the federation in question. This is thus the start ID that was assigned during the subscription. 38 AthleticsManager Manual 2015v1 License details – Category The category that belongs to the athlete. This category is calculated based on the athlete's date of birth. The second tab is the This competition-tab and contains one button: Add <name> to current meeting, where <name> is of course the name of the concerning athlete. If you add the athlete to the current meeting (by clicking on the button), the tab will show your more information, existing of two parts: General and Participations. Figure: Tab add athlete in current meeting On top of the tab you have the possibility to remove the athlete from the current meeting. General – License The license under which the athlete will participate in the meeting/event. General – Name The name of the athlete. General – Start ID This is the start ID that you can assign yourself. This can be a different number than the standard number that was assigned by the federation during the subscription (and which you entered in the previous tab). General – Team The athlete's team. 39 AthleticsManager Manual 2015v1 Participations In this part you will see the events in which you would like the participant to participate. If you check the Show all events-check box, all events will be listed in order to select manually the events to participate in. Personal best, Contains one part: Performance. In this tab you can enter the best performance per event (of the season / of the entire career). This performance will also be shown in the list of possible events in the This competition-tab. Figure: Tab New Athlete – Personal Bests. Performance – Event The event for which you want to enter the best performance. Performance – Performance The result of the best performance. Performance – Wind If the wind could have influenced the performance, you can enter the wind velocity (by means of a wind measurement) here. Performance – Date The date of this best performance. Performance – Seasons best/Alltime best Here you can enter whether it was the best performance of the season or of his entire career. 40 AthleticsManager Manual 2015v1 4.3.2. Athlete participation Note: If you add an athlete directly as a member of a team, or you register the athlete immediately in an event, they automatically become a participant of the meet. The steps explained in this section will then occur automatically. Imagine that you already know which athletes will participate, but you do not know yet in which team or in which events, then you can add an athlete to a meet, by following these steps: • Search in the athlete’s panel for the desired athlete. You can use a quick search for this (start typing in the search field) or an advanced search (button with binoculars-icon). • As soon as you have found the athlete in the list, you open his or her properties. There are two ways to do this: – Right-click on the concerning athlete and choose Properties, – Or select the concerning athlete and then click on the button Modify athlete (pencil) on top of the athlete’s panel. • Go to the tab page This competition. • Click on the button Add <name> to the current competition, where <name> is of course the name of the concerning athlete. • The athlete is now a participant of the meet 4.3.3. Adding an athlete to a team It is common that the athletes are registered per club. A club sends one or more teams, by means of lists with athletes. Make sure that the teams are created (see 3.1.4 Teams) before continuing. Attention: By teams we do not mean relay teams. These are explained in the next section. • Open the team’s panel and double-click on a team to open it. • Choose the identification method to add an athlete: – by license number (default), – by start ID, – or by name. • Then type in the search field (Search and enter) a search action and push [Tab]. • Next to the combo box to select the type, there will be a second button, with the first search result. You can push once again on [Tab] to show a next search result (for example with athletes with the same name — with license numbers, there is normally only 1 result). • Push [Enter] to confirm the current result. 41 AthleticsManager Manual 2015v1 Note: You can also directly push [Enter], without first pushing [Tab]. Then the first search result will be added immediately. 4.3.4. Enrol an athlete in to an event Another possibility to add athletes to a meet, is by directly assigning them to an event. There are several methods to do this: • Double-clicking – Open the event in which you want the athlete to participate. – Search for the desired athlete in the athlete’s panel. – Double-click on the concerning athlete. Multiple athletes simultaneously – Open the event in which you want the athlete to participate. – Select the desired athlete in the athlete’s panel. – Choose at the bottom left in the athletes panel the action Add to current event. – Click on the button right next to it to execute the action. Typing – Open the event in which you want the athlete to participate. – Open the Participants tab or the Start lists-tab. – In the Start lists-tab you can choose in which round, event, heat or group you would like the athlete to participate in – Use the search field like in 4.3.3 adding an athlete to a team to add an athlete. • Checking individual events – Add the athlete like a participant of the meet, as described in 4.3.2 Athlete participations, in which you check the events in the athlete's properties. – In the same tab page (This competition) you can find a list of events at the bottom. Check the desired events in the list. Note: This list is based on the category of the athlete and the category/ies of the team of the athlete, no matter whether he is a member or not. For example: An athlete with the category 'junioren C jongens', is member of the teams with the categories 'junioren A jongens', 'junioren B meisjes'. The event list in the athlete properties will then contain events with category 'junioren A jongens', 'junioren B meisjes' or 'junioren C jongens'. To deactivate this 'filter', check again Show all events. Note: If you already created teams, the application will try to assign the athlete automatically to the correct team. The application will first check whether there are any teams of which the default federation matches with the athlete's federation. If this is the case, the application will check the default categories of the team and the category of the athlete. If there is a match, the athlete will automatically become member of that team. If there are more matches, the application will pick the team that was created first. Exception – Enrol an athlete into a relay event In case of relay events, the participations are relay teams. Each time you enrol an athlete into a relay event, a window will pop up in which you can create new relay teams or select existing teams. You can enrol an athlete into a relay event 42 AthleticsManager Manual 2015v1 by opening the relay event in the events panel, and then adding the athlete (for example by double-clicking the athlete). Then this window will pop up. To create new relay teams, you have to type the desired name and then click New. To pick an existing relay team, select the desired relay team in the list and click Select. Next the athlete will be added to the relay team in question, in that event. Figure: Creating or selecting a relay team. Editing an existing relay team can be done by double-clicking the team in the event in question. A window will pop up in which you can edit the name of the relay team, delete its members or rearrange the order of the athletes. Cursive names with a grey font are the reserves and will not be counted in the teampoints calculation. Removing a relay team is the same procedure as in an ordinary participation: select and push [Delete]. Figure: Modifying a relay team. 4.3.5. Editing participation categories As we mentioned in the first part of this section, the participation category is the category of the participation (both for an athlete and a relay team) which is taken into account in the point calculation. You will find the participation category in the Participants-tab of an opened event, in the Category-column. When enrolling an athlete into an event, the participation category will be equalized as much as possible to the athlete's category. If the athlete's category is not in the list of the permitted categories for this event, then the closest next category will be picked. 43 AthleticsManager Manual 2015v1 Example: An event has the following participation categories: • Juniors C • Juniors D A 'junior C' athlete participates as a 'junior C'. A 'junior D' athlete participates as a 'junior D'. A 'pupil A' athlete participates as a 'junior D' athlete. A senior athlete participates as senior (invalid category, no points will be calculated). In the Participants-tab you see the categories in which the athletes participate. The font colour shows you the validity of the participation category: White Athlete participates in his own category. • • Yellow Athlete participates in another (higher age) category. Red Athlete participates in an invalid (lower age) category. The participation category can always manually be 'overwritten': • • Right-click on the participation category you would like to modify. Go to the menu Category and select the valid participation category. (The categories listed are the categories of the event). Attention: If a participation category is not accepted (and so marked in red), no points will be calculated for that participation. 4.4. Heat composition The heat/group composition can be done in the Start lists-tab of an opened event. An automatic heat/group composition is based on the options that are set in the properties of an event, the round in question more specifically. Just click on the Create Heatsbutton. If any heats or groups have already been created, the application will ask you to overwrite these. Manually creating or deleting heats/groups can be desirable. This can be done as follows: • Left-click on the round of which you would like to modify the heats/groups. For the events without any rounds, this will be an asterisk (*). • Click on the plus-button underneath the list to add a heat/group, or at the trashbutton to delete a heat/group. You can assign participations to a specific heat/group by selecting the round, right-clicking on the participation and then selecting a heat/group in the sub menu Add to heat. This is also possible with a selection of multiple participations. Note: Heat composition is MANDATORY ! Even if you do not want heat/group compositions, we recommend you to create always 1 heat or group. This way the application can do its job correctly. 4.5. Assigning start ID’s You can assign start ID's by using the Assign Start ID's-button, which you find on the left-hand side of print button in the athletes panel. If you click on this button, a new window will appear where you can set the parameters. 44 AthleticsManager Manual 2015v1 Figure: Assigning start ID's. • Group by Here you can choose whether you want to group the start ID's by club or by team. The advantage of this functionality is that the start ID's of the athletes that belong to one team/club will have a consecutive order. • Gap after each group This option gives you the possibility to leave a gap between the numbers of two different teams/clubs, as spare numbers for later usage. In case you have some late additional inscriptions of a certain team, then these 'blank' numbers will be assigned to these late inscriptions. This way their numbers apply to the consecutive order of their team. • Replace existing In case that some athletes already had a start ID (for instance because you started a previous meet), you can replace their numbers by new ones by checking the check box. • Start at Start assigning ID numbers from a set number. • Number of characters The number of characters that each ID number will contain. In this case, number 1 will be shown as 001 (3 characters). • Prefix Enter the characters that you want to show before of the ID number, if desired. • Suffix Enter the characters that you want to show after of the ID number, if desired. 45 AthleticsManager Manual 2015v1 4.6. Taking along competition files You can easily make a backup of the competition by using AthleticsManager Server. This is in fact a backup of the database. Make sure that the database service is activated before making or loading a backup. Click in the AthleticsManager Server on Make a backup of the current meet, select the location and choose a file name. You can for example copy this file to a safe location on your network or on a USB flash drive. To work again with your backup (for example on another location), you have to click on Load an earlier copy of a meet. Select your backup and click Open. When you want to mail a backup it is better to send a zip files instead of the .amb file due to the security setting of most computers. To have an ideal workflow, follow these steps: • Fill in all preliminary data in the meet at your home pc. • Make a backup of this meet. • Make sure that the AthleticsManager. • Load the backup of the meet that you set in advance. • Fill in, during the meet, the results and so on. • Create a new backup of this meet. • Load the meet again on your home pc, or copy the backup to a backup location external pc has installed all required aspects ----------------------------------- 46 of AthleticsManager Manual 2015v1 5. Import Athletes and Participants in AthleticsManager 5.1. Description This chapter describes the feature of TimeTronics' AthleticsManager to import athletes and participants from any structured text file. 5.2. About the Text file You need a structured text file, the most common type is a CSV-file (comma-separated values). Other files with tabulated data are fine as well. All spreadsheet software packages (like MS Excel, OO Calc, LibreOffice Calc, Apple Numbers, …) have a functionality to save the file as a structured text file. In the screenshot below, we will show you the Save As options from LibreOffice Calc. 5.3. Start the Import The import can be started from menu File->Import->Import athletes and participants. If this menu is greyed-out, your user-profile has not sufficient rights to import athletes and participants. 47 AthleticsManager Manual 2015v1 5.4. Select the Text File and Its Properties You start with opening a file with the button at the right-top of the import-window. After the first lines of the file are loaded, try to find the correct settings for the separator and the text delimiter. To visualize a {tab}, AthleticsManager uses an arrow (→). If your text delimiter is different than a single (') or double quote (“) or if you don't have a text delimiter, you can type over the value in the drop-down list. If you have found the correct separator and text delimiter, continue with the character set. If you have no idea about the character set used for the text file, try to find some special characters (like é, å, ç, Š, ß, …) and try some character sets (UTF-8, windows1252, ...). The setting to skip some rows at the beginning of the file, is useful when you have a header row with labels for each column, but as these labels might be useful when selecting the type of content for each column, we will keep them visible for now. If your file contains information regarding the gender of the athletes, you can define which values translate to male and which to female. If you don't specify anything, m and M will be translated to male, f, F, w and W will be translated to female. Unknown characters will be translated to female and if you don't specify a column for the athlete’s gender, all athletes will be male. Now we can start with selecting the type of content of each column. You do so by clicking on the column header and select the correct value from the pop-up menu. These are all possible types: athlete information o primary key: useful if you want to specify a unique identification for each athlete yourself o firstname o last name o birthdate o birthdate by category (a name of a category will be translated to a birthdate) o gender o nationality (by name of the country or IAAF code) o bib number (same as in club information): will be used in the license and in the competition o license number (same as in club information) club information o name of the club o abbreviation of the name of the club 48 AthleticsManager Manual 2015v1 o o bib number (same as in athlete information): will be used in the license and in the competition license number (same as in athlete information) event information o name of the event o number of the event personal best information o value of the personal best: a lot of possible formats or supported (1:23.45, 1.23.45, 1'23”45, 1m23, 1.23, …) even a mix of all these formats o date of the personal best o place where the personal best was achieved competition team information o name of the competition team o abbreviation of the name of the competition team o name of the competition team group relay team information o name of the relay team o order in the relay team Note that some values are pure for identification, e.g. you can only try to identify the correct event, you can't create a new event just by importing a text file. That is why you can only select one identification of an event. Also note that you can only define a type of content once. E.g. no two columns can contain the firstname of an athlete. Now that we defined all columns, we can hide the rows with column labels, if we had any, by setting the correct value of rows to skip (From row). 5.5. Define the Unique Constraint You can define the unique constraint yourself or ignore this step and be good with the default choice of AthleticsManager. 49 AthleticsManager Manual 2015v1 The unique constraint is the combination of columns the import feature will use to match an existing athlete with one row in the import file. 5.6. Translating Category Names to Birthdates Sometimes you don't have information regarding birthdates of the athletes, but you know the (age) category they are in. The import feature can translate for you the name of the category to a birthdate. If you selected the type of content athlete information > birthdate by category name, you will be presented with a window to build up a translation table between category names and birthdates. The window has also import/export functionalities. The syntax of the import file is: category name {tab} e.g. seniors men seniors women juniors men juniors women {tab} 1994-01-01 birthdate {tab} {tab} {tab} in yyyy-MM-dd 1990-01-01 1990-01-01 1994-01-01 50 AthleticsManager Manual 2015v1 5.7. Inspect the Feedback After you clicked on Import in the previous window, the text file is processed and you are presented with some feedback. Note that no changes have been written in AthleticsManagers database yet. You could copy the feedback to the clipboard, paste it in a file and manually inspect if you need to do some changes to your database before executing the import. Or you can use the feedback windows, provided by AthleticsManagers import feature. 5.8. Feedback on the Athletes You can see the number of new athletes (yellow background) and the number of athletes, the import feature found a match for (white background). If you believe this feedback is not correct, you need to cancel the import, modify your text file or your AthleticsManager database and restart the import. 5.9. Feedback on the Clubs In the feedback on the clubs, you can also see the number of new and already existing clubs. But here you can also force a match, change a match or even create the new club manually by clicking on the pencil in the right-most column. The new teams will be created for you automatically. The federation of the club will be the same as the federation of your current competition. 51 AthleticsManager Manual 2015v1 5.10. Feedback on the Events You will see the number of events which AthleticsManager could not match and the number of events matched correctly. You can force a match or even create new events by clicking on the pencil in the right-most column. Note that no events are created manually, so if there are events without a match, the participants will not be created (the athletes however will be created). You will probably want all events to exist in your database before you do the import! 5.11. Feedback on the Competition Teams The feedback of the competition teams is equal to that of the clubs, you have all chances to create new teams, force matches, … All competition teams without match, will be created automatically for you in the competition you are currently working in. 5.12. Finally Execute the Import Just click on the button do the import and AthleticsManager will write all data to the database. 52 AthleticsManager Manual 2015v1 5.13. Remark 1: relay teams The ‘name of the relay team’ and the ‘order in the relay team’ are two possible content types for a column in the file. A note for relay teams is that you don't need one line for one relay team, but you need one line per athlete in the relay team. An example for one relay team with 4 athletes (licensenumber;firstname;lastname;relay team name;order in relay team;event name): 120483;Kristel;Verbeke;ACK3;2;4x100_meter_girls 120827;Karen;Damen;ACK3;4;4x100_meter_girls 100479;Kathleen;Aerts;ACK3;1;4x100_meter_girls 142473;Josje;Huisman;ACK3;3;4x100_meter_girls 5.14. Remark 2: Application note: Inschrijven.nl We would like to list some notes regarding the usage of export files from inschrijven.nl as the source for importing into AthleticsManager. a) The output file from inschrijven.nl is an Excel file (*.xls). You will have to save it as a structured text file. b) The output file from inschrijven.nl has no column for the lastname of an athlete. Instead, it is split into two columns, labeled Tussenvoegsel and Achternaam. You need to make an extra column and calculate the lastname. E.g. in OO Calc or LibreOffice calc, you could use the formula (where Tussenvoegsel is in column D and Achternaam is in column E): =TRIM(CONCATENATE($D1;” “;$E1)) c) Athletes need to type in there licensenumber themselves, this is a major source of typos. So we would advice to use other columns than the licensenumber for the unique constraint. E.g. use a combination of firstname, lastname and birthdate. d) The output file from inschrijven.nl uses one single line for a relay team, with the participants in numerous syntaxes in a column at the end of the file. AthleticsManagers import feature cannot handle this syntax, so you need to either skip the import for relay events, or modify the import file to the correct syntax with one line per athlete in the relay team. --------------------------------- 53 AthleticsManager Manual 2015v1 6. Administration during the meet Administration of a meet in progress happens mainly in the events administrator. Multiple events can be opened at the same time, and every individual event is divided into three vertical tab pages: Participants, Start lists and Results. You have various possibilities to manage or open an event, always starting from the events panel: • Double-click on an event. • Select an event and push [Space] or [Enter]. • Right-click on an event and choose Work with <event name>. Tip: To switch easily between open events, you can make use of the shortcut key [Ctrl] +[Tab]. 6.1. Entering performances There are different kinds of results: • Time-related performances: – hand times, manual entry – electronic times, manual entry – electronic times, automatic entry (by using MacFinish) • Metric performances: – distances, enter only the best result – distances, enter every attempt – heights, enter only the best result – heights, enter every attempt • Invalid performances: – no result (NR) – disqualified (DIS) – did not start (DNS) Every heat runs through a series of statuses. Depending on the status, the background colour of this heat will change. When all heats have reached a certain status, the round to which these heats belong, will take over their status. Status (colour) Description Empty (white) Waiting (grey) Started (light blue) Contains no participations. Contains participations, but no results. Event has started and results are being entered. All results are entered and the button Ready has been clicked. The results are approved and the button Official has been clicked. A result has been modified, although the results were already official. Results available (yellow) Official (green) Corrected (red) Table: The possible statuses that a heat or group can run through. When entering the performances, you can make use of the [Enter]-key to confirm your entry and jump directly to the next (entry) field. By default this is the field directly below. By using the [Tab]-key, you can switch between the different code buttons to enter the result of an attempt. 54 AthleticsManager Manual 2015v1 You can also add a note to a performance, for extra information concerning this performance. This is useful in case of pointing to a specific rule for a disqualification for example. To add a note, right-click and choose Add a note. Fill in the note text and click OK. The note will appear in the tool tip of that performance. It can sometimes occur that the points are not immediately calculated. You can then click on the button on the top right, with a green turning arrow, to recalculate the points. 6.1.1. Adding wind measurement If you do a wind measurement by using a wind measurer (e.g. WindSpeed), you can import the results of it into AthleticsManager. This could be useful if you want to show whether the wind velocity could have influenced the final results or not. If you import the results into AthleticsManager, the results will be shown in a separate column named Wind measurement. This column is hidden by default, but can be shown by right-clicking on the column heading and choosing Wind measurement. The format is meter per second. 6.1.2. Entering hand times When hand times have been used for the results, instead of electronic times, then they have to be filled in in the separate column Hand timing. This is necessary for the application to adjust the points calculation for hand times. The column is hidden by default, but can be shown by right-clicking on the column heading and choosing Hand timing. 6.1.3. Adding photofinish results If you have photofinish results, by using for instance MacFinish, you can import the results into AthleticsManager. This way you do not have to enter the results manually. The column for the photofinish results is hidden by default, but can be shown by right-clicking on the column heading and choosing Photofinish results. If you have multiple results, because you used multiple photofinish cameras, you can send all results to AthleticsManager. These multiple results will then all be shown in the photofinish results-column, separated by a slash. 6.1.4. Adding reaction times You can also import the reaction times of the athletes into AthleticsManager, after you have measured these by means of the FalseStartIII for instance. The column Reaction times is hidden by default, but can be shown by right-clicking on the column heading and choosing Reaction times. If you have multiple reaction times, because of a false start for instance, you can send all reaction times to AthleticsManager. These reaction times will then all be shown in the reaction times column, separated by a slash. 6.1.5. Entering electronic times manually Entering electronic times manually can be done by selecting a performance field and starting to type. Valid characters are 0 up to 9 for numbers, : and ; to distinguish hours/minutes/seconds, and . and , to distinguish seconds/milliseconds. There is also a shorter version of entering times manually, in which the hours/minutes/seconds are automatically separated by a colon. For example: entering ‘123.45’ becomes ‘1:23.45’. 55 AthleticsManager Manual 2015v1 6.1.6. Entering electronic times automatically It is possible to import electronic times automatically from MacFinish-compatible products into AthleticsManager. 6.1.7. Entering metric performances: Best performances vs All attempts By default AthleticsManager is set to register all the attempts. You can modify this to enter only the best performance. You can switch between these two modes by using the button left on top in the Results-tab. When the icon stands on n (by default), you are in the mode to fill in all attempts. In the other case the icon will stand on 1, which indicates that only the best performance can be entered. Entering only the best performance is the same as entering times in the performance field, but this time with metric data with meter as unit. Then the colon is not used here, but the decimal point still is. When you enter all attempts, you get the possibility to switch between entry directions. As mentioned before, you can enter easily by using the [Enter]-key. By default the entry field jumps to the field directly underneath the current field. This is the vertical entry of performances, but also the horizontal entry is possible. To switch between entry directions, you click on the button at the top right, with a green arrow pointing below or to the right (not turning). If the arrow pointing below is visible, then the vertical entry is active. If the arrow pointing to the right is visible, then the horizontal entry is active. 6.1.8. Entering multiple distance attempts Note: Make sure that for this, you are in the Enter all attempts-mode, otherwise you cannot enter multiple attempts. You can find the attempts at the right in the list with results. It is possible that you first have to scroll to the right. The number of attempts that is shown here, can be modified in the round properties (on the right side of the tab in the opened Event > Rounds > Field event). The best attempt will automatically be filled in in the Performance-field. You have three possible values for entering the performance of an attempt, plus possibly an entry field for wind measurement (depending on the event type). Possible values are metric values, 'X', or '-'. • The metric performance is the obtained distance in meter, to be entered with numeric keys ([0] up to [9]) and if necessary a decimal differentiator ([ . ] or [ , ]). • The 'X' stands for 'fail' and has to be entered by using the corresponding button or the shortcut keys [X] or [∗]. • The '-' stands for 'pass' and has to be entered by using the corresponding button or the shortcut key [ - ]. 56 AthleticsManager Manual 2015v1 6.1.9. Entering multiple height attempts Note: Make sure that for this, you are in the Enter all attempts-mode, otherwise you cannot enter multiple attempts. You can find the available heights at the right in the list with results. It is possible that you first have to scroll to the right. The height columns that are shown here, have to be added yourself by using the button New height at the top left. Adding according to height means that the entered height will stand on its linear place between the height columns. Adding by barrage means that the entered height will be placed behind the height columns. By default the start height will be present as height column. The start height and the default interval with which the heights have to be incremented, are both adjustable in the round properties (on the right side of the tab in the opened opened Event > Rounds > Field event). The Performancefield will be filled in automatically with the highest reached height. You have three possible values for entering the performance of a height attempt. Possible values are '0', 'X', or '-'. • The '0' stands for 'success' and has to be entered by using the corresponding button or the shortcut key [0]. • The 'X' stands for 'fail' and has to be entered by using the corresponding button or the shortcut keys [X] or [∗]. • The '-' stands for 'pass' and has to be entered by using the corresponding button or the shortcut key [ - ]. Note: The barrage heights are not taken into account yet in the calculation of the place, so you have to modify the place manually (if necessary). This functionality is planned for a next version of AthleticsManager. 6.1.10. Entering invalid performances When a participant had no result (NR), was disqualified (DIS), or did not start (DNS), then you can enter this by right-clicking on the performance field of that participant and choosing the desired option in the sub menu Use code. 6.2. Point calculation 6.2.1. Individual points The individual points are calculated based on an implemented formula. This formula is set in advance. 6.2.2. Team points Next to the individual points you can find the team points. It depends on the round properties whether team points will be assigned to that participation or not. If you select not assigned, then no team points will be assigned. The obtained points are only added to the subtotal of the team points of that team if the heat has the status 'official'. You can print the subtotal of the team points at all times by using the button Print in the teams panel. 57 AthleticsManager Manual 2015v1 6.3. Qualification rounds If you have chosen a qualification method in the round properties, then the correct participations are automatically qualified for that round. The qualifications on place are indicated by a Q on the left side of the participation result. The qualifications on time are indicated by a q. You can however still modify the qualifications, by right-clicking on the qualification field. Once the results are official, you can go back to the tab page Start lists, select the concerning qualification round, and click on the button Qualification. The qualified participations are automatically transferred to the next round. You will still need to add heats! 6.4. Personalized menu A personalized menu, in which every federation can use its own personalized functions, has been implemented in AthleticsManager. This menu is indicated by the logo of the federation. If you click on this menu, you will see the different functions. ----------------------------------------- 58 AthleticsManager Manual 2015v1 7. Global settings The global settings have already been set correctly by TimeTronics, for your user friendliness. It concerns mainly a digital collection of the rules and parameters that are used by the athletics federation of your region. Although these values are not visible for users by default, they are completely adjustable to your needs. You can use this for example by adding an own event type with your own chosen pointcalculation parameters. Only a superuser has the privileges to change the global settings. This is set for safety reasons, so that not everybody can ‘accidentally’ or intentionally change the settings during the meet. You can find all the global settings in the superuser bar. To make the superuser bar visible, see 3.2.4 Modifying interface. There is a separate button per group settings: Event types, categories, Clubs, Point calculation, Correction factors, Users, Federations, Nationalities, Languages, Seeding methods, Qualification methods, Teampoints calculationmethods. 7.1. Event types All normal event types are installed by default. You can however add new types, or modify or delete existing types. Examples of event types are: Discus 1.000kg, 110m Hurdles 0.914m, Javelin 600g, etc. The default event names that are being used, will only apply if no translation was entered. For each of these event types you can of course make a personalized translation. Figure: Modify the event types in the Event types-window. Name code An ID code that is used for translations of the full name of this event type. Abbreviation code An ID code that is being used for translations of the abbreviation of this event type. Venue Specifies if this is an indoor or outdoor event type. Possible values are I (indoor) and O (outdoor). Distance The distance as an integer for distance event types (by default 0). 59 AthleticsManager Manual 2015v1 Wind mode Specifies how the wind measurement has to be executed. Possible values are N (not), H (per heat) and I (per individual performance). Wind type The amount of seconds (integer) that has to be measured for the wind measurement. Mostly this is one of these values: 5, 10 or 13. Precision Specifies the accuracy (decimal) of the performance. Possible values are 1 (integer), 10 (one tenth), 100 (one hundredth), 1,000 (one thousandth) and 10,000 (one ten thousandth). Type of field event Specifies the type of field event for this event type. Possible values are (no field event), H (horizontal field event) and V (vertical field event). Correction for manual timing The value that is added to the entered hand times to be used in the point calculation. Number of athletes The number of athletes that works together to accomplish a performance. This is by default 1, with a relay event this is usually 4. Implement The weight factor that has to be used in the calculation (in kilogram). The weight of the goods with throwing events is of importance here. Decimal values are possible. Number of events for combined events The number of events (integer) that this combined events- eventtype contains. Only applicable to combined events-eventtypes. List of field events Semicolon-separated list of event types that will be used as events for this combined events-eventtype. Only applicable to combined events-eventtypes. By double-clicking on the corresponding field in the List of field events-column or Number of events for combined events, you open a new window in which you can create new or modify existing combined events. 60 AthleticsManager Manual 2015v1 Figure: Configure or create a combined event. In this window you can add event types to your combined events by selecting the desired event in the left column, and then clicking on the right arrow. Deleting event types can be done by selecting the event type in the right column, and then clicking on the left arrow. You can arrange the event order by using the arrows on the right-hand side of the window. If you then click on OK, you will see the values in the Event types-window change. Default name The system name of this event type. If no translation for your defined language is entered, then the system name will be used. Default abbreviation The default abbreviation of this this event type. If no translation for the abbreviation of this event type is entered, the default abbreviation will be used. Sort Specifies the method by which performances should be sorted. Possible values are false (descending) or true (ascending). Name (*) The name, translated into language *, for this event type. Abbreviation (*) T The abbreviation, translated into language *, for this event type. 61 AthleticsManager Manual 2015v1 7.2. Categories The categories are defined in this window. The categories are grouped by federation. There has to be a separate category per gender, so for one age category there will always be two instances. For example: Masters men and Masters women. Figure: Manipulate the categories in the window Categories. Name The name of the category. Abbreviation The abbreviation of the category. Gender The gender of the category. Possible values are M for masculine and W for feminine. Minimum/maximal type The type that is used to check the age limit for minimum/maximum. Possible values are N (no minimum/maximum limit), D (limit control by date of birth) or Y (limit control by year of birth). Minimum/maximal age The value that is used to check the age limit for minimum/maximum. 62 AthleticsManager Manual 2015v1 7.3. Clubs The athletic clubs are defined in this window. The clubs are grouped by federation. Figure: Club window 7.4. Name The name of the club. Abbreviation The abbreviation of the club. Federation number The identification number under which the club is being registered by the federation. Place The home base of the club. Point calculation The pointcalculation rules are defined in this window. The rules are grouped by pointcalculation method. For an extensive definition of pointcalculation methodology, see section 6.2 Point calculation. Figure: Point Calculation Window 63 AthleticsManager Manual 2015v1 7.5. Event type The event type to which these rules should apply. Category The category to which these rules should apply. Parameter -NThe parameter values which will be entered in the internal pointcalculation algorithms. Correction factors The correction factors are defined in this window. The correction factors are grouped by federation. The correction factors are optionally used in the pointcalculation formula. For an extensive description of correction factors, see section 6.2 Point calculation. Figure: Correction factor window 7.6. Event type The event type to which this correction factor should apply. Category The category to which this correction factor should apply. Correction factor The value of the correction factor. (by default ‘1’) User profiles This window shows the different user profiles, with each their own specifications and privileges. 64 AthleticsManager Manual 2015v1 Figure: User Profile Window. In the left part (Users) you can see the existing users listed. Adding and deleting is possible through the according buttons at the bottom of this list. You can only add and delete users when you have the privileges for this. Only the superuser can do this by default. The superuser, advanced user and beginner user are always present and cannot be deleted. When you add a new user, the privileges of the current selected user will be copied to the new account. In the right part (User options) you see a list of the user privileges. 0 means 'not allowed', 1 means 'allowed'. You can use the button Change password to change the password for the current selected user. Unless you are a superuser, you do not need to enter an old password. 7.7. Federations The different federations with each their own specifications are described in this window. You can add new or delete existing federations by using the buttons on the top righthand side of the window. Figure: Federation Window 65 AthleticsManager Manual 2015v1 7.8. Name The name of the federation. Abbreviation The abbreviation of the federation. Code A system code that is used for the federation. Language The language of the federation. Country The country of the federation. Season start The date of the start of the season. If an athlete participates in a meet after this date, then his/her category will be determined based on the athlete's age on the reference date. Reference date To determine the athlete's category, the category calculation will use the athlete's age on this date. Nationalities This window contains all nationalities with each their own code and specifications. You can add new or delete existing nationalities by using the buttons on the top right-hand side of the window. Figure: Country-window. Name The name of the country. Flag The flag of the country. ISO An international code, consisting of two characters, that belongs to the country. 66 AthleticsManager Manual 2015v1 7.9. ISO3 An international code, consisting of three characters, that belongs to the country. Numeric code System code that is used by the application to define the country. Area The continental federation to which the country belongs. Languages This window contains the different languages that are implemented in AthleticsManager. You can add new or delete existing languages by using the buttons on the top right-hand side of the window. Figure: Modify the languages in the Languages-window. Language The name of the language. Code An abbreviated code that is used for that language. 7.10. Seeding methods This windows defines the different seeding methods. You can add new or delete existing methods by using the buttons on the top right-hand side of the window. Figure: Modify the seeding methods in the Seeding methods-window. 67 AthleticsManager Manual 2015v1 Name The name of the method. Algorithm The formula of this method. 7.11. Qualification methods This windows defines the different qualification methods. You can add new or delete existing methods by using the buttons on the top right-hand side of the window. PLACE;TIME or PRESTATION;MINIMUM_PARTICIPANTS Figure: Modify the qualification methods in the Qualification methods-window. Name The name of the method. Algorithm The formula of this method. 7.12. Teampoint calculationmethods This windows defines the different methods that are used to calculate team points. You can add new or delete existing methods by using the buttons on the top right-hand side of the window. RESULT or PLACE or MEDALS or COMBINED Figure: Modify the methods for teampoints calculation in the Teampointcalculationmethods-window. 68 AthleticsManager Manual 2015v1 Name The name of the method. Algorithm The formula of this method. ------------------------------------------ 69 AthleticsManager Manual 2015v1 Appendix A: Personalised Menu In this chapter you can find the personalised menu for AthleticsManager software. Please note that the explanation is only in the language requested by the specific organisation/Federation. ------------------------------------ Atletiekunie-menu Het Atletiekunie-menu is het gepersonaliseerde menu voor de Atletiekunie. Dit menu heeft het logo van de Atletiekunie, en bevat drie verschillende functies: exporteren (naar CSVfile), controleren van de wedstrijd en het afdrukken van startetiketten of diploma's. Exporteren In het Atletiekunie-menu kan u drie zaken exporteren: de deelnemers, de resultaten en de teampunten. Als u op één van deze mogelijkheden klikt, opent er een kader waar u de locatie kan kiezen naar waar u het bestand wil exporteren. Het formaat van dit bestand zal standaard een CSV-bestand zijn. Wedstrijd controleren Met behulp van deze knop kan u de applicatie doen controleren of de algemene parameters (3) niet overschreven zijn. De applicatie gaat dan controleren dat: de teams niet meer deelnemers bevatten dan het maximum aantal deelnemers; de atleten het maximum aantal toegestane onderdelen niet hebben overschreden; de ploegen niet meer atleten hebben ingeschreven dan toegestaan voor een bepaald onderdeel. Startetiketten afdrukken Dit was tot voordien nog niet mogelijk, maar deze functie is ondertussen geïmplementeerd. Een kleine handleiding over het afdrukken van startetiketten vindt u in appendix F. Diploma's afdrukken Dit was tot voordien nog niet mogelijk, maar deze functie is ondertussen geïmplementeerd. Een kleine handleiding over het afdrukken van diploma's vindt u in appendix G. ------------------------------------ 70 AthleticsManager Manual 2015v1 Appendix B: Entering categories Example 1: Club AV1 sends out one mixed team of the Juniors category. The meet contains only juniors. The correct composition will be: Name: AV1 Group: Juniors Default club: AV1 Default categories: • Juniors men • Juniors women -----------------------------------Example 2: Club AV2 sends out two teams of the juniors category. Men and women separately. The meet contains only juniors. The correct composition will be: Name: AV2 Group: Juniors men Default club: AV2 Default categories: • Juniors men Name: AV2 Group: Juniors women Default club: AV2 Default categories: • Juniors women -----------------------------------Example 3: Club AV3 sends out five teams of Juniors and Masters category. Men and women separately, Juniors women has two teams. The meet contains both masters and juniors. The correct composition will be: Name: AV3 MM Group: Masters men Default club: AV3 Default categories: • Masters men Name: AV3 MW Group: Masters women Default club: AV3 Default categories: • Masters women Name: AV3 JDM Group: Juniors men Default club: AV3 Default categories: • Juniors men 71 AthleticsManager Manual 2015v1 Name: AV3 JDW 1 Group: Juniors women Default club: AV3 Default categories: • Juniors women Name: AV3 JDW 2 Group: Juniors women Default club: AV3 Default categories: • Juniors women ------------------------------------ 72 AthleticsManager Manual 2015v1 Appendix C: Methods of heat composition The heat compositions are based on an implemented method, which you can choose. There are two possible methods by default regarding the heat compositions: • iaaf seeding method: Heat composition in which the participants with the best (rank 1) and poorest performances are divided over the different heats. For example: there are 12 participants and 4 available lanes. Then the heat composition will be as follows (the number defines the rank): – Heat A: 1, 6, 7, 12 – Heat B: 2, 5, 8, 11 – Heat C: 3, 4, 9, 10 • on best performance: Heat composition which groups together the participants with the best performances, the poorest performances, and in between. This way the participants will be more matched per heat. For example: there are 12 participants and 4 available lanes. Then the heat composition will be as follows (the number defines the rank): – Heat A: 12, 11, 10, 9 – Heat B: 8, 7, 6, 5 – Heat C: 4, 3, 2, 1 • <not assigned>: No specific method. The participants are randomly divided over the heats. ------------------------------------ 73 AthleticsManager Manual 2015v1 Appendix D: Entering electronic times automatically In case you are using MacFinish product for electronic timing, you can export these data to the AthleticsManager database. To see which data is sent, you can open the MacFinish panel through the menu Window > MacFinish. You can still change received results if necessary by overtyping the concerning field. To directly send electronic times from MacFinish, you need at last MacFinish version 6.x, 7.x or 8.x. Set-up The diagram below explains how the communication works between the different pieces of software and how your set-up has to be. The COM-connection works through a serial connection, the UDPconnections work through a network. There are various set-ups possible: you can install all software on one system or you can install the different software parts on different systems, according to your preference. MacFinish 6.x MacFinish 7.x MacFinish 8.x COM AthleticsManager Serial- Link UDP AthleticsManager Server UDP AthleticsManager Client Figure: The required connections for the link. When you want to use MacFinish 6.x, you first start AthleticsManager Serial-Link, you choose a desired AthleticsManager Server, and the COM-port you want to use. Figure : Use AthleticsManager Serial-Link to connect with MacFinish 6.x 74 AthleticsManager Manual 2015v1 The use of the electronic timing program is not discussed here. You can find an overview of how the communication works in MacFinish 7.x and MacFinish 8.x, via the direct link. For the MacFinish 6.x it is the same process, but then you select Hytek compatible as meetmanager. Setting up MacFinish for use with AthleticsManager First make sure that the AthleticsManager Server is running. Start MacFinish, and go to the menu File > Preferences. In the tab page Meetmanager you select the meetmanager AthleticsManager. Two new fields will appear: Server and Competition. For Server you choose the name that you gave your AthleticsManager Server (just like selecting in the AthleticsManager Client). For Competition you choose the meet name where you want to work with. Figure : The properties in MacFinish to use AthleticsManager. Sending electronic times of MacFinish to AthleticsManager Start just like you usually work with MacFinish. After you have made your photofinish image, the import dialogue window will automatically appear on your screen. If not, you click on the menu Document > Import. Choose the heat that belongs to this photofinish image. The participations are imported in MacFinish and the file name is automatically placed correctly. Place in MacFinish the time lines on the correct locations, so the electronic times are registered. When all the times are registered, you click in the menu on Document > Export. The electronic times are now exported to AthleticsManager. Figure : Dialogue window to import an AthleticsManager heat into MacFinish. 75 AthleticsManager Manual 2015v1 When you had an opened AthleticsManager Client, you will first see a notification in the MacFinish panel that the electronic times are available. These will then be processed in a few seconds in the according heat. ------------------------------ 76 AthleticsManager Manual 2015v1 Appendix E: Formula for point calculation AthleticsManager calculates the points based on an implemented formula: result= POINTSCALC( ROUND( prestation× correction) ) result the result as individual points; POINTSCALC the point calculation function; ROUND the rounding function; prestation the delivered performance (physical measurement result); correction the correction factor which has to be multiplied with the performance if necessary. The correction factor Correction depends on the participation category. The correction factor of that participation category is only taken into account, if the correction factor of that specific participation category is added in the round properties (Properties > Point calculation). In all other cases, this is simply the value ‘1’. The rounding function ROUND depends on the precision of this event type. The dependencies of the correction factor have an indirect effect on the result of this function. The point calculation function POINTSCALC depends on the event type (various formulas per event type), the participation category (various parameters per category for the formula of the event type) and the used pointcalculation method in the round properties. The dependencies of both the correction factor and the rounding function also have an indirect effect on the result of this function. --------------------------------------- 77

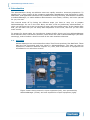
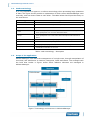
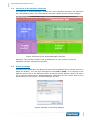
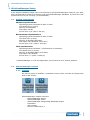

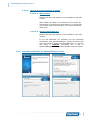

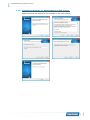

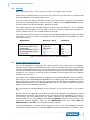

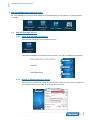
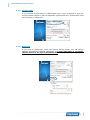
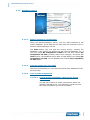

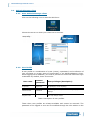
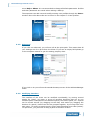
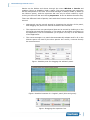
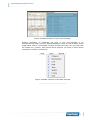

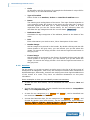

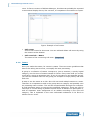
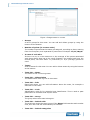

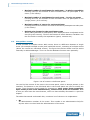

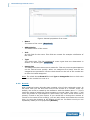
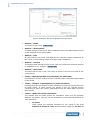
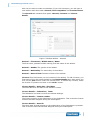
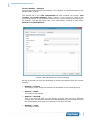
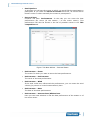
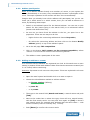
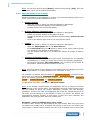
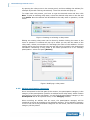
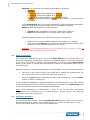
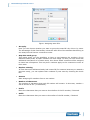
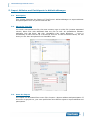


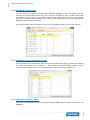
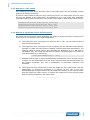


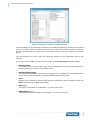
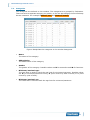
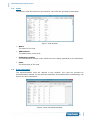
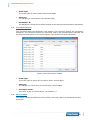
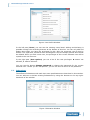
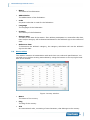
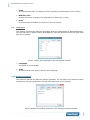


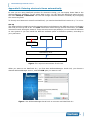
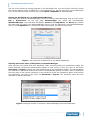
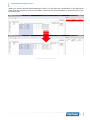


![English [2014v1]](http://vs1.manualzilla.com/store/data/005775879_1-a83e57144a66539570f80a48a6e80397-150x150.png)
![English [2012v1]](http://vs1.manualzilla.com/store/data/005666127_1-015c2c1b906ab908850f1f1f8721a849-150x150.png)


![English [2012v1]](http://vs1.manualzilla.com/store/data/005770981_1-8c196de42073f8db3e58cd387e9490be-150x150.png)

![English [2012v1]](http://vs1.manualzilla.com/store/data/005857990_1-ba5aca9850e0a37c2eb2dd5a5d355973-150x150.png)