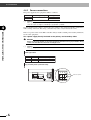
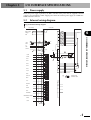
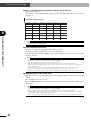
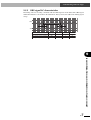
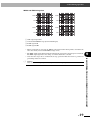
1
YAMAHA SINGLE-AXIS ROBOT CONTROLLER
Pico type
PRC
User’s Manual
ENGLISH
E
E82-Ver. 1.05
General Contents
Chapter 1
INTRODUCTION ....................................................................................... 1-1
Chapter 2
ABOUT SAFETY .......................................................................................... 2-1
2.1 Safety items ................................................................................................................. 2-1
2.1.1 Signal word meaning .......................................................................................................................... 2-1
2.1.2 Safety instructions .............................................................................................................................. 2-1
2.2 Before using the robot controller ................................................................................. 2-5
Chapter 3
OVERVIEW ................................................................................................. 3-1
3.1
3.2
3.3
3.4
3.5
3.6
3.7
Chapter 4
Concept ....................................................................................................................... 3-1
Features ....................................................................................................................... 3-1
System configuration ................................................................................................... 3-2
Connector names and functions .................................................................................. 3-3
Point function .............................................................................................................. 3-3
Communicating with equipment ................................................................................. 3-4
Sequence from purchase to operation ......................................................................... 3-4
INSTALLING THE CONTROLLER ................................................................ 4-1
4.1 Before installing the controller .................................................................................... 4-1
4.1.1 Before unpacking ............................................................................................................................... 4-1
4.1.2 Unpacking .......................................................................................................................................... 4-1
4.1.3 Installation and operating environment ............................................................................................... 4-1
4.2 Installation ................................................................................................................... 4-3
4.3 Wiring ..........................................................................................................................4-4
4.3.1 Cable wiring ....................................................................................................................................... 4-4
4.4 Connections ................................................................................................................. 4-5
4.4.1
4.4.2
4.4.3
4.4.4
4.4.5
4.4.6
4.4.7
4.4.8
Connecting to the robot ......................................................................................................................
Connecting to the I/O connector ........................................................................................................
Power connections .............................................................................................................................
Grounding connections ......................................................................................................................
Preventing faulty operation due to noise .............................................................................................
Other wiring precautions ....................................................................................................................
Cables ................................................................................................................................................
Power cable specifications .................................................................................................................
4-5
4-5
4-6
4-7
4-7
4-8
4-8
4-8
4.5 Connecting to a PC ...................................................................................................... 4-9
4.5.1 Connecting with a PC interface unit ................................................................................................... 4-9
Chapter 5
I/O INTERFACE SPECIFICATIONS .............................................................. 5-1
5.1
5.2
5.3
5.4
5.5
Power supply ............................................................................................................... 5-1
External wiring diagram ............................................................................................... 5-1
CN1 DC characteristics ............................................................................................... 5-2
To customers only using serial communication ............................................................ 5-2
I/O connector signal table ........................................................................................... 5-3
5.5.1 Input signal description ...................................................................................................................... 5-3
5.5.2 Output signal description ................................................................................................................... 5-5
5.6 I/O cable specifications ............................................................................................... 5-7
5.7 Connecting to a PLC using 24V DC power supply ....................................................... 5-8
5.7.1 Connecting to a Mitsubishi PLC model AY50 output unit .................................................................... 5-8
5.7.2 Connecting to a Mitsubishi PLC model AX40 input unit ..................................................................... 5-8
1
Chapter 6
SERIAL COMMUNICATION ....................................................................... 6-1
6.1 Overview .....................................................................................................................6-1
6.2 Serial communication specifications............................................................................ 6-1
6.3 Serial communication cable specifications .................................................................. 6-1
6.3.1 When connecting to external devices such as PCs .............................................................................. 6-1
6.3.2 Connecting PRC units in a daisy chain ............................................................................................... 6-2
6.4 Setting the rotary switch .............................................................................................. 6-2
6.5 Setting the DIP switch ................................................................................................. 6-3
6.6 Setting for a daisy chain between PRC units ................................................................ 6-4
6.6.1 When using two PRC units in a daisy chain ........................................................................................ 6-4
6.6.2 When using three or more PRC units in a daisy chain ......................................................................... 6-5
Chapter 7
PARAMETERS .............................................................................................. 7-1
7.1 How to set the parameters ........................................................................................... 7-1
7.2 Cautions when setting the parameters ......................................................................... 7-1
7.3 Parameter description .................................................................................................. 7-2
Chapter 8
POINT ......................................................................................................... 8-1
8.1 Overview .....................................................................................................................8-1
8.2 Point trace movement .................................................................................................. 8-1
8.2.1
8.2.2
8.2.3
8.2.4
8.2.5
Absolute position movement ..............................................................................................................
Relative position movement ...............................................................................................................
Torque movement ..............................................................................................................................
Changing speed during movement .....................................................................................................
Additional movement .........................................................................................................................
8-1
8-1
8-2
8-2
8-2
8.3 Point data .................................................................................................................... 8-3
8.3.1 Cautions on setting the speed, acceleration and deceleration ............................................................. 8-3
8.3.2 Cautions on setting the position, INPOS width, and Torque distance .................................................. 8-3
8.3.3 Point data table information ............................................................................................................... 8-4
Chapter 9
BASIC OPERATION AND OPERATION TIMING CHART ........................... 9-1
9.1 Power-on ......................................................................................................................9-1
9.1.1
9.1.2
9.1.3
9.1.4
Normal operation at power-on ...........................................................................................................
When emergency stop was triggered during power-on .......................................................................
When interlock (LOCK) was activated during power-on ......................................................................
Alarm status (cancelable alarm) ..........................................................................................................
9-1
9-3
9-4
9-5
9.2 Performing return-to-origin ......................................................................................... 9-6
9.2.1 Normal return-to-origin ...................................................................................................................... 9-6
9.2.2 ORG signal AC characteristics ............................................................................................................ 9-7
9.2.3 Return-to-origin operation error .......................................................................................................... 9-8
9.3 Positioning operation ...................................................................................................9-9
9.3.1
9.3.2
9.3.3
9.3.4
9.3.5
9.3.6
9.3.7
Normal positioning operation ............................................................................................................. 9-9
START signal AC characteristics ........................................................................................................ 9-10
Positioning with a short movement time ........................................................................................... 9-11
When movement is continuous ........................................................................................................ 9-12
Canceling an emergency stop/alarm during movement ..................................................................... 9-16
Canceling an interlock during movement ......................................................................................... 9-18
Cases where movement commands cannot be run ........................................................................... 9-20
9.4 Torque movement ...................................................................................................... 9-21
9.4.1
9.4.2
9.4.3
9.4.4
9.4.5
9.4.6
Normal torque movement ................................................................................................................
When the robot moves in same direction (dribble) after torque movement ends ...............................
When the robot moves in reverse direction after torque movement ..................................................
When the robot has pushed past target position ...............................................................................
When held in position at interlock during torque movement ............................................................
When alarm or EMG were input during torque movement ...............................................................
9-21
9-24
9-25
9-26
9-27
9-29
9.5 Zone output operation ............................................................................................... 9-31
9.5.1 Normal zone output operation ......................................................................................................... 9-31
2
Chapter 10 SPECIFICATIONS ...................................................................................... 10-1
10.1 Basic specifications .................................................................................................... 10-1
10.2 External view ............................................................................................................. 10-2
10.3 Robot No. ..................................................................................................................10-2
Chapter 11 Troubleshooting ........................................................................................ 11-1
11.1 When problems occur ............................................................................................... 11-1
11.2 Checking the alarm and countermeasure .................................................................. 11-1
11.2.1 Alarm display ................................................................................................................................... 11-1
11.2.2 Alarms not requiring restart .............................................................................................................. 11-5
11.3 Dealing with problems based on trouble symptom .................................................... 11-6
11.3.1 Robot operation ................................................................................................................................ 11-7
11.3.2 Parallel I/O ..................................................................................................................................... 11-13
11.3.3 Others ............................................................................................................................................ 11-17
Chapter 12 MAINTENANCE AND WARRANTY .......................................................... 12-1
12.1 Maintenance .............................................................................................................. 12-1
12.2 Warranty ...................................................................................................................12-2
12.3 Disposal ..................................................................................................................... 12-2
3
MEMO
4
Chapter 1
INTRODUCTION
At this time our sincere thanks for your purchase of the YAMAHA PRC series robot controller. This manual describes installation and operation methods for use with the YAMAHA PRC series robot controller. Read this manual
and related equipment manuals carefully to make sure that operation is both correct and safe when using the YAMAHA
PRC series robot controller.
1.Keep this manual near the machine for the required installation, operation and adjustments.
2.Make the required installation, operation and adjustments while viewing the CD-ROM
version of the manual on a PC.
3.Make the required installation, operation and adjustments after extracting the necessary portions of the manual beforehand from the CD-ROM and making a printout.
Refer to the individual instruction manual for information on the robot unit, support software and
teaching box.
The YAMAHA robot controllers and robots are manufactured as a standard piece of industrial equipment. The following points must therefore be kept in mind during use.
The YAMAHA robot controllers and robots:
• Cannot be used with devices such as medical treatment equipment that are critical to
human life.
• Cannot be used in or with equipment exerting major effects either socially or publicly.
• Cannot be used in environments where it will be subject to vibrations such as on ships
or in vehicles.
• Cannot be modified or altered in any manner.
Before using this robot controller (for example, before installing, making wiring connections, operating, servicing or inspecting), read this manual carefully to ensure safe and correct use. After gaining thorough understanding of the equipment, safety information and precautions, use this robot
controller.
Every effort was made to ensure that this manual is accurate and complete. However, please contact
us if any errors, misprints or omissions are noticed.
1
1-
INTRODUCTION
After reading this manual store it carefully and make sure it is always available to the end user.
Use any of the following approaches for installing, operating and adjusting this YAMAHA robot
controller and keep it available for quick use when needed
1
MEMO
1-
2
Chapter 2
ABOUT SAFETY
2.1
Safety items
2.1.1 Signal word meaning
To use the YAMAHA robot and controller safely and correctly, always comply with the safety rules
and instructions described in this manual or shown on warning labels.
This manual classifies safety caution items into the following alert levels, using the signal words
“WARNING” and “CAUTION”.
w
c
WARNING
Indicates a potentially hazardous situation which, if not avoided, could result in death or serious
injury.
CAUTION
Indicates a potentially hazardous situation which, if not avoided, may result in minor or moderate injury, or may
damage the robot controller or peripheral equipment.
Note that the items classified into “CAUTION” might result in serious injury depending on the situation or
environmental conditions.
Always comply with the CAUTION and WARNING instructions as these are essential for safety.
2.1.2 Safety instructions
To use the YAMAHA robot safely and correctly, be sure to follow the safety rules and instructions
described in this manual or shown on warning labels. Failure to follow the necessary safety instructions or incorrect handling could result in death or serious injury to the user (persons installing,
operating, servicing or adjusting the robot), as well as malfunction and damage to the robot and/or
robot controller.
[General precautions]
w
WARNING
Do not use in explosive atmosphere. Personal injury or fire may result.
w
WARNING
Never touch this robot controller while power is being supplied to it. Electrical shock may result.
w
w
c
c
c
WARNING
Do not perform work such as wiring, maintenance and inspection while power is being supplied
to the robot controller. Always turn the power off and then wait for at least 1 minute before
beginning the work to avoid electrical shock.
WARNING
When moving, installing, wiring, operating, servicing or inspecting the robot controller, only a
person with required expertise may perform the work. Electrical shock, injury or fire may result.
CAUTION
Always use the controller and robot within the specifications listed in this manual to avoid electrical shock,
injury or damage.
CAUTION
Do not use the controller and robot if they are damaged, as personal injury or fire may result.
CAUTION
Use the controller and robot in a specified combination. An incorrect combination may cause fire or operation
failure.
1
2-
2
ABOUT SAFETY
Before using this YAMAHA robot controller, be sure to read this manual and related equipment
manuals carefully, and follow their instructions to ensure adequate safety and correct handling of the
PRC controller and robot.
Warning and caution items listed in this manual relate to this YAMAHA PRC series robot controller.
When this robot controller is used in a robot controller system, please take appropriate safety measures needed by the user’s individual system.
2.1 Safety items
c
2
CAUTION
The robot controller and robot become hot during operation. Be careful to avoid burns.
[Design precautions]
ABOUT SAFETY
w
w
c
WARNING
For details on the operating status of the robot controller, refer to this manual and related
equipment manuals. Design and configure the system including the robot controller so that it will
always work safely.
WARNING
The robot controller has an emergency stop terminal to trigger emergency stop. Using this
terminal, prepare a physical interlock circuit so that the system including the robot controller will
work safely.
CAUTION
Do not bundle control lines or communication cables together or in close contact with the robot controller main
circuit or power lines. Noise in the main circuit or power lines may cause faulty operation or malfunction.
[Installing precautions]
w
w
c
c
c
c
c
WARNING
Securely install the connectors into the robot controller, and when wiring the connectors, make
the crimp, press-contact or solder connections correctly, using the tool specified by the manufacturer.
WARNING
Always shut off the power supply externally before starting installation or wiring work. Failure to
shut off the power could lead to electric shock or product damage.
CAUTION
Use the robot controller within the environment specifications listed in this manual. Using the controller in an
environment outside the specification range could lead to electric shock, fire, malfunction, product damage or
deteriorated performance.
CAUTION
Tighten the screws on the robot controller firmly to make secure connections.
CAUTION
Never directly touch the conductive sections or electronic parts other than the rotary switches and DIP switches
on the outside panel of the robot controller.
CAUTION
Securely install each connection cable connector into the receptacles or sockets. Poor connections will cause
faulty operation or malfunction.
CAUTION
Provide clearance between this controller and the inner surface of the control board or other equipment,
according to the distance specified in this manual. Insufficient clearance may cause faulty operation or
malfunction.
[Wiring precautions]
w
w
2-
2
WARNING
Always shut off the power supply externally before starting installation or wiring work. Failure to
shut off the power could lead to electric shock or product damage.
WARNING
Always make a secure connection to the ground terminals on the controller and robot to prevent
electrical shock.
2.1 Safety items
w
w
c
c
c
c
c
WARNING
When making connections to the power cable, follow the wiring diagram or instruction listed in
this manual to avoid electrical shock or fire.
CAUTION
Use caution not to allow foreign matter such as cutting chips and wire scraps to enter the robot controller.
Electrical shock or fire may result.
CAUTION
Always store the cables connected to the robot controller in a conduit or clamp them securely in place. If the
cables are not stored in a conduit or properly clamped, excessive play or movement, or mistakenly pulling on the
cable may damage the connector or cables, and poor cable contact may lead to faulty operation or malfunction.
CAUTION
When disconnecting the cable, detach by holding the connector itself and not by tugging on the cable. Loosen
the screws on the connector (if fastened with the screws), and then disconnect the cable. Detaching by pulling on
the cable itself may damage the connector or cables, and poor cable contact may lead to faulty operation or
malfunction.
CAUTION
Do not measure the insulation resistance, withstand voltage and noise immunity to avoid damage to the robot
controller.
CAUTION
When making wiring connections, follow the electrical installation technical standards or instruction listed in
this manual. Incorrect wiring may result in fire or damage by fire.
CAUTION
This robot controller does not have an over-current protective function. Make correct wiring securely so the
power line is not shorted. Incorrect wiring may cause damage to the controller or motor.
[Start-up and maintenance precautions]
w
w
w
w
w
WARNING
When operating the robot, only personnel trained in safety and robot operation may operate it.
WARNING
Never allow anyone to enter the robot movement range when the robot controller is turned on.
Serious accident including fatal injury or death could otherwise result. We recommend installing
a safety enclosure or fence or a gate interlock using area sensors to keep any person from
entering within the movement range of the robot.
WARNING
This robot controller is not designed for explosion-proof. Do not use it in locations exposed to
inflammable gases, gasoline or solvent that could cause explosion or fire.
WARNING
Never disassemble or modify the robot controller. This may lead to breakdowns, malfunction,
injury or fire. When parts used in the robot controller must be replaced or repaired, consult our
sales office or representative for the correct procedure.
WARNING
When using ferrite cores for noise elimination, fit them to the power cable as close to the robot
controller as possible, to prevent faulty operation or malfunction due to noise.
3
2-
2
ABOUT SAFETY
c
WARNING
Use caution to prevent damage to the cables. Do not apply excessive stress to the cables, place a
heavy object on them or allow them to be pinched. Electrical shock may result.
2.1 Safety items
w
2
ABOUT SAFETY
c
WARNING
When performing maintenance of the robot controller under instructions from YAMAHA, turn off
the robot controller and wait for at least 1 minute. Some parts in the robot controller may be hot
or applied at a high voltage shortly after operation, so burns or electrical shock may occur if
those parts are touched.
CAUTION
Make sure that the power supply voltage is within the specification range. Using a voltage outside the specification range may cause breakdown or malfunction.
[Disposal precautions]
c
2-
4
CAUTION
When disposing of this product, handle it as industrial waste.
2.2 Before using the robot controller
2.2
Before using the robot controller
Please be sure to perform the following tasks before using the robot controller.
Failing to perform these tasks may cause abnormal operation (vibration, unusual noise).
2
2. When connecting robot cables to the robot controller
Be sure to keep robot cables separate from the robot controller power connection lines and other
equipment power lines. Using in close contact with lines carrying power may cause malfunction
or abnormal operation.
5
2-
ABOUT SAFETY
1. When connecting the power supply to the robot controller
Always make a secure connection to the ground terminal on the robot controller to ensure safety
and prevent malfunction due to noise. See chapter 4, “Installing the controller”.
MEMO
2-
6
Chapter 3
OVERVIEW
3.1
Concept
This PRC series robot controller was created to combine the latest in control technology with design
technology for high performance, precision compact motors with the goal of producing a new type of
intelligent robot controller that is easy to use and low in cost.
3.2
Features
3
Fig. 3-1
OVERVIEW
Application example
• Cylinder
• General industrial machine
• Semiconductor manufacturing
equipment
Start command by
parallel I/O
or
PRC
T4P
Position command by
serial I/O (RS-485)
PRC
T5P
PRC
T5P
• Position data stored beforehand in the controller via a serial I/O can be started and run by a Start
command and specifying a point No. from a parallel I/O. An ordinary parallel I/O can control
operation so hardware costs are kept low.
• Has a thrust force control function and teaching function.
• Speed can be changed from any position during movement.
• Current flow in motor is regulated according to the motor load so a minimum of heat is emitted
and operation is highly efficient. A special feature is that the motor yields large torque in the low
speed range compared to other motors so system size is kept compact.
• In-house technique gives motor a holding torque when stopped so there is no tiny vibration as
found in conventional servos.
• Controller has internal holding brake control and regenerative control functions.
1
3-
3.3 System configuration
3.3
System configuration
The PRC series controller is made up of the following major components.
Fig. 3-2 System layout
External control (PLC, etc.)
OVERVIEW
3
PWR
ALM
PWR
ALM
CN1
CN1
CN5
PC
or
COM
CN6
CN5
COM
CN6
Multi-drop
(multiple units can be connected)
Front view
TP-2
CN2
CN3
Single-axis robot
(T4P/T5P)
CN4
Bottom view
3-
2
Power supply
3.4 Connector names and functions
3.4
Connector names and functions
Fig. 3-3 Parts name
3
q PWR
w ALM
PWR
ALM
OVERVIEW
e Rotary switch
i CN2
CN2
r COM
CN1
o CN3
t CN1
CN5
CN3
COM
CN6
y CN5
u CN6
!0 CN4
CN4
Bottom view
Front view
Connector names and indicators
Connector name or indicator
Purpose
Function
q PWR
Lights up when power is turned on.
w ALM
Lights up or flashes if an alarm is issued.
e Rotary switch
Use to make the controller address setting.
r COM
t CN1
Connector for RS-485 communication.
I/O port
Signal input/output connector.
u CN6
Communication
connector
Use these connectors to control two or more robots from one PC.
i CN2
Encoder
Connector for motor feedback and sensor signals.
o CN3
Motor
Connector for driving the motor.
!0 CN4
Power
Connector for supplying power to the controller.
y CN5
3.5
Point function
Point positions and operating types can be assigned to a maximum of 32 points.
The assigned point positions and operating types are stored in the nonvolatile memory inside the
controller. These can be run by sending operating signals from CN1, making motion control with a
PLC easier. No special controller is required so system costs can be kept low.
Use the teaching box TP-2 or support software YPB-Win installed on a PC to edit point (TP-2 and
YPB-Win are options). See the TP-2 manual or support software manual for the operation method.
3
3-
3.6 Communicating with equipment
3.6
Communicating with equipment
In the Pico series, data can be sent over the RS-485 line. Here, one PC is connected to one PRC unit
using support software instead of a teaching box to perform on-line operations such as editing of
parameters and point data and robot control. Different addresses can be set for multiple PRC units
and a daisy chain formed via the CN5 and CN6 connectors so that up to a maximum of 16 PRC units
can be connected to one PC to allow editing parameters and point data and operating the robot with
support software.
3
OVERVIEW
3.7
Sequence from purchase to operation
The basic sequence from purchase to actual operation is shown below.
Operation procedures are shown in detail in each section.
See the support software manual or teaching box manual for information on how to operate (creating
point data and loading data, etc.).
What to do
Setup
Install the controller.
Wiring
Make connections to power supply, ground terminal and peripheral equipment.
Power ON
Data setting
Operation
3-
4
Turn on power to the controller.
Create point data and load the data into the controller.
Operate the robot.
Chapter 4
INSTALLING THE CONTROLLER
4.1
Before installing the controller
4.1.1 Before unpacking
This product is a precision instrument so take plenty of care when unpacking. In the unlikely event
you find large scratches, damage or dents on the package, promptly contact us without opening the
package.
4.1.2 Unpacking
Be careful not to apply shock or impact to the controller unit when opening the package. After opening the package, check the accessory items using the list below.
Standard items
Optional items
c
Qty
PRC main unit
1
Power cable
1
Motor cable
1
Encoder cable
1
I/O flat cable
1
User's Manual (CD-ROM version)
1
RS485 conversion adapter (with cable) HA-2
1
RS232C communication cable
1
Link cable
-
Support software installation disk
1
CAUTION
Be careful not to drop the package and/or its contents when opening it. Dropping it may cause injury as well as
scratch and damage the equipment. So take adequate precautions during handling.
4.1.3 Installation and operating environment
Using this controller under the wrong operating conditions will cause accidents due to equipment
breakdowns. Use while observing the following points.
■ Ambient operating temperature
If installed in a cramped or narrow location, the controller itself and peripheral equipment might
generate heat, that raises the surrounding temperature and eventually causes the equipment to
malfunction, run out of control or degrade the performance specifications. Carefully consider the
installation location and keep the controller ambient temperature to below 55°C.
To ensure reliability and a long service life, using the controller in surroundings at a temperature
below 40°C is recommended.
Even in cases where heat convection or heat radiation is likely to increase temperature, you should
always keep the controller ambient temperature within 55°C.
■ Storage temperature
Store in a location not exposed to direct sunlight and within a fixed temperature range (-20°C to
+65°C).
If storing the controller for long periods of time (3 years or more) then consult with us beforehand. Capacity of the electrolytic condensers will drop after extended periods of storage and lead
to equipment breakdowns.
1
4-
INSTALLING THE CONTROLLER
Product name
4
4.1 Before installing the controller
■ Ambient operating humidity
Operate within a specified humidity and temperature range.
Controller : 0°C to 55°C, within 90% RH (no condensation)
Robot
: 0°C to 40°C, within 90% RH (no condensation)
■ Storage humidity
Store in a location not exposed to direct sunlight and within a specified humidity and temperature
range (within 90% RH (no condensation)).
■ Vibration and impact
Do not apply strong shock or impact to the controller. Install in a stable location having little
vibration.
If installing at a location near a source of vibration, install a shock absorber at the base so that the
vibration is not applied directly to the controller.
INSTALLING THE CONTROLLER
4
■ Atmosphere (gas, dust, etc.)
Absolutely never use in locations having corrosive gas. Long term use in such environments will
cause connection problems in electrical contacts (such as in connectors) and lead to equipment
breakdowns.
Do not use in locations having explosive or combustible gases. Using in such environments may
lead to accidents involving fire or explosions.
Do not use in locations with excessive dust or oil mist. The dust or oil mist may attach to the
equipment causing insulation deterioration or electrical leakage from conductive components which
might damage the controller.
■ Noise
When located near large sources of noise, the noise might enter the line signal or power supply
circuit through induction and cause faulty operation or malfunction. If there is a possibility of
external noise penetration, then install a noise filter, have the line wiring checked and take measures to prevent noise generation.
4-
2
4.2 Installation
4.2
Installation
Prepare a location beforehand taking the various conditions for system layout into account and where
it will be easy to service the equipment. Be sure to read the cautions listed in “4.1.3 Installation and
operating environment” and "4.4.6 Other wiring precautions", and also read the following caution
points.
Fig. 4-1 Controller installation diagram
4
50mm or more
PWR
ALM
CN1
CN1
CN5
COM
CN6
CN5
INSTALLING THE CONTROLLER
PWR
ALM
Allow a space of at least 50 mm
on the upper and lower sides of
the controller so that there are
no obstructions to the flow of
air from equipment emitting
heat.
Install a fan to circulate the air if
heat tends to accumulate above
the controller.
When two or more controllers
are used, install at least a space
of 10 mm between the
controllers.
COM
CN6
10mm or more
50mm or more
30mm or more
c
c
c
c
c
CAUTION
Do not apply impact or loads to the connectors on the front or bottom of the controller. This may damage the PC
boards inside the controller.
CAUTION
Allow extra slack when routing the cables and do not place a load on the connector by pulling on the cables.
CAUTION
Avoid installing the controller in locations where oil or water might get on it. If installation in such locations is
unavoidable then use a water-proof box (with cleaning unit) to house the controller.
CAUTION
Install the controller in a stable, level location. Do not install facing any direction other than specified. Also
avoid installing in locations with large amounts of vibration.
CAUTION
Avoid installing in locations where ambient temperatures are high.
3
4-
4.3 Wiring
4.3
Wiring
4.3.1 Cable wiring
Fig. 4.2 External wiring connection layout
4
INSTALLING THE CONTROLLER
Connection to
PLC
I/O flat cable (1)
Link cable (5)
Connection to
other PRC
controller
Link cable (5)
Power
supply
Noise filter
Power cable (4)
Motor cable (3)
Power input line
Encoder cable (2)
Robot
Install the cables as shown above.
4-
4
4.4 Connections
4.4
Connections
4.4.1 Connecting to the robot
Connect the robot cables to the connectors CN2 and CN3 on the bottom of the controller as shown.
w
WARNING
Turn off the power before making these connections. Otherwise equipment breakdowns might
result.
4
Robot encoder connector (CN2) signal table
Signal name
Pin No.
Signal name
1
A
Encoder A-phase output
Description
7
5V
Encoder power supply 5V
Description
2
A
Encoder A-phase inverted output
8
5G
Encoder power supply 0V
3
B
Encoder B-phase output
9
FG
Frame ground
4
B
Encoder B-phase inverted output
10
SDN
Sensor power supply 24V
5
C
Not used
11
SEN+
Sensor signal
6
C
Not used
12
SEN-
Sensor power supply 0V
INSTALLING THE CONTROLLER
Pin No.
Robot motor connector (CN3) signal table
Pin No.
Signal name
1
A
Motor A-phase
Description
2
A
Motor A-phase inverted
3
B
Motor B-phase
4
B
Motor B-phase inverted
5
BRK+
Brake signal +
6
BRK-
Brake signal -
4.4.2 Connecting to the I/O connector
Connect external equipment such as the PLC (programmable logic controller). To control the robot
from external equipment via the I/O port, connect the I/O flat cable (supplied with controller) to the
controller after making the necessary wiring to the I/O flat cable.
For information on the meaning and operation of signals assigned to each terminal on the connector,
see chapter 5, "I/O Interface specifications".
w
WARNING
Turn off the power before making these connections. Otherwise equipment breakdowns might
result.
5
4-
4.4 Connections
4.4.3 Power connections
The power supplied to the equipment shall be as follows.
Model No.
Power supply voltage
Power supply current
PRC 1
DC24V ±10%
1.6Arms
PRC 2
CAUTION
This is power required by the controller itself. Power needed for I/O control must be supplied to the I/O
connector section. See chapter 5, "I/O Interface specifications” for details.
4
Use the supplied power cable to connect the power supply to the connector CN4. Be careful not to
make a wrong connection. The wrong connection may cause a major hazard such as fire.
INSTALLING THE CONTROLLER
c
2.7Arms
There is no power switch on the PRC controller. Always install a suitable power breaker (insulation)
for the entire equipment.
Use a power supply heavily insulated on the primary and secondary sides.
w
c
WARNING
Always set the power breaker for the entire equipment to OFF before doing any installation wiring
on the controller. Otherwise electrical shock might occur.
CAUTION
Always provide ground connections.
CN4 signal table
Pin No.
Signal name
A1
+24V
Controller drive power supply 24V
Description
B1
24GND
Controller drive power supply 0V
B3
FG
Frame ground
Fig. 4-3 CN4 pinout (controller side)
1 2 3
4-
6
CN4
CN3
CN2
B
A
Connector pin No.
4.4 Connections
4.4.4 Grounding connections
The controller uses PWM for controlling the transistors in the main circuit. If the ground wiring is
not correct or inadequate then transistor switching noise will occur. The controller also has internal
electronic circuits such as a CPU so wiring and other measures to prevent external noise are required.
Be sure the wiring and grounding connections are sufficient to prevent trouble such as from circuit
noise.
Make a reliable grounding connection for Type III ground (ground resistance of 100 ohms or less).
Motor frame grounds
Always provide a robot and controller ground at one point.
4
4.4.5 Preventing faulty operation due to noise
Evaluate the following points to prevent faulty operation or malfunctions from noise.
1. Noise filters
If using with parts having an inductive load such as motors and solenoid valves then always install
a noise filter in the power line. Faulty operation or malfunctions might occur if you fail to use a
noise filter.
Fig. 4-4 Noise filter installation diagram
AC input line
Noise filter q
DC24V supply line
24V supply
Noise filter w
PRC
Noise filter q
Always install a noise filter in AC power input lines of 24V power supply units.
Noise filter w
If the power line from the 24V power supply unit to the controller is long or if using with a
component that is a large inductive load and the noise environment is bad, then installing a noise
filter in the 24V power supply line is recommended.
<Recommended noise filter>
NEC Tokin
: GT2000 Series
TDK Corporation: ZAG-11S Series
2. Others
• Install the noise filters, controller and host controller in close proximity to each other.
• Always install a surge protector when using coils such as relays, electromagnetic contacts,
inductive motors or brake solenoids, etc.
• Do not run power supply, motor lines and signal lines bundled together in the same duct.
• Do not bundle noise filters in the primary cable, with the secondary cable.
• Do not use a long ground line.
7
4-
INSTALLING THE CONTROLLER
Cable grounds
If motor wiring is routed through a metal conduit or metal box, then always be sure to ground
these metal portions. Provide a ground at one point.
4.4 Connections
4.4.6 Other wiring precautions
q Miswiring
A miswiring in the controller or robot might damage the equipment so take adequate care to
ensure that the wiring was performed correctly.
w Fuses
The controller contains fuses. These fuses are for the purpose of preventing secondary damage if
the controller is damaged due to a short circuit in the power supply or motor. They are not intended to protect the controller itself.
4
INSTALLING THE CONTROLLER
e Emergency stop circuit
Always install an external emergency stop circuit to instantly stop operation and shut down the
power.
4.4.7 Cables
Use the following cable sizes and wire types.
Cable No.
Name
Type
Cable 1
I/O flat cable
Standard item
Cable 2
Encoder cable
Standard item
Cable 3
Motor cable
Power supply cable
Ground cable
Standard item
Standard item
Not supplied
Link cable
Optional items
Cable 4
Cable5
Note
Cable length
1.27mm pitch flat cable
AWG28
2m
Twisted-pairshielded
cable
AWG22
AWG20
AWG20 or thicker wire
Twisted-pairshielded
cable
4.4.8 Power cable specifications
Power cable (KX1-M532A-000)
B3
Pin No.
Signal name
A1
+24V
B1
24GND
B3
FG
A1
B1
See "4.4.3 Power connections" for power supply connections.
4-
8
10m, 5m, 3.5m
10m, 5m, 3.5m
2m
20cm
4.5 Connecting to a PC
4.5
Connecting to a PC
Parameter settings and the controller status can be loaded from a PC interface unit (sold separately).
4.5.1 Connecting with a PC interface unit
Fig. 4-5 Wiring diagram
PC
4
PRC
RS485 adapter HA-2
(with cable)
COM
D-Sub 9-pin female
connector
Function
D-Sub 9-pin female
connector
• Point data creation
• Teaching function
• I/O monitor function
D-Sub 9-pin male
connector
D-Sub 9-pin male
connector
• Point/run function
• Data save into file and load from file
* Support software is not supplied with this PRC unit.
* The communication connector on the controller side should be plugged into the COM port.
9
4-
INSTALLING THE CONTROLLER
RS232C communication cable
MEMO
4-
10
Chapter 5
I/O INTERFACE SPECIFICATIONS
5.1
Power supply
Beside the power supply required by the PRC controller itself, power must be supplied to the I/O
connector for external I/O control. Supply power from the external power supply to +COM and COM on the I/O connector.
5.2
External wiring diagram
Fig. 5-1 External wiring diagram
User device
Controller
CN4
PRC
6
CN2
Pow
Input supply
voltage
24V
1
2
A
Pow
A
N
B
B
C
CN5,6
CTXD
5V
1
2
RTXD
CTXD
Vcc
5G
CRXD
4
FG
5
OPTICAL
ENCORDER
2
3
4
I/O INTERFACE SPECIFICATIONS
C
1
5
6
7
8
9
Vcc
GND
START2
3
5 GND
CN2
6
SEN+
SEN+ 11
CN1
+COM
START
PNT1
PNT2
PNT3
3
SDN 10
12
4
5
SEN-
PNT5
EMG
ALMCLR
ORG
ACK
ROTATE
A
7
B
8
B
9
BRK-
ZONE
EMGMON
ORGMON/LOCKMON
INPOS
-COM
2
3
4
5
6
Hold brake (DC 24V)
11
Motor
Twisted-pair
shielded cable
12
13
COM
14
15
RTXD
2
3
16
GND
END
1
10
CTXD
ALM
External
sensor
CN3
6
BRK+
LOCK
-
SEN-
A
PNT4
+
1
5
17
18
RTS
7
19
20
2
1
5-
5.3 CN1 DC characteristics
5.3
CN1 DC characteristics
Circuit
+COM
Specifications
Input signal
4.7kΩ
• DC 5V to 24V±10%
• Response time : 1ms
Output signal
• DC 30V . 30mA or less
5
• Response time
ON : 1ms
I/O INTERFACE SPECIFICATIONS
-COM
5.4
OFF : 30ms
To customers only using serial communication
When using only serial communication, the EMG input must be shorted to the LOCK input on the I/
O connector. If the LOCK input is open an interlock occurs. If the EMG input is open an emergency
stop is triggered, so return-to-origin and point trace are disabled.
Fig. 5-2
+5 to +24V
+COM
LOCK
CN1
EMG
-COM
OV
External DC power supply
5-
2
PRC
5.5 I/O connector signal table
5.5
I/O connector signal table
In the I/O connector provided as a standard feature of the PRC controller, one signal is assigned to
each terminal on the connector. The table below gives the names and descriptions of signals assigned
to each terminal and the pin No. A detailed explanation is given in “5.5.1 Input signal description”
and “5.5.2 Output signal description”.
No.
Pin No.
1
A1
+COM
Signal name
I/O port common supply voltage +5V to 24V
Description
Input/output
2
A2
-COM
I/O port common supply voltage 0V
3
A3
START
Point start signal
Input
4
A4
PNT1
5
A5
PNT2
6
A6
PNT3
Specify point number. *1
Input
7
A7
PNT4
8
A8
PNT5
-
A9
LOCK
Interlock signal
Input
A10
EMG
Emergency stop signal
Input
11
B1
ALMCLR
Alarm reset signal
Input
12
B2
ORG
Return-to-origin start signal
13
B3
ACK
Response signal to ORG and START
Output
14
B4
ROTATE
Motor drive status output signal
Output
15
B5
ALM
Alarm status output signal
Output
16
B6
ZONE
Position output signal
Output
17
B7
END
Normal end output signal
Output
18
B8
EMGMON
Emergency stop status output signal
Output
q ORGMON
q Return-to-origin completion output signal
w LOCKMON *2
w Interlock status output signal
INPOS
Positioning completion output signal
19
B9
20
B10
I/O INTERFACE SPECIFICATIONS
9
10
5
Input
Output
Output
*1: For information on how to designate the point data, see “8 Point”.
*2: This is set to ORGMON at the factory. To use in LOCKMON, change the parameter.
5.5.1 Input signal description
To find more information on the timing chart, see “9. Basic operation and timing chart”.
The term “ON” indicates closed contacts while the term “OFF” indicates open contacts.
■ START (Start command : Pin No. A3)
This is a run signal for the movement command.
The movement command set in the point No. is run at the rise (OFF to ON) of the start signal
n
NOTE
• There is no reply to the ACK output signal if executing the command is already impossible.
• Always turn the start signal off if there is no ACK response within the specified time.
3
5-
5.5 I/O connector signal table
■ PNT 1 to 5 (Point signal designation command: Pin No. A4 to 8)
Specifies the point No..
The point No. is specified with a binary input as shown in the table below. Points can be specified
from 0 to 31.
< Point No. setting example>
I/O INTERFACE SPECIFICATIONS
5
n
Point No.
PNT5 (24)
PNT4 (23)
PNT3 (22)
PNT2 (21)
PNT1 (20)
0
OFF
OFF
OFF
OFF
OFF
1
OFF
OFF
OFF
OFF
ON
2
OFF
OFF
OFF
ON
OFF
13
OFF
ON
ON
OFF
ON
31
ON
ON
ON
ON
ON
NOTE
Point Nos. specified with PNT1 through 5 are only valid for movement with a START input signal. These are not
used for movement via communication.
■ LOCK (Interlock: Pin No. A9)
This serves as an operation stop signal while still in servo-on.
The interlock is triggered when the contacts open (B contact).
If the LOCK input signal turns OFF (contacts open) while the robot is moving, the robot will
decelerate and stop.
n
NOTE
• Movement commands are not accepted while the robot is moving. Serial communication at this time results in a
command error and there is no ACK reply to execution of START.
• After decelerating, the stop position becomes the target position.
• After decelerating and stopping, the interlock condition is canceled by signal ON (contact closed).
• Canceling the interlock input (edge detection of Active to Non Active) also cancels the interlock command set by
serial communication.
• Interlock is triggered when a logic OR condition from both the I/O port and serial communication is met.
• If the power is turned on with the interlock triggered, then the unit starts up in emergency stop.
• Reset is not performed after power is turned on, if the LOCK input signal is OFF (contacts open) when restarted.
■ EMG (Emergency stop: Pin No. A10)
This is the emergency stop signal. Emergency stop is triggered when the contacts are opened (B
contact).
The controller then sets to servo-off.
When the EMG input signal turns OFF (contacts open) during robot movement, the robot immediately stops.
n
5-
4
NOTE
• The movement command is not accepted during emergency stop. Serial communication at this time results in a
command error and there is no ACK reply to execution of START.
• When emergency stop is canceled in a state with no ALM issued, the servo turns on automatically.
• When the EMG signal is canceled by serial communication (edge detection of Active to Non Active) the EMG
command set by serial communication is also canceled.
• Emergency stop is triggered when OR conditions are met by serial communication (input) and the I/O entry port.
5.5 I/O connector signal table
■ ALMCLR (Alarm clear: Pin No. B1)
This is the alarm clear signal.
This only clears alarms that can be reset.
Resettable alarms are cleared on detecting the rise (OFF to ON) of the ALM CLR signal.
See “11. Troubleshooting” for more information on alarms.
n
c
NOTE
If an alarm cannot be cleared, try turning the power off and then back on again.
CAUTION
• This is not edge detection.
• Avoid trying to input other signals while the alarm clear signal is input.
5
■ ORG (Return-to-origin input: Pin No. B2)
This is a signal for executing return-to-origin.
Return-to-origin is performed at the rise (OFF to ON) of the ORG signal.
NOTE
• If executing this command is already impossible, then no reply is issued to the ACK output signal.
• Always turn the ORG signal OFF if there is no ACK reply within the specified time.
5.5.2 Output signal description
To find more information on the timing chart, see “9. Basic operation and timing chart”.
■ ACK (Pin No. B3)
This is a reply signal to the start command (START) and return-to-origin command (ORG). No
reply is made to commands that cannot be executed.
n
NOTE
• ACK reply is not made if data for the specified point No. is not registered.
• ACK reply is not made if the movement command is outside the software limits.
■ ROTATE (motor drive: Pin No. B4)
Outputs the motor drive status. Turns on during motor drive. Turns off during stop.
n
NOTE
• The ROTATE signal is output in response to execution of the START or ORG command.
• This is always off during servo-off.
• This is off while an interlock is triggered.
• Turns off when pushing operation ends normally.
• Pushing operation turns off (when not an ALM) on reaching the target position.
• When the movement command is less than 4 motor pulses, the motor signal stays off.
■ ALM (Alarm output: Pin No. B5)
This is output when an alarm occurs. This is off during alarm status. (B contact)
5
5-
I/O INTERFACE SPECIFICATIONS
n
5.5 I/O connector signal table
■ ZONE (Zone output: Pin No. B6)
Output for prespecified coordinate range on deciding current position. Turns on when within the
prespecified range.
n
c
NOTE
This is output regardless of whether return-to-origin is complete so use after finishing return-to-origin. The PRC
controller sets the robot position as 0, where the servo turns on when power is turned on.
CAUTION
There is no fixed output when a disconnected wire is detected or CPU alarm occurs regardless of the controller
status so use caution.
■ END (Pin No. B7)
This is output when the executed signal (START, ORG) ends normally.
No reply is made to movement by serial communication.
Turns off at the point that an execution signal was received.
5
I/O INTERFACE SPECIFICATIONS
n
NOTE
• Turns on when power is turned on or restarted when initialization ends normally.
• During positioning, the END signal turns on under the condition that the ACK signal is off and also that the
INPOS signal is on.
• Maintains the immediately prior status when stopped due to interlock, ALM or EMG.
• Turns on when pushing operation ends normally during torque movement.
• Remains off when pushing is ineffective.
■ EMGMON (EMG monitor: Pin No. B8)
Monitors the emergency stop status via both serial communication and EMG input.
This is on in emergency stop and is off when emergency stop is canceled.
n
NOTE
• The monitor signal is output during emergency stop by serial communication input, when a command other than
an ALM was issued to check the controller status.
• A monitor signal is output in EMG input port status regardless of the controller status.
■ ORGMON (Return-to-origin end monitor: Pin No. B9)
This monitors the normal end of return-to-origin operation. Turns on when return-to-origin is
completed.
n
c
NOTE
Turns off return-to-origin was run again after return-to-origin ended. Turns on at the point that return-to-origin is
again completed.
CAUTION
Either interlock monitor (LOCKMON) or return-to-origin end monitor (ORGMON) can be selected. The returnto-origin end monitor is enabled (valid) by factory setting prior to shipment. If you wish to use LOCKMON, this
can be changed with the parameter. However ORGMON and LOCKMON cannot both be used at the same time.
■ LOCKM ON (Interlock monitor: Pin No. B9)
This monitors the interlock status.
c
5-
6
CAUTION
Either interlock monitor (LOCKMON) or return-to-origin end monitor (ORGMON) can be selected. The returnto-origin end monitor is enabled (valid) by factory setting prior to shipment. If you wish to use LOCKMON, this
can be changed with the parameter. However ORGMON and LOCKMON cannot both be used at the same time.
5.5 I/O connector signal table
■ INPOS (Pin B10)
This outputs the INPOS status.
The INPOS (in position) status is the state when the robot axis has entered the positioning completion range. Turns on in INPOS status.
The INPOS output signal turns on when the robot enters within the INPOS range. That INPOS
output signal turns off when the next movement command is run.
n
5.6
NOTE
• The INPOS signal is off when the servo is off.
• Turns on when return-to-origin ends correctly.
• Determines the INPOS width for the target position during torque movement.
• When the movement command is less than 4 motor pulses, the motor signal remains on.
5
I/O cable specifications
I/O flat cable (KX1-M5163-200)
B1
A1
B10
A10
Cable mark (red)
7
5-
I/O INTERFACE SPECIFICATIONS
The I/O cable is used to connect the PRC controller to an external control device such as a PLC.
To operate the controller from an external device via I/O control, first perform the necessary wiring
connections of the I/O flat cable supplied with the PRC controller, and then connect it to the PRC
controller.
5.7 Connecting to a PLC using 24V DC power supply
5.7
Connecting to a PLC using 24V DC power supply
5.7.1 Connecting to a Mitsubishi PLC model AY50 output unit
PRC controller
AY50 output unit
Surge killer
YO0
TB1
Photocoupler
R
R
YO1
YO2
R
YO3
YO4
5
YO5
I/O INTERFACE SPECIFICATIONS
YO6
YO7
DC24V
0V
YO8
YO9
DC24V
0V
2
3
4
5
6
7
8
3
START
4
PNT1
5
PNT2
6
PNT3
7
PNT4
8
PNT5
9
LOCK
10
EMG
11
ALMCLR
12
ORG
1
+COM
2
-COM
9
10
11
12
19
20
+
External DC 24V
power supply
5.7.2 Connecting to a Mitsubishi PLC model AX40 input unit
AX40 input unit
PRC controller
TB1
ACK
XO0
R
13
2
ROTATE
XO1
14
R
3
ALM
15
ZONE
16
XO2
4
XO3
5
END
XO4
17
6
EMG MON
XO5
18
7
ORG MON
XO6
19
8
INPOS
XO7
20
9
+COM
1
-COM
2
-
+
External DC 24V
power supply
5-
8
DC24V
Internal Circuit
Chapter 6
SERIAL COMMUNICATION
6.1
Overview
In the Pico series, support software via RS-485 communication is used instead of a teaching box. In
this arrangement, one PC is connected to one PRC unit to perform on-line operations such as editing
parameters and point data or operating the robot. Different addresses can also be set in multiple PRC
units, and by then forming a daisy chain through the CN5/CN6 connectors, one PC can be connected
to a maximum of 16 PRC units and on-line operations such as editing parameters and point data or
operating the robot can be performed.
6.2
Serial communication specifications
Communication method
RS-485 (2-wire half duplex, polling method)
Baud rate
9600 bps or 38400 bps (DSW1-3)
Synchronization method
Start-stop synchronization
Data bit
8 bits
Stop bit
1 bit
Parity check
Yes
Parity setting
Even
Address
0 to 15 (RSW1)
Cable length
100 meters maximum (total extension)
CAUTION
The internal circuits on the PRC unit, and the ground (GND) on the input to the power supply and the communication line ground (GND) are not insulated.
6.3
Serial communication cable specifications
6.3.1 When connecting to external devices such as PCs
Connect the RS485 adapter HA-2 (KX1-M4400-000) to the COM port on the PRC unit. Also connect the external devices such as a PC with an RS232C communication cable (KX1-M538F-000).
Fig. 6-1
PC
PRC
RS232C communication cable
RS485 adapter HA-2
(with cable)
COM
D-Sub 9-pin female
connector
D-Sub 9-pin female
connector
D-Sub 9-pin male
connector
D-Sub 9-pin male
connector
■ RS485 adapter HA-2 (KX1-M4400-000)
This is an adapter unit for converting the RS-485 interface to the RS232C interface.
■ RS232C communication cable (KX1-M538F-000).
This is a shielded straight cable terminated with a 9-pin (female) connector at both ends.
1
6-
SERIAL COMMUNICATION
c
6
6.3 Serial communication cable specifications
6.3.2 Connecting PRC units in a daisy chain
Make a daisy chain between PRC units by connecting the CN5/CN6 connectors with a link cable
(KX1-M5361-000). The CN5/CN6 connectors are functionally the same.
Fig. 6-2
Link cable
6
6.4
Setting the rotary switch
SERIAL COMMUNICATION
Specify the PRC unit address (0 to 15) with the hexadecimal (0 to F) rotary switch.
BCD
E
F
0
Use a small flat-blade screwdriver to
align the arrow with the desired
address.
12
789A
6
Fig. 6-3
34 5
• An address "0" is set at the factory prior to shipment.
• After changing the address always turn the power off and then back on again. The previous
settings are used until you turn the power off and then on again.
• When connecting multiple PRC units in a daisy chain using the CN5/CN6 connectors, always set
a different address for each PRC unit.
6-
2
6.5 Setting the DIP switch
6.5
Setting the DIP switch
The DIP switch settings need to be changed in some cases when connecting multiple PRC units in a
daisy chain.
The DIP switch is located next to the COM port inside the PRC unit.
Meaning
1
OFF
2
3
4
ON
OFF
1
Internal termination resistance
Enable
Disable
2
Internal termination resistance
Enable
Disable
3
Communication speed
9600 bps
38400 bps
4
Reserved
• These are all set to “ON” at the factory prior to shipment.
• If you changed the DIP switch settings, always be sure to turn the power off and then on again.
The previous settings are used unless you turn the power off and then on again.
Communication speed
➢ Always set the communication speed at the same setting as used on the PC (support software
side). Communication exchange is impossible if these are at different settings.
c
CAUTION
To change the DIP switch setting, you need to remove the PRC unit cover. At that time be careful not to touch
anything other than the DIP switches.
3
6-
6
SERIAL COMMUNICATION
Internal termination resistance
➢ Termination resistance 1 and 2 (see above) must be the same setting.
➢ When connecting multiple PRC units in a daisy chain using the CN5/CN6 connectors, always
activate the termination resistance on devices at both ends of the daisy chain. Deactivate (disable) the termination resistance on the other devices.
➢ When using the PRC as single units (no daisy chain) use with termination resistance 1 and 2
activated (enabled).
6.6 Setting for a daisy chain between PRC units
6.6
Setting for a daisy chain between PRC units
6.6.1 When using two PRC units in a daisy chain
Here is how to make the setting when the daisy chain is connected between two PRC units.
c
CAUTION
Always shut off the power supply during this task.
1. Set the addresses on the qPRC and wPRC.
c
CAUTION
When connecting multiple PRC units in a daisy chain, always set a different address for each PRC unit.
2. Remove the covers from the qPRC and wPRC.
3. Check that DIP switches 1 and 2 are both set to ON. If not both set to ON then set so that both of
them are ON. Switches 1 and 2 are both set to ON prior to shipment at the factory.
SERIAL COMMUNICATION
6
qPRC
1
2
3
OFF
c
wPRC
4
1
2
3
4
OFF
CAUTION
Always set the communication speed (DIP switch 3) to the same setting as the PC side (support software side). If
these have different settings then communication is disabled. If different settings are used for communication
speed on the support software (PC side) among the PRC connected by daisy chain then communication with
those PRC is impossible.
4. Reattach the covers to the qPRC and wPRC.
5. Connect the qPRC and wPRC with a link cable.
The CN5/CN6 connectors are functionally the same. Either one can be used.
qPRC
6-
4
wPRC
6.6 Setting for a daisy chain between PRC units
6.6.2 When using three or more PRC units in a daisy chain
Here is how to make the setting when the daisy chain is connected between three or more PRC units.
The following is an example for connecting four PRC units in a daisy chain.
c
CAUTION
Always shut off the power supply during this task.
1. Set the addresses on qPRC, wPRC, ePRC and rPRC.
c
CAUTION
When connecting multiple PRC units in a daisy chain, always set a different address for each PRC unit.
2. Remove the covers from the qPRC, wPRC, ePRC and rPRC.
3. Check that DIP switches 1 and 2 for the qPRC and rPRC are both set to ON. If not both set to
ON then set so that both of them are ON. Switches 1 and 2 are both set to ON prior to shipment
at the factory.
6
1
OFF
c
2
3
wPRC
4
ePRC
rPRC
1
2
3
4
OFF
CAUTION
Always set the communication speed (DIP switch 3) to the same setting as the PC side (support software side). If
these have different settings then communication is disabled. If different settings are used for communication
speed on the support software (PC side) among the PRC connected by daisy chain then communication with
those PRC is impossible.
5
6-
SERIAL COMMUNICATION
qPRC
6.6 Setting for a daisy chain between PRC units
4. Check that DIP switches 1 and 2 for the wPRC and ePRC are both set to OFF. If not both set to
ON then set so that both of them are OFF. Switches 1 and 2 are both set to ON prior to shipment
at the factory.
qPRC
wPRC
1
SERIAL COMMUNICATION
6
2
3
ePRC
4
OFF
c
1
2
3
rPRC
4
OFF
CAUTION
Always set the communication speed (DIP switch 3) to the same setting as the PC side (support software side). If
these have different settings then communication is disabled. If different settings are used for communication
speed on the support software (PC side) among the PRC connected by daisy chain then communication with
those PRC is impossible.
5. Reattach the covers to the qPRC, wPRC, ePRC and rPRC.
6. Connect the qPRC, wPRC, ePRC and rPRC with link cables.
The CN5/CN6 connectors are functionally the same. Either one can be used.
qPRC
6-
6
wPRC
ePRC
rPRC
Chapter 7
PARAMETERS
7.1
How to set the parameters
See the support software manual or teaching box manual for information on how to set the parameters.
7.2
Cautions when setting the parameters
Some parameters are input in millimeter units. Parameters input in millimeters are recognized as
multiples of the distance (mm) that the robot moves per pulse according to the screw lead length. So
the input parameter settings might sometimes be rewritten during storing of the data.
Example: When 13 mm was input into "Upper Zone Range" (PRM59) limit for a robot lead length of 12 mm
13 ÷ 12 × 800 = 866.6 867
Movement amount ÷ lead length × encoder division (800 pulses) = setting value [pulses]
867 ÷ 800 × 12 = 13.005
13.01
Movement pulse amount ÷ encoder division (800 pulses) × lead length = setting value [mm]
The input value in this case is 13 mm but the value is stored as 13.01 mm.
Parameters that are input in millimeter units are shown to 2 decimal places and the third decimal
point value is rounded off.
PARAMETERS
Example: 250.005 mm is rounded off to 250.01 mm.
7
1
7-
7.3 Parameter description
7.3
Parameter description
This manual basically does not list write-protected parameters. Consult with YAMAHA, when changing
of parameters is required for running special applications.
Write-protected parameters
System-related parameters
PRM0 to 18, PRM20 to 23, PRM25, PRM33 to 35, PRM38,
PRM39, PRM41 to 44, PRM48 to 54, PRM64, PRM68
Robot type dependent parameters
PRM26, PRM2, PRM37, PRM40, PRM45 to 47,
PRM65 to 67, PRM70, PRM71
PRM19: DO3 Output Function
Description:
Sets the function of the DO3 output signal.
When “ORGMON” was set, a return-to-origin status, which is "off" if incomplete or "on" if
complete, is output to the ORGMON output signal (pin No. B9).
When “DI4MON” was set, the signal input set in PRM13, which is normally an interlock (LOCK),
is directly output to the LOCKMON output signal (pin No. B9).
PARAMETERS
7
Input range:
0
DI4MON
3 (default)
ORGMON
Remarks:
• The robot must be returned to origin before robot movement is attempted. When the DO3
output function was set in “ORGMON” and point trace movement failed, a check can be made
of ORGMON signal status to determine if the problem is failure to return to origin.
• The interlock input signal (LOCK) is usually input to the controller from a host device such as
a PLC.
When the DO3 output function was set in “DI4MON” the host PLC or other device can check
the LOCKMON output signal and determine if there is an interlock state or not.
7-
2
7.3 Parameter description
PRM24: Motor Direction
Description:
Sets the motor rotation direction for moving the linear robot in the plus direction (see below).
Input range:
0 (default)
CW (Clockwise)
1
CCW (Counterclockwise)
Remarks:
Motor
Motor shaft
Clockwise
7
Note:
Changing only this parameter will invert the origin position.
(+)
Return-to-origin direction
(-)
When only PRM24
was changed.
(-)
(+)
3
7-
PARAMETERS
Return-to-origin direction
7.3 Parameter description
PRM28: Position Limit Alarm
Description:
This parameter specifies whether to permit or protect inverting the plus/minus sign of the absolute
position counter (except for zero point), in a rotary robot.
If this parameter is set to “Permit”, an “A11: Position Limit Exceeded” alarm is issued during
servo-on when the plus/minus sign for the current position is inverted (except for zero point), and
the servo turns off.
If this parameter is set to “Protected”, no alarm is issued even when the plus/minus sign in coordinates is inverted.
Input range:
0 (default)
Permit
1
Protected
Remarks:
The PRC controller operates in a range from -134217727 to 134217727 (pulses). However, the
absolute position command (ABS-PT) moves the robot so as not to exceed the upper limit value in
each direction and does not perform shortcut control. When moved in the same rotation direction
with the relative position command (INC-PT), the plus/minus sign of the current position is inverted at the point that 134217728 (pulses) is exceeded.
PARAMETERS
7
-1
0
1
Counterclockwise
(minus direction)
Clockwise
(plus direction)
ABS-PT
-134217727
134217727
134217728
(-134217728)
Example 1
...Target position
When PRM28 is set to "Protected"
INC-PT
INC-PT
INC-PT
OK
134217728
(-134217728)
When PRM28 is set to "Protected"
INC-PT
7-
4
OK
7.3 Parameter description
Example 2
...Target position
NG
ABS-PT
ABS-PT
OK
ABS-PT
134217728
(-134217728)
PRM29: Insufficient Torque Alarm
Description:
Specifies whether to permit or protect an alarm output when torque movement is ineffective (robot moved a specified pushing distance without reaching a specified torque current limit) during
torque movement with the torque current limit specified as 1 or more by point setting.
When this parameter is set to “Permit” and pushing operation was ineffective, then the “A12:
Torque Motion Failed” occurs and the servo turns off.
When set to “Protected”, then no alarm occurs even when pushing operation was ineffective.
Input range:
0
Permit (Alarm will be issued.)
1 (default)
Protected
Note:
Even when the “A12: Torque Motion Failed” has occurred, other movement commands can be run
after turning the servo on by inputting an alarm clear ALMCLR signal. See “11. Troubleshooting”
for more information on alarms.
5
7-
7
PARAMETERS
Note:
• When an “A11: Position Limit Exceeded” alarm is issued, the servo turns on by input of an
ALMCLR signal and other movement commands can be run. See “11. Troubleshooting” for
detailed information on alarms.
• On linear robots, if the PRM69 (Origin Preset) parameter is set so large that the plus/minus
sign is inverted at a location within the movement range, the software upper limit value becomes smaller than the software lower limit value. This state is always treated as being outside
the software limits when the software limit functions are enabled, so the robot cannot move.
• When using a rotary robot in unlimited rotation mode, PRM28 (Position Limit Alarm) must be
set to “Protected”, and PRM31 (Upper Soft Limit Function) and PRM32 (Lower Soft Limit
Function) to “Disabled”.
• PRM28 (Position Limit Alarm) is enabled after completing return-to-origin.
7.3 Parameter description
PRM30: Position Deviation Alarm
Description:
This parameter specifies whether to permit or protect an alarm output when the robot is pushed
back to the maximum position deviation during normal robot movement or during hold operation
or when the robot is pulled forward or is pushed back to the maximum deviation during torque
movement.
When this parameter is set to “Permit” and the robot is pushed back to a value exceeding that set
in PRM27 (Max Position Deviation) during normal robot movement or hold operation or when
pushed back to a value exceeding that set in PRM36 (Max Torque Deviation) during torque movement, an “A05: Servo Error” alarm is issued and the servo turns off.
When set to “Protected”, no alarm is issued even when the robot is pulled forward or is pushed
back.
Input range:
0
Permit (Alarm will be issued.)
1 (default)
Protected
Note:
• Even when an “A05: Servo Error” alarm has occurred, other movement commands can be run
after turning the servo on by inputting an alarm clear ALMCLR signal. See “11. Troubleshooting” for more information on alarms.
• PRM27 (Max Position Deviation) is a write-protected parameter.
PARAMETERS
7
PRM31: Upper Soft Limit Function
Description:
This parameter specifies whether to permit or protect the upper software limit function.
(The software limits determine the robot movement range that is permitted by software setting.)
When the upper software limit function is enabled, movement to a position that might exceed the
upper software limit value is determined as an error prior to movement. However, if the current
position has already exceeded the upper software limit value, then the robot can still move towards the allowable movement range.
Input range:
0 (default)
Enable
1
Disabled
Note:
• No ACK signal is issued after running a movement command from the parallel I/O when the
point data target position has exceeded the upper software limit value. Running a movement
command through the serial I/O port will cause a command error.
• When using the software limit functions on a linear robot to avoid striking the mechanical
stopper (stroke end), set PRM31 (Upper Soft Limit Function) and PRM32 (Lower Soft Limit
Function) to “Enable” and set the values for PRM61 (Upper Soft Limit) and PRM62 (Lower
Soft Limit).
• When using a rotary robot in unlimited rotation mode, PRM28 (Position Limit Alarm) must be
set to “Protected”, and PRM31 (Upper Soft Limit Function) and PRM32 (Lower Soft Limit
Function) to “Disabled”.
7-
6
7.3 Parameter description
PRM32: Lower Soft Limit Function
Description:
This parameter specifies whether to permit or protect the lower software limit function.
(The software limits determine the robot movement range that is permitted by software setting.)
When the lower software limit function is enabled, movement to a position that might exceed the
lower software limit value is determined as an error prior to movement. However, if the current
position has already exceeded the lower software limit value, then the robot can still move towards the allowable movement range.
Input range:
0 (default)
Enable
1
Disabled
7
7-
7
PARAMETERS
Note:
• No ACK signal is issued after running a movement command through the parallel I/O port
when the point data target position has exceeded the lower software limit value. Running movement instructions from a serial I/O will cause a command error.
• When using the software limit functions on a linear robot to avoid striking the mechanical
stopper (stroke end), set PRM31 (Upper Soft Limit Function) and PRM32 (Lower Soft Limit
Function) to “Enable” and set the values for PRM61 (Upper Soft Limit) and PRM62 (Lower
Soft Limit).
• When using a rotary robot in unlimited rotation mode, PRM28 (Position Limit Alarm) must be
set to “Protected”, and PRM31 (Upper Soft Limit Function) and PRM32 (Lower Soft Limit
Function) to “Disabled”.
7.3 Parameter description
PRM36: Max Torque Deviation
Description:
This parameter sets the movement amount to be detected as excessive deviation when the robot is
pulled forward or is pushed back torque movement.
Input range:
1 to 65535 (pulses). (default 533)
Note:
• This parameter is enabled only when PRM30 is “0”. However, the movement amount is not
detected if set to a distance longer than the robot stroke. Also might not be detected depending
on the robot position.
Example:
When detected
Pushed-back movement
7
PARAMETERS
Maximum amount of pushing deviation
When not detected
Pushed-back movement
Maximum amount of pushing deviation
• The input range for maximum pushing deviation, previous setting and units vary according to
the robot.
Example: On the T4P-12
Resolution .............. 800
Deceleration rate ... 0
0.015 (mm) per pulse
Lead length ............ 12
The input range is from 0.02 to 983.03 (mm) and the default value is 8.00 (mm).
PRM55: Slowdown Adjust Function
Description:
Selects whether to use or not use the deceleration curve compensation function.
Input range:
0 (default)
Disabled
1
Enable
Note:
The deceleration compensation coefficient is set with PRM56.
7-
8
7.3 Parameter description
PRM56: Slowdown Adjust Coefficient
Description:
This parameter is for compensating the deceleration curve so that there is a gentle deceleration
just before stopping.
This function is for ensuring a soft landing when stopping.
Input range:
1 to 255 (default 1)
Movement start position
Target position
Speed
7
Deceleration distance
Remarks: At a speed of 160, deceleration of 20 and lead of 12mm
c
Slowdown Adjust Coefficient
Deceleration distance (mm)
Deceleration time (s)
Not used.
77.00
0.26
20
95.00
0.39
40
118.00
0.83
CAUTION
The above are only reference values. Actual values may vary according to load conditions and movement range.
9
7-
PARAMETERS
As the deceleration compensation coefficient gets larger, the deceleration distance and deceleration time get longer.
7.3 Parameter description
PRM57: Torque Detection Time
Description:
This specifies the time for deciding the end of pushing operation after reaching the torque current
limit during torque movement.
Input range:
1 to 255 (x10 ms) (default 15)
Note:
When the current falls below the torque current limit due to dribble (workpiece gradually moves
in pushing direction) during the pushing decision time, the time count is reset and starts counting
again after reaching the specified current level.
Torque Distance
Torque Speed
Movement Speed
7
PARAMETERS
Torque Limit
Pushing decision count
Current position
Pushing decision recount
Target position
PRM58: Torque Speed
Description:
Specifies the speed during torque movement.
Input range:
1 to 20 (default 2)
Remarks:
• Motor is 18.75 (rotations/minute) at an input of 1.
• Movement speed for an input of 1 depends on the robot deceleration rate and the lead length.
Example: On the T4P-12
Deceleration rate ... 0
Movement speed is 225 mm/min for an input of 1.
Lead length ............ 12
7-
10
7.3 Parameter description
PRM59: Upper Zone Range
Description:
This parameter specifies the upper limit value for switching a zone output signal in absolute
coordinates.
Input range:
-134217727 to 134217727 (pulses). (default 0)
Note:
• Specified value is contained in the zone range.
• Zone output signal is ON when inside the zone range.
• If using the zone function, set both PRM59 and PRM60. However, the zone function is disabled when PRM59 and PRM60 are the same value.
• On linear robots, if the PRM69 (Origin Preset) parameter is set so large that the plus/minus
sign is inverted at a location within the movement range, the zone upper limit becomes smaller
than the zone lower limit. This state is always treated as being outside the zone range.
The input range is from -2013265.91 to 2013265.91 (mm) and the default value is 0.00 (mm).
11
7-
7
PARAMETERS
Remarks:
• This parameter can be used to check whether or not the axis is within the specified range,
regardless of whether the robot is moving or stopped.
• The input range for the zone upper limit, default value and unit used will vary according to the
robot.
Example: On the T4P-12
Resolution .............. 800
0.015 (mm) per pulse.
Deceleration rate ... 0
Lead length ............ 12
7.3 Parameter description
PRM60: Lower Zone Range
Description:
This parameter specifies the lower limit value for switching a zone output signal in absolute
coordinates.
Input range:
-134217727 to 134217727 (pulses). (default 0)
Note:
• Specified value is contained in the zone range.
• Zone output signal is ON when inside the zone range.
• If using the zone function, set both PRM59 and PRM60. However, the zone function is disabled when PRM59 and PRM60 are the same value.
• On linear robots, if the PRM69 (Origin Preset) parameter is set so large that the plus/minus
sign is inverted at a location within the movement range, the zone upper limit becomes smaller
than the zone lower limit. This state is always treated as being outside the zone range.
Remarks:
• This parameter can be used to check whether or not the axis is within the specified range,
regardless of whether the robot is moving or stopped.
• The input range for the zone lower limit, default value and unit used will vary according to the
robot.
Example: On the T4P-12
Resolution .............. 800
0.015 (mm) per pulse.
Deceleration rate ... 0
Lead length ............ 12
PARAMETERS
7
The input range is from -2013265.91 to 2013265.91 (mm) and the default value is 0.00 (mm).
7-
12
7.3 Parameter description
PRM61: Upper Soft Limit
Description:
This parameter specifies the upper software limit value in absolute coordinates.
(The software limits determine the robot movement range that is permitted by software setting.)
When the upper software limit function is enabled, movement to a position that might exceed this
upper limit value is determined as an error prior to movement. However, if the current position has
already exceeded the upper software limit value, then the robot can still move towards the allowable movement range.
Input range:
-134217727 to 134217727 (pulses). (default 134217727)
Remarks:
• The input range for the upper software limit value, default value and unit used will vary according to the robot.
Example: On the T4P-12
Resolution .............. 800
0.015 (mm) per pulse
Deceleration rate ... 0
Lead length ............ 12
The input range is from –2013265.91 to 2013265.91 (mm).
13
7-
7
PARAMETERS
Note:
• When using the software limit functions on a linear robot to avoid striking the mechanical
stopper (stroke end), set PRM31 (Upper Soft Limit Function) and PRM32 (Lower Soft Limit
Function) to “Enable” and set the values for PRM61 (Upper Soft Limit) and PRM62 (Lower
Soft Limit).
• When using a rotary robot in unlimited rotation mode, PRM28 (Position Limit Alarm) must be
set to “Protected”, and PRM31 (Upper Soft Limit Function) and PRM32 (Lower Soft Limit
Function) to “Disabled”.
• On linear robots, if the PRM69 (Origin Preset) parameter is set so large that the plus/minus
sign is inverted at a location within the movement range, the software upper limit value becomes smaller than the software lower limit value. This state is always treated as being outside
the software limits when the software limit functions are enabled, so the robot cannot move.
7.3 Parameter description
PRM62: Lower Soft Limit
Description:
This parameter specifies the lower software limit value in absolute coordinates.
(The software limits determine the robot movement range that is permitted by software setting.)
When the lower software limit function is enabled, movement to a position that might exceed this
lower limit value is determined as an error prior to movement. However, if the current position has
already exceeded the lower software limit value, then the robot can still move towards the allowable movement range.
Input range:
-134217727 to 134217727 (pulses). (default 134217727)
Note:
• When using the software limit functions on a linear robot to avoid striking the mechanical
stopper (stroke end), set PRM31 (Upper Soft Limit Function) and PRM32 (Lower Soft Limit
Function) to “Enable” and set the values for PRM61 (Upper Soft Limit) and PRM62 (Lower
Soft Limit).
• When using a rotary robot in unlimited rotation mode, PRM28 (Position Limit Alarm) must be
set to “Protected”, and PRM31 (Upper Soft Limit Function) and PRM32 (Lower Soft Limit
Function) to “Disabled”.
• On linear robots, if the PRM69 (Origin Preset) parameter is set so large that the plus/minus
sign is inverted at a location within the movement range, the software upper limit value becomes smaller than the software lower limit value. This state is always treated as being outside
the software limits when the software limit functions are enabled, so the robot cannot move.
PARAMETERS
7
Remarks:
• The input range for the lower software limit value, default value and unit used will vary according to the robot.
Example: On the T4P-12
Resolution .............. 800
0.015 (mm) per pulse
Deceleration rate ... 0
Lead length ............ 12
The input range is from –2013265.91 to 2013265.91 (mm).
7-
14
7.3 Parameter description
PRM63: Origin Method
Description:
Specifies the origin point detection method during return-to-origin.
Input range:
1
Sensor
3 (default)
Edge
Note:
• The return-to-origin method varies according to the robot. Linear robots generally use the
“Edge” detection method that utilizes a mechanical stopper (stroke end).
• Even if the return-to-origin method is changed, the return-to-origin status is the same until you
perform return-to-origin again. Be sure to perform return-to-origin after changing the returnto-origin method.
• Please note YAMAHA can accept no liability for problems resulting from changing this parameter without consulting us in advance.
7
PRM69: Origin Preset
Input range:
-134217727 to 134217727 (pulses). (default 0)
Note:
• This parameter does not perform any movement.
• This is enabled after return-to-origin is complete.
• When using the software limit functions, the amount specified with this parameter must be
added to PRM61 (Upper Soft Limit) and PRM62 (Lower Soft Limit).
• When using the zone function, it is not necessary to add the amount specified with this parameter to PRM59 (Upper Zone Range) and PRM60 (Lower Zone Range).
• On linear robots, if the PRM69 (Origin Preset) parameter is set so large that the plus/minus
sign is inverted at a location within the movement range, the software upper limit value becomes smaller than the software lower limit value. This state is always treated as being outside
the software limits when the software limit functions are enabled, so the robot cannot move.
Remarks:
• Use when collectively shifting the teaching point positions.
• The origin preset input range and unit used will vary according to the robot.
Example: On the T4P-12
Resolution .............. 800
0.015 (mm) per pulse
Deceleration rate ... 0
Lead length ............ 12
The input range is from –2013265.91 to 2013265.91 (mm).
15
7-
PARAMETERS
Description:
This is a default value for the position when return-to-origin is completed.
7.3 Parameter description
Distance from origin 100mm
Origin
Target position
Mechanical deviation
(Installation shift)
Origin
Target position
PARAMETERS
7
Origin preset
Distance from preset origin 100mm
Zone output range
Software limit range
* If this software limit value is not changed, this position is then used as
the software limit range. So when using the origin preset parameter,
change the software limit by adding the origin preset value to it.
7-
16
Chapter 8
POINT
8.1
Overview
On the PRC, a total of 32 points can be specified from PNT0 to 31.
This point data can be entered by one of 3 different methods: manual data-in, teaching playback, and
direct teaching.
Manual data-in is a method for directly specifying numeric data for a target position.
Teaching playback is a method for specifying a target position by actually moving the robot in jog to
the position.
Direct teaching is a method for specifying a target position by moving the robot manually to the
actual position by your hand.
See the support software manual or teaching box manual for information on how to set the parameters.
8.2
Point trace movement
Point trace movement is achieved by specifying a point number from the parallel I/O and running a
command described for the point data.
8.2.1 Absolute position movement
Absolute position movement is an action to move to a specified point. The point specified here is the
position relative to the origin.
Origin
8
Target position
POINT
Moves to a specified position relative to the origin.
8.2.2 Relative position movement
Relative position movement is an action to move from the current position by an amount specified in
the point data.
Current position
Target position
Moves by an amount specified in the point data.
1
8-
8.2 Point trace movement
8.2.3 Torque movement
Torque movement is utilized for pushing or press-fitting a workpiece by regulating the motor torque.
Pushing
Press-fitting
8.2.4 Changing speed during movement
The speed during movement to a target position can be changed by using two point data items.
Final target position
8
POINT
Moves at speed specified in
2nd point data.
Moves at speed specified in
1st point data.
8.2.5 Additional movement
The INPOS signal and ZONE signal can be used during movement to consecutively move to the next
point.
INPOS signal: ON
1st movement command
2nd movement command
Note:
• When an additional movement by INC-PT is performed during ABS-PT, the robot moves by
relative movement to the target position of the absolute position movement command, instead
of moving from the position at that time the command was received.
8-
2
8.3 Point data
8.3
Point data
One point is comprised of the following elements.
Position
(mm)
INPOS width
(mm)
Speed
ABS-PT
12.00
0.06
50
10
PNT31 INC-PT
25.01
1.00
50
10
Item Command
PNT0
Torque limit
Torque distance
(mm)
10
0
0.00
10
0
0.00
Acceleration Deceleration
8.3.1 Cautions on setting the speed, acceleration and deceleration
The upper limit that can be entered for “Speed”, “Acceleration” and “Deceleration” point data depends on the payload.
The payload is preset to the robot maximum payload when shipped from the factory.
Before setting the “Speed”, “Acceleration” and “Deceleration”, perform a generation to match the
customer’s payload.
See the support software manual or teaching box manual for information on how to perform generation.
8.3.2 Cautions on setting the position, INPOS width, and Torque
distance
Example: When a movement amount of 250mm was entered for a robot with a 12mm lead length.
250 ÷ 12 × 800 = 16666.6 166667
Movement amount ÷ lead length × encoder division (800 pulses) = movement pulse amount
16667 ÷ 800 × 12 = 250.005
250.01
Movement pulse amount ÷ encoder division (800 pulses) × lead length = movement amount [mm]
In this case, the value entered was 250mm but is stored as a value of 250.01mm.
When the 3 point data items (“Position”, “INPOS width” and “Torque Distance”) are displayed in
millimeters, each piece of data is shown to 2 decimal places and the third decimal point value is
rounded off.
Example: 250.005 mm is rounded off to 250.01 mm.
3
8-
8
POINT
When the 3 point data items, “Position” “INPOS width” “Torque Distance” are displayed in millimeters,
each piece of data is treated as a multiple of the distance (mm) that the lead length moves per pulse.
So these input data values might sometimes be rewritten during storing of data.
8.3 Point data
8.3.3 Point data table information
■ Command
Description:
Specifies the type of movement.
Input range:
ABS-PT
Absolute position movement from origin
INC-PT
Relative position movement from current position
Remarks:
ABS-PT
Origin
Target position
Distance from origin: 150mm
INC-PT
Current position
8
POINT
Target position
Distance from current position: 100mm
8-
4
8.3 Point data
■ Position
Description:
Specifies the movement destination position (movement amount).
Input range:
-134217727 to 134217727 (pulses). (default 0)
Note:
• The current position after movement is the movement amount ±1 pulse. So when acquiring
current position information and setting a new movement destination by absolute position
movement, the range might be deviated by ±1 pulse. During operation by continuous relative
position movement, the target position stored inside the controller functions as the reference
position so there is no deviation. When using the zone function, set the zone range upper limit
to a point which is +1 pulse wider and the zone range lower limit to a point which is -1 pulse
wider.
• The amount of relative movement from the current position cannot exceed a movement of
±134217727 (pulses). In such a case, prepare 2 points and avoid the problem by additional
movement by the INPOS signal.
• If the PRM69 (Origin Preset) parameter is set so large that the plus/minus sign is inverted at a
location within the movement range, absolute movement to a position of ±134217728 (pulses)
cannot be performed.
The input range is from -2013265.91 to 2013265.91 (mm) and the default value is 0.00 (mm).
• The PRC controller operates in a range of -134217727 to 134217727 (pulses). However, the
absolute position command (ABS-PT) moves the robot so as not to exceed the upper limit
value in each direction and does not perform shortcut control. When moved in the same rotation direction with the relative position command (INC-PT), the plus/minus sign of the current
position is inverted at the point that ±134217728 (pulses) is exceeded.
-1
0
1
Counter Clockwise
(minus direction)
Clockwise
(plus direction)
ABS-PT
-134217727
134217727
134217728
(-134217728)
5
8-
8
POINT
Remarks:
• The input range for movement amount, default value, and unit used will vary according to the
robot.
Example: On the T4P-12
Resolution .............. 800
0.015 (mm) per pulse
Deceleration rate ... 0
Lead length ............ 12
8.3 Point data
Example 1
...Target position
INC-PT
INC-PT
INC-PT
OK
134217728
(-134217728)
8
INC-PT
OK
POINT
Example 2
...Target position
NG
ABS-PT
ABS-PT
OK
ABS-PT
134217728
(-134217728)
8-
6
8.3 Point data
■ INPOS width
Description:
Specifies the position for switching the INPOS signal during movement as an amount inversely
calculated from the target position.
Direction of robot movement
INPOS width
Direction of robot movement
INPOS width
Input range:
4 to 134217727 (pulses). (default 4)
The input range is from 0.06 to 2013265.91 (mm) and the default value is 0.06 (mm).
■ Speed
Description:
Specifies the movement speed.
Input range:
0 to 240. (default 4)
Remarks:
• Motor is 18.75 (rotations/minute) at an input of 1.
• Input range for movement speed and default values will vary according to the robot.
7
8-
8
POINT
Remarks:
• Set the INPOS width to a large figure when changing the speed during movement or changing
the movement destination. By setting a large figure for the INPOS width, the END signal
during movement can be utilized to change the target position or movement speed.
• The input range for INPOS width, default value, and unit used will vary according to the robot.
Example: On the T4P-12
Resolution .............. 800
Deceleration rate ... 0
0.015 (mm) per pulse
Lead length ............ 12
8.3 Point data
■ Acceleration
Description:
Specifies the amount of acceleration during movement.
Input range:
1 to 255. (default 20)
Remarks:
• At an input of 1, motor is 9.75 (rotations per second2).
• Input range for acceleration and default values will vary according to the robot.
■ Deceleration
Description:
Specifies the amount of deceleration during movement.
Input range:
1 to 255. (default 10)
Remarks:
• At an input of 1, motor is 9.75 (rotations per second2).
• Input range for deceleration and default values vary according to the robot.
POINT
8
■ Torque Limit
Description:
Specifies the motor excitation current limit value to determine the start of pushing operation.
Input range:
0 to 255. (default 0)
Note:
Torque movement is not performed when this value is 0.
See the following page for information on how the current limit value for each robot model relates
to thrust force when stopped.
8-
8
8.3 Point data
Current limit value versus thrust force for each robot model
T4P
100
90
80
Thrust (N)
70
60
50
Lead length 6mm
40
30
Lead length 12mm
20
10
0
30
60
90
120
150
Current limit
180
210
240
T5P
500
450
8
400
300
Lead length 6mm
POINT
Thrust (N)
350
250
200
Lead length 12mm
150
100
50
0
30
60
90
120
150
180
210
240
Current limit
The values in the above graph are only reference values and are
not a guarantee of the thrust force accuracy while stopped.
• If the thrust force is too small, then the sliding resistance might
cause faulty pushing operation so use caution.
• Set an offset amount and thrust force so that the pushing
moment will be smaller than the allowable static load moment
of each model.
Allowable static load moment (N • m)
Model
T4P
T5P
MY
6.2
10.9
MP
5.7
10.0
MY
MR
MP
MR
15.9
29.4
9
8-
8.3 Point data
■ Torque Distance
Description:
This specifies the torque movement amount in the same direction from the target position.
Pushing movement amount
Moves at pushing speed
Full pushing
Moves at normal speed
End of pushing Target position
Pushing movement amount
Moves at normal speed
Moves at pushing speed
Target position
End of pushing
Full pushing
Input range:
0 to 4095 (pulses). (default 0)
8
POINT
Note:
• The torque movement amount is ignored when the torque current limit is “0”.
• The settings for "PRM29: Insufficient Torque Alarm", "PRM30: Position Deviation Alarm",
"PRM36: Max Torque Deviation", "PRM57: Torque Detection Time", and "PRM58: Torque
Speed" are utilized for torque movement.
• The speed at the start of pushing operation changes smoothly to the steady torque movement
speed.
Remarks:
• Input range for torque movement amount and default values vary according to the robot.
Example: On the T4P-12
Resolution .............. 800
Deceleration rate ... 0
0.015 (mm) per pulse
Lead length ............ 12
The input range is from 0.00 to 61.43 (mm) and the default value is 0.00 (mm).
8-
10
Chapter 9
BASIC OPERATION AND OPERATION TIMING CHART
This chapter explains basic operating methods and the operation timing charts.
The signal level is defined as "Hi" (high) when the photocoupler is ON, and as "Lo" (low) when the photocoupler
is OFF.
9.1
Power-on
The basic operation and operation timing charts for operation when power is turned on are shown
here. Please note that these operation timing charts are only for showing general operation and are
not actual examples.
9.1.1 Normal operation at power-on
Basic operation
Precondition:
Installation and wiring of the controller and robot must already be complete.
1. Turn on power to the controller.
2. When the power is turned on, the robot performs initialization and the servo automatically
turns on. However this does not happen if emergency stop or an interlock were triggered externally.
3. The END output signal turns on after initialization is complete. When the END output signal
turns on then operation so far is normal. After power is on, the END output signal is a way to
check if the servo turned on or not.
Timing chart
9
Power
BASIC OPERATION AND OPERATION TIMING CHART
ALM
Hi
EMG
Hi
LOCK
Initialization
END
Servo ON
INPOS
2000ms or more
1
9-
9.1 Power-on
c
n
BASIC OPERATION AND OPERATION TIMING CHART
9
9-
2
CAUTION
If the robot is a vertical installation type then brake release will be delayed for a certain time after the servo
turns on. Do not run a movement command until at least 50 ms have elapsed after servo-on.
NOTE
About initialization
After turning the power on, the PRC controller runs the motor within a defined range (maximum of 8 degree
mechanical angle) in order to initialize for position detection.
A maximum of 2,000 ms (2 seconds) is required for this operation.
9.1 Power-on
9.1.2 When emergency stop was triggered during power-on
Initialization is not performed if the emergency stop (EMG) signal was input during power-on. Initialization will automatically start when the EMG input signal is cancelled.
When the EMGMON output signal is on during power-on, close the contacts for the EMG input
signal and LOCK input signal.
Timing chart
Power
ALM
EMG
Hi
LOCK
EMGMON
Initialization
9
END
BASIC OPERATION AND OPERATION TIMING CHART
Servo ON
INPOS
2000ms or more
c
CAUTION
If the robot is a vertical installation type then brake release will be delayed for a certain time after the servo
turns on. Do not run a movement command until at least 50 ms have elapsed after servo-on.
3
9-
9.1 Power-on
9.1.3 When interlock (LOCK) was activated during power-on
Initialization is not performed if the interlock (LOCK) signal was input during power-on. Initialization will automatically start when the LOCK input signal is cancelled.
When the interlock (LOCK) signal was input during power-on, the EMGMON output signal turns
on.
When the EMGMON output signal is ON during power-on, close the contacts for the EMG input
signal and LOCK input signal.
Timing chart
Power
ALM
Hi
EMG
Hi
LOCK
EMGMON
9
BASIC OPERATION AND OPERATION TIMING CHART
Initialization
END
Servo ON
INPOS
2000ms or more
c
9-
4
CAUTION
If the robot is a vertical installation type then brake release will be delayed for a certain time after the servo
turns on. Do not issue a movement command for 50ms after servo-on.
9.1 Power-on
9.1.4 Alarm status (cancelable alarm)
See “11. Troubleshooting” for detailed information on alarms.
The END output signal does not change when an alarm occurs.
Timing chart
Power
ALM
Hi
EMG
Hi
LOCK
ALMCLR
Initialization
END
9
Servo ON
2000ms or more
c
c
CAUTION
The ALMCLR input signal does not use edge detection. Always turn the signal off after ALMCLR input. If the
ALMCLR signal is left still input, then the next alarm that occurs will be cleared right away.
CAUTION
If the robot is a vertical installation type then brake release will be delayed for a certain time after the servo
turns on. Do not run a movement command until at least 50 ms have elapsed after servo-on.
5
9-
BASIC OPERATION AND OPERATION TIMING CHART
INPOS
9.2 Performing return-to-origin
9.2
Performing return-to-origin
This section explains the basic operation and operating timing charts for return-to-origin. When
power to the controller is turned on, the robot is not set at the origin (return-to-origin incomplete). As
long as return-to-origin is incomplete, the robot will not move even if a movement command is
issued. Robot movement by the jog keys is also impossible. Always be sure to complete return-toorigin before attempting robot movement.
9.2.1 Normal return-to-origin
Basic operation
1. Set the return-to-origin (ORG) signal from OFF to ON.
c
CAUTION
Return-to-origin is performed when the ON edge is detected.
2. When the ORG input signal turns on normally, the ACK output signal turns ON and the robot
moves in return-to-origin direction.
3. When return-to-origin ends normally, the END output signal turns ON. If the return-to-origin
complete (ORGMON) output signal is enabled, it turns ON when the return-to-origin operation is completed.
c
CAUTION
If the ORG input signal stays ON, the ACK output signal will stay ON even if return-to-origin has completed.
The END output signal cannot turn ON if the ACK output signal is still ON.
Timing chart
9
BASIC OPERATION AND OPERATION TIMING CHART
ORG
ACK
END
ORGMON
ROTATE
c
CAUTION
Always turn the ORG input signal OFF at the point that the ACK output signal has turned on.
See the next section “9.2.2 ORG signal AC characteristics” for information such as the ORG
signal minimum hold time.
9-
6
9.2 Performing return-to-origin
9.2.2 ORG signal AC characteristics
The timing chart for executing commands with the ORG signal is shown below. The ORG signal
minimum hold time is also shown in the table below. Always refer to this table when making signal
setups.
ORG
tEL
tEB
tEA
ACK
Symbol
MIN
MAX
Unit
ORG signal hold time
Item
tEL
1
-
ms
ACK signal response delay time
tEB
-
1
ms
ACK signal response delay time
tEA
-
30
ms
9
BASIC OPERATION AND OPERATION TIMING CHART
7
9-
9.2 Performing return-to-origin
9.2.3 Return-to-origin operation error
The END signal does not turn ON if an interlock signal or EMG signal was input or an alarm occurred during return-to-origin operation.
Timing chart
When an interlock signal is input during return-to-origin operation
LOCK
ORG
ACK
END
ORGMON
ROTATE
BASIC OPERATION AND OPERATION TIMING CHART
9
9-
8
9.3 Positioning operation
9.3
Positioning operation
This section explains the basic operation and operation timing chart when positioning.
9.3.1 Normal positioning operation
Example:
Moving at a speed of 50 for positioning at a position 245 mm from origin point.
Precondition:
Point data has already been created and the data loaded into the controller.
Item Command
PNT1
ABS-PT
Position
(mm)
INPOS width
(mm)
Speed
245.00
0.06
50
Acceleration Deceleration
35
Torque limit
Torque distance
(mm)
0
0.00
35
* See the support software manual or teaching box manual for information on how to create
point data and how to load data.
Basic operation
1. Specify the movement point.
Methods for specifying the point are as follows.
PNT5 (24)
PNT4 (23)
PNT3 (22)
PNT2 (21)
PNT1 (20)
0
OFF
OFF
OFF
OFF
OFF
1
OFF
OFF
OFF
OFF
ON
2
OFF
OFF
OFF
ON
OFF
13
OFF
ON
ON
OFF
ON
31
ON
ON
ON
ON
ON
9
2. Set the START input signal to ON.
c
CAUTION
The START input signal is executed by ON edge detection.
3. When a START input signal is normally received, the ACK output signal turns ON, and the
robot starts to move.
The ROTATE output signal turns ON during robot movement (during motor drive).
4. An END output signal turns ON, when robot movement to the specified movement point ends
normally.
c
CAUTION
If the ORG input signal stays ON, the ACK output signal will stay ON even if movement has completed. The
END output signal cannot turn ON if the ACK output signal is still ON.
9
9-
BASIC OPERATION AND OPERATION TIMING CHART
Point No.
9.3 Positioning operation
Timing chart
PNT 1 to 5
START
ACK
Motor speed
ROTATE
END
INPOS width
*
* An END output signal turns ON when the robot enters within the INPOS range.
c
9
CAUTION
Always turn the START input signal OFF at the point that the ACK output signal has turned on.
BASIC OPERATION AND OPERATION TIMING CHART
See the next section “9.3.2 START signal AC characteristics” for information on START signal
minimum hold time, etc.
9.3.2 START signal AC characteristics
The timing chart for executing commands with the START signal is shown below. The START signal
minimum hold time is also shown in the table below. Always refer to this table when making signal
setups.
tDS
PNT 1 to 5
ORG
tDE
tEL
tEA
tEB
ACK
Item
9-
10
Symbol
MIN
MAX
Unit
Point data hold time
tDS
2
-
ms
START signal hold time
tEL
1
-
ms
START signal setup time
tDE
1
-
ms
ACK signal response delay time
tEB
-
1
ms
ACK signal response delay time
tEA
-
30
ms
9.3 Positioning operation
9.3.3 Positioning with a short movement time
Timing chart
2ms q
PNT 1 to 5
1ms w
1ms e
START
t
1ms r
ACK
30ms y
Motor speed
ROTATE
END
q
w
e
r
*
*
c
CAUTION
Always turn the START input signal OFF at the point that the ACK output signal has turned ON.
See “9.3.2 START signal AC characteristics” for information on START signal minimum hold
time, etc.
11
9-
9
BASIC OPERATION AND OPERATION TIMING CHART
t
y
Hold "PNT1 to 5" for at least 2 ms.
After setting "PNT1 to 5", wait at least 1 ms and then set the START signal to ON.
After setting the START signal to ON, set a hold state for 1 ms or more.
After setting the START signal to ON, the PRC unit sets the ACK output signal to ON within
1 ms. This is not set to ON if an error occurs.
After determining that the ACK output signal has ended, set the START input signal to OFF.
After the START input signal turns OFF, the PRC unit turns the ACK output signal OFF within
30 ms if it was ON.
When the movement time is short, the END output signal turn OFF in synchronization with
the ACK output signal.
The ROTATE output signal does not change if the movement distance was less than 4 motor
pulses. Similarly the ROTATE output signal does not change if the same position as the current
position was specified.
9.3 Positioning operation
9.3.4 When movement is continuous
By setting the INPOS width of the first command larger, the END signal during movement can be
used to execute the next movement.
Example:
Moving to a position 245 mm from origin point
In this example, the movement speed is set to 100 at startup and then switched to a speed of 50
during movement.
Precondition:
Point data has already been created and the data loaded into the controller.
Item Command
Position
(mm)
INPOS width
(mm)
Speed
Acceleration Deceleration
Torque limit
Torque distance
(mm)
PNT1
ABS-PT
120.0
30.0
100
35
35
0
0.00
PNT2
ABS-PT
245.0
0.06
50
35
35
0
0.00
* See the support software manual or teaching box manual for information on how to create
point data and how to load data.
PNT1
PNT2
INPOS width 30.0mm
1st movement
2nd movement
Basic operation
1. Specify the movement point. Methods for specifying the point are as follows.
BASIC OPERATION AND OPERATION TIMING CHART
9
Point No.
PNT5 (24)
PNT4 (23)
PNT3 (22)
PNT2 (21)
PNT1 (20)
0
OFF
OFF
OFF
OFF
OFF
1
OFF
OFF
OFF
OFF
ON
2
OFF
OFF
OFF
ON
OFF
13
OFF
ON
ON
OFF
ON
31
ON
ON
ON
ON
ON
Specify PNT1 here.
2. Set the START input signal to ON.
c
CAUTION
The START input signal is executed by ON edge detection.
3. When the START input signal is normally received, the ACK output signal turns ON, and the
robot starts to move.
Turn the START input signal OFF when the ACK output signal has turned ON.
The ROTATE output signal turns ON during robot movement (during motor drive).
4. Specify the next movement point position. Specify PNT2 here.
5. The END output signal turns ON when entering within the INPOS range of PNT1. Continuous
movement to the next point can be performed by using this signal as a trigger.
6. Turn the START input signal ON using the END output signal as a trigger.
c
CAUTION
The START input signal is run by ON edge detection.
7. When a START input signal is normally received, the ACK output signal turns ON, and the
robot starts to move.
The ROTATE output signal turns ON during robot movement (during motor drive).
9-
12
9.3 Positioning operation
8. An END output signal turns ON, when robot movement to the specified movement point ends
normally.
c
CAUTION
If the START input signal is left ON, the ACK output signal will stay ON even if movement has been completed.
The END output signal will not turn ON if the ACK output signal is still ON.
Relative movement (INC-PT) during continuous operation
The movement position concept for relative movement (INC-PT) during continuous operation is
described below using a simple example.
■ Absolute movement (ABS-PT) to relative movement (INC-PT)
The reference position for performing consecutive absolute movement and relative movement is
the position specified by the preceding absolute movement.
However, when an interlock, alarm or emergency stop has been triggered during movement, the
stop position becomes the reference position for performing relative movement after canceling
the interlock, alarm or emergency stop.
Movement points are as follows.
Start position
Position 12mm from origin
PNT1
ABS-PT
Movement amount 150mm
PNT2
INC-PT
Movement amount -60mm
INPOS width 36mm
1. Moves to PNT1 from start position.
9
PNT1
Movement command input to move
to PNT2
PNT1
INPOS width 36mm
PNT2
PNT1
Movement amount –60mm
13
9-
BASIC OPERATION AND OPERATION TIMING CHART
2. On entering within the INPOS range of PNT1, the END output signal is used as a trigger to
move to PNT2.
9.3 Positioning operation
■ Relative movement (INC-PT) to relative movement (INC-PT)
The reference position for performing consecutive relative movements is the position calculated
from the preceding relative position.
However, when an interlock, alarm or emergency stop has been triggered during movement, the
stop position becomes the reference position for performing relative movement after canceling
the interlock, alarm or emergency stop.
Movement points are as follows.
Start position
Position 12mm from origin
PNT1
INC-PT
Movement amount 150mm
PNT2
INC-PT
Movement amount -60mm
INPOS width 36mm
1. Moves to PNT1 from start position
PNT1
Movement amount 150mm
2. On entering within the INPOS range of PNT1, the END output signal is used as a trigger to
move to PNT2.
Movement command input to move
to PNT2
PNT1
9
BASIC OPERATION AND OPERATION TIMING CHART
INPOS width 36mm
PNT2
PNT1
Movement amount –60mm
9-
14
9.3 Positioning operation
Timing chart
PNT 1 to 5
START
ACK
Motor speed
ROTATE
END
c
c
CAUTION
When the data specified for the second point is defective during continuous operation with movement commands, operation at the 2nd point is not run and the 1st point movement is run up until its end. If there is no
ACK output signal reply to the START signal to the 2nd point, then you must install some means such as an
interlock. (See “9.3.7 When running the movement command is impossible” for more information.)
9
CAUTION
Always turn the START input signal OFF at the point that the ACK output signal has turned ON.
BASIC OPERATION AND OPERATION TIMING CHART
15
9-
9.3 Positioning operation
9.3.5 Canceling an emergency stop/alarm during movement
When an EMG (emergency stop) or alarm state occurs during robot movement, the servo automatically turns off.
During an EMG or alarm state, the robot does not move even if a movement command is issued.
When the EMG or alarm state is canceled, the servo automatically turns on. The robot performs no
steps to enable movement.
Timing chart
PNT 1 to 5
START
ACK
Motor speed
ROTATE
INPOS
9
BASIC OPERATION AND OPERATION TIMING CHART
EMG (ALM)
END
EMGMON
q
q
w
e
r
c
9-
16
w
e
r
ACK output signal ON
Arrived within INPOS range (before EMG input)
EMG signal ON
EMG signal OFF
CAUTION
If the robot is a vertical installation type then brake release will be delayed for a certain time after the servo
turns on. Do not run a movement command until at least 50 ms have elapsed after servo-on.
9.3 Positioning operation
INPOS and END timing chart
INPOS
INPOS
END
END
INPOS
INPOS
END
END
q
q
w
e
r
w
e
r
q
w
e
r
ACK output signal ON
Arrived within INPOS range (before EMG input)
EMG signal ON
EMG signal OFF
c
CAUTION
Always turn the START input signal OFF at the point that the ACK output signal has turned ON.
c
CAUTION
The ALMCLR input signal does not use edge detection. Always turn the signal off after ALMCLR input.
17
9-
9
BASIC OPERATION AND OPERATION TIMING CHART
* When emergency stop is triggered, the INPOS output signal turns OFF regardless of whether
the robot has already entered within INPOS range or not.
* The END output signal during emergency stop maintains the signal state it had just prior to
emergency stop. The END output signal does not change even if emergency stop is canceled.
* After the robot stops due to an alarm or emergency stop, the stop position will be the reference
position for performing relative movement.
9.3 Positioning operation
9.3.6 Canceling an interlock during movement
When an interlock is activated during robot movement, the robot decelerates and stops but the servo
does not turn off.
The robot does not move when an interlock has been activated, even if a movement command is run.
The robot will not continue movement even if the interlock is canceled.
Timing chart
PNT 1 to 5
START
ACK
Motor speed
ROTATE
INPOS
9
BASIC OPERATION AND OPERATION TIMING CHART
LOCK
END
q
q
w
e
r
9-
18
w
ACK output signal ON
Arrived within INPOS range (before LOCK input)
LOCK signal ON
LOCK signal OFF
e
r
9.3 Positioning operation
INPOS and END timing chart
INPOS
INPOS
END
END
INPOS
INPOS
END
END
q
q
w
e
r
w
e
r
q
w
e
r
ACK output signal ON
Arrived within INPOS range (before LOCK input)
LOCK signal ON
LOCK signal OFF
c
CAUTION
Always turn the START input signal OFF at the point that the ACK output signal has turned on.
19
9-
9
BASIC OPERATION AND OPERATION TIMING CHART
* When an interlock is activated, the INPOS output signal turns ON regardless of whether the
robot has already entered within INPOS range or not.
* The END output signal during interlock maintains the signal state it had just prior to interlock.
The END output signal does not change even if the interlock is canceled.
* After the robot stops due to an interlock, the stop position will be the reference position for
performing relative movement.
9.3 Positioning operation
9.3.7 Cases where movement commands cannot be run
Timing chart
PNT 1 to 5
START
ACK
Lo
Motor speed
Lo
ROTATE
Lo
END
The following cases do not permit movement commands to be run.
1. No data is stored (registered) in the designated point No.
2. When the specified target position is outside the software limits (software limit over).
3. When an interlock, an alarm or emergency stop has occurred.
BASIC OPERATION AND OPERATION TIMING CHART
9
A command error is issued if the ACK output signal does not turn ON within 1 ms after input of
the START signal. The END output signal pulse falls at the point that no ACK output signal rise is
detected inside the PRC controller.
c
9-
20
CAUTION
The END output signal does not turn ON during a command error so check that the ACK output signal is not
ON even after 1 ms or more after the START input signal turns ON, and then always set the START input signal
to OFF.
9.4 Torque movement
9.4
Torque movement
This section explains the basic operating methods and the operation timing charts for torque movement.
9.4.1 Normal torque movement
Example:
Moving at a speed of 100 towards a position 150 mm from the origin point.
In this example, the current limit is set at 150 during torque movement and the torque distance is
15 mm.
Precondition:
Point data has already been created and the data loaded into the controller.
Item Command
PNT1
ABS-PT
Position
(mm)
INPOS width
(mm)
Speed
150.00
0.06
100
Acceleration Deceleration
35
Torque limit
Torque distance
(mm)
150
15.00
35
* See the support software manual or teaching box manual for information on how to create
point data and how to load data.
c
CAUTION
Set the INPOS range to a value smaller than the torque distance.
Basic operation
1. Specify the movement point.
Methods for specifying the point are as follows.
9
PNT5 (24)
PNT4 (23)
PNT3 (22)
PNT2 (21)
PNT1 (20)
0
OFF
OFF
OFF
OFF
OFF
1
OFF
OFF
OFF
OFF
ON
2
OFF
OFF
OFF
ON
OFF
13
OFF
ON
ON
OFF
ON
31
ON
ON
ON
ON
ON
2. Set the START input signal to ON.
c
CAUTION
The START input signal is executed by ON edge detection.
3. When a START input signal is normally received, the ACK output signal turns ON, and the
robot starts to move.
The ROTATE output signal turns ON during robot movement (during motor drive).
4. On reaching the target position, the speed reduces to a pushing speed and torque movement
starts.
5. Torque detection time starts at the point that the torque limit is reached.
6. The ROTATE output signal turns OFF at count-up.
7. The END output signal turns ON when the torque movement ends correctly.
c
CAUTION
When the START input signal stays ON, the ACK output signal remains ON even if the torque movement is
complete. When the ACK output signal remains ON, the END output signal cannot turn ON.
21
9-
BASIC OPERATION AND OPERATION TIMING CHART
Point No.
9.4 Torque movement
Robot torque movement is any one of the following states.
Balanced state (operation
ends normally)
External force and specified torque
current match so that the robot stops at
that position.
External force = specified torque current
Pushed past target position
Specified pushing torque current is larger
than external force so robot ended
movement at target position + Torque
distance.
External force < specified torque current
Dribble
External force matched the specified
pushing torque current but the torque
current exceeded the external force so
the robot gradually moved in that same
direction.
External force < specified torque current
Pushed back (Moves
rearward after balancing)
External force matched specified torque
current but the torque current was less
than the external force so the robot
moved in the reverse direction.
External force > specified torque current
During torque movement, the particular state such as normal end, pushing past target position, or
dribble can be found by checking for one of 3 signals: ROTATE, END, INPOS. (However, this is
only when the INPOS width setting is less than 4 pulses.)
Start movement
BASIC OPERATION AND OPERATION TIMING CHART
9
9-
22
ROTATE
END
INPOS
ON→OFF
ON
OFF
Ends normally
OFF
ON
Ineffective
ON
ON
Dribble, then ineffective
9.4 Torque movement
Timing Chart
PNT 1 to 5
START
ACK
Torque detection time
Motor speed
qw
er t
ROTATE
INPOS
*
END
y
Starts decelerating towards target position. (Torque distance is added to target position.)
Reduces to torque movement speed.
Starts torque movement.
Reaches specified torque current.
Balanced state
Target position + torque distance
* After the pushing conditions are set up, the INPOS output signal turns ON when the robot
enters within INPOS range before the torque detection time elapses. The INPOS output signal
remains ON even after the torque detection time elapses.
After the pushing conditions are set up, the END output signal is ON after the torque detection
time elapses, regardless of the ROTATE and INPOS signal states.
c
CAUTION
After reaching the specified current, if the current value falls below the specified value during torque detection
(such as when workpiece has moved by torque control) then the count starts again after once again reaching the
specified current.
c
CAUTION
Set the INPOS range to a value smaller than the torque distance.
c
CAUTION
Always set the START input signal to OFF at the point that the ACK output signal has turned ON.
23
9-
9
BASIC OPERATION AND OPERATION TIMING CHART
q
w
e
r
t
y
9.4 Torque movement
9.4.2 When the robot moves in same direction (dribble) after
torque movement ends
When the robot has moved in the same direction after torque movement ends, it stops at the point the
specified torque distance is reached.
Timing Chart
PNT 1 to 5
START
ACK
Torque distance
Torque detection time
t
Motor speed
qw
er
y
ROTATE
INPOS
9
*
BASIC OPERATION AND OPERATION TIMING CHART
END
q
w
e
r
t
y
u
u
Starts decelerating towards target position.
Reduces to torque movement speed.
Starts torque movement.
Reaches specified torque current.
Balanced state
Restarts operation.
Target position + torque distance
* After the pushing conditions are set up, the INPOS output signal turns ON when the robot
enters within INPOS range before the torque detection time elapses. The INPOS output signal
remains ON even when the robot further moves in the same direction after the torque movement is complete.
After the pushing conditions are set up, the END output signal is ON after the torque detection
time elapses, regardless of the ROTATE signal state.
c
9-
24
CAUTION
Always set the START input signal to OFF at the point that the ACK output signal has turned ON.
9.4 Torque movement
9.4.3 When the robot moves in reverse direction after torque
movement
When the robot has moved in the reverse direction after torque movement, an alarm is issued on
returning a certain amount from the balanced position specified by parameter (PRM36: Max Torque
Deviation) and the robot stops.
Timing Chart
PNT 1 to 5
START
ACK
Torque detection time
Parameter specified
amount
t
Motor speed
qw
er
y
ALM
ROTATE
INPOS
9
*
q
w
e
r
t
y
Starts decelerating towards target position.
Reduces to torque movement speed.
Starts torque movement.
Reaches specified torque current.
Balanced state
Restarts operation.
* After the pushing conditions are setup, the INPOS output signal turns ON when the robot
enters within INPOS range before the torque detection time elapses.
After the pushing conditions are set up, the INPOS output signal turns OFF when the robot has
moved in reverse and deviated from the INPOS range before returning to the movement amount
specified by parameter.
When entering INPOS range, the INPOS output signal is also OFF when the robot has returned by an amount of movement specified by parameter.
• After pushing conditions are set up, the END output signal is ON after the torque detection
time elapses, regardless of the ROTATE signal state.
• The END output signal state does not change even if an ALM (alarm) is issued.
See “11. Troubleshooting” for detailed information on alarms.
• The state of the INPOS output signal depends on whether the balanced point with the reverse
direction force is within or outside the INPOS range.
c
CAUTION
Always set the START input signal to OFF at the point that the ACK output signal has turned ON.
25
9-
BASIC OPERATION AND OPERATION TIMING CHART
END
9.4 Torque movement
9.4.4 When the robot has pushed past target position
When the robot has moved past the target position during torque movement, it then stops at the target
position + torque distance.
Timing Chart
PNT 1 to 5
START
ACK
e
Motor speed
qw
ROTATE
INPOS
*
END
9
r
BASIC OPERATION AND OPERATION TIMING CHART
q
w
e
r
Starts decelerating towards target position.
Reduces to torque movement speed.
Torque movement is complete.
Target position + torque distance
* When the robot has moved past the target position during torque movement, it then stops at the
target position + torque distance, so the INPOS output signal will turn ON.
• Pushing conditions are not satisfied when the robot has pushed past the target position, so the
END output signal does not turn ON.
• When then END output signal turns OFF while the ROTATE signal is OFF, this state means
the robot has pushed past the target position.
c
9-
26
CAUTION
Always set the START input signal to OFF at the point that the ACK output signal has turned ON.
9.4 Torque movement
9.4.5 When held in position at interlock during torque movement
Timing chart
Before the end of torque movement
When an interlock (LOCK) is input during torque movement, the position during input is held.
PNT 1 to 5
START
ACK
LOCK
Torque detection time
Motor speed
qw
er
ROTATE
INPOS
*
9
q
w
e
r
Starts decelerating towards target position.
Reduces to torque movement speed.
Starts torque movement.
Reaches specified torque current.
* During torque movement, when the INPOS output signal turns ON with the robot already
within INPOS range prior to an interlock state, the INPOS output signal will stay ON even if a
LOCK signal is input.
• When the LOCK input is entered before the torque detection time elapses after starting torque
movement, position hold is performed with the END output signal still turned OFF.
• Even if the interlock is canceled, the END output signal and INPOS output signal maintain the
same state they had during the interlock.
• When performing relative movement after stopped with LOCK, the stop position becomes the
reference position.
c
CAUTION
Always set the START input signal to OFF at the point that the ACK output signal has turned ON.
27
9-
BASIC OPERATION AND OPERATION TIMING CHART
END
9.4 Torque movement
After completing torque movement
PNT 1 to 5
START
ACK
LOCK
Torque detection time
Motor speed
qw
er
ROTATE
INPOS
*
END
9
BASIC OPERATION AND OPERATION TIMING CHART
q
w
e
r
Starts decelerating towards target position. (Torque distance is added to target position.)
Reduces to torque movement speed.
Starts torque movement.
Reaches specified torque current.
* When the robot enters within INPOS range before torque movement is complete, the INPOS
output signal turns ON at that point.
The INPOS output signal stays ON even if the LOCK input is entered after torque movement
is complete.
• When the LOCK input is entered when the torque detection time has elapsed after starting
torque movement, position hold is performed with the END output signal still turned OFF.
• Even if the interlock is canceled, the END output signal and INPOS output signal maintain the
same state they had during the interlock.
• When performing relative movement after stopped with LOCK, the stop position becomes the
reference position.
c
9-
28
CAUTION
Always set the START input signal to OFF at the point that the ACK output signal has turned ON.
9.4 Torque movement
9.4.6 When alarm or EMG were input during torque movement
When an alarm or EMG (emergency stop) were input during torque movement, the robot is held at
the position where these were input, and the servos are in free state after stopping.
Timing chart
Before the end of torque movement
PNT 1 to 5
START
ACK
EMG
Torque detection time
Motor speed
qw
er
ROTATE
INPOS
9
*
EMG MON
q
w
e
r
Starts decelerating towards target position.
Reduces to torque movement speed.
Starts torque movement.
Reaches specified torque current.
* During torque movement, when the INPOS output signal turns ON with the robot already
within INPOS range prior to an emergency stop, the INPOS output signal will turn OFF if an
alarm or EMG signal is input.
• When an alarm or EMG signal is input before the torque detection time elapses after starting
torque movement, the robot stops with the END output signal still turned OFF, and the servo
turns off.
• Even if the emergency stop is canceled, the END output signal maintains the same state it had
during the emergency stop. At this point, the INPOS output signal turns ON.
• When performing relative movement after stopped with an alarm or EMG input, the stop position becomes the reference position.
c
CAUTION
Always set the START input signal to OFF at the point that the ACK output signal has turned ON.
c
CAUTION
The ALMCLR input signal does not use edge detection. Always turn the signal off after ALMCLR input.
29
9-
BASIC OPERATION AND OPERATION TIMING CHART
END
9.4 Torque movement
After completing torque movement
PNT 1 to 5
START
ACK
EMG
Torque detection time
Motor speed
qw
er
ROTATE
INPOS
*
END
9
BASIC OPERATION AND OPERATION TIMING CHART
EMG MON
q
w
e
r
Starts decelerating towards target position. (Torque distance is added to target position.)
Reduces to torque movement speed.
Starts torque movement.
Reaches specified torque current.
* When the robot enters within INPOS range before torque movement is complete, the INPOS
output signal turns ON at that point.
The INPOS output signal will turn OFF if an alarm or EMG signal is input after torque movement is complete.
• When an alarm or EMG signal is input before the torque detection time elapses after starting
torque movement, the robot stops with the END output signal still turned ON, and the servo
turns off.
• Even if the emergency stop is canceled, the END output signal maintains the same state it had
during the emergency stop. At this point, the INPOS output signal turns ON.
• When performing relative movement after stopped with an alarm or EMG input, the stop position becomes the reference position.
c
9-
30
CAUTION
Always set the START input signal to OFF at the point that the ACK output signal has turned ON.
9.5 Zone output operation
9.5
Zone output operation
This section explains the basic operation and operation timing charts for zone output operation.
9.5.1 Normal zone output operation
Example:
A position is set 12 mm from the origin point. During movement to a position 245 mm from origin
point, a zone signal is output when the robot enters a position in an area from 120 mm to 150 mm
from the origin point.
Precondition:
Point data has already been created and the data loaded into the controller.
Parameter
Description
Setting
PRM59
Upper Zone Range (mm)
150
PRM60
Lower Zone Range (mm)
120
Item Command
PNT1
ABS-PT
Position
(mm)
INPOS width
(mm)
Speed
245.00
0.06
50
Acceleration Deceleration
35
Torque limit
Torque distance
(mm)
0
0.00
35
* See the support software manual or teaching box manual for information on how to create
point data and how to load data.
Basic operation
1. Specify the movement point.
Methods for specifying the point are as follows.
9
PNT5 (24)
PNT4 (23)
PNT3 (22)
PNT2 (21)
PNT1 (20)
0
OFF
OFF
OFF
OFF
OFF
1
OFF
OFF
OFF
OFF
ON
2
OFF
OFF
OFF
ON
OFF
13
OFF
ON
ON
OFF
ON
31
ON
ON
ON
ON
ON
2. Set the START input signal to ON.
c
CAUTION
The START input signal is executed by ON edge detection.
3. When the START input signal turns ON normally, the ACK output signal turns ON, and the
robot starts to move.
The ROTATE output signal turns ON during robot movement (during motor drive).
4. The ZONE output signal turns ON when the robot enters the zone output signal designated
area.
5. The ZONE output signal turns OFF when the robot leaves the zone output signal designated
area.
6. The END output signal turns ON when the robot normally completes movement to the designated movement point.
c
c
CAUTION
When the START input signal stays ON, the ACK output signal remains ON even if the movement is complete.
When the ACK output signal remains ON, the END output signal cannot turn ON.
CAUTION
The ZONE output position is inaccurate if return-to-origin is incomplete. Always use the ZONE output signal
after performing return-to-origin.
31
9-
BASIC OPERATION AND OPERATION TIMING CHART
Point No.
9.5 Zone output operation
Timing Chart
PNT 1 to 5
START
ACK
Motor speed
ROTATE
END
INPOS width
INPOS
ZONE
9
ZONE output range
BASIC OPERATION AND OPERATION TIMING CHART
The ZONE output signal can determine and output the current position when the robot has changed
to the interlock state, emergency stop state or alarm state.
However, the previous output status is maintained when a broken wire detection, or CPU error
alarm has occurred.
c
9-
32
CAUTION
Always turn the START input signal OFF at the point that the ACK output signal has turned ON.
Chapter 10
SPECIFICATIONS
10.1 Basic specifications
Model
Specification item
Controllable robot
Dimensions
Basic
Weight
specifications
Power input
Power capacity (Max.)
Number of control axes
Control method
Position detection method
Position setting units
Axis control Operation method
Speed setting
Acceleration/deceleration setting
Servo adjustment
Pulse resolution
Number of points
Point input method
Memory
specifications Origin detection method
Point teaching method
Parallel I/O signal
External
I/O
interface
Protective
function
General
Others
Detectable error items
Operating temperature
Storage temperature
Operating humidity
Selectable option
PRC2
10
SPECIFICATIONS
Serial I/O signal
Power
Brake output
Emergency stop input
External communication
PRC1
T4P
T5P
W42.5×H102×D81mm
0.4kg (Controller only)
DC24V±10% *1 *2
1.6Arms
2.7Arms
1 axis
Software servo
Encoder
mm or pulses
PTP operation (point trace method) *3
0 to 240, in 1 increment (100=1875rpm)
1 to 255, in 1 increment (100=6123rad/s2)
Adjustable by parameter setting: gain adjustment, LPF adjustment
800 P/R
32 points
Teaching box (TP-2) or PC *4
Stroke end or sensor
Manual input, teaching input, direct teaching
Dedicated 10/8 points
• Start input (START)
• Instruction position number input (5-bit binary)
• Interlock (LOCK)
Input
• Emergency stop (EMG)
• Alarm clear
• Return-to-origin input (ORG)
• ACK
• Motor drive status output (ROTATE)
• Alarm output (ALM)
• Zone output (ZONE)
Output
• END
• EMG monitor
• Return-to-origin input monitor (ORG monitor) / Interlock
monitor (LOCK monitor) *5
• In-POSITION (target point arrival check)
Serial interface I/O (RS-485) *6
DC 5 to 24V
Available
Normally-closed contact input
Conforms to RS-485: 1CH (teaching box or PC)
Over-current, wire breakage, supply voltage drop, servo error, CPU
error, memory error, regenerative unit error, over-speed, etc.
0°C to 55°C
-20°C to 70°C
Below 90%RH (no condensation)
Teaching box, support software
* 1 Power needed for I/O control must be supplied from an I/O connector from an I/O power supply. This is separate
from the power required by the controller itself.
* 2 Always install a noise filter on the power line when used with inductive loads such as motors and solenoid valves.
Misoperation or malfunction may occur if no noise filter is used. See “4.4.5 Preventing misoperation due to noise”.
* 3 The trace command format for the PRC controller is different from that for the YAMAHA ERCX, SRCX, DRCX,
TRCX controllers.
* 4 Optional support software YPB-Win for PRC is needed.
* 5 The ORG monitor and LOCK monitor can be changed by parameter setting. The ORG monitor is set prior to
shipment from the factory.
* 6 One to 16 slave stations can be connected to one master station.
1
10-
10.2 External view
10.2 External view
Fig. 10-1 PRC external view
28
2-φ3.5
42.5
81
5
5.5
40
4.5
21.5
)
(R
CN1
CN5
91
102
93
PWR
ALM
COM
CN6
SER.NO
MANUFACTURED
(R
FACTORY AUTOMATION EQUIPMENT MADE IN JAPAN
)
5
CN4
CN3
CN2
37
10.3 Robot No.
10
SPECIFICATIONS
Robots have a number established to identify them according to model, lead and installation layout.
Refer to the following table when initializing parameters or checking robot settings.
10-
2
T4P-06
T4P-12
T5P-06
T5P-12
Horizontal installation
2
3
4
6
Vertical installation
-
-
5
7
Chapter 11
Troubleshooting
11.1 When problems occur
When contacting us after problems occur, please provide information in as much detail as possible
about the following items.
Item
What?
Description
• Controller type
• Controller serial No.
• Robot type
• Robot serial No.
When?
• When purchased
• Usage period, circumstance of use
• Circumstances of problem that occurred
What condition?
• What was done that made the problem occur?
What happened?
• Symptoms of the problem
How often?
• How often does the problem occur?
11.2 Checking the alarm and countermeasure
This controller has an LED to show the alarm status and for checking if trouble has occurred. The
nature of the trouble can be found by the number of times the LED flashes, or the alarm code by
communicating with the device. How to find the trouble and deal with it when an alarm occurs are
described below. Consult with us if the trouble is not corrected.
11.2.1 Alarm display
The alarm information, cause and countermeasure are explained in the alarm code sequence.
Format
11
Alarm code
OVERLOAD
LED flash count :
Description
:
Cause
Action
LED flash count : When an alarm occurs, the LED on the front panel flashes or lights up according to the alarm information.
Description
: This lists the alarm information.
Cause
: Shows the cause of the alarm.
Action
: Shows the corrective action to take to cancel or avoid the alarm.
*Alarms that have “(Restart)” appearing behind the alarm name require that the
controller be restarted in order to cancel the alarm.
1
11-
TROUBLESHOOTING
A06
Alarm name (*)
11.2 Checking the alarm and countermeasure
Alarm message list
A01
Encoder Wire Broken (REBOOT)
LED flash count : 1 time
Description
: Encoder wire broken or disconnected.
Cause
Action
Encoder wire is broken or miswired.
Check the encoder wire connection.
Misoperation or malfunction caused due to noise.
Make a check for ambient noise. See “4.4.5 Preventing misoperation
due to noise” and take proper measures.
A02
Power Supply Voltage High
LED flash count : 2 times
Description
: Power supply voltage exceeded its rated specifications.
Cause
Excessive supply voltage on the 24 V power line or a wrong connection.
A03
Action
Check the power supply connection and setting.
Power Supply Voltage Low
LED flash count : 2 times
Description
: Power supply voltage dropped below its rated specifications.
*This is detected during servo-on and initializing operation. Not detected during
servo-off (emergency stop) or during alarm.
Cause
Controller drive power is insufficient.
Action
Check the capacity of the power supply. If insufficient, replace it
with a power supply having larger capacity.
A04
Initial Motion Failed (REBOOT)
LED flash count : 3 times
Description
: Initialization did not finish within 5.5 seconds.
11
TROUBLESHOOTING
Cause
Action
Motor wire is broken or connected wrong.
Check the motor wire connection.
Encoder wire is broken or miswired.
Check the encoder wire connection.
Controller drive power supply has insufficient capacity.
Check the power supply capacity. If insufficient, replace it with a
power supply having large capacity.
Motor defective
Replace the motor.
Electromagnetic brake or wire is broken.
Operate the brake and check if the brake can be released.
Abnormal resistance in mechanical sliding part.
Check if the robot moving parts are working sluggishly. If sluggish,
then readjust the mechanical alignment.
Payload too heavy
Do not place a load during initialization.
Parameter error
Perform generation if the PRM25 parameter (Initial Motion Bump)
is not set to "0:Permit".
Controller defective
11-
2
Replace the controller if problems frequently occur.
11.2 Checking the alarm and countermeasure
A05
Servo Error
LED flash count : 4 times
Description
: In the case that “PRM30: Position Deviation Alarm” is “0: Permit”,
• Normal movement (amount) or movement in reverse direction of command
exceeded the value of “PRM27: Max Position Deviation”.
• Movement amount to direction in reverse of command during torque movement exceeded the value of “PRM36: Max Torque Deviation”.
Cause
Problems during use
Action
To permit just the push-back during pushing movement, set the
Max Torque Deviation (PRM36) to a figure larger than the effective
robot stroke.
Detected excessive vibration such as overshoot during
Lower the speed and acceleration/deceleration values in the point
movement.
data.
Motor defective
Replace the motor.
Electromagnetic brake or wire is broken.
Operate the brake and check if the brake can be released.
Abnormal resistance in mechanical sliding parts.
Check if the robot moving parts are working sluggishly. If sluggish,
then readjust the mechanical alignment.
Parameter error
Perform generation.
Controller defective
Replace the controller if problems frequently occur.
A06
Overload
LED flash count : 4 times
Description
: Overload on motor.
Cause
Action
Problems during use
Correct the payload as well as speed settings in the point data.
Motor defective
Replace the motor.
Electromagnetic brake or wire is broken.
Operate the brake and check if the brake can be released.
Abnormal resistance in mechanical sliding parts.
Check if the robot moving parts are working sluggishly. If sluggish,
then readjust the mechanical alignment.
Parameter error
Perform generation.
Controller defective
Replace the controller if problems frequently occur.
Over Speed
TROUBLESHOOTING
A07
11
LED flash count : 4 times
Description
: Motor rotation speed exceeded the maximum value.
Cause
Action
Problems during use
Correct the payload as well as speed settings in the point data.
Motor defective
Replace the motor.
Parameter error
Perform generation.
Controller defective
Replace the controller if problems frequently occur.
A08
Over Regenerator Voltage
LED flash count : 5 times
Description
: Motor regenerative voltage exceeded the maximum value.
Cause
Action
Problems during use
Lower the robot operating duty.
Parameter error
Perform generation.
Controller defective
Replace the controller if problems frequently occur.
3
11-
11.2 Checking the alarm and countermeasure
A09
Origin Motion Failed
LED flash count : 6 times
Description
: Return-to-origin operation does not end normally.
Cause
Action
Parameter error
Perform generation.
Controller defective
Replace the controller if problems frequently occur.
A10
Deviation Counter Overflow
LED flash count : 7 times
Description
: Deviation from current position to target position exceeded 134127727 pulses.
Cause
Problems during use
A11
Action
Correct the Position in the point data.
Position Limit Exceeded
LED flash count : 7 times
Description
: Plus/minus sign on absolute position counter inverts when the Position Limit
Alarm (PRM28) is “0: Permit”.
Cause
Problems during use
Action
Set the Position Limit Alarm (PRM28) to “1: Protected” when using
the unlimited rotation function.
When the Origin Preset (PRM69) is different from the value already
set, set a value that does not invert the plus/minus sign within the
operating range.
A12
Torque Motion Failed
LED flash count : 8 times
Description
: Robot moved up to the torque movement amount position by pushing operation when the Insufficient Torque Alarm (PRM29) was “0: Permit”.
11
Cause
TROUBLESHOOTING
Could not obtain balance versus robot pushing thrust.
Action
If not wishing to issue an alarm for pushing operation error, set the
Insufficient Torque Alarm (PRM29) to “1: Protected”.
A16
Memory Error (REBOOT)
LED flash count : lights up
Description
: Error occurred in memory inside the controller.
Cause
Action
Misoperation or malfunction caused due to noise.
Make a check for ambient noise. See “4.4.5 Preventing misoperation
Controller defective
Replace the controller if problems frequently occur.
due to noise” and take proper measures.
11-
4
11.2 Checking the alarm and countermeasure
Alarms not shown on alarm code
A** CPU HALT
LED flash count : lights up
Description
: The CPU in the controller won’t operate correctly.
Cause
Action
Drop in power supply voltage.
Check if the power supply voltage is within the rated specifications.
Misoperation or malfunction caused due to noise.
Make a check for ambient noise. See “4.4.5 Preventing misoperation
due to noise” and take proper measures.
Controller defective
Replace the controller if problems frequently occur.
11.2.2 Alarms not requiring restart
Alarms not requiring re-startup can be reset by setting the alarm clear signal (ALMCLR) to ON.
When the alarm is canceled, the alarm signal (ALM) turns ON (normal controller status) and the
servo is on. After checking this, always turn off the alarm clear signal (ALMCLR). If the alarm clear
signal (ALMCLR) is always on, then alarms will be mistakenly cleared as soon as they occur.
See “9.1.4 Alarm status (cancelable alarm)” for more information.
11
TROUBLESHOOTING
5
11-
11.3 Dealing with problems based on trouble symptom
11.3 Dealing with problems based on trouble symptom
This section explains causes, checkpoints and action to take for the following problem symptoms. If
problem symptoms occur that are not covered in the table below then consult with YAMAHA.
Problem Symptom
Refer to:
Problems with robot operation
No servo-lock on robot even if power is turned on.
See "11.3.1 Robot operation".
Abnormal noise or oscillation occurs.
Position deviation occurs.
Robot speed is abnormally slow.
Robot won’t move with return-to-origin command.
Alarm occurs during return-to-origin.
Position is deviated after return-to-origin.
Robot won't move with movement commands.
Robot stops during movement.
Robot won't perform torque movement.
Robot stops during torque movement.
Torque movement ends while in-progress.
Cannot perform jog movement.
Cannot release brake.
Problems with parallel I/O
Output signal won’t turn ON.
See "11.3.2 Parallel I/O".
Output signal won’t turn OFF.
ALM signal is off after power is turned on.
END signal won’t turn ON after power is turned on.
No ACK signal is returned after ORG signal is input.
END signal won’t turn ON after ORG signal is input.
ORGMON signal won’t turn ON after return-to-origin.
ACK signal is not returned after START signal is input.
ROTATE signal won’t turn on after START signal is input.
11
INPOS signal won’t turn OFF after START signal is input.
END signal won’t turn ON after START signal is input.
TROUBLESHOOTING
ZONE signal won’t turn ON.
ZONE signal stays ON or stays OFF.
EMGMON signal won’t turn ON even if emergency stop is input.
LOCKMON signal won’t turn ON even if interlock is input.
INPOS signal won’t turn ON in servo-ON and with robot in stop state.
Others
Alarm is canceled at the same time that it occurs.
Servo holding power is weak.
Robot starts to move at the same time that Lock signal is canceled.
11-
6
See "11.3.3 Others".
11.3 Dealing with problems based on trouble symptom
Format
Symptom
Abnormal noise or oscillation occurs.
Cause
Checkpoint
Action
:
:
:
Cause
Checkpoint
Action
: Shows the cause that made the problem symptom occur.
: Shows a checkpoint for the problem symptom.
: Shows an action or countermeasure for resolving the problem.
11.3.1 Robot operation
No servo-lock on robot even if power is turned on.
Cause 1
Checkpoint
Action
: Alarm has occurred.
: Connect the teaching box or support software and check description on alarm
that occurred.
: See “11.2.1 Alarm display” and take countermeasures.
Cause 2
Checkpoint
Action
: Has set to emergency stop.
: Check emergency stop signal input.
: Cancel emergency stop signal input.
Cause 3
Checkpoint
Action
: An interlock is activated.
: Check Lock signal input.
: Cancel Lock signal input.
11
Abnormal noise or oscillation occurs. q
: Imperfect alignment.
: Check if robot moving parts work smoothly.
: Adjust the parts alignment.
Cause 2
Checkpoint
Action
: Imperfect coupling tightening.
: Check the tightened section.
: Tighten if loose.
Cause 3
Checkpoint
Action
: Cover setscrews are loose.
: Check the tightened section.
: Tighten if loose.
Cause 4
Checkpoint
Action
: Guide problem.
: Check for intrusion of foreign objects or breakage/warping.
: • Replace the guide rail.
• Check the usage method, amount of tool offset, etc.
TROUBLESHOOTING
Cause 1
Checkpoint
Action
7
11-
11.3 Dealing with problems based on trouble symptom
Abnormal noise or oscillation occurs. w
Cause 5
Checkpoint
Action
: Ball screw abnormality
: Check for intrusion of foreign objects or breakage/warping.
: • Replace ball screw
• Check usage method, payload, etc.
Cause 6
Checkpoint
Action
: Levelness of robot installation surface is below tolerance value.
: Measure the levelness of the installation surface.
: If below the tolerance value, re-machine the installation surface.
Cause 7
Checkpoint
Action
: Robot type setting error
: Refer to the robot No. (PRM42) and check that the robot type is set correctly.
: • If the No. does not match the model you are using, then perform generation.
• Reset the speed and acceleration/deceleration of the point data.
Cause 8
Checkpoint
Action
: Payload exceeded robot allowable payload.
: Refer to payload (PRM44) and check that is set correctly.
: • Perform generation according to the actual payload.
• Reset the speed and acceleration/deceleration of the point data.
Cause 9
Checkpoint
Action
: Motor is defective.
: Try using another motor.
: If operation with another motor is okay, then replace the defective motor.
Cause 10
Checkpoint
Action
: Controller is defective.
: Try using another controller.
: If operation with another controller is okay, then replace the defective controller.
Position deviation occurs q
TROUBLESHOOTING
11
11-
8
Cause 1
Checkpoint
Action
: Imperfect tightening of coupling.
: Check the tightened section.
: Tighten if loose.
Cause 2
Checkpoint
Action
: Ball screw abnormality
: Check for excessive play, or loose nuts and bolts.
: • Tighten the nuts and bolts if loose.
• Replace the ball screw if defective.
• Check the usage method and payload, etc.
11.3 Dealing with problems based on trouble symptom
Position deviation occurs w
Cause 3
Checkpoint
Action
: Robot installation is defective.
: Check the installation bolts on the mount base.
: Tighten if loose.
Cause 4
Checkpoint
Action
: Misoperation due to noise.
: • Check if the robot and controller are using the same ground point.
• Check if there are any noise sources in the vicinity of the controller such as
welders or discharge machines.
: See “4.4.5 Preventing misoperation due to noise” and take countermeasures.
Cause 5
Checkpoint
Action
: Defective motor.
: Try using another motor.
: If operation with another motor is okay, then replace the defective motor.
Cause 6
Checkpoint
Action
: Controller is defective.
: Try using another controller.
: If operation with another controller is okay, then replace the defective controller.
Robot speed is abnormally slow.
Cause 1
Checkpoint
Action
: Speed and acceleration/deceleration of point data is set too low.
: Check the point data setting.
: Reset the speed and acceleration/deceleration of the point data.
Cause 2
Checkpoint
Action
: Load on the robot is too large.
: Check if the payload is higher than the allowable robot payload.
: Correct the payload weight.
Cause 3
Checkpoint
Action
: Imperfect alignment
: Check if robot moving parts work smoothly.
: Adjust the moving part alignment.
11
Cause 1
Checkpoint
Action
: Alarm has occurred.
: Connect the teaching box or support software and check description on alarm
that occurred.
: See “11.2.1 Alarm display” and take countermeasures.
Cause 2
Checkpoint
Action
: Has set to emergency stop.
: Check emergency stop signal input.
: Cancel emergency stop signal input.
Cause 3
Checkpoint
Action
: An interlock is activated.
: Check Lock signal input.
: Cancel Lock signal input.
Alarm occurs during return-to-origin.
Cause 1
Checkpoint
Action
: Encoder cable or motor cable are broken or disconnected.
: Check the encoder cable and motor cable connections.
: If broken then replace the cable.
Cause 2
Checkpoint
Action
: The return-to-origin method (PRM63) parameter is not set correctly.
: Check if the setting matches the robot type. (“Edge” or “Sensor”)
: Reset the parameter.
9
11-
TROUBLESHOOTING
Robot won’t move with return-to-origin command.
11.3 Dealing with problems based on trouble symptom
Position is deviated after return-to-origin q
Cause 1
Checkpoint
Action
: Imperfect coupling tightening.
: Check the tightened section.
: Tighten if loose.
Cause 2
Checkpoint
Action
: Ball screw abnormality
: Check for excessive play, or loose nuts and bolts.
: • Tighten the nuts and bolts if loose.
• Replace the ball screw if defective.
• Check the usage method and payload, etc.
Cause 3
Checkpoint
: Misoperation due to noise.
: • Check if the robot and controller are using the same ground point.
• Check if there are any noise sources in the vicinity of the controller such as
welders or discharge machines.
: See “4.4.5 Preventing misoperation due to noise” and take countermeasures.
Action
Position is deviated after return-to-origin w
Cause 4
Checkpoint
Action
: Defective motor.
: Try using another motor.
: If operation with another motor is okay then replace the defective motor.
Cause 5
Checkpoint
Action
: Controller is defective.
: Try using another controller.
: If operation with another motor is okay then replace the defective controller.
Robot won’t move with movement commands.
Cause 1
Checkpoint
TROUBLESHOOTING
11
Action
: Alarm has occurred.
: Connect the teaching box or support software and check description on alarm
that occurred.
: See “11.2.1 Alarm display” and take countermeasures.
Cause 2
Checkpoint
Action
: Has set to emergency stop.
: Check emergency stop signal input.
: Cancel emergency stop signal input.
Cause 3
Checkpoint
Action
: An interlock is activated.
: Check Lock signal input.
: Cancel Lock signal input.
Cause 4
Checkpoint
Action
: Return-to-origin is incomplete.
: Check if return-to-origin is complete.
: Perform return-to-origin if not completed.
Cause 5
Checkpoint
: Target point is outside of software limits.
: • Check movement amount of designated point data.
• Check the upper and lower soft limit (PRM61, PRM62) settings.
: Reset the point data movement amount as well as upper and lower soft limits
(PRM61, PRM62) to their correct settings.
Action
Cause 6
Checkpoint
Action
11-
10
: Movement amount specified in absolute position movement command from
current position to target position exceeded 134217727 pulses.
: Check the movement amount of the designated point data.
: Reset the point data.
11.3 Dealing with problems based on trouble symptom
Robot stopps during movement.
Cause 1
Checkpoint
Action
: Alarm has occurred.
: Connect the teaching box or support software and check description on alarm
that occurred.
: See “11.2.1 Alarm display” and take countermeasures.
Cause 2
Checkpoint
Action
: Has set to emergency stop.
: Check emergency stop signal input.
: Cancel emergency stop signal input.
Cause 3
Checkpoint
Action
: An interlock is activated.
: Check Lock signal input.
: Cancel Lock signal input.
Robot won’t perform torque movement.
Cause 1
Checkpoint
Action
: Position robot arrive at by torque movement is outside the software limit range.
: Check the point data or the software limit settings.
: Reset the point data or the software limit.
Robot stops during torque movement.
Cause 1
Checkpoint
Action
: Alarm has occurred.
: Connect the teaching box or support software and check description on alarm
that occurred.
: See “11.2.1 Alarm display” and take countermeasures.
Cause 2
Checkpoint
Action
: Emergency stop signal was input during operation.
: Check emergency stop signal input.
: Cancel emergency stop signal input.
Cause 3
Checkpoint
Action
: A Lock signal was activated during operation.
: Check Lock signal input.
: Cancel Lock signal input.
11
TROUBLESHOOTING
Torque movement ends while in-progress.
Cause 1
Checkpoint
Action
: Torque current limit value for point data is extremely low.
: Check the setting for the torque current limit.
: Reset the point data.
Cause 2
Checkpoint
Action
: Load on the robot is too large.
: Check if the payload is higher than the allowable robot payload.
: Correct the payload.
Cause 3
Checkpoint
Action
: Abnormal sliding movement resistance.
: Check if robot movement sections work smoothly.
: Adjust the alignment.
11
11-
11.3 Dealing with problems based on trouble symptom
Cannot perform jog movement.
Cause 1
Checkpoint
Action
: Alarm has occurred.
: Connect the teaching box or support software and check description on alarm
that occurred.
: See “11.2.1 Alarm display” and take countermeasures.
Cause 2
Checkpoint
Action
: Has set to emergency stop.
: Check emergency stop signal input.
: Cancel emergency stop signal input.
Cause 3
Checkpoint
Action
: An interlock is activated.
: Check Lock signal input.
: Cancel Lock signal input.
Cause 4
Checkpoint
Action
: Return-to-origin is incomplete.
: Check if return-to-origin is complete.
: Perform return-to-origin if not completed.
Cause 5
Checkpoint
: Operation specified for jog movement has exceeded the software limits
: Check the current position and jog movement speed, as well as the movement
direction.
: Change the jog movement speed setting, as well as the movement direction.
Action
Cannot release brake.
TROUBLESHOOTING
11
11-
12
Cause 1
Checkpoint
Action
: Brake cable is defective.
: Check if brake cable requires replacement.
: Replace the defective cable.
Cause 2
Checkpoint
Action
: Defective motor.
: Try using another motor.
: If operation with another motor is okay, then replace the defective motor.
Cause 3
Checkpoint
Action
: Controller is defective.
: Try using another controller.
: If operation with another motor is okay, then replace the defective controller.
11.3 Dealing with problems based on trouble symptom
11.3.2 Parallel I/O
Output signal won’t turn ON.
Cause 1
Checkpoint
Action
: Drive power for I/O signal is not supplied.
: Check if drive power for I/O signal is being supplied to +COM, -COM of I/O
flat cable.
: Supply drive power for I/O signal.
Cause 2
Checkpoint
Action
: I/O flat cable is broken or disconnected.
: Check the power to the I/O flat cable with a tester or multimeter, etc.
: Correct the wiring.
Cause 3
Checkpoint
Action
: I/O flat cable is miswired.
: Check if connection to wrong Pin No. was made.
: Correct the miswiring.
Cause 4
Checkpoint
Action
: Controller is defective.
: Try using another controller.
: If operation with another motor is okay, then replace the defective controller.
Output signal won’t turn OFF.
Cause 1
Checkpoint
Action
: I/O flat cable is shorted to -COM.
: Use a tester or multimeter to find if the I/O flat cable and –COM are shorted
: Correct the miswiring (short).
Cause 2
Checkpoint
Action
: I/O flat cable is miswired.
: Check if connection to wrong Pin No. was made.
: Correct the miswiring.
Cause 3
Checkpoint
Action
: Controller is defective.
: Try using another controller.
: If operation with another motor is okay, then replace the defective controller.
Cause 1
Checkpoint
Action
: Alarm has occurred.
: Connect the teaching box or support software and check description on alarm
that occurred.
: See “11.2.1 Alarm display” and take countermeasures.
ALM signal is OFF after power is turned on. w
Cause 2
Checkpoint
Action
: Drive power to the controller is not supplied.
: Check the connection at the controller power input connector, and also if
power is being supplied through the power cable.
: Supply drive power to the controller.
13
11-
TROUBLESHOOTING
ALM signal is OFF after power is turned on. q
11
11.3 Dealing with problems based on trouble symptom
END signal won’t turn ON after power is turned on.
Cause 1
Checkpoint
Action
: Alarm has occurred.
: Connect the teaching box or support software and check description on alarm
that occurred.
: See “11.2.1 Alarm display” and take countermeasures.
Cause 2
Checkpoint
Action
: Has set to emergency stop.
: Check emergency stop signal input.
: Cancel emergency stop signal input.
Cause 3
Checkpoint
Action
: An interlock is activated.
: Check Lock signal input.
: Cancel Lock signal input.
Cause 4
Checkpoint
Action
: System parameter settings are incorrect.
: ----: Perform generation.
No ACK signal is returned after ORG signal is input.
Cause 1
Checkpoint
TROUBLESHOOTING
11
Action
: Alarm has occurred.
: Connect the teaching box or support software and check description on alarm
that occurred.
: See “11.2.1 Alarm display” and take countermeasures.
Cause 2
Checkpoint
Action
: Has set to emergency stop.
: Check emergency stop signal input.
: Cancel emergency stop signal input.
Cause 3
Checkpoint
Action
: An interlock is activated.
: Check Lock signal input.
: Cancel Lock signal input.
Cause 4
Checkpoint
Action
: System parameter settings are incorrect.
: ----: Perform generation.
END signal won’t turn ON after ORG signal is input.
11-
14
Cause 1
Checkpoint
Action
: ORG or START signal has turned ON and still stays ON.
: Check the ORG or START signal input state.
: Always set the ORG and START signal to OFF when the ACK signal is ON or
expected time is elapsed.
Cause 2
Checkpoint
Action
: Alarm has occurred.
: Connect the teaching box or support software and check description on alarm
that occurred.
: See “11.2.1 Alarm display” and take countermeasures.
Cause 3
Checkpoint
Action
: Has set to emergency stop during origin point.
: Check emergency stop signal input.
: Cancel emergency stop signal input.
Cause 4
Checkpoint
Action
: An interlock was activated during return-to-origin.
: Check Lock signal input.
: Cancel Lock signal input.
Cause 5
Checkpoint
Action
: System parameter settings are incorrect.
: ----: Perform generation.
11.3 Dealing with problems based on trouble symptom
ORGMON signal won’t turn ON after return-to-origin.
Cause 1
Checkpoint
Action
: The DO3 output function (PRM19) is not set to “3. ORGMON”.
: Check the DO3 output function (PRM19) value.
: Set the DO3 output function (PRM19) to “3. ORGMON”.
ACK signal is not returned after START signal is input. q
Cause 1
Checkpoint
Action
: Alarm has occurred.
: Connect the teaching box or support software and check description on alarm
that occurred.
: See “11.2.1 Alarm display” and take countermeasures.
Cause 2
Checkpoint
Action
: Has set to emergency stop.
: Check emergency stop signal input.
: Cancel emergency stop signal input.
Cause 3
Checkpoint
Action
: An interlock is activated.
: Check Lock signal input.
: Cancel Lock signal input.
ACK signal is not returned after START signal is input. w
Cause 4
Checkpoint
Action
: Return-to-origin is incomplete.
: Check if return-to-origin is complete.
: Perform return-to-origin if not completed.
Cause 5
Checkpoint
Action
: Data is not stored in point specified by PNT signal.
: After connecting a teaching box or support software and checking the input
status of PNT1 to PNT5 on an I/O monitor screen, check the designated point
data.
: Select the point No. and correct the point data.
Cause 6
Checkpoint
Action
: Target point is outside of software limits.
: Check the point data movement setting.
: Correct the point data.
11
Cause 1
Checkpoint
Action
: The target position is the same as current position or is a position within 4
pulses of the current position.
: Check the point data movement amount setting.
: ---
INPOS signal won’t turn OFF after START signal is input.
Cause 1
Checkpoint
Action
Cause 2
: The target position is the same as current position or is a position within 4
pulses of the current position.
: Check the point data movement amount setting.
: ---
Checkpoint
Action
: The INPOS width setting is larger than the movement amount due to executing
point data.
: Check the point data for the INPOS width setting.
: Correct the point data.
Cause 3
Checkpoint
Action
: System parameter settings are incorrect.
: ----: Perform generation.
15
11-
TROUBLESHOOTING
ROTATE signal won’t turn on after START signal is input.
11.3 Dealing with problems based on trouble symptom
END signal won’t turn ON after START signal is input.
Cause 1
Checkpoint
Action
: ORG or START signal has turned ON and still stays ON.
: Check the ORG or START signal input state.
: Always set the ORG and START signals to OFF when the ACK signal is ON
or expected time is elapsed.
Cause 2
Checkpoint
Action
: Alarm occurred during operation.
: Connect the teaching box or support software and check description on alarm
that occurred.
: See “11.2.1 Alarm display” and take countermeasures.
Cause 3
Checkpoint
Action
: Has set to emergency stop during operation.
: Check emergency stop signal input.
: Cancel emergency stop signal input.
Cause 4
Checkpoint
Action
: An interlock was activated during operation.
: Check Lock signal input.
: Cancel Lock signal input.
Cause 5
Checkpoint
Action
: Torque movement was completed without arriving at current limit (robot has
moved past the target position during torque movement).
: Check the point data torque limit settings and torque distance settings.
: Correct the point data.
Cause 6
Checkpoint
Action
: System parameter settings are incorrect.
: ----: Perform generation.
ZONE signal won’t turn ON.
TROUBLESHOOTING
11
Cause 1
Checkpoint
Action
: Zone range upper and lower limits are the same value.
: Check the Upper and Lower Zone Range values (PRM59, PRM60).
: Reset the Upper and Lower Zone Range to the correct values (PRM59,
PRM60).
Cause 2
: Respective large and small values in zone range upper and lower limit values
are now reversed.
: Check the Upper and Lower Zone Range values (PRM59, PRM60).
: Reset the Upper and Lower Zone Range to the correct values (PRM59,
PRM60).
Checkpoint
Action
ZONE signal stays ON or stays OFF.
Cause 1
Checkpoint
Action
: CPU error or encoder broken cable alarm occurring.
: Connect the teaching box or support software and check description on alarm
that occurred.
: See “11.2.1 Alarm display” and take countermeasures.
EMGMON signal won’t turn ON even if emergency stop is input.
Cause 1
Checkpoint
Action
: System parameter settings are incorrect.
: ----: Perform generation.
LOCKMON signal won’t turn ON even if Lock is input.
Cause 1
Checkpoint
Action
11-
16
: The DO3 output function (PRM19) is not set to “2. DI4MON”.
: Check the DO3 output function (PRM19) value.
: Set the DO3 output function (PRM19) to “2. DI4MON”.
11.3 Dealing with problems based on trouble symptom
INPOS signal won’t turn ON in servo-ON and with robot in stop state.
Cause 1
Checkpoint
Action
: System parameter settings are incorrect.
: ----: Perform generation.
11.3.3 Others
Alarm is canceled at the same time that it occurs.
Cause 1
Checkpoint
Action
: ALMCLR signal is left turned ON.
: Check the ALMCLR signal input state.
: Set the ALMCLR signal to OFF.
Servo holding power is weak.
Cause 1
Checkpoint
Action
: Robot settings are incorrect.
: Check the robot No. (PRM42).
: Perform generation.
Robot starts to move at the same time that Lock signal is canceled.
Cause 1
Checkpoint
Action
: System parameter settings are incorrect.
: ----: Perform generation.
11
TROUBLESHOOTING
17
11-
MEMO
11-
18
Chapter 12
MAINTENANCE AND WARRANTY
12.1 Maintenance
Check the surrounding area environment periodically, also clean away dust and tighten the various
screws, nuts and bolts.
Also please note the following items.
1. Contact YAMAHA when repairs are required.
2. The controller frame reaches high temperature so use caution during maintenance
and inspections.
3. The electrolytic capacitors in the controller will deteriorate over time so replacing
them with new capacitors about every 5 years (at 40°C) is recommended as preventive maintenance.
12
MAINTENANCE AND WARRANTY
1
12-
12.2 Warranty
12.2 Warranty
The YAMAHA robot and/or related product you have purchased are warranted against the defects or
malfunctions as described below.
Warranty description
: If a failure or breakdown occurs due to defects in materials or
workmanship in the genuine parts constituting this YAMAHA
robot and/or related product within the warranty period, then
YAMAHA will repair or replace those parts free of charge (hereafter called "warranty repair").
Warranty Period
: The warranty period ends when any of the following applies:
(1) After 18 months (one and a half year) have elapsed from the
date of shipment
(2) After one year has elapsed from the date of installation
(3) After 2,400 hours of operation
Exceptions to the Warranty
: This warranty will not apply in the following cases:
(1) Fatigue arising due to the passage of time, natural wear and
tear occurring during operation (natural fading of painted or
plated surfaces, deterioration of parts subject to wear, etc.)
(2) Minor natural phenomena that do not affect the capabilities
of the robot and/or related product (noise from computers,
motors, etc.).
(3) Programs, point data and other internal data that were
changed or created by the user.
Failures resulting from the following causes are not covered by warranty repair.
1) Damage due to earthquakes, storms, floods, thunderbolt, fire or any other natural or man-made
disasters.
2) Troubles caused by procedures prohibited in this manual.
3) Modifications to the robot and/or related product not approved by YAMAHA or YAMAHA
sales representatives.
4) Use of any other than genuine parts and specified grease and lubricants.
5) Incorrect or inadequate maintenance and inspection.
6) Repairs by other than authorized dealers.
MAINTENANCE AND WARRANTY
12
YAMAHA MOTOR CO., LTD. MAKES NO OTHER EXPRESS OR IMPLIED WARRANTIES,
INCLUDING ANY IMPLIED WARRANTY OF MERCHANTABILITY OR FITNESS FOR ANY
PARTICULAR PURPOSE. THE WARRANTY SET FORTH ABOVE IS EXCLUSIVE AND IS IN
LIEU OF ALL EXPRESSED OR IMPLIED WARRANTIES, INCLUDING WARRANTIES OF
MERCHANTABILITY, FITNESS FOR A PARTICULAR PURPOSE, OR WARRANTIES ARISING FROM A COURSE OF DEALING OR USAGE OF TRADE.
YAMAHA MOTOR CO., LTD. SOLE LIABILITY SHALL BE FOR THE DELIVERY OF THE
EQUIPMENT AND YAMAHA MOTOR CO., LTD. SHALL NOT BE LIABLE FOR ANY CONSEQUENTIAL DAMAGES (WHETHER ARISING FROM CONTRACT, WARRANTY, NEGLIGENCE OR STRICT LIABILITY). YAMAHA MOTOR CO., LTD. MAKES NO WARRANTY
WHATSOEVER WITH REGARD TO ACCESSORIES OR PARTS NOT SUPPLIED BY YAMAHA
MOTOR CO., LTD.
12.3 Disposal
When disposing of this controller, handle it as industrial waste.
12-
2
MEMO
Revision record
Manual version
Issue date
Description
Ver. 1.02
Ver. 1.03
Ver. 1.04
Ver. 1.05
Nov. 2003
Oct. 2005
Aug. 2006
Jan. 2007
English manual Ver. 1.02 is based on Japanese manual Ver. 1.02.
English manual Ver. 1.03 is based on Japanese manual Ver. 1.03.
English manual Ver. 1.04 is based on Japanese manual Ver. 1.05.
English manual Ver. 1.05 is based on Japanese manual Ver. 1.06.
User's Manual
Pico Series
Robot Controller
Jan. 2007
Ver. 1.05
This manual is based on Ver. 1.06 of Japanese manual.
© YAMAHA MOTOR CO., LTD.
IM Operations
All rights reserved. No part of this publication may be reproduced in
any form without the permission of YAMAHA MOTOR CO., LTD.
Information furnished by YAMAHA in this manual is believed to be
reliable. However, no responsibility is assumed for possible
inaccuracies or omissions. If you find any part unclear in this manual,
please contact YAMAHA or YAMAHA sales representatives.