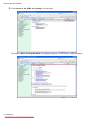
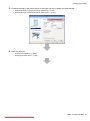
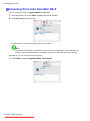
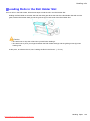
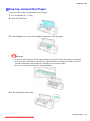
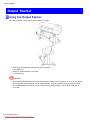
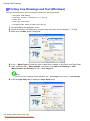
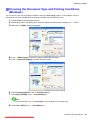
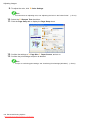
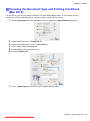
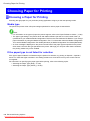
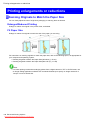
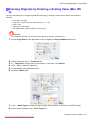
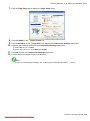
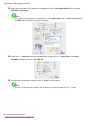
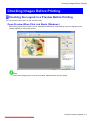
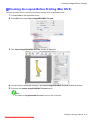
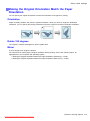
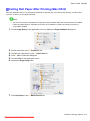
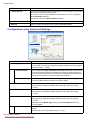
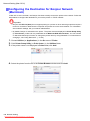
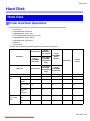
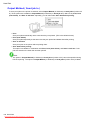
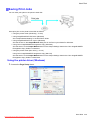
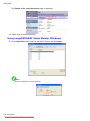
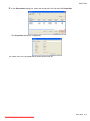
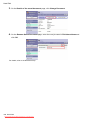
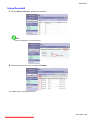
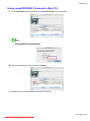
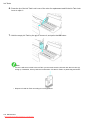
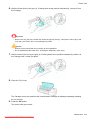
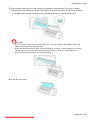
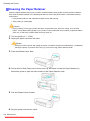
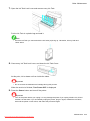
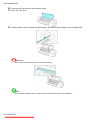
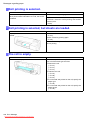
1
Lar g e F o r m a t P r i n t e r User Manual ENG Downloaded from ManualsPrinter.com Manuals Downloaded from ManualsPrinter.com Manuals Contents Contents Introduction 1 How to use this manual.....................................................................................1 About This User Manual...............................................................................................................1 Searching Topics..........................................................................................................................3 HTML Version of the Manual for Printing......................................................................................5 Printer Parts 13 Printer parts.....................................................................................................13 Front...........................................................................................................................................13 Back...........................................................................................................................................14 Top Cover (Inside)......................................................................................................................15 Carriage......................................................................................................................................16 Ink Tank Cover (Inside)...............................................................................................................17 Control Panel..............................................................................................................................18 Control Panel...................................................................................................20 Control Panel..............................................................................................................................20 Turning the Printer On and Off...................................................................................................22 Printer Modes.............................................................................................................................24 Switching Modes........................................................................................................................29 Printer Menu Operations............................................................................................................31 Main Menu Operations...............................................................................................................33 Menu Structure...........................................................................................................................37 Main Menu Settings....................................................................................................................50 Main Menu Settings (During Printing)........................................................................................62 Submenu Display.......................................................................................................................65 Status Print.................................................................................................................................67 Optional accessories.......................................................................................73 Roll Holder Set...........................................................................................................................73 IEEE 1394 (FireWire) Expansion Board.....................................................................................73 Printer Specifications.......................................................................................74 Specifications.............................................................................................................................74 Basic Environmental Performance.............................................................................................78 Print Area....................................................................................................................................79 Basic Printing Workflow 80 Printing procedure...........................................................................................80 Printing Options Using Rolls and Sheets...................................................................................80 Loading and Printing on Rolls....................................................................................................82 Loading and Printing on Sheets.................................................................................................86 Printing from Windows...............................................................................................................89 Printing from Mac OS X..............................................................................................................90 Downloaded from ManualsPrinter.com Manuals Contents � Contents Canceling print jobs.........................................................................................92 Canceling Print Jobs from the Control Panel.............................................................................92 Canceling Print Jobs from Windows...........................................................................................93 Canceling Print Jobs from Mac OS X.........................................................................................94 Handling Paper 96 Paper...............................................................................................................96 Types of Paper...........................................................................................................................96 Paper Sizes..............................................................................................................................101 Handling rolls.................................................................................................104 Selecting the Paper Source......................................................................................................104 Selecting the Paper Type (Roll)................................................................................................105 Specifying the Paper Length (Roll)...........................................................................................106 Loading Rolls on the Roll Holder..............................................................................................107 Loading Rolls in the Roll Holder Slot........................................................................................109 Loading the Roll in the Printer.................................................................................................. 110 Removing the Roll from the Printer.......................................................................................... 113 Removing Rolls From the Roll Holder Slot............................................................................... 114 Removing a Roll from the Roll Holder...................................................................................... 114 Clearing Jammed Roll Paper................................................................................................... 115 Feeding Roll Paper Manually................................................................................................... 118 Detection of the Remaining Roll Paper.................................................................................... 119 Specifying the Ink Drying Time for Rolls...................................................................................120 Specifying the Cutting Method for Rolls...................................................................................122 Cutting the Leading Edge of Roll Paper Automatically.............................................................126 Reducing Dust from Cutting Rolls............................................................................................127 Roll Holder Set.........................................................................................................................128 Attaching Accessories to the Roll Holder.................................................................................129 Handling sheets.............................................................................................131 Selecting the Paper Source......................................................................................................131 Selecting the Paper Type (Sheet)............................................................................................132 Loading the Sheet in the Printer...............................................................................................133 Manually Loading Paper to the Position for Printing................................................................136 Removing the Sheet.................................................................................................................137 Clearing a Jammed Sheet........................................................................................................138 Output Stacker...............................................................................................140 Using the Output Stacker.........................................................................................................140 Working With Various Print Jobs 142 Printing Photos and Images...........................................................................142 Printing Photos and Images (Windows)...................................................................................142 Printing Photos and Images (Windows, Mac OS X).................................................................144 Printing Photos and Images (Windows)...................................................................................146 Printing Photos and Images (Mac OS X).................................................................................148 ii Downloaded Contents from ManualsPrinter.com Manuals Contents Printing CAD Drawings..................................................................................151 Printing CAD Drawings.............................................................................................................151 Printing Line Drawings and Text (Windows).............................................................................152 Printing Line Drawings and Text (Windows, Mac OS X)..........................................................153 Printing Line Drawings and Text (Windows).............................................................................154 Printing Line Drawings and Text (Mac OS X)...........................................................................156 Specifying Colors and Printing CAD Drawings.........................................................................159 Specifying Colors and Printing CAD Drawings (Windows).......................................................160 HP-GL/2 Printing......................................................................................................................162 Printing Office Documents.............................................................................163 Printing Office Documents........................................................................................................163 Printing Office Documents (Windows)......................................................................................164 Printing Office Documents (Mac OS X)....................................................................................166 Using the Printer With a Color imageRUNNER.............................................168 Printing Enlargements of Scanned Originals from a Color imageRUNNER.............................168 Printing Enlargements of Scanned Originals from a Color imageRUNNER (Windows)...........168 Printing Enlargements of Scanned Originals from a Color imageRUNNER (Mac OS X).........170 Enhanced Printing Options 172 Adjusting Images...........................................................................................172 Adjusting the Color in the Printer Driver...................................................................................172 Fine-Tuning Colors of Photos and Images (Windows).............................................................174 Fine-Tuning Colors of Photos and Images (Mac OS X)...........................................................177 Giving Priority to Particular Graphic Elements and Colors for Printing....................................180 Choosing the Document Type and Printing Conditions (Windows)..........................................183 Choosing the Document Type and Printing Conditions (Mac OS X)........................................185 Choosing Paper for Printing...........................................................................188 Choosing a Paper for Printing..................................................................................................188 Selecting the Paper Type (Roll)................................................................................................189 Selecting the Paper Type (Sheet)............................................................................................190 Specifying Paper in the Printer Driver......................................................................................191 Specifying Paper in the Printer Driver (Windows)....................................................................192 Specifying Paper in the Printer Driver (Mac OS X)..................................................................194 Printing enlargements or reductions..............................................................196 Resizing Originals to Match the Paper Size.............................................................................196 Resizing Originals to Match the Paper Size (Windows)...........................................................197 Resizing Originals to Match the Paper Size (Mac OS X).........................................................199 Resizing Originals to Fit the Roll Width....................................................................................202 Resizing Originals to Fit the Roll Width (Windows)..................................................................203 Resizing Originals to Fit the Roll Width (Mac OS X)................................................................205 Resizing Originals by Entering a Scaling Value.......................................................................208 Resizing Originals by Entering a Scaling Value (Windows).....................................................209 Resizing Originals by Entering a Scaling Value (Mac OS X).................................................... 211 Printing Enlargements of Scanned Originals from a Color imageRUNNER.............................214 Printing Enlargements of Scanned Originals from a Color imageRUNNER (Windows)...........214 Printing Enlargements of Scanned Originals from a Color imageRUNNER (Mac OS X).........216 Downloaded from ManualsPrinter.com Manuals Contents iii Contents Printing at full size..........................................................................................218 Printing on Oversized Paper....................................................................................................218 Printing at Full Size (Windows)................................................................................................220 Printing at Full Size (Mac OS X)...............................................................................................222 Borderless Printing at Actual Size............................................................................................225 Borderless Printing at Actual Size (Windows)..........................................................................227 Borderless Printing at Actual Size (Mac OS X)........................................................................229 Borderless Printing........................................................................................232 Borderless Printing on Paper of Equivalent Size......................................................................232 Borderless Printing by Resizing Originals to Match the Paper Size (Windows).......................234 Borderless Printing by Resizing Originals to Match the Paper Size (Mac OS X).....................236 Borderless Printing by Resizing Originals to Fit the Roll Width................................................239 Borderless Printing by Resizing Originals to Fit the Roll Width (Windows)..............................241 Borderless Printing by Resizing Originals to Fit the Roll Width (Mac OS X)............................243 Borderless Printing at Actual Size............................................................................................246 Borderless Printing at Actual Size (Windows)..........................................................................248 Borderless Printing at Actual Size (Mac OS X)........................................................................250 Printing banners or at other non-standard sizes............................................253 Printing Vertical or Horizontal Banners (Large-Format Printing)..............................................253 Printing Vertical or Horizontal Banners (Large-Format Printing; Windows)..............................254 Printing Vertical or Horizontal Banners (Large-Format Printing; Mac OS X)............................258 Printing on Non-Standard Paper Sizes....................................................................................261 Printing on Non-Standard Paper Sizes (Windows)..................................................................262 Printing on Non-Standard Paper Sizes (Mac OS X).................................................................266 Tiling and multiple pages per sheet...............................................................268 Printing Multiple Originals Next to Each Other.........................................................................268 Printing Multiple Originals Next to Each Other (Windows).......................................................270 Printing Multiple Originals Next to Each Other (Mac OS X).....................................................272 Printing Multiple Pages Continuously.......................................................................................274 Printing Multiple Pages Continuously (Windows).....................................................................275 Printing Multiple Pages Continuously (Mac OS X)...................................................................277 Printing Multiple Pages Per Sheet............................................................................................279 Printing Multiple Pages Per Sheet (Windows)..........................................................................280 Printing Multiple Pages Per Sheet (Mac OS X)........................................................................282 Printing Posters in Sections.....................................................................................................285 Printing Large Posters (Windows)............................................................................................286 Centering originals.........................................................................................288 Printing Originals Centered on Rolls........................................................................................288 Printing Originals Centered on Rolls (Windows)......................................................................289 Printing Originals Centered on Rolls (Mac OS X)....................................................................291 Printing Originals Centered on Sheets.....................................................................................294 Printing Originals Centered on Sheets (Windows)...................................................................295 Printing Originals Centered on Sheets (Mac OS X).................................................................297 Conserving roll paper.....................................................................................299 Conserving Roll Paper by Rotating Originals 90 Degrees.......................................................299 Conserving Roll Paper by Rotating Originals 90 Degrees (Windows).....................................300 Conserving Roll Paper by Rotating Originals 90 Degrees (Mac OS X)....................................302 ivDownloaded Contents from ManualsPrinter.com Manuals Contents Conserving Roll Paper by Printing Originals Without Top and Bottom Margins.......................305 Conserving Roll Paper by Printing Originals Without Top and Bottom Margins (Windows).....306 Conserving Roll Paper by Printing Originals Without Top and Bottom Margins (Mac OS X)...308 Checking Images Before Printing.................................................................. 311 Checking the Layout in a Preview Before Printing................................................................... 311 Checking the Layout in a Preview Before Printing (Windows).................................................313 Checking the Layout Before Printing (Mac OS X)....................................................................315 Other useful settings......................................................................................316 Printing With Watermarks.........................................................................................................316 Printing with Watermarks-COPY, FILE COPY, and so on (Windows)......................................317 Making the Original Orientation Match the Paper Orientation..................................................319 Making the Original Orientation Match the Paper Orientation (Windows)................................320 Making the Original Orientation Match the Paper Orientation (Mac OS X)..............................322 Using Favorites........................................................................................................................325 Using Favorites (Windows)......................................................................................................326 Using Favorites (Mac OS X).....................................................................................................328 Cutting Roll Paper After Printing...............................................................................................329 Cutting Roll Paper After Printing (Windows).............................................................................330 Cutting Roll Paper After Printing (Mac OS X)...........................................................................331 Windows Software 333 Printer Driver..................................................................................................333 Printer Driver Settings (Windows)............................................................................................333 Specifying Paper in the Printer Driver (Windows)....................................................................335 Confirming Print Settings (Windows)........................................................................................337 Checking the Layout in a Preview Before Printing (Windows).................................................339 Using Favorites (Windows)......................................................................................................341 Accessing the Printer Driver Dialog Box from Applications (Windows)....................................343 Accessing the Printer Driver Dialog Box from the Operating System Menu (Windows)..........345 Main Sheet (Windows).............................................................................................................347 Paper Information on Printer Dialog Box (Windows)................................................................350 Media Detailed Settings Dialog Box (Windows).......................................................................351 View Settings Dialog Box for the Printing Application (Windows)............................................352 Color Adjustment Sheet: Color (Windows)...............................................................................353 Matching Sheet (Windows)......................................................................................................355 Color Adjustment Sheet: Monochrome (Windows)...................................................................357 Page Setup Sheet (Windows)..................................................................................................359 Paper Size Options Dialog Box (Windows)..............................................................................361 Layout Sheet (Windows)..........................................................................................................362 Page Options Dialog Box (Windows).......................................................................................364 Special Settings Dialog Box (Windows)...................................................................................365 Favorites Sheet (Windows)......................................................................................................366 Utility Sheet (Windows)............................................................................................................368 Support Sheet (Windows)........................................................................................................369 Device Settings Sheet (Windows)............................................................................................370 Settings Summaries Dialog Box (Windows).............................................................................371 Status Monitor................................................................................................372 imagePROGRAF Status Monitor (Windows)............................................................................372 Downloaded from ManualsPrinter.com Manuals Contents Contents Digital Photo Front-Access............................................................................373 Digital Photo Front-Access.......................................................................................................373 PosterArtist....................................................................................................374 Using PosterArtist to Compose Originals.................................................................................374 Using PosterArtist to Compose Originals (Windows)...............................................................375 Device Setup Utility........................................................................................377 imagePROGRAF Device Setup Utility......................................................................................377 Installing imagePROGRAF Device Setup Utility......................................................................377 Configuring the IP Address Using imagePROGRAF Device Setup Utility................................378 Mac OS X Software 379 Printer Driver..................................................................................................379 Printer Driver Settings (Mac OS X)..........................................................................................379 Specifying Paper in the Printer Driver (Mac OS X)..................................................................380 Confirming Print Settings (Mac OS X)......................................................................................382 Checking the Layout Before Printing (Mac OS X)....................................................................384 Using Favorites (Mac OS X).....................................................................................................385 Accessing the Printer Driver Dialog Box from Applications (Mac OS X)..................................386 Main Pane (Mac OS X)............................................................................................................387 Paper Information on Printer Dialog Box (Mac OS X)..............................................................389 Media Detailed Settings Dialog Box (Mac OS X).....................................................................390 View Settings Dialog Box for the Printing Application (Mac OS X)...........................................391 Color Settings Pane: Color (Mac OS X)...................................................................................392 Color Settings Pane: Monochrome (Mac OS X).......................................................................394 Page Setup Pane (Mac OS X).................................................................................................395 Utility Pane (Mac OS X)...........................................................................................................397 Additional Settings Pane (Mac OS X)......................................................................................398 Support Pane (Mac OS X)........................................................................................................399 Printmonitor...................................................................................................400 imagePROGRAF Printmonitor (Macintosh)..............................................................................400 Network Setting 401 Network Setting.............................................................................................401 Network Environment...............................................................................................................401 Configuring the IP Address on the Printer................................................................................403 Configuring the IP Address Using imagePROGRAF Device Setup Utility................................404 Configuring the IP Address Using the Printer Control Panel....................................................405 Configuring the IP Address Using ARP and PING Commands................................................406 Using RemoteUI.......................................................................................................................407 Configuring the Printer's TCP/IP Network Settings..................................................................408 Configuring the Printer's AppleTalk Network Settings..............................................................410 Configuring the Printer's NetWare Network Settings................................................................ 411 Specifying Printer-Related Information.....................................................................................413 Configuring the Communication Mode Manually......................................................................414 Email Notification When Printing is Finished or Errors Occur..................................................415 Initializing the Network Settings...............................................................................................416 viDownloaded Contents from ManualsPrinter.com Manuals Contents Network Setting (Windows)...........................................................................417 Configuring the Printer Driver Destination (Windows)..............................................................417 Sharing the Printer in Windows................................................................................................418 Configuring the Printer's NetWare Network Settings................................................................420 Specifying the Printer's Frame Type.........................................................................................422 Specifying NetWare Print Services...........................................................................................424 Specifying NetWare Protocols..................................................................................................427 Configuring NetWare Network Settings....................................................................................429 Installing imagePROGRAF Device Setup Utility......................................................................430 Configuring the IP Address Using imagePROGRAF Device Setup Utility................................430 Network Setting (Mac OS X)..........................................................................431 Configuring the Printer Driver Destination (Macintosh)............................................................431 Configuring the Printer's AppleTalk Network Settings..............................................................432 Configuring the Destination for AppleTalk Network (Macintosh)..............................................433 Configuring the Destination for TCP/IP Network (Macintosh)..................................................436 Configuring the Destination for Bonjour Network (Macintosh).................................................438 Hard Disk 439 Hard Disk.......................................................................................................439 Printer Hard Disk Operations...................................................................................................439 Saved Print Jobs......................................................................................................................441 Saving Print Jobs Sent from Sources Other than the Printer Driver........................................444 Saving Print Jobs.....................................................................................................................445 Do Not Save Print Jobs in the Common Box...........................................................................448 Managing Queued Jobs (Deleting or Preempting Other Jobs)................................................449 Setting Passwords for Personal Boxes....................................................................................452 Naming Personal Boxes...........................................................................................................456 Displaying a List of Saved Jobs...............................................................................................460 Printing a List of Saved Jobs....................................................................................................464 Printing Saved Jobs.................................................................................................................465 Moving saved jobs....................................................................................................................470 Displaying Details of Saved Jobs.............................................................................................475 Renaming Saved Jobs.............................................................................................................479 Deleting Saved Jobs................................................................................................................484 Checking the Free Hard Disk Space........................................................................................488 Erasing Data on the Printer's Hard Disk...................................................................................490 Adjustments for Better Print Quality 491 Adjusting the Printhead..................................................................................491 Correcting Print Misalignment..................................................................................................491 Adjusting the Printhead Alignment Automatically.....................................................................491 Adjusting the Printhead Alignment Manually............................................................................493 Adjusting the Printhead Orientation..........................................................................................495 Adjusting the Printhead Height.................................................................................................497 Adjusting the feed amount.............................................................................498 Adjusting the Feed Amount Automatically................................................................................498 Adjusting the Feed Amount Manually.......................................................................................501 Downloaded from ManualsPrinter.com Manuals Contents vii Contents Adjusting the Measurement Scale for Better Accuracy............................................................504 Adjusting the Vacuum Strength................................................................................................506 Maintenance 507 Ink Tanks........................................................................................................507 Ink Tanks..................................................................................................................................507 Replacing Ink Tanks.................................................................................................................508 Checking Ink Tank Levels.........................................................................................................513 When to Replace Ink Tanks......................................................................................................514 Printheads......................................................................................................515 Printhead..................................................................................................................................515 Checking the Print Quality........................................................................................................515 Improving the Print Quality.......................................................................................................515 Checking for Nozzle Clogging..................................................................................................516 Cleaning the Printhead.............................................................................................................517 Replacing the Printhead...........................................................................................................518 Cutter Unit......................................................................................................525 Cutter Unit................................................................................................................................525 Replacing the Cutter Unit.........................................................................................................526 Maintenance Cartridge..................................................................................528 Maintenance Cartridge.............................................................................................................528 Replacing the Maintenance Cartridge......................................................................................528 Checking the Remaining Maintenance Cartridge Capacity......................................................535 When to Replace the Maintenance Cartridge..........................................................................536 Cleaning the Printer.......................................................................................537 Cleaning the Printer Exterior....................................................................................................537 Cleaning Inside the Top Cover.................................................................................................538 Cleaning the Paper Retainer....................................................................................................540 Cleaning the Printhead.............................................................................................................541 Other Maintenance........................................................................................542 Preparing to Transfer the Printer..............................................................................................542 Updating the Firmware.............................................................................................................546 Troubleshooting 547 Frequently Asked Questions..........................................................................547 Frequently Asked Questions....................................................................................................547 Problems Regarding Paper...........................................................................549 Clearing Jammed Roll Paper...................................................................................................549 Clearing a Jammed Sheet........................................................................................................552 Roll paper cannot be inserted into the Paper Feed Slot...........................................................554 Cannot Load Sheets.................................................................................................................554 Paper is not cut neatly..............................................................................................................554 Paper cannot be cut.................................................................................................................554 viiiDownloaded Contents from ManualsPrinter.com Manuals Contents Printing does not start....................................................................................555 The Data lamp on the Control Panel does not light up.............................................................555 The Printer Does Not Respond Even if Print Jobs are Sent.....................................................555 The Display Screen indicates the system is filling with ink.......................................................555 The printer stops during a print job................................................................556 An error message is shown on the Display Screen..................................................................556 The printer ejects blank, unprinted paper.................................................................................556 The printer stops when printing a HP-GL/2 job (the carriage stops moving)............................556 Problems with the printing quality..................................................................557 Printing is faint..........................................................................................................................557 Paper rubs against the Printhead.............................................................................................558 The edges of the paper are dirty..............................................................................................559 The surface of the paper is dirty...............................................................................................560 The back side of the paper is dirty...........................................................................................560 Printed colors are inaccurate....................................................................................................560 Banding in different colors occurs............................................................................................561 Colors in printed images are uneven........................................................................................562 Image Edges are Blurred or White Banding Occurs................................................................562 The contrast becomes uneven during printing.........................................................................562 The length of printed images is inaccurate...............................................................................563 Documents are printed crooked...............................................................................................563 Documents are printed in monochrome...................................................................................563 Line thickness is not uniform (Windows)..................................................................................563 Lines are misaligned................................................................................................................563 Thin lines are not printed after switching to Economy Printing mode.......................................564 Problems with the printing quality caused by the type of paper...............................................564 Cannot print over a network...........................................................................565 Cannot connect the printer to the network...............................................................................565 Cannot print over a TCP/IP network.........................................................................................565 Cannot print over a NetWare network......................................................................................566 Cannot print over AppleTalk or Bonjour networks....................................................................566 Installation problems......................................................................................567 The IEEE 1394 Driver Cannot Be Installed Correctly...............................................................567 Removing Installed Printer Drivers...........................................................................................568 HP-GL/2 problems.........................................................................................569 With HP-GL/2, printing is misaligned........................................................................................569 Lines or images are missing in the HP-GL/2 data that was printed.........................................569 Lines Are Printed Too Thick or Thin During HP-GL/2 Printing..................................................569 HP-GL/2 jobs are printed in monochrome (or color)................................................................569 Printed Colors in Line Drawings are Inaccurate During HP-GL/2 Printing...............................569 HP-GL/2 jobs are printed 6 mm larger than specified..............................................................570 HP-GL/2 jobs are printed at maximum size, even if a standard size is specified.....................570 HP-GL/2 printing takes a long time..........................................................................................570 The printer stops when printing a HP-GL/2 job (the carriage stops moving)............................570 Downloaded from ManualsPrinter.com Manuals Contents ix Contents Other problems..............................................................................................571 The printer does not go on.......................................................................................................571 If the Printer Makes a Strange Sound......................................................................................571 Messages advising to check the maintenance cartridge are not cleared.................................571 The printer consumes a lot of ink.............................................................................................572 Ink Level Detection...................................................................................................................572 Error Message 575 Responding to Messages..............................................................................575 Responding to Messages.........................................................................................................575 Error Messages........................................................................................................................576 Messages regarding paper............................................................................578 Paper Mismatch.......................................................................................................................578 Papr Type Mismatch.................................................................................................................578 Papr Size Mismatch.................................................................................................................578 Paper size not detected............................................................................................................579 Insufficient paper for job...........................................................................................................579 This paper cannot be used.......................................................................................................579 Roll printing is selected............................................................................................................580 Roll printing is selected, but sheets are loaded........................................................................580 The roll is empty.......................................................................................................................580 No sheets.................................................................................................................................581 Sheet printing is selected.........................................................................................................581 Regular printing is selected, but a roll is loaded.......................................................................581 Cannot feed paper....................................................................................................................581 Paper jam.................................................................................................................................582 Paper loaded askew.................................................................................................................582 Cannot detect papr...................................................................................................................582 Leading edge detection error....................................................................................................583 Cannot feed paper....................................................................................................................583 Cannot cut this paper...............................................................................................................583 End of paper feed.....................................................................................................................583 Rel lever is in wrong position....................................................................................................583 Borderless printng not possible................................................................................................584 Messages regarding ink.................................................................................585 Ink insufficient...........................................................................................................................585 No ink left.................................................................................................................................585 Remaining level of the ink cannot be correctly detected..........................................................586 Ink Level: Check.......................................................................................................................586 No ink tank loaded....................................................................................................................586 Ink tank error............................................................................................................................586 Messages regarding printing or adjusment....................................................587 Use another paper....................................................................................................................587 Cannot print as specified..........................................................................................................587 Cannot adjust band..................................................................................................................587 Cannot adjust printhead...........................................................................................................587 Downloaded Contents from ManualsPrinter.com Manuals Contents Messages regarding printheads....................................................................588 Cannot adjust printhead...........................................................................................................588 Cannot adjust band..................................................................................................................588 PHead needs cleaning.............................................................................................................588 Problem with Printhead............................................................................................................588 Printhead error.........................................................................................................................589 Execute printhead cleaning......................................................................................................589 Messages regarding the maintenance cartridge............................................590 No maintenance cartridge........................................................................................................590 Prepare for maint cart replacement..........................................................................................590 No Maintenance Cartridge capacity.........................................................................................590 Maintenance cartridge full........................................................................................................590 Maintenance cartridge problem................................................................................................590 Messages regarding the hard disk.................................................................591 Hard disk error..........................................................................................................................591 File read error...........................................................................................................................591 Mail box full..............................................................................................................................591 Mail box full. Now printing without saving data.........................................................................591 Mail box nearly full....................................................................................................................591 Mail box full. Delete unwanted data.........................................................................................591 Mail box full. Cannot save........................................................................................................592 Messages regarding HP-GL/2.......................................................................593 This type of paper is not compatible with HP-GL/2..................................................................593 GL2: Wxxxx The memory is full. (xxxx is 0501, 0903, or 0904)...............................................593 GL2: W0502 The parameter is out of range.............................................................................593 GL2: W0504 This command is not supported..........................................................................593 Other Messages............................................................................................594 GARO Wxxxx (x represents a number)....................................................................................594 ERROR Exxx-xxxx (x represents a letter or number)...............................................................594 Hardware error. xxxxxxxx-xxxx (x represents a letter or number)............................................594 Top cover is open.....................................................................................................................595 Carriage Cover is open............................................................................................................595 Prepare for parts replacement..................................................................................................595 Parts replacement time has passed.........................................................................................595 Unknown file.............................................................................................................................595 Multi-sensor error.....................................................................................................................595 Downloaded from ManualsPrinter.com Manuals Contents xi Contents xiiDownloaded Contents from ManualsPrinter.com Manuals How to use this manual Introduction How to use this manual About This User Manual • Symbols The following symbols are used in this User Manual to indicate safety information and explanations on restrictions or precautions in use. Important Indicates important information that must be followed when using the printer. Be sure to read this information to prevent printer damage or operating errors. Caution Indicates caution items for which operating error poses a risk of injury or damage to equipment or property. To ensure safe use, always follow these precautions. Note Indicates helpful reference information and supplemental information on particular topics. • Button names and user interface elements Key and button names on the control panel and user interface elements in software (such as menus and buttons) are indicated as follows in this User Manual. Control panel buttons Example: Press the OK button. Control panel messages Example: Head Cleaning is displayed. Software interface items (Menus and Buttons) Example: Click OK. Keyboard keys Example: Press the Tab key. • Part names Names of printer parts are indicated as follows in this User Manual. Printer part names Example: Open the Top Cover. • Cross-reference Other pages or manuals that provide related information are indicated as follows in this User Manual. Cross-reference in the same User Manual Example: see “Turning the Printer On and Off”. (→P.22) Cross-reference in related manuals Example: See the Paper Reference Guide. Other cross-reference Example: See the printer driver help. Introduction 1 Downloaded from ManualsPrinter.com Manuals How to use this manual • Figures and software screens • Figures in this User Manual may be different from the actual appearance of the printer in some cases. • Screens depicted in this User Manual for the printer driver or other software may be different from the actual screens because of subsequent updates. • Windows XP screens are used in explanations of Windows operations in this User Manual. • Trademarks • Canon, the Canon logo, and imagePROGRAF are trademarks or registered trademarks of Canon Inc. • Microsoft and Windows are registered trademarks of Microsoft Corporation in the United States and other countries. • Macintosh is a registered trademark of Apple Inc. in the United States and other countries. • Other company and product names are trademarks or registered trademarks of their respective owners. • Copyright © 2008 Canon Inc. • Unauthorized reproduction of this User Manual in whole or part is prohibited. • May we request Thank you for understanding the following points. • The information in this User Manual is subject to change without notice. • We strive to ensure accuracy of information in this User Manual, but if you notice errors or omissions, please contact us. 2 Introduction Downloaded from ManualsPrinter.com Manuals How to use this manual Searching Topics You can nd information in topics of this User Manual by searching for relevant terms. 1. Enter a term and click the Search button. Note • To search for multiple terms at once, enter a space between each term. Search results are listed at left. Introduction 3 Downloaded from ManualsPrinter.com Manuals How to use this manual 2. Click a topic you want to read. The terms you searched for will be highlighted in the topic. To review multiple topics at once, select the check box of desired topics and click the Apply button. 4 Introduction Downloaded from ManualsPrinter.com Manuals How to use this manual HTML Version of the Manual for Printing You can select a group of topics in the table of contents or individual topics in this manual for printing. The following procedure describes how to do this, using the information in Basic Printing Workow as an example. Printing a group of topics in the manual When you access printable HTML versions of the content from section titles in the table of contents, you can specify a group of topics to print. 1. Click a section title in the table of contents. Here, Basic Printing Workow is used as an example. Introduction 5 Downloaded from ManualsPrinter.com Manuals How to use this manual 2. Click Access to the HTML for printing in the title area. The topics in Basic Printing Workow are displayed together in HTML format, ready for printing. 6 Introduction Downloaded from ManualsPrinter.com Manuals How to use this manual 3. Clear the sections you will not print and click the Apply button. Printing a group of individual topics in the manual When you access printable HTML versions from subtitles in the table of contents, you can specify a group of topics to print. 1. Click a section title in the table of contents. Here, Basic Printing Workow is used as an example. Introduction 7 Downloaded from ManualsPrinter.com Manuals How to use this manual 2. Under Basic Printing Workow, click Printing Procedure. 3. Click Access to the HTML for printing in the title area. 8 Introduction Downloaded from ManualsPrinter.com Manuals How to use this manual The topics in Printing Procedure are displayed together in HTML format, ready for printing. 4. Clear the topics you will not print and click the Apply button. Introduction 9 Downloaded from ManualsPrinter.com Manuals How to use this manual Printing selected topics Print selected topics as follows. 1. Access the printing dialog box as follows, depending on your computer’s operating system. • Windows In Windows, right-click anywhere in the explanation area except on a gure or a link.In the shortcut menu, click Print to display the Print dialog box. 10 Introduction Downloaded from ManualsPrinter.com Manuals How to use this manual • Macintosh On a Macintosh computer, click anywhere in the explanation area except on a gure or a link while holding the Ctrl key. In the shortcut menu, click Print Frame to display the Print dialog box. 2. Specify conditions as needed, and then click Print (Windows) or Print (Macintosh). • Windows Introduction 11 Downloaded from ManualsPrinter.com Manuals How to use this manual • Macintosh Note • To print only individual topics that are displayed, use this method. 12 Introduction Downloaded from ManualsPrinter.com Manuals Printer parts Printer Parts Printer parts Front a. Top Cover Open this cover to install the Printhead, load paper, and remove any jammed paper from inside the printer as needed. (→P.15) b. Ejection Guide Supports paper as it is ejected to prevent it from rising. c. Maintenance Cartridge Ink used for maintenance purposes such as head cleaning is absorbed. (Replace the cartridge when it is full.) d. Maintenance Cartridge Cover Open this cover to replace the Maintenance Cartridge. e. Control Panel Use this panel to operate the printer and check the printer status. (→P.18) f. Ink Tank Cover Open this cover to replace an Ink Tank. (→P.17) g. Stand A stand that holds the printer. Equipped with casters to facilitate moving the printer. h. Output Stacker A cloth tray that catches ejected documents. i. Stopper Locks the Stand casters. Always release the Stopper before moving the printer. Moving the printer while the Stopper is locked may scratch the casters or the oor. j. Accessory Box For storing printer accessories. Printer Parts 13 Downloaded from ManualsPrinter.com Manuals Printer parts Back a. Release Lever Releases the Paper Retainer. Push this release lever back before loading paper or cleaning inside the printer. b. Carrying Handles (Four Positions) When carrying the printer, hold it by these handles under both sides. c. Power Supply Connector Connect the power cord to this connector. d. Roll Holder Slot Slide the Roll Holder into this guide slot. e. Holder Stopper Secure the roll on the Roll Holder with this part. f. Roll Holder Load the roll on this holder. g. Accessory Pocket Holds printer manuals, assembly tools, and other items. h. Expansion Board Slots Install an IEEE 1394 (FireWire) expansion board, as desired. i. Ethernet Port Connect an Ethernet cable to this port. The lamp is lit if the Ethernet cable is connected correctly and communication is possible between the computer and printer. j. USB Port Connect a USB cable to this port. (Compatible with USB 2.0 High Speed mode) k. Paper Feed Slot When loading a roll, insert the edge of the roll here. 14 Printer Parts Downloaded from ManualsPrinter.com Manuals Printer parts Top Cover (Inside) a. Top Cover Roller Prevents paper from rising when ejected. b. Paper Alignment Line Align paper with this line when loading it. c. Carriage Moves the Printhead. The carriage serves a key role in printing. (→P.16) d. Carriage Shaft The Carriage slides along this shaft. e. Paper Retainer Important in supplying the paper. This retainer holds paper as it is fed. f. Platen The Printhead moves across the platen to print. The Vacuum holes on the platen hold paper in place. g. Borderless Printing Ink Grooves These grooves catch ink outside the edges of paper during borderless printing. h. Cleaning Brush When cleaning inside of the Top Cover, use this brush to sweep away paper dust on the Platen. i. Linear Scale The linear scale serves a key role in detecting the Carriage position. Be careful not to touch this part when cleaning inside the Top Cover or clearing paper jams. Printer Parts 15 Downloaded from ManualsPrinter.com Manuals Printer parts Carriage a. Carriage Cover Protects the Carriage. b. Printhead Fixer Cover Holds the Printhead in place. c. Printhead The printhead is equipped with ink nozzles. It is a key part of the printer. d. Printhead Fixer Lever Locks the Printhead Fixer Cover. e. Shaft Cleaner Prevents the Carriage Shaft from becoming dirty. f. Angle Adjustment Lever Use this lever to ne-tune the printer to correct misalignment of printed lines. g. Cutter Unit A round-bladed cutter for automatic paper cutting. The cutter blade is retracted inside when not cutting. 16 Printer Parts Downloaded from ManualsPrinter.com Manuals Printer parts Ink Tank Cover (Inside) a. Ink Tank Cartridges of ink in various colors. b. Ink Tank Lock Lever A lever that locks the Ink Tank in place and protects it. Open or close the lever when replacing an Ink Tank. c. Ink Lamp (Red) Indicates the state of the Ink Tank as follows when the Ink Tank Cover is opened. • On On: The Ink Tank is installed correctly. • Off Off: No Ink Tank is installed, or the ink level detection function is disabled. • Flashing Slowly Not much ink is left. • Flashing Rapidly There is no more ink. a. Ink Color Label Load an Ink Tank corresponding to the color and name on these labels. b. Ink Set An Ink Tank that can be used in the printer is labeled with a white letter “A” in a black circle on the side. When purchasing an Ink Tank, make sure an “A” is printed on the label. (→P.507) Printer Parts 17 Downloaded from ManualsPrinter.com Manuals Printer parts Control Panel a. Online Button (Green) Switches the printer online and ofine. (→P.29) • On The printer is online. • Flashing The printer is switching modes. • Off The printer is ofine. b. Menu Button Displays the main menu of the printer. (→P.50) c. Data lamp (Green) • Flashing During printing, the Data lamp ashes when the printer is receiving or processing print jobs. This lamp ashes when the print job is paused or the printer is updating the rmware. • Off There are no active print jobs when the Data lamp is off. d. Message lamp (Orange) • On A warning message is displayed. • Flashing An error message is displayed. • Off The printer is off or is operating normally. e. Paper Source Section After you press the Feeder Selection button, the lamp for your chosen paper source is lit. 1. Roll Media lamp (Green) • On Indicates that a roll is selected as the paper source. • Off Indicates that a sheet is selected as the paper source. 2. Cut Sheet lamp (Green) • On Indicates that a sheet is selected as the paper source. • Off Indicates that a roll is selected as the paper source. 18 Printer Parts Downloaded from ManualsPrinter.com Manuals Printer parts f. Feeder Selection Button Switches the paper source. Each time you press this button, the paper source switches between the roll and the sheet, and the corresponding lamp on the Paper Source Section is lit. g. Display Screen Shows the printer menu, as well as the printer status and messages. h. Color Labels These labels indicate the Ink Tank colors. The labels correspond to the ink levels on the Display Screen. i. ◄ Button Menu mode: Press this button to display the menu one level higher. j. ▲ Button Ofine mode: Press this button to rewind the roll manually. (→P.118) Menu mode: Press this button to display the previous menu item or setting value. k. ▼ Button Ofine mode: Press this button to feed the roll manually in the direction of ejection, as needed. (→P.118) Menu mode: Press this button to display the next menu item or setting value. l. ► Button Menu mode: Press this button to display the menu one level lower. m.OK Button In Menu mode, press this button to conrm or execute the selected item or setting. Press this button if the Display Screen indicates to do so. n. Information Button Displays printer submenus. Press this key to display information about ink, paper, and so on. (→P.65) You can also hold down this button for three seconds to clean the Printhead ( Head Cleaning A ). o. Power Button Turns the printer on and off. (→P.22) p. Load/Eject Button By pressing this button, you can check instructions on loading and removing paper. Instructions for loading paper are shown on the Display Screen if pressed when no paper is loaded, and instructions for removing paper are shown if paper is loaded. q. Stop Button Hold down for at least a second to cancel print jobs in progress or end the ink drying period. Note • In Sleep mode, you can press any button except the Power button to bring the printer online again. Printer Parts 19 Downloaded from ManualsPrinter.com Manuals Control Panel Control Panel Control Panel a. Online Button (Green) Switches the printer online and ofine. (→P.29) • On The printer is online. • Flashing The printer is switching modes. • Off The printer is ofine. b. Menu Button Displays the main menu of the printer. (→P.50) c. Data lamp (Green) • Flashing During printing, the Data lamp ashes when the printer is receiving or processing print jobs. This lamp ashes when the print job is paused or the printer is updating the rmware. • Off There are no active print jobs when the Data lamp is off. d. Message lamp (Orange) • On A warning message is displayed. • Flashing An error message is displayed. • Off The printer is off or is operating normally. e. Paper Source Section After you press the Feeder Selection button, the lamp for your chosen paper source is lit. 1. Roll Media lamp (Green) • On Indicates that a roll is selected as the paper source. • Off Indicates that a sheet is selected as the paper source. 2. Cut Sheet lamp (Green) • On Indicates that a sheet is selected as the paper source. • Off Indicates that a roll is selected as the paper source. 20 Printer Parts Downloaded from ManualsPrinter.com Manuals Control Panel f. Feeder Selection Button Switches the paper source. Each time you press this button, the paper source switches between the roll and the sheet, and the corresponding lamp on the Paper Source Section is lit. g. Display Screen Shows the printer menu, as well as the printer status and messages. h. Color Labels These labels indicate the Ink Tank colors. The labels correspond to the ink levels on the Display Screen. i. ◄ Button Menu mode: Press this button to display the menu one level higher. j. ▲ Button Ofine mode: Press this button to rewind the roll manually. (→P.118) Menu mode: Press this button to display the previous menu item or setting value. k. ▼ Button Ofine mode: Press this button to feed the roll manually in the direction of ejection, as needed. (→P.118) Menu mode: Press this button to display the next menu item or setting value. l. ► Button Menu mode: Press this button to display the menu one level lower. m.OK Button In Menu mode, press this button to conrm or execute the selected item or setting. Press this button if the Display Screen indicates to do so. n. Information Button Displays printer submenus. Press this key to display information about ink, paper, and so on. (→P.65) You can also hold down this button for three seconds to clean the Printhead ( Head Cleaning A ). o. Power Button Turns the printer on and off. (→P.22) p. Load/Eject Button By pressing this button, you can check instructions on loading and removing paper. Instructions for loading paper are shown on the Display Screen if pressed when no paper is loaded, and instructions for removing paper are shown if paper is loaded. q. Stop Button Hold down for at least a second to cancel print jobs in progress or end the ink drying period. Note • In Sleep mode, you can press any button except the Power button to bring the printer online again. Printer Parts 21 Downloaded from ManualsPrinter.com Manuals Control Panel Turning the Printer On and Off Turning the printer on 1. Press the Power button to turn on the printer. The printer will now start up. After the Display Screen shows the Canon logo, Starting up... Please wait. is displayed. 2. The printer goes online in preparation for printing after startup, and the Online lamp and paper source section lamp remain lit. The printer will not go online in the following situations. Take action as needed. • The Top Cover is open Close the Top Cover. • The Ink Tank Cover is open Close the Ink Tank Cover. • The Printhead is not installed Install the Printhead. For the instruction, see “Replacing the Printhead”. (→P.518) • Ink Tank is not installed Install the Ink Tanks. For the instruction, see “Replacing Ink Tanks”. (→P.508) • If “ERROR” is shown on the Display Screen Turn off the printer and contact your Canon dealer. • The Online lamp and Message lamp are not lit (even once), and nothing appears on the Display Screen Make sure the printer is plugged in correctly. Check the connection at the plug and electrical outlet. • No paper is loaded Load paper. (→P.82) (→P.86) Important • Starting the printer when it is connected via the USB cable to a Macintosh computer that is off may cause the computer to start up at the same time. To prevent this, disconnect the USB cable before starting the printer. Connecting the printer to the computer via a USB hub may solve this issue. 22 Printer Parts Downloaded from ManualsPrinter.com Manuals Control Panel Turning the printer off Important • Never turn the printer off or unplug it during a print job. This could damage the printer. 1. Make sure no print jobs are in progress. If the Message lamp is ashing, check the message on the Display Screen and take action as necessary. (→P.576) If the Data lamp is ashing, the printer is receiving a print job. Turn off the printer only after printing is nished. 2. Hold down the Power button for more than a second. After Shut Down.. Please Wait.. is shown on the Display Screen, the printer shuts off. Printer Parts 23 Downloaded from ManualsPrinter.com Manuals Control Panel Printer Modes Printer modes are classied as follows and described in this topic. • • • • • • Modes (→P.24) Mode transition (→P.25) Online, and state of the Control Panel (→P.26) Ofine, and state of the Control Panel (→P.27) Menu mode, and state of the Control Panel (→P.28) Submenu mode, and state of the Control Panel (→P.28) Modes The printer has ve modes as follows: • Online The printer is ready to receive jobs sent from the computer. Jobs sent from the computer are processed immediately. If jobs are received in other modes, they are printed the next time the printer goes online. • Ofine Any jobs sent from the computer are held without being processed. While the printer is ofine, you can feed or cut roll paper manually. The printer goes ofine automatically if jobs cannot be processed, such as if errors occur. • Menu mode Menus are displayed on the printer, and you can select, set, or execute menu items. Any jobs sent from the computer are held without being printed. • Submenu mode Submenus are displayed regarding ink and paper information. Jobs can be received and printing is possible while submenus are displayed and the printer is online. In other modes, any jobs sent from the computer are held without being printed while submenus are displayed. • Sleep mode The printer is in power-saving mode. The printer automatically enters Sleep mode to conserve power if it is idle for a specic period (by factory default, ve minutes), that is, if no print jobs are received or buttons are pressed while all covers are closed. You can specify the period before the printer enters Sleep mode in the Sleep Timer menu. (→P.50) If any print jobs are received when the printer is in Sleep mode (after it was originally online), the printer goes online and prints the jobs. 24 Printer Parts Downloaded from ManualsPrinter.com Manuals Control Panel Mode transition The printer mode transitions are as follows: *1: When submenus are displayed, you can press any button other than the Information button to return to the previous mode. *2: The printer automatically enters Sleep mode if it is idle for a specic period (by factory default, ve minutes), that is, if no print jobs are received or buttons are pressed while all covers are closed. However, it does not enter Sleep mode while error messages are displayed. *3: In Sleep mode, the printer can be restored to the previous state by pressing any button. Sleep mode is also terminated if a print job is received or a command is issued from RemoteUI. Printer Parts 25 Downloaded from ManualsPrinter.com Manuals Control Panel Online, and state of the Control Panel Not printing Printing in progress (receiving or processing print jobs) Display Screen • Top Level of the Display Screen The printer status is displayed here. The selected paper source is indicated by an icon in the upper-right corner. Any warning messages are displayed here on lines 2-4. Take action as needed. (→P.576) • Middle Level of the Display Screen The rst and second lines display the paper type and size. • Bottom Level of the Display Screen Here, the remaining ink level is indicated. (→P.513) Control Panel • Online lamp Lit when the printer is online. • Data lamp Flashes when print jobs are being received or processed. • Message lamp Lit when warning messages are displayed. 26 Printer Parts Downloaded from ManualsPrinter.com Manuals Control Panel Ofine, and state of the Control Panel Ofine Not printing Printing is paused Display Screen • Top Level of the Display Screen The printer status is displayed here. The selected paper source is indicated by an icon in the upper-right corner. Any warning messages are displayed here on lines 2-4. Take action as needed. (→P.576) • Middle Level of the Display Screen The rst and second lines display the paper type and size. • Bottom Level of the Display Screen Here, the remaining ink level is indicated. (→P.513) Control Panel • Message lamp Lit when warning messages are displayed. Error Messages If action can be taken If no action can be taken • Top and Middle Levels • Top and Middle Levels • Top and Middle Levels of the Display Screen Error messages are displayed. • Bottom Level of the Display Screen Here, the remaining ink level is indicated. (→P.513) of the Display Screen Error messages are displayed. • Bottom Level of the Display Screen The corrective actions are displayed here. of the Display Screen The error message is displayed with the following instructions: Turn off printer, wait, then turn on again.. • Data lamp Flashes when print jobs are being received. • Message lamp Flashes when error messages are displayed. Take action as needed. (→P.576) • Display Screen “ERROR” is displayed, followed by the error code and Call for service.. • Data lamp Flashes when print jobs are being received. • Message lamp Flashes when error messages are displayed. Turn off the printer and wait at least three seconds before restoring the power. If the message is still displayed after this, write down the error code and message, turn off the printer, and contact the Canon dealer for assistance. Printer Parts 27 Downloaded from ManualsPrinter.com Manuals Control Panel Menu mode, and state of the Control Panel Main menu • Display Screen Menu items and settings • Display Screen Pressing the Menu button when printing is not in progress displays the main menu. The title of the selected menu is displayed on the rst line, and menus immediately under the current menu are displayed on the second and subsequent lines. The lower level menus are available if “►” is displayed at right. (→P.33) The title of the selected menu is displayed on the rst line, and menu items or settings are displayed on the second and subsequent lines. (→P.33) The menu of options available during printing (top gure) can be displayed by pressing the ► button when the main menu is displayed (left gure). Main menu (during printing) • Display Screen Menus available during printing are displayed if you press the Menu button during printing. If you select a menu, the title of the selected menu is displayed on the rst line, and menus immediately under the current menu are displayed on the second and subsequent lines. The lower level menus are available if “►” is displayed at right. (→P.33) Submenu mode, and state of the Control Panel Ink levels and the remaining Maintenance Cartridge capacity Information of the Printer information loaded paper GL2 Settings Press the Information button to display this information, one after another: the Maintenance Cartridge capacity and remaining ink levels, paper information, printer information, and GL2 settings information. (→P.65) 28 Printer Parts Downloaded from ManualsPrinter.com Manuals Control Panel Switching Modes Switching the printer online/ofine Press the Online button to switch the printer online or ofine. The Online lamp is lit in Online mode. Printing is possible in this mode. The Online lamp is off in Ofine mode. Depending on the status, the printer switches online and ofine as follows. Printer Status When the Online Button is Pressed Online The printer switches ofine and the Online lamp goes off. Online, printing Switches ofine and printing is paused. When printing is paused, the Printing menu is available. Ofine Switches online and the Online lamp is lit. Ofine, when an error message is displayed In the case of error messages other than those shown below or if paper is not loaded, the printer remains ofine until you solve the problem. The Online lamp remains off. If the following error messages are displayed, the printer switches online and printing is resumed. • Insufcient paper for job • PHead needs cleaning. • Papr Size Mismatch • Papr Type Mismatch Menu mode Switches online and the Online lamp is lit. Menu mode, printing Switches online and the Online lamp is lit. Printing is resumed. Printer Parts 29 Downloaded from ManualsPrinter.com Manuals Control Panel Switching to Menu mode Press the Menu button to display the main menu. Depending on the status, the printer switches to Menu mode as follows. When the Menu Button is Pressed Printer Status Online Switches to Menu mode. Online, printing Either menus available during printing or a screen to manage print jobs is displayed. If you select a menu, the printer switches to that menu mode. Ofine Switches to Menu mode. Ofine, printing Menus available during printing are displayed. Ofine, when an error message is displayed You cannot access Menu mode until the problem is solved. Press the Information button to display the submenus. Press the Information button to display the Maintenance Cartridge capacity and remaining ink levels, as well as information on the loaded paper and the printer. Press the Information button repeatedly to change the information displayed. (→P.65) Press any button other than the Information button to restore the previous mode. After you display a submenu, the printer will revert to the previous mode in about ten seconds if no print job is received or if you do not operate the printer. Note • You can start Head Cleaning A by holding down the Information button for three seconds or more. (→P.517) 30 Printer Parts Downloaded from ManualsPrinter.com Manuals Control Panel Printer Menu Operations The printer menu includes a main menu and submenus. • • • • Main menu operations when no print job is in progress (→P.31) Main menu operations during printing (→P.31) Job Management Menu Operations (→P.32) Submenu operations (→P.32) Main menu operations when no print job is in progress Access the main menu by pressing the Menu button on the Control Panel. Note • The main menu will not be displayed in the following case even if you press the Menu button. • An error message is displayed: Switches to Menu mode after the problem is solved. The following operations are available from the main menu. • • • • Paper settings Print settings Printer settings HP-GL/2 settings For a description of specic items available in the main menu, see “Main Menu Settings”. (→P.50) For instructions on selecting and setting main menu items, see “Main Menu Operations”. (→P.33) Note • By default, main menu settings apply to all print jobs. However, for settings that are also available in the printer driver, the values specied in the printer driver take priority. Main menu operations during printing Selecting Menu Durng Prtng on the Menu Selection screen (displayed by pressing the Menu button on the Control Panel during printing) will display only the menu options you can execute during printing, specically, Head Cleaning, Fine Band Adj., and Information. Note • The Menu Selection screen will not be displayed in the following case even if you press the Menu button. • An error message is displayed: Switches to Menu mode after the problem is solved. The following operations are available from the main menu during printing. • Printhead cleaning • Manual adjustment of the paper feed amount • Display of printer-related information For a description of specic items available in the main menu during printing, see “Main Menu Settings (During Printing)”. (→P.62) For instructions on selecting and setting main menu items during printing, see “Main Menu Operations”. (→P.33) Printer Parts 31 Downloaded from ManualsPrinter.com Manuals Control Panel Job Management Menu Operations To display the Job Mgmt Menu, press Job Mgmt Menu on the Menu Selection screen, which is displayed by pressing the Menu button on the Control Panel during printing. Note • The Menu Selection screen will not be displayed in the following case even if you press the Menu button. • An error message is displayed You can access Menu mode after you have solved the problem. The following operations are available from the Job Mgmt Menu. • Job queue operations • Operations involving the common mail box • Operations involving personal boxes For a description of specic items available in the main menu during printing, see “Main Menu Settings (During Printing)”. (→P.62) Submenu operations Access submenus by pressing the Information button on the Control Panel. You can check the following information in submenus. • • • • • Remaining Maintenance Cartridge capacity Ink levels Information on the loaded paper Printer information Job management For a description of specic items displayed in submenus, see “Submenu Display”. (→P.65) 32 Printer Parts Downloaded from ManualsPrinter.com Manuals Control Panel Main Menu Operations Press the Menu button to display the main menu. For details, see “Main Menu Settings”. (→P.50) • Main menu when no print job is in progress • Menu selection (if you press the Menu button when printing is in progress) Note • The main menu will not be displayed in the following case even if you press the Menu button. • An error message is displayed You can access the Menu mode after you have solved the problem. To access each function menu from the main menu, and set or execute menu items, use buttons on the Control Panel. The following section describes menu operations and how they are presented in this User Manual. • • • • Accessing Menus (→P.34) Specifying menu items (→P.35) Specifying numerical values (→P.36) Executing menu commands (→P.36) Printer Parts 33 Downloaded from ManualsPrinter.com Manuals Control Panel Accessing Menus Printer menus are grouped by function. Menus are displayed with the upper line selected. Use the buttons on the Control Panel to access each menu. • Press ▲ to access a higher menu in the menu list, and press ▼ to access a lower one. If items of the menu list are more than the lines of the screen, press ▲ and ▼ to scroll the menu. If you navigate to the lowest-level menu and press the ▼ button again, the display switches to the top-level menu screen. If you navigate to the top-level menu and press the ▲ button again, the display switches to the lowest-level menu screen. Items you select are highlighted. The scroll bar at right indicates the current position in the overall menu. • The lower level menus are available if “►” is displayed at right. To access these lower level menus, select a menu and press ►. • The upper level menus are available if “◄” is displayed at left. To access these upper level menus, select a menu and press ◄. 34 Printer Parts Downloaded from ManualsPrinter.com Manuals Control Panel Specifying menu items Follow the steps below to specify menu items. 1. Press ▲ or ▼ to select a menu, and then press the ► button. Repeat these steps until the desired menu options are displayed. 2. Press ▲ or ▼ to select the desired setting, and then press the OK button. The check box at left is selected, and the setting is conrmed. After two seconds, the display reverts to the upper level menu. 3. Press the Online button to bring the printer online. Note • If a conrmation message is displayed regarding the setting you entered, press the OK button. The setting is applied, and the printer goes online. Printer Parts 35 Downloaded from ManualsPrinter.com Manuals Control Panel Specifying numerical values Follow the steps below to enter numbers for items such as network settings. 1. 2. 3. 4. 5. Press ▲ or ▼ to select Interface Setup, and then press the ► button. 6. Press ▲ or ▼ to select the number, and then press the OK button. Press ▲ or ▼ to select TCP/IP, and then press the ► button. Press ▲ or ▼ to select IP Setting, and then press the ► button. Press ▲ or ▼ to select IP Address, and then press the ► button. Press ◄ or ► to move the cursor (_) to each eld for entering numbers. Note • Hold down ▲ or ▼ to increase or decrease the value continuously. • Make sure the IP address you enter for the printer is not the same as any computer IP address in your network. 7. 8. Repeat steps 2 and 3 to continue entering numbers. Press the Online button to bring the printer online. Note • If a conrmation message is displayed regarding the setting you entered, press the OK button. The setting is applied, and the printer goes online. Executing menu commands Follow the steps below to execute menu commands. 1. Press ▲ or ▼ to select a menu, and then press the ► button. Repeat these steps until the desired menu options are displayed. 2. Press ▲ or ▼ to select the action to execute, and then press the OK button. After two seconds, the menu command is executed. After commands are executed, the printer commonly reverts to the state before the menu operation, either online or ofine. 36 Printer Parts Downloaded from ManualsPrinter.com Manuals Control Panel Menu Structure Main Menu The structure of the main menu is as follows. Values at right indicated by an asterisk “*” are the defaults. For instructions on menu operations, see “Main Menu Operations”. (→P.33) For details on menu items, see “Main Menu Settings”. (→P.50) First Level Paper Cutting Third Level Second Level Fourth Level Fifth Level No * Yes Rep. Ink Tank No * Yes Head Cleaning Head Cleaning A * Head Cleaning B Media Menu Cut Sheet Type (The paper type is displayed here.) (*5) Roll Media Type (*1) (The paper type is displayed here.) (*5) Chk Remain.Roll Off * On Roll Length Set (*2) ###.# m ### feet (*9) Paper Details (The paper type is displayed here.) (*5) Roll DryingTime Off 30 sec. 1 min. 3 min. 5 min. 10 min. 30 min. 60 min. Scan Wait Time Off 1 sec. 3 sec. 5 sec. 7 sec. 9 sec. Printer Parts 37 Downloaded from ManualsPrinter.com Manuals Control Panel First Level Second Level Third Level Feed Priority Fourth Level Automatic * Band Joint Print Length Adjust Length From -0.70% to 0.70% Head Height Automatic * Highest High Standard Low Lowest Skew Check Lv. Standard * Loose Off VacuumStrngth Automatic * Strongest Strong Standard Weakest Width Detection Off On * NearEnd RollMrgn 3mm 20mm Cut Speed Fast Standard Slow Trim Edge First Automatic Off On Cutting Mode Automatic Eject Manual Bordless Margin Automatic Fixed CutDustReduct. 38 Printer Parts Downloaded from ManualsPrinter.com Manuals Off Fifth Level Control Panel First Level Third Level Second Level Fourth Level Fifth Level On NearEnd Sht Mrgn 3mm 20mm Return Defaults No Yes Job Management Job Queue Ope. Job List Delete Priority Com. BOX Ope. Job List Print Delete Print Job List No Yes Psnl. BOX Ope. Folder List Job List Print Delete Print Job List No Yes GL2 Settings Color Mode Monochrome Color (CAD) 1 * Color (CAD) 2 Print Quality Fast Standard * High Input Resolution 600dpi * 300dpi Media Source Automatic * Roll Paper Cut Sheet Conserve Paper Off * On Line Cap Software * Rounded Smoothing Software * Smooth Line Width 1 dot 2 dots 3 dots Printer Parts 39 Downloaded from ManualsPrinter.com Manuals Control Panel First Level Third Level Second Level Fourth Level 4 dots * 5 dots 6 dots 7 dots ThickenFineLines Off * On AdjustFaintLines Off On * Auto Rotate Off * On Nesting Use Nesting Off * On Nesting WaitTime 1-99 minutes Cut Lines Off * On On-the-Fly Off * On ProcessingOption PageSizeProcess1 Off * On PageSizeProcess2 Off * On Adjust Printer Auto Head Adj. Standard Adj. No Yes Advanced Adj. No Yes Auto Print Off On * Manual Head Adj No Yes Auto Band Adj. Standard Adj. No Yes Advanced Adj. No Yes Manual Band Adj No Yes 40 Printer Parts Downloaded from ManualsPrinter.com Manuals Fifth Level Control Panel First Level Third Level Second Level Fourth Level Fifth Level Adjust Length (*3) No Yes Head Inc. Adj. No Yes Interface Setup EOP Timer 10 sec. 30 sec. 1 min. 2 min. 5 min. 10 min. * 30 min. 60 min. TCP/IP IP Mode Automatic Manual * Protocol (*4) DHCP On Off * BOOTP On Off * RARP On Off * IP Setting NetWare NetWare IP Address 0.0.0.0255.255.255.255 Subnet Mask 0.0.0.0255.255.255.255 Default G/W 0.0.0.0255.255.255.255 On Off * Frame Type (*6) Auto Detect Ethernet 2 Ethernet 802.2 * Ethernet 802.3 Ethernet SNAP Print Service (*6) BinderyPServer RPrinter NDSPServer * Printer Parts 41 Downloaded from ManualsPrinter.com Manuals Control Panel First Level Third Level Second Level Fourth Level NPrinter AppleTalk On Off * Ethernet Driver Auto Detect On * Off Comm.Mode (*7) Half Duplex * Full Duplex Ethernet Type (*7) 10 Base-T * 100 Base-TX Spanning Tree Not Use * Use MAC Address Ext. Interface No IEEE1394 Return Defaults No Yes Maintenance Repl. maint cart No Yes Replace P.head No Yes Repl. S. Cleaner No * Yes Change Cutter No * Yes Move Printer No * Yes System Setup Warning Buzzer Off On * Detect Mismatch Pause Warning None * Keep Media Size Off * On Paper Size Basis Sht Selection 1 ISO A3+ * 13"x19"(Super B) 42 Printer Parts Downloaded from ManualsPrinter.com Manuals Fifth Level Control Panel First Level Third Level Second Level Sht Selection 2 Fourth Level Fifth Level ISO B1 28"x40" (ANSI F) Noz. Check Freq. Off 1 page 10 pages Automatic * Sleep Timer 5 min. * 10 min. 15 min. 20 min. 30 min. 40 min. 50 min. 60 min. 240 min. Length Unit meter * feet/inch Time Zone 0:London (GMT) +1:Paris,Rome +2:Athens,Cairo +3:Moscow +4:Eerevan,Baku +5:Islamabad +6:Dacca +7:Bangkok +8:Hong Kong +9:Tokyo,Seoul +10:Canberra +11NewCaledonia +12:Wellington -12:Eniwetok -11:Midway is. -10Hawaii(AHST) -9:Alaska(AKST) -8:Oregon (PST) Printer Parts 43 Downloaded from ManualsPrinter.com Manuals Control Panel First Level Third Level Second Level Fourth Level Fifth Level -7:Arizona(MST) -6:Texas (CST) -5:NewYork(EST) -4:Santiago -3:Buenos Aires -2: -1:Cape Verde Date Format yyyy/mm/dd * dd/mm/yyyy mm/dd/yyyy Date & Time Date yyyy/mm/dd (*8) Time (*10) Language * Contrast Adj. -4, -3, -2, -1, 0*, +1, +2, +3, +4 Reset PaprSetngs No Yes Erase HDD Data High Speed No Yes Secure High Spd. No Yes Secure 44 Printer Parts Downloaded from ManualsPrinter.com Manuals No hh:mm Control Panel First Level Third Level Second Level Fourth Level Fifth Level Yes Output Method Print * Print (Auto Del) Save: Box XX Save and Print Off * On Save: Shared Box Off On * Test Print Status Print No Yes Media Details No Yes Print Job Log No Yes Menu Map No Yes Nozzle Check No Yes Information System Info Error Log ########-#### Job Log (Choose from Document Name information about the latest three print jobs.) User Name Page Count Job Status Print Start Time Print End Time Print Time Print Size Media Type Interface Ink Consumed HDD Information HDDSpace *1: Available only if a roll is loaded. *2: Available only if Chk Remain.Roll is On. Printer Parts 45 Downloaded from ManualsPrinter.com Manuals Control Panel *3: Available only if Feed Priority is Print Length. *4: Available only if IP Mode is Automatic. *5: For information on the types of paper the printer supports, refer to the Paper Reference Guide. (→P.96)The paper type setting in the printer driver and related software (as well as on the Control Panel ) is updated when you install the printer driver from the User Software CD-ROM or if you change paper information by using the Media Conguration Tool.See the Media Conguration Tool Guide (Windows) or Media Conguration Tool Guide (Macintosh). *6: Available only if NetWare is On. *7: Available only if Auto Detect is Off. *8: Follows the setting in Date Format. *9: Follows the setting in Length Unit. *10:Available only if the Date setting is specied. 46 Printer Parts Downloaded from ManualsPrinter.com Manuals Control Panel Submenus Each time you press the Information button on the Control Panel, printer information is displayed in the following order. ■The remaining Maintenance Cartridge capacity and ink levels ■Information of the loaded paper ■Printer information ■HP-GL/2 settings information For details on submenu screens, see “Submenu Display”. (→P.65) Printer Parts 47 Downloaded from ManualsPrinter.com Manuals Control Panel Main menu during printing The structure of the main menu during printing is as follows. For instructions on menu operations, see “Main Menu Operations”. (→P.33) For details on menu items, see “Main Menu Settings (During Printing)”. (→P.62) Second First Level Third Level Fourth Level Fifth Level Sixth Level Level Menu Durng Head Head Prtng Cleaning Cleaning A Head Cleaning B Fine Band Adj. (*1) From -5 to 5 Information System Info Error Log ############ Job Log (Choose from Document information Name about the latest three print jobs.) User Name Page Count Job Status Print Start Time Print End Time Print Time Print Size Media Type Interface Ink Consumed HDD Information Job Mgmt Menu Job Queue Ope. Job List (Choose a print job) Priority Delete Com. BOX Ope. Job List (Choose a print job) Print Delete Print Job List No Yes 48 Printer Parts Downloaded from ManualsPrinter.com Manuals Seventh Level Control Panel First Level Second Level Psnl. BOX Ope. Third Level Folder List Fourth Level Fifth Level (Enter a Job List password if one has been set.) Sixth Level (Choose a print job) Seventh Level Print Delete Print Job List No Yes *1: Available if Feed Priority is Automatic or Band Joint. Printer Parts 49 Downloaded from ManualsPrinter.com Manuals Control Panel Main Menu Settings Main menu items are described in the following tables. For instructions on selecting or setting menu items, see “Main Menu Operations”. (→P.33) For details on menu levels and values, see “Menu Structure”. (→P.37) Setting Item Description, Instructions Paper Cutting This command is available only if a roll is loaded. Choose Yes to cut the roll at the current position. However, if paper cannot be advanced to the cut position, it will not be cut. In this case, manually advance the roll before cutting it. (→P.118) Rep. Ink Tank When replacing ink tanks, choose Yes and follow the instructions on the screen. (→P.508) Head Cleaning Clean the Printhead. (→P.517) Choose Head Cleaning A if printing is faint, oddly colored, or contains foreign substances. Choose Head Cleaning B if no ink is printed at all, or if printing is not improved by Head Cleaning A. Media Menu Specify the type and size of paper. (→P.51) Paper Details Specify detailed paper-related settings, including the ink drying time and borderless printing options. (→P.52) Job Management Manage print jobs on the printer’s hard disk. (→P.54) GL2 Settings Specify settings for HP-GL/2 printing. (→P.55) Adjust Printer Adjust the Printhead alignment or amount of feed by printing a test pattern. (→P.57) Interface Setup Congure the EOP timer and network settings. (→P.58) Maintenance Access maintenance settings when replacing the Printhead or preparing to move the printer. (→P.59) System Setup Specify the printer system settings, including the date format and display language. (→P.59) Test Print Choose Status Print to print information about the printer. Choose Media Details to print the paper settings as specied in Paper Details. Choose Print Job Log to print a record of print jobs, including the paper type and size, amount of ink used, and so on. (Information on ink consumption is general, not specic in nature.) Choose Menu Map to print a list of the main menu options. Choose Nozzle Check to print a test pattern for checking the nozzles. Information Displays printer information and a record of print jobs. (→P.61) 50 Printer Parts Downloaded from ManualsPrinter.com Manuals Control Panel Paper Menu Setting Item Description, Instructions Cut Sheet Type (*1) Choose the type of sheets. (→P.132) Roll Media Type (*1) Choose the type of roll. (→P.105) Chk Remain.Roll Choose On to print a barcode at the end of a roll before you remove it. The printed barcode can be used in managing the amount of roll paper left. Choose Off if you prefer not to print the barcode. Roll Length Set Displayed if Chk Remain.Roll is On. If a barcode is not printed on rolls, specify the roll length. The roll length is displayed in meters or feet, depending on the setting in Length Unit. *1: For information on the types of paper the printer supports, refer to the Paper Reference Guide. (→P.96) The types of paper indicated in the printer driver and related software (as well as on the Control Panel ) are updated when you install the printer driver from the User Software CD-ROM or if you update paper information by using the Media Conguration Tool. See Media Conguration Tool Guide (Windows) or Media Conguration Tool Guide (Macintosh). Printer Parts 51 Downloaded from ManualsPrinter.com Manuals Control Panel Paper Details Setting Item (The type of paper is Roll DryingTime displayed here.)(*1) Scan Wait Time Description, Instructions Specify the time to wait for the ink to dry for each sheet. Specify the time to wait for the ink to dry between each scan in bidirectional printing, in consideration of how quickly the ink dries. Note that printing will take longer if you specify a wait time. Feed Priority Specify exact paper feeding, if desired. Normally, select Automatic. Choose Print Length if you prefer to feed the paper an exact amount. However, note that choosing Print Length may result in slight banding in the direction of Carriage scanning. Adjust Length Displayed if Feed Priority is Print Length. Adjustment relative to the amount of stretching or shrinkage of the current paper. Enter either the adjustment results from Print Pattern or the discrepancy that you measured (as a percentage). For paper that tends to stretch, increase the feed amount by choosing a higher adjustment value. For paper that tends to shrink, decrease the feed amount by choosing a lower adjustment value. Head Height Adjust the Printhead height. (→P.497) Skew Check Lv. If you print on Japanese paper (washi) or other handmade paper that has an irregular width, choose Loose for a higher skew detection threshold, or choose Off to disable skew detection. However, if paper is loaded askew when detection is Off, note that paper jams or Platen soiling may occur. VacuumStrngth Specify the level of suction that holds paper against the Platen. (→P.506) Width Detection Specify this option to print inside boundaries, for example, when printing at a different size than the paper size. Paper width and skew are not detected if you select Off. If paper is loaded askew, note that paper jams or Platen soiling may occur. NearEnd RollMrgn Specify the minimum margin at the leading edge of roll paper to ensure better printing quality at the leading edge. Note that if you choose 3mm, it may lower the printing quality at the leading edge and affect feeding accuracy. The printed surface may be scratched, and ink may adhere to the leading edge. It may also cause the Platen to become soiled. Cut Speed Choose the cutting speed. If you use adhesive paper, choosing Slow helps prevent adhesive from sticking to the cutter and keeps the cutter sharp. Trim Edge First If a roll is loaded, the end of the paper will be cut. 52 Printer Parts Downloaded from ManualsPrinter.com Manuals Control Panel Setting Item (The type of paper is Cutting Mode displayed here.)(*1) Description, Instructions Specify whether or not to cut with the standard round-bladed cutter. Choose Automatic to have the roll cut automatically after printing. If you choose Manual, the paper will not be cut after printing. Instead, a line will be printed at the cut position. Choose Eject if you prefer not to have documents dropped immediately after printing, as when waiting for ink to dry. Bordless Margin Adjust the margin during borderless printing. Choose Automatic to have the printer automatically detect the paper width and congure the margin settings for borderless printing. If margins are mistakenly created when Automatic is selected, choose Fixed. In this case, the paper width is not detected automatically, and the document is printed without borders, using the margin settings required by the printer. CutDustReduct. Choose On to reduce the amount of debris generated when cutting lm and similar media by printing a line at the cut position. This option reduces the amount of debris given off after cutting. It also helps prevent adhesive from sticking to the cutter and keeps the cutter sharp if you use adhesive paper. (→P.127) NearEnd Sht Mrgn Specify a margin at the leading edge of sheets to ensure better printing quality at the leading edge. Note that if you choose 3mm, it may lower the printing quality at the leading edge and affect feeding accuracy. The printed surface may be scratched, and ink may adhere to the leading edge. Return Defaults Choose Yes to restore Paper Details to the default values. *1: For information on the types of paper the printer supports, refer to the Paper Reference Guide. (→P.96) The types of paper indicated in the printer driver and related software (as well as on the Control Panel ) are updated when you install the printer driver from the User Software CD-ROM or if you update paper information by using the Media Conguration Tool. Printer Parts 53 Downloaded from ManualsPrinter.com Manuals Control Panel Job Management Setting Item Job Queue Ope. Job List Description, Instructions (Choose a print Delete job) Delete the current job or queued jobs. (→P.449) Priority Com. BOX Ope. Job List Print the job rst after the current print job is nished. (→P.449) (Choose a print Print job) Delete Print jobs in the Common Box. Delete jobs in the Common Box. Print Job List Psnl. BOX Ope. Folder List Print a list of jobs in the Common Box. (Enter a password if one has been set.) 54 Printer Parts Downloaded from ManualsPrinter.com Manuals Job List Print Print jobs in Personal Boxes. Delete Delete jobs in Personal Boxes. Print Job List Print a list of jobs in Personal Boxes. Control Panel GL2 Settings Setting Item Color Mode Description, Instructions Monochrome Print in monochrome. Color (CAD) 1 Print in standard colors. Color (CAD) 2 Print in brighter colors. Print Quality Choose the print quality. Input Resolution Choose the printer input resolution, 600dpi or 300dpi. Media Source Choose the media source for HP-GL/2 printing. Conserve Paper Conserves paper when printing. Line Cap Choose the shape of the end point, determined by Software or Rounded. • If you choose Software Operation is determined by the application. If nothing is specied by the application, the result is as shown in the gure. • If you choose Rounded Smoothing Choose whether to print arcs as smooth curved lines or as multiple connected line segments. • If you choose Software Operation is determined by the application. If nothing is specied by the application, the result is as shown in the gure. Note: By default, this is a 72-sided gure • If you choose Smooth Line Width Choose the width for printing lines if no width is specied in the data. Dots in the line width are 300 dpi each. ThickenFineLines Select On to print ne lines more distinctly. AdjustFaintLines If ne lines are printed in colors that do not match the colors of other shapes, selecting Off may help produce the expected results. However, lines in some colors may appear broken. Printer Parts 55 Downloaded from ManualsPrinter.com Manuals Control Panel Setting Item Auto Rotate Nesting Description, Instructions If the long side of an original is shorter than the roll width, the original is automatically rotated 90 degrees to conserve paper. Similarly, if the long side of an original in landscape orientation is longer than the roll width and the short side is shorter than the roll width, the original is repositioned to t on the paper. HP RTL print jobs are not rotated.(*1) Use Nesting Selecting On will store print jobs until multiple documents can be arranged to ll up the roll width, instead of printing each print job as it is received. Nesting WaitTime Specify a time to wait until printing, as desired. Cut Lines Select On to print cut lines between each document on the roll. On-the-Fly Selecting On will start printing jobs sooner if you are printing only HP RTL print jobs and printing would not start until later. However, images may be omitted in some cases, so be sure to check the printing results. ProcessingOption PageSizeProcess1 Selecting On will print at the specied paper size. However, a 3 mm margin is subtracted from the paper size at each edge when printing; this margin is left blank. Normally, the area available for printing excludes a margin required by the printer, and images are positioned accordingly. Selecting On in this setting eliminates any misalignment of the printing position if the image itself includes a border. PageSizeProcess2 Selecting On will determine the paper size based on the image rendering area. *1: Because HP RTL images are not rotated even if the paper is rotated 90 degrees, images may be cut off or the blank paper may be ejected. In this case, set Auto Rotate to Off. 56 Printer Parts Downloaded from ManualsPrinter.com Manuals Control Panel Adjust Printer Setting Item Auto Head Adj. Standard Adj. Choose Yes to have the printer print and read a test pattern for the automatic adjustment of Printhead alignment relative to the printing direction. (→P.491) Advanced Adj. Choose Yes to have the printer print and read a test pattern for the automatic adjustment of Printhead alignment relative to the nozzle, ink tank, and printing direction. (→P.491) Auto Print Choose On to have the printer automatically execute the Advanced Adj. operations after you replace the Printhead. (→P.491) Manual Head Adj Auto Band Adj. Description, Instructions Choose Yes to print a test pattern for adjustment of Printhead alignment relative to the printing direction. Enter the adjustment value manually based on the resulting pattern. (→P.493) Standard Adj. Choose Yes to have the printer print and read a band adjustment test pattern for automatic adjustment of the feed amount. (→P.498) Advanced Adj. Choose this option when using paper other than genuine Canon paper or paper for which printing has been veried by Canon. Choose Yes to have the printer print and read a band adjustment test pattern for automatic adjustment of the feed amount. Note that this function takes more time and requires more ink than Standard Adj. (→P.498) Manual Band Adj Choose Yes to print a test pattern for adjusting the feed amount based on the type of paper. (→P.501) Adjust Length Choose Yes to print a test pattern for adjustment relative to paper stretching or shrinkage, after which you can enter the amount of adjustment. (→P.504) Head Inc. Adj. Choose Yes to print a test pattern for adjusting the orientation of the Printhead. (→P.495) Printer Parts 57 Downloaded from ManualsPrinter.com Manuals Control Panel Interface Setup Setting Item Description, Instructions EOP Timer TCP/IP Specify the timeout period before cancellation of print jobs that cannot be received by the printer. IP Mode Protocol Choose whether the printer IP address is congured automatically or a static IP address is entered manually. DHCP BOOTP Specify the protocol used to congure the IP address automatically. RARP IP Setting IP Address Subnet Mask Default G/W NetWare NetWare Specify the NetWare protocol. To apply your changes, choose Register Setting. Frame Type Specify the frame type to use. Print Service Choose the print service. AppleTalk Ethernet Driver Specify the printer network information when using a static IP address. Enter the IP address assigned to the printer, as well as the network subnet mask and default gateway. Specify whether to use the AppleTalk protocol. To apply your changes, choose Register Setting. Auto Detect Specify the communication method. To apply your changes, choose Register Setting. Choose On for automatic conguration of the LAN communication protocol. Choose Off to use settings values of Comm.Mode and Ethernet Type. Comm.Mode Choose the LAN communication method. Ethernet Type Choose the LAN transfer rate. Spanning Tree Choose whether spanning-tree packets are supported over the LAN. MAC Address Displays the MAC address. Ext. Interface Choose the expansion interface. Return Defaults Return Defaults/Execute? is displayed if you press the ▼ button. Choose OK to restore the network settings to the default values. 58 Printer Parts Downloaded from ManualsPrinter.com Manuals Control Panel Maintenance Setting Item Description, Instructions Repl. maint cart When replacing the Maintenance Cartridge, choose Yes and follow the instructions on the screen. (→P.528) Replace P.head Not displayed during a warning message that the remaining Maintenance Cartridge capacity is low. When replacing the Printhead, choose Yes and follow the instructions on the screen. (→P.518) Repl. S. Cleaner When replacing the Shaft Cleaner, choose Yes and follow the instructions on the screen. (→P.528) Change Cutter When replacing the Cutter Unit, choose Yes and follow the instructions on the screen. (→P.526) You can also reset the cut counter after the Cutter Unit is replaced. Move Printer Not displayed during a warning message that the remaining Maintenance Cartridge capacity is low. When transferring the printer to another location, choose Yes and follow the instructions on the screen. (→P.542) System Setup Setting Item Warning Description, Instructions Buzzer Set the buzzer. Choose On for the buzzer to sound once for warnings and three times for errors. Detect Mismatch Choose Warning for notication (display of a warning message) during printing if the paper type specied in the printer menu does not match the paper type in the printer driver. Choose None to continue to print without notication. Choose Pause to have printing paused under these circumstances. In this case, you can continue printing by pressing the Online button. Keep Media Size Choose On to use the paper size setting as the basis for printing instead of other settings. The margin setting of the printer menu will be used instead of the margin setting of the printer driver if the latter is smaller, which may prevent text or images in the margin from being printed. Choose Off to use the printer driver settings instead. Even if the margin setting of the printer driver is smaller than that of the printer menu, text or images will not be cut off. However, this requires longer paper because the actual margin will be equal to the margin setting of the printer driver plus the margin setting of the printer menu. Printer Parts 59 Downloaded from ManualsPrinter.com Manuals Control Panel Setting Item Paper Size Basis Description, Instructions Sht Selection 1 If sheet size detection is activated, choose whether ISO A3+ or 13"x19"(Super B) is applied when an intermediate size is detected. Sht Selection 2 If sheet size detection is activated, choose whether ISO B1 or 28"x40" (ANSI F) is applied when an intermediate size is detected. Noz. Check Freq. Specify the timing for automatic checks of nozzle clogging. Choose 1 page to check once per printed page. Choose 10 pages to check once per ten printed pages. Choose Automatic to have the printer automatically adjust the timing for checks based on the frequency of nozzle use. Sleep Timer Specify the period before the printer enters sleep mode. Length Unit Choose the unit of measurement when roll length is displayed. You can switch the unit displayed for Roll Length Set and the remaining paper amount displayed in the submenu. Time Zone Specify the time zone. Time zone options indicate a main city in this time zone and the difference from Greenwich Mean Time. Date Format Specify the date format. Date & Time Date Set the current date. Time Set the current time. Available only if the Date setting is specied. Language Specify the language used on the Display Screen. Contrast Adj. Adjust the Display Screen contrast level. Reset PaprSetngs Restores settings that you have changed with Media Conguration Tool to the default values. Erase HDD Data For hard disk formatting operations. 60 Printer Parts Downloaded from ManualsPrinter.com Manuals Control Panel Information Setting Item System Info Version Description, Instructions Firm Displays the printer rmware version. Boot Displays the version of the boot ROM. MIT Displays the version of the MIT database format. s/n Displays the printer’s serial number. MAC Displays the MAC address of the printer. IP Displays the printer’s IP address. Error Log ########-#### Displays the most recent error messages (up to two). Job Log (Choose from information about the latest three print jobs.) Document Name Displays the document name in the last print job. User Name Displays the name of the user who sent the print job. Page Count Displays the number of pages in the print job. Job Status Displays the results of the print job processed. Print Start Time Displays the time when the print job was started. Print End Time Displays the time when the print job was nished. Print Time Displays the time required to print the job. Print Size Displays the paper size in the print job. Media Type Displays the type of paper in the print job. Interface Displays the interface used for the print job. Ink Consumed Displays the ink consumption. HDD Information HDDSpace Displays the space available on the printer’s hard disk. Printer Parts 61 Downloaded from ManualsPrinter.com Manuals Control Panel Main Menu Settings (During Printing) Main menu items during printing are described in the following tables. For instructions on selecting or setting menu items, see “Main Menu Operations”. (→P.33) For details on menu levels and values, see “Menu Structure”. (→P.37) Setting Item Menu Durng Prtng Head Cleaning Description, Instructions Printhead cleaning options. (→P.517) Choose Head Cleaning A if printing is faint, oddly colored, or contains foreign substances. Choose Head Cleaning B if no ink is printed at all, or if printing is not improved by Head Cleaning A. Fine Band Adj. Fine-tune the feed amount manually. Information Displays the information about the printer and history of print jobs. (→P.63) Job Mgmt Menu 62 Printer Parts Downloaded from ManualsPrinter.com Manuals Manage print jobs on the printer’s hard disk. (→P.64) Control Panel Information Setting Item System Info Version Description, Instructions Firm Displays the version of the printer and rmware. Boot Displays the version of the boot ROM. MIT Displays the version of the MIT database format. Ext I/F Displays the name of interfaces compatible with the expansion slot. s/n Displays the printer’s serial number. MAC Displays the MAC address. HDDSpace Displays the space available on the printer’s hard disk. Error Log ########-#### Displays the most recent error messages (up to two). Job Log (Choose from Document Name Displays the document name in the last print job. information User Name Displays the name of the user who sent the print job. about the latest three print jobs.) Page Count Displays the number of pages in the print job. HDD Information Job Status Displays the results of the print job processed. Print Start Time Displays the time when the print job was started. Print End Time Displays the time when the print job was nished. Print Time Displays the time required to print the job. Print Size Displays the paper size in the print job. Media Type Displays the paper type in the print job. Interface Displays the interface used for the print job. Ink Consumed Displays the ink consumption. HDDSpace Displays the space available on the printer’s hard disk. Printer Parts 63 Downloaded from ManualsPrinter.com Manuals Control Panel Job Mgmt Menu Setting Item Job Queue Ope. Job List Description, Instructions (Choose a print Priority job) Print the job rst after the current print job is nished. (→P.449) Delete Com. BOX Ope. Job List Delete the current job or queued jobs. (→P.449) (Choose a print Print job) Delete Print jobs in the Common Box. Delete jobs in the Common Box. Print Job List Psnl. BOX Ope. Folder List Print a list of jobs in the Common Box. (Enter a Job List password if one has been set.) Print Job List 64 Printer Parts Downloaded from ManualsPrinter.com Manuals Print Print jobs in Personal Boxes. Delete Delete jobs in Personal Boxes. Print a list of jobs in Personal Boxes. Control Panel Submenu Display Press the Information button to display this information, one after another: the Maintenance Cartridge capacity and remaining ink levels, paper information, and printer information. Each time you press the Information button, the following submenus are displayed. Note • Press any button other than the Information button to restore the previous mode. • After you display a submenu, the printer will revert to the previous mode in about ten seconds if no print job is received or if you do not operate the printer. Remaining Maintenance Cartridge capacity and ink levels The remaining Maintenance Cartridge capacity is shown on the top level of the Display Screen. The remaining level of each ink is shown on the bottom level of the Display Screen. Ink levels shown on the Display Screen correspond to the inks identied by the color labels on the bottom of the Display Screen. These symbols may be displayed above the ink level: “!” if ink is low, “×” if no ink is left, and “?” if you have deactivated ink level detection. Remaining ink is indicated as follows. Information of the loaded paper Here, the paper size, type, and related printer settings are displayed. Printer Parts 65 Downloaded from ManualsPrinter.com Manuals Control Panel Printer information Displays the rmware version, serial number, MAC address, IP address, and interface information. GL2 Settings The following settings information is displayed on two screens: HP-GL/2 Color Mode, Print Quality, Input Resolution, Media Source, Conserve Paper, Line Cap, Smoothing, and Line Width, ThickenFineLines, and AdjustFaintLines. 66 Printer Parts Downloaded from ManualsPrinter.com Manuals Control Panel Status Print You can print a Status Print report indicating the current status of the printer. With Status Print, information is printed regarding the printer rmware version, various settings, and the utilization level of consumables. Printing Status Print Reports 1. Load paper. If using sheets, load paper A4/Letter-sized. You will need at least four sheets. 2. Press the Menu button to display MAIN MENU. 3. 4. 5. Press ▲ or ▼ to select Test Print, and then press the ► button. Press ▲ or ▼ to select Status Print, and then press the ► button. Press ▲ or ▼ to select Yes, and then press the OK button. Checking the information in the Status Print report The following information is included in the Status Print report. Canon imagePROGRAF iPFxxxx Status Print Printer model Firm Firmware Version Boot Boot ROM Version MIT(DBF) MIT Database Format Version MIT(DB) MIT Database Version S/N Printer serial number MC Maintenance Cartridge capacity (%) C,M,Y,MBK,MBK2,BK Ink levels. The remaining ink is displayed in a ve-level scale. Media Menu Information on the loaded paper. Roll Media Type Check Remain. Roll Cut Sheet Type Adjust Printer Current printer settings. Head Adjust Printhead adjustment value. Auto Print A1-F2 Feed Priority Settings related to paper feeding. Adjust Length Printer Parts 67 Downloaded from ManualsPrinter.com Manuals Control Panel HP-GL/2 Settings HP-GL/2 setting values. Color Mode Print Quality Input Resolution Media Source Conserve Paper Line Cap Smoothing Line Width Interface Setup Current network settings. EOP Timer Sets the elapsed time between receiving last data and canceling printing. TCP/IP Settings related to TCP/IP. IP Mode Protocol DHCP BOOTP RARP IP Setting IP Setting values. IP Address Subnet Mask Default G/W NetWare NetWare settings. Frame Type Print Service AppleTalk Values that specify whether AppleTalk is active or not. Ethernet Driver Ethernet Driver settings. Auto Detect Comm.Mode Ethernet Type Spanning Tree MAC Address 68 Printer Parts Downloaded from ManualsPrinter.com Manuals Control Panel System Setup Warning Current warning and error settings. Buzzer Detect mismatch Keep Media Size Current paper-related settings. Sheet Selection 1 Sheet Selection 2 Noz. Check Freq. Nozzle-check settings. Sleep Timer General printer settings. Length Unit Time Zone Date Format Language Contrast Adj. Information System information and an error log. RAM Error Log HDD Capacity Printer Parts 69 Downloaded from ManualsPrinter.com Manuals Control Panel Network (RemoteUI) Current network settings used by RemoteUI. TCP/IP Frame Type Use DHCP Use BOOTP Use RARP Enable DNS Dynamic Update Use Zeroconf Function IP Address* Subnet Mask* Gateway Address* LPD Printing IPP Printing IPP Printer URI RAW Printing Raw Port Number Raw Mode Bi-direction FTP Printing Primary DNS Server Address* Secondary DNS Server Address* DNS Host Name* DNS Domain Name* SMTP Server Address* Multicast DNS Service Name *: Blank if the status has been saved by using Status Monitor. NetWare Current NetWare settings. Frame Type IPX External Network Number* Node Number* Print Service *: Depending on the NetWare print service settings, information on one of the following four items is printed. 70 Printer Parts Downloaded from ManualsPrinter.com Manuals Control Panel Bindery PServer File Server Name* Values set when NetWare > Print Service > Bindery PServer is selected. Print Server Name* Print Server Password* Polling Interval RPrinter Values set when NetWare > Print Service > RPrinter is selected. Print Server Name* Printer Number* NDS PServer Values set when NetWare > Print Service > NDS PServer is selected. Tree Name* Context name* Print Server Name* Print Server Password* NPrinter Values set when NetWare > Print Service > NPrinter is selected. Print Server Name* Printer Number* *: Blank if the status has been saved by using Status Monitor. AppleTalk Current AppleTalk settings. Phase Type Name* Network Number* Zone* *: Blank if the status has been saved by using Status Monitor. HEAD LOT NUMBER Printhead lot number. LOT PARTS STATUS Utilization status of replacement parts that require servicing. COUNTER A-V Printer Parts 71 Downloaded from ManualsPrinter.com Manuals Control Panel COUNTER Utilization status of the cutter, media, and other items (indicating how much they have been used). CUTTER MEDIA MEDIA1-7 NAME TTL ROLL CUTSHEET AFTER INSTALLATION 72 Printer Parts Downloaded from ManualsPrinter.com Manuals Optional accessories Optional accessories Roll Holder Set A set of parts comprising the Roll Holder, Holder Stopper, 2-Inch Paper Core Attachment, and 3-Inch Paper Core Attachment. To load a roll with a 3-inch paper core, remove the 2-Inch Paper Core Attachment from the Holder Stopper and then attach the 3-Inch Paper Core Attachment on both the Roll Holder and Holder Stopper. To load a roll with a 2-inch paper core, remove the 3-Inch Paper Core Attachment from both the Roll Holder and Holder Stopper and then attach the 2-Inch Paper Core Attachment on the Holder Stopper. (→P.129) • Roll Holder Set RH4-32 (for 2- and 3-inch paper cores) IEEE 1394 (FireWire) Expansion Board An interface board to add an IEEE 1394 (also called "FireWire") port. • IEEE1394 Expansion Board EB-05 Caution • Note that EB-04 is incompatible. For instructions on installing the IEEE 1394 expansion board, refer to the documentation provided with the optional IEEE 1394 expansion board. Printer Parts 73 Downloaded from ManualsPrinter.com Manuals Printer Specications Printer Specications Specications Important • This information is subject to change as the printer is updated. • The following values may vary depending on the operating environment. Printer Power supply Power consumption 100-120 V AC (50/60 Hz), 220-240 V AC (50/60 Hz) During operation 140 W max. Sleep mode 100-120 V: 5 W max. (10 W max. when an IEEE 1394 (FireWire) expansion board is installed.) 220-240 V: 6 W max. (11 W max. when an IEEE 1394 (FireWire) expansion board is installed.) Off 1 W max. (*1) During operation Approx. 52 dB (A) max. Standby Approx. 35 dB (A) max. Temperature 15-30°C (59-86°F) Humidity 10-80%, non-condensing Dimensions (W × D × H) Printer and Stand (including Roll Holder and Output Stacker ) 1,507× 871 × 1,097 mm (59.3 × 34.3 × 43.2 in) Weight Printer and Stand (not including the Printhead and Ink Tank ) 65 kg (143.3 lb) Operating noise Operating environment Space for installation (W × D × H) 2,307× 2,071 × 2,000 mm (90.8 × 81.5 × 78.7 in) Applicable standards International Energy Star Program, Law on Promoting Green Purchasing, GPN, RoHS, The Eco Declaration, WEEE, U.S. presidential directives, J-MOSS (Green Mark) *1: The printer uses a trace amount of power even when turned off. To stop all power consumption, turn off the printer and unplug the power cord. Printing performance Print method Bubblejet Maximum resolution 2400 dpi horizontally (*1) × 1200 dpi vertically Printhead PF-03 Number of nozzles • MBK: 5,120 • 2,560 nozzles each for BK, C, M, and Y *1: Prints with a minimum 1/2400 inch dot pitch between ink droplets. 74 Printer Parts Downloaded from ManualsPrinter.com Manuals Printer Specications Interface Expansion Board Slots 1 USB 2.0(*1) Format Internal port Mode Full-speed (12 Mbps), high-speed (480 Mbps) Connector Series B (4-pin) Format Internal port Specication IEEE 802.3 10BASE-T, IEEE 802.3u 100BASE-TX /Auto-Negotiation, IEEE 802.3x Full Duplex Protocols IPX/SPX (Netware 4.2, 5.1, 6.0), SNMP, HTTP, TCP/IP, AppleTalk Format Optional board (compatible with the expansion slot) Specication IEEE 1394-1995, conforms to P1394a Specication ver. 2.0, half duplex, Data/Strb differential serial Transfer speed 100/200/400 Mbps Connector Conforms to IEEE 1394-1995 (6-pin), no power supply Ethernet IEEE 1394 *1: Use in USB 2.0 High Speed mode requires the following environment: • Computer: USB 2.0 High-Speed-compatible • Operating system: Windows Vista/Windows Server 2003/Windows XP/Windows 2000 or Mac OS X ver. 10.3.3 or later • USB 2.0 driver: Microsoft USB 2.0 driver (available from Windows Update or the Service Pack.) • USB cable: Certied USB 2.0 cable Ink Ink Tank BK Ink Tank ( Black Ink ) Dye ink PFI-102BK MBK Ink Tank ( Matte Black Ink, or black ink for matte paper) Pigment ink PFI-102MBK C Ink Tank ( Cyan Ink ) Dye ink PFI-102C M Ink Tank ( Magenta Ink ) Dye ink PFI-102M Y Ink Tank ( Yellow Ink ) Dye ink PFI-102Y Capacity 130 ml (4.4 oz) per color (*1) *1: The provided Starter Ink Tanks contain 90 ml (3.0 oz) each. Printer Parts 75 Downloaded from ManualsPrinter.com Manuals Printer Specications Paper (*1) Paper width 203-917 mm (8-36.1 in) Maximum length per page Rolls 18 m (19.9 yd) Sheets 1.6 m (1.7 yd) Thickness Rolls 0.07-0.8 mm (0.0028-0.031 in) Sheets 0.07-0.8 mm (0.0028-0.031 in) Roll width 36-in Roll (914 mm), ISO A0/A1 Roll (841 mm), 30-in Roll (762 mm), JIS B1/B2 Roll (728 mm), 24-in Roll (610 mm), ISO A1/A2 Roll (594 mm), JIS B2/B3 Roll (515 mm), 17-in Roll (432 mm), ISO A2/A3 Roll (420 mm), 16-in Roll (407 mm), 14-in Roll (356 mm), ISO A3/A4 Roll (297 mm), 10-in Roll (254 mm) Sheets ISO A0, ISO A1, ISO A2, ISO A2+, ISO A3, ISO A3+, ISO A4, ISO B1, ISO B2, ISO B3, ISO B4, JIS B1, JIS B2, JIS B3, JIS B4, 34"x44" (ANSI E), 28"x40" (ANSI F), 22"x34" (ANSI D), 17"x22" (ANSI C), 11"x17" (Ledger), 13"x19" (Super B), Letter (8.5"x11"), Legal (8.5"x14"), 36"x48" (ARCH E), 30"x42" (ARCH E1), 26"x38" (ARCH E2), 27"x39" (ARCH E3), 24"x36" (ARCH D), 18"x24" (ARCH C), 12"x18" (ARCH B), 9"x12" (ARCH A), DIN C0, DIN C1, DIN C2, DIN C3, DIN C4, 20"x24", 18"x22", 14"x17", 12"x16", 10"x12", 10"x15", 8"x10", US Photo (16"x20"), Poster 20"x30", Poster 30"x40", Poster 300x900mm, 13"x22" Normal size Printable area • Rolls 3 mm (0.12 in) from each side • Sheets 3 mm (0.12 in) from the top and each side, and 23 mm (0.91 in) from the bottom Guaranteed print area • Rolls 20 mm (0.79 in) from the top, 5 mm (0.20 in) from the bottom, and 5 mm (0.20 in) from each side • Sheets 20 mm (0.79 in) from the top, 23 mm (0.91 in) from the bottom, and 5 mm (0.20 in) from each side For information on the guaranteed print area, see “Print Area”. (→P.79) Borderless printing (*2) Printable area (rolls) Entire surface Paper Size Print area Supported width for borderless printing 36-in Roll (914 mm), ISO A0/A1 Roll (841 mm), JIS B1/B2 Roll (728 mm), 24-in Roll (610 mm), ISO A1/A2 Roll (594 mm), JIS B2/B3 Roll (515 mm), 16-in Roll (407 mm), 14-in Roll (356 mm), 10-in Roll (254 mm) *1: For information on the types of paper the printer supports, refer to the Paper Reference Guide. (→P.96) *2: Printing may not be possible in some cases, depending on the type and size of paper. 76 Printer Parts Downloaded from ManualsPrinter.com Manuals Printer Specications Hard Disk Capacity on the hard disk to store image data 48 GB Print job storage capacity • Common mail box: 100 jobs • Personal boxes: 100 jobs Printer Parts 77 Downloaded from ManualsPrinter.com Manuals Printer Specications Basic Environmental Performance Printer Power consumption Sleep mode Off Resource efciency Weight Product safety 100-120 V: 5 W max. (10 W max. when an IEEE 1394 (FireWire) expansion board is installed.) 220-240 V: 6 W max. (11 W max. when an IEEE 1394 (FireWire) expansion board is installed.) 1 W max. Printer and Stand : 65 kg (143.3 lb) Dimensions (W × D × H) Printer and Stand : 1,507 × 871 × 1,094 mm (59.3 × 34.3 × 43.1 in) Recycling Recyclable plastic used for printer body Toxic substances Structural components: No prohibited brominated ame retardants used (PBB or PBDE) Body plastic: No heavy metals (Pb, Hg, Cr[Vl], or Cd) or halogenated ame retardants used Operating noise During operation: Approx. 52 dB (A) max. (6.6 bels or less) Standby: Approx. 35 dB (A) max. (6.3 bels or less) Packaging materials Heavy metal content (Pb, Hg, Cr[Vl], and Cd) 78 Printer Parts Downloaded from ManualsPrinter.com Manuals None (none in packaging) Printer Specications Print Area A margin required by the printer is added with respect to the size of paper loaded in the printer. Except in borderless printing, the actual printing area corresponds to the paper size minus the space for this margin. Top Edge Printable Area Bottom Edge Recommended Print Area Top Edge Bottom Edge Sides Sides Sheets 3 mm (0.12 in) 23 mm (0.91 in) 3 mm (0.12 in) 20 mm (0.79 in) 23 mm (0.91 in) 5 mm (0.20 in) Rolls 0/3 mm (0/0.12 in) 0/3 mm (0/0.12 in) 0/3 mm (0/0.12 in) 20 mm (0.79 in) 5 mm (0.20 in) 5 mm (0.20 in) Sheets • Printable Area: A margin of 3 mm (0.12 in) on top, 23 mm (0.91 in) on bottom, and 3 mm (0.12 in) on left and right sides is required. • Recommended print area: A margin of 20 mm (0.79 in) on top, 23 mm (0.91 in) on bottom, and 5 mm (0.20 in) on left and right sides is required. Rolls • Printable Area: A margin of 3 mm (0.12 in) on all sides is required. A margin of 3 mm (0.12 in) on the top, bottom, and both sides is required. During borderless printing, the margin on all sides is 0 mm. For information on paper compatible with borderless printing, see the Paper Reference Guide. (→P.96) • Recommended print area: A margin of 20 mm (0.79 in) on top, 5 mm (0.20 in) on bottom, and 5 mm (0.20 in) on left and right sides is required. Note • Printable area: The area that can be printed. • Guaranteed Print Area: We recommend printing within this area. • To print so that your original matches the print area exactly, use an oversized paper size that includes the required margin. (→P.218) Printer Parts 79 Downloaded from ManualsPrinter.com Manuals Printing procedure Basic Printing Workow Printing procedure Printing Options Using Rolls and Sheets The printer supports both rolls and sheets. This section introduces the main features of each, as well as the main printing methods available. Select rolls or sheets to suit your particular printing application. Note • For information on the types of paper the printer supports, refer to the Paper Reference Guide. (→P.96) • A variety of other ways to print are available besides those introduced here. Choose the printing method that suits your particular printing application, referring to "Working With Various Print Jobs" and "Enhanced Printing Options" from the table of contents. Roll printing Media in spooled rolls is generally called Roll Media. Rolls are loaded on the Roll Holder, which are in turn loaded in the printer. Rolls can be used to print large photos or create posters or banners that cannot be printed on regular sheets. • Large-format printing Easily print vertical or horizontal banners from familiar applications such as Microsoft Ofce applications. (→P.253) • Borderless printing Print without a margin (border) around posters or photos. (→P.232) (→P.239) (→P.225) • Banner printing You can print multiple pages as a single continuous image, without margins between pages. (→P.274) • 90-degree rotation before printing Originals in portrait orientation are rotated 90 degrees when possible to use paper more efciently. (→P.299) • Enlarged/reduced printing You can freely adjust the size of originals by enlarging or reducing originals before printing. (→P.196) (→P.202) (→P.208) • Free Layout function Print multiple documents from multiple applications (such as word-processing programs, spreadsheet programs, and so on) next to each other. (→P.268) 80 Basic Printing Workow Downloaded from ManualsPrinter.com Manuals Printing procedure Sheet printing Sheets refers to individual sheets of paper in regular sizes. Insert the sheet between the Platen and the Paper Retainer. • Enlarged/reduced printing You can freely adjust the size of originals by enlarging or reducing originals before printing. (→P.196) (→P.202) (→P.208) • Free Layout function Print multiple documents from multiple applications (such as word-processing programs, spreadsheet programs, and so on) next to each other. (→P.268) Basic Printing Workow 81 Downloaded from ManualsPrinter.com Manuals Printing procedure Loading and Printing on Rolls These are the basic steps for loading and printing on rolls. Follow the steps below to switch to a new roll or a roll of a different type or width before printing. Note • Before printing banners or other long documents, spread a clean cloth or paper on the oor. Otherwise use the optional Output Stacker. Otherwise, long sheets that touch the oor after printing may become dirty. • If you prefer to wait for the ink to dry after printing and simply eject the document, you can deactivate automatic cutting and cut the paper manually. (→P.122) 1. Turn the printer on. (→P.22) 2. Select a roll as the paper source. (→P.104) 3. Set a roll on the Roll Holder. (→P.107) 82 Basic Printing Workow Downloaded from ManualsPrinter.com Manuals Printing procedure 4. Load the roll in the Roll Holder Slot. (→P.109) 5. Load the roll in the printer. (→P.110) 6. Select the paper type. (→P.105) 7. Specify the paper length. (→P.106) Basic Printing Workow 83 Downloaded from ManualsPrinter.com Manuals Printing procedure 8. Complete settings in the printer driver for the type of paper and other details. • Specifying Paper in the Printer Driver (Windows) (→P.192) • Specifying Paper in the Printer Driver (Mac OS X) (→P.194) Important • Always specify the same type and size of paper in the printer menu and printer driver. If the type and size do not match, an error message may be displayed and printing may not be possible. • Papr Size Mismatch (→P.578) • Papr Type Mismatch (→P.578) • Paper Mismatch (→P.578) 84 Basic Printing Workow Downloaded from ManualsPrinter.com Manuals Printing procedure 9. Send the print job. • Printing from Windows (→P.89) • Printing from Mac OS X (→P.90) Start printing. Note • You can skip steps 6 and 7 if a barcode has been printed on the roll paper and you have activated automatic detection of the remaining roll. The paper type and amount of paper left are automatically detected. The barcode will automatically be cut off after it has been read. • You can skip step 6 if you have deactivated automatic detection of the remaining roll paper. • If you have deactivated width detection, you will need to enter the roll width after choosing the paper type in step 5. (→P.50) • If you select a type of paper for which width detection is Off when detection of the remaining roll paper is also Off, you will need to advance the paper manually to the starting position for printing. (→P.136) • For details on supported sizes and types of rolls, see “Paper Sizes” or the Paper Reference Guide. (→P.101) (→P.96) • When printing on rolls after printing on sheets, if the lit paper selection lamp does not switch from the Cut Sheet lamp to the Roll Media lamp, press the Feeder Selection button. Important • After changing rolls, clean the Platen. (→P.538) Basic Printing Workow 85 Downloaded from ManualsPrinter.com Manuals Printing procedure Loading and Printing on Sheets These are the basic steps for loading sheets and then printing. Follow the steps below to load and print on sheets. 1. Turn the printer on. (→P.22) 2. Remove any loaded paper that will not be used. • Roll (→P.113) • Sheet (→P.137) 86 Basic Printing Workow Downloaded from ManualsPrinter.com Manuals Printing procedure 3. Complete settings in the printer driver for the type and size of paper and other details. • Specifying Paper in the Printer Driver (Windows) (→P.192) • Specifying Paper in the Printer Driver (Mac OS X) (→P.194) 4. Send the print job. • Printing from Windows (→P.89) • Printing from Mac OS X (→P.90) Basic Printing Workow 87 Downloaded from ManualsPrinter.com Manuals Printing procedure 5. Load the sheet. (→P.133) Note • If you will load a sheet before sending a print job, after you load the sheet, the printer automatically shows a menu for selection of the paper type on the Display Screen. Follow these steps. • Selecting the Paper Type (Sheet) (→P.132) Start printing. Note • If you select a type of paper for which Media Width Detection is deactivated ( Off is selected), you must advance the paper manually to the position for printing. (→P.136) • For details on supported types and sizes of the paper, see “Paper Sizes” or the Paper Reference Guide. (→P.101) (→P.96) 88 Basic Printing Workow Downloaded from ManualsPrinter.com Manuals Printing procedure Printing from Windows Print from the application software menu. Important • The Windows printer driver can be used in the following versions of Windows: • Windows 2000 (Professional or Server) • Windows XP (Home Edition or Professional) • Windows Server 2003 (Standard Edition) • Windows Vista • We recommend exiting unnecessary applications before printing. Running several applications while printing may interrupt the transfer of print data and affect printing quality. 1. In the application software, select Print from the File menu to display the dialog box for printing conditions. 2. After conrming that the printer is selected in the dialog box, click Print or OK to start printing. Note • The appearance of the dialog box varies depending on the application software. In most cases, the dialog box includes basic printing options and enables you to choose the printer, specify the range of pages, number of copies, and so on. Example: Print dialog box displayed by the application software Note • If another printer is selected, select the printer you want to use under Select Printer or in the dialog box displayed after clicking Printer. Settings for many printing methods (including enlarged or reduced printing, borderless printing, and so on) are displayed in the printer driver dialog box. There are two ways to access the printer driver dialog box, as follows: • From the application software (→P.343) • From the operating system menu (→P.345) Basic Printing Workow 89 Downloaded from ManualsPrinter.com Manuals Printing procedure Printing from Mac OS X Print from the application menu after registering the printer. Important • We recommend exiting unnecessary applications before printing. Running several applications while printing may interrupt the transfer of print data and affect printing quality. Registering the printer Before printing, you must register the printer in Printer Setup Utility (or Print Center ). For instructions on registering the printer, see “Conguring the Printer Driver Destination (Macintosh)”. (→P.431) Important • During this setup process, the printer will not be listed among available printers if it is off or disconnected. • By factory default, the AppleTalk protocol is disabled on the printer. You must enable the AppleTalk protocol before using the printer in an AppleTalk network. For instructions on activating AppleTalk protocol, see “Conguring the Destination for AppleTalk Network (Macintosh)”. (→P.433) Note • When registering the printer, choose USB if the printer is connected via USB, Canon FireWire(iPF) if connected via IEEE 1394, or AppleTalk, Canon IP(iPF), or Bonjour if connected via a network. • For Canon IP(iPF) connections, enter the printer’s IP address. 90 Basic Printing Workow Downloaded from ManualsPrinter.com Manuals Printing procedure Printing from the application software 1. In the application software, select Print from the File menu to display the dialog box for printing conditions. Note • This dialog box includes basic printing options and enables you to choose the printer, specify the range of pages, number of copies, and so on. 2. Select the printer in the Printer list. 3. Click Print to start printing. As shown in the following illustration, you can switch to other panes in this dialog box to complete settings for various methods of printing, including enlarged and reduced printing, borderless printing, and so on. Basic Printing Workow 91 Downloaded from ManualsPrinter.com Manuals Canceling print jobs Canceling print jobs Canceling Print Jobs from the Control Panel Hold down the Stop button for a second or more to cancel print jobs or ink drying in progress when the printer is online, ofine, or in Menu mode. Printer operation varies depending on the status when you hold down the Stop button for a second or more during printing. • If you press the Stop button before printing starts Holding down the Stop button for a second or more before printing cancels the print job and brings the printer online. When the roll is selected as the paper source, the printer goes online, and when sheet is selected, the printer goes ofine. • If you press the Stop button during printing Holding down the Stop button for a second or more during printing stops printing immediately. • If you press the Stop button when printing is paused Holding down the Stop button for a second or more when printing is paused cancels the print job. 92 Basic Printing Workow Downloaded from ManualsPrinter.com Manuals Canceling print jobs Canceling Print Jobs from Windows You can cancel print jobs in the printer window. 1. Click the printer icon in the taskbar to display the printer window. Note • You can also display this window by double-clicking the printer icon in the Printers and Faxes (or Printers ) folder, accessible through the Windows start menu. 2. Right-click the job to cancel and select Cancel. Note • The print job is displayed on the printer screen during the transmission of print data from the computer. When the transmission is nished, the job is not displayed even during printing. To cancel print jobs from the Control Panel, follow these steps. 1. If the Display Screen of the Control Panel still indicates that the job is in progress and the Data lamp continues ashing, hold down the Stop button for a second or more to stop printing. Do the following if no print jobs are shown in the printer window (because they have already been sent to the printer). 1. 2. Double-click the taskbar icon to access the imagePROGRAF Status Monitor. On the Printer Status sheet, click Cancel Job. Basic Printing Workow 93 Downloaded from ManualsPrinter.com Manuals Canceling print jobs Canceling Print Jobs from Mac OS X You can cancel print jobs in imagePROGRAF Printmonitor. 1. 2. Click the printer icon in the Dock to display the printer window. Click Stop Jobs to stop printing. In this window, you can cancel jobs sent to the printer. Note • The print job is displayed on the printer’s screen during the transmission of print data from the computer. When the transmission is completed, the job is not displayed even during printing. Alternatively, you can cancel print jobs as follows. 1. Click Utility to display imagePROGRAF Printmonitor. 94 Basic Printing Workow Downloaded from ManualsPrinter.com Manuals Canceling print jobs 2. Select the print job to cancel and click the Cancel Job button to remove the print job. The job sent to the printer is canceled. Note • The print job is displayed on the imagePROGRAF Printmonitor window while the printer receives the print data from the computer. It is not displayed before transmission of print data to the printer, even if the computer has started the process of the data. 3. Exit imagePROGRAF Printmonitor. In the printer window, click Start Jobs. Important • Always follow these steps if you cancel print jobs. If you do not restart job processing, the next job cannot be printed. To cancel print jobs from the Control Panel, follow these steps. 1. If the Display Screen of the Control Panel still indicates that the job is in progress and the Data lamp continues ashing, hold down the Stop button for a second or more to stop printing. Basic Printing Workow 95 Downloaded from ManualsPrinter.com Manuals Paper Handling Paper Paper Types of Paper For information on the types of paper the printer supports, refer to the Paper Reference Guide . This guide identies supported plain paper, coated paper, photo paper (such as glossy photo paper), proong paper, CAD paper, and other types of paper. The Paper Reference Guide identies types and specications of paper, as well as information on printer driver settings and tips on handling paper. You can update paper information in the Paper Reference Guide , on the printer Control Panel, and in the printer driver by downloading the latest version of the Media Conguration Tool from the imagePROGRAF website. Note • The media types with "†" marked in the product name are those specied as genuine Canon media. For other media, please contact the respective media manufacturer after reading the instruction manuals supplied with the media. 96 Handling Paper Downloaded from ManualsPrinter.com Manuals Paper Viewing the Paper Reference Guide You can access the Paper Reference Guide as follows. Follow the steps for your particular operating system. • Windows 1. Double-click the iPFxxxx Support icon on the desktop. (Here, iPFxxxx represents the printer model.) The online support window is displayed. 2. Select Paper Reference Guide. The Paper Reference Guide is displayed. Handling Paper 97 Downloaded from ManualsPrinter.com Manuals Paper • Mac OS X 1. Click the iPF Support icon in the Dock. The online support window is displayed. 2. Select Paper Reference Guide. The Paper Reference Guide is displayed. 98 Handling Paper Downloaded from ManualsPrinter.com Manuals Paper Updating paper information You can update paper information in the Paper Reference Guide and on the printer by downloading the latest version of the Media Conguration Tool from the imagePROGRAF website. For information about the Media Conguration Tool, see the Media Conguration Tool Guide (Windows) or Media Conguration Tool Guide (Macintosh). Follow these steps to access the imagePROGRAF website. Important • When you update paper information by using the Media Conguration Tool, the paper type setting on the Control Panel, in the printer driver, and in related software is updated. • Windows 1. Double-click the iPFxxxx Support icon on the desktop. (Here, iPFxxxx represents the printer model.) The online support window is displayed. 2. Select Stay Informed. The default browser is started, and the imagePROGRAF webpage is displayed. Handling Paper 99 Downloaded from ManualsPrinter.com Manuals Paper • Mac OS X 1. Click the iPF Support icon in the Dock. The online support window is displayed. 2. Select Stay Informed. The default browser is started, and the imagePROGRAF webpage is displayed. Note • In Windows, you can also access the imagePROGRAF webpage by clicking the start menu, selecting Programs > iPFxxxx Media Conguration Tool (here, iPFxxxx represents the printer model) > iPFxxxx Media Conguration Tool to start the Media Conguration Tool, and clicking Extra Information. • On a Macintosh computer, you can also access the imagePROGRAF website from the Finder by selecting Applications > Canon Utilities > iPFxxxx Media Conguration Tool (here, iPFxxxx represents the printer model) > MCTxxxx to start the Media Conguration Tool and then clicking Extra Information. 100 Handling Paper Downloaded from ManualsPrinter.com Manuals Paper Paper Sizes Rolls Rolls that meet the following conditions are supported. • Outer diameter: up to 150 mm (6.0 in) • Inner diameter of paper core: 2 or 3 inches • Printing side out Roll width Roll Paper Width Settings in Printer Driver Borderless Printing (*1) 914.4 mm (36.00 in) 36-in. Roll (914.4mm) Yes 841.0 mm (33.11 in) ISO A0/A1 Roll (841.0mm) Yes 762.0 mm (30.00 in) 30-in. Roll (762.0mm) No 728.0 mm (28.66 in) JIS B1/B2 Roll (728.0mm) Yes 609.6 mm (24.00 in) 24-in. Roll (609.6mm) Yes 594.0 mm (23.39 in) ISO A1/A2 Roll (594.0mm) Yes 515.0 mm (20.28 in) JIS B2/B3 Roll (515.0mm) Yes 431.8 mm (17.00 in) 17-in. Roll (431.8mm) No 420.0 mm (16.54 in) ISO A2/A3 Roll (420.0mm) No 406.4 mm (16.00 in) 16-in. Roll (406.4mm) Yes 355.6 mm (14.00 in) 14-in. Roll (355.6mm) Yes 297.0 mm (11.69 in) ISO A3/A4 Roll (297.0mm) No 254.0 mm (10.00 in) 10-in. Roll (254.0mm) Yes Custom Paper Size 203.2 mm (8.00 in) - 917.0 mm (36.10 in) *1: For information on types of paper compatible with borderless printing, refer to the Paper Reference Guide. (→P.96) Handling Paper 101 Downloaded from ManualsPrinter.com Manuals Paper Sheets Sheets of the following sizes are supported. Paper Size Dimensions ISO A0 841.0 × 1189.0 mm (33.11 × 46.81 in) ISO A1 594.0 × 841.0 mm (23.39 × 33.11 in) ISO A2 420.0 × 594.0 mm (16.54 × 23.39 in) ISO A2+ 431.8 × 609.6 mm (17.00 × 24.00 in) ISO A3 297.0 × 420.0 mm (11.69 × 16.54 in) ISO A3+ 329.0 × 483.0 mm (12.95 × 19.02 in) ISO A4 210.0 × 297.0 mm (8.27 × 11.69 in) ISO B1 707.0 × 1000.0 mm (27.83 × 39.37 in) ISO B2 500.0 × 707.0 mm (19.69 × 27.83 in) ISO B3 353.0 × 500.0 mm (13.90 × 19.69 in) ISO B4 250.0 × 353.0 mm (9.84 × 13.90 in) JIS B1 728.0 × 1030.0 mm (28.66 × 40.55 in) JIS B2 515.0 × 728.0 mm (20.28 × 28.66 in) JIS B3 364.0 × 515.0 mm (14.33 × 20.28 in) JIS B4 257.0 × 364.0 mm (10.12 × 14.33 in) 34"x44"(ANSI E) 863.6 × 1117.6 mm (34.00 × 44.00 in) 28"x40"(ANSI F) 711.2 × 1016.0 mm (28.00 × 40.00 in) 22"x34"(ANSI D) 558.8 × 863.6 mm (22.00 × 34.00 in) 17"x22"(ANSI C) 431.8 × 558.8 mm (17.00 × 22.00 in) 11"x17"(Ledger) 279.4 × 431.8 mm (11.00 × 17.00 in) 13"x19"(Super B) 330.2 × 482.6 mm (13.00 × 19.00 in) Letter(8.5"x11") 215.9 × 279.4 mm (8.50 × 11.00 in) Legal(8.5"x14") 215.9 × 355.6 mm (8.50 × 14.00 in) 36"x48"(ARCH E) 914.4 × 1219.2 mm (36.00 × 48.00 in) 30"x42"(ARCH E1) 762.0 × 1066.8 mm (30.00 × 42.00 in) 26"x38"(ARCH E2) 660.4 × 965.2 mm (26.00 × 38.00 in) 27"x39"(ARCH E3) 685.8 × 990.6 mm (27.00 × 39.00 in) 24"x36"(ARCH D) 609.6 × 914.4 mm (24.00 × 36.00 in) 18"x24"(ARCH C) 457.2 × 609.6 mm (18.00 × 24.00 in) 12"x18"(ARCH B) 304.8 × 457.2 mm (12.00 × 18.00 in) 9"x12"(ARCH A) 228.6 × 304.8 mm (9.00 × 12.00 in) DIN C0 917.0 × 1296.0 mm (36.10 × 51.02 in) DIN C1 648.0 × 917.0 mm (25.51 × 36.10 in) DIN C2 458.0 × 648.0 mm (18.03 × 25.51 in) 102 Handling Paper Downloaded from ManualsPrinter.com Manuals Paper Paper Size Dimensions DIN C3 324.0 × 458.0 mm (12.76 × 18.03 in) DIN C4 229.0 × 324.0 mm (9.02 × 12.76 in) 20"x24" 508.0 × 609.6 mm (20.00 × 24.00 in) 18"x22" 457.2 × 558.8 mm (18.00 × 22.00 in) 14"x17" 355.6 × 431.8 mm (14.00 × 17.00 in) 12"x16" 304.8 × 406.4 mm (12.00 × 16.00 in) 10"x12" 254.0 × 304.8 mm (10.00 × 12.00 in) 10"x15" 254.0 × 381.0 mm (10.00 × 15.00 in) 8"x10" 203.2 × 254.0 mm (8.00 × 10.00 in) US Photo 16"x20" 406.4 × 508.0 mm (16.00 × 20.00 in) Poster 20"x30" 508.0 × 762.0 mm (20.00 × 30.00 in) Poster 30"x40" 762.0 × 1016.0 mm (30.00 × 40.00 in) 13"x22" 329.0 × 558.0 mm (12.95 × 21.97 in) Poster 300x900mm 300.0 × 900.0 mm (11.81 × 35.43 in) Custom Paper Size 203.2 × 203.2 mm (8.00 × 8.00 in) - 917.0 × 1600.0 mm (36.10 × 62.99 in) Note • In the printer driver, paper sizes are categorized into groups based on the “size system” such as ISO A or ANSI. In Windows, some size systems are not available by default. Follow the steps below to make them available. 1. Display the printer driver dialog box. 2. Click the Page Setup tab to display the Page Setup sheet. 3. Click Size Options to display the Paper Size Options dialog box. 4. Select the Display Series check box. • For details on non-standard paper sizes, see “Printing on Non-Standard Paper Sizes”. (→P.261) • Borderless printing is not supported on sheets. Handling Paper 103 Downloaded from ManualsPrinter.com Manuals Handling rolls Handling rolls Selecting the Paper Source When advancing paper, press the Feeder Selection button and select the source. You can determine the selected source by checking which lamp is lit-either the Roll Media lamp (a) or the Cut Sheet lamp (b). • Roll Media lamp : Selected when printing on Roll Media. • Cut Sheet lamp : Selected when printing on Sheets. Note • If any paper is loaded that will not be used, a message is shown on the Display Screen, either Remove roll? or Eject sheet? when you press the Feeder Selection button. When removing the paper, press the OK button. • You cannot switch the paper source in the following situations: • If the Message lamp is ashing Check the message on the Display Screen and take action as necessary. (→P.575) • If the Data lamp is ashing Select the paper source after printing. • If a printer menu operation is in progress Select the paper source after the menu operation. • When in the process of loading paper Finish loading the paper before selecting the paper source. • When in the process of replacing Ink Tanks Finish replacing the Ink Tanks before selecting the paper source. • If the Top Cover is open Close the Top Cover before selecting the paper source. 104 Handling Paper Downloaded from ManualsPrinter.com Manuals Handling rolls Selecting the Paper Type (Roll) When changing the type of paper after the paper has been advanced, specify the type of paper as follows. Important • For best printing results, the printer ne-tunes the feed amount for each type of paper. Be sure to select the type of paper to use correctly before printing. • Because the printer ne-tunes the feed amount for each type of paper, the margins and the size of printed images may vary depending on the type of paper used. If margins and the size of images are not as you expected, adjust the paper feed amount and Printhead height. (→P.498) (→P.497) Note • After you load the roll, the printer automatically shows a menu for selection of the paper type on the Display Screen, unless a barcode has been printed on the roll or you have activated automatic detection of the remaining roll paper. Select the type of paper, and then press the OK button. If no barcode has been printed on the roll and you have activated automatic detection of the remaining roll paper, specify the roll length after the paper type. (→P.106) 1. Press the Menu button to display MAIN MENU. 2. 3. 4. Press ▲ or ▼ to select Media Menu, and then press the ► button. Press ▲ or ▼ to select Roll Media Type, and then press the ► button. Press ▲ or ▼ to select the type of paper loaded in the printer, and then press the OK button. Note • For details on types of paper, see the Paper Reference Guide. (→P.96)By factory default, Plain Paper is selected. • If you move the Release Lever, the setting automatically reverts to the previously selected paper. • Be sure to select the correct paper type. If this setting does not match the loaded paper, it may cause feed errors and affect the printing quality. • If you select a type of paper for which width detection is Off when detection of the remaining roll paper is also Off, you will need to advance the paper manually to the starting position for printing. (→P.136) 5. Press the Online button to bring the printer online. Handling Paper 105 Downloaded from ManualsPrinter.com Manuals Handling rolls Specifying the Paper Length (Roll) When changing the length of paper after the paper has been advanced, specify the length as follows. Note • When you specify the roll length in the printer menu, Chk Remain.Roll must be set to On. If it is Off, the Roll Length Set menu is not shown. • After you specify the roll type, the printer automatically shows a menu for selection of the roll length on the Display Screen if no barcode has been printed on the roll and you have activated automatic detection of the remaining roll paper. Select the roll length, and then press the OK button. The printer will automatically go online. 1. Press the Menu button to display MAIN MENU. 2. 3. 4. Press ▲ or ▼ to select Media Menu, and then press the ► button. Press ▲ or ▼ to select Roll Length Set, and then press the ► button. Press ▲ or ▼ to select the length of paper loaded in the printer, and then press the OK button. Specify the roll length as follows. 1. Press ◄ or ► to move the cursor (_) to each eld for entering numbers. 2. Press the ▲ or ▼ button to enter the value. 3. Repeat steps 1 and 2 to nish entering the value, and then press the OK button. 5. Press the Online button to bring the printer online. 106 Handling Paper Downloaded from ManualsPrinter.com Manuals Handling rolls Loading Rolls on the Roll Holder When printing on rolls, attach the Roll Holder to the roll. Attach the 2-inch or 3-inch paper core attachment to the roll holder, depending on the size of the paper core of the roll you will use. The printer is delivered with the 2-inch paper core attachment installed. (→P.129) Important • Cut the edge of the roll paper if it is uneven, dirty, or has tape residue. Otherwise, it may cause feeding problems and affect the printing quality. Be careful not to cut through any barcodes printed on the roll. • Wind up the roll so that the edge is even across the roll. This may cause feeding problems. Caution • Set the roll on a table or other at surface so that it does not roll or fall. Rolls are heavy, and dropping a roll may cause injury. Note • For details on supported sizes and types of rolls, see “Paper Sizes” or the Paper Reference Guide. (→P.101) (→P.96) • After pressing the Load/Eject button, you can refer to instructions on the Display Screen as you load the paper. 1. Lift the Holder Stopper lever (a) from the shaft side to unlock it. Holding the Holder Stopper at the position indicated (b), remove it from the Roll Holder. Handling Paper 107 Downloaded from ManualsPrinter.com Manuals Handling rolls 2. With the edge of the roll paper facing back as shown, set the roll with the Roll Holder from the right. Insert the roll rmly until it touches the ange (a) of the Roll Holder. Important • When loading a roll, be careful to avoid hitting the printer hard with the roll. This may damage the Roll Holder. 3. Insert the Holder Stopper from the right in the Roll Holder as shown. Holding it at the position indicated (b), push it rmly in until the ange (a) of the Holder Stopper touches the roll. Lock the Holder Stopper lever (c) by pushing it down toward the shaft side. 108 Handling Paper Downloaded from ManualsPrinter.com Manuals Handling rolls Loading Rolls in the Roll Holder Slot Once a roll is in the Roll Holder, follow these steps to load the roll in the Roll Holder Slot. Holding the Roll Holder so that the side with the white gear faces the side of the Roll Holder Slot with a white gear, load the Roll Holder shaft (a) into the grooves (b) on both ends of the Roll Holder Slot. Caution • Be careful not to drop the roll and hurt yourself when loading it. • Be careful not to pinch your ngers between the Roll Holder shaft (a) and the guide grooves (b) when loading rolls. At this point, to advance the roll, see “Loading the Roll in the Printer”. (→P.110) Handling Paper 109 Downloaded from ManualsPrinter.com Manuals Handling rolls Loading the Roll in the Printer Follow these steps to load rolls in the printer. Note • Remove any loaded paper that will not be used. • Roll (→P.113) (→P.114) • Sheet (→P.137) • If the Platen is dirty, clean inside the Top Cover. (→P.538) 1. Push the Release Lever back and pull out the roll paper evenly on both ends. Insert the edge in the Paper Feed Slot (a) and advance the paper until vacuuming paper starts. After the paper reaches the Platen, it is automatically advanced and vacuuming paper starts. Important • Be careful not to soil the printing surface of roll paper as you insert it in the slot. This may affect the printing quality. We recommend wearing clean cloth gloves when handling rolls to protect the printing surface. • If the paper is wrinkled or warped, straighten it out before loading it. • If it is difcult to insert the roll paper in the Paper Feed Slot, insert the left or right corner in the slot rst, and then straighten the paper as you advance it. • Load the roll so that there is no gap between the right edge of the paper and the Roll Holder. Note • You can adjust the strength of vacuum holding paper against the Platen when the Release Lever is open. If it is difcult to load paper, press the ▲ or ▼ button on the Control Panel to adjust the strength. Set vacuum stronger by pressing the ▲ button or weaker with the ▼ button. Three settings are available. 110 Handling Paper Downloaded from ManualsPrinter.com Manuals Handling rolls 2. Open the Top Cover. Important • Do not touch the Linear Scale (a) or Carriage Shaft (b). 3. Pull the roll edge gently and align it with the Paper Alignment Line (a). Lower the Release Lever toward the front. Important • Do not force the roll paper into alignment with the Paper Alignment Line (a). This may prevent the paper from being advanced straight. Handling Paper 111 Downloaded from ManualsPrinter.com Manuals Handling rolls 4. Close the Top Cover. After you load a roll, the printer automatically shows a menu for selection of the paper type on the Display Screen. At this point, specify the paper type. (→P.105) 112 Handling Paper Downloaded from ManualsPrinter.com Manuals Handling rolls Removing the Roll from the Printer Remove rolls from the printer as follows. Note • If you need to cut a printed roll, select Paper Cutting in the printer menu and cut the roll at the desired position. (→P.122) • If you have selected Media Menu > Chk Remain.Roll > On in the printer menu, a barcode indicating the amount of paper left is printed on the leading edge of the roll. However, barcodes are not printed on some types of paper, and only a text message indicating media information is printed. Caution • If you have activated automatic monitoring of the remaining roll paper, do not remove the roll before the barcode is printed. You will be unable to keep track of the amount of roll paper left. 1. Press the Load/Eject button. A conrmation message is displayed regarding removal of the roll. 2. Press the OK button. The roll can now be removed. Next, when removing rolls from the Roll Holder Slot, see “Removing Rolls From the Roll Holder Slot”. (→P.114) Handling Paper 113 Downloaded from ManualsPrinter.com Manuals Handling rolls Removing Rolls From the Roll Holder Slot Remove rolls from the Roll Holder Slot as follows. Make sure the roll is away from the Paper Feed Slot, and then remove the Roll Holder from the Roll Holder Slot. Removing a Roll from the Roll Holder 1. Lift the Holder Stopper lever (a) from the shaft side to unlock it. Holding the Holder Stopper at the position indicated (b), remove it from the Roll Holder. 2. Remove the roll from the Roll Holder. Important • After removal, store the roll in the original bag or box, away from high temperature, humidity, and direct sunlight. If paper is not stored properly, the printing surface may become scratched, which may affect the printing quality when you use it again. 114 Handling Paper Downloaded from ManualsPrinter.com Manuals Handling rolls Clearing Jammed Roll Paper If roll paper jams, follow the steps below to remove jams. 1. 2. Turn the printer off. (→P.22) 3. If the Carriage is out, move the Carriage to separate it from the paper. Open the Top Cover. Important • If you push the Carriage to the left edge, the blade of the Cutter Unit will be lowered in preparation to cut the paper. Be careful not to pinch your ngers between the Carriage and Platen if you have pushed the Carriage to the left edge or if a paper jam occurs during cutting. • Do not touch the Linear Scale (a) or Carriage Shaft (b). 4. Push the Release Lever back. Handling Paper 115 Downloaded from ManualsPrinter.com Manuals Handling rolls 5. Holding the paper on both sides, pull the jammed portion out toward the front. Use a scissors to cut away the printed or wrinkled portion. Caution • When cutting paper, be careful to avoid injury and damaging the printer. 6. If the Carriage is on the left, move the Carriage to the right until it stops. Important • Always move the Carriage to the right side. If the Carriage is on the left, a Carriage error may occur when you turn on the printer. 7. Pull the roll edge gently and align it with the Paper Alignment Line (a). Lower the Release Lever toward the front. Important • Do not force the roll paper into alignment with the Paper Alignment Line (a). This may prevent the paper from being advanced straight. • The amount of paper pulled from the roll corresponds to the margin of the leading edge. 116 Handling Paper Downloaded from ManualsPrinter.com Manuals Handling rolls 8. Close the Top Cover. 9. Turn the printer on. (→P.22) The roll is now advanced. After it is nished being advanced, you can resume printing. Note • You can ensure that the edge is cut neatly by following the steps below. 1. Press the Online button to bring the printer ofine. 2. Hold down the ▼ button to advance the paper. 3. Set Paper Cutting to Yes in the printer menu, and the edge will be cut. Handling Paper 117 Downloaded from ManualsPrinter.com Manuals Handling rolls Feeding Roll Paper Manually You can bring the printer ofine by pressing the Online button. When the printer is ofine and roll paper is selected as the paper source, you can feed or retract the roll paper by pressing ▲ or ▼. Press ▲ to retract the roll paper manually. Press ▼ to feed the roll paper manually. If you hold down ▲ or ▼ for less than a second, the roll paper will move about 1 mm (0.04 in). If you hold down ▲ or ▼ for more than a second, the paper will move until you release the button. Release the button when the Display Screen indicates End of paper feed. Cannot feed paper more.. 118 Handling Paper Downloaded from ManualsPrinter.com Manuals Handling rolls Detection of the Remaining Roll Paper If you have activated automatic detection of the remaining roll paper, when the roll is ejected, a barcode with text is printed on the roll paper that identies the type of paper and amount left. If this function is activated and barcodes are printed on the roll paper, the type of paper and amount left are automatically detected when you load a roll. The barcode will be cut off after it has been read. Note • If the document is not cut but kept in the printer, only the text message is printed. This is also the case when printing on 8-inch rolls or clear lm. Important • If the barcode is not detected when it is advanced, enter the type and length of paper on the Control Panel. • Barcodes are not cut off when Chk Remain.Roll and Trim Edge First are both Off. To have the printer cut off barcodes automatically, on the Control Panel menu, set Chk Remain.Roll to On. Otherwise cut off barcodes by using Paper Cutting in the Control Panel menu. Follow these steps to activate detection of the remaining roll paper. 1. Press the Menu button to display MAIN MENU. 2. 3. 4. Press ▲ or ▼ to select Media Menu, and then press the ► button. Press ▲ or ▼ to select Chk Remain.Roll, and then press the ► button. Press ▲ or ▼ to select the desired setting option, and then press the OK button. Handling Paper 119 Downloaded from ManualsPrinter.com Manuals Handling rolls Specifying the Ink Drying Time for Rolls When you are using paper that takes longer for ink to adhere, if the Cutter touches printed surfaces that are still wet, it may damage the paper or cause rough cut edges. Also, ink may be transferred onto the paper surface during ejection, soiling it. You can prevent problems by adjusting the drying time after printing before the paper is cut. Windows 1. Display the printer driver dialog box. (→P.345) 2. Select the Main sheet and click C Advanced Settings in A Media Type. 3. In the Paper Detailed Settings dialog box displayed next, select the desired settings values in C Between Pages and D Between Scans in B Drying Time, and then click OK. (→P.351) 120 Handling Paper Downloaded from ManualsPrinter.com Manuals Handling rolls Mac OS X 1. 2. Choose Print in the application menu. 3. In the Paper Detailed Settings dialog box displayed next, select the desired settings values in Select the Main pane and click C Settings in A Media Type. C Between Pages and D Between Scans in B Drying Time, and then click OK. (→P.390) Note • By factory default, Drying Time is deactivated ( Off ) for all paper types. • To have the printer wait for ink to dry immediately after printing without releasing paper, set Cutting Mode to Eject in the printer menu. (→P.122) Handling Paper 121 Downloaded from ManualsPrinter.com Manuals Handling rolls Specifying the Cutting Method for Rolls How a roll is cut after ejection varies depending on the printer settings. Cutting Method Automatic The roll is automatically cut by the Cutter Unit following printer driver settings. Eject (→P.123) Menu Settings Cutting Mode Driver Setting Automatic Auto Cut Yes Choose this setting if you prefer not to have documents dropped immediately after printing, as when waiting for ink to dry. To cut the roll using the Cutter Unit, hold the Stop button for a second or more. Eject Yes Manual (→P.124) Choose this setting when using media that cannot be cut using the Cutter Unit. Cut each page from the roll using scissors. For continuous printing (if you will cut each page later), in Auto Cut, select Yes, or select Print Cut Guideline. (→P.329) Manual NoYesPrint Cut Guideline Paper Cutting (→P.125) Choose this option if you want to cut pages Paper by pressing Cutter Unit buttons for manual Cutting cutting after printing when the printer driver is congured to Auto Cut > No or Print Cut Guideline. Otherwise choose this option if you want to cut the roll edge after loading a roll. Yes NoPrint Cut Guideline Note • Automatic and Eject are valid only when you have specied Auto Cut > Yes in the printer driver. • With Eject, printing does not resume after a series of jobs have been printed continuously until the roll is cut. Cut the roll manually in the following cases: 122 Handling Paper Downloaded from ManualsPrinter.com Manuals Handling rolls Eject (waiting for ink to dry after printing) 1. Press the Menu button to display MAIN MENU. 2. 3. 4. 5. 6. Press ▲ or ▼ to select Paper Details, and then press the ► button. Press ▲ or ▼ to select the type of paper, and then press the ► button. Press ▲ or ▼ to select Cutting Mode, and then press the ► button. Press ▲ or ▼ to select Eject, and then press the OK button. Start printing. Roll paper is fed to the specied cut position and then automatically stopped. 7. As you support the printed document to prevent it from dropping, hold the Stop button for at least a second to cut the roll. Handling Paper 123 Downloaded from ManualsPrinter.com Manuals Handling rolls Manual (when using media that cannot be cut using the Cutter Unit ) 1. Press the Menu button to display MAIN MENU. 2. 3. 4. 5. 6. Press ▲ or ▼ to select Paper Details, and then press the ► button. Press ▲ or ▼ to select the type of paper, and then press the ► button. Press ▲ or ▼ to select Cutting Mode, and then press the ► button. Press ▲ or ▼ to select Manual, and then press the OK button. Start printing. The printer stops advancing the paper after printing. 7. Press the Online button. Roll paper is fed to the specied cut position and then automatically stopped. 8. Use scissors to cut the roll paper along the cut line. 9. Close the Top Cover. 124 Handling Paper Downloaded from ManualsPrinter.com Manuals Handling rolls 10. Press the Online button. The roll is rewound, and rewinding stops automatically. Paper Cutting (to have the roll cut at your specied position) 1. If the printer stops operating after printing, press the Online button. The printer goes ofine. 2. Press ▲ or ▼ to feed the roll paper to the position for cutting. 3. Press the Menu button to display MAIN MENU. 4. 5. Press ▲ or ▼ to select Paper Cutting, and then press the ► button. Press ▲ or ▼ to select Yes, and then press the OK button. After the roll paper is cut, it is rewound automatically. Caution • If paper would be short when cut at a particular position, the roll may automatically be advanced in some cases before cutting. Handling Paper 125 Downloaded from ManualsPrinter.com Manuals Handling rolls Cutting the Leading Edge of Roll Paper Automatically If the leading edge of a roll is crooked or warped, it may cause an error message or printing problems. In this case, set Trim Edge First to Automatic or On on the Control Panel to have the printer cut the leading edge to make the edge straight after you load a roll. Trim Edge First offers the following options. • Automatic If the left and right side of the leading edge of the roll ((a) and (b)) are uneven by 3 mm (0.12 in) or more when you load the roll, the edge is cut an amount relative to the slant to ensure a straight edge, and scraps are removed. The edge is not cut if the unevenness is less than 3 mm. • Off The edge is not cut and scraps are not removed. This setting is Off for most types of paper, by default. For more information, see the Paper Reference Guide. (→P.96) • On The leading edge is cut off when you load a roll, and scraps are removed. The amount of paper cut off from the leading edge varies depending on the paper type. For more information, see the Paper Reference Guide. (→P.96) Note • If you print on paper that has an irregular width, set Skew Check Lv. to Loose for a higher skew detection threshold or to Off to disable skew detection. However, if paper is loaded askew when detection is Off, note that paper jams or Platen soiling may occur. Follow these steps to change the Trim Edge First setting. 1. Press the Menu button to display MAIN MENU. 2. 3. 4. 5. Press ▲ or ▼ to select Paper Details, and then press the ► button. Press ▲ or ▼ to select the type of paper, and then press the ► button. Press ▲ or ▼ to select Trim Edge First, and then press the ► button. Press ▲ or ▼ to select the desired setting option, and then press the OK button. This setting takes effect the next time you load a roll. 126 Handling Paper Downloaded from ManualsPrinter.com Manuals Handling rolls Reducing Dust from Cutting Rolls The printer is equipped with a function to reduce cutting dust for media such as Backlit Film that are more likely to generate debris when cut. This may improve printing quality and help prevent Printhead damage. You can set up this function to be activated for some types of paper. When this function is activated, black lines are printed at the leading and trailing edges of documents. Important • Do not activate the function to reduce cutting dust for paper that wrinkles easily, such as Plain Paper or lightweight paper. This may impair cutting and cause paper jams. • Borderless printing is not available when this function is activated. Deactivate this function before borderless printing. 1. Press the Menu button to display MAIN MENU. 2. 3. 4. 5. Press ▲ or ▼ to select Paper Details, and then press the ► button. Press ▲ or ▼ to select the type of paper loaded in the printer, and then press the ► button. Press ▲ or ▼ to select CutDustReduct., and then press the ► button. Press ▲ or ▼ to select On, and then press the OK button. The function to reduce cutting dust is now activated. Handling Paper 127 Downloaded from ManualsPrinter.com Manuals Handling rolls Roll Holder Set A set of parts comprising the Roll Holder, Holder Stopper, 2-Inch Paper Core Attachment, and 3-Inch Paper Core Attachment. To load a roll with a 3-inch paper core, remove the 2-Inch Paper Core Attachment from the Holder Stopper and then attach the 3-Inch Paper Core Attachment on both the Roll Holder and Holder Stopper. To load a roll with a 2-inch paper core, remove the 3-Inch Paper Core Attachment from both the Roll Holder and Holder Stopper and then attach the 2-Inch Paper Core Attachment on the Holder Stopper. (→P.129) • Roll Holder Set RH4-32 (for 2- and 3-inch paper cores) 128 Handling Paper Downloaded from ManualsPrinter.com Manuals Handling rolls Attaching Accessories to the Roll Holder The following attachments are provided with the Roll Holder. Use the attachment that matches the size of the paper core of the roll you will use. The printer is delivered with the 2-Inch Paper Core Attachment on the Roll Holder. Using the 2-Inch Paper Core Attachment Using the 3-Inch Paper Core Attachment Roll Holder Side Holder Stopper Side Roll Holder Side Holder Stopper Side No Attachment Needed 2-Inch Paper Core Attachment 3-Inch Paper Core Attachment #1 3-Inch Paper Core Attachment #2 Installing the 3-Inch Paper Core Attachment When loading a roll with a 3-inch paper core, remove the 2-Inch Paper Core Attachment from the Holder Stopper and then attach the 3-Inch Paper Core Attachment on both the Roll Holder and Holder Stopper. 1. Push the tips (a) of the 2-Inch Paper Core Attachment in and remove the 2-Inch Paper Core Attachment from the Holder Stopper. 2. Align the tips (a) of 3-Inch Paper Core Attachment #1 with the holes (b) of the Roll Holder and insert it rmly. 3. Align the tips (a) of 3-Inch Paper Core Attachment #2 with the holes (b) of the Holder Stopper and insert it rmly. Handling Paper 129 Downloaded from ManualsPrinter.com Manuals Handling rolls Installing the 2-Inch Paper Core Attachment When loading a roll with a 2-inch paper core, remove the 3-Inch Paper Core Attachment from both the Roll Holder and Holder Stopper and then attach the 2-Inch Paper Core Attachment on the Holder Stopper. 1. Push the tips (a) of 3-Inch Paper Core Attachment #1 in and remove the 3-Inch Paper Core Attachment from the Roll Holder. 2. Push the tips (a) of 3-Inch Paper Core Attachment #2 in and remove the 3-Inch Paper Core Attachment from the Holder Stopper. 3. Align the tips (a) of the 2-Inch Paper Core Attachment with the holes (b) of the Holder Stopper and insert it rmly. 130 Handling Paper Downloaded from ManualsPrinter.com Manuals Handling sheets Handling sheets Selecting the Paper Source When advancing paper, press the Feeder Selection button and select the source. You can determine the selected source by checking which lamp is lit-either the Roll Media lamp (a) or the Cut Sheet lamp (b). • Roll Media lamp : Selected when printing on Roll Media. • Cut Sheet lamp : Selected when printing on Sheets. Note • If any paper is loaded that will not be used, a message is shown on the Display Screen, either Remove roll? or Eject sheet? when you press the Feeder Selection button. When removing the paper, press the OK button. • You cannot switch the paper source in the following situations: • If the Message lamp is ashing Check the message on the Display Screen and take action as necessary. (→P.575) • If the Data lamp is ashing Select the paper source after printing. • If a printer menu operation is in progress Select the paper source after the menu operation. • When in the process of loading paper Finish loading the paper before selecting the paper source. • When in the process of replacing Ink Tanks Finish replacing the Ink Tanks before selecting the paper source. • If the Top Cover is open Close the Top Cover before selecting the paper source. Handling Paper 131 Downloaded from ManualsPrinter.com Manuals Handling sheets Selecting the Paper Type (Sheet) When changing the type of paper after the paper has been advanced, specify the type of paper as follows. Note • After you load the sheet, the printer automatically shows a menu for selection of the paper type on the Display Screen. In this case, select the paper type, and then press the OK button. The printer will automatically go online. 1. Press the Menu button to display MAIN MENU. 2. 3. 4. Press ▲ or ▼ to select Media Menu, and then press the ► button. Press ▲ or ▼ to select Cut Sheet Type, and then press the ► button. Press ▲ or ▼ to select the type of paper loaded in the printer, and then press the OK button. Note • For details on paper types, see the Paper Reference Guide. (→P.96) Plain Paper is selected by factory default. If you move the Release Lever, the setting automatically reverts to Plain Paper. • Be sure to select the correct paper type. If this setting does not match the loaded paper, it may cause feed errors and affect the printing quality. • If you select a type of paper for which Media Width Detection is deactivated ( Off is selected), you must advance the paper manually to the position for printing. (→P.136) 5. Press the Online button to bring the printer online. 132 Handling Paper Downloaded from ManualsPrinter.com Manuals Handling sheets Loading the Sheet in the Printer Note • For details on supported types and sizes of the paper, see “Paper Sizes” or the Paper Reference Guide. (→P.101) (→P.96) • Remove any loaded paper that will not be used. • Roll (→P.113) (→P.114) • Sheet (→P.137) • If the Platen is dirty, clean inside the Top Cover. (→P.538) • After pressing the Load/Eject button, you can refer to instructions on the Display Screen as you load the paper. 1. Remove the Roll Holder from the printer and remove Basket Fastener A (a) from the Stand Stay (b). Note • If you print on a long sheet (longer than 914 mm [36 in]), the trailing edge may touch the oor and become dirty. Before loading long paper, remove the Roll Holder and spread a clean cloth or paper on the oor. Handling Paper 133 Downloaded from ManualsPrinter.com Manuals Handling sheets 2. Open the Top Cover and push the Release Lever back. Important • Do not touch the Linear Scale (a) or Carriage Shaft (b). 3. With a sheet lengthwise and printing-side up, insert it between the Platen (a) and the Paper Retainer (b). Align the edges of the sheet as follows. 1. Align the sheet with the Paper Alignment Line (c) at right. 2. Align the inserted edge of the sheet with the leading edge of the Paper Alignment Line (d), as shown. When inserted, sheets are automatically held by suction against the Platen. 134 Handling Paper Downloaded from ManualsPrinter.com Manuals Handling sheets Important • Load a sheet so that it is parallel to the Paper Alignment Line (d). Loading paper askew will cause an error. • Warped paper may rub against the Printhead. Straighten paper if it is warped before loading it. • If the sides of the sheet are not perpendicular at the corners, the sheet may not be advanced straight. Note • You can adjust the strength of vacuum holding paper against the Platen when the Release Lever is open. If it is difcult to load paper, press the ▲ or ▼ button on the Control Panel to adjust the strength. Set vacuum stronger by pressing the ▲ button or weaker with the ▼ button. Three settings are available. • A sheet is held in place by vacuuming through holes on the Platen. Although the vacuuming may produce a noise when paper is loaded in some positions, it does not indicate a problem. If the noise is distracting, try moving the paper over slightly to the left or right (up to 1 mm [0.039 in]) while keeping it parallel to the Paper Alignment Line. 4. Lower the Release Lever toward the front and close the Top Cover. The printer now starts feeding the paper. After the paper is advanced, the printer automatically goes online and starts printing. If no print job has been received from the computer beforehand, the printer automatically shows a menu for selection of the paper type on the Display Screen. In this case, select the type of paper. (→P.132) Handling Paper 135 Downloaded from ManualsPrinter.com Manuals Handling sheets Manually Loading Paper to the Position for Printing You will need to advance the paper manually to the starting position for printing after selecting the type of paper in the Control Panel menu when rolls or sheets are loaded in the following cases, which require a different paper feeding method than usual. • Rolls If you select a type of paper for which Width Detection is Off when Chk Remain.Roll is also Off • Sheets If you select a type of paper for which Width Detection is Off In these cases, printing starts from the position at which the paper has been loaded, so you must load the paper as far into the Paper Feed Slot as possible. Manually advance paper as follows. 1. When Width Detection OFF. OK to continue? is shown on the Display Screen, press ▲ or ▼ to select Leave OFF and then press the OK button. If you select Width Detection ON, change the Media Detailed Settings information for that paper and use the regular feeding method. 2. Keeping the right edge of the sheet aligned with the extended line of the paper alignment line (a) on the right side of the printer, load the sheet so that the near edge is aligned with the groove (b) at the far end of the platen. 3. 4. Check the position of the loaded paper and press the OK button. After a menu for selection of the paper size is shown on the Display Screen, press ▲ or ▼ to select the paper size, and then press the OK button. Note • If a print job received requires paper larger than the selected paper, it may soil the Platen. 136 Handling Paper Downloaded from ManualsPrinter.com Manuals Handling sheets Removing the Sheet 1. Press the Load/Eject button. Note • Paper cannot be ejected by using the Load/Eject button when print jobs are in progress or during the ink drying period. Before ejecting paper, press the Stop button to cancel printing, print job processing, or ink drying. 2. Press the OK button to eject the paper. The paper is ejected from the front of the printer. 3. Holding the paper, push the Release Lever back and remove the sheet. 4. Pull the Release Lever forward. Handling Paper 137 Downloaded from ManualsPrinter.com Manuals Handling sheets Clearing a Jammed Sheet If a sheet jams, follow the steps below to remove it. 1. 2. Turn the printer off. (→P.22) 3. If the Carriage is out, move the Carriage to separate it from the paper. Open the Top Cover. Important • Do not touch the Linear Scale (a) or Carriage Shaft (b). 4. Push the Release Lever back. 138 Handling Paper Downloaded from ManualsPrinter.com Manuals Handling sheets 5. If the paper is visible, grasp the paper and pull it forward. 6. If you cannot see the paper, remove the scrap from behind the printer. After removing the paper, make sure there are no other scraps of paper in the printer. 7. If the Carriage is on the left, move the Carriage to the right until it stops. Important • Always move the Carriage to the right side. If the Carriage is on the left, a Carriage error may occur when you turn on the printer. 8. Turn the printer on. (→P.22) Handling Paper 139 Downloaded from ManualsPrinter.com Manuals Output Stacker Output Stacker Using the Output Stacker The Output Stacker can be held at two positions, as shown. • When storing printed documents on the Output Stacker Use position (1). • When the Output Stacker is not used Use position (2). Important • When storing printed documents on the Output Stacker, always use it in position (1). If you do not, printed documents may not be dropped into the Output Stacker, and the printed surface may become soiled. • The Output Stacker can hold one sheet. When printing multiple pages, remove each sheet after it is printed. 140 Handling Paper Downloaded from ManualsPrinter.com Manuals Output Stacker Use the Output Stacker in the normal position (a). However, for some types of media, you can use the stacker in the position for easy removal (b). To switch the stacker to the position for easy removal, move the Support Rod to the position of (b). This position enables printed documents to be removed more easily. For information on the position for easy removal, refer to the Paper Reference Guide. (→P.96) Handling Paper 141 Downloaded from ManualsPrinter.com Manuals Printing Photos and Images Working With Various Print Jobs Printing Photos and Images Printing Photos and Images (Windows) Printing is easy when you simply choose the print target. Easy Settings Simply choose the printing application in the list for optimal printing results. Print Target Choose presets that match the type of document to be printed. Print targets for photos and images Print Target Description Highest Quality Setting optimized for printing at the highest level of quality. Photo (from digital camera) Setting optimized for printing photographic images from digital cameras. Poster (Graphic Image) Settings optimized for printing posters mainly composed of photos. POP Ad Setting optimized for printing vivid, eye-catching store posters combining images and text. Scanned Image Setting optimized for printing scanned images with accurate color reproduction to match the original images. Draft Setting optimized for high-speed draft printing. 142 Working With Various Print Jobs Downloaded from ManualsPrinter.com Manuals Printing Photos and Images Caution • Depending on the Media Type setting, some Print Target options may not be available. Note • You can check the settings values for each print target by clicking View Settings. • You can also ne-tune these values as needed. ( Advanced Settings ) For details on Advanced Settings, see “Giving Priority to Particular Graphic Elements and Colors for Printing”. (→P.180) • For instructions on printing photos and images, refer to the following topics, as appropriate for your computer and operating system. • Printing Photos and Images (Windows) (→P.146) Working With Various Print Jobs 143 Downloaded from ManualsPrinter.com Manuals Printing Photos and Images Printing Photos and Images (Windows, Mac OS X) Printing is easy when you simply choose the print target. Easy Settings Simply choose the printing application in the list for optimal printing results. Print Target Choose presets that match the type of document to be printed. Print targets for photos and images Print Target Description Highest Quality Setting optimized for printing at the highest level of quality. Photo Setting optimized for printing photographic images from digital cameras. Poster (Photos) Settings optimized for printing posters mainly composed of photos. Poster (Text, Illustrations) Setting optimized for printing vivid, eye-catching store posters combining images and text. Scanned Image Setting optimized for printing scanned images with accurate color reproduction to match the original images. Draft Setting optimized for high-speed draft printing. Caution • Depending on the Media Type setting, some Print Target options may not be available. 144 Working With Various Print Jobs Downloaded from ManualsPrinter.com Manuals Printing Photos and Images Note • You can check the settings values for each print target by clicking View Settings. • You can also ne-tune these values as needed. ( Advanced Settings ) For details on Advanced Settings, see “Giving Priority to Particular Graphic Elements and Colors for Printing”. (→P.180) • For instructions on printing photos and images, refer to the following topics, as appropriate for your computer and operating system. • Printing Photos and Images (Windows) (→P.146) • Printing Photos and Images (Mac OS X) (→P.148) Working With Various Print Jobs 145 Downloaded from ManualsPrinter.com Manuals Printing Photos and Images Printing Photos and Images (Windows) This topic describes how to print photos based on the following example. • • • • • Document: Photo image from a digital camera Page size: 10×12 inches (254.0×304.8 mm) Paper: Roll Paper type: Glossy Photo Paper Roll paper width: 10 inches (254.0 mm) 1. 2. 3. Choose Print in the application menu. 4. In the A Media Type list, select the type of paper that is loaded. In this case, click Glossy Select the printer in the dialog box, and then display the printer driver dialog box. (→P.343) Make sure the Main sheet is displayed. Photo Paper. In the A Media Type, choose the type of paper used for printing, such as Glossy Paper, Coated Paper, and so on. Make sure the paper you select is loaded in the printer. Note • The paper type setting in the printer driver and related software (as well as on the Control Panel ) is updated when you install the Media Conguration Tool from the User Software CD-ROM or if you change paper information by using the Media Conguration Tool. (See the Media Conguration Tool Guide (Windows) or Media Conguration Tool Guide (Macintosh).) 5. After conrming that D Easy Settings is selected, click Photos in the E Print Target list. Note • You can check the settings values selected in the E Print Target list by clicking F View Settings. 146 Working With Various Print Jobs Downloaded from ManualsPrinter.com Manuals Printing Photos and Images 6. Click the Page Setup tab to display the Page Setup sheet. 7. In the A Page Size list, click the size of the original as specied in the application. In this case, click 10"x12". 8. 9. Click Roll Paper in the L Paper Source list. Select the width of the loaded roll in the M Roll Paper Width list. In this case, click 10-in. Roll (254.0mm), and then click OK. 10. Specify additional printing conditions. For details on available printing conditions, see “Printer Driver Settings (Windows)”. (→P.333) 11. Conrm the print settings and print as desired. Note • For instructions on conrming print settings, see “Conrming Print Settings (Windows)”. (→P.337) Working With Various Print Jobs 147 Downloaded from ManualsPrinter.com Manuals Printing Photos and Images Printing Photos and Images (Mac OS X) This topic describes how to print photos based on the following example. • • • • • Document: Photo image from a digital camera Page Size: 10×12 inches (254.0×304.8 mm) Paper: Roll Paper Type: Glossy Photo Paper Roll paper Width: 10 inches (254 mm) 1. Choose Page Setup in the application menu to display the Page Attributes dialog box. 2. 3. 4. 5. 6. Select the printer in the B Format for list. In the C Paper Size list, click the size of the original. In this case, click 10"x12". Click F OK to close the dialog box. Choose Print in the application menu. Access the Main pane. 148 Working With Various Print Jobs Downloaded from ManualsPrinter.com Manuals Printing Photos and Images 7. In the A Media Type list, select the type of paper that is loaded. In this case, click Glossy Photo Paper. Make sure the paper you select is loaded in the printer. Note • The paper type setting in the printer driver and related software (as well as on the Control Panel ) is updated when you install the Media Conguration Tool from the User Software CD-ROM or if you change paper information by using the Media Conguration Tool. See the Media Conguration Tool Guide (Windows) or Media Conguration Tool Guide (Macintosh). 8. After conrming that D Easy Settings is selected, click Photo in the E Print Target list. Note • For information on settings optimized for printing photos and images, see “Printing Photos and Images (Windows, Mac OS X)”. (→P.144) • You can check the settings values selected in the E Print Target list by clicking F View set.. 9. 10. Access the Page Setup pane. Click Roll Paper in the A Media Source list. Working With Various Print Jobs 149 Downloaded from ManualsPrinter.com Manuals Printing Photos and Images 11. Make sure the width of the loaded roll is displayed in the B Roll Paper Width list in this case, 10 in. (254.0mm). Note • If the width of the loaded roll is not displayed in B Roll Paper Width, click L Printer Information on the Main pane and update the printer information. 12. Make sure C Page Size on the Page Setup pane shows the original size as specied in C Paper Size in the Page Attributes dialog box-in this case, 10"x12". 13. Specify additional printing conditions. For details on available printing conditions, see “Printer Driver Settings (Mac OS X)”. (→P.379) 14. Conrm the print settings, and then click M Print to start printing. Note • For tips on conrming print settings, see “Conrming Print Settings (Mac OS X)”. (→P.382) 150 Working With Various Print Jobs Downloaded from ManualsPrinter.com Manuals Printing CAD Drawings Printing CAD Drawings Printing CAD Drawings Using this printer, you can print ne lines and text clearly and sharply. It’s easy to produce highly precise drawings from CAD applications. Note • In Windows, you can print highly precise drawings using the provided imagePROGRAF HDI Driver for AutoCAD/AutoCAD LT. For details on the HDI driver, see HDI Driver . For instructions on CAD printing, refer to the following topics, as appropriate for your computer and operating system. • Printing Line Drawings and Text (Windows) (→P.154) • Printing Line Drawings and Text (Mac OS X) (→P.156) Working With Various Print Jobs 151 Downloaded from ManualsPrinter.com Manuals Printing CAD Drawings Printing Line Drawings and Text (Windows) Printing is easy when you simply choose the type of original to print. Easy Settings Simply choose the printing application in the list for optimal printing results. Print Target Choose presets that match the type of document to be printed. Print targets for line drawings and text Print Target Description CAD (Line Drawing) Settings optimized to print intricate lines in CAD drawings clearly. CAD (Fast) Settings optimized for fast printing of CAD drawings. CAD (Monochrome Line Drawing ) (Windows) CAD (B/W Line Drawing) (Mac OS 9) Settings optimized to print black lines in CAD drawings clearly. CAD (High Accuracy) Settings optimized for attractive printing of highly precise documents such as CAD drawings with smooth lines and small text. Poster (Notice Announcement) Settings optimized for printing announcements such as wall newspapers and other notices with a large amount of text. 3D/GIS Map Settings optimized for printing 3D CAD drawings, perspective drawings, and maps, including GIS maps. Note • You can check the settings values for each print target by clicking View Settings. • You can also ne-tune these values as needed. ( Advanced Settings ) For details on Advanced Settings, see “Giving Priority to Particular Graphic Elements and Colors for Printing”. (→P.180) For instructions on printing line drawings and text, refer to the following topics, as appropriate for your computer and operating system. • Printing Line Drawings and Text (Windows) (→P.154) 152 Working With Various Print Jobs Downloaded from ManualsPrinter.com Manuals Printing CAD Drawings Printing Line Drawings and Text (Windows, Mac OS X) Printing is easy when you simply choose the type of original to print. Easy Settings Simply choose the printing application in the list for optimal printing results. Print Target Choose presets that match the type of document to be printed. Print targets for line drawings and text Print Target Description CAD (Line Drawing) Settings optimized to print intricate lines in CAD drawings clearly. CAD (Fast) Settings optimized for fast printing of CAD drawings. CAD (Monochrome Line Drawing ) Settings optimized to print black lines in CAD drawings clearly. CAD (High Accuracy) Settings optimized for attractive printing of highly precise documents such as CAD drawings with smooth lines and small text. Poster (Notice Announcement) Settings optimized for printing announcements such as wall newspapers and other notices with a large amount of text. 3D CAD, GIS Settings optimized for printing 3D CAD drawings, perspective drawings, and maps, including GIS maps. Note • You can check the settings values for each print target by clicking View Settings. • You can also ne-tune these values as needed. ( Advanced Settings ) For details on Advanced Settings, see “Giving Priority to Particular Graphic Elements and Colors for Printing”. (→P.180) For instructions on printing line drawings and text, refer to the following topics, as appropriate for your computer and operating system. • Printing Line Drawings and Text (Windows) (→P.154) • Printing Line Drawings and Text (Mac OS X) (→P.156) Working With Various Print Jobs 153 Downloaded from ManualsPrinter.com Manuals Printing CAD Drawings Printing Line Drawings and Text (Windows) This topic describes how to print line drawings based on the following example. • • • • • Document: CAD drawing Page size: A3 (297.0 × 420.0 mm [11.7 × 16.5 in]) Paper: Roll Paper type: Plain Paper Roll paper width: A2/A3 roll (420.0 mm [16.5 in]) 1. 2. 3. Choose Print in the application menu. 4. 5. In the A Media Type list, select the type of paper that is loaded. In this case, click Plain Paper. Select the printer in the dialog box, and then open the printer driver dialog box. (→P.343) Make sure the Main sheet is displayed. After conrming that D Easy Settings is selected, click CAD (Line Drawing) or CAD (Monochrome Line Drawing ) in the E Print Target list. Note • You can check the settings values selected in the E Print Target list by clicking F View Settings. 6. Click the Page Setup tab to display the Page Setup sheet. 154 Working With Various Print Jobs Downloaded from ManualsPrinter.com Manuals Printing CAD Drawings 7. In A Page Size, click the size of the original as specied in the application software. In this case, click ISO A3. 8. 9. Click Roll Paper in the L Paper Source list. Select the width of the loaded roll in the M Roll Paper Width list-in this case, ISO A2/A3 Roll (420.0mm). 10. Specify additional printing conditions. For details on available printing conditions, see “Printer Driver Settings (Windows)”. (→P.333) 11. Conrm the print settings and print as desired. Note • For tips on conrming print settings, see “Conrming Print Settings (Windows)”. (→P.337) Working With Various Print Jobs 155 Downloaded from ManualsPrinter.com Manuals Printing CAD Drawings Printing Line Drawings and Text (Mac OS X) This topic describes how to print line drawings based on the following example. • • • • • Document: CAD drawing Page size: A3 (297.0 × 420.0 mm [11.7 × 16.5 in]) Paper: Roll Paper type: Plain Paper Roll paper width: A2/A3 roll (420.0 mm [16.5 in]) 1. Choose Page Setup in the application menu to display the Page Attributes dialog box. 2. 3. 4. 5. 6. Select the printer in the B Format for list. 7. 8. In the A Media Type list, select the type of paper that is loaded. In this case, click Plain Paper. In the C Paper Size list, click the size of the original. In this case, click ISO A3. Click F OK to close the dialog box. Choose Print in the application menu. Access the Main pane. After conrming that D Easy Settings is selected, click CAD (Line Drawing) or CAD (Monochrome Line Drawing ) in the E Print Target list. Note • You can check the settings values selected in the E Print Target list by clicking F View set.. 156 Working With Various Print Jobs Downloaded from ManualsPrinter.com Manuals Printing CAD Drawings 9. 10. 11. Access the Page Setup pane. Click Roll Paper in the A Media Source list. Make sure the width of the loaded roll is displayed in the B Roll Paper Width list-in this case, ISO A2/A3 (420.0mm). Note • If the width of the loaded roll is not displayed in B Roll Paper Width, click L Printer Information on the Main pane and update the printer information. Working With Various Print Jobs 157 Downloaded from ManualsPrinter.com Manuals Printing CAD Drawings 12. Make sure C Page Size on the Page Setup pane shows the original size as specied in C Paper Size in the Page Attributes dialog box-in this case, ISO A3. 13. Specify additional printing conditions. For details on available printing conditions, see “Printer Driver Settings (Mac OS X)”. (→P.379) 14. Conrm the print settings, and then click M Print to start printing. Note • For tips on conrming print settings, see “Conrming Print Settings (Mac OS X)”. (→P.382) 158 Working With Various Print Jobs Downloaded from ManualsPrinter.com Manuals Printing CAD Drawings Specifying Colors and Printing CAD Drawings You can complete color settings when Color (CAD) is selected in Color Mode. Colors can be adjusted before printing as follows when Color Compatibility is selected. Note • Color (CAD) is displayed when you select Advanced Settings on the Main sheet and set Print Priority to Line Drawing/Text. Color Compatibility Color Setting Item Color Setting Description Color (CAD) 1 Print in standard colors. Color (CAD) 2 Print in brighter colors. Color (CAD) 3 Print emulating the Canon BJ-W3000/W3050, in colors resembling colors produced by these printers. Color (CAD) 4 Print emulating the HP Designjet 500/800, in colors resembling colors produced by these printers. Color (CAD) 5 Print emulating the HP Designjet 1000, in colors resembling colors produced by this printer. Color (CAD) 6 Print emulating the HP Designjet 4000/4500, in colors resembling colors produced by these printers. Important • If you have selected Color (CAD) 3, Color (CAD) 4, Color (CAD) 5, or Color (CAD) 6, it is not possible to match the colors and image quality produced by the specied printer exactly. For instructions on conguring Color Compatibility, refer to the following topics. • Specifying Colors and Printing CAD Drawings (Windows) (→P.160) Working With Various Print Jobs 159 Downloaded from ManualsPrinter.com Manuals Printing CAD Drawings Specifying Colors and Printing CAD Drawings (Windows) You can complete color settings when Color (CAD) is selected in Color Mode. Note • Color (CAD) is displayed when you select Advanced Settings on the Main sheet and set Print Priority to Line Drawing/Text. 1. 2. Click start > Printers and Faxes (or Printers ). 3. Click the Device Settings tab to display the Device Settings sheet. 4. Click A Color Compatibility to display the Color Compatibility dialog box. Select the printer, and then display the printer properties dialog box. 160 Working With Various Print Jobs Downloaded from ManualsPrinter.com Manuals Printing CAD Drawings 5. Select the desired color settings in the A Color Compatibility list. Note • For details on color settings, see “Specifying Colors and Printing CAD Drawings”. (→P.159) For printing instructions, refer to the following topic. • Choosing the Document Type and Printing Conditions (Windows) (→P.183) Working With Various Print Jobs 161 Downloaded from ManualsPrinter.com Manuals Printing CAD Drawings HP-GL/2 Printing This printer supports the original Canon GARO printer control language as well as HP-GL/2 and HP RTL(*1) emulation.(*2) When printing from applications that support HP-GL/2 output, specify HP-GL/2 in the application’s plotter output settings. Note • For instructions on conguring these settings, refer to the software documentation. The printer automatically switches to the corresponding processing depending on whether a GARO, HP-GL/2, or HP RTL job is received. Congure the optional settings for HP-GL/2 emulation on the printer control panel. (→P.50) This printer can emulate the following printers using HP-GL/2 emulation. Emulated Printers Canon W3000 and W3050(*3) Hewlett-Packard Designjet 450c, Designjet 750c Plus, and Designjet 750c *1: HP-GL/2: Hewlett-Packard Graphics Language 2; HP RTL: Hewlett-Packard Raster Transfer Language *2: It may not be possible to print jobs with excessively large amounts of data correctly. *3: Layout templates are not supported. 162 Working With Various Print Jobs Downloaded from ManualsPrinter.com Manuals Printing Ofce Documents Printing Ofce Documents Printing Ofce Documents Printing is easy when you simply choose the type of original to print. Easy Settings Simply choose the printing application in the list for optimal printing results. Print Target Choose presets that match the type of document to be printed. Print targets for ofce documents Print Target Ofce Document Description Settings optimized for clear printing of ofce documents such as handouts. Note • You can check the settings values for each print target by clicking View Settings. • You can also ne-tune these values as needed. (Advanced Settings) For details on Advanced Settings, see “Giving Priority to Particular Graphic Elements and Colors for Printing”. (→P.180) For instructions on printing ofce documents, refer to the following topics, as appropriate for your computer and operating system. • Printing Ofce Documents (Windows) (→P.164) • Printing Ofce Documents (Mac OS X) (→P.166) Working With Various Print Jobs 163 Downloaded from ManualsPrinter.com Manuals Printing Ofce Documents Printing Ofce Documents (Windows) This topic describes how to print ofce documents based on the following example. • • • • • Document: Ofce document created using word-processing software or spreadsheet programs Page size: A4 (210.0×297.0 mm)/Letter (8.3 × 11.7 in) Paper: Sheets Paper type: Plain Paper Paper size: A4 (210.0×297.0 mm)/Letter (8.3 × 11.7 in) 1. 2. 3. Choose Print in the application menu. 4. 5. In the A Media Type list, select the type of paper that is loaded. In this case, click Plain Paper. Select the printer in the dialog box, and then display the printer driver dialog box. (→P.343) Make sure the Main sheet is displayed. After conrming that D Easy Settings is selected, click Ofce Document in the E Print Target list. Note • You can check the settings values selected in the E Print Target list by clicking F View Settings. 6. Click the Page Setup tab to display the Page Setupsheet. 164 Working With Various Print Jobs Downloaded from ManualsPrinter.com Manuals Printing Ofce Documents 7. In the A Page Size list, click the size of the original as specied in the application. In this case, click ISO A4 or Letter (8.5"x11"). 8. 9. Select sheets in the L Paper Source list. Specify additional printing conditions. For details on available printing conditions, see “Printer Driver Settings (Windows)”. (→P.333) 10. Conrm the print settings and print as desired. Caution • Depending on the Media Type setting, some Print Target options may not be available. Note • For instructions on conrming print settings, see “Conrming Print Settings (Windows)”. (→P.337) Working With Various Print Jobs 165 Downloaded from ManualsPrinter.com Manuals Printing Ofce Documents Printing Ofce Documents (Mac OS X) This topic describes how to print ofce documents based on the following example. • • • • • Document: Ofce document created using word-processing or spreadsheet programs Page size: A4 (210.0×297.0 mm [8.3×11.7 in])/Letter Paper: Sheets Paper type: Plain Paper Paper size: A4 (210.0×297.0 mm [8.3×11.7 in.])/Letter 1. Choose Page Setup in the application menu to display the Page Attributes dialog box. 2. 3. 4. 5. 6. Select the printer in the B Format for list. 7. 8. In the A Media Type list, select the type of paper that is loaded. In this case, click Plain Paper. In the C Paper Size list, click the size of the original. In this case, click ISO A4 - Cut Sheet. Click F OK to close the dialog box. Choose Print in the application menu. Access the Main pane. After conrming that D Easy Settings is selected, click Ofce Document in the E Print Target list. Note • You can check the settings values selected in the E Print Target list by clicking F View set.. 166 Working With Various Print Jobs Downloaded from ManualsPrinter.com Manuals Printing Ofce Documents 9. 10. 11. Access the Page Setup pane. Select sheets in the A Media Source list. Make sure the C Page Size setting matches the original size as selected in C Paper Size in the Page Attributes dialog box-in this case, ISO A4. 12. Specify additional printing conditions. For details on available printing conditions, see “Printer Driver Settings (Mac OS X)”. (→P.379) 13. Conrm the print settings, and then click M Print to start printing. Note • For tips on conrming print settings, see “Conrming Print Settings (Mac OS X)”. (→P.382) Working With Various Print Jobs 167 Downloaded from ManualsPrinter.com Manuals Using the Printer With a Color imageRUNNER Using the Printer With a Color imageRUNNER Printing Enlargements of Scanned Originals from a Color imageRUNNER Scanned originals from a Color imageRUNNER can be enlarged and printed automatically. For instructions on printing enlargements of scanned originals from a Color imageRUNNER, refer to the following topic. • Printing Enlargements of Scanned Originals from a Color imageRUNNER (Windows) (→P.168) • Printing Enlargements of Scanned Originals from a Color imageRUNNER (Mac OS X) (→P.170) Printing Enlargements of Scanned Originals from a Color imageRUNNER (Windows) Scanned originals from a Color imageRUNNER can be enlarged and printed automatically. Originals you create by scanning with a Color imageRUNNER are transferred to a "hot folder" and printed automatically after enlargement according to printing conditions you specify for that folder. This processing sequence is called the Color imageRUNNER Enlargement Copy function. To use Color imageRUNNER Enlargement Copy, rst complete these settings in the following order. 1. Register a hot folder on your computer. Register a hot folder on your computer for storing scanned originals from the Color imageRUNNER and complete the settings for enlargement copy. 2. Complete the scanning settings on the Color imageRUNNER. Congure the Color imageRUNNER to send scanned originals to the hot folder. After these settings are complete, you can print enlarged copies of scanned originals from the Color imageRUNNER. Registering a hot folder on your computer Folders used for Color imageRUNNER Enlargement Copy (iR enlargement copy) are called hot folders. Register a hot folder on your computer for storing scanned originals from the Color imageRUNNER. You can specify printing conditions (such as the image quality and paper size), based on which originals transferred to the hot folder will be printed. Follow these steps to register and modify hot folders. 1. Display the printer driver dialog box. (→P.345) 168 Working With Various Print Jobs Downloaded from ManualsPrinter.com Manuals Using the Printer With a Color imageRUNNER 2. Click the Utility tab to display the Utility sheet. 3. Click B Color imageRUNNER Enlargement Copy to start the Color imageRUNNER Enlargement Copy utility. 4. Use the Color imageRUNNER Enlargement Copy utility to register or modify hot folders. For instructions on registering and modifying hot folders, refer to the help le for the Color imageRUNNER Enlargement Copy utility. Completing the scanning settings on the Color imageRUNNER. Congure the Color imageRUNNER to send scanned originals to the hot folder. It is easy to send scanned originals to the hot folder if you assign the scanning settings and destination to a Favorites button on the Color imageRUNNER. For instructions on assigning scanning settings and destinations to a Favorites button, refer to the setting manual, displayed by clicking Color imageRUNNER Enlargement Copy Setup Manual button of Color imageRUNNER Enlargement Copy utility, or refer to the Color imageRUNNER manual. Scanning the original and print an enlargement Follow the steps below to scan an original on the Color imageRUNNER for enlarged printing on the printer. For detailed instructions, refer to the Color imageRUNNER manual. 1. 2. 3. 4. Load the original on the platen glass or document feeder of the Color imageRUNNER. Press Send to display the screen for transmission. Press Favorites, and then press the Favorites button assigned to the hot folder. Press Start on the control panel. If you scan originals on the platen glass, after scanning all originals, press Done on the touch-panel display. Scanned originals are sent to the hot folder and automatically enlarged and printed following the conditions you specied for the folder. Note • For details on Color imageRUNNER Enlargement Copy, refer to Color imageRUNNER Enlargement Copy . Working With Various Print Jobs 169 Downloaded from ManualsPrinter.com Manuals Using the Printer With a Color imageRUNNER Printing Enlargements of Scanned Originals from a Color imageRUNNER (Mac OS X) Scanned originals from a Color imageRUNNER can be enlarged and printed automatically. Originals you create by scanning with a Color imageRUNNER are transferred to a "hot folder" and printed automatically after enlargement according to printing conditions you specify for that folder. This processing sequence is called the Color imageRUNNER Enlargement Copy function. To use Color imageRUNNER Enlargement Copy, rst complete these settings in the following order. 1. Register a hot folder on your computer. Register a hot folder on your computer for storing scanned originals from the Color imageRUNNER and complete the settings for enlargement copy. 2. Complete the scanning settings on the Color imageRUNNER. Congure the Color imageRUNNER to send scanned originals to the hot folder. After these settings are complete, you can print enlarged copies of scanned originals from the Color imageRUNNER. Registering a hot folder on your computer Folders used for Color imageRUNNER Enlargement Copy (iR enlargement copy) are called hot folders. Register a hot folder on your computer for storing scanned originals from the Color imageRUNNER. You can specify printing conditions (such as the image quality and paper size), based on which originals transferred to the hot folder will be printed. Follow these steps to register and modify hot folders. 1. To display the Color imageRUNNER Enlargement Copy dialog box, either double-click the Color imageRUNNER Enlargement Copy.app icon after navigating to Canon Utilities imagePROGRAF in the Applications folder or click C Set in the Utility pane. 2. In Enlarged Copy Settings, click Add or Edit and either create or modify the hot folder. For instructions on registering and modifying hot folders, refer to the help le for Color imageRUNNER Enlargement Copy. 170 Working With Various Print Jobs Downloaded from ManualsPrinter.com Manuals Using the Printer With a Color imageRUNNER Completing the scanning settings on the Color imageRUNNER. Congure the Color imageRUNNER to send scanned originals to the hot folder. It is easy to send scanned originals to the hot folder if you assign the scanning settings and destination to a Favorites button on the Color imageRUNNER. For instructions on assigning scanning and sending settings to the Favorites button, refer to the Color imageRUNNER manual. Scanning the original and print an enlargement Follow the steps below to scan an original on the Color imageRUNNER for enlarged printing on the printer. For detailed instructions, refer to the Color imageRUNNER manual. 1. 2. 3. 4. Load the original on the platen glass or document feeder of the Color imageRUNNER. Press Send to display the screen for transmission. Press Favorites, and then press the Favorites button assigned to the hot folder. Press Start on the control panel. If you scan originals on the platen glass, after scanning all originals, press Done on the touch-panel display. Scanned originals are sent to the hot folder and automatically enlarged and printed following the conditions you specied for the folder. Note • For details on Color imageRUNNER Enlargement Copy, see Color imageRUNNER Enlargement Copy . Working With Various Print Jobs 171 Downloaded from ManualsPrinter.com Manuals Adjusting Images Enhanced Printing Options Adjusting Images Adjusting the Color in the Printer Driver Color settings specied in the application for your documents are essentially given priority over other settings for each print job, but further color adjustment is possible in the printer driver. Color Mode Choose how the printer driver processes color, as desired. The available options vary depending on the color mode. Description Color Mode Color Adjustment Color Print in color. You can adjust the color balance and color-matching method. Monochrome Print in grayscale. You can adjust the color balance. Color (CAD) A color mode optimized for line drawings You can adjust the color balance. (2D-CAD). Lines in red, yellow, and other colors are printed especially clearly. Color (CAD) enables adjustment of color settings. (→P.159) Monochrome (BK ink) A color mode for printing line drawings. Only Black ink is used. Monochrome Bitmap Print in a color mode for CAD, using Color Ink, with all non-white portions printed in black. You can adjust the color balance. No color adjustment is supported. Color Adjustment You can adjust colors separately for images, graphics, and text documents. Adjustment Item Cyan Description Fine-tune color tones by adjusting the levels of Cyan, Magenta, and Yellow. Magenta Yellow Gray Tone Adjust gray tones to suit the images of monochrome photos. Choose cool black (tinged with blue), pure black (neutral), warm black (tinged with red), and so on. Select the color tone in the color region or from the list. Brightness Adjust the brightness of printed images while keeping the darkest and lightest portions intact. Contrast Adjust the contrast of the darkest and lightest portions relative to each other. For soft gradation, decrease the contrast. For hard gradation, increase the contrast. Saturation Adjust the level of color saturation, in a range from subdued to vivid. 172 Enhanced Printing Options Downloaded from ManualsPrinter.com Manuals Adjusting Images Matching You can choose the color-matching mode and method. By adjusting the color-matching mode and method, you can make printed colors match the colors of on-screen images more closely. Matching Mode Description Notes Driver Matching Mode Color adjustment based on the original color prole of the printer driver ICC Matching Mode Color adjustment based on ICC color proles (an You can select the printer prole in international standard) using the printer driver the Printer Prole Settings list. Driver ICM Mode Color adjustment based on the standard Windows Available when using Windows ICM function. The printer driver adjusts the colors. 2000, Windows XP, Windows Server 2003, Windows Vista, or Windows Color adjustment based on the standard Windows Server 2008. ICM function. Windows adjusts the colors. Host ICM Mode This is the default color-matching method. Normally, use Driver Matching Mode. ColorSync Color adjustment based on the standard Mac OS Available when using Mac OS X ColorSync function. Mac OS adjusts the colors. 10.2.8-10.4. Off (No Correction) No color-matching Matching Method Auto Choose this option for color-matching by the software application or with your own color prole, when you want to disable color-matching by the printer driver. Description Notes Color-matching optimized for images, graphics, or text Perceptual The available options and their display order vary depending on your selection in Color-Matching Color-matching optimized for photos. Print Mode, as well as the operating images with smooth gradations and colors closer system. to those as displayed on the screen. Colorimetric Color-matching with adjustment to remove color from white area. Colors in data are reproduced accurately. Colorimetric (No Wht-pnt Corr) Color-matching without white adjustment to reect the prole of original data. Colors in data are reproduced accurately. Without white adjustment, colors are added to white areas. Saturation Color-matching optimized for graphics. This option emphasizes color saturation. Note • Be sure to calibrate your monitor colors correctly if you adjust the colors for printing. If monitor colors are not calibrated correctly, you may not obtain the desired printing results. For instructions on monitor calibration, refer to the documentation for your monitor and operating system. For instructions on color adjustment, refer to the following topics, as appropriate for your computer and operating system. • Fine-Tuning Colors of Photos and Images (Windows) (→P.174) • Fine-Tuning Colors of Photos and Images (Mac OS X) (→P.177) Enhanced Printing Options 173 Downloaded from ManualsPrinter.com Manuals Adjusting Images Fine-Tuning Colors of Photos and Images (Windows) You can specify your own print settings instead of using the Print Target presets. This topic describes how to ne-tune the color tone of photos before printing. 1. 2. 3. Choose Print in the application menu. 4. 5. In the A Media Type list, select the type of paper that is loaded. 6. Click Color in the G Color Mode list. Select the printer in the dialog box, and then display the printer driver dialog box. (→P.343) Make sure the Main sheet is displayed. Click D Advanced Settings to switch the print mode. 174 Enhanced Printing Options Downloaded from ManualsPrinter.com Manuals Adjusting Images 7. Click H Color Settings to display the Color Settings dialog box. 8. On the Color Adjustment sheet, adjust the color tones, brightness, and so on as desired. Adjustment Item D Cyan Description Fine-tune color tones by adjusting the levels of Cyan, Magenta, and Yellow. E Magenta F Yellow 9. 10. G Gray Tone Adjust the gray tone to suit the images of monochrome photos. Choose cool black (tinged with blue), pure black (neutral), warm black (tinged with red), and so on. Select the color tone in the color region or from the list. H Brightness Adjust the brightness of printed images while keeping the darkest and lightest portions intact. I Contrast Adjust the contrast of the darkest and lightest portions relative to each other. For soft gradation, decrease the contrast. For hard gradation, increase the contrast. J Saturation Adjust the level of color saturation, in a range from subdued to vivid. Close the Color Settings dialog box. Click the Page Setup tab to display the Page Setup sheet. Enhanced Printing Options 175 Downloaded from ManualsPrinter.com Manuals Adjusting Images 11. 12. Conrm the settings of A Page Size, L Paper Source, and so on. Conrm the print settings and print as desired. Note • For tips on conrming print settings, see “Conrming Print Settings (Windows)”. (→P.337) 176 Enhanced Printing Options Downloaded from ManualsPrinter.com Manuals Adjusting Images Fine-Tuning Colors of Photos and Images (Mac OS X) You can specify your own print settings instead of using the Print Target presets. This topic describes how to ne-tune the color tone of photos before printing. 1. Choose Page Setup in the application menu to display the Page Attributes dialog box. 2. 3. 4. 5. 6. Select the printer in the B Format for list. 7. In the A Media Type list, select the type of paper that is loaded. Choose the original size in the C Paper Size list. Click F OK to close the dialog box. Choose Print in the application menu. Access the Main pane. Enhanced Printing Options 177 Downloaded from ManualsPrinter.com Manuals Adjusting Images 8. 9. 10. Click D Advanced Settings to switch the print mode. Click Color in the H Color Mode list. Click I Set to display the Color Settings dialog box. 178 Enhanced Printing Options Downloaded from ManualsPrinter.com Manuals Adjusting Images 11. On the Color Adjustment pane, adjust the color tones, brightness, and so on as desired. Adjustment Item D Cyan Description Fine-tune color tones by adjusting the levels of Cyan, Magenta, and Yellow. E Magenta F Yellow G Gray Tone Adjust the gray tone to suit the images of monochrome photos. Choose cool black (tinged with blue), pure black (neutral), warm black (tinged with red), and so on. Select the color tone in the color region or from the list. H Brightness Adjust the brightness of printed images while keeping the darkest and lightest portions intact. I Contrast Adjust the contrast of the darkest and lightest portions relative to each other. For soft gradation, decrease the contrast. For hard gradation, increase the contrast. J Saturation Adjust the level of color saturation, in a range from subdued to vivid. 12. 13. Click OK to close the Color Settings dialog box. 14. 15. Conrm the settings of A Media Source and C Page Size. Access the Page Setup pane. Conrm the print settings, and then click M Print to start printing. Note • For tips on conrming print settings, see “Conrming Print Settings (Mac OS X)”. (→P.382) Enhanced Printing Options 179 Downloaded from ManualsPrinter.com Manuals Adjusting Images Giving Priority to Particular Graphic Elements and Colors for Printing You can specify detailed print settings as desired for the quality level, colors, and other criteria. Advanced Settings For printing results that appear just as expected for your original, you can specify which graphic elements and colors to prioritize for printing. Note • Easy Settings are also available, providing convenient presets. To use the presets, simply choose the printing application. For details on Easy Settings, refer to the following topics. • Printing Photos and Images (Windows, Mac OS X) (→P.144) • Printing Line Drawings and Text (Windows, Mac OS X) (→P.153) • Printing Ofce Documents (→P.163) Print Priority Choose the graphic elements that you want to emphasize for printing. Print Priority (*1) Description Image A setting for posters or other documents made up mainly of photos or images, or for emphasizing photos or images in printed documents. Line Drawing/Text Choose this setting for CAD drawings made up mainly of intricate lines, or wall newspapers and other notices with a large amount of text. Suitable for emphasizing detailed text in printed documents. However, the quality may not be sufcient when printing photos or images that require a lot of color coverage. In this case, choose “Image” instead. Ofce Document Choose this setting for better legibility of documents combining text and graphics, such as documents and presentation material created with typical ofce applications. *1: Options suitable for the selected type of paper are listed under Print Priority. 180 Enhanced Printing Options Downloaded from ManualsPrinter.com Manuals Adjusting Images Print Quality Choose the print quality. The printing mode is determined by a combination of the print quality and resolution. Print Quality (*1) Print Priority Description Highest A setting for printing at the highest resolution when quality is most important. Printing takes longer and consumes more ink than in other modes, but this mode offers superior printing quality. Image High Choose this setting to print at high resolution when quality is most important. Printing takes longer and consumes more ink than in “Standard” or “Draft” modes, but this mode offers exceptional printing quality. Image Line Drawing/Text Standard Choose this setting to print at standard resolution when quality Image and speed are both important. Line Drawing/Text Printing takes less time than in “Highest” or “High” mode. Ofce Document Draft Choose this setting to print faster. Image Printing in draft mode can help you work more efciently when Line Drawing/Text checking layouts. *1: Options suitable for the selected Print Priority are listed under Print Quality. Color settings Setting Item Options Description Color Mode (*1) Color Monochrome Color (CAD) Monochrome (BK ink) Monochrome Bitmap Choose whether to print in color or monochrome. (→P.172) Color Adjustment Cyan Magenta Yellow Gray Tone Brightness Contrast Saturation You can adjust the levels of cyan, magenta, and yellow as well as the brightness, contrast, saturation, and gray tones. If you choose Monochrome or Monochrome (BK ink) in Color Mode only Brightness and Contrast can be adjusted. Image, Graphics, and Text are available as Object Adjustment options. (In Windows and Mac OS X 10.5 only.) Color-Matching Modes Driver Matching Mode ICC Matching Mode Driver ICM Mode Host ICM Mode Off Choose the color-matching mode. Other color-matching modes may be provided by the computer operating system, such as ICM and ColorSync. Color-Matching Method (*2) Auto Perceptual Colorimetric Saturation other Choose the color-matching method. The available options vary depending on your selection in “Color-Matching Mode.” *1: Options suitable for the selected Print Priority are listed under Color Mode. *2: The order of options displayed varies depending on the operating system. Enhanced Printing Options 181 Downloaded from ManualsPrinter.com Manuals Adjusting Images Enhancing printing quality Setting Item Description Unidirectional Printing Choosing unidirectional printing can improve printing results if lines are printed crooked or images are uneven. However, this takes more time than regular printing. Thicken Fine Lines (Windows) Thicken Fine Lines (Mac OS X) Choose this option to make ne lines clearer in CAD drawings or similar documents. Sharpen Text (*1) Choose this option to print intricate text more distinctly. Reduce Print Unevenness (*2) Choose this option to counteract uneven printing. Economy Printing When this mode is selected, less ink is consumed than in regular printing, but the quality is diminished. Select this mode if you want to conserve ink when checking drawings, for example. Depending on the Media Type and Print Quality settings, this mode may not be available. *1: Displayed in Windows and Mac OS X 10.5. *2: Displayed in Mac OS X. Note • To print at a higher level of quality, in the printer driver, choose High or Highest in Print Quality, and choose Unidirectional Printing as the direction of printing. • For instructions on specifying the print quality and color settings before printing, refer to the following topics, as appropriate for your computer and operating system. • Choosing the Document Type and Printing Conditions (Windows) (→P.183) • Choosing the Document Type and Printing Conditions (Mac OS X) (→P.185) 182 Enhanced Printing Options Downloaded from ManualsPrinter.com Manuals Adjusting Images Choosing the Document Type and Printing Conditions (Windows) You can specify your own print settings instead of using the Print Target presets. As an example, this topic describes how to print CAD drawings as clearly as possible, with sharp lines and text. 1. 2. 3. Choose Print in the application menu. 4. 5. In the A Media Type list, select the type of paper that is loaded. 6. 7. Click Line Drawing/Text in the E Print Priority list. Select the printer in the dialog box, and then display the printer driver dialog box. (→P.343) Make sure the Main sheet is displayed. Click D Advanced Settings to switch the print mode. Click High (1200dpi) in the F Print Quality list. Note • Options displayed in the F Print Quality list vary depending on the paper type. 8. Click Color (CAD) in the G Color Mode list. Enhanced Printing Options 183 Downloaded from ManualsPrinter.com Manuals Adjusting Images 9. To adjust the color, click H Color Settings. Note • For instructions on adjusting color, see “Adjusting the Color in the Printer Driver”. (→P.172) 10. 11. Select the K Sharpen Text check box. 12. 13. Conrm the settings of A Page Size, L Paper Source, and so on. Click the Page Setup tab to display the Page Setup sheet. Conrm the print settings and print as desired. Note • For tips on conrming print settings, see “Conrming Print Settings (Windows)”. (→P.337) 184 Enhanced Printing Options Downloaded from ManualsPrinter.com Manuals Adjusting Images Choosing the Document Type and Printing Conditions (Mac OS X) You can specify your own print settings instead of using the Print Target presets. As an example, this topic describes how to print CAD drawings as clearly as possible, with sharp lines and text. 1. Choose Page Setup from the application menu to display the Page Attributes dialog box. 2. 3. 4. 5. 6. Select the printer in the B Format for list. 7. In the A Media Type list, select the type of paper that is loaded. Choose the original size in the C Paper Size list. Click F OK to close the dialog box. Choose Print in the application menu. Access the Main pane. Enhanced Printing Options 185 Downloaded from ManualsPrinter.com Manuals Adjusting Images 8. 9. 10. Click D Advanced Settings to switch the print mode. Click Line Drawing in the E Print Priority list. Click High(1200dpi) in the F Print Quality list. Note • Options displayed in the F Print Quality list vary depending on the paper type. 11. 12. Click Color (CAD) in the H Color Mode list. To adjust the color, click I Set. Note • For instructions on adjusting color, see “Adjusting the Color in the Printer Driver”. (→P.172) 13. Access the Page Setup pane. 186 Enhanced Printing Options Downloaded from ManualsPrinter.com Manuals Adjusting Images 14. 15. Conrm the settings of A Media Source and C Page Size. Conrm the print settings, and then click M Print to start printing. Note • For tips on conrming print settings, see “Conrming Print Settings (Mac OS X)”. (→P.382) Enhanced Printing Options 187 Downloaded from ManualsPrinter.com Manuals Choosing Paper for Printing Choosing Paper for Printing Choosing a Paper for Printing Choosing the right paper for your particular printing application will give you the best printing results. Media type The printer and printer driver offer print settings optimized for various paper characteristics. Note • For information on the types of paper the printer supports, refer to the Paper Reference Guide. (→P.96) • The paper type setting in the printer driver and related software (as well as on the Control Panel ) is updated when you install the Media Conguration Tool from the User Software CD-ROM or if you change paper information by using the Media Conguration Tool. For information about the Media Conguration Tool, see the Media Conguration Tool Guide (Windows) or Media Conguration Tool Guide (Macintosh). • An error message is displayed on the printer Control Panel if the paper type as specied in the printer driver does not match the type specied on the printer. Although you can print under these conditions, the printing results may not be suitable. If the paper type is not listed for selection If the type of paper loaded is not listed among the options for selection, try printing on Special 1, Special 2, and so on. Note that higher numbers in this setting enable more vivid colors but may also cause colors to run together. For instructions on specifying the paper type before printing, refer to the following topics. • Selecting the Paper Type (Roll) (→P.189) • Selecting the Paper Type (Sheet) (→P.190) 188 Enhanced Printing Options Downloaded from ManualsPrinter.com Manuals Choosing Paper for Printing Selecting the Paper Type (Roll) When changing the type of paper after the paper has been advanced, specify the type of paper as follows. Important • For best printing results, the printer ne-tunes the feed amount for each type of paper. Be sure to select the type of paper to use correctly before printing. • Because the printer ne-tunes the feed amount for each type of paper, the margins and the size of printed images may vary depending on the type of paper used. If margins and the size of images are not as you expected, adjust the paper feed amount and Printhead height. (→P.498) (→P.497) Note • After you load the roll, the printer automatically shows a menu for selection of the paper type on the Display Screen, unless a barcode has been printed on the roll or you have activated automatic detection of the remaining roll paper. Select the type of paper, and then press the OK button. If no barcode has been printed on the roll and you have activated automatic detection of the remaining roll paper, specify the roll length after the paper type. (→P.106) 1. Press the Menu button to display MAIN MENU. 2. 3. 4. Press ▲ or ▼ to select Media Menu, and then press the ► button. Press ▲ or ▼ to select Roll Media Type, and then press the ► button. Press ▲ or ▼ to select the type of paper loaded in the printer, and then press the OK button. Note • For details on types of paper, see the Paper Reference Guide. (→P.96)By factory default, Plain Paper is selected. • If you move the Release Lever, the setting automatically reverts to the previously selected paper. • Be sure to select the correct paper type. If this setting does not match the loaded paper, it may cause feed errors and affect the printing quality. • If you select a type of paper for which width detection is Off when detection of the remaining roll paper is also Off, you will need to advance the paper manually to the starting position for printing. (→P.136) 5. Press the Online button to bring the printer online. Enhanced Printing Options 189 Downloaded from ManualsPrinter.com Manuals Choosing Paper for Printing Selecting the Paper Type (Sheet) When changing the type of paper after the paper has been advanced, specify the type of paper as follows. Note • After you load the sheet, the printer automatically shows a menu for selection of the paper type on the Display Screen. In this case, select the paper type, and then press the OK button. The printer will automatically go online. 1. Press the Menu button to display MAIN MENU. 2. 3. 4. Press ▲ or ▼ to select Media Menu, and then press the ► button. Press ▲ or ▼ to select Cut Sheet Type, and then press the ► button. Press ▲ or ▼ to select the type of paper loaded in the printer, and then press the OK button. Note • For details on paper types, see the Paper Reference Guide. (→P.96) Plain Paper is selected by factory default. If you move the Release Lever, the setting automatically reverts to Plain Paper. • Be sure to select the correct paper type. If this setting does not match the loaded paper, it may cause feed errors and affect the printing quality. • If you select a type of paper for which Media Width Detection is deactivated ( Off is selected), you must advance the paper manually to the position for printing. (→P.136) 5. Press the Online button to bring the printer online. 190 Enhanced Printing Options Downloaded from ManualsPrinter.com Manuals Choosing Paper for Printing Specifying Paper in the Printer Driver If you replace the paper, complete the printer driver settings for the paper type and size. For instructions on conguring paper settings in the printer driver, refer to the following topics, as appropriate for your computer and operating system. • Specifying Paper in the Printer Driver (Windows) (→P.192) • Specifying Paper in the Printer Driver (Mac OS X) (→P.194) Enhanced Printing Options 191 Downloaded from ManualsPrinter.com Manuals Choosing Paper for Printing Specifying Paper in the Printer Driver (Windows) If you have replaced the paper, you must complete the following settings in the printer driver. Important • Always specify the same type and size of paper in the printer menu and printer driver. If the type and size do not match, an error message will be displayed and printing is not possible. 1. 2. 3. Choose Print in the application menu. 4. 5. In the A Media Type list, select the type of paper that is loaded. 6. 7. In the A Page Size list, select the size of the original as specied in the application. Select the printer in the dialog box, and then display the printer driver dialog box. (→P.343) Make sure the Main sheet is displayed. Click the Page Setup tab to display the Page Setup sheet. In the L Paper Source list, select how paper is supplied. 192 Enhanced Printing Options Downloaded from ManualsPrinter.com Manuals Choosing Paper for Printing 8. If you have selected Roll Paper in L Paper Source, select the width of the loaded roll in M Roll Paper Width. Note • A variety of settings are available in the printer driver to suit different printing applications. For details on available printing conditions, see “Printer Driver Settings (Windows)”. (→P.333) Enhanced Printing Options 193 Downloaded from ManualsPrinter.com Manuals Choosing Paper for Printing Specifying Paper in the Printer Driver (Mac OS X) If you have replaced the paper, you must complete the following settings in the printer driver. 1. Choose Page Setup from the application menu to display the Page Attributes dialog box. 2. 3. 4. 5. 6. Select the printer in the B Format for list. 7. In the A Media Type list, select the type of paper that is loaded. Choose the original size in the C Paper Size list. Click F OK to close the dialog box. Choose Print in the application menu. Access the Main pane. 194 Enhanced Printing Options Downloaded from ManualsPrinter.com Manuals Choosing Paper for Printing 8. 9. 10. Access the Page Setup pane. In the A Media Source list, select how paper is supplied. If you have selected Cut Sheet or Manual in A Media Source, make sure the size as selected in Page Setup is displayed in C Page Size. If you have selected Roll Paper in A Media Source, make sure the width of the loaded roll is displayed in B Roll Paper Width. Note • If the width of the roll loaded in the printer is not shown in B Roll Paper Width, click L Printer Information on the Main pane to update the printer information. Note • A variety of settings are available in the printer driver to suit different printing applications. For details on available printing conditions, see “Printer Driver Settings (Mac OS X)”. (→P.379) Enhanced Printing Options 195 Downloaded from ManualsPrinter.com Manuals Printing enlargements or reductions Printing enlargements or reductions Resizing Originals to Match the Paper Size You can freely adjust the size of originals by enlarging or reducing them as desired. Enlarged/Reduced Printing Enlarge or reduce the original in the printer driver, as desired. Fit Paper Size Enlarge or reduce the original to match the size of the paper you are using. For instructions on resizing originals to match the paper size, refer to the following topics, as appropriate for your computer and operating system. • Resizing Originals to Match the Paper Size (Windows) (→P.197) • Resizing Originals to Match the Paper Size (Mac OS X) (→P.199) Note • For better printing results when enlarging photos from a digital camera in TIFF or JPEG format, use an image-editing application software such as Adobe Photoshop to specify an image resolution of 150 dpi or more at actual size. 196 Enhanced Printing Options Downloaded from ManualsPrinter.com Manuals Printing enlargements or reductions Resizing Originals to Match the Paper Size (Windows) This topic describes how to enlarge originals before printing to match the paper size, based on the following example. • • • • • Document: Any Type Page size: A4 (210.0×297.0mm)/Letter (8.3 × 11.7 in) Paper: Roll Paper type: Plain Paper Roll paper width: A2/A3 roll (420.0 mm [16.5 in]) 1. 2. 3. Choose Print in the application menu. 4. 5. 6. In the A Media Type list, select the type of paper that is loaded. In this case, click Plain Paper. 7. Click Roll Paper in the L Paper Source list. Select the printer in the dialog box, and then open the printer driver dialog box. (→P.343) Make sure the Main sheet is displayed. Select the printing application in the E Print Target list. Click the Page Setup tab to display the Page Setup sheet. Enhanced Printing Options 197 Downloaded from ManualsPrinter.com Manuals Printing enlargements or reductions 8. Select the width of the loaded roll in the M Roll Paper Width list-in this case, ISO A2/A3 Roll (420.0mm). 9. In the A Page Size list, click the size of the original as specied in the application. In this case, click ISO A4. 10. 11. 12. 13. Select the C Enlarged/Reduced Printing check box. Select the D Fit Paper Size check box. Click ISO A3 in the G Paper Size list. Conrm the print settings and print as desired. Note • For tips on conrming print settings, see “Conrming Print Settings (Windows)”. (→P.337) 198 Enhanced Printing Options Downloaded from ManualsPrinter.com Manuals Printing enlargements or reductions Resizing Originals to Match the Paper Size (Mac OS X) This topic describes how to enlarge originals before printing to match the paper size, based on the following example. • • • • • Document: Any Type Page size: A4 (210.0 × 297.0 mm)/Letter (8.3 × 11.7 in) Paper: Roll Paper type: Plain Paper Roll paper width: A2/A3 roll (420.0 mm [16.5 in]) 1. Choose Page Setup in the application menu to display the Page Attributes dialog box. 2. 3. 4. 5. 6. Select the printer in the B Format for list. 7. 8. In the A Media Type list, select the type of paper that is loaded. In this case, click Plain Paper. In the C Paper Size list, click the size of the original. In this case, click ISO A4. Click F OK to close the dialog box. Choose Print in the application menu. Access the Main pane. Select the printing application in the E Print Target list. Enhanced Printing Options 199 Downloaded from ManualsPrinter.com Manuals Printing enlargements or reductions 9. 10. 11. Access the Page Setup pane. Click Roll Paper in the A Media Source list. Make sure the width of the loaded roll is displayed in the B Roll Paper Width list-in this case, ISO A2/A3 (420.0mm). Note • If the width of the roll loaded in the printer is not shown in B Roll Paper Width, click L Printer Information on the Main pane to update the printer information. 200 Enhanced Printing Options Downloaded from ManualsPrinter.com Manuals Printing enlargements or reductions 12. Make sure C Page Size on the Page Setup pane shows the original size as specied in C Paper Size in the Page Attributes dialog box-in this case, ISO A4. 13. 14. 15. 16. Select the D Enlarged/Reduced Printing check box. Make sure E Fit Media Size is selected. Click ISO A3 in the I Media Size list. Conrm the print settings, and then click M Print to start printing. Note • For tips on conrming print settings, see “Conrming Print Settings (Mac OS X)”. (→P.382) Enhanced Printing Options 201 Downloaded from ManualsPrinter.com Manuals Printing enlargements or reductions Resizing Originals to Fit the Roll Width You can freely adjust the size of originals by enlarging or reducing them as desired. Enlarged/Reduced Printing Enlarge or reduce the original in the printer driver, as desired. Fit Roll Paper Width Enlarge or reduce the original as a whole to match the roll paper width, as desired. For instructions on resizing originals to match the roll paper width, refer to the following topics, as appropriate for your computer and operating system. • Resizing Originals to Fit the Roll Width (Windows) (→P.203) • Resizing Originals to Fit the Roll Width (Mac OS X) (→P.205) Note • For better printing results when enlarging photos from a digital camera in TIFF or JPEG format, use an image-editing application software such as Adobe Photoshop to specify an image resolution of 150 dpi or more at actual size. 202 Enhanced Printing Options Downloaded from ManualsPrinter.com Manuals Printing enlargements or reductions Resizing Originals to Fit the Roll Width (Windows) This topic describes how to enlarge originals before printing to match the roll width, based on the following example. • • • • • Document: Any type Page size: A4 (210.0×297.0 mm)/Letter (8.3 × 11.7 in) Paper: Roll Paper type: Plain Paper Roll paper width: 16 inches (406.4 mm) 1. 2. 3. Choose Print in the application menu. 4. 5. 6. In the A Media Type list, select the type of paper that is loaded. In this case, click Plain Paper. 7. 8. Click Roll Paper in the L Paper Source list. Select the printer in the dialog box, and then display the printer driver dialog box. (→P.343) Make sure the Main sheet is displayed. Select the printing application in the E Print Target list. Click the Page Setup tab to display the Page Setup sheet. In the A Page Size list, click the size of the original as specied in the application. In this case, click ISO A4 or Letter (8.5"x11"). Enhanced Printing Options 203 Downloaded from ManualsPrinter.com Manuals Printing enlargements or reductions 9. Select the C Enlarged/Reduced Printing check box. Note • If the Enlarged/Reduced Printing check box is not displayed on the Page Setup sheet, clear the B Borderless Printing check box. 10. Click E Fit Roll Paper Width. Note • After you click E Fit Roll Paper Width, the Information dialog box is displayed. Select the width of the loaded roll in the Roll Paper Width list and click OK. • Make sure the roll paper width you specify matches the width of the loaded roll. 11. Conrm the print settings and print as desired. Note • For tips on conrming print settings, see “Conrming Print Settings (Windows)”. (→P.337) 204 Enhanced Printing Options Downloaded from ManualsPrinter.com Manuals Printing enlargements or reductions Resizing Originals to Fit the Roll Width (Mac OS X) This topic describes how to enlarge originals before printing to match the roll width, based on the following example. • • • • • Document: Any type Page size: A4 (210.0×297.0 mm)/Letter (8.3 × 11.7 in) Paper: Roll Paper type: Plain Paper Roll paper width: 16 inches (406.4 mm) 1. Choose Page Setup from the application menu to display the Page Attributes dialog box. 2. 3. 4. 5. 6. Select the printer in the B Format for list. 7. 8. In the A Media Type list, select the type of paper that is loaded. In this case, click Plain Paper. In C Paper Size, click the size of the original. In this case, click ISO A4. Click F OK to close the dialog box. Choose Print in the application menu. Access the Main pane. Select the print target in the E Print Target list. Enhanced Printing Options 205 Downloaded from ManualsPrinter.com Manuals Printing enlargements or reductions 9. 10. 11. Access the Page Setup pane. Click Roll Paper in the A Media Source list. Make sure the width of the loaded roll is displayed in the B Roll Paper Width list-in this case, 16 in. (406.4mm). Note • If the width of the loaded roll is not displayed in B Roll Paper Width, click L Printer Information on the Main pane and update the printer information. 206 Enhanced Printing Options Downloaded from ManualsPrinter.com Manuals Printing enlargements or reductions 12. Make sure the C Page Size setting matches the original size as selected in C Paper Size in the Page Attributes dialog box-in this case, ISO A4. 13. 14. 15. Select the D Enlarged/Reduced Printing check box. Click F Fit Roll Paper Width. Conrm the print settings, and then click M Print to start printing. Note • For tips on conrming print settings, see “Conrming Print Settings (Mac OS X)”. (→P.382) Enhanced Printing Options 207 Downloaded from ManualsPrinter.com Manuals Printing enlargements or reductions Resizing Originals by Entering a Scaling Value You can freely adjust the size of originals by enlarging or reducing them as desired. Enlarged/Reduced Printing Enlarge or reduce the original in the printer driver, as desired. Scaling Enlarge or reduce originals by a particular amount, as desired. For instructions on entering a scaling value to resize originals, refer to the following topics, as appropriate for your computer and operating system. • Resizing Originals by Entering a Scaling Value (Windows) (→P.209) • Resizing Originals by Entering a Scaling Value (Mac OS X) (→P.211) Note • For better printing results when enlarging photos from a digital camera in TIFF or JPEG format, use an image-editing application software such as Adobe Photoshop to specify an image resolution of 150 dpi or more at actual size. 208 Enhanced Printing Options Downloaded from ManualsPrinter.com Manuals Printing enlargements or reductions Resizing Originals by Entering a Scaling Value (Windows) This topic describes how to enlarge originals before printing by entering a scaling value, based on the following example. • • • • • Document: Any type Page size: A4 (210.0×297.0 mm)/Letter (8.3 × 11.7 in) Paper: Roll Paper type: Plain Paper Roll paperr width: A2/A3 roll (420.0 mm [16.5 in]) Important • In borderless printing, you cannot resize originals by entering a scaling value. 1. 2. 3. Choose Print in the application menu. 4. 5. 6. In the A Media Type list, select the type of paper that is loaded. In this case, click Plain Paper. Select the printer in the dialog box, and then display the printer driver dialog box. (→P.343) Make sure the Main sheet is displayed. Select the print target in the E Print Target list. Click the Page Setup tab to display the Page Setup sheet. Enhanced Printing Options 209 Downloaded from ManualsPrinter.com Manuals Printing enlargements or reductions 7. 8. Click Roll Paper in the L Paper Source list. Select the width of the loaded roll in the M Roll Paper Width list-in this case, ISO A2/A3 Roll (420.0mm). 9. In the A Page Size list, click the size of the original as specied in the application. In this case, click ISO A4 or Letter (8.5"x11"). 10. 11. 12. Select the C Enlarged/Reduced Printing check box. Click ISO A4 in the G Paper Size list. Click F Scaling and enter “120.” Note • You can specify enlargement that exceeds the paper size, but in this case, the portion off the edge of the paper will not be printed. • If the original size after enlargement or reduction is smaller than the paper size, the original is printed in the upper-left corner. In this case, you can center originals by selecting G Print Centered on the Layout sheet. 13. Conrm the print settings and print as desired. Note • For tips on conrming print settings, see “Conrming Print Settings (Windows)”. (→P.337) 210 Enhanced Printing Options Downloaded from ManualsPrinter.com Manuals Printing enlargements or reductions Resizing Originals by Entering a Scaling Value (Mac OS X) This topic describes how to enlarge originals before printing by entering a scaling value, based on the following example. • • • • • Document: Any type Page size: A4 (210.0×297.0 mm)/Letter (8.3 × 11.7 in) Paper: Roll Paper type: Plain Paper Roll paper width: A2/A3 roll (420.0 mm [16.5 in]) Important • In borderless printing, you cannot resize originals by entering a scaling value. 1. Choose Page Setup in the application menu to display the Page Attributes dialog box. 2. 3. 4. 5. 6. Select the printer in the B Format for list. 7. 8. In the A Media Type list, select the type of paper that is loaded. In this case, click Plain Paper. In C Paper Size, click the size of the original. In this case, click ISO A4. Click F OK to close the dialog box. Choose Print in the application menu. Access the Main pane. Select the print target in the E Print Target list. Enhanced Printing Options 211 Downloaded from ManualsPrinter.com Manuals Printing enlargements or reductions 9. 10. 11. Access the Page Setup pane. Click Roll Paper in the A Media Source list. Make sure the width of the loaded roll is displayed in the B Roll Paper Width list-in this case, ISO A2/A3 (420.0mm). Note • If the width of the loaded roll is not displayed in B Roll Paper Width, click L Printer Information on the Main pane and update the printer information. 212 Enhanced Printing Options Downloaded from ManualsPrinter.com Manuals Printing enlargements or reductions 12. Make sure the C Page Size setting matches the original size as selected in C Paper Size in the Page Attributes dialog box-in this case, ISO A4. 13. 14. Select the D Enlarged/Reduced Printing check box. Click G Scaling and enter “120.” Note • You can specify enlargement that exceeds the paper size, but in this case, the portion off the edge of the paper will not be printed. • If the original size after enlargement or reduction is smaller than the paper size, the original is printed in the upper-left corner. In this case, you can center originals by selecting the J Print Centered check box. 15. Conrm the print settings, and then click M Print to start printing. Note • For tips on conrming print settings, see “Conrming Print Settings (Mac OS X)”. (→P.382) Enhanced Printing Options 213 Downloaded from ManualsPrinter.com Manuals Printing enlargements or reductions Printing Enlargements of Scanned Originals from a Color imageRUNNER Scanned originals from a Color imageRUNNER can be enlarged and printed automatically. For instructions on printing enlargements of scanned originals from a Color imageRUNNER, refer to the following topic. • Printing Enlargements of Scanned Originals from a Color imageRUNNER (Windows) (→P.214) • Printing Enlargements of Scanned Originals from a Color imageRUNNER (Mac OS X) (→P.216) Printing Enlargements of Scanned Originals from a Color imageRUNNER (Windows) Scanned originals from a Color imageRUNNER can be enlarged and printed automatically. Originals you create by scanning with a Color imageRUNNER are transferred to a "hot folder" and printed automatically after enlargement according to printing conditions you specify for that folder. This processing sequence is called the Color imageRUNNER Enlargement Copy function. To use Color imageRUNNER Enlargement Copy, rst complete these settings in the following order. 1. Register a hot folder on your computer. Register a hot folder on your computer for storing scanned originals from the Color imageRUNNER and complete the settings for enlargement copy. 2. Complete the scanning settings on the Color imageRUNNER. Congure the Color imageRUNNER to send scanned originals to the hot folder. After these settings are complete, you can print enlarged copies of scanned originals from the Color imageRUNNER. Registering a hot folder on your computer Folders used for Color imageRUNNER Enlargement Copy (iR enlargement copy) are called hot folders. Register a hot folder on your computer for storing scanned originals from the Color imageRUNNER. You can specify printing conditions (such as the image quality and paper size), based on which originals transferred to the hot folder will be printed. Follow these steps to register and modify hot folders. 1. 2. Display the printer driver dialog box. (→P.345) Click the Utility tab to display the Utility sheet. 214 Enhanced Printing Options Downloaded from ManualsPrinter.com Manuals Printing enlargements or reductions 3. Click B Color imageRUNNER Enlargement Copy to start the Color imageRUNNER Enlargement Copy utility. 4. Use the Color imageRUNNER Enlargement Copy utility to register or modify hot folders. For instructions on registering and modifying hot folders, refer to the help le for the Color imageRUNNER Enlargement Copy utility. Completing the scanning settings on the Color imageRUNNER. Congure the Color imageRUNNER to send scanned originals to the hot folder. It is easy to send scanned originals to the hot folder if you assign the scanning settings and destination to a Favorites button on the Color imageRUNNER. For instructions on assigning scanning settings and destinations to a Favorites button, refer to the setting manual, displayed by clicking Color imageRUNNER Enlargement Copy Setup Manual button of Color imageRUNNER Enlargement Copy utility, or refer to the Color imageRUNNER manual. Scanning the original and print an enlargement Follow the steps below to scan an original on the Color imageRUNNER for enlarged printing on the printer. For detailed instructions, refer to the Color imageRUNNER manual. 1. 2. 3. 4. Load the original on the platen glass or document feeder of the Color imageRUNNER. Press Send to display the screen for transmission. Press Favorites, and then press the Favorites button assigned to the hot folder. Press Start on the control panel. If you scan originals on the platen glass, after scanning all originals, press Done on the touch-panel display. Scanned originals are sent to the hot folder and automatically enlarged and printed following the conditions you specied for the folder. Note • For details on Color imageRUNNER Enlargement Copy, refer to Color imageRUNNER Enlargement Copy . Enhanced Printing Options 215 Downloaded from ManualsPrinter.com Manuals Printing enlargements or reductions Printing Enlargements of Scanned Originals from a Color imageRUNNER (Mac OS X) Scanned originals from a Color imageRUNNER can be enlarged and printed automatically. Originals you create by scanning with a Color imageRUNNER are transferred to a "hot folder" and printed automatically after enlargement according to printing conditions you specify for that folder. This processing sequence is called the Color imageRUNNER Enlargement Copy function. To use Color imageRUNNER Enlargement Copy, rst complete these settings in the following order. 1. Register a hot folder on your computer. Register a hot folder on your computer for storing scanned originals from the Color imageRUNNER and complete the settings for enlargement copy. 2. Complete the scanning settings on the Color imageRUNNER. Congure the Color imageRUNNER to send scanned originals to the hot folder. After these settings are complete, you can print enlarged copies of scanned originals from the Color imageRUNNER. Registering a hot folder on your computer Folders used for Color imageRUNNER Enlargement Copy (iR enlargement copy) are called hot folders. Register a hot folder on your computer for storing scanned originals from the Color imageRUNNER. You can specify printing conditions (such as the image quality and paper size), based on which originals transferred to the hot folder will be printed. Follow these steps to register and modify hot folders. 1. To display the Color imageRUNNER Enlargement Copy dialog box, either double-click the Color imageRUNNER Enlargement Copy.app icon after navigating to Canon Utilities imagePROGRAF in the Applications folder or click C Set in the Utility pane. 2. In Enlarged Copy Settings, click Add or Edit and either create or modify the hot folder. For instructions on registering and modifying hot folders, refer to the help le for Color imageRUNNER Enlargement Copy. 216 Enhanced Printing Options Downloaded from ManualsPrinter.com Manuals Printing enlargements or reductions Completing the scanning settings on the Color imageRUNNER. Congure the Color imageRUNNER to send scanned originals to the hot folder. It is easy to send scanned originals to the hot folder if you assign the scanning settings and destination to a Favorites button on the Color imageRUNNER. For instructions on assigning scanning and sending settings to the Favorites button, refer to the Color imageRUNNER manual. Scanning the original and print an enlargement Follow the steps below to scan an original on the Color imageRUNNER for enlarged printing on the printer. For detailed instructions, refer to the Color imageRUNNER manual. 1. 2. 3. 4. Load the original on the platen glass or document feeder of the Color imageRUNNER. Press Send to display the screen for transmission. Press Favorites, and then press the Favorites button assigned to the hot folder. Press Start on the control panel. If you scan originals on the platen glass, after scanning all originals, press Done on the touch-panel display. Scanned originals are sent to the hot folder and automatically enlarged and printed following the conditions you specied for the folder. Note • For details on Color imageRUNNER Enlargement Copy, see Color imageRUNNER Enlargement Copy . Enhanced Printing Options 217 Downloaded from ManualsPrinter.com Manuals Printing at full size Printing at full size Printing on Oversized Paper Except in borderless printing, the actual printing area corresponds to your selected paper size minus the space for a margin. (→P.79) To print documents or images you prepare without a margin at actual size, use an oversized paper size. For example, to print a A4-sized original without a margin at A4 size, print it on paper larger than A4 size and cut away the excess margin. Note • If you prepare an original for printing without a margin and print it on paper of regular size, the image near the edge will not be printed. Oversize The margin required by the printer is added around the “outside” of a regular paper size. For example, when printing a A4-sized original (210×297 mm), you have the following options. a. Regular paper size: Gray area not printed b. Page Size c. Oversized paper size: Print area matches the page size (b) Important • When printing on oversize paper, load paper larger than the page size-a size that includes the margin required by the printer. • Sheets: Load paper that is at least 6 mm (0.24 in) wider and 26 mm (1 in) higher than the page size • Rolls: Load paper that is at least 6 mm (0.24 in) wider and 6 mm (0.24 in) higher than the page size • Paper larger than the maximum size supported by the printer cannot be used as paper for oversized printing. (→P.101) 218 Enhanced Printing Options Downloaded from ManualsPrinter.com Manuals Printing at full size Note • Oversized printing (selecting Oversize in Page Size ) is only available in Windows. For oversized printing on sheets, choose Cut Sheet as the paper source. • To perform oversized printing on a Macintosh computer, you must specify a non-standard page size and print on it. • To specify a non-standard paper size in oversized printing, register the paper size as a Custom Paper Size. Oversized printing is not available with “Custom Size.” (→P.261) For instructions on oversized printing, refer to the following topics, as appropriate for your computer and operating system. • Printing at Full Size (Windows) (→P.220) • Printing at Full Size (Mac OS X) (→P.222) Enhanced Printing Options 219 Downloaded from ManualsPrinter.com Manuals Printing at full size Printing at Full Size (Windows) This topic describes how to print at full size based on the following example. (Oversized Printing) • • • • • Document: Any Type Page Size: A4 (210.0×297.0 mm)/Letter (8.3 × 11.7 in) Paper: Roll Paper type: Plain Paper Roll paper width: A2/A3 roll (420.0 mm [16.5 in]) 1. 2. 3. Choose Print in the application menu. 4. 5. In the A Media Type list, select the type of paper that is loaded. In this case, click Plain Paper. 6. 7. 8. 9. Click O Size Options to display the Paper Size Options dialog box. Select the printer in the dialog box, and then display the printer driver dialog box. (→P.343) Make sure the Main sheet is displayed. Click the Page Setup tab to display the Page Setup sheet. In the Paper Size Options dialog box, select the Oversize check box in Display Series. Click OK to close the Paper Size Options dialog box. Click Oversize - ISO A4 in the A Page Size list. 220 Enhanced Printing Options Downloaded from ManualsPrinter.com Manuals Printing at full size 10. 11. Click Roll Paper in the L Paper Source list. Select the width of the loaded roll in the M Roll Paper Width list-in this case, ISO A2/A3 Roll (420.0mm). 12. Conrm the print settings and print as desired. Note • For tips on conrming print settings, see “Conrming Print Settings (Windows)”. (→P.337) Note • You can select Oversize in Display Series to make all oversized versions of paper in the selected Display Series available for printing. These sizes are displayed in the Page Size list in the format Oversize - xxxxxx. Enhanced Printing Options 221 Downloaded from ManualsPrinter.com Manuals Printing at full size Printing at Full Size (Mac OS X) This topic describes how to print at full size based on the following example. (Oversized Printing) • • • • • Document: Any type Page size: A4 (210.0×297.0 mm)/Letter (8.3 × 11.7 in) Paper: Roll Paper type: Plain Paper Roll paper width: A2/A3 roll (420.0 mm [16.5 in]) 1. Choose Page Setup from the application menu to display the Page Attributes dialog box. 2. 3. Select the printer in the B Format for list. In C Paper Size, click the size of the original. In this case, click ISO A4 - Oversize. Note • For oversized printing, choose paper identied by the regular paper name followed by “- Oversize.” 4. 5. 6. Click F OK to close the dialog box. 7. 8. In the A Media Type list, select the type of paper that is loaded. In this case, click Plain Paper. Choose Print in the application menu. Access the Main pane. Select the printing application in the E Print Target list. 222 Enhanced Printing Options Downloaded from ManualsPrinter.com Manuals Printing at full size 9. 10. 11. Access the Page Setup pane. Click Roll Paper in the A Media Source list. Make sure the width of the loaded roll is displayed in the B Roll Paper Width list-in this case, ISO A2/A3 (420.0mm). Note • If the width of the loaded roll is not displayed in B Roll Paper Width, click L Printer Information on the Main pane and update the printer information. Enhanced Printing Options 223 Downloaded from ManualsPrinter.com Manuals Printing at full size 12. Make sure C Page Size shows the original size as specied in C Paper Size in the Page Attributes dialog box-in this case, ISO A4 - Oversize. 13. Conrm the print settings, and then click M Print to start printing. Note • For tips on conrming print settings, see “Conrming Print Settings (Mac OS X)”. (→P.382) 224 Enhanced Printing Options Downloaded from ManualsPrinter.com Manuals Printing at full size Borderless Printing at Actual Size Take advantage of borderless printing to print documents such as posters (made up mainly of photos or images) without a surrounding margin, or border. Borderless Printing In regular printing, a margin required by the printer is added around the original. With borderless printing, you can print documents without the margin, so that the printed image covers the entire surface of the paper. Important • Borderless printing is only available with rolls. • Paper you can use for borderless printing is restricted to particular types of paper and rolls of particular widths. For information on types of paper compatible with borderless printing, refer to the Paper Reference Guide. (→P.96) • Paper incompatible with the printer’s auto cut function can be printed without borders on the left and right sides only. • These features cannot be used in combination with borderless printing: special page layouts, centering originals, and printing cut lines on rolls. • You cannot have pages rotated 90 degrees to conserve paper if you have set up borderless printing at actual size or in combination with resizing originals to match the paper size. • When borderless printing is used, the edge of the paper is cut during printing. Thus, ink density may be uneven at the edges. If you require higher image quality, specify No in Auto Cut in the printer driver. In this case, the paper can be printed without borders on the left and right sides only. After ejecting and cutting the printed document, use scissors to cut away the top and bottom edges. • By factory default, the ink drying time is disabled for all paper. When you are using paper that takes longer for ink to adhere for borderless printing and the Cutter Unit touches printing surfaces that are not dry yet, it may damage the paper or the edge of the document that is cut, depending on frequency of use. In this case, follow these steps to change the ink drying time. 1. On the Main sheet of the printer driver, click Settings in Media Type. 2. Select the ink drying time in the Between Pages list of Drying Time. Borderless Printing Method Choose the method of borderless printing that suits the original, as desired. Enhanced Printing Options 225 Downloaded from ManualsPrinter.com Manuals Printing at full size Print Image with Actual Size Prints originals at actual size, without enlarging or reducing them. Originals must be prepared in a size that exceeds the dimensions of the paper by 3 mm (0.12 in) on each side. Note • Not all page sizes are available. • Even if you prepare originals of the same size as the paper size, the originals are automatically enlarged when you print borderlessly in combination with resizing originals to match the paper size. This may affect image quality. When image quality is most important, make the original 3 mm longer on each side than the paper size so that the image can be printed at actual size in borderless printing. For instructions on borderless printing of photos and images at actual size, refer to the following topics, as appropriate for your computer and operating system. • Borderless Printing at Actual Size (Windows) (→P.227) • Borderless Printing at Actual Size (Mac OS X) (→P.229) 226 Enhanced Printing Options Downloaded from ManualsPrinter.com Manuals Printing at full size Borderless Printing at Actual Size (Windows) This topic describes how to print borderlessly at actual size based on the following example. • • • • • 1. Document: Any type Page size: 10×12 inches (254.0×304.8 mm) Paper: Roll Paper type: Heavyweight Coated Paper Roll paper width: 10 inches (254.0 mm) Create the original in the source application 3 mm (0.12 in) larger on each side than 254.0×304.8 mm (10 × 12 in) -that is, 260.0×310.8 mm (10.2 × 12.2 in) Note • If you can specify the margin, as in Microsoft Word, set the margin at 0 mm. For instructions on specifying the margin, refer to the software documentation. • The extra 3 mm (0.12 in) on each side will not be printed. Create the original so that it ts inside the paper area to be printed on. 2. 3. 4. Choose Print in the application menu. 5. In the A Media Type list, select the type of paper that is loaded. In this case, click Heavyweight Select the printer in the dialog box, and then display the printer driver dialog box. (→P.343) Make sure the Main sheet is displayed. Coated Paper. 6. Select the print target in the E Print Target list. Enhanced Printing Options 227 Downloaded from ManualsPrinter.com Manuals Printing at full size 7. Click the Page Setup tab to display the Page Setup sheet. 8. In the A Page Size list, click the size of the original as specied in the source application. In this case, click 10"x12". 9. 10. Click Roll Paper in the L Paper Source list. 11. Select the width of the loaded roll in the Roll Paper Width list-in this case, click 10-in. Roll Select the B Borderless Printing check box to display the Information dialog box. (254.0mm). 12. 13. 14. Click OK to close the Information dialog box. In C Borderless Printing Method, click F Print Image with Actual Size. Conrm the print settings and print as desired. Note • For tips on conrming print settings, see “Conrming Print Settings (Windows)”. (→P.337) 228 Enhanced Printing Options Downloaded from ManualsPrinter.com Manuals Printing at full size Borderless Printing at Actual Size (Mac OS X) This topic describes how to print borderlessly at actual size based on the following example. • • • • • Document: Any type Page size: 10 × 12 inches (254.0×304.8 mm)-Borderless Paper: Roll Paper type: Heavyweight Coated Paper Roll paper width: 10 inches (254.0 mm) 1. Choose Page Setup from the application menu to display the Page Attributes dialog box. 2. 3. Select the printer in the B Format for list. In the C Paper Size list, choose a paper size supported for borderless printing. Here, click 10"x12" - Borderless. Note • Paper sizes supported for borderless printing are indicated by “-Borderless.” 4. 5. 6. 7. Click F OK to close the dialog box. 8. In the A Media Type list, select the type of paper that is loaded. In this case, click Heavyweight In the application, create an original that takes up the entire space of the paper size. Choose Print in the application menu. Access the Main pane. Coated Paper. 9. Select the print target in the E Print Target list. Enhanced Printing Options 229 Downloaded from ManualsPrinter.com Manuals Printing at full size 10. Access the Page Setup pane. 11. 12. Click Roll Paper in the A Media Source list. Conrm that the roll paper width matches the paper size. Make sure the width of the loaded roll is displayed in the B Roll Paper Width list-in this case, 10 in. (254.0mm). Note • If the width of the loaded roll is not displayed in B Roll Paper Width, click L Printer Information on the Main pane and update the printer information. 230 Enhanced Printing Options Downloaded from ManualsPrinter.com Manuals Printing at full size 13. Make sure the C Page Size setting matches the original size as selected in C Paper Size in the Page Attributes dialog box-in this case, 10"x12" - Borderless. 14. Conrm the print settings, and then click M Print to start printing. Note • For tips on conrming print settings, see “Conrming Print Settings (Mac OS X)”. (→P.382) Enhanced Printing Options 231 Downloaded from ManualsPrinter.com Manuals Borderless Printing Borderless Printing Borderless Printing on Paper of Equivalent Size Take advantage of borderless printing to print documents such as posters (made up mainly of photos or images) without a surrounding margin, or border. Borderless Printing In regular printing, a margin required by the printer is added around the original. With borderless printing, you can print documents without the margin, so that the printed image covers the entire surface of the paper. Important • Borderless printing is only available with rolls. • Paper you can use for borderless printing is restricted to particular types of paper and rolls of particular widths. For information on types of paper compatible with borderless printing, refer to the Paper Reference Guide. (→P.96) • Paper incompatible with the printer’s auto cut function can be printed without borders on the left and right sides only. • These features cannot be used in combination with borderless printing: special page layouts, centering originals, and printing cut lines on rolls. • You cannot have pages rotated 90 degrees to conserve paper if you have set up borderless printing at actual size or in combination with resizing originals to match the paper size. • When borderless printing is used, the edge of the paper is cut during printing. Thus, ink density may be uneven at the edges. If you require higher image quality, specify No in Auto Cut in the printer driver. In this case, the paper can be printed without borders on the left and right sides only. After ejecting and cutting the printed document, use scissors to cut away the top and bottom edges. • By factory default, the ink drying time is disabled for all paper. When you are using paper that takes longer for ink to adhere for borderless printing and the Cutter Unit touches printing surfaces that are not dry yet, it may damage the paper or the edge of the document that is cut, depending on frequency of use. In this case, follow these steps to change the ink drying time. 1. On the Main sheet of the printer driver, click Settings in Media Type. 2. Select the ink drying time in the Between Pages list of Drying Time. Borderless Printing Method Choose the method of borderless printing that suits the original, as desired. 232 Enhanced Printing Options Downloaded from ManualsPrinter.com Manuals Borderless Printing Fit Paper Size Enlarge or reduce the original to match the size of the paper you are using. Note • The printer driver automatically enlarges originals 3 mm (0.12 in) past the dimensions of the paper on each side. The 3 mm portion beyond the edge on each side is not printed. For instructions on borderless printing of photos, images, and other documents to match the paper size, refer to the following topics, as appropriate for your computer and operating system. • Borderless Printing by Resizing Originals to Match the Paper Size (Windows) (→P.234) • Borderless Printing by Resizing Originals to Match the Paper Size (Mac OS X) (→P.236) Enhanced Printing Options 233 Downloaded from ManualsPrinter.com Manuals Borderless Printing Borderless Printing by Resizing Originals to Match the Paper Size (Windows) This topic describes how to enlarge originals before borderless printing to match the paper size, based on the following example. • • • • • 1. Document: Any type Page size: 10×12 inches (254.0×304.8 mm) Paper: Roll Paper type: Heavyweight Coated Paper Roll paper width: 10 inches (254.0 mm) In the application, create an original that takes up the entire space of the paper size. Note • If you can specify the margin, as in Microsoft Word, set the margin at 0 mm. For instructions on specifying the margin, refer to the software documentation. 2. 3. 4. Choose Print in the application menu. 5. In the A Media Type list, select the type of paper that is loaded. In this case, click Heavyweight Select the printer in the dialog box, and then display the printer driver dialog box. (→P.343) Make sure the Main sheet is displayed. Coated Paper. 6. Select the print target in the E Print Target list. 234 Enhanced Printing Options Downloaded from ManualsPrinter.com Manuals Borderless Printing 7. Click the Page Setup tab to display the Page Setup sheet. 8. In the A Page Size list, click the size of the original as specied in the application. In this case, click 10"x12". 9. 10. Click Roll Paper in the L Paper Source list. 11. Select the width of the loaded roll in the Roll Paper Width list-in this case, click 10-in. Roll Select the B Borderless Printing check box to display the Information dialog box. (254.0mm). 12. 13. 14. 15. Click OK to close the Information dialog box. In C Borderless Printing Method, click D Fit Paper Size. Click Match Page Size in the G Paper Size list. Conrm the print settings and print as desired. Note • For tips on conrming print settings, see “Conrming Print Settings (Windows)”. (→P.337) Enhanced Printing Options 235 Downloaded from ManualsPrinter.com Manuals Borderless Printing Borderless Printing by Resizing Originals to Match the Paper Size (Mac OS X) This topic describes how to enlarge originals before borderless printing to match the paper size, based on the following example. • • • • • Document: Any type Page size: 10×12 inches (254.0×304.8 mm) Paper: Roll Paper type: Heavyweight Coated Paper Roll paper width: 10 inches (254.0 mm) 1. Choose Page Setup from the application menu to display the Page Attributes dialog box. 2. 3. Select the printer in the B Format for list. In the C Paper Size list, click the size of the original. In this case, click 10"x12". Note • All sizes are available in borderless printing if you resize originals to match the paper size. 4. 5. 6. 7. Click F OK to close the dialog box. 8. In the A Media Type list, select the type of paper that is loaded. In this case, click Heavyweight In the application, create an original that takes up the entire space of the paper size. Choose Print in the application menu. Access the Main pane. Coated Paper. 236 Enhanced Printing Options Downloaded from ManualsPrinter.com Manuals Borderless Printing 9. 10. Select the print target in the E Print Target list. 11. 12. Click Roll Paper in the A Media Source list. Access the Page Setup pane. Make sure the width of the loaded roll is displayed in the B Roll Paper Width list-in this case, 10 in. (254.0mm). Note • If the width of the loaded roll is not displayed in B Roll Paper Width, click L Printer Information on the Main pane and update the printer information. Enhanced Printing Options 237 Downloaded from ManualsPrinter.com Manuals Borderless Printing 13. Make sure the C Page Size setting matches the original size as selected in C Paper Size in the Page Attributes dialog box-in this case, 10"x12". 14. 15. 16. 17. 18. On the Page Setup pane, select the D Enlarged/Reduced Printing check box. Select the H Borderless Printing check box. Click E Fit Media Size under D Enlarged/Reduced Printing. In I Media Size, click the paper size. In this case, click 10"x12" - Borderless. Conrm the print settings, and then click M Print to start printing. Note • For tips on conrming print settings, see “Conrming Print Settings (Mac OS X)”. (→P.382) 238 Enhanced Printing Options Downloaded from ManualsPrinter.com Manuals Borderless Printing Borderless Printing by Resizing Originals to Fit the Roll Width Take advantage of borderless printing to print documents such as posters (made up mainly of photos or images) without a surrounding margin, or border. Borderless Printing In regular printing, a margin required by the printer is added around the original. With borderless printing, you can print documents without the margin, so that the printed image covers the entire surface of the paper. Important • Borderless printing is only available with rolls. • Paper you can use for borderless printing is restricted to particular types of paper and rolls of particular widths. For information on types of paper compatible with borderless printing, refer to the Paper Reference Guide. (→P.96) • Paper incompatible with the printer’s auto cut function can be printed without borders on the left and right sides only. • These features cannot be used in combination with borderless printing: special page layouts, centering originals, and printing cut lines on rolls. • You cannot have pages rotated 90 degrees to conserve paper if you have set up borderless printing at actual size or in combination with resizing originals to match the paper size. • When borderless printing is used, the edge of the paper is cut during printing. Thus, ink density may be uneven at the edges. If you require higher image quality, specify No in Auto Cut in the printer driver. In this case, the paper can be printed without borders on the left and right sides only. After ejecting and cutting the printed document, use scissors to cut away the top and bottom edges. • By factory default, the ink drying time is disabled for all paper. When you are using paper that takes longer for ink to adhere for borderless printing and the Cutter Unit touches printing surfaces that are not dry yet, it may damage the paper or the edge of the document that is cut, depending on frequency of use. In this case, follow these steps to change the ink drying time. 1. On the Main sheet of the printer driver, click Settings in Media Type. 2. Select the ink drying time in the Between Pages list of Drying Time. Borderless Printing Method Choose the method of borderless printing that suits the original, as desired. Enhanced Printing Options 239 Downloaded from ManualsPrinter.com Manuals Borderless Printing Scale to t Roll Paper Width Enlarge or reduce the original as a whole to match the roll paper width. Note • You can combine this function with rotating pages 90 degrees before printing so that the original width (relative to portrait orientation) matches the roll paper width in borderless printing. For instructions on borderless printing of photos, images, and other documents to match the roll paper width, refer to the following topics, as appropriate for your computer and operating system. • Borderless Printing by Resizing Originals to Fit the Roll Width (Windows) (→P.241) • Borderless Printing by Resizing Originals to Fit the Roll Width (Mac OS X) (→P.243) 240 Enhanced Printing Options Downloaded from ManualsPrinter.com Manuals Borderless Printing Borderless Printing by Resizing Originals to Fit the Roll Width (Windows) This topic describes how to enlarge originals before borderless printing to match the roll width, based on the following example. • • • • • 1. Document: Any type Page size: A4 (210.0×297.0 mm)/Letter (8.3 × 11.7 in) Paper: Roll Paper type: Heavyweight Coated Paper Roll paper width: 10 inches (254.0 mm) In the application, create an original that takes up the entire space of the paper size. Note • If you can specify the margin, as in Microsoft Word, set the margin at 0 mm. For instructions on specifying the margin, refer to the software documentation. 2. 3. 4. Choose Print in the application menu. 5. In the A Media Type list, select the type of paper that is loaded. In this case, click Heavyweight Select the printer in the dialog box, and then display the printer driver dialog box. (→P.343) Make sure the Main sheet is displayed. Coated Paper. 6. Select the print target in the E Print Target list. Enhanced Printing Options 241 Downloaded from ManualsPrinter.com Manuals Borderless Printing 7. Click the Page Setup tab to display the Page Setup sheet. 8. In the A Page Size list, click the size of the original as specied in the application. In this case, click ISO A4 or Letter (8.5"x11"). 9. 10. Click Roll Paper in the L Paper Source list. 11. Select the width of the loaded roll in the Roll Paper Width list-in this case, click 10-in. Roll Select the B Borderless Printing check box to display the Information dialog box. (254.0mm). 12. 13. 14. Click OK to close the Information dialog box. In C Borderless Printing Method, make sure E Scale to t Roll Paper Width is selected. Conrm the print settings and print as desired. Note • For tips on conrming print settings, see “Conrming Print Settings (Windows)”. (→P.337) 242 Enhanced Printing Options Downloaded from ManualsPrinter.com Manuals Borderless Printing Borderless Printing by Resizing Originals to Fit the Roll Width (Mac OS X) This topic describes how to enlarge originals before printing to match the roll width, based on the following example. • • • • • Document: Any type Page size: A4 (210.0×297.0 mm)/Letter (8.3 × 11.7 in) Paper: Roll Paper type: Heavyweight Coated Paper Roll paper width: 10 inches (254.0 mm) 1. Choose Page Setup from the application menu to display the Page Attributes dialog box. 2. 3. Select the printer in the B Format for list. In C Paper Size, click the size of the original. In this case, click ISO A4. Note • All sizes are available in borderless printing if you resize originals to t the roll width. 4. 5. 6. 7. Click F OK to close the dialog box. 8. In the A Media Type list, select the type of paper that is loaded. In this case, click Heavyweight In the application, create an original that takes up the entire space of the paper size. Choose Print in the application menu. Access the Main pane. Coated Paper. 9. Select the print target in the E Print Target list. Enhanced Printing Options 243 Downloaded from ManualsPrinter.com Manuals Borderless Printing 10. Access the Page Setup pane. 11. 12. Click Roll Paper in the A Media Source list. Make sure the width of the loaded roll is displayed in the B Roll Paper Width list-here, 10 in. (254.0mm). Note • If the width of the loaded roll is not displayed in B Roll Paper Width, click L Printer Information on the Main pane and update the printer information. 244 Enhanced Printing Options Downloaded from ManualsPrinter.com Manuals Borderless Printing 13. Make sure the C Page Size setting matches the original size as selected in C Paper Size in the Page Attributes dialog box-in this case, ISO A4. 14. 15. Select the D Enlarged/Reduced Printing check box. Select the H Borderless Printing check box. This ensures that F Fit Roll Paper Width is automatically selected in D Enlarged/Reduced Printing. 16. Conrm the print settings, and then click M Print to start printing. Note • For tips on conrming print settings, see “Conrming Print Settings (Mac OS X)”. (→P.382) Enhanced Printing Options 245 Downloaded from ManualsPrinter.com Manuals Borderless Printing Borderless Printing at Actual Size Take advantage of borderless printing to print documents such as posters (made up mainly of photos or images) without a surrounding margin, or border. Borderless Printing In regular printing, a margin required by the printer is added around the original. With borderless printing, you can print documents without the margin, so that the printed image covers the entire surface of the paper. Important • Borderless printing is only available with rolls. • Paper you can use for borderless printing is restricted to particular types of paper and rolls of particular widths. For information on types of paper compatible with borderless printing, refer to the Paper Reference Guide. (→P.96) • Paper incompatible with the printer’s auto cut function can be printed without borders on the left and right sides only. • These features cannot be used in combination with borderless printing: special page layouts, centering originals, and printing cut lines on rolls. • You cannot have pages rotated 90 degrees to conserve paper if you have set up borderless printing at actual size or in combination with resizing originals to match the paper size. • When borderless printing is used, the edge of the paper is cut during printing. Thus, ink density may be uneven at the edges. If you require higher image quality, specify No in Auto Cut in the printer driver. In this case, the paper can be printed without borders on the left and right sides only. After ejecting and cutting the printed document, use scissors to cut away the top and bottom edges. • By factory default, the ink drying time is disabled for all paper. When you are using paper that takes longer for ink to adhere for borderless printing and the Cutter Unit touches printing surfaces that are not dry yet, it may damage the paper or the edge of the document that is cut, depending on frequency of use. In this case, follow these steps to change the ink drying time. 1. On the Main sheet of the printer driver, click Settings in Media Type. 2. Select the ink drying time in the Between Pages list of Drying Time. Borderless Printing Method Choose the method of borderless printing that suits the original, as desired. 246 Enhanced Printing Options Downloaded from ManualsPrinter.com Manuals Borderless Printing Print Image with Actual Size Prints originals at actual size, without enlarging or reducing them. Originals must be prepared in a size that exceeds the dimensions of the paper by 3 mm (0.12 in) on each side. Note • Not all page sizes are available. • Even if you prepare originals of the same size as the paper size, the originals are automatically enlarged when you print borderlessly in combination with resizing originals to match the paper size. This may affect image quality. When image quality is most important, make the original 3 mm longer on each side than the paper size so that the image can be printed at actual size in borderless printing. For instructions on borderless printing of photos and images at actual size, refer to the following topics, as appropriate for your computer and operating system. • Borderless Printing at Actual Size (Windows) (→P.248) • Borderless Printing at Actual Size (Mac OS X) (→P.250) Enhanced Printing Options 247 Downloaded from ManualsPrinter.com Manuals Borderless Printing Borderless Printing at Actual Size (Windows) This topic describes how to print borderlessly at actual size based on the following example. • • • • • 1. Document: Any type Page size: 10×12 inches (254.0×304.8 mm) Paper: Roll Paper type: Heavyweight Coated Paper Roll paper width: 10 inches (254.0 mm) Create the original in the source application 3 mm (0.12 in) larger on each side than 254.0×304.8 mm (10 × 12 in) -that is, 260.0×310.8 mm (10.2 × 12.2 in) Note • If you can specify the margin, as in Microsoft Word, set the margin at 0 mm. For instructions on specifying the margin, refer to the software documentation. • The extra 3 mm (0.12 in) on each side will not be printed. Create the original so that it ts inside the paper area to be printed on. 2. 3. 4. Choose Print in the application menu. 5. In the A Media Type list, select the type of paper that is loaded. In this case, click Heavyweight Select the printer in the dialog box, and then display the printer driver dialog box. (→P.343) Make sure the Main sheet is displayed. Coated Paper. 6. Select the print target in the E Print Target list. 248 Enhanced Printing Options Downloaded from ManualsPrinter.com Manuals Borderless Printing 7. Click the Page Setup tab to display the Page Setup sheet. 8. In the A Page Size list, click the size of the original as specied in the source application. In this case, click 10"x12". 9. 10. Click Roll Paper in the L Paper Source list. 11. Select the width of the loaded roll in the Roll Paper Width list-in this case, click 10-in. Roll Select the B Borderless Printing check box to display the Information dialog box. (254.0mm). 12. 13. 14. Click OK to close the Information dialog box. In C Borderless Printing Method, click F Print Image with Actual Size. Conrm the print settings and print as desired. Note • For tips on conrming print settings, see “Conrming Print Settings (Windows)”. (→P.337) Enhanced Printing Options 249 Downloaded from ManualsPrinter.com Manuals Borderless Printing Borderless Printing at Actual Size (Mac OS X) This topic describes how to print borderlessly at actual size based on the following example. • • • • • Document: Any type Page size: 10 × 12 inches (254.0×304.8 mm)-Borderless Paper: Roll Paper type: Heavyweight Coated Paper Roll paper width: 10 inches (254.0 mm) 1. Choose Page Setup from the application menu to display the Page Attributes dialog box. 2. 3. Select the printer in the B Format for list. In the C Paper Size list, choose a paper size supported for borderless printing. Here, click 10"x12" - Borderless. Note • Paper sizes supported for borderless printing are indicated by “-Borderless.” 4. 5. 6. 7. Click F OK to close the dialog box. 8. In the A Media Type list, select the type of paper that is loaded. In this case, click Heavyweight In the application, create an original that takes up the entire space of the paper size. Choose Print in the application menu. Access the Main pane. Coated Paper. 9. Select the print target in the E Print Target list. 250 Enhanced Printing Options Downloaded from ManualsPrinter.com Manuals Borderless Printing 10. Access the Page Setup pane. 11. 12. Click Roll Paper in the A Media Source list. Conrm that the roll paper width matches the paper size. Make sure the width of the loaded roll is displayed in the B Roll Paper Width list-in this case, 10 in. (254.0mm). Note • If the width of the loaded roll is not displayed in B Roll Paper Width, click L Printer Information on the Main pane and update the printer information. Enhanced Printing Options 251 Downloaded from ManualsPrinter.com Manuals Borderless Printing 13. Make sure the C Page Size setting matches the original size as selected in C Paper Size in the Page Attributes dialog box-in this case, 10"x12" - Borderless. 14. Conrm the print settings, and then click M Print to start printing. Note • For tips on conrming print settings, see “Conrming Print Settings (Mac OS X)”. (→P.382) 252 Enhanced Printing Options Downloaded from ManualsPrinter.com Manuals Printing banners or at other non-standard sizes Printing banners or at other non-standard sizes Printing Vertical or Horizontal Banners (Large-Format Printing) You can create vertical or horizontal banners by printing originals that are in banner format on rolls. Originals created in Microsoft Word or other applications in your preferred size can be enlarged to ll the width of roll paper by completing simple printer driver settings. Fit Roll Paper Width You can easily create vertical or horizontal banners by automatically enlarging or reducing originals to t the full width of rolls. Note • The maximum supported roll length is 18.0 m or 19.7 yd (when printing in Mac OS X). For instructions on printing vertical or horizontal banners, refer to the following topics, as appropriate for your computer and operating system. • Printing Vertical or Horizontal Banners (Large-Format Printing; Windows) (→P.254) • Printing Vertical or Horizontal Banners (Large-Format Printing; Mac OS X) (→P.258) Important • Before printing, check how much of the roll paper is left. If you have activated automatic detection of the remaining roll paper, a warning message is displayed when there is not enough roll paper left. • If not much ink is left, prepare replacement ink tanks. • To print at a higher level of quality, in the printer driver, choose High or Highest in Print Quality, and choose Unidirectional Printing as the direction of printing. Enhanced Printing Options 253 Downloaded from ManualsPrinter.com Manuals Printing banners or at other non-standard sizes Printing Vertical or Horizontal Banners (Large-Format Printing; Windows) This topic describes how to print a banner about ve times as long as the roll width based on the following example. • • • • • Document: A horizontal banner created in Microsoft Word Page size: Non-standard (100×500 mm [3.9×19.7 in]) Paper: Roll Paper type: Plain Paper Roll paper width: 16 in (406.4 mm) Follow the steps below to print a banner in either horizontal or vertical format. 1. Register a Custom Paper Size. Banners tend to be in non-standard sizes, so register a Custom Paper Size. In this example, 100×500 mm (3.9×19.7 in) is registered. 2. In the application, create an original in the size you registered. 3. Print the banner, using the settings that correspond to banners. Registering a Custom Paper Size This example describes how to register a paper size that is horizontally elongated and suitable for banners in either horizontal or vertical format. 1. 2. Display the printer driver dialog box. (→P.345) 3. 4. 5. Click Roll Paper in the L Paper Source list. Click the Page Setup tab to display the Page Setup sheet. Click O Size Options to display the Paper Size Options dialog box. Enter a desired paper name in Custom Paper Size Name. “My Horizontal Banner” is used in this example. 6. 7. 8. 9. In Units, click mm. Under Paper Size, enter “100” in Width and “500” in Height. Click Add to add the paper size of “My Horizontal Banner.” Click OK to close the Paper Size Options dialog box. 254 Enhanced Printing Options Downloaded from ManualsPrinter.com Manuals Printing banners or at other non-standard sizes 10. Close the printer driver dialog box. Note • You can also specify a Custom Size as the paper size. Note that Custom Size settings are not available after you exit the application. For more information, see “Printing on Non-Standard Paper Sizes (Windows)”. (→P.262) Creating the banner in the application Follow the steps below to create the banner in Microsoft Word using the Custom Paper Size you registered. 1. 2. 3. Start Microsoft Word. Choose Page Setup from the File menu to display the Page Setup dialog box. Under Paper Size, click the Custom Paper Size you registered-"My Horizontal Banner" in this example. Important • If "My Horizontal Banner" is not listed, make sure this printer is selected as the printer to use. • In applications such as Microsoft PowerPoint that do not enable you to choose registered paper sizes, use the custom paper size setting in “Custom” and specify 100×500 mm (3.9×19.7 in) 4. 5. Set the printing orientation to horizontal. Create the banner. Printing the banner Follow the steps below to print the banner using the corresponding banner settings. 1. 2. 3. Choose Print in the Microsoft Word menu. 4. 5. In the A Media Type list, select the type of paper that is loaded. In this case, click Plain Paper. Select the printer in the dialog box, and then open the printer driver dialog box. (→P.343) Make sure the Main sheet is displayed. After conrming that D Easy Settings is selected, click Poster (Text, Illustrations) in the E Print Target list. Enhanced Printing Options 255 Downloaded from ManualsPrinter.com Manuals Printing banners or at other non-standard sizes 6. Click the Page Setup tab to display the Page Setup sheet. 7. 8. In the A Page Size list, click the size you registered, "My Horizontal Banner." Select the C Enlarged/Reduced Printing check box. Note • If the Enlarged/Reduced Printing check box is not displayed on the Page Setup sheet, clear the B Borderless Printing check box. 9. 10. 11. Click Roll Paper in the L Paper Source list. After you click E Fit Roll Paper Width, the Information dialog box is displayed. Select the width of the loaded roll in the Roll Paper Width list. In this case, click 16-in. Roll (406.4mm), and then click OK. 256 Enhanced Printing Options Downloaded from ManualsPrinter.com Manuals Printing banners or at other non-standard sizes 12. Conrm the print settings and print as desired. Note • For instructions on conrming print settings, see “Conrming Print Settings (Windows)”. (→P.337) Note • If printing is unsuccessful, you may be able to print after completing the following setting. 1. On the Layout sheet, click M Special Settings to display the Special Settings dialog box. 2. In the FineZoom Settings list, click Yes. Enhanced Printing Options 257 Downloaded from ManualsPrinter.com Manuals Printing banners or at other non-standard sizes Printing Vertical or Horizontal Banners (Large-Format Printing; Mac OS X) This topic describes how to print a banner about ve times as long as the roll width based on the following example. • • • • • Document: An original designed for a horizontal banner Page Size: Non-standard (100×500 mm [3.9×19.7 in]) Paper: Roll Paper type: Plain Paper Roll paper width: 16 inches (406.4 mm) Follow the steps below to print a banner in either horizontal or vertical format. 1. In the application, create an original in the format of a horizontal or vertical banner. 2. Register a “Custom Page Size.” Banners tend to be in non-standard sizes, so register a “Custom Page Size” in Page Setup. In this example, 100×500 mm (3.9×19.7 in) is registered. 3. Print the banner, using the settings that correspond to banners. Note • The following procedures are based on Mac OS X 10.4. The method of setting up non-standard paper sizes varies depending on the version of Mac OS X. Register a Custom Page Size This example describes how to register and print using a page size that is horizontally elongated and suitable for banners in either horizontal or vertical format. 1. 2. Create the document in the application. 3. 4. Select the printer in the B Format for list. Choose Page Setup from the application menu to display the Page Attributes dialog box. Click Manage Custom Sizes in the C Paper Size list to display the Custom Page Sizes dialog box. 5. Double-click Untitled in the list at left, and then enter a name for the page size you want to register. Here, enter “100*500.” If the Untitled size is not listed at left, click + below the list. 6. Under Page Size, enter “10” in Width and “50” in Height. Here, measurements are entered in centimeters. 7. Specify the margins by entering “0.3” in Printer Margins. Here, too, measurements are entered in centimeters. 8. Click OK to close the Custom Page Sizes dialog box. 258 Enhanced Printing Options Downloaded from ManualsPrinter.com Manuals Printing banners or at other non-standard sizes 9. In the C Paper Size list, click the size of the original. In this case, click "100*500", the size you registered. 10. 11. In D Orientation, click the icon of the document in landscape orientation. Click F OK to close the dialog box. Print the banner Follow the steps below to print the banner using the corresponding banner settings. 1. 2. Choose Print in the application menu. 3. 4. 5. In the A Media Type list, select the type of paper that is loaded. In this case, click Plain Paper. 6. Click Roll Paper in the A Media Source list. Access the Main pane. After conrming that D Easy Settings is selected, click POP in the E Print Target list. Access the Page Setup pane. Enhanced Printing Options 259 Downloaded from ManualsPrinter.com Manuals Printing banners or at other non-standard sizes 7. Make sure the width of the loaded roll is displayed in the B Roll Paper Width list-in this case, 16 in. (406.4mm). Note • If the width of the loaded roll is not displayed in B Roll Paper Width, click L Printer Information on the Main pane and update the printer information. 8. 9. 10. 11. In C Page Size, make sure "100*500" is displayed, as registered in Page Setup. Select the D Enlarged/Reduced Printing check box. Click F Fit Roll Paper Width. Conrm the print settings, and click M Print to start printing. Note • For tips on conrming print settings, see “Conrming Print Settings (Mac OS X)”. (→P.382) 260 Enhanced Printing Options Downloaded from ManualsPrinter.com Manuals Printing banners or at other non-standard sizes Printing on Non-Standard Paper Sizes By specifying the paper size, you can print on non-standard sizes of paper. There are two ways to print on non-standard paper sizes, as follows. Registering non-standard paper size in the printer driver After you register non-standard paper sizes, they are listed with standard sizes so that you can choose them anytime as needed. Note • These non-standard paper sizes you register in the printer driver are called Custom Paper Sizes in Windows and “Custom Sizes” in Mac OS X. Specifying custom paper sizes for temporary use Because these are sizes you specify temporarily in the printer driver, the sizes will not be available after you exit the application. If you want to set up a non-standard paper size so that it will always be available, we recommend registering the paper size in the printer driver. Note • These temporary paper sizes you register on the printer are called “Custom Sizes” in Windows. For instructions on specifying non-standard paper sizes for printing, refer to the following topics, as appropriate for your computer and operating system. • Printing on Non-Standard Paper Sizes (Windows) (→P.262) • Printing on Non-Standard Paper Sizes (Mac OS X) (→P.266) Enhanced Printing Options 261 Downloaded from ManualsPrinter.com Manuals Printing banners or at other non-standard sizes Printing on Non-Standard Paper Sizes (Windows) This topic describes two ways to print on non-standard paper sizes. • Printing by using Custom Size (→P.262) • Printing by using Custom Paper Size (→P.264) Printing by using Custom Size This section describes how to print using Custom Size based on the following example. • • • • • Document: Scanned image Page size: Square of non-standard dimensions (430 × 430 mm [16.9 × 16.9 in]) Paper: Sheets Paper type: Plain Paper Paper size: A square sheet (430 × 430 mm [16.9 × 16.9 in]) 1. 2. 3. 4. Load the square paper (430 × 430 mm [16.9 × 16.9 in]) in the printer. 5. 6. In the A Media Type list, select the type of paper that is loaded. In this case, click Plain Paper. Choose Print in the application menu. Select the printer in the dialog box, and then open the printer driver dialog box. (→P.343) Make sure the Main sheet is displayed. After conrming that D Easy Settings is selected, click Scanned Image in the E Print Target list. 262 Enhanced Printing Options Downloaded from ManualsPrinter.com Manuals Printing banners or at other non-standard sizes 7. 8. 9. 10. Click the Page Setup tab to display the Page Setup sheet. Click Cut Sheet in the L Paper Source list. Click Custom Size in the A Page Size list to display the Custom Size Settings dialog box. Complete the following settings in the Custom Size Settings dialog box. 1. Select mm or inch in Units. 2. Enter “430” (16.9 in) in both Width and Height. 11. 12. Click OK to close the Custom Size Settings dialog box. Conrm the print settings and print as desired. Note • For tips on conrming print settings, see “Conrming Print Settings (Windows)”. (→P.337) Enhanced Printing Options 263 Downloaded from ManualsPrinter.com Manuals Printing banners or at other non-standard sizes Printing by using Custom Paper Size This section describes how to print using Custom Paper Size based on the following example. First, register a non-standard paper size called “430 mm Square” as a Custom Paper Size. • • • • • Document: Scanned image Page size: A square sheet (430 × 430 mm [16.9 × 16.9 in]) Paper: Sheets Paper type: Plain Paper Paper size: A square sheet (430 × 430 mm [16.9 × 16.9 in]) 1. 2. 3. 4. Load the square paper (430 × 430 mm [16.9 × 16.9 in]) in the printer. 5. 6. In the A Media Type list, select the type of paper that is loaded. In this case, click Plain Paper. Choose Print in the application menu. Select the printer in the dialog box, and then open the printer driver dialog box. (→P.343) Make sure the Main sheet is displayed. After conrming that D Easy Settings is selected, click Scanned Image in the E Print Target list. 264 Enhanced Printing Options Downloaded from ManualsPrinter.com Manuals Printing banners or at other non-standard sizes 7. Click the Page Setup tab to display the Page Setup sheet. 8. 9. Click O Size Options to display the Paper Size Options dialog box. Complete the following settings in the Paper Size Options dialog box. 1. Enter a desired paper name in Custom Paper Size Name. “430 mm Square” is used in this example. 2. Select mm or inch in Units. 3. Enter “430” (16.9 in) in both Width and Height. Note • If you select the Fix the Ratio of the Width to Height check box, after you enter a value in either Width or Height, the other value will be automatically applied based on the original aspect ratio. 10. 11. 12. 13. 14. Click Add to register “430 mm Square.” Click OK to close the Paper Size Options dialog box. Click Cut Sheet in the L Paper Source list. In the A Page Size list, click the size you added, "430 mm Square." Conrm the print settings and print as desired. Note • For tips on conrming print settings, see “Conrming Print Settings (Windows)”. (→P.337) Enhanced Printing Options 265 Downloaded from ManualsPrinter.com Manuals Printing banners or at other non-standard sizes Printing on Non-Standard Paper Sizes (Mac OS X) This topic describes how to print after registering “Custom Media Size” based on the following example. Here, you will register a non-standard paper size named “430*430” in “Custom Media Size”. • • • • • Document: Scanned image Page size: A square sheet (430 × 430 mm [16.9 × 16.9 in]) Paper: Sheets Paper type: Plain Paper Paper size: A square sheet (430 × 430 mm [16.9 × 16.9 in]) Note • The following procedures are based on Mac OS X 10.4. The method of setting up non-standard paper sizes varies depending on the version of Mac OS X. 1. 2. 3. Create the document in the application. 4. 5. Select the printer in the B Format for list. Load the square paper (430 × 430 mm [16.9 × 16.9 in]) in the printer. Choose Page Setup in the application menu to display the Page Attributes dialog box. Click Manage Custom Sizes in the C Paper Size list to display the Custom Page Sizes dialog box. 6. In Page Size, enter the height and width of the original. Here, enter “43.00 cm” in Height and Width. 7. In Printer Margins, enter “0.3” for the top and side margins and “2.3” for the bottom margin. Here, measurements are entered in centimeters. 8. Double-click Untitled in the list at left in the Custom Page Sizes dialog box and enter the paper name-in this case, “430*430”. 9. 10. Click OK to close the Custom Page Sizes dialog box. In the C Paper Size list, click the size of the original. In this case, click “430*430”, the size you registered. 11. 12. Click F OK to close the dialog box. Choose Print in the application menu. 266 Enhanced Printing Options Downloaded from ManualsPrinter.com Manuals Printing banners or at other non-standard sizes 13. Access the Main pane. 14. 15. In the A Media Type list, select the type of paper that is loaded. In this case, click Plain Paper. After conrming that D Easy Settings is selected, click Scanned Image in the E Print Target list. 16. Access the Page Setup pane. 17. 18. 19. Click Cut Sheet in the A Media Source list. In D Easy Settings, make sure “430*430” is displayed, as registered in Page Setup. Conrm the print settings, and then click M Print to start printing. Note • For tips on conrming print settings, see “Conrming Print Settings (Mac OS X)”. (→P.382) Enhanced Printing Options 267 Downloaded from ManualsPrinter.com Manuals Tiling and multiple pages per sheet Tiling and multiple pages per sheet Printing Multiple Originals Next to Each Other By arranging originals from word-processing or spreadsheet programs or web browser screen shots next to each other on single sheets, you can create highly expressive presentation materials, easy-to-understand meeting materials, and a variety of other printed documents. Free Layout (Windows) Besides combining multiple pages in a single-page layout, you can combine originals from multiple les-even multiple source applications-in a single-page layout. 268 Enhanced Printing Options Downloaded from ManualsPrinter.com Manuals Tiling and multiple pages per sheet imagePROGRAF Free Layout (Macintosh) Besides combining multiple pages in a single-page layout, you can combine originals from multiple les-even multiple source applications-in a single-page layout. Important • The driver must be installed from the User Software CD-ROM to use this function. For instructions on arranging originals from multiple applications, refer to the following topics. • Printing Multiple Originals Next to Each Other (Windows) (→P.270) • Printing Multiple Originals Next to Each Other (Mac OS X) (→P.272) Enhanced Printing Options 269 Downloaded from ManualsPrinter.com Manuals Tiling and multiple pages per sheet Printing Multiple Originals Next to Each Other (Windows) This topic describes how to arrange multiple originals using the Free Layout function. 1. 2. 3. Choose Print in the application menu. 4. Click the Layout tab to display the Layout sheet. 5. 6. Select the A Page Layout check box. Select the printer in the dialog box, and then open the printer driver dialog box. (→P.343) Make sure the Main sheet is displayed. Click Free Layout in the B Page Layout list. 270 Enhanced Printing Options Downloaded from ManualsPrinter.com Manuals Tiling and multiple pages per sheet 7. When you attempt to print, the imagePROGRAF Free Layout window is displayed. (At this point, the document will not be printed yet.) 8. Edit and rearrange the image in the imagePROGRAF Free Layout window as desired. Important • Without closing the imagePROGRAF Free Layout window, repeat steps 1-7 to arrange originals from multiple applications on the same page. Note • For instructions on editing and rearranging images, refer to the imagePROGRAF Free Layout help topic. 9. Print from the imagePROGRAF Free Layout menu. Note • For details on imagePROGRAF Free Layout functions, refer to Free Layout . Enhanced Printing Options 271 Downloaded from ManualsPrinter.com Manuals Tiling and multiple pages per sheet Printing Multiple Originals Next to Each Other (Mac OS X) This topic describes how to use the Free Layout function to arrange multiple originals next to each other before printing. 1. 2. Choose Print in the application menu. 3. The Canon imagePROGRAF Free Layout window is displayed. 4. Edit and rearrange the image in the Canon imagePROGRAF Free Layout window as desired. Click PDF and select Canon imagePROGRAF Free Layout. Important • Without closing the Canon imagePROGRAF Free Layout window, repeat steps 1-7 to arrange originals from multiple applications on the same page. Note • For instructions on editing and rearranging images, refer to the Canon imagePROGRAF Free Layout help topic. 272 Enhanced Printing Options Downloaded from ManualsPrinter.com Manuals Tiling and multiple pages per sheet 5. Print from the Canon imagePROGRAF Free Layout menu. Note • For details on Canon imagePROGRAF Free Layout functions, refer to Free Layout . Enhanced Printing Options 273 Downloaded from ManualsPrinter.com Manuals Tiling and multiple pages per sheet Printing Multiple Pages Continuously You can print multiple pages as a single continuous image, without margins between pages. Roll paper (banner) Important • This feature is only available with rolls. It cannot be used when printing on sheets. • During banner printing, settings for conserving paper, number of copies, borderless printing, enlargement or reduction, and other layout-related settings are disregarded. For instructions on borderless printing of photos and images at actual size, refer to the following topics, as appropriate for your computer and operating system. • Printing Multiple Pages Continuously (Windows) (→P.275) • Printing Multiple Pages Continuously (Mac OS X) (→P.277) 274 Enhanced Printing Options Downloaded from ManualsPrinter.com Manuals Tiling and multiple pages per sheet Printing Multiple Pages Continuously (Windows) This topic describes how to print multiple pages as a single continuous image, without margins between pages. Important • This feature is only available with rolls. It cannot be used when printing on sheets. • During banner printing, settings for conserving paper, number of copies, borderless printing, enlargement or reduction, and other layout-related settings are disregarded. 1. 2. 3. Choose Print in the application menu. 4. 5. In the A Media Type list, click the type of paper that is loaded. 6. Click Roll Paper in the L Paper Source list. Select the printer in the dialog box, and then display the printer driver dialog box. (→P.343) Make sure the Main sheet is displayed. Click the Page Setup tab to display the Page Setup sheet. Enhanced Printing Options 275 Downloaded from ManualsPrinter.com Manuals Tiling and multiple pages per sheet 7. 8. 9. 10. Click N Roll Paper Options to display the Roll Paper Options dialog box. Select the B Banner Printing check box. Click OK. Conrm the print settings and print as desired. Note • For tips on conrming print settings, see “Conrming Print Settings (Windows)”. (→P.337) 276 Enhanced Printing Options Downloaded from ManualsPrinter.com Manuals Tiling and multiple pages per sheet Printing Multiple Pages Continuously (Mac OS X) This topic describes how to print multiple pages as a single continuous image, without margins between pages. Important • This feature is only available with rolls. It cannot be used when printing on sheets. • During banner printing, settings for conserving paper, number of copies, borderless printing, enlargement or reduction, and other layout-related settings are disregarded. 1. Choose Page Setup in the application menu to display the Page Attributes dialog box. 2. 3. 4. 5. 6. Select the printer in the B Format for list. 7. 8. In the A Media Type list, click the type of paper that is loaded. Click the original size in the C Paper Size list. Click F OK to close the dialog box. In the source application menu, choose Print. Access the Main pane. Make your selection in the E Print Target list. Enhanced Printing Options 277 Downloaded from ManualsPrinter.com Manuals Tiling and multiple pages per sheet 9. 10. 11. Access the Page Setup pane. Click Roll Paper (Banner) in the A Media Source list. Conrm the print settings, and then click M Print to start printing. Note • For tips on conrming print settings, see “Conrming Print Settings (Mac OS X)”. (→P.382) 278 Enhanced Printing Options Downloaded from ManualsPrinter.com Manuals Tiling and multiple pages per sheet Printing Multiple Pages Per Sheet To conserve paper, you can print several pages of the original on a single sheet by reducing the original and dividing the sheet into areas for each page. Page Layout Specify a number of pages of the original to print on a single sheet, in a layout of multiple pages per sheet. Note • You can print up to 16 pages of the original on a single sheet. • You can also change the page layout order and print page boundary lines, as desired. Important • This function cannot be combined with the following options. • Borderless Printing • Resizing to Fit the Roll Width (Windows) • Scaling Originals (Windows) • Banner Printing (Windows) For instructions on printing multiple pages per sheet, refer to the following topics, as appropriate for your computer and operating system. • Printing Multiple Pages Per Sheet (Windows) (→P.280) • Printing Multiple Pages Per Sheet (Mac OS X) (→P.282) Enhanced Printing Options 279 Downloaded from ManualsPrinter.com Manuals Tiling and multiple pages per sheet Printing Multiple Pages Per Sheet (Windows) This topic describes how to print four pages of originals together on a single sheet based on the following example. • • • • • Document: Any Type Page size: A3 (297.0×420.0 mm [11.7×16.5 in]) Paper: Roll Paper type: Plain Paper Roll paper width: A2/A3 roll (420.0 mm [16.5 in]) 1. 2. 3. Choose Print in the application menu. 4. 5. 6. In the A Media Type list, select the type of paper that is loaded. In this case, click Plain Paper. 7. In A Page Size, click the size of the original as specied in the application software. In this case, Select the printer in the dialog box, and then open the printer driver dialog box. (→P.343) Make sure the Main sheet is displayed. Select the printing application in the E Print Target list. Click the Page Setup tab to display the Page Setup sheet. click ISO A4 or Letter (8.5"x11"). 8. Click Roll Paper in the L Paper Source list. 280 Enhanced Printing Options Downloaded from ManualsPrinter.com Manuals Tiling and multiple pages per sheet 9. Select the width of the loaded roll in the M Roll Paper Width list-in this case, ISO A2/A3 Roll (420.0mm). 10. Click the Layout tab to display the Layout sheet. 11. 12. Select the A Page Layout check box. Click 4 Pages/Sheet in the B Page Layout list. Note • You can select the layout order for placing four pages on a sheet and a frame border in the Page Layout Printing dialog box by clicking C Set. 13. Conrm the print settings and print as desired. Note • For tips on conrming print settings, see “Conrming Print Settings (Windows)”. (→P.337) Enhanced Printing Options 281 Downloaded from ManualsPrinter.com Manuals Tiling and multiple pages per sheet Printing Multiple Pages Per Sheet (Mac OS X) This topic describes how to print four pages of originals together on a single sheet based on the following example. • • • • • Document: Any Type Page size: A3 (297.0 × 420.0 mm [11.7 × 16.5 in]) Paper: Roll Paper type: Plain Paper Roll paper width: A2/A3 roll (420.0 mm [16.5 in]) 1. Choose Page Setup in the application menu to display the Page Attributes dialog box. 2. 3. 4. 5. 6. Select the printer in the B Format for list. 7. Click 4.0 in the A Pages per Sheet list. In the C Paper Size list, click the size of the original. In this case, click ISO A3. Click F OK to close the dialog box. Choose Print in the application menu. Access the Layout pane. Note • You can choose the layout order and specify a boundary line for the four pages in B Layout Direction and C Border (or Border ). 282 Enhanced Printing Options Downloaded from ManualsPrinter.com Manuals Tiling and multiple pages per sheet 8. Access the Main pane. 9. 10. 11. In the A Media Type list, select the type of paper that is loaded. In this case, click Plain Paper. 12. Click Roll Paper in the A Media Source list. Select the printing application in the E Print Target list. Access the Page Setup pane. Enhanced Printing Options 283 Downloaded from ManualsPrinter.com Manuals Tiling and multiple pages per sheet 13. Make sure the width of the loaded roll is displayed in the B Roll Paper Width list-in this case, ISO A2/A3 (420.0mm). Note • If the width of the loaded roll is not displayed in B Roll Paper Width, click L Printer Information on the Main pane and update the printer information. 14. Make sure C Page Size shows the original size as specied in C Paper Size in the Page Attributes dialog box-in this case, ISO A3. 15. Conrm the print settings, and then click M Print to start printing. Note • For tips on conrming print settings, see “Conrming Print Settings (Mac OS X)”. (→P.382) 284 Enhanced Printing Options Downloaded from ManualsPrinter.com Manuals Tiling and multiple pages per sheet Printing Posters in Sections You can enlarge an original to print it in sections on several sheets. By assembling the printed sheets, you can create a poster larger than the maximum supported paper size of the printer. Page Layout Choose poster printing. For instructions on printing large posters, refer to the following topics, as appropriate for your computer and operating system. • Printing Large Posters (Windows) (→P.286) Note • This method of poster printing is supported in Windows. Enhanced Printing Options 285 Downloaded from ManualsPrinter.com Manuals Tiling and multiple pages per sheet Printing Large Posters (Windows) You can enlarge an original to print it in sections on several sheets. By assembling the printed sheets, you can create a poster larger than the maximum supported paper size of the printer. This topic describes how to enlarge an A2 original for printing it in sections on four sheets, based on the following example. • • • • • Document: Poster Page size: A2 (420.0×594.0 mm [16.5 × 23.4 in]) Paper: Sheets ( Cut Sheet ) Paper Type: Glossy Paper Paper size: A2 (420.0×594.0 mm [16.5 × 23.4 in]) 1. 2. 3. Choose Print in the application menu. 4. 5. 6. In the A Media Type list, select the type of paper that is loaded. In this case, click Glossy Paper. 7. In A Page Size, click the size of the original as specied in the application. In this case, click Select the printer in the dialog box, and then display the printer driver dialog box. (→P.343) Make sure the Main sheet is displayed. Click Poster (Photos) or Poster (Text, Illustrations) in the E Print Target list. Click the Page Setup tab to display the Page Setup sheet. ISO A2. 286 Enhanced Printing Options Downloaded from ManualsPrinter.com Manuals Tiling and multiple pages per sheet 8. 9. 10. 11. Click Cut Sheet in the L Paper Source list. Click the Layout tab to display the Layout sheet. Select the A Page Layout check box. Click Poster (2 x 2) in the B Page Layout list. Note • Follow the steps below to print only a portion of the poster as divided for printing. 1. Click C Set under B Page Layout to display the Pages to Print dialog box. 2. On the Pages to Print dialog box, clear the check boxes of the portion you do not want to print. 3. Click OK to close the Pages to Print dialog box. 12. Conrm the print settings and print as desired. Note • For instructions on conrming print settings, see “Conrming Print Settings (Windows)”. (→P.337) Enhanced Printing Options 287 Downloaded from ManualsPrinter.com Manuals Centering originals Centering originals Printing Originals Centered on Rolls When using originals smaller than the roll paper width, you can center them relative to the width when printing. Print Centered Aligns the center of the original with the center of the roll, relative to the width. For instructions on centering originals when printing on rolls, refer to the following topics, as appropriate for your computer and operating system. • Printing Originals Centered on Rolls (Windows) (→P.289) • Printing Originals Centered on Rolls (Mac OS X) (→P.291) 288 Enhanced Printing Options Downloaded from ManualsPrinter.com Manuals Centering originals Printing Originals Centered on Rolls (Windows) This topic describes how to center originals before printing on rolls based on the following example. • • • • • Document: Any type Page size: A4 (210.0×297.0 mm)/Letter (8.3 × 11.7 in) Paper: Roll Paper type: Plain Paper Roll width: A3/A4 roll (297.0 mm [11.7 in]) 1. 2. 3. Choose Print in the application menu. 4. 5. 6. In the A Media Type list, select the type of paper that is loaded. In this case, click Plain Paper. 7. In the A Page Size list, click the size of the original as specied in the application. In this case, Select the printer in the dialog box, and then display the printer driver dialog box. (→P.343) Make sure the Main sheet is displayed. Select the print target in the E Print Target list. Click the Page Setup tab to display the Page Setup sheet. click ISO A4 or Letter (8.5"x11"). 8. Click Roll Paper in the L Paper Source list. Enhanced Printing Options 289 Downloaded from ManualsPrinter.com Manuals Centering originals 9. Select the width of the loaded roll in the M Roll Paper Width list-in this case, ISO A3/A4 Roll (297.0mm). 10. Click the Layout tab to display the Layout sheet. 11. 12. Select the G Print Centered check box. Conrm the print settings and print as desired. Note • For tips on conrming print settings, see “Conrming Print Settings (Windows)”. (→P.337) 290 Enhanced Printing Options Downloaded from ManualsPrinter.com Manuals Centering originals Printing Originals Centered on Rolls (Mac OS X) This topic describes how to center originals before printing on rolls based on the following example. • • • • • Document: Any type Page size: A4 (210.0×297.0mm)/Letter (8.3 × 11.7 in) Paper: Roll Paper type: Plain Paper Roll paper width: A3/A4 roll (297.00 mm [11.7 in]) 1. Choose Page Setup from the application menu to display the Page Attributes dialog box. 2. 3. 4. 5. 6. Select the print target in the B Format for list. 7. 8. In the A Media Type list, select the type of paper that is loaded. In this case, click Plain Paper. In C Paper Size, click the size of the original. In this case, click ISO A4. Click F OK to close the dialog box. Choose Print in the application menu. Access the Main pane. Select the print target in the E Print Target list. Enhanced Printing Options 291 Downloaded from ManualsPrinter.com Manuals Centering originals 9. 10. 11. Access the Page Setup pane. Click Roll Paper in the A Media Source list. Make sure the width of the loaded roll is displayed in the B Roll Paper Width list-in this case, 10-in. Roll. Note • If the width of the loaded roll is not displayed in B Roll Paper Width, click L Printer Information on the Main pane and update the printer information. 292 Enhanced Printing Options Downloaded from ManualsPrinter.com Manuals Centering originals 12. Make sure the C Page Size setting matches the original size as selected in C Paper Size in the Page Attributes dialog box-in this case, ISO A4. 13. 14. Select the J Print Centered check box. Conrm the print settings, and click M Print to start printing. Note • For tips on conrming print settings, see “Conrming Print Settings (Mac OS X)”. (→P.382) Enhanced Printing Options 293 Downloaded from ManualsPrinter.com Manuals Centering originals Printing Originals Centered on Sheets When you print originals that are smaller than the sheet size, the originals are arranged in the upper left corner of the sheet. If you prefer, you can print originals that were arranged this way centered on the sheet instead. Print Centered Aligns the center of the original with the center of the sheet. For instructions on centering originals when printing on sheets, refer to the following topics, as appropriate for your computer and operating system. • Printing Originals Centered on Sheets (Windows) (→P.295) • Printing Originals Centered on Sheets (Mac OS X) (→P.297) 294 Enhanced Printing Options Downloaded from ManualsPrinter.com Manuals Centering originals Printing Originals Centered on Sheets (Windows) This topic describes how to reduce an original 50% for printing centered on a sheet. • • • • • Document: Any Type Page size: A4 (210.0 × 297.0 mm)/Letter (8.3 × 11.7 in) Paper: Sheets Paper type: Plain Paper Paper size: A4 (210.0 × 297.0 mm)/Letter (8.3 × 11.7 in) 1. 2. 3. Choose Print in the application menu. 4. 5. 6. In the A Media Type list, select the type of paper that is loaded. In this case, click Plain Paper. 7. In the A Page Size list, click the size of the original as specied in the application. In this case, Select the printer in the dialog box, and then open the printer driver dialog box. (→P.343) Make sure the Main sheet is displayed. Select the printing application in the E Print Target list. Click the Page Setup tab to display the Page Setup sheet. click ISO A4 or Letter (8.5"x11"). 8. Select the C Enlarged/Reduced Printing check box. Enhanced Printing Options 295 Downloaded from ManualsPrinter.com Manuals Centering originals 9. 10. 11. 12. Click Match Page Size in the G Paper Size list. 13. 14. Select the G Print Centered check box. Click F Scaling and enter “50.” Click Cut Sheet in the L Paper Source list. Click the Layout tab to display the Layout sheet. Conrm the print settings and print as desired. Note • For tips on conrming print settings, see “Conrming Print Settings (Windows)”. (→P.337) Important • If you have selected Cut Sheet as the paper source, follow the instructions on the printer control panel to enter the paper size. 296 Enhanced Printing Options Downloaded from ManualsPrinter.com Manuals Centering originals Printing Originals Centered on Sheets (Mac OS X) This topic describes how to center originals for printing on sheets, based on the following example. • • • • • Document: Any type Page size: A4/Letter Paper: Sheets Paper type: Plain Paper Paper size: Non-standard 1. Choose Page Setup from the application menu to display the Page Attributes dialog box. 2. 3. 4. 5. In the C Paper Size list, click the size of the original. In this case, click ISO A4. 6. 7. In the A Media Type list, select the type of paper that is loaded. In this case, click Plain Paper. Click F OK to close the dialog box. In the application software menu, choose Print. Access the Main pane. Select the printing application in the E Print Target list. Enhanced Printing Options 297 Downloaded from ManualsPrinter.com Manuals Centering originals 8. 9. 10. Access the Page Setup pane. Click Cut Sheet in the A Media Source list. Make sure C Page Size shows the original size as specied in C Paper Size in the Page Attributes dialog box-in this case, ISO A4. 11. 12. Select the J Print Centered check box. Conrm the print settings, and then click M Print to start printing. Note • For tips on conrming print settings, see “Conrming Print Settings (Mac OS X)”. (→P.382) Important • If you have selected Cut Sheet as the paper source, follow the instructions on the printer control panel to enter the paper size. 298 Enhanced Printing Options Downloaded from ManualsPrinter.com Manuals Conserving roll paper Conserving roll paper Conserving Roll Paper by Rotating Originals 90 Degrees You can conserve roll paper by specifying particular settings as suitable for your original. Rotate Page 90 degrees (Conserve Paper) When originals are printed in portrait orientation, the original is rotated 90 degrees before printing if it ts within the roll width. This enables you to conserve paper. Important • If the page would exceed the roll paper width after rotation, use this function with Scale to t Roll Paper Width to print rotated pages. For tips on conserving roll paper, refer to the following topics, as appropriate for your computer and operating system. • Conserving Roll Paper by Rotating Originals 90 Degrees (Windows) (→P.300) • Conserving Roll Paper by Rotating Originals 90 Degrees (Mac OS X) (→P.302) Enhanced Printing Options 299 Downloaded from ManualsPrinter.com Manuals Conserving roll paper Conserving Roll Paper by Rotating Originals 90 Degrees (Windows) This topic describes how to conserve paper by rotating originals 90 degrees before printing, based on the following example. • • • • • Document: Any type Page size: A4 (210.0×297.0 mm)/Letter (8.3×11.7 in) Paper: Roll Paper type: Plain Paper Roll paper width: A3/A4 roll (297.0 mm [11.7 in]) This example illustrates how to rotate an A4 (210.0×297.0 mm)/Letter (8.3×11.7 in) original in portrait orientation 90 degrees to t within the width of A3/A4 roll paper (297.0 mm [11.7 in]), which enables you to conserve paper. 1. 2. 3. Choose Print in the application menu. 4. 5. In the A Media Type list, select the type of paper that is loaded. In this case, click Plain Paper. Select the printer in the dialog box, and then open the printer driver dialog box. (→P.343) Make sure the Main sheet is displayed. Click the Page Setup tab to display the Page Setup sheet. 300 Enhanced Printing Options Downloaded from ManualsPrinter.com Manuals Conserving roll paper 6. In the A Page Size list, click the size of the original as specied in the application. In this case, click ISO A4 or Letter (8.5"x11"). 7. 8. Click Roll Paper in the L Paper Source list. Select the width of the loaded roll in the M Roll Paper Width list-in this case, ISO A3/A4 Roll (297.0mm). 9. 10. Select the K Rotate Page 90 degrees (Conserve Paper) check box. Conrm the print settings and print as desired. Note • For tips on conrming print settings, see “Conrming Print Settings (Windows)”. (→P.337) Enhanced Printing Options 301 Downloaded from ManualsPrinter.com Manuals Conserving roll paper Conserving Roll Paper by Rotating Originals 90 Degrees (Mac OS X) This topic describes how to conserve roll paper by rotating originals 90 degrees before printing, based on the following example. • • • • • Document: Any type Page Size: A4 (210.0×297.0 mm)/Letter (8.3 × 11.7 in) Paper: Roll Paper type: Plain Paper Roll paper width: A3/A4 roll (297.0 mm [11.7 in]) This example illustrates how to rotate an A4 (210.0×297.0 mm)/Letter (8.3 × 11.7 in) original in portrait orientation 90 degrees to t within the width of A3/A4 roll (297.0 mm [11.7 in]), which enables you to conserve paper. 1. Choose Page Setup in the application menu to display the Page Attributes dialog box. 2. 3. 4. 5. 6. Select the printer in the B Format for list. 7. In the A Media Type list, select the type of paper that is loaded. In this case, click Plain Paper. In the C Paper Size list, click the size of the original. In this case, click ISO A4. Click F OK to close the dialog box. Choose Print in the application menu. Access the Main pane. 302 Enhanced Printing Options Downloaded from ManualsPrinter.com Manuals Conserving roll paper 8. 9. 10. Access the Page Setup pane. Click Roll Paper in the A Media Source list. Make sure the width of the loaded roll is displayed in B Roll Paper Width -in this case, ISO A3/A4 (297.0mm). Note • If the width of the loaded roll is not displayed in B Roll Paper Width, click L Printer Information on the Main pane and update the printer information. Enhanced Printing Options 303 Downloaded from ManualsPrinter.com Manuals Conserving roll paper 11. Make sure the C Page Size setting matches the original size as selected in C Paper Size in the Page Attributes dialog box-in this case, ISO A4. 12. 13. Select the L Rotate Page 90 degrees check box. Conrm the print settings, and then click M Print to start printing. Note • For tips on conrming print settings, see “Conrming Print Settings (Mac OS X)”. (→P.382) 304 Enhanced Printing Options Downloaded from ManualsPrinter.com Manuals Conserving roll paper Conserving Roll Paper by Printing Originals Without Top and Bottom Margins You can conserve roll paper by specifying particular settings as suitable for your original. No Spaces at Top or Bottom (Conserve Paper) You can print without feeding the paper for blank portions of originals if there are top and bottom margins in originals. This enables you to conserve as much paper as the size of the margins. Important • Printing without the top and bottom margins is not supported in the following cases. • Banner printing • If you have chosen poster as the type of page layout Note • Even during borderless printing, you can print without the top and bottom margins. • Printing without the top and bottom margins may cause inconsistency in the size of printed documents, depending on the layout of images or text in your originals. For tips on conserving roll paper, refer to the following topics, as appropriate for your computer and operating system. • Conserving Roll Paper by Printing Originals Without Top and Bottom Margins (Windows) (→P.306) • Conserving Roll Paper by Printing Originals Without Top and Bottom Margins (Mac OS X) (→P.308) Enhanced Printing Options 305 Downloaded from ManualsPrinter.com Manuals Conserving roll paper Conserving Roll Paper by Printing Originals Without Top and Bottom Margins (Windows) This topic describes how to conserve roll paper when printing originals that have a top and bottom margin, based on the following example. • • • • • Document: Any type Page size: A4 (210.0×297.0mm)/Letter (8.3 × 11.7 in) Paper: Roll Paper type: Plain Paper Roll paper width: A3/A4 roll (297.0 mm [11.7 in]) 1. 2. 3. Choose Print in the application menu. 4. 5. In the A Media Type list, select the type of paper that is loaded. In this case, click Plain Paper. 6. In the A Page Size list, click the size of the original as specied in the application. In this case, Select the printer in the dialog box, and then display the printer driver dialog box. (→P.343) Make sure the Main sheet is displayed. Click the Page Setup tab to display the Page Setup sheet. click ISO A4 or Letter (8.5"x11"). 7. Click Roll Paper in the L Paper Source list. 306 Enhanced Printing Options Downloaded from ManualsPrinter.com Manuals Conserving roll paper 8. Select the width of the loaded roll in the M Roll Paper Width list-in this case, ISO A3/A4 Roll (297.0mm). 9. 10. 11. Click the Layout tab to display the Layout sheet. Select the I No Spaces at Top or Bottom (Conserve Paper) check box. Conrm the print settings and print as desired. Note • For tips on conrming print settings, see “Conrming Print Settings (Windows)”. (→P.337) Enhanced Printing Options 307 Downloaded from ManualsPrinter.com Manuals Conserving roll paper Conserving Roll Paper by Printing Originals Without Top and Bottom Margins (Mac OS X) This topic describes how to conserve roll paper when printing originals that have a top and bottom margin, based on the following example. • • • • • Document: Any type Page size: A4 (210.0×297.0 mm)/Letter (8.3 × 11.7 in) Paper: Roll Paper type: Plain Paper Roll paper width: A3/A4 roll (297.0 mm [11.7 in]) 1. Choose Page Setup from the application menu to display the Page Attributes dialog box. 2. 3. 4. 5. 6. Select the print target in the B Format for list. 7. In the A Media Type list, select the type of paper that is loaded. In this case, click Plain Paper. In C Paper Size, click the size of the original. In this case, click ISO A4. Click F OK to close the dialog box. Choose Print in the application menu. Access the Main pane. 308 Enhanced Printing Options Downloaded from ManualsPrinter.com Manuals Conserving roll paper 8. 9. 10. Access the Page Setup pane. Click Roll Paper in the A Media Source list. Make sure the width of the loaded roll is displayed in B Roll Paper Width -in this case, ISO A3/A4 (297.0mm). Note • If the width of the loaded roll is not displayed in B Roll Paper Width, click L Printer Information on the Main pane and update the printer information. Enhanced Printing Options 309 Downloaded from ManualsPrinter.com Manuals Conserving roll paper 11. Make sure the C Page Size setting matches the original size as selected in C Paper Size in the Page Attributes dialog box-in this case, ISO A4. 12. 13. Select the K No Spaces at Top or Bottom check box. Conrm the print settings, and click M Print to start printing. Note • For tips on conrming print settings, see “Conrming Print Settings (Mac OS X)”. (→P.382) 310 Enhanced Printing Options Downloaded from ManualsPrinter.com Manuals Checking Images Before Printing Checking Images Before Printing Checking the Layout in a Preview Before Printing You can check the print layout on the preview screen. Open Preview When Print Job Starts (Windows) While viewing the preview screen, you can also adjust orientation or other settings, and your changes will be instantly applied on the preview screen. Note • Under some settings and in some environments, PageComposer may be started. Enhanced Printing Options 311 Downloaded from ManualsPrinter.com Manuals Checking Images Before Printing Preview (Macintosh) While viewing the preview screen, you can also adjust layout or size settings, and your changes will be instantly applied on the preview screen. Important • The driver must be installed from the User Software CD-ROM to use this function. For instructions on how to check the layout before printing, refer to the following topics: • Checking the Layout in a Preview Before Printing (Windows) (→P.313) • Checking the Layout Before Printing (Mac OS X) (→P.315) 312 Enhanced Printing Options Downloaded from ManualsPrinter.com Manuals Checking Images Before Printing Checking the Layout in a Preview Before Printing (Windows) This topic describes how to preview images of print jobs before actually printing them. 1. 2. 3. Choose Print in the application menu. 4. 5. Select the L Open Preview When Print Job Starts check box. Select the printer in the dialog box, and then display the printer driver dialog box. (→P.343) Make sure the Main sheet is displayed. After you click OK, when you print a job, the imagePROGRAF Preview window will be displayed. Note • If PageComposer is running, access the Special Settings dialog box from the Layout sheet and clear Enable Preview Switching. Enhanced Printing Options 313 Downloaded from ManualsPrinter.com Manuals Checking Images Before Printing 6. 7. On the main window, you can check the layout and change settings as needed. To print, click Start Printing in the File menu. Note • For details on imagePROGRAF Preview functions, see Preview . 314 Enhanced Printing Options Downloaded from ManualsPrinter.com Manuals Checking Images Before Printing Checking the Layout Before Printing (Mac OS X) This topic describes how to check the layout before printing using the Preview function. 1. 2. Choose Print in the application menu. 3. The Canon imagePROGRAF Preview window is displayed. 4. 5. Check the layout and adjust settings in the Canon imagePROGRAF Preview window as desired. Click PDF and select Canon imagePROGRAF Preview. Print from the Canon imagePROGRAF Preview menu. Note • For details on imagePROGRAF Preview functions, refer to Preview . Enhanced Printing Options 315 Downloaded from ManualsPrinter.com Manuals Other useful settings Other useful settings Printing With Watermarks You can add watermarks (background images) to documents that require special handling. Watermark Watermarks are applied to all pages of your document. Important • Watermarks are not printed if you select poster as the type of page layout. The following watermarks are provided: • • • • • • • • CONFIDENTIAL COPY DRAFT FILE COPY FINAL PRELIMINARY PROOF TOP SECRET You can also create your own watermarks. Specify the following options to customize your watermark. • Watermark string: Specify the font, size, color, and so on. Surround the watermark with a frame, if desired. • Watermark position: Specify the position on the page, the angle, and so on. • Watermark printing method: Specify whether to print the watermark superimposed or under the document image. You can also print the watermark only on the rst page, if desired. Note • Watermarks are supported in Windows. • In addition to the provided watermarks, you can create up to 50 original watermarks in Windows. For detailed instructions on printing with watermarks, refer to the following topics: • Printing with Watermarks-COPY, FILE COPY, and so on (Windows) (→P.317) 316 Enhanced Printing Options Downloaded from ManualsPrinter.com Manuals Other useful settings Printing with Watermarks-COPY, FILE COPY, and so on (Windows) This topic describes how to print ofce documents with a watermark (in this case, “FILE COPY”) based on the following example. • • • • • Document: CAD drawing Page size: A2 (420.0 × 594.0 mm [16.5 × 23.4 in]) Paper: Roll Paper type: Plain Paper Roll paper width: A2/A3 roll (420.0 mm [16.5 in]) 1. 2. 3. Choose Print in the application menu. 4. 5. In the A Media Type list, select the type of paper that is loaded. In this case, click Plain Paper. Select the printer in the dialog box, and then open the printer driver dialog box. (→P.343) Make sure the Main sheet is displayed. After conrming that D Easy Settings is selected, click CAD (Line Drawing) in the E Print Target list. Note • You can check the settings values selected in the E Print Target list by clicking F View Settings. Enhanced Printing Options 317 Downloaded from ManualsPrinter.com Manuals Other useful settings 6. Click the Page Setup tab to display the Page Setup sheet. 7. In A Page Size, click the size of the original as specied in the application software. In this case, click ISO A4 or Letter (8.5"x11"). 8. 9. Click Roll Paper in the L Paper Source list. Select the width of the loaded roll in the M Roll Paper Width list-in this case, ISO A2/A3 Roll (420.0mm). 10. Click the Layout tab to display the Layout sheet. 11. 12. Select the D Watermark check box. Click FILE COPY in the E Watermarks list. Note • To create your own, original watermark, click F Edit Watermark. Refer to the printer driver help for instructions on modifying watermarks to create your own. 13. Conrm the print settings and print as desired. Note • For tips on conrming print settings, see “Conrming Print Settings (Windows)”. (→P.337) 318 Enhanced Printing Options Downloaded from ManualsPrinter.com Manuals Other useful settings Making the Original Orientation Match the Paper Orientation You can specify the original orientation to match the orientation of the paper for printing. Orientation Paper is usually loaded in the printer in portrait orientation. When you have an original in landscape orientation, you can specify the printing orientation so that the original is printed in landscape orientation. Rotate 180 degrees The original is rotated 180 degrees to print it upside down. Mirror A mirror image of the original is printed. For instructions on specifying the original orientation before printing, refer to the following topics, as appropriate for your computer and operating system. • Making the Original Orientation Match the Paper Orientation (Windows) (→P.320) • Making the Original Orientation Match the Paper Orientation (Mac OS X) (→P.322) Enhanced Printing Options 319 Downloaded from ManualsPrinter.com Manuals Other useful settings Making the Original Orientation Match the Paper Orientation (Windows) This topic describes how to print an original in landscape orientation after matching the paper orientation, based on the following example. • • • • • Document: An original in landscape orientation Page size: A4 (210.0 × 297.0 mm)/Letter (8.3 × 11.7 in) Paper: Roll Paper type: Plain Paper Roll paper width: A2/A3 roll (420.0 mm [16.5 in]) 1. 2. 3. Choose Print in the application menu. 4. 5. 6. In the A Media Type list, select the type of paper that is loaded. In this case, click Plain Paper. 7. In the A Page Size list, click the size of the original as specied in the application. In this case, Select the printer in the dialog box, and then open the printer driver dialog box. (→P.343) Make sure the Main sheet is displayed. Select the printing application in the E Print Target list. Click the Page Setup tab to display the Page Setup sheet. click ISO A4 or Letter (8.5"x11"). 320 Enhanced Printing Options Downloaded from ManualsPrinter.com Manuals Other useful settings 8. 9. 10. In H Orientation, click J Landscape. Click Roll Paper in the L Paper Source list. Select the width of the loaded roll in the M Roll Paper Width list-in this case, ISO A2/A3 Roll (420.0mm). 11. Conrm the print settings and print as desired. Note • For tips on conrming print settings, see “Conrming Print Settings (Windows)”. (→P.337) Enhanced Printing Options 321 Downloaded from ManualsPrinter.com Manuals Other useful settings Making the Original Orientation Match the Paper Orientation (Mac OS X) This topic describes how to print an original in landscape orientation after matching the paper orientation, based on the following example. • • • • • Document: An original in landscape orientation Page size: A4 (210.0 × 297.0 mm)/Letter (8.3 × 11.7 in) Paper: Roll Paper type: Plain Paper Roll paper width: A2/A3 roll (420.0 mm [16.5 in]) 1. Choose Page Setup in the application menu to display the Page Attributes dialog box. 2. 3. 4. 5. 6. 7. Select the printer in the B Format for list. 8. 9. In the A Media Type list, select the type of paper that is loaded. In this case, click Plain Paper. In the C Paper Size, click the size of the original. In this case, click ISO A4. In D Orientation, click the icon of the document in landscape orientation. Click F OK to close the dialog box. Choose Print in the application menu. Access the Main pane. Select the printing application in the E Print Target list. 322 Enhanced Printing Options Downloaded from ManualsPrinter.com Manuals Other useful settings 10. Access the Page Setup pane. 11. 12. Click Roll Paper in the A Media Source list. Make sure the width of the loaded roll is displayed in the B Roll Paper Width list-in this case, ISO A2/A3 (420.0mm). Note • If the width of the loaded roll is not displayed in B Roll Paper Width, click L Printer Information on the Main pane and update the printer information. Enhanced Printing Options 323 Downloaded from ManualsPrinter.com Manuals Other useful settings 13. Make sure the C Page Size setting matches the original size as selected in C Paper Size in the Page Attributes dialog box-in this case, ISO A4. 14. Conrm the print settings, and then click M Print to start printing. Note • For tips on conrming print settings, see “Conrming Print Settings (Mac OS X)”. (→P.382) 324 Enhanced Printing Options Downloaded from ManualsPrinter.com Manuals Other useful settings Using Favorites You can register print settings as Favorites to reuse settings from a particular job that met your expectations, or settings for a particular page size that you will use repeatedly. Favorites Registering a favorite for later use. You can choose the settings you have registered from a list before printing, and you can check the settings details. Note • You can also save the favorite settings as les. Using these les is a convenient way to print under the same conditions on another computer. (In Windows.) For instructions on using favorites to print, refer to the following topics, as appropriate for your computer and operating system. • Using Favorites (Windows) (→P.326) • Using Favorites (Mac OS X) (→P.328) Enhanced Printing Options 325 Downloaded from ManualsPrinter.com Manuals Other useful settings Using Favorites (Windows) This topic describes how to register favorites and print using favorite settings. Registering a favorite Follow the steps below to save the current print settings as a favorite. 1. 2. 3. 4. Choose Print in the application menu. 5. 6. Click H Add to display the Add dialog box. 7. Click OK to close the Add dialog box. Select the printer in the dialog box, and then display the printer driver dialog box. (→P.343) Complete the print settings. Click the Favorites tab to display the Favorites sheet. Complete the following settings in the Add dialog box. • Enter a desired name in Name, such as “Photos for Presentations” or “Monthly Report.” • Choose a tting icon for these print settings in the Icon list. • In Comment, enter a description of the favorite to be added, as desired. The favorite you have added is now displayed in A Favorites. Note • To save a favorite as a le, click J Export and specify the le to save. 326 Enhanced Printing Options Downloaded from ManualsPrinter.com Manuals Other useful settings Printing using the favorite Follow the steps below to print using the favorite you have registered. 1. 2. 3. Choose Print in the application menu. 4. In the A Favorites, choose the favorite you registered. Select the printer in the dialog box, and then display the printer driver dialog box. (→P.343) Click the Favorites tab to display the Favorites sheet. Note • To import a favorite, click I Import and specify the favorite le. 5. 6. Click D Apply Favorite to replace the favorite settings with the current print settings. Conrm the print settings and print as desired. Note • For instructions on conrming print settings, see “Conrming Print Settings (Windows)”. (→P.337) Enhanced Printing Options 327 Downloaded from ManualsPrinter.com Manuals Other useful settings Using Favorites (Mac OS X) You can use the Presets function in Mac OS X for favorite-based printing. Note • In the printing dialog box, click Save As in the Presets list to save the current print settings. This is a standard feature of the operating system. For details, refer to the Mac OS documentation. 328 Enhanced Printing Options Downloaded from ManualsPrinter.com Manuals Other useful settings Cutting Roll Paper After Printing Roll paper can be automatically cut after printing. Note • It may not be possible to cut certain types of paper, such as adhesive paper. For details on types of paper that cannot be used with the auto cut feature, see the Paper Reference Guide. (→P.96) Automatic Cutting Roll paper is cut automatically after printing. If you prefer, you can print continuously without cutting the roll, or you can print a cut line. For instructions on cutting roll paper after printing, refer to the following topics, as appropriate for your computer and operating system. • Cutting Roll Paper After Printing (Windows) (→P.330) • Cutting Roll Paper After Printing (Mac OS X) (→P.331) Enhanced Printing Options 329 Downloaded from ManualsPrinter.com Manuals Other useful settings Cutting Roll Paper After Printing (Windows) This topic describes how to cut roll paper automatically (using the auto cut function) after printing, as well as how to print a cut line to cut the paper manually. Note • Auto cut function is activated on the printer by factory default and when the printer driver is installed. Follow the steps below to reactivate the function after it is disabled, or to change the setting for printing a cut line instead. 1. 2. 3. Choose Print in the application menu. 4. 5. Click Roll Paper in the L Paper Source list. 6. To enable automatic cutting, click Yes in the A Automatic Cutting list. If you prefer to cut the Select the printer in the dialog box, and then display the printer driver dialog box. (→P.343) Click the Page Setup tab to display the Page Setup sheet. Click N Auto Cut to display the Automatic Cutting Settingsdialog box. paper later yourself, click Print Cut Guideline. 7. 8. Click OK to close the Automatic Cutting Settings dialog box. Conrm the print settings and print as desired. Note • For tips on conrming print settings, see “Conrming Print Settings (Windows)”. (→P.337) Roll paper will be automatically cut after printing. 330 Enhanced Printing Options Downloaded from ManualsPrinter.com Manuals Other useful settings Cutting Roll Paper After Printing (Mac OS X) This topic describes how to cut roll paper automatically (using the auto cut function) after printing, as well as how to print a cut line to cut the paper manually. Note • The auto cut function is activated on the printer by factory default and when the printer driver is installed. Follow the steps below to reactivate the function once disabled, or select the setting for printing a cut guideline instead. 1. Choose Page Setup in the application menu to display the Page Attributes dialog box. 2. 3. 4. 5. 6. Select the printer in the B Format for list. 7. Click Roll Paper in the A Media Source list. Choose the original size in the C Paper Size list. Click F OK to close the dialog box. Choose Print in the application menu. Access the Page Setup pane. Enhanced Printing Options 331 Downloaded from ManualsPrinter.com Manuals Other useful settings 8. Access the Main pane. 9. 10. In the A Media Type list, select the type of paper that is loaded. 11. To enable automatic cutting, click Printer Default in the H Automatic Cutting list. If you prefer Click C Set to display the Media Detailed Settingsdialog box. to cut the paper later yourself, click Print Cut Guideline. Important • If the automatic cut function has been deactivated on the printer, change the auto cut setting on the printer Control Panel. 12. 13. Click OK to close the Media Detailed Settings dialog box. Conrm the print settings, and click M Print to start printing. Note • For tips on conrming print settings, see “Conrming Print Settings (Mac OS X)”. (→P.382) 332 Enhanced Printing Options Downloaded from ManualsPrinter.com Manuals Printer Driver Windows Software Printer Driver Printer Driver Settings (Windows) For instructions on accessing the Windows printer driver, refer to the following topics. • Accessing the Printer Driver Dialog Box from Applications (Windows) (→P.343) • Accessing the Printer Driver Dialog Box from the Operating System Menu (Windows) (→P.345) For information on the Windows printer driver settings, refer to the following topics. • Main Sheet (Windows) (→P.347) You can specify the type of paper, color processing, print quality, print preview, and other settings. Choose Easy Settings to specify basic print settings based on the printing application or Advanced Settings to complete more detailed settings as desired. • • • • • Media Detailed Settings Dialog Box (Windows) (→P.351) View Settings Dialog Box for the Printing Application (Windows) (→P.352) Color Adjustment Sheet: Color (Windows) (→P.353) Matching Sheet (Windows) (→P.355) Color Adjustment Sheet: Monochrome (Windows) (→P.357) • Page Setup Sheet (Windows) (→P.359) You can specify the page size of the original, borderless printing, enlargement or reduction, the orientation, the paper size and feed source, and automatic cutting. • Paper Size Options Dialog Box (Windows) (→P.361) • Layout Sheet (Windows) (→P.362) You can specify the page layout, watermarks, the orientation, the number of copies, and print processing options. • Page Options Dialog Box (Windows) (→P.364) • Special Settings Dialog Box (Windows) (→P.365) • Favorites Sheet (Windows) (→P.366) Groups of print settings you select on each sheet can be saved as a favorite. Favorites you have added can be edited or used at the time of printing as desired. Windows Software 333 Downloaded from ManualsPrinter.com Manuals Printer Driver • Utility Sheet (Windows) (→P.368) You can specify settings related to maintenance for the Printhead and feed amount, as well as settings for Color imageRUNNER Enlargement Copy. • Support Sheet (Windows) (→P.369) You can view support information and the user manual. • Device Settings Sheet (Windows) (→P.370) You can display settings for optional equipment installed on the printer and see the printer driver version. imagePROGRAF Free Layout is a feature for freely arranging originals from various source applications on a single page as desired before printing. For details, see Free Layout . Color imageRUNNER Enlargement Copy is a feature for automatic enlargement and printing of scanned originals from a Color imageRUNNER. For details, see Color imageRUNNER Enlargement Copy . 334 Windows Software Downloaded from ManualsPrinter.com Manuals Printer Driver Specifying Paper in the Printer Driver (Windows) If you have replaced the paper, you must complete the following settings in the printer driver. Important • Always specify the same type and size of paper in the printer menu and printer driver. If the type and size do not match, an error message will be displayed and printing is not possible. 1. 2. 3. Choose Print in the application menu. 4. 5. In the A Media Type list, select the type of paper that is loaded. 6. 7. In the A Page Size list, select the size of the original as specied in the application. Select the printer in the dialog box, and then display the printer driver dialog box. (→P.343) Make sure the Main sheet is displayed. Click the Page Setup tab to display the Page Setup sheet. In the L Paper Source list, select how paper is supplied. Windows Software 335 Downloaded from ManualsPrinter.com Manuals Printer Driver 8. If you have selected Roll Paper in L Paper Source, select the width of the loaded roll in M Roll Paper Width. Note • A variety of settings are available in the printer driver to suit different printing applications. For details on available printing conditions, see “Printer Driver Settings (Windows)”. (→P.333) 336 Windows Software Downloaded from ManualsPrinter.com Manuals Printer Driver Conrming Print Settings (Windows) There are two ways to conrm the print settings, as follows. • Checking a preview of the settings (→P.337) • Checking a print preview (→P.338) Checking a preview of the settings A preview of the settings is displayed on the left side of the Main, Page Setup, and Layout sheets. By checking illustrations and numerical values in the preview, you can conrm current settings for the page size, orientation, paper source, layout, and so on. Display Area Information Displayed P Top illustrations Illustrations indicate the orientation, page layout, borderless printing selection, color mode, and other settings information. Q Middle, bordered area The page size, paper size, and method and percentage of enlargement or reduction are indicated. R Bottom illustrations Illustrations indicate the feed source, orientation, borderless printing selection, and other settings information. Note • To conrm the Print Target specied in Easy Settings, click F View Settings on the Main sheet to display the View Settings dialog box. Windows Software 337 Downloaded from ManualsPrinter.com Manuals Printer Driver Checking a print preview You can check an image of the original just as it will be printed. When you activate this feature, imagePROGRAF Preview or PageComposer is started before printing. Conrming how documents will be printed this way helps prevent printing errors. For details on print previews, see “Checking the Layout in a Preview Before Printing”. (→P.311) 338 Windows Software Downloaded from ManualsPrinter.com Manuals Printer Driver Checking the Layout in a Preview Before Printing (Windows) This topic describes how to preview images of print jobs before actually printing them. 1. 2. 3. Choose Print in the application menu. 4. 5. Select the L Open Preview When Print Job Starts check box. Select the printer in the dialog box, and then display the printer driver dialog box. (→P.343) Make sure the Main sheet is displayed. After you click OK, when you print a job, the imagePROGRAF Preview window will be displayed. Note • If PageComposer is running, access the Special Settings dialog box from the Layout sheet and clear Enable Preview Switching. Windows Software 339 Downloaded from ManualsPrinter.com Manuals Printer Driver 6. 7. On the main window, you can check the layout and change settings as needed. To print, click Start Printing in the File menu. Note • For details on imagePROGRAF Preview functions, see Preview . 340 Windows Software Downloaded from ManualsPrinter.com Manuals Printer Driver Using Favorites (Windows) This topic describes how to register favorites and print using favorite settings. Registering a favorite Follow the steps below to save the current print settings as a favorite. 1. 2. 3. 4. Choose Print in the application menu. 5. 6. Click H Add to display the Add dialog box. 7. Click OK to close the Add dialog box. Select the printer in the dialog box, and then display the printer driver dialog box. (→P.343) Complete the print settings. Click the Favorites tab to display the Favorites sheet. Complete the following settings in the Add dialog box. • Enter a desired name in Name, such as “Photos for Presentations” or “Monthly Report.” • Choose a tting icon for these print settings in the Icon list. • In Comment, enter a description of the favorite to be added, as desired. The favorite you have added is now displayed in A Favorites. Note • To save a favorite as a le, click J Export and specify the le to save. Windows Software 341 Downloaded from ManualsPrinter.com Manuals Printer Driver Printing using the favorite Follow the steps below to print using the favorite you have registered. 1. 2. 3. Choose Print in the application menu. 4. In the A Favorites, choose the favorite you registered. Select the printer in the dialog box, and then display the printer driver dialog box. (→P.343) Click the Favorites tab to display the Favorites sheet. Note • To import a favorite, click I Import and specify the favorite le. 5. 6. Click D Apply Favorite to replace the favorite settings with the current print settings. Conrm the print settings and print as desired. Note • For instructions on conrming print settings, see “Conrming Print Settings (Windows)”. (→P.337) 342 Windows Software Downloaded from ManualsPrinter.com Manuals Printer Driver Accessing the Printer Driver Dialog Box from Applications (Windows) 1. 2. Choose Print from the File menu to display the dialog box for printing conditions. Select the printer, and then display the printer driver dialog box. Note • The dialog box for specifying printing conditions varies depending on the source application. In some cases, when you select the printer, a sheet for conguring the printer driver is added to the dialog box. In the following case, click Preferences. ■Example: Print dialog box displayed by the application software Six sheets of print settings are displayed by the printer driver: Main, Page Setup, Layout, Favorites, Utility, and Support. Note • The titles of dialog boxes may vary depending on the application, and sheets other than these six sheets may be displayed. Windows Software 343 Downloaded from ManualsPrinter.com Manuals Printer Driver Important • If you access the printer driver dialog box from the source application, changes you make to the settings will only apply temporarily to that application. Because these are sizes you specify temporarily in the printer driver, the sizes will not be available after you exit the application. • You can also access the printer driver dialog box from the Windows system menu. see “Accessing the Printer Driver Dialog Box from the Operating System Menu (Windows)”. (→P.345) 344 Windows Software Downloaded from ManualsPrinter.com Manuals Printer Driver Accessing the Printer Driver Dialog Box from the Operating System Menu (Windows) 1. 2. Click start > Printers and Faxes (or Printers ). 3. Click Printing Preferences to display the Printing Preferences dialog box, titled with the Select the printer, and then display the printer properties dialog box. name of this printer. Note • The Device Settings sheet is also an extension of the printer driver. (→P.370) Windows Software 345 Downloaded from ManualsPrinter.com Manuals Printer Driver Six sheets of print settings are displayed by the printer driver: Main, Page Setup, Layout, Favorites, Utility, and Support. Important • If you access the printer driver dialog box from the operating system menu, changes you make to the settings will apply to all applications you use for printing. • You can also access the printer driver dialog box from applications. see “Accessing the Printer Driver Dialog Box from Applications (Windows)”. (→P.343) 346 Windows Software Downloaded from ManualsPrinter.com Manuals Printer Driver Main Sheet (Windows) The following settings are available on the Main sheet. For details on settings items, refer to the printer driver help le. Note • On the Main sheet, choose Easy Settings to specify basic print settings based on the particular printing application, or switch to Advanced Settings to complete more detailed settings as desired. Conguration using Easy Settings Setting Item A Media Type Description Select the type of paper. For information on the types of paper the printer supports, refer to the Paper Reference Guide. (→P.96) B Get Information Click to display the Paper Information on Printer dialog box, which shows the types and sizes of paper specied on the printer for each feed source. When you select a feed source, your selection is applied to the printer driver settings for the feed source, type of paper, and roll width. C Advanced Settings Click to display the Paper Detailed Settings dialog box for ink drying time and other detailed settings based on the type of paper. E Print Target F View Settings Choose presets that match the type of document to be printed. Printing Photos and Images (Windows, Mac OS X) (→P.144) Printing Line Drawings and Text (Windows, Mac OS X) (→P.153) Printing Ofce Documents (→P.163) Depending on the Media Type setting, some Print Target options may not be available. Click to display the View Settings dialog box, which enables you to conrm the settings for the selected item from the E Print Target list or change the order of items listed in E Print Target. L Open Preview When Print Activate this option to check on-screen previews of documents before Job Starts printing. Checking the Layout in a Preview Before Printing (→P.311) Windows Software 347 Downloaded from ManualsPrinter.com Manuals Printer Driver Setting Item Description M Status Monitor Click to start imagePROGRAF Status Monitor, which enables you to conrm the status of the printer and print jobs. You can also set up email notication if printer errors occur by completing the Email Notice settings. For details, refer to the Status Monitor help le. N About Click to conrm version information for the printer driver. S Defaults Click to restore all settings on the sheet to the default values. Conguration using Advanced Settings Setting Item A Media Type B Get Information Description Select the type of paper. For information on the types of paper the printer supports, refer to the Paper Reference Guide. (→P.96) Click to display the Paper Information on Printer dialog box, which shows the types and sizes of paper specied on the printer for each feed source. When you select a feed source, your selection is applied to the printer driver settings for the feed source, type of paper, and roll width. C Advanced Settings Click to display the Paper Detailed Settings dialog box for ink drying time and other detailed settings based on the type of paper. E Print Priority Choose the graphic elements that you want to emphasize for printing. Giving Priority to Particular Graphic Elements and Colors for Printing (→P.180) F Print Quality Choose the level of print quality. Giving Priority to Particular Graphic Elements and Colors for Printing (→P.180) G Color Mode Choose the color mode. Giving Priority to Particular Graphic Elements and Colors for Printing (→P.180) Depending on the Media Type setting, some Color Mode options may not be available. H Color Settings Click to display the Color Settings dialog box for more advanced color settings. Adjusting the Color in the Printer Driver (→P.172) 348 Windows Software Downloaded from ManualsPrinter.com Manuals Printer Driver Setting Item Description I Thicken Fine Lines Activate this option to print ne lines more distinctly. J Unidirectional Printing Although unidirectional printing is slower, it can help prevent misaligned lines and ensure better results. K Sharpen Text Activate this option to print text more sharply. T Economy Printing When this mode is selected, less ink is consumed than in regular printing, but the quality is diminished. Select this mode if you want to conserve ink when checking drawings, for example. Depending on the Media Type and Print Quality settings, this mode may not be available. L Open Preview When Print Activate this option to check on-screen previews of documents before Job Starts printing. Checking the Layout in a Preview Before Printing (→P.311) M Status Monitor Click to start imagePROGRAF Status Monitor, which enables you to conrm the status of the printer and print jobs. You can also set up email notication if printer errors occur by completing the Email Notice settings. For details, refer to the Status Monitor help le. N About Click to conrm version information for the printer driver. S Defaults Click to restore all settings on the sheet to the default values. Windows Software 349 Downloaded from ManualsPrinter.com Manuals Printer Driver Paper Information on Printer Dialog Box (Windows) On the Paper Information on Printer dialog box, you can obtain information on the paper in the printer and congure printer driver settings for the paper source and media type. Note • To display the Paper Information on Printer dialog box, on the Main sheet, click Get Information by Media Type. (→P.347) Setting Item A Paper Source Description Shows the Paper Source supported by the printer, as well as information about the loaded paper. To update the Paper Source and media type settings in the printer driver, select the desired Paper Source option and click OK. 350 Windows Software Downloaded from ManualsPrinter.com Manuals Printer Driver Media Detailed Settings Dialog Box (Windows) The Paper Detailed Settings dialog box offers the following settings. For details on settings items, refer to the printer driver help. Note • To display the Paper Detailed Settings dialog box, on the Main sheet, click Settings by Media Type. (→P.347) Setting Item Description A Media Type Select the paper type. For information on the types of paper the printer supports, refer to the Paper Reference Guide. (→P.96) B Drying Time Specify the time that the printer waits for ink to dry, as needed. The Drying Time setting is only valid for rolls. (→P.120) C Between Pages Specify the time the printer waits after printing a page until ejecting the paper, as needed. D Between Scans Specify the time the printer waits after printing a line on the page until printing the next line, as needed. E Roll Paper Margin for Safety F Near End Margin You can specify the length of a margin on the leading edge of paper to ensure that paper susceptible to curling is held rmly against the Platen. Specify the length of the Near End Margin (the leading edge margin) of the roll, as needed. G Cut Speed Select the speed of automatic cutting, as needed. You can adjust this setting if paper is not cut well when automatic cutting is used. I Mirror Specify whether to print a mirror image, as needed. Select this option to print a version of the document or image with the left and right sides inverted. Windows Software 351 Downloaded from ManualsPrinter.com Manuals Printer Driver View Settings Dialog Box for the Printing Application (Windows) In the View Settings dialog box, you can check details of the selected printing application. Note • To display the View Settings dialog box, on the Main sheet, click View Settings by Print Target. (→P.347) Setting Item Description A Print Target Shows all Print Target options (settings items for the printing application). B Name Identies the item selected in Print Target by its name and an icon. C Details Here, you can conrm detailed settings values for each listed item for the selected Print Target. 352 Windows Software Downloaded from ManualsPrinter.com Manuals Printer Driver Color Adjustment Sheet: Color (Windows) If the color tone as printed is not as you expected, you can adjust it on the Color Adjustment sheet. Note • To display the Color Adjustment sheet, on the Main sheet, click Color Settings by Color Mode in Advanced Settings. (→P.347) Setting Item Description A Sample Type Choose a sample image from Standard, Portrait, Landscape, or Graphics. B View Color Pattern Clicking to select this check box will display the color pattern. C Apply to Sample Clicking to select this check box will apply the revised settings to the sample image. D Cyan Fine-tune color tones by adjusting the levels of each color. E Magenta F Yellow G Gray Tone Adjust the color tone of grays as desired. Choose Cool Black (tinged with blue) or Warm Black (tinged with red). H Brightness Adjust the overall image brightness as desired. You can adjust the brightness if the printed document is lighter or darker than the original image (that is, the original photo that was scanned or the original graphic as it appears on the computer screen). I Contrast Adjust the contrast of the darkest and lightest portions relative to each other, as desired. Increasing the Contrast makes images sharper, and reducing the Contrast softens images. J Saturation Adjust the color intensity as desired. Increasing the Saturation setting makes colors more vivid, and reducing the Saturation makes colors more subdued. Windows Software 353 Downloaded from ManualsPrinter.com Manuals Printer Driver Setting Item Description K Object Adjustment Select this option to display the Object Adjustment dialog box, in which you can specify objects subject to color adjustment. S Defaults Click to restore all settings on the sheet to the default values. Note • For details on settings items, see “Adjusting the Color in the Printer Driver”. (→P.172) Object Adjustment dialog box In the Object Adjustment dialog box, you can specify what type of print jobs to apply color adjustment to. If an original comprises images, graphics, and text, you can specify which portion to apply color adjustment to. Note • To display the Object Adjustment dialog box, click Object Adjustment on the Color Adjustment sheet. Setting Item Description A Image Select this option to apply color adjustment to image areas, such as photos. B Graphics Select this option to apply color adjustment to graphics, such as lines and circles. C Text Select this option to apply color adjustment to text. 354 Windows Software Downloaded from ManualsPrinter.com Manuals Printer Driver Matching Sheet (Windows) On the Matching sheet, you can specify color matching to compensate for differences in the appearance of colors on various devices. Driver Matching Mode The following options are available when you select Driver Matching Mode in the Matching Mode list. Note • To display the Matching sheet, on the Main sheet, click Color Settings by Color Mode in Advanced Settings, and then click the Matching sheet. (→P.347) Setting Item Description A Matching Mode Select the color matching mode to use, as desired. Normally, select Driver Matching Mode. For color matching based on ICC proles, select ICC Matching Mode, Driver ICM Mode, or Host ICM Mode, depending on your color matching system. If you prefer not to use the printer driver for color matching, select No. B Matching Method Select the color matching method that suits the document to be printed. Various Matching Method options are available depending on your selection in Matching. Note • For details on settings items, see “Adjusting the Color in the Printer Driver”. (→P.172) Windows Software 355 Downloaded from ManualsPrinter.com Manuals Printer Driver ICC Matching Mode, Driver ICM Mode and Host ICM Mode On the Matching sheet, you can specify color matching to compensate for differences in the appearance of colors on various devices. The following options are available when you select ICC Matching Mode, Driver ICM Mode, or Host ICM Mode on the Matching Mode sheet. Note • To display the Matching sheet, on the Main sheet, click Color Settings by Color Mode in Advanced Settings, and then click the Matching sheet. (→P.347) Setting Item Description A Matching Mode Select the color matching mode to use, as desired. B Input Prole Settings You can select Image, Graphics, or Text. You can choose Matching Method and Input Prole. Various options are available depending on your selected Matching Mode. To apply the same input prole automatically for Graphics and Text, select Use the Same Prole for All Objects. To apply separate input proles to Graphics and Text, clear Use the Same Prole for All Objects and specify the individual settings. C Printer Prole Settings Specify the printer prole as desired. Normally, select Auto Settings. Note • For details on settings items, see “Adjusting the Color in the Printer Driver”. (→P.172) 356 Windows Software Downloaded from ManualsPrinter.com Manuals Printer Driver Color Adjustment Sheet: Monochrome (Windows) On the Color Adjustment sheet for monochrome printing, you can adjust the brightness and contrast. Note • To display the Color Adjustment sheet, on the Main sheet, click Color Settings by Color Mode in Advanced Settings. (→P.347) Setting Item Description A Sample Type Choose a sample image from Standard, Portrait, Landscape, or Graphics. B View Color Pattern Clicking to select this check box will display the color pattern. C Apply to Sample Clicking to select this check box will apply the revised settings to the sample image. D Cyan Not available. E Magenta F Yellow G Gray Tone Not available. H Brightness Adjust the overall image brightness as desired. You can adjust the brightness if the printed document is lighter or darker than the original image (that is, the original photo that was scanned or the original graphic as it appears on the computer screen). I Contrast Adjust the contrast of the darkest and lightest portions relative to each other, as desired. Increasing the Contrast makes images sharper, and reducing the Contrast softens images. J Saturation Not available. K Object Adjustment Select this option to display the Object Adjustment dialog box, in which you can specify objects subject to color adjustment. S Defaults Click to restore all settings on the sheet to the default values. Windows Software 357 Downloaded from ManualsPrinter.com Manuals Printer Driver Note • For details on settings items, see “Adjusting the Color in the Printer Driver”. (→P.172) Object Adjustment dialog box In the Object Adjustment dialog box, you can specify what type of print jobs to apply color adjustment to. If an original comprises images, graphics, and text, you can specify which portion to apply color adjustment to. Note • To display the Object Adjustment dialog box, click Object Adjustment on the Color Adjustment sheet. Setting Item Description A Image Select this option to apply color adjustment to image areas, such as photos. B Graphics Select this option to apply color adjustment to graphics, such as lines and circles. C Text Select this option to apply color adjustment to text. 358 Windows Software Downloaded from ManualsPrinter.com Manuals Printer Driver Page Setup Sheet (Windows) The following settings are available on the Page Setup sheet. For details on settings items, refer to the printer driver help le. Setting Item Description A Page Size Select the page size as specied in the source application. For details on available page sizes, see “Paper Sizes”. (→P.101) B Borderless Printing Borderless printing is available if Roll Paper is selected in the L Paper Source list. Choose from the following options when this setting is activated. Borderless Printing on Paper of Equivalent Size (→P.232) Borderless Printing by Resizing Originals to Fit the Roll Width (→P.239) Borderless Printing at Actual Size (→P.225) D Fit Paper Size Scales the document image to match the paper size. E Scale to t Roll Paper Scales the document image to match the roll width. Width F Print Image with Actual Size Prints documents at their actual size. This function is available when you have selected the size same as the width of Roll Paper for either the length or width of the document from the A Page Size list. G Paper Size Choose the size of the paper you will print on. Available when Fit Paper Size For details on available paper sizes, see “Paper Sizes”. (→P.101) Paper sizes compatible with borderless printing are shown in the list. is selected. C Enlarged/Reduced Printing Choose from the following options when this setting is activated. Resizing Originals to Match the Paper Size (→P.196) Resizing Originals to Fit the Roll Width (→P.202) Resizing Originals by Entering a Scaling Value (→P.208) Windows Software 359 Downloaded from ManualsPrinter.com Manuals Printer Driver Setting Item Description D Fit Paper Size Scales the document image to match the paper size. E Fit Roll Paper Width Scales the document image to match the roll width. F Scaling Resizes the document image based on a specied scaling value. Enter a value in a range of “5-600.” G Paper Size Choose the size of the paper you will print on. For details on available paper sizes, see “Paper Sizes”. (→P.101) H Orientation Choose the printing orientation. Making the Original Orientation Match the Paper Orientation (→P.319) K Rotate Page 90 degrees Activate this setting to rotate the document image by 90 degrees before printing. Conserving Roll Paper by Rotating Originals 90 Degrees (→P.299) (Conserve Paper) L Paper Source Choose the feed source, as desired. Options displayed in the list vary depending on the selection in Media Type on the Main sheet. M Roll Paper Width Choose the roll width. For details on available roll widths, see “Paper Sizes”. (→P.101) N Roll Paper Options Complete optional roll paper settings. Click to display the Roll Paper Options dialog box. Under A Automatic Cutting, you can specify Yes or No and Print Cut Guideline. Cutting Roll Paper After Printing (→P.329) Select B Banner Printing when printing multiple pages continuously. Printing Multiple Pages Continuously (→P.274) P Output Method Click to display the Output Method dialog box, which enables you to complete the Output Method and Name of data to be saved settings. O Size Options Click to display the Paper Size Options dialog box, which enables you to register additional paper sizes or select the size system for use. S Defaults Restores all settings on the sheet to the default values. 360 Windows Software Downloaded from ManualsPrinter.com Manuals Printer Driver Paper Size Options Dialog Box (Windows) In the Paper Size Options dialog box, you can create and register your own Custom Paper Size. The sizes you dene are listed with standard paper sizes for selection later as needed. Note • To display the Paper Size Options dialog box, on the Page Setup sheet, click Paper Size Options. (→P.359) Setting Item Description A Paper Size List Shows the names and sizes of paper that can be used with the printer driver. B Delete Custom paper sizes created by users can be deleted from the Paper Size List, as needed. However, they cannot be deleted in the following situations. • If a standard paper size of the printer driver is selected. • If an oversized paper size is selected. • If a paper size in a red box is selected. C Custom Paper Size Name You can name Custom Paper Size as desired. D Units Specify the desired unit of measure for the Custom Paper Size height and width. E Paper Size Specify the desired Width and Height. You can make your selection from sizes that are compatible with Borderless Printing by selecting Borderless Printing Size. To maintain the aspect ratio of the Width and Height as you resize the paper, select Fix the Ratio of the Width to Height. F Add Enables you to register the custom paper size you have specied or overwrite an existing custom paper size. G Display Series You can limit the number of options shown in Page Size, Paper Size, and Paper Size List. Windows Software 361 Downloaded from ManualsPrinter.com Manuals Printer Driver Layout Sheet (Windows) The following settings are available on the Layout sheet. For details on settings items, refer to the printer driver help le. Setting Item A Page Layout C Set D Watermark Description Activate this setting to select a particular page layout. Printing Multiple Pages Per Sheet (→P.279) Printing Posters in Sections (→P.285) Printing Multiple Originals Next to Each Other (→P.268) Using PosterArtist to Compose Originals (→P.374) Click to display one of the following dialog boxes depending on the selection in A Page Layout. In these dialog boxes, you can specify layout details and which pages to print, as well as other settings. • Page Layout Printing • Pages to Print • Free Layout Settings Activating this option makes two settings available, E Watermarks and F Edit Watermark. Printing With Watermarks (→P.316) E Watermarks Lists the provided watermarks. Choose the watermark to print. F Edit Watermark Click to display the Edit Watermark dialog box for creating your own, original watermark. G Print Centered Activate this setting to print document images in the center of the paper. Printing Originals Centered on Rolls (→P.288) Printing Originals Centered on Sheets (→P.294) H Rotate 180 degrees Activate this option to rotate document images by 180 degrees before printing. I No Spaces at Top or Activate this setting to print the next image skipping blank areas above and below printable data in documents, which enables you to conserve the paper. Conserving Roll Paper by Printing Originals Without Top and Bottom Margins (→P.305) Bottom (Conserve Paper) J Copies Reverse Order Enter the number of copies to print, in a range of “1-999.” Activate this option to print pages in reverse order. 362 Windows Software Downloaded from ManualsPrinter.com Manuals Printer Driver Setting Item Description K Page Options Click to display the Page Options dialog box, which enables you to complete settings for printing the user name, date, or page number in the header or footer. M Special Settings If the printing results are not as you expected, click this option to change how printing is processed. S Defaults Click to restore all settings on the sheet to the default values. Windows Software 363 Downloaded from ManualsPrinter.com Manuals Printer Driver Page Options Dialog Box (Windows) The Page Options dialog box offers the following settings. Note • To display the Page Options dialog box, on the Layout sheet, click Page Options. (→P.362) Setting Item Description A Print Date Select where the date is printed, as desired. To print the time as well, select B Print Time Also. C Print User Name Select where the user name is printed, as desired. D Print Page Number Select where the page number is printed, as desired. E Format Settings Click to display the Format Settings dialog box, which enables you to complete format-related settings. Note • If you specify the same position for multiple items, the items are printed from left to right in this order: date, user name, and page number. • When you print multiple pages per sheet using Page Layout Printing or similar functions, these items will be printed for each page. 364 Windows Software Downloaded from ManualsPrinter.com Manuals Printer Driver Special Settings Dialog Box (Windows) If the printing results are not as you expected, you can change how printing is processed in the Special Settings dialog box. Note • To display the Special Settings dialog box, on the Layout sheet, click Special Settings. (→P.362) Setting Item A FineZoom Settings Description This function is used in large-format printing. Normally, choose Auto. If documents are not printed correctly on large-format paper, it may help to select Yes, and if ne lines are not visible or if images are distorted when printed, it may help to select No. B Application Color Matching You can give applications priority in color management. Priority C Enable Preview Switching Selecting this option will start PageComposer if you print when Open Preview When Print Job Starts is selected on the Main sheet. D Fast Graphic Process If image colors are inconsistent in printed documents or if lines are printed in varying thicknesses, clearing this option may help produce the expected results. E Reduce Print Unevenness If you are concerned about uneven colors, selecting this option may improve printing results. However, printing may take longer for some images. F Adjust faint lines If ne lines are printed in colors that do not match the colors of other shapes, clearing this option may help produce the expected results. However, lines in some colors may appear broken. Windows Software 365 Downloaded from ManualsPrinter.com Manuals Printer Driver Favorites Sheet (Windows) The following settings are available on the Favorites sheet. For details on settings items, refer to the printer driver help. Setting Item Description A Favorites Printing favorites you have created are listed with Default Settings favorites. Using Favorites (→P.325) B Settings Details Displays details of the favorite selected in the A Favorites. C Comment Displays notes registered in the favorite. D Apply Favorite Click to change the current print settings to those of the favorite selected in the A Favorites. E Application Settings Priority Activate this setting to use settings values specied in the source application in preference to favorite settings selected in the A Favorites, when clicking D Apply Favorite. For details on the settings items used in preference, refer to the printer driver help. F Delete Click to delete the selected favorite from the A Favorites list. G Edit Click to display the Edit dialog box, which enables you to change the name and icon for the favorite selected in the A Favorites list. H Add Click to display the Add dialog box, which enables you to add the current print settings as a favorite. I Import Click to display the Open dialog box, which enables you to import favorite settings saved as a le. J Export Click to display the Save As dialog box, which enables you to save the favorite settings as a le. 366 Windows Software Downloaded from ManualsPrinter.com Manuals Printer Driver Setting Item Description K Up Click to move the selected favorite up in the A Favorites list. L Down Click to move the selected favorite down in the A Favorites list. Windows Software 367 Downloaded from ManualsPrinter.com Manuals Printer Driver Utility Sheet (Windows) The following settings are available on the Utility sheet. For details on the utilities, refer to the relevant utility help. Corresponding Utility Button A Maintenance Click to start the imagePROGRAF Status Monitor, which offers the following maintenance for the printer. • Nozzle (ink ejecting outlet) check • Nozzle (ink ejecting outlet) cleaning • Head alignment adjustment • Feed amount adjustment B Color imageRUNNER Click to launch Color imageRUNNER Enlargement Copy (*1) (iR enlargement copy), which enables you to create hot folders used for Color imageRUNNER Enlargement Copy and assign print settings to hot folders. Printing Enlargements of Scanned Originals from a Color imageRUNNER (Windows) (→P.168) Enlargement Copy *1: For details, see Color imageRUNNER Enlargement Copy . 368 Windows Software Downloaded from ManualsPrinter.com Manuals Printer Driver Support Sheet (Windows) On the Support sheet, you can view support information and the user’s manual. Corresponding Utility Button A Support Information Click to access the Canon support webpage, where you can nd the latest information on the printer and consumables, check for printer driver updates, and browse other information. B User Manual Click to view the printer user’s manual. This function requires the user’s manual to be installed on your computer. C Settings Summaries Click to display the View Settings dialog box, which enables you to conrm the settings for the Main, Page Setup, Layout, and Favorites sheets. Windows Software 369 Downloaded from ManualsPrinter.com Manuals Printer Driver Device Settings Sheet (Windows) Many settings items on the printer properties sheets are controlled by Windows applications. However, the Device Settings sheet is for conguring the printer, and it is an extension of the printer driver. The following settings are available on the Device Settings sheet. Setting Item Description A Color Compatibility Click to display the Color Compatibility dialog box, which enables you to adjust colors if you have selected Color Mode > Color (CAD). B About Displays version information for the printer driver. 370 Windows Software Downloaded from ManualsPrinter.com Manuals Printer Driver Settings Summaries Dialog Box (Windows) The Settings Summaries dialog box enables you to conrm the settings for the Main, Page Setup, Layout, and Favorites sheets. Corresponding Utility Button A Copy Click to copy the settings information to the clipboard. You can paste the settings information into a le created with a text editor or similar application. Windows Software 371 Downloaded from ManualsPrinter.com Manuals Status Monitor Status Monitor imagePROGRAF Status Monitor (Windows) imagePROGRAF Status Monitor is a utility for checking the printer status and managing print jobs. Two screens are available in imagePROGRAF Status Monitor : “Printer List” shows a list of printers, and “Status Monitor” shows details for each printer. • You can view a list of the printers for which printer drivers have been installed on your computer, printers connected to your computer, and printers found on the network. • Printer status can be checked in real time on a computer monitor. • If a printer error occurs, you can investigate the corrective action immediately. • Images of Ink Tanks are shown, with different images for various types of ink. An icon and warning message will notify you when ink levels are low. • The type of paper loaded in each media source is identied. You can also check to see if paper has run out. • This way, the utility enables you to check printer information and take care of printer maintenance for optimal printing results. • You can also set up automatic email notication of any printer problems or errors to email addresses you designate in advance. Note • For details, refer to the imagePROGRAF Status Monitor help. 372 Windows Software Downloaded from ManualsPrinter.com Manuals Digital Photo Front-Access Digital Photo Front-Access Digital Photo Front-Access Digital Photo Front-Access is an application that links photos from Canon digital cameras and other image les on your computer with various other applications. • Simply select an image and click the icon of the application you want to start to launch the application. • You can also print from Digital Photo Front-Access. In short, Digital Photo Front-Access can help you manage images in many ways from editing to printing as an effective way to work with other applications. • Digital Photo Front-Access also enables image retouching. For automatic retouching, select an image for retouching and click Image Adjustment. • Because this application automates the workow from retouching to display for all of your images, it can save time and work in retouching. Note • For details, refer to the Digital Photo Front-Access help. Windows Software 373 Downloaded from ManualsPrinter.com Manuals PosterArtist PosterArtist Using PosterArtist to Compose Originals You can print a variety of source documents from word-processing or spreadsheet programs or screen shots from web browsers after composing an original with them using PosterArtist. Important • PosterArtist (sold separately) must be installed to use this function. Edit Using PosterArtist PosterArtist offers a wide range of features, including features to insert source documents in posters and compose an original with them. Important • This function is only supported in Windows. For detailed instructions on editing with PosterArtist, refer to the following topic: • Using PosterArtist to Compose Originals (Windows) (→P.375) 374 Windows Software Downloaded from ManualsPrinter.com Manuals PosterArtist Using PosterArtist to Compose Originals (Windows) This topic describes how to use PosterArtist to compose originals from multiple applications, creating a poster layout for printing. Important • PosterArtist (sold separately) must be installed to use this function. 1. 2. 3. Choose Print in the application menu. 4. Click the Layout tab to display the Layout sheet. 5. 6. 7. Select the A Page Layout check box. Select the printer in the dialog box, and then open the printer driver dialog box. (→P.343) Make sure the Main sheet is displayed. Click in the Edit Using PosterArtist in the B Page Layout list. When you attempt to print, PosterArtist starts up and the PageCapture window is displayed. (At this point, the document will not be printed yet.) 8. Choose the page to load in PosterArtist. Windows Software 375 Downloaded from ManualsPrinter.com Manuals PosterArtist 9. Edit and rearrange the image in the PosterArtist window as desired. Important • Without closing the PosterArtist window, repeat steps 1-8 to arrange originals from multiple applications on the same page. Note • For instructions on editing and rearranging images, refer to the PosterArtist Manual. 10. Print from the PosterArtist menu. 376 Windows Software Downloaded from ManualsPrinter.com Manuals Device Setup Utility Device Setup Utility imagePROGRAF Device Setup Utility imagePROGRAF Device Setup Utility is a utility to establish communication between the printer and your computer by completing relevant settings. After the printer is installed, for example, you can use imagePROGRAF Device Setup Utility to complete the network settings initially. • Starting imagePROGRAF Device Setup Utility will show a list of printers found on the network. In this list, select the printer (specically, the printer’s MAC address) that you want to set up, and then congure the basic settings from your computer, such as the printer’s IP address and the network frame type. • You can see which printers are online in the network by checking the printer list. Communication between your computer and these printers is possible. Note • We recommend that your network or printer administrator complete the setup work using imagePROGRAF Device Setup Utility. • For details, refer to the imagePROGRAF Device Setup Utility help. Installing imagePROGRAF Device Setup Utility Install imagePROGRAF Device Setup Utility from the User Software CD-ROM provided with the printer as follows: Important • In Windows 2000/Windows XP/Windows Server 2003/Windows Vista, you must log on with administrative rights equivalent to the “Administrator” account. 1. 2. 3. 4. Insert the User Software CD-ROM in the CD-ROM drive. On the Setup Menu window, click Install Individual Software. Click Install in imagePROGRAF Device Setup Utility. Follow the instructions on the screen to proceed with the installation. Windows Software 377 Downloaded from ManualsPrinter.com Manuals Device Setup Utility Conguring the IP Address Using imagePROGRAF Device Setup Utility From a computer running Windows, you can use imagePROGRAF Device Setup Utility provided with the printer to congure the printer’s IP address. This topic describes how to congure the IP address using imagePROGRAF Device Setup Utility. Important • To congure network settings, you must be logged in with administrative rights such as “Administrator” account. We recommend that your network administrator congure the network settings. • For instructions on installing imagePROGRAF Device Setup Utility, see “Installing imagePROGRAF Device Setup Utility”. (→P.377) 1. 2. 3. 4. 5. 6. 7. Start imagePROGRAF Device Setup Utility from the start menu. In the Product Name list displayed, select the printer to congure. Choose Protocol Settings from the Printer menu. In the Setting IP Address list, choose Manual. Enter the IP address assigned to the printer and click the Set button. Click OK after the Conrmation message dialog box is displayed. Exit imagePROGRAF Device Setup Utility. Note • To congure the IP address automatically, choose Auto in the Setting IP Address list and select DHCP, BOOTP, or RARP. • You can also specify the subnet mask and default gateway. 378 Windows Software Downloaded from ManualsPrinter.com Manuals Printer Driver Mac OS X Software Printer Driver Printer Driver Settings (Mac OS X) For instructions on accessing the Mac OS X printer driver, refer to the following topics. • Accessing the Printer Driver Dialog Box from Applications (Mac OS X) (→P.386) For information on the Mac OS X printer driver settings, refer to the following topics. • Main Pane (Mac OS X) (→P.387) You can specify the media type, color processing, print quality, print preview, and other settings. Choose Easy Settings to specify basic print settings based on the printing application or Advanced Settings to complete more detailed settings as desired. • • • • Media Detailed Settings Dialog Box (Mac OS X) (→P.390) View Settings Dialog Box for the Printing Application (Mac OS X) (→P.391) Color Settings Pane: Color (Mac OS X) (→P.392) Color Settings Pane: Monochrome (Mac OS X) (→P.394) • Page Setup Pane (Mac OS X) (→P.395) You can specify the page size of the original, borderless printing, enlargement or reduction, the orientation, the paper size and source, and automatic cutting. • Utility Pane (Mac OS X) (→P.397) You can specify settings related to maintenance for the Printhead and feed amount, as well as settings for Color imageRUNNER Enlargement Copy. • Additional Settings Pane (Mac OS X) (→P.398) You can specify settings for how print jobs are sent to the printer. • Support Pane (Mac OS X) (→P.399) You can view support information and the user’s manual. With the imagePROGRAF Free Layout feature, you can arrange originals from various source applications on a single page before printing. For details, see Free Layout . With the imagePROGRAF Preview feature, you can check the layout before printing and adjust layout or size settings while viewing a preview screen. For details, see Preview . With the Color imageRUNNER Enlargement Copy feature, you can automatically enlarge and print scanned originals from a Color imageRUNNER. For details, see Color imageRUNNER Enlargement Copy . Mac OS X Software 379 Downloaded from ManualsPrinter.com Manuals Printer Driver Specifying Paper in the Printer Driver (Mac OS X) If you have replaced the paper, you must complete the following settings in the printer driver. 1. Choose Page Setup from the application menu to display the Page Attributes dialog box. 2. 3. 4. 5. 6. Select the printer in the B Format for list. 7. In the A Media Type list, select the type of paper that is loaded. Choose the original size in the C Paper Size list. Click F OK to close the dialog box. Choose Print in the application menu. Access the Main pane. 380 Mac OS X Software Downloaded from ManualsPrinter.com Manuals Printer Driver 8. 9. 10. Access the Page Setup pane. In the A Media Source list, select how paper is supplied. If you have selected Cut Sheet or Manual in A Media Source, make sure the size as selected in Page Setup is displayed in C Page Size. If you have selected Roll Paper in A Media Source, make sure the width of the loaded roll is displayed in B Roll Paper Width. Note • If the width of the roll loaded in the printer is not shown in B Roll Paper Width, click L Printer Information on the Main pane to update the printer information. Note • A variety of settings are available in the printer driver to suit different printing applications. For details on available printing conditions, see “Printer Driver Settings (Mac OS X)”. (→P.379) Mac OS X Software 381 Downloaded from ManualsPrinter.com Manuals Printer Driver Conrming Print Settings (Mac OS X) There are two ways to conrm what printing conditions have been specied, as follows. • Checking a preview of the settings (→P.382) • Checking a print preview (→P.383) Checking a preview of the settings A preview of the settings is displayed on the left side of the Main, Page Setup, Utility, and Additional Settings panes.By checking images and numerical values in the preview, you can conrm current settings for the page size, orientation, paper source, and so on. Display Area Information Displayed Pane displayed when the H Images tab is clicked On top, illustrations indicate the page size of the original, the paper size, orientation, layout, borderless printing selection, color mode, and other settings information. Under this, the page size, paper size, and method and percentage of enlargement or reduction is displayed. Pane displayed when the I Size tab is clicked Paper size details are indicated numerically. Pane with printer and paper illustrations Illustrations indicate the paper source, orientation, borderless printing selection, and other settings information. 382 Mac OS X Software Downloaded from ManualsPrinter.com Manuals Printer Driver Note • To conrm the Print Target specied in Easy Settings, click F View set. on the Main pane to display the View settings dialog box. Checking a print preview You can check an image of the original just as it will be printed. Conrming the image of print jobs beforehand helps prevent printing errors. For details on print previews, see “Checking the Layout in a Preview Before Printing”. (→P.311) Mac OS X Software 383 Downloaded from ManualsPrinter.com Manuals Printer Driver Checking the Layout Before Printing (Mac OS X) This topic describes how to check the layout before printing using the Preview function. 1. 2. Choose Print in the application menu. 3. The Canon imagePROGRAF Preview window is displayed. 4. 5. Check the layout and adjust settings in the Canon imagePROGRAF Preview window as desired. Click PDF and select Canon imagePROGRAF Preview. Print from the Canon imagePROGRAF Preview menu. Note • For details on imagePROGRAF Preview functions, refer to Preview . 384 Mac OS X Software Downloaded from ManualsPrinter.com Manuals Printer Driver Using Favorites (Mac OS X) You can use the Presets function in Mac OS X for favorite-based printing. Note • In the printing dialog box, click Save As in the Presets list to save the current print settings. This is a standard feature of the operating system. For details, refer to the Mac OS documentation. Mac OS X Software 385 Downloaded from ManualsPrinter.com Manuals Printer Driver Accessing the Printer Driver Dialog Box from Applications (Mac OS X) 1. In the application software, select Print from the File menu to display the dialog box for printing conditions. Note • This dialog box includes basic printing options and enables you to choose the printer, specify the range of pages, number of copies, and so on. 2. Select the printer in the Printer list. 3. Click Print to start printing. As shown in the following illustration, you can switch to other panes in this dialog box to complete settings for various methods of printing, including enlarged and reduced printing, borderless printing, and so on. 386 Mac OS X Software Downloaded from ManualsPrinter.com Manuals Printer Driver Main Pane (Mac OS X) The following settings are available on the Main pane. For details on settings items, refer to the printer driver help. Note • On the Main pane, choose Easy Settings to specify basic print settings based on the print target, or switch to Advanced Settings to complete more detailed settings as desired. Conguration using Easy Settings Setting Item A Media Type Description Select the paper type. For information on the types of paper the printer supports, refer to the Paper Reference Guide. (→P.96) B Get Information Click to display the Get Information dialog box, which shows media types specied on the printer for each media source. When you select a media source, your selection is applied to the printer driver settings for the media source and media type. C Set Click to display the Media Detailed Settings dialog box for ink drying time and other detailed settings based on the paper type. E Print Target F View set. L Printer Choose presets that match the type of document to be printed. Printing Photos and Images (Windows, Mac OS X) (→P.144) Printing Line Drawings and Text (Windows, Mac OS X) (→P.153) Printing Ofce Documents (→P.163) Click to display the View settings dialog box, which enables you to conrm the settings for the selected item from the E Print Target list or change the order of items listed in E Print Target. Click to display the Printer dialog box, which indicates the ink levels and gives other information about the printer. Mac OS X Software 387 Downloaded from ManualsPrinter.com Manuals Printer Driver Conguration using Advanced Settings Setting Item A Media Type B Get Information C Set Description Select the paper type. For information on the types of paper the printer supports, refer to the Paper Reference Guide. (→P.96) Click to display the Get Information dialog box, which shows media types specied on the printer for each media source. When you select a media source, your selection is applied to the printer driver settings for the media source and media type. Click to display the Media Detailed Settings dialog box for ink drying time and other detailed settings based on the paper type. E Print Priority Choose the graphic elements that you want to emphasize for printing. Giving Priority to Particular Graphic Elements and Colors for Printing (→P.180) F Print Quality Choose the level of print quality. Giving Priority to Particular Graphic Elements and Colors for Printing (→P.180) H Color Mode Choose the color mode. Giving Priority to Particular Graphic Elements and Colors for Printing (→P.180) I Set J Unidirectional Printing K Reduce Print Unevenness Click to display the Color Settings dialog box for more advanced color settings. Adjusting the Color in the Printer Driver (→P.172) Although unidirectional printing is slower, it can help prevent misaligned lines and ensure better results. This option is displayed if you have selected Plain Paper in A Media Type and Ofce Document in E Print Priority. Activate this option for two-pass printing to reduce color shading. N Economy Printing When this mode is selected, less ink is consumed than in regular printing, but the quality is diminished. Select this mode if you want to conserve ink when checking drawings, for example. Depending on the Media Type and Print Quality settings, this mode may not be available. L Printer Click to display the Printer dialog box, which indicates the ink levels and gives other information about the printer. 388 Mac OS X Software Downloaded from ManualsPrinter.com Manuals Printer Driver Paper Information on Printer Dialog Box (Mac OS X) On the Paper Information on Printer dialog box, you can obtain information on the paper in the printer and congure printer driver media type setting. Note • To display the Paper Information on Printer dialog box, on the Main pane, click Get Information by Media Type. (→P.387) Setting Item A Paper Source Description Shows the Paper Source supported by the printer, as well as the type of paper loaded. To update the media type setting in the printer driver, select the desired Paper Source option and click OK. Mac OS X Software 389 Downloaded from ManualsPrinter.com Manuals Printer Driver Media Detailed Settings Dialog Box (Mac OS X) The Paper Detailed Settings dialog box offers the following settings. For details on settings items, refer to the printer driver help. Note • To display the Paper Detailed Settings dialog box, on the Main pane, click Settings by Media Type. (→P.387) Setting Item Description A Media Type Select the paper type. For information on the types of paper the printer supports, refer to the Paper Reference Guide. (→P.96) B Drying Time Specify the time that the printer waits for ink to dry, as needed. The Drying Time setting is only valid for rolls. (→P.120) C Between Pages Specify the time the printer waits after printing a page until ejecting the paper, as needed. D Between Scans Specify the time the printer waits after printing a line on the page until printing the next line, as needed. E Roll Paper Margin for Safety F Near End Margin You can specify the length of a margin on the leading edge of paper to ensure that paper susceptible to curling is held rmly against the Platen. Specify the length of the Near End Margin (the leading edge margin) of the roll, as needed. G Cut Speed Select the speed of automatic cutting, as needed. You can adjust this setting if paper is not cut well when automatic cutting is used. H Automatic Cutting You can activate or deactivate Automatic Cutting and printing of cut lines, as desired. In this list, specify Yes, No, or Print Cut Guideline. J Mirror Specify whether to print a mirror image, as needed. Select this option to print a version of the document or image with the left and right sides inverted. 390 Mac OS X Software Downloaded from ManualsPrinter.com Manuals Printer Driver View Settings Dialog Box for the Printing Application (Mac OS X) In the View Settings dialog box, you can check details of the selected printing application. Note • To display the View Settings dialog box, on the Main pane, click View Settings by Print Target. (→P.387) Setting Item Description A Print Target Shows all Print Target options (settings items for the printing application). B Name Identies the item selected in Print Target by its name and an icon. C Details Here, you can conrm detailed settings values for each item selected in the Print Target list. Mac OS X Software 391 Downloaded from ManualsPrinter.com Manuals Printer Driver Color Settings Pane: Color (Mac OS X) In general, make any needed adjustments to the color of documents in the application used to create them. However, if the color tone as printed is not as you expected, you can also adjust the color in the printer driver. Color Adjustment pane: color If the color tone as printed is not as you expected, you can adjust it on the Color Adjustment pane. Note • To display the Color Adjustment pane, on the Main pane, click Color Settings by Color Mode in Advanced Settings. (→P.387) Setting Item Description A Preview The image at left is updated to reect any changes you make to setting items on the pane, enabling you to check the results of adjustment. B Original The image at right shows the original state before adjustment. You can compare it to the Preview image. C Cyan Correct color tones by adjusting the levels of each color. D Magenta E Yellow F Brightness Adjust the overall image brightness as desired. You can adjust the brightness if the printed document is lighter or darker than the original image (that is, the original photo that was scanned or the original graphic as it appears on the computer screen). G Contrast Adjust the contrast of the darkest and lightest portions relative to each other, as desired. Increasing the Contrast makes images sharper, and reducing the Contrast softens images. H Saturation Adjust the color intensity as desired. Increasing the Saturation setting makes colors more vivid, and reducing the Saturation makes colors more subdued. I Gray Tone Adjustment Adjust the color tone of grays as desired. Choose Cool Black (tinged with blue), Warm Black (tinged with red), and so on. 392 Mac OS X Software Downloaded from ManualsPrinter.com Manuals Printer Driver Note • For details on settings items, see “Adjusting the Color in the Printer Driver”. (→P.172) Matching pane On the Matching pane, you can specify color matching, to compensate for differences in the appearance of colors on various devices. Note • To display the Matching pane, on the Main pane, click Color Settings by Color Mode in Advanced Settings, and then click Matching. (→P.387) Setting Item Description A Matching Mode Select the color matching mode to use, as desired. B Matching Method Select the matching method that suits the document to be printed. Various Matching Method options are available depending on your selection in Matching. Note • For details on settings items, see “Adjusting the Color in the Printer Driver”. (→P.172) Mac OS X Software 393 Downloaded from ManualsPrinter.com Manuals Printer Driver Color Settings Pane: Monochrome (Mac OS X) The following settings are available on the Color Settings pane for monochrome printing. Color Adjustment pane: monochrome On the Color Adjustment pane for monochrome printing, you can adjust the brightness and contrast. Note • To display the Color Adjustment pane, on the Main pane, click Color Settings in Advanced Settings. (→P.387) Setting Item Description A Preview The image at left is updated to reect any changes you make to setting items on the pane, enabling you to check the results of adjustment. B Original The image at right shows the original state before adjustment. You can compare it to the Preview image. C Cyan Not available. D Magenta E Yellow F Brightness Adjust the overall image brightness as desired. You can adjust the brightness if the printed document is lighter or darker than the original image (that is, the original photo that was scanned or the original graphic as it appears on the computer screen). G Contrast Adjust the contrast of the darkest and lightest portions relative to each other, as desired. Increasing the Contrast makes images sharper, and reducing the Contrast softens images. H Saturation Not available. I Gray Tone Not available. Note • For details on settings items, see “Adjusting the Color in the Printer Driver”. (→P.172) 394 Mac OS X Software Downloaded from ManualsPrinter.com Manuals Printer Driver Page Setup Pane (Mac OS X) The following settings are available on the Page Setup pane. For details on settings items, refer to the printer driver help. Setting Item Description A Media Source Choose how paper is supplied. Options displayed in the list vary depending on the selection in A Media Type in the Main pane. B Roll Paper Width Displays the paper width of the roll loaded in the printer. Unknown is displayed if the printer cannot detect the roll paper width. C Page Size Displays the size of the original, as specied in the page settings of the application. For details on page sizes available in the application.see “Paper Sizes”. (→P.101) D Enlarged/Reduced Printing Choose from the following options when this setting is activated. Resizing Originals to Match the Paper Size (→P.196) Resizing Originals to Fit the Roll Width (→P.202) Resizing Originals by Entering a Scaling Value (→P.208) E Fit Media Size Resizes the document image to match the paper size. F Fit Roll Paper Width Resizes the document image to match the roll width. G Scaling Resizes the document image based on a specied scaling value. Enter a value in a range of “5-600.” H Borderless Printing Borderless printing is available if Roll Paper is selected in the A Media Source list. Activate this setting for borderless printing to match the size and width of the paper. Borderless Printing on Paper of Equivalent Size (→P.232) Borderless Printing by Resizing Originals to Fit the Roll Width (→P.239) Borderless Printing at Actual Size (→P.225) I Media Size Choose the size of the paper you will print on. Click Display all selections for Paper Size to list available sizes. For details on available paper sizes, see “Paper Sizes”. (→P.101) Mac OS X Software 395 Downloaded from ManualsPrinter.com Manuals Printer Driver Setting Item Description J Print Centered Activate this setting to print document images in the center of the paper. Printing Originals Centered on Rolls (→P.288) Printing Originals Centered on Sheets (→P.294) K No Spaces at Top or Activate this setting to print the next image skipping blank areas above and below printable data in documents, which enables you to conserve the paper. Conserving Roll Paper by Printing Originals Without Top and Bottom Margins (→P.305) Bottom L Rotate Page 90 degrees Activate this setting to rotate the original 90 degrees before printing. Conserving Roll Paper by Rotating Originals 90 Degrees (→P.299) 396 Mac OS X Software Downloaded from ManualsPrinter.com Manuals Printer Driver Utility Pane (Mac OS X) The following settings are available on the Utilitypane. Setting Item Description A Set Click to display the Printer dialog box, which offers the following maintenance for the printer. • Nozzle (ink ejecting outlet) cleaning • Head alignment adjustment • Feed amount adjustment B View Click to start imagePROGRAF Printmonitor, which enables you to view the status of print jobs. C Set Click to complete the settings for Color imageRUNNER Enlargement Copy (iR enlargement copy). *1: For details, see Color imageRUNNER Enlargement Copy . Mac OS X Software 397 Downloaded from ManualsPrinter.com Manuals Printer Driver Additional Settings Pane (Mac OS X) The following settings are available on the Additional Settings pane. Setting Item Description A Data Send Method Choose how print data is sent to the printer. • B Send Print Data Immediately to Printer • C Send All Print Data as Batch to Printer D Send job to Click to display the Send job to dialog box, which enables you to specify how print jobs are stored on the printer’s hard disk. • E Print • F Print (auto delete) • G Save in mail box H Save data before printing Jobs are printed after they are saved on the hard disk. 398 Mac OS X Software Downloaded from ManualsPrinter.com Manuals Printer Driver Support Pane (Mac OS X) On the Support pane, you can view support information and the user’s manual. Corresponding Utility Button A Support Information Click to access the Canon support webpage, where you can nd the latest information on the printer and consumables, check for printer driver updates, and browse other information. B User Manual Click to view the printer user’s manual. This function requires the user’s manual to be installed on your computer. C Settings The settings can be saved as a le. Click to display the Export dialog box, which enables you to specify where to save the le. D About You can display version information for the printer driver. Mac OS X Software 399 Downloaded from ManualsPrinter.com Manuals Printmonitor Printmonitor imagePROGRAF Printmonitor (Macintosh) imagePROGRAF Printmonitor is a utility for checking the printer status and managing print jobs. • • • • Printer status can be checked in real time on a computer monitor. You can check the status of print jobs, cancel jobs, and manage them as needed. If a printer error occurs, you can investigate the corrective action immediately. You can also set up automatic email notication of any printer problems or errors to email addresses you designate in advance. Note • If the status of the desired printer is not shown in imagePROGRAF Printmonitor, select the printer again as follows. 1. Make sure the printer is on and connected to the network or to a local port. 2. In the Printer menu, select the name of the desired printer. After the printer is detected, the printer status is shown. 3. If information about the printer is not shown in step 2, choose Search Printer in the Printer menu. 4. Select the zone to search (or select *(My Zone) if no zones have been set up) and click the Search button. Printer names listed in the Printer menu are updated with the printers that are now detected. 5. In the Printer menu, select the name of the desired printer. After the printer is detected, the printer status is shown. 400 Mac OS X Software Downloaded from ManualsPrinter.com Manuals Network Setting Network Setting Network Setting Network Environment System requirements The system requirements, which vary depending on your network, are as follows. • Printing over a TCP/IP network • Compatible operating systems • Windows 2000 (Professional or Server) • Windows XP (Home Edition or Professional) • Windows Server 2003 (Standard Edition) • Windows Vista (Home Basic/Business/Ultimate) • Mac OS X 10.2.8 or later • Compatible computer • A computer that runs one of the above operating systems • Printing over an AppleTalk network • Compatible operating systems • Mac OS X 10.2.8 or later • Compatible computer • A computer that runs one of the above operating systems Note • The printer cannot be used over a LocalTalk network. • Compatible with EtherTalk Phase 2. • Printing over a NetWare network • Compatible servers • Novell NetWare 4.2/5.1/6.0 • Compatible clients • Windows 2000 (Professional or Server) • Windows XP (Professional) • Compatible computer • A computer that runs one of the above operating systems Note • In NetWare 6.0, iPrint is not supported. Network Setting 401 Downloaded from ManualsPrinter.com Manuals Network Setting Network environment After conrming what type of network environment you will connect the printer to, set up the printer and computers as needed. • Example of a Windows network In Windows networks, print over TCP/IP. Note • NetBIOS is not supported. • Example of a Macintosh network In Macintosh networks, print over AppleTalk (EtherTalk) or TCP/IP, using Bonjour(Zeroconf) functions. • Example of a NetWare network Note • Even if there is a NetWare server in your network environment, you can use both TCP/IP and AppleTalk. In this case, complete the settings for each protocol you will use. 402 Network Setting Downloaded from ManualsPrinter.com Manuals Network Setting Conguring the IP Address on the Printer You must congure the printer’s IP address before using the printer in a TCP/IP network. The printer’s IP address is congured automatically when you install the printer driver following the instructions in the Quick Start Guide. Congure the IP address by using imagePROGRAF Device Setup Utility, the printer Control Panel, or ARP or PING commands, if the IP address is changed, or if you change the printer connection mode to a network connection. For details on conguring the IP address, refer to the following topics. • Conguring the IP Address Using imagePROGRAF Device Setup Utility (→P.404) • Conguring the IP Address Using the Printer Control Panel (→P.405) • Conguring the IP Address Using ARP and PING Commands (→P.406) Important • If you use a DHCP server for automatic assignment of the printer’s IP address, printing may no longer be possible after the printer is turned off and on. This is because an IP address different from before has been assigned. Thus, when using DHCP server functions, consult your network administrator and congure the settings in one of the following ways. • Congure the setting for dynamic DNS updating In RemoteUI, activate the setting Enable DNS Dynamic Update. (→P.408) • Congure the setting for assignment of the same IP address each time the printer starts up Note • We recommend conguring the printer’s IP address even if you will use the printer in networks other than TCP/IP networks. Conguring the printer’s IP address enables you to use RemoteUI to congure the network settings and manage the printer with a web browser. For details on RemoteUI, see “Using RemoteUI”. (→P.407) Network Setting 403 Downloaded from ManualsPrinter.com Manuals Network Setting Conguring the IP Address Using imagePROGRAF Device Setup Utility From a computer running Windows, you can use imagePROGRAF Device Setup Utility provided with the printer to congure the printer’s IP address. This topic describes how to congure the IP address using imagePROGRAF Device Setup Utility. Important • To congure network settings, you must be logged in with administrative rights such as “Administrator” account. We recommend that your network administrator congure the network settings. • For instructions on installing imagePROGRAF Device Setup Utility, see “Installing imagePROGRAF Device Setup Utility”. (→P.377) 1. 2. 3. 4. 5. 6. 7. Start imagePROGRAF Device Setup Utility from the start menu. In the Product Name list displayed, select the printer to congure. Choose Protocol Settings from the Printer menu. In the Setting IP Address list, choose Manual. Enter the IP address assigned to the printer and click the Set button. Click OK after the Conrmation message dialog box is displayed. Exit imagePROGRAF Device Setup Utility. Note • To congure the IP address automatically, choose Auto in the Setting IP Address list and select DHCP, BOOTP, or RARP. • You can also specify the subnet mask and default gateway. 404 Network Setting Downloaded from ManualsPrinter.com Manuals Network Setting Conguring the IP Address Using the Printer Control Panel This topic describes how to congure the printer’s IP address on the Control Panel. 1. Press the Menu button to display MAIN MENU. 2. 3. 4. 5. 6. 7. Press ▲ or ▼ to select Interface Setup, and then press the ► button. Press ▲ or ▼ to select TCP/IP, and then press the ► button. Press ▲ or ▼ to select IP Setting, and then press the ► button. Press ▲ or ▼ to select IP Address, and then press the ► button. After pressing ◄ or ► to select the input eld, press the OK button to enable numerical input. Press ▲ or ▼ to select the number, and then press the OK button. Note • Pressing the ▲ button increases the number by 1. The maximum value is “255,” after which “0” is displayed. • Pressing the ▼ button decreases the number by 1. The minimum value is “0,” after which “255” is displayed. • Hold down ▲ or ▼ to increase or decrease the value continuously. 8. 9. Repeat steps 3-4 to enter the IP address assigned to the printer. Press the Online button to bring the printer online. If any of the settings are changed, a message for conrmation is displayed. In this case, press the OK button. Important • Be sure to complete step 9. This will activate the values you have entered. • You can also specify the subnet mask and default gateway on the Control Panel. Note • If an error message is displayed, check the settings and correct any invalid values. • To cancel the setup process, hold down the Stop button for a second or more. Network Setting 405 Downloaded from ManualsPrinter.com Manuals Network Setting Conguring the IP Address Using ARP and PING Commands This topic describes how to congure the IP address using ARP and PING commands. To use the ARP and PING commands, you will need to know the printer’s MAC address. You can conrm the MAC address on the Control Panel. 1. Check the printer’s MAC address. You can conrm the MAC address on the Control Panel as follows: 1. Press the Menu button to display MAIN MENU. 2. Press ▲ or ▼ to select Interface Setup, and then press the ► button. 3. Press ▲ or ▼ to select Ethernet Driver, and then press the ► button. 4. Press ▲ or ▼ to select MAC Address, and then press the ► button. Note • You can investigate the MAC address by printing a Status Print report. (→P.67) 2. 3. In Windows, open a command prompt, or in Mac OS X, start Terminal. Execute the following command to add entries to the ARP table for managing IP addresses and corresponding MAC addresses. arp -s [IP address] [the printer’s MAC address you have veried] Example: arp -s xxx.xxx.xxx.xxx 00-00-85-xx-xx-xx Note • In Mac OS X when using Terminal, enter the arp command in the format “arp -s xxx.xxx.xxx.xxx 00:00:85:xx:xx:xx.” For details, refer to the help le for the command line. 4. Execute the following command to send the IP address to the printer and congure it. ping [IP address as specied in the ARP command] -l 479 Example: ping xxx.xxx.xxx.xxx -l 479 Note • In “-l,” the “l” is the letter “l”. • In Mac OS X when using Terminal, enter the ping command in the format “ping -s 479 xxx.xxx.xxx.xxx.” For details, refer to the help le for the command line. Note • The subnet mask and default gateway will be set to “0.0.0.0.” Use RemoteUI to change the subnet mask and default gateway to match your network settings. For details on RemoteUI, see “Using RemoteUI”. (→P.407) 406 Network Setting Downloaded from ManualsPrinter.com Manuals Network Setting Using RemoteUI Enter the printer’s IP address in a web browser to display the RemoteUI page. After you log on to RemoteUI from the page, you can check and change the status of the printer and print jobs, and congure network settings. To access RemoteUI, start the web browser and enter the following URL in the Location (or Address ) box to display the RemoteUI page. http://“printer IP address or name”/ Example: http://xxx.xxx.xxx.xxx/ For details on conguring printer settings for networks, refer to the following topics. • • • • Conguring the Printer’s TCP/IP Network Settings (→P.408) Conguring the Printer’s AppleTalk Network Settings (→P.410) Conguring the Printer’s NetWare Network Settings (→P.411) Specifying Printer-Related Information (→P.413) Note • RemoteUI also offers many other features. You can display the ink levels, check error messages and other status information, and cancel print jobs. • By factory default, the English screen is displayed. To change the display language, select the desired language under Language before logging on in administrator mode. Important • Use Netscape Navigator 6.0 or later, Internet Explorer 5.01 or later, or Firefox 1.5 or later as a web browser. In Mac OS X, you can also use Safari 1.32 or later or Safari 2.03 or later. • Access is not possible via a proxy server. In environments where a proxy server is used, add the printer’s IP address to Exceptions (addresses accessed without a proxy server) in the web browser proxy server settings. (Settings may vary depending on the network environment.) • Enable JavaScript and cookies in the web browser. • If you access RemoteUI with the printer name instead of its IP address, make sure the DNS settings are correctly congured. Network Setting 407 Downloaded from ManualsPrinter.com Manuals Network Setting Conguring the Printer’s TCP/IP Network Settings Follow the steps below to congure the TCP/IP network settings. 1. Start the web browser and enter the following URL in the Location (or Address ) box to display the RemoteUI page. http://“printer IP address or name”/ Example: http://xxx.xxx.xxx.xxx/ 2. 3. 4. 5. Select Administrator Mode and click Logon. If a password has been set on the printer, enter the password. Click Network in the Device Manager menu at left to display the Network page. Click Edit in the upper-right corner of the TCP/IP group to display the Edit TCP/IP Protocol Settings page. 6. Refer to the TCP/IP Settings Items table to complete the settings. TCP/IP Settings Items Item Default Setting Details Use DHCP Activate this setting to use DHCP Off for conguring the IP address. Use BOOTP Activate this setting to use BOOTP for conguring the IP address. Use RARP Activate this setting to use RARP Off for conguring the IP address. Enable DNS Dynamic Update Activate this setting to perform DNS server registration automatically. Off Use Zeroconf Function Activate this setting to use Bonjour. On IP Address Specify the printer’s IP address. 0.0.0.0 Subnet Mask Specify the printer’s subnet mask. 0.0.0.0 Gateway Address Specify the printer’s default gateway. 0.0.0.0 LPD Printing Activate this setting to use LDP Printing. On IPP Printing Activate this setting to use IPP Printing. On IPP Printer URI Specify the URI of the printer printer used for IPP printing using up to 252 characters. When using a standard Windows port for IPP printing, enter an URL less than 255 bytes for all characters for “http://"IP address"/IPP-URI.” RAW Printing Activate this setting to use Raw Printing. 408 Network Setting Downloaded from ManualsPrinter.com Manuals Off On Network Setting Item 7. Default Setting Details RAW Mode Bi-direction Activate this setting to use Raw mode bidirectional communication. Off FTP Printing Activate this setting to use FTP Printing. On SMTP Server Address Specify the SMTP server’s IP address. 0.0.0.0 Primary DNS Server Address Specify the IP address of the primary DNS server. 0.0.0.0 Secondary DNS Server Address Specify the IP address of the secondary DNS server. 0.0.0.0 DNS Host Name Specify the printer host name, up to 63 characters (1-63 characters). Use single-byte letters, numbers, and “-” (hyphens). Do not use numbers or “-” for the rst character or “-” for the last character. NB-17FBxxxxxxxxxxxx DNS Domain Name Specify the printer domain blank name, up to 63 characters. Use single-byte letters, numbers, “-” (hyphens), and “.” (periods). Do not use numbers, “-”, or “.” for the rst character, or “-” or “.” for the last character. Multicast DNS Service Name Specify the printer’s Multicast Canon iPFxxxx (xxxxxx) DNS service name. (1-63 characters) This name will be displayed when Bonjour functions are used. Click OK to display the Network page. Note • If you specify to congure the IP address using DHCP, BOOTP, or RARP, there must be a server that supports such protocol running in the network. • If you specify to congure the IP address using DHCP, BOOTP, or RARP, the IP address obtained by this method is used rst. If you cannot obtain the IP address, the address specied in IP Address is used. • It takes a minute or two to determine whether DHCP, BOOTP, or RARP are available. We recommend clearing check boxes of options you will not use. • If you are using a DNS server, select Enable DNS Dynamic Update and enter the IP Address for DNS servers, DNS host name, and DNS domain name in Primary DNS Server Address, Secondary DNS Server Address, DNS Host Name, and DNS Domain Name, respectively. Network Setting 409 Downloaded from ManualsPrinter.com Manuals Network Setting Conguring the Printer’s AppleTalk Network Settings Follow the steps below to congure the AppleTalk network settings. 1. Start the web browser and enter the following URL in the Location (or Address ) box to display the RemoteUI page. http://“printer IP address or name”/ Example: http://xxx.xxx.xxx.xxx/ 2. 3. 4. 5. Select Administrator Mode and click Logon. If a password has been set on the printer, enter the password. Click Network in the Device Manager menu at left to display the Network page. Click Edit in the upper-right corner of the AppleTalk group to display the Edit AppleTalk Protocol Settings page. 6. Refer to the AppleTalk Settings Items table to complete the settings. AppleTalk Settings Items Item Details Default Setting Phase Type Specify whether to use AppleTalk. Disabled If you will use AppleTalk, choose Phase 2. If you will not use AppleTalk, choose Disabled. Name (*1) Specify the object name used by Canon NB-17FB (xxxxxx) AppleTalk (in up to 31 single-byte or 15 double-byte characters). However, do not use the following single-byte characters: @ * : = Zone (*2) Specify the printer zone name, up * to 31 single-byte characters. However, do not use the following single-byte characters: @ : = Also avoid using “*” (which represents the default zone) in the middle of a string. *1:The object name you have specied in Name is displayed in Printer Setup Utility (or Print Center ) in Mac OS X. If you use multiple printers in the same zone, assign a unique name to each printer. By default, the network interface name is “Canon NB-17FB (xxxxxx).” (Here, xxxxxx is the last six digits of the printer’s MAC address.) *2: If zones have been created on the network, enter the name of the printer’s zone. If there are no zones, leave the asterisk “*” entry (for the default zone) as it is. If you enter a network zone name that does not match created zones, the printer will not be detected by Macintosh computers. Consult your network administrator for information on zone names. 7. Click OK to display the Network page. 410 Network Setting Downloaded from ManualsPrinter.com Manuals Network Setting Conguring the Printer’s NetWare Network Settings Follow the steps below to congure the NetWare network settings. 1. Start the web browser and enter the following URL in the Location (or Address ) box to display the RemoteUI page. http://“printer IP address or name”/ Example: http://xxx.xxx.xxx.xxx/ 2. 3. 4. 5. Select Administrator Mode and click Logon. If a password has been set on the printer, enter the password. Click Network in the Device Manager menu at left to display the Network page. Click Edit in the upper-right corner of the NetWare group to display the Edit NetWare Protocol Settings page. 6. Refer to the NetWare Settings Items table to complete the settings. NetWare Settings Items Item Default Setting Details Frame Type Specify the type of frame to use in NetWare. NCP Burst Mode Activate this setting to use On NCP Burst Mode. This mode supports fast data transfer when printing in queue server mode. Normally, leave the setting On. Print Application Choose the print service. • Bindery PServer • RPrinter • NDS PServer • NPrinter Packet Signature Select If Requested by Server If Requested by Server to use packet signature. Bindery PServer File Server Name Specify the name of a le server that has a NetWare print server. (0-47 characters) Print Server Name Specify the name of a NetWare print server. (0-47 characters) Print Server Password Set a password for the print server. (0-20 characters) - Polling Interval Specify the interval to conrm jobs. (1-15 seconds) 5 Print Server Name Specify the name of a NetWare print server. (0-47 characters) RPrinter Disabled NDS PServer Network Setting 411 Downloaded from ManualsPrinter.com Manuals Network Setting Item NDS PServer NPrinter 7. Default Setting Details Printer Number Specify the number of the printer connected to the NetWare print server. (0-15) 0 Tree Name Specify the name of an NDS tree that has a NetWare print server. (0-32 characters) - Context Name Specify the name of a context that has a NetWare print server. (0-255 characters) Print Server Name Specify the name of a NetWare print server. (0-64 characters) Print Server Password Set a password for the print server. (0-20 characters) - Polling Interval Specify the interval to conrm jobs. (1-255 seconds) 5 Print Server Name Specify the name of a NetWare print server. (0-47 characters) Printer Number Specify the number of the printer connected to the NetWare print server. (0-254) Click OK to display the Network page. 412 Network Setting Downloaded from ManualsPrinter.com Manuals 0 Network Setting Specifying Printer-Related Information Follow the steps below to specify device information and security settings. 1. Start the web browser and enter the following URL in the Location (or Address ) box to display the RemoteUI page. http://“printer IP address or name”/ Example: http://xxx.xxx.xxx.xxx/ 2. 3. 4. 5. Select Administrator Mode and click Logon. If a password has been set on the printer, enter the password. Click Information in the Device Manager menu at left to display the Information page. To display the relevant settings page, click Edit in the upper-right corner of Device Information or Security, depending on what information you want to specify. 6. Refer to the table of settings for device information, security, and email notication as you complete these settings. Device Information Settings Item Details Default Setting Device Name Enter a device name. (0-32 characters) blank Location Enter the location where the device is installed. (0-32 characters) blank Administrator Enter the administrator’s name. (0-32 characters) blank Phone Enter the administrator’s contact information. (0-32 characters) blank Comments(E-mail) Enter any comments regarding the administrator. blank (0-32 characters) Security Settings Item Details Default Setting Old Password Enter the current device password. (0-14 characters) blank New Password Enter the new password. (0-14 characters) blank Conrm Enter the new password again to conrm it. (0-14 characters) blank Besides entering a password, you can specify other security-related information, such as IP address-based SNMP or TCP usage restrictions, MAC address-based access restrictions, or IPP and FTP authentication settings. 7. Click OK to activate the settings. Network Setting 413 Downloaded from ManualsPrinter.com Manuals Network Setting Conguring the Communication Mode Manually This topic gives instructions for conguring the communication mode manually. 1. Press the Menu button to display MAIN MENU. 2. 3. 4. 5. Press ▲ or ▼ to select Interface Setup, and then press ►. Press ▲ or ▼ to select Ethernet Driver, and then press ►. Press ▲ or ▼ to select Auto Detect, and then press ►. Press ▲ or ▼ to select Off, and then press OK. Return to the Ethernet Driver menu. 6. 7. Press ▲ or ▼ to select Comm.Mode, and then press ►. Press ▲ or ▼ to select the communication mode, and then press the OK button. Return to the Ethernet Driver menu. 8. 9. Press ▲ or ▼ to select Ethernet Type, and then press ►. Press ▲ or ▼ to select the Ethernet type, and then press OK. Return to the Ethernet Driver menu. 10. 11. Press ▲ or ▼ to select Spanning Tree, and then press ►. Press ▲ or ▼ to enable or disable spanning tree support, and then press OK. Return to the Ethernet Driver menu. 12. Press the Online button. After the conrmation message is displayed, press OK. The printer will now restart. 414 Network Setting Downloaded from ManualsPrinter.com Manuals Network Setting Email Notication When Printing is Finished or Errors Occur The printer can notify you of the printer status by email. Even when you are away from the printer, you can know when printing is nished or if errors occur. Receive notication via email on your mobile phone or at your computer. Use the imagePROGRAF Status Monitor (Windows) function to set up email recipients and message timing. Besides being informed of nished print jobs or errors, you can also complete settings for email notication when service is needed or it’s time to replace consumables. For detailed instructions,see “Specifying Printer-Related Information”. (→P.413) Note • For details on email notication using imagePROGRAF Status Monitor (in Windows), refer to the imagePROGRAF Status Monitor help. Network Setting 415 Downloaded from ManualsPrinter.com Manuals Network Setting Initializing the Network Settings Use RemoteUI to restore the network settings to the default values as follows. Important • Initializing the network settings will also restore the default value of the printer’s IP address. As a result, the RemoteUI page cannot be displayed in the web browser after this procedure. • For instructions on reconguring the IP address, see “Conguring the IP Address on the Printer”. (→P.403) • For details on RemoteUI, see “Using RemoteUI”. (→P.407) 1. Start the web browser and enter the following URL in the Location (or Address ) box to display the RemoteUI page. http://“printer IP address or name”/ Example: http://xxx.xxx.xxx.xxx/ 2. 3. 4. 5. 6. Select Administrator Mode and click Logon. If a password has been set on the printer, enter the password. Click Network in the Device Manager menu at left to display the Network page. Click Reset to Default settings in the lower-right corner of the Network Interface group. After conrming the message, click OK to restore the network settings to the default values. Note • You can also use imagePROGRAF Device Setup Utility or the Control Panel to restore the default network settings. • If you use the Control Panel to initialize the network settings, press the Menu button to display MAIN MENU, and then press ▲, ▼, and ► to select Interface Setup → Ethernet Driver → Init. Settings → Yes (in this order), and nally press the OK button. 416 Network Setting Downloaded from ManualsPrinter.com Manuals Network Setting (Windows) Network Setting (Windows) Conguring the Printer Driver Destination (Windows) This topic describes how to specify the printer driver destination if the printer’s IP address is changed, or if you will use the printer over a network connection instead of via USB connection. The procedure described below is the conguration based on the LPR or Raw protocol using the standard TCP/IP port in Windows ( Standard TCP/IP Port ). Important • If you will use the printer in a TCP/IP network, make sure the printer’s IP address is congured correctly. • Conguring the IP Address on the Printer (→P.403) 1. 2. 3. 4. 5. 6. Open the Printers and Faxes (or Printers ) window. Right-click the icon of this printer and choose Properties to open the printer properties window. Click the Port tab to display the Port sheet. Click Add Port to display the Printer Ports dialog box. In the Available Port list, select Standard TCP/IP Port. Click New Port. After the wizard starts, a window is displayed for the Welcome to the Add Standard TCP/IP Printer Port Wizard. 7. 8. 9. 10. 11. 12. Click Next. In Printer Name or IP Address, enter the printer’s IP address. Follow the instructions on the screen to add a printer port. Click Close to close the Printer Ports dialog box. Make sure the printer port you added is displayed under Ports, and that the port is selected. Click Close to close the printer properties window. Network Setting 417 Downloaded from ManualsPrinter.com Manuals Network Setting (Windows) Sharing the Printer in Windows If you set up a computer as a print server in Windows 2000, Windows XP, Windows Server 2003, Windows Vista, or Windows Server 2008, the computer can receive print jobs sent from other computers (clients) connected to it for printing. This topic describes how to share the printer in Windows. Important • We recommend that your network administrator congure your network for printer sharing. 1. Open the Printers and Faxes (or Printers ) window. 2. Right-click the icon of this printer and choose Sharing to open the printer properties window. 418 Network Setting Downloaded from ManualsPrinter.com Manuals Network Setting (Windows) 3. On the Sharing sheet, click Share this printer and enter the shared name. 4. To print jobs from clients running other versions of Windows, click Additional Drivers and follow the instructions to install the printer driver of the corresponding version. If you are prompted to choose the location of the printer driver le, insert the provided User Software CD-ROM in the CD-ROM drive and specify the folder where the printer driver is located. 5. Click OK. Important • When installing the printer driver on client computers, select "Network Printer" on the connection type screen in the printer wizard, and then select the printer shared from the computer set up as the print server. Network Setting 419 Downloaded from ManualsPrinter.com Manuals Network Setting (Windows) Conguring the Printer’s NetWare Network Settings Follow the steps below to congure the NetWare network settings. 1. Start the web browser and enter the following URL in the Location (or Address ) box to display the RemoteUI page. http://“printer IP address or name”/ Example: http://xxx.xxx.xxx.xxx/ 2. 3. 4. 5. Select Administrator Mode and click Logon. If a password has been set on the printer, enter the password. Click Network in the Device Manager menu at left to display the Network page. Click Edit in the upper-right corner of the NetWare group to display the Edit NetWare Protocol Settings page. 6. Refer to the NetWare Settings Items table to complete the settings. NetWare Settings Items Item Default Setting Details Frame Type Specify the type of frame to use in NetWare. NCP Burst Mode Activate this setting to use On NCP Burst Mode. This mode supports fast data transfer when printing in queue server mode. Normally, leave the setting On. Print Application Choose the print service. • Bindery PServer • RPrinter • NDS PServer • NPrinter Packet Signature Select If Requested by Server If Requested by Server to use packet signature. Bindery PServer File Server Name Specify the name of a le server that has a NetWare print server. (0-47 characters) Print Server Name Specify the name of a NetWare print server. (0-47 characters) Print Server Password Set a password for the print server. (0-20 characters) - Polling Interval Specify the interval to conrm jobs. (1-15 seconds) 5 Print Server Name Specify the name of a NetWare print server. (0-47 characters) RPrinter 420 Network Setting Downloaded from ManualsPrinter.com Manuals Disabled NDS PServer Network Setting (Windows) Item NDS PServer NPrinter 7. Default Setting Details Printer Number Specify the number of the printer connected to the NetWare print server. (0-15) 0 Tree Name Specify the name of an NDS tree that has a NetWare print server. (0-32 characters) - Context Name Specify the name of a context that has a NetWare print server. (0-255 characters) Print Server Name Specify the name of a NetWare print server. (0-64 characters) Print Server Password Set a password for the print server. (0-20 characters) - Polling Interval Specify the interval to conrm jobs. (1-255 seconds) 5 Print Server Name Specify the name of a NetWare print server. (0-47 characters) Printer Number Specify the number of the printer connected to the NetWare print server. (0-254) 0 Click OK to display the Network page. Network Setting 421 Downloaded from ManualsPrinter.com Manuals Network Setting (Windows) Specifying the Printer’s Frame Type To enable communication between the printer and computers on your network, specify the Ethernet frame type in your NetWare environment. Follow the steps below to specify the frame type by using imagePROGRAF Device Setup Utility or the printer Control Panel. Note • You can specify the frame type by using RemoteUI if the printer’s IP address is congured. Important • Before specifying the frame type, make sure the printer is on and connected to the network. • For instructions on installing imagePROGRAF Device Setup Utility, see “Installing imagePROGRAF Device Setup Utility”. (→P.377) Specifying the Frame Type Using imagePROGRAF Device Setup Utility 1. 2. 3. 4. 5. 6. Start imagePROGRAF Device Setup Utility. In the list of printers, select the printer to congure. Choose Protocol Settings from the Printer menu. In the NetWare Frame Type list, select the frame type. Click ETHERNET II under Frame Type in TCP/IP. In IP Address, enter the IP address assigned to the printer, and then enter the subnet mask in Subnet Mask and the default gateway in Gateway Address. Important • You must specify the IP address here to be able to congure NetWare protocol settings using RemoteUI. 7. 8. 9. Click Set. Click OK after the Conrmation message dialog box is displayed. Exit imagePROGRAF Device Setup Utility. 422 Network Setting Downloaded from ManualsPrinter.com Manuals Network Setting (Windows) Specifying the Frame Type Using the Printer Control Panel 1. Press the Menu button to display MAIN MENU. 2. 3. 4. 5. Press ▲ or ▼ to select Interface Setup, and then press the ► button. Press ▲ or ▼ to select NetWare, and then press the ► button. Press ▲ or ▼ to select NetWare, and then press the ► button. Press ▲ or ▼ to select On, and then press the OK button. Return to the NetWare menu. 6. 7. Press ▲ or ▼ to select Frame Type, and then press the ► button. Press ▲ or ▼ to select the frame type to use, and then press the OK button. Return to the NetWare menu. 8. 9. Press ▲ or ▼ to select Print Service, and then press the ► button. Press ▲ or ▼ to select the desired print service, and then press the OK button. Return to the NetWare menu. 10. Press the Online button to bring the printer online. If any of the settings is changed, a message for conrmation is displayed. In this case, press the OK button. Important • Be sure to complete step 10. This will activate the values you have entered. Note • If an error message is displayed, check the settings and correct any invalid values. • To cancel the setup process, hold down the Stop button for a second or more. Network Setting 423 Downloaded from ManualsPrinter.com Manuals Network Setting (Windows) Specifying NetWare Print Services Before printing in a NetWare network, you must congure print services such as print servers, print queues, and so on. You can congure the print service settings from a computer using any of the following software. • NWADMIN • PCONSOLE (from Novell, provided with NetWare) Important • If you use NWADMIN to congure the print service settings, Novell Client (the Novell NetWare client software) must be installed as the client software application. • NetWare networking is unsupported in Windows Vista. This topic gives instructions for conguring NetWare print services. The order of this procedure may vary depending on the environment. Choosing the type of print services Before completing print service settings, choose the type of print service. Refer to the following descriptions as needed. Note • In NetWare 5.1 or 6.0, NDPS may also be used as the print service. If you use NDPS, use the Novell printer gateway included with NetWare. For details on conguring NDPS, refer to the NetWare documentation. • NDS (Novell Directory Service) and bindery NDS and bindery are both supported. Use the mode that is compatible with your network environment. • Queue server mode and remote printer mode Queue server mode and remote printer mode are both supported. • Queue server mode When using queue server mode, all print server functions are supported, so there is no need for other print server software or hardware. In NDS queue server mode (NDS PServer), the NDS print server is used for printing. In bindery queue server mode (Bindery PServer), the bindery print server is used for printing. Note that if you use queue server mode, a NetWare user license is required for each network interface. • Remote printer mode In remote printer mode, the printer is controlled by the NetWare print server. Thus, a NetWare print server is required. In NDS remote printer mode (NPrinter), the NDS print server is used for printing, and in bindery remote printer mode (RPrinter), the bindery print server is used for printing. 424 Network Setting Downloaded from ManualsPrinter.com Manuals Network Setting (Windows) Using NWADMIN or PCONSOLE to set up the print server Use NWADMIN to set up the print server if NDS queue server mode or remote printer mode is used. 1. 2. Log into NetWare as Administrator or with equivalent rights, and then start NWADMIN. Run Quick Setup. 1. Choose Print Services Quick Setup in the Tools menu. 2. Enter a desired name in Print Server Name. To use an existing print server, click the button at right and choose the name from the list. 3. Enter a desired printer name in Name. 4. To use the printer in queue server mode, choose Other/Unknown in Type. To use the printer in remote printer mode, choose Parallel in Type, click Communications, and set Ports to LPT1 and Connection Type to Manual Load. 5. Enter a desired queue name in Name. 6. In Volume, enter the volume object (that is, the object representing the physical volume on the network) where the print queue will be created. Click the button at right to choose from a list. 7. Complete other settings as needed and click OK. Note • The print server name will be required when conguring the printer’s protocol settings. Write down the print server name for future reference. • When running Quick Setup, the printer is assigned printer number “0.” When using the printer in queue server mode, do not change the printer number from “0.” 3. Set a password. 1. Right-click the print server created in step 2 and choose Details. 2. Click Change Password to open the password input dialog box. Enter the password. 3. Click OK to close the password input dialog box. 4. Click OK or Cancel to close the details dialog box. 4. To use the printer in remote printer mode, start the print server. To use the NetWare le server as the print server, enter “LOAD PSERVER.NLM” at the le server and press the Enter key. Note • This procedure is not required when using queue server mode. Network Setting 425 Downloaded from ManualsPrinter.com Manuals Network Setting (Windows) Use PCONSOLE to set up the print server if bindery queue server mode or remote printer mode is used. 1. 2. 3. Log into NetWare as Supervisor and start PCONSOLE. Switch to bindery mode. If the print server has not been created, create it. 1. In Available Options, select Quick Setup and press the Enter key. 2. Enter the name of the new print server, the new printer, and the queue. Note • The print server name will be required when conguring the printer’s protocol settings. Write down the print server name for future reference. 4. Specify the printer type. 1. To use the printer in queue server mode, choose Other/Unknown in Type. To use remote printer mode, set Printer Type to Parallel and Position to Manual Load. 2. Press the Esc key. 3. After the conrmation message is displayed, choose Yes and press the Enter key. 5. Set a password. 1. In Available Options, select Print Servers and press the Enter key. 2. Select the print server created in step 2 and press the Enter key. 3. Select Password, and press the Enter key to display the password input dialog box. 4. Enter the password and press the Enter key. 6. Press the Esc key several times to display the dialog box for conrming that PCONSOLE is nished. 7. Click Yes to exit PCONSOLE. 426 Network Setting Downloaded from ManualsPrinter.com Manuals Network Setting (Windows) Specifying NetWare Protocols Follow the steps below to congure NetWare protocol settings other than the frame type by using RemoteUI. Note • For details on RemoteUI, see “Using RemoteUI”. (→P.407) 1. Start the web browser and enter the following URL in the Location (or Address ) box to display the RemoteUI page. http://“printer IP address or name”/ Example: http://xxx.xxx.xxx.xxx/ 2. 3. 4. 5. Select Administrator Mode and click Logon. If a password has been set on the printer, enter the password. Click Network in the Device Manager menu at left to display the Network page. Click Edit in the upper-right corner of the NetWare group to display the Edit NetWare Protocol Settings page. 6. 7. Make sure the Frame Type indicates the frame type used on the NetWare network. To use burst mode, choose On for NCP Burst Mode. Note • Burst mode supports fast data transfer when printing in queue server mode. Normally, choose On. 8. In Print Application, click the print service to be used. Note • Only one print service selected here will be enabled. Multiple print services are not available at the same time. 9. 10. For packet signature, click If Requested by Server in Packet Signature. Complete the following settings based on the selected service. • If you have selected Bindery PServer: Queue Server Mode (Using a Bindery Print Server) 1. In File Server Name, enter the le server name. 2. In Print Server Name, enter the name of the print server created in "Specifying NetWare Print Services. (→P.424)" 3. In Print Server Password, enter the password of the print server created in "Specifying NetWare Print Services. (→P.424)" 4. In Polling Interval, specify the interval at which the printer checks the NetWare print queue. • If you have selected RPrinter: Remote Printer Mode (Using a Bindery Print Server) 1. In Print Server Name, enter the advertising name of the print server created in "Specifying NetWare Print Services. (→P.424)" 2. In Printer Number, enter the same printer number specied in "Specifying NetWare Print Services. (→P.424)" Network Setting 427 Downloaded from ManualsPrinter.com Manuals Network Setting (Windows) • If you have selected NDS PServer: Queue Server Mode (Using an NDS Print Server) 1. In Tree Name and Context Name, enter the tree and context name of the print server. 2. In Print Server Name, enter the name of the print server created in "Specifying NetWare Print Services. (→P.424)" 3. In Print Server Password, enter the password of the print server created in "Specifying NetWare Print Services. (→P.424)" 4. In Polling Interval, specify the interval at which the printer checks the NetWare print queue. • If you have selected NPrinter: Remote Printer Mode (Using a NDS Print Server) 1. In Print Server Name, enter the advertising name of the print server created in "Specifying NetWare Print Services. (→P.424)" Usually, the advertising name is the same as the name of the print server. 2. In Printer Number, enter the same printer number specied in "Specifying NetWare Print Services. (→P.424)" 11. 12. Click OK to display the Network page. Click Reset to activate the settings. For a list of NetWare protocol settings items, see “Conguring the Printer’s NetWare Network Settings”. (→P.411) Note • If you use RemoteUI to display the print log in RPrinter or NPrinter mode, the document and user information cannot be obtained. Thus, Document Name only indicates Unknown, and the User Name information is identied as RPRINTER/NPRINTER. 428 Network Setting Downloaded from ManualsPrinter.com Manuals Network Setting (Windows) Conguring NetWare Network Settings To print over a NetWare network, congure the network environment as follows. Important • To congure network settings, you must be logged in with administrative rights such as “Administrator” account. We recommend that your network administrator congure the network settings. 1. Specify the Ethernet frame type for communication between the printer and computers. For instructions, see “Specifying the Printer’s Frame Type”. (→P.422) 2. Specify the NetWare print services, including the print server and queue. For instructions, see “Specifying NetWare Print Services”. (→P.424) 3. Specify NetWare protocol details besides the frame type. For instructions, see “Specifying NetWare Protocols”. (→P.427) After you have completed the steps above, congure each computer for printing over the NetWare network. 4. Connect to the NetWare network. Install NetWare client software on each computer to be used for printing over the network, and log in to the NetWare server or tree. For instructions on connection, refer to the NetWare and operating system documentation. 5. Install the printer driver. Follow the instructions of your network administrator to install the printer driver on each computer to be used for printing. When installing the printer driver, choose Network Printer as the printer destination, and then choose the print queue created from the NetWare print service settings. 6. Follow these steps to congure the printer port. This step is not necessary if you specied the printer destination during installation of the printer driver. 1. Open the Printers and Faxes (or Printers ) window. 2. Right-click the printer icon and choose Properties. 3. Click the Port (or Advanced ) tab to display the Port (or Advanced ) sheet. 4. As the destination port, specify the print queue created by conguring the NetWare print service settings. Network Setting 429 Downloaded from ManualsPrinter.com Manuals Network Setting (Windows) Installing imagePROGRAF Device Setup Utility Install imagePROGRAF Device Setup Utility from the User Software CD-ROM provided with the printer as follows: Important • In Windows 2000/Windows XP/Windows Server 2003/Windows Vista, you must log on with administrative rights equivalent to the “Administrator” account. 1. 2. 3. 4. Insert the User Software CD-ROM in the CD-ROM drive. On the Setup Menu window, click Install Individual Software. Click Install in imagePROGRAF Device Setup Utility. Follow the instructions on the screen to proceed with the installation. Conguring the IP Address Using imagePROGRAF Device Setup Utility From a computer running Windows, you can use imagePROGRAF Device Setup Utility provided with the printer to congure the printer’s IP address. This topic describes how to congure the IP address using imagePROGRAF Device Setup Utility. Important • To congure network settings, you must be logged in with administrative rights such as “Administrator” account. We recommend that your network administrator congure the network settings. • For instructions on installing imagePROGRAF Device Setup Utility, see “Installing imagePROGRAF Device Setup Utility”. (→P.377) 1. 2. 3. 4. 5. 6. 7. Start imagePROGRAF Device Setup Utility from the start menu. In the Product Name list displayed, select the printer to congure. Choose Protocol Settings from the Printer menu. In the Setting IP Address list, choose Manual. Enter the IP address assigned to the printer and click the Set button. Click OK after the Conrmation message dialog box is displayed. Exit imagePROGRAF Device Setup Utility. Note • To congure the IP address automatically, choose Auto in the Setting IP Address list and select DHCP, BOOTP, or RARP. • You can also specify the subnet mask and default gateway. 430 Network Setting Downloaded from ManualsPrinter.com Manuals Network Setting (Mac OS X) Network Setting (Mac OS X) Conguring the Printer Driver Destination (Macintosh) Specify the printer driver destination as follows if the printer’s IP address is changed, or if you will use the printer over a network connection instead of via USB connection. • If you switch to printing in an AppleTalk network, see “Conguring the Destination for AppleTalk Network (Macintosh)”. (→P.433) • If you switch to printing in a TCP/IP network, or if the printer’s IP address is changed, see “Conguring the Destination for TCP/IP Network (Macintosh)”. (→P.436) • If you switch to printing in a Bonjour network, see “Conguring the Destination for Bonjour Network (Macintosh)”. (→P.438) Network Setting 431 Downloaded from ManualsPrinter.com Manuals Network Setting (Mac OS X) Conguring the Printer’s AppleTalk Network Settings Follow the steps below to congure the AppleTalk network settings. 1. Start the web browser and enter the following URL in the Location (or Address ) box to display the RemoteUI page. http://“printer IP address or name”/ Example: http://xxx.xxx.xxx.xxx/ 2. 3. 4. 5. Select Administrator Mode and click Logon. If a password has been set on the printer, enter the password. Click Network in the Device Manager menu at left to display the Network page. Click Edit in the upper-right corner of the AppleTalk group to display the Edit AppleTalk Protocol Settings page. 6. Refer to the AppleTalk Settings Items table to complete the settings. AppleTalk Settings Items Item Default Setting Details Phase Type Specify whether to use AppleTalk. If you will use AppleTalk, choose Phase 2. If you will not use AppleTalk, choose Disabled. Disabled Name (*1) Specify the object name used by AppleTalk (in up to 31 single-byte or 15 double-byte characters). However, do not use the following single-byte characters: @ * : = Canon NB-17FB (xxxxxx) Zone (*2) Specify the printer zone name, up to 31 single-byte characters. However, do not use the following single-byte characters: @ : = Also avoid using “*” (which represents the default zone) in the middle of a string. * *1: The object name you have specied in Name is displayed in Printer Setup Utility (or Print Center) in Mac OS X. If you use multiple printers in the same zone, assign a unique name to each printer. By default, the network interface name is “Canon NB-17FB (xxxxxx).” (Here, xxxxxx is the last six digits of the printer’s MAC address.) *2: If zones have been created on the network, enter the name of the printer’s zone. If there are no zones, leave the asterisk “*” entry (for the default zone) as it is. If you enter a network zone name that does not match created zones, the printer will not be detected by Macintosh computers. Consult your network administrator for information on zone names. 7. Click OK to display the Network page. 432 Network Setting Downloaded from ManualsPrinter.com Manuals Network Setting (Mac OS X) Conguring the Destination for AppleTalk Network (Macintosh) To print over an AppleTalk network, activate the AppleTalk protocol and congure the destination as follows. Activating AppleTalk on the printer Important • By factory default, the AppleTalk protocol is disabled on the printer. 1. Press the Menu button to display MAIN MENU. 2. 3. 4. 5. Press ▲ or ▼ to select Interface Setup, and then press the ► button. Press ▲ or ▼ to select AppleTalk, and then press the ► button. Press ▲ or ▼ to select On, and then press the OK button. Press the Online button to bring the printer online. If any of the settings is changed, a message for conrmation is displayed. In this case, press the OK button. Important • Be sure to complete step 5. This will activate the values you have entered. Note • By using RemoteUI, you can also specify the object name used by AppleTalk, as well as the printer zone name. For details on RemoteUI, see “Using RemoteUI”. (→P.407) Network Setting 433 Downloaded from ManualsPrinter.com Manuals Network Setting (Mac OS X) Conguring the Destination (Mac OS X) Note • The following procedures are based on Mac OS X 10.4. The method of conguring the destination varies depending on the version of Mac OS X. 1. 2. In System Preferences, click Network to display the Network window. In Show, choose Built-in Ethernet. Next, click AppleTalk, select Make AppleTalk Active, and click Apply now. 3. 4. 5. 6. Close the Network window and save the settings. Choose Utilities (or Applications ) in the Go menu of Finder. Click Printer Setup Utility (or Print Center ) in the Utilities folder. If the printer name is not displayed in Printer List, click Add. 434 Network Setting Downloaded from ManualsPrinter.com Manuals Network Setting (Mac OS X) 7. Select the printer from the list in the Printer Browser window and click Add. Network Setting 435 Downloaded from ManualsPrinter.com Manuals Network Setting (Mac OS X) Conguring the Destination for TCP/IP Network (Macintosh) Follow the steps below to congure the destination if you will use the printer in a TCP/IP network. Important • If you will use the printer in a TCP/IP network, make sure the printer’s IP address is congured correctly. • Conguring the IP Address Using the Printer Control Panel (→P.405) Conguring the Destination (Mac OS X) Note • The following procedures are based on Mac OS X 10.4. The method of conguring the destination varies depending on the version of Mac OS X. If you use other versions, refer to the help for the Printer Setup Utility (or the Print Center ). 1. 2. 3. Choose Utilities (or Applications ) in the Go menu of Finder. 4. Click More Printers. Click Printer Setup Utility (or Print Center ) in the Utilities folder. Click Add to display the Printer Browser window. 436 Network Setting Downloaded from ManualsPrinter.com Manuals Network Setting (Mac OS X) 5. In the list of connection methods, click Canon IP(iPF). 6. Enter the printer’s IP address in Printer’s Address and click Add. 7. Make sure the printer has been added, and then close the Printer List window. Important • If imagePROGRAF Generic is indicated in Kind, the printer information is not properly acquired. Make sure the printer is on and connected to the network. (→P.565) Network Setting 437 Downloaded from ManualsPrinter.com Manuals Network Setting (Mac OS X) Conguring the Destination for Bonjour Network (Macintosh) In Mac OS X 10.2.8 and later, use Bonjour functions to easily connect the printer to the network. Follow the steps below to congure the destination if you use the printer on TCP/IP network. Important • Bonjour and IP Print (Auto) do not support printing to a printer on other network groups that require a router for connection. Make sure the computer and printer are on the same network. For information about network settings, ask your network administrator. • By default, Bonjour is activated on the printer. The printer name as displayed in Printer Setup Utility (or Print Center ) in Mac OS X is predened as the Multicast DNS Service Name. You can activate or deactivate the Bonjour function or change the printer name by using RemoteUI. For instructions on changing it, see “Using RemoteUI”. (→P.407) 1. 2. 3. Choose Utilities (or Applications ) in the Go menu of Finder. 4. Select the printer from the list in the Printer Browser window and click Add. Click Printer Setup Utility (or Print Center ) in the Utilities folder. If the printer name is not displayed in Printer List, click Add. 438 Network Setting Downloaded from ManualsPrinter.com Manuals Hard Disk Hard Disk Hard Disk Printer Hard Disk Operations Printer hard disk operations are available from the following programs and interfaces. • • • • • • • • Printer driver imagePROGRAF HDI Driver imagePROGRAF Free Layout Color imageRUNNER Enlargement Copy imagePROGRAF Status Monitor imagePROGRAF Printmonitor RemoteUI Control Panel The hard disk operations available through each interface are as follows. Printer driver Windows imagePROGRAF HDI Driver Mac OS Operation Saving print jobs Operations with saved jobs imagePROGRAF Free Layout Color imageRUNNER Enlargement Copy imagePROGRAF Status Monitor RemoteUI Control Panel Availability Availability Color imageimageRUNNER Printer driver PROGRAF Enlargement Printmonitor Copy Availability Availability Availability Print Yes Yes No No No Print (auto delete) Yes Yes No No No Save in mail box Yes No No No No Save data before printing(*1) Yes Yes No No No Print saved jobs No No Yes Yes Yes Delete saved jobs No No Yes Yes Yes Hard Disk 439 Downloaded from ManualsPrinter.com Manuals Hard Disk Printer driver Windows imagePROGRAF HDI Driver Mac OS Operation Job queue management Mail box management Other operations imagePROGRAF Free Layout Color imageRUNNER Enlargement Copy imagePROGRAF Status Monitor RemoteUI Control Panel Availability Availability Color imageimageRUNNER Printer driver PROGRAF Enlargement Printmonitor Copy Availability Availability Availability Display job queue No No Yes Yes Yes Delete No No Yes Yes Yes Priority No No Yes Yes Yes Move saved jobs No No Yes Yes No Modify saved No jobs No Yes Yes No Modify mail boxes No No Yes Yes No Print a list of saved jobs No No No No Yes Display a list of saved jobs No No Yes Yes Yes Display free hard disk space No No Yes Yes Yes Initialize hard No disk No No No Yes Recover after No errors No No No Yes No Yes Yes Yes Display error messages No *1: This option is available with Print, Print (auto delete), and Save in mail box. Print jobs are saved and then printed. 440 Hard Disk Downloaded from ManualsPrinter.com Manuals Hard Disk Saved Print Jobs Saving print jobs refers to the process of sending print jobs from a computer and storing them on the printer’s hard disk. By saving print jobs, you can print them repeatedly as needed without sending them from a computer again. Saving print jobs enables you to do the following things. • Save the time spent using a computer When you send a print job to the printer, you can either print it and save it on the printer at the same time or simply save it on the printer without printing it yet. Saved print jobs can be printed in the required quantity later without the need to use a computer again. • Simplify reprinting, if any errors occur If errors occur in the middle of printing (as when paper runs out), you can resume printing after clearing the error without resending the print job from a computer. • Streamline printing work Without using a computer, you can select print jobs and print in the desired quantity. You can also select multiple print jobs to print during the same period. This enables unattended operation at night, for example. Hard Disk 441 Downloaded from ManualsPrinter.com Manuals Hard Disk Output Method ( Send job to ) To save print jobs on the printer’s hard disk, select Output Method (in Windows) or Send job to (in Mac OS X). Three options are available in Output Method (in Windows) or Send job to (in Mac OS X): Print, Print (auto delete), and Save in mail box. Optionally, you can also select Save data before printing. • Print Save print jobs automatically at the same time they are printed. (This is the default format.) • Print (auto delete) Save print jobs temporarily at the same time they are printed and delete them after printing. • Save in mail box Save print jobs on the printer without printing them. • Save data before printing This option is available in combination with Print, Print (auto delete), and Save in mail box. Print jobs are saved on the hard disk and then printed. Note • The option in Output Method (in Windows) or Send job to (in Mac OS X) cannot be specied during HP-GL/2 printing. The option in Output Method (in Windows) or Send job to (in Mac OS X) is Print. 442 Hard Disk Downloaded from ManualsPrinter.com Manuals Hard Disk Storage destination The storage area on the printer’s hard disk is divided into a temporary storage area and a permanent storage area. Print jobs in the “job queue” or “Common Box” are saved in the temporary storage area. Jobs in “Personal Boxes” are saved in the permanent storage area. • Job queue Print jobs in progress(*1) are temporarily saved in the job queue, a storage space where jobs are saved in the order they will be printed. Up to ten jobs can be stored in the queue. Subsequent jobs are treated as "standby" jobs, to be processed when possible. *1: Jobs that are being saved, received, processed, printed, or deleted, or jobs that have been interrupted or are waiting to print • Common Box If you have selected Print in Output Method (in Windows) or Send job to (in Mac OS X) as the format for print jobs sent from the computer, the jobs are saved in the common box. There is one Common Box, numbered “00”. A password cannot be set for the Common Box. Up to 100 print jobs can be saved here, but they will be deleted one after another starting with the oldest job in the following situations. • If there are more than 100 jobs in the Common Box and job queue combined • If the temporary storage area becomes full during reception of print jobs for which you have selected Print or Print (auto delete) in Output Method (in Windows) or Send job to (in Mac OS X) • If there is not enough space in the temporary and permanent storage areas during reception of print jobs for which you have selected Save in mail box in Output Method (in Windows) or Send job to (in Mac OS X) • Personal Boxes You can store jobs in Personal Boxes in either of the following ways. • By moving a job stored in the Common Box into a Personal Box • By selecting Save in mail box in Output Method (in Windows) or Send job to (in Mac OS X) There are nine Personal Boxes, numbered “01” to “09”. You can specify a name and password for each Personal Box. Up to 100 print jobs can be saved in all Personal Boxes combined. Hard Disk 443 Downloaded from ManualsPrinter.com Manuals Hard Disk Saving Print Jobs Sent from Sources Other than the Printer Driver To save print jobs sent from software or systems other than the printer driver provided with the printer, complete the Output Method and Save and Print settings in the printer menu. Important • Contact the software or system developer for information about support for this printer function. Specifying Output Method 1. Press the Menu button to display MAIN MENU. 2. 3. 4. Press ▲ or ▼ to select System Setup, and then press the ► button. Press ▲ or ▼ to select Output Method, and then press the ► button. Press ▲ or ▼ to select the output method, and then press the OK button. • Print Save print jobs automatically at the same time they are printed. (This is the default format.) • Print (Auto Del) Save print jobs temporarily at the same time they are printed and delete them after printing. • Save: Box 01 (Here, the number represents a box number) Save print jobs on the printer. If you select this option, go to step 5 and select the box for saving print jobs. 5. Press ▲ or ▼ to select the box, and then press the OK button. Specifying Save and Print 1. Press the Menu button to display MAIN MENU. 2. 3. 4. Press ▲ or ▼ to select System Setup, and then press the ► button. Press ▲ or ▼ to select Save and Print, and then press the ► button. Press ▲ or ▼ to select On, or Off, and then press the OK button. If you select On, print jobs are saved on the hard disk and then printed. 444 Hard Disk Downloaded from ManualsPrinter.com Manuals Hard Disk Saving Print Jobs You can save print jobs on the printer’s hard disk. Save print jobs on the printer’s hard disk as follows. • Using the printer driver (Windows) (→P.445) • Using imagePROGRAF HDI Driver (Windows) See "Output Method Setting" in the HDI Driver Guide. • Using imagePROGRAF Free Layout (Windows) See the section on the Output Method dialog box in the Free Layout Guide For Windows. • Using Color imageRUNNER Enlargement Copy (Windows) See the section on the Output Method button on the Output Settings sheet in the Color imageRUNNER Enlargement Copy Guide For Windows. • Using the printer driver (Mac OS X) (→P.447) Using Color imageRUNNER Enlargement Copy (Mac OS) See the section on the Output Method button on the Output Settings sheet in the Color imageRUNNER Enlargement Copy Guide For Macintosh. Using the printer driver (Windows) 1. Access the Page Setup sheet. Hard Disk 445 Downloaded from ManualsPrinter.com Manuals Hard Disk 2. Click Output Method to display the Output Method dialog box. 3. Choose an Output Method. • Print Save print jobs automatically at the same time they are printed. (This is the default format.) • Print (auto delete) Save print jobs temporarily at the same time they are printed and delete them after printing. • Save in mail box Save print jobs on the printer without printing them. If you choose Save in mail box, also specify the destination Personal Box in the Mail box list. Note • Click Acquire Mail Box Name to display Personal Box names in the Mail box list, as acquired from the printer. • Save data before printing This option is available in combination with Print, Print (auto delete), and Save in mail box. Print jobs are saved on the hard disk and then printed. 4. In Name of data to be saved, specify how to name saved print jobs. • To use the le name, choose Use le name. • Otherwise choose Enter name and enter a name in Name. 5. Click OK to close the Output Method dialog box. 446 Hard Disk Downloaded from ManualsPrinter.com Manuals Hard Disk Using the printer driver (Mac OS X) 1. Access the Additional Settings pane. 2. Choose an Send job to. • Print Save print jobs automatically at the same time they are printed. • Print (auto delete) Save print jobs temporarily at the same time they are printed and delete them after printing. • Save in mail box Save print jobs on the printer without printing them. The Destination dialog box is displayed if you select Save in mail box. Here, specify the name and Personal Box number for saved print jobs. 1. In Document title, enter a name to identify saved print jobs. 2. Select the Personal Box number in the Mail box list. 3. Click OK to close the Destination dialog box. Note • Save data before printing This option is available in combination with Print, Print (auto delete), and Save in mail box. Print jobs are saved on the hard disk and then printed. Hard Disk 447 Downloaded from ManualsPrinter.com Manuals Hard Disk Do Not Save Print Jobs in the Common Box If you have selected Print in Output Method (in Windows) or Send job to (in Mac OS X) in the printer driver as the format for print jobs sent from the computer, the jobs are saved in the common box. (→P.441) You can select Save: Shared Box > Off in the printer menu so that print jobs for which you have selected Output Method > Print in the printer driver are deleted from the common box after printing. Use this function when printing highly condential documents. 1. Press the Menu button to display MAIN MENU. 2. 3. 4. Press ▲ or ▼ to select System Setup, and then press the ► button. Press ▲ or ▼ to select Save: Shared Box, and then press the ► button. Press ▲ or ▼ to select Off, and then press the OK button. 448 Hard Disk Downloaded from ManualsPrinter.com Manuals Hard Disk Managing Queued Jobs (Deleting or Preempting Other Jobs) You can delete queued jobs. You can also select queued jobs and give them rst priority, to print them immediately after the printer has printed jobs that are currently being processed or printed. Note • You cannot interrupt jobs that are currently being saved, processed, printed, or deleted by printing other jobs before these processes are nished. You can manage queued print jobs as follows. • • • • Using the Control Panel Using RemoteUI Using imagePROGRAF Status Monitor (Windows) Using imagePROGRAF Printmonitor (Macintosh) Hard Disk 449 Downloaded from ManualsPrinter.com Manuals Hard Disk Using the Control Panel 1. Press the Menu button to display Menu Durng Prtng. 2. You can manage queued jobs as follows. • Deleting queued jobs 1. Press ▲ or ▼ to select Job Mgmt Menu, and then press the OK button. 2. Press ▲ or ▼ to select Job Queue Ope., and then press the ► button. 3. Press ▲ or ▼ to select the print job to delete, and then press the ► button. 4. Press ▲ or ▼ to select Delete, and then press the OK button. • Changing the order of printing 1. Press ▲ or ▼ to select Job Mgmt Menu, and then press the OK button. 2. Press ▲ or ▼ to select Job Queue Ope., and then press the ► button. 3. Press ▲ or ▼ to select the job to print rst, and then press the ► button. 4. Press ▲ or ▼ to select Priority, and then press the OK button. Using RemoteUI On the Print Job page, select the job to manage and how to manage it. For details, refer to the RemoteUI help. 450 Hard Disk Downloaded from ManualsPrinter.com Manuals Hard Disk Using imagePROGRAF Status Monitor On the Job sheet, select the job and the desired function. The following functions are available. • • • • Preempting other jobs Pausing printing Resuming printing Canceling print jobs For details, refer to the imagePROGRAF Status Monitor help. Using imagePROGRAF Printmonitor On the Driver pane, select the job and the desired function. The following functions are available. • • • • Preempting other jobs Pausing printing Resuming printing Canceling print jobs For details, refer to the imagePROGRAF Printmonitor help. Hard Disk 451 Downloaded from ManualsPrinter.com Manuals Hard Disk Setting Passwords for Personal Boxes By default, no passwords are set for personal boxes. For greater security, you can set passwords for each personal box. After you set a password, it will be required to modify the personal box settings, as well as to display, print, delete, move, and modify jobs saved in the personal box. Note • A password cannot be set for the common box. • Enter a four-digit number as the password, in the range 0001-9999. • Even if you have set passwords, they are not required to access personal boxes in Administrator Mode in RemoteUI. You can set a password for a personal box as follows. • Using RemoteUI • Using imagePROGRAF Status Monitor (Windows) • Using imagePROGRAF Printmonitor (Mac OS) 452 Hard Disk Downloaded from ManualsPrinter.com Manuals Hard Disk Using RemoteUI 1. 2. On the Stored Job page, select the personal box for a password. 3. In the Set/Register User’s Inbox dialog box, specify the password and click OK. • Set Password : Select the check box. • Password : Enter the password. (This eld is limited to four digits in the range 0001-9999.) • Conrmation Number : Re-enter the password to conrm it. Click Edit. For details, refer to the RemoteUI help. Hard Disk 453 Downloaded from ManualsPrinter.com Manuals Hard Disk Using imagePROGRAF Status Monitor (Windows) 1. On the Hard Disk sheet, select a listed personal box for a password and click Open. Note • Enter a password if one has been set for the personal box. 2. In the Documents dialog box, click Settings. 454 Hard Disk Downloaded from ManualsPrinter.com Manuals Hard Disk 3. In the Settings dialog box, specify the password and click OK. • Set password : Select the check box. • Password : Enter the password. (This eld is limited to four digits in the range 0001-9999.) • Re-enter to conrm : Re-enter the password to conrm it. For details, refer to the imagePROGRAF Status Monitor help le. Using imagePROGRAF Printmonitor (Mac OS) 1. In the Hard Disk pane, click “►” next to Inbox No./Name to list saved jobs. Select a saved job and click Set. 2. In the Settings dialog box, specify the password and click OK. • Set password : Select the check box. • Password : Enter the password. (This eld is limited to four digits in the range 0001-9999.) • Verify : Re-enter the password to conrm it. For details, refer to the imagePROGRAF Printmonitor help le. Hard Disk 455 Downloaded from ManualsPrinter.com Manuals Hard Disk Naming Personal Boxes By default, personal boxes are unnamed. You can name them for easier management. You can assign a name to a personal box as follows. • Using RemoteUI • Using imagePROGRAF Status Monitor (Windows) • Using imagePROGRAF Printmonitor (Mac OS) Using RemoteUI 1. On the Stored Job page, select the personal box to identify. Note • Enter a password if one has been set for the personal box. 2. Click Edit. 456 Hard Disk Downloaded from ManualsPrinter.com Manuals Hard Disk 3. In the Set/Register User’s Inbox dialog box, enter the personal box name in Inbox Name and click OK. For details, refer to the RemoteUI help. Using imagePROGRAF Status Monitor (Windows) 1. On the Hard Disk sheet, select a listed personal box to identify and click Open. Note • Enter a password if one has been set for the personal box. Hard Disk 457 Downloaded from ManualsPrinter.com Manuals Hard Disk 2. In the Documents dialog box, click Settings. 3. In the Settings dialog box, enter the personal box name and click OK. For details, refer to the imagePROGRAF Status Monitor help le. 458 Hard Disk Downloaded from ManualsPrinter.com Manuals Hard Disk Using imagePROGRAF Printmonitor (Mac OS) 1. On the Hard Disk pane, click “►” next to Inbox No./Name to list saved jobs. Select a saved job and click Set. Note • Enter a password if one has been set. The password is a four-digit number. 2. In the Settings dialog box, enter the personal box name and click OK. For details, refer to the imagePROGRAF Printmonitor help le. Hard Disk 459 Downloaded from ManualsPrinter.com Manuals Hard Disk Displaying a List of Saved Jobs You can display saved print jobs in the Common Box and each Personal Box. You can view a list of stored print jobs as follows. • • • • Using the Control Panel Using RemoteUI Using imagePROGRAF Status Monitor (Windows) Using imagePROGRAF Printmonitor (Macintosh) Using the Control Panel 1. Press the Menu button to display MAIN MENU. 2. Display a list of saved print jobs. • To display jobs saved in the Common Box 1. Press ▲ or ▼ to select Job Management, and then press the ► button. 2. Press ▲ or ▼ to select Com. BOX Ope., and then press the ► button. 3. Press the ▲ or ▼ button to select Job List. • To display jobs saved in Personal Boxes 1. Press ▲ or ▼ to select Job Management, and then press the ► button. 2. Press ▲ or ▼ to select Psnl. BOX Ope., and then press the ► button. 3. Press ▲ or ▼ to select the folder, and then press the ► button. 4. Enter a password if one has been set, and then press the ► button. 5. Press the ▲ or ▼ button to select Job List. Note • You can check a list of print jobs in the queue by choosing Job Management → Job Queue Ope.. 460 Hard Disk Downloaded from ManualsPrinter.com Manuals Hard Disk Using RemoteUI Choose a mail box on the Stored Job page to display a list of jobs saved in that mail box. Note • Enter a password if one has been set. Jobs saved in the mail box are listed. Note • Document and owner names during HP-GL/2 printing A job number is automatically assigned by the printer as the document name or title. GL2 JOB#001 (Range: 001-210) The owner name is blank. For details, refer to the RemoteUI help. Hard Disk 461 Downloaded from ManualsPrinter.com Manuals Hard Disk Using imagePROGRAF Status Monitor (Windows) On the Hard Disk sheet, select a mail box in the list and click Open. Note • Enter a password if one has been set. Jobs saved in that mail box are displayed in the Documents dialog box. Note • Document and owner names during HP-GL/2 printing A job number is automatically assigned by the printer as the document name or title. GL2 JOB#001 (Range: 001-210) The owner name is blank. For details, refer to the imagePROGRAF Status Monitor help. 462 Hard Disk Downloaded from ManualsPrinter.com Manuals Hard Disk Using imagePROGRAF Printmonitor (Macintosh) In the Hard Disk pane, click “►” next to Inbox No./Name to list saved jobs. Note • Document and user names during HP-GL/2 printing A job number is automatically assigned by the printer as the document name or title. GL2 JOB#001 (Range: 001-210) The user name is blank. Note • Enter a password if one has been set. The password is a four-digit number. For details, refer to the imagePROGRAF Printmonitor help. Hard Disk 463 Downloaded from ManualsPrinter.com Manuals Hard Disk Printing a List of Saved Jobs You can print a list of saved print jobs in the common box and each personal box. You can also print a list of print jobs by using the Control Panel. 1. Press the Menu button to display MAIN MENU. 2. Print a list of saved print jobs. • To print a list of jobs saved in the Common Box 1. Press ▲ or ▼ to select Job Management, and then press the ► button. 2. Press ▲ or ▼ to select Com. BOX Ope., and then press the ► button. 3. Press ▲ or ▼ to select Print Job List, and then press the ► button. 4. Press ▲ or ▼ to select Yes, and then press the OK button. • To print a list of jobs saved in Personal Boxes 1. Press ▲ or ▼ to select Job Management, and then press the ► button. 2. Press ▲ or ▼ to select Psnl. BOX Ope., and then press the ► button. 3. Press ▲ or ▼ to select the folder, and then press the ► button. 4. Enter a password if one has been set, and then press the OK button. 5. Press ▲ or ▼ to select Print Job List, and then press the ► button. 6. Press ▲ or ▼ to select Yes, and then press the OK button. 464 Hard Disk Downloaded from ManualsPrinter.com Manuals Hard Disk Printing Saved Jobs You can print jobs stored on the printer’s hard disk as follows. • • • • Using the Control Panel Using RemoteUI Using imagePROGRAF Status Monitor (Windows) Using imagePROGRAF Printmonitor (Mac OS) Using the Control Panel 1. Press the Menu button to display MAIN MENU. 2. Print the saved job. • Printing jobs in the common box 1. Press ▲ or ▼ to select Job Management, and then press the ► button. 2. Press ▲ or ▼ to select Com. BOX Ope., and then press the ► button. 3. Press ▲ or ▼ to select Job List, and then press the ► button. 4. Press ▲ or ▼ to select the saved job to print, and then press the ► button. 5. Press ▲ or ▼ to select Print, and then press the ► button. 6. Conrm the paper to use for printing and press the OK button. 7. Specify the number of copies and press the OK button. • Printing jobs in personal boxes 1. Press ▲ or ▼ to select Job Management, and then press the ► button. 2. Press ▲ or ▼ to select Psnl. BOX Ope., and then press the ► button. 3. Press ▲ or ▼ to select the folder, and then press the ► button. 4. Enter a password if one has been set, and then press the ► button. 5. Press ▲ or ▼ to select Job List, and then press the ► button. 6. Press ▲ or ▼ to select the saved job to print, and then press the ► button. 7. Press ▲ or ▼ to select Print, and then press the ► button. 8. Conrm the paper to use for printing and press the OK button. 9. Specify the number of copies and press the OK button. Hard Disk 465 Downloaded from ManualsPrinter.com Manuals Hard Disk Using RemoteUI 1. On the Stored Job page, choose the mail box. Note • Enter a password if one has been set. 2. Select the print job in the list and click Print. 466 Hard Disk Downloaded from ManualsPrinter.com Manuals Hard Disk 3. On the Print Saved Document page, enter the quantity to print in Copies and click OK. For details, refer to the RemoteUI help. Using imagePROGRAF Status Monitor (Windows) 1. On the Hard Disk sheet, select a mail box in the list and click Open. Note • Enter a password if one has been set. Hard Disk 467 Downloaded from ManualsPrinter.com Manuals Hard Disk 2. In the Documents dialog box, select the print job in the list and click Print. 3. In the Print dialog box, enter the quantity to print in Copies and click OK. For details, refer to the imagePROGRAF Status Monitor help le. Using imagePROGRAF Printmonitor (Mac OS) 1. In the Hard Disk pane, click “►” next to Inbox No./Name to list saved jobs. Note • Enter a password if one has been set. The password is a four-digit number. 468 Hard Disk Downloaded from ManualsPrinter.com Manuals Hard Disk 2. Select the saved job in the list and click Resume Printing to display the Resume Printing dialog box. 3. Specify the number of copies and click the OK button. For details, refer to the imagePROGRAF Printmonitor help le. Hard Disk 469 Downloaded from ManualsPrinter.com Manuals Hard Disk Moving saved jobs Print jobs for which Print is selected as the format in Output Method (in Windows) or Send job to (in Mac OS X) are saved in the Common Box, number “00”. However, jobs in this mail box will be deleted one after another starting with the oldest job in the following situations. • If there are more than 100 saved jobs in the Common Box and job queue combined • If the temporary storage area becomes full during reception of print jobs for which you have selected Print or Print (auto delete) in Output Method (in Windows) or Send job to (in Mac OS X) • If the temporary and permanent storage areas no longer have enough space during reception of print jobs for which you have selected Save in mail box in Output Method (in Windows) or Send job to (in Mac OS X) You can move jobs to Personal Boxes “01” to “09” to prevent them from being deleted. (Up to 100 jobs can be stored here.) You can also move saved jobs from one Personal Box to another. You can move stored print jobs as follows. • Using RemoteUI • Using imagePROGRAF Status Monitor (Windows) • Using imagePROGRAF Printmonitor (Macintosh) Note • Jobs saved in Personal Boxes cannot be moved to the Common Box. Using RemoteUI 1. On the Stored Job page, choose the mail box. 470 Hard Disk Downloaded from ManualsPrinter.com Manuals Hard Disk Note • Enter a password if one has been set. 2. Select the print job in the list and click Move. 3. On the Move Document page, select the name or number of the destination Personal Box in the Destination mail box list and click OK. For details, refer to the RemoteUI help. Hard Disk 471 Downloaded from ManualsPrinter.com Manuals Hard Disk Using imagePROGRAF Status Monitor (Windows) 1. On the Hard Disk sheet, select a mail box in the list and click Open. Note • Enter a password if one has been set. 2. In the Documents dialog box, select the print job in the list and click Move. 472 Hard Disk Downloaded from ManualsPrinter.com Manuals Hard Disk 3. In the Move dialog box, select the destination Personal Box and click OK. For details, refer to the imagePROGRAF Status Monitor help. Hard Disk 473 Downloaded from ManualsPrinter.com Manuals Hard Disk Using imagePROGRAF Printmonitor (Macintosh) 1. In the Hard Disk pane, click “►” next to Inbox No./Name to list saved jobs. Note • Enter a password if one has been set. The password is a four-digit number. 2. Select the print job in the list and click Move. 3. In the Move Document dialog box, select the destination Personal Box and click OK. For details, refer to the imagePROGRAF Printmonitor help. 474 Hard Disk Downloaded from ManualsPrinter.com Manuals Hard Disk Displaying Details of Saved Jobs You can view details of stored print jobs as follows. • Using RemoteUI • Using imagePROGRAF Status Monitor (Windows) • Using imagePROGRAF Printmonitor (Mac OS) Using RemoteUI 1. On the Stored Job page, choose the mail box. Note • Enter a password if one has been set. 2. Select the saved job in the list and click Details. Hard Disk 475 Downloaded from ManualsPrinter.com Manuals Hard Disk The Details of the saved document page is displayed. For details, refer to the RemoteUI help. Using imagePROGRAF Status Monitor (Windows) 1. On the Hard Disk sheet, select a mail box in the list and click Open. Note • Enter a password if one has been set. 476 Hard Disk Downloaded from ManualsPrinter.com Manuals Hard Disk 2. In the Documents dialog box, select the saved job in the list and click Properties. The Properties dialog box is displayed. For details, refer to the imagePROGRAF Status Monitor help le. Hard Disk 477 Downloaded from ManualsPrinter.com Manuals Hard Disk Using imagePROGRAF Printmonitor (Mac OS) 1. On the Hard Disk pane, click ► next to Inbox No./Name to list saved jobs. Note • Enter a password if one has been set. The password is a four-digit number. For details, refer to the imagePROGRAF Printmonitor help le. 478 Hard Disk Downloaded from ManualsPrinter.com Manuals Hard Disk Renaming Saved Jobs You can rename stored print jobs as follows. • Using RemoteUI • Using imagePROGRAF Status Monitor (Windows) • Using imagePROGRAF Printmonitor (Mac OS) Using RemoteUI 1. On the Stored Job page, choose the mail box. Note • Enter a password if one has been set. 2. Select the saved job in the list and click Details. Hard Disk 479 Downloaded from ManualsPrinter.com Manuals Hard Disk 3. On the Details of the saved document page, click Change Document. 4. On the Rename Saved Document page, enter the new job name in Document Name and click OK. For details, refer to the RemoteUI help. 480 Hard Disk Downloaded from ManualsPrinter.com Manuals Hard Disk Using imagePROGRAF Status Monitor (Windows) 1. On the Hard Disk sheet, select a mail box in the list and click Open. Note • Enter a password if one has been set. 2. In the Documents dialog box, select the saved job in the list and click Properties. Hard Disk 481 Downloaded from ManualsPrinter.com Manuals Hard Disk 3. In the Properties dialog box, enter the new job name and click OK. For details, refer to the imagePROGRAF Status Monitor help le. Using imagePROGRAF Printmonitor (Mac OS) 1. On the Hard Disk pane, click ► next to Inbox No./Name to list saved jobs. Note • Enter a password if one has been set. The password is a four-digit number. 482 Hard Disk Downloaded from ManualsPrinter.com Manuals Hard Disk 2. Select the saved job in the list and click Set. 3. In the Settings dialog box, enter the new job name and click OK. Documents cannot be renamed unless a password has been set. In this case, specify a password. After renaming, you can cancel the password as needed. For details, refer to the imagePROGRAF Printmonitor help le. Hard Disk 483 Downloaded from ManualsPrinter.com Manuals Hard Disk Deleting Saved Jobs You can delete saved jobs in the box shared among all users and in each personal box. Delete stored print jobs as follows. • • • • Using the Control Panel Using RemoteUI Using imagePROGRAF Status Monitor (Windows) Using imagePROGRAF Printmonitor (Mac OS) Using the Control Panel 1. Press the Menu button to display MAIN MENU. 2. Delete the saved job. • To delete saved jobs in the Common Box 1. Press ▲ or ▼ to select Job Management, and then press the ► button. 2. Press ▲ or ▼ to select Com. BOX Ope., and then press the ► button. 3. Press ▲ or ▼ to select Job List, and then press the ► button. 4. Press ▲ or ▼ to select the saved job to delete, and then press the ► button. 5. Press ▲ or ▼ to select Delete, and then press the ► button. 6. Conrm the print job for deletion and press the OK button. • To delete saved jobs in Personal Boxes 1. Press ▲ or ▼ to select Job Management, and then press the ► button. 2. Press ▲ or ▼ to select Psnl. BOX Ope., and then press the ► button. 3. Press ▲ or ▼ to select the folder, and then press the ► button. 4. Enter a password if one has been set, and then press the OK button. 5. Press ▲ or ▼ to select Job List, and then press the ► button. 6. Press ▲ or ▼ to select the saved job to delete, and then press the ► button. 7. Press ▲ or ▼ to select Delete, and then press the ► button. 8. Conrm the print job for deletion and press the OK button. 484 Hard Disk Downloaded from ManualsPrinter.com Manuals Hard Disk Using RemoteUI 1. On the Stored Job page, choose the mail box. Note • Enter a password if one has been set. 2. Select the saved job in the list and click Delete. For details, refer to the RemoteUI help. Hard Disk 485 Downloaded from ManualsPrinter.com Manuals Hard Disk Using imagePROGRAF Status Monitor (Windows) 1. On the Hard Disk sheet, select a mail box in the list and click Open. Note • Enter a password if one has been set. 2. In the Documents dialog box, select the print job in the list and click Delete. For details, refer to the imagePROGRAF Status Monitor help le. 486 Hard Disk Downloaded from ManualsPrinter.com Manuals Hard Disk Using imagePROGRAF Printmonitor (Mac OS) 1. On the Hard Disk pane, click ► next to Inbox No./Name to list saved jobs. Note • Enter a password if one has been set. The password is a four-digit number. 2. Select the saved job in the list and click Delete. For details, refer to the imagePROGRAF Printmonitor help le. Hard Disk 487 Downloaded from ManualsPrinter.com Manuals Hard Disk Checking the Free Hard Disk Space You can check the space available on the printer’s hard disk as follows. • • • • Using the Control Panel Using RemoteUI Using imagePROGRAF Status Monitor (Windows) Using imagePROGRAF Printmonitor (Macintosh) Using the Control Panel 1. Press the Menu button to display MAIN MENU. 2. 3. Press ▲ or ▼ to select Information, and then press the ► button. Press ▲ or ▼ to select HDD Information, and then press the ► button. Note • You can also check the free hard disk space by pressing the Information button three times. Using RemoteUI To view the box list, select Stored Job in Job Management. On the Stored Job page, the free hard disk space is shown in the upper-right corner when boxes are listed. For details, refer to the RemoteUI help. 488 Hard Disk Downloaded from ManualsPrinter.com Manuals Hard Disk Using imagePROGRAF Status Monitor The Hard Disk sheet shows the free hard disk space. ■Hard Disk Sheet in imagePROGRAF Status Monitor For details, refer to the imagePROGRAF Status Monitor help. Using imagePROGRAF Printmonitor The Hard Disk pane shows the free hard disk space. ■Hard Disk Pane in imagePROGRAF Printmonitor For details, refer to the imagePROGRAF Printmonitor help. Hard Disk 489 Downloaded from ManualsPrinter.com Manuals Hard Disk Erasing Data on the Printer’s Hard Disk You can erase data on the printer’s hard disk from the Control Panel. There are three ways to erase the data, as follows. Erasure Method Time Required Details High Speed A few seconds Erases le management data for print job data stored on the printer’s hard disk. Choose this method for relatively fast erasure. Because only the le management data is erased, the print job data itself is not erased. Note that it may be possible to read this data using commercial data recovery software. Secure High Spd. About 40 minutes Overwrites the entire hard disk with random data. No verication is performed to check if the data was correctly written. Choose this method to erase highly condential data. Note that it may be possible to read the overwritten data using specialized data recovery tools. Secure About 20 hours Overwrites the entire hard disk with 00, FF, and random data (one time each). Verication is performed to check if the data was correctly written. Choose this method to erase especially condential data. It is virtually impossible to recover the overwritten data. Conforms to the DoD5220.22-M standard of the U.S. Department of Defense. Note • For a more secure method of preventing data recovery, we recommend physically or magnetically destroying the hard disk. In this case, the hard disk can no longer be used. • Erase HDD Data is not available if there is a job queue. Also note that during execution of Erase HDD Data, print jobs cannot be processed. 1. Press the Menu button to display MAIN MENU. 2. 3. 4. 5. 6. Press ▲ or ▼ to select System Setup, and then press the ► button. Press ▲ or ▼ to select Erase HDD Data, and then press the ► button. Press ▲ or ▼ to select the method of erasure, and then press the ► button. Press ▲ or ▼ to select Yes, and then press the OK button to display the conrmation screen. Press ▲ or ▼ to select Yes, and then press the OK button to start erasure. 490 Hard Disk Downloaded from ManualsPrinter.com Manuals Adjusting the Printhead Adjustments for Better Print Quality Adjusting the Printhead Correcting Print Misalignment If printed vertical lines are warped or colors are out of alignment, adjust the Printhead alignment. Adjust the Printhead alignment automatically or manually by using a printed test pattern. For instructions on automatic adjustment, see “Adjusting the Printhead Alignment Automatically”. (→P.491) For instructions on manual adjustment, see “Adjusting the Printhead Alignment Manually”. (→P.493) Adjusting the Printhead Alignment Automatically If printed vertical lines are warped or colors are out of alignment, adjust the Printhead alignment. Adjust the Printhead alignment automatically or manually by printing and reading a test pattern. There are two modes for automatic adjustment: Standard Adj. and Advanced Adj.. Standard Adj. will x most slight image distortion or color misalignment, but if not, try Advanced Adj.. If using special media or printing does not improve even after performing automatic adjustment using advanced adjustment, try manual adjustment. For instructions on manual adjustment, see “Adjusting the Printhead Alignment Manually”. (→P.493) Follow these steps for standard automatic adjustment of the Printhead. 1. Prepare one unused sheet A4/Letter-sized or larger when Standard Adj. is selected or ve when Advanced Adj. is selected. When using a roll, load a roll 10 inches (254 mm) or wider. • Loading the Sheet in the Printer (→P.133) • Loading Rolls on the Roll Holder (→P.107) • Loading Rolls in the Roll Holder Slot (→P.109) • Loading the Roll in the Printer (→P.110) Note • Use Standard Adj. if you have switched to another type of paper or if you want the boundaries between colors to appear as attractive as possible. • Use Advanced Adj. to ne-tune the space between nozzles or colors if you have switched the printhead or if you want printed documents to appear as vivid as possible. We recommend using Advanced Adj. for printing at a higher level of image quality. • Always make sure the loaded paper matches the media type setting on the printer. Adjustment cannot be completed correctly unless the setting value matches the loaded paper. • We recommend using the type of paper you use most often for adjustment. • This function is not available for CAD Tracing Paper, CAD Translucent Matte Film, or CAD Clear Film. If adjustment is not possible as expected using highly transparent lm or similar media, try another type of media or adjust the Printhead alignment manually. (→P.493) Adjustments for Better Print Quality 491 Downloaded from ManualsPrinter.com Manuals Adjusting the Printhead 2. Press the Menu button to display MAIN MENU. 3. 4. 5. 6. Press ▲ or ▼ to select Adjust Printer, and then press the ► button. Press ▲ or ▼ to select Auto Head Adj., and then press the ► button. Press ▲ or ▼ to select Advanced Adj., and then press the ► button. Press ▲ or ▼ to select Yes, and then press the OK button. A test pattern is printed for printhead adjustment. After reading the pattern, the printer automatically adjusts the Printhead alignment. 492 Adjustments for Better Print Quality Downloaded from ManualsPrinter.com Manuals Adjusting the Printhead Adjusting the Printhead Alignment Manually If printed vertical lines are warped or colors are out of alignment, adjust the Printhead alignment. Adjust the Printhead alignment automatically or manually by using a printed test pattern. You can adjust the Printhead alignment automatically or manually. Normally, choose automatic adjustment. If using special media or printing does not improve even after performing automatic adjustment using advanced adjustment, try manual adjustment. For instructions on automatic adjustment, see “Adjusting the Printhead Alignment Automatically”. (→P.491) Follow these steps for standard manual adjustment of the Printhead. Note • If Manual Head Adj is unusable although displayed in the menu, choose Advanced Adj. in Auto Head Adj.. Manual Head Adj is available in the menu after you try Auto Head Adj. once. 1. When using sheets, have an unused sheet A4/Letter-sized or larger ready. When using a roll, load a roll 10 inches (254 mm) or wider. • Loading the Sheet in the Printer (→P.133) • Loading Rolls on the Roll Holder (→P.107) • Loading Rolls in the Roll Holder Slot (→P.109) • Loading the Roll in the Printer (→P.110) Note • Always make sure the loaded paper matches the media type setting on the printer. Adjustment cannot be completed correctly unless the setting value matches the loaded paper. • We recommend using the type of paper you use most often for feed amount adjustment. 2. Press the Menu button to display MAIN MENU. 3. 4. 5. Press ▲ or ▼ to select Adjust Printer, and then press the ► button. Press ▲ or ▼ to select Manual Head Adj, and then press the ► button. Press ▲ or ▼ to select Yes, and then press the OK button. A test pattern is printed for printhead adjustment. 6. 7. Press ▲ or ▼ to select D, and then press the ► button. Press ▲ or ▼ to select D-1, and then press the ► button. Adjustments for Better Print Quality 493 Downloaded from ManualsPrinter.com Manuals Adjusting the Printhead 8. Examine test pattern D-1 for printhead adjustment. After you determine the pattern with straight lines, press ▲ or ▼ to choose the pattern number, and then press the OK button. Note • If lines seem straightest in two patterns but you cannot decide which one is better, choose an intermediate value. For example, choose 11 if you cannot decide whether pattern 10 or 12 is better. 9. 10. 11. 12. Repeat steps 7 and 8 to specify the adjustment value for D-2 to D-5 and D-7 to D-11. Press the ◄ button. Press ▲ or ▼ to select Register Setting, and then press the ► button. Press ▲ or ▼ to select Yes, and then press the OK button. The printer now goes online. 494 Adjustments for Better Print Quality Downloaded from ManualsPrinter.com Manuals Adjusting the Printhead Adjusting the Printhead Orientation If printed lines are misaligned, try adjusting the angle of the Printhead. Even slight misalignment can be corrected. Adjust the Printhead orientation by printing and reading a test pattern. 1. When using sheets, have an unused sheet A4/Letter-sized or larger ready. When using a roll, load a roll 10 inches (254 mm) or wider. • Loading the Sheet in the Printer (→P.133) • Loading Rolls on the Roll Holder (→P.107) • Loading Rolls in the Roll Holder Slot (→P.109) • Loading the Roll in the Printer (→P.110) Note • When loading paper, specify the correct paper type. Using paper that you have not specied on the printer may cause feeding problems and affect the printing quality. • We recommend loading a type of paper that you use often. 2. Press the Menu button to display MAIN MENU. 3. Select Adjust Printer Head Inc. Adj. → Yes and press the OK button. After the Printhead is moved, a message is displayed prompting you to open the Top Cover. 4. At this point, open the Top Cover. 5. Align the Angle Adjustment Lever with the red square and close the Top Cover. A test pattern is printed for adjustment. Adjustments for Better Print Quality 495 Downloaded from ManualsPrinter.com Manuals Adjusting the Printhead Important • Do not touch the Linear Scale (a) or Carriage Shaft (b). 6. Examine the test pattern for adjustment. Determine the straightest set of lines. Note • If no single set of lines is perfectly straight, choose the two sets of lines that are least misaligned. 7. Open the Top Cover and move the Angle Adjustment Lever to match the number (or the square) of the straightest set of lines. If no single set of lines is perfectly straight, move the Angle Adjustment Lever to a position between the numbers (or between the number and the square) of the two sets of lines that are least misaligned. 8. Close the Top Cover. The Printhead orientation is adjusted, and the printer goes online. 496 Adjustments for Better Print Quality Downloaded from ManualsPrinter.com Manuals Adjusting the Printhead Adjusting the Printhead Height If printed documents rub against the printer during printing or if the edge of paper is wrinkled from rubbing, it may help to raise the Printhead. If image edges are blurred, it may help to lower the Printhead. 1. Press the Menu button to display MAIN MENU. 2. 3. 4. 5. Press ▲ or ▼ to select Paper Details, and then press the ► button. Press ▲ or ▼ to select the type of paper, and then press the ► button. Press ▲ or ▼ to select Head Height, and then press the ► button. Press ▲ or ▼ to select the Printhead height, and then press the OK button. Adjustments for Better Print Quality 497 Downloaded from ManualsPrinter.com Manuals Adjusting the feed amount Adjusting the feed amount Adjusting the Feed Amount Automatically If printed images are affected by banding in different colors, adjust the amount that paper is fed. There are two modes for adjusting the amount paper is fed, Standard Adj. and Advanced Adj.. Advanced Adj. offers a wider range of adjustment than Standard Adj.. If using Standard Adj. does not eliminate streaks, or if streaks are quite noticeable, try Advanced Adj.. Follow the steps below for standard automatic adjustment of the feed amount. When using highly transparent media for which automatic adjustment is not supported, you must adjust the feed amount manually. For instructions on manual adjustment, see “Adjusting the Feed Amount Manually”. (→P.501) Note • To adjust the measurement scale and ensure accuracy (so that lines in CAD drawings are printed at exactly the right length, for example), specify the amount of paper stretching or shrinkage when adjusting the feed amount. (→P.504) • This may take some time, depending on the type of paper. Important • Use paper of the same type and size for adjustment as you will use for printing. • To apply the results of adjusting the feed amount in printing, you must rst set Feed Priority to Band Joint. Note that if you select Automatic, the results of adjustment will only be applied in printing if you set Print Priority in the printer driver to Image or Ofce Document. (→P.180) Follow these steps to change the Feed Priority setting. 1. Press the Menu button to display MAIN MENU. 2. Press ▲ or ▼ to select Paper Details, and then press the ► button. 3. Press ▲ or ▼ to select the type of paper, and then press the ► button. 4. Press ▲ or ▼ to select Feed Priority, and then press the ► button. 5. Press ▲ or ▼ to select Band Joint, and then press the OK button. 498 Adjustments for Better Print Quality Downloaded from ManualsPrinter.com Manuals Adjusting the feed amount Follow the steps below to adjust the feed amount automatically. 1. Prepare one unused sheet A4/Letter-sized or larger when Standard Adj. is selected or two when Advanced Adj. is selected (or one when using a sheet A2-sized or larger). When using a roll, load a roll 10 inches (254 mm) or wider. • Loading Rolls on the Roll Holder (→P.107) • Loading Rolls in the Roll Holder Slot (→P.109) • Loading the Roll in the Printer (→P.110) • Loading the Sheet in the Printer (→P.133) Note • Always make sure the loaded paper matches the media type setting. Adjustment cannot be completed correctly unless the setting value matches the loaded paper. 2. Press the Menu button to display MAIN MENU. 3. 4. 5. 6. Press ▲ or ▼ to select Adjust Printer, and then press the ► button. Press ▲ or ▼ to select Auto Band Adj., and then press the ► button. Press ▲ or ▼ to select Standard Adj. or Advanced Adj., and then press the ► button. Press ▲ or ▼ to select Yes, and then press the OK button. A test pattern is printed for band adjustment. After reading the pattern, the printer automatically adjusts the feed amount and returns to online mode. Note • In some cases, the feed amount cannot be adjusted automatically. If so, choose Advanced Adj. in Auto Band Adj. (→P.50) • If printed documents are still affected by uneven contrast or banding in different colors at regular intervals after this adjustment, you can adjust the feed amount during printing. (→P.500) Adjustments for Better Print Quality 499 Downloaded from ManualsPrinter.com Manuals Adjusting the feed amount Adjusting the feed amount during printing If, during printing, the contrast is uneven sideways across the paper or banding in different colors appears every 40 mm (1.6 in) or so, try adjusting the feed amount as follows. However, note that because printing is paused, colors may be slightly different. 1. Press the Online button to pause printing. 2. Press the Menu button to display Menu Durng Prtng. 3. 4. Press ▲ or ▼ to select Fine Band Adj., and then press the OK button. Press ▲ or ▼ to change the value, and then press the OK button. Note • The supported range is -5 to +5. 5. Press the Online button to resume printing. Note • The Fine Band Adj. value set during printing is also applied to the next print job. However, the value is reset to 0 if you execute Auto Band Adj., Manual Band Adj, or Adjust Length. 500 Adjustments for Better Print Quality Downloaded from ManualsPrinter.com Manuals Adjusting the feed amount Adjusting the Feed Amount Manually If printed images are affected by banding in different colors, adjust the amount that paper is fed. This topic describes how to adjust the feed amount manually. When using highly transparent media for which automatic adjustment is not supported, adjust the feed amount manually. We recommend automatic adjustment for other types of media. For instructions on automatic adjustment, see “Adjusting the Feed Amount Automatically”. (→P.498) Note • To adjust the measurement scale and ensure accuracy (so that lines in CAD drawings are printed at exactly the right length, for example), specify the amount of paper stretching or shrinkage when adjusting the feed amount. (→P.504) Important • Use paper of the same type and size for adjustment as you will use for printing. • To apply the results of adjusting the feed amount in printing, you must rst set Feed Priority to Band Joint. Note that if you select Automatic, the results of adjustment will only be applied in printing if you set Print Priority in the printer driver to Image or Ofce Document. (→P.180) Follow these steps to change the Feed Priority setting. 1. Press the Menu button to display MAIN MENU. 2. Press ▲ or ▼ to select Paper Details, and then press the ► button. 3. Press ▲ or ▼ to select the type of paper, and then press the ► button. 4. Press ▲ or ▼ to select Feed Priority, and then press the ► button. 5. Press ▲ or ▼ to select Band Joint, and then press the OK button. Follow the steps below to adjust the feed amount manually. 1. When using sheets, have two unused sheets A4/Letter-sized or larger ready. When using a roll, load a roll 10 inches (254 mm) or wider. • Loading Rolls on the Roll Holder (→P.107) • Loading Rolls in the Roll Holder Slot (→P.109) • Loading the Roll in the Printer (→P.110) • Loading the Sheet in the Printer (→P.133) Note • Always make sure the loaded paper matches the media type setting. Adjustment cannot be completed correctly unless the setting value matches the loaded paper. Adjustments for Better Print Quality 501 Downloaded from ManualsPrinter.com Manuals Adjusting the feed amount 2. Press the Menu button to display MAIN MENU. 3. 4. 5. Press ▲ or ▼ to select Adjust Printer, and then press the ► button. Press ▲ or ▼ to select Manual Band Adj, and then press the ► button. Press ▲ or ▼ to select Yes, and then press the OK button. Test pattern A is printed for band adjustment. 6. Examine test pattern A for band adjustment.After you determine the pattern in which streaks are least noticeable, press ▲ or ▼ to choose the pattern number, and then press the OK button. Test pattern B is printed for band adjustment. Note • If streaks seem least noticeable in two patterns but you cannot decide which one is better, choose an intermediate value. For example, choose 11 if you cannot decide whether pattern 10 or 12 is better. 7. Examine test pattern B for band adjustment.After you determine the pattern in which streaks are least noticeable, press ▲ or ▼ to choose the pattern number, and then press the OK button. The feed amount is adjusted, and the printer goes online. If printed documents are still affected by uneven contrast or banding in different colors at regular intervals after this adjustment, you can adjust the feed amount during printing. (→P.503) 502 Adjustments for Better Print Quality Downloaded from ManualsPrinter.com Manuals Adjusting the feed amount Adjusting the feed amount during printing If, during printing, the contrast is uneven sideways across the paper or banding in different colors appears every 40 mm (1.6 in) or so, try adjusting the feed amount as follows. The results of adjustment are applied to printing in progress, enabling you to check the results immediately. However, note that because printing is paused, colors may be slightly different. 1. Press the Online button to pause printing. 2. Press the Menu button to display Menu Durng Prtng. 3. 4. Press ▲ or ▼ to select Fine Band Adj., and then press the OK button. Press ▲ or ▼ to change the value, and then press the OK button. Note • The supported range is -5 to +5. 5. Press the Online button to resume printing. Note • The Fine Band Adj. value set during printing is also applied to the next print job. However, the value is reset to 0 if you execute Auto Band Adj., Manual Band Adj, or Adjust Length. Adjustments for Better Print Quality 503 Downloaded from ManualsPrinter.com Manuals Adjusting the feed amount Adjusting the Measurement Scale for Better Accuracy To adjust the measurement scale and ensure accuracy (so that lines in CAD drawings are printed at exactly the right length, for example), specify the amount of paper stretching or shrinkage when adjusting the feed amount. Note • If printed images are affected by banding in different colors, adjust the amount that paper is fed. (→P.501) Important • Use paper of the same type and size for adjustment as you will use for printing. • To apply the results of adjusting the measurement scale for better accuracy in printing, you must rst set Feed Priority to Print Length. Note that if you select Automatic, the results of adjustment will only be applied in printing if you set Print Priority in the printer driver to Line Drawing/Text. (→P.180) Follow these steps to change the Feed Priority setting. 1. Press the Menu button to display MAIN MENU. 2. Press ▲ or ▼ to select Paper Details, and then press the ► button. 3. Press ▲ or ▼ to select the type of paper, and then press the ► button. 4. Press ▲ or ▼ to select Feed Priority, and then press the ► button. 5. Press ▲ or ▼ to select Print Length or Automatic, and then press the OK button. Follow these steps to adjust the scale for better accuracy. 1. When using sheets, load one unused sheet A4/Letter-sized or larger. When using a roll, load a roll 10 inches (254 mm) or wider. • Loading the Sheet in the Printer (→P.133) • Loading Rolls on the Roll Holder (→P.107) • Loading Rolls in the Roll Holder Slot (→P.109) • Loading the Roll in the Printer (→P.110) Note • When loading paper, specify the correct paper type. When the paper type is not specied, the printing quality may be affected without the correct adjustment of the feeding. • We recommend using the type of paper you use most often for feed amount adjustment. 504 Adjustments for Better Print Quality Downloaded from ManualsPrinter.com Manuals Adjusting the feed amount 2. Press the Menu button to display MAIN MENU. 3. 4. 5. Press ▲ or ▼ to select Adjust Printer, and then press the ► button. Press ▲ or ▼ to select Adjust Length, and then press the ► button. Press ▲ or ▼ to select Yes, and then press the OK button. A test pattern is printed for adjustment based on the amount of paper stretching or shrinkage. The scale bar shows “Millimeter” in 50 mm units and “Inch” in 1 inch units. 6. Measure the length of the adjustment pattern. Calculate the difference between the measured length and actual length. Enter it as a percentage and press the OK button. You can adjust the value in 0.02% increments. Press ▲ to increase the value and ▼ to decrease it. If the scale is printed shorter than actual size, set the value toward the positive side; if it is printed longer, set the value toward the negative side. Note • You can also specify the adjustment value by selecting Paper Details → Adjust Length. Adjustments for Better Print Quality 505 Downloaded from ManualsPrinter.com Manuals Adjusting the feed amount Adjusting the Vacuum Strength When printing on heavyweight paper or paper that curls or wrinkles easily, if paper rubs against the printer or the edge is wrinkled from rubbing, adjusting the level of suction against paper on the Platen may improve results. 1. Press the Menu button to display MAIN MENU. 2. 3. 4. 5. Press ▲ or ▼ to select Paper Details, and then press the ► button. Press ▲ or ▼ to select the type of paper, and then press the ► button. Press ▲ or ▼ to select VacuumStrngth, and then press the ► button. Press ▲ or ▼ to select the level of suction against paper on the Platen, and then press the OK button. 506 Adjustments for Better Print Quality Downloaded from ManualsPrinter.com Manuals Ink Tanks Maintenance Ink Tanks Ink Tanks An Ink Tank that can be used in the printer is labeled with a white letter “A” in a black circle on the side. When purchasing an Ink Tank, make sure an “A” is printed on the label, along with the following Ink Tank part numbers. • • • • • BK Ink Tank PFI-102BK MBK Ink Tank PFI-102MBK C Ink Tank PFI-102C M Ink Tank PFI-102M Y Ink Tank PFI-102Y 130 ml (4.4 oz) per color Note • For instructions on replacing Ink Tank, see “Replacing Ink Tanks”. (→P.508) Maintenance 507 Downloaded from ManualsPrinter.com Manuals Ink Tanks Replacing Ink Tanks Compatible Ink Tank An Ink Tank that can be used in the printer is labeled with a white letter “A” in a black circle on the side. Request an Ink Tank with the same label when you purchase a new Ink Tank. For more information, see “Ink Tanks”. (→P.507) Precautions when handling an Ink Tank Take the following precautions when handling an Ink Tank. Caution • For safety, keep an Ink Tank out of the reach of children. • If ink is accidentally ingested, contact a physician immediately. Important • Before removing an Ink Tank from the pouch for installation, shake it gently seven or eight times. If you do not shake the Ink Tank, the ink may sediment, which may affect printing quality. • Do not remove and shake an Ink Tank that has already been installed in the printer. Ink may leak out. • Avoid dropping the Ink Tank after removing it from the pouch. Otherwise, ink may leak and cause stains. • There may be ink around the ink holes of Ink Tank you remove. Handle an Ink Tank carefully during replacement. The ink may stain clothing. • We recommend using up an Ink Tank in the course of printing within six months after breaking the seal. Using an old Ink Tank may affect the printing quality. • Do not remove the Ink Tank if the printer is not used for a long period (a month or more). Ink remaining in the printer may become clogged and cause of printing problems. • Coverage may be uneven if you replace the ink during a print job. 508 Maintenance Downloaded from ManualsPrinter.com Manuals Ink Tanks Replacing an Ink Tank 1. Make sure no print jobs are in progress. You can replace Ink Tank if the Display Screen indicates the printer is Online or Ofine, or if messages advise you to check the amount of ink left or replace the Ink Tank. If a message prompts you to replace the Ink Tank, press the OK button. Steps 2-4 are unnecessary in this case. Go to step 5 and remove the Ink Tank. Do not remove an Ink Tank during initialization immediately after turning on the printer, or during printing or printhead cleaning. Note • Ink Tank replacement is possible even when print jobs are being canceled or if paper is being fed. 2. Press the Menu button to display MAIN MENU. 3. 4. Press ▲ or ▼ to select Rep. Ink Tank, and then press the ► button. Press ▲ or ▼ to select Yes, and then press the OK button. A message on the Display Screen advises you to open the Ink Tank Cover. Next, remove the Ink Tank. 5. Open the Ink Tank Cover and check the Ink Lamp. The Ink Lamp ashes quickly if there is no ink left. Maintenance 509 Downloaded from ManualsPrinter.com Manuals Ink Tanks 6. Press the tip of the Ink Tank Lock Lever of the color for replacement and lift the Ink Tank Lock Lever to open it. 7. Hold the empty Ink Tank by the grip to remove it, and press the OK button. Note • If there is still some ink left in the Ink Tank you removed, store the ink tank with the ink holes (a) facing up. Otherwise, ink may leak and cause stains. Put the Ink Tank in a plastic bag and seal it. • Dispose of used Ink Tank according to local regulations. 510 Maintenance Downloaded from ManualsPrinter.com Manuals Ink Tanks 8. Before opening the pouch, shake the Ink Tank gently seven or eight times. Agitate the ink in the Ink Tank by slowly turning the Ink Tank upside-down and right side up several times. Note • If you do not shake the Ink Tank, the ink may sediment, which may affect printing quality. 9. Open the pouch and remove the Ink Tank. Note • Never touch the ink holes or metal contacts. This may cause stains, damage the Ink Tank, and affect printing quality. • Avoid dropping the Ink Tank after removing it from the pouch. Otherwise, ink may leak and cause stains. • Do not remove and shake an Ink Tank that has already been installed in the printer. Ink may leak out. 10. Press the OK button and insert the Ink Tank into the holder facing as shown in the gure, with the ink holes down. Important • Ink Tank cannot be loaded in the holder if the color or orientation is wrong. If the Ink Tank does not t in the holder, do not force it into the holder. Make sure the color of the Ink Tank Lock Lever matches the color of the Ink Tank, and check the orientation of the Ink Tank before reloading it. Maintenance 511 Downloaded from ManualsPrinter.com Manuals Ink Tanks 11. Close the Ink Tank Lock Lever until it clicks. 12. Make sure the Ink Lamp is lit in red. Note • Ink Lamp ashes when there is little ink left. 13. Close the Ink Tank Cover. The printer returns to the mode before replacement of Ink Tank. 512 Maintenance Downloaded from ManualsPrinter.com Manuals Ink Tanks Checking Ink Tank Levels On the Display Screen, you can check how much ink is left in the Ink Tank. The Display Screen indicates the remaining ink levels, unless an error message is displayed. During error messages, press the Information button to view the ink levels on the Display Screen. These levels shown on the Display Screen correspond to the inks identied by the Color Label on the bottom of the Display Screen. These symbols may be displayed above the ink level: “!” if ink is low, “×” if no ink is left, and “?” if you have deactivated ink level detection. The remaining ink level is indicated as shown below. If the Display Screen indicates to replace the Ink Tank, replace the Ink Tank. If a message is displayed indicating to check the remaining ink levels, or after tasks that consume a lot of ink such as large-format printing or head cleaning, check the remaining levels and replace Ink Tank as needed. (→P.508) Maintenance 513 Downloaded from ManualsPrinter.com Manuals Ink Tanks When to Replace Ink Tanks Replace or prepare to replace Ink Tank in the following situations. If a message for checking the ink is shown on the Display Screen When there is little ink left, the Message lamp is lit and Ink Level: Check is shown on the Display Screen. You can continue to print, but prepare to replace the Ink Tank. (→P.513) Before print jobs and maintenance that consume a lot of ink If little ink is left, there may not be enough for large-format printing, head cleaning, and maintenance, which require a lot of ink. In this case, replace or prepare to replace the Ink Tank before maintenance. If a message for ink replacement is shown on the Display Screen When ink runs out, the Message lamp ashes, a message regarding Ink Tank replacement is shown on the Display Screen, and printing is disabled. Replace the Ink Tank at this point. 514 Maintenance Downloaded from ManualsPrinter.com Manuals Printheads Printheads Printhead • Printhead PF-03 Note • For instructions on replacing the Printhead, see “Replacing the Printhead”. (→P.518) Checking the Print Quality If printing is faint or streaked in different colors, make sure the Printhead nozzles are clear by printing a test pattern to check the nozzles. For instructions, see “Checking for Nozzle Clogging”. (→P.516) Improving the Print Quality If printing is faint or streaked in different colors, make sure the Printhead nozzles are clear by printing a test pattern to check the nozzles. Clean the Printhead if the printed test pattern was faint. For instructions on cleaning the Printhead, see “Cleaning the Printhead”. (→P.517) Maintenance 515 Downloaded from ManualsPrinter.com Manuals Printheads Checking for Nozzle Clogging If printing is faint or streaked in different colors, make sure the Printhead nozzles are clear by printing a test pattern to check the nozzles. Note • You can specify a number of pages in the printer’s Noz. Check Freq. menu for automatic nozzle checking every time you nish printing that quantity. (→P.50) 1. Load unused paper. • Loading Rolls on the Roll Holder (→P.107) • Loading Rolls in the Roll Holder Slot (→P.109) • Loading the Roll in the Printer (→P.110) • Loading the Sheet in the Printer (→P.133) 2. Press the Menu button to display MAIN MENU. 3. 4. 5. Press ▲ or ▼ to select Test Print, and then press the ► button. Press ▲ or ▼ to select Nozzle Check, and then press the ► button. Press ▲ or ▼ to select Yes, and then press the OK button. The printer goes online and prints a test pattern. 6. Check the printing results. If the horizontal lines are not faint or incomplete, the nozzles are clear. If some sections of the horizontal lines are faint or incomplete, the nozzles for those colors are clogged. If horizontal lines are faint or incomplete, follow the steps below and check again for nozzle clogging. 1. Clean the Printhead. (→P.517) 2. Print a test pattern to check the nozzles. Note • If you repeat these steps several times but the horizontal lines are still faint or incomplete, contact your Canon dealer. 516 Maintenance Downloaded from ManualsPrinter.com Manuals Printheads Cleaning the Printhead Cleaning the Printhead may help clear nozzles that are clogged. Note • You can specify a number of pages in the printer’s Noz. Check Freq. menu for automatic nozzle checking and cleaning every time you nish printing that quantity. (→P.50) • You can start Head Cleaning A by holding down the Information button for three seconds or more. Cleaning the Printhead 1. Press the Menu button to display MAIN MENU. 2. 3. Press ▲ or ▼ to select Head Cleaning, and then press the ► button. Press ▲ or ▼ to select the type of cleaning, and then press the OK button. • Head Cleaning A Use Head Cleaning A if printing is faint or contains foreign substances. This method of cleaning consumes the least amount of ink. It takes about three minutes to complete. • Head Cleaning B Use Head Cleaning B if no ink comes out of the printhead, or if Head Cleaning A does not solve the problem. It takes about four minutes to complete. The printhead is cleaned, and the printer goes online. 4. Print a test pattern to check the nozzles, and determine whether cleaning has cleared the nozzles. (→P.516) Note • If printing does not improve after Head Cleaning A, try Head Cleaning B. If this does not solve the problem, repeat Head Cleaning B two or three times. If this still does not improve printing, the Printhead may have reached the end of its useful life. Contact your Canon dealer. Caution • Do not remove the Maintenance Cartridge or Ink Tanks during cleaning. Maintenance 517 Downloaded from ManualsPrinter.com Manuals Printheads Replacing the Printhead When to replace the Printhead Replace the Printhead in the following situations. • If the printing quality does not improve even after two cycles of Head Cleaning B from the printer menu • If the Display Screen indicates Open top cover and replace the printhead. • If your Canon dealer has advised you to replace the Printhead Compatible Printhead For information on the compatible Printhead, see “Printhead”. (→P.515) Precautions when handling the Printhead Take the following precautions when handling the Printhead. Caution • For safety, keep the Printhead in a place inaccessible for children. • If ink is accidentally ingested, contact a physician immediately. • Do not touch the Printhead immediately after printing. The Printhead becomes extremely hot, and there is a risk of burns. Important • Avoid dropping or shaking the Printhead. Otherwise, ink may leak and cause stains. • There may be ink around the nozzles of the Printhead you remove. Handle the Printhead carefully during replacement. The ink may stain clothing. • Do not open the Printhead pouch until immediately before installation. After removing the Printhead from the pouch, install it right away. If the Printhead is left after the pouch is opened, the nozzles may dry out, which may affect printing quality. • If you need to store a Printhead temporarily before installation, do not keep the nozzles and metal contacts (→P.522) facing down. If the nozzles or metal contacts are damaged, it may affect the printing quality. • Never attempt to take apart or modify a Printhead. This may damage the printer. • Never touch the Printhead nozzles or the metal contacts. This may cause printing problems. 518 Maintenance Downloaded from ManualsPrinter.com Manuals Printheads Replacing the Printhead Follow the steps below to replace the Printhead. Failure to follow this procedure may cause ink leak from the Printhead, which may cause stains. Note • Prepare a new Ink Tank when ink levels are low. • Your hands may become dirty during Printhead replacement. Use the gloves provided with the new Printhead for replacement. • Choose On in Auto Print to have the printer automatically adjust the Printhead alignment after replacement of the Printhead. (→P.50) 1. If the roll is not ejected because of the cutting method selected, cut it manually and remove it. (→P.329) 2. 3. Clean inside the Top Cover. (→P.538) 4. 5. 6. Press ▲ or ▼ to select Maintenance, and then press the ► button. Press the Menu button to display MAIN MENU. Press ▲ or ▼ to select Replace P.head, and then press the ► button. Press ▲ or ▼ to select Yes, and then press the OK button. Ink is now lled. After about three minutes, a message is shown on the Display Screen instructing you to open the Top Cover. 7. Open the Top Cover. Instructions are now shown on the Display Screen regarding Printhead replacement. Maintenance 519 Downloaded from ManualsPrinter.com Manuals Printheads 8. If the Printhead Fixer Cover or Printhead Fixer Lever is dirty, use a damp cloth that you have wrung out completely to wipe it clean. Important • Never touch the Linear Scale (a) or Carriage Shaft (b). • Never touch the metal contacts of the Carriage. This may damage the printer. 9. Lift the Carriage Cover to open it fully. 520 Maintenance Downloaded from ManualsPrinter.com Manuals Printheads 10. Pull the Printhead Fixer Lever forward all the way to open it completely. 11. Pull up the Printhead Fixer Cover to open it completely. 12. Remove the used Printhead. Caution • When replacing the Printhead immediately after printing, wait a few minutes before replacing it. The metal parts of the Printhead become hot during printing, and there is a risk of burns from touching these parts. Note • Dispose of the used Printhead in accordance with local regulations. Maintenance 521 Downloaded from ManualsPrinter.com Manuals Printheads 13. Holding the new Printhead by the grips (a), remove it from the case. Important • When handling the Printhead, always hold it by the grips (a). Never touch the nozzles (b) or the metal contacts (c). This may damage the Printhead and affect printing quality. 14. While rmly holding the Printhead you have removed, use your other hand to remove the orange Safety Cap 1 (a). Squeeze the grips (c) of Safety Cap 2 (b) and pull it down to remove it. Important • Safety Cap 1 (a) may be coated with ink to protect the Printhead. Be careful not to touch areas other than the grips. • Never touch the ink supply section (d). This may cause printing problems. • The inside surface of Safety Cap 2 (b) is coated with ink to protect the nozzles. Handle it carefully to avoid touching the nozzles or spilling ink. Spilled ink may cause stains. The Printhead contains ink to protect the nozzles. If this ink is accidentally spilled, it may stain the printer or surrounding area. We recommend removing the Safety Cap 2 (b) on top of the Printhead package or safely out of the way. Wipe off any spilled ink with a dry cloth. This ink is non-toxic. • Do not reattach the Safety Cap or protective material. Dispose of these materials in accordance with local regulations. 522 Maintenance Downloaded from ManualsPrinter.com Manuals Printheads 15. With the nozzles facing down and the metal contacts toward the back, insert the Printhead into the Carriage. Making sure that the metal contacts do not touch the Carriage, carefully push the printhead rmly into the carriage. 16. Pull the Printhead Fixer Cover down toward the front to lock the Printhead in place. 17. Push the Printhead Fixer Lever toward the back of the printer until it clicks. 18. Push the Carriage Cover forward until it clicks. Maintenance 523 Downloaded from ManualsPrinter.com Manuals Printheads 19. Close the Top Cover. Ink now lls the system. After about 13 minutes, the Printhead alignment will be automatically adjusted, and the printer will go online. If no paper has been loaded, a message is displayed requesting you to load paper. Important • Never remove an Ink Tank while the system is lling with ink. • If Auto Print is Off in the printer menu, the Printhead alignment will not be adjusted. In this case, adjust the alignment after Printhead replacement by accessing Auto Head Adj. in Advanced Adj.. (→P.491) 524 Maintenance Downloaded from ManualsPrinter.com Manuals Cutter Unit Cutter Unit Cutter Unit A reaplacement Cutter Unit. • Cutter Unit CT-05 Note • For instructions on replacing the Cutter Unit, see “Replacing the Cutter Unit”. (→P.526) Maintenance 525 Downloaded from ManualsPrinter.com Manuals Cutter Unit Replacing the Cutter Unit Note • For information on compatible Cutter Unit, see “Cutter Unit”. (→P.525) • During Cutter Unit replacement, do not open the Carriage Cover. Ink will automatically ll the Printhead after the Carriage Cover is opened, which consumes ink. 1. 2. Turn the printer on. (→P.22) 3. Select Maintenance → Change Cutter → Yes, and then press the OK button. Press the Menu button to display MAIN MENU. After the Carriage is centered, a message is shown on the Display Screen instructing you to open the Top Cover. Note • If you do not respond within two minutes, cutter replacement is canceled and the printer goes online automatically. In this case, repeat the steps above. 4. Open the Top Cover. 5. If the Cutter Unit or Carriage is dirty, use a damp cloth that you have wrung out completely to wipe it clean. Important • Do not touch the Linear Scale (a) or Carriage Shaft (b). 526 Maintenance Downloaded from ManualsPrinter.com Manuals Cutter Unit 6. Hold the Cutter Unit by the grip (a). Pushing down at the position indicated (b), remove it from the Carriage. Important • Never touch any part of the Cutter Unit except the grips (a) and (b). This poses a risk of injury and may stain your hands. Also, it may damage the printer. Caution • Dispose of the used Cutter Unit according to local regulations. • Do not disassemble the Cutter Unit. Touching the blade may cause injury. 7. Hold the new Cutter Unit by the grip (a). Pushing down at the position indicated (b), attach it to the Carriage until it clicks into place. 8. Close the Top Cover. The Carriage moves into position and a conrmation message is displayed regarding resetting the cut counter. 9. Press the OK button. The printer now goes online. Maintenance 527 Downloaded from ManualsPrinter.com Manuals Maintenance Cartridge Maintenance Cartridge Maintenance Cartridge A replacement Maintenance Cartridge. Maintenance Cartridge includes a Shaft Cleaner. • Maintenance Cartridge MC-07 Note • For instructions on replacing the Maintenance Cartridge, see “Replacing the Maintenance Cartridge”. (→P.528) Replacing the Maintenance Cartridge Compatible Maintenance Cartridge For information on the compatible Maintenance Cartridge, see “Maintenance Cartridge”. (→P.528) Precautions when handling the Maintenance Cartridge Take the following precautions when handling the Maintenance Cartridge. Caution • For safety, keep the Maintenance Cartridge out of the reach of children. • If ink is accidentally ingested, contact a physician immediately. Important • Do not remove the Maintenance Cartridge except to replace it. • To prevent ink from leaking from a used Maintenance Cartridge, avoid dropping the cartridge or storing it at an angle. Otherwise, ink may leak and cause stains. • Ink adheres to the top of the Maintenance Cartridge after it has been used. Handle the Maintenance Cartridge carefully during replacement. The ink may stain clothing. • Do not install a used Maintenance Cartridge in another printer. 528 Maintenance Downloaded from ManualsPrinter.com Manuals Maintenance Cartridge Replacing the Maintenance Cartridge 1. Make sure no print jobs are in progress. You can replace the Maintenance Cartridge if the Display Screen indicates the printer is Ofine or if messages advise you to replace the Maintenance Cartridge. If a message prompts you to replace the Maintenance Cartridge, go to step 6 and remove the Maintenance Cartridge. Do not replace the Maintenance Cartridge during initialization immediately after turning on the printer, during Printhead cleaning, or while ink is being lled. If you pause printing to replace the Maintenance Cartridge, it may cause the printed images to be blurry. 2. Press the Menu button to display MAIN MENU. 3. 4. 5. 6. Press ▲ or ▼ to select Maintenance, and then press the ► button. Press ▲ or ▼ to select Repl. maint cart, and then press the ► button. Press ▲ or ▼ to select Yes, and then press the OK button. At this point, open the Maintenance Cartridge Cover. Maintenance 529 Downloaded from ManualsPrinter.com Manuals Maintenance Cartridge 7. Hold the handle (a) of the used Maintenance Cartridge and pull out the cartridge. Grasp the handles on both sides (b) and keep the cartridge level as you remove it. Important • Used Maintenance Cartridge is heavy. Always grasp the cartridge handles on both sides rmly and keep the cartridge level during removal and storage. If you drop a used Maintenance Cartridge or store it at an angle, ink may leak and cause stains. 8. Wipe away any soiling on the Maintenance Cartridge Cover. 9. Keeping the used Maintenance Cartridge level, insert it in the plastic bag of the new Maintenance Cartridge. Expel excess air and seal the zipper. After making sure the zipper is rmly sealed, fold the bag in two. 530 Maintenance Downloaded from ManualsPrinter.com Manuals Maintenance Cartridge 10. Conrm the Maintenance Cartridge is right-side up, put it in the box, and store it so that it stays level. Important • Always put the used Maintenance Cartridge back in the box and store the box on a at surface. Otherwise, ink may leak and cause stains. • In accordance with its active and ongoing policy to protect the environment, Canon collects used Maintenance Cartridge. Follow the instructions provided with the new Maintenance Cartridge that describe how to process the used Maintenance Cartridge. 11. Holding the handles on both sides of the new Maintenance Cartridge (a), insert it completely, keeping it level. 12. Close the Maintenance Cartridge Cover. 13. Press the OK button. The printer now initializes the Maintenance Cartridge. After about ve seconds when initialization is nished, a message prompts you to replace the Shaft Cleaner. 14. Press ▲ or ▼ to select Yes, and then press the OK button. After the Carriage is moved, the Display Screen indicates Open top cover.. Note • If you select No, the printer goes back online. Maintenance 531 Downloaded from ManualsPrinter.com Manuals Maintenance Cartridge 15. Replace the Shaft Cleaner. Replacing the (→P.533) The printer returns to the mode before replacement of the Maintenance Cartridge. If a message is displayed advising you to replace the Maintenance Cartridge, printing is not possible. Make sure that the Maintenance Cartridge is installed correctly. If a print job was in progress when the Maintenance Cartridge was replaced, printing is resumed. Important • Do not remove the Maintenance Cartridge during about the rst ve seconds after the printer goes back online. This may damage the Maintenance Cartridge. • If you replace the Maintenance Cartridge when the printer is off, do not remove the Maintenance Cartridge during about the rst ve seconds after you turn the printer on again after replacement. This may damage the Maintenance Cartridge. 532 Maintenance Downloaded from ManualsPrinter.com Manuals Maintenance Cartridge Replacing the Shaft Cleaner Replace the Shaft Cleaner when you replace the Maintenance Cartridge. New Shaft Cleaner is included with replacement Maintenance Cartridge. After Maintenance Cartridge replacement, a message on the Display Screen prompts you to replace the Shaft Cleaner. Select Yes and press the OK button. Next, go to step 3. 1. Press the Menu button to display MAIN MENU. 2. 3. 4. Press ▲ or ▼ to select Maintenance, and then press the ► button. Press ▲ or ▼ to select Repl. S. Cleaner, and then press the ► button. Press ▲ or ▼ to select Yes, and then press the OK button. After the Carriage is moved, the Display Screen indicates Open top cover.. 5. Open the Top Cover. 6. Hold the Shaft Cleaner on the right side of the Carriage by the grips (a) and pull it toward you to remove it. Important • Never touch parts other than those mentioned in the instructions. This may stain your hands and damage the printer. Maintenance 533 Downloaded from ManualsPrinter.com Manuals Maintenance Cartridge 7. After removing the cap of the new Shaft Cleaner, hold it by the grips (a) and attach it to the Carriage. Push the Shaft Cleaner until it clicks into place. Note • Attach the cap from the new Shaft Cleaner on the used one. Be sure to put the used Shaft Cleaner in the small box before putting it in the larger box with the used Maintenance Cartridge for disposal. 8. Close the Top Cover. The Carriage is moved, and the printer goes online. 534 Maintenance Downloaded from ManualsPrinter.com Manuals Maintenance Cartridge Checking the Remaining Maintenance Cartridge Capacity The Maintenance Cartridge absorbs excess ink from borderless printing, printhead cleaning, and other processes. You can conrm the remaining capacity of the Maintenance Cartridge by checking the Maintenance Cartridge capacity shown on the Display Screen. Press the Information button to display the remaining capacity of the Maintenance Cartridge on the Display Screen. If the Display Screen indicates to replace the Maintenance Cartridge, replace the Maintenance Cartridge. If a message is displayed indicating to check the remaining capacity of the Maintenance Cartridge, or before tasks that deplete much of the capacity such as head cleaning or preparations to move the printer, check the remaining Maintenance Cartridge capacity and replace the Maintenance Cartridge as needed. (→P.528) Maintenance 535 Downloaded from ManualsPrinter.com Manuals Maintenance Cartridge When to Replace the Maintenance Cartridge Replace or prepare to replace the Maintenance Cartridge in the following situations. If a message for checking the Maintenance Cartridge is shown on the Display Screen When the Maintenance Cartridge capacity is low, the Message lamp is lit and Prepare for maint cart replacement. is displayed. You can continue to print, but check the remaining Maintenance Cartridge capacity and prepare to replace the Maintenance Cartridge with a new one. (→P.535) When much of the Maintenance Cartridge capacity is depleted Printhead cleaning, Printhead replacement, and preparations to transfer the printer deplete much of the Maintenance Cartridge capacity. (In particular, preparing to move the printer depletes a lot of the capacity.) To check the remaining Maintenance Cartridge capacity, press the Information button. Replace the Maintenance Cartridge and perform related maintenance as needed. If a message for the Maintenance Cartridge replacement is shown on the Display Screen When the Maintenance Cartridge is full, the Message lamp ashes and a message to replace the Maintenance Cartridge is shown on the Display Screen. Printing is disabled, and you cannot replace the Printhead or transfer the printer. Replace the Maintenance Cartridge with a new one. 536 Maintenance Downloaded from ManualsPrinter.com Manuals Cleaning the Printer Cleaning the Printer Cleaning the Printer Exterior Clean the printer regularly to maintain better printing quality and help prevent problems. About once a month, clean the printer exterior. 1. 2. Turn the printer off. (→P.22) Unplug the power cord from the outlet. Caution • Always turn off the printer and unplug the power cord before cleaning or maintenance. Accidentally leaving the printer on poses a risk of injury if you touch moving parts inside the printer. 3. Using a damp cloth that you have wrung out completely, wipe away any dirt or paper dust from the Paper Feed Slot (a), power cord plug, and so on. Dry these parts with a dry cloth. Caution • Never use ammable solvents such as alcohol, benzene, or thinner. If these substances come into contact with electrical components inside the printer, there is a risk of re or electrical shock. Important • If the Ejection Guide is dirty, it may soil the edge of the paper when the paper is cut. We recommend cleaning the Ejection Guide even if it does not appear dirty, because it may actually be covered with paper dust. 4. Plug the power cord into the outlet. Maintenance 537 Downloaded from ManualsPrinter.com Manuals Cleaning the Printer Cleaning Inside the Top Cover Clean inside the Top Cover about once a month to maintain better printing quality and help prevent problems. Also clean inside the Top Cover in the following situations to ensure optimal operation. • • • • • • • If the printed surface or the underside of paper is dirty after printing After you have used up a roll After borderless printing After printing on small paper After printing on paper that generates a lot of cutting debris If you have replaced the roll After printing on paper that generates a lot of paper dust Important • If the Platen inside the Top Cover becomes dirty, it may soil the underside of paper. We recommend always cleaning the Platen after borderless printing or printing on small paper. • If the Ejection Guide is dirty, it may soil the edge of the paper when the paper is cut. We recommend cleaning the Ejection Guide even if it does not appear dirty, because it may actually be covered with paper dust. 1. Open the Top Cover. 2. If paper dust has accumulated in the Vacuum holes (a) on the Platen or in the Borderless Printing Ink Grooves (b), use the Cleaning Brush (c), provided with the printer, to wipe it away. Note • If the Cleaning Brush is dirty, rinse it in water. 538 Maintenance Downloaded from ManualsPrinter.com Manuals Cleaning the Printer 3. Using a damp cloth that you have wrung out completely, wipe inside the Top Cover to clean it. Wipe away any ink residue on the Top Cover Roller (a), all over the Platen (b), the Paper Retainer (c), the Borderless Printing Ink Grooves (d), the Ejection Guide (e), and the guide rail (f). Important • Do not use a dry cloth to wipe inside the Top Cover. This may create a static charge, which may attract dust and affect the printing quality. • Never use ammable solvents such as alcohol, benzene, or thinner. If these substances come into contact with electrical components inside the printer, there is a risk of re or electrical shock. • Never touch the Linear Scale (a) or Carriage Shaft (b). 4. Close the Top Cover. Maintenance 539 Downloaded from ManualsPrinter.com Manuals Cleaning the Printer Cleaning the Paper Retainer Clean the Paper Retainer about once a month to maintain better printing quality and help prevent problems. Also clean the Paper Retainer in the following situations to ensure the printer offers a comfortable working environment. • If the printed surface or the underside of paper is dirty after printing • After printing on small paper Caution • During cleaning, use a type of paper that does not generate much dust from cutting, such as Plain Paper. It may affect printing quality if you use lm or other media that are more likely to generate debris when cut, or that have a surface nish that may come off. 1. 2. Turn the printer off. (→P.22) Unplug the power cord from the outlet. Caution • Always turn off the printer and unplug the power cord before cleaning and maintenance. Accidentally leaving the printer on poses a risk of injury if you touch moving parts inside the printer. 3. Push the Release Lever back. 4. Fold a sheet of Plain Paper two or three times (a) and insert it under the Paper Retainer (b) behind the printer to wipe the entire surface of the Paper Retainer clean. 5. Pull the Release Lever forward. 6. Plug the power cord into the outlet. 540 Maintenance Downloaded from ManualsPrinter.com Manuals Cleaning the Printer Cleaning the Printhead Cleaning the Printhead may help clear nozzles that are clogged. Note • You can specify a number of pages in the printer’s Noz. Check Freq. menu for automatic nozzle checking and cleaning every time you nish printing that quantity. (→P.50) • You can start Head Cleaning A by holding down the Information button for three seconds or more. Cleaning the Printhead 1. Press the Menu button to display MAIN MENU. 2. 3. Press ▲ or ▼ to select Head Cleaning, and then press the ► button. Press ▲ or ▼ to select the type of cleaning, and then press the OK button. • Head Cleaning A Use Head Cleaning A if printing is faint or contains foreign substances. This method of cleaning consumes the least amount of ink. It takes about three minutes to complete. • Head Cleaning B Use Head Cleaning B if no ink comes out of the printhead, or if Head Cleaning A does not solve the problem. It takes about four minutes to complete. The printhead is cleaned, and the printer goes online. 4. Print a test pattern to check the nozzles, and determine whether cleaning has cleared the nozzles. (→P.516) Note • If printing does not improve after Head Cleaning A, try Head Cleaning B. If this does not solve the problem, repeat Head Cleaning B two or three times. If this still does not improve printing, the Printhead may have reached the end of its useful life. Contact your Canon dealer. Caution • Do not remove the Maintenance Cartridge or Ink Tanks during cleaning. Maintenance 541 Downloaded from ManualsPrinter.com Manuals Other Maintenance Other Maintenance Preparing to Transfer the Printer To protect the internal parts in transit, always follow the steps below before transferring the printer to a new location. Refer to the Quick Start Guide for details on packing the printer and installing it after transfer. Note • It is not possible to prepare the printer for transfer if the Display Screen prompts you to replace the Maintenance Cartridge or check the remaining capacity. Replace the Maintenance Cartridge before transfer preparations. (→P.528) • Do not tilt the printer in transit. Ink inside the printer may leak and cause stains. If it is necessary to stand the printer up or tilt it, contact your Canon dealer. 1. Remove the paper. • Rolls (→P.113), (→P.114), (→P.114) • Sheet (→P.137) 2. Press the Menu button to display MAIN MENU. 3. 4. 5. Press ▲ or ▼ to select Maintenance, and then press the ► button. Press ▲ or ▼ to select Move Printer, and then press the ► button. Press ▲ or ▼ to select Yes, and then press the OK button. The printer now starts preparing for transfer. If a message is shown on the Display Screen requesting you to open the Ink Tank Cover, follow the procedure starting with step 6. 6. Open the Ink Tank Cover. 542 Maintenance Downloaded from ManualsPrinter.com Manuals Other Maintenance 7. Open the Ink Tank Lock Lever and remove every Ink Tank. Put the Ink Tank in a plastic bag and seal it. Note • Store the Ink Tank you removed with the ink holes (a) facing up. Otherwise, ink may leak and cause stains. 8. Close every Ink Tank Lock Lever, and close the Ink Tank Cover. At this point, ink is drawn out from inside the tubes. Important • Do not remove the Maintenance Cartridge during this process. When the suction is nished, Turn Power Off!! is displayed. 9. Press the Power button and turn off the printer. Important • Turn off the printer before you unplug it. It may damage the printer if you unplug it before it is off and transfer it in that state. If you accidentally unplug the printer, plug it in again, reinstall the Ink Tanks, wait until the printer comes online, and follow this procedure again. Maintenance 543 Downloaded from ManualsPrinter.com Manuals Other Maintenance 10. 11. Disconnect the power cord and interface cable. 12. Grasp the Belt, insert it between the Belt Stopper, and afx the Belt Stopper to the Carriage Shaft. Open the Top Cover. Important • Never touch the Linear Scale (a) or Carriage Shaft (b). Note • Here, the Belt Stopper is the one that was removed and stored after initial installation. 544 Maintenance Downloaded from ManualsPrinter.com Manuals Other Maintenance 13. Close the Top Cover. 14. 15. Tape down printer covers to secure them, in the reverse order of tape removal during installation. Repack the Roll Holder, Holder Stopper, and printer in shipping materials, and then package them in a shipping box. Maintenance 545 Downloaded from ManualsPrinter.com Manuals Other Maintenance Updating the Firmware Update the printer rmware to take advantage of new and improved printer functions. Conrming the rmware version 1. Press the Menu button to display MAIN MENU. 2. 3. Press ▲ or ▼ to select Information, and then press ►. Press ▲ or ▼ to select System Info, and then press the ► button. The rmware version is displayed. Updating the Firmware To obtain the latest rmware, visit the Canon website. If the rmware available online is newer than the installed rmware, update the printer rmware. For details on downloading and updating the rmware, visit the Canon website. 546 Maintenance Downloaded from ManualsPrinter.com Manuals Frequently Asked Questions Troubleshooting Frequently Asked Questions Frequently Asked Questions This section presents frequently asked questions and answers. To view more detailed explanations, click the hyperlinks in the answer column. Answer Question How do I print on a roll? When printing on rolls, after loading the roll, specify the paper type and length, both on the Control Panel and in the printer driver. ÞLoading and Printing on Rolls (→P.82) How do I print manually? When printing manually, specify the paper type and size in the printer driver, and then load the paper. ÞLoading and Printing on Sheets (→P.86) How do I switch between printing on a roll and printing manually? Press the Feeder Selection button to switch the paper source between the roll and a sheet. ÞSelecting the Paper Source (→P.104) How do I change the paper type or size? Specify the type and size of paper, both on the Control Panel and in the printer driver. • Specifying it in the Printer Driver ÞSpecifying Paper in the Printer Driver (→P.191) • Specifying it on the Control Panel Selecting the paper type ÞSelecting the Paper Type (Roll) (→P.105) ÞSelecting the Paper Type (Sheet) (→P.132) Selecting the Paper Size ÞSpecifying the Paper Length (Roll) (→P.106) How do I cut the roll paper You can wait until ink dries before cutting the roll, and you can cut rolls at a after printing? desired position. ÞSpecifying the Cutting Method for Rolls (→P.122) How do I print without borders? Borderless printing is possible on rolls. You can also specify borderless printing in the printer driver by adjusting the original size to match the paper size. Borderless printing is not supported on sheets. ÞBorderless Printing on Paper of Equivalent Size (→P.232) ÞBorderless Printing by Resizing Originals to Fit the Roll Width (→P.239) ÞBorderless Printing at Actual Size (→P.225) How do I print an A4 original enlarged on A2 paper? In the printer driver, you can adjust the original image to match the paper size or width, or you can specify enlargement or reduction before printing as desired. ÞResizing Originals to Match the Paper Size (→P.196) ÞResizing Originals to Fit the Roll Width (→P.202) ÞResizing Originals by Entering a Scaling Value (→P.208) How do I print without wasting paper? To conserve paper, you can specify in the printer driver to rotate originals 90 degrees or to print without top and bottom margins. ÞConserving Roll Paper by Rotating Originals 90 Degrees (→P.299) ÞConserving Roll Paper by Printing Originals Without Top and Bottom Margins (→P.305) Troubleshooting 547 Downloaded from ManualsPrinter.com Manuals Frequently Asked Questions Answer Question How do I print without By specifying to rotate originals 90 degrees in the printer driver, you can print at wasting all the blank A4 size to ll the width of A3 paper. space on the right side ÞConserving Roll Paper by Rotating Originals 90 Degrees (→P.299) when printing an A4-sized original at A3 size? How do I print in landscape (or portrait) orientation? You can print originals that are in landscape (or portrait) orientation automatically enlarged to t the roll width. This is an easy way to create vertical or horizontal banners. ÞPrinting Vertical or Horizontal Banners (Large-Format Printing) (→P.253) How do I print on a custom You can specify custom sizes temporarily in the printer driver. paper size? ÞPrinting on Non-Standard Paper Sizes (→P.261) How do I register custom paper sizes? You can add desired sizes (Custom Media Sizes) in the Size Options dialog box of the printer driver. ÞPrinting on Non-Standard Paper Sizes (→P.261) How do I print lines thicker? By specifying Thicken Fine Lines in the printer driver, you can print ne lines thicker to make them easier to see. ÞGiving Priority to Particular Graphic Elements and Colors for Printing (→P.180) How do I modify how colors are printed? You can adjust colors in the printer driver as desired before printing. ÞAdjusting the Color in the Printer Driver (→P.172) How do I use printer driver settings again in subsequent jobs? By saving settings information in a favorite, you can apply the settings again before printing anytime as needed. ÞUsing Favorites (→P.325) Can I use the printer in The printer can be used for automatic enlargement and printing of scanned combination with a Color originals from a Color imageRUNNER. imageRUNNER ? ÞPrinting Enlargements of Scanned Originals from a Color imageRUNNER (→P.168) How do I print enlargements of scanned originals from a Color imageRUNNER ? By using Color imageRUNNER Enlargement Copy (iR enlargement copy), you can automatically print enlargements of scanned originals from a Color imageRUNNER. ÞPrinting Enlargements of Scanned Originals from a Color imageRUNNER (→P.168) 548 Troubleshooting Downloaded from ManualsPrinter.com Manuals Problems Regarding Paper Problems Regarding Paper Clearing Jammed Roll Paper If roll paper jams, follow the steps below to remove jams. 1. 2. Turn the printer off. (→P.22) 3. If the Carriage is out, move the Carriage to separate it from the paper. Open the Top Cover. Important • If you push the Carriage to the left edge, the blade of the Cutter Unit will be lowered in preparation to cut the paper. Be careful not to pinch your ngers between the Carriage and Platen if you have pushed the Carriage to the left edge or if a paper jam occurs during cutting. • Do not touch the Linear Scale (a) or Carriage Shaft (b). Troubleshooting 549 Downloaded from ManualsPrinter.com Manuals Problems Regarding Paper 4. Push the Release Lever back. 5. Holding the paper on both sides, pull the jammed portion out toward the front. Use a scissors to cut away the printed or wrinkled portion. Caution • When cutting paper, be careful to avoid injury and damaging the printer. 6. If the Carriage is on the left, move the Carriage to the right until it stops. Important • Always move the Carriage to the right side. If the Carriage is on the left, a Carriage error may occur when you turn on the printer. 550 Troubleshooting Downloaded from ManualsPrinter.com Manuals Problems Regarding Paper 7. Pull the roll edge gently and align it with the Paper Alignment Line (a). Lower the Release Lever toward the front. Important • Do not force the roll paper into alignment with the Paper Alignment Line (a). This may prevent the paper from being advanced straight. • The amount of paper pulled from the roll corresponds to the margin of the leading edge. 8. Close the Top Cover. 9. Turn the printer on. (→P.22) The roll is now advanced. After it is nished being advanced, you can resume printing. Note • You can ensure that the edge is cut neatly by following the steps below. 1. Press the Online button to bring the printer ofine. 2. Hold down the ▼ button to advance the paper. 3. Set Paper Cutting to Yes in the printer menu, and the edge will be cut. Troubleshooting 551 Downloaded from ManualsPrinter.com Manuals Problems Regarding Paper Clearing a Jammed Sheet If a sheet jams, follow the steps below to remove it. 1. 2. Turn the printer off. (→P.22) 3. If the Carriage is out, move the Carriage to separate it from the paper. Open the Top Cover. Important • Do not touch the Linear Scale (a) or Carriage Shaft (b). 4. Push the Release Lever back. 552 Troubleshooting Downloaded from ManualsPrinter.com Manuals Problems Regarding Paper 5. If the paper is visible, grasp the paper and pull it forward. 6. If you cannot see the paper, remove the scrap from behind the printer. After removing the paper, make sure there are no other scraps of paper in the printer. 7. If the Carriage is on the left, move the Carriage to the right until it stops. Important • Always move the Carriage to the right side. If the Carriage is on the left, a Carriage error may occur when you turn on the printer. 8. Turn the printer on. (→P.22) Troubleshooting 553 Downloaded from ManualsPrinter.com Manuals Problems Regarding Paper Roll paper cannot be inserted into the Paper Feed Slot Cause The roll paper is warped. Corrective Action Straighten out curls and reload the roll. Cannot Load Sheets Cause The paper source selection is incorrect. Corrective Action Press the Feeder Selection button to activate the Cut Sheet lamp. Paper is not cut neatly Cause Corrective Action The paper is bent or curled at the cut position. Straighten out any curling by the edges of the paper. Paper rises by the ends of the cut position before it is cut. Reload the paper correctly. The Cutter Unit is installed incorrectly. Install the Cutter Unit correctly. (→P.526) The blade of the Cutter Unit is dull. Replace the Cutter Unit. (→P.526) Paper cannot be cut Cause Corrective Action In the printer driver, No or Print Cut Guideline is specied in Auto Cut. Specify Yes in Auto Cut in the printer driver. In MAIN MENU, Eject or Manual is specied in Cutting Mode. Specify Automatic in Cutting Mode in MAIN MENU. The Cutter Unit is not installed. Install the Cutter Unit. (→P.526) 554 Troubleshooting Downloaded from ManualsPrinter.com Manuals Printing does not start Printing does not start The Data lamp on the Control Panel does not light up Cause Corrective Action The printer is not on. Make sure the power cord is securely plugged in, all the way. Press the Power button to turn the printer on. The printer is not selected in the printer driver. (The printer is in Sleep mode.) In Windows, select the printer by clicking Select Printer or Printer in the printing dialog box and try printing again. The print job is paused. (The printer is in Sleep mode.) In Windows, restart the print job as follows. 1. Select the printer icon in the Printers and Faxes (or Printers ) window. 2. Clear Pause Printing in the File menu to restart the print job. In Mac OS X, select the printer by clicking Printer Setup Utility (or Print Center ) and try printing again. In Mac OS X, restart the print job as follows. 1. Open the Printer Setup Utility (or the Print Center ). 2. Select the printer, and then Start Jobs in the Printers menu to restart the print job. The Printer Does Not Respond Even if Print Jobs are Sent Cause Corrective Action The printer is ofine. Press the Online button on the Control Panel to bring the printer online. The Display Screen indicates the system is lling with ink Cause When the printer was turned off previously, some cleaning operation was terminated. Corrective Action Wait until the system has been lled with ink. This process may take about ten minutes. Troubleshooting 555 Downloaded from ManualsPrinter.com Manuals The printer stops during a print job The printer stops during a print job An error message is shown on the Display Screen Status Corrective Action An error message is displayed during printing. Check the error message and take action as necessary. (→P.576) The last portion of roll paper was used during a print job, and paper could not be advanced because the trailing edge is taped to the roll. Remove the used roll and insert a new roll. (→P.113) (→P.114) (→P.114) (→P.82) The printer ejects blank, unprinted paper Status Corrective Action The leading edge of the roll paper was cut to straighten it. This operation is normal. The printer cuts the leading edge of the roll to straighten it and ejects the scraps when Trim Edge First in the printer menu is On or when Trim Edge First is Automatic and the leading edge is slanted. The printer is ready to print after this initial preparation. When Off is selected under Trim Edge First, the edge is not cut and scraps are not removed. The Printhead nozzles are clogged. Print a test pattern to check the nozzles and make sure the Printhead is in good condition for printing. (→P.516) Clean the Printhead if the nozzles are clogged. (→P.517) A print job was received from an incompatible printer Use the correct imagePROGRAF printer driver for driver. the printer and try printing again. The printer has received print data that includes HP RTL commands when Auto Rotate is On. Set Auto Rotate to Off before attempting to print again. (→P.50) The printer is damaged. Contact your Canon dealer for assistance. The printer stops when printing a HP-GL/2 job (the carriage stops moving) Cause The printer is analyzing the print job. 556 Troubleshooting Downloaded from ManualsPrinter.com Manuals Corrective Action Either wait a while for printing to resume, or on the printer Control Panel, set Input Resolution to 300dpi. (→P.50) Problems with the printing quality Problems with the printing quality Printing is faint Cause Corrective Action You may be printing on the wrong side of the paper. Print on the printing surface. The Printhead nozzles are clogged. Print a test pattern to check the nozzles and see if they are clogged. (→P.516) Because the printer was left without Ink Tanks installed for some time, ink has become clogged in the ink supply system. After the Ink Tank has been installed for 24 hours, run Head Cleaning B. (→P.517) Paper is jammed inside the Top Cover. Follow the steps below to remove the jammed piece of paper inside the Top Cover. 1. Press the Online button to bring the printer ofine. 2. Open the Top Cover and make sure the Carriage is not over the Platen. 3. Remove any scraps of paper inside the Top Cover. 4. Close the Top Cover. For tips on clearing paper jams, refer to the following topics. • Clearing Jammed Roll Paper (→P.115) • Clearing a Jammed Sheet (→P.138) During borderless printing, the ink was not dry enough before cutting. Specify a longer drying period in the printer menu, in Roll DryingTime in Paper Details. (→P.50) Printing may be faint if Print Quality in Advanced Settings in the printer driver is set to Standard or Draft. In Advanced Settings in the printer driver, choose Highest or High in Print Quality. (→P.180) Troubleshooting 557 Downloaded from ManualsPrinter.com Manuals Problems with the printing quality Paper rubs against the Printhead Cause Corrective Action The paper type as specied in the printer driver does Load paper of the same type as you have specied not match the type loaded in the printer. (*1) in the printer driver. (→P.110) (→P.133) Make sure the same type of paper is specied in the printer driver as you have loaded in the printer. 1. Hold down the Stop button for a second or more to cancel printing. 2. Change the paper type in the printer driver and try printing again. Paper has been loaded incorrectly, causing it to wrinkle. Reload the paper. (→P.110) (→P.133) The Printhead is set too low. In Head Height, choose Automatic. (→P.497) You are printing on heavyweight paper or paper that curls or wrinkles easily after absorbing ink. When printing on Heavyweight Coated Paper or other paper-based media, choose a VacuumStrngth setting of Strong, or Strongest. If the paper is still scratched, try setting the Printhead level in Head Height to Highest. (→P.506) (→P.497) When printing on CAD Tracing Paper or other lm-based media, choose a VacuumStrngth setting of Standard, Strong, or Strongest. If the paper is still scratched, try setting the Printhead level in Head Height to Highest. (→P.506) (→P.497) When printing on paper 0.1 mm (0.004 in) thin or thinner, choose a VacuumStrngth setting of Weakest. If the paper is still scratched, try setting the Printhead level in Head Height to Highest. (→P.506) (→P.497) *1: Always make sure the loaded paper matches the media type setting on the printer. 558 Troubleshooting Downloaded from ManualsPrinter.com Manuals Problems with the printing quality The edges of the paper are dirty Cause Corrective Action The Platen has become dirty after borderless printing Open the Top Cover and clean the Platen. or printing on small paper. (→P.538) The paper type as specied on the printer does not match the type specied in the printer driver. Make sure the same paper type is specied on the printer as in the printer driver. (→P.105) (→P.132) Make sure the same paper type is specied in the printer driver as on the printer. 1. Hold down the Stop button for a second or more to cancel printing. 2. Change the paper type in the printer driver and try printing again. The paper is wrinkled or warped. Straighten out the wrinkles or curls and reload the paper. Do not use paper that has been printed on previously. (→P.110) (→P.133) A cut line is printed because the function to reduce cutting dust has been activated. If this function is not needed, deactivate CutDustReduct. through the printer menu. (→P.50) The Printhead is set too low. In Head Height, choose Automatic. (→P.497) You are printing on heavyweight paper or paper that curls or wrinkles easily after absorbing ink. When printing on Heavyweight Coated Paper or other paper-based media, choose a VacuumStrngth setting of Strong or Strongest. If paper still rubs against the printhead, try raising the Printhead by setting Head Height to Highest. (→P.506) (→P.497) When printing on CAD Tracing Paper or lm-based media, choose a VacuumStrngth setting of Standard, Strong, or Strongest. If paper still rubs against the printhead, try raising the Printhead by setting Head Height to Highest. (→P.506) (→P.497) The Ejection Guide is soiled. Clean the Ejection Guide. (→P.537) Troubleshooting 559 Downloaded from ManualsPrinter.com Manuals Problems with the printing quality The surface of the paper is dirty Cause Corrective Action The Paper Retainer is soiled. Clean the Paper Retainer. (→P.540) You are using a paper that does not dry easily. Specify a time of about a minute in Roll DryingTime. The back side of the paper is dirty Cause Corrective Action The Platen has become dirty after borderless printing Open the Top Cover and clean the Platen. or printing on small paper. (→P.538) The Paper Retainer is soiled. Clean the Paper Retainer. (→P.540) Printed colors are inaccurate Cause Corrective Action Color adjustment has not been activated in the Advanced Settings of the printer driver. In the Advanced Settings of the printer driver, access Color Settings in Color Mode to adjust colors. Colors have not been adjusted on the computer or monitor. Refer to the computer and monitor documentation to adjust the colors. Adjust the settings of the color management software, referring to the software documentation as needed. The Printhead nozzles are clogged. Print a test pattern to check the nozzles and see if they are clogged. (→P.516) In the printer driver, Application Color Matching Priority is not selected. Click Special Settings on the Layout sheet of the printer driver and select Application Color Matching Priority in the dialog box. Printhead characteristics gradually change through repeated use, and colors may change. Adjust the Printhead alignment. (→P.491) (→P.493) Color may change slightly even on the same model Follow these steps to prepare the printing of printer if you use a different version of the rmware environment. or printer driver, or when you print under different 1. Use the same version of rmware, printer driver, settings or in a different printing environment. and other software. 2. Specify the same value for all settings items. 560 Troubleshooting Downloaded from ManualsPrinter.com Manuals Problems with the printing quality Banding in different colors occurs Cause Corrective Action The paper feed amount is not adjusted correctly. Adjust the feed amount. (→P.498) Printing does not proceed smoothly because print jobs are interrupted during transmission. Exit other applications and cancel other print jobs. In the printer menu, Print Length is specied in Feed Priority. Selecting Band Joint may improve printing results. Adjust the feed amount in the printer menu by specifying Band Joint in Feed Priority and try printing again. (→P.498) The Printhead is out of alignment. Adjust the Printhead alignment. (→P.491) Streaks may occur if you set the Print Quality too low. Choose a higher level of Print Quality in the Advanced Settings of the printer driver and try printing again. (→P.180) Troubleshooting 561 Downloaded from ManualsPrinter.com Manuals Problems with the printing quality Colors in printed images are uneven Cause Corrective Action Line Drawing/Text is selected when printing images Specify Image in the printer driver. in many solid colors. You are printing on paper that curls easily. Printed colors may appear uneven on the leading edge of paper that is susceptible to curling. Increase the level of vacuum holding the paper against the Platen or specify a margin of 20 mm (0.79 in) or more for the leading edge. (→P.506) Printed colors may be uneven if you set the Print Quality too low. Choose a higher level of Print Quality in the Advanced Settings of the printer driver. (→P.180) Color may be uneven between dark and light image areas. Select Unidirectional Printing in the Advanced Settings of the printer driver. When using Borderless Printing, the edge of the paper is cut during printing. Thus, ink density may not be even at the edges. Specify No in Auto Cut in the printer driver before printing. In this case, the paper can be printed without borders on the left and right sides only. Cut the printed document ejected from the printer, then use scissors to cut away the edges on the top and bottom. Choose a higher level of Print Quality in the Advanced Settings of the printer driver. (→P.180) The Printhead is out of alignment. Adjust the Printhead alignment. (→P.491) Drying documents stacked on each other may cause To avoid uneven colors, we recommend drying each uneven colors. sheet separately. Color density may be uneven if you use Glossy Paper, art paper, or Coated Paper. In Advanced Settings of the printer driver, choose Highest or High in Print Quality. Image Edges are Blurred or White Banding Occurs Cause Corrective Action The Platen suction is too strong. Set VacuumStrngth to Weakest. (→P.506) The Printhead is set too high. Lower the Printhead. (→P.497) The contrast becomes uneven during printing Cause The paper feed amount is out of adjustment. Corrective Action Adjust the feed amount. (→P.498) Execute Fine Band Adj. during printing. (→P.498) 562 Troubleshooting Downloaded from ManualsPrinter.com Manuals Problems with the printing quality The length of printed images is inaccurate Cause Corrective Action In the printer menu, Band Joint is specied in Feed Priority. To ensure the feed amount matches the paper size, select Print Length in Feed Priority in the printer menu and enter the amount for adjustment in Adjust Length. You can adjust the feed amount in 0.02% increments. (→P.50) Documents are printed crooked Cause Corrective Action Skew Skew Check Lv. has been set to Loose or Off. Choose Standard in Skew Check Lv.. Width Detection has been set to Off. Choose On in Width Detection. Documents are printed in monochrome Cause Corrective Action In the Advanced Settings of the printer driver, Monochrome, Monochrome (BK ink), or Monochrome Bitmap is specied in Color Mode. In the Advanced Settings of the printer driver, specify Color in Color Mode and try printing again. The Printhead nozzles are clogged. Print a test pattern to check the color ink nozzles and see if they are clogged. (→P.516) Line thickness is not uniform (Windows) Cause In the Special Settings dialog box of the Windows printer driver, Fast Graphic Process is selected. Corrective Action Open the printer driver’s Properties dialog box from Print in the application software’s File menu, and try printing following the steps below. 1. Remove the check from Open Preview When Print Job Starts in the Main sheet. 2. Remove the check from Page Layout in the Layout sheet. 3. Click the Special Settings button in the Layout sheet to open the Special Settings dialog box, and remove the check from Fast Graphic Process. Lines are misaligned Cause The Printhead alignment is not adjusted. Corrective Action Adjust the Printhead alignment. (→P.491) (→P.493) (→P.495) Troubleshooting 563 Downloaded from ManualsPrinter.com Manuals Problems with the printing quality Thin lines are not printed after switching to Economy Printing mode Cause Corrective Action You have selected Economy Printing in the printer driver before printing. Clear the Economy Printing check box in the printer driver and try printing again. Problems with the printing quality caused by the type of paper For paper-specic troubleshooting tips to improve the printing quality, refer to the Paper Reference Guide. (→P.96) 564 Troubleshooting Downloaded from ManualsPrinter.com Manuals Cannot print over a network Cannot print over a network Cannot connect the printer to the network Cause Corrective Action The Ethernet cable is not connected correctly to the printer’s Ethernet port. 1. Make sure the printer is connected to the network with the correct Ethernet cable, and then turn the printer on. For instructions on connecting the cable, refer to the Quick Start Guide. 2. Make sure the Link indicator is lit. The Link indicator is green if the printer is connected via 100 Base-TX and orange if connected via 10Base-T. If the Link indicator is not lit, check the following points. • Make sure the hub is on. • Make sure the end of the Ethernet cable is connected correctly. Insert the Ethernet cable until it clicks and locks in place. • Make sure there is no problem with the Ethernet cable. If there is any problem, replace the Ethernet cable. • Check the communication mode with the hub. Although the printer normally detects the hub communication mode and transmission rate automatically (in auto negotiation mode), sometimes the hub settings cannot be detected. In this case, congure the connection method manually, specifying the communication mode in use. (→P.414) Cannot print over a TCP/IP network Cause Corrective Action The printer’s IP address is not congured correctly. Make sure the printer’s IP address is congured correctly. (→P.378) (→P.405) The printer’s TCP/IP network settings are not congured correctly. Make sure the printer’s TCP/IP network settings are congured correctly. (→P.408) The computer you are trying to print from is not congured correctly. Make sure the computer’s TCP/IP network settings are congured correctly. (→P.417) (→P.436) Troubleshooting 565 Downloaded from ManualsPrinter.com Manuals Cannot print over a network Cannot print over a NetWare network Cause Corrective Action The printer’s NetWare settings are not congured correctly. Make sure the printer’s NetWare settings are congured correctly. In particular, make sure a valid frame type is selected. For details, see “Conguring the Printer’s NetWare Network Settings”. (→P.411) The computer you are trying to print from is not congured correctly. Make sure the computer’s NetWare settings are congured correctly. For details, see “Conguring NetWare Network Settings”. (→P.429) The NetWare server and services are not congured Check the following points. correctly. 1. Make sure the NetWare le server is running. 2. Make sure there is enough free disk space on the NetWare le server. Insufcient disk space may prevent you from processing large print jobs. 3. Start NWADMIN or PCONSOLE and conrm that the print service is congured correctly and the print queue is available. 4. If data transmission to a printer on another subnet fails, deactivate NCP burst mode in that printer’s network protocol settings. 5. If the printer is used in queue server mode, specify “Other/Unknown” as the printer type. The printer was turned off and on when not disconnected from the server. Leave the printer off for at least 30 seconds, and then restore power. Cannot print over AppleTalk or Bonjour networks Cause Corrective Action The AppleTalk protocol is not enabled on the printer. Activate AppleTalk on the printer. (→P.410) The computer you are trying to print from is not congured correctly. Make sure the computer’s AppleTalk settings are congured correctly. (→P.433) (→P.438) The computer and printer are not on the same network. Due to the nature of Bonjour, you cannot print if the printer is on another network behind a router. Make sure the computer and printer are on the same network. For information about network settings, ask your network administrator. 566 Troubleshooting Downloaded from ManualsPrinter.com Manuals Installation problems Installation problems The IEEE 1394 Driver Cannot Be Installed Correctly In Windows, the device interface driver may not be installed correctly in some cases if you connected the IEEE 1394 cable before installing the printer driver. If so, reinstall the IEEE 1394 device interface driver and the printer driver as follows. Important • This procedure is based on an example for Windows XP. The name of the wizard may be different in other operating systems. 1. 2. 3. 4. Right-click My Computer and choose Properties to display the System Properties window. On the Hardware sheet, click Device Manager to display the Device Manager window. Right-click Other Devices icon and choose Properties. On the Driver sheet, click Update Driver to start the Hardware Update Wizard (or the Upgrade Device Driver Wizard.) 5. 6. Follow the instructions on the screen. When the window is displayed to choose the source for driver installation, select the CD-ROM drive. Insert the User Software CD-ROM provided with the printer and follow the instructions on the screen. The device/interface driver is installed. The device is detected, and the New Hardware Wizard (or Add New Hardware Wizard ) is started. 7. 8. Follow the instructions on the screen. When the window is displayed to choose the source for driver installation, select the printer driver folder. Choose the CD-ROM drive > Driver > WinXP_2K > Driver, and click OK. (For Windows 2000/Windows XP/Windows Server 2003) 9. Follow the instructions on the screen. The printer driver is installed. Troubleshooting 567 Downloaded from ManualsPrinter.com Manuals Installation problems Removing Installed Printer Drivers Follow these steps to remove installed printer drivers and utilities. Removing printer drivers (Windows) Remove the printer driver as follows. Note • In Windows 2000/Windows XP/Windows Server 2003/Windows Vista/Windows Server 2008, you must log on with administrative rights, such as those of the “Administrator” account. 1. From the Windows start menu, select Programs > Canon Printer Uninstaller > imagePROGRAF Printer Driver Uninstaller to display the Delete Printer window. 2. 3. 4. Select the printer in the list and click Delete. Click Yes after the Warning message is displayed. Make sure that the printer has been removed from the list, and then click Exit. Removing printer drivers and imagePROGRAF Printmonitor (Macintosh) Remove the printer driver or imagePROGRAF Printmonitor as follows. 1. 2. Insert the User Software CD-ROM provided with the printer in the CD-ROM drive. Start the printer driver installer included in the User Software CD-ROM. Open the OS X folder and double-click iPF Driver Installer X. 3. 4. In the upper left menu, choose Uninstall, and then click Uninstall. Follow the instructions on the screen to remove the printer driver or imagePROGRAF Printmonitor. Removing imagePROGRAF Status Monitor (Windows) Remove imagePROGRAF Status Monitor as follows. 1. From the Windows start menu, select Programs > imagePROGRAF Status Monitor > Uninstaller (imagePROGRAF Status Monitor) to start the wizard. 2. 3. In the wizard window, click Delete, and then click Next. Follow the instructions on the screen to remove imagePROGRAF Status Monitor. Removing imagePROGRAF Device Setup Utility (Windows) Remove imagePROGRAF Device Setup Utility as follows. 1. From the Windows start menu, select Programs > imagePROGRAF Device Setup Utility > Uninstaller (imagePROGRAF Device Setup Utility) to start the wizard. 2. 3. In the wizard window, click Delete, and then click Next. Follow the instructions on the screen to remove imagePROGRAF Device Setup Utility. 568 Troubleshooting Downloaded from ManualsPrinter.com Manuals HP-GL/2 problems HP-GL/2 problems With HP-GL/2, printing is misaligned. Cause The plotter origin is incorrect. Corrective Action Check the printing commands. Lines or images are missing in the HP-GL/2 data that was printed. Cause Corrective Action The memory is full. Check the size of the data in the print job. An HP-GL/2 command not supported by this printer was received. Check the print job and settings. The printer has received print data that includes HP RTL commands when Auto Rotate is On. Set Auto Rotate to Off before attempting to print again. (→P.50) Lines Are Printed Too Thick or Thin During HP-GL/2 Printing Cause Corrective Action The Line Width setting in the main menu is incorrect. Conrm the selection in Line Width. If ne lines are printed faint, setting ThickenFineLines to On in the main menu will print the lines more distinctly. (→P.50) HP-GL/2 jobs are printed in monochrome (or color). Cause The color mode is incorrect. Corrective Action On the printer Control Panel, check the color mode setting. (→P.50) For optimal printhead performance, the printer consumes trace amounts of color ink even in monochrome mode. Printed Colors in Line Drawings are Inaccurate During HP-GL/2 Printing Cause AdjustFaintLines in the main menu is set to On. Corrective Action Selecting Off may help produce the expected results. However, lines in some colors may appear broken. Troubleshooting 569 Downloaded from ManualsPrinter.com Manuals HP-GL/2 problems HP-GL/2 jobs are printed 6 mm larger than specied Cause Corrective Action The page size of the HP-GL/2 print job, as created in In MAIN MENU, set PageSizeProcess1 to On. the source application, is incorrect. (→P.50) HP-GL/2 jobs are printed at maximum size, even if a standard size is specied Cause Corrective Action The page size of the HP-GL/2 print job, as created in In MAIN MENU, set PageSizeProcess2 or the source application, is incorrect. Conserve Paper to On. The layout will be changed to the optimal layout. (→P.50) HP-GL/2 printing takes a long time. Cause Corrective Action Large print jobs with a lot of data take longer to print. On the printer Control Panel, set Input Resolution to 300dpi. (→P.50) The printer stops when printing a HP-GL/2 job (the carriage stops moving) Cause The printer is analyzing the print job. 570 Troubleshooting Downloaded from ManualsPrinter.com Manuals Corrective Action Either wait a while for printing to resume, or on the printer Control Panel, set Input Resolution to 300dpi. (→P.50) Other problems Other problems The printer does not go on Cause Corrective Action The printer is unplugged. Plug the power cord into the outlet, and then turn on the printer. The specied voltage is not supplied. Check the voltage of the outlet and breaker. (→P.74) If the Printer Makes a Strange Sound The following sounds do not indicate a problem with the printer. • There is a sound of vacuum from the Platen To prevent paper from rising, paper is held against the Platen by suction from Vacuum holes under it. • When a Roll is Rewound, There is a Sound as if the Paper is Pulled Taut This sound may be heard when rolls are loaded. When rolls are automatically rewound, you may hear the sound of pulling paper taut. • Roll paper makes a uttering sound during printing There may be a uttering sound when large paper is advanced. • There is a Hissing or Whistling Noise Parts inside the printer may resonate with the sound made by the Carriage as it moves quickly. • The Carriage Makes a Noise When Returning This sound may be heard during automatic adjustment of the printhead. Protective parts by the ink tubes, which move in response to the Carriage, may strongly swing when the Carriage returns, causing a sound when the parts touch the inner wall of the printer. • If you suddenly hear the tone for cleaning operations At regular intervals, for printer maintenance, cleaning operations will begin automatically, even if the printer is in Sleep mode. In other cases, contact your Canon dealer. Messages advising to check the maintenance cartridge are not cleared Cause The printer has not detected the new Maintenance Cartridge that was used to replace the old one. Corrective Action Remove the new Maintenance Cartridge you have just installed and insert it again rmly. Restart the printer. Troubleshooting 571 Downloaded from ManualsPrinter.com Manuals Other problems The printer consumes a lot of ink Cause Corrective Action Many full-page color images are printed. In print jobs such as photos, images are lled with color. This consumes a lot of ink. This does not indicate a problem with the printer. Head Cleaning B is used often. Head Cleaning B consumes a lot of ink. This does not indicate a problem with the printer. Unless the printer has been moved or stored for a long period or you are troubleshooting Printhead problems, we recommend not performing Head Cleaning B, to the extent possible. You have just nished initial installation, when more ink is consumed to ll the system. After initial installation or at the rst-time use after transfer, ink ows into the system between the Ink Tank and Printhead, which may cause the ink level indicators to drop to 80%. This does not indicate a problem with the printer. Ink Level Detection Ink level detection will be deactivated if you load ink tanks once emptied. Ink level detection Ink tanks specied for this printer feature an ink level detection function to prevent the ink from running out during printing, which prevents printer damage. (→P.507) This function will not work correctly if you use rell ink tanks. As a result, printing stops. Thus, before using rell ink tanks, you must cancel the ink level detection. Printing with the ink level detection canceled may lead to printer damage and printing problems. Canon Inc. is not liable for any damage that may occur as a result of relling ink. Caution • After ink level detection has been disabled, this function cannot be reactivated for the currently loaded Ink Tank. To use ink level detection again, replace the Ink Tank with a new ink tank specied for use with the printer. • Repeatedly removing and inserting an Ink Tank may damage the connection between the Ink Tank and the printer, which may cause ink leakage from the Ink Tank and damage the printer. 572 Troubleshooting Downloaded from ManualsPrinter.com Manuals Other problems Disabling ink level detection 1. On the Display Screen, a message indicates that the ink level cannot be detected. After checking the message, press the ► button. 2. Press ▲ or ▼ to select Information, and then press the OK button. 3. A conrmation message is shown on the Display Screen about disabling ink level detection. After checking the message, press the ► button. 4. After checking the message, press the ► button. 5. Press ▲ or ▼ to select Yes, and then press the OK button. 6. Check the message and press the ► button. Troubleshooting 573 Downloaded from ManualsPrinter.com Manuals Other problems 7. Check the message and press the ► button. 8. Press ▲ or ▼ to select Yes, and then press the OK button. 9. A conrmation message about updating ink information is shown on the Display Screen. After checking the message, press the ► button. 10. Press ▲ or ▼ to select Yes, and then press the OK button. Ink level detection is now disabled, and the printer goes online. 574 Troubleshooting Downloaded from ManualsPrinter.com Manuals Responding to Messages Error Message Responding to Messages Responding to Messages Error messages Check the message and take the appropriate action. (→P.576) Other Messages These messages do not prevent printer operation. Check the information on the Display Screen and take action as necessary. Messages requiring special attention are as follows: Note • Messages are also displayed in imagePROGRAF Status Monitor (Windows) or imagePROGRAF Printmonitor (Macintosh). Error Message 575 Downloaded from ManualsPrinter.com Manuals Responding to Messages Error Messages Error messages Check the message and take the appropriate action. • • • • • • • • • • • • • • • • • • • • • • • • • • • • • • • • • • • • • • • • • • • • Borderless printng not possible. (→P.584) Cannot adjust band. (→P.587) Cannot adjust printhead. (→P.587) Cannot cut this paper. (→P.583) Cannot detect papr (→P.582) Cannot feed paper. (→P.581) Cannot feed paper. (→P.583) Cannot print as specied. (→P.587) Carriage Cover is open. (→P.595) End of paper feed. (→P.583) ERROR Exxx-xxxx (x represents a letter or number) (→P.594) Execute printhead cleaning. (→P.589) File read error. (→P.591) GARO Wxxxx (x represents a number) (→P.594) GL2: W0502 The parameter is out of range. (→P.593) GL2: W0504 This command is not supported. (→P.593) GL2: Wxxxx The memory is full. (xxxx is 0501, 0903, or 0904) (→P.593) Hard disk error. (→P.591) Hardware error. xxxxxxxx-xxxx (x represents a letter or number) (→P.594) Ink insufcient. (→P.585) Ink Level: Check (→P.586) Ink tank error. (→P.586) No ink left. (→P.585) Insufcient paper for job (→P.579) Leading edge detection error. (→P.583) Mail box full. Cannot save. (→P.592) Mail box full. (→P.591) Mail box full. Delete unwanted data (→P.591) Mail box full. Now printing without saving data. (→P.591) Mail box nearly full. (→P.591) Maintenance cartridge full. (→P.590) Maintenance cartridge problem. (→P.590) Multi-sensor error (→P.595) No ink tank loaded. (→P.586) No Maintenance Cartridge capacity. (→P.590) No maintenance cartridge. (→P.590) No sheets. (→P.581) Paper jam. (→P.582) Paper loaded askew. (→P.582) Paper Mismatch (→P.578) Paper size not detected. (→P.579) Papr Size Mismatch (→P.578) Papr Type Mismatch (→P.578) Parts replacement time has passed. (→P.595) 576 Error Message Downloaded from ManualsPrinter.com Manuals Responding to Messages • • • • • • • • • • • • • • • • PHead needs cleaning. (→P.588) Prepare for maint cart replacement. (→P.590) Prepare for parts replacement. (→P.595) Printhead error (→P.589) Problem with Printhead (→P.588) Regular printing is selected, but a roll is loaded. (→P.581) Rel lever is in wrong position. (→P.583) Roll printing is selected, but sheets are loaded. (→P.580) Roll printing is selected. (→P.580) Sheet printing is selected. (→P.581) The roll is empty. (→P.580) This paper cannot be used. (→P.579) This type of paper is not compatible with HP-GL/2. (→P.593) Top cover is open. (→P.595) Unknown le. (→P.595) Use another paper. (→P.587) Other Messages These messages do not prevent printer operation. Check the information on the Display Screen and take action as necessary. Messages requiring special attention are as follows: • Remaining level of the ink cannot be correctly detected. (→P.586) Error Message 577 Downloaded from ManualsPrinter.com Manuals Messages regarding paper Messages regarding paper Paper Mismatch Cause Corrective Action You printed a test pattern for printer adjustment on several sheets, but sheets of different types or sizes of paper were used. When printing a test pattern, use sheets of the same type and size of paper. Papr Type Mismatch Cause The paper type as specied on the printer does not match the type specied in the printer driver. Corrective Action Make sure the same type of paper is specied on the printer as in the printer driver. (→P.82) (→P.86) Follow these steps to ensure the paper type matches on the printer and in the printer driver. 1. Hold down the Stop button for a second or more to cancel printing. 2. Either change the type of paper specied in the printer driver settings or replace the loaded paper and change the paper type setting on the printer. Press the Online button to resume printing. However, this may cause a paper jam or printing problem. *Printing will continue if you have set Detect Mismatch to Warning or None. Papr Size Mismatch Cause The paper size as specied on the printer does not match the size specied in the printer driver. Corrective Action Adjust the paper size setting in the printer driver to match the size loaded in the printer as follows. 1. Hold down the Stop button for a second or more to cancel printing. 2. Change the paper size setting in the printer driver to the size loaded in the printer and try printing again. Replace the loaded paper with paper of a size that matches the size setting in the printer driver as follows. 1. Hold down the Stop button for a second or more to cancel printing. 2. Replace the loaded paper to match the paper size setting in the printer driver and try printing again. Press the Online button to resume printing. However, this may cause a paper jam or printing problem. 578 Error Message Downloaded from ManualsPrinter.com Manuals Messages regarding paper Paper size not detected. Cause Paper has been loaded askew, or warped paper has been loaded. Corrective Action Reload paper straight, in the correct position. (→P.110) (→P.133) Insufcient paper for job Cause The printer has received a print job longer than the amount of roll paper left. Corrective Action Follow the steps below to replace the roll. 1. Remove the roll. (→P.113) (→P.114) (→P.114) 2. Load a roll with enough paper left. (→P.107) (→P.109) (→P.110) 3. If no barcode was printed on the roll, specify the paper type. (→P.105) 4. Specify the paper length, unless a barcode has been printed on the roll and you have deactivated the automatic detection function of the remaining roll paper. (→P.106) Hold down the Stop button for a second or more to cancel printing. Press the Online button to resume printing. However, the roll paper may run out during the print job and you may not be able to print all of the document. This paper cannot be used. Check supported paper sizes. Cause Corrective Action Paper that is too large for the printer has been loaded. Load paper of the correct size. (→P.101) Paper that is too small for the printer has been loaded. Load paper of the correct size. (→P.101) Error Message 579 Downloaded from ManualsPrinter.com Manuals Messages regarding paper Roll printing is selected. Cause You have attempted to print a test print sheet or other printer status information on a roll, but no roll is loaded. Corrective Action Load a roll and try printing again. To print on a sheet instead, hold the Stop button for more than a second to cancel printing, load a sheet, and then print. (→P.86) Roll printing is selected, but sheets are loaded. Cause A print job for rolls was received when a sheet is loaded. Corrective Action Press the OK button and remove the sheet. (→P.137) Load a roll and try printing again. (→P.110) Hold down the Stop button for a second or more to cancel printing. The roll is empty. Cause There is no more paper left on the roll. 580 Error Message Downloaded from ManualsPrinter.com Manuals Corrective Action Follow the steps below to replace the used roll with a new roll of the same type and size. 1. Remove the roll. (→P.113) (→P.114) (→P.114) 2. Load the new roll. (→P.107) (→P.109) (→P.110) 3. If no barcode was printed on the roll, specify the paper type. (→P.105) 4. If no barcode was printed on the roll, specify the paper length. (→P.106) Messages regarding paper No sheets. Cause A sheet is not loaded. Corrective Action Load paper of the type and size you have specied in the printer driver. (→P.133) Hold down the Stop button for a second or more to cancel printing. Sheet printing is selected. Cause Corrective Action You have attempted to print a test print sheet or other Load a sheet and try printing again. printer status information on a sheet, but no sheet To print on a roll instead, hold the Stop button for is loaded. more than a second to cancel printing, load a roll, and then print. (→P.82) Regular printing is selected, but a roll is loaded. Cause A print job for printing on sheets was sent when a roll is loaded. Corrective Action Hold down the Stop button for a second or more to cancel printing. Load sheets of the type and size you have specied in the printer driver. (→P.86) Hold down the Stop button for a second or more to cancel printing.Change the printer driver settings to match the roll already loaded and try printing again. Cannot feed paper. Cause Corrective Action The paper has come out of the printer. Remove the paper, press the Load/Eject button, and reload the paper. A paper jam has occurred. Lift the Release Lever, remove the jammed paper, and reload paper. If the error occurs again, turn off the printer and wait a while before restoring power. Error Message 581 Downloaded from ManualsPrinter.com Manuals Messages regarding paper Paper jam. Cause A paper jam occurred in the printer during printing. Corrective Action Lift the Release Lever and remove the jammed paper. (→P.115) (→P.138) Paper loaded askew. Cause Paper has been loaded askew. Corrective Action Follow the steps below to reload the roll. 1. Open the Top Cover. 2. Push the Release Lever back. 3. Align the right edge of the roll paper parallel to the Paper Alignment Line. 4. Pull the Release Lever forward. 5. Close the Top Cover. 6. Select the paper type. (→P.105) Follow the steps below to reload the sheet. 1. Open the Top Cover. 2. Push the Release Lever back. 3. Align the right edge of the sheet parallel to the right Paper Alignment Line and the far edge parallel to the inner paper alignment line. 4. Pull the Release Lever forward. 5. Close the Top Cover. Note • To disable this message (if it is displayed repeatedly despite reloading paper, for example), choose Off or Loose in the Skew Check Lv. setting of the printer menu. However, this may cause jams as paper may be askew when it is printed. Also, the Platen may become soiled, which may soil the back of the next document when it is printed. Cannot detect papr Cause Corrective Action The paper has come out of the printer. Remove the paper that has come out of the printer, press the Load/Eject button, and reload the paper. (→P.82) (→P.86) A paper jam occurred in the printer. Lift the Release Lever, remove the jammed paper, press the Load/Eject button, and reload paper. (→P.115) (→P.138) 582 Error Message Downloaded from ManualsPrinter.com Manuals Messages regarding paper Leading edge detection error. Cause Corrective Action A roll has been loaded when sheets are selected as the paper source on the Control Panel. Either remove the roll and load a sheet or select the roll as the media source on the Control Panel. The sheet is loaded askew. Reload the sheet straight, in the correct position. (→P.133) Cannot feed paper. Cause Paper came out of the feed path during feeding. Corrective Action Reload the paper correctly and advance it again. (→P.110) If the message is displayed when paper is not being advanced, contact your Canon dealer for assistance. Cannot cut this paper. Cause Corrective Action There are sheets left on the Ejection Guide. Remove the paper. There is a foreign object by the Output Tray, obstructing the Cutter Unit. Remove the foreign object. You are not using the printer under the recommended Use the printer only where the recommended environmental conditions for the paper. environmental conditions for the paper are met. Note that various environmental conditions are recommended for various types of paper. For details on the recommended environmental conditions for paper, see “Types of Paper”. (→P.96) You are using paper that is not compatible with automatic cutting. Cut the roll manually. (→P.122) The Cutter Unit stops in the middle of cutting. Move the Carriage to the left, remove the paper, and return the Carriage to the right. If the roll cannot be cut using the Cutter Unit, cut the roll manually. (→P.115) (→P.122) The Cutter Unit is not installed. Install the Cutter Unit. (→P.526) In other cases, the Cutter Unit may be damaged. Contact your Canon dealer for assistance. End of paper feed. Cause You are pressing the ▲ button on the Control Panel and trying to rewind the roll to the edge. Corrective Action Release the ▲ button. Rel lever is in wrong position. Cause The Release Lever is pushed back. Corrective Action Pull the Release Lever forward. Error Message 583 Downloaded from ManualsPrinter.com Manuals Messages regarding paper Borderless printng not possible. Check roll position. Cause The paper is loaded askew. Corrective Action Press the Load/Eject button and reload the paper. Insert the roll rmly until it touches the ange of the Roll Holder. (→P.107) (→P.109) (→P.110) If you press the Online button and continue printing, the document will be printed with a border. The paper loaded is not compatible with borderless printing. Load paper compatible with borderless printing and try printing again. Paper you can use for borderless printing is restricted to particular types of paper and rolls of particular widths. For information on types of paper compatible with borderless printing, refer to the Paper Reference Guide. (→P.96) Because paper expands or contracts depending on Use each type of paper only where the recommended the environment of use, it may become narrower or environmental conditions are met. For details on wider than the supported width for borderless printing. environmental conditions for various paper, see the Paper Reference Guide. (→P.96) Check supported paper. Cause Corrective Action The print job received species a type or width of paper that is not compatible with borderless printing. Follow these steps to change the settings of the print job to enable borderless printing. 1. Hold down the Stop button for a second or more to cancel printing. 2. Make sure the correct printer driver for the printer is selected and try printing again. For information on types of paper compatible with borderless printing, refer to the Paper Reference Guide. (→P.96) If you press the Online button and continue printing, the document will be printed with a border. 584 Error Message Downloaded from ManualsPrinter.com Manuals Messages regarding ink Messages regarding ink Ink insufcient. Cause Corrective Action The ink level is low, so you cannot clean the Printhead. Press the OK button and replace the Ink Tank that is low with a new Ink Tank. (→P.508) The ink level is low, so there may not be enough ink to nish printing. Press the OK button and replace the Ink Tank that is low with a new Ink Tank. (→P.508) You can print until the ink runs out by pressing the Online button. However, if the ink runs out during printing, the following situation will occur depending on the position of the leading edge when it passes through the printer. 1. No ink left. is displayed and printing stops. Press the Stop button to cancel printing, or press the OK button, replace the ink tank that is low with a new one, and continue printing. However, note that because printing is paused, colors may be slightly different. (→P.508) 2. Ink tank empty. Canceling printing of this page. is displayed and printing stops. After the paper is ejected, press the OK button and replace the ink tank that is low with a new one. (→P.508) No ink left. Cause There is no ink left. Corrective Action Open the Ink Tank Cover and replace the Ink Tank for which the Ink Lamp is ashing. (→P.508) Error Message 585 Downloaded from ManualsPrinter.com Manuals Messages regarding ink Remaining level of the ink cannot be correctly detected. Cause Ink level detection cannot work correctly if you use rell ink tanks. Corrective Action The rell ink tank can no longer be used. See the section “Ink level detection” and take the appropriate action. (→P.572) Ink Level: Check Cause Not much ink is left. Corrective Action Prepare a new Ink Tank. We recommend replacing the Ink Tank with a new Ink Tank at this point if you plan to print large-format or high-quantity jobs. No ink tank loaded. Cause Corrective Action There is no Ink Tank of the indicated color in the printer. Load or reload the Ink Tank. (→P.508) There is a problem with the Ink Tank. Replace it with a new Ink Tank. (→P.508) Ink tank error. Cause The Ink Tank in the printer is incompatible. 586 Error Message Downloaded from ManualsPrinter.com Manuals Corrective Action Load an Ink Tank specied for use with the printer. (→P.508) Messages regarding printing or adjusment Messages regarding printing or adjusment Use another paper. Cause Corrective Action The Printhead and feed amount cannot be adjusted when highly transparent lm is loaded. We recommend using a type of paper that you often use, other than lm, for Printhead adjustment. (→P.491) Adjust the feed amount manually. (→P.501) Cannot print as specied. Lift the release lever and replace paper with A4/LTR (vertical) or larger Cause The loaded paper is too small. Corrective Action Switch to paper A4/Letter (vertical) or larger. Lift the release lever and replace roll with 10 in. wide or larger roll Cause The loaded paper is too small. Corrective Action Load a roll 10 inches wide or larger. Cannot adjust band. Cause The Printhead nozzles are clogged. Corrective Action Follow the steps below to check the nozzles. 1. Print a test pattern to check the nozzles. (→P.516) 2. Clean the Printhead if the nozzles are clogged. (→P.517) Highly transparent lm is loaded that cannot be used Adjust the feed amount manually. for feed amount adjustment. (→P.501) Cannot adjust printhead. Cause The Printhead nozzles are clogged. Corrective Action Follow the steps below to check the nozzles. 1. Print a test pattern to check the nozzles. (→P.516) 2. Clean the Printhead if the nozzles are clogged. (→P.517) Highly transparent lm is loaded that cannot be used We recommend using a type of paper that you often for Printhead adjustment. use, other than lm, for Printhead adjustment. (→P.491) Error Message 587 Downloaded from ManualsPrinter.com Manuals Messages regarding printheads Messages regarding printheads Cannot adjust printhead. Cause The Printhead nozzles are clogged. Corrective Action Follow the steps below to check the nozzles. 1. Print a test pattern to check the nozzles. (→P.516) 2. Clean the Printhead if the nozzles are clogged. (→P.517) Highly transparent lm is loaded that cannot be used We recommend using a type of paper that you often for Printhead adjustment. use, other than lm, for Printhead adjustment. (→P.491) Cannot adjust band. Cause The Printhead nozzles are clogged. Corrective Action Follow the steps below to check the nozzles. 1. Print a test pattern to check the nozzles. (→P.516) 2. Clean the Printhead if the nozzles are clogged. (→P.517) Highly transparent lm is loaded that cannot be used Adjust the feed amount manually. for feed amount adjustment. (→P.501) PHead needs cleaning. Cause The Printhead nozzles are clogged. Corrective Action Specify Printhead cleaning options. (→P.517) If the message is still displayed after Head Cleaning B, contact the Canon dealer for assistance. Problem with Printhead Cause The Printhead nozzles are becoming clogged. 588 Error Message Downloaded from ManualsPrinter.com Manuals Corrective Action If printing is faint, clean the Printhead. (→P.517) Messages regarding printheads Printhead error Cause Corrective Action An incompatible Printhead has been installed. Install a Printhead specied for use with the printer. (→P.518) There is a problem with the Printhead. Open the Top Cover. If the Carriage is over the Platen, replace the Printhead with a new one. (→P.518) If, after opening the Top Cover, you see that the Carriage is not over the Platen, follow the steps below. 1. Close the Top Cover and press the Online button. 2. Replace the Printhead. (→P.518) Execute printhead cleaning. Cause The Printhead nozzles are clogged. Corrective Action Follow these steps to clean the Printhead. 1. Hold down the Stop button for a second or more to cancel printing. 2. Printhead cleaning options. (→P.517) If this message is still displayed, replace the Printhead. (→P.518) Error Message 589 Downloaded from ManualsPrinter.com Manuals Messages regarding the maintenance cartridge Messages regarding the maintenance cartridge No maintenance cartridge. Cause The Maintenance Cartridge is not installed. Corrective Action Install the Maintenance Cartridge. (→P.528) Prepare for maint cart replacement. Cause The Maintenance Cartridge is almost full. Corrective Action You can continue to print, but prepare a new Maintenance Cartridge to use when the message for replacement is displayed. No Maintenance Cartridge capacity. Cause The Maintenance Cartridge cannot absorb enough ink for Printhead cleaning or other operation. Corrective Action After conrming that the printer has stopped operating, replace the Maintenance Cartridge. (→P.528) Maintenance cartridge full. Cause The Maintenance Cartridge is full. Corrective Action After conrming that the printer has stopped operating, replace the Maintenance Cartridge. (→P.528) Maintenance cartridge problem. Cause Corrective Action An incompatible or used Maintenance Cartridge has been installed. Install a Maintenance Cartridge specied for use with the printer. (→P.528) 590 Error Message Downloaded from ManualsPrinter.com Manuals Messages regarding the hard disk Messages regarding the hard disk Hard disk error. Cause Corrective Action There is a format problem with the printer’s hard disk. Press the OK button to start reformatting the hard disk. When formatting is nished, the printer automatically restarts. (Formatting will erase all data on the hard disk.) File read error. Cause Files on the printer’s hard disk have become corrupted. Corrective Action Restart the printer. Only the corrupted les will be deleted, and the printer will restart. Mail box full. Cause There is no more space on the printer’s hard disk. Corrective Action Press the Stop button to cancel the print job. Delete print jobs from the queue. (→P.449) Delete unneeded jobs stored on the hard disk. (→P.484) Mail box full. Now printing without saving data. Cause Corrective Action No more space is available on the printer’s hard disk, After printing, this message is cleared. so jobs are now printed without saving them. (Print Delete unneeded jobs stored on the hard disk. jobs can no longer be saved on the hard disk.) (→P.484) Mail box nearly full. Cause The free hard disk space left for Personal Boxes in the printer’s hard disk does not have more than 1 GB, combined. Corrective Action Delete unneeded jobs stored in Personal Boxes. (→P.484) Mail box full. Delete unwanted data Cause 100 jobs are stored in the Personal Box. Corrective Action Delete unneeded jobs stored in Personal Boxes. (→P.484) Error Message 591 Downloaded from ManualsPrinter.com Manuals Messages regarding the hard disk Mail box full. Cannot save. Cause Saved jobs exceed the Personal Box capacity. Corrective Action Press the Stop button to cancel the print job. Delete print jobs from the queue. (→P.449) Delete unneeded jobs stored on the hard disk. (→P.484) 592 Error Message Downloaded from ManualsPrinter.com Manuals Messages regarding HP-GL/2 Messages regarding HP-GL/2 This type of paper is not compatible with HP-GL/2. Cause The printer has received a HP-GL/2 print job that cannot be printed on the paper that has been advanced. Corrective Action Replace the paper with a type compatible with HP-GL/2. For details on paper compatible with HP-GL/2, refer to the Paper Reference Guide. (→P.96) The printer may continue printing, but the printing quality may be affected. Check the printing results. GL2: Wxxxx The memory is full. (xxxx is 0501, 0903, or 0904) Cause The printer memory is full. Corrective Action Because the entire print job could not be received, the printer may not be able to print the entire original. Check the printing results. GL2: W0502 The parameter is out of range. Cause A parameter specied in a HP-GL/2 command is out of the supported range. Corrective Action Check the print job. GL2: W0504 This command is not supported. Cause The printer has received an unsupported HP-GL/2 command. Corrective Action Check the print job. Error Message 593 Downloaded from ManualsPrinter.com Manuals Other Messages Other Messages GARO Wxxxx (x represents a number) Cause There is a problem with the print job. Corrective Action Try printing again, using the correct printer driver. It is also possible to continue printing in this state. However, you may not be able to obtain the desired printing results. ERROR Exxx-xxxx (x represents a letter or number) In the following situations, turn off the printer and wait at least three seconds before restoring power. If the message is still displayed, write down the error code and message, turn off the printer, and contact your Canon dealer for assistance. • “ERROR” is displayed, followed by the error code and Call for service.. Hardware error. xxxxxxxx-xxxx (x represents a letter or number) In the following situations, turn off the printer and wait at least three seconds before restoring power. However, keep the printer off and remove the roll if the last portion of roll paper was used during a print job and paper could not be advanced because the trailing edge is taped to the roll. If tape and the Belt Stopper have not been removed from inside the Top Cover, turn off the printer, open the Top Cover, and remove the tape and Belt Stopper before restoring power. If the message is still displayed, write down the error code and message, turn off the printer, and contact your Canon dealer for assistance. • The error message is displayed with the following instructions: Turn off printer, wait, then turn on again.. 594 Error Message Downloaded from ManualsPrinter.com Manuals Other Messages Top cover is open. Cause Corrective Action The printer has detected that the Top Cover is open. Open the Top Cover fully, remove any foreign objects, and close the Top Cover again. If the error occurs again, turn off the printer and wait a while before restoring power. Carriage Cover is open. Cause The Carriage Cover is open. Corrective Action Close the Carriage Cover. (→P.518) If the error occurs again, turn off the printer and wait a while before restoring power. Prepare for parts replacement. Cause It is almost time to replace consumables for which service is required. Corrective Action If Parts replacement time has passed. is displayed, you can continue to use the printer for some time. Contact your Canon dealer for assistance. Parts replacement time has passed. Cause It is past the recommended time to replace consumables for which service is required. Corrective Action Contact your Canon dealer for assistance. Unknown le. Cause Invalid data format. Corrective Action Check the print job and resend it. Multi-sensor error Cause Corrective Action Direct sunlight or strong lighting may be shining on the printer and causing the sensor to malfunction. Take steps to ensure the printer is not used when exposed to direct sunlight or strong lighting. The performance of a sensor inside the printer may be impaired. Contact your Canon dealer for assistance. Error Message 595 Downloaded from ManualsPrinter.com Manuals 596 Downloaded from ManualsPrinter.com Manuals Index Index A Borderless Printing at Actual Size...................225, 246 Borderless Printing....................................225, 246 About This User Manual..............................................1 Accessing the Printer Driver Dialog Box from Applications (Mac OS X).........................................386 Accessing the Printer Driver Dialog Box from Applications (Windows)...........................................343 Accessing the Printer Driver Dialog Box from the Operating System Menu (Windows)........................345 Borderless Printing Method.......................225, 246 Print Image with Actual Size......................226, 247 Borderless Printing at Actual Size (Mac OS X)......................................................229, 250 Borderless Printing at Actual Size (Windows)......................................................227, 248 Additional Settings Pane (Mac OS X).....................398 Borderless Printing by Resizing Originals to Fit the Roll Width................................................................239 Adjusting Images.....................................................172 Borderless Printing............................................239 Adjusting the Color in the Printer Driver..................172 Borderless Printing Method...............................239 Color Adjustment...............................................172 Scale to fit Roll Paper Width..............................240 Color Mode........................................................172 Borderless Printing by Resizing Originals to Fit the Roll Width (Mac OS X)............................................243 Matching............................................................173 Adjusting the feed amount.......................................498 Adjusting the Feed Amount Automatically...............498 Adjusting the feed amount during printing.........500 Adjusting the Feed Amount Manually......................501 Borderless Printing by Resizing Originals to Fit the Roll Width (Windows)..............................................241 Borderless Printing by Resizing Originals to Match the Paper Size (Mac OS X).....................................236 Adjusting the feed amount during printing.........503 Borderless Printing by Resizing Originals to Match the Paper Size (Windows).......................................234 Adjusting the Measurement Scale for Better Accuracy..................................................................504 Borderless Printing on Paper of Equivalent Size.....232 Borderless Printing............................................232 Adjusting the Printhead...........................................491 Borderless Printing Method...............................232 Adjusting the Printhead Alignment Automatically....491 Adjusting the Printhead Alignment Manually...........493 Fit Paper Size....................................................233 Borderless printng not possible...............................584 Adjusting the Printhead Height................................497 Check roll position.............................................584 Adjusting the Printhead Orientation.........................495 Adjusting the Vacuum Strength...............................506 Adjustments for Better Print Quality........................491 An error message is shown on the Display Screen.....................................................................556 Check supported paper.....................................584 C Canceling print jobs...................................................92 Attaching Accessories to the Roll Holder................129 Canceling Print Jobs from Mac OS X........................94 Installing the 2-Inch Paper Core Attachment.....130 Canceling Print Jobs from the Control Panel............92 Installing the 3-Inch Paper Core Attachment.....129 Canceling Print Jobs from Windows..........................93 Cannot adjust band.........................................587, 588 B Cannot adjust printhead..................................587, 588 Back..........................................................................14 Banding in different colors occurs...........................561 Basic Environmental Performance............................78 Packaging materials............................................78 Printer..................................................................78 Basic Printing Workflow.............................................80 Borderless Printing..................................................232 Cannot connect the printer to the network..............565 Cannot cut this paper..............................................583 Cannot detect papr..................................................582 Cannot feed paper...........................................581, 583 Cannot Load Sheets................................................554 Cannot print as specified.........................................587 Lift the release lever and replace paper with A4/ LTR (vertical) or larger.......................................587 Lift the release lever and replace roll with 10 in. wide or larger roll...............................................587 Index 597 Downloaded from ManualsPrinter.com Manuals Index Cannot print over a NetWare network.....................566 Color Settings Pane: Monochrome (Mac OS X)......394 Cannot print over a network....................................565 Color Adjustment pane: monochrome...............394 Cannot print over a TCP/IP network........................565 Colors in printed images are uneven.......................562 Cannot print over AppleTalk or Bonjour networks...566 Configuring NetWare Network Settings...................429 Carriage.....................................................................16 Configuring the Communication Mode Manually.....414 Carriage Cover is open...........................................595 Centering originals..................................................288 Configuring the Destination for AppleTalk Network (Macintosh)..............................................................433 Checking for Nozzle Clogging.................................516 Activating AppleTalk on the printer....................433 Checking Images Before Printing............................ 311 Checking Ink Tank Levels........................................513 Checking the Free Hard Disk Space.......................488 Configuring the Destination (Mac OS X)...........434 Configuring the Destination for Bonjour Network (Macintosh)..............................................................438 Using imagePROGRAF Printmonitor................489 Configuring the Destination for TCP/IP Network (Macintosh)..............................................................436 Using imagePROGRAF Status Monitor............489 Configuring the Destination (Mac OS X)...........436 Using RemoteUI................................................488 Using the Control Panel....................................488 Checking the Layout Before Printing (Mac OS X)......................................................315, 384 Configuring the IP Address on the Printer...............403 Configuring the IP Address Using ARP and PING Commands..............................................................406 Checking the Layout in a Preview Before Printing... 311 Configuring the IP Address Using imagePROGRAF Device Setup Utility.................................378, 404, 430 Open Preview When Print Job Starts (Windows)......................................................... 311 Configuring the IP Address Using the Printer Control Panel.......................................................................405 Preview (Macintosh)..........................................312 Configuring the Printer Driver Destination (Macintosh)..............................................................431 Checking the Layout in a Preview Before Printing (Windows).......................................................313, 339 Checking the Print Quality.......................................515 Configuring the Printer Driver Destination (Windows)...............................................................417 Checking the Remaining Maintenance Cartridge Capacity..................................................................535 Configuring the Printer's AppleTalk Network ettings..............................................................410, 432 Choosing a Paper for Printing.................................188 Configuring the Printer's NetWare Network Settings........................................................... 411, 420 If the paper type is not listed for selection.........188 Media type.........................................................188 Choosing Paper for Printing....................................188 Choosing the Document Type and Printing Conditions (Mac OS X)............................................185 Configuring the Printer's TCP/IP Network Settings...................................................................408 Confirming Print Settings (Mac OS X).....................382 Checking a preview of the settings....................382 Checking a print preview...................................383 Choosing the Document Type and Printing Conditions (Windows).............................................183 Confirming Print Settings (Windows).......................337 Cleaning Inside the Top Cover................................538 Checking a preview of the settings....................337 Cleaning the Paper Retainer...................................540 Checking a print preview...................................338 Cleaning the Printer.................................................537 Conserving roll paper..............................................299 Cleaning the Printer Exterior...................................537 Conserving Roll Paper by Printing Originals Without Top and Bottom Margins.........................................305 Cleaning the Printhead....................................517, 541 Cleaning the Printhead..............................517, 541 Clearing a Jammed Sheet...............................138, 552 Clearing Jammed Roll Paper.......................... 115, 549 Color Adjustment Sheet: Color (Windows)..............353 Object Adjustment dialog box............................354 Color Adjustment Sheet: Monochrome (Windows)...357 No Spaces at Top or Bottom (Conserve Paper)..............................................305 Conserving Roll Paper by Printing Originals Without Top and Bottom Margins (Mac OS X)......................308 Conserving Roll Paper by Printing Originals Without Top and Bottom Margins (Windows).......................306 Object Adjustment dialog box............................358 Conserving Roll Paper by Rotating Originals 90 Degrees...................................................................299 Color Settings Pane: Color (Mac OS X)..................392 Rotate Page 90 degrees (Conserve Paper)......299 Color Adjustment pane: color............................392 Conserving Roll Paper by Rotating Originals 90 Degrees (Mac OS X)...............................................302 Matching pane...................................................393 598 Index Downloaded from ManualsPrinter.com Manuals Index Conserving Roll Paper by Rotating Originals 90 Degrees (Windows).................................................300 Error Message.........................................................575 Control Panel.......................................................18, 20 Error messages.................................................576 Correcting Print Misalignment.................................491 Other Messages................................................577 Cutter Unit...............................................................525 Execute printhead cleaning.....................................589 Cutting Roll Paper After Printing..............................329 Automatic Cutting..............................................329 Cutting Roll Paper After Printing (Mac OS X)..........331 Cutting Roll Paper After Printing (Windows)............330 Cutting the Leading Edge of Roll Paper Automatically...........................................................126 Error Messages.......................................................576 F Favorites Sheet (Windows).....................................366 Feeding Roll Paper Manually.................................. 118 File read error..........................................................591 Fine-Tuning Colors of Photos and Images (Mac OS X)..............................................................177 D Deleting Saved Jobs...............................................484 Using imagePROGRAF Printmonitor (Mac OS)...........................................................487 Using imagePROGRAF Status Monitor (Windows).........................................................486 Using RemoteUI................................................485 Fine-Tuning Colors of Photos and Images (Windows)...............................................................174 Frequently Asked Questions...................................547 Front..........................................................................13 G Using the Control Panel....................................484 GARO Wxxxx (x represents a number)...................594 Detection of the Remaining Roll Paper................... 119 Giving Priority to Particular Graphic Elements and Colors for Printing....................................................180 Device Settings Sheet (Windows)...........................370 Advanced Settings............................................180 Device Setup Utility.................................................377 Color settings....................................................181 Digital Photo Front-Access......................................373 Enhancing printing quality.................................182 Displaying a List of Saved Jobs..............................460 Print Priority.......................................................180 Using imagePROGRAF Printmonitor (Macintosh)........................................................463 Print Quality.......................................................181 Using imagePROGRAF Status Monitor (Windows).........................................................462 GL2: W0502 The parameter is out of range............593 Using RemoteUI................................................461 GL2: Wxxxx The memory is full. (xxxx is 0501, 0903, or 0904)..................................593 Using the Control Panel....................................460 Displaying Details of Saved Jobs............................475 Using imagePROGRAF Printmonitor (Mac OS)...........................................................478 Using imagePROGRAF Status Monitor (Windows).........................................................476 Using RemoteUI................................................475 Do Not Save Print Jobs in the Common Box..........448 Documents are printed crooked..............................563 Documents are printed in monochrome..................563 E Email Notification When Printing is Finished or Errors Occur............................................................415 End of paper feed....................................................583 Enhanced Printing Options......................................172 Erasing Data on the Printer's Hard Disk..................490 ERROR Exxx-xxxx (x represents a letter or number).............................594 GL2: W0504 This command is not supported.........593 H Handling Paper..........................................................96 Handling rolls...........................................................104 Handling sheets.......................................................131 Hard Disk.................................................................439 Hard disk error.........................................................591 Hardware error. xxxxxxxx-xxxx (x represents a letter or number).............................594 How to use this manual...............................................1 HP-GL/2 jobs are printed 6 mm larger than specified..................................................................570 HP-GL/2 jobs are printed at maximum size, even if a standard size is specified..........................570 HP-GL/2 jobs are printed in monochrome (or color)..................................................................569 HP-GL/2 Printing.....................................................162 HP-GL/2 printing takes a long time.........................570 Index 599 Downloaded from ManualsPrinter.com Manuals Index HP-GL/2 problems...................................................569 HTML Version of the Manual for Printing.....................5 M Printing a group of individual topics in the manual...................................................................7 Mac OS X Software.................................................379 Printing a group of topics in the manual................5 Mail box full. Cannot save.......................................592 Printing selected topics.......................................10 Mail box full. Delete unwanted data........................591 I Mail box full.............................................................591 Mail box full. Now printing without saving data........591 Mail box nearly full...................................................591 IEEE 1394 (FireWire) Expansion Board....................73 Main Menu Operations..............................................33 If the Printer Makes a Strange Sound.....................571 Accessing Menus................................................34 Image Edges are Blurred or White Banding Occurs.....................................................................562 Executing menu commands................................36 imagePROGRAF Device Setup Utility.....................377 Specifying numerical values................................36 imagePROGRAF Printmonitor (Macintosh).............400 Main Menu Settings...................................................50 imagePROGRAF Status Monitor (Windows)...........372 Adjust Printer.......................................................57 Improving the Print Quality......................................515 GL2 Settings........................................................55 Initializing the Network Settings..............................416 Information..........................................................61 Ink insufficient..........................................................585 Interface Setup....................................................58 Ink Level Detection..................................................572 Job Management.................................................54 Disabling ink level detection..............................573 Maintenance........................................................59 Ink level detection..............................................572 Paper Details.......................................................52 Ink Level: Check......................................................586 Paper Menu.........................................................51 Ink Tank Cover (Inside)..............................................17 System Setup......................................................59 Ink tank error...........................................................586 Main Menu Settings (During Printing).......................62 Ink Tanks.................................................................507 Information..........................................................63 Installation problems...............................................567 Job Mgmt Menu...................................................64 Installing imagePROGRAF Device Setup Utility................................................................377, 430 Main Pane (Mac OS X)...........................................387 Insufficient paper for job..........................................579 Configuration using Easy Settings....................387 Introduction..................................................................1 L Specifying menu items........................................35 Configuration using Advanced Settings.............388 Main Sheet (Windows)............................................347 Configuration using Advanced Settings.............348 Configuration using Easy Settings....................347 Layout Sheet (Windows).........................................362 Maintenance............................................................507 Leading edge detection error...................................583 Maintenance Cartridge............................................528 Line thickness is not uniform (Windows).................563 Maintenance cartridge full.......................................590 Lines are misaligned...............................................563 Maintenance cartridge problem...............................590 Lines Are Printed Too Thick or Thin During HP-GL/2 Printing....................................................................569 Making the Original Orientation Match the Paper Orientation...............................................................319 Lines or images are missing in the HP-GL/2 data that was printed.......................................................569 Mirror.................................................................319 Loading and Printing on Rolls...................................82 Rotate 180 degrees...........................................319 Loading and Printing on Sheets................................86 Making the Original Orientation Match the Paper Orientation (Mac OS X)...........................................322 Loading Rolls in the Roll Holder Slot.......................109 Loading Rolls on the Roll Holder.............................107 Loading the Roll in the Printer................................. 110 Loading the Sheet in the Printer..............................133 Orientation.........................................................319 Making the Original Orientation Match the Paper Orientation (Windows).............................................320 Managing Queued Jobs (Deleting or Preempting Other Jobs).......................449 Using imagePROGRAF Printmonitor................451 600 Index Downloaded from ManualsPrinter.com Manuals Index Using imagePROGRAF Status Monitor............451 Using RemoteUI................................................450 Using the Control Panel....................................450 Manually Loading Paper to the Position for Printing....................................................................136 Matching Sheet (Windows).....................................355 Driver Matching Mode.......................................355 ICC Matching Mode, Driver ICM Mode and Host ICM Mode..........................................................356 Media Detailed Settings Dialog Box (Mac OS X)....390 Media Detailed Settings Dialog Box (Windows)......351 Menu Structure..........................................................37 No sheets................................................................581 O Optional accessories.................................................73 Other Maintenance..................................................542 Other Messages......................................................594 Other problems........................................................571 Other useful settings...............................................316 Output Stacker........................................................140 P Main Menu...........................................................37 Page Options Dialog Box (Windows)......................364 Main menu during printing...................................48 Page Setup Pane (Mac OS X)................................395 Submenus...........................................................47 Page Setup Sheet (Windows).................................359 Messages advising to check the maintenance cartridge are not cleared.........................................571 Paper.........................................................................96 Messages regarding HP-GL/2.................................593 Paper Information on Printer Dialog Box (Mac OS X)..............................................................389 Messages regarding ink..........................................585 Messages regarding paper......................................578 Paper cannot be cut................................................554 Messages regarding printheads..............................588 Paper Information on Printer Dialog Box (Windows)...............................................................350 Messages regarding printing or adjusment.............587 Paper is not cut neatly.............................................554 Messages regarding the hard disk..........................591 Paper jam................................................................582 Messages regarding the maintenance cartridge.....590 Paper loaded askew................................................582 Moving saved jobs...................................................470 Paper Mismatch......................................................578 Using imagePROGRAF Printmonitor (Macintosh)........................................................474 Paper rubs against the Printhead............................558 Using imagePROGRAF Status Monitor (Windows).........................................................472 Paper Size Options Dialog Box (Windows).............361 Using RemoteUI................................................470 Rolls..................................................................101 Multi-sensor error....................................................595 Sheets...............................................................102 N Paper size not detected...........................................579 Paper Sizes.............................................................101 Papr Size Mismatch................................................578 Papr Type Mismatch................................................578 Naming Personal Boxes..........................................456 Parts replacement time has passed........................595 Using imagePROGRAF Printmonitor (Mac OS)...........................................................459 PHead needs cleaning............................................588 Using imagePROGRAF Status Monitor (Windows).........................................................457 Prepare for maint cart replacement.........................590 Using RemoteUI................................................456 Network Environment..............................................401 Network environment........................................402 System requirements........................................401 Network Setting.......................................................401 Network Setting (Mac OS X)...................................431 PosterArtist..............................................................374 Prepare for parts replacement.................................595 Preparing to Transfer the Printer.............................542 Print Area...................................................................79 Rolls....................................................................79 Sheets.................................................................79 Printed colors are inaccurate...................................560 Network Setting (Windows).....................................417 Printed Colors in Line Drawings are Inaccurate During HP-GL/2 Printing..........................................569 No ink left................................................................585 Printer Driver...................................................333, 379 No ink tank loaded...................................................586 Printer Driver Settings (Mac OS X).........................379 No Maintenance Cartridge capacity.........................590 Printer Driver Settings (Windows)...........................333 No maintenance cartridge.......................................590 Printer Hard Disk Operations..................................439 Index 601 Downloaded from ManualsPrinter.com Manuals Index Printer Menu Operations...........................................31 Printing Large Posters (Windows)...........................286 Job Management Menu Operations....................32 Printing Line Drawings and Text (Mac OS X)..........156 Main menu operations during printing.................31 Printing Line Drawings and Text (Windows)....152, 154 Main menu operations when no print job is in progress..............................................................31 Easy Settings....................................................152 Submenu operations...........................................32 Print targets for line drawings and text..............152 Printer Modes............................................................24 Menu mode, and state of the Control Panel........28 Printing Line Drawings and Text (Windows, Mac OS X).............................................153 Mode transition....................................................25 Easy Settings....................................................153 Modes..................................................................24 Print Target........................................................153 Offline, and state of the Control Panel................27 Print targets for line drawings and text..............153 Online, and state of the Control Panel................26 Printing Multiple Originals Next to Each Other........268 Submenu mode, and state of the Control Panel...................................................................28 Free Layout (Windows).....................................268 Printer Parts..............................................................13 Printing Multiple Originals Next to Each Other (Mac OS X)..............................................................272 Printer Specifications.................................................74 Printhead.................................................................515 Print Target........................................................152 imagePROGRAF Free Layout (Macintosh).......269 Printhead error........................................................589 Printing Multiple Originals Next to Each Other (Windows)...............................................................270 Printheads...............................................................515 Printing Multiple Pages Continuously......................274 Printing a List of Saved Jobs...................................464 Roll paper (banner)...........................................274 Printing at full size...................................................218 Printing Multiple Pages Continuously (Mac OS X)...277 Printing at Full Size (Mac OS X)..............................222 Printing Multiple Pages Continuously (Windows)....275 Printing at Full Size (Windows)...............................220 Printing Multiple Pages Per Sheet...........................279 Printing banners or at other non-standard sizes.....253 Page Layout......................................................279 Printing CAD Drawings............................................151 Printing Multiple Pages Per Sheet (Mac OS X).......282 Printing does not start.............................................555 Printing Multiple Pages Per Sheet (Windows).........280 Printing Enlargements of Scanned Originals from a Color imageRUNNER......................................168, 214 Easy Settings....................................................163 Printing Office Documents.......................................163 Printing Enlargements of Scanned Originals from a Color imageRUNNER (Mac OS X)..................170, 216 Print Target........................................................163 Completing the scanning settings on the Color imageRUNNER.........................................171, 217 Printing Office Documents (Mac OS X)...................166 Registering a hot folder on your computer.......170, 216 Printing on Non-Standard Paper Sizes...................261 Scanning the original and print an enlargement .............................................171, 217 Printing Enlargements of Scanned Originals from a Color imageRUNNER (Windows)....................168, 214 Completing the scanning settings on the Color imageRUNNER. .......................................169, 215 Registering a hot folder on your computer...................................................168, 214 Scanning the original and print an enlargement..............................................169, 215 Print targets for office documents......................163 Printing Office Documents (Windows).....................164 Registering non-standard paper size in the printer driver......................................................261 Specifying custom paper sizes for temporary use.....................................................................261 Printing on Non-Standard Paper Sizes (Mac OS X)..............................................................266 Printing on Non-Standard Paper Sizes (Windows)...............................................................262 Printing by using Custom Paper Size................264 Printing by using Custom Size..........................262 Printing enlargements or reductions........................196 Printing on Oversized Paper...................................218 Printing from Mac OS X.............................................90 Oversize............................................................218 Printing from the application software.................91 Printing Options Using Rolls and Sheets..................80 Registering the printer.........................................90 Roll printing.........................................................80 Printing from Windows..............................................89 Sheet printing......................................................81 Printing is faint.........................................................557 602 Index Downloaded from ManualsPrinter.com Manuals Index Printing Originals Centered on Rolls.......................288 Problems with the printing quality............................557 Print Centered...................................................288 Problems with the printing quality caused by the type of paper...........................................................564 Printing Originals Centered on Rolls (Mac OS X)...291 Printing Originals Centered on Rolls (Windows).....289 Printing Originals Centered on Sheets....................294 R Print Centered...................................................294 Reducing Dust from Cutting Rolls...........................127 Printing Originals Centered on Sheets (Mac OS X)..............................................................297 Regular printing is selected, but a roll is loaded......581 Printing Originals Centered on Sheets (Windows)...............................................................295 Remaining level of the ink cannot be correctly detected...................................................................586 Printing Photos and Images....................................142 Removing a Roll from the Roll Holder..................... 114 Printing Photos and Images (Mac OS X)................148 Removing Installed Printer Drivers..........................568 Printing Photos and Images (Windows)..........142, 146 Removing imagePROGRAF Device Setup Utility (Windows).........................................................568 Easy Settings....................................................142 Print Target........................................................142 Print targets for photos and images..................142 Printing Photos and Images (Windows, Mac OS X).............................................144 Rel lever is in wrong position...................................583 Removing imagePROGRAF Status Monitor (Windows).........................................................568 Removing printer drivers (Windows).................568 Easy Settings....................................................144 Removing printer drivers and imagePROGRAF Printmonitor (Macintosh)...................................568 Print Target........................................................144 Removing Rolls From the Roll Holder Slot.............. 114 Print targets for photos and images..................144 Removing the Roll from the Printer......................... 113 Printing Posters in Sections....................................285 Removing the Sheet................................................137 Page Layout......................................................285 Renaming Saved Jobs............................................479 Printing procedure.....................................................80 Using imagePROGRAF Printmonitor (Mac OS)...........................................................482 Printing Saved Jobs................................................465 Using imagePROGRAF Printmonitor (Mac OS)...........................................................468 Using imagePROGRAF Status Monitor (Windows).........................................................481 Using RemoteUI................................................479 Using imagePROGRAF Status Monitor (Windows).........................................................467 Replacing Ink Tanks................................................508 Using RemoteUI................................................466 Compatible Ink Tank..........................................508 Using the Control Panel....................................465 Precautions when handling an Ink Tank............508 Printing Vertical or Horizontal Banners (Large-Format Printing)...........................................253 Replacing an Ink Tank.......................................509 Replacing the Cutter Unit........................................526 Fit Roll Paper Width..........................................253 Replacing the Maintenance Cartridge.....................528 Printing Vertical or Horizontal Banners (Large-Format Printing; Mac OS X).........................258 Compatible Maintenance Cartridge...................528 Print the banner.................................................259 Precautions when handling the Maintenance Cartridge............................................................528 Register a Custom Page Size...........................258 Replacing the Maintenance Cartridge...............529 Printing Vertical or Horizontal Banners (Large-Format Printing; Windows)..........................254 Replacing the Printhead..........................................518 Creating the banner in the application...............255 Compatible Printhead........................................518 Printing the banner............................................255 Precautions when handling the Printhead.........518 Registering a Custom Paper Size.....................254 Replacing the Printhead....................................519 Printing With Watermarks........................................316 When to replace the Printhead..........................518 Watermark.........................................................316 Resizing Originals by Entering a Scaling Value.......208 Printing with Watermarks-COPY, FILE COPY, and so on (Windows)...............................................317 Enlarged/Reduced Printing...............................208 Printmonitor.............................................................400 Problem with Printhead...........................................588 Replacing the Shaft Cleaner.............................533 Scaling...............................................................208 Resizing Originals by Entering a Scaling Value (Mac OS X).............................................................. 211 Problems Regarding Paper.....................................549 Index 603 Downloaded from ManualsPrinter.com Manuals Index Resizing Originals by Entering a Scaling Value (Windows)...............................................................209 Special Settings Dialog Box (Windows)..................365 Resizing Originals to Fit the Roll Width...................202 Hard Disk.............................................................77 Enlarged/Reduced Printing...............................202 Ink........................................................................75 Fit Roll Paper Width..........................................202 Interface..............................................................75 Resizing Originals to Fit the Roll Width (Mac OS X)..............................................................205 Paper...................................................................76 Resizing Originals to Fit the Roll Width (Windows)...............................................................203 Printing performance...........................................74 Resizing Originals to Match the Paper Size............196 Enlarged/Reduced Printing...............................196 Fit Paper Size....................................................196 Resizing Originals to Match the Paper Size (Mac OS X)..............................................................199 Resizing Originals to Match the Paper Size (Windows)...............................................................197 Responding to Messages........................................575 Error messages.................................................575 Other Messages................................................575 Roll Holder Set..................................................73, 128 Roll paper cannot be inserted into the Paper Feed Slot..........................................................................554 Roll printing is selected, but sheets are loaded.......580 Roll printing is selected...........................................580 S Specifications............................................................74 Printer..................................................................74 Specifying Colors and Printing CAD Drawings........159 Color Compatibility............................................159 Specifying Colors and Printing CAD Drawings (Windows)...............................................................160 Specifying NetWare Print Services..........................424 Choosing the type of print services...................424 Using NWADMIN or PCONSOLE to set up the print server........................................................425 Specifying NetWare Protocols.................................427 Specifying Paper in the Printer Driver.....................191 Specifying Paper in the Printer Driver (Mac OS X)......................................................194, 380 Specifying Paper in the Printer Driver (Windows).......................................................192, 335 Specifying Printer-Related Information....................413 Specifying the Cutting Method for Rolls..................122 Eject (waiting for ink to dry after printing)..........123 Saved Print Jobs.....................................................441 Manual (when using media that cannot be cut using the Cutter Unit)........................................124 Storage destination...........................................443 Paper Cutting (to have the roll cut at your specified position)..............................................125 Saving Print Jobs....................................................445 Specifying the Ink Drying Time for Rolls..................120 Using the printer driver (Mac OS X)..................447 Mac OS X..........................................................121 Using the printer driver (Windows)....................445 Windows............................................................120 Saving Print Jobs Sent from Sources Other than the Printer Driver...........................................................444 Specifying the Paper Length (Roll)..........................106 Specifying Output Method.................................444 Specifying the Frame Type Using imagePROGRAF Device Setup Utility...............422 Output Method ( Send job to )...........................442 Specifying Save and Print.................................444 Searching Topics.........................................................3 Selecting the Paper Source.............................104, 131 Selecting the Paper Type (Roll).......................105, 189 Selecting the Paper Type (Sheet)....................132, 190 Specifying the Printer's Frame Type........................422 Specifying the Frame Type Using the Printer Control Panel.....................................................423 Status Monitor.........................................................372 Status Print................................................................67 Setting Passwords for Personal Boxes...................452 Checking the information in the Status Print report ..................................................................67 Using imagePROGRAF Printmonitor (Mac OS)...........................................................455 Printing Status Print Reports...............................67 Using imagePROGRAF Status Monitor (Windows).........................................................454 Submenu Display......................................................65 GL2 Settings........................................................66 Using RemoteUI................................................453 Information of the loaded paper..........................65 Settings Summaries Dialog Box (Windows)............371 Printer information...............................................66 Sharing the Printer in Windows...............................418 Remaining Maintenance Cartridge capacity and ink levels..............................................................65 Sheet printing is selected........................................581 604 Index Downloaded from ManualsPrinter.com Manuals Support Pane (Mac OS X).......................................399 Index Support Sheet (Windows).......................................369 Using Favorites.......................................................325 Switching Modes.......................................................29 Favorites............................................................325 Switching the printer online/offline.......................29 Using Favorites (Mac OS X)............................328, 385 Switching to Menu mode.....................................30 Using Favorites (Windows).............................326, 341 T Printing using the favorite..........................327, 342 Registering a favorite................................326, 341 The back side of the paper is dirty..........................560 Using PosterArtist to Compose Originals................374 The contrast becomes uneven during printing........562 Edit Using PosterArtist......................................374 The Data lamp on the Control Panel does not light up.....................................................................555 Using PosterArtist to Compose Originals (Windows)...............................................................375 The Display Screen indicates the system is filling with ink....................................................................555 Using RemoteUI......................................................407 The edges of the paper are dirty.............................559 Using the Printer With a Color imageRUNNER.......168 The IEEE 1394 Driver Cannot Be Installed Correctly..................................................................567 Utility Pane (Mac OS X)..........................................397 The length of printed images is inaccurate..............563 The printer consumes a lot of ink............................572 The printer does not go on......................................571 The Printer Does Not Respond Even if Print Jobs are Sent...................................................................555 The printer ejects blank, unprinted paper................556 The printer stops during a print job..........................556 The printer stops when printing a HP-GL/2 job (the carriage stops moving).............................556, 570 Using the Output Stacker........................................140 Utility Sheet (Windows)...........................................368 V View Settings Dialog Box for the Printing Application (Mac OS X)..............................................................391 View Settings Dialog Box for the Printing Application (Windows)...............................................................352 W The roll is empty......................................................580 When to Replace Ink Tanks.....................................514 The surface of the paper is dirty..............................560 Before print jobs and maintenance that consume a lot of ink..........................................................514 Thin lines are not printed after switching to Economy Printing mode..........................................................564 This paper cannot be used......................................579 This type of paper is not compatible with HP-GL/2..................................................................593 Tiling and multiple pages per sheet.........................268 Top Cover (Inside).....................................................15 Top cover is open....................................................595 Troubleshooting.......................................................547 Turning the Printer On and Off..................................22 If a message for checking the ink is shown on the Display Screen..................................................514 If a message for ink replacement is shown on the Display Screen..................................................514 When to Replace the Maintenance Cartridge.........536 If a message for checking the Maintenance Cartridge is shown on the Display Screen........536 If a message for the Maintenance Cartridge replacement is shown on the Display Screen...536 Turning the printer off..........................................23 When much of the Maintenance Cartridge capacity is depleted...........................................536 Turning the printer on..........................................22 Windows Software...................................................333 Types of Paper..........................................................96 With HP-GL/2, printing is misaligned.......................569 Updating paper information.................................99 Working With Various Print Jobs.............................142 Viewing the Paper Reference Guide...................97 U Unknown file............................................................595 Updating the Firmware............................................546 Confirming the firmware version........................546 Updating the Firmware......................................546 Use another paper...................................................587 Index 605 Downloaded from ManualsPrinter.com Manuals ©CANON INC. 2008 Downloaded from ManualsPrinter.com Manuals