1
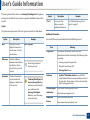
CONTENTS
Copyright
© 2014 Samsung Electronics Co, Ltd. All rights reserved.
This manual is provided for informational purposes. All information contained in this document is subject to change without notice.
Samsung Electronics is not responsible for any direct/indirect damages arising due or relating to the use of the user's manual.
Unless required by applicable law or agreed to in writing, software distributed under the License is distributed "as is" basis without warranties or condition of any
kind, either express or implied. See the License for the specific language governing permissions and limitations under the License.
•
Samsung and Samsung logo are trademarks of Samsung Electronics Co, Ltd.
•
Microsoft, Windows, Windows Vista, Windows 7 and Windows 2008 Server R2 are either registered trademarks or trademarks of Microsoft Corporation.
•
Other brands and their products are trademarks or registered trademarks of their respective holders.
REV. 2.01
Copyright
2
CONTENTS
1. Installing and Uninstalling Samsung
Cloud Agent
5. Troubleshooting
Common Problems
Installing Samsung Cloud Agent
7
Uninstalling Samsung Cloud Agent
9
20
2. Getting Started
Introduction to Samsung Cloud Agent
11
3. Checking Licenses Manually
Requirements
13
Checking Licenses Manually
14
Removing User Connection Information
15
4. Scanning and Sending via the Phone
Number
Requirements
17
Scanning and Sending to the Samsung Cloud Print 18
3
User's Guide Information
This user’s guide describes how to use Samsung Cloud Agent. Both beginners
and experts can utilize this user’s guide as a guide in installation and use of the
product.
Syntax
(“See”)
Syntax
The syntax conventions used in this user’s guide are listed in the table below.
Syntax
Bold
Reference
Precaution
Description
Bold type is used on
displayed characters or
on the name of control
panel buttons.
Provides additional
information and detailed
specifications for the
product's functions and
features.
Provides information to
prevent mechanical
damages or malfunctions
of the product.
Example
Description
Directs you to the
reference page for
additional information.
Example
(See "Installing Samsung Cloud
Agent" on page 7)
Additional Information
You can find the necessary information from the following sources.
Start> Programs
Item
Target Users
Meaning
This manual is intended for network users and
administrators who have knowledge of the following items
for printing.
• Scanning using Samsung products
Cannot log on without a
Samsung account.
• Network Protocol-Proxy, DNS
• Samsung Cloud Service
If Samsung Cloud Agent and
Scan to Samsung Cloud are
installed, you must delete the
apps and then install
Samsung Cloud Agent.
Otherwise, your system may
not work properly.
Reference
• SyncThru™ Web Admin Service: It is useful for the
network administrators to manage multiple products at
the same time. This program is only for network models
(http://samsungprinter.com).
Product Support
Information
Please contact Samsung printer services
Compatible
Devices
Please visit the website below.
http://www.samsungprinter.com
https://www.samsungcloudprint.com/
User's Guide Information
4
User's Guide Information
Terminology
Terminology
LUI
Meaning
• Local user interface
• Indicates the letters shown on the display screen of the
control panel.
SWS
This means SyncThru™Web Service. SyncThru™Web Service
is one of the useful network programs offered by Samsung.
It is a web server in which users can set up various network
environments. Both administrators and users can easily
manage and maintain the product by using this program.
USB
The USB memory device offers a wide range of memory
capacities as well as additional space to store or carry
documents, presentations, music and video files, highresolution photos, and others.
User's Guide Information
5
1. Installing and Uninstalling
Samsung Cloud Agent
This section provides information on installing and uninstalling Samsung Cloud Agent.
The contents of this section are as follows.
• Installing Samsung Cloud Agent
7
• Uninstalling Samsung Cloud Agent
9
Some models may have different steps to install and uninstall.
Installing Samsung Cloud Agent
You can install Samsung Cloud Agent using the SyncThru™ Web Service.
10
11
1
Installation using SyncThru™ Web Service
Select the Application Management > Application.
You can check that the installation is complete from the list of
applications.
2
Install Samsung Cloud Agent using SyncThru™ Web Service according to the
following steps.
Installation using a USB memory device
Install Samsung Cloud Agent using a USB memory device.
1
Check that the network cable is connected to the product. If not, connect
a standard network cable to the product.
2
Start a Web browser such as Internet Explorer, Safari or Firefox, and enter
the product's IP address.
3
Log on with an administrator account by clicking Login in the upper
right corner of the SyncThru™ Web Service website.
1
Select Machine Setup > Others > Application Management on the
product display screen.
4
5
6
7
8
Please select Maintenance from the main menu.
2
3
Log on with an administrator account.
4
Once the product recognizes the USB memory device, the Install button
is activated.
5
6
Click Install.
The following steps may differ depending on the product.
9
Select the Application Management > Application.
Select Add > Browse.
Select the .par file you wish to install, and select OK.
If there is terms and conditions, check the terms by selecting View EULA
and select I agree, and then select OK.
Connect the USB memory device that contains the Samsung Cloud
Agent installation file to the device.
Select the Samsung Cloud Agent installation file.
When the installation is complete, click OK.
1. Installing and Uninstalling Samsung Cloud Agent
7
Installing Samsung Cloud Agent
7
8
When the pop-up screen appears, select I agree and click OK.
9
Select Machine Setup > Others > Application Management on the
display screen, and you can verify from the list that the installation is
complete.
Installation of Samsung Cloud Agent begins. After the installation is
complete, click OK.
1. Installing and Uninstalling Samsung Cloud Agent
8
Uninstalling Samsung Cloud Agent
3
4
Uninstalling by using SyncThru™ Web Service
Uninstall Samsung Cloud Agent according to the following steps.
1
Check that the network cable is connected to the product. If not, connect
a standard network cable to the product.
2
Start a Web browser such as Internet Explorer, Safari or Firefox, and enter
the product's IP address.
3
Log on with an administrator account by clicking Login in the upper
right corner of the SyncThru™ Web Service website.
4
5
6
7
8
9
Please select Maintenance from the main menu.
Select the Application Management > Application.
Uninstalling from the display screen
Uninstall Samsung Cloud Agent according to the following steps.
The following steps may differ depending on the product.
1
Select Machine Setup > Others > Application Management on the
product display screen.
2
3
4
Log on with an administrator account.
Select Samsung Cloud Agent, and click Uninstall.
Click Yes in the pop-up window.
Select Samsung Cloud Agent.
Click Delete.
When the delete screen appears, click OK.
Click OK in the confirmation window when the deletion is complete.
1. Installing and Uninstalling Samsung Cloud Agent
9
2. Getting Started
This section provides basic information on the use of Samsung Cloud Agent and the requirements that must be met
to use Samsung Cloud Agent on a network.
The contents of this section are as follows.
• Introduction to Samsung Cloud Agent
11
Introduction to Samsung Cloud Agent
Samsung Cloud Agent is a solution that is built on Samsung's open platform,
XOA (Xtensible Open Architecture). The main objectives of the Samsung Cloud
Agent are as follows.
•
Promote Samsung Cloud Print service
•
Print documents sent from Samsung Cloud Print
•
Initialization of the user connected to the device
•
Scan and send to Samsung Cloud
2. Getting Started
11
3. Checking Licenses
Manually
This section describes the conditions which must be met to check the Samsung Cloud Agent license and to remove
your connection information.
The contents of this section are as follows.
• Requirements
13
• Checking Licenses Manually
14
• Removing User Connection Information
15
Requirements
The following conditions must be met to check the Samsung Cloud Agent
license and to remove your connection information.
•
•
The product must be able to connect to the Samsung Cloud server.
-
The product must be connected to the Internet.
-
DNS must be set in the product.
-
If the network is using a proxy, SyncThru™ Web Service > Settings >
Network Settings > Proxy must be configured in the proxy.
To access the Samsung Cloud Agent setup menu, you must log on with an
account that has administrator rights.
3. Checking Licenses Manually
13
Checking Licenses Manually
You can check the license status by using the manual verification of the setup
menu.
1
Check that the network cable is connected to the product. If not, connect
a standard network cable to the product.
2
Start a Web browser such as Internet Explorer, Safari or Firefox, and enter
the product's IP address.
3
Log on with an administrator account by clicking Login on the upper
right corner of the SyncThru™ Web Service website.
4
5
6
Select XOA > Samsung Cloud Agent.
Select Print from the menu on the left side.
Click the Manually verification button.
3. Checking Licenses Manually
14
Removing User Connection Information
You can remove all user information associated with Scan to Samsung Cloud
using the remove user connection information function.
1
Check that the network cable is connected to the product.
If not, connect a standard network cable to the product.
2
Start a Web browser such as Internet Explorer, Safari or Firefox, and enter
the product's IP address.
3
Log on with an administrator account by clicking Login on the upper
right corner of the SyncThru™ Web Service website.
4
5
6
Select XOA > Samsung Cloud Agent.
Select Print from the menu on the left side.
Click the Remove Now button.
3. Checking Licenses Manually
15
4. Scanning and Sending
via the Phone Number
This section provides information on sending scans using the phone numbers registered with the Scan to Samsung
Cloud menu.
The contents of this section are as follows.
• Requirements
17
• Scanning and Sending to the Samsung Cloud Print 18
Requirements
To send a scan using the phone number on the Scan to Samsung Cloud, the
following conditions must be met.
•
The product must be able to connect to the Samsung Cloud server.
-
The product must be connected to the Internet.
-
DNS must be set in the product.
-
If the network is using a proxy, SyncThru™ Web Service > Settings >
Network Settings > Proxy must be configured in the proxy.
4. Scanning and Sending via the Phone Number
17
Scanning and Sending to the Samsung Cloud Print
You can scan images and store in the Samsung Cloud Print.
1
Insert all original papers into the source feeder with the front facing up
or place a piece of the original paper on the scanner glass with its front
facing down.
2
3
4
Click Samsung Cloud on the product display home.
A confirmation window appears if the user is not registered in the Samsung
Cloud Print. Select works in progress or completed.
Enter the recipient's country code and phone number.
Enter the sender's information.
Sender information is for the recipient to identify the sender of the
document. The default string is entered, and the user may edit this
information. Up to 45 characters can be entered.
5
Enter a file name to save the scanned data.
You can set the file name from the SyncThru™ Web Service. Open a web
browser on a networked computer, and enter the IP address of the product.
When SyncThru™ Web Service is opened, click Settings > Machine
Settings > Scan to Samsung Cloud > File Name.
6
Click the Start button to scan and save the scanned files to the Samsung
Cloud server.
4. Scanning and Sending via the Phone Number
18
5. Troubleshooting
This section describes how to troubleshoot if a problem occurs.
• Common Problems
20
Common Problems
This section contains answers to common questions that you may have while using Samsung Cloud Agent.
Condition
Troubleshooting
The uploaded file on the Samsung Cloud is
not printing.
Check if the license status is valid. (See "Checking Licenses Manually" on page 14)
License status is displayed as disconnected.
Check your network connection.
• The product must be able to connect to the Samsung Cloud server.
- The product must be connected to the Internet.
- DNS must be set in the product.
- If the network is using a proxy, SyncThru™ Web Service > Settings > Network Settings > Proxy must be
configured in the proxy.
5. Troubleshooting
20
Open Source Information
Open Source Information
21
Open Source Information
Open Source Information
22