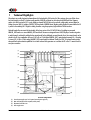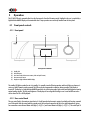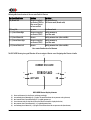
1
D1 SACD/CD unit
User Manual
Dear Client,
We are honored that you have chosen the CH D1 SACD/CD unit. Our team has put all his efforts into designing and manufacturing
this outstanding product and is proud to present it to you. We hope your D1 will bring you uncountable hours of musical emotion
from your SACD and CD collection.
But before starting your musical journey, we kindly ask you to pay attention to the information contained in this manual. The D1,
as you will discover in the following pages, is a Swiss precision product designed for ultimate performance and flexibility. However,
reaching sonic excellence requires your unit to be setup and operated correctly and this what this manual is all about. If you have
any questions or require assistance, please don't hesitate to contact your authorized dealer.
We hope you will enjoy your D1 SACD/CD unit for many years.
The Concert has just begun...
Cossy F.
Heeb T.
FCC-Notice
Note: This equipment has been tested and found to comply with the limits for a Class B digital device, pursuant to Part 15 of
the FCC Rules. These limits are designed to provide reasonable protection against harmful interference in a residential
installation. This equipment generates, uses and can radiate radio frequency energy and, if not installed and used in
accordance with the instructions, may cause harmful interference to radio communications. However there is no guarantee that
interference will not occur in a particular installation.
If this equipment does cause harmful interference to radio or television reception, which can be determined by turning the
equipment off and on, the user is encouraged to try to correct the interference by one or more of the following measures:
•
adjust or relocate the receiving antenna
•
increase the separation between the equipment and the receiver
•
connect the equipment into a mains outlet on a circuit different from that to which the receiver is connected
•
consult the dealer or an experienced ratio/TV technician for help
This product has been designed and manufactured according to FDA regulations “title 21, CFR, chapter 1, subchapter J, based
on the Radiation Control for Health and Safety Act of 1968”, and is classified as class 1 laser product. There is not hazardous
invisible laser radiation during operation because invisible laser radiation emitted inside of this product is completely confined
in the protective housings.
Optical pickup
Type:
SLD6163RL-G
Manufacturer:
SONY CORPORATION
Laser output:
Less than 1mW on the objective lens
Wavelength:
785 ± 15nm (CD), 655 ± 10nm (SACD)
Disposal – Environmental care
Directive 2002/96/EG of the European Parliament requires consumer electro-technical appliances to be
disposed separately and have to be indicated with the following symbol. Should you dispose this
component please do so in conformity with local and global legal and environmental regulations and
according to best practices. We strongly encourage you to recycle any batteries used with this component.
Table of contents
1 Technical Highlights.............................................................................................................................................................. 8
1.1 SACD/CD drive (VMK-5).............................................................................................................................................. 9
1.2 Mechanical construction............................................................................................................................................... 9
1.3 Modular architecture and slot-in boards........................................................................................................................ 9
1.3.1 Multi-channel support....................................................................................................................................... 10
1.3.2 Digital outputs and CH Link: DIGITAL_OUT board................................................................................................ 11
1.3.3 Stereo analog outputs: ANALOG_OUT board option............................................................................................. 11
1.3.4 Monaural analog outputs: Mono ANALOG_OUT board option............................................................................... 11
1.3.5 External clock synchronization: SYNC_IO board option........................................................................................ 11
1.4 Power supply............................................................................................................................................................ 12
1.4.1 Optional external power supply......................................................................................................................... 12
2 Before Use........................................................................................................................................................................ 13
2.1 Package content........................................................................................................................................................ 13
2.2 Safety notice............................................................................................................................................................. 13
2.3 User Manual............................................................................................................................................................. 14
2.4 Mains supply............................................................................................................................................................. 14
2.5 Transport and packaging............................................................................................................................................ 14
2.6 Cleaning................................................................................................................................................................... 15
2.7 Maintenance and service............................................................................................................................................ 15
3 Installation........................................................................................................................................................................ 16
3.1 Unpacking................................................................................................................................................................ 16
3.1.1 Removing the security screw.............................................................................................................................. 16
3.2 Positioning................................................................................................................................................................ 16
3.2.1 Unit position adjustment.................................................................................................................................... 16
3.2.2 Adjustment shaft covers.................................................................................................................................... 17
3.3 Connections............................................................................................................................................................... 18
3.3.1 CONTROL board................................................................................................................................................ 19
3.3.1.1 USB port.................................................................................................................................................. 20
3.3.1.2 Ethernet port........................................................................................................................................... 20
3.3.2 DIGITAL_OUT boards........................................................................................................................................ 20
3.3.2.1 Standard digital outputs........................................................................................................................... 20
3.3.2.2 CH Link digital audio interface.................................................................................................................. 20
3.3.3 Stereo ANALOG_OUT boards............................................................................................................................. 21
3.3.4 Monaural main ANALOG_OUT boards................................................................................................................ 21
3.3.5 SYNC_IO board................................................................................................................................................ 22
3.3.5.1 BNC clock input........................................................................................................................................ 22
3.3.5.2 BNC clock outputs..................................................................................................................................... 22
3.3.6 Power cord receptacle and voltage selection....................................................................................................... 22
3.3.7 External power supply connector....................................................................................................................... 22
4 Operation.......................................................................................................................................................................... 23
4.1 Front panel controls................................................................................................................................................... 23
4.1.1 Front panel...................................................................................................................................................... 23
4.1.2 User control knob............................................................................................................................................. 23
4.2 Operating modes....................................................................................................................................................... 24
4.2.1 Normal mode................................................................................................................................................... 25
6
D1 User Manual
Rev 2.4
4.2.2 Shortcuts.......................................................................................................................................................... 26
4.2.3 Menu mode...................................................................................................................................................... 28
4.3 Configuration............................................................................................................................................................ 31
4.3.1 D1 configuration menu items............................................................................................................................ 32
4.3.1.1 AUDIO SETTING........................................................................................................................................ 32
4.3.1.2 DISPLAY SETTING...................................................................................................................................... 34
4.3.1.3 SHORTCUTS.............................................................................................................................................. 35
4.3.1.4 FACTORY SETTING..................................................................................................................................... 37
4.3.1.5 INSTALLED OPTIONS................................................................................................................................. 38
4.3.1.6 NETWORK................................................................................................................................................ 39
4.4 Remote control.......................................................................................................................................................... 40
4.4.1 Remote control operation.................................................................................................................................. 40
4.4.2 Changing the remote control batteries................................................................................................................ 41
4.5 Advanced clocking..................................................................................................................................................... 41
4.5.1 General clocking considerations......................................................................................................................... 41
4.5.2 Without SYNC_IO board.................................................................................................................................... 41
4.5.3 D1 SACD/CD drive (with SYNC_IO board) + C1 D/A controller (with SYNC_IO board)..........................................42
4.5.4 Multichannel D1 drive + 3x C1 D/A controllers (all with SYNC_IO board)............................................................43
4.6 Returning to Factory defaults..................................................................................................................................... 45
5 Firmware update............................................................................................................................................................... 46
5.1 Introduction.............................................................................................................................................................. 46
5.2 Firmware Update procedure....................................................................................................................................... 46
5.2.1 Preparing the firmware image........................................................................................................................... 46
5.2.2 Updating the firmware (Firmware Update procedure)......................................................................................... 47
5.2.3 Emergency Firmware Update procedure............................................................................................................. 47
6 Troubleshooting................................................................................................................................................................. 49
7 Specifications..................................................................................................................................................................... 50
7.1 Specifications............................................................................................................................................................ 50
7.2 Dimensions............................................................................................................................................................... 52
7.3 Factory settings......................................................................................................................................................... 53
Rev 2.4
D1 User Manual
7
1
Technical Highlights
CH products are proudly designed and manufactured in Switzerland by CH Precision Sàrl. Our engineers have put all their knowhow into bringing you the D1, a highest quality modular SACD/CD unit based on slot-in boards and USB flash-drive firmware
update. In its base version the D1 is a pure digital two channel SACD/CD drive to be used with a high quality external Digital to
Analog Converter (DAC). It includes a DIGITAL_OUT board and a CONTROL board. Highest quality playback is ensured when the D1
is paired to the matching CH C1 Digital to Analog Controller using the proprietary high definition CH Link interface.
Optional boards allow to extend the functionality of the base version of the D1 SACD/CD drive. By adding two monaural
ANALOG_OUT boards or a stereo ANALOG_OUT board the D1 becomes an integrated stereo SACD/CD player. Seamless migration
to multi-channel is achieved by adding further output boards for the additional surround channels. Up to four output boards can be
placed in the D1. Any combination of stereo (L/R, Ls/Rs or C/Sub) digital (DIGITAL_OUT), main channels monaural (L + R) analog
or stereo (L/R, Ls/Rs or C/Sub) analog (ANALOG_OUT) output boards are allowed. Finally, the SYNC_IO optional board provides
advanced clock synchronization capabilities for use with external clock generators or to enslave the D1 to the C1's master clock for
zero-jitter connection.
(1)
(9)
(2)
(10)
(3)
(3)
(11)
(4)
(12)
(5)
(13)
(6)
(7)
(3)
(3)
(8)
(14)
D1 main components
(1)
(2)
(3)
(4)
8
External power supply input. For X1 optional external power supply only
Mains switch and power cord receptacle (on back panel)
Adjustment shafts and screws
Power supply section
D1 User Manual
Rev 2.4
(5)
(6)
(7)
(8)
(9)
(10)
(11)
(12)
(13)
(14)
Main power transformer
Standby power transformer (ensures green mode Standby)
Esoteric VMK-5 SACD/CD drive mounted on steel support
SACD/CD drawer and AMOLED display (on front panel)
Audio, clock, USB (firmware update) and RJ-45 (control) connectors (from slot-in boards). Analog ground to Earth jumper
Slot-in boards (SYNC_IO, CONTROL, DIGITAL_OUT, stereo ANALOG_OUT or monaural ANALOG_OUT)
Main board
Power supply regulation board
SACD/CD mechanism control section
Concentric push control knob
1.1 SACD/CD drive (VMK-5)
The D1 SACD/CD unit is built around the high-quality Esoteric VMK-5 SACD/CD mechanism featuring VRDS-Neo disc clamping. The
VRDS disc clamp covers the whole disc (not only its central part) ensuring vibration and error free digital data reading. CH has
further improved the vibration immunity of the SACD/CD mechanism by mounting it on a heavy steel rails directly assembled to a
massive steel base plate weighting over 15kg.
1.2 Mechanical construction
The D1 SACD/CD unit is assembled from high-quality aluminum and steel elements with no visible screws on the front, top and side
panels. The base of the unit is made of a heavy steel plate whereas the front panel, the side panels and the top cover are
machined from aluminum. The power supply is isolated from the audio section in its own compartment to avoid any contamination
of the audio circuits by noise radiated from the supply. Pin assembly of all chassis elements provides smooth joints between
elements while screws every 6cm ensures protection against electromagnetic interferences. First class mechanical and chemical
surface treatments provide the luxury finish of the D1.
Four steel feet support the unit. Each feet ends with a elastomer ring to sit on delicate surfaces but is also equipped with a height
adjustable steel spike to fine tune unit positioning. Horizontal adjustment is done with the provided screwdriver through the four
adjustment shafts accessible from the top of the unit. In addition to providing convenient horizontal adjustment from the top of the
unit, the shafts also serve as vibration evacuation channels for any stacked unit. Special shaft covers are provided to interface with
the spikes of the stacked unit. Any vibration from the upper unit is transmitted by the shaft cover to the shaft and from the shaft to
the lower unit feet or spike, forming a privileged path for vibrations evacuation.
1.3 Modular architecture and slot-in boards
The D1 benefits from a fully modular architecture. It features separated sections for power-supply, disc mechanism and related
control, front panel, central host processor and slot-in boards. This modular architecture combined to the USB plug for all firmwares
(MCU, DSP, and FPGA) update allows for easy servicing and upgrade should one section become faulty or obsolete.
The slot-in boards section consists in a vertically mounted mother board with optional boards plugged into it. Optional boards
Rev 2.4
D1 User Manual
9
provide audio functionality and connectivity to other equipment. There are five types of slot-in boards:
•
CONTROL board: provides a USB port for software upgrade and an Ethernet port for command
•
DIGITAL_OUT: provides two channels of digital audio output. Specific back panels for L/R, Ls/Rs or C/Sub channels
•
Stereo ANALOG_OUT: provides two channels of analog audio output. Specific back panels for L/R, Ls/Rs or C/Sub
channels
•
Monaural ANALOG_OUT: provides one fully balanced channel of analog audio output. Specific back panels for Left or
Right channel
•
SYNC_IO: provides advanced clock synchronization options (1 clock in, 2 clock out)
SD
DIGITAL_OUT L/R
DIGITAL_OUT Ls/Rs
DIGITAL_OUT C/Sub
Mono ANALOG_OUT L
Mono ANALOG_OUT R
ANALOG_OUT L/R
ANALOG_OUT Ls/Rs
ANALOG_OUT C/Sub
Description
Configuration
There are 6 slots in the D1. A CONTROL board is always installed inside the D1, leaving space for 5 optional boards. One of these
slots is reserved for the SYNC_IO board. Note that optional boards MUST be installed by a qualified technician. Failure to do so will
void any warranty. Following table shows the typical recommended configurations for D1:
Stereo SACD/CD drive (Base configuration). To be used with 1 external stereo DAC.
9
SP
DMP
MD
Dual-Mono SACD/CD player.
9 9
Multi-channel SACD/CD drive. To be used with 3 external stereo DACs.
9 9 9
MP
9 9 9 Multi-channel SACD/CD player.
DM-MP
MH
Stereo SACD/CD player.
9
9 9
9
9 9 Dual-Mono (for L+R) Multi-channel SACD/CD player.
9 9 Multi-channel SACD/CD hybrid drive/player. To be used with 1 external DAC.
D1 recommended configurations (CONTROL board is included in all configurations and SYNC_IO board can be
added in any configuration)
1.3.1 Multi-channel support
True multi-channel SACD playback is achieved by means of optional boards. The Stereo versions of D1 are delivered with a single
10
D1 User Manual
Rev 2.4
DIGITAL_OUT board and/or a single ANALOG_OUT board configured for L/R channels. They can be extended to multi-channel by
simple addition of DIGITAL_OUT or ANALOG_OUT boards for the Ls/Rs and C/Sub channels. No other action is required as the D1
firmware will automatically sense the presence of the additional boards and enable true multi-channel reproduction.
When a D1 has multi-channel capability (either digital, analog or hybrid outputs), it will always select multi-channel DSD layer on
SACDs whenever available. User can then manually change to another available layer (stereo DSD and/or CD layer) from a given
disc.
When a D1 is purely stereo (either drive or player), it will first select stereo DSD layer on SACDs whenever available. User can then
manually change to another available layer from a given disc, including a down-mixed version of the multichannel DSD layer if
this layer exists.
Four channel configurations are not supported. Multiple output boards of the same type (DIGITAL_OUT or ANALOG_OUT) on any
channel pair (L/R, Ls/Rs or C/Sub) are not supported.
1.3.2 Digital outputs and CH Link: DIGITAL_OUT board
The DIGITAL_OUT board provides digital output for an audio channel pair. Three different DIGITAL_OUT boards are available,
corresponding to L/R, Ls/Rs and C/Sub channel pairs. Each DIGITAL_OUT board provides standard digital outputs in AES-EBU,
Coaxial RCA (S/PDIF) and Optical TOSLINK (S/PDIF) formats as well as in the CH Link high-definition proprietary format. CH Link
uses a dedicated connector to carry high resolution audio and control data over a single link between CH units. It supports both
PCM (up to 768kHz, 32bits) and DSD. To comply with high definition digital content protection, DSD signals are cyphered when
transported over CH Link from the D1. Standard digital outputs down-convert DSD signals to 16bits/44.1kHz PCM audio.
1.3.3 Stereo analog outputs: ANALOG_OUT board option
The ANALOG_OUT board provides analog line level output for two audio channels. Three different ANALOG_OUT boards are
available, corresponding to L/R, Ls/Rs and C/Sub channel pairs. Each ANALOG_OUT board provides both balanced (on XLR
connectors) and single-ended (on RCA connectors) outputs. Digital to analog conversion is handled by two WM8742 DACs (one per
channel) combined with a discrete dual mono output stage. A choice of digital filters is available to the user. Filters for PCM and
DSD audio can be selected independently.
1.3.4 Monaural analog outputs: Mono ANALOG_OUT board option
The monaural ANALOG_OUT board pair provides analog line level output for the two main audio channels (Left and Right). Each
monaural ANALOG_OUT board provides both true balanced (on XLR connectors, with a dedicated analog output stage on each –
warm and cold – point) and single-ended (on RCA connectors) outputs. Each board (i.e. each channel) has its own dedicated
voltage regulators. Digital to analog conversion is handled by one WM8742 DAC on each board combined with a discrete dual
mono output stage. A choice of digital filters is available to the user. Filters for PCM and DSD audio can be selected independently.
1.3.5 External clock synchronization: SYNC_IO board option
The SYNC_IO board provides advanced clock synchronization options for D1 when used with an external clock generator or
matching CH DAC (C1). It includes a clock input on BNC connector with selectable 75 Ohm or high input impedance. Supported
Rev 2.4
D1 User Manual
11
input frequencies on this connector are all standard audio Wordclocks (44.1, 48, 88.2, 96, 176.4 and 196 kHz), audio
Masterclocks (22.5792 and 24.576 MHz), DSD bitclock (2.8224 MHz) and atomic-clock multiples (100 kHz and 10 MHz). When
fed with an audio Wordclock, the D1's internal clock will lock its VCXO internal clock in frequency and in phase (phase accuracy of
+/- 2.5 us), tracking below 0.1 Hz with 0.1 PPM corrections for optimal jitter rejection.
Two 75 Ohm Wordclock outputs completes the input/output capabilities of the SYNC_IO board.
1.4 Power supply
The power supply of the D1 is a linear supply with multiple independent local regulations. It is based on an oversized magnetically
shielded toroidal mains transformer and includes a mains filter. A secondary (also toroidal) transformer is used as Standby
transformer to ensure green Standby mode, meeting the latest energy saving regulations. Both transformers have static shields
between primaries and secondaries. They are mounted on a separate steel plate which is isolated from the main base steel plate by
silent blocks.
Discrete (power-transistor and op-amp based) ultra low noise regulators are used throughout the power supply and special care has
been paid to the master clock power supply. The master clock benefits from its own dedicated supply, completely decoupled from
the noisy digital and motor sections. This ensures an ultra-low jitter clock source for the whole system.
Input AC voltage to the power supply can be set to 100V, 115V or 230V AC depending on your local mains voltage.
1.4.1 Optional external power supply
The D1 is equipped with an external power supply input. This input is dedicated to the CH X1 external power supply. When the
external power supply is connected, the internal power supply of the D1 is turned-off (only the Standby transformer remains
active). Turning the internal power supply off ensures that no power supply induced noise or radiations are generated inside the
D1 unit, thus permitting optimal operating conditions for the circuits.
12
D1 User Manual
Rev 2.4
2
Before Use
Please read the following carefully.
2.1 Package content
Make sure that the package content is complete. If not, please contact your authorized dealer. Your package should contain:
•
D1 SACD/CD unit
•
Power cord
•
Accessory box
•
User Manual (this manual, located in the accessory box)
•
D1 SACD/CD Service Booklet with warranty card (located in the accessory box)
•
Remote control (located the in the accessory box)
•
Adjustment screwdriver (located in the accessory box)
•
4x adjustment steel spikes (located in the accessory box)
•
4x adjustment shafts steel stacking covers (located in the accessory box)
•
4x adjustment shafts aluminum top covers (located in the accessory box)
Please store the packaging material for future transportation. Check your D1 SACD/CD unit for apparent damages. In case of
damage, please contact your authorized dealer. If your D1 SACD/CD unit is still very cold from transport, please let it warm up to
room temperature in order to avoid condensation inside the unit.
2.2 Safety notice
Make sure to observe the following rules:
•
Install your D1 SACD/CD player on a stable base
•
Do not install your D1 SACD/CD unit near water
•
Always handle with care. The D1 SACD/CD unit is very heavy, so have someone help you when moving it around
•
Do not expose the unit to any kind of liquid
Rev 2.4
D1 User Manual
13
•
Do not install in direct sun light or near any heat source such as radiators or other apparatus generating heat
•
Do not install in a confined space and make sure sufficient air can flow around the unit
•
Do not operate under high ambient temperature (>40C) or with extremely high humidity such as in humid cellars
•
Only use options and accessories specified or recommended by the manufacturer
•
Do not open the unit nor try to service it by yourself. Do not try to install any option board by yourself. Always refer to a
qualified technician for service, maintenance or upgrades. Failure to do so will void the unit's warranty
2.3 User Manual
Please read this manual carefully before making connections or operating your D1 SACD/CD unit. After reading, store the manual
in an accessible place for future reference. If, after reading this manual, you feel unsure about how to make connections or how to
operate the unit, please contact your authorized dealer.
2.4 Mains supply
Make sure to use 3 terminals (phase, neutral and earth) power cords with ground conductor. Make sure that the mains voltage
selection of the unit matches your mains voltage.
Make sure your D1 SACD/CD unit is disconnected from AC wall power in the following cases:
•
When making connections (it is also recommended to disconnect the rest of the system from AC wall power)
•
When cleaning
•
During thunder storms
•
When unused for a long period
2.5 Transport and packaging
The D1 SACD/CD unit must always be stored in its original packaging for transportation. Doing so will ensure optimal level of
protection of your unit. Therefore, keep all the packaging material in a dry and clean place for future use.
To avoid any damage to the SACD/CD mechanism, an optical disc must be inserted into the drawer for transportation. We
recommend a blank CD-R.
In addition, the transformer base plate must be secured for transportation to avoid excessive constraints on the silent blocks
isolating the chassis from transformer vibrations. This is done by the insertion of a security screw on the bottom of the unit. Do not
14
D1 User Manual
Rev 2.4
forget to install this screw for transportation and to remove it at installation of the unit in its new location.
Finally we recommend to remove the adjustment spikes and to put them into the accessory box for transportation. Indeed,
vibrations during transport may cause the adjustment spikes to move from their fully retracted position. There is risk of scratching
the installation base if the spikes are not fully retracted when installing the unit.
2.6 Cleaning
Use a soft, dry towel or cloth for cleaning. Never use any solvent or liquids as they may damage the surface treatment or
penetrate inside the unit.
2.7 Maintenance and service
The D1 SACD/CD unit contains no user serviceable parts. Do not try to open, modify or repair your D1 by yourself. This will void
any warranty. Your D1 SACD/CD player must be checked by a qualified technician in any of the following cases:
•
The unit is not functioning properly
•
The mains cable or the power cord receptacle is damaged
•
The unit has been dropped to the floor or presents external damage
•
The D1 SACD/CD player has been exposed to liquids (such as rain) or unknown substances
Rev 2.4
D1 User Manual
15
3
Installation
3.1 Unpacking
Unpack the D1 SACD/CD unit and store the packaging for future transportation. Be careful when lifting the D1 as the unit is heavy
(over 30kg). Get someone to help you if necessary. When unpacking and installing the D1, take care not to damage the high
quality surface treatments.
3.1.1 Removing the security screw
The transformer base plate must be secured during transportation to avoid damage to the isolating silent blocks. The security screw
is located at the bottom of the unit. To remove the security screw, tilt the unit on its side and unscrew. Do not tilt the unit on the
front or back panels as this may damage the user control knob or the connectors.
(1)
Security screw location
(1) Security screw. Must be mounted for transport and removed at installation
3.2 Positioning
Position the D1 unit on a stable base. Make sure cooling air is able to freely flow around the unit.
3.2.1 Unit position adjustment
The D1 SACD/CD unit is equipped with height adjustable feet. More precisely, each feet has an internal height adjustable spike
which can be accessed with the provided adjustment screwdriver through the adjustment shafts. When delivered from factory, the
adjustment spikes are not mounted in the unit but are located in the accessory box. Remove the adjustment spikes from the
accessory box and put one into each adjustment shaft. Place the provided screwdriver into the adjustment shafts and turn anticlockwise to secure the spikes and make the required adjustments. When the spikes are fully retracted, the D1 sits on elastomer
rings. If the base on which the D1 is located is fragile or should not be scratched, this is the preferred spikes position. Spikes may
damage the installation base, so make sure to protect it if required.
16
D1 User Manual
Rev 2.4
(1)
(1)
(2)
(2)
(2)
(2)
(3)
(1)
(3)
(3)
(1)
(3)
(4)
Adjustment shafts, feet and spikes
(1)
(2)
(3)
(4)
Adjustment shafts. Insert adjustment spikes and use screwdriver to secure and adjust individual feet spikes
Feet
Adjustment spike heads (when inserted into adjustment shafts)
Adjustment spike
3.2.2 Adjustment shaft covers
Once the position of the unit is adjusted, place the appropriate shaft covers on the four adjustment shafts. There are two types of
shaft covers delivered with your D1 unit. One type of shaft cover (stacking cover, made of steel) is used when different CH units
are stacked. This type of cover includes a receptacle to receive the corresponding spike of the unit placed just above. By doing so,
mechanical vibrations are optimally transmitted to ground and minimized inside CH units. The second type of shaft cover (top
cover, made of aluminum) can be used when units are not stacked or for the top unit when stacked. It covers the shaft and
provides a smooth finish to the top of the unit. Shaft covers are located in the accessories box delivered with your D1 unit.
Never stack any component other than CH's on your D1. Never use the aluminum shaft covers (top covers) when another CH
component is to be stacked on top of your D1.
Shaft covers (left: stacking cover, right: top cover)
Rev 2.4
D1 User Manual
17
3.3 Connections
This section provides information about how to connect your D1 SACD/CD unit to your system. As the D1 is a modular design with
different optional boards, the description applies to the example configuration presented below. If your options do not match the
example or you don't feel secure with the connections to be applied to your configuration, please contact your authorized dealer
for assistance.
The example configuration is a full featured multi-channel configuration with 3x DIGITAL_OUT boards (L/R, Ls/Rs, C/Sub), 1x
ANALOG_OUT (L/R) board and clock synchronization option (SYNC_IO board). This is one of the most complete configurations of
D1. If your configuration does not include some of the presented options, just discard the corresponding connections.
(1)
(2)
(3) (4)
(5) (6)
(7) (8)
(14) (15) (16) (17) (18) (19) (20) (21) (22)
(9)
(10) (11)
(23)
(24) (25) (26)
(12)
(27)
(13)
(28)
Rear panel connections
(1)
(2)
(3)
(4)
(5)
(6)
(7)
(8)
(9)
(10)
(11)
(12)
(13)
(14)
(15)
(16)
(17)
(18)
(19)
18
Ethernet port for command interface. Unused for now. [CONTROL board]
BNC clock input. Provides 75 Ohm or Hi-Z input. [optional SNYC_IO board]
TOSLINK (S/PDIF) digital output for L/R channels [DIGITAL_OUT board for L/R channels]
AES-EBU digital output for L/R channels [DIGITAL_OUT board for L/R channels]
TOSLINK (S/PDIF) digital output for Ls/Rs channels. [optional DIGITAL_OUT board for Ls/Rs channels]
AES-EBU digital output for Ls/Rs channels. [optional DIGITAL_OUT board for Ls/Rs channels]
TOSLINK (S/PDIF) digital output for C/Sub channels. [optional DIGITAL_OUT board for C/Sub channels]
AES-EBU digital output for C/Sub channels. [optional DIGITAL_OUT board for C/Sub channels]
Balanced analog output for L channel. [optional ANALOG_OUT board for L/R channels]
Single-ended analog output for L channel. [optional ANALOG_OUT board for L/R channels]
Earth connector. Internally connected to digital ground
External power supply connector for X1 power supply option
Power on/off switch
USB port for software upgrades. [CONTROL board]
BNC 75 Ohm clock output 2. [optional SYNC_IO board]
BNC 75 Ohm clock output 1. [optional SYNC_IO board]
CH Link digital output for L/R channels. [DIGITAL_OUT board for L/R channels]
Coaxial (S/PDIF) digital output for L/R channels. [DIGITAL_OUT board for L/R channels]
CH Link digital output for Ls/Rs channels. [optional DIGITAL_OUT board for Ls/Rs channels]
D1 User Manual
Rev 2.4
(20)
(21)
(22)
(23)
(24)
(25)
(26)
(27)
(28)
Coaxial (S/PDIF) digital output for Ls/Rs channels. [optional DIGITAL_OUT board for Ls/Rs channels]
CH Link digital output for C/Sub channels. [optional DIGITAL_OUT board for C/Sub channels]
Coaxial (S/PDIF) digital output for C/Sub channels. [optional DIGITAL_OUT board for C/Sub channels]
Balanced analog output for R channel. [optional ANALOG_OUT board for L/R channels]
Unbalanced analog output for R channel. [optional ANALOG_OUT board for L/R channels]
Analog ground connector 2
Analog ground connector 1.Can be connected to digital ground (Earth) using provided jumper
Power fuse and voltage selection
Power cord receptacle
The CONTROL board is mandatory in any D1 SACD/CD unit configuration and is always factory installed. Depending on optional
boards and their arrangement in the D1's expansion slots, connector arrangement may differ on your unit. Each D1 unit provides
5 expansion slots supporting any combination of the following optional boards (note that one slot is dedicated to the SYNC_IO
board):
•
Stereo DIGITAL_OUT boards for L/R, Ls/Rs or C/Sub channels
•
Stereo ANALOG_OUT boards for L/R, Ls/Rs or C/Sub channels
•
Monaural ANALOG_OUT Left and Right boards (must be used together as a pair)
•
SYNC_IO board for external clock synchronization
Note that only one SYNC_IO board is allowed. Each pair of channels (L/R, Ls/Rs or C/Sub) can support a DIGITAL_OUT and/or an
ANALOG_OUT board. Optional output boards can be placed in any slot. Installation of optional boards must be done by a qualified
technician only. Do not attempt to install any optional board by yourself as this would void the unit's warranty.
3.3.1 CONTROL board
The CONTROL board is factory installed into the D1. It provides a USB port for software updates and an Ethernet port for
controlling the unit over a network. Following drawing shows the layout of the back panel of the CONTROL board:
CONTROL board back panel layout
Rev 2.4
D1 User Manual
19
3.3.1.1 USB port
The USB port on the CONTROL board is dedicated to the firmware update of the D1 unit. Do not use it for any other purpose. For
more information on unit firmware update, please refer to the corresponding section of this manual.
3.3.1.2 Ethernet port
The Ethernet port on the CONTROL board is dedicated to network based control of the unit. This functionality is currently not
implemented, thus leave the Ethernet port unconnected. A future D1 firmware release will provide this functionality.
3.3.2 DIGITAL_OUT boards
DIGITAL_OUT boards provide digital audio output capabilities. Additional DIGITAL_OUT boards for Ls/Rs and C/Sub channels can
be added to the default factory installed DIGITAL_OUT L/R into D1 for full digital high-definition multi-channel support.
DIGITAL_OUT boards provide both standard (AES-EBU, Coaxial and Optical) digital audio outputs and a proprietary (CH Link) highdefinition digital audio interface. Following drawing shows the layout of the DIGITAL_OUT board connectors and naming for the
different channel pairs:
DIGITAL_OUT boards back panel layout for L/R, Ls/Rs and C/Sub channels
3.3.2.1 Standard digital outputs
Each DIGITAL_OUT board provides three standard digital outputs: AES-EBU (carrying consumer encoding), Coaxial (S/PDIF) and
Optical (TOSLINK). Digital output is fixed at 16bits/44.1kHz on all standard outputs. If an SACD is played in the D1, the DSD
stream is down converted to 16bits/44.1kHz on the standard digital outputs. When a CD is played, the data from the disc is
directly transferred to the standard digital outputs.
3.3.2.2 CH Link digital audio interface
Each DIGITAL_OUT board includes a CH Link proprietary digital audio interface. This interface carries both complete audio stream
and control information. Use this link as the preferred interface when connecting your D1 to other CH units such as C1 converters.
The proprietary CH Link digital audio interface allows for high definition uncompressed digital audio transfer and supports both
DSD and PCM (up to 705.6 / 768 kHz). For digital content protection reasons, the CH Link interface cyphers the native DSD stream
20
D1 User Manual
Rev 2.4
from SACD when transferring such data.
3.3.3 Stereo ANALOG_OUT boards
ANALOG_OUT boards provide analog audio output capabilities. ANALOG_OUT boards for L/R, Ls/Rs and C/Sub channel pairs can
be installed into D1 for analog stereo or multi-channel support. DIGITAL_OUT, stereo ANALOG_OUT and monaural ANALOG_OUT
boards can be combined, providing for instance digital output on the main (L/R) channels and analog out on Ls/Rs and C/Sub
channels. Stereo ANALOG_OUT boards provide both balanced (XLR) and single-ended (RCA) analog audio outputs. Following
drawing shows the layout of the Stereo ANALOG_OUT board connectors and naming for the different channel pairs:
Stereo ANALOG_OUT boards back panel layout for L/R, Ls/Rs and C/Sub channels
3.3.4 Monaural main ANALOG_OUT boards
ANALOG_OUT boards provide analog audio output capabilities. Monaural ANALOG_OUT board pairs for Left and Right channels
can be installed into D1 for analog support on main channels. DIGITAL_OUT, stereo ANALOG_OUT and monaural ANALOG_OUT
boards can be combined, providing for instance monaural analog output on Left and on Right channels, and stereo analog output
on Ls/Rs and C/Sub channels. Monaural ANALOG_OUT boards provide true fully-balanced (XLR), single-ended 75 Ohm (RCA) and
single-ended 50 Ohm (BNC) analog audio outputs. Following drawing shows the layout of the Monaural ANALOG_OUT board
connectors and naming:
Monaural ANALOG_OUT board pair
Rev 2.4
D1 User Manual
21
3.3.5 SYNC_IO board
The SYNC_IO board is an optional clock synchronization board to be used with an external clock generator or together with other
CH products, such as the C1 Digital to Analog Controller. The board provides one clock input and two clock output on BNC
connectors. The VCXO digital PLL of the D1 is capable of frequency and phase locking. The frequency is tracked below 0.1 Hz with
0.1 PPM adjustments for optimal jitter rejection. When fed with an audio Wordclock, the D1's internal clock will always keep a
phase accuracy below 2.5 us (equivalent to sub-millimeter position accuracy), thus enabling phase perfect match in a multichannel
configuration. Following diagram shows the layout of the back panel of the SYNC_IO board:
SYNC_IO board back panel layout
3.3.5.1 BNC clock input
The SYNC_IO board provides a BNC clock input that can be configured as 75 Ohm input impedance or high input impedance
through the D1's menu. Supported input frequencies on this connector are all standard audio Wordclocks (44.1, 48, 88.2, 96,
176.4 and 196 kHz), audio Masterclocks (22.5792 and 24.576 MHz), DSD bitclock (2.8224 MHz) and atomic-clock multiples (100
kHz and 10 MHz). Use this connector to synchronize your D1 unit to an external clock source (atomic clock generator or external
DAC such as CH C1).
3.3.5.2 BNC clock outputs
Two 75 Ohm output clock connectors are also provided on the SYNC_IO board. Use one of these connectors to synchronize an
external device to your D1. Output clock is either a buffered version of input clock (if D1 is synchronized to it input clock), or
current audio Wordclock (if D1 is clocked by its internal high precision oscillator).
3.3.6 Power cord receptacle and voltage selection
Make sure that the voltage selection is set to the correct value with respect to the AC voltage in your location. Connect the power
cord to the power cord receptacle and plug the power plug to an AC wall outlet only after all other connections have been made.
3.3.7 External power supply connector
The external power supply connector allows you to connect the X1 optional external power supply from CH. When the X1 is used, it
completely replaces the D1's internal power supply, resulting in minimized noise and enhanced audio quality. Note that only the
(small) standby transformer of the D1 remains active in this case to ensure the D1's wake up functionality.
22
D1 User Manual
Rev 2.4
4
Operation
The D1 SACD/CD unit is operated either from the front panel or from the IR remote control. Feedback to the user is provided by a
high-definition AMOLED display with customizable colors. Setup operations are exclusively handled from the front panel.
4.1 Front panel controls
4.1.1 Front panel
(1)
(2)
(4)
(3)
(5)
Front panel elements
(1)
(2)
(3)
(4)
(5)
Standby LED
SACD/CD drawer
User control knob (dual concentric rotatory knob with push function)
IR remote control receiver
Display area (high-definition AMOLED display
The standby LED lights up when the unit is in standby. It is normally turned-off during operation and shortly lights up whenever it
receives a valid IR remote control command. The LED can also be programmed to remain on during operation if the display is
turned off. The display is a high-definition AMOLED panel with very wide viewing angle, high contrast and high brightness ensuring
optimal reading comfort. The color and brightness of the display can be configured according to user's taste and different colors
can be chosen for CD or SACD playback.
4.1.2 User control knob
The user control knob is the main user input device. It is build around a dual concentric rotatory knob with push function, mounted
on a Teflon guide. Both the central and the external part of the knob can be moved to the left or the right independently, giving
four movements: rotate External Rotate Left/Right [<<E]/[E>>] and Central Rotate Left/Right [<<C]/[C>>]. The central part of
Rev 2.4
D1 User Manual
23
the knob also supports a push functionality. There are two types of push: Normal Push [NP] and Long Push [LP]. For a Normal
Push, just press the central part of the knob and release it immediately. For a Long Push, press and hold the central part of the
knob for 2s or more.
(1)
(4)
(2)
(5)
(3)
User control knob movements
(1)
(2)
(3)
(4)
(5)
External ring rotate Left [<<E]
Central knob rotate Left [<<C]
Central knob push. There are two types of push: Normal Push [NP] and Long Push [LP]
External ring rotate Right [E>>]
Central knob rotate Right [C>>]
User Action Code
Description
[<<C]
Central Left: Rotate central knob to the left
[C>>]
Central Right: Rotate central knob to the right
[<<E]
External Left: Rotate external ring to the left
[E>>]
External Right: Rotate external ring to the right
[NP]
Normal Push: push and release central knob
[LP]
Long Push: push central knob and maintain for 2s before release
User Action Codes
4.2 Operating modes
The D1 SACD/CD unit has two main operating modes: Normal mode and Menu mode. Normal mode is used to access standard
playback controls whereas Menu mode is used to configure the unit. The D1 also includes Shortcuts for quick access to selected
Menu mode items. Shortcuts are user programmable and most Menu mode items can be selected as Shortcuts.
24
D1 User Manual
Rev 2.4
4.2.1 Normal mode
Normal mode is used for SACD/CD playback control. When powered-on, the D1 SACD/CD unit starts in Normal mode. The display
looks as follows:
(1)
(13)
(12)
(11)
(2)
SACD 6ch
TOTAL
(3)
7
(4)
: ALL
7 0 0:28:34
<H
J INTERNAL
(10)
(9)
(5)
(6)
(7)
(8)
Normal mode display elements
(1) Disc layer selection for SACD (indicates 6ch if multi-channel layer is selected and player is equipped for multi-channel or DM if the multi-channel
layer is read but the player output is stereo only)
(2) Time display mode. Indicates TOTAL if time information is relative to the whole disc
(3) Mute indication. If the 7 symbol is present, the output is muted
(4) Repeat indication. If the symbol : is present, repeat mode is engaged
(5) Repeat type. If repeat is for the whole disc, the indication ALL is activated
(6) Current time. Negative time indicates remaining time (either for track or for disc)
(7) Polarity (phase) indication. If the H symbol is present, polarity is reversed
(8) External power supply indication. When an external power supply is connected and engaged, < symbol is displayed and internal power supply is
turned off
(9) Clock source indication
(10) Playing status indication
(11) Lock indication (J or K). Tells if the unit is locked to a clock source or not
(12) Track number
(13) Disc type (CD or SACD)
Displayed elements depend on the type of disc, installed optional boards and user settings. In the example above, the 7 th track of a
multi-channel SACD is played back on a unit supporting multi-channel output. Total elapsed time is 28min 34s, phase is inverted
and the whole disc is repeated. The D1 powered through an external power supply and is locked to its internal clock but its outputs
are muted. Displayed elements for other configurations and settings or when playing back a CD are similar.
Rev 2.4
D1 User Manual
25
Following table shows the actions of the user control knob in Normal mode.
User Control Knob Action
Unit State
Unit Action
[NP] Normal Push
OPEN
Any other state
Closes the drawer and reads the disc's TOC (STOP)
Enter Shortcuts mode
[LP] Long Push
OPEN
Any other state
Closes the drawer and goes to STANDBY
Go to STANDBY
[C>>] Center Rotate Right
OPEN
STOP
PLAY
PAUSE
Closes the drawer and reads the disc's TOC (STOP)
Start playback (PLAY)
Go into pause (PAUSE)
Resume playback (PLAY)
[<<C] Center Rotate Left
OPEN
STOP
PLAY
PAUSE
Do nothing
Open the drawer (OPEN)
Stop playback (STOP)
Resume playback (PLAY)
[E>>] External Rotate Right
OPEN
STOP
PLAY
PAUSE
Do nothing
Skip through tracks forward and starts playback (PLAY)
Skip to next track
Skip through tracks forward
[<<E] External Rotate Left
OPEN
STOP
PLAY/PAUSE
Do nothing
Skip through tracks backward and starts playback (PLAY)
Skip to track begin, then to previous tracks on subsequent
[<<E]
User control knob actions in Normal mode
To wake the unit up from STANDBY, apply a Normal Push [NP].
4.2.2 Shortcuts
The D1 SACD/CD unit is configured by a set of menus as described in the next sections. To allow quick access to the most frequently
used configuration menu items, the D1 offers the concept of Shortcuts. Shortcuts are fully programmable and the user may choose
any configuration parameter as a Shortcut. There are up to 6 user programmable Shortcuts. To learn how to program individual
Shortcuts, please refer to the SHORTCUTS menu item in the next section. For a list of Factory default Shortcuts, please refer to the
Specifications section.
Shortcuts are accessed from Normal mode by a Normal Push [NP]. Additional Normal Push [NP] skips to the next Shortcut. The last
Shortcut is always dedicated to entering the Menu mode (SETUP). On this last Shortcut, a Normal Push [NP] will return to Normal
Mode and an External Rotate Right [E>>] (or Central Rotate Right [C>>]) will enter the Menu mode. The individual parameter for
a given Shortcut is modified using External Rotate Left [<<E] (or Central Rotate Left [<<C]) and/or External Rotate Right [E>>]
(or Central Rotate Right [C>>]) . If there is no user action for 10s the unit will revert to Normal mode. Note that Shortcuts are
dynamically loaded depending on the unit's state. For instance, the Shortcut for SEARCH will not appear if the unit is in STOP state
as searching requires the disc to be playing.
26
D1 User Manual
Rev 2.4
Following table shows the actions of the user control knob for Shortcuts.
User Control Knob Action
Unit State
Unit Action
[NP] Normal Push
Shortcut (except last)
Skip to next Shortcut
Last Shortcut (SETUP) or Exit Shortcuts mode (Normal mode)
after current Shortcut
has been modified
[LP] Long Push
Any state
As in Normal mode
[C>>] Central Rotate Right
Shortcuts (except last)
Last Shortcut (SETUP)
Modify parameter up
Enter Menu mode
[<<C] Central Rotate Left
Shortcuts
Modify parameter down (when available)
[E>>] External Rotate Right
Shortcuts (except last)
Last Shortcut (SETUP)
Modify parameter up
Enter Menu mode
[<<E] External Rotate Left
Shortcuts
Modify parameter down (when available)
User control knob actions for Shortcuts
The DISC LAYER Shortcut gives a good illustration of how to navigate a Shortcut screen. Navigating other Shortcuts is similar.
(1)
CURRENT DISC LAYER
(6)
(5)
A
STEREO SACD
6CH SACD
C
(2)
CD
(3)
(4)
DISC LAYER Shortcut display elements
(1)
(2)
(3)
(4)
(5)
(6)
Rev 2.4
Shortcut title (Parameter, for other Shortcuts, title changes accordingly)
Arrow indicating External Rotate Right [E>>] if applies. The item below indicates the next parameter value (up direction)
Next Parameter Value if External Rotate Right [E>>] is applied (parameter up)
Current Parameter Value (for other Shortcuts the current Value of the Parameter is displayed on this line)
Next parameter value if External Rotate Left [<<E] is applied (parameter down)
Arrow indicating External Rotate Left [<<E] if applies. The item below indicates the next parameter value (down direction)
D1 User Manual
27
The last Shortcut (SETUP) is always the same and cannot be removed or altered. It gives access the Menu mode to access the
detailed setup of the unit.
(1)
DETAILED SETUP
EXIT
(2)
C
ENTER
(3)
(4)
SETUP Shortcut display elements
(1)
(2)
(3)
(4)
Shortcut title. It indicates that Detailed Setup (Menu mode) can be entered at this stage
Current value of the parameter. Default action is to exit (go back to Normal mode)
Arrow indicating External Rotate Right [E>>] (or Central Rotate Right [C>>])
Next parameter value. If External Rotate Right [E>>] is applied, the unit enters into Menu mode
4.2.3 Menu mode
The Menu mode allows for Configuration and Setup of the D1 SACD/CD unit through a set of menus. Menu mode is entered from
the last Shortcut item (see above). From Normal mode, enter the Shortcut mode by applying a Normal Push [NP]. By successive
Normal Pushes [NP], step to the last Shortcut item (DETAILED SETUP) and apply an External Rotate Right [E>>] to enter the Menu
mode.
Navigation in Menu mode is based on Central Rotate Left/Right [<<C]/[C>>] to select a given menu item and External Rotate
Left/Right [<<E]/[E>>] to change menu level.
User Control Knob Action
Unit Action
[NP] Normal Push
Enter next menu level or Validate choice (save setting)
[LP] Long Push
Puts the unit into Standby
[C>>] Center Rotate Right
Move to next menu item downward
[<<C] Center Rotate Left
Move to next menu item upward
[E>>] External Rotate Right
Enter next menu level
[<<E] External Rotate Left
Return to previous menu level without saving
User control knob actions in Menu mode
28
D1 User Manual
Rev 2.4
Following illustration shows the elements of a the D1 SETUP Menu page, the entry point to the D1 menu structure.
(1)
D1 SETUP
AUDIO SETTING
DISPLAY SETTING
SHORTCUTS
FACTORY SETTING
INSTALLED OPTIONS
NETWORK
> Mute
Phase polarity
Clock source
Active output
Current disc layer
(3)
(2)
D1 SETUP menu display elements
(1) Menu title. When entering a menu item, the title also shows the parent menu. If the AUDIO SETTING menu is entered, the title line would display
D1 SETUP >> AUDIO SETTING.
(2) Shows the accessible parameters when entering the currently highlighted menu item. In this example, AUDIO SETTING is highlighted and the
second column shows the parameters accessible in the AUDIO SETTING menu.
(3) List of items in the current menu. Navigate from one item to the other using Central Rotate Left/Right [<<C]/[C>>]. To enter the highlighted
menu item, use External Rotate Right [E>>] (or a Normal Push [NP]). To go to the previous menu level use External Rotate Left [<<E]. In this
example, External Rotate Left [<<E] exists the Menu mode and sets the unit back to Normal mode.
Once a menu item is selected by External Rotate Right [E>>], parameters for the corresponding menu item can be navigated and
accessed. As an example, the following drawing shows the display elements of the D1 SETUP >> AUDIO SETTING sub-menu.
(1)
D1 SETUP >> AUDIO SETTING
(5)
MUTE
PHASE POLARITY
CLOCK SOURCE
ACTIVE OUTPUT
...
Unmuted
In phase
Internal clock
...
(4)
(2)
(3)
D1 SETUP >> AUDIO SETTING menu display elements
Rev 2.4
D1 User Manual
29
(1) Menu title. D1 SETUP >> AUDIO SETTING shows that the parent menu is D1 SETUP. By applying External Rotate Left [<<E], the unit returns to
the parent menu.
(2) A Parameter Value of '...' indicates that the menu items gives access to one or more further sub-menu(s). Further sub-menus have the same
structure as this example.
(3) This is the Parameter Value column. For each item in the Parameter column, the Parameter Value item on the same line indicates the current
value of the Parameter.
(4) This is the Parameter column. The currently active Parameter is highlighted. Use Central Rotate Left/Right [<<C]/[C>>] to navigate from
Parameter to Parameter.
(5) If the first or last item in the Parameter column is indicated by '...' it means that there are additional Parameters not displayed currently onscreen. Use Central Rotate Left/Right [<<C]/[C>>] to navigate towards the '...' to make the corresponding Parameters appear on screen.
Once a terminal Parameter (e.g. a Parameter not giving access to a further sub-menu) is selected by External Rotate Right [E>>],
the D1 displays the corresponding Parameter adjustment screen. Following example shows the AUDIO SETTING >> PHASE
POLARITY Parameter adjustment screen. Other Parameters are similar but may show more (or less) choices for Parameter value.
Once a Parameter is set to the desired value, a Normal Push [NP] saves the new Parameter Value and gets back to the parent level
(save and exit). On the other hand, an External Rotate Left [<<E] gets back to the parent menu (in the case of this example:
AUDIO SETTING), but possible modifications of the Parameter Value are discarded (exit without saving).
(1)
AUDIO SETTING >> PHASE POLARITY
(4)
PHASE POLARITY
In phase
Out of phase
(2)
(3)
AUDIO SETTING >> PHASE POLARITY menu display elements
(1) Menu title. AUDIO SETTING >> PHASE POLARITY shows that the parent menu is AUDIO SETTING. To access the parent menu, use External Rotate
Left [<<E]
(2) The current Parameter Value is highlighted. Use Central Rotate Left/Right [<<C]/[C>>] to navigate through Parameter Values
(3) Other possible Parameter Value(s). Number of other Parameter Value(s) depends on Parameter
(4) Parameter for which the Parameter Value can be modified in the current menu.
The following section gives detailed information about the menu structure and the various Parameters. Note that certain Parameter
may or may not appear in the menu depending on installed options. For instance if no ANALOG_OUT board is installed, menu
items related to the DAC (Digital to Analog Converter) digital filters do not appear in the menu.
30
D1 User Manual
Rev 2.4
4.3 Configuration
Configuration of your D1 SACD/CD unit is accomplished by setting parameters in the Menu mode (see previous section for how to
access Menu mode and how to navigate menu items). Following diagram shows the complete menu structure (terminal items not
show). Grayed menu items are items which depend on installed optional slot-in boards.
Normal mode
7 0 0:28:34
Shortcut mode
SHORTCUT 1
SHORTCUT 2
D1 SETUP
D1 SETUP >>
AUDIO SETTING
Menu mode
SHORTCUT N
EXIT
ENTER
AUDIO SETTING >>
MUTE
AUDIO SETTING >>
PHASE POLARITY
D1 SETUP >>
SET ENCODER
CUSTOMIZE ENCODER >>
SHORTCUT 1
AUDIO SETTING >>
CLOCK SOURCE
CUSTOMIZE ENCODER >>
SHORTCUT 2
AUDIO SETTING >>
ACTIVE OUTPUT
CUSTOMIZE ENCODER >>
SHORTCUT 3
ACTIVE OUTPUT >>
CHANNEL
AUDIO SETTING >>
CURRENT DISC LAYER
CUSTOMIZE ENCODER >>
SHORTCUT 4
AUDIO SETTING >>
DEFAULT DISC LAYER
CUSTOMIZE ENCODER >>
SHORTCUT 5
AUDIO SETTING >>
REPEAT MODE
CUSTOMIZE ENCODER >>
SHORTCUT 6
AUDIO SETTING >>
DAC PCM FILTER
AUDIO SETTING >>
DAC DSD FILTER
AUDIO SETTING >>
ANALOG OUT
SETUP >>
DISPLAY SETTING
D1 SETUP >>
FACTORY SETTING
DISPLAY SETTING >>
TIME INFORMATION
DISPLAY SETTING >>
DISPLAY ON/OFF
FACTORY SETTING >>
FIRMWARE VERSION
FACTORY SETTING >>
UPDATE FIRMWARE
FACTORY SETTING >>
RESET ALL SETTING
DISPLAY SETTING >>
LED ON/OFF
EDIT CUSTOM >>
RED
DISPLAY SETTING >>
BRIGHTNESS CD
EDIT CUSTOM >>
GREEN
DISPLAY SETTING >>
COLOR CD
FACTORY SETTING >>
SHORTCUTS
COLOR CD >>
EDIT CUSTOM
EDIT CUSTOM >>
BLUE
COLOR SACD >>
EDIT CUSTOM
EDIT CUSTOM >>
RED
DISPLAY SETTING >>
BRIGHTNESS SACD
FACTORY SETTING >>
OUTPUT ENABLED
DISPLAY SETTING >>
COLOR SACD
FACTORY SETTING >>
NETWORK
EDIT CUSTOM >>
GREEN
FACTORY SETTING >>
SERIAL NUMBER
EDIT CUSTOM >>
BLUE
D1 SETUP >>
INSTALLED OPTIONS
D1 SETUP >>
NETWORK
NETWORK >>
STATUS
NETWORK >>
CONFIGURE
NETWORK >>
ANNOUNCE
INSTALLED OPTIONS >>
SYNCHRO
INSTALLED OPTIONS >>
SLOT 1
INSTALLED OPTIONS >>
SLOT 2
INSTALLED OPTIONS >>
SLOT 3
INSTALLED OPTIONS >>
SLOT 4
D1 CD/SACSD unit menu structure
Rev 2.4
D1 User Manual
31
There are six main menus used for configuration of the D1:
•
AUDIO SETTING: Allows to adjust audio related parameters
•
DISPLAY SETTING: Allows to adjust display related parameters
•
SHORTCUTS: Allows to assign and modify Shortcuts for user interface customization
•
FACTORY SETTING: Indicates the software version and allows to update it. Also allows to return to factory settings
•
INSTALLED OPTIONS: Provides information about the installed optional slot-in boards
•
NETWORK: Provides information about the network setup and enables its configuration.
4.3.1 D1 configuration menu items
4.3.1.1 AUDIO SETTING
D1 SETUP >> AUDIO SETTING
MUTE
PHASE POLARITY
CLOCK SOURCE
ACTIVE OUTPUT
...
Unmuted
In phase
Internal clock
...
The D1 SETUP >> AUDIO SETTING menu allows configuration of the audio
related Parameters of the unit. Accessible Parameters are:
- MUTE:
Mutes or unmutes the audio output
- PHASE POLARITY: Allows to revert the phase of the audio output
- CLOCK SOURCE:
Allows to select the clock source
- ACTIVE OUTPUT:
Selects active outputs (DIGITAL_OUT boards only)
- CURRENT DISC LAYER: Selects the disc layer to be read for current SACD
- DEFAULT DISC LAYER: Selects default layer used upon disc loading
- REPEAT MODE:
Selects the repeat mode
- DAC PCM FILTER:
Digital filter selection for PCM audio (ANALOG_OUT only)
- DAC DSD FILTER:
Digital filter selection for DSD audio (ANALOG_OUT only)
- ANALOG OUTPUT: Selects if the D1 outputs analog signal at full level or not
The following table details the Parameters of the AUDIO SETTING menu:
PARAMETER
PARAMETER VALUES
REQUIRED OPTIONS
REMARKS
MUTE
Muted
Unmuted
None
None
PHASE POLARITY
In phase
Out of phase
None
None
CLOCK SOURCE
Internal Clock
SYNC_IO board to
Synchro BNC (75 Ohm) choose another clock
Synchro BNC (Hi-Z)
source than Internal
32
D1 User Manual
Internal clock source is available in all cases
Synchro BNC (75 Ohm) and Synchro (Hi-Z) are only
Rev 2.4
available when the SYNC_IO board is installed.
SYNC_IO offers choice of 75 Ohm or highimpedance on its BNC clock input.
ACTIVE OUTPUT
CH-LINK L/R
AES-EBU L/R
RCA S/PDIF L/R
TOSLINK S/PDIF L/R
CH-LINK Ls/Rs
AES-EBU Ls/Rs
RCA S/PDIF Ls/Rs
TOSLINK S/PDIF Ls/Rs
CH-LINK C/Sub
AES-EBU C/Sub
RCA S/PDIF C/Sub
TOSLINK S/PDIF C/Sub
At least 1x DIGITAL_OUT Used to individually enable/disable digital outputs.
Note: AES-EBU outputs support consumer encoding.
Options for Ls/Rs channels are only displayed if a
DIGITAL_OUT board is installed for Ls/Rs channels.
Options for C/Sub channels are only displayed if a
DIGITAL_OUT board is installed for C/Sub channels.
CURRENT DISC LAYER Multichannel SACD
Stereo SACD
Stereo CD
When an SACD is stopped, the user can force the D1
to read another layer by changing the CURRENT
DISC LAYER parameter.
If Multichannel layer is selected in pure Stereo D1
unit, the output will be a L/R downmix of the
multichannel information. For pure stereo D1
applications, it is recommended to use Stereo SACD
as SACD layer (default behavior).
DEFAULT DISC LAYER
Multichannel SACD
Stereo SACD
Multi-channel capability
(Output boards
(DIGITAL_OUT or
ANALOG_OUT) for L/R,
Ls/Rs and C/Sub)
Chose if the stereo or the multichannel layer of an
SACD should be selected by default upon loading
(whenever these layer are available on a given
SACD).
REPEAT MODE
Normal
Repeat track
Repeat all
None
This setting is only valid while a disc is playing.
Returns to default (Normal) upon disc stop.
DAC PCM FILTER
Min P. low ringing
Min P. apodising
Min P. sharp
Linear P. apodising
Linear P. sharp
At least 1x
ANALOG_OUT
Choice of different filter types for PCM audio (CD or
CD layer of an SACD).
Min P. indicates minimal phase and Linear P.
indicates linear phase.
Low ringing corresponds to a soft-knee filter and
Sharp corresponds to a steep cut-off. Apodising
filters reach full attenuation at half the sampling
frequency to minimize transition band aliasing.
Rev 2.4
D1 User Manual
33
DAC DSD FILTER
Min P.
Linear P. low ringing
Linear P. trade-off
Linear P. sharp
At least 1x
ANALOG_OUT
Choice of different filter types for DSD audio (DSD
layer of an SACD).
Min P. indicates minimal phase and Linear P.
indicates linear phase.
Low ringing corresponds to a soft-knee filter and
Sharp corresponds to a steep cut-off. Trade-off, as
the name suggests, is an intermediary between Low
ringing and Sharp filters.
ANALOG OUTPUT
To preamp
To power amp
At least 1x
ANALOG_OUT
If D1 analog output is connected directly to a power
amp, its is attenuated by the volume set in the
master C1 (command is sent from C1 to D1 through
TCP/IP command on the network)
Details of AUDIO SETTING menu Parameters
4.3.1.2 DISPLAY SETTING
D1 SETUP >> DISPLAY SETTING
TIME INFO
DISPLAY ON/OFF
LED ON/OFF
BRIGHTNESS CD
...
Track
On
Off
80%
The D1 SETUP >> DISPLAY SETTING menu allows configuration of the display
related Parameters of the unit. Accessible Parameters are:
- TIME INFO:
Selects time display mode
- DISPLAY ON/OFF: Allows to turn the display off
- LED ON/OFF:
Selects if the LED is turned on when the display is off
- BRIGHTNESS CD:
Sets the display brightness for CD playback
- COLOR CD:
Selects the display color for CD playback
- BRIGHTNESS SACD: Sets the display brightness for SACD playback
- COLOR SACD:
Selects the display color for SACD playback
The following table details the Parameters of the DISPLAY SETTING menu:
PARAMETER
PARAMETER VALUES
REQUIRED OPTIONS
REMARKS
TIME INFO
Track
Track remain
Disc
Disc remain
None
Remaining times are indicated with a minus sign in
front of the time value display.
DISPLAY ON/OFF
On
Off
None
Allows to turn the display on or off. This is combined
with the LED ON/OFF Parameter
LED ON/OFF
On
Off
None
If the display is turned off, setting the LED ON/OFF
Parameter to On will make sure the LED in the logo
34
D1 User Manual
Rev 2.4
remains lit during operation.
If the LED ON/OFF Parameter is set to Off, the LED
will turn off during operation whatever the value of
the DISPLAY ON/OFF parameter.
BRIGHTNESS CD
COLOR CD
10%
20%
30%
...
90%
100%
None
Predefined colors
Custom color
Edit custom color
None
Sets the display brightness when a CD is played.
The D1 supports two different display settings
(BRIGHTNESS and COLOR parameters). One used
during CD playback and one used during SACD
playback.
Selects the display color for CD playback
Predefined colors represents a set of factory defined
colors
Custom color is a user definable color. To Edit the
custom color select the Edit custom color Value. Submenus allow to individually configure Red, Green
and Blue components (RGB) of the custom color.
BRIGHTNESS SACD
COLOR SACD
10%
20%
30%
...
90%
100%
None
Predefined colors
Custom color
Edit custom color
None
Sets the display brightness when an SACD is played.
The D1 supports two different display settings
(BRIGHTNESS and COLOR parameters). One used
during CD playback and one used during SACD
playback.
Selects the display color for SACD playback
Predefined colors represents a set of factory defined
colors
Custom color is a user definable color. To Edit the
custom color select the Edit custom color Value. Submenus allow to individually configure Red, Green
and Blue components (RGB) of the custom color.
Details of DISPLAY SETTING menu Parameters
4.3.1.3 SHORTCUTS
The D1 SETUP >> SHORTCUTS menu allows configuration of the Shortcuts.
Accessible Parameters are:
Rev 2.4
D1 User Manual
35
- SHORTCUT1:
Defines action for Shortcut #1
- SHORTCUT2:
Defines action for Shortcut #2
- SHORTCUT3:
Defines action for Shortcut #3
- SHORTCUT4:
Defines action for Shortcut #4
- SHORTCUT5:
Defines action for Shortcut #5
- SHORTCUT6:
Defines action for Shortcut #6
Note that unused Shortcuts are not displayed. The first available (e.g. non
defined) Shortcut has a Parameter Value of 'None' (the example on the left has
4 defined Shortcuts, hence Shortcut #5 has a Parameter Value of 'None')
D1 SETUP >> SHORTCUTS
SHORTCUT 1
SHORTCUT 2
SHORTCUT 3
SHORTCUT 4
SHORTCUT 5
Search
Phase polarity
Current disc layer
Time info
None
The following table details the Parameters of the SHORTCUTS menu:
PARAMETER
PARAMETER VALUES
REQUIRED OPTIONS
REMARKS
SHORTCUT 1
Any Parameter of the
None
AUDIO SETTING and
DISPLAY SETTING menus
or None
If SHORTCUT 1 is not defined, Parameter value for
SHORTCUT 1 is set to 'None'. SHORTCUT 2 to 6 are
not displayed in this case.
SHORTCUT 2
Any Parameter of the
None
AUDIO SETTING and
DISPLAY SETTING menus
or None
If SHORTCUT 2 is not defined, Parameter value for
SHORTCUT 2 is set to 'None'. SHORTCUT 3 to 6 are
not displayed in this case.
SHORTCUT 3
Any Parameter of the
None
AUDIO SETTING and
DISPLAY SETTING menus
or None
If SHORTCUT 3 is not defined, Parameter value for
SHORTCUT 3 is set to 'None'. SHORTCUT 4 to 6 are
not displayed in this case.
SHORTCUT 4
Any Parameter of the
None
AUDIO SETTING and
DISPLAY SETTING menus
or None
If SHORTCUT 4 is not defined, Parameter value for
SHORTCUT 4 is set to 'None'. SHORTCUT 5 and 6 are
not displayed in this case.
SHORTCUT 5
Any Parameter of the
None
AUDIO SETTING and
DISPLAY SETTING menus
or None
If SHORTCUT 5 is not defined, Parameter value for
SHORTCUT 5 is set to 'None'. SHORTCUT 6 is not
displayed in this case.
SHORTCUT 6
Any Parameter of the
None
AUDIO SETTING and
DISPLAY SETTING menus
or None
If SHORTCUT 6 is not defined, Parameter value for
SHORTCUT 6 is set to 'None'.
Details of SHORTCUTS menu Parameters
36
D1 User Manual
Rev 2.4
4.3.1.4 FACTORY SETTING
D1 SETUP >> FACTORY SETTING
FIRMWARE VERSION
UPDATE FIRMWARE
RESET ALL SETTING
SHORTCUTS
OUTPUT ENABLED
2.2
Update
Reset
Default mapping
Enable All
The D1 SETUP >> FACTORY SETTING menu allows to get information about
current D1 firmware version, to update the D1 firmware and to reset the unit to
default configuration. Accessible Parameters are:
- FIRMWARE VERSION: Current firmware version (read only)
- UPDATE FIRMWARE: Allows to update the unit's firmware
- RESET ALL SETTING: Returns the unit to factory settings
- SHORTCUTS:
Redefines all Shortcuts to factory settings
- OUTPUT ENABLED: Allows to enable all digital outputs at once
- NETWORK:
Clears list of detected devices on the network
- SERIAL NUMBER: Displays the serial number of the machine
The following table details the Parameters of the FACTORY SETTING menu:
PARAMETER
RELATED ACTION/VALUE REQUIRED OPTIONS
REMARKS
FIRMWARE VERSION
Firmware version
None
Firmware version indicates the version of the current
firmware. Format is x.y. This parameter is read only.
UPDATE FIRMWARE
Update
None
Selecting 'Update' launches the D1 firmware update
process.
RESET ALL SETTING
Reset
None
Selecting 'Reset' returns the D1 to its factory
settings. Factory settings are detailed in the
Specifications section.
SHORTCUTS
Default mapping
None
Selecting 'Default Mapping' returns the D1's
Shortcuts to their factory settings. Factory settings
are detailed in the Specifications section.
OUTPUT ENABLE
Enable all
None
Selecting 'Enable all' will enable all D1 (digital)
outputs.
NETWORK
Reset
None
Clears the D1's memory of other CH Precision
devices
it has discovered through the TCP/UDP proprietary
protocol.
SERIAL NUMBER
Serial number
None
Serial number indicates the serial number of the D1.
Format is yymm01nn. This parameter is read only.
Details of FACTORY SETTING menu Parameters
Rev 2.4
D1 User Manual
37
4.3.1.5 INSTALLED OPTIONS
D1 SETUP >> INSTALLED OPTIONS
SYNCHRO
SLOT 1
SLOT 2
SLOT 3
SLOT 4
Clock In/Out
Digital Out L/R
DAC Ls/Rs
DAC C/Sub
-
The D1 SETUP >> INSTALLED OPTIONS menu provides read-only information
about installed slot-in boards. Details are:
- SYNCHRO:
Synchronization option installed
- SLOT 1:
Output board installed in Slot 1
- SLOT 2:
Output board installed in Slot 2
- SLOT 3:
Output board installed in Slot 3
- SLOT 4:
Output board installed in Slot 4
Each slot indicates the type of board and the channels it handles. A '-' indicates
that the slot is currently unpopulated.
The following table details the Parameters of the INSTALLED OPTIONS menu:
PARAMETER
PARAMETER VALUES
REQUIRED OPTIONS
SLOT 1
SLOT 2
SLOT 3
SLOT 4
Digital Out L/R
Digital Out Ls/Rs
Digital Out C/Sub
Internal DAC L/R
Internal DAC Ls/Rs
Internal DAC C/Sub
Internal DAC Left
Internal DAC Right
-
At least 1x DIGITAL_OUT Parameters report which type of board
or 1x ANALOG_OUT
(DIGITAL_OUT, ANALOG_OUT or none) are installed
in the different slots.
They also indicate for which channels pair (L/R,
Ls/Rs or C/Sub) the boards are configured.
Clock In/Out
-
SYNC_IO
SYNCHRO
REMARKS
'-' indicates no board is installed in the given slot.
Parameters are Read Only
Reports the presence of the SYNC_IO board . If
SYNC_IO is not installed, the Parameter reads '-'.
Parameter is Read Only
Details of INSTALLED OPTIONS menu Parameters
38
D1 User Manual
Rev 2.4
4.3.1.6 NETWORK
The D1 SETUP >> NETWORK menu allows knowledge and customization of the
network related Parameters of the unit. Accessible Parameters are:
- STATUS:
Listing of all CH products detected (product type, IP and
MAC addresses
- CONFIGURE:
Defines if the D1 should interact with the network
(online) or not (offline)
- ANNOUNCE:
Forces the D1 to send a broadcast message on the local
network to announce itself
D1 SETUP >> NETWORK
STATUS
CONFIGURE
ANNOUNCE
...
This D1 is online
Broadcast
The following table details the Parameters of the NETWORK menu:
PARAMETER
PARAMETER VALUES
REQUIRED OPTIONS
REMARKS
STATUS
IP address
Product type
MAC address
Connection to a router
via its RJ-45 Ethernet
port (on the Control
board)
When the D1 is in standby, it searches its attached
network (front LED blinking) for other CH products.
All detected CH products are listed here, starting
with current D1.
Parameters are Read Only
CONFIGURE
This D1 is online
This D1 is offline
Connection to a router
via its RJ-45 Ethernet
port (on the Control
board)
When physically connected to a network, the D1 can
ignore this network (offline) or connect to it
(online) to take full advantage of information
sharing among CH products (such as sound level for
multichannel D1+C1 configurations).
ANNOUNCE
Broadcast
Connection to a router
via its RJ-45 Ethernet
port (on the Control
board)
Forces the D1 to send a broadcast message on the
local network to announce itself. This forces other
devices to detect it, and send back acknowledge
messages with their own information.
Details of NETWORK menu Parameters
Rev 2.4
D1 User Manual
39
4.4 Remote control
4.4.1 Remote control operation
The D1 SACD/CD unit is delivered with an IR remote to control the unit's basic operations. The provided remote control is not
intended to be used to configure the unit.
(1)
(2)
(3)
(4)
(5)
(6)
D1 SACD/CD unit remote control
(1)
(2)
(3)
(4)
(5)
(6)
Remote control activity LED
Mute/Standby (long push) button
Play/Pause / Phase polarity inversion (long push) button
Skip/Search Forward button
Skip/Search Backward button
Stop/Eject button
The remote control activity LED is illuminated while a button is pushed on the remote. The remote control's buttons support dual
functions by distinguishing Normal Push [NP] and Long Push [LP]. For a Normal Push [NP], the button is released immediately
after pressing. A Long Push [NP] requires the button to be pressed for at least 2s before being released.
Remote control functions are according to the following table:
Remote Control Button
Normal Push [NP]
Long Push [LP]
MUTE
Mute/Unmute (also wakes-up from STANDY) Sets unit into STANDBY or wakes it up
PLAY (0)
Play/Pause
Phase polarity inversion
SKIP FORWARD (4)
Skip to next track
Search forward
SKIP BACKWARD (3)
Skip to previous track
Search backward
STOP (2)
Stop (also closes drawer if required)
Open the drawer
Remote control functions
40
D1 User Manual
Rev 2.4
4.4.2 Changing the remote control batteries
If the LED does not turn on when pressing a button of the remote, it is likely that the remote batteries need to be changed. To
replace the batteries, remove the back cover of the remote control by removing the screws (M2.5 cross-shaped type, make sure to
use appropriate screwdriver). Exchange the batteries for new ones (make sure to respect batteries polarity) and put the back cover
back in place and tighten the screws. 2 AAA batteries are required.
4.5 Advanced clocking
When connected to the CH C1 DAC, different clocking scheme can be used, depending on the D1 and C1 options. Some are simply
not working at all (no sound will come out of your DAC, e.g. because at least one unit doesn't lock its internal clock to the
configured clock source), some others will work for some time before muting (e.g. in case more than one unit is configured to lock
to its own internal clock), some others will work fine but won't be optimal depending on your hardware (e.g. using D1 as clock
source and C1 as clock slave when equipped with SYNC_IO boards), while others will bring you the joy associated to pure musical
emotion.
Recommended use cases for various configurations are detailed in the following paragraphs. Even though this chapter is quite
technical, we kindly ask you to take the time to read it in order to get the best sound out of your CH system.
4.5.1 General clocking considerations
In any configuration, there must always be no more and no less than one clock master. In CH product range, the clock master is the
unit clocked on its own internal clock (parameter clock source is INTERNAL). It can be a CH product, or an external clock generator.
If more than one clock master is used, the system is no more synchronized (at some point a unit will display “CLOCKING ERR.”). If
there isn't any clock master, each unit gets synchronization from a unit that is clock slave itself. This kind of system is not stable
clockwise. If the configured clock source (e.g. SYNCHRO BNC 75 Ohm) is not connected or has no synchronization signal, the C1 can
not lock (open padlock symbol displayed) and mutes its output.
4.5.2 Without SYNC_IO board
When a D1 with no SYNC_IO board is used together with a CH C1 DAC (or other DAC), both audio data and clocking goes from the
source to the DAC. More precisely, clocking is embedded in the audio stream. Schematic below shows optimal way to connect such
system:
Rev 2.4
D1 User Manual
41
D1 SACD/CD Drive, default setup (1x DIGITAL_OUT)
CH-LINK Cable
C1 D/A Controller, default setup (1x DIGITAL_IN)
Simple D1 - C1 connection
More generally, when a D1 has no SYNC_IO board, it can only clock itself to its internal clock, and the DAC has to recover the clock
from the audio data. The same applies for multichannel setup when CH products have no SYNC_IO board. In such cases:
•
D1clock source: INTERNAL
•
DAC (e.g. C1) clock source: AUDIO IN
4.5.3 D1 SACD/CD drive (with SYNC_IO board) + C1 D/A controller (with SYNC_IO board)
When both the D1 and the C1 are equipped with a SYNC_IO board, optimum performances are obtained when the C1 DAC is the
clock master, and the D1 drive is the clock slave. Audio stream goes from the D1 to the C1, but clock goes the other way. Schematic
below shows how to connect such system:
42
D1 User Manual
Rev 2.4
D1 SACD/CD Drive, 1x DIGITAL_OUT + SYNC_IO
CH-LINK Cable
75 Ohm BNC coaxial cable
C1 D/A Controller, 1x DIGITAL_IN + SYNC_IO
D1 - C1 connection when SYNC_IO equipped
The same applied if the D1 is hybrid configured (DIGITAL_OUT L/R + ANALOG_OUT Ls/RS and C/Sub), i.e. clock goes from C1 to
D1 to have optimal conversion condition for main channels. In such case:
•
D1 clock source: SYNCHRO BNC 75 Ohm
•
C1 clock source (for this input): INTERNAL
4.5.4 Multichannel D1 drive + 3x C1 D/A controllers (all with SYNC_IO board)
In this 4-unit multichannel setup (D1 with all 6 channels digital out + 3 C1 DAC pairs), when all units are equipped with SYNC_IO
boards, we still recommend that the C1 processing the main channels is the clock master. The D1 is slaved to this C1's clock, and
generates a synchronization signal for the two other C1s (Ls/Rs and C/Sub ones). Schematic below shows the optimal way to
connect such system:
Rev 2.4
D1 User Manual
43
D1 SACD/CD Drive, 3x DIGITAL_OUT (L/R + Ls/Rs + C/Sub) + SYNC_IO
CH-LINK Cable
CH-LINK Cable
CH-LINK Cable
75 Ohm BNC coaxial cable
75 Ohm BNC coaxial cable
75 Ohm BNC coaxial cable
L/R C1 D/A Controller, 1x DIGITAL_IN + SYNC_IO
Ls/Rs C1 D/A Controller, 1x DIGITAL_IN + SYNC_IO
C/Sub C1 D/A Controller, 1x DIGITAL_IN + SYNC_IO
Multichannel D1 - C1 connection when SYNC_IO equipped
In such case:
44
•
D1 clock source: SYNCHRO BNC 75 Ohm
•
L/R channels C1 clock source: INTERNAL
•
Ls/Rs channels C1 clock source: SYNCHRO BNC 75 Ohm
D1 User Manual
Rev 2.4
•
C/Sub channels C1 clock source : SYNCHRO BNC 75 Ohm
4.6 Returning to Factory defaults
The unit can be reset to Factory default settings by using the RESET ALL SETTING item of the FACTORY SETTING menu. For a list of
Factory default settings, please refer to the Specifications section.
Rev 2.4
D1 User Manual
45
5
Firmware update
5.1 Introduction
The D1 SACD/CD unit is built around multiple programmable circuits. This approach allow the unit to be updated to support new
features. In its basic version (stereo drive), it includes a host micro-controller, one display controller, several FPGAs (Field
Programmable Gate Arrays) and one DSP (Digital Signal Processor). When optional boards are added, even more programmable
circuits are in use inside your D1. All of these components run firmwares which can be updated when needed, for instance to
support additional features or to correct a bug. The following sections describe how to update the complete firmware of your D1
unit.
5.2 Firmware Update procedure
5.2.1 Preparing the firmware image
Before doing the actual firmware update, it is necessary to prepare the firmware update image. Firmware update images are
available in the form of compressed .zip files from our website at www.ch-precision.com.
The following procedure shows how to prepare the firmware image:
1. Start by downloading the latest D1 firmware image from www.ch-precision.com
2. Prepare a blank, FAT32 formatted USB stick. Please note that some USB sticks are not properly detected by the USB
interface of the D1. CH Precision have tested successfully and therefore recommends Sandisk USB flash drives.
3. Decompress the firmware image .zip file to the root of your USB stick
After doing so, your USB stick should contain the following files:
•
D1_xxx.ds1:
Firmware update file for D1 DSP
•
D1_xxx.fp1:
Firmware update file for D1 FPGA
•
D1_xxx.mc1:
Firmware update file for D1 Micro-controller
•
D1_xxx.ol1:
Firmware update file for D1 Display controller
where 'xxx' indicate the software version number.
Make sure all four file are present at the root of your USB stick. Any missing file will prevent correct operation of the firmware
update procedure.
46
D1 User Manual
Rev 2.4
5.2.2 Updating the firmware (Firmware Update procedure)
Once the USB stick is ready with the appropriate files, the effective firmware update can be engaged. To do so, follow the steps of
the Software Update procedure:
1. Connect the USB stick to the USB port of the CONTROL board at the rear of your D1 unit.
2. Turn the unit on if it is in standby or powered-off. Navigate to the D1_SETUP>>FACTORY_SETTING menu and select the
UPDATE_FIRMWARE item.
3. Start the Firmware Update process by applying a Normal Push [NP].
4. Once the Firmware Update is done, the unit automatically goes into Standby. Please note that the unit will perform a
quick Reset (display turning off and back on) during this procedure. Remove the USB stick and wake the unit from
Standby. The new firmware should now be active.
5. To verify that the Firmware Update was effective, navigate to the D1_SETUP>>FACTORY_SETTING menu and select the
FIRMWARE_VERSION item. Check that the displayed firmware version number matches the version number of the
firmware update image.
Note: The Firmware Update process can last several minutes (about 5 minutes), do NOT interrupt it!
When performing a Firmware Update, do NOT interact with the unit or the remote control, do NOT unplug the unit from the AC wall
outlet and do NOT turn the mains power switch off. Interruption of the Firmware Update procedure may result in corrupted
firmware and non functioning unit. In case something has gone wrong during a Firmware Update and the unit is not functioning
correctly anymore, apply the Emergency Firmware Update procedure described in the next section.
5.2.3 Emergency Firmware Update procedure
Apply the following Emergency Firmware Update procedure if your unit is not functioning correctly after a failed Firmware Update
procedure:
1. Turn the unit completely off by setting the Power on/off switch to off.
2. Prepare and insert the USB key with the appropriate firmware image for your unit (make sure all files are present).
3. Push the Control Knob and power-up the unit by setting the Power on/off switch to on. Keep the Control Knob pushed
until you hear the internal relay click (a couple of seconds).
4. The unit will start up in Emergency Firmware Update mode and will update its internal firmware with the firmware
images present on the USB stick. Do not interrupt or unplug the unit until the Emergency Firmware Update is finished.
This may take several minutes. Please note that the unit will perform a quick Reset (display turning off and back on)
during this procedure.
5. Once the Emergency Firmware Update is finished, the units goes into Standby mode. Remove the USB stick and wakeup the unit by a Normal Push [NP]. The unit should now start-up properly with the new Firmware.
Rev 2.4
D1 User Manual
47
6. To verify that the Emergency Firmware Update was effective, navigate to the D1_SETUP>>FACTORY_SETTING menu
and select the FIRMWARE_VERSION item. Check that the displayed firmware version number matches the version
number of the firmware update used for the Emergency Firmware Update procedure.
Note: The Emergency Firmware Update process can last several minutes, do NOT interrupt it!
If the Emergency Software Update procedure fails, try to download the latest software images from www.ch-precision.com and
rerun the Emergency Software Update procedure (don't forget to prepare the software update files and USB stick accordingly). If
failure persists, contact your authorized dealer.
48
D1 User Manual
Rev 2.4
6
Troubleshooting
Error
Action
No power
Check the AC power cord
Check the power button at the back of the unit
Check the mains fuse on the AC power cord receptacle
Remote control does not work
Check if the unit is connected to the AC wall outlet and powered-on
Check if distance is not too far to the D1 unit. Get closer and try again. D1's Standby LED
should briefly illuminate
Change batteries in remote control if required (Remote control LED does not illuminate)
Disc doesn't play
Check if disc has been inserted correctly (labeled side up)
Check that disc is not empty (CD-R / CD-RW only)
Check if disc type is supported by the D1 unit (CD and SACD only, no DVD or BD)
Check if disc is dirty. If so, clean with a dry cloth from center to exterior of disc
Check that disc is not scrapped or damaged
Sound skips
Check if disc is dirty. If so, clean with a dry cloth from center to exterior of disc
Check that disc is not scrapped or damaged
Disc plays, but no sound
(general)
Check that your DAC, pre-amplifier and amplifier are turned-on
Check that the system volume setting is not too low
Check that the correct input is selected on your DAC and pre-amplifier
Check that the outputs are correctly enabled on your D1
Disc plays, but no sound
(“7” is displayed)
Your D1 is muted (display area 3 7 must be off). Unmute using the red RC button
Disc plays, but no sound
(“K” is displayed)
D1 is not locked to its clock source (symbol 11 should be a closed padlock J).
Please refer to advanced clocking chapter for details on valid clocking combinations.
If you are using a clocking scheme involving external clock in/out (SYNC_IO optional board),
make sure 75 Ohm BNC cable is properly connected and not damaged.
Lost in the settings?
Restore factory settings and start your setup again
Software update fails
Try Emergency Software Update procedure
If it fails, download the latest D1 firmware from www.ch-precision.com, prepare a software
update image on a FAT32 formatted USB stick and run the Emergency Software Update
procedure again
USB flash drive for firmware
update is not detected by D1
Please try another brand of USB flash drive (e.g. Sandisk).
Troubleshooting
If the error cannot be corrected using the information from the above table, disconnect the unit from AC wall power and from the
rest of you system and contact your authorized dealer.
Rev 2.4
D1 User Manual
49
7
Specifications
7.1 Specifications
General
Supported discs
CD, CD-R, CD-RW: stereo PCM 16 bits, 44.1kHz (redbook)
SACD single layer and hybrid, stereo and multi-channel (1), DSD 1bit,
2.8224MHz (scarlettbook)
User control
Dual concentric rotary knob with push function (control knob)
Display
480 x 272 24bits RGB AMOLED
Power supply
Selectable 100V, 115V or 230V AC, 47Hz to 63Hz
Power consumption (Standby)
< 1W
Power consumption (Operation, 2 channels digital
out)
30W average
Operating conditions
Temperature: +5C to +35C, humidity: 5% to 85% (no condensation)
Dimensions (L x D x H)
440mm x 440mm x 120mm (main body)
Weight
32kg
Digital Audio outputs (DIGITAL_OUT board, 2 channels per board)
CH LINK
Proprietary high-definition link supporting high-definition uncompressed
audio and control. Cyphered operation for high resolution signals (DSD).
LVDS signaling for all I2S audio signals (incl. clocks).
16bits/44.1kHz (CD), 1bit/2.8224MHz (SACD)
AES-EBU (consumer format)
XLR connector, 2.5Vpp diff., 110'Ohm, 16bits/44.1kHz (CD and SACD)
Coaxial (S/PDIF)
RCA connector, 0.5Vpp, 75'Ohm, 16bits/44.1kHz (CD and SACD)
Optical TOSLINK (S/PDIF)
Standard TOSLINK optical connector, 16bits/44.1kHz (CD and SACD)
Stereo Analog Audio outputs (Stereo ANALOG_OUT board, two channels per board)
Balanced outputs
XLR connectors
Single-ended outputs
RCA connectors
Output level
2Vrms (balanced)
2Vrms (unbalanced)
Frequency response (-3dB point)
DC-50kHz (SACD, balanced and unbalanced, digital filter dependent)
DC-20kHz (CD, balanced and unbalanced, digital filter dependent)
Dynamic Range (DNR)
120dB (SACD, balanced and unbalanced)
96dB (CD, balanced and unbalanced)
Signal to Noise Ratio (SNR)
121dB (SACD, balanced)
121dB (SACD unbalanced)
121dB (CD, balanced)
50
D1 User Manual
Rev 2.4
121dB (CD, unbalanced)
Total Harmonic Distortion + Noise (THD+N)
<0.0015% (SACD, balanced)
<0.0015% (SACD unbalanced)
<0.002% (CD, balanced)
<0.002% (CD, unbalanced)
Monaural Analog Audio outputs (Monaural ANALOG_OUT board, one channel per board)
Balanced outputs
True balanced XLR connector
Single-ended outputs
RCA connector & BNC connector
Output level
4Vrms (balanced)
2Vrms (unbalanced)
Frequency response (-3dB point)
DC-50kHz (SACD, balanced and unbalanced, digital filter dependent)
DC-20kHz (CD, balanced and unbalanced, digital filter dependent)
Dynamic Range (DNR)
120dB (SACD, balanced and unbalanced)
96dB (CD, balanced and unbalanced)
Signal to Noise Ratio (SNR)
121dB (SACD, balanced)
121dB (SACD unbalanced)
121dB (CD, balanced)
121dB (CD, unbalanced)
Total Harmonic Distortion + Noise (THD+N)
<0.0015% (SACD, balanced)
<0.0015% (SACD unbalanced)
<0.002% (CD, balanced)
<0.002% (CD, unbalanced)
Synchronization inputs and output (SYNC_IO board)
Clock input
1x BNC connector, 0.5Vpp to 5Vpp, 75'Ohm or high input impedance
Wordclock (44.1, 48, 88.2, 96, 176.4, 192 kHz),
Masterclock (22.5792, 24.476 MHz),
DSD bitclock (2.8224 MHz),
Atomic clock (100 kHz, 10 MHz),
40% to 60% duty cycle square wave
Clock output
2x BNC connectors, 2Vpp, 75'Ohm output impedance
Buffered Clock input or Audio Wordclock
50% duty cycle square wave
Remote control
Remote control type
Infrared. Uses RC5 codes. Range: 10m (line of sight)
Remote control batteries
2x AAA type
(1) True multi-channel SACD operation requires additional optional output boards (digital or analog) for Ls/Rs and C/Sub channels
Specifications
Rev 2.4
D1 User Manual
51
Design and Specifications are subject to change without notice
Weight and dimensions are approximate
Illustrations are informative only and may differ from actual production models
Casing design by Mana Ishoni
7.2 Dimensions
D1 SACD/CD unit dimensions
52
D1 User Manual
Rev 2.4
7.3 Factory settings
Following table lists the factory settings of your D1 SACD/CD unit:
SETTING
Value
AUDIO SETTING
MUTE
Unmuted
PHASE POLARITY
In phase
CLOCK SOURCE
Internal clock
ACTIVE OUTPUT
All outputs enabled
DISC LAYER
If a CD disc is inserted into D1:
- CD
If an SACD disc is inserted into D1:
- SACD stereo layer if D1 is stereo only
- SACD stereo layer if D1 is multichannel but disc is stereo only
- SACD multichannel layer if both D1 and disc are multichannel
REAPEAT MODE
Normal (no repeat). This is reset each time the unit is in STOP state
DAC PCM FILTER
Minimum phase low-ringing
DAC DSD FILTER
Minimum phase
ANALOG OUT
To pre-amp
DISPLAY SETTING
TIME INFO
Track. This is reset each time the unit is in STOP state
DISPLAY ON/OFF
On
LED ON/OFF
Off
BRIGHTENESS CD
80%
COLOR CD
Blue
CUSTOM COLOR CD
VFD like
BRIGHTENESS SACD
80%
COLOR SACD
Blue
CUSTOM COLOR SACD
VFD like
SHORTCUTS
SHORTCUT1
SEARCH (appears only in PLAY state)
SHORTCUT2
PHASE POLARITY
SHORTCUT3
DISC LAYER (appears only in STOP state)
Rev 2.4
D1 User Manual
53
SHORTCUT4
TIME INFO (appears only in PLAY state)
SHORTCUT5
None
SHORTCUT6
None
Factory settings
54
D1 User Manual
Rev 2.4
Rev 2.4
D1 User Manual
55
CH Precision Sàrl
ZI Le Trési 6D
CH-1028 Préverenges
SWITZERLAND
www.ch-precision.com
[email protected]
Made in Switzerland
56
D1 User Manual
Rev 2.4