1
PUNCH USER MANUAL
Concept by: Rob Papen and Jon Ayres
Instrument by: Jon Ayres and Rob Papen
Programming by: Jon Ayres and Jacek Kusmierczyk
Graphics by: Hans Van Even www.musicworks.fr
Presets by: Rob Papen and various artists
Manual by: Rob Papen, Jon Ayres and Armand ten Dam
Special thanks to: Jon Evers (percussion and drums) & Tim Schwarz
[Welcome]
With Punch, Rob Papen delivers a brand new speaker busting, body rattling software
instrument. Punch delivers synthesized drums in the finest audio quality and with
breathtaking features for the contemporary producer. You can use synthesis and the
build in samples to build your own unique sounding drum-kit, but also your own
samples can be loaded into Punch to complete your kit. Your sounds can then be
crafted using the stunning features, filters and huge synth power we all know from
other RP synthesizers. Punch has a unique sound but also built in sequencers,
allowing you the user to have multiple patterns at your fingertips. These grooves can
be triggered in a live environment to build a song, but are also great for just
improvisation and jamming! Also featured are drum-kits built by famous DJ's which
complete the arsenal of power that is Punch…
[Table of Contents]
[Installation]................................................................................................................ 4
[Punch Overview]....................................................................................................... 6
[Controls] .................................................................................................................... 7
[Presets]...................................................................................................................... 9
[External Midi Control – ECS] ................................................................................. 11
[Drum Pads].............................................................................................................. 12
[Drum Presets] ......................................................................................................... 12
[Global Drum Module Controls].............................................................................. 13
[Bass Drum Module] ................................................................................................ 17
[Snare Drum Module]............................................................................................... 20
[Hi-Hat Module] ........................................................................................................ 23
[Clap Module] ........................................................................................................... 26
[Tom Module] ........................................................................................................... 28
[User Module] ........................................................................................................... 31
[Built-In Samples Module] ....................................................................................... 40
[Sampler Module] ..................................................................................................... 42
[Sequencer] .............................................................................................................. 45
[Easy Controls] ........................................................................................................ 48
[Mixer] ....................................................................................................................... 49
[Modulation Controls].............................................................................................. 50
[FX Controls] ............................................................................................................ 52
[Manager Screen] ..................................................................................................... 62
[MIDI Mapping] ......................................................................................................... 66
[Building Punch Presets] ........................................................................................ 69
[Installation]
Installation on PC (VST)
1. If you have purchased a box version of the RP plug-in, you can use the installer
on the CD- ROM/DVD. However to ensure you have the latest version, you download
it from our web-site, by following the steps below.
2. Login onto the www.robpapen.com homepage or create an account if you do not
have one yet
3. Then register your RP plug-in, using the serial from your registration email.
NOTE: registering your plug-in will also allows you to obtain support, updates and
2nd serials for additional computers.
4. Next click on the download link that pops up after registration and download the
correct version for your computer. The Multi-core versions for PC are for multi-core
processor computers and the 64bits versions are for 64bits (music software) hosts
and computers.
5. Run the plug-in's installer and enter the RP serial when asked for.
6. Open, inside your (music program) host, the RP plug-in. If you have mis-entered
your serial you will be prompted to enter it again. After it has been entered correctly
the plugin will be authorized and ready for use.
If you have any questions regarding the installation of your RP software please look
in the FAQ section or contact our support team at www.robpapen.com/yourdetails
For details on how to handle plugins in general, please look at your music software
(host) documentation.
Installation on PC (RTAS)
1. If you have purchased a box version of the RP plug-in, you can use the installer
on the CD- ROM/DVD. However to ensure you have the latest version, you download
it from our web-site, by following the steps below.
2. Login onto the www.robpapen.com homepage or create an account if you do not
have one yet
3. Then register your RP plug-in, using the serial from your registration email.
NOTE: registering your plug-in will also allows you to obtain support, updates and
2nd serials for additional computers.
4. Next click on the download link that pops up after registration and download the
correct version for your computer.
5. Run the plug-in's installer and enter the RP serial when asked for.
6. Open, inside your (music program) host, the RP plug-in. If you have mis-entered
your serial you will be prompted to enter it again. After it has been entered correctly
the plugin will be authorized and ready for use.
If you have any questions regarding the installation of your RP software please look
in the FAQ section or contact our support team at www.robpapen.com/yourdetails
For details on how to handle plugins in general, please look at your music software
(host) documentation.
Installation on Mac (VST, AU and RTAS)
1. If you have purchased a box version of the RP plug-in, you can use the installer
on the CD- ROM/DVD. However to ensure you have the latest version, you download
it from our web-site, by following the steps below.
2. Login onto the www.robpapen.com homepage or create an account if you do not
have one yet
3. Then register your RP plug-in, using the serial from your registration email.
NOTE: registering your plug-in will also allows you to obtain support, updates and
2nd serials for additional computers.
4. Next click on the download link that pops up after registration and download the
correct version for your computer.
5. Run the plug-in's installer and enter the RP serial when asked for.
6. Open, inside your (music program) host, the RP plug-in. If you have mis-entered
your serial you will be prompted to enter it again. After it has been entered correctly
the plugin will be authorized and ready for use.
If you have any questions regarding the installation of your RP software please look
in the FAQ section or contact our support team at www.robpapen.com/yourdetails
For details on how to handle plugins in general, please look at your music software
(host) documentation.
[Punch Overview]
Punch is a drum plug-in with three main components:
Drum synthesizer / sample player
Step sequencer
Mixer and effects
The figure below shows how they interact:
Punch Architecture
The drum synthesizer has numerous models available to synthesize drum sounds
from scratch. It can also play back samples that you select and load into Punch.
Each synthesis model is optimised to generate a particular drum sound and comes
with its own set of parameters in a separate module to sculpt the sound. You will find
modules for Bass Drum, Snare, Clap, Hi-Hats etc. Each module has several models
that generate the sound with subtle difference between them. If this sounds a bit
confusing at first – don’t worry – Punch has enough features and Presets built-in to
help you on your way quickly.
One way to play the drum sounds is to direct MIDI-notes from your DAW to Punch.
This can be a programmed pattern, or your MIDI-keyboard routed to the Punch plugin. The second method is to let Punch do some of the work for you. Punch comes
with a built-in step sequencer. The step sequencer is fully programmable and
consists of 8 patterns, divided in Grooves and Breaks. Each Groove and Break
contains 4 Tracks, where each Track triggers a particular drum sound.
The beauty of Punch is that it allows you to start of with a basic beat and improvise
on top of that by triggering individual drum sounds, throw in the occasional break and
switch grooves. The Grooves and Breaks consist of 16 steps each and there are a
number of parameters that you program for every individual step.
The drum sounds get routed through up to four effect modules and blended together
in the mixer section. Essentially this gives you the opportunity to bring everything
together in a mixed drum kit, but with all the flexibility of a modern computer-based
workstation. You get flexible effects routing, individual panning and volume and, if
required, separate output busses for the drum parts.
[Controls]
Punch uses controller knobs and buttons to adjust its parameters. If you move your
mouse over a control, the controller name and its value are shown in Punch’s readout screen, which is located at the top left hand side.
Knobs
You turn a knob by left clicking on it and moving the mouse up and down. The
display (read-out screen) displays the value. Pressing shift and moving up / down
allows you to fine-tune the control and pressing ctrl + mouse button sets the control
to its default value.
Buttons come in three kinds:
On / Off buttons When you left click these, they toggle between being on and off.
Radio Buttons Allow you to set one option out of several. An example is the FX
selector buttons.
Menu buttons
Left click on these and a pop-up menu appears. Select a setting
from the pop-up menu
Right clicking
Right clicking (or control-click on Mac) on a control will bring up the midi / help menu.
Here is shown the control name, the current value and which midi control this control
is latched to. Also you can do the following.
Set to default Set the control to its default value.
Set to Zero
Set the control to its zero value.
Latch to midi Latches that control to the next midi control received.
For instance to latch “Volume” to midi expression, right click on "Volume Knob”, click
on “Latch to Midi” in the pop-up menu. Then move the midi expression control, this
should move the Volume knob as well, and the midi expression control will be latched
to the “Volume”.
These latched midi controllers are global and will work for all presets and active
Punch instruments in your host.
Unlatch midi
Clear midi
Unlatches that Punch control from any midi controls.
Clears all of the midi latching.
Note: in the preset section you can save or load your whole midi (latch)
controller setup to hard-disk. This file button is called ECS.
Computer Keyboard Controls
You can alter the current preset and banks using the computers keyboard. This can
be turned “off” in Punch’s back panel. To access the back panel, click on the Punch
logo. This setting is global.
Up Arrow key
Down Arrow key
Right Arrow key
Left Arrow key
Page Down key
Page Up key
Previous preset.
Next preset.
Increase preset number by 8
Decrease preset number by 8
Next Punch bank
Previous Punch bank
Mouse Scroll Wheel Controls
Scrolling the mouse wheel up and down scrolls through the presets
[Presets]
In the Preset Section you manage all the presets, banks and external control settings
of Punch. It includes a “Favorite” function, which makes it easy to create your own
sets of favorite Punch presets. You select a preset by clicking on the 'preset screen'
itself which pops up a menu where you can select the preset. You can also use the <
and > keys to scroll through the presets of the selected bank.
The preset menu also has Quick Browser, Recently Browsed and Favorites
functions. It allows you to manage presets and banks through load, save, rename,
copy, paste and reset to default operations.
Note: The Presets are saved as part of a Bank. When you start creating your own
Presets, it is best to save the Bank with a new name for the first time. This way you
will keep all factory Presets that come with Punch, while you organise all your new /
changed Presets in their own Bank.
Quick Browser
The "Quick Browser" shows all the available banks and their presets. When you click
on a preset, the preset and the corresponding bank will be loaded.
Recently Browsed
This shows a list of all the recently used presets. Clicking on an entry loads in that
preset again. Clicking on "Clear Recent" removes all entries.
Favorites
This shows a list of presets selected as being Favorites presets. Clicking on an entry
loads in that preset. You can select a preset to be a Favorite by clicking on "Add
Current to Favorites". "Remove Current from Favorites" removes the current preset
from the Favorites list, and "Clear Favorites" removes all entries.
The Favorites list is stored on the computer's hard disk, so the list will be
remembered the next time you use the plug-in.
Bank
This is where you can select the bank, either by clicking on the bank screen and
selecting from the menu or by using the < and > to scroll through the different types
of banks. All Punch banks are saved in the “Punch/Banks” folder on your computer. It
is recommended that you save your own Punch banks in their own folder.
To save a bank or to load a bank you need to use the file function in this section.
Note: if you change a preset in a bank, you need to save that preset with the whole
bank to keep the changed preset. To keep the original preset banks, always save the
bank with a new name.
Edit / Orig
Once you have edited a preset, the 'Edit/Orig' button will light up. If you then the click
on the “Orig” button it will return the preset to its original settings, if you then click on
the “Edit” button it will return it to its edited version. This allows you to toggle
between the original preset and the edited one, to hear the differences to any
changes that you have made.
Note: if you change a preset in a bank, you need to save that preset with the whole
bank to keep the changed preset. To keep the original preset banks, always save the
bank with a new name.
[External Midi Control – ECS]
This allows you to load / save an external midi controller setup. Once set, it is shared
by all of the presets. You can latch one of Punch's controls to a midi controller by
using the right button (or control-click on a Mac) menu and selecting “latch midi”. You
can also unlatch midi controls the same way or clear all of the midi controls.
Load ECS
Save ECS
Reset all Midi
This opens the folder that holds ECS setups. The installer of
Punch installed a folder called ECS that holds all .ECS files
This gives you the option to save the midi setup you made and
use it in other songs. It is saved as an .ECS file
This clears all the midi settings for Punch. Handy if you want to
start from scratch.
Help Manual
Pressing the “Help Button” brings up the manual for Punch
Global Volume
Controls the global volume for Punch
Punch Logo / Back Panel
Clicking here opens Punch’s back panel, which allows you to change a handful of
Punch’s global settings:
When this is turned on, Punch’s screen size is increased by
40% when you next use Punch.
Host Sync/Sensitivity When this is on Punch’s patterns are synced to your host’s
sequencer when it is playing, and so will attempt to start at the
next set period. By default this is the next 1/16 of a note but
you can change this in the Sync Sensitivity menu
Computer Keyboard Turns on / off computer keyboard program / bank change.
Midi Map
Selects between the Midi GM & standard midi mapping, please
see the appendix for details of this.
Big Screen
[Drum Pads]
Clicking on one of the drum pads will trigger the associated drum sound. Clicking on
the LED button will select that drum module, and its controls are shown in the drum
module screen.
If you turn on the Dynamic Selection (DYN SELECT), clicking on a drum pad will
select that drum and also trigger it as well.
[Drum Presets]
Punch allows you save drum presets for each of the different drum modules, so you
can easily create drum kits. The drum preset menu allows you to select these drum
presets, and can be found to the right of the drum / sampler module screen. It has
the following controls.
Default Presets
Save Preset
Rename Preset
Delete Preset
Undo
Set the current drum module to its default setting.
Saves the settings of the current drum module to a
preset.
Renames the currently selected preset.
Deletes the currently selected preset.
Undoes the last preset command.
Clicking on a preset in the Presets sub-menu, loads in that preset. Clicking on the
drum preset arrow buttons allows you to scroll through the drum presets.
[Global Drum Module Controls]
Each drum & sample module has the same general global controls, these are located
in the right-hand side of the screen.
Output
Allows you to set the output channel for this drum module. In single channel output,
this allows you to send the module output to the four effects, or to the dry output.
In the multi-channel output, this allows you to send the output to the following stereo
channels
Dry Output
FX 1
FX 2
FX 3
FX 4
Stereo 6
Stereo 7
Stereo 8
Stereo Channel 1
Stereo Channel 2
Stereo Channel 3
Stereo Channel 4
Stereo Channel 5
Stereo Channel 6
Stereo Channel 7
Stereo Channel 8
For the effect, whether a FX is output to a stereo channel, depends on the selected
FX path, please see the effect section for more details.
Choke
This allows one drum module to ‘choke’ i.e. stop, another currently playing drum
module, if they both belong to the same choke group.
For example, if BD 1 and SN 1 are both in choke group 1, and SN 1 is currently
playing and you trigger BD 1, then SN 1 is instantly stopped i.e. choked.
Volume
Volume of the drum module
Vel
Velocity to volume of the drum module, i.e. how much the triggering note’s velocity
alters the volume. From 0% (no effect), to 100% (the volume is totally controlled by
the velocity).
Pan
Panning position for the drum module’s output. From wholly left, to centred, to wholly
right.
Distortion Type
Each module has it’s own distortion effect, with having two distort controls. Usually
“Dist 1” control the amount of distortion and “Dist 2” the dry / distortion mix
The distortion types are
None
Bits
Clipper
Cos
Cross 1
Cross 2
Foldover
Fuzz
Gapper
Hard Limiter
OverDrive
Octave
Octave 2
Power
Rectify
S&H
Saturate
SoftLimit
Square
Transient
No distortion.
Bit reduction effect, “Dist 1” controls the bit rate.
Hard clipper, “Dist 1” controls the top clipping amount, “Dist 2”
the bottom clipping amount.
Cosine distortion effect.
Cross distortion type 1.
Cross distortion type 2. “Dist 1” controls the top crossing
amount, “Dist 2” the bottom crossing amount.
Fold-over distortion, this amplifies and then ‘folds over’ the
sound.
Fuzz-box distortion, “Dist 2” controls it’s frequency.
Gapper distortion, “Dist 1” controls the frequency of the
gapping.
Hard-limiter, “Dist 1” controls the limit.
Overdrive effect
Octave effect, this shifts the sound up an octave, “Dist 1”
controls the upper mixing, “Dist 2” controls the lower mixing.
Octave effect type 2, “Dist 1” controls the frequency of the
shift.
Power wave-shaping effect.
Rectifies the signal. “Dist 1” controls the amount of rectification.
Sample & holds the signal, “Dist 1” is the sample rate.
Saturation effect.
Soft-limiter, “Dist 1” controls the mixing between the normal
and
soft-limited signal.
Squares the signal, “Dist 1” controls the upper mixing, “Dist 2”
controls the lower mixing.
Distorts the transients, i.e. the beginnings of sounds. “Dist 1” is
the transient range, and “Dist 2“ the amount of distortion.
[Quick Edit]
Each drum synth module has a number of quick edit controls. These are located on
the left-hand side of the screen, and give you easy access to change the module’s
main parameters.
[Envelopes]
Punch uses a number of different envelope types
Attack Envelope
Attack Envelopes start at zero and then increase to the full amount, the time taken is
set by the attack controller.
Decay Envelopes
Decay Envelopes start at the full amount and then decrease to zero, the time taken is
set by the decay controller.
Decay & Rise Envelopes.
Decay & Rise Envelopes start at the full amount and then decrease to zero during
the decay time. It then increases to the full amount again during the rise time, unless
rise is “Off” then the envelope stays at zero.
The decay and rise times are set by the decay and rise controllers respectively.
Hold & Decay Envelopes
Hold & Decay Envelopes start and stay at the full amount for the hold time, and then
decrease to zero during the decay time.
The hold and decay times are set by the hold and decay controllers respectively.
Attack & Decay Envelopes
Attack & Decay Envelopes, start at zero, and then increase to the full amount during
the attack time. They then decrease to zero during the decay time.
The attack and decay times are set by the attack and decay controllers respectively.
Attack, Hold & Decay Envelopes
Attack, Hold and Decay envelopes, start at zero, and then increase to the full amount
during the attack time. They then stay at the full amount for the hold time, and then
decrease to zero during the decay time.
The attack, hold and decay times are set by the attack, hold and decay controllers
respectively.
For some envelopes, such as the “sample amp envelope”, the hold time can be set to
be infinite; in this case the hold readout reads “Held”.
[Bass Drum Module]
Punch has two bass drum modules, BD1 and BD2. These can play synthesized bass
drums or the built-in bass drum samples. You can select the various different bass
drum models / samples by clicking on the “model” menu.
Attack
A very quick attack envelope, used to remove any initial sounds
Easy Bypass
When ‘on’ the module is not changed by the easy page controls.
Model 1
In this model, an oscillator whose pitch & volume are altered by two envelopes are
the basis for the bass drum.
Menus
Osc Wave
Curve
Oscillator wave.
Frequency envelope curve shape - “low” & “high”. These create
different types of bass drum sounds.
Oscillator Frequency
Start
End
Decay
Curve
Start frequency for the oscillator.
End frequency for the oscillator.
Oscillator frequency envelope decay time. Time taken for the
oscillator to go from the start to end frequencies.
Oscillator frequency envelope curve, from linear (0%) to exponential
(100%).
Oscillator Amp Envelope
Hold
Decay
Curve
Oscillator amp envelope hold time.
Oscillator amp envelope decay time.
Oscillator amp envelope curve, from linear (0%) to exponential
(100%).
Model 2
Model 2 adds a click / noise source to the oscillator in Model 1
Click / Noise
Vol
Mix
Freq
Drop
Decay
Spread
Offset
Volume of click / noise.
Type & mix of click / noise, from sine wave to white noise to pink
noise.
Base frequency of the click / noise.
Amount the click / noise frequency drops.
Time taken for the click / noise frequency to drop to the base
frequency, and also the time taken for the click / noise amp
envelope to decrease to zero.
Noise filter stereo spreading.
Noise filter frequency offset, i.e. the difference in filter frequency
between the left and right channels.
Model 3
Model 3 is very similar to Model 1, but has a different way of setting the oscillator
frequency, and adds a secondary ‘Punch’ envelope to create punchier sounds.
Oscillator Frequency
Base
Drop
Decay
Curve
Base oscillator frequency.
Amount the oscillator frequency drops.
Time the oscillator frequency takes to drop to the base frequency.
Also the time taken for the oscillator amp envelope to decrease to
zero.
Oscillator frequency envelope curve, from linear (0%) to exponential
(100%).
Punch
Amount
Decay
Curve
Amount the punch frequency envelopes adds to the oscillator
frequency.
Time the punch frequency envelope takes to drop to zero.
Punch frequency envelope curve, from linear (0%) to exponential
(100%).
Model 4
Model 4 is Model 3 plus the click / noise envelope from Model 2.
Classic / Punch
These models allow you to use the built-in bass drum samples, please see the “builtin sample” section for more details.
[Snare Drum Module]
Punch has two snare drum modules, SN1 and SN2 . These can play synthesized
snare drums or the built-in snare drum samples. You can select the various different
snare drum models / samples by clicking on the “model” menu.
The Snare sound is created by mixing together an oscillator and a filtered noise
source.
Attack
A very quick attack envelope, used to remove any initial sounds
Easy Bypass
When ‘on’ the module is not changed by the easy page controls.
Model 1
Menus
Osc Wave
Noise Filter
Curve
Oscillator wave.
Noise filter type.
Frequency envelope curve shape - “low” & “high”, these create
different types of snare drum sounds.
Oscillator Frequency
Base
Drop
Decay
Curve
Base oscillator frequency.
Amount the oscillator frequency drops.
Time the oscillator frequency takes to drop to the base frequency.
Oscillator frequency envelope curve, from linear (0%) to exponential
(100%).
Oscillator Amp Envelope
Volume
Hold
Decay
Curve
HP
Oscillator volume.
Oscillator amp envelope hold time.
Oscillator amp envelope decay time.
Oscillator amp envelope curve, from linear (0%) to exponential
(100%).
The output of the oscillator is passed through a high pass filter. HP
Filter controls this filter’s frequency.
Noise
Volume
Attack
Decay
Noise volume.
Noise amp envelope attack time.
Noise amp envelope decay time.
Noise Filter
Frequency
Q
Spread
Offset
Base frequency of the noise filter.
Resonance of the noise filter. If you are using the vowel filter, this
controls the vowel.
Noise filter stereo spreading.
Noise filter frequency offset, i.e. the difference in filter frequency
between the left and right channels.
Noise Filter Envelope
Drop
Decay
Rise
Curve
Vel > Freq
Amount the noise filter frequency drops.
Time taken for the noise filter frequency to drop to the base
frequency.
Time taken for the noise filter frequency to return to the initial
frequency. If set to “Off” then rise is turned off and the noise filter
frequency stays at the base frequency.
Noise filter frequency envelope curve, from linear (0%) to
exponential (100%).
Velocity to noise filter frequency, how much the note’s
velocity
alters the noise filter frequency. At 0% it’s turned off.
Model 2
Model 2 adds a click to the model 1.
Click
Vol
Freq
Vel > Freq
Drop
Decay
Volume of click.
Base frequency of click.
Velocity to click frequency, how much the note’s frequency alters
the click frequency. At 0% it’s turned off.
Amount the click frequency drops during the decay time.
Time taken for the click frequency to drop to the base frequency,
and also the time taken for the click amp envelope to decrease to
zero.
Classic / Punch
These models allow you to use the built-in snare drum samples, please see the
“built-in sample” section for more details.
[Hi-Hat Module]
Punch has four hi-hat drum modules, CH1, OH1, CH2 & OH2. These can play
synthesized hi-hats or the built-in hi-hat samples. They are named CH & OH, so to
help in differentiating between the closed and the open hi-hat modules. You can
select the various different hi-hats models / samples by clicking on the “model” menu.
Attack
A very quick attack envelope, used to remove any initial sounds
Easy Bypass
When ‘on’ the module is not changed by the easy page controls.
Model 1
Model 1 uses filtered noise to synthesize hi-hats.
Menus
Noise Filter
Noise filter type.
Noise
Vol
Decay
Vel
Volume of the noise.
Noise amp envelope decay time.
Velocity to decay time, how much the note’s velocity alters the noise
amp envelope’s decay time . At 0% it’s turned off.
Noise Filter
Freq
Q
Vel > Freq
Base frequency of the noise filter.
Resonance of the noise filter. If you are using the vowel filter, this
controls the vowel.
Velocity to noise filter frequency, how much the note’s velocity alters
the noise filter frequency. At 0% it’s turned off.
Noise Filter Envelope
Drop
Decay
Rise
Amount the noise filter frequency drops.
Time taken for the noise filter frequency to drop to the base
frequency.
Time taken for the noise filter frequency to return to the initial
frequency. If set to “Off” then rise is turned off and the noise filter
frequency stays at the base frequency.
Model 2
Model 2 uses a filtered frequency modulated oscillator to create hi-hats.
Menus
FM/Ring
Osc Filter
Controls if the modulation oscillator frequency or ring
the main oscillator.
Oscillator filter type.
modulates
Oscillator
Vol
Freq
Vel
Rnd
Volume of oscillator.
Base frequency of oscillator.
Velocity to oscillator frequency, how much the note’s velocity alters
the oscillator frequency. At 0% it’s turned off.
Oscillator frequency randomization, how much the oscillator
randomly varies in frequency when it is triggered. At 0% it’s turned
off.
Oscillator Filter
Frequency
Q
Drop
Decay
Rise
Base frequency of the oscillator filter.
Resonance of the oscillator filter.
Amount the oscillator frequency drop. This amount can be negative,
then the oscillator frequency goes up.
Time taken for the oscillator filter frequency to drop (or rise) to the
base frequency.
Time taken for the oscillator filter frequency to return to the initial
frequency. If set to “Off” then rise is turned off and the oscillator filter
frequency stays at the base frequency.
Oscillator Amp Envelope
Decay
Vel > Decay
Oscillator amp envelope decay time.
Velocity to decay time, how much the note's velocity alters the
oscillator amp envelope’s decay time . At 0% it’s turned off.
Modulator
Mod
Freq
Vel
Spread
Drop
Decay
Amount of modulation.
Base frequency of modulation oscillator.
Velocity to modulation oscillator frequency, how much the note’s
velocity alters the modulation oscillator frequency. At 0% it’s turned
off.
How much the modulation frequency is spread out
Amount the modulation frequency drops. This amount can be
negative, then the frequency goes up.
Time taken for the modulation frequency to drop (or rise) to the base
frequency.
Model 3
Model 3 is Model 1 + Model 2
Classic / Punch
These models allow you to use the built-in hi-hat samples, please see the “built-in
sample” section for more details.
[Clap Module]
Punch has two clap modules, Clap1 and Clap2 . These can play synthesized claps or
the built-in clap samples. You can select the various different clap models / samples
by clicking on the “model” menu.
Easy Bypass
When ‘on’ the module is not changed by the easy page controls.
Model 1
The clap module works by passing filtered noise through a quickly re-triggered amp
decay envelope and then a much longer decaying amp envelope.
Menu
Filter Noise filter type.
Repeat Number of times the amp envelope is re-triggered.
Filter
Freq
Q
Rnd
Base frequency of the noise filter.
Resonance of the noise filter.
Noise filter frequency randomization, how much the noise filter
frequency randomly varies in frequency when you trigger it. At 0%
it’s turned off.
Repeats
Speed
Re-triggering speed of the amp envelope.
Amp Envelopes
Hold
Decay
Curve
Final amp envelope hold time.
Final amp envelope decay time.
Final amp envelope curve, from linear (0%) to exponential (100%).
Model 2
In Model 2, controls for stereo spread are added
Spread
Offset
Speed
Noise filter stereo spreading.
Noise filter frequency offset, i.e. the difference in frequency
between the left and right channels.
Repeat speed offset, i.e. the difference in repeat speeds between
the left and right channels.
Model 3
Humanization controls are added, these randomize some controls to give a more
‘human’ sound.
Humanization
Speed
Vol
Decay
Randomizes the re-trigger speed, 0% means no randomization.
Randomizes the volume, 0% means no randomization.
Randomized the final decay time, 0% means no randomization.
Classic / Punch
These models allow you to use the built-in clap samples, please see the “built-in
sample” section for more details.
[Tom Module]
Punch has three tom modules, Tom1, Tom2 and Tom3 . These can play synthesized
tom drums or the built-in tom drum samples. Also these modules can be set to play
the user models by clicking on the “User Model” button.
You can select the various different tom models / samples by clicking on the “model”
menu.
Attack
A very quick attack envelope, used to remove any initial sounds
Easy Bypass
When ‘on’ the module is not changed by the easy page controls.
Model 1
Model 1 uses a single oscillator to create tom sounds.
Menus
Curve
Frequency envelope curve shape, “low” & “high”, these create
different types of snare drum sounds.
Oscillator Frequency
Base
Drop
Decay
Curve
Vel > Freq
Base oscillator frequency.
Amount the oscillator frequency drops.
Time the oscillator frequency takes to drop to the base frequency.
Oscillator frequency envelope curve, from linear (0%) to exponential
(100%).
Velocity to click frequency, how much the note’s frequency alters the
click filter frequency. At 0% it’s turned off.
Oscillator Amp Envelope
Hold
Decay
Curve
Model 2
Oscillator amp envelope hold time.
Oscillator amp envelope decay time.
Oscillator amp envelope curve, from linear (0%) to exponential
(100%).
Mode 2 adds a second frequency modulator to create FM tom sounds, plus click /
noise oscillator is added.
Menus
Osc Filter
Oscillator filter type.
Modulator Frequency
Base
Drop
Decay
Base frequency of modulation oscillator.
Amount the modulation frequency drops. This amount can be
negative, so the frequency goes up.
Time taken for the modulation frequency to drop to the base
frequency.
Modulation Amp Envelope
Mod
Hold
Decay
Amount of modulation.
Modulation amp envelope hold time.
Modulation amp envelope decay time.
Oscillator Filter
Frequency
Q
Drop
Decay
Base frequency of the oscillator filter.
Resonance of the oscillator filter.
Amount the oscillator filter frequency drop. This amount can be
negative, so the frequency goes up.
Time taken for the oscillator filter frequency to drop (or rise) to the
base frequency.
Click
Volume
Mix
Frequency
Drop
Decay
Volume of click / noise.
Type & mix of click / noise, from sine wave to white noise to pink
noise.
Base frequency of click / noise.
Amount the click / noise frequency drops.
Time taken for the click / noise frequency to drop to the base
frequency, and also the time taken for the click / noise amp
envelope to decrease to zero.
Classic / Punch
These models allow you to use the built-in tom samples, please see the “built-in
sample” section for more details.
[User Module]
Punch has six user drum modules, User 1 to User 6 (User 1 to 3 are selected in the
Tom1 to Tom3 screen) . These can play a variety of general synth drum modules or
built-in drum samples. You can select the various different user models / samples by
clicking on the “model” menu.
Easy Bypass
When ‘on’ the module is not changed by the easy page controls.
Model 1 / 1-L
Model 1 is a filtered noise, Model 1-L is the same as Model 1 but with longer
envelopes times.
Menus
Filter
Noise Filter Type.
Noise Amp Envelope
Vol
Mix
Attack
Curve
Hold
Decay
Vel
Rnd
Volume of noise.
Mix of noise/ pink noise.
Noise amp envelope attack time.
Noise amp envelope attack curve, from linear (0%) to exponential
(100%).
Noise amp envelope hold time.
Noise amp envelope decay time.
Velocity to noise amp envelope decay time, how much the note’s
velocity alters the decay time. At 0% it has no effect.
Noise amp envelope decay time randomization, how much the noise
amp envelope varies in decay time when you trigger it. At 0% it has
no effect.
Noise Filter
Frequency
Q
Vel > Freq
Rnd > Freq
Drop
Decay
Rise
LFO Amount
LFO Speed
LFO Free
LFO Sync
Base frequency of the noise filter
Resonance of the noise filter. If you are using the vowel filter,
this
controls the vowel.
Velocity to noise filter frequency, how much the note’s velocity alters
the noise filter frequency. At 0% it’s turned off.
Noise filter frequency randomization, at 0% it’s turned off.
Amount the noise filter frequency drops.
Time taken for the noise filter frequency to drop to the base
frequency.
Time taken for the noise filter frequency to return to the initial
frequency. If set to “Off” then rise is turned off and the noise filter
frequency stays at the base frequency.
How much the filter LFO alters the noise filter frequency.
Speed of the filter LFO.
Turns on / off the filter LFO free-running mode.
Turns on / off the filter LFO tempo syncing.
Stereo Swap
Start
End
Time
Start stereo position.
End stereo position.
Time taken to go from the start to end stereo positions.
Model 2 / 2-L
Model 2 is an oscillator with frequency modulation and a filter. Model 2-L is the same
as Model 2 but with longer envelope times.
Menus
FM / Ring
Osc Wave
Osc Filter
Selects between frequency & ring modulation.
Oscillator wave type.
Oscillator filter type.
Oscillator
Vol
Freq
Vel
Oscillator volume.
Oscillator frequency.
Velocity to oscillator frequency, how much the note’s velocity alters
the oscillator frequency. At 0% it’s turned off.
Filter
Frequency
Q
Drop
Decay
Rise
Base frequency of the oscillator filter.
Resonance of the oscillator filter.
Amount the oscillator frequency drop. This amount can be negative,
so the frequency goes up.
Time taken for the oscillator filter frequency to drop to the base
frequency.
Time taken for the oscillator filter frequency to return to the initial
frequency. If set to “Off” then rise is turned off and the oscillator filter
frequency stays at the base frequency.
Oscillator Amp Envelope
Attack
Curve
Hold
Decay
Vel
Oscillator amp envelope attack time
Oscillator amp envelope attack curve, from linear (0%) to
exponential (100%)
Oscillator amp envelope hold time
Oscillator amp envelope decay time
Velocity to oscillator amp envelope decay time, how much thenote’s
velocity alters the decay time. At 0% it has no effect.
Modulator
Mod
Freq
Vel
Spread
Drop
Decay
Rise
Amount of modulation
Base frequency of modulation oscillator
Velocity to modulation oscillator frequency, how much the note’s
velocity alters the modulation oscillator frequency. At 0% it’s turned
off.
How much the modulation frequency is spread out
Amount the modulation frequency drops. This amount can be
negative, so the frequency goes up.
Time taken for the modulation frequency to drop (or rise) to the base
frequency.
Time taken for the modulation frequency to return to the base
frequency. If set to “Off” then rise is turned off and the modulation
frequency stays at the base frequency.
Stereo Swap
Start
End
Time
Start stereo position
End stereo position
Time taken to go from the start to end stereo positions.
Model 3 / 3-L
Mode 3 is the same as model 1, but with a amp modulation oscillator. Model 3-L is
the same as Model 3 but with longer envelopes times.
Menu
Mod Wave
Modulator oscillator wave.
Modulator
Mod
Freq
Vel
Spread
Drop
Decay
Rise
Amount of modulation.
Base frequency of modulation oscillator.
Velocity to modulation oscillator frequency, how much the note’s
velocity alters the modulation oscillator frequency. At 0% it’s turned
off.
How much the modulation frequency is spread out.
Amount the modulation frequency drops. This amount can be
negative, so the frequency goes up.
Time taken for the modulation frequency to drop (or rise) to the base
frequency.
Time taken for the modulation frequency to return to the initial
frequency. If set to “Off” then rise is turned off and the modulation
frequency stays at the base frequency.
Model 4
Model 4 uses filtered noise.
Menus
Noise Filter
Noise Filter type.
Noise
Vol
Decay
Vel
Volume of the noise.
Noise amp envelope decay time.
Velocity to decay time, how much the note's velocity alters the noise
amp envelope’s decay time . At 0% it’s turned off.
Noise Filter
Freq
Q
Vel > Freq
Base frequency of the noise filter.
Resonance of the noise filter. If you are using the vowel filter,
this
controls the vowel.
Velocity to noise filter frequency, how much the note’s velocity alters
the noise filter frequency. At 0% it’s turned off.
Noise Filter Envelope
Drop
Decay
Rise
Amount the noise filter frequency drops.
Time taken for the noise filter frequency to drop (or rise) to the base
frequency.
Time taken for the noise filter frequency to return to the initial
frequency. If set to “Off” then rise is turned off and the noise filter
frequency stays at the base frequency.
Model 5
Model 5 uses a frequency/ring modulated oscillator.
Menus
FM/Ring
Osc Wave
Osc Filter
Selects if the modulating oscillator frequency or ring modulates the
main oscillator.
Oscillator wave type.
Oscillator filter type.
Oscillator
Vol
Freq
Vel
Rnd
Volume of oscillator
Frequency of oscillator
Velocity to oscillator frequency, how much the note’s velocity alters
the oscillator frequency. At 0% it’s turned off.
Oscillator frequency randomization, how much the oscillator
randomly varies in frequency when you trigger it. At 0% it’s turned
off.
Oscillator Filter
Freq
Q
Drop
Decay
Rise
Base frequency of the oscillator filter.
Resonance of the oscillator filter.
Amount the oscillator frequency drop. This amount can be negative,
so the frequency goes up.
Time taken for the oscillator filter frequency to drop (or rise) to the
base frequency.
Time taken for the oscillator filter frequency to return to the initial
frequency. If set to “Off” then rise is turned off and the oscillator filter
frequency stays at the base frequency.
Oscillator Amp Envelope
Decay
Vel
Oscillator amp envelope decay time.
Velocity to decay time, how much the note's velocity alters the
oscillator amp envelope’s decay time. At 0% it’s turned off.
Modulator
Mod
Freq
Vel>Freq
Spread
Drop
Decay
Amount of modulation.
Base frequency of modulation oscillator.
Velocity to modulation oscillator frequency, how much the note’s
velocity alters the modulation oscillator frequency. At 0% it’s turned
off.
How much the modulation frequency is spread out
Amount the modulation frequency drops. This amount can be
negative, so the frequency goes up.
Time taken for the modulation frequency to drop (or rise) to the base
frequency.
Model 6
Model 6 is Model 4 + Model 5
Model 7
Model 7 use an oscillator with a frequency envelope plus a click / noise oscillator.
Menus
Curve
Osc Wave
Osc Filter
Frequency envelope curve shape, “low” & “high”. these create
different types of sounds.
Oscillator wave.
Oscillator filter type.
Oscillator Frequency
Start
End
Decay
Curve
Start Frequency for the oscillator.
End Frequency for the oscillator.
Oscillator frequency envelope decay time. Time taken for the
oscillator to go from the start to end frequency.
Oscillator frequency envelope curve, from linear (0%) to exponential
(100%).
Oscillator Amp Envelope
Attack
Hold
Decay
Curve
Oscillator amp envelope attack time.
Oscillator amp envelope hold time.
Oscillator amp envelope decay time.
Oscillator amp envelope curve, from linear (0%) to exponential
(100%).
Oscillator Filter
Freq
Q
Drop
Decay
Rise
Base frequency of the oscillator filter.
Resonance of the noise filter. If you are using the vowel filter, this
controls the vowel.
Amount the oscillator frequency drop. This amount can be negative,
so the frequency goes up.
Time taken for the oscillator filter frequency to drop (or rise) to the
base frequency.
Time taken for the oscillator filter frequency to return to the initial
frequency. If set to “Off” then rise is turned off and the oscillator filter
frequency stays at the base frequency.
Click / Noise
Volume
Mix
Frequency
Drop
Decay
Spread
Offset
Volume of click / noise
Type & mix of click / noise, from sine wave to white noise to pink
noise.
Base frequency of click / noise.
Amount the click / noise frequency drops.
Time taken for the click / noise frequency to drop to the base
frequency, and also the time taken for the click / noise amp
envelope to decrease to zero.
Noise filter stereo spreading.
Noise filter frequency offset, i.e. the difference in frequency between
the left and right channels.
Stereo Swap
Start
End
Time
Start stereo position.
End stereo position.
Time taken to go from the start to end stereo positions.
Model 8
Model 8 is Model 7 with an amp modulation oscillator.
Modulator
Mod
Freq
Vel>Freq
Spread
Drop
Decay
Rise
Amount of modulation.
Base frequency of modulation oscillator.
Velocity to modulation oscillator frequency, how much the note’s
velocity alters the modulation oscillator frequency. At 0% it’s turned
off.
How much the modulation frequency is spread out.
Amount the modulation frequency drops. This amount can be
negative, so the frequency goes up.
Time taken for the modulation frequency to drop (or rise) to the base
frequency.
Time taken for the modulation frequency to return to the initial
frequency. If set to “Off” then rise is turned off and the modulation
frequency stays at the base frequency.
Model 9
Model 9 is the same as Model 7, but uses a two frequency envelope oscillator.
Oscillator Frequency
Base
Drop
Decay
Curve
Base oscillator frequency.
Amount the oscillator frequency drops.
Time the oscillator frequency takes to drop to the base frequency,
and the time the oscillator amp envelope takes to decay to zero.
Oscillator frequency envelope curve, from linear (0%) to exponential
(100%).
Punch
Amount
Decay
Curve
Amount the punch frequency envelope adds to the oscillator
frequency.
Time the punch frequency envelope takes to drop to zero.
Punch frequency envelope curve, from linear (0%) to exponential
(100%).
Classic / Punch / Percussion
These models allow you to use the built-in user samples, please see the “built-in
sample” section for more details.
[Built-In Samples Module]
Punch has a wide variety of built-in samples, over 250. These are accessed in the
drum synth modules, by selecting the Classic, Punch or Percussion models.
Tuning
Semi
Fire
Vel
Rnd
Semi-tone tuning of the sample.
Fine tuning of the sample.
Velocity to tuning, how much the note’s velocity alters the tuning. At
0% it’s turned off.
Tuning randomization, how much the tuning randomly varies when
you trigger it. At 0% it’s turned off.
Filter
Type
Frequency
Q
Vel
LFO Amount
LFO Speed
LFO Mode
LFO Sync
Env
Attack
Hold
Decay
Filter type.
Base filter frequency.
Resonance of the noise filter. If you are using the vowel filter, this
controls the vowel.
Velocity to filter frequency, how much the note’s velocity alters the
filter frequency. At 0% it’s turned off.
How much the filter LFO alters the noise filter frequency.
Speed of the filter LFO.
Turns on / off the LFO free running mode.
Turns on / off LFO tempo syncing.
Filter frequency envelope amount.
Filter frequency envelope attack time.
Filter frequency envelope hold time.
Filter frequency envelope decay time.
Amp Envelope
Attack
Hold
Decay
Amp envelope attack time.
Amp envelope hold time.
Amp envelope decay time.
Samples
Sample Offset
Sample Re-triggers
Sample Re-trigger Time
Sample Reverse
Sample offset for the sample, this alters the start position.
Number of times the sample is re-triggered. If ‘Off’ then it is
not re-triggered.
Time after which the sample is re-triggered.
When turned ‘on’ the sample is reversed.
Easy Bypass
When ‘on’ the module is not changed by the easy page controls.
[Sampler Module]
Punch has eight sampler modules, each sampler module can load in two samples.
Sample A / B
Clicking on the “Edit Sample A / Edit Sample B” allows you to edit sample A or
sample B.
Turning ‘on’ the combine button, means that Sample A & Sample B will share the
same settings, ‘off’ means that they can have different settings.
Sample File Screen
The sample file screen allows you to load any samples (either or .wav or .aiff files).
Punch allows you to drag and drop samples, to do this select the external sample or
samples on your computer, and then drag them into the sample file screen. The
sample file screen has several sections that allow you to manage the samples.
Sample Name
Sample Menu
At the top of the screen is displayed the current sample’s
name.
Clicking here brings up the sample command menu
Previous Folder - Goes up a folder
Goto Base Folder - Goes to the base folder
Clear Sample A - unloads sample A
Clear Sample B - unloads sample B
Clear Sample A & B - unloads both samples
Import Samples - imports samples into the current sample
folder
Set External Folder - this allows you to set an external
folder where Punch can look for samples. Click on this and
then select the folder to use.
Show Punch Samples / Show External Samples - this
allows you to toggle between showing the samples in
Punch's sample folder, and the samples in the external
folder.
Open Explorer - opens an Explorer on PC or Finder on the
Mac, window showing the current folder. This allows you to
perform any file commands, such as deleting files etc.
PLEASE NOTE: the external sample folder path is set externally to Punch (in the
registry / cache file). If you use Punch on another machine you will need to set
external sample folder path to the appropriate one for this computer so that Punch
can access the external samples.
Clicking on the arrow / dot icon, moves you up a folder
Folders are indicated by a > before the folder name. Double
clicking on a folder name, opens it.
Double clicking on a sample name loads it. Right clicking on it
will preview it.
At the bottom, the current folder path is shown.
Up a Folder Icon
Folders
Samples
Path
Sample Controls
Play Controls
Play Mode
Punch can work in 5 different sample playback modes
Mix
Split
Spread
Sample A - sample A is played
Sample B - sample B is played
Alternative - sample A and sample B are played alternatively
when you trigger the sample, so A then B then A and so on are
played.
Split - sample playback is velocity split. Below the split point
sample A is played, above sample B is played.
Mix - sample A and B are played at the same time, the mix knob
controls the mixing between the samples.
Controls the mixing between sample A & B, from sample A only to
sample A & B, to sample only.
Sample velocity split point. Below the split point sample A is played,
above sample B is played.
Spreads the samples out in the stereo field. At the maximum sample
A is played in the left channel only and, sample B is played in the
right channel only.
Samples
Sample Offset
Sample Re-triggers
Sample Re-trigger Time
Sample Reverse
Sample Looping
Sample offset for the sample, this alters the start position.
Number of times the sample is re-triggered. If ‘Off’ then it
is not re-triggered.
Time after which the sample is re-triggered.
When ‘on’ the sample is reversed.
Turns on / off sample looping. You can set the sample
loop points using the “Loop Start” and the “Loop End,
buttons. Moving the mouse over these buttons will show
the current loop points in the main readout. The “<” and
“>” buttons move the loop points to the previous and next
zero crossing points respectively. The << and >> buttons
moves the loop points by -/+ 5% of the sample’s length.
Tuning
Semi
Fire
Vel
Rnd
Env
Attack
Hold
Decay
Semi-tone tuning of the sample.
Fine tuning of the sample.
Velocity to tuning, how much the note’s velocity alters the tuning. At
0% it’s turned off.
Tuning randomization, how much the tuning randomly varies when
you trigger it. At 0% it’s turned off.
Pitch envelope amount.
Pitch envelope attack time.
Pitch envelope hold time.
Pitch envelope decay time.
Filter
Type
Frequency
Q
Vel
LFO Amount
LFO Speed
LFO Mode
LFO Sync
Env
Attack
Hold
Decay
Filter type.
Base filter frequency.
Resonance of the noise filter. If you are using the vowel filter,
this
controls the vowel.
Velocity to filter frequency, how much the note’s velocity alters the
filter frequency. At 0% it’s turned off.
How much the filter LFO alters the noise filter frequency.
Speed of the filter LFO.
Turns on / off filter LFO free running.
Turns on / off filter LFO tempo syncing.
Filter frequency envelope amount.
Filter frequency envelope attack time.
Filter frequency envelope hold time.
Filter frequency envelope decay time.
Amp Envelope
Attack
Hold
Decay
Amp envelope attack time.
Amp envelope hold time.
Amp envelope decay time.
Stereo Swap
Start
End
Time
Start stereo position.
End stereo position.
Time taken to go from the start to end stereo positions.
Easy Bypass
When ‘on’ the sampler module is not changed by the easy page controls.
[Sequencer]
Punch has eight sequencer patterns, Groove 1 to 4 and Break 1 to 4.
Selectors
The Groove 1 to 4 and Break 1 to 4 buttons allow you set which pattern is shown.
Pattern Screen
Each pattern is composed of 4 tracks, each track having up-to 16 steps. Each track
triggers one of the drum modules.
The pattern screen can show either a single track or all four tracks at once. You can
switch between the two views by using the “track view” button.
Single track view.
Step
On
Vel
Pan
Tune
Flam
Env Speed
Off
Free
Pattern step, the currently played step is shown in inverse.
A circle indicates that the drum module for this track is triggered at
this step.
Velocity of this step.
Panning position of this step.
Tuning for this step.
A circle indicates a flam step. Flam steps are ones where the drum
module is re-triggered during the step, this flam timing controlled by
the “flam timing “ control.
Envelope speed for this step.
This sets the timing offset for this step. It effectively delays the start
of the drum trigger. The range is from 0 to 100% of the step length.
Free modulation value. This value is the same for all four tracks.
Pressing Ctrl + left click on any entry will set that entry to it’s default value.
Four Track View
This shows all four tracks at once, a circle indicates that the drum modules for this
track is triggered at this step.
For both views, right clicking brings up a menu which allows you to copy, paste &
clear tracks & patterns. Also you can randomize and move single tracks, load & save
patterns and bypass individual tracks.
Controls
Selects the current track. Clicking on the T1 to T4 labels
turns track bypassing “on” or “off”.
Track 1 to 4 Menu
This menu allows you to set which drum module this track
triggers.
Track View
Toggles between showing the one track or four-track view
Latch
Turns on pattern latching, so that when you trigger a pattern, it plays
even if you release the pressed note.
Swing
This controls the swing factor of the pattern. It is the difference in
timing between consecutive notes and it gives a more human/swing
feel to the pattern.
Flam
This controls the flam time.
Humanization This controls timing humanization. This means that each step is
slightly different in length, 0% means that each step is the same.
Start
Loop start step
End
Number of steps in the pattern. This can be from 1 to 16 steps.
Speed
Speed of the pattern in respect to the host tempo, from ¼ of the
tempo up to 4 times the tempo.
Lock
This locks the current pattern, so when you change presets the
pattern stays the same. There are 3 modes:
Track 1 to 4 Button
Sync
Off - locking is turned off
On - locking is turned on, the pattern stays the same when you
change presets, but it can't be altered and the current preset is
not permanently changed.
Set - the current preset pattern is permanently changed to the
locked sequence and locking is turned off.
Pattern Syncing can be turned on / off in the back screen
Pattern File Screen
The pattern file screen allows you to load & save patterns.
Home Icon
Folders
Patterns
Menu
Export to Midi
The up / dot icon returns you to the base pattern folder.
Folders have a > before them, double clicking on a folder opens it
up.
Clicking on a pattern selects it, double clicking loads it.
Shows the pattern file menu.
Create Folder - creates a blank folder
Load Pattern - loads in a pattern file.
Save Pattern - saves the current pattern in a file.
Copy Pattern - copies the currently selected pattern
Paste Pattern - pastes the last copied pattern
Delete Pattern - deletes the currently selected pattern.
Undo - undoes the last pattern operation.
Exports the current pattern to a midi file. This midi file does not
contain the drum track pitch or envelope speed.
[Easy Controls]
The easy page allows you to easily change the main parameters in the all drum
modules except those where “easy bypass” is turned on.
Synth Pitch
Controls the tuning of the drum synth modules. Selecting “Semi” or “Oct” allows you
to select between changing the semi-tone tuning or the octave tuning.
Sample Pitch
Controls the tuning of the drum sampler modules. Selecting “Semi” or “Oct” allows
you to select between changing the semi-tone tuning or the octave tuning.
Synth Decay
Controls the hold / decay time for the volume envelopes in the drum synth modules.
Sample Decay
Controls the hold / decay time for the volume envelopes in the drum sampler
modules.
Filter Freq / Q
Controls the filter frequency and resonance.
Pitch Env
Controls the speed of the pitch envelopes.
LFO Amount / Speed
Controls the amount & speed of all the LFOs
FX1 to FX4 Bypass
Allows you to bypass FX 1 to 4
FX1 to FX4 Mix
Controls the FX wet / dry mixing, C means centered i.e. 100% wet and 100% dry, for
FX 1 to 4.
[Mixer]
The mixer screen allows you set the volume and panning position of all the modules.
Also you can set the mixing and pan position of the effects, and also turn effect
bypass on or off.
Hovering the mouse over the drum’s label will display its output channel, and clicking
here allows you to set the drum output channel.
[Modulation Controls]
Envelope
The envelope section allows you to use Punch's two free envelopes to alter Punch’s
parameters. You select the envelope by clicking on the buttons labelled "ENV 1" or
"ENV 2".
Attack
Hold
Decay
Destination
Amount
Source
Mod Amount
Envelope attack time; determines how quickly the envelope reaches
maximum value after it is triggered
Determines how long the envelope stays at its maximum level.
Controls how quickly the envelope decays to zero after the hold
time.
Determines which parameter is modulated by the envelope.
Sets the amount the envelope modulates the envelope destination.
Which modulation source alters the envelope amount.
Amount this modulation source alters the envelope amount.
LFO
The LFO section allows you to use Punch's two LFOs to alter Punch’s parameters.
You select the LFO by clicking on the buttons labelled "LFO 1" or "LFO 2".
Wave
Sync
Mode
LFO Waveform, there are 6 types - Sine, Triangle, Saw Up / Down,
Square and Sample and Hold
This controls if the LFO’s speed is synced to your host's tempo.
This controls how the LFO reacts to new notes.
Speed
Human
Sym
Destination
Poly - the LFO is polyphonic and is resets on new notes
Free - the LFO is monophonic and is not reset on new notes
Mono - the LFO is monophonic and is reset on new notes.
This controls how fast or slow the LFO is running. If the control
“Sync” is set on then the speed is synced to the host’s tempo.
This controls how much the speed of the LFO randomly changes
over time.
This controls the LFO symmetry, basically how quickly the LFO
reaches its middle point. It’s can be to alter the pulse width of the
square LFO.
Which parameter is modulated by the LFO
Amount
Source
Mod Amount
Sets the amount the LFO modulates the LFO destination.
Which modulation source alters the envelope amount.
Amount this modulation source alters the envelope amount.
Modulation
The modulator section allows you to use one of Punch's 8 modulator slots to
attached a modulation source to Punch’s parameters. You select the modulator slot
by clicking on the buttons labelled "MOD 1" to "MOD 8".
Source
Destination
Amount
Mod Source
Mod Amount
Modulation source.
Which parameter is modulated by this source
Sets the overall amount the modulator source modulates the
destination parameter.
Which modulation source alters the modulation amount.
Amount this modulation source alters the modulation amount.
[FX Controls]
Punch has four effect units. In the FX section you can set the effect type and it’s
parameters.
Selector
Here you can select the effect unit, FX 1 to 4.
Type
Here you can select the effect type, there are 27 of them.
Path
Here you can select how the effects are joined together.
Parallel
Serial
[1,2,3] > 4
[1,2] > 3 > 4
1>2+3>4
Here the effects are arranged in parallel. Each effect receives the
same input signal, but processes it independently. The outputs of
the four effects are added together and this passed to the output.
Here the effects are in serial, so the output of FX1 goes into FX2,
the output of FX2 goes into FX3, and the output of FX3 goes into
FX4
Here the output of FX1, FX2 & FX3 are added together and passed
into FX4
Here the output of FX1 & FX2 are added together and passed into
FX3. The output of FX3 then goes into FX 4
Here the output of FX1 goes into FX2, the output of FX3 goes into
FX4, then the output of FX2 and FX4 are added together.
In the multi-channel version of Punch, the final outputs of the effects go to different
Stereo channels.
FX1 goes to stereo channel 2, FX2 goes to stereo channel 3, FX3 goes to stereo
channel 4 and FX 4 goes to stereo channel 5.
This only applies to effects whose output doesn’t go into another effect, for instance
in “Serial” mode, only FX4’s output is final, and this goes to stereo channel 5.
Mix
This controls how much the effects output is mixed with the original signal. Fully left
only the original signal is output and the more you move the knob to the right, the
more the effect will be added.
Pan
Controls the panning of the selected effect.
Bypass
This bypasses the current effect, so only the dry signal is heard
Effect Types
Mono Delay
A mono tempo based delay, great for making rhythmic grooves. To make the sound
a bit spacey, modulation of the length is possible which makes the delay swirl.
Length
Feedback
LP Filter
HP Filter
Widen
Mod Amount
Mod Speed
Sync
Length of the delay, set in tempo-based settings when ‘sync’ is on,
or time based when it’s off
Feedback of the delay.
Low pass filter frequency.
High pass filter frequency.
Stereo widening amount.
Delay modulation amount.
Delay modulation speed.
Determines if the delay length is tempo-based or time based.
Stereo Delay
Two tempo based delays. One delay for each of the audio channels (left and Right).
This is useful for making deep pad sounds if you use 1/8* (Left) and 1/4 (right)
settings. The Feed Equal option makes it possible to have equal feedback fade time,
even if the left and right delay have other length settings.
Left Delay
Right Delay
Feedback
CrossFeed
Feed Equal
LP Filter
HP Filter
Mod Amount
Sync
Length of the left delay, set in tempo-based settings when ‘sync’ is
on, or time based when it’s off
Length of the right delay, set in tempo-based settings when ‘sync’ is
on, or time based when it’s off
Feedback of the delay.
Feedback between the left / right delay.
When equal is “on”, it makes that both L and R feedback fade
equally, regardless which length you use.
Low pass filter frequency.
High pass filter frequency.
Delay modulation amount.
Determines if the delay length is tempo-based or time based.
Comb
The Comb Filter effect uses two joined comb filters where the output of one is fed
back into the other one. Comb filters that are very short in delay and has a frequency,
which in turn determines the length of this delay.
Comb 1 Freq
Comb Filter 1 Frequency.
Comb 1 Feed Comb Filter 1 Feedback amount.
Comb 1 Mod
Comb Filter 1 Feedback modulation amount.
Comb 2 Freq
Comb Filter 2 Frequency.
Comb 2 Feed Comb Filter 2 Feedback amount.
Comb 2 Mod
Comb Filter 2 Feedback modulation amount.
Mod 1&2 Speed Feedback tempo based modulation speed.
Reverb
This effect reproduces the sound of acoustics in rooms using different sizes and
reflections. After the reverb, the sound is passed through a noise-gate which
removes
sound below a volume threshold.
Pre-Delay
Size
Damp
LP Filter
HP Filter
Spread
Gate
Gate Hold
Gate Decay
Pre-delay amount of the reverbed signal.
Reverb room size.
Reverb damping amount.
Low pass filter frequency.
High pass filter frequency.
Stereo spreading amount.
Noise-Gate threshold volume
Hold time for noise-gate.
Decay time for noise-gate.
HQ Reverb
This is a higher quality version of the reverb.
Pre-Delay
Size
Damp
LP Filter
HP Filter
Spread
Gate
Gate Hold
Gate Decay
Pre-delay amount of the reverbed signal.
Reverb room size.
Reverb damping amount.
Low pass filter frequency.
High pass filter frequency.
Stereo spreading amount.
Noise-Gate threshold volume
Hold time for noise-gate.
Decay time for noise-gate.
Chorus
The chorus is a modulated delay signal which is useful for thickening up the sound
and making it sound ‘fatter’.
Length
Width
Speed
Spread
LP Filter
Widen
Length of the chorus.
Maximum change or modulation to chorus length.
Speed that the chorus length changes.
Difference in speed between the left and right hand channels.
Low pass filter frequency.
Stereo widening amount.
Chorus/Delay
This is a combined chorus / delay. Specially developed in case you want to use
another effect in combination with Chorus without losing a delay function.
Length
Width
Speed
Spread
Delay
Feedback
Delay Vol
Maximum length of the chorus in milliseconds.
The amount how much the chorus length will change.
The rate the chorus length changes.
The amount the chorus length differs between left and right
channels
Length of the chorus delay. Delay is after the chorus.
Amount the chorus delay feeds back into the sound.
Volume of the delay.
Flanger
The flanger effect is a very short delay which changes overtime, to make a
whooshing type sound.
Length
Width
Speed
Feedback
Pan Mod
LP Filter
HP Filter
Length of the flanger.
Maximum change to flanger length.
Speed the flanger length changes, this is midi tempo based.
Feedback of the flanger.
Flanger panning amount.
Low pass filter frequency.
High pass filter frequency.
Phaser
A phaser is a combination of filters that can create a phasing effect.
Stages
Pitch
Feedback
Width
Speed
Spread
Pan Mode
Number of stages in the phaser.
Pitch of the phaser.
Feedback of the phaser.
Maximum change to phaser pitch.
Speed the phaser length changes, this is midi tempo based.
Amount the phaser stages are spread from the central pitch.
Speed the phaser pans from the left / right hand channels.
Wah/Delay
This effect produces a wah-wah type effect by running the sound through a lowpassfilter who’s frequency changes over time. There is a built in delay which adds delays
to the sound.
Low Range
High Range
Speed
Resonance
Delay
Feedback
Delay Vol
Lowest Frequency of the filter. Here you can adjust how deep the LP
filter ranges. The more you move the dial to the left, the lower the
filter goes.
Highest Frequency of the filter. Here you can adjust how high the LP
filter goes. The more you move the dial to the right, the higher the
filter goes.
The rate the filter frequency changes over time. Tempo based.
Controls the resonance of the used low-pass filter.
Length of the wahwah delay. This delay is after the WahWah FX.
Amount the wahwah delay feeds back into the sound.
Volume of the delay.
Distortion
This distorts the audio by saturating, limiting, rectifying and bandpass filtering the
input.
Hard limiter threshold.
Amount of rectification, from -100% (no change), 0% half to 100% full.
Distort
Amount of Distortion.
Tone
Frequency of the band pass filter.
Emphasis
Bandwidth of the band pass filter.
Post-Boost
Amount the filter signal is boosted.
M-Wheel>Tone Amount the band pass filter frequency is changed by the modulation
wheel.
Limit
Rect
Low-Fi
This effect reduces the digital audio quality of the sound, which results in old style
computer sound effects.
Bits
Sample Rate
LP Filter
M-Wheel>Filter
Bit level of the signal.
Sample rate of the signal.
Frequency of the low pass filter.
Amount the low pass filter frequency is changed by the modulation
wheel.
Amp Sim
Several types of amp types are simulated. Great for creating edgy sounds.
Type of amp simulation. Settings are:- None, 4x10" guitar speakers,
4x12" guitar speakers, Bass speaker, Combo speaker and Radio
speaker.
The none speaker setting is useful if you want to only use the distortion in the FX
effect.
Distort
Amount of distortion added to the sound. Also works if the “none”
speaker setting is selected.
Bass
Bass EQ Volume. Adds or removes low end from the speaker
simulator.
Treble
Treble EQ Volume. Adds or removes high frequencies from the
speaker simulator.
Volume
Volume boost. Adjusts the volume of the processed sound.
Type
When using the amp simulator , it is recommended that you a fully wet signal.
WaveShaper
The waveshaper effect shapes the in-going sound to a kind of distorted version of it.
It is then passed through a low pass filter which its frequency is changed over time by
a tempo based LFO.
Top Amt
Bottom Amt
Rect
Filter
LFO Amount
LFO Speed
The amount positive input is waveshaped.
The amount negative input is waveshaped.
The amount the sound is rectified, at -100% the sound goes through
as normal, at 0% no negative output is heard and at 100% any
negative output is made positive.
Low pass filter frequency. This filter does not filter the high
frequencies.
The amount the low pass filter frequency can change.
The rate the low pass filter frequency can change.
Stereo Widener
This effect widens the stereo sound.
Widen
Width
Speed
LP Filter
HP Filter
Stereo widening amount.
Maximum change to the stereo widening amount.
Speed at which the stereo widening amount changes.
Low pass filter frequency.
High pass filter frequency.
AutoPan
Autopan pans the sound between the left and right speakers.
Amount
Speed
Amount the autopan moves the sound in the stereo field.
The rate at which the autopan moves the sound. This is Tempo
based so for example 1/1 does mean that the pan moves from left to
right within 1bar.
When using the auto-pan, it is recommended that you a fully wet signal.
Gator
The gator uses a 16 step sequencer to alter the volume of the sound to give a
‘trancegate’ type effect. Basically it is a sequencer controlled audio gate.
Speed
Smooth
Mode
Sync
Left
Right
The speed of the gator. Speed is time based from 16/1 up to 1/32T
speed. If for example the speed is set to 1/1 each step is 1/16 note.
If for example the speed is set to 2/1 then each step is 1/8 of a note.
How much the volume changes are smoothed out. This helps to
avoid clicks.
Whether the gator affects the left & right channels, the left channel
only or the right channel only or both.
Turns on / off the host syncing. For example if you do not hear the
gator FX in standalone host, then switch to “off”. Inside a host
sequencer program the best setting is “auto” or “sync”. The default
setting in most presets is “auto”.
So if you have problems with these settings, try “off”.
Left channel sequencer. Clicking here turns on / off that step in the
gator. When a step is on (light colour) the gate is open and you can
hear the audio. When a step is off (dark colour) the audio is muted.
Right channel sequencer. Clicking here turns on / off that step in the
gator. When a step is on (light colour) the gate is open and you can
hear the audio. When a step is off (dark colour) the audio is muted.
When using the Gator, it is recommended that you a fully wet signal.
Ring Mod
The ring modulates (multiplies) different signals together depending on the type.
Type
Sine, Saw, Sqr & Tri, multiplies the input with the set oscillator.
L + R, multiplies the left & right channels together.
Frequency
Sets the oscillator frequency.
Q
Sets the ring modulation amount.
FX Filter
This is a analogue modelled stereo Multimode Filter, which has all the properties of
Punch’s main filter.
Type
Distort
Frequency
Q
LFO Amount
LFO Speed
Sets the type of filter, offering 6dB LowPass and HighPass, 12dB,
18dB and 24dB LowPass, HighPass, 12dB and 24dB BandPass,
12dB and 24dB Notch and Comb Filter modes.
Sets the pre-filter distortion of the filter.
Sets the Cutoff frequency of the filter.
Sets the Resonance level of the filter.
The filter LFO alters the filter frequency over time. This controls the
amount this LFO changes the filter frequency.
The speed of the filter LFO.
Equalizer
The equalizer uses 5 bands at 60Hz, 200Hz, 600Hz, 2000Hz and 8000Hz
frequencies. The control knob for each band controls that bands volume, from -20db
to +20db
When using the equalizer, it is recommended that you a fully wet signal.
Compressor
The compressor is an audio effect that changes the dynamic range and response of
a signal.
Threshold
Ratio
Attack
Release
Volume
This sets the threshold on which the compressor starts to work.
This sets the amount of dB reduction. So with a ratio setting of 1:2,
and the signal exceeds the threshold by 4dB then it is reduced by
4db/2 = 2db”.
This sets how fast the compressor kicks in.
This sets how long the compressor takes to react to a reduction in
volume.
This allows you to correct the volume after the signal has been
compressed.
When using the compressor, it is recommended that you a fully wet signal.
Noise Gate
The noise-gate is an audio effect that removes any sound (‘gates’) that is below a
threshold volume.
Threshold
Attack
Hold
Decay
This sets the threshold on which the noise-gate starts to work.
This sets how fast the noise-gate returns to normal after the input
volume is over the threshold.
This sets how long the input volume has to below the threshold
volume before the noise-gate is triggered.
This sets how long the noise-gate takes to reduce the volume to
zero after the noise-gate is triggered.
When using the noise-gate, it is recommended that you a fully wet signal.
Ensemble
This effect uses 6 choruses, each having its own setting, to give the effect of several
copies of the sound playing at once.
Length
Width
Speed
Feedback
Ensemble
Spread
Length of the ensemble effect.
Maximum change to ensemble length.
Speed the ensemble length changes.
Feedback of the choruses.
Amount the choruses differ from each other.
Amount the choruses are panned to the left or right.
Cabinet
Several types of cabinet types are simulated. Great for creating edgy sounds.
Type
Distort
Bass
Treble
Volume
Type of cabinet simulation. Settings are:- None, Fender,Marshall &
Off Axis. The none speaker setting is useful if you want to only use
the distortion in the FX effect.
Amount of distortion added to the sound. Also works if the none
cabinet setting is selected.
Bass EQ Volume. Adds or removes low end from the cabinet
simulator.
Treble EQ Volume. Adds or removes high frequencies from the
cabinet simulator.
Volume boost. Adjusts the volume of the processed sound.
When using the cab simulator , it is recommended that you a fully wet signal.
MultiDistort
Allows you to use several different types of distortion effects
Type
Different type of distortion allowed, they are
None, Atan, Cos, Cross, Foldover, Fuzz, Limiter, Overdrive, Power, Rectifier,
Saturator, Square.
“None” means that no distortion is used
Pre-Boost
How much the signal is boosted before going into the distortion
Amount 1
Control how much the signal is distorted
Amount 2
Additional distortion parameter for Fuzz
Normalize
How much the output volume is normalized to the input volume, at
100% the output volume should be the same as the input volume.
Low Filter
Post distortion low-pass filter
High Filter
Post distortion high-pass filter
Post-Boost
How much the output of the distortion is boosted.
AutoWah
Autowah uses a low/bandpass filter to filter the signal using the volume of signal to
alter the frequency of the filter.
Type
Low Frequency
High Frequency
Amount
Q
Smooth
Type of auto-wah filter, lowpass or bandpass
Lowest frequency of auto-wah filter
Highest frequency of auto-wah filter
How much the volume of the signal alters the filter's frequency
Resonance / Bandwidth of autowah filter
How much signal volume is smoothed.
Effect modulation matrix
Below the FX section you can find two modulation matrix slots. These allow you to
modulate the parameters of the current effect. Using these slots you can connect
different midi or Punch synth parts to the FX parameters. There are 60 modulation
sources and you can use any FX parameter as a destination.
Source
Amount
Destination
Here you can select the source that will modulate the Fx parameter.
Here you can set how much the modulation source will alter the Fx
parameter.
Here you can select the modulation destination, all the FX
parameters are shown here, though some work better using
modulation than others.
[Manager Screen]
The manager screen allows you to see and alter, all the patterns, presets & banks at
the same time.
You enter the manager screen by clicking on the “Manager” button. To return to the
main screen, click on the “Close” button.
Pattern Manager
Clicking on the “Pattern” button show the Pattern Manager, this shows all the
patterns. The pattern manager shows all the patterns. The left hand side shows the
entire pattern folder. Clicking on a folder shows you the patterns in that folder.
Selecting the top folder, “Pattern”, shows you the patterns in the base folder.
The right hand side shows the patterns in the selected folder. Clicking on a pattern
selects it, double clicking on it loads it.
Commands
Pattern
Folder
Load
Save
Copy
Paste
Delete
Preview
Undo
Select the pattern to use, Groove 1 to 4 & Break 1 to 4.
Creates a new pattern folder.
Loads a pattern.
Saves the current pattern.
Copy the currently selected pattern.
Pastes the last copied pattern.
Deletes the last selected pattern.
Previews the current pattern.
Undoes any changes to the current pattern.
Preset Manager
The Preset manager screen shows all the presets in the current bank. The current
preset has a dot next to it, and any selected presets are shown in inverse.
Clicking selects a presets, shift + clicking allows you select a range of presets, and
ctrl + clicking allows you select unconnected presets.
Right clicking brings up the preset command menu.
Commands
Load
Save
Copy
Paste
Swap
Move
Insert
Original
Edited
Default
Delete
Rename
Find
Undo
Loads in a saved preset / presets
Saves the current preset/presets as a fxp file.
Copies current preset
Pastes last copied preset
Swaps the current preset with another one
Moves the current preset to another position
Inserts a blank preset at the current position, moving the rest of the
presets forward one.
Returns the current preset to it's original settings
Returns the current preset to it's last edited settings
Sets the current preset to the default settings
Deletes the current preset, move the rest of presets back one
Renames the current preset
Read find section below
Undo last preset command
Drum Preset Manager
Clicking on the “Drum Preset” button shows the Drum Preset Manager, this shows
the drum presets. Clicking on a drum name in the left hand side selects that drum, so
clicking on SN1 selects snare drum 1.
Clicking on a drum preset in the right hand loads drum preset, the currently selected
one is shown in inverse.
Right clicking on a drum preset will preview that drum preset.
Commands
Save
Copy
Paste
Clear
Rename
Delete
Find
All
Preview
Undo
Saves the current drum preset.
Copies the current drum preset.
Pastes the last copied drum preset.
Set the current selected drum to its default setting.
Renames the current drum preset.
Deletes the current drum preset.
Searches through the drum presets names for any that match
the entered text.
Clears the find settings, and shows all the drum presets.
Previews the current drum.
Undo the latest command.
Bank Manager
The Bank Manager screen shows the current banks. The current bank is shown in
inverse.
Load
Save
Copy
Loads in a bank,
Saves current bank
Makes a copy of current bank
New
Delete
Rename
Creates a new bank
Deletes the current bank (actually renames it as a ~fxb file so it's not
shown)
Renames current bank
Find Mode
Clicking on the “Find” button brings up the find dialog. Here you can enter a searchstring. All presets which contain this string will be shown in the bank manager screen.
They are shown in the form as “[bank name] - [preset name]”.
Clicking on an entry will load that bank and its presets.
The current “Find” string is shown at the bottom of the Find display, clicking here will
allow you to search for a different string. Clicking on the “Close” label here, returns
you to the normal bank display.
[Back Panel]
Clicking on the Punch logo shows the back screen. Here you can see the credits,
version & serial info plus general control information. Also you can do a number of
other things here.
Host sync
This turns on / off the pattern syncing to your host sequencer. Depending on your
host and also what you are doing you may want this to be either ‘on’ or ‘off’. Default
is ‘on’
Computer Keyboard on/off
You can turn ‘on’ or ‘off’ computer keyboard control.
Midi Map
Shows the current midi map setup, this is which midi notes triggers which drum
modules or patterns. There are two midi setups GM and Standard, please see the
midi mapping section for details of these.
[MIDI Mapping]
GM Mapping
Midi notes 0 to 31 plays BD1 to Break 4 in that order.
Note
0
1
2
3
4
5
6
7
8
9
10
11
12
13
14
15
16
17
18
19
20
21
22
23
24
25
26
27
28
29
30
31
Drum
BD 1
BD 2
SN 1
SN 2
CH 1
OH 1
CH 2
OH 2
CLAP 1
CLAP 2
TOM / USER 1
TOM / USER 2
TOM / USER 3
USER 4
USER 5
USER 6
SAMPLE 1
SAMPLE 2
SAMPLE 3
SAMPLE 4
SAMPLE 5
SAMPLE 6
SAMPLE 7
SAMPLE 8
GROOVE 1
GROOVE 2
GROOVE 3
GROOVE 4
BREAK 1
BREAK 2
BREAK 3
BREAK 4
Midi notes 36 to 67, is the midi GM drum mapping.
Note
36
37
38
39
40
41
42
43
44
45
46
47
48
49
50
51
52
53
54
55
56
57
58
59
60
61
62
63
64
65
66
67
Drum
BD 1
USER 4
SN 1
CLAP 1
SN 2
BD 2
CH 1
USER 5
USER 6
TOM 3
OH 1
TOM 2
TOM 1
SAMPLE 1
SAMPLE 2
SAMPLE 3
SAMPLE 4
SAMPLE 5
SAMPLE 6
SAMPLE 7
SAMPLE 8
CH 2
OH 2
CLAP 2
GROOVE 1
GROOVE 2
GROOVE 3
GROOVE 4
BREAK 1
BREAK 2
BREAK 3
BREAK 4
Midi notes 72 - 107 are the same as midi notes 0 - 31, and so plays BD1 to Break 4
in order, so Midi Note 72 is BD1 and so on.
All other midi notes trigger nothing.
Standard
This maps the midi input linearly, so.
Midi notes 0 - 31, 36 - 67 & 72 - 103 plays BD1 to Break 4 in order. All other midi
notes trigger nothing.
Note
Drum
0, 36, 72
1, 37, 73
2 ,38, 74
3 ,39, 75
4, 40, 76
5, 41, 77
6, 42, 78
7, 43, 79
8, 44, 80
9, 45, 81
10, 46, 82
11, 47, 83
12, 48, 84
13, 49, 85
14, 50, 86
15, 51, 87
16, 52, 88
17, 53, 89
18, 54, 90
19, 55, 91
20, 56, 92
21, 57, 93
22, 58, 94
23, 59, 95
24, 60, 96
25, 61, 97
26, 62, 98
27, 63, 99
28, 64, 100
29, 65, 101
30, 66, 102
31, 67, 103
BD 1
BD 2
SN 1
SN 2
CH 1
OH 1
CH 2
OH 2
CLAP 1
CLAP 2
TOM / USER 1
TOM / USER 2
TOM / USER 3
USER 4
USER 5
USER 6
SAMPLE 1
SAMPLE 2
SAMPLE 3
SAMPLE 4
SAMPLE 5
SAMPLE 6
SAMPLE 7
SAMPLE 8
GROOVE 1
GROOVE 2
GROOVE 3
GROOVE 4
BREAK 1
BREAK 2
BREAK 3
BREAK 4
[Building Punch Presets]
Punch does have total presets (sounds with included grooves/sequences) and
separate presets for the drum modules/pads. It is important to distinguish between
both.
General rules:
- Keep master volume -5dB
- About complete drum kits: always use a sample at the sample pads. E.g a cymbal
or percussion instrument. Pick one of the presets, just to make all keys have a sound
assigned, also if you do not use them.
- Use kit if it is only a kit without grooves/breaks active.
- Add bpm value to preset name. This makes that people get the initial idea of the
groove.
Presets inside pads:
Each pad can have its own presets and I use these rules below (preset numbering) in
saving presets.
- Keep volume inside the drum presets also max -5dB. Only if vocal filter is used, you
may set it higher.
- Keep panning at middle for drum presets. (if users pick these presets, they always
can change the panning according their own vision)
- Keep velocity at 90% for drum presets.
- Drum presets do not store the output routing or choke. But distortion settings they
store.
The underscored ones (numbers below 01 02 03) are most important for factory built
in presets. But during building stage you also can chose to have different number for
trade sets. Advice, to use 10 for trade sets or additional sets .
BD pad presets (number settings):
01 a Nice one (example name)
info: presets using the synthesis models
02 Sub 8 (example name)
info: presets using the synthesis models, main focus sub BD.
03 Classic 1
info: presets using the build in classic samples and punch samples.
99 Model1 high
info: default presets
Clap pad presets (number settings):
01 Big alive (example name)
info: presets using the synthesis models
02 Punch 07 (example name)
info: presets using build in samples and edited with features.
03 Classic 1
info: presets using the build in classic samples and clean punch samples.
99 Model1 high
info: default presets
HH pad presets (number settings):
01 My CL (example name)
info: presets using the synthesis models
02 Classic 1 (example name)
info: presets using build in classic samples
03 12inch 1
info: presets using the build in punch samples
99 Model1 HH
info: default presets
SN pad presets (number settings):
01 Elec long high (example name)
info: presets using the synthesis models
02 P31 Combz (example name)
info: presets using build in samples and edited with features.
03 Classic 1
info: presets using the build in classic samples and clean punch samples.
99 Model1 high
info: default presets
Tom pad presets (number settings):
01 Model1 high (example name)
info: presets using the synthesis models
02 Vowel 10inch (example name)
info: presets using build in samples and edited with features.
03 Classic
info: presets using the build in classic samples and clean punch sample
99 Model1 high
info: default presets
User pad presets (number settings):
01 Clack (example name)
info: synthesized sounds, which are more to reproduce acoustic percussion and
drum sounds
02 Flatter (example name)
info: synthesized sound, fatasy...fx....real puch stuff
03 Comb Ago
info: build in sample stuff used. synthesized stuff...new stuff...fx
04 Bongo High
info: percussion sounds, realistic sounds
99 Model 1
info: default presets of all kind
Sample pad presets (number settings):
01 BD 1 (example name)
info: 01 is for drums and start with BD or SN ahead of the rest of the name.
02 Bongo 1 (example name)
info: 02 is for percussion sounds and start with Bongo or Conga ahead of the rest of
the name
03 FX Cla-Ow (example name)
info: 03 is for fx stuff and odd sounds.
99 default
info: default presets (not yet added)
Groove build up.
Each groove and break can contain 4 tracks. But that does not mean you have to use
them all. Main goal is that if you hit all Grooves notes and Break 4 that is should be a
very cool total groove. So in other words hitting C3 / D3 / E3 / F3 / G3 at once, should
be a total groove.
Below in the image I have the recommended settings.
Groove1 =
Groove2 =
Groove3 =
Groove4 =
BD + what you think is good to add
HiHats (Cl and OP) + what you think is good to add. You also can
chose here Cabasa or what ever. That has a kind of hihat function
type groove for your beat
SN + what you think is good to add
Percussion + what you think is good to add
Break1 =
Break2 =
Break3 =
Break4 =
Cymbal hit or other break type / add on
Snare break or other break type / add on
break or add on
add on, that is great to use in combination with groove 1
Saving patterns:
Essential, this is most handy for the non-sample pads; the groove will then fit
automatically.
With samples, the samples also should be loaded.
Order in saving patterns:
BD =
01 (for instance 01 BD groove 1)
SN =
02 (for instance 02 SN groove 1)
HH =
03 (for instance 03 HH groove 1) and in most cases:
Track 1 Close HH 1 and Track 2 Open HH 1
Track 3 Close HH 2 and Track 4 Open HH 2
CLP=
04 (for instance 04 CLP groove)
TOM=
05 (for instance 05 Tom breaks)
User=
06 (for instance 06 Caxici groove)
Sample pads= 07 (for instance 07 bongo groove)


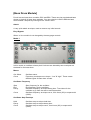

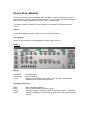
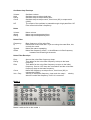
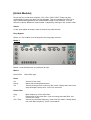


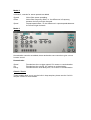
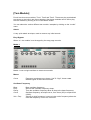


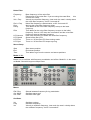

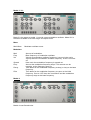


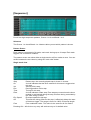
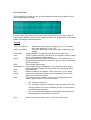
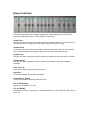
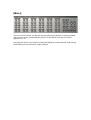
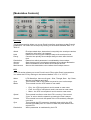


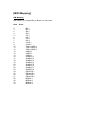
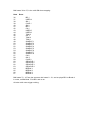
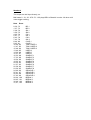
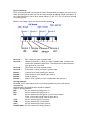


![How To Make A Noise [free version - July 2007]](http://vs1.manualzilla.com/store/data/005953668_1-8b501b70130f0a85eac6cc9cd6ff18b6-150x150.png)