1
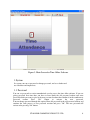
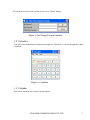
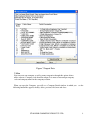
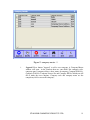
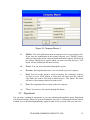
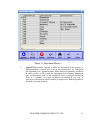
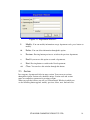
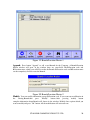
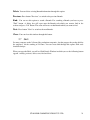
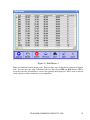
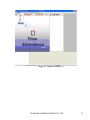
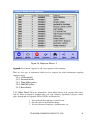
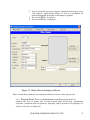
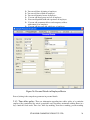
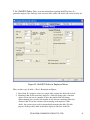
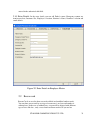
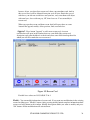
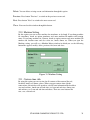
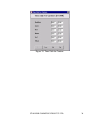
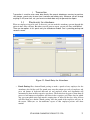
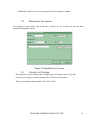
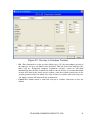
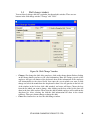
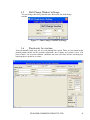
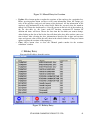
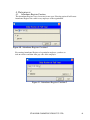
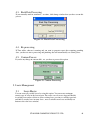
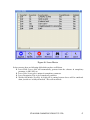
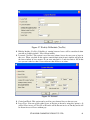
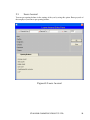
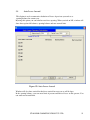
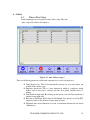
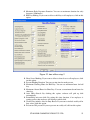
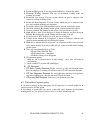
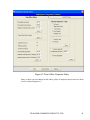
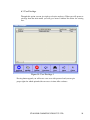
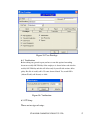
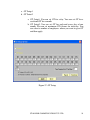
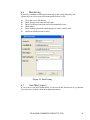
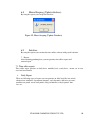
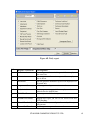
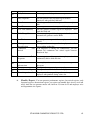
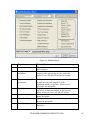
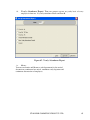
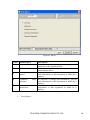
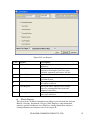
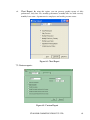
USER MANUAL
FOR
TIME OFFICE
SOFTWARE
STAR LINK COMMUNICATION PVT. LTD.
1
INDEX
Introduction
1. System
1.1 Password
1.2 Calculator
1.2 Calendar
1.3 Import
2. Main
2.1 Company
2.2 Department
2.3 Section
2.4 Grade
2.5 Category
2.6 Branch
2.7 Shift
2.8 Employee
2.8.1.All
2.8.2.Active
2.8.3.NonActive
2.9 Reason card
2.10 Machine setting
2.11 Canteen time slab
3. Transaction
3.1 Punch entry for attendance
3.2 Punch entry for canteen
3.3 Overstay to overtime
3.4 Shift change window
3.5 Shift change window by range
STAR LINK COMMUNICATION PVT. LTD.
2
3.6 Punch entry for overtime
3.7 Holiday Entry
4. Data process
4.1 Attendance Register Creation
4.2 Attendance Register Updating
4.3 Back Date Processing
4.4 Re-processing
4.5 Canteen Process
5. Leave Management
5.1 Leave Master
5.2 Leave Application
5.3 Leave Accrual
5.4 Auto Leave Accrual
6. Admin
6.1 Timeoffice Setup
6.2 Timeoffice Corporate policy
6.3 User Privilege
6.4 Verification
6.5 OT Setup
6.6 Mail Setting
6.7 Auto Mail (report)
6.7.1.Late Arrival Register
6.7.2.Absenteeism Register
6.8 House Keeping (Update database)
6.9 Interface
7. Reports
7.1 Time office reports
7.2 Canteen reports
8. Exit
STAR LINK COMMUNICATION PVT. LTD.
3
Introduction
Time office software is generally used to generate reports ( after capturing punching data) on daily
basis , monthly basis , yearly basis etc in excel, word and text format. With the help of this time
office software we can calculate over time of those employees who stay after their working hours
and also can calculate out work.
After installing time office software, you just double click on star Time Office general and you
will see license window and ask the valid user name and password like below:
Figure 1: License window for time office software
STAR LINK COMMUNICATION PVT. LTD.
4
Figure 2: Set User Name and Password
Enter a user name and password that you can set for open time office software
STAR LINK COMMUNICATION PVT. LTD.
5
Figure 3: Main Screen for Time Office Software
1 System
In system you can set password or change password, and see calendar and
use calculator and import data.
1.1 Password
You can set password to restrict unauthorized user for access the time office software. If you are
giving password first time then you have to leave blank the old password textbox and enter
password which you want to give in the new password textbox then confirm it in the confirm new
password
textbox
Press
"Ok"
button
to
activate
the
new
password.
You can change password through this option. Enter old password in the old password textbox and
continue the same process as new password creation and press "Ok". The new password will
activate after pressing "Ok" button.
STAR LINK COMMUNICATION PVT. LTD.
6
To cancel the new password creation process press "Cancel" button.
Figure 4: Set/ Change Password window
1.2 Calculator
You can do any mathematical calculation through this calculator as you do through the pocket
calculator.
Figure 5: Calculator
1.3 Calendar
You can see calendar and set date from this option.
STAR LINK COMMUNICATION PVT. LTD.
7
Figure 6: Calendar
1.4
Import
This option is used for import data from the excel sheet. If You are doing master feeding from the
excel sheet, you have to careful of one thing ; The excel sheet is in the proper format(The format is
given in the software.). If you want to know the proper format, press "Excel file structure" button.
The proper format will shown in the excel sheet.
For import the data from the excel sheet, press "Select Excel File" button. Then "select file dialog"
box will open select the file in which you save the master data and press "Open" button, the
selected excel file path will shown in the "Select File Textbox". then press "Import Data" button.
Import data message will appear in the screen press "Ok" button. The import data process will
done successfully.
Press "Close" button to close the import data window.
STAR LINK COMMUNICATION PVT. LTD.
8
Figure 7: Import Data
2 Main
You can create one company as well as many companies through this option of time
office software. Company code should be unique. It is must to enter unique company
code and company name for the company creation.
When you open the Company, you will see a Company Details window in which you
following button like append, modify, delete, previous, find, next and close.
STAR LINK COMMUNICATION PVT. LTD.
see the
9
Figure 8: Main Master
2.1
Company
You can create one company as well as many companies in this main
master of time office software. Company code should be unique.
When you open the company master, you will see a window in which
you see the following information like append, modify, delete,
previous, find, next and close.
STAR LINK COMMUNICATION PVT. LTD.
10
Figure 9: company master -1
i.
Append: Press button "Append" to add a new company. A Company Master
window will open , in the window there are some fields like company code,
company name, company address, short name of company, Company PAN No.,
Company TAN No, Company License No and Company PF No, which you will
fill to make the new company. Company code and company name are the
compulsory field to create the company ..
STAR LINK COMMUNICATION PVT. LTD.
11
Figure 10: Company Master-2
ii.
Modify: You can modify information in company master except company code.
If you want any modification in the existing company, press "Modify" button .
After pressing modify button complete information about company will shown in
the window. Modify those options which you want to modify and press "Ok"
button. All the modification will activated now.
iii.
Delete: You can delete information through this option.
iv.
Previous: Pressing button Previous, you can switch to previous company.
v.
Find: You can use this option to search a company. For searching a company
you have to press "Find" button. A dialog box will open enter the company
code which you want to find in the textbox and press "Ok" button. The arrow
will move to that company which you want to find.
vi.
Next: Pressing button Next to switch to the next company.
vii.
Close: You can close this window through this button.
2.2
Department
You can create a number of departments as per your requirement through this option. Department
code should be unique. When you open the department, you will see a Department Details window
in which you see the following button like append, modify, delete, previous, find, next and close.
STAR LINK COMMUNICATION PVT. LTD.
12
Figure 11: Department Master-1
i.
Append: Press button "Append" to add a new department in the company. A
Department Master window will open, in the window there are some fields
like department code, department name, HOD (Head of Department) and Email
Id, which you have to fill to make the department in the company. Department
code and department name are the compulsory field to create the department.
There is a sendmail send mail checkbox in the window. If you want to
send report of absenteeism and late coming of employees to HOD of department,
Check the send mail checkbox
STAR LINK COMMUNICATION PVT. LTD.
13
Figure 12: Department Master-2
ii.
Modify: You can modify information except department code, press button to
modify.
iii.
Delete: You can delete information through this option.
iv.
Previous: Pressing button previous to switch to the previous department.
v.
Find: If you can use this option to search a department.
vi.
Next: Pressing button to switch to the Next department.
vii.
Close: You can close this window through this button.
2.3
Section
In a company, department divides in many section. You can create sections
through this option. Section code should be unique. Section code and section
name are compulsory parameter for creating sections.
When you open the section, you will see Section Details Window in which you
see the following button append, modify, previous, delete, next, find and close.
STAR LINK COMMUNICATION PVT. LTD.
14
Figure 13: Section Master-1
Append: - Press button "Append" to add a new section in the department. A Section Master
window will open, in the window there are some fields like section code and section name, which
you will fill to make the section in the department. Section code and section name are the
compulsory field to create the section.
Figure 14: Section Master-2
Modify:- You can modify information except section code, If you want any modification in the
existing section then press "Modify" button .After pressing modify button complete information
about section will shown in the window. Modify that option which you want to modify and press
"Ok" button. All the modification will activated now.
STAR LINK COMMUNICATION PVT. LTD.
15
Delete: You can delete existing section information through this option.
Previous: Press button "Previous", to switch to the previous section.
Find: You can use this option to search a section. For searching a section you have to press
"Find" button. A dialog box will open enter the section code which you want to find in the
textbox and press "Ok" button. The arrow will move to that section which you want to find.
Next: Press button "Next" to switch to the next section.
Close: You can close this window through this button.
2.4
Grade
You can create Grades to allot the employees through this option. Grade code and Grade name are
compulsory parameter in Grade master. Grade code should be unique.
When you open the Grade, you will see a Grade Detail window in which you see the following
button like append, modify, delete, find and close.
STAR LINK COMMUNICATION PVT. LTD.
16
Figure 15: Grade Master -1
Append: Press button "Append" to add a new Grade in the department. A Grade Master window
will open, in the window there are some fields like grade code and grade name, which you will fill
to make the grade .Grade code and Grade name are the compulsory field to create the Grade.
Figure 16: Grade Master-2
Modify: You can modify information except Grade code, If you want any modification in the
existing Grade then press "Modify" button .After pressing modify button complete information
about Grade will shown in the window. Modify that option which you want to modify and press
"Ok" button. All the modification will activated now.
Delete: You can delete existing Grade information through this option.
Previous: Press button "Previous", to switch to the previous Grade.
Find: You can use this option to search a Grade. For searching a Grade you have to press "Find"
button. A dialog box will open enter the Grade code which you want to find in the textbox and
press "Ok" button. The arrow will move to that Grade which you want to find.
Next: Press button "Next" to switch to the next Grade.
Close: You can close this window through this button.
2.5
Category
You can create category to categorize the employees as per your requirement through this option.
Category code and Category name are compulsory in master. Category code should be unique.
When you open the Category, you will see a Category details window in which you see the
following button like append, modify, delete, find and close.
STAR LINK COMMUNICATION PVT. LTD.
17
Figure 17: Category Master -1
Append: Press button "Append" to add a new Category for the employee. A Category Master
window will open, in the window there are some fields like Category code and
Category name, which you will fill to make the Category .Category code and Category name are
the compulsory field to create the Category.
Figure-18: Category Master-2
STAR LINK COMMUNICATION PVT. LTD.
18
Modify: You can modify information except Category code, If you want any modification in the
existing Category then press "Modify" button .After pressing modify button complete information
about Category will shown in the window. Modify that option which you want to modify and press
"Ok" button. All the modification will activated now.
Delete: You can delete existing Category information through this option.
Previous: Press button "Previous", to switch to the previous Category.
Find: You can use this option to search a Category. For searching a Category you have to press
"Find" button. A dialog box will open enter the Category code which you want to find in the
textbox and press "Ok" button. The arrow will move to that Category which you want to find.
Next: Press button "Next" to switch to the next Category.
Close: You can close this window through this button.
2.6
Branch
You can create many Branches of the company as per requirement through this option. Branch
code and Branch name are compulsory in master. Branch code should be unique.
When you open the Branch, you will see a Branch Details window in which you see the
following button like append, modify, delete, find and close.
STAR LINK COMMUNICATION PVT. LTD.
19
Figure 19: Branch/Location Master-1
Append: Press button "Append" to add a new Branch for the Company. A Branch/Location
Master window will open, in the window there are some fields like B/Location code and
B/Location name, which you will fill to make the Branch .B/Location code and B/Location name
are the compulsory field to create the Branch.
Figure 20: Branch/Location Master-2
Modify: You can modify information except B/Location code, If you want any modification in
the existing Branch then press
"Modify"
button .After pressing modify button
complete information about Branch will shown in the window. Modify those option which you
want to modify and press "Ok" button. All the modification will activated now.
STAR LINK COMMUNICATION PVT. LTD.
20
Delete: You can delete existing Branch information through this option.
Previous: Press button "Previous", to switch to the previous Branch.
Find: You can use this option to search a Branch. For searching a Branch you have to press
"Find" button. A dialog box will open enter the Branch code which you want to find in the
textbox and press "Ok" button. The arrow will move to that Branch which you want to find.
Next: Press button "Next" to switch to the next Branch.
Close: You can close this window through this button.
2.7
Shift
So many company works 24 hours like production companies, for that purpose they make shift for
the employee, for the working of 24 hours. You can create shift through this option. Shift code
should be unique.
When you open the Shift, you will see Shift Details Window in which you see the following button
append , modify, previous, delete, next, find and close.
STAR LINK COMMUNICATION PVT. LTD.
21
Figure 21: Shift Master-1
Shifts are identified by their unique codes. There are three type of shift fixed, rotational and ignore
shift. You can enter any valid 3 character code for shift except OFF and IGN because OFF is
reserved for weekly off and IGN is reserved for ignorable shift employees. IGN is used to allot for
senior employees whose attendance is not compulsory.
STAR LINK COMMUNICATION PVT. LTD.
22
Figure 22: Shift Master-2
There are following option you can use to make a shift.
Shift code
: Add the new shift code.
Shift Start Time
: This is the shift starting time.
Shift End Time
: This is the shift end time.
Shift Hours
: This is the total working hours
Lunch Start Time
: This is lunch’s starting time.
Lunch Duration
: This is the duration of lunch.
Lunch End Time
: This is lunch’s end time.
Lunch deduction
: This is the time period that will be deducted from the
working hours.
STAR LINK COMMUNICATION PVT. LTD.
23
Overtime deduct after: This is the limit of period after which the OT won’t be
considered e.g. If OT deduct after is initialized as 3.00 hrs
and employee having OT 5.00 hrs. Then it would consider
3.00 hrs. Only If you want to give actual overtime, set
23.59 in this option.
Overtime start after : This is the time period after which OT will be considered. If
you set 30 minute in this option, between this duration OT
will not calculate, But if employee stays till 31st minute in
the company, he/her will get OT 31 min.
Overtime deduction
: This is the time period that will deduct from the
overtime hours. Example : if over time is 4 hours
and overtime deduction is 30 min , total over time
will be 3 hours and 30 min.
Shift Position
: Three types of shift as Day, Night and Half day.
2.8
Employee
You can do entry of new employee of the company through this option of time office software.
Paycode and card no. should be unique. It must to enter unique Paycode, unique card no. and
name and date of join for the employee creation.
When you open the Employee master, you will see three type of parameter; All, Active and
Nonactive.
All –see all (active & nonactive) employees of company
Active – see all active employees of company
Nonactive – see all nonactive employees who have left job from that Company.
STAR LINK COMMUNICATION PVT. LTD.
24
Figure 23: Employee Master-1
STAR LINK COMMUNICATION PVT. LTD.
25
Figure 24: Employee Master -2
Append: Press button "Append" to add a new employee in the company.
There are five type of information which used to complete the whole information regarding
employee master.
2.8.1. Office details
2.8.2. Personal details
2.8.3. Time Office policy
2.8.4. Shift/WO policy
2.8.5. Extra details
2.8.1 Office Detail: There are information’s about official details of an employee like active,
card No, Name of employee, guardian name, pay code, company, department, category, section,
grade, photograph, and signature, PF No, ESI No. and Dispensary.
1
2
3
You can decide that employee is on roll or not.
Pay code and card no should be unique.
You can add name of employee, guardian name, etc.
STAR LINK COMMUNICATION PVT. LTD.
26
4
5
6
You can assign the respective company, department and category, etc to
each employee, which he/she belongs to. You can even include the
scanned photographs of employee and employee signature.
You can add PF No. of employee.
You can add ESI No. of employee.
Figure 25: Official Detail in Employee Master
There are only three parameters are compulsory which are card no., name and pay code.
2.8.2. Personal Detail: There are much information regarding personal detail of a
employee like date of joining, date of birth, married status, blood group, qualification,
experience, permanent address & phone no, temporary address & phone no, designation, sex,
email id , bus route and vehicle No.
STAR LINK COMMUNICATION PVT. LTD.
27
You can add date of joining of employee.
You can add date of birth of employee.
You can add married status of employee.
You can add blood group and sex of employee.
You can add qualification and experience of employee.
You can add permanent address and temporary address
with contact no of employee.
You can add bus route and vehicle no. of employee.
Figure 26: Personal Details in Employee Master
Date of joining is the compulsory parameter in personal details.
2.8.3. Time office policy: There are information regarding time office policy of a particular
employee like permissible late arrival, permissible early departure, maximum working hours in a
day, round the clock work, Time loss, half day marking, short leave marking, present marking
STAR LINK COMMUNICATION PVT. LTD.
28
duration, maximum working hours for half day, maximum absent for short leave, punches, over
time and over stay.
1.Permissible late arrival :You can set time which you give to employee who
comes late without marking as late.
2.Permissible early departure: You can set time which you give to employee who goes
early without show early.
3. Maximum working hours in a day : If there is a shift and
employee
wants to continue next sift then you can set this
24:00.after 24 hours, employee has to punch again.
4. Round the clock work : If a employee wants to continue next shift, in
that case you have to tick out this option.
5.Consider Time loss: If you want to activate feature like time loss, half day and
short leave, just tick out these option in the window.
6.
Present marking duration: If working hour is less than this present marking duration,
employee will show absent. If working hour is equal to
& greater then system check his half day/short day.
STAR LINK COMMUNICATION PVT. LTD.
29
Figure 27: Time shift policy in Employee Master
7. Maximum working hour for half day: If employee working
hours is between present working hour and max working hour for half day
then he is half day present. If working hour is greater than it, he is full day
present.
8. Maximum absent hours for short day:
Absent hour= shift hour – working hour
If absent hour is greater than this max absent hour, he is marked SRT.
9. Punches required in a day:
No punch: This punch is used for senior employees whose
attendance is not required.
Single punch : This punch is used for single punch to mark
STAR LINK COMMUNICATION PVT. LTD.
30
present. Out Punch will be taken automatically
from the machine as shift out time whether out
punch is existing or not.
Two punch: This option is for 2 punches like IN punch and out
punch.
Four punches: This option is for 4 punches –IN, OUT, Lunch
IN & Lunch OUT.
Multiple punch: This option is work for max 20 punches.
10. Overtime and overstay: When an employee works after his
working hour, that works will count in overtime but if company
don’t want to give over time then it will show as overstay.
STAR LINK COMMUNICATION PVT. LTD.
31
2.8.4. Shift/WO Policy: There are many information regarding shift/WO policy of a
particular employee like shift type, shift, run auto shift, weekly off details and second weekly off.
Figure 28: Shift/WO Policy in Employee Master
There are three type of shifts ---Fixed , Rotational and Ignore
1. Fixed shift: If a employee comes in a single shift, it means his shift will be fixed.
2. Rotational shift: In the rotational, employee’s shift will change after a duration
of time. Even you can set a number of days after which shift will change.
Shift remaining days specifies the number of days that are remaining in the first
allocated shift. If you are not interested in entering each employee's shift
details, the system can be used for automatically changing the shifts. For this
purpose all the possible shifts in which an employee can come should be
STAR LINK COMMUNICATION PVT. LTD.
32
entered in the authorized shift field.
2.8.5 Extra Details: In the extra details you can add Father’s name, Emergency contact no,
Anniversary date, Insurance No., Employee’s location, Nominee’s Name, Nominee’s relation and
email address.
Figure 29: Extra Details in Employee Master
2.9
Reason card
Reason Cards are used to show reason for official and unofficial outdoor work.
You can show reason card by two type of reason-one is on leave and another is
without leave. In the case of without leave, reason will be adjusted with different
type of leave like late , early, excess lunch and hours worked. If you are late
STAR LINK COMMUNICATION PVT. LTD.
33
because of jam, you show first reason card, show your attendance card. And in
this case no leave will be deducted from your over all leave. But in the case of
with leave, you tick out at with leave and your late, early extra hours will adjust
with earn leave, leave with out pay, OT, short leave etc. You can modify in
reason card.
When you open the reason card then reason detail will open, there are some
buttons like append, modify, delete previous, find, next and close.
Append: Press button "Append" to add a new reason card. A reason
card window will open, in the window there are some fields like reason card,
description, and some checkbox's to check and select some field from dropdown list
which you will fill to make the new reason card.
Figure 30: Reason Card
Possible leave values are 0.25, 0.50, 0.75 & 1.
Modify: You can modify information of reason card, If you want any modification in the existing
reason card then press "Modify" button .After pressing modify button complete information about
reason card will shown in the window. Modify that option which you want to modify and press
"Ok" button. All the modification will activated now.
STAR LINK COMMUNICATION PVT. LTD.
34
Delete: You can delete existing reason card information through this option.
Previous: Press button "Previous", to switch to the previous reason card.
Next: Press button "Next" to switch to the next reason card.
Close: You can close this window through this button.
2.10 Machine Setting
By this option you can use this machine for attendance or for lunch. If you hung machine
for attendance, check on option attendance and enter machine ID number and location
name. If you hung machine for Canteen, check on option canteen and enter machine ID
number and location name and also select tea, lunch, dinner etc. When you open the
Machine setting, you will see a Machine Master window in which you see the following
button like append, modify, delete, previous, find, next and close.
Figure 31: Machine Setting
2.11 Canteen time slab
By using this option you can set time for all contents of the canteen like tea1,
breakfast, lunch, tea2,dinner, others. When you open canteen time slab the
canteen time slab window will open here you fill some information like breakfast
start and end time, lunch start and end time, tea1 start and end time, dinner start
and end time, tea 2 start and end time and others. There are some buttons like
new, save, edit and exit.
STAR LINK COMMUNICATION PVT. LTD.
35
Figure 32: Time Slab for Canteen
STAR LINK COMMUNICATION PVT. LTD.
36
3
Transaction
Transaction is used for enter some data directly like manual attendance, overstay to overtime,
shift change , punch entry for over time & canteen and holiday entry. Whenever you will change
anything in shift, over time , etc, you have to use back date entry for generate the reports.
3.1
Punch entry for attendance
When an employee forgot his card, in that case you can mark his attendance present through this
option in time office software. But when you will generate report, present will show with Manual.
There are two options in this punch entry for attendance window. One is punching posting and
second is cancel.
Figure 33: Punch Entry for Attendance
•
Punch Posting:-Press button Punch posting to make a punch of any employee for the
attendance who left the card. For punch entry enter the unique pay code of employee and
press tab button of keyboard then card no and employee name and department will
automatically show in their respective text boxes. Then enter date for process from then all
processed and unprocessed punches will show in the respective grid. Enter date for which
date you want punch entry and enter his coming time of office on that day. After all data
will filled then press button "Punch posting" then the punch of the employee will save in
the system. When you see the attendance report of that employee present will show
manual.
STAR LINK COMMUNICATION PVT. LTD.
37
•
Close:-Press button close to close the punch entry for attendance window.
3.2
Punch entry for canteen
If an employee forgot his/her card at the time of lunch, tea, etc, in that case you can mark
attendance through this option.
Figure 34: Punch Entry for Canteen
3.3
Overstay to Overtime
If an employee stays in company after working hours and company want to give him
over time, you can give over time through OS to OT conversion voucher .
There are two buttons in this window "Ok" and "Cancel".
STAR LINK COMMUNICATION PVT. LTD.
38
Figure 35: Overstay to Overtime Voucher
•
•
Ok: - Press button ok to set the over time. Before press "ok" first enter unique paycode of
the employee and press tab button of the keyboard. Then all detail of the employee like
name, card no., designation, company, department, category, section etc will show
automatically enter the date for which you want to convert overstay to overtime then actual
overstay will show in the actual overstay textbox, enter the overtime granted time in the
overtime granted textbox for which you want overstay to overtime conversion and press
"ok" button, overstay will converted into overtime now.
Cancel:-Press button cancel to cancel the overstay to overtime conversion or close the
window.
STAR LINK COMMUNICATION PVT. LTD.
39
3.4
Shift change window
You can directly change shift for a particular day through this window. There are two
buttons in the shift change window "Change" and "Close".
Figure 36: Shift Change Voucher
•
•
Change:- For change the shift of the employee, click on the change button. Before clicking
on the change button you have to fill some information. Enter the Unique paycode of the
employee and press tab button of the keyboard, then all the information of the employee
will automatically in the related fields, then enter the year in which you want to shift
change and select the month from the dropdown list then a list will generate in the left side
of the window, in the list date, shift, shift attended, and status will show. Choose the date
from the list which you want to change. After clicking on the date of the list the date will
show in the date office textbox. Then select the shift in which employee will work from the
dropdown list. After selecting the shift the shift information will show in the related
textboxes. Then press button change to change the shift.
Close:-Press button close to close the shift change window.
STAR LINK COMMUNICATION PVT. LTD.
40
3.5
Shift Change Window by Range
You can change shift for a particular time duration by this shift change
voucher.
Figure 37: Shift Change Voucher by Range
3.6
Punch entry for overtime
You can manually mark entry for over time through this option. There are two button in this
manual punch voucher for the overtime calculation: one is update and second is close. You
have to check “ for over time addition” checkbox and enter over time( in hour) and then press
button update to update in over time
STAR LINK COMMUNICATION PVT. LTD.
41
Figure 38: Manual Entry for Overtime
•
•
Update :-Press button update to update the overtime of the employee for a particular day.
Before pressing update button you have to fill some information. Enter the Unique pay
code of the employee and press tab button of the keyboard, All the information of the
employee will automatically in the related fields. Enter the year and select the month to
change for OT from the dropdown list, a list will generate in the left side of the window, in
the list date, shift, in, out, hours work, OT duration, maximum OT duration, OT
addition and status will show. Choose the date from the list which you want to change.
After clicking on the date of the list the date will show in the date office textbox, enter over
time in hour. After selecting the date, information of that day like in time and out time
status and present value of that date will show in the related textboxes. Then press button
update to update the overtime of the employee.
Close :-Press button close to close the "Manual punch voucher for the overtime
calculation" window.
3.7 Holiday
Entry
You can add all holidays from this option.
Figure 39: Holiday Entry
STAR LINK COMMUNICATION PVT. LTD.
42
If you work on this holiday and you will get OT, tick on OT factor option.
Do not forget to select Company and Department selection to declare Holiday.
STAR LINK COMMUNICATION PVT. LTD.
43
4. Data process
4.1.
Attendance Register Creation
The Attendance Register is used to create for one year. Selecting option all will create
Attendance Register for each & every employee of the organization.
Figure 40: Attendance Register Creation-1
For creating Attendance Register of a particular employee, you have to
tick on selective and then enter pay code of the employee.
Figure 41: Attendance Register Creation-2
STAR LINK COMMUNICATION PVT. LTD.
44
4.2. Attendance Register Updating
If the shift policies of all employees or selective employees have changed and that
will be affective for the remaining year, you must use this option.
First make all changes in the masters of a particular date and then use this
option.
Figure 42: Attendance Register Updating-1
For a particular employee, you have to tick on selective and enter a paycode of that employee
and then press update.
Figure 43: Attendance Register Updating-2
STAR LINK COMMUNICATION PVT. LTD.
45
4.3. Back Date Processing
If you manually mark in attendance , overtime, shift change window then you have to run this
process.
Figure 44: Back Date Processing
4.4. Re-processing
If Time office software is running and you want to generate report after capturing punching
data , you have to run re-processing and punching data will automatically set at their places.
4.5. Canteen Process
If you do any change in canteen shift , etc, you have to process this option.
Figure 45: Canteen Processing
5. Leave Management
5.1
Leave Master
You can create all possible leaves by using this option. You can create maximum
twenty types of leave in the leave master. For create a new leave use Append. Modify
in existing leave and use delete to delete existing leave, previous to switch to previous
and find to search a leave in many leave , next to switch to next leave and finally use
button to close the leave window.
STAR LINK COMMUNICATION PVT. LTD.
46
Figure 46: Leave Master
In leave master, there are following field which you have to fill them:
Leave Field: Leave field will automatically generate from the software & compulsory
parameter.i.e.L01, L02, etc.
Leave Code: Leave code is unique & compulsory parameter.
Leave Description: This is also compulsory parameter.
Weekly Off include (Yes/No): if weekly off is coming between leaves will be considered
when you tick on “weekly off include”. Else will not include.
STAR LINK COMMUNICATION PVT. LTD.
47
Figure 47: Weekly Off Include (Yes/No)
Holiday Include (Yes/No): If holiday is coming between leaves will be considered when
you tick on “holiday include”. Else will not include.
Is accrual (Yes/No): This option is used for carry balance leaves for next year or lapse in
this year . When you click on this option, sanction limit (min & max) window will open in
the same window of leave master. If you enter min limit is 3 and max limit is 20, in that
case you can’t take less than 3 leave and more than 20 leaves at a time.
Figure 48: Accrual
Carried and Fixed- This option can be used for carry forward leave to the next year.
Leave Type: You can specify either Leave or Present or absent by using this option i.e. It
will be Leave in case of CL or SL or EL and it will be Present in case of On duty and it will
be Absent in case of Leave without pay.
STAR LINK COMMUNICATION PVT. LTD.
48
5.2
Leave Application
You can use this voucher to enter any type leaves or tours for a single or group of employees
for a single or multiple days. Before using this voucher, you should make sure that, all possible
leaves are defined in the leave master.
Figure 49: Leave Application
Once you give the pay code (single or range) and date you will select for leave then you have to
select leave duration of quarter, half day, three fourth and full day. You have to select leave code,
reason and also enter approved date
STAR LINK COMMUNICATION PVT. LTD.
49
5.3
Leave Accrual
You can put opening balance in the starting of the year by using this option. Enter paycode of
that employee you want to put opening balance.
Figure 49: Leave Accrual
STAR LINK COMMUNICATION PVT. LTD.
50
5.4
Auto Leave Accrual
This Option is used to automatic calculation of Leave of previous year and set as
opening balance for current year.
By using this option you can calculate auto leave opening. When you tick on L01, window will
show three option old balances, opening balance and max accrual limit.
Figure 50: Auto Leave Accrual
Window will also show carried for that leave carried for next year or will be lapse.
In the opening balance, you can enter limit of present and limit of leave on this present .You
can enter max accrual limit.
STAR LINK COMMUNICATION PVT. LTD.
51
6. Admin
6.1
Time office Setup
Each company has its own policy for time office setup. This time
office setup will work for all employee.
Figure 51: time office setup-1
There are following parameters which each company has to set for all employees:
Setup Register No.: This will automatically generate on every time when you
modify in time office setup.
Duplicate check min: This is a time duration in which if a employee punch
his/her card at many time, software will take first punch. Default time is 5
minute.
Four Punch in Night shift: By clicking on this option, you can allow maximum 4
punches in the night shift.
End time to IN Punch & End time for End Punch: this option is used for RTC
employees only for the duration of more than 24 hours.
Maximum Late Arrival Duration: You can set maximum duration for late arrival
(240minutes).
STAR LINK COMMUNICATION PVT. LTD.
52
Maximum Early Departure Duration: You can set maximum duration for early
departure (240minutes).
Half Day Making: If you want to allow to half day to all employees, click on this
option.
Figure 52: time office setup-2
Short Leave Marking: If you want to allow to short leave to all employees, click
on this option.
Present Marking Duration: You can set min time for mark present.
Maximum Working Hours for Half Day: You can set maximum hours for half
day.
Maximum Absent Hours for Short Day: You can set maximum absent hours for
short day.
Auto Shift allowed: By clicking this option, software will pick up shift
automatically.
PremisEarly min auto shift: By setting this time duration, if an employee is
coming earlier, that employee will belong to which shift.
Weekly Day include or not in Duty Roster: If you want to include weekly off in
duty roster, click this option.
Present on WO present: If you are present on weekly off, click on this option.
STAR LINK COMMUNICATION PVT. LTD.
53
Present on HLD present: If you are present on holiday, click on this option.
Maximum Working Duration: You can set maximum working hours for
working in a month.
Permissible Late Arrival: You can set time which you give to employee who
comes late without marking as late.
Permissible Early Departure: You can set time which you give to employee who
goes early without marking early departure.
Over Time Allowed: By clicking on this option, you can activate this option.
Out Work Allowed: By clicking on this option, you can activate this option.
Overstay Allowed: By clicking on this option, you can activate over stay.
Mark AWA as AAA: If an employee is absent on Saturday and also absent on
Monday. By clicking this option, Sunday will also count as absent.
No of present for WO: You can set no of days for weekly off.
Is Auto absent Allowed: If an employee is absent on Saturday, software will
show his absent automatically by clicking this option.
Mark WO as Absent when no of present < no of present of WO: if no of weekly
off is greater than no of present, weekly off will count as weekly off by clicking
on this option.
There are some formulas for Over Time:
OT=Out Time-Shift End Time
OT=Working hours – shift hours
OT=Early coming + Late Departure
OT parameter options:
1. check on “OT is allowed incase of early coming” : Over time will count on
early coming.
2. check “round OT” to count OT round figure.
OT Durations:
1. OT Early Coming Duration: In this you have to enter time duration before
that if an employee is coming, OT will not count. OT will count after that time.
2. OT Late Departure Duration: By setting this time duration, if an employee
stay after working hours, after this duration OT will not count.
3. OT restrict End Duration: You have to set maximum over time.
6.2 Time office Corporate policy
If you want to change in time shift policy for all employees or selected employees in
employee master, use this option.
If you change in permissible late arrival, permissible early departure and maximum
working hours in a day and press button save to save these information only.
STAR LINK COMMUNICATION PVT. LTD.
54
Figure 53: Time Office Corporate Policy
Same as above you can change in time office policy of employee master and save them
to all or selected employees.
STAR LINK COMMUNICATION PVT. LTD.
55
6.3 User Privilege
Through this option you can give right to selective employee. When you will open user
privilege from the main menu, you will get a browse window like below for existing
user.
Figure 54: User Privilege-1
Pressing button append you will create a new user with password and you can give
proper rights for which option he/she can access in time office software.
STAR LINK COMMUNICATION PVT. LTD.
56
Figure 55: User Privilege
6.4 Verification
Before taking any general report you have to run this option for marking
absent on weekly Off / Holiday if the employee is absent before and after the
weekly Off / Holiday and this will effect only if you will tick on time office
policy like No of weekly off is 3,Is auto absent allowed Yes, mark AWA
(Absent Weekly off Absent) as AAA.
Figure 56: Verification
6.5 OT Setup
There are two type of setup:
STAR LINK COMMUNICATION PVT. LTD.
57
a. OT Setup1
b. OT Setuo2
a. OT Setup1: You can set OT for a day. You can set OT for a
week and OT for a month.
b. OT Setup2: You can set OT for each and every day of one
month. You can set maximum OT 6 hours for each day. You
can select a number of employees whose you want to give OT
and then apply.
Figure 57: OT Setup
STAR LINK COMMUNICATION PVT. LTD.
58
6.6
Mail Setting
If you have a machine at different location and by this setting when they will
capture the data, a text report will automatically deliver to you.
Give that server‘s IP address.
Mail of that person from mail will come.
Mail id of that person when mail will automatically come.
Mail subject.
Mail sending option from which option you can to send the mail.
Mail text which you want to write.
Figure 58: Mail Setting
6.7
Auto Mail (report)
If you want to send mail automatically of late arrival and absenteeism of a particular
day, you have to tick on send mail in department master.
STAR LINK COMMUNICATION PVT. LTD.
59
6.8
House Keeping (Update database)
By using this option you can update data base.
Figure 59: House keeping (Update Database)
6.9
Interface
By using this option you can interface time office software with payroll software.
7. Reports
After capturing punching data, you can generate time office reports and
canteen report.
7.1. Time office reports
Time office report generate on daily basis, monthly basis, yearly basis , memo, etc in text,
excel and word format.
i.
Daily Report
There are following types of reports you can generate on daily basis like late arrival,
absenteeism, attendance, department summary, early departure, shift wise presence,
machine raw punch, reason card punch, daily performance, early departure, time
loss, etc.
STAR LINK COMMUNICATION PVT. LTD.
60
Figure 60: Daily report
S.No.
Report’s Reason
Description
1
Late Arrival
2
Absenteeism
3
Attendance
4
Department Summary
You can generate late arrival report of those employees
who come late.
You can generate absenteeism report of those employees
who is absent.
You can generate attendance report of all employees for
IN punch only.
You can generate department wise attendance.
5
Early Arrival
6
Shift Wise Presence
7
Machine Raw Punch
8
Manual Punch Audit
9
Reason Card Punch
You can generate report of those employees who come
earlier before the shift IN time.
You can generate shift wise report.
Through this report you can see all record of IN and
OUT punching.
If you will do any manual punch on a day, this report
will generate.
You can generate report of reason card.
STAR LINK COMMUNICATION PVT. LTD.
61
10
Daily Performance
You can generate daily performance report.
11
Early Departure
12
Time Loss
13
14
Over Time
Over Time Summary
15
Shift Change Statement
You can generate early departure report of those
Employees who go before shift end.
You can generate time loss report of those employee
who
You can generate over time report of all employees.
You can generate overtime report of employees who
work after shift end
When you change shift of a particular day, shift
statement will generate send to HOD.
16
Out Work
17
Missing
Reverification
Continuous
Arrival
18
You can generate report of those employees who work
in field.
and This report shows miss punch of employees but they
were working on that day.
Late If an employee is coming late continuously, you can
generate his continuous late arrival report between
duration of days.
19
Continuous
Departure
20
Continuous
Absenteeism
Present
Lunch Duration Report
Time slot punch audit
21
22
23
ii.
Early You can generate this report for employee who left
continuously before shift end time.
If an employee is continuous absent, you can generate
this report.
This report shows report of present employee.
This report shows lunch duration of employee.
This report shows punching data of a particular
employee who punched during a time slot.
Monthly Reports: You can generate performance register, late arrival register, early
departure register, absenteeism register ,etc register on monthly basis in text, excel and
word. And also can generate muster roll, form no-12, form no-25 and employee wise
and department wise reports.
STAR LINK COMMUNICATION PVT. LTD.
62
Figure 61 : Monthly Report
S.No.
Report
1
Performance Register
2
Employee
Attendance
3
Department
Attendance
4
5
6
7
Description
This report shows the monthly performance of each and
every employee.
Wise This report shows the attendance details of all
employees like total present, absent, weekly off,
holiday, Leave, OT and OT amount for a month.
Wise This report shows department wise attendance
of employees like total employees in the
department, number of presents, absents, leaves
and weekly off and holiday.
Shift Wise Attendance This report shows shift wise attendance of
employees. It shows the number of days present,
absent, weekly off, leave, OT and OT amount.
Absenteeism Register
This report shows of all employees who were absent
during one month.
Late Arrival Register
This report shows late arrival of each employee between
duration of one month.
Over Time Register
This report shows over time for one month of all
Employees.
STAR LINK COMMUNICATION PVT. LTD.
63
8
Over Time Summary
This report shows total over time duration of
One month of each and every employee.
9
Shift schedule
This report shows shift chart of all employees
For a month. This report can be generated for all
Shifts (fixed, rotational, ignorable).This chart
shows shift pattern, weekly off and the shift of
each day employee wise.
10
Employee
Performance
11
12
13
14
15
16
Wise This report shows attendance of each employee
like attendance status , late arrival, early departure and
hours worked for every day of one month.
Early
Departure This report shows early departure of each employee
Register
between duration of one month.
Over Stay Register
This report shows over stay of those employees who
stay in company but don’t work.
Employee Status
This report shows status of employees.
Manual OT deduction
This report shows report of OT deduction of all
employee whose entry had done through “punch entry
for OT”
Lunch Duration Report This report shows lunch duration of employee.
Night Shift punch
This report shows all punches in night shift.
STAR LINK COMMUNICATION PVT. LTD.
64
iii.
Yearly Attendance Report: You can generate reports on yearly basis of every
employee in form no. 14, yearly attendance details and from B.
Figure 62: Yearly Attendance Report
iv.
Memo :
You can send notice and Memo to each department for late arrival,
absenteeism, continuous late arrival, continuous early departure and
continuous absenteeism of employees.
STAR LINK COMMUNICATION PVT. LTD.
65
Figure 61: Memo
S.No. Memo Report
Late Arrival
1
2
Absenteeism
3
Continuous
Arrival
4
Continuous
Departure
5
Continuous
absenteeism
v.
Description
You can see late arrival of a particular employee and
send notice to his department head.
You can send notice/memo of that employee who was
absent without notice.
Late If a employee is coming late continuously, you can
send notice/memo to that department in which he is
working.
Early If a employee is coming early continuously, you can
send notice/memo to that department in which he is
working.
If a employee is absent continuously, you can send
notice/memo to that department in which he is
working.
Leave Report :
STAR LINK COMMUNICATION PVT. LTD.
66
Figure 62: Leave Reports
S.No. Reports
Sanctioned leave
1
2
Leave Card
3
4
Accrued Leave
Consumed Leave
5
Balance Leave
6
Leave Register
7
Leave approval
vi.
Description
Reports of details of sanctioned leaves of all
employees.
This is the card which can be given to
Employees showing his / her leave status
(Accrued, consumed and balance) till date.
Reports of all accrued leaves.
This report show how many leaves an employee
has taken till now.
This report show how many leave has been left to
the employee till now.
This report shows employee wise accrual,
Date wise consumption with reason and
balance of each leave.
In this report you will see the approval person ,
leave type, total leave.
Master Reports:
This report shows all Master information according to your selection like, declared
Holiday, Company, Department, Category, Shift, Employee setup information,
employee general information, leave, Employee joining information, employee
leaving information and employee who is not on payroll.
STAR LINK COMMUNICATION PVT. LTD.
67
Figure 63: Master Reports
STAR LINK COMMUNICATION PVT. LTD.
68
vii.
Chart Report: By using this option, you can generate graphic reports of daily
performance, daily time loss, monthly performance, monthly time loss with overstay,
monthly leave status , department wise employees and weekly presence status.
Figure 64: Chart Report
7.2. Canteen reports:
Figure 65: Canteen Report
STAR LINK COMMUNICATION PVT. LTD.
69
You can generate canteen report on shift wise consumption, daily consumption, monthly
consumption , monthly consumption and amount due summery ,etc.
S No.
1
2
3
4
5
6
Reports
Description
Shift
Wise This report show the shift wise consumption of the
Consumption
selected item on the selected date.
Daily Consumption
This report show the Daily consumption of the
selected item on the selected date.
Monthly Consumption This report show the monthly consumption of the
selected item.
Monthly Consumption This report show the monthly consumption of the
and
amount
due selected item. And amount due summary of the
summary
month.
Monthly consumption This report show the monthly consumption of the
summary of holiday selected item on weekly off and holiday.
and weekly off
Extra
consumption This report show the extra consumption of the month
report(More than one in the selected month.
meal)
8. Exit: Close the time office software.
STAR LINK COMMUNICATION PVT. LTD.
70