1
Node.JS | Untangle | Cfengine 3 | Armitage | Firewall Builder ™ Linux HA Firewall Tutorial Increase Security with Cfengine Since 1994: The Original Magazine of the Linux Community MAY 2011 | ISSUE 205 | www.linuxjournal.com SECURITY TESTING with Armitage and Metasploit Secure Your Virtual Environment + Defend Against NEW COLUMN: Tales from the Server Room DNS Cache Poisoning REVIEWED: The Google Cr-48 “Mario” Chrome OS Notebook $5.99US $5.99CAN Untangle’s Multi-Functional Firewall Software 0 09281 03102 05 4 More TFLOPS, Fewer WATTS Microway delivers the fastest and greenest floating point throughput in history 2.5 TFLOPS Enhanced GPU Computing with Tesla Fermi 480 Core NVIDIA® Tesla™ Fermi GPUs deliver 1.2 TFLOP single precision & 600 GFLOP double precision performance! New Tesla C2050 adds 3GB ECC protected memory New Tesla C2070 adds 6GB ECC protected memory Tesla Pre-Configured Clusters with S2070 4 GPU servers WhisperStation - PSC with up to 4 Fermi GPUs OctoPuter™ with up to 8 Fermi GPUs and 144GB memory New Processors 12 Core AMD Opterons with quad channel DDR3 memory 8 Core Intel Xeons with quad channel DDR3 memory Superior bandwidth with faster, wider CPU memory busses Increased efficiency for memory-bound floating point algorithms Configure your next Cluster today! www.microway.com/quickquote 508-746-7341 10 TFLOPS 5 TFLOPS FasTree™ QDR InfiniBand Switches and HCAs 36 Port, 40 Gb/s, Low Cost Fabrics 45 TFLOPS Compact, Scalable, Modular Architecture Ideal for Building Expandable Clusters and Fabrics MPI Link-Checker™ and InfiniScope™ Network Diagnostics FasTree 864 GB/sec Bi-sectional Bandwidth Achieve the Optimal Fabric Design for your Specific MPI Application with ProSim™ Fabric Simulator Now you can observe the real time communication coherency of your algorithms. Use this information to evaluate whether your codes have the potential to suffer from congestion. Feeding observed data into our IB fabric queuing-theory simulator lets you examine latency and bi-sectional bandwidth tradeoffs in fabric topologies. GSA Schedule Contract Number: GS-35F-0431N pC2_Microway.indd 1 7/15/10 9:20:43 AM 1&1® WEB HOSTING 1&1® HOSTING PACKAGES 6 MONTHS FREE! * OFFER ENDS 4/30/11 1&1® BUSINESS PACKAGE: As the world‘s largest web host, we know the developer features you need in a hosting package! .com .info .org .net Domains Included All hosting packages include domains, free for the life of your package. Unlimited Traffic Unlimited traffic to all websites in your 1&1 hosting package. N3 Included Domains NPrivate Domain Registration N250 GB Web Space NUNLIMITED Traffic NNEW: Version Management Software (git) N2 ,500 E-mail Accounts N50 MySQL Database N25 FTP Accounts NE-mail Marketing Tool N24/7 Toll-free Customer Support 9 $ Developer Features Extensive language support with PHP 5/6 (beta) with Zend Framework and git version management software. .99 C$ per month* 9 .99 per month* Need more domains? Online Marketing Tools SEO tools to optimize your website. 1&1 Webstatistics makes it easy to monitor your progress. .info domain only $0.99/first year* .com domain only $4.99/first year* More special offers available on our website! NEW! Now offering .ca domains to our Canadian customers. C$9.99/first year.* Visit www.1and1.ca for details. 1-877-GO-1AND1 www.1and1.com 1-855-CA-1AND1 www.1and1.ca ® *Offers valid through 4/30/2011. 12 month minimum contract term applies for web hosting offers. Setup fee and other terms and conditions may apply. Domain offers valid first year only. After first year, standard pricing applies. Visit www.1and1.com for full promotional offer details. Program and pricing specifications and availability subject to change without notice. 1&1 and the 1&1 logo are trademarks of 1&1 Internet AG, all other trademarks are the property of their respective owners. © 2011 1&1 Internet, Inc. All rights reserved. CONTENTS MAY 2011 Issue 205 FEATURES 44 Live-Fire Security Testing with Armitage and Metasploit Defend your network by attacking it. Armitage and Metasploit give you the same techniques skilled attackers use, in an easy-to-use package. 50 Virtual Security: Combating Actual Threats Just because you’ve removed the physical, doesn’t mean you’ve removed the risk. Jeramiah Bowling Raphael Mudge 56 Build a Better Firewall— Linux HA Firewall Tutorial Use a combination of open-source packages to build and manage a Linux-based HA firewall pair that includes support for many of the advanced features commonly found in commercial firewalls. Mike Horn 2 | may 2011 w w w. l i n u x j o u r n a l . c o m 64 Security Monitoring and Enforcement with Cfengine 3 How can a configuration management tool increase security? Aleksey Tsalolikhin ON THE COVER • Linux HA Firewall Tutorial, p. 56 • Increase Security with Cfengine, p. 64 • Security Testing with Armitage and Metasploit, p. 44 • Secure Your Virtual Environment, p. 50 • Defend Against DNS Cache Poisoning, p. 24 • New Column: Tales from the Server Room, p. 76 • Reviewed: The Google Cr-48 “Mario” Chrome OS Notebook, p. 40, and Untangle's Multi-Functional Firewall Software, p. 38 COVER IMAGE by Jan Michael T. Aldeguer. 10 Gig On Board Blazing Fast, Embedded 10Gb Ethernet 10G Rackmount Servers in the iX-Neutron server line feature the Intel® Xeon® Processor 5600/5500 Series, and come with 10GbE networking integrated onto the motherboard. This eliminates the need to purchase an additional expansion card, and leaves the existing PCI-E slots available for other expansion devices, such as RAID controllers, video cards, and SAS controllers. For more information on the iX-1204-10G, or to request a quote, visit: http://www.iXsystems.com/neutron 30% cost savings/port over equivalent DualPort 10 GB PCI Express add-on card solution KEY FEATURES: . Supports Dual 64-Bit Six-Core, Quad- IPMI NIC . . . GigE NICS 10GbE NICS . . 10Gb Ethernet Adapters Call iXsystems toll free or visit our website today! 1-855-GREP-4-IX | www.iXsystems.com Intel, the Intel logo, Xeon, and Xeon Inside are trademarks or registered trademarks of Intel Corporation in the U.S. and/or other countries. . . . . Core or Dual-Core, Intel® Xeon® Processor 5600/5500 Series 1U Form Factor with 4 Hot-Swap SAS/ SATA 3.5” Drive Bays Intel® 5520 chipset with QuickPath Interconnect (QPI) Up to 192GB DDR3 1333/1066/800 SDRAM ECC Registered Memory (18 DIMM Slots) 2 (x8) PCI-E 2.0 slots + 1 (x4) PCI-E 2.0 (in x8 slot -Low-Profile - 5.5” depth) Dual Port Intel® 82599EB 10 Gigabit SFP+ - Dual Port Intel® 82576 Gigabit Ethernet Controller Matrox G200eW Graphics Remote Management - IPMI 2.0 + IP-KVM with Dedicated LAN Slim DVD 700W/750W Redundant AC-DC 93%+ High-Efficiency Power Supply CONTENTS MAY 2011 Issue 205 COLUMNS 16 Reuven M. Lerner’s At the Forge Node.JS 22 Dave Taylor’s Work the Shell Mad Libs Generator, Tweaks and Hacks 24 Mick Bauer’s Paranoid Penguin DNS Cache Poisoning, Part I 28 Kyle Rankin’s Hack and / Your Own Personal Server: Blog 76 Kyle Rankin and Bill Childers’ Tales from the Server Room 34 BRAIN WORKSHOP 38 UNTANGLE’S MULTI-FUNCTIONAL FIREWALL SOFTWARE 40 THE GOOGLE CR-48 CHROME NOTEBOOK Panic on the Streets of London 80 Doc Searls’ EOF The Limits of Scale REVIEWS 38 Untangle’s Multi-Functional Firewall Software Shawn Powers 40 The Google Cr-48 “Mario” Chrome OS Notebook Daniel Bartholomew INDEPTH 72 Installing an Alternate SSL Provider on Android A step-by-step tutorial on installing a third-party C library on Android. Chris Conlon IN EVERY ISSUE 8 10 12 32 34 65 79 Current_Issue.tar.gz Letters UPFRONT New Products New Projects Advertisers Index Marketplace USPS LINUX JOURNAL (ISSN 1075-3583) (USPS 12854) is published monthly by Belltown Media, Inc., 2121 Sage Road, Ste. 310, Houston, TX 77056 USA. Periodicals postage paid at Houston, Texas and at additional mailing offices. Cover price is $5.99 US. Subscription rate is $29.50/year in the United States, $39.50 in Canada and Mexico, $69.50 elsewhere. POSTMASTER: Please send address changes to Linux Journal, PO Box 16476, North Hollywood, CA 91615. Subscriptions start with the next issue. Canada Post: Publications Mail Agreement #41549519. Canada Returns to be sent to Pitney Bowes, P.O. Box 25542, London, ON N6C 6B2 4 | may 2011 w w w. l i n u x j o u r n a l . c o m RouterBOARD SXT - Solid all-in-one design One hand enclosure access Quick and easy to mount 5GHz 802.11a/n wireless module 16dBi dual chain antenna built-in Signal strenght LED indicators One 10/100 Ethernet port USB 2.0 port FCC certified Voltage and temperature monitors Packaged with mounting bracket, attachment ring, power adapter and PoE injector - Only $89 for the complete kit SXT 5HnD is a low cost, high speed wireless device which can be used for point to point links, or as a CPE for point to multipoint installations. Dual chain 802.11n and TDMA technology help to achieve even 200Mbit real throughput. Complete with a ready to mount enclosure and built-in antenna, the package contains everything you need to make a point to point link, or connect to an AP. The SXT is powered by RouterOS, the most advanced router, bandwidth controller and firewall. www.mikrotik.com Executive Editor Senior Editor Associate Editor Art Director Products Editor Editor Emeritus Technical Editor Senior Columnist Security Editor Hack Editor Virtual Editor Jill Franklin [email protected] Doc Searls [email protected] Shawn Powers [email protected] Garrick Antikajian [email protected] James Gray [email protected] Don Marti [email protected] Michael Baxter [email protected] Reuven Lerner [email protected] Mick Bauer [email protected] Kyle Rankin [email protected] Bill Childers [email protected] Contributing Editors Ibrahim Haddad • Robert Love • Zack Brown • Dave Phillips • Marco Fioretti • Ludovic Marcotte Paul Barry • Paul McKenney • Dave Taylor • Dirk Elmendorf • Justin Ryan Proofreader Publisher General Manager Senior Sales Manager Associate Publisher Webmistress Accountant Geri Gale Carlie Fairchild [email protected] Rebecca Cassity [email protected] Joseph Krack [email protected] Mark Irgang [email protected] Katherine Druckman [email protected] Candy Beauchamp [email protected] Linux Journal is published by, and is a registered trade name of, Belltown Media, Inc. PO Box 980985, Houston, TX 77098 USA Editorial Advisory Panel Brad Abram Baillio • Nick Baronian • Hari Boukis • Steve Case Kalyana Krishna Chadalavada • Brian Conner • Caleb S. Cullen • Keir Davis Michael Eager • Nick Faltys • Dennis Franklin Frey • Alicia Gibb Victor Gregorio • Philip Jacob • Jay Kruizenga • David A. Lane Steve Marquez • Dave McAllister • Carson McDonald • Craig Oda Jeffrey D. Parent • Charnell Pugsley • Thomas Quinlan • Mike Roberts Kristin Shoemaker • Chris D. Stark • Patrick Swartz • James Walker Advertising E-MAIL: [email protected] URL: www.linuxjournal.com/advertising PHONE: +1 713-344-1956 ext. 2 Subscriptions E-MAIL: [email protected] URL: www.linuxjournal.com/subscribe PHONE: +1 818-487-2089 FAX: +1 818-487-4550 TOLL-FREE: 1-888-66-LINUX MAIL: PO Box 16476, North Hollywood, CA 91615-9911 USA Please allow 4–6 weeks for processing address changes and orders PRINTED IN USA LINUX is a registered trademark of Linus Torvalds. Learn Drupal & jQuery FROM THE COMFORT OF YOUR LIVING ROOM The Lullabot Learning Series includes everything you need to become a Drupal & jQuery expert from the comfort of your living room! The videos are available in both DVD format and high-definition video download. Purchase the videos at http://store.lullabot.com Current_Issue.tar.gz So Long Insecurity! T SHAWN POWERS he keys have been in my truck’s ignition ever since I bought it. In fact, as far back as I can remember, I’ve left my keys in the ignition of every vehicle I’ve ever owned. This lack of security works fairly well for me, because I live in a very rural area and drive fairly undesirable vehicles. Does that make me an idiot? Well, I agree I’m a bit naïve, and possibly foolish, but considering how often I lose things, it’s a risk I’m willing to take. My servers, however, don’t have the luxury of a rural environment. The Internet knows no backwater, and anything plugged in to the Net is vulnerable, regardless of location. We’ve dedicated this issue to security. As Linux users, we may brag about how secure our systems are, but a system is only as secure as you make it, so it’s important to read this issue and make sure you’re doing your part to keep your system clean. Our resident security whiz, Mick Bauer, gets us started by explaining DNS cache poisoning. If you use DNS (and if you use the Internet, you do), it’s important to learn how to keep your system safe from getting hijacked. Kyle Rankin also helps us with our servers, but in his column, he explains how to install a blog. Sure, you can host your blog elsewhere, but if you want to control every aspect of it, you’ll want to install it on your own server. Kyle shows how. Everyone knows the first line of defense when it comes to a network is the firewall. This month, we look at two different methods to set up your own. I review Untangle, which is a Linux-based firewall solution designed to be a one-stop shop for all your firewalling and filtering needs. Untangle is a complete distro, and it comes with both free and commercial modules. Whether you want to set up a simple firewall or provide Web filtering, load balancing, virus scanning and so forth, Untangle is a simple product for very complicated tasks. If you prefer to set up your own firewall server, however, Mike Horn shows how to use Firewall Builder to create a custom, highly available firewall on your own box. There even are GUI tools, which I always appreciate. Preparing for attack is a great idea, but sometimes it’s good practice to attack your own 8 | may 2011 w w w. l i n u x j o u r n a l . c o m servers, just to make sure they’re secure. Raphael Mudge teaches how to shoot our servers in the foot using Armitage and Metasploit. They may sound like comic-book antagonists, but these two software packages really can reveal weak points in your security. Knowledge is power, and with security, the more you know the better. Jeramiah Bowling takes us into the world of virtual servers this month, for some unique vulnerabilities to watch for when using a virtual environment. For the most part, virtual servers behave just like their steel and silicon counterparts, but they offer one more layer of vulnerability, so we should be careful how we secure them. Aleksey Tsalolikhin provides a different take on a well-known product this month as well, as he demonstrates Cfengine’s ability to assist in securing computers. Anyone who manages configurations for multiple computers is familiar with Cfengine, but Aleksey describes some features we may not have considered before. If all this talk of security is making you paranoid, don’t worry. In this issue of Linux Journal, we still have the reviews, product announcements, and columns you’re used to. Whether it’s Reuven M. Lerner’s column on Node.JS, Dave Taylor’s continuation of the Mad Libs game he started last month, or Kyle Rankin and Bill Childer’s new column Tales from the Server Room, this issue should entertain and educate, even if you’re not a security nut. Remember, just because I’m foolish with my car keys doesn’t mean you need to be foolish with computer security. I always can offset my bad key habits with GPS tracking and hidden security cameras. If you put your password on a Post-It note stuck to your monitor, this issue won’t help you. There’s not a firewall in the world that can fix lazy!I Shawn Powers is the Associate Editor for Linux Journal. He’s also the Gadget Guy for LinuxJournal.com, and he has an interesting collection of vintage Garfield coffee mugs. Don’t let his silly hairdo fool you, he’s a pretty ordinary guy and can be reached via e-mail at [email protected]. Or, swing by the #linuxjournal IRC channel on Freenode.net. Save the Date! 2011 USENIX Federated Conferences Week June 14–17, 2011, Portland, OR www.usenix.org/events/#fedweek11 REGISTRATION DISCOUNTS AVAILABLE! USENIX ATC ’11 2011 USENIX Annual Technical Conference Wednesday–Friday, June 15–17 www.usenix.org/atc11 WIOV ’11 3rd Workshop on I/O Virtualization Tuesday, June 14 www.usenix.org/wiov11 HotStorage ’11 WebApps ’11 2nd USENIX Conference on Web Application Development Wednesday–Thursday, June 15–16 www.usenix.org/webapps11 HotCloud ’11 3rd USENIX Workshop on Hot Topics in Cloud Computing 3rd USENIX Workshop on Hot Topics in Storage and File Systems Tuesday, June 14 www.usenix.org/hotcloud11 Tuesday, June 14 www.usenix.org/hotstorage11 And more! Registration will be open in early April. Register by the Early Bird Registration Deadline, Monday, May 23, and receive the greatest savings. Visit www.usenix.org/events/#fedweek11 for new workshop announcements and registration information. Stay Connected... www.usenix.org http://www.usenix.org/facebook http://www.usenix.org/linkedin http://twitter.com/usenix http://blogs.usenix.org letters challenge and would benefit from some expert experience. Keep up the good work. -George Dave Taylor replies: Thanks for your note, George. It’s always great to get reader mail (as long as it’s not complaining that I don’t handle spaces in filenames properly). I’m not exactly sure what you’re talking about here though. Can you give me a more specific example of what you’re trying to accomplish? Second-String Desktop “Statistics with R” Joey Bernard’s “Statistics with R” was a very welcome and useful piece [LJ, March 2011]. As an instructor, I noticed a very interesting on-line GNU-licensed statistics “textbook” based on R, IPSUR. Although available in “frozen” PDF format, it is also available “live” as a Lyx+Sweave file. I was never really able to get Lyx and Sweave to work (I use plain-vanilla Lyx all the time). There are instructions on-line, but I could not get them to work for me. Maybe it’s too specialized for a column (is it?), but maybe you have suggestions. -Federico Marchetti Work the Shell Request I have a request for Dave Taylor: do a series on system admin scripts. I have been doing basic bash stuff for years, but have several scripts that are quite a bit more complex—specifically, wrapper functions for things like database queries that can be included into any script or grabbing the output of stderr, getting the exit codes from commands and acting on them. I personally find these a 1 0 | may 2011 w w w. l i n u x j o u r n a l . c o m Linux for Science Column I would like to second Kwan Lowe’s comments in the March 2011 Letters regarding Joey Bernard’s new column. I love it. Being a computer scientist by trade, and having worked in engineering data processing/presentation at Boeing labs and wind tunnel for more than 20 years, I love working with and learning about data analysis tools and processes. If LJ would give Joey a couple more pages to work with, maybe some articles on CFD and Finite Elements might be fun. Also, generating fractal landscapes and some basic 3-D rendering (PovRay) are always fun to play with. I just wanted to comment on the desktop manager article by Shawn Powers [LJ, February 2011]. The memory usage stated by Shawn from the screenshots are not the actual amounts used by the system and applications. The amount in the article is the physical memory used. In Linux, unused resources are considered wasted, so the kernel will cache as much memory as it can for faster access. To get the amount of memory being used by the system, we have to look at the used column for -/+ buffers/cache. And, the free column on this same row is the amount available for applications. -Jim Phelps -Mohamed King Checking RAID Status Thanks for the tip. My main point in comparison is how much physical RAM was used. Because that is such a critical point for low-end systems, it’s what I wanted to concentrate on. I took the snapshot immediately after the system booted, and even if memory was freed afterward, it still loaded up that much RAM at first, which would be a problem for low-end systems. You are correct that the kernel is amazing at managing memory, which is why I took my snapshot on a fresh boot.—Ed. Joey Bernard replies: I know that a lot of CFD people use the Ansys products, but I’d like to keep these pieces focused on open-source software. I have a piece on getting started with OpenFOAM on my list, so keep on the lookout for that. As for longer pieces, that depends on how much space is available in any given issue. I’ll let Shawn and the rest of the editorial team figure out what the best balance is for all the readers. In the February 2011 Letters section, David N. Lombard suggests to check RAID status periodically by making a cron job with a command similar to this: # echo check > /sys/block/md0/md/sync_action I think that this is good advice, but I’d suggest that users should check whether their distribution already ships with a similar solution. For example, Ubuntu Karmic does have a cron job in /etc/cron.d/mdadm that calls a script located at /usr/share/mdadm/checkarray every At Your Service week that does exactly what David suggested. It also has other convenient features, such as checking whether the MD device is idle before issuing a “check” command. -Rafael Varela Tips for Finding Your Phone This is to thank Daniel Bartholomew for the article “Finding Your Phone, the Linux Way” in the November 2010 issue. It was very useful. Regarding triggering the “lostphone-actions” on the phone, I think an important method is missed. One can send an SMS to the phone (when one feels it’s lost) and trigger these actions. The advantages for this compared to the suggested methods are that you won’t need a Web site, and the phone won’t need to poll it to trigger these actions. The phone can respond back by replying to the trigger SMS (with GPS coordinates and so on) giving you flexibility as compared to hard-coding the recipient. One also may specify an e-mail ID to respond to in the SMS, so that the phone can send GPS coordinates and/or photos in that e-mail ID. Look at SMSCON (talk.maemo.org/ showthread.php?t=60729), although I have not tried this out myself. -Mayuresh Home Server Series Just a quick note to pass along how much I’m enjoying Kyle Rankin’s article in the March 2011 issue of Linux Journal regarding setting up a home server. The first paragraph was too ironic, in that I’ve been preaching that same thing to people for some time now—the “cloud” sounds nice, and Canonical and others are putting a lot of effort in that direction, but it may not be as universally accepted as they might think or hope. I bought Kyle’s Ubuntu Server book a while back and set up a server and network in our home, and it works great. It’s just a Samba file server for Ubuntu and Mac machines, but it stores all of our family pictures, videos and so on. Thanks to Kyle for providing such clear guidance in that book on how to set it up! I’m just an airline pilot (not in the computer industry) hacker, educated long ago as an aero engineer, so all of this is selflearning. When I first gave Linux a try, I did get some bad reviews about Linux Journal and ended up spending lots of money for two of the British periodicals, even though they tend toward the tabloid at times. The feedback I got then was that Linux Journal was “just for heavy business servers people”, and that an individual wouldn’t find much use with getting it. Your direction is clearly to improve that image, and I do enjoy what else Linux Journal has included lately. So thanks. You’ve been a great help already. I’ll sign off by asking Kyle to keep this series that he’s starting. It’s useful for the little people as much as more Linuxcompetent types, and I encourage the editors to keep broadening the scope of the magazine as well. I do enjoy getting it every month. Keep up the great work! -Brad Knapp MAGAZINE PRINT SUBSCRIPTIONS: Renewing your subscription, changing your address, paying your invoice, viewing your account details or other subscription inquiries can instantly be done on-line, www.linuxjournal.com/subs. Alternatively, within the U.S. and Canada, you may call us toll-free 1-888-66-LINUX (54689), or internationally +1-818-487-2089. E-mail us at [email protected] or reach us via postal mail, Linux Journal, PO Box 16476, North Hollywood, CA 91615-9911 USA. Please remember to include your complete name and address when contacting us. DIGITAL SUBSCRIPTIONS: Digital subscriptions of Linux Journal are now available and delivered as PDFs anywhere in the world for one low cost. Visit www.linuxjournal.com/digital for more information or use the contact information above for any digital magazine customer service inquiries. LETTERS TO THE EDITOR: We welcome your letters and encourage you to submit them at www.linuxjournal.com/contact or mail them to Linux Journal, PO Box 980985, Houston, TX 77098 USA. Letters may be edited for space and clarity. WRITING FOR US: We always are looking for contributed articles, tutorials and realworld stories for the magazine. An author’s guide, a list of topics and due dates can be found on-line, www.linuxjournal.com/author. ADVERTISING: Linux Journal is a great resource for readers and advertisers alike. Request a media kit, view our current editorial calendar and advertising due dates, or learn more about other advertising and marketing opportunities by visiting us on-line, www.linuxjournal.com/advertising. Contact us directly for further information, [email protected] or +1 713-344-1956 ext. 2. ON-LINE WEB SITE: Read exclusive on-line-only content on Linux Journal’s Web site, www.linuxjournal.com. Also, select articles from the print magazine are available on-line. Magazine subscribers, digital or print, receive full access to issue archives; please contact Customer Service for further information, [email protected]. FREE e-NEWSLETTERS: Each week, Linux Journal editors will tell you what's hot in the world of Linux. Receive late-breaking news, technical tips and tricks, and links to in-depth stories featured on www.linuxjournal.com. Subscribe for free today, www.linuxjournal.com/enewsletters. w w w. l i n u x j o u r n a l . c o m may 2011 | 1 1 UPFRONT NEWS + FUN Organize Your Shows with Sickbeard diff -u WHAT’S NEW IN KERNEL DEVELOPMENT First, a disclaimer: the program Sickbeard was created for the purpose of pirating television shows from Usenet Sometimes a large kernel project does a lot of work outside the standard kernel development process, and then it’s difficult to merge the code into the mainline source tree. This had been going on for a while with Google’s Linux port to the Nexus One phone. The Nexus One development process involved lots and lots of “micro-patches” that could leave the code in a completely broken state, but that ultimately added up to the working system it had produced. This goes against standard kernel development practice, where each patch is expected to leave the kernel code in a working, testable state. Another aspect of the Nexus One development process that caused some problems was the fact that in some cases, the true authors of a given piece of code could not be clearly established. This was just because of the way they constructed their changesets, but it made for a sticky situation for anyone trying to port code back to the official tree. Just such an “anyone” recently appeared in the form of Daniel Walker. With excellent intentions, he tried to wrestle the Nexus One code base into a form that could be submitted for inclusion to the kernel folks, some of whom felt that such a merge was actually long overdue. But because of the difficulty of determining attribution, and partly because Daniel himself may not have understood the true significance of some of the attribution fields in git changelogs, Daniel took an approach that led to some violent conflagrations before it was cleared up. Since his own patches were significant massages of Google’s code, he just listed himself as the author and attributed the actual ownership of the code to Google in his changelog comments. This caused problems, because some people thought Daniel was claiming authorship for other people’s work; while others pointed out that without a proper chain of “signed-off-by” fields in the changesets, there would be no evidence that the code was appropriately GPLed. Others (the Google developers) felt that although Daniel wasn’t necessarily claiming work that wasn’t his, they still wanted attribution wherever it was feasible to give it. Ultimately, the misunderstanding seems to have been cleared up, though it serves as a good illustration of what can happen when a large third-party project lets its code deviate beyond a certain degree from the main kernel tree before attempting to merge it back in. I’ve been writing about the BKL and its future demise for a long time. Well, the future is now, apparently. Arnd Bergmann posted the patch of his recent dreams, not only taking out the last occurrences of uses of the BKL, but also removing its actual implementation. It is gone. Hoots and hollers of glee echoed through the kernel’s chambers as the news was announced. Alan Cox reflected, “Nice to see it gone—it seemed such a good idea in Linux 1.3.” Reinhard Tartler and the VAMOS team have released undertaker, a new tool that does static analysis (automated bug-hunting without compiling or running the code) for the Linux kernel. They’ve wound it tightly against producing false positives, saying it’s better to miss a bug than to report on one incorrectly— sort of a software version of “innocent until proven guilty”. —ZACK BROWN 1 2 | may 2011 w w w. l i n u x j o u r n a l . c o m and torrent sites. I don’t condone piracy of any sort, but Sickbeard has some amazing other features that make it worth mentioning. Sickbeard is a server-based application that runs on your file server, and it can manage and sort all of your television shows. If you have a collection of TV episodes you’ve recorded with MythTV, ripped from DVD, pulled from TiVo or however you might have procured them, organizing them in a way that programs like Boxee or XBMC understand can be daunting. Sickbeard is a program that can sort, organize and rename episodes automatically. It lets you know if you are missing episodes, and it can download metadata and cover art. It even can notify you with a pop-up on your XBMC hometheater device when a new episode is added to your library. Again, Sickbeard was designed with nefarious intentions in mind, but even if you don’t want to pirate television shows from Usenet, it’s a great way to keep your XBMC database organized. Check it out at www.sickbeard.com. —SHAWN POWERS [ NON-LINUX FOSS If you love Linux but find yourself often stuck on Windows, the folks at Pendrivelinux.com have you covered. Their USB Linux installers are some of the best available, but you can create them only with Windows! Whether you want a simple Universal USB Installer tool for Linux ISO files or to create a USB drive with multiple bootable images, their tools are painless to use. If you have Windows, but you want to install or use Linux, you owe it to yourself to give these USB creation tools a try. You might find Windows is the easiest way to install Linux! —SHAWN POWERS UPFRONT ] Managing Your Dead Tree Library If you’re an e-book reader, chances are you already use the wonderful Calibre software (www.calibre-ebook.com). If not, see Dan Sawyer’s article in the April 2011 issue. Like many avid readers, however, I still find something soothing about a book made from dead trees. Unfortunately, it’s easy to lose track of all the books I own. If you’re the type of person who lends books out, it can become even more complicated. Enter Alexandria. If you have a sizable personal book library, you might be interested in Alexandria (alexandria.rubyforge.org). With Alexandria, you not only can manage, sort, organize and consolidate your book collection, but you also can keep track of books you loan out. You can be a tiny little lending library, without the need for library cards! At the very least, it’s nice to keep track of your books. Alexandria makes adding books a snap, and most of the time it even automatically downloads cover art for you. You can go from a pile of dead trees (Figure 1), to a window full of perfect pixels (Figure 2) easily. Recycle’s Friend, Reuse Recycling is something we all deal with, or at least should deal with, when it comes to technology. Old computers, monitors, motherboards and their ilk are full of toxic chemicals that must be disposed of properly. Thankfully, “Being Green” is a trend that hasn’t really lost any steam. As technologists, we understand the need to use less power, recycle old technology and make wise purchasing decisions when it comes to hardware. And, we shouldn’t forget recycle’s buddies reduce and reuse either. With modern virtualization, it’s possible to reduce the number of servers we need to buy. Add to that the reduction in power usage with low-power CPUs, and it’s relatively easy to reduce the amount of waste in our server rooms. Unfortunately, it doesn’t eliminate the problem completely. That’s where reuse comes into play. In the photo, you’ll see a clock I received as a Christmas gift. It’s simply the circuit board from some sort of router that has “clock guts” added to it. Geeky yes, but if it’s stuck on my wall, it’s one fewer piece of computer scrap in a landfill. No, reusing old technology like this won’t solve our technology waste problem, but every little bit helps. Plus, items like my picture frame made from old 30-pin SIMM memory chips make for great conversation pieces. How have you reused technology in nontraditional ways? Send a photo to [email protected], and I’ll post some of them on our Web site. Perhaps we’ll all get some gift ideas for the next holiday season! —SHAWN POWERS Figure 1. Dead Trees Figure 2. Books Organized with Alexandria —SHAWN POWERS w w w. l i n u x j o u r n a l . c o m may 2011 | 1 3 [ UPFRONT ] Numeric Relativity This month finds us at the cutting edge of physics, numerical general relativity. Because we haven’t perfected mind-to-mind transmission of information, we won’t actually be able to cover in any real detail how this all works. If you are interested, you can check out Wikipedia (en.wikipedia.org/wiki/ADM_formalism) or Living Reviews (relativity.livingreviews.org/Articles/subject.html#NumRel). Once you’ve done that, and maybe taken a few graduate courses too, you can go ahead and read this article. General relativity, along with quantum mechanics, describes the world as we know it at its most fundamental level. The problem is there is a very small set of solutions to Einstein’s equations. And, they are all solutions for idealized situations. Here are the most common ones: I Schwarzschild: static, spherically symmetric. I Reissner-Nordstrom: static, spherically symmetric, charged. I Kerr: rotating, spherically symmetric. I Kerr, Newman: rotating, spherically symmetric, charged. In order to study more realistic situations, like a pair of black holes orbiting each other, you need to solve Einstein’s equations numerically. Traditionally, this has been done either from scratch by each individual researcher, or you may inherit some previous work from another researcher. But, now there is a project everyone can use, the Einstein Toolkit. The project started out as Cactus Code. Cactus Code is a framework consisting of a central core (called the flesh) and a number of plugins (called thorns). Cactus Code provides a generic framework for scientific computing in any number of fields. The Einstein Toolkit is a fork of Cactus Code with only the thorns you need for numerical relativity. General relativity is a theory of gravitation, proposed by Einstein, where time is to be considered simply another dimension, like the three spatial ones. So the three space and one time dimensions together give you space-time. Numerical relativity (at least in one of the more common techniques) re-introduces the break between space and time. The basic idea is that you describe space at one instance in time, and then describe with equations how that space changes moving from one time to another. This technique was introduced by Arnowitt, Deser and Misner, and is called the ADM formalism. The code in the Einstein Toolkit uses a variation on this technique. The toolkit code is available through Subversion and Git. To make checkouts and updates easier on end users, the development team has provided a script called GetComponents. This script expects to use git, so you need git installed on your system. To get it, you can wget it from: ¯manifest/branches/ET_2010_11/einsteintoolkit.th This downloads all of the parts you need to get a running system in the subdirectory Cactus. To update the code, you simply need to run: ./GetComponent -a -u ./einsteintoolkit.th You can do it this way because the file einsteintoolkit.th actually is downloaded to the current directory by the GetComponents script. This is pretty heavy-duty number crunching, so you likely will need to make sure you have several other packages installed on your system. You will need a C compiler, a C++ compiler and a FORTRAN compiler. You’ll probably want to install MPI as well. File input and output is available in ASCII, but you may want to consider HDF5 for more structured data. Some thorns also may need some specialized libraries, such as LAPACK. This depends on which thorns you actually are using. The way Einstein Toolkit is set up, you create and use a configuration for a particular executable. This way, you can have multiple configurations, which use different thorn combinations, all from the same core source code. To create a new configuration, it is as simple as typing make configname, where configname is the name you give to the configuration. For the rest of this article, let’s play with a configuration called config1. So you would type make config1, and get a new subdirectory called config1 containing all the required files. Don’t forget that this needs to be done from within the Cactus directory that was created by the GetComponents script. Once this initialization is done, you can execute several different commands against this configuration. An example would be make config1-configinfo, which prints out the configuration options for this particular configuration (Figure 1). Figure 1. Example Configuration Options wget http://svn.cactuscode.org/Utilities/branches/ ¯ET_2010_11/Scripts/GetComponents chmod 777 GetComponents Although there are several options to this script, most people simply will want to use it to grab the latest code for the Einstein Toolkit: ./GetComponents -a http://svn.einsteintoolkit.org/ 1 4 | may 2011 w w w. l i n u x j o u r n a l . c o m The first step is making sure everything is configured properly. When you created your new configuration above, the config command was run for you. If you decide that you actually wanted to include some other options, you can rerun the config command with make config1-config <options>, where <options> are the options you wanted to set. These options are in the form <name>=<value>. An example would be MPI=MPICH, if you [ wanted to compile in support for MPICH parallelism. For now, you can just enter the following to do a basic configuration: UPFRONT ] learn what is possible. To run your executable, run it as: cactus_config1 parfile.par make config1-config MPI=MPICH If you are running an MPI version, it would look like this: If you ever want to start over, you can try make config1-clean or make config1-realclean. If you are done with this particular configuration, you can get rid of it completely with make config1-delete. Now that everything is configured exactly the way you want it, you should go ahead and build it. This is done simply with the command make config1. Now, go off and have a cup of your favourite beverage while your machine is brought to its knees with the compile. This is a fairly complex piece of software, so don’t be too disappointed if it doesn’t compile cleanly on the first attempt. Just go over the error messages carefully, and make whatever changes are necessary. The most likely causes are either that you don’t have a needed library installed or the make system can’t find it. Keep iterating through the build step until you get a fully compiled executable. It should be located in the subdirectory exe. In this case, you will end up with an executable called cactus_config1. You can run some basic tests on this executable with the command make config1-testsuite. It will ask you some questions as to what you want to test, but you should be okay if you accept the defaults most of the time. When you get to the end, you can ask the system to run all of the tests, run them interactively or choose a particular test to run. Remember, if you are using MPICH, you need to have mpd running on the relevant hosts so the test suite will run correctly. This by no means guarantees the correctness of the code. It’s just the first step in the process. As in any scientific programming, you should make sure the results you’re getting are at least plausible. Now that you have your executable, you need some data to feed it. This is the other side of the problem—the “initial data” problem. The Einstein Toolkit uses a parameter file to hand in the required parameters for all of the thorns being used. The development team has provided some introductory parameter files (located at https://svn.einsteintoolkit.org/cactus/EinsteinExamples/ branches/ET_2010_06/par) that beginners can download to They Said It The real danger is not that computers will begin to think like men, but that men will begin to think like computers. —Sydney J. Harris mpirun -np X cactus_config1 parfile.par where X is the number of CPUs to use, and parfile.par is the parameter file to use. As it stands, the Einstein Toolkit provides a very powerful set of tools for doing numerical relativity. But, this is only the beginning. The true power is in its extensibility. It is distributed under the GPL, so you are free to download it and alter it as you see fit. You just have to be willing to share those changes. But, the entire design of the toolkit is based around the idea that you should be able to alter the system easily. It’s as simple as writing and including a new thorn. Because you have all the source code for the included thorns, you have some very good examples to look at and learn from. And, because thorns are ideally independent from each other, you should be able to drop in your new thorn easily. The list of thorns to be compiled and linked into the flesh is controlled through the file configs/config1/ThornList. In case you decide to write your own thorn, I’ll cover a bit of the concepts here. A thorn should, ideally, be completely unlinked from any other thorn. Any communication should happen through the flesh. This means that data should be translated into one of the standard formats and handed off to the flesh. The thorns are responsible for everything from IO to data management to the actual number crunching. If you are working on some new algorithm or solution technique, this is where you want to be. The last step is getting pretty graphics. You likely will want to share your results with others, and that seems to be easiest through pictures. You will want to use other tools, like gnuplot, to generate plots or even movies of the results from your calculations. Several tutorials exist for what you can do with tools like gnuplot. I hope this has given you enough to get started with a very powerful tool for numerical relativity. And, as always, if there is a subject you’d like to see, please let me know. Until then, keep exploring.—JOEY BERNARD Security at LinuxJournal.com Did you know you can visit www.linuxjournal.com/ tag/security to see all our latest security-related articles The factory of the future will have only two employees, a man and a dog. The man will be there to feed the dog. The dog will be there to keep the man from touching the equipment. —Warren G. Bennis in one place? It’s important to stay informed about all things security-related, so we hope you’ll visit us often. Do you have some security insights to share with LinuxJournal.com readers? We’re always looking for What the country needs are a few labor-making inventions. —Arnold Glasow Web contributors, so let us know if you have some- If it keeps up, man will atrophy all his limbs but the pushbutton finger. —Frank Lloyd Wright at [email protected]. thing to share with the whole class. Drop me a line —KATHERINE DRUCKMAN w w w. l i n u x j o u r n a l . c o m may 2011 | 1 5 COLUMNS AT THE FORGE Node.JS Want to write high-performance network server applications? Node.JS uses JavaScript to do exactly that. REUVEN M. LERNER Back in 1995, a number of my coworkers and I went to a big event in New York City where Sun Microsystems, a major UNIX vendor at the time, was announcing its new programming language, Java. Java, of course, was impressive in many ways, but what wowed us was the ability to write “applets”, little Java programs that executed inside the browser. Also at that event was browser powerhouse Netscape Communications, who demonstrated a separate programming language that executed inside the browser. Netscape originally called the language LiveScript, but in the wake of the hype that Java generated, Netscape renamed it JavaScript. Fast-forward to today, and it’s amazing to see how much of this story has changed. Sun is no more, having been bought out by Oracle. Netscape is no more, although its crown-jewel browser has been turned into a leading open-source project. Java has become popular and ubiquitous, and there no longer is any need to convince programmers that it’s worthwhile to learn. And, although in-browser applets still exist, they are a tiny fraction of what people now do with Java. JavaScript is getting a great deal of love and attention, and you can expect further improvements during the coming months and years. The most interesting part of this whole story is JavaScript. Originally meant to be a simple language put inside browsers, then renamed as part of a marketing effort, you could say that JavaScript had a troubled childhood. Each browser’s implementation was slightly different, making it hard to write programs that would work on all browsers. Many implementations were laughably unstable or insecure. One friend of mine enjoyed demonstrating this with a Web page that contained a “while” loop that opened an infinite number of “alert” dialog boxes. Execution was fairly slow and used a large amount of memory. And, of course, there were all sorts of language features that were hard to understand, ambiguous, implementation-dependent or annoying. Adding insult to injury was the odd standardization process that JavaScript went through, giving it an 1 6 | may 2011 w w w. l i n u x j o u r n a l . c o m official name of ECMAScript. (Of course, no one really calls it that.) Nearly everything about JavaScript seems to have changed in the past few years. JavaScript used to be the language everyone used for lack of an alternative. Now, JavaScript is coming into its own. This is certainly true for client-side programming. The ease with which it’s now possible to create good interfaces is a testament not only to front-end developers, but also to libraries, such as Prototype, MooTools and jQuery, that make it enjoyable, rather than painful, to work with JavaScript. Because so many sites now use JavaScript extensively, the need for fast, stable JavaScript engines has grown dramatically. Each of the major open-source browsers (Firefox, Chrome and Safari) now has a team of specialists working to make JavaScript better in all ways, and the improvements are obvious to those who have upgraded their browsers in the past year. JavaScript is getting a great deal of love and attention, and you can expect further improvements during the coming months and years. Some of these modern JavaScript implementations now are available outside the browser as independent libraries. This means if you want to create a nonbrowser program that uses JavaScript, you can do so without too much trouble. About a year ago, a friend and colleague told me that JavaScript was starting to show some potential as a language for server applications. I laughed this off, saying it was probably a fad or a crazy project. After all, I asked him, who would want to use JavaScript as a server-side language, when we have such excellent languages and frameworks already? Of course, the joke is on me. In the past year, more and more people have started to use JavaScript as a server-side language. This is due in no small part to the emergence of Node.JS, an amazingly fast engine for network applications written in JavaScript, which also was covered by Avi Deitcher in last month’s LJ. The secret to this speed isn’t just JavaScript, although that’s certainly part of the equation. Node.JS uses Google’s V8 JavaScript engine, along with native C++ and JavaScript code. The other reason for Node.JS’s high speed is that it is eventdriven. Rather than handling incoming traffic with many different processes (à la classic Apache) or threads (modern Apache, as well as some other servers), Node.JS handles all incoming connections in a single process and a single thread. This form of programming is a bit strange at first, but it works very well—so well, in fact, a large community has formed around Node.JS with many plugins and extensions. This month, I take a quick look at Node.JS, what you can do with it, and why its usage is growing, especially in high-demand Web applications. Even if you never end up using Node.JS in your own work, I assure you that after you’ve seen what it can do, it’ll change your thinking about what JavaScript is and how you write Web applications. Installation Although it’s common to think of Node.JS as a JavaScript program, it’s actually an engine on top of which JavaScript programs run. Node.JS itself is actually an executable you must install onto your machines. I’m normally a big fan of Ubuntu’s packaging mechanism, which allows me to use apt-get install to fetch and install whatever software I want. Node.JS isn’t yet available for Ubuntu 9.10, which I have running on my server, so I was forced to install it from source. Fortunately, that’s quite simple to do, especially if you’re familiar with the Git version-control system. First, I cloned the repository from GitHub: git clone git://github.com/ry/node.git Then, I compiled Node.JS by going into the node directory and running the standard commands for compiling source: cd node ./configure && make && make test && make install Note that when you compile Node.JS, you’re compiling a program that includes the V8 JavaScript engine, so don’t be surprised if it takes a while to compile on your machine. The default installation goes under /usr/local/, including /usr/local/lib/node, /usr/local/include/node and (for the executable) /usr/local/bin/node. Now that it’s installed, what can you do? Well, the traditional thing to do in any programming language is a “Hello, world” program. So let’s look at one (modified from an example in the Node.JS documentation): var http = require('http'); http.createServer(function (request, response) { var startTime = new Date().getTime(); response.writeHead(200, {'Content-Type': 'text/plain'}); response.write("line 1\n"); response.end('Hello World\n'); var elapsedTime = new Date().getTime() - startTime; console.log("Elapsed time (in ms): " + elapsedTime); }).listen(8124); console.log('Server running at http://127.0.0.1:8124/'); The first thing that comes to mind when I look at code like this is, “Wow, JavaScript can look like any other language!” Perhaps that’s an odd thing to think or say, but I’m so used to seeing JavaScript inside an HTML page or (better yet) in a file of its own but inside unobtrusive document-ready blocks in jQuery, that seeing a server-side JavaScript program that doesn’t reference the DOM even once is a new and strange experience. The first line uses the require function, provided by CommonJS. CommonJS is an API that attempts to fill in the gaps left by the JavaScript standard, now that JavaScript is used beyond the browser. There are a number of implementations of the CouchJS standard, of which one is in Node.JS. One of the most useful aspects of the specification has to do with modules, allowing you to do in JavaScript what’s taken for granted in other languages— putting a number of function and variable definitions into a file and then importing that file via a reference name into a program. With CommonJS installed, the require function is, thus, available. The first line puts all of the definitions from the http module into our http variable. With that in place, you invoke the http.createServer function. This function takes one parameter—a function that itself takes two parameters: a request and a response. The request object contains everything you would expect in an HTTP request, including headers, parameters and the body. The response object, which is created by the server, contains the actual response headers and data. If you are new to JavaScript, it might seem a bit odd that I’m passing a function as a parameter. (And, if you’re not used to anonymous functions, you had better start now!) But I’m also not directly invoking that function. Rather, this is the way you tell Node.JS that when an HTTP request comes in via the server, your function should be invoked— and the HTTP request should be passed to the function’s first parameter. Indeed, this style is at the heart of Node.JS. You typically don’t invoke functions directly. Rather, you tell the underlying infrastructure that when a request comes in, such and such a function should be invoked. This use of “callbacks” is already somewhat familiar to anyone who has used JavaScript in a browser. After all, a client-side JavaScript program is nothing more than a bunch of callbacks. But in the server context, it seems w w w. l i n u x j o u r n a l . c o m may 2011 | 1 7 COLUMNS AT THE FORGE a bit different, at least to me. Now, what does this callback function do? First, it gets the current time, in milliseconds and stores it in a variable (startTime). I’ll use it later on to find out how long the execution took. The callback then uses the built-in functions that have been defined for the response object to send data back to the user’s browser. Several methods are available to use. response.writeHead sends the HTTP response code, as well as one or more HTTP headers, passed as a JavaScript object. response.write (which should be invoked only after response.writeHead) sends an arbitrary string to the user’s browser. The response to the user needs to finish with a call to response.end; if you include a string as a parameter, it’s the same as calling response.write with that string, followed by response.end. The final thing that this function does is print, on the console, the number of milliseconds that have elapsed since it first was invoked. Now, this might seem a little silly when using a toy program like this one. But even when I used ApacheBench to make 10,000 total requests with 1,000 of them happening concurrently, Node.JS kept chugging along, handling each of these requests in either 0 or 1ms. That’s pretty good from my perspective, and it matches the extreme performance others have reported with Node.JS, even on more sophisticated programs. The call to createServer returns an HTTP server object, which I then instruct to listen on port 8124. From that point on, the server is listening—and each time it receives an HTTP request, it invokes the callback. At any given time, Node.JS is handling many simultaneous connections, each of which is sending or receiving data. But as a single-process, single-thread program, Node.JS isn’t really doing all of this simultaneously. Rather, it’s doing its own version of multitasking, switching from one task to another inside its own program. This gives Node.JS some pretty amazing speed. that you can require a file and have its contents imported into a local variable. In order to promote the distribution and usage of many such modules, Isaac Schlueter created npm, the Node.JS package manager. npm doesn’t come with Node.JS, but I expect this will change over time. To install npm, simply run the following command (but not as root!) from the shell: curl http://npmjs.org/install.sh | sh If you find you cannot install it because of the permissions associated with the node.js directory, you should not install npm as root. Rather, you should change the permissions on the node.js directory (typically /usr/local/nodejs), such that you can install npm as a regular user. Once you’ve installed npm, you can get a list of what’s available with npm list. This lists all the packages, and at the time of this writing, there were more than 3,700 packages available, although I must admit that each version of a package counts toward the list. To install one of these packages, simply type: node install express And sure enough, the npm module “express” is installed. I should add that it took me a while to get the permissions right, such that npm could install things into /usr/local on my server to which a nonroot user typically has limited rights. I hope these sorts of permission issues will go away in the future, perhaps by putting npm’s files in a place other than /usr/local. Now that you have installed this module, what do you do with it? You can write a simple Web application for starters. Express is designed to be much like Sinatra, a simple Web server for Ruby. Here’s a simple “Hello, world” program in express, based on the express documentation: npm and More Advanced Programs What, you’re not impressed by a high-speed “hello, world” program? I can understand if you’re hesitating. And besides, the last few years have shown how powerful it can be to have a high-level abstraction layer for creating Web applications. Perhaps if you were writing low-level socket programs, it wouldn’t be a problem for you to send each header and the contents. But maybe there’s a way to have the high speed of Node.JS, while enjoying a high-level Web development library. Or, perhaps you’re interested in building not a Web application, but something that’ll be appropriate for a newer protocol, such as Web Sockets. I’ve already shown that Node.JS supports the CommonJS standard for external modules, such 1 8 | may 2011 w w w. l i n u x j o u r n a l . c o m var app = require('express').createServer(); app.get('/', function(req, res){ res.send("Hello, world\n"); }); app.listen(3000); In other words, you first require the express module. Because you downloaded express via npm, it is available to you automatically. You don’t need to set any paths or options. You then get the result back from loading the module and immediately create a server, which you put into your app variable. app is what you will use throughout your application. Then, you tell the application that when it receives a GET request for the '/' path, it should execute the function that you indicate. Notice that you don’t have to deal with the low-level details of HTTP responses here. You simply can send your response and be done with it. You then tell the application to listen on port 3000. You can save and run your application, and when you go to /, you get your greeting. Well, what else can you do? I’ve expanded express.js a bit and put it into Listing 1. To begin with, you can see that by specifying a Rails-style route (/person/:id) with a colon in front of one of the path segments, you can set a parameter name that is retrieved automatically, and that is then available via app.params.id: app.get('/person/:id', function(req, res){ res.send('Oh, you want information about person ' ¯+ req.params.id + "\n"); }); Going to /person/100 will result in the output: Oh, you want information about person 100 which means that the parameter can be used as the key in a database, for example. (And if you wonder whether Node.JS can talk to a database, be aware that there are adapters for many of them—both relational databases, such as MySQL and PostgreSQL, and also non-relational databases, such as MongoDB, Redis and CouchDB.) You aren’t limited to GET requests: app.post('/foo', function(req, res){ res.send("You requested foo\n"); }); If you ask for /foo via a POST request, you will get this response. But if you ask for /foo via GET, you will receive a 404 error from Node.JS. Finally, you also can use templates on the filesystem. One particularly Ruby-style template is called ejs, and it has a virtually identical syntax to Ruby’s ERb (embedded Ruby), including the need for a “views” directory and for a layout. Create a views subdirectory, and put index.ejs in it, as per Listing 2. You then COLUMNS AT THE FORGE can do something like the following: app.get('/file/:id', function(req, res) { res.render('index.ejs', { locals: {param: req.params.id} })}); Here, you’re taking the parameter (which you’re calling id), and you’re passing it to your template (index.ejs) as the local name param. You then ask express to render your template with the variable in it. Sure enough, your template is rendered in all of its Listing 1. express.js var app = require('express').createServer(); app.set('view options', { layout: false }); app.get('/', function(req, res){ res.send("Hello, world\n"); }); app.get('/person/:id', function(req, res){ res.send('Oh, you want information about person ' ¯+ req.params.id + "\n"); }); app.post('/foo', function(req, res){ res.send("You requested foo\n"); }); HTML glory, with the data that you passed to it. Actually, that’s not entirely true. Express looks for a layout, much as Rails templates do, and if it doesn’t find a layout, it’ll throw an exception. You could create a layout, but it’s easier just to modify the express application’s configuration. Do that by setting parameters inside app.set: app.set('view options', { layout: false }); Once that is added, your template is rendered just fine. Conclusion Node.JS already has started to affect the way that people write Web applications and even how they think about writing Web applications. Some sites (such as GitHub) have moved toward Node.JS for specific, high-performance tasks. Others are looking to change over completely. I don’t think I’ll be using Node.JS for a Web application any time soon, but I can think of several other ways it would be useful. Node.JS already has had a huge impact on the world of Web developers, and it appears poised to continue to hold this position of leadership for some time to come. Certainly, the days when I scoffed at the notion of server-side JavaScript have long gone.I Reuven M. Lerner is a longtime Web developer, architect and trainer. He is a PhD candidate in learning sciences at Northwestern University, researching the design and analysis of collaborative on-line communities. Reuven lives with his wife and three children in Modi’in, Israel. Resources app.get('/file/:id', function(req, res) { res.render('index.ejs', { locals: {param: req.params.id} })}); The home page for Node.JS is nodejs.org. The home page for the npm package manager is npmjs.org, And the home page for express is expressjs.com. app.listen(3000); Listing 2. index.ejs <html> <head> <title>Title!</title> </head> <body> <p>Body!</p> <p>From param: <%= param %></p> </body> </html> 2 0 | may 2011 w w w. l i n u x j o u r n a l . c o m Node.JS is not the first event-driven Web application engine. If you’re interested in learning more about similar projects in other languages, look at Twisted Python (twistedmatrix.com) and EventMachine for Ruby (rubyeventmachine.com). A full introduction to the world of event-driven network programming, using Twisted, is at krondo.com. Click on the “Twisted introduction” link to get started. You can get some specific pointers and tutorials on Node.JS via several sites, such as dailyjs.com and howtonode.org. Finally, you can learn more about the CommonJS standard at www.commonjs.org. COLUMNS WORK THE SHELL Mad Libs Generator, Tweaks and Hacks DAVE TAYLOR We continue building a Mad Libs tool and slowly come to realize that it’s a considerably harder problem than can be neatly solved in a 20-line shell script. Last month, I ended with a script that could take an arbitrary set of sentences and randomly select, analyze and replace words with their parts of speech with the intention of creating a fun and interesting Mad Libsstyle puzzle game. With a few tweaks, giving it a simple few sentences on party planning, we get something like this: and ((fill:noun)) the ((house:noun)) with ((lots:noun)) of ((pirate:noun)) ((booty:noun)) Next, let’s look at the output by simply blanking out the words we’ve chosen: If you're ___ for a fun ___ to celebrate your next ___ how ___ a pirate-themed costume party? Start If you're ((looking:noun)) [for] a fun ((way:noun)) by sending ___ in the form of ___ buried ___ map [to] celebrate your next ((birthday:noun)) how with X ___ the ___ of your house, then put a sign on ((about:adjective)) a pirate-themed costume the ___ ___ that ___ "Ahoy, mateys" and ___ the ___ party? Start by sending ((invitations:noun)) in the with ___ of ___ ___. form of ((a:noun)) <buried:verb> ((treasure:noun)) {map} with {X} ((marking:noun)) {the} ((location:noun)) [of] your house, then {put} {a} sign on the ((front:noun)) ((door:noun)) [that] ((reads:noun)) "Ahoy, mateys" {and} ((fill:noun)) [the] ((house:noun)) [with] ((lots:noun)) of ((pirate:noun)) ((booty:noun)) In the current iteration of the script, it marks words chosen but discarded as being too short with {}, words where it couldn’t unambiguously figure out the part of speech with [] and words that have what we defined as uninteresting parts of speech with <>. It seems like too many words are being replaced, doesn’t it? Fortunately, that’s easily tweaked. If we display them as regular words without any indication that they’ve been rejected for different reasons, here’s what we have left: If you're ((looking:noun)) for a fun ((way:noun)) to celebrate your next ((birthday:noun)) how ((about:adjective)) a pirate-themed costume party? Start by sending ((invitations:noun)) in the form of ((a:noun)) buried ((treasure:noun)) map with X ((marking:noun)) the ((location:noun)) of your It seems like too many words are being replaced, doesn’t it? Fortunately, that’s easily tweaked. What’s a bit harder to tweak is that there are two bad choices that survived the heuristics: “a” (in “form of a buried treasure map”) and “about” (in “how about a pirate-themed costume party?”). Just make three letters the minimum required for a word that can be substituted? Skip adjectives? For the purposes of this column, let’s just proceed because this is the kind of thing that’s never going to be as good as a human editor taking a mundane passage of prose and pulling out the potential for amusing re-interpretation. Prompting for Input The next step in the evolution of the script is to prompt users for different parts of speech, then actually substitute those for the original words as the text passage is analyzed and output. There are a couple ways to tackle this, but let’s take advantage of tr and fmt to replace all spaces with carriage returns, then reassemble them neatly into formatted text again. The problem is that both standard input and standard output already are being mapped and redirected: input is coming from the redirection of an input file, and output is going to a pipe that reassembles the individual words into a paragraph. This means we end up needing a complicated solution like the following: house, then put a sign on the ((front:noun)) ((door:noun)) that ((reads:noun)) "Ahoy, mateys" 2 2 | may 2011 w w w. l i n u x j o u r n a l . c o m /bin/echo -n "Enter a ${pos}: " > /dev/tty Even more than that, I suspect that however much we hack the script to make smarter word selections and identify context, the fact is that creating a really great Mad Libs involves human intervention. read newword < /dev/tty echo $newword esac /bin/echo -n "${prompt}: " > /dev/tty We have to be careful not to redirect to /dev/stdout, because that’s redirected, which means that a notation like &>1 would have the same problem of getting our input and output hopelessly muddled. Instead, it actually works pretty well right off the bat: One more thing we need to add for completeness is to detect when we have plural versus singular, particularly with nouns. This can be done simply by looking at whether the last letter of a word is an s. It’s not 100% accurate, but for our purposes, we’ll slide with it being pretty good: $ sh madlib.sh < madlib-sample-text-2 Enter a noun: Starbucks Enter a adjective: wet Enter a adjective: sticky Enter a noun: jeans Enter a noun: dog Enter a noun: window Enter a noun: mouse Enter a noun: bathroom Enter a noun: Uncle Mort plural="" if [ "$(echo $word | rev | cut -c1)" = "s" ] ; then plural="Plural "; fi Then, just modify the prompt appropriately: /bin/echo -n "$plural${prompt}: " > /dev/tty But, There Are Problems That produced the following result: adjective: an attribute (red, squishy, sticky, wet) Looking back at what we’ve done, however, there are a couple problems. The most important is that although we have a tool that identifies part of speech, it’s not particularly accurate, because it turns out that many words can be identified properly based only on their use and context. A grammarian already will have identified some of the problems above! Even more than that, I suspect that however much we hack the script to make smarter word selections and identify context, the fact is that creating a really great Mad Libs involves human intervention. Given an arbitrary sentence, there are words that can be replaced to make it funny, and others that just make it incomprehensible. Now, it wouldn’t be too much to have a somewhat less ambitious program that understood a Mad Libs type of markup language and prompted as appropriate, reassembling the results after user input. Perhaps “The <noun> in <place> stays mainly in the plain”, which turns into: Instead of just asking for the part of speech, we can have a simple case statement to include a useful prompt: Noun (person, place or thing): Noun (a place): case $pos in noun ) prompt="Noun (person, place or thing: ¯dog, Uncle Mort, Starbucks)" ;; verb ) prompt="Verb (action word: eat, ¯sleep, drink, jump)" ;; adjective ) prompt="Adjective (attribute: red, ¯squishy, sticky, wet)" ;; * ) prompt="$pos" ;; But, that I will leave as (ready for it?) an exercise for the reader! Note: Mad Libs is a registered trademark of Penguin Group USA.I If you're (( Starbucks )) for a fun way to celebrate your (( wet )) birthday, how (( sticky )) a pirate-themed costume (( jeans )) Start by sending invitations in the (( dog )) of a buried treasure map with X marking the (( window )) of your house, then put a (( mouse )) on the front (( bathroom )) that reads "Ahoy mateys" and fill the house with lots of pirate (( Uncle Mort )) Now let’s add some prompts, because if you’re like me, you might not immediately remember the difference between a verb and an adjective. Here’s what I came up with: verb: an action word (eat, sleep, drink, jump) noun: a person, place or thing (dog, Uncle Mort, Starbucks) Dave Taylor has been hacking shell scripts for a really long time, thirty years. He’s the author of the popular Wicked Cool Shell Scripts and can be found on Twitter as @DaveTaylor and more generally at www.DaveTaylorOnline.com. w w w. l i n u x j o u r n a l . c o m may 2011 | 2 3 COLUMNS PARANOID PENGUIN DNS Cache Poisoning, Part I MICK BAUER Understand and defend against DNS cache poisoning. Few recent Internet threats have made such a big impact as security researcher Dan Kaminsky’s discovery, in 2008, of fundamental flaws in the Domain Name System (DNS) protocol that can be used by attackers to redirect or even hijack many types of Internet transactions. The immediate response by DNS software providers was to release software patches that make the problematic “DNS cache poisoning” attacks more difficult to carry out, and this certainly helped. But, the best fix is to use DNSSEC, a secure version of the DNS protocol that uses x.509 digital certificates validated through Public Key Infrastructure (PKI) to protect DNS data from spoofing. Slowly but surely, DNSSEC is being deployed across key swaths of Internet infrastructure. What does DNS cache poisoning mean, and how does it affect you? How can you protect your users from attacks on your organization’s nameserver? The next few months, I’m going to explore DNS cache poisoning and DNSSEC in depth, including how DNS queries are supposed to work, how they can be compromised, and how they can be protected both in general and specific terms. I’m not going to attempt to cover all aspects of DNS server security, like in Chapter Six of my book Linux Server Security (see Resources). Armed with the next few months’ columns, however, I hope you’ll understand and be able to defend against cache poisoning, a particular but very nasty DNS vulnerability. As seems to be the pattern with these multipleinstallment extravaganzas, I’m going to start out at a general, less-hands-on level, and enter increasingly technical levels of detail as the series progresses. With that, let’s talk about how DNS is supposed to work and how it can break. DNS Basics The Domain Name System is both a protocol and an Internet infrastructure for associating user-friendly “names” (for example, www.linuxjournal.com) with networks and computers that are, in fact, known to each other and to network infrastructure devices by their Internet Protocol (IP) addresses (for example, 76.74.252.198). Sounds simple enough, right? Perhaps it would be, if the Internet wasn’t composed of thousands of different organizations, each needing to control and manage its own IP addresses and namespaces. Being such, the 2 4 | may 2011 w w w. l i n u x j o u r n a l . c o m Internet’s Domain Name System is a hierarchical but highly distributed network of “name authorities”—that is, DNS servers that are “authoritative” only for specific swaths of namespace. Resolving a host or network/domain name to an IP address, therefore, is a matter of determining which name authority knows the answer to your particular question. And, as you’ll see shortly, it’s extremely important that you can trust the answer you ultimately receive. If you punch the name of your bank’s on-line banking site into your Web browser, you don’t want to be sent to a clever clone of online.mybank.com that behaves just like the real thing but with the “extra feature” of sending your login credentials to an organized crime syndicate; you want to be sent to the real online.mybank.com. The security challenge in DNS lookups (also called queries) is, therefore, to ensure that an attacker can’t tamper with or replace DNS data. Unfortunately, the DNS protocol was designed with no rigorous technical controls for preventing such attacks. But, I’m getting ahead of myself! Let’s dissect a DNS lookup to show what happens between the time you type that URL into your browser and the time the page begins to load. Your Web browser doesn’t actually interact with authoritative nameservers. it passes the question “what’s the IP address of online.mybank.com?” to your computer’s local “stub resolver”, a part of the operating system. Your operating system forwards the query to your local network’s DNS server, whose IP address is usually stored, on UNIX and UNIX-like systems, in the file /etc/resolv.conf (although this often is just a copy of data stored in some other network configuration script or file or of configuration data received from a DHCP server). That local nameserver, which in practice is run either by your organization’s Information Technology department or by your Internet Service Provider, then does one of two things. If it already has resolved online.mybank.com reasonably recently, it sends your browser the query results from its “cache” of recently resolved names. If online.mybank.com isn’t in its cache, it will perform a recursive query on your behalf. Recursive queries generally take several steps, illustrated in Figure 1. In our example, the recursing DNS server first randomly selects the IP address of one of the Internet’s “root” nameservers from a locally stored tend to have longer TTLs. I’ve described how DNS query recursion is supposed to work. How can it be broken? DNS Cache Poisoning Figure 1. A Recursive DNS Query list (every DNS server has this list; it isn’t very long and seldom changes). It asks that root nameserver for the IP address of online.mybank.com. The root nameserver replies that it doesn’t know, but it refers the recursing nameserver to an authoritative nameserver for the .com top-level domain (TLD)— in our example, the fictional host dotcom.au7h.com. The root nameserver also provides this host’s IP address (3.30.30.31). These two records, the NS record referring dotcom.au7h.com as an authority for .com and the A record providing dotcom.au7h.com’s IP address, are called glue records. The recursing nameserver then asks dotcom.au7h.com if it knows the IP address for online.mybank.com. It too replies that it doesn’t know, but it refers the recursing nameserver to another nameserver, ns.mybank.com, which is authoritative for the mybank.com domain. It also provides that host’s IP address (5.50.50.50). Finally, the recursing nameserver asks ns.mybank.com whether it knows the IP address for online.mybank.com. Yes, it does: ns.mybank.com replies with the requested IP address, and the recursing nameserver forwards that information back to the end user’s stub resolver, which in turn provides the IP address to the end user’s Web browser. In this example, then, the simple query from your stub resolver results in three queries from your local recursing DNS server, representing queries against root, the .com TLD and, finally, the mybank.com name domain. The results from all three of these queries are cached by the local DNS server, obviating the need for your server to pester authoritative nameservers for .com and .mybank.com until those cache entries expire. That expiration time is determined by each cached record’s Time to Live (TTL) value, which is specified by whatever authoritative nameserver provides a given record. A records that map IPs to specific hosts tend to have relatively short TTLs, but NS records that specify authoritative nameservers for entire domains or TLDs Two things should be fairly obvious to you by now. First, DNS is an essential Internet infrastructure service that must work correctly in order for users to reach the systems with which they wish to interact. Second, even a simple DNS query for a single IP address can result in multiple network transactions, any one of which might be tampered with. Relying, as it does, on the “stateless” UDP protocol for most queries and replies, DNS transactions are inherently prone to tampering, packet-injection and spoofing. Tampering with the reply to a DNS query, on a local level, is as simple as sending spoofed packets to the “target” system making the query and hoping they arrive before the query’s “real” answer does. Spoofing a DNS reply being sent from a recursing DNS server to a client system impacts only that one client system’s users. What if you could instead tamper with the recursive nameserver’s queries, injecting false data into its cache and, thus, affecting the DNS queries of all computers that use that DNS server? And, what if, instead of tampering strictly with individual A records describing the IPs of individual hosts, you could inject fraudulent NS records that redirect DNS queries to your (fraudulent) nameserver, potentially impacting an entire name domain? When security researcher Dan Kaminsky discovered fundamental flaws in the DNS protocol in 2008, these were the very attack scenarios he identified. Before you get too panicky, I’m going to give a little spoiler, and say that even in 2008, before he gave his nowrenowned Black Hat presentation on these attacks, Kaminsky worked with DNS server software vendors, such as ISC and Microsoft, to release urgent patches that at least partially mitigated this risk before Kaminsky’s attack became widely known. But, the attack has been only partially mitigated by patching. Because this is such an important, widespread and interesting issue, let’s explore Kaminsky’s DNS cache poisoning attack in depth. All the transactions comprising the DNS query in Figure 1 use UDP, which I’ve said is easily spoofed. So, what’s to prevent an attacker from sending fraudulent replies to any one of those transactions? Before 2008, the answer to this question was twofold: Query IDs and bailiwick checking. Every DNS query packet contains a Query ID, a 16-bit number that must be included in any reply to that query. At the very least, Query IDs help a recursive DNS server that may have numerous, concurrent queries pending at any given time to correlate replies to the proper queries as they arrive, but the Query ID also is supposed to make w w w. l i n u x j o u r n a l . c o m may 2011 | 2 5 COLUMNS PARANOID PENGUIN Figure 2. Kaminsky’s Cache Poisoning Attack it harder to spoof DNS replies. Bailiwick is, here, a synonym for “relevance”. Any glue records included in a DNS reply must be relevant to the corresponding query. Therefore, if an attacker attempts to poison a recursing DNS server’s cache via a “Kashpureff attack” (see the Cricket Liu interview in the Resources section) in which extraneous information is sent via glue records to a recursing DNS server that has been tricked into making a query against a hostile nameserver, the attack will succeed only if the recursing nameserver fails to perform bailiwick checking that correlates those glue records to the query. For example, if I can get a recursing DNS server to look up the name an.evilserver.com, and I control the evilserver.com name domain, I could send a reply that includes not only the requested IP, but “extra” A records that point www.citibank.com, www.ameritrade.com and other sites whose traffic I wish to intercept using impostor servers. Those fake A records will replace any records for those hosts already cached by the target recursing nameserver. However, bailiwick checking has been a standard, default feature for practically all DNS server software since 1997, so the Kashpureff attack is largely obsolete (insofar as any historical TCP/IP attack ever is). So to review, Query IDs are supposed to prevent reply spoofing, and bailiwick checking is supposed to prevent weirdness with glue records. Yet, Kaminsky discovered that despite Query IDs and bailiwick checking, it nonetheless was possible both to spoof DNS replies and abuse glue records and, thus, to poison the caches of most recursing nameservers successfully. Here’s how Kaminsky’s attack works. The object of this attack is to poison a recursing DNS nameserver’s cache with fraudulent A records (for individual hosts) or even fraudulent NS records (for entire domains). In the example I’m about to use, the 2 6 | may 2011 w w w. l i n u x j o u r n a l . c o m objective will be to inject a fraudulent A record for the host online.mybank.com. This will be achieved by either initiating, or tricking some other host served by the recursing nameserver into initiating, a flood of queries against random, presumably nonexistent hostnames in the same name domain as that of the host whose name we wish to hijack. Figure 2 shows an attacker sending a flood of queries for hostnames, such as random3232.mybank.com, random4232.mybank.com and so forth. Besides the fact that it’s convenient to generate a lot of them, querying randomized/nonexistent hostnames increases the odds that the answers aren’t already cached. Obviously, if you send a query for some host whose IP already is in the recursing nameserver’s cache, that nameserver will send you the IP in question without making any recursive queries. Without recursive queries, there are no nameserver replies to spoof! Almost concurrently with sending the queries, the attacker unleashes a flood of spoofed replies purporting to originate from that name domain’s authoritative nameserver (in Figure 2, ns.mybank.com). There are several notable things about these replies. First, also as shown in Figure 2, they do not provide answers to the attacker’s queries, which as you know concern nonexistent hosts anyhow. Rather, they refer the recursing nameserver to another “nameserver”, online.mybank.com, conveniently offering its IP address as well (which, of course, is actually the IP address of an attacker-controlled system). The whole point of these queries is to provide an opportunity to send glue records that pass bailiwick checking but are nonetheless fraudulent. If you’re trying to hijack DNS for an entire domain, in which case you’d spoof replies to queries against a Top-Level Domain authority, such as for .com, you’d send glue records pointing to a hostile DNS server that could, for example, send fraudulent (attacker-controlled) IPs for popular on-line banking and e-commerce sites, and simply recurse everything else. In the example here, however, the attacker instead is using the pretense of referring to a different nameserver, in order to plant a fake online.mybank.com Web server’s IP address into the target recursing nameserver’s cache. The fact that this fake Web server doesn’t even respond to DNS queries doesn’t matter; the attacker wants on-line banking traffic to go there. The second notable thing about the attacker’s spoofed replies (and this is not shown in Figure 2), is that each contains a different, random Query ID. The reason for sending a flood of queries and a flood of replies is to maximize the chance that one of these reply’s Query IDs will match that of one of the corresponding recursed queries that the targeted recursing nameserver has initiated to ns.mybank.com. And, this is arguably the most important aspect of Kaminsky’s attack. By simultaneously making multiple guesses at the Query IDs of multiple queries, the attack takes advantage of the “birthday problem” to improve the chances of matching a spoofed reply to a real query. I’ll resist the temptation to describe the birthday problem here (see Resources), but suffice it to say, it’s a statistical principle that states that for any potentially shared characteristic, the odds of two or more subjects sharing that characteristic increases significantly by increasing the population of subjects even slightly. Thus, even though the odds are 65,534 to 1 against an attacker guessing the correct Query ID of a single DNS query, these odds become exponentially more favorable if the attacker attempts multiple queries, each with multiple fake replies. In fact, using a scripted attack, Kaminsky reported success in as little as ten seconds! Yet another thing not shown in Figure 2 is the TTL for the fraudulent glue A records in the attacker’s spoofed replies. The attacker will set this TTL very high, so that if the attack succeeds, the victim nameserver will keep the fraudulent A record in its cache for as long as possible. The last thing to note about this attack is that it will fail if none of the spoofed replies matches a query, before ns.mybank.com manages to get its real reply back to the recursing nameserver. Here again, initiating lots of simultaneous queries increases the odds of winning at least one race with the real nameserver, with a reply containing a valid Query ID. Mitigating Kaminsky’s Attack As scary as Dan Kaminsky’s cache poisoning attack is, the short-term fix is simple: make DNS server software send its DNS queries from random UDP source ports, rather than using UDP port 53 or some other static, predictable port. Prior to 2008, BIND, Microsoft DNS Server and other DNS server packages would send all DNS queries from a single port. This meant that to spoof replies to DNS queries, the attacker needed to know only what type of DNS software the target server was running to know what UDP port to use as the destination port for spoofed reply packets. Randomizing query source ports thus makes spoofers’ jobs much harder: they either have to eavesdrop network traffic and observe from what port a given query originates or send lots of spoofed replies to many different ports in the hope that one of them is “listening” for the reply. Thus, in the context of Kaminsky’s cache poisoning attack, selecting a random source port from a pool even as small as 2,048 possible ports makes it exactly 2,048 times harder for attackers to guess what a valid DNS reply packet should look like, than if they have to guess only the correct Query ID! Sure enough, before Kaminsky publicly announced the details of his attack, he convinced DNS server software vendors to issue patches that made their respective products randomize DNS query source ports, and now in 2011, this is the way DNS servers behave by default. This was only a partial fix, however. It’s still possible to make Kaminsky’s attack work; it just takes much longer. A better fix is to sign DNS zone data cryptographically, so that recursing nameservers can validate DNS replies. This is possible with the DNSSEC extension to the DNS protocol, and DNSSEC will be the subject of the next column or two. Conclusion Having described DNS recursion and cache poisoning attacks in gory detail, next time, I’ll begin showing you how to enable DNSSEC on your own (BIND-based) recursing nameserver, so that it checks the signatures of any signed DNS data it comes across. Until then, make sure your DNS software is fully patched, try not to worry too much, and be safe!I Mick Bauer ([email protected]) is Network Security Architect for one of the US’s largest banks. He is the author of the O’Reilly book Linux Server Security, 2nd edition (formerly called Building Secure Servers With Linux), an occasional presenter at information security conferences and composer of the “Network Engineering Polka”. Resources Linux Server Security, 2nd Edition by Mick Bauer, Sebastopol, CA: O’Reilly Media, 2006. “An Illustrated Guide to the Kaminsky DNS Vulnerability” by Steve Friedl, Unixwiz.net Tech Tips: unixwiz.net/techtips/ iguide-kaminsky-dns-vuln.html “DNS Vulnerability: An Exclusive Interview with Cricket Liu” by Greg Ness, Archimedius: gregness.wordpress.com/2008/07/23/ dns-vulnerability-an-exclusive-interviewwith-cricket-liu Birthday Problem: en.wikipedia.org/wiki/Birthday_paradox “Understanding Kaminsky’s DNS Bug” by Cory Wright: www.linuxjournal.com/content/ understanding-kaminskys-dns-bug w w w. l i n u x j o u r n a l . c o m may 2011 | 2 7 COLUMNS HACK AND / Your Own Personal Server: Blog KYLE RANKIN If your blog isn’t on your own server, is it truly yours? Learn how to set up your own. This column is the third in a series about how to manage your own services on your own server. In the first column, I discussed how to make sure your home network is ready to host your own services. In the second, I covered DNS, and in this column, I talk about one of the services people commonly put in the cloud but is simple to host yourself: a blog. At first, I planned to focus this series strictly on how to set up your own Web server, but I realized that these days, most people don’t simply set up Apache and upload some static HTML. Instead, most modern sites are built so that their content is generated dynamically, often with data stored on a database. Instead of just a basic static page, today if you want to set up your own Web server at home, you probably want to host a forum, post some information about yourself, share some pictures or, quite likely, manage your own blog. What Flavor Is the Best? Many different types of blogs exist—from sites that attempt to replicate the function of a physical magazine on the Web to sites that act as a person’s Along with this new organization, the apache2 package includes a set of new tools to enable and disable sites and modules. public diary to sites that just link to other interesting content. And, just as many different types of blogging software are available under Linux. Each type of blogging software has its advantages and disadvantages, but for the purposes of this article, I had to pick one. I chose WordPress because it’s relatively simple to set up and has a large user base, which means it should be easier for you to get support from the community. I not only had to choose what blogging software to cover, I also had to decide on a base distribution. When it comes to Apache and WordPress, although the software itself is basically the same across major Linux distributions, the organization of that software 2 8 | may 2011 w w w. l i n u x j o u r n a l . c o m can be quite different. Because I’m aiming this column at someone who has never set up a Web server before, I’m going to use Ubuntu Server here (specifically 10.04 LTS), as I think the way it has organized Apache configuration and WordPress is the most friendly for the new system administrator. Install the Software The first step in the process is to install WordPress, Apache and all of the dependencies this software needs. On a modern Linux distribution, this is relatively simple. In the case of Ubuntu, simply type the following into a terminal: $ sudo apt-get install apache2 mysql-server wordpress Those packages will pull down the Web server software, the MySQL server that WordPress will access on this same machine and WordPress itself, along with all of its dependencies. During the install, you will be prompted to choose a password for the MySQL root user. Although you optionally can leave this blank, I advise you to choose a password and document it somewhere. If you decide to leave it blank, you always can add a password to the root user later, but it’s much simpler to set it here. Ubuntu Apache2 Site Organization Apache2 under Ubuntu (and Debian-based distributions in general) has a somewhat unique way to organize Apache configuration. If you ever have managed multiple Web sites on a single Apache instance (often referred to as virtual hosts), you know how challenging it sometimes can be to organize each site’s configuration along with all the modules you need Apache to load. Under Ubuntu, all of the currently available virtual hosts and modules store their files under /etc/apache2/sites-available and /etc/apache2/mods-available, respectively. Any virtual hosts or modules that are enabled are set up as symbolic links under /etc/apache2/sites-enabled and /etc/apache2/mods-enabled. Along with this new organization, the apache2 package includes a set of new tools to enable and disable sites and modules. For instance, if you added a new virtual host configuration at /etc/apache2/sites-available/foo That command creates the necessary symlinks for you in /etc/apache2/sites-enabled. Likewise, if you wanted to load a module named cgi that you see under /etc/apache2/mods-available, you would type: different ways you can configure the WordPress virtual host under Apache, and included in the wordpress package are examples of the different methods under /usr/share/doc/wordpress/example/apache.conf. For this article, I’m choosing a configuration that makes it simple to manage multiple WordPress sites on the same host, so create a file called /etc/apache2/sites-available/wordpress that contains the following data: $ sudo a2enmod cgi NameVirtualHost *:80 and wanted to enable it, you would type: $ sudo a2ensite foo To undo the above two commands, you would type: $ sudo a2dissite foo $ sudo a2dismod foo Although it’s true that you could set up these symlinks manually, the included commands certainly make it more clear and easier to script. Set Up Your WordPress Virtual Host Now that you are familiar with how Apache organizes files under Ubuntu, the next step is to configure a new virtual host. It turns out there are a number of RACKMOUNT SERVERS <VirtualHost *:80> UseCanonicalName Off VirtualDocumentRoot /var/www/%0 Options All </VirtualHost> Now, enable this new site and disable any default virtual hosts Apache may have included: $ sudo a2ensite wordpress $ sudo a2dissite default In my example, I have used the Apache option COLUMNS HACK AND / (such as when you add new sites), you also can use the following commands. To restart Apache by forcibly stopping existing processes and starting them again: $ sudo apache2ctl restart To start Apache if it is completely stopped: $ sudo apache2ctl start To stop Apache hard (kill all of the current processes even if they are still processing a user request): $ sudo apache2ctl stop To stop Apache gracefully (it will kill processes only after they are finished with their current request): $ sudo apache2ctl graceful-stop Figure 1. The Default WordPress Configuration Page VirtualDocumentRoot, so I can more easily manage multiple WordPress sites. Unfortunately, the module to allow that feature isn’t enabled by default, so I also need to enable the vhost_alias module so that feature works: $ sudo a2enmod vhost_alias The way I have set up WordPress, each WordPress site you host from this server will have its own document root under /var/www/<domainname>. When you add a new site, you need to create a symlink under /var/www/ named after your domain name that points to the installed WordPress software. In my case, I want to create a site called www.example.org, so I would type: Configure MySQL for WordPress Like with many dynamic sites these days, WordPress gets its data from a database back end: in this case, MySQL. The wordpress package includes a nice little shell script you can use to set up your MySQL database automatically for your site at /usr/share/doc/wordpress/examples/setup-mysql. All you have to do is pass it the -n option and tell it the name of the MySQL user you want to use and the name of the database. In my case, I use the user name “wordpress” and name the database after my site, www.example.org: $ sudo bash /usr/share/doc/wordpress/examples/setup-mysql $ sudo ln -s /usr/share/wordpress /var/www/www.example.org Instead of www.example.org, put the fully qualified domain name you are going to use for your site. While you’re at it, if you haven’t already set up an A record on your DNS server that points to your new site, now would be a good time. If you followed the steps in my previous column to set up a DNS server of your own, you already should have an entry in place for www. Simply change the IP address to point to the external, public IP address you will use for your Web server and reload the bind9 service. After the symlink is created, I use the apache2ctl Apache management tool to reload Apache: $ sudo apache2ctl graceful Note: the apache2ctl program is the main command-line program you will use to manage the Apache service on your machine. In addition to the graceful argument, which tells Apache to reload any new configuration you have changed safely 3 0 | may 2011 w w w. l i n u x j o u r n a l . c o m ¯-n wordpress www.example.org Note: this command attempts to ping the domain name that you list, so if you haven’t set up the domain in DNS yet, you will want to do it before you run the above command. Again, make sure your domain points to the public IP address you will use for your site. Once you get to this point, your blog actually should be ready to use. All you need to do is visit http://www.example.org (in your case, you would visit the URL you set up for your blog), and you should be greeted with the initial WordPress configuration page as shown in Figure 1. From that point, all you have to do is enter the title for your blog and the contact e-mail you’d like to use. WordPress will present you with the admin user name and a temporary password. From there, you can log in and start tweaking, creating posts and changing your theme.I Kyle Rankin is a Systems Architect in the San Francisco Bay Area and the author of a number of books, including The Official Ubuntu Server Book, Knoppix Hacks and Ubuntu Hacks. He is currently the president of the North Bay Linux Users’ Group. ©2011 O’Reilly Media, Inc. O’Reilly logo is a registered trademark of O’Reilly Media, Inc. 11223 2011 MAY 16–19 BALTIMORE, MARYLAND REGISTER NOW & SAVE 15% Use discount code rc11ljr co-presented by June 14–16, 2011 | Santa Clara, California Automated, Optimized, Ubiquitous Register Now & Save 15%! Use discount code VEL11LJR Now in its fourth year—Velocity, the Web Performance and Operations conference from O'Reilly Media—is the premier technical event dedicated to optimizing every aspect of your company's website. It's the convergence of performance and site reliability experts and rock stars who share the information critical to building and scaling fast and reliable websites and services. Velocity 2011 Topics & Themes: velocityconf.com NoSQL Mobile Performance Effective Cloud Computing Impact on the Bottom Line JavaScript Speedups TCP, HTTP, & SSL Optimizations Metrics & Monitoring ©2011 O’Reilly Media, Inc. The O’Reilly logo is a registered trademark of O’Reilly Media, Inc.11222 NEW PRODUCTS Rectiphy’s ActiveImage Protector Linux Edition At Rectiphy, innovation goes beyond the spelling of the company name to include its new technology—that is, the company’s ActiveImage Protector Linux Edition. The product is a disk-imaging backup technology for Linux environments that incorporates Rectiphy’s Smart Sector snapshot technology, which the company says speeds up backups and reduces disk storage space in Ext2/Ext3/Ext4 formats. Support for the Linux-native snapshot driver enables users to create a full backup of the Linux server HD or volume without shutting down the OS. Bare-metal recovery is supported, as well as retrieval of individual files from the backup image. www.rectiphy.com Stefan Kottwitz’s LaTeX Beginner’s Guide (Packt Publishing) Few things will burnish your hard-core technorati credentials like learning the classic document markup language LaTeX and its typesetting companion program TeX. The tools are used for creating scientific and technical documents. Get up to speed fast with Stefan Kottwitz’s LaTeX Beginner’s Guide, a new book that helps new users overcome LaTeX’s relatively steep learning curve and leverage its powerful features. Readers learn to typeset documents containing tables, figures, formulas and common book elements like bibliographies, glossaries and indexes. Additional topics include management of complex documents and the latest fonts and PDF-related features. A great deal of the book is dedicated to one of LaTeX’s most powerful features: the designing of complex math formulas and other expressions. www.packtpub.com Cory Altheide and Harlan Carvey’s Digital Forensics with Open Source Tools (Syngress) Syngress describes Cory Altheide and Harlan Carvey’s new book Digital Forensics with Open Source Tools as “digital forensics, MacGyver style.” Unfortunately for the 1980s TV hero MacGyver, his toolset predated open source. But thanks to Altheide and Carvey, you have all the open-source forensics tools at your disposal for investigating Linux, Mac and Windows systems, complete with guidance. Topics include the open-source examination platform, disk and filesystem analysis, system-specific issues and artifacts, Internet-related artifacts, file analysis, automating analysis and more. The appendix goes into detail on particularly useful open-source tools. I N C O R P O R AT I O N www.syngress.com Xelltec Integrated Security System The team at Xelltec categorizes it new Xelltec Integrated Security System (XISSYS) as “revolutionary” because it enables users “to remotely track and protect their laptops and handheld devices”. The patent-pending XISSYS microchip is an embedded security solution designed to allow users to disable or find a stolen laptop, smartphone, or other mobile device easily. This prevents thieves from gaining access to sensitive data. The microchip can wipe out data, or it can destroy the mobile device physically with a high-frequency voltage so that it is completely inoperable. Furthermore, if the user needs the data that is on the mobile device, it can be copied remotely from the device to a server before the data is destroyed. The microchip also acts as a tracking device, enabling the owner to find the physical location of the stolen device. Xelltec is seeking strategic alliances with popular main board and computer manufacturing companies worldwide. www.xelltec.com 3 2 | may 2011 w w w. l i n u x j o u r n a l . c o m NEW PRODUCTS Napatech Software Suite If you deploy the new Napatech Software Suite for your network appliance development, the company says you’ll need to develop its application software only once and then simply decide which network adapter combination works best in the particular deployment. Besides this flexibility, the suite offers critical functionality that can accelerate performance of network appliances. Both a hardware abstraction and streamlined API are provided, allowing network appliance vendors to take advantage of Napatech’s full range of intelligent network adapters quickly and easily. Hardware abstraction allows multiple intelligent network adapters of different types to be combined on a plug-and-play basis in a standard server platform. The same feature set can be offered independent of the port speed. A number of open-source software applications, such as Suricata, Snort and Ostinato are supported. www.napatech.com CloudPassage’s Halo SVM and Halo Firewall CloudPassage recently launched out of “stealth mode”, releasing a formidable one-two punch for securing elastic cloud environments in the form of Halo SVM and Halo Firewall. Punch one, Halo SVM, addresses the specific server vulnerability management needs in cloud server environments, such as elasticity. Customers can maintain continuous exposure and compliance intelligence, even in rapidly growing cloud server farms. Other features include a light footprint and ability to assess thousands of server configuration points in seconds. Punch two, Halo Firewall, controls server attack surfaces by centralizing and automating host-based firewall management, the preferred alternative to traditional enterprise perimeter firewalls, says CloudPasage. www.cloudpassage.com Open-Xchange Microsoft Outlook Connector Applying the Linux community’s classic flair for maximizing interoperability, Open-Xchange introduced full MAPI support to its completely redeveloped Microsoft Outlook Connector. The move enables users of its open-source Open-Xchange e-mail and collaboration server to use Microsoft Outlook as the client software. The Open-Xchange alternative to the more expensive Microsoft Exchange server integrates e-mail, calendar, contact and task management with advanced groupware features, such as information management and document sharing, along with cutting-edge social-network integration. While users utilize the familiar client, the new software connector ensures seamless synchronization with Open-Xchange server in the background. The software connector supports Microsoft Outlook 2003 and 2007, as well as the 32-bit version of Outlook 2010. www.open-xchange.com Lantronix PremierWave EN Design engineers and OEMs can add intelligent, wireless Ethernet networking to nearly any device by putting to work the new Lantronix PremierWave EN embedded-Linux wireless device server. When incorporated within an OEM product, the PremierWave EN’s secure, high-quality wireless connectivity enables businesses across a variety of different industries to transmit medical, financial, customer or other important information across corporate networks securely. The module allows customers to leverage the many advantages offered by the dual-band 802.11 a/b/g/n standard, including network load balancing and traffic segmentation. A 32-bit ARM9 processor allows for a potent combination of high performance and low power consumption. Lantronix’s proprietary SmartRoam technology ensures uninterrupted connectivity between wireless networks. www.lantronix.com Please send information about releases of Linux-related products to [email protected] or New Products c/o Linux Journal, PO Box 980985, Houston, TX 77098. Submissions are edited for length and content. w w w. l i n u x j o u r n a l . c o m may 2011 | 3 3 NEW PROJECTS Fresh from the Labs Brain Workshop Scroll down the page for the Linux instructions. The If you’re looking to improve your mental only other real faculties, especially in the area of memory, requirement check out this project. According to the mentioned here is Web site: Python 2.5, although most modern Brain Workshop is a free opendistros likely have source version of the dual n-back this pre-installed. brain training exercise. As I mentioned above, the instruc...A recent study published in tions say that you PNAS, an important scientific should install AVBin journal, shows that a particular 7. Although this is memory task called dual n-back optional, it will give may actually improve working you musical cues that memory (short-term memory) are rather satisfying, and fluid intelligence. The main playing mode involves remembering letters and positions, so I recommend two turns back. doing so. Luckily for ...Brain Workshop implements this me, the Webmaster has been good Now strap yourself in, because this task. The dual n-back task involves enough to provide detailed instructions game is much more grueling than it first remembering a sequence of spoken for AVBin’s installation, as well as links appears. Assuming you have the game set letters and a sequence of positions to both 32- and 64-bit versions. to its defaults, two stimuli will be coming of a square at the same time, and Once the prerequisites are out of the at you: positions and audio. The former identifying when a letter or position way, grab the latest tarball and extract it. appears in the guise of a blue square, matches the one that appeared From here, the Webmaster again has appearing randomly in any of the nine in trials earlier. done the work, so I’m quoting the next squares. The latter takes place as letters, step verbatim: “Open a terminal, enter the spoken out loud by a female voice that Installation Although running Brain brainworkshop directory and type python just happens to sound like the one used Workshop isn’t particularly difficult, on almost all computer systems in every installing another external program, brainworkshop.pyw to launch Brain futuristic sci-fi movie ever made. AVBin 7, is recommended. Workshop. You also may enable execute As this is happening, you control the Head to the project Web site, click the permissions on brainworkshop.pyw, if game with only two keys: A and L. Let go Download link, and click the link, “Source you’d like to launch it, by double-clicking.” of the mouse, and let your left hand rest Distribution for Linux”. This page contains Usage Upon entering the program, on A and your right hand on L. Now, I’ll instructions for both Mac OS X and Linux. you’ll be greeted with a menu and a explain how the game actually works. fabulous background Each level has a series of three-second diagram of an Trials. The first Trial will have the square anatomical brain. appear in one of the boxes in tandem I could explore a with a spoken letter. The second Trial will number of options have the square in another box with at this point, but for another spoken letter. These first two now, let’s jump right Trials don’t require you to do anything, into the game. but instead provide the information for Press the spacethe following Trials. bar, and the level Given this default mode is “2-Back”, that’s about to start the information provided in the first Trial appears, most likely is the basis for testing against in the third called Dual 2-Back. Trial. The information in the second Trial is Here you can alter the for testing against the fourth, and so on. game mode if you Now, let’s examine the third Trial and know what you’re onward, where the actual game begins. doing. Press the Was the position of the blue block the spacebar a second same as the first Trial? If so, press the A time, and the level Anatomy students will be chuffed with this brain diagram in the key. Was the letter the same? If so, press actually starts. menu background. brainworkshop.sourceforge.net 3 4 | may 2011 w w w. l i n u x j o u r n a l . c o m in this column, but so far they’ve been for Japanese, Chinese and German—all languages spoken by large populations. So a dictionary program for a language like Serbian jumped right out at me. According to the SourceForge page: “Serbian Dictionary is a bidirectional SerbianEnglish dictionary. It currently contains only a command-line Some of the advanced playing modes of Brain Workshop include interface. It supports multiple audio streams, images, arithmetic and more. only *nix-based operating systems at this moment. Tested L. Each Trial may have a combination of on Linux, *BSD and Cygwin.” both position and letter, or just the one, Installation I found only a source or even no matches. tarball at the Web site at the time of As you can see, this game mode is all this writing, although the installation about remembering what happened two still is quite easy. Also, the home page Trials ago. This sounds easy, but each stimis in Serbian, and I had to use a translator ulus acts independently of the other, so (Chrome’s translator handled this well). most of the time, the letter and position The download page at least is called won’t land in the same place. This means “Download”, so that was easy. The your memory has to split in two different download page takes you to a basic directions—multitasking in memory. Does SourceForge file list, which should be that sound tricky? Believe me, it is. I’d localized into your own language. even go so far as to call it intense. Grab the latest tarball, extract Chances are you’ll get a bad score, it, and open a terminal in the new but that’s okay. The manual recommends folder. Compiling this program is easy, starting with a game of 1-Back, but I just enter: thought I’d start you off with the harder mode because I’m mean like that! If you want to alter the difficulty, prior to starting $ make a level is a list of options at the top left where you can increase/decrease the N-Back number (try 1 for instance), the number of trials, change the speed and so on. That’s all I have space for here, but if you want more information, check out the game’s documentation available at the main menu. I recommend looking into the game’s more-advanced features, such as color and image testing, arithmetic and more. All in all, this is one of the most grueling brain exercises I’ve come across, and anyone looking to improve specific areas of memory definitely should try Brain Workshop. If your distro uses sudo, enter: $ sudo make install And, if your distro uses root, enter: $ su # make install Usage Using SerbDict also is very easy (at least, once I’d translated the documentation). If you want to translate something from English into Serbian, enter: $ serbdict -e word If you want to translate a Serbian word into English, enter: $ serbdict -s word SerbDict appears to query a database of words and terms, and it outputs everything, including extensions of your queried word. For instance, querying the word “entire” gave me not only translations for entire, but also for entirely and entirety. If you speak Serbian (and I don’t), there’s a man page with instructions on how to extend the program, available with the command: $ man serbdict One thing I managed to pick up from the man page is that if you skip the -s and -e extensions, any query you make will output any matches in both English and SerbDict—Serbian-English Dictionary serbdict.sourceforge.net I’ve highlighted a few language programs SerbDict lets you translate words from English to Serbian and vice versa. w w w. l i n u x j o u r n a l . c o m may 2011 | 3 5 NEW PROJECTS other than the default parameters. The basic syntax is as follows: $ ebook2cw textfile.txt -o outputfile Here’s a search involving Serbian to English and a search involving both languages simultaneously. Serbian at the same time. Below your outputted text will be a message saying, “Ukupno: x prevoda”. After querying those words, it turns out Ukupno means altogether. And although “prevoda” didn’t return any matches, prevod means rendering, translation or version, so I’m guessing prevoda would be some kind of plural form of these words. Well, that covers Serbian, but if anyone has written a program for a really rare or dying language, send me an e-mail. I’d love to cover it. Library requirements are mostly minimal, but for the source, you will need the development packages (-dev) installed for the lame and ogg libraries. If you’re running with the source, grab the latest tarball, extract it, and open a terminal in the new folder. Compiling this program is also easy. Again, just enter: $ make If your distro uses sudo, enter: $ sudo make install ebook2cw—E-book to Morse Code Conversion If your distro uses root, enter: fkurz.net/ham/ebook2cw.html You know I love niche projects, but this is the first project I’ve come across that genuinely made me laugh out loud and exclaim, “I’ve got to cover that!” To quote the Web site: “ ebook2cw is a commandline program (optional GUI available) that converts a plain text (ISO 8859-1 or UTF-8) e-book to Morse code MP3 or OGG audio files. It works on several platforms, including Windows and Linux.” Installation Quoting the documentation: Here, the textfile.txt obviously represents whichever text file you want to convert to Morse code. The -o switch is for specifying the output file, followed by the output file’s name. Notice I haven’t given the output file an extension, such as mp3. ebook2cw does this for you automatically, and I actually recommend against doing so, as the resulting filename becomes rather messy. I don’t have the space to go into detail on ebook2cw’s command-line switches, but I can at least highlight a handful that will be the most useful to the majority of users. If you want to switch from MP3 output to Ogg, use the switch -O (note the uppercase letter). The sample rate is set by default to 11khz @ 16kbps—perfectly adequate for a series of dots and dashes, but sometimes it’s a bit clippy and horrid to listen to. If you want to change the sample rate to 44khz, for instance, use the switch: -s 44100. To change the bitrate, using this combination, set the bitrate at 64kbps: -b 64. You can work things out from here, but I hope you enjoy the results. Maybe the works of Dickens are even better, slowly spelled out one letter at time? Either way, this project has probably given me the biggest grin since I started this column. I’m sure it’ll be very useful—to someone.I $ su # make install Usage ebook2cw is a command-line program and using it is fairly simple, although you’ll want to keep the man pages at the ready for using something John Knight is a 26-year-old, drumming- and bassobsessed maniac, studying Psychology at Edith Cowan University in Western Australia. He usually can be found playing a kick-drum far too much. Brewing something fresh, innovative or mind-bending? Send e-mail to [email protected]. 1) Binaries: statically compiled binaries are available at the project Web site, for Linux (i386) and Win32. Those should be suitable for most users. 2) Source: a Makefile is included; it compiles both under Linux and Windows (with MinGW). 3 6 | may 2011 w w w. l i n u x j o u r n a l . c o m Turn e-books into Morse code audio tracks—I’m guessing this is intended for Morse code students. The newly updated LINUX JOURNAL ARCHIVE is here! ALL 200 ISSUES! The archive includes all 200 issues of Linux Journal, from the premiere issue in March 1994 through December 2010. In easy-to-use HTML format, the fully searchable, space-saving archive offers immediate access to an essential resource for the Linux enthusiast: Linux Journal. www.LinuxJournalStore.com REVIEWS software Untangle’s Multi-Functional Firewall Software Untangling your network with Untangle. Most reviews are based on trying a product and running it through hypothetical situations to see how it performs. In the case of my Untangle review, I had an emergency for which I needed a Web filter ASAP. I’m the technology director for a K–12 school district in Michigan, and our proprietary Web filter quit working. In order to meet federal requirements for Internet filtering, Free Features vs. Commercial Add-ons FREE MODULES: I Web Filter Lite I Spam Blocker I Virus Blocker I Spyware Blocker I Phish Blocker I Attack Blocker I Ad Blocker I Intrusion Prevention I Protocol Control I OpenVPN I Router SHAWN POWERS I had to have a working Web filter, and I had to have it before the next morning— thus, my full-blown, production-level review of the Untangle product. Hopefully, my all-night installation and configuration marathon is beneficial to you. The Swiss Army Network Knife At its core, Untangle is a Linux distribution designed to filter and manage network traffic. It can act as a transparent bridge functioning between a router and network, or it can work in router mode, both filtering and routing at the same time. I tested Untangle in transparent bridge mode, but if used as a router, it supports load balancing from multiple WAN links (for additional cost). Untangle is a free product that offers premium commercial options. Although it’s obvious the company wants to sell those premium products, the free features are surprisingly robust. (See the sidebar for a comparison of free features vs. commercial add-ons.) For my test, I activated most of the free features and started a 14-day trial of the premium Web filter. I Firewall My Tango with Untangle I Reports Installation is done similarly to any other Linux distribution. The steps were very simple and mostly automatic. My server was a standard rackmount Dell machine, and all hardware was detected and configured correctly. After initial installation, all configuration is done via Web browser. Interestingly, the Untangle server installs the X Window System and a browser, so configuration can be done directly on the server. I found it more convenient, however, to configure it remotely. When you first log in to the configuration page, you’re presented with a graphical representation of an empty server rack. As you add services, they visually fill this “rack” on your screen (Figure 1). Each service is represented as a service on the virtual rack and can be turned on or off by I Captive Portal PREMIUM MODULES: I Live Support I Configuration Backup I Directory Connector I Policy Manager I Branding Manager I Web Filter I Kaspersky Virus Blocker I Commtouch Spam Booster I WAN Balancer I WAN Failover I Bandwidth Shaping I Web Cache 3 8 | may 2011 w w w. l i n u x j o u r n a l . c o m Figure 1. Adding services fills a “rack” on your screen. Figure 2. Configuration Window for the Spyware Blocker Module clicking on a virtual power button. I’ll admit it seemed a bit silly at first glance, but after a while, I found it rather logical and easy to use. (It also made it easy to turn services off, which was required as my production day started. More on that later.) The configuration pages for most services are similar in design. Figure 2 shows the configuration window for the Spyware Blocker module. Although I wish many of the modules had more configuration options available, Untangle provides a decent set of configurations with a very REVIEWS The premium Web filter, on the other hand, seems to be on par with other commercial Web filtering solutions. Pricing is based on concurrent users, but based on the pricing for 500 workstations, the cost was comparable or lower than other products. Because I was unable to authenticate Untangle with my user accounts, I can’t attest to how finegrained access control is, but the configuration Figure 3. Untangle’s Searchable and Visually Appealing Reports appears to be adequate for tiered access. That’s important for us, as staff and students sensible default setting for most features. have different access rights. The biggest frustration I had with Untangle was its extremely limited authentication integration. Although the server apparently The Bad will authenticate against a Microsoft Active I’ve already mentioned the limited configDirectory, I don’t have AD in my network. uration options for user authentication. The only other authentication option is to Unfortunately, that’s not the only problem use a Radius server, which quite frankly I with authentication. Untangle works in haven’t had on my network since we hosted transparent mode only. By that, I mean it dial-up networking. The inability to commuintercepts traffic as it passes through the nicate via LDAP or Open Directory forced me bridged network ports, but it doesn’t act to use Untangled in anonymous mode. That as a proxy. I find using a proxy (one that is was fine for my emergency situation, but it configured on the browser and is assigned would be a major hurdle for permanent to connect via proxy server) is a very adoption in my network. efficient way to manage Web filtering. Although transparent mode is convenient, it also breaks SSL connections, requiring The Good some fancy hacking to block filtered SSL I’ve been using Linux routers and Web sites. Don’t get me wrong, Untangle does filters for more than a decade. I’ve never a really great job of hacking, but if it had seen a system with so many filtering actual proxy support, it would be simpler to features that is so easy to configure. I was support SSL traffic. Plus, I wouldn’t have to particularly impressed with the Protocol reconfigure 500 workstations that currently Control module. Although not 100% have proxy settings in the browser! accurate, it did a really good job of stopping The only other frustration I had with traffic based on packet type. For example, Untangle was its system requirements. in the first hour of school, Untangle found Although my single Xeon CPU is a few and blocked a student from running years old, with just the Web filter bittorrent on our network. The torrent module active, my CPU was pegged traffic was running on a random port, but at 100% usage most of the day. When Untangle was able to identify and block the I turned on the other modules, like traffic. The system-wide Ad Blocker module Protocol Control, Ad Blocker, Spam also was nice, since blocking ads on Web Blocker and so on, my entire network sites helps kids focus on their work. (The slowed to a crawl. I do have a rather moral ramifications of blocking Web ads in busy network, and I realize protocol a school district are, of course, up to the analyzation is very CPU-intensive, but I reader, but the ad blocker works very well.) was surprised at how quickly my 2.8GHz The free Web filter (or “lite” version) is Xeon CPU became overloaded. Still, with very basic. It includes a few categories and enough horsepower, I fully expect my does not block SSL traffic. Although it might network would not slow down. Just be be sufficient for a home user trying to block aware that Untangle’s awesome features accidental porn surfing, it certainly isn’t come at a CPU premium. robust enough for a K–12 school district. The Nifty Untangle has an amazing number of features. Some of them seem a little redundant (like the Spyware Blocker and the Phish Blocker), but it’s nicer to be overprotected rather than underprotected. The reports are searchable and quite visually appealing (Figure 3). I find myself looking at the daily reports that arrive in my e-mail inbox to look for trends and troublesome client computers. If authentication were a bit easier to configure, those same trends could be identified by user as well. One of the best parts of being forced to use Untangle in a production environment is that I was able to identify its major weaknesses for my purposes very quickly. I’m happy to say that the company seemed very willing to hear my concerns, and the developers were given my feedback immediately. In fact, I wouldn’t be surprised if some of my concerns are addressed by the time this review is printed. I’m always encouraged by a company that listens to criticism. Hopefully, that criticism will be put to good use in future editions of Untangle. Untangle, Untangled I’m always hesitant when companies provide a small portion of their product for free and charge for premium features. Thankfully with Untangle, the free offering is extremely generous and sufficient for what many users would want. The premium features are truly valuable, and the pricing is fair. There are some situations that make Untangle the wrong choice for your network, and unfortunately for now, I am in that situation. Until Untangle works out additional authentication schemes and provides direct proxying, I can’t implement it as my main Web filter. I will admit, however, that even though I’m not using Untangle as my Web filter anymore, I did leave it in place to filter P2P traffic and block ads. I’m very impressed with Untangle and would recommend it to others. With its very robust set of free features, many users won’t need to pay in order to meet their needs. For more information and a free download, check out www.untangle.com.I Shawn Powers is the Associate Editor for Linux Journal. He’s also the Gadget Guy for LinuxJournal.com, and he has an interesting collection of vintage Garfield coffee mugs. Don’t let his silly hairdo fool you, he’s a pretty ordinary guy and can be reached via e-mail at [email protected]. Or, swing by the #linuxjournal IRC channel on Freenode.net. w w w. l i n u x j o u r n a l . c o m may 2011 | 3 9 REVIEWS hardware The Google Cr-48 “Mario” Chrome OS Notebook How much Linux do you get with Chrome OS? DANIEL BARTHOLOMEW I was fortunate enough to receive one of the Google Cr-48 “Mario” Chrome OS notebooks to test. My day job is technical writer and sysadmin for Monty Program, the company behind MariaDB, so the two main questions I wanted to answer about this stripped-down operating system were: 1. Can I use it for my normal work tasks? 2. Chrome OS runs on top of a Linux kernel, but how much of the normal Linux experience do you get? The notebook itself is well built and attractive, but not exceptional. The keyboard has a nice feel to it and a good layout, apart from the tiny up/down arrow keys. The battery life is excellent—easily the best I’ve experienced on a laptop. Chrome OS itself is not surprising, at least if you’re familiar with the Chrome Web browser. There are a few extra configuration options, like setting the trackpad sensitivity, and network settings. But, the amount of customization you can do is minimal. An example of this minimization is with user accounts—there aren’t any, at least in the traditional sense. You actually are running as the “chronos” user, but you never log in as that user. Instead, you log in using your Google account credentials. When you first sign in, Chrome OS looks to see if you are signed up with the Chrome browser synchronization service, and if so, it syncs all the items you have selected for syncing (bookmarks, extensions and so on). A couple minutes after booting Chrome OS the first time, my favorite Chrome extensions had been downloaded and installed automatically, and all of my bookmarks imported. I had to configure the extensions, but doing so didn’t take much time. My desktop Chrome environment was replicated with almost no effort on my part, so it was time to start looking under the covers to see what I could find. And, what I found was...not much. There’s 4 0 | may 2011 w w w. l i n u x j o u r n a l . c o m Figure 1. The Cr-48 Box and Everything Inside It certain, specific commands. You can get the list of commands with the help command. The full list, with instructions for each command, is only one screen of text. There’s ping, SSH, a traceroute command, route, top, a couple commands for managing corporate SSL certificates, some networking diagnostic and logging commands, and that’s it. A few were unfamiliar to me, but the output of the help command explains Figure 2. The Cr-48 keyboard—notice no “Windows” keys them in sufficient detail. My and no Caps Lock. guess is the crosh console really nothing beyond the browser to interface mainly exists to provide support Chrome OS. Okay, there’s one thing. By techs or a help desk the ability to default, the Cr-48 comes with crosh, the troubleshoot your Chrome OS device Chrome OS shell. You can access this shell over the phone or in person. with the Ctrl-Alt-t key combination. The commands are not very useful for Crosh is very limited, but that’s by daily work. Even the one command I nordesign. It’s not meant as a full commandmally find very convenient, SSH, is not. It’s line interface. It allows you to run only not OpenSSH for one thing. It’s more like Figure 3. On first boot, Chrome OS helpfully provides you with a short tutorial. Figure 4. Pressing Ctrl-Alt-? brings up a handy keyboard diagram showing what keys do what. Here I’m viewing the Ctrl key combinations. Figure 5. There’s not much to configure in Chrome OS. a wrapper script for people who don’t know how to use SSH and can’t be bothered to take five minutes to learn it. For example, when using this crippled crosh SSH, you can’t enter ssh [email protected]. Instead, you need to use ssh me example.com. There also is no way to use SSH keys. The funny thing is, OpenSSH is installed on Chrome OS, but to use it, you need to get into “developer” mode. Switching to developer mode turns off the hardware verification system, which prevents the running of modified firmware. To get into developer mode, you remove the battery and slide a small switch hidden under a piece of tape. The reason for using a physical switch is because you can’t prevent physical attacks anyway, so you might as well make running modified software require physical access—at least that way you shut down remote attacks (there’s obviously no way to slide the physical switch remotely). Full instructions for the procedure, with photos, are found on www.chromium.org. The first time you boot in to developer mode, the notebook resets itself to factory settings and displays a warning. In Chrome OS, this means you need to set up your network connection, and you need to download and install your extensions again. Apart from those two things, nothing else is stored on the notebook, so it’s an easy procedure, especially because the extension part happens automatically in the background. When in developer mode, the warning screen appears every time you boot. It’s more of an annoyance than anything else. A simple Ctrl-d dismisses it and continues the boot process. The upside to the annoyance is that there is no possible way for you to not know your Chrome OS device is in developer mode. Developer mode adds a new “shell” command to crosh. This command starts a bash shell—GNU bash, version 4.0.35(2)release for those of you keeping score. But, just because you have a bash shell doesn’t mean you have a complete command-line environment. For one thing, although some programs are installed, there’s no vi/vim/ed/nano/pico or other command-line text editor present. So, Chrome OS has this strange commandline environment where you can use more to view the contents of a file; wc to count the number of characters, lines and words in the file; and even md5sum to generate a w w w. l i n u x j o u r n a l . c o m may 2011 | 4 1 REVIEWS hash; but you can’t actually edit the file. What were they thinking? That’s a rhetorical question. The answer is “the cloud”. In a clouded world, why enable editing files when there is no network connection? Why would you do that? My answer is because the cloud is not reliably available at all times everywhere, and because, gosh darn it, I like editing files locally in vim. I like it so much, I even use an extension in Chrome that allows me to use vim to edit text areas in Web forms (it comes in very handy for long Knowledgebase articles). At my house, an Internet connection is almost a given, likewise around town (mostly). But when traveling, it’s a crap-shoot. It depends on where I am (and sometimes when). The Verizon cell radio in the Cr-48 makes for decent coverage in the United States, but connecting in Europe and other areas of the world is via Wi-Fi or not at all. Most of the time, having a laptop that requires an Internet connection is okay, but sometimes it’s not. For example, when using the Cr-48 on a plane, should I even bother turning therefore, are the two most important things to me, followed by good IRC and e-mail clients. When I said before that no text editor was included, I was being only partially accurate. Google doesn’t leave you completely high and dry. One of the Chrome OS “applications” installed by default is a simple rich text editor called Scratchpad. Scratchpad saves a copy of all text locally on the Cr-48 and syncs with Google Docs. In Google Docs, synced documents show up in a folder called Scratchpad. Any existing text documents you place in that folder also show up in Scratchpad when you next sync. As might be expected, nontext documents (spreadsheets, presentations and so on) are not supported by Scratchpad and do not show up, even if you place them in that folder. The only issue I have with using Scratchpad is that it’s not a good editor. It’s quicker and more convenient than using Google Docs, but as a text editor, it is merely passable—nowhere near as efficient or useful as a true text editor. To a “real” Linux command line. Currently, the only way to get vim or any other native apps not included by default is to compile your own build of Chrome OS and/or your own packages. For developers, this will be fine, but I’m not a developer. For me, it would be nice if there were some sort of simple package manager, even if it contained only a limited selection of preapproved native applications. Lack of common Linux applications aside, Chrome OS is very stable, and the hardware and software work well together. Sleep, resume, the Webcam and so on all work very well. That said, I was able to make Chrome OS crash, or at least freeze temporarily, on some pages with embedded Adobe Flash content and when playing a game I installed from the Chrome Web Store (I’m not sure if the game was using Flash or if it was an HTML5 Web app). On most of these occasions, the OS was able to recover without my help after a minute or so (no reboot required), but one time it wouldn’t or couldn’t recover, and I was forced to hold the power button to force Currently, the only way to get vim or any other native apps not included by default is to compile your own build of Chrome OS and/or your own packages. it on? If the plane has Wi-Fi and there’s something that justifies the cost, sure; otherwise, no. I might as well put it in my checked luggage. The Cr-48 is, of course, just a prototype device. When several different Chrome OS devices are available commercially, you’ll be able to choose the one that gives you the most reliable always-available connection for your area and travel habits. The reliance on an always-available Internet connection is an Achilles heel, but one that eventually will be fixed or minimized. The good news is that when I do have a connection, I actually am able to do most of my day-to-day work using nothing but a browser and SSH. Being able to get by with nothing but a browser and terminal will, of course, not be true for everyone. I happen to spend my workday writing (blogs, wiki and Knowledgebase entries, e-mail and IRC for the most part), editing what others have written, and maintaining a small group of servers. A good text editor and SSH, 4 2 | may 2011 w w w. l i n u x j o u r n a l . c o m be fair, the trade-off in efficiency is partly made up for with ubiquity. It’s nice knowing the document always will be only a click away in any decent Web browser on any computer anywhere in the world. After text editing, the next biggest things I do are IRC and e-mail—neither of which I can do natively on Chrome OS. Yes, Gmail is there and works wonderfully (along with all other Web-based e-mail sites), but my work e-mail does not have a Web front end. Hopefully, developers are working on a solid IMAP client for Chrome OS. Ditto on a good IRC client. Thank goodness Mutt and Irssi are perfectly usable over an SSH connection (so is vim for that matter), because without them, I would be unable even to consider using Chrome OS full-time. The downside to running them remotely is that when the network to which I’m connected is slow or unreliable, it quickly becomes difficult to get anything done. Finally, even though in developer mode I can use OpenSSH (hooray for SSH keys!), the experience is not as good as when using a reboot. Thankfully, booting Chrome OS is very fast—about 20 seconds in my tests from opening the lid to the first tab loading after login. Yes, the Cr-48 boots when you open it—a nice touch. Another nice touch is the Search, or “new tab key”, as I refer to it. This key replaces the Caps Lock key (you can configure it to be the Caps Lock key in the system preferences, if you want). Pressing it opens a new tab with the cursor in the Chrome search/address bar, so you can press it and begin typing out your search or the URI you want to go to immediately. The keys that normally would be function keys also have been assigned to specific browser and system-related actions, such as forward, back, reload, full-screen, volume, screen brightness and so forth. The whole experience is very polished, and it should be. I mean, there’s really only one application you’re running, so it would be surprising if the hardware wasn’t tuned for it. So, how much Linux do you get with Chrome OS? Not much, apart from SSH. Of course, Linux is very much behind the scenes, but all in inaccessibleto-normal-users ways. Some commandline applications are included, but not enough to consider the Chrome OS command line useful. By way of comparison, the Ben NanoNote’s command line (which I reviewed in the October 2010 issue of LJ) is much more useful, even though it has no network connection. Unless you are a developer, customizing Chrome OS doesn’t go far beyond superficial things like bookmarks, extensions and browser themes. Superficial or not, the fact remains that thanks to SSH, I can use this notebook to perform most of my work-related tasks—most, but not all. And, even with the many tasks I can perform, unless they are tasks for which I normally use a Web browser, I can’t do them as easily as on my regular Ubuntu-powered Linux system. This is partly related to long-term habits I have, and partly because a good, dedicated application often is better than a Web-based work-alike (for example, a Web-based image editor compared to The GIMP). As an example, I regularly use ClusterSSH to log in to large portions of our servers simultaneously to perform maintenance. The screen size of the Cr-48 is large enough, in theory, to have six or more simultaneous SSH windows open and visible, but this simply is not possible on Chrome OS unless you are a developer and compile ClusterSSH (if it’s even possible to do so) or code from scratch a work-alike replacement solution. I still can upgrade all six of the servers that need it, but I have to log in and upgrade each of them separately. In the end, Chrome OS is a no-fuss browser-only operating system. If you truly can or do use a browser for everything you do on a computer (or even almost everything), this is the perfect way to do it. There aren’t any configuration issues, because there’s nothing to configure beyond logging in to your Google account. There aren’t any maintenance issues, because Google handles that for you behind the scenes, updating you to the newest version of Chrome OS automatically. There aren’t any data-loss issues, because it doesn’t store anything that isn’t also stored somewhere else or that cannot be easily re-installed. I could go on, but there’s not much else to say. For better or for worse, Chrome OS contains just enough Linux to run the Chrome Web browser, and that’s it. Similar to the situation a couple years ago when I gave my Dell Netbook to my daughter, I don’t think I will use this notebook as my primary one. It’s not because the keyboard is too small (my main complaint about the Dell Netbook). The keyboard on the Cr-48 is excellent. And, it’s not because of anything else hardware-related (it’s an attractive, well-built notebook), but because it cannot do some of the things I expect and need a portable computer to do. I may take it on trips as a backup machine, but I think this notebook will end up more or less belonging to my wife. Most of what she does on her desktop computer is, or easily can be done inside a Web browser. For her, this is the perfect notebook; it’s easy to use, stable and secure. In fact, it’s been one of the very few gadgets I’ve owned that she keeps borrowing. Chrome OS may not be for everyone, but Google is on to something here.I Daniel Bartholomew works for Monty Program (montyprogram.com) as a technical writer and system administrator. He lives with his wife and children in North Carolina and often can be found hanging out on both #linuxjournal and #maria on Freenode IRC. Resources Poking around Your Chrome OS Notebook: www.chromium.org/ poking-around-your-chrome-os-device Cr-48 Chrome Notebook Developer Information: www.chromium.org/ chromium-os/developer-information-for-chrome-os-devices/ cr-48-chrome-notebook-developer-information Virtually Destroy Chrome OS Notebooks: www.google.com/chromeos/demolab LIVE-FIRE SECURITY TESTING with ARMITAGE and METASPLOIT Armitage and Metasploit let you attack your network like skilled criminals. Use these attacks to evaluate your security posture. RAPHAEL MUDGE YOUR BOSS CALLS YOU INTO HER OFFICE. You stare at the fake mahogany panels that line her wall. She strikes a match and asks, “Did you see the news? Criminals broke into our competitor’s network. Embarrassing.” She lights her cigar and demands, “I want you to test our network and tell me that we’re safe!” Many are finding themselves in this position. The Payment Card Industry Data Security Standard requires a penetration test each year. Sarbanes-Oxley, FISMA and HIPAA demand an annual security review. Because of these pressures, many organizations are looking at penetration testing. A penetration test is a step beyond a vulnerability assessment. A vulnerability assessment pairs missing patches and configuration 4 4 | may 2011 w w w. l i n u x j o u r n a l . c o m errors with vague threat descriptions. A penetration test requires exploiting vulnerabilities to learn how an attacker may get access to key systems and files. By following this article, you’ll evaluate your security posture using the same process skilled attackers follow. You’ll learn how to perform reconnaissance, exploit hosts and maneuver deeper into your network. To do this, you’ll use Armitage and Metasploit. Metasploit is an open-source exploit development framework owned by Rapid7. Armitage is one of the interfaces available for Metasploit. Armitage makes it easy to launch exploits and conduct post-exploitation steps once you have access to a host. w w w. l i n u x j o u r n a l . c o m may 2011 | 4 5 FEATURE Live-Fire Security Testing with Armitage and Metasploit GETTING STARTED Use BackTrack Linux to follow this article. BackTrack Linux includes Metasploit and its dependencies. Update your Metasploit installation to get the latest version of Armitage: cd /pentest/exploits/framework3 svn update . To start Armitage: Figure 2. Network Services /etc/init.d/mysql start ./armitage see your network. You’ll learn what your firewall blocks and which services display too much information to anonymous users. Click Start MSF when the GUI comes up. Armitage will execute Metasploit in the background and connect to it. EXPLOITATION It’s time to exploit your network. You need to match your hosts and services against Metasploit’s 640+ exploits. The next sections in this article discuss automatic, semi-automatic and manual ways to do this. You also will learn how to launch password-guessing and client-side attacks. I recommend using your inside scans for this phase of the penetration test. You should assume attackers will get inside your network perimeter. I also recommend attacking hosts from inside your network perimeter. This will better show what attackers can do. I justify these recommendations in the pivoting section. AUTOMATIC EXPLOITATION Figure 1. Armitage User Interface Figure 1 shows the Armitage user interface; it has three parts. The top-left is the module browser. Use this browser to search for and execute any of Metasploit’s modules. The top-right is the targets area. Armitage displays your hosts here. The bottom is the tabs area. Armitage opens each shell, console and browser in a separate tab. Armitage’s Hail Mary feature uses your scan results to launch exploits automatically. Go to Attacks→Hail Mary→by port. Armitage finds, filters and sorts exploits into an optimal order. Armitage then launches these exploits against each of your hosts. At the end of this attack, Armitage lists the compromised hosts and the successful exploits. This attack is noisy, and some exploits may crash a service before the correct exploit reaches it. However, this attack requires little skill to run. Try this attack from outside your network to see what your intrusion-detection system finds. SEMI-AUTOMATIC EXPLOITATION Use Attacks→Find Attacks→by port to get exploit recommendations. Armitage creates an Attack menu (Figure 3) for each host with RECONNAISSANCE Attackers perform reconnaissance to learn your network configuration. Accurate information allows them to execute targeted attacks. Use reconnaissance to learn how attackers see your network. Attackers want to know which hosts are on your network, which ports are open and what software you’re running. Nmap is a popular reconnaissance tool. It scans your network to report open ports and service banners. Nmap also guesses host operating systems using irregularities in TCP/IP packet headers. Click Hosts→Nmap Scan→Quick Scan (OS Detect) to scan your network. Once the scan is complete, Armitage populates its targets area with your hosts. Click View→Targets→Table View to display your hosts in a table if you have a lot of hosts. Right-click a host and select Services to see the results of your scan. Armitage displays the open ports and service banners in a new tab. Highlight multiple hosts to display your scan results in one tab. Figure 2 shows a scan of my network. Execute the reconnaissance step from both inside and outside your network. Outside reconnaissance will show you how attackers 4 6 | may 2011 w w w. l i n u x j o u r n a l . c o m Figure 3. Attack Menu relevant exploits. These are the same exploits launched by the Hail Mary attack. Right-click a host in the targets area to reach this menu. Armitage organizes each Attack menu by exploitable service. On my network, I have a Windows XP SP2 host. To exploit it, I right-click the host and navigate to Attacks→smb→ms08_067_netapi. This opens the launch dialog shown in Figure 4. them, and they’re less reliable. Armitage’s Hail Mary and exploit recommendation features use exploits rated at the great and excellent levels only. You can change this through Armitage→Preferences. Metasploit rates some exploits as manual. These exploits need extra information, such as a user name and password, to launch. Manual exploits are not available using the automatic and semi-automatic approaches. MANUAL EXPLOITATION Figure 4. Exploit Launch Dialog The exploit launch dialog has a table of preconfigured options. Double-click any value to edit it. Click Show advanced options to see other options. Most of the time you don’t need to change these. Click Launch to run the exploit against your target. If the attack succeeds, your target turns red with lightning bolts around it (Figure 5). Manual exploitation requires matching your devices and services to Metasploit modules. This step requires some preparation. Create an inventory of your network devices and the software running on each host. Type each software package and device into the search field below the module browser. Press Enter to execute the search. If you know a Linux host is running ProFTPD 1.3.3, type ProFTPD into the search field. Armitage displays all matching modules in the module browser. Highlight hosts in the targets area to preconfigure the module’s RHOSTS option. Double-click a module to open its launcher. Click Launch to run the attack. You sometimes will see auxiliary modules in your search results. Figure 6 shows a search for Cisco. This search reveals auxiliary modules to scan for known authorization bypass vulnerabilities and access configuration files using SNMP. Pay attention to the auxiliary modules. They offer a lot of attack value. Figure 5. Compromised Host MIND THE RISK Exploiting services is a risky business. You’re introducing input into your applications that executes flawed code paths. When possible, you should test nonproduction systems. If you must test against a production host, it helps to understand Metasploit’s exploit rating system. Metasploit rates each exploit as poor, normal, good, great or excellent. Excellent rated exploits use simple command injection flaws. These are the safest and most reliable exploits. Exploits rated great are reliable memory corruption exploits. These may crash your system, but it’s extremely unlikely. Exploits rated good and below have more risk associated with Figure 6. Cisco Modules w w w. l i n u x j o u r n a l . c o m may 2011 | 4 7 FEATURE Live-Fire Security Testing with Armitage and Metasploit The manual exploitation approach is the best way to learn what capabilities Metasploit has against your network. This approach requires more time and skill to get access, but it’s also more thorough. PASSWORD-GUESSING ATTACKS Metasploit also has modules to run a dictionary-based passwordguessing attack against most services. Search for _login in the module browser to find these modules. To attack SSH, highlight several hosts in the targets view and double-click the ssh_login module. Metasploit gives you a lot of flexibility for executing passwordguessing attacks. Set the USERNAME and PASSWORD options if you want to try one user name and password. Set USERPASS_FILE to a file with “username password” entries on each line. Or set USER_FILE and PASS_FILE to attempt access using every user name from USER_FILE with every password from the PASS_FILE. Metasploit comes with several user name and password word lists. On BackTrack, they’re located in /pentest/exploits/framework3/ data/wordlists. Double-click a file-expecting option name (for example, PASS_FILE) to set the option using a file-chooser dialog. Click Launch to begin the password-guessing attack. Armitage displays the attack’s progress in a new tab. Metasploit stores successful logins in its database. Go to View→Credentials to see them. You can use these credentials to log in to a host as well. Right-click a host, select Login, and choose the service to log in to. If the login yields a session, the host turns red with lightning bolts (just like a successful exploit). A session is an active shell or agent that you can interact with. Password-guessing attacks are an important part of a penetration test. You should verify that common user name and password combinations do not give access to your network resources. Also, guessed credentials make other attacks possible. For example, the snmp_login module might find a community string that an attacker uses to write a new configuration file to your Cisco device. CLIENT-SIDE EXPLOITATION To use exploits and launch password-guessing attacks, attackers need network access to your services. A configured firewall will stop many attacks. However, attackers are not out of options. Determined attackers will use client-side exploits and social engineering to get inside your network’s perimeter. Go to Attacks→Browser Attacks→multi→java_signed_applet to launch a cross-platform client-side attack. This attack starts a Web server with a malicious Java applet. The applet asks visitors to grant the applet full rights to their local system. Disguise this applet as a neat game, and you may get access to a lot of hosts. Use Attacks→Evil Files→windows→adobe_pdf_embedded_exe to generate a PDF file with an embedded executable that connects back to Metasploit. This attack asks users to take an action that runs this embedded executable. Most users are unaware of the security risks with opening a PDF file. Click Attacks→Browser Autopwn to start a Web server that 4 8 | may 2011 w w w. l i n u x j o u r n a l . c o m will use the browser fingerprint of each visitor to send an exploit. If you e-mail every user in your organization with this link, how many hosts would you compromise? I recommend testing these client-side attacks on your workstations and seeing what’s possible. User education is the best defense against these attacks. Consider demonstrating these attacks at your next training event. Users who can recognize attacks will add to your security posture. PIVOTING One compromised host allows attackers to attack your network from the inside. Metasploit’s pivoting feature allows you to bounce your attack traffic through a compromised host. Pivoting makes client-side attacks very dangerous. Pivoting works like a router within Metasploit. You choose a network and set a compromised host as the gateway. Metasploit uses these routes for all of its attacks and scanning modules. Right-click a compromised host and navigate to Meterpreter→Pivoting→Setup to configure this feature. Armitage shows a green line between pivot hosts and their known targets (Figure 7). Figure 7. Targets with Pivoting Metasploit has a built-in proxy server. Use this if you want to use an external tool, like Firefox, through the pivots you have set up. Go to Armitage→SOCKS Proxy to launch this feature. POST-EXPLOITATION Post-exploitation is what happens after access. A successful attack gives you shell access on non-Windows hosts. Successful Windows exploitation gives you access to Meterpreter. Meterpreter is a powerful post-exploitation agent built in to Metasploit. Meterpreter runs from the memory of the process you attacked. Through it, you can browse and download files, view processes, take screenshots, log keystrokes, run privilege escalation exploits and interact with a command shell. Armitage provides an intuitive interface for much of Meterpreter’s functionality. Figure 8 shows the file browser. Right-click a compromised host and navigate to the Meterpreter menu to explore these functions. Meterpreter is powerful, but Armitage has a few tricks for shell access too. Right-click a compromised host and navigate to the Shell menu. Select Interact to open the command shell in a learned how to maneuver deeper into your network using the pass-the-hash technique. The next step is to apply what you have learned. I recommend that you download the Metasploitable virtual machine. Metasploitable has many services you can exploit for shell access and information. Attack Metasploitable to become familiar with Armitage and Metasploit before you start your first penetration test.I Figure 8. File Browser Raphael Mudge is the developer of Armitage. He lives in Washington, DC. Contact him at www.hick.org/~raffi. tab. Use Upload to upload a file using the UNIX printf command. Choose Disconnect to close the session. Resources PASS THE HASH After post-exploitation, you’ll want to compromise more hosts. Pass the hash is a technique for further compromising a Windows network. Windows hosts do not pass your network credentials in the clear. Rather, they use a challenge-response scheme to generate a hash. Windows uses this hash to authenticate you on the Active Directory domain. Windows hosts cache and re-use hashes to authenticate to other hosts on the network. This saves you the trouble of retyping your password when you access a file share. Attackers use stolen hashes to get access to other hosts on your active directory domain. Dumping cached hashes requires local administrator access. Use Meterpreter→Access→Escalate Privileges to try several local exploits to increase your privileges. Go to Meterpreter→Access→Dump Hashes to steal the local cached credentials. Now you need targets. Use the auxiliary/windows/smb/smb_version module to find other Windows hosts on the Active Directory domain. Go to Attacks→Find Attacks to generate an Attack menu for each host. Highlight several Windows hosts, right-click, and use Attacks→smb→pass the hash. Armitage lets you choose which set of credentials to try. Pick a pair and click Launch. You’ve passed the hash. Each successful login will give you a Meterpreter session. Patches exist for Metasploit’s Windows privilege escalation exploits. Attackers who compromise a patched system don’t have to stop though. They may scan for an unpatched host, exploit it and then carry out these steps. EVALUATING THE RISK Earlier, I defined a penetration test as a way to learn how attackers may get access to key systems and files. I suspect you did not find a working exploit for your key servers. Before you conclude your network penetration test, I’d like you to think like an attacker for a moment. Attackers will use social engineering and client-side attacks to get a foothold. Attackers then will try to exploit a workstation to collect hashes. Using pass-the-hash, your patched Windows systems are no longer safe. What happens if attackers access your workstation, install a key logger and download your SSH keys? One vulnerable host can lead to a total compromise of your otherwise secure assets. NEXT STEPS In this article, I’ve shown you the techniques attackers use against your network. You learned how to scan your network, exploit hosts and carry out post-exploitation actions. You also BackTrack Linux: www.backtrack-linux.org Metasploit: www.metasploit.com Documentation for Armitage: www.fastandeasyhacking.com Metasploitable Virtual Machine: blog.metasploit.com/ 2010/05/introducing-metasploitable.html Low Cost Panel PC PDX-057T Vortex86DX11GHz GHzFanless Fanless CPU CPU llVortex86DX 5.7"VGA VGALCD LCDwith withTouchscreen Touchscreen ll5.7" RS232/422/485serial serial port port ll11RS232/422/485 Mini-PCIExpansion Expansionslot slot llMini-PCI USB2.0 2.0Host HostPorts Ports ll22USB 10/100BaseT BaseTEthernet Ethernet && Audio Audio ll10/100 PS/2mouse mouse&&keyboard keyboard llPS/2 l CompactFlash & MicroSD card sockets l CompactFlash & MicroSD card sockets l Resolution/Colors: 640 x 480 @ 256K l Resolution/Colors: 640 x 480 @ 256K l Low Power Consumption l Low Power Consumption l Linux, Embedded XP or Windows CE OS Options l Linux, Embedded XP or Windows CE OS Options l l Wide Input Voltage and Wireless Options 2.6 KERNEL 2.6 KERNEL Wide Input Voltage and Wireless Options Setting up a Panel PC can be a Puzzling experience. However, the PDX-057T Setting up a Panel PC can be a Puzzling experience. However, the PDX-057T comes ready to run with Linux Operating System installed on flash disk. Just apply comes ready to run with Linux Operating System installed on flash disk. Just apply power and watch the Linux X-Windows desktop User Interface appear on the vivid power and watch the Linux X-Windows desktop User Interface appear on the vivid color LCD . Interact with the PDX-057T using the responsive integrated color LCD . Interact with the PDX-057T using the responsive integrated touchscreen. Everything works out of the box, allowing you to concentrate on your touchscreen. Everything works out of the box, allowing you to concentrate on your application rather than building and configuring device drivers. Just Write-It and application rather than building Run-It... Starting at $440 Qtyand 1. configuring device drivers. Just Write-It and Run-It... Starting at $440 Qty 1. For more info visit: www.emacinc.com/panel_pc/pdx089.htm For more info visit: www.emacinc.com/panel_pc/pdx089.htm Since 1985 Since 1985 OVER OVER 24 24 YEARS OF SINGLE YEARSBOARD OF SOLUTIONS SINGLE BOARD SOLUTIONS EQUIPMENT MONITOR AND CONTROL EQUIPMENT MONITOR AND CONTROL Phone: (618) 529-4525 · Fax: (618) 457-0110 · www.emacinc.com Phone: (618) 529-4525 · Fax: (618) 457-0110 · www.emacinc.com w w w. l i n u x j o u r n a l . c o m may 2011 | 4 9 VIRTUAL SECURITY: Combating Actual Threats Learn how to secure your virtual environment from every angle. JERAMIAH BOWLING The barriers between physical and virtual are disappearing rapidly in the data center. With virtualization’s myriad benefits and the emergence of cloud computing, many shops are virtualizing their server and desktop systems at a breakneck pace. In this great migration to the virtual, admins face new security challenges in the transition that require a much broader knowledge of the enterprise. Couple these new challenges with the ease of access users now have to build their own virtual resources, and you quickly can find your environment in a state of “virtual sprawl”. The good news is that by following a few simple guidelines and utilizing a defense-in-depth strategy, you can minimize your risk whether you’re deploying a new virtual infrastructure or just trying to manage sprawl. In the course of this article, I discuss several high-level security concerns when deploying a virtual environment. In each area of concern covered, I offer basic guidance for dealing with the issues, and when possible, I offer technical solutions to address the associated risks. In keeping with a big-picture view, I don’t provide detailed instructions for the specific solutions presented. The vastness of the product space and the limited format of this article also prevent me from delving into every solution available. Although I attempt to stay vendor-neutral, not every vendor offers a product or solution to address each security concern presented here. In those instances, I briefly look at those products/solutions that are available. To keep this discussion focused, I won’t delve into any esoteric arguments about type 1 or type 2 hypervisors, nor do I discuss the merits of para-virtualization versus hardware translation/emulation. I also stick to products that use a Linux-based hypervisor (including Linux KVM). The use of the term host in this article refers to the underlying physical system with direct access to the hardware. The term guests refers to those virtual machines (VMs) that run an instance of an OS on top of the host virtualization software or hypervisor. 5 0 | may 2011 w w w. l i n u x j o u r n a l . c o m Physical Security The first area to consider is physical security. Virtualization is all about separating the hardware from the OS, but VMs still run on a piece of iron. As such, you can use the same best practices for hardening physical hardware to secure your virtual host. Use common-sense controls like placing locks on your racks and servers and securing keyboard-video-mouse consoles. Be aware of operational factors, such as power, cooling and cabling. As virtualization consolidates systems to achieve higher hardware efficiency, your host servers become hotter and draw more power as they are utilized more. Always make sure your data center has adequate power and cooling to maintain your systems’ basic operations. If building your host servers from scratch, properly size your systems before deploying them. Several vendors provide excellent sizing guides to do just this (Figure 1). Although these baselines may not be an exact representation of your final deployment, they are a good way to approximate your hardware needs. When thinking about hardware, keep performance and redundancy at the forefront. An overtaxed system is easier to penetrate, manipulate and deny access to. As a general guideline, install surplus storage and memory, because those are the typical bottlenecks on hosts. Buy as many of the fastest high-capacity disks you can afford. More disks usually mean more IOPS. You also should have an enterprise-grade array controller running your drives. Consider using a RAID level that has both a stripe and uses parity, such as RAID 10, 5 or 50. Memory should be fast and large in quantity. With excess storage and memory, you create a cushion against undersizing. RAID level. If using network storage, look into redundant options for your NAS/SAN/shelf. This can give you the ability to hot-failover VMs during system failure using tools like VMware’s vMotion and Storage vMotion. Disaster Recovery Always make sure you take regular backups of your host systems. Although technology such as vMotion can make host backups seem trivial, backups still are vital to your disaster recovery options. Backing up a host typically entails running an operation from a command-line interface. In VMware, this is done from the virtual Command-Line Interface (vCLI) using the vicfg-cfgbackup.pl command. In XenServer, the command is xe host-backup. Because KVM runs on the Linux kernel, you simply can back up the kernel using normal methods. Several options are available for backing up guests. At the data level, guests are made up of one or more files that contain a guest’s configuration and virtual disks, so it is quite viable simply to back up those files on the host or wherever they might be stored. The downside to backing up guests this way is that the guest has to be powered down. You can avoid this problem with a variety of dedicated backup solutions that use snapshot technology to back up running guests. There are impressive offerings from Symantec (Backup Exec) and Veeam for VMware deployments. For XenServer environments, there is Alike by Quorum Systems (Figure 2). If you have a mixed environment with multiple hypervisor types, consider Arkeia’s Network Backup, which can back up all of the major vendors’ systems with the exception of Linux KVM. Linux KVM users have limited options, but one popular technique for backing up running guests involves taking a snapshot of a guest volume using LVM and then syncing the resulting snapshot file to another disk on a remote server. If you are unable to back up the guest’s virtual data/disk files or take a snapshot, you always can use traditional backup methods to back up the guest OS. Figure 1. HP’s ESX Sizing Tool Consider using a separate physical network from your production network for your hosts. This reduces chatter on your other segments and makes it easier to secure the segment assigned to your hosts and their guests. When using networked or shared storage to store your VM’s data files and virtual disks, use another dedicated segment to separate and streamline storage-related traffic. In terms of redundancy, try to follow the old adage of “buy two of everything”. Look for cost-effective redundant options for your host systems, such as redundant power supplies and multipathed or teamed network ports. Storage also should be highly redundant. Consider the number of disks needed for each type and how many disk failures can be tolerated when selecting your Figure 2. Running a Quick Backup for a XenServer Guest Using Alike Hypervisor/Host Security Next up is the hypervisor. The hypervisor is the virtualization software (or layer) that controls communication between, and access to, the hardware and the guests. It usually is composed of a w w w. l i n u x j o u r n a l . c o m may 2011 | 5 1 FEATURE Virtual Security: Combating Actual Threats streamlined distribution of an operating system run from either internal or external storage and typically is segmented into its own special partition. With the exception of Microsoft’s Hyper-V, hypervisors usually are a flavor of Linux. In the case of Linux KVM, it is actually a Linux kernel module, but I treat it as a hypervisor. As much as the hypervisor is the heart of the virtualization, it also is a big juicy target. This was a major concern with virtualization early on, and it continues to be so. If you can exploit and control the hypervisor on a host, you can control every guest it controls. The primary factors in determining the hypervisor’s security are its size and complexity. Fortunately, the current trend sees vendors reducing their hypervisor’s footprint to an operationally minimal size, which reduces the threat surface. Regardless of size, the hypervisor still is software, and just like any critical piece of software, it is imperative that you patch it regularly. In addition to patching, make sure to allocate your hardware resources appropriately on the host. This means setting limits/ceilings on your guest’s hardware utilization. As a best practice, set limits on memory and processor utilization, or if you want to go further, set limits on network traffic. This ensures performance baselines are met across your guests and reduces the threat of DOS attacks or unintended hardware spikes bringing down the host or other guests. You can set these limits through most of the available management GUIs (Figure 3), or in the case of KVM, you can use cgroups. When using any management GUIs that access your hosts, make sure to evaluate and develop a policy regarding access to them before providing access to users. Follow a least-privilege model for permissions, and when possible, use an external authentication source. Also consider using role-based access controls (RBACs) if they are available for your solution (Figure 4). RBACs provide granular control over operation-specific permissions, such as the ability to create new guests or move guests between hosts. Figure 4. RBAC in VMware vSphere Guest Security Figure 3. Limiting Utilization with Resource Allocation in VMware 5 2 | may 2011 w w w. l i n u x j o u r n a l . c o m Securing your guests may be the easiest part of the process. You can use many of the same practices to secure your guests as you would a physical box. These practices include regular patching, using an antivirus, implementing host- (guest-) based firewalls and locking down unneeded services. If deploying a large number of VMs at once, consider using a common template to deploy your VMs. This standardizes your builds and makes securing and managing them easier. If you are deploying a specific application with its own set of security best practices (for example, Apache or MySQL) to a guest, follow those as well. Next, determine the criticalness and/or sensitivity of your guests, and, if necessary, place them in different security domains. It is quite possible to mix guests in different domains on a single host. It’s also possible to segment your guests onto different host-specific or physical networks (more on this in the next section of this article). sVirt To verify that sVirt is in use, use virsh list to see the VMs that are running. Then, dump the VM’s XML file using virsh dumpxml, and look for svirt in the label: [root@systemname ~]# virsh list Id Name State ---------------------------------5 jbxp4 running desktop? Once you have settled on a remote access method, be sure to use a least-privilege model and follow any best practices for locking down your specific solution, such as using nonstandard ports and using certificates. Monitoring and Alerts Once your hosts and guests are in place, regularly monitor your virtual environment. Doing so minimizes incidents of configuration errors or host/guest failures, [root@systemname ~]# virsh dumpxml jbxp4 | grep label unauthorized creation of new guests. <seclabel type='dynamic' model='selinux'> There are many ways to monitor your <label>system_u:system_r:svirt_t:s0:c335,c384</label> virtual environment, but the best is to <imagelabel>system_u:object_r:svirt_image_t:s0:c335,c384</imagelabel> combine the internal OS logging on your </seclabel> guests with tools provided by your virtualization product (Figure 5). There is also a budding market of third-party products, such as Reflex In addition to any application controls, consider using Systems vWatch, which has extended monitoring capabilities, some form of mandatory access control at the guest level, such as the ability to monitor for change controls and guest such as sVirt for KVM. sVirt uniquely labels guest processes software/asset inventorying. running on the host to identify them to the hypervisor. This Also keep an eye on performance. Even with resource allocaprovides a framework for admins to determine which guests tion in place, hosts can spike due to overpopulation or hardware and/or processes are authorized to communicate with the failures. Most vendors’ management GUIs have some form of perhypervisor (see the sVirt sidebar). If you plan to provide formance monitoring. Open-source users can use virt-manager for remote access to your guests’ OS, determine how your clients KVM or Convirt to monitor performance on KVM and Xen systems and/or admins will do so. Will they use SSH, VNC or remote Small, Portable Devices with Ubuntu Linux Small Form Factor Intel® Atom™ Platform No fans, no moving parts. Just quiet, reliable operaƟon. Incredibly compact and full featured; no compromises. VESA-Mountable NVIDIA® ION/ION2 System Compact, lightweight system with GeForce® Graphics. Flexible storage opƟons (dual HDD support) and WiFi. Value only an Industry Leader can provide. SelecƟng a complete, dedicated plaƞorm from Logic Supply is simple: Pre-conĮgured systems perfect for both business & desktop use, Linux development services for greater system customizaƟon, and a wealth of online resources all within a few clicks. Learn More > www.logicsupply.com/linux © 2010 Logic Supply, Inc. All products and company names listed are trademarks or trade names of their respective companies. LogicSupply1-2horizLJ_Q4-10.indd 1 10/5/2010 4:02:59 PM FEATURE Virtual Security: Combating Actual Threats Figure 5. Viewing Events in XenCenter as a management interface and shares the remaining port(s) between the guests. Any management interfaces should be placed on a separate physical network from any network your guests will use. If you are using a proprietary management client, limit access to the client install files and make sure you use some method of authentication or role-based access control (both mentioned earlier). If you are managing a LinuxKVM based system, follow the normal recommendations for securing SSH. When it comes to networking guests, you have two basic options: bridging with NAT or using a virtual switch. Bridging is simple and quick to set up, but it is less secure and only masquerades the guest’s virtual NIC as the host’s NIC. Using a virtual switch gives you more flexibility in networking your guests. The default configuration on most solutions is to use a single default virtual switch for all guests that is uplinked to one of the host’s NICs. Now, most solutions even have the ability to use VLANs on their virtual switch. The process of VLAN-ing involves labeling a client NIC with a unique ID so it communicates only with other computers that use the same VLAN ID. VLANs on a virtual switch can exist solely on the host or span other guests and devices on the physical network (Figure 7). Figure 6. Viewing a KVM Host’s Performance Data in Convirt (Figure 6). With reliable knowledge of your host utilization, you can plan future hosts better and improve your ability to consolidate, which in many cases, means improving ROI. It always is good practice to automate your systems to alert you to failures or outages. This logic extends to virtual environments as well. Redundancy is great, but if a failure is not acted on in a timely fashion, it can cost you further time and money. Alerts also may help you with any service level agreements (SLAs) and compliance issues (such as PCI, Sarbanes-Oxley and so on). A number of management tools have alerting built into them, but it also is easy to integrate SNMP and other monitoring protocols with a solution like Zenoss to keep an eye on your virtual environment. Virtual Network The last area to secure is networking. Securing your virtual networking environment can be divided into two parts: securing management interfaces and guest networking. In most scenarios, the host utilizes one network interface card (NIC) 5 4 | may 2011 w w w. l i n u x j o u r n a l . c o m Figure 7. VMware’s Highly Flexible Networking Options Although VLANs provide an additional security layer to the virtual network, they are limited to layer 2 (switching) functions. Because of this, vendors have developed products to provide additional protection at a virtual layer 3 (routing) and above. Vyatta’s vRouter and vFirewall act as a networking layer between the hypervisor and its guests to provide layer 3 protection for VMware, XenServer and KVM systems. VMware also has developed similar functionality with its vShield technology and the resulting products. When you can extend layer 3 functionality to your virtual environment securely, you can deploy guests safely as edge or even public-facing devices. Additionally, be sure to monitor virtual network activity. You can monitor external traffic leaving the host using traditional sniffing, IDS and packet capture methods. Things get a little more difficult when you try to sniff interhost or interguest traffic, as the hypervisor makes very different types of network-related calls between guests from what it would with other devices on a network. As a result, traditional methods of sniffing won’t work. However, products that can sniff this traffic, like Network Instruments’ Observer, are beginning to pop up. Observer can sniff virtual traffic inside the host and redirect it to a physical port for analysis by an IDS, IPS or other external monitoring system. In this short overview, you can see that securing a virtual environment from every angle requires a lot of work and knowledge. Just like any other new technology, there is a learning curve for administrators. If you add the fact that not all of the technology is fully mature, the curve becomes steeper and the risks greater. Don’t be hesitant to embrace virtualization though. For now, it seems to be the future of the industry, so we probably will all have to take the plunge. If you educate yourself about the technology and its limitations, and keep abreast of current trends, you’ll be just fine. As you progress in knowledge and experience with virtualization, you will find it easier to identify those areas at risk of exposure and take the appropriate precautions. The recommendations made here are a good start. If you follow them, you should be able to minimize your risks and rest a little bit easier when deploying your virtualized solutions.I Resources KVM: www.linux-kvm.org Xen: www.xen.org Citrix (XenServer): www.citrix.com VMware: www.vmware.com Quorum (Alike): www.quorumsoft.com Symantec: www.symantec.com Veeam: www.veeam.com Arkeia: www.arkeia.com Reflex Systems (vWatch): www.reflexsystems.com Convirt: www.convirture.com Vyatta (vRouter and vFirewall): www.vyatta.com Jeramiah Bowling has been a systems administrator and network engineer for more than ten years. He works for a regional accounting and auditing firm in Hunt Valley, Maryland, and holds numerous industry certifications, including the CISSP. Your comments are welcome at [email protected]. Network Instruments (Observer): www.netinst.com BUILD A BETTER FIREWALL— Linux HA Firewall Tutorial Tired of maintaining your expensive commercial firewalls? Check out how combining Firewall Builder with a Linux HA firewall pair can provide a big solution at a low price. MIKE HORN Many enterprise networks require redundant HA (High Availability) infrastructure for key systems like network firewalls. This article demonstrates how you can use a combination of open-source packages to build and manage a Linux-based HA firewall pair that includes support for many of the advanced features commonly found in commercial firewalls. The collection of open-source packages that I use to create the HA firewall in this article are iptables, conntrackd, keepalived and Firewall Builder. The network diagram in Figure 1 shows the example environment that will be configured. The example uses a pair of servers running Ubuntu Server 10.10 that will be configured to run in an Active-Backup configuration. This means traffic will be going through only one firewall at any given time. More complex Active-Active solutions also are possible, but are beyond the scope of this article. The conntrackd and keepalived packages are installed on both servers using apt-get. Since many commands require root privileges to run, the examples are shown using user root to help keep things concise. Figure 1. HA Diagram 5 6 | may 2011 w w w. l i n u x j o u r n a l . c o m Conntrackd Overview and Configuration Conntrackd is a dæmon developed by the netfilter.org project, the same organization that develops iptables. Conntrackd synchronizes the state of active connections between two or more firewalls running iptables. In an Active-Backup configuration, like the example in this article, each time a connection is allowed through the active firewall, information about this connection is sent to the backup firewall. In the event of a failover, the backup firewall already will have information about the active allowed connections, so that existing connections do not have to be re-established after the failover occurs. The example here is based on one of the example configuration files that comes with conntrackd. This configuration uses the FTFW reliable protocol to synchronize the connection data between the firewalls. There is also a script called primarybackup.sh that provides integration between keepalived and conntrackd. For Ubuntu, these example files are located in the /usr/share/doc/conntrackd/examples/sync/ directory. Run the commands listed below to copy the sample config file and failover script to the default directory for conntrackd, /etc/conntrackd/conntrackd.conf: root@lj-fw-1:/# cd /usr/share/doc/conntrackd/examples/sync root@lj-fw-1:/# gunzip ftfw/conntrackd.conf.gz root@lj-fw-1:/# cp ftfw/conntrackd.conf /etc/conntrackd/ root@lj-fw-1:/# cp primary-backup.sh /etc/conntrackd Open the /etc/conntrackd/conntrackd.conf file for editing, and find the section in the file called Multicast. Edit the default values in this section to match the example network environment shown in Figure 1. Repeat the same process for the lj-fw-2 server, making sure to use the correct interface IP addresses for the lj-fw-2 server. When the package is installed, an /etc/init.d/conntrackd script is created. To test the configuration, start conntrackd and then run the status command to verify it is running properly (note: conntrackd needs to be started on both the lj-fw-1 and lj-fw-2 firewalls): root@lj-fw-1:/# /etc/init.d/conntrackd start root@lj-fw-1:/# conntrackd -s cache internal: current active connections: 1 (Additional output removed for brevity.) For more information about configuring conntrackd, see the conntrackd configuration manual listed in the Resources for this article. Keepalived Overview and Configuration The keepalived dæmon allows two or more servers to share a virtual IP address. Only one server, called the master, will respond to packets sent to the virtual IP address. The other servers are in backup mode, ready to take over the virtual IP address if the master server fails. By default, keepalived uses the configuration file /etc/keepalived/keepalived.conf. The following is a very basic keepalived.conf configuration: lj-fw-1 /etc/keepalived/keepalived.conf file contents: vrrp_sync_group { group { fw-cluster-eth0 fw-cluster-eth1 } Multicast { notify_master "/etc/conntrackd/primary-backup.sh primary" IPv4_address 225.0.0.50 notify_backup "/etc/conntrackd/primary-backup.sh backup" IPv4_interface 192.168.100.2 # IP of eth2 interface, notify_fault "/etc/conntrackd/primary-backup.sh fault" # used for conntrackd synch Interface eth2 } Group 3780 vrrp_instance fw-cluster-eth0 { state MASTER Next, find the section at the bottom of the configuration file called IgnoreTrafficFor and edit the default values in this section to match the example network environment: interface eth0 virtual_router_id 20 priority 100 virtual_ipaddress { IgnoreTrafficFor { IPv4_address 127.0.0.1 # loopback IPv4_address 192.168.1.2 # eth0 interface IP IPv4_address 10.1.1.2 # eth1 interface IP IPv4_address 192.168.100.2 # eth2 interface IP } 192.168.1.1/24 brd 192.168.1.255 dev eth0 } } vrrp_instance fw-cluster-eth1 { state MASTER interface eth1 virtual_router_id 30 TWO INTERFACE FIREWALLS This example uses a dedicated interface for the conntrackd synchronization traffic, which is recommended for optimal security and performance. If your firewall has only two network interfaces, modify the Multicast section of conntrackd.conf to use the inside interface name and IP address. w w w. l i n u x j o u r n a l . c o m may 2011 | 5 7 FEATURE Build a Better Firewall—Linux HA Firewall Tutorial priority 100 virtual_ipaddress { 10.1.1.1/24 brd 10.1.1.255 dev eth1 } } Additional options, like neighbor authentication, are available. More information about advanced configuration options is available at the keepalived Web site (see Resources). The configuration for lj-fw-2 is very similar, with only a few values changed to identify that this system is acting as a backup: vrrp_sync_group { group { fw-cluster-eth0 informs conntrackd of VRRP state transitions so that conntrackd knows which firewall is currently acting as the master. VRRP uses priority numbering to determine which firewall should be the master when both firewalls are on-line. The firewall with the highest priority number is chosen as the master. Because the lj-fw-1 server has the highest priority number, as long as the lj-fw-1 server is “alive”, it will respond to traffic sent to the virtual IP addresses. If the lj-fw-1 server fails, the lj-fw-2 server automatically will take over the virtual IP addresses and respond to traffic sent to it. When using VRRP, devices on the network should be configured to route through the virtual IP address. In this example, devices on the internal LAN that are going out through the HA firewall pair should be configured with a default gateway of 10.1.1.1. fw-cluster-eth1 } Firewall Builder Overview and Configuration notify_master "/etc/conntrackd/primary-backup.sh primary" Now that there are two servers configured and ready to act as HA firewalls, it’s time to add rules. In most HA pairs, the rules should be identical on both firewalls. Although this can be done by manually entering iptables commands, it can be difficult to maintain and is easy for errors to occur. Firewall Builder makes it simple to configure and maintain a synchronized set of rules on both of the HA firewall servers. Firewall Builder is a GUI-based firewall configuration management application that supports a wide range of firewalls, including iptables. Information about downloading and installing Firewall Builder can be found on the Firewall Builder Web site, including a Quick Start Guide (see Resources) that provides a high-level overview of the GUI layout and key concepts. Multiple firewalls can be managed from a single workstation using Firewall Builder. SSH and SCP are used to transfer the generated firewall scripts to the remote firewalls, so it is recommended that the Firewall Builder application be run on a different workstation and not on one of the firewall servers. The focus of this article is using Firewall Builder’s cluster feature to manage a single firewall policy for the HA firewall pair, but let’s start with a quick overview of a few key Firewall Builder concepts. Objects form the foundation of the Firewall Builder GUI. Objects are used to represent common firewall rule elements, such as IP networks, IP hosts and TCP and UDP protocols. Firewall Builder comes with hundreds of predefined objects for common elements, like well-known TCP services. The same object can be used in firewall rules on multiple firewalls, letting users define an object once and use it as many times as needed. After a firewall object has been created and rules have been configured for that firewall, Firewall Builder generates a script that will be run on the target firewall server to implement the firewall rules that were defined in the GUI. The process of creating this notify_backup "/etc/conntrackd/primary-backup.sh backup" notify_fault "/etc/conntrackd/primary-backup.sh fault" } vrrp_instance fw-cluster-eth0 { state BACKUP interface eth0 virtual_router_id 20 priority 50 virtual_ipaddress { 192.168.1.1/24 brd 192.168.1.255 dev eth0 } } vrrp_instance fw-cluster-eth1 { state BACKUP interface eth1 virtual_router_id 30 priority 50 virtual_ipaddress { 10.1.1.1/24 brd 10.1.1.255 dev eth1 } } One of the benefits of keepalived is that it provides sync_groups—a feature to ensure that if one of the interfaces in the sync_group transitions from the master to the backup, all the other interfaces in the sync_group also transition to the backup. This is important for Active-Backup HA firewall deployments where all the traffic must flow in and out of the same firewall. The sync_group configuration includes information about the scripts to call in the event of a VRRP transition on the local server to the master, backup or fault states. The primary-backup.sh script, which was copied to the /etc/conntrackd directory earlier, ABOUT FIREWALL BUILDER Originally started in 2000, Firewall Builder is an open-source project with thousands of users around the world using it to manage production firewalls. In addition to iptables, Firewall Builder also includes support for configuring BSD pf, Cisco ASA, PIX and FWSM firewalls, Cisco router access, ipfw and ipfilter firewalls. Commercial licenses are available for prebuilt MS Windows and Mac OS X packages. 5 8 | may 2011 w w w. l i n u x j o u r n a l . c o m script is called compiling the firewall rules. The generated firewall script also can be used to manage interface IP addresses, static routes and various system settings. For more information about Firewall Builder basics, go to the NetCitadel Web site (see Resources), which includes a comprehensive Users Guide. Now, let’s dive in to configuring the firewall cluster with Firewall Builder. In order to create an HA firewall pair, called a cluster in Firewall Builder, you first need to configure the individual firewall objects that will be members of the cluster. Creating Firewall Objects in Firewall Builder Click the Create new firewall button in the middle of the main window to launch the new firewall wizard that provides a series of dialog windows to walk you through the process of creating a new firewall object. Set the firewall name (lj-fw-1) and platform type (iptables) in the first dialog and click the Next button. Leave the default setting of “Configure interfaces manually” on the next dialog window, and click the Next button. The final dialog window is where the interfaces for the firewall are defined. Follow the steps shown below to add the interfaces for the lj-fw-1 firewall. Step 1: click the green + sign to create a new interface: I Set the interface name to “eth0”. I Set the interface label to “outside”. I Click the Add address button. I Enter 192.168.1.2 with Netmask of 255.255.255.0. Step 2: click the green + sign to create a new interface, and repeat the steps from Step 1 to configure eth1 (“eth1”, “inside”, 10.1.1.2, 255.255.255.0). Step 3: click the green + sign to create a new interface, and repeat the steps from Step 1 to configure eth2 (“eth2”, “synch”, 192.168.100.2, 255.255.255.0). Step 4: click the green + sign to create a new interface, and repeat the steps from Step 1 to configure lo (“lo”, “loopback”, 127.0.0.1, 255.0.0.0). Figure 2 shows an example of the interface dialog window after the first interface, eth0, has been defined. Once all interfaces are configured, click the Finish button to create the firewall object. Figure 2. The Set Interface Dialog Window for New Firewall Wizard The newly created firewall object will be displayed in the object tree in the left object tree panel. Right-click on the lj-fw-1 object and select Duplicate→Place in Library User from the menu. FEATURE Build a Better Firewall—Linux HA Firewall Tutorial Leave the default settings in the next dialog window and click the Next button. The third dialog window (Figure 4) is where the failover protocol and virtual IP addresses are defined. For each interface tab at the top of the dialog window, enter the values according to the information in Table 1. Figure 3. Changing Interface IP Addresses on the Copied Firewall This creates an exact copy of lj-fw-1 in the object tree and opens it for editing in the editor panel at the bottom of the screen. Rename the newly created firewall object to lj-fw-2. Click “Yes” on the warning message that is displayed about changing the name of all child objects. The lj-fw-2 firewall object will show in the object tree with all its child objects expanded. When the firewall is duplicated, the interface IP addresses on the new firewall are the same as the interface IP addresses on the original firewall. Update the interface IP addresses to match the correct IP addresses for the eth0 interface on the lj-fw-2 firewall as shown in Figure 3. Repeat this process for IP addresses of interfaces eth1 and eth2. The final step is to identify the interface that will be used to manage each of the lj-fw-1 and lj-fw-2 firewalls. This will be used later by the installer to determine which IP address to use to connect to the firewall. Double-click on the interface object named “eth1” of the lj-fw-1 firewall to open it for editing and check the box labeled “Management interface” in the editor panel. Repeat the process for the lj-fw-2 firewall. Figure 4. Setting Cluster Interface Values After all interfaces have been configured, click Next. On the next dialog window, leave the default setting of “Do not use any, I will create new Policy and NAT rules”, and click Next. The final dialog window will show a summary of the cluster configuration. Review it, and if everything is correct, click Finish to create the cluster object. After the cluster is created, it is displayed in the object tree. Double-click on the “State Synch Group” object located under the newly created lj-fw-cluster object. The State Synch Group defines the interfaces that are being used for the conntrackd FTFW synchronization traffic. Click on the Manage Members button at the bottom of the editor panel. In the dialog window that appears, click the eth2 interface below the lj-fw-1 firewall and click the right arrow to add the interface as a cluster member. Repeat the process for the eth2 interface of the lj-fw-2 firewall. Click OK to accept the changes. Double-click the Policy object under the lj-fw-cluster object in the object tree. The Policy is where the firewall rules are configured. Click the green + sign at the top of the window to add a new rule. By default, new firewall rules are set to deny everything. Edit rules by dragging and dropping objects from the object tree into the fields of the rule. Creating Cluster Objects in Firewall Builder Now that the firewall objects have been created, the next step is to create a new cluster object with the lj-fw-1 and lj-fw-2 firewalls as members of the cluster. Right-click on the Cluster system folder in the object tree and select the New Cluster menu item. This launches the new cluster wizard, which walks you through the steps required to create a new firewall cluster. On the first dialog window, enter the cluster name (lj-fw-cluster), and select lj-fw-1 and lj-fw-2 as cluster members (make sure lj-fw-1 is the master). Click the Next button. Table 1. Cluster Interface Configuration Parameters Configuring Rules for the Cluster INTERFACE LABEL FAILOVER PROTOCOL VIRTUAL IP NETMASK eth0 cluster-outside VRRP 192.168.1.1 255.255.255.0 eth1 cluster-inside VRRP 10.1.1.1 255.255.255.0 eth2 cluster-synch None n/a n/a lo cluster-loopback None n/a n/a 6 0 | may 2011 w w w. l i n u x j o u r n a l . c o m For this example, let’s create three simple firewall rules and a single NAT rule. The first firewall rule should be a rule that allows the firewall to communicate with itself using the loopback interface. This is needed because many applications rely on unfiltered access to the loopback for interprocess communication. Drag and drop the interface object named “lo” from the lj-fw-cluster in the object tree to Firewall Builder comes with hundreds of predefined objects, including most well-known protocols like SSH. the Interface field of the rule on the right. Right-click in the Action field of the rule and select Accept. Finally, right-click in the Options field of the rule and select Logging Off. After this is done, the rule should look like Figure 5. Figure 5. Rule to Allow Interprocess Communication Using the Loopback Note that the lo interface object used in the rule was from the cluster object, not an individual firewall’s loopback interface object. When Firewall Builder generates the firewall configuration script for each individual firewall, it automatically replaces the cluster interface object with the local interface values for that firewall. The next two rules use a Network object called Internal LAN that has been created with a value of 10.1.1.0/24. To create a new Network object, double-click the Objects folder in the object tree, right-click on the Networks system folder and select New Network. Fill in the object name and network value in the editor panel at the bottom of the screen. Right-click on the first rule, and select Add New Rule Below to add another rule to the firewall. The second firewall rule will allow traffic from the Internal LAN object to access the firewall on the internal eth1 interface using SSH. Drag and drop the Internal LAN object from the object tree to the Source field of the newly created rule. Drag and drop the eth1 interface from the lj-fw-cluster cluster to the Destination field. Firewall Builder comes with hundreds of predefined objects, including most well-known protocols like SSH. Switch to the Standard object library to access the predefined objects. Figure 6 shows the location of the library selection menu at the top of the object tree. clear the filter by clicking the X next to the filter box. Switch back to the User library, and drag and drop the eth1 object from the lj-fw-cluster object to the Interface field of the rule. Right-click on Direction field and select Inbound. Finally, right-click on the Action field and set it to Accept. If you want to log SSH connections to the firewall, leave the Options field set to Logging On; otherwise, set it to Logging Off. Follow the same process to create the third rule, which should allow the Internal LAN to access Internet Web servers using HTTP and HTTPS going out the eth0 “outside” interface. Figure 7 shows the Policy configuration for all three firewall rules. Figure 7. Cluster Firewall Configured with Three Firewall Rules Notice that we didn’t enter any rules to allow the VRRP or conntrackd traffic between the firewalls. Firewall Builder automatically LCD Mountable NVIDIA® ION/ION2 System with Ubuntu Linux Small & lightweight, with GeForce® Graphics. Flexible storage (dual HDD support) & Wi-Fi. Value only an Industry Leader can provide. Learn More > www.logicsupply.com/linux Figure 6. Library Selection Menu To find the SSH object in the Standard library quickly, type ssh into the filter box at the top of the object tree. Drag and drop the ssh object to the Service field of the firewall rule. Remember to © 2011 Logic Supply, Inc. All products and company names listed are trademarks or trade names of their respective companies. w w w. l i n u x j o u r n a l . c o m may 2011 | 6 1 LS 3 33x4 875v1 2011 indd 1 2/10/2011 10:34:52 AM FEATURE Build a Better Firewall—Linux HA Firewall Tutorial generates these rules based on the configuration of the cluster. The last step is to configure the NAT rule that will translate the source IP address of all traffic originating from the internal LAN going to the Internet to the outside virtual IP address of the firewall. Using the virtual IP address as the translated source ensures that traffic going through the firewall will continue to flow in the event of a failover from the master firewall to the backup firewall. Double-click the NAT child object under the hq-fw-cluster object to open the NAT table for editing. Just like in the Policy rules, click the green + icon to add a new rule to the NAT configuration. Drag and drop the Internal LAN object from the object tree to the Original Src field of the NAT rule, and then drag and drop the eth0 “cluster-outside” interface from the lj-fw-cluster object to the Translated Src field. The final NAT rule should look like Figure 8. Firewall Builder is running. Clicking Next on this window launches the installer dialog window (Figure 10). Each firewall in the cluster will have its own installer window. The installer uses SCP to transfer the firewall script that was generated for the cluster member to the firewall. After the firewall script is copied, Firewall Builder logs in using SSH to run the script. The installer includes an option to run in verbose mode, which displays each command as it is being run on the remote firewall. After the install completes, a new installer appears for lj-fw-2, and the same process is repeated. Figure 8. NAT Rule Deploying the Rules to the Cluster The final step in the process is generating the firewall scripts and installing them on the firewall cluster members. To keep the article short, I’m using the root user to install the Firewall Builder-generated firewall scripts on the firewall servers, but Firewall Builder also supports using nonroot users with proper sudo rights. This is covered in the on-line Users Guide. Before you can install the rules on the cluster member, firewalls create a directory called /etc/fw on both lj-fw-1 and lj-fw-2 servers. This is the default location where Firewall Builder will install the generated firewall script. As previously mentioned, the process where Firewall Builder converts the rules into a firewall script that will be run on the firewall is called compiling the rules. To compile and use the built-in installer to deploy the rules, click on the Install button at the top of Firewall Builder to launch the install wizard. Click the check box next to the cluster name, and make sure the Install check boxes are selected for both lj-fw-1 and lj-fw-2. If there are any errors in the configuration, the compiler will display these; otherwise, you will see a dialog window (Figure 9) showing that the cluster was compiled successfully. When the cluster is compiled, a firewall for each member of the cluster is created and saved locally on the machine where Figure 10. Installer Window for Cluster Member lj-fw-1 This article just skims the surface of using Firewall Builder to configure firewall clusters. You can find much more information in the Firewall Builder Users Guide, including how to install custom policies on an individual cluster member, which is available on-line at the NetCitadel Web site.I Mike Horn is the co-founder of NetCitadel LLC, the company that develops and supports Firewall Builder. He has worked on network and security technologies for more than 15 years at companies ranging from small startups to large global Internet Service Providers. Resources Netfilter: www.netfilter.org Conntrackd User Manual: conntrack-tools.netfilter.org/manual.html Keepalived: www.keepalived.org NetCitadel’s Firewall Builder: www.fwbuilder.org NetCitadel’s Firewall Builder Quick Start Guide: www.fwbuilder.org/4.0/quick_start_guide.html Figure 9. Cluster Compiler Status Window 6 2 | may 2011 w w w. l i n u x j o u r n a l . c o m If You Use Linux, You Should Be Reading LINUX JOURNAL ™ UU In-depth information providing a full 360degree look at featured topics relating to Linux UU Tools, tips and tricks you will use today as well as relevant information for the future UU Advice and inspiration for getting the most out of your Linux system SAVE 62% UU Instructional how-tos will save you time and money Get Linux Journal delivered to your door monthly for 1 year for only $29.50! Plus, you will receive a free gift with your subscription. SUBSCRIBE NOW AT: WWW.LINUXJOURNAL.COM/SUBSCRIBE Offer valid in US only. Newsstand price per issue is $5.99 USD; Canada/Mexico annual price is $39.50 USD; International annual price is $69.50. Free gift valued at $5.99. Prepaid in US funds. First issue will arrive in 4-6 weeks. Sign up for, renew, or manage your subscription on-line, www.linuxjournal.com/subscribe. Security Monitoring and Enforcement with Cfengine 3 Cfengine is well known as a powerful system configuration management tool, but did you know you also can use it to secure your systems? ALEKSEY TSALOLIKHIN Cfengine, from the start, has had security as a key part of its design and use scenarios. Here, I demonstrate how Cfengine 3 can be used to increase the security of a Linux system by monitoring file checksums, monitoring filesystems for suspicious filenames, monitoring running processes, monitoring open ports and managing sshd.conf. Because Cfengine 3 is under active development, I suggest you install the latest version from the Cfengine Source Archive (see Resources). The purpose of this article is to give practical examples of how you can use Cfengine to increase security on a Linux system. See the Quick Start Guide in the Resources section of this article for help in learning the Cfengine language. (I don’t provide a tutorial on the Cfengine language here.) This article is based on Cfengine version 3.1.5a1. 6 4 | may 2011 w w w. l i n u x j o u r n a l . c o m Monitoring File Checksums Cfengine 3.1.4 shipped with 214 unit tests that can double as examples of Cfengine’s functionality. They are installed to /usr/local/share/doc/cfengine/. I’ve adopted unit_change_detect.cf into detect_changes_in_etc.cf (Listing 1). Advertiser Index CHECK OUT OUR BUYER'S GUIDE ON-LINE. Go to www.linuxjournal.com/buyersguide where you can learn more about our advertisers or link directly to their Web sites. Thank you as always for supporting our advertisers by buying their products! Listing 1. detect_changes_in_etc.cf # GNU GPL 3 Advertiser URL Page # 1&1 INTERNET, INC. www.oneandone.com ABERDEEN, LLC www.aberdeeninc.com C3 EMAC, INC. www.emacinc.com 49 EMPERORLINUX www.emperorlinux.com 69 GENSTOR SYSTEMS, INC. www.genstor.com 59 GIADA TECHNOLOGY, INC. www.giadatech.com 79 IXSYSTEMS, INC. www.ixsystems.com 3 LINODE, LLC www.linode.com 71 LINUX JOURNAL STORE www.linuxjournalstore.com 37 bundle agent detect_changes_in_etc LOGIC SUPPLY, INC. www.logicsupply.com { files: LULLABOT www.lullabot.com MAGNETCON magnetcon.info MICROWAY, INC. www.microway.com MIKRO TIK www.routerboard.com O'REILLY RAILS CONFERENCE railsconf.com 31, 77 O'REILLY VELOCITY velocityconf.com 31, 75 POLYWELL COMPUTERS, INC. www.polywell.com 79 RACKMOUNTPRO www.rackmountpro.com 19 SILICON MECHANICS www.siliconmechanics.com TECHNOLOGIC SYSTEMS www.embeddedx86.com USENIX ANNUAL TECHNICAL CONFERENCE www.usenix.org/events/#fedweek11 ################################################### # # Change detect # ################################################### body common control { bundlesequence } => { "detect_changes_in_etc" }; ################################################### "/etc" changes => detect_all_change, depth_search => recurse("inf"); 1 53, 61 7 21 C2, C4 5 } ################################################### body changes detect_all_change { report_changes => "all"; update_hashes => "true"; } 29, 55 43 9 ################################################### body depth_search recurse(d) ATTENTION ADVERTISERS { depth } => "$(d)"; August 2011 Issue #208 Deadlines Space Close: May 23; Material Close: May 31 Theme: Community Run this with: cf-agent -KIf detect_changes_in_etc.cf cf-agent is the component of Cfengine that actually makes changes to the system. (There are other components to serve files, BONUS DISTRIBUTIONS: O’Reilly’s Open Source Conference (OSCON), O’Reilly’s Rail Conf, Black Hat Vegas, DEF CON Contact Joseph Krack, +1-713-344-1956 ext. 118, [email protected] w w w. l i n u x j o u r n a l . c o m may 2011 | 6 5 FEATURE Security Monitoring and Enforcement with Cfengine 3 monitor system activity and so on. cf-agent is the piece that makes changes to the system, and the one you’d use to start learning Cfengine.) In the command above: I -K — tells cf-agent to ignore time-based locks and allows you to run cf-agent repeatedly (no “cool-off” period, which might otherwise kick in to prevent system overload). I -I — tells cf-agent to inform you of its actions and any changes made to the system. I -f — specifies the policy filename. On the first pass, cf-agent builds a file information database containing file timestamps and inode numbers and builds an MD5 hash for each file. You should see something like this: # cf-agent -KIf detect_changes_in_etc.cf !! File /etc/hosts.allow was not in MD5 database - new file found I: Made in version 'not specified' of 'detect_changes_in_etc.cf' near line 22 ... # There are two messages here, alert and info. Cfengine prefixes its output to help you understand what kind of output it is (in other words, metadata): I Informational messages start with “I”. I Reports start with “R”. I Alerts start with !! or ALERT. I Notice of changes to the system starts with ->. In the above case, the alert message is accompanied with an info message about the policy that was in effect when the alert was produced, its version number (if supplied) and the line number. I didn’t specify the version number, but the line number is useful. Line 22 is: changes => detect_all_change, This is the line responsible for Cfengine adding /etc/passwd to the MD5 database. It tells Cfengine what to do about changes— to detect them. Now, I run cf-agent again, and it runs quietly. The contents of /etc match the MD5 sum database: # cf-agent -KIf detect_changes_in_etc.cf # Next, I edit /etc/hosts.allow to add “sshd: ALL” to simulate an unauthorized change. Watch cf-agent scream: # cf-agent -KIf detect_changes_in_etc.cf !!!!!!!!!!!!!!!!!!!!!!!!!!!!!!!!!!!!!!!!!!!!!! 6 6 | may 2011 w w w. l i n u x j o u r n a l . c o m ALERT: Hash (MD5) for /etc/hosts.allow changed! !!!!!!!!!!!!!!!!!!!!!!!!!!!!!!!!!!!!!!!!!!!!!! -> Updating hash for /etc/hosts.allow to MD5=2637c1edeb55081b330a1829b4b98c45 I: Made in version 'not specified' of './detect_changes_in_etc.cf' near line 22 !!!!!!!!!!!!!!!!!!!!!!!!!!!!!!!!!!!!!!!!!!!!!! ALERT: inode for /etc/hosts.allow changed 38901878 -> 38901854 ALERT: Last modified time for /etc/hosts.allow changed Sat Jan 29 17:09:26 2011 -> Mon Jan 31 08:00:02 2011 !!!!!!!!!!!!!!!!!!!!!!!!!!!!!!!!!!!!!!!!!!!!!! # There are three alerts: 1. MD5 hash changed (because the contents changed). 2. The inode number changed (when vi saved the file). 3. The modification time changed (when vi saved the file). Reminder: messages about actions that Cfengine takes are prefixed with “->”: -> Updating hash for /etc/hosts.allow to MD5=2637c1edeb55081b330a1829b4b98c45 You can set up Cfengine to complain via e-mail or syslog, so even if the intruder tampers with the MD5 database, the alarm will sound. In commercial versions of Cfengine (Nova), you can set up multiple Cfengine nodes to share their MD5 databases and monitor and cross-check each other. You can run this check fairly often—every five minutes, if you like and if your hardware will sustain it. (Computing lots of MD5 sums can be expensive on CPU and disk I/O.) Is the added security worth it to you? Monitoring for Suspicious Filenames Cfengine has a special cf-agent control variable called suspiciousnames. You can put a list of names into it to warn about during any file search (such as was done during the MD5 hash check). If Cfengine sees these names during recursive (depth) file searches, it will warn about them. If suspiciousnames is not set, cf-agent won’t check for them. It’s not set by default. Let me demonstrate how this works by adding the following control block to detect_changes_in_etc.cf: body agent control { suspiciousnames => { ".mo", "lrk3", "rootkit" }; } A cf-agent control block controls the behavior of cf-agent. This is where you can set things like dry-run mode (don’t change anything but report only on what changes would have been made— useful for learning Cfengine), the largest file size Cfengine will edit and so on. So the suspiciousnames variable is set in the agent control block. It’s an array of strings. Let’s create a suspiciously named file to see cf-agent get excited: Listing 3. report_suspicious_process_names.cf # date > /etc/rootkit # cf-agent -IKf detect_changes_in_etc.cf Suspicious file rootkit found in /etc # body common control So, if you’re scanning your system directories for an MD5 hash check, you can add the suspicious name check too. { bundlesequence => { "report_suspicious_process_names" } Monitoring Running Processes ################################################### I follow the best practice of securing servers by disabling unnecessary services. I often want to make sure my Web servers are not running CUPS—usually, a Web server does not need to print! The example shown in Listing 2 is based on the Cfengine unit test unit_process_kill.cf. }; bundle agent report_suspicious_process_names { vars: Listing 2. cups_not_running.cf "suspicious_process_names" slist => { "sniff", "eggdrop", "r00t", "^\./", "john", "crack" }; body common control { bundlesequence } => { "cups_not_running" }; ######################################## processes: bundle agent cups_not_running { ".*" processes: process_select => proc_finder("$(suspicious_process_names)"); "cupsd" signals => { "term", "kill" }; } } ################################################### The line of interest in Listing 2 is: processes: "cupsd" signals => { "term", "kill" }; body process_select proc_finder(pattern) { command => ".*$(pattern).*"; This means if there is an entry in the process table matching “cupsd”, that process will be sent TERM and then KILL signals: process_result => "command"; } # cf-agent -IKf cups_not_running.cf -> Signalled 'term' (15) to observed process match '28140' -> Signalled 'kill' (9) to observed process match '28140' # But, let’s not be so brutal. Cfengine can report suspicious process names. You can keep an eye out for password sniffers, crackers, IRC bots and so on with the policy shown in Listing 3. The key line here is: vars: "suspicious_process_names" slist => { "sniff", "eggdrop", "r00t", "^\./", "john", "crack" }; A variable called “suspicious_process_names” is a list of strings; what we deem as suspicious process names includes, let’s say, any processes starting with ./. As you can see, this list can include regular expressions. Cfengine uses Perl-compatible regular expressions. You can set the contents of this array to reflect what you consider suspicious process names. Then, Cfengine scans the entire process table (that’s the processes: .*) and loops over the contents of the “suspicious_process_names” array. Cfengine has implicit looping over arrays, so if you have an array @{suspicious_process_names} and you reference ${suspicious_process_names}, you’re actually saying: w w w. l i n u x j o u r n a l . c o m may 2011 | 6 7 FEATURE Security Monitoring and Enforcement with Cfengine 3 for ${suspicious_process_names} in (@{suspicious_process_names} do The first numeric field (20044) is the PID. The last field is the process name. (Why is there an IRC bot on my Web server?) ... done Listing 4. check_listening_ports.cf That’s what happens when you say process_select => proc_finder("$(suspicious_process_names)"); You’re actually saying, for each element in @(suspicious_process_names), find processes that match that regex. Anyway, I want this to be a security demonstration rather than a language primer, so let’s continue: # cf-agent -IKf report_suspicious_process_names.cf !! Matched: root 20044 20002 20044 0.0 0.0 4956 19 664 1 22:05 00:00:00 ./eggdrop # CASE STUDY In 2000, David Ressman and John Valdes of University of Chicago reported in a LISA paper “Use of Cfengine for Automated, Multi-Platform Software and Patch Distribution” how they detected a cracker using similar functionality in Cfengine 2: Since the people who break into our systems almost exclusively use the compromised systems to run sniffers, IRC bots, or DoS tools, we decided to make up a list of suspicious process names to have Cfengine look for and warn us about every time it ran. Besides the usual suspects (more than one running copy of inetd, anything with “sniff”, “r00t”, “eggdrop”, etc., in the process name, password crackers, etc.), we had Cfengine watch for any process with “./” in the process name. One afternoon, we got an e-mail from Cfengine on one of our computers that had noticed that the regular user of that machine was running a program as “./irc”. It wasn’t uncommon to see our users using “./” to run programs, nor do we have objections to our users running IRC, but in this case, it was a bit unusual for this particular user to be running an irc process (good UNIX system administration practice also dictates that you know your users). Poking around the system, we discovered that the person running this program was not the regular user of the machine, but was someone who had evidently sniffed our user’s password from somewhere else and remotely logged in to his system just minutes before Cfengine had alerted us. This person was in the process of setting up an IRC bot and had not yet tried to get a root shell. You can add to your defense-in-depth by monitoring for suspicious process names. 6 8 | may 2011 w w w. l i n u x j o u r n a l . c o m body common control { bundlesequence => { "check_listening_ports" inputs => { "Cfengine_stdlib.cf" }; } }; bundle agent check_listening_ports { vars: "listening_ports_and_processes_ideal_scene" string => "22 sshd 80 httpd 443 httpd 5308 cf-server"; # this is our expected configuration vars: "listening_ports_and_processes" string => execresult("/usr/sbin/lsof -i -n -P | \ /bin/grep LISTEN | \ /bin/sed -e 's#*:##' | \ /bin/grep -v 127.0.0.1 | \ /bin/grep -v ::1 | \ /bin/awk '{print $8,$1}' | \ /bin/sort | \ /usr/bin/uniq | \ /bin/sort -n | \ /usr/bin/xargs echo", "useshell"); # actual config. # tell Cfengine to use a shell with "useshell" # to do a command pipeline. classes: "reality_does_not_match_ideal_scene" not => regcmp ( "$(listening_ports_and_processes)", "$(listening_ports_and_processes_ideal_scene)" ); # check whether expected config matches actual reports: reality_does_not_match_ideal_scene:: " DANGER! DANGER! Expected open ports and processes: DANGER! $(listening_ports_and_processes_ideal_scene) DANGER! DANGER! Actual open ports and processes: DANGER! $(listening_ports_and_processes) DANGER! "; # and yell loudly if it does not match. # Note: A "commands" promise could be used in # addition to "reports" to send a text message # to a sysadmin cell phone or to feed # CRITICAL status to a monitoring system. } Monitoring Open Ports You can increase your security situational awareness by knowing on what ports your server is listening. Intruders may install an FTP server to host warez or install an IRC server for bot command and control. Either way, your server’s TCP profile has changed (increased) in terms of on what TCP ports it listens. By constantly comparing desired and actual open TCP ports, Cfengine quickly can detect an intrusion. Cfengine 3 runs every five minutes by default, so it can detect a compromise pretty fast. The code example shown in Listing 4 starts with hard-coded lists of what TCP ports and corresponding process names are expected on the system: 22 sshd 80 httpd 443 httpd 5308 cf-server. It then uses lsof to get the actual list of TCP ports and process names, compare them and report DANGER if the comparison fails. Here’s an example run: # cf-agent -IKf ./check_listening_ports.cf By constantly comparing desired and actual open TCP ports, Cfengine quickly can detect an intrusion. DANGER! 22 sshd 80 httpd 443 httpd 3306 mysqld 5308 cf-server DANGER!!! # Again, this is a security demonstration, not a language primer, but if you want to understand the policy, follow the Quick Start Guide for Cfengine. If you need any help understanding this policy, come to the help-cfengine mailing list or ask me directly at [email protected]. R: DANGER! Managing sshd.conf DANGER! Expected open ports and processes: The next example is Diego Zamboni’s Cfengine bundle for editing the sshd configuration file and restarting sshd if any changes were made. It has two parts (to abstract the underthe-hood details). In the first part, the sysadmin edits the sshd DANGER! 22 sshd 80 httpd 443 httpd 5308 cf-server DANGER! DANGER! Actual open ports and processes: FEATURE Security Monitoring and Enforcement with Cfengine 3 array to set variables corresponding to the sshd configuration parameters. For example, to mandate Protocol 2 of SSH, set: "sshd[Protocol]" string => "2"; Listing 5. use_edit_sshd.cf bundle agent configfiles { vars: "sshdconfig" string => "/etc/ssh/sshd_config"; If the parameter is commented out, Cfengine uncomments it and sets it to the desired value. If the parameter is absent, Cfengine adds it and sets it to the desired value. Additionally, if any changes were made to sshd_config, sshd restarts to activate the change. For an example of changes made, run diff of sshd_config before and after Cfengine edited it to set Protocol, X11Forwarding and UseDNS: # diff /etc/ssh/sshd_config /etc/ssh/sshd_config.cf-before-edit 14c14 < #Protocol 2,1 --- # SSHD configuration to set "sshd[Protocol]" string => "2"; "sshd[X11Forwarding]" string => "yes"; "sshd[UseDNS]" string => "no"; > Protocol 2 95,96c95,96 < #X11Forwarding no < X11Forwarding no --- methods: "sshd" usebundle => edit_sshd("$(sshdconfig)", "configfiles.sshd"); } > X11Forwarding yes > X11Forwarding yes 109c109 < #UseDNS yes Listing 6. edit_sshd.cf # Parameters are: # If the line is commented out with #, it gets uncommented first. # file: file to edit # Adds a new line if none exists. # params: an array indexed by parameter name, containing # The argument is an associative array containing v[LHS]="rhs" # the corresponding values. For example: # "sshd[Protocol]" string => "2"; # Based on set_variable_values from Cfengine_stdlib.cf, modified to # "sshd[X11Forwarding]" string => "yes"; # use whitespace as separator, and to handle commented-out lines. # "sshd[UseDNS]" string => "no"; # Diego Zamboni, November 2010 { bundle agent edit_sshd(file,params) vars: "index" slist => getindices("$(v)"); { files: "$(file)" # Be careful if the index string contains funny chars handle => "edit_sshd", "cindex[$(index)]" string => canonify("$(index)"); comment => "Set desired sshd_config parameters", edit_line => set_config_values("$(params)"), field_edits: classes => if_repaired("restart_sshd"); # If the line is there, but commented out, first uncomment it "#+$(index)\s+.*" # set_config_values is a bundle Diego wrote based on edit_field => col("\s+","1","$(index)","set"); # set_variable_values from Cfengine_stdlib.cf. # match a line starting like the key something commands: "$(index)\s+.*" restart_sshd.!no_restarts:: edit_field => col("\s+","2","$($(v)[$(index)])","set"), "/etc/init.d/sshd restart" classes => if_ok("not_$(cindex[$(index)])"); handle => "sshd_restart", comment => "Restart sshd if the configuration file was modified"; } insert_lines: "$(index) $($(v)[$(index)])", bundle edit_line set_config_values(v) ifvarclass => "!not_$(cindex[$(index)])"; # Sets the RHS of configuration items in the file of the form # LHS RHS 7 0 | may 2011 w w w. l i n u x j o u r n a l . c o m } --- Resources > UseDNS no # You may notice X11Forwarding is there twice after the edit, because it was in the file twice before the edit, once commented and once uncommented. But, this does not break things. Having X11Forwarding yes is valid syntax, and the /usr/sbin/sshd -t syntax checker does not complain. You also may notice that cf-agent saved a copy of the original file, just in case. Learning More Download the source and follow the Recommended Reading on the Quick Start Guide site. Also, please visit us on the help-cfengine mailing list to share your ideas on automating security with Cfengine.I Aleksey Tsalolikhin has been a UNIX systems administrator for 13 years, including seven at EarthLink. Wrangling EarthLink’s server farms by hand, he developed an abiding interest in automating server configuration management. Aleksey taught “Introduction to Automating System Administration with Cfengine 3” at Ohio Linux Fest 2010 and Southern California Linux Expo 2011 as an instructor from the League of Professional System Administrators. Develop. D ev velop. Cfengine Source Archive: www.cfengine.org/pages/source_code Quick Start Guide: www.cfengine.org/pages/getting_started “Automating Security with GNU Cfengine”, Kirk Bauer, February 5, 2004 (although based on Cfengine 2, the article gives an excellent overview of Cfengine’s philosophy and power): www.linuxjournal.com/article/6848 Diego Zamboni’s Cfengine Bundle for Editing the sshd Configuration File and Restarting sshd If Needed: https://gist.github.com/714948 Download the Cfengine Policies Used in This Article: www.verticalsysadmin.com/cfengine/LJ-May-2011 Deploy. D eploy. Scale. S cale. Ful Fulll root access on your own virtual serv server er for as little as $19.95/mo 0XOWLSOH / 0XOWLSOH /LQX[ L QX [ G GLVWULEXWLRQV LVWULEXWLRQV WWR R FFKRRVH KRRVH IIURP URP :HEEDVHG :HE EDVHG G GHSOR\PHQW HSOR\PHQW ) )LYH LYH J JHRJUDSKLFDOO\ H R JU DS KL F DOO\ GLYHUVHGDWDFHQWHUV'HGLFDWHG,3DGGUHVV3UHPLXPEDQGZLGWKSURYLGHUVFRUH603;HQ G LYHUVH GDWD FHQWHUV 'HGLFDWHG ,3 DGGUHVV 3UHPLXP EDQGZLGWK SURYLGHUV FRUH 603 ;HQ LLQVWDQFHV2XWRIEDQGFRQVROHDFFHVV3ULYDWHEDFNHQGQHWZRUNIRUFOXVWHULQJ,3IDLORYHU QVWDQFHV 2XW RI EDQG FRQVROH DFFHVV 3ULYDWH EDFN HQG QHW ZRUN IRU FOXVWH W ULQJ ,3 IDLO RYHU VVXSSRUWIRUKLJKDYDLODELOLW\(DVLO\XSJUDGHRUDGGDGGLWLRQDO/LQRGHV)UHHPDQDJHG'16 XSSRU W IRU KLJK DYDLODELOLW\(DVLO\XSJUDGH RU DGG DGGLWLRQDO /LQRGHV )UHH PDQDJHG '16 )RUPRUHLQIRUPDWLRQYLVLWwww.linode.com ) RU PRUHLQIRUPDWLRQ YLVLW w w w.linode.com o orr FFDOOXVDW609-593-7103 DOOXVDW 609- 593 3-7103 INDEPTH Installing an Alternate SSL Provider on Android The ability to install third-party libraries on Android offers developers the freedom to customize and optimize for applications. CHRIS CONLON use a single API while allowing any desired implementation to be plugged in underneath. Under this architecture, multiple providers for a service may be installed side by side. In the case of having multiple providers for a service, each provider is given an order of priority in which it should be used by the Java platform. By default, Java will use higher-priority providers first if they offer the desired functionality. The javax.net.ssl Java API package is responsible for supplying SSL functionality to the Java platform. The diagram in Figure 1 gives a general overview of how SSL providers—or more generally, providers—are organized within the Java platform. Because Android is based heavily on the Java framework and supports this provider design, we are able to install CyaSSL Figure 1. The structure of the Java provider framework, showing specifically the javax.net.ssl as an SSL provider for Android. Java security providers are listed and prioripackage and how individual providers are tized in a file named java.security on OS X “plugged in” to the provider framework. and Linux, or java.properties on the Android platform. On Android, this file is located at /libcore/security/src/main/java/java/security/security.properties. This file is the primary configuration file for Java providers and will be key in the CyaSSL installation process. TLS and SSL in a Nutshell TLS (Transport Layer Security) and its predecessor SSL (Secure Socket Layer) are cryptographic protocols that provide security for Preparing a Build Environment and Getting communications over networks. Originally created by Netscape, the Android Source these protocols allow client/server applications to create an First, you need to set up the local build environment to accommodate encrypted link and ensure that all traffic being sent and received for the Android build system as well as download the Android is both private and secure. platform source code. TLS and SSL provide this secure layer through the use of To build the Android source files, you should have either Linux public/private key encryption, symmetric encryption, hashing and or OS X installed on your development machine. At the time of this trusted certificates. A message (the pre-master secret for SSL/TLS) writing, Windows is not currently supported. Further, the most current encrypted with a public key can be decrypted only using the version of OS X, Snow Leopard, is not supported due to incompatiassociated private key. The public key is usually publicly available, bilities with Java 6. The remainder of this article assumes that the allowing anyone with this key to encrypt a message. Only the operating system of choice is 32-bit Linux. Because of the speed at owner of that public key may decrypt the message once encrypted which the Android platform evolves, check the Android Developer with the associated private key. There are multiple cipher suites Web site for the most current host operating system support. that may be used by TLS and SSL to create a secure socket. Instructions for setting up your local work environment for Android development as well as instructions for getting the Android source code can be found in the Android documentation Java Security Provider Overview titled “Get Android Source Code”, located on the Android The Java platform contains a set of security APIs (public key infrasDeveloper Web site. Before continuing, make sure you are able tructure, authentication, secure communication and access control), to build the Android platform as is without modifications by all of which are only interfaces defining a “contract” for provider following the steps outlined on-line. implementations to meet. This gives Java programmers the ability to The Android platform quickly has become one of the most popular mobile operating systems for both developers and end users. As such, security is a high priority, but so is the sometimes-conflicting goal of minimizing resource usage. By default, the Android platform uses OpenSSL to provide Java developers with SSL functionality, but by using CyaSSL instead, developers gain a smaller footprint as well as a faster SSL implementation. The intent of this article is to provide insight and instruction on how to install an alternative SSL provider on the Android platform, specifically using CyaSSL as an example. After doing so, developers will have the option of using CyaSSL for SSL functionality and will gain the advantages in size and speed that an embedded SSL library offers. Users interested in replacing other pre-installed libraries on Android or developers porting C libraries over from other systems to Android also may find this information useful as a recipe for their own development efforts. 7 2 | may 2011 w w w. l i n u x j o u r n a l . c o m INDEPTH Working with and contributing to the Android platform is done through the use of Git and Repo. In Android, Git is used for local operations, such as local branching, commits, diffs and edits. Repo, on the other hand, is a tool built by Google on top of Git. According to Google, “Repo helps manage the many Git repositories, does the uploads to the revision control system, and automates parts of the Android development workflow. Repo is not meant to replace Git, only to make it easier to work with Git in the context of Android.” into the shared library named libcyassl.so. This library contains all the functions that would be found in the CyaSSL library on a regular desktop installation and is the foundation of the CyaSSL Java SSL provider. The shared library source files are found in the CyaSSL provider download under the /external/cyassl directory. The provider code uses JNI to communicate between Java and native C and C++ code. Because of this, there are two separate parts that need to be installed: the Java code and the native C++ code. These source files are in the provider download under the /libcore/yassl directory. The Android Emulator To make testing and debugging modifications to the Android platform easier, Google has created the Android emulator. This emulator is highly customizable, allowing custom hardware configurations, providing a log output, allowing shell access and much more. Before using the emulator, you need to download it. It comes bundled with the Android SDK. Once you download the SDK, you will find a variety of tools in the <Android-SDK>/tools directory, where <Android-SDK> is the root directory of the SDK. These tools will include the emulator and the Android Debug Bridge (adb). SSL Provider Components Overview The CyaSSL Java SSL provider is composed of two parts: the CyaSSL shared library and the Java provider code. The provider code uses JNI (Java Native Interface) to communicate between Java and the CyaSSL C library. The Android platform is divided into several layers, which are shown in Figure 2. The two layers affected during the SSL provider installation are the libraries and Android runtime layers. In order to continue, download the CyaSSL Java SSL provider for Android from the yaSSL Web site. A download also is offered for Linux and Mac, so make sure you download the provider for Android. Installing the CyaSSL Shared Library In this article, <Android-Platform> represents the Android platform source root on the development machine. The Android platform has a monolithic build system, meaning that the entire platform is built at once. Google has built a custom build system for Android in which each component is required to have an Android.mk file. This file is not a makefile by itself, but instead ties the component into the overall build system. Because we are installing a new library, we’re going to create a new folder for it under the /external directory in the Android platform. Most third-party shared libraries being placed into the Android platform should be installed under the /external directory. To do this, copy the cyassl directory from src/external/cyassl of the CyaSSL provider download to the /external directory of the Android platform. After copying, this folder should be located at <Android-Platform>/external/cyassl. These source files will be compiled into libcyassl.so by the Android build system using the rules in the /external/cyassl/src/Android.mk file. Open <Android-Platform>/build/core/prelink-linux-map.map, and add a new entry for libcyassl.so under the heading # libraries for specific apps or temporary libraries. The prelink-linux-map.map file is for used for providing addresses so that the loading of all registered libraries can be done faster. It should look similar to the following (note that libraries should be aligned on 1MB boundaries): libcyassl.so 0x9C500000 # [~1M] for external/cyassl Open the file <Android-Platform>/dalvik/libnativehelper/Android.mk, and add libcyassl.so to the shared_libraries list. Installing the Java SSL Provider Figure 2. Android Platform Layer Composition CyaSSL is a C-language-based SSL library targeted for embedded and RTOS environments, primarily because of its small size and speed. It supports the industry standards up to the current TLS 1.2 level, is fully functional and is optimized for embedded environments, making it an ideal choice for Android. There are two main components of the CyaSSL SSL provider: a shared library written in C and the SSL provider code, which contains both Java and native code. The CyaSSL shared library is compiled by the Android build system Now that the shared library has been installed, it’s time to install the JNI provider code. The existing SSL provider in Android (Apache Harmony using OpenSSL) is located in the /libcore directory. The CyaSSL provider will be installed there as well for consistency. To begin, copy the yassl directory from src/libcore/yassl of the provider source to the /libcore directory of the Android platform. This folder should now be located at <Android-Platform>/libcore/yassl. The CyaSSL SSL provider contains an initialization method (in the native C++ code), which needs to be registered with the Android platform so that the native methods can be registered with the Dalvik VM at runtime. Dalvik is Android’s modified version of the Java Virtual Machine. Unlike a desktop Java installation, Dalvik handles JNI differently in that it requires a function to be w w w. l i n u x j o u r n a l . c o m may 2011 | 7 3 INDEPTH written (within the JNI code) to register explicitly every native method that needs to be made available to the JVM. This method needs to be added to libnativehelper’s Register.c file. Open the file <Android-Platform>/dalvik/libnativehelper/Register.c, and add the register_com_yassl_xnet_provider_jsse_NativeCrypto method under the entry for the existing provider. When added, it should resemble the following (note the existing Apache Harmony installation): if (register_org_apache_harmony_xnet_provider_jsse_ ¯NativeCrypto(env) != 0) goto bail; if (register_com_yassl_xnet_provider_jsse_ ¯NativeCrypto(env) != 0) goto bail; to be done: $ cd external/cyassl $ mm The Android platform build process results in three image files: <Android-Platform>/out/target/product/generic/ramdisk.img, <Android-Platform>/out/target/product/generic/system.img and <Android-Platform>/out/target/product/generic/userdata.img: I ramdisk.img — a small partition that is mounted as read-only by the kernel at boot time. It contains only /init and a few configuration files. It is used to start /init, which will boot the rest of the system images and run the init procedure. I system.img — a partition image that will be mounted as / and The configuration file for the Java provider framework is the security.properties file. This will allow you to set CyaSSL as the default SSL provider. Open the security.properties file (<Android-Platform>/libcore/security/src/main/java/java/security/ security.properties), and make the following changes to configure the CyaSSL provider. Add the following line above the default org.apache.harmony.xnet.provider.jsse.JSSEProvider provider. Note the numbers beside each provider. These reflect the priority of the provider. It might be necessary to renumber this list after inserting the new provider: contains all system binaries. This is the image file that contains all of the changes that were made above. I userdata.img — this image is used only when the -wipe-data option is used with the emulator. In a normal emulator execution, a default userdata image will be used. Of these, system.img is of the highest concern. It contains the majority of the system and all of the changes that have been made with the addition of the CyaSSL SSL provider. Emulator Execution security.provider.3=com.yassl.xnet.provider.jsse.JSSEProvider Change the ssl.SocketFactory.provider entry to point to the new CyaSSL Provider: ssl.SocketFactory.provider=com.yassl.xnet.provider.jsse. ¯SocketFactoryImpl Testing Platform Modifications At this point, the CyaSSL provider is fully installed into the Android platform. You can move on to building and testing the platform with the new provider installed. If no errors arise during the platform build, the provider can be loaded into the emulator to make sure the platform runs correctly with the new provider installed. Before you can use the Android Emulator, you must create an Android Virtual Device. Android Virtual Devices are configurations of emulator options that allow developers to model a physical Android device better. They hold configuration information, such as a hardware profile, a mapping to a system image and a dedicated storage area. To create an Android Virtual Device, the android application is used. This application is found under the tools directory of the SDK. Create a new Virtual Device using the following command (issued from the SDK /tools directory): $ android create avd -n <desired-name> -t <target-version> where <desired-name> is the name of the Android Virtual Device and <target-version> is the desired target platform. Run the following command to view available targets: Rebuilding the Android Platform The build process can take a significant amount of time depending on the build environment. All commands should be run from the Android platform root: $ android list targets After the Android Virtual Device has been created, load the emulator with the built images: $ source build/envsetup.sh [Sets environment variables] $ lunch 1 [Builds the emulator] $ emulator -avd <virtual-device-name> -system $ make [Builds the Android Platform] <Android-Platform>/out/target/product/generic/system.img -data <Android-Platform>/out/target/product/generic/userdata.img -ramdisk Keep in mind that it is possible to rebuild a single project (such as the CyaSSL shared library) to test that the shared library builds correctly using the mm command (shown below), but before testing in the emulator, a full platform build needs 7 4 | may 2011 w w w. l i n u x j o u r n a l . c o m <Android-Platform>/out/target/product/generic/ramdisk.img There are other useful emulator options that may be added to the above command. A few are listed below, but for a complete list see the official Android Emulator Web page: Chris Conlon is a developer at yaSSL. Finding a balance between outdoor adventures and computing, Chris enjoys continually learning and strives to bring new and helpful things to the technology community. Chris welcomes comments at [email protected]. I -verbose — verbose output. I -nocache — don’t use a cache. I -show-kernel — print kernel messages to the terminal window. Resources Once the emulator is running, the logcat output can be viewed in a new terminal window (assuming the current directory is <Android-SDK>/tools): An In-depth Look at TLS and SSL: en.wikipedia.org/wiki/Transport_Layer_Security Android Developer Web Site: source.android.com/source/download.html $ adb logcat Conclusion In this article, installing an alternative SSL provider into the Android platform is explained using CyaSSL. By using CyaSSL in the Android platform instead of OpenSSL, developers are able to leverage both the speed and size advantages of the CyaSSL library. Making use of both a shared library and JNI, the same general process could apply to installing other third-party libraries into the Android platform and could provide a good reference for developers moving C libraries over to Android from other operating environments.I Android SDK Download: developer.android.com/sdk/index.html CyaSSL Java SSL Provider for Android from the yaSSL Web Site: www.yassl.com/yaSSL/Download_More.html Android Emulator Web Page: developer.android.com/ guide/developing/tools/emulator.html June 14–16, 2011 | Santa Clara, California Automated, Optimized, Ubiquitous Register Now & Save 15%! Use discount code VEL11LJR Now in its fourth year—Velocity, the Web Performance and Operations conference from O'Reilly Media—is the premier technical event dedicated to optimizing every aspect of your company's website. It's the convergence of performance and site reliability experts and rock stars who share the information critical to building and scaling fast and reliable websites and services. Velocity 2011 Topics & Themes: velocityconf.com NoSQL Mobile Performance Effective Cloud Computing Impact on the Bottom Line JavaScript Speedups TCP, HTTP, & SSL Optimizations Metrics & Monitoring ©2011 O’Reilly Media, Inc. The O’Reilly logo is a registered trademark of O’Reilly Media, Inc.11222 TALES FROM THE SERVER ROOM Panic on the Streets of London KYLE RANKIN BILL CHILDERS What do you do when your kickstart doesn’t kick? Find out what Kyle does in this first episode of Tales from the Server Room. I’ve always thought it’s better to learn from someone else’s mistakes than from my own. In this column, Kyle Rankin or Bill Childers will tell a story from their years as systems administrators while the other will chime in from time to time. It’s a win-win: you get to learn from our experiences, and we get to make snide comments to each other. Kyle tells the first story in this series. I was pretty excited about my first trip to the London data center. I had been to London before on vacation, but this was the first time I would visit our colocation facility on business. What’s more, it was the first remote data-center trip I was to take by myself. Because I still was relatively new to the company and the junior-most sysadmin at the time, this was the perfect opportunity to prove that I knew what I was doing and could be trusted for future trips. The Best Laid Plans of a Sysadmin The maintenance was relatively straightforward. A few machines needed a fresh Linux install, plus I would troubleshoot an unresponsive server, audit our serial console connections, and do a few other odds and ends. We estimated it was a two-day job, but just in case, we added an extra provisional day. [Bill: If I remember right, I had to fight to get that extra day tacked onto the trip for you. We’d learned from past experience that nothing at that place seemed easy at face value.] Even with an extra day, I wanted this trip to go smoothly, so I came up with a comprehensive plan. Each task was ordered by its priority along with detailed lists of the various commands and procedures I would use to accomplish each task. I even set up an itemized checklist of everything I needed to take with me. [Bill: I remember thinking that you were taking it way too seriously—after all, it was just a kickstart of a few new machines. What could possibly go wrong? In hindsight, I’m glad you made all those lists.] The first day I arrived at the data center, I knew exactly what I needed to do. Once I got my badge and was escorted through multiple levels of security to our colocation cages, I would kickstart each of the servers on my list one by one and perform all the manual configuration steps they needed. If I had time, I could finish the rest of the maintenance; otherwise, I’d leave 7 6 | may 2011 w w w. l i n u x j o u r n a l . c o m any other tasks for the next day. Now, it’s worth noting that at this time we didn’t have a sophisticated kickstart system in place nor did we have advanced lights-out management—just a serial console and a remotely controlled power system. Although our data center did have a kickstart server with a package repository, we still had to connect each server to a monitor and keyboard, boot from an install CD and manually type in the URL to the kickstart file. [Bill: I think this experience is what started us down the path of a lights-out management solution. I remember pitching it to the executives as “administering from the Bahamas”, and relaying this story to them was one of the key reasons that pitch was successful.] Kicking Servers Like Charlie Brown Kicks Footballs After I had connected everything to the first server, I inserted the CD, booted the system and typed in my kickstart URL according to my detailed plans. Immediately I saw the kernel load, and the kickstart process was under way. Wow, if everything keeps going this way, I might even get this done early, I thought. Before I could start making plans for my extra days in London though, I saw the kickstart red screen of death. The kickstart logs showed that for some reason, it wasn’t able to retrieve some of the files it needed from the kickstart server. Great, now I needed to troubleshoot a broken kickstart server. Luckily, I had brought my laptop with me, and the troubleshooting was straightforward. I connected my laptop to the network, eventually got a DHCP lease, pointed the browser to the kickstart server, and sure enough, I was able to see my kickstart configuration files and browse through my package repository with no problems. I wasn’t exactly sure what was wrong, but I chalked it up to a momentary blip and decided to try again. This time, the kickstart failed, but at a different point in the install. I tried a third time, and it failed at the original point in the install. I repeated the kickstart process multiple times, trying to see some sort of pattern, but all I saw was the kickstart fail at a few different times. The most maddening thing about this problem was the inconsistency. What’s worse, even though I had more days to work on this, the kickstart of this first TALES FROM THE SERVER ROOM server was the most important task to get done immediately. In a few hours, I would have a team of people waiting on the server so they could set it up as a database system. If at First You Don’t Succeed Here I was, thousands of miles away from home, breathing in the warm exhaust from a rack full of servers, trying to bring a stubborn server back to life. I wasn’t completely without options just yet. I had a hunch the problem was related to DHCP, so I pored through the logs on my DHCP server and confirmed that, yes, I could see leases being granted to the server, and, yes, there were ample spare leases to hand out. I even restarted the DHCP service for good measure. Finally, I decided to watch the DHCP logs during a kickstart. I would start the kickstart process, see the machine gets its lease, either the first time or when I told it to retry, then fail later on in the install. I had a log full of successful DHCP requests with no explanation of why it didn’t work. Then I had my first real clue: during one of the kickstarts, I noticed that the server had actually requested a DHCP lease multiple times. Even with this clue, I started running out of I had kickstarted the machine so many times now, I had the entire list of arguments memorized. I was running out of options, patience and most important, time. explanations. The DHCP server seemed to be healthy. After all, my laptop was able to use it just fine, and I had a log file full of successful DHCP requests. Here I turned to the next phase of troubleshooting: the guessing game. I swapped cables, changed what NIC was connected and even changed the switch port. After all of that, I still had the same issue. I had kickstarted the machine so many times now, I had the entire list of arguments memorized. I was running out of options, patience and most important, time. [Bill: I remember seeing an e-mail or two about this. I was comfortably ensconced at the corporate HQ in California, and you were working on this while I was ©2011 O’Reilly Media, Inc. O’Reilly logo is a registered trademark of O’Reilly Media, Inc. 11223 2011 REGISTER NOW & SAVE 15% Use discount code rc11ljr MAY 16–19 BALTIMORE, MARYLAND co-presented by TALES FROM THE SERVER ROOM asleep. I’m sure I’d have been able to help more if I’d been awake. I’m glad you were on the case though.] Not So Fast I was now at the next phase of troubleshooting: prayer. Somewhere around this time, I had my big breakthrough. While I was swapping all the cables around, I noticed something interesting on the switch—the LEDs for the port I was using went amber when I first plugged in the cable, and it took quite a bit of time to turn green. I noticed that the same thing happened when I kickstarted my machine and again later on during the install. It looked as though every time the server brought up its network interface, it would cause the switch to reset the port. When I watched this carefully, I saw during one install that the server errored out of the install while the port was still amber and just before it turned green! What did all of this mean? Although it was true that the DHCP server was functioning correctly, DHCP requests themselves typically have a 30-second timeout before they give an error. It turned out that this switch was just hovering on the 30-second limit to bring a port up. When it was below 30 seconds I would get a lease; when it wasn’t, I wouldn’t. Even though I found the cause of the problem, it didn’t do me much good. Because the installer appeared to reset its port at least three times, there was just about no way I was going to be able to be lucky enough to get three consecutive sub-30-second port resets. I had to figure out another way, yet I didn’t manage the networking gear, and the people who did wouldn’t be awake for hours (see sidebar). [Bill: One of the guys I worked with right out of college always told me “Start your troubleshooting with the cabling.” When troubleshooting networking issues, it’s easy to forget about things that can affect the link-layer, so I check those as part of the cabling now. It doesn’t take long and can save tons of time.] The Solution Always Is Right in Front of You I started reviewing my options. I needed some way to take the switch out of the equation. In all of my planning for this trip, I happened to bring quite a toolkit of MacGyver sysadmin gear, including a short handmade crossover cable and a coupler. I needed to keep the original kickstart server on the network, but I realized if I could clone all of the kickstart configurations, DHCP settings and package repositories to my laptop, I could connect to the machine with a crossover cable and complete the kickstart that way. After a few apt-gets, rsyncs, and some tweaking and tuning on the server room floor, I had my Frankenstein kickstart server ready to go. Like I had hoped, the kickstart completed without a hitch. I was then able to repeat the same task on the other two servers in no time and was relieved to send the e-mail to the rest of the team saying that all of their servers were ready for them, right on schedule. On the next day of the trip, I was able to knock out all of my tasks early so I could spend the final provisional day sightseeing around London. It all goes to show that although a good plan is important, you also should In all of my planning for this trip, I happened to bring quite a toolkit of MacGyver sysadmin gear, including a short handmade crossover cable and a coupler. The ultimate cause of the problem was that every time the port was reset, the switch recalculated the spanning tree for the network, which sometimes can take up to a minute or more. The long-term solution was to make sure that all ports we intended to kickstart were set with the portfast option so that they came up within a few seconds. 7 8 | may 2011 w w w. l i n u x j o u r n a l . c o m be flexible for when something inevitably goes outside your plan. [Bill: I’m glad you planned like you did, but it also highlights how important being observant and having a good troubleshooting methodology are. Although you were able to duct-tape a new kickstart server out of your laptop, you could have spent infinitely longer chasing the issue. It’s just as important to know when to stop chasing a problem and put a band-aid in place as it is to fix the problem in the first place.]I Kyle Rankin is a Systems Architect in the San Francisco Bay Area and the author of a number of books, including The Official Ubuntu Server Book, Knoppix Hacks and Ubuntu Hacks. He is currently the president of the North Bay Linux Users’ Group. Bill Childers is an IT Manager in Silicon Valley, where he lives with his wife and two children. He enjoys Linux far too much, and he probably should get more sun from time to time. In his spare time, he does work with the Gilroy Garlic Festival, but he does not smell like garlic. www.GiadaPC.com Giada i30/ i32 Intel® Atom™ D525/ D510 2G RAM, 320GB HD Giada i50 Core i5 Giada N20 ION2 Intel® Atom™ D525 $295 2G RAM, 320GB HD Nvidia® ION2™, HDMI/ DVI Intel® Core™ i5 $449 2GB RAM, 320G HD, HDMI/ DVI Giada A50 E-350 AMD® Fusion E-350 $322 2GB RAM, 320G HD ATI® Radeon™ HD6310 Giada N10U Giada MI-D525 $99 Atom™ D525, Dual LAN Giada MI-E350 AMD® Fusion™+ATI® 6310 Giada Technology, Inc. Giada MI-H67 Intel® Core™ i7/ i5 Giada MI-ION2 Nvidia® ION2™, HDMI/ DVI Intel® Atom™, Nvidia® ION™ 2G RAM, 250GB HD 1461-3 San Mateo Ave., South San Francisco, CA 94080 415.202.5441 Fax: 415.727.4947 LINUX JOURNAL MARKETPLACE The Trend - Ultra Mini PC [email protected] NVIDIA, ION are trademarks of NVIDIA Corporation. Intel Core, Atom are trademarks of Intel Corporation. Other names are for informational purposes only and may be trademarks of their respective owners. Choices, Excellent Service, Polywell Solutions More Great Prices! Quiet Storage NAS/SAN/iSCSI 4U24A 4U-24Bay 72TB RAID-6, NAS/iSCSI/SAN Storage Mix SAS / SATA, 4x Giga / 10Gbit LAN ITX-300G 4U-45Bay 135TB JBOD 5048A 40TB $6,999 60TB $9,999 9020H 20Bay 5U-48Bay 144TB Storage Server - Dual Gigabit LAN - RAID-5, 6, 0, 1, 10 - Hot Swap, Hot Spare - Linux, Windows, Mac - E-mail Notification - Tower Case Polywell OEM Services, Your Virtual Manufacturer Prototype Development with Linux/FreeBSD Support Small Scale to Mass Production Manufacturing Fulfillment, Shipping and RMA Repairs Polywell Computers, Inc ITX-400A ITX-500A w/ slim CD Bay 20 Years of Customer Satisfaction 5-Year Warranty, Industry's Longest First Class Customer Service 888.765.9686 [email protected] www.polywell.com/us 1461 San Mateo Ave. South San Francisco, CA 94080 650.583.7222 Fax: 650.583.1974 OLY POLYWELL w w w. l i n u x j o u r n a l . c o m may 2011 | 7 9 EOF The Limits of Scale Maybe what’s wrong with Too Big is what’s right with starting over. DOC SEARLS Linux is like limestone; you can build anything with it. So, while you find limestone in everything from lipstick to pyramids, you find Linux in everything from picture frames to Google. What brings this analogy to mind is the matter of scale, long regarded as a virtue in the tech world. Getting to scale and staying there are both considered Good Things. But, as with other Good Things, is it possible to have too much? At what point do the biggest things we make with Linux risk turning into pyramids—that is, durable landmarks that are also dead? These questions came up for me back in January, when two things happened. One was Larry Page replacing Eric Schmidt as Google’s CEO. The other was mysterious account deletions at Flickr. Without Linux, there would be no Google or Flickr. In Google’s case, I saw the writing on the wall at the Techonomy conference in Lake Tahoe, August 2010. On stage was Eric Schmidt, amid four other panelists. In the Q&A, Eric said, “If we look at enough of your messaging and your location, and use artificial intelligence, we can predict where you are going to go....Show us 14 photos of yourself and we can identify who you are.” He added: I would make a stronger point— that the only way to meet this set of challenges that we are facing is by much greater transparency and no anonymity. And the reason is that in a world of asymmetric threats, true anonymity is too dangerous....One of the errors that the Internet made a long time ago is that there was not an accurate and non-revocable identity management service....You need a name service for humans.....governments are going to require it at some point. 8 0 | may 2011 w w w. l i n u x j o u r n a l . c o m (You can follow along at wn.com/ Eric_Schmidt_at_Techonomy, starting at 21:10. The first question is mine.) I wanted to freeze time and say “Eric, no! Stop, big guy! Better to say nothing than this kind of stuff!” But I just sat and winced. Two months later in an interview with The Atlantic at the Washington Ideas Forum, Eric said, “We don’t need you to type at all. We know where you are. We know where you’ve been. We can more or less know what you’re thinking about.” Spoken like an eyeball on a pyramid. At this point, it was just a matter of time before one of the founders would return, Steve Jobs-like (and hopefully not Jerry Yang-like) to bring the company back in alignment with Original Principles. That happened in January, followed quickly by a Bloomberg Businessweek cover story titled “Larry Page’s Google 3.0”. Said the writers, “The unstated goal is to save the search giant from the ossification that can paralyze large corporations. It won’t be easy, because Google is a tech conglomerate, an assemblage of parts that sometimes work at cross-purposes.” The piece goes on to profile a half-dozen “star deputies”. Of them, it says, “Together, their mandate is to help the company move more quickly and effectively—to keep it from becoming yet another once-dominant tech company that sees its mantle of innovation stolen away by upstarts.” Good luck with that. Flickr’s first pyramid moment was a report that photographer Deepa Praveen had her entire Pro account (the kind people pay for) deleted without explanation. The story broke first in Thomas Hawk’s blog, and then the action moved to my own blog, with a post titled “What if Flickr fails?” That one racked up 107 comments, including a pair from Yahoo executives. (Flickr belongs to Yahoo.) Nowhere was there anything to relieve fears that an account deletion might come at any time, to anybody, with no chance of recovering whatever was lost. (My own exposure is about 50,000 photos.) Then Mirco Wilhelm, another Flickr Pro photographer, had his 3,400 photos deleted, in what Flickr eventually admitted was its own error. These were later restored, with much apologizing by Flickr. Still, one had to wonder how much of the problem had to do with Flickr’s size. According to the most recent reports at this writing, Flickr hosts more than 5,000,000,000 photos for 51,000,000 registered users, with new photos arriving at more than 3,000 per minute. One of the best talks on Linux deployment was one given by Cal Henderson at the March 2006 O’Reilly Emerging Technology Conference. It was an all-day tutorial about “launching and scaling new Web services”. I remember being highly impressed at how well Linux allowed a fast-growing pile of digital goods to expand, while still providing near-instantaneous service to everybody who wanted it. I also remember wondering what would happen after Cal left—which he did in 2009. The answer is workarounds and startups. Here are a few examples, just from the comments that followed my Flickr post: unhosted.org, couchapp.org, www.tonido.com, backupify.com, gallery.menalto.com, pix.am, status.net, thinkupapp.com, piwigo.org, www.zoofoo.com and https://pixi.me, in that order. None yet compete with Flickr, but maybe that’s not the idea. Nature’s idea is to take its course. It’s as much Linux’s nature to start something as it is to grow to the limits of viability. It may help to remember that limestone is made from the corpses of once-living things. Without abundant endings, we wouldn’t have beginnings.I Doc Searls is Senior Editor of Linux Journal. He is also a fellow with the Berkman Center for Internet and Society at Harvard University and the Center for Information Technology and Society at UC Santa Barbara. ANYONE INTERESTED IN SAVING MONEY? Looks like these guys are comfortable overpaying for enterprise storage. Are You? “Hewlett-Packard Co. agreed to buy 3Par Inc. for $2.35 billion” — Bloomberg.com “EMC to Buy Isilon Systems Inc. for $2.25 Billion” — Wall Street Journal “Dell to Buy Compellent for $960 Million” — CNBC So what “benefit” will you see by this spending spree, other than higher costs? The AberSAN Z-Series scalable unified storage platform, featuring the Intel® Xeon® processor 5600 series, brings the simplicity of network attached storage (NAS) to the SAN environment by utilizing the innovative ZFS file system. The AberSAN Z20 is easily found starting under $20,000. Who gives you the best bang for the buck? 3Par Compellent Isilon Aberdeen InServ F200 Storage Center Series 30 NL-Series AberSAN Z20 ✓ ✓ ✓ ✓ ✓ ✓ ✓ x x x ✓ ✓ ✓ ✓ ✓ ✓ ✓ x x ✓ ✓ ✓ ✓ ✓ ✓ ✓ ✓ ✓ ✓ OneFS Up to N+4 2304TB ZFS 128-bit 5, 6 and Z Unlimited Storage Scale-Out ✓ Thin Provisioning ✓ HA Clustering ✓ ® VMware Ready Certified ✓ Async / Synchronous Replication ✓ iSCSI / Fibre Channel Target ✓ Unlimited Snapshots x Native Unified Storage: NFS, CiFS x Virtualized SAN x Deduplication x Native File System none RAID Level Support 5 and 6 Raw Array Capacity (max) 128TB 3 Years Warranty Online Configurator with Pricing Not Available none 5 and 6 1280TB iSCSI Only 5 Years 3 Years 5 Years Not Available Not Available Available Above specific configurations obtained from the respective websites on Feb. 1, 2011. Intel, Intel Logo, Intel Inside, Intel Inside Logo, Pentium, Xeon, and Xeon Inside are trademarks or registered trademarks of Intel Corporation or its subsidiaries in the United States and other countries. All trademarks are the property of their respective owners. All rights reserved. For terms and conditions, please see www.aberdeeninc.com/abpoly/abterms.htm. lj038 888-297-7409 www.aberdeeninc.com/lj038 Cut Execution Time by >50% with WhisperStation-GPU Delivered ready to run new GPU-enabled applications: Design 3ds Max Bunkspeed Shot Adobe CS5 Simulation ANSYS Mechanical Autodesk Moldflow Mathematica BioTech MATLAB ACUSIM AcuSolve Tech-X GPULib AMBER GROMACS NAMD, VMD TeraChem Integrating the latest CPUs with NVIDIA Tesla Fermi GPUs, Microway’s WhisperStation-GPU delivers 2x-100x the performance of standard workstations. Providing explosive performance, yet quiet, it’s custom designed for the power hungry applications you use. Take advantage of existing GPU applications or enable high performance with CUDA C/C++, PGI CUDA FORTRAN, or OpenCL compute kernels. Up to Four Tesla Fermi GPUs, each with: 448 cores, 6 GB GDDR5, 1 TFLOP single and 515 GFLOP double precision performance Up to 24 cores with the newest Intel and AMD Processors, 128 GB memory, 80 PLUS® certified power supply, and eight hard drives Nvidia Quadro for state of the art professional graphics and visualization Ultra-quiet fans, strategically placed baffles, and internal sound-proofing New: Microway CL-IDE™ for OpenCL programming on CPUs and GPUs WhisperStation with 4 Tesla Fermi GPUs OctoPuter™ 4U Server with up to 8 GPUs and 144 GB memory Microway’s Latest Servers for Dense Clustering 4P, 1U nodes with 48 CPU cores, 512 GB and QDR InfiniBand 2P, 1U nodes with 24 CPU cores, 2 Tesla GPUs and QDR InfiniBand 2U Twin2 with 4 Hot-Swap MBs, each with 2 Processors + 256 GB 1U S2050 servers with 4 Tesla Fermi GPUs 1U Node with 2 Tesla Fermi GPUs Microway Puts YOU on the Cutting Edge Design your next custom configuration with techs who speak HPC. Rely on our integration expertise for complete and thorough testing of your workstations, turnkey clusters and servers. Whether you need Linux or Windows, CUDA or OpenCL, we’ve been resolving the complicated issues – so you don’t have to – since 1982. Configure your next WhisperStation or Cluster today! microway.com/quickquote or call 508-746-7341 Sign up for technical newsletters and special GPU promotions at microway.com/newsletter 2U Twin2 Node with 4 Hot-Swap Motherboards Each with 2 CPUs and 256 GB GSA Schedule Contract Number: GS-35F-0431N pC4_Microway.indd 1 10/17/10 5:07:51 PM


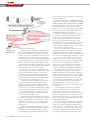


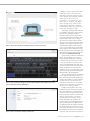


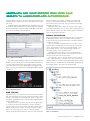


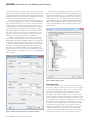

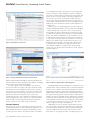


![Tester Bench [BETA] User Manual](http://vs1.manualzilla.com/store/data/005798606_1-651c3b6b51a13c0d6f27995a84bd9cc4-150x150.png)


![webcademie-programme [720.99 Ko]](http://vs1.manualzilla.com/store/data/006420325_1-1b6a730fdb186f5d646e70ec3bf998e1-150x150.png)