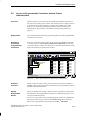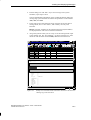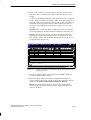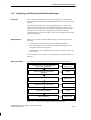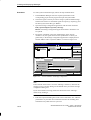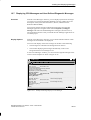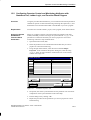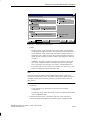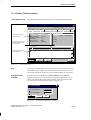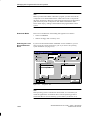
1
Preface, Contents
Part 1: Preparing for a
Programming Session
Part 2: Configuring and Assigning
Parameters to the Hardware
SIMATIC
Standard Software
for S7 and M7
STEP 7
Part 3: Working with S7
Programmable Controllers
Part 4: Working with M7
Programmable Control Systems
Part 5: Final Tasks
Appendix
User Manual
This manual is part of the documentation
package with the order number:
6ES7810-4CA03-8BA0
C79000-G7076-C552-01
Glossary, Index
ii
Safety Guidelines
!
!
!
This manual contains notices which you should observe to ensure your own personal safety, as well as to
protect the product and connected equipment. These notices are highlighted in the manual by a warning
triangle and are marked as follows according to the level of danger:
Danger
indicates that death, severe personal injury or substantial property damage will result if proper precautions are
not taken.
Warning
indicates that death, severe personal injury or substantial property damage can result if proper precautions are
not taken.
Caution
indicates that minor personal injury or property damage can result if proper precautions are not taken.
Note
draws your attention to particularly important information on the product, handling the product, or to a particular
part of the documentation.
Qualified Personnel
The device/system may only be set up and operated in conjunction with this manual.
Only qualified personnel should be allowed to install and work on this equipment. Qualified persons are
defined as persons who are authorized to commission, to ground, and to tag circuits, equipment, and systems in accordance with established safety practices and standards.
Correct Usage
!
Trademarks
Note the following:
Warning
This device and its components may only be used for the applications described in the catalog or the technical
description, and only in connection with devices or components from other manufacturers which have been
approved or recommended by Siemens.
SIMATICR, SIMATIC NET R and SIMATIC HMI R are registered trademarks of SIEMENS AG.
Third parties using for their own purposes any other names in this document which refer to trademarks might
infringe upon the rights of the trademark owners.
Copyright E Siemens AG 1997 All rights reserved
Disclaimer of Liability
The reproduction, transmission or use of this document or its
contents is not permitted without express written authority.
Offenders will be liable for damages. All rights, including rights
created by patent grant or registration of a utility model or design, are
reserved.
We have checked the contents of this manual for agreement with the
hardware and software described. Since deviations cannot be
precluded entirely, we cannot guarantee full agreement. However,
the data in this manual are reviewed regularly and any necessary
corrections included in subsequent editions. Suggestions for
improvement are welcomed.
Siemens AG
Automation Group
Industrial Automation Systems
Postfach 4848, D-90327 Nürnberg
Siemens Aktiengesellschaft
Technical data subject to change.
E Siemens AG 1997
C79000-G7076-C552
Standard Software for S7 and M7 – STEP 7 User Manual
C79000 G7076 C552 01
Preface
Purpose of the
Manual
This manual has the following aims:
S To explain the basic concepts of the standard software
S To introduce its most important functions
The software used to configure and program the SIMATIC S7/M7/C7
programmable logic controllers has been developed in accordance with the
latest state-of-the-art ergonomic designs. Handling the software is therefore
easy to learn and to a large extent self-explanatory.
When procedures are explained, you will find the relevant menu commands
are also described. However, instructions on how to fill out dialog boxes are
not included: you will find explanations for this in the online help.
Audience
This manual is intended for installation personnel, programmers, and service
personnel who have little or no experience of working with the software
package STEP 7.
Where is this
Manual Valid?
This manual is valid for release 4 of the STEP 7 programming software. It is
valid for the STEP 7 Standard software package and as the basis for the
optional software packages which complement the standard package.
Which Standards
Does the Software
Comply With?
The STEP 7 software fulfils the International Electrotechnical Commission’s
standard IEC 1131-3 (or EN 61131-3) for programming languages used with
programmable controllers. You will find more details in the manuals on the
various programming languages and in the standard compliance table in the
NORM_TBL.WRI file in STEP 7.
Standard Software for S7 and M7 – STEP 7 User Manual
C79000-G7076-C552-01
iii
Preface
Where Does this
Manual Fit in with
the Rest of the S7
Documentation?
There is a wide range of user documentation available to support you in
configuring and programming an S7 programmable controller which is
intended to be used selectively. The following explanations should make it
easier for you to use the user documentation.
This symbol indicates the order in which you should read the
manuals, particularly if you are a first-time user of S7.
Meaning
Symbol
This documentation introduces the methodology.
Reference works which are only required selectively.
The documentation is supported by an online help.
S7-300 Programmable Controller
Quick Start
Primer
/30/
Manuals on
S7-300/S7-400
Hardware
Manual
Programming
Manual
System Software for S7-300/S7-400
Program Design
/234/
Online Help
User
Manual
Standard Software for S7 and M7
STEP 7
/233/
Standard Software for S7
From S5 to S7
/230/
/231/
LAD
Converter
Manual
STL
/232/
FBD
/236/
SCL
/250/
Reference
Manual
GRAPH
for S7
/251/
HiGraph
/252/
CFC
Vol. 1
/254/
CFC
Vol. 2
System Software for S7-300/400
System and Standard Functions
/235/
/249/
Language Packages
/xxx/: Number in the literature list
Figure 1-1
iv
S7 Information Landscape
Standard Software for S7 and M7 – STEP 7 User Manual
C79000-G7076-C552-01
Preface
Table 1-1
S7 Documentation Information Content
Content
Title
S7-300 Programmable
Controller
Quick Start
Primer
The Primer offers a basic introduction to the methodology of the structure and
programming of an S7-300/S7-400. It is especially suited to first-time users of an S7
programmable control system.
S7-300 and S7-400
Program Design
Programming Manual
The S7-300/S7-400 Program Design Programming Manual provides basic information
on the structure of the operating system and of a user program of an S7 CPU. The
first-time user of an S7-300 or S7-400 should use this manual to acquire an overview of
the programming methodology and to use it to base their user program design on.
S7-300 and S7-400
System and Standard
Functions
Reference Manual
The S7 CPUs have integrated system functions and organization blocks included with
their operating system, which you can use when programming. The manual provides
you with an overview of the system functions, organization blocks, and loadable
standard functions available in S7, and – in the form of reference information – detailed
interface descriptions for their use in your user program.
STEP 7
User Manual
The STEP 7 User Manual explains the main usage and the functions of the STEP 7
automation software. As a first-time user of STEP 7 and as an experienced user of
STEP 5, this manual will provide you with an overview of the procedures used to
configure, program, and start up an S7-300/S7-400.
While you are working with the software you can access a range of online help topics
which offer detailed support on using the software.
Converter Manual
From S5 to S7
You will need the From S5 to S7 Converter Manual if you want to convert existing S5
programs to run them on S7 CPUs. The manual provides an overview of the procedures
and usage of the Converter; you can find a detailed description of the converter
functions in the online help. You will also find the interface descriptions for the
converted S7 functions available in the online help. Practical information is also
provided on SIMATIC S7 hardware and software.
Statement List, Ladder
Logic, Function Block
Diagram, SCL1
Manuals
The manuals for the programming language packages Statement List, Ladder Logic,
Function Block Diagram, and SCL (Sequential Control Language) contain both the
user’s guide and the reference description of the programming language or
representation type. You only require one language type for programming an
S7-300/S7-400, but you can mix the languages within a project, if required. If you are
using a language for the first time, it is recommended that you use the manual to learn
about the methodology of creating a program in the chosen language first.
While you are working with the software you can access a range of online help topics
which offer detailed support on using the respective editors/compilers.
GRAPH1 , HiGraph1,
CFC1
Manuals
The languages GRAPH, HiGraph, and CFC (Continuous Function Chart) offer
additional methods of programming blocks in the form of sequential controls, state
graphs, or charts. The manuals contain both the user’s guide and the reference
description of the programming language. If you are using a language for the first time,
it is recommended that you use the manual to learn about the methodology of creating a
program in the chosen language first.
While you are working with the software you can access a range of online help topics
which offer detailed support on using the respective editors/compilers (with the
exception of HiGraph).
1
Optional package for system software for S7-300/S7-400
Standard Software for S7 and M7 – STEP 7 User Manual
C79000-G7076-C552-01
v
Preface
Where Does this
Manual Fit in with
the Rest of the M7
Documentation?
There is a wide range of user documentation available to support you in
configuring and programming an M7 programmable control system which is
intended to be used selectively. The following explanations should make it
easier for you to use the user documentation.
This symbol indicates the order in which you should read the
manuals, particularly if you are a first-time user of M7.
Meaning
Symbol
This documentation introduces the methodology.
Reference works which are only required selectively.
This documentation is supported by an online help.
System Software for M7-300/M7-400
Program Design
Programming
Manual
Manual
Manuals on
M7-300/M7-400
Hardware
/280/
Online Help
User
Manual
Standard Software for S7 and M7
STEP 7
/290/
System Software for M7-300/M7-400
Installation and Operation
/282/
/231/
Pro C/C++
for M7
User
Manual
CFC
Vol. 1
CFC
Vol. 2
/254/
/249/
Reference
Manual
System Software for M7-300/M7-400
System and Standard Functions
/281/
Debugging
C
Programs
/291/
Language Packages
/xxx/: Number in the literature list
Figure 1-2
vi
M7 Information Landscape
Standard Software for S7 and M7 – STEP 7 User Manual
C79000-G7076-C552-01
Preface
Table 1-2
M7 Documentation Information Content
Content
Title
M7-300 and M7-400
Program Design
Programming Manual
The M7-300/M7-400 Program Design Programming Manual provides basic
information on the structure of the operating system and of a user program of an M7
CPU/FM. The first-time user of an M7-300/M7-400 should use this manual to
acquire an overview of the programming methodology and to use it to base their user
program design on.
M7-300 and M7-400
System and Standard
Functions
Reference Manual
This manual provides you with an overview of the system functions and standard
functions available in M7 which you can use when programming.
STEP 7
User Manual
The STEP 7 User Manual explains the main usage and the functions of the STEP 7
automation software. As a first-time user of STEP 7 and as an experienced user of
STEP 5, this manual will provide you with an overview of the procedures used to
configure, program, and start up an M7-300/M7-400.
While you are working with the software you can access a range of online help topics
which offer detailed support on using the software.
System Software for
M7-300/M7-400
User Manual
This User Manual explains the installation of the system software for
M7-300/M7-400 and the starting up and handling of the M7 programmable control
systems.
ProC/C++ for M7-300 and
M7-400
Manual
This manual contains the user’s guide. You will find the description of the language
in the online documentation for Borland C++.
Debugging C Programs
Manual
This manual describes the handling and usage of the debugging tool Organon
XDB386 for Borland C/C++ programs.
CFC1
Manual
The language CFC (Continuous Function Chart) offers an additional method of
programming by connecting blocks in the form of charts. The manual contains both
the user’s guide and the reference description of the programming language. If you
are using a language for the first time, it is recommended that you use the manual to
learn about the methodology of creating a program in the chosen language first.
While you are working with the software you can access a range of online help topics
which offer detailed support on using the respective utilities (editor/compiler/symbol
import editor).
While you are working with the software you can access a range of online help topics
which offer detailed support on using the respective editor/compiler.
1
Optional package for system software for M7-300/M7-400
Structure of the
Manual
This manual is split up into the following parts according to topic:
S Part 1 contains general information on terminology, basic handling of the
standard S7 and M7 software, and on preparing for a programming
session. You should read the first three chapters before you start working
with the software.
S In Part 2 there is a description of how to configure and assign parameters
to your hardware.
S Parts 3 and 4 show you how to program S7 and M7 programmable logic
controllers.
S Part 5 deals with supplementary tasks such as archiving user programs.
Standard Software for S7 and M7 – STEP 7 User Manual
C79000-G7076-C552-01
vii
Preface
As a first-time user you should use this manual in the following manner:
1. Read the first three chapters before you start to use the software to make
yourself familiar with the terminology and the principles of how the
system works.
2. Use each of the remaining chapters in the manual as you come to a
particular step in a programming session (such as creating the symbol
table).
If you have already created a small project and gained experience doing this,
you can read each chapter separately as you require information on the topic
it deals with.
Conventions
References to other manuals are shown using the part number of the literature
between slashes /.../. Using these numbers you can find out the exact title of
the manual from the literature list at the end of this manual.
Additional
Assistance
If you have any questions regarding the software described in this manual
and cannot find an answer here or in the online help, please contact the
Siemens representative in your area. You will find a list of addresses in the
Appendix of /70/ or /100/, or in catalogs, and in Compuserve (go
autforum). You can also speak to our Hotline under the following phone
or fax number:
Tel. (+49) (911) 895 7000 (Fax 7001)
If you have any questions or comments on this manual, please fill out the
remarks form at the end of the manual and return it to the address shown on
the form. We would be grateful if you could also take the time to answer the
questions giving your personal opinion of the manual.
Siemens also offers a number of training courses to introduce you to the
SIMATIC S7 automation system. Please contact your regional training center
or the central training center in Nuremberg, Germany for details:
D-90327 Nuremberg, Tel. (+49) (911) 895 3154.
Current
Information
You can find up-to-date information about SIMATIC products:
S On the Internet under http://www.aut.siemens.de/
S Using fax polling no. (+49) 8765 93 00 50 00
The SIMATIC Customer Support team provides you with current information
and downloads which may be useful for users of SIMATIC products:
S On the Internet under
http://www.aut.siemens.de/support/html_00/index.shtml
S Via the SIMATIC Customer Support Mailbox under the number
(+49) (911) 895-7100
To dial in, use a modem with V.34 (28.8 kbps) capability whose
parameters you should set as follows: 8, N, 1, ANSI, or dial in using
ISDN (x.75, 64 kbit).
viii
Standard Software for S7 and M7 – STEP 7 User Manual
C79000-G7076-C552-01
Preface
You can reach SIMATIC Customer Support by phone using the number
(+49) (911) 895-7000 and by fax using (+49) (911) 895-7002. You can also
send inquiries by e-mail in the Internet or by mail to the above mailbox.
Notes on Using the
Manual
The user’s guide sections in this manual do not contain exact procedures in
individual steps, but are intended to explain basic procedures. You will find
more detailed information on the individual dialogs in the software and how
to use them in the relevant online help.
Standard Software for S7 and M7 – STEP 7 User Manual
C79000-G7076-C552-01
ix
Preface
x
Standard Software for S7 and M7 – STEP 7 User Manual
C79000-G7076-C552-01
Contents
Preface . . . . . . . . . . . . . . . . . . . . . . . . . . . . . . . . . . . . . . . . . . . . . . . . . . . . . . . . . . . . . . . . .
iii
1
Product Overview . . . . . . . . . . . . . . . . . . . . . . . . . . . . . . . . . . . . . . . . . . . . . . . . . . . . . . .
1-1
2
Installing and Uninstalling . . . . . . . . . . . . . . . . . . . . . . . . . . . . . . . . . . . . . . . . . . . . . . .
2-1
2.1
Requirements for Installation . . . . . . . . . . . . . . . . . . . . . . . . . . . . . . . . . . . . . .
2-2
2.2
Authorization and Rights of Usage . . . . . . . . . . . . . . . . . . . . . . . . . . . . . . . . .
2-3
2.3
Guidelines for Handling Authorizations . . . . . . . . . . . . . . . . . . . . . . . . . . . . . .
2-5
2.4
Installing and Uninstalling the STEP 7 Software . . . . . . . . . . . . . . . . . . . . . .
2-7
2.5
Setting the PG/PC Interface . . . . . . . . . . . . . . . . . . . . . . . . . . . . . . . . . . . . . . .
2-10
2.6
Multi-User Configuration in a Windows Network . . . . . . . . . . . . . . . . . . . . . .
2-12
User Interface . . . . . . . . . . . . . . . . . . . . . . . . . . . . . . . . . . . . . . . . . . . . . . . . . . . . . . . . . . .
3-1
3.1
Starting the STEP 7 Software . . . . . . . . . . . . . . . . . . . . . . . . . . . . . . . . . . . . . .
3-2
3.2
User Interface: Windows . . . . . . . . . . . . . . . . . . . . . . . . . . . . . . . . . . . . . . . . . .
3-3
3.3
User Interface: Dialog Boxes . . . . . . . . . . . . . . . . . . . . . . . . . . . . . . . . . . . . . .
3-4
3.4
Calling the Help Functions . . . . . . . . . . . . . . . . . . . . . . . . . . . . . . . . . . . . . . . .
3-5
3.5
Saving and Restoring the Window Layout . . . . . . . . . . . . . . . . . . . . . . . . . . .
3-6
3.6
Using Teleservice . . . . . . . . . . . . . . . . . . . . . . . . . . . . . . . . . . . . . . . . . . . . . . . .
3-7
STEP 7 Projects and Basic Operation . . . . . . . . . . . . . . . . . . . . . . . . . . . . . . . . . . . . .
4-1
4.1
Opening a Project . . . . . . . . . . . . . . . . . . . . . . . . . . . . . . . . . . . . . . . . . . . . . . . .
4-2
4.2
Components for Configuring Hardware and Networks . . . . . . . . . . . . . . . . .
4-3
4.3
Components for Creating Software . . . . . . . . . . . . . . . . . . . . . . . . . . . . . . . . .
4-4
4.4
Object-Oriented Operating Philosophy . . . . . . . . . . . . . . . . . . . . . . . . . . . . . .
4-6
4.5
Creating and Managing Objects . . . . . . . . . . . . . . . . . . . . . . . . . . . . . . . . . . . .
4-7
4.6
Selecting Objects in a Browser . . . . . . . . . . . . . . . . . . . . . . . . . . . . . . . . . . . . .
4-10
Creating and Editing Projects . . . . . . . . . . . . . . . . . . . . . . . . . . . . . . . . . . . . . . . . . . . .
5-1
5.1
Creating Projects . . . . . . . . . . . . . . . . . . . . . . . . . . . . . . . . . . . . . . . . . . . . . . . .
5-2
5.2
Inserting and Configuring Stations . . . . . . . . . . . . . . . . . . . . . . . . . . . . . . . . . .
5-4
5.3
Basic Procedure for Creating Software . . . . . . . . . . . . . . . . . . . . . . . . . . . . . .
5-6
5.4
Inserting Components for Creating Software in S7 and M7 Programs . . .
5-7
5.5
Creating Software without Configured Hardware . . . . . . . . . . . . . . . . . . . . .
5-9
3
4
5
Standard Software for S7 and M7 – STEP 7 User Manual
C79000-G7076-C552-01
xi
Contents
6
7
8
xii
5.6
Storing Projects . . . . . . . . . . . . . . . . . . . . . . . . . . . . . . . . . . . . . . . . . . . . . . . . . .
5-11
5.7
Access to Programmable Controllers within a Project . . . . . . . . . . . . . . . . .
5-12
5.8
Access to Programmable Controllers without Project Administration . . . .
5-15
5.9
Access to Programmable Controllers without Configured Hardware . . . . .
5-16
5.10
Adapting PG/PC Interfaces on the Programming Device to Configured
Network Settings . . . . . . . . . . . . . . . . . . . . . . . . . . . . . . . . . . . . . . . . . . . . . . . . .
5-17
Assigning Symbols . . . . . . . . . . . . . . . . . . . . . . . . . . . . . . . . . . . . . . . . . . . . . . . . . . . . . .
6-1
6.1
Symbols . . . . . . . . . . . . . . . . . . . . . . . . . . . . . . . . . . . . . . . . . . . . . . . . . . . . . . . .
6-2
6.2
Symbol Table . . . . . . . . . . . . . . . . . . . . . . . . . . . . . . . . . . . . . . . . . . . . . . . . . . . .
6-3
6.3
Incomplete and Non-Unique Symbols . . . . . . . . . . . . . . . . . . . . . . . . . . . . . . .
6-5
6.4
Working with the Symbol Table . . . . . . . . . . . . . . . . . . . . . . . . . . . . . . . . . . . .
6-6
6.5
Defining Single Symbols in a Dialog Box . . . . . . . . . . . . . . . . . . . . . . . . . . . .
6-7
6.6
Exporting and Importing Symbol Tables . . . . . . . . . . . . . . . . . . . . . . . . . . . . .
6-8
Configuring and Assigning Parameters to Modules . . . . . . . . . . . . . . . . . . . . . . . .
7-1
7.1
Creating the Configuration – An Overview . . . . . . . . . . . . . . . . . . . . . . . . . . .
7-2
7.2
Basic Operation . . . . . . . . . . . . . . . . . . . . . . . . . . . . . . . . . . . . . . . . . . . . . . . . . .
7-4
7.3
Example 1: Central Structure . . . . . . . . . . . . . . . . . . . . . . . . . . . . . . . . . . . . . .
7-6
7.4
Example 2: Structure with Interface Submodules . . . . . . . . . . . . . . . . . . . . .
7-9
7.5
Example 3: Structure of C7 Control Systems . . . . . . . . . . . . . . . . . . . . . . . .
7-10
7.6
Example 4: Expanding the Structure with Smart Connect . . . . . . . . . . . . . .
7-11
7.7
Example 5: Structure with a Distributed I/O (PROFIBUS DP) . . . . . . . . . .
7-12
7.8
Example 6: Distributed I/O with Intelligent DP Slaves . . . . . . . . . . . . . . . . .
7-15
7.9
Example 7: Configuring Multicomputing Operation . . . . . . . . . . . . . . . . . . . .
7-18
7.10
Assigning Module Parameters . . . . . . . . . . . . . . . . . . . . . . . . . . . . . . . . . . . . .
7-20
7.11
Assigning Addresses . . . . . . . . . . . . . . . . . . . . . . . . . . . . . . . . . . . . . . . . . . . . .
7-21
7.12
Saving, Downloading, Reading, Modifying, and Copying a Configuration
7-23
7.13
Editing a Station Configuration . . . . . . . . . . . . . . . . . . . . . . . . . . . . . . . . . . . . .
7-27
Configuring Networks . . . . . . . . . . . . . . . . . . . . . . . . . . . . . . . . . . . . . . . . . . . . . . . . . . .
8-1
8.1
Creating Network Configurations – Overview . . . . . . . . . . . . . . . . . . . . . . . .
8-4
8.2
Configuring a Network in the SIMATIC Manager . . . . . . . . . . . . . . . . . . . . . .
8-5
8.3
Setting Your Network Configuration Graphically – Starting NETPRO . . . .
8-7
8.4
Creating Network Configurations with Symbols in the Network View . . . .
8-9
8.5
Opening and Editing the Network View with DP Slaves . . . . . . . . . . . . . . . .
8-11
Standard Software for S7 and M7 – STEP 7 User Manual
C79000-G7076-C552-01
Contents
8.6
9
10
11
12
Selecting Context Functions for Subnets, Stations, and Modules in the
Network View . . . . . . . . . . . . . . . . . . . . . . . . . . . . . . . . . . . . . . . . . . . . . . . . . . . .
8-13
8.7
Special Feature when Configuring MPI Subnets in S7-300 . . . . . . . . . . . .
8-14
8.8
Changing Node Addresses and Downloading the Configuration via
the Network . . . . . . . . . . . . . . . . . . . . . . . . . . . . . . . . . . . . . . . . . . . . . . . . . . . . .
8-15
Configuring Global Data Communication . . . . . . . . . . . . . . . . . . . . . . . . . . . . . . . . . .
9-1
9.1
Global Data . . . . . . . . . . . . . . . . . . . . . . . . . . . . . . . . . . . . . . . . . . . . . . . . . . . . .
9-2
9.2
Opening a Global Data Table . . . . . . . . . . . . . . . . . . . . . . . . . . . . . . . . . . . . . .
9-3
9.3
Filling Out a Global Data Table . . . . . . . . . . . . . . . . . . . . . . . . . . . . . . . . . . . . .
9-5
9.4
Compiling and Downloading a Global Data Table . . . . . . . . . . . . . . . . . . . . .
9-6
9.5
Setting Scan Rates . . . . . . . . . . . . . . . . . . . . . . . . . . . . . . . . . . . . . . . . . . . . . . .
9-8
9.6
Displaying and Editing the Global Data Status . . . . . . . . . . . . . . . . . . . . . . .
9-10
9.7
Configuration Examples . . . . . . . . . . . . . . . . . . . . . . . . . . . . . . . . . . . . . . . . . . .
9-11
Establishing Communication Connections . . . . . . . . . . . . . . . . . . . . . . . . . . . . . . . .
10-1
10.1
Communication Connections – An Overview . . . . . . . . . . . . . . . . . . . . . . . . .
10-2
10.2
Creating a Connection . . . . . . . . . . . . . . . . . . . . . . . . . . . . . . . . . . . . . . . . . . . .
10-4
10.3
Properties of S7 Connections . . . . . . . . . . . . . . . . . . . . . . . . . . . . . . . . . . . . . .
10-9
10.4
Properties of Point-to-Point Connections . . . . . . . . . . . . . . . . . . . . . . . . . . . . 10-12
10.5
Communication Connections to Partners in Other Projects . . . . . . . . . . . . 10-14
10.6
Communication Connections to Other Stations, PGs/PCs,
or SIMATIC S5 Stations . . . . . . . . . . . . . . . . . . . . . . . . . . . . . . . . . . . . . . . . . . . 10-15
10.7
Downloading the Connection Table to the Programmable Controller . . . . 10-17
Creating User Programs . . . . . . . . . . . . . . . . . . . . . . . . . . . . . . . . . . . . . . . . . . . . . . . . .
11-1
11.1
Programming S7 CPUs . . . . . . . . . . . . . . . . . . . . . . . . . . . . . . . . . . . . . . . . . . .
11-2
11.2
Selecting the Programming Language and the Editor . . . . . . . . . . . . . . . . .
11-4
11.3
Programming Blocks with Ladder Logic, Statement List, and Function
Block Diagram . . . . . . . . . . . . . . . . . . . . . . . . . . . . . . . . . . . . . . . . . . . . . . . . . . .
11-5
11.4
Programming Source Files with Statement List and S7-SCL . . . . . . . . . . .
11-7
11.5
Programming Blocks with S7-Graph . . . . . . . . . . . . . . . . . . . . . . . . . . . . . . . .
11-8
11.6
Programming Source Files with S7-HiGraph . . . . . . . . . . . . . . . . . . . . . . . . .
11-9
11.7
Programming in the CFC Programming Language . . . . . . . . . . . . . . . . . . . . 11-11
Creating and Displaying Messages . . . . . . . . . . . . . . . . . . . . . . . . . . . . . . . . . . . . . . .
12-1
12.1
Configuring Messages – An Overview . . . . . . . . . . . . . . . . . . . . . . . . . . . . . .
12-2
12.2
Assigning and Editing Block-Related Messages . . . . . . . . . . . . . . . . . . . . . .
12-4
12.3
Assigning and Editing Symbol-Related Messages . . . . . . . . . . . . . . . . . . . . 12-11
12.4
Creating and Editing User-Defined Diagnostic Messages . . . . . . . . . . . . . . 12-15
Standard Software for S7 and M7 – STEP 7 User Manual
C79000-G7076-C552-01
xiii
Contents
13
12.5
Translating and Editing User Texts . . . . . . . . . . . . . . . . . . . . . . . . . . . . . . . . . 12-18
12.6
Transferring Configuration Data to the Programmable Controller . . . . . . . 12-19
12.7
Displaying CPU Messages and User-Defined Diagnostic Messages . . . . 12-23
Operator Control and Monitoring of Variables . . . . . . . . . . . . . . . . . . . . . . . . . . . . .
13-1
13.1
Overview . . . . . . . . . . . . . . . . . . . . . . . . . . . . . . . . . . . . . . . . . . . . . . . . . . . . . . .
13-2
13.2
Configuring Operator Control and Monitoring Attributes with Statement
List, Ladder Logic, and Function Block Diagram . . . . . . . . . . . . . . . . . . . . . .
13-3
Configuring Operator Control and Monitoring Attributes via the Symbol
Table . . . . . . . . . . . . . . . . . . . . . . . . . . . . . . . . . . . . . . . . . . . . . . . . . . . . . . . . . . .
13-5
13.4
Changing Operator Control and Monitoring Attributes with CFC . . . . . . . .
13-7
13.5
Transferring Configuration Data to the Programmable Controller . . . . . . .
13-8
Displaying Reference Data . . . . . . . . . . . . . . . . . . . . . . . . . . . . . . . . . . . . . . . . . . . . . . .
14-1
14.1
Overview . . . . . . . . . . . . . . . . . . . . . . . . . . . . . . . . . . . . . . . . . . . . . . . . . . . . . . .
14-2
14.2
Generating and Deleting Reference Data . . . . . . . . . . . . . . . . . . . . . . . . . . .
14-3
14.3
Displaying Reference Data . . . . . . . . . . . . . . . . . . . . . . . . . . . . . . . . . . . . . . . .
14-4
14.4
Notes on Displaying Reference Data . . . . . . . . . . . . . . . . . . . . . . . . . . . . . . .
14-5
14.5
Displaying Cross References . . . . . . . . . . . . . . . . . . . . . . . . . . . . . . . . . . . . . .
14-6
14.6
Displaying Program Structures . . . . . . . . . . . . . . . . . . . . . . . . . . . . . . . . . . . . .
14-8
14.7
Displaying Assignments . . . . . . . . . . . . . . . . . . . . . . . . . . . . . . . . . . . . . . . . . . . 14-10
14.8
Displaying Unused Symbols . . . . . . . . . . . . . . . . . . . . . . . . . . . . . . . . . . . . . . . 14-12
14.9
Displaying Addresses without Symbols . . . . . . . . . . . . . . . . . . . . . . . . . . . . . 14-13
13.3
14
15
Downloading and Uploading User Programs . . . . . . . . . . . . . . . . . . . . . . . . . . . . . .
15-1
15.1
Displaying and Changing the Operating Mode . . . . . . . . . . . . . . . . . . . . . . .
15-2
15.2
Memory and Load Concept . . . . . . . . . . . . . . . . . . . . . . . . . . . . . . . . . . . . . . . .
15-4
15.3
Resetting the CPU in a Programmable Controller . . . . . . . . . . . . . . . . . . . .
15-6
15.4
Downloading User Programs from a Programming Device to a
Programmable Controller . . . . . . . . . . . . . . . . . . . . . . . . . . . . . . . . . . . . . . . . .
15-7
Downloading Blocks from a Programming Device to a Programmable
Controller . . . . . . . . . . . . . . . . . . . . . . . . . . . . . . . . . . . . . . . . . . . . . . . . . . . . . . .
15-8
15.6
Deleting Blocks on the CPU in a Programmable Controller . . . . . . . . . . . .
15-9
15.7
Reloading Blocks from a Programming Device to a Programmable
Controller . . . . . . . . . . . . . . . . . . . . . . . . . . . . . . . . . . . . . . . . . . . . . . . . . . . . . . . 15-10
15.8
Editing Blocks from the CPU in the Programming Device . . . . . . . . . . . . . . 15-11
15.9
Compressing the User Memory (RAM) . . . . . . . . . . . . . . . . . . . . . . . . . . . . . . 15-12
15.10
Saving the RAM Contents of the CPU to the Integrated EPROM . . . . . . . 15-13
15.11
Saving Blocks and User Programs on a Memory Card . . . . . . . . . . . . . . . . 15-14
15.5
xiv
Standard Software for S7 and M7 – STEP 7 User Manual
C79000-G7076-C552-01
Contents
16
17
18
19
Debugging User Programs . . . . . . . . . . . . . . . . . . . . . . . . . . . . . . . . . . . . . . . . . . . . . . .
16-1
16.1
Overview . . . . . . . . . . . . . . . . . . . . . . . . . . . . . . . . . . . . . . . . . . . . . . . . . . . . . . .
16-2
16.2
Creating a Variable Table . . . . . . . . . . . . . . . . . . . . . . . . . . . . . . . . . . . . . . . . .
16-4
16.3
Editing a Variable Table . . . . . . . . . . . . . . . . . . . . . . . . . . . . . . . . . . . . . . . . . . .
16-5
16.4
Establishing Connections to CPUs . . . . . . . . . . . . . . . . . . . . . . . . . . . . . . . . .
16-7
16.5
Setting Triggers . . . . . . . . . . . . . . . . . . . . . . . . . . . . . . . . . . . . . . . . . . . . . . . . . .
16-8
16.6
Monitoring and Modifying Values . . . . . . . . . . . . . . . . . . . . . . . . . . . . . . . . . . .
16-9
16.7
Information on Forcing Variables . . . . . . . . . . . . . . . . . . . . . . . . . . . . . . . . . . . 16-10
16.8
Creating and Deleting Force Jobs . . . . . . . . . . . . . . . . . . . . . . . . . . . . . . . . . . 16-12
16.9
Enabling Peripheral Outputs (PQ) . . . . . . . . . . . . . . . . . . . . . . . . . . . . . . . . . . 16-13
Diagnosing Hardware . . . . . . . . . . . . . . . . . . . . . . . . . . . . . . . . . . . . . . . . . . . . . . . . . . . .
17-1
17.1
Displaying Module Information from the SIMATIC Manager . . . . . . . . . . . .
17-2
17.2
Displaying Module Information from Configuration Tables . . . . . . . . . . . . .
17-3
17.3
Diagnostics Symbols . . . . . . . . . . . . . . . . . . . . . . . . . . . . . . . . . . . . . . . . . . . . .
17-4
17.4
Troubleshooting . . . . . . . . . . . . . . . . . . . . . . . . . . . . . . . . . . . . . . . . . . . . . . . . . .
17-6
17.5
Module Type-Dependent Information . . . . . . . . . . . . . . . . . . . . . . . . . . . . . . .
17-7
17.6
Tabs in the “Module Information” Dialog Box . . . . . . . . . . . . . . . . . . . . . . . . .
17-8
17.7
Displaying General Module Data . . . . . . . . . . . . . . . . . . . . . . . . . . . . . . . . . . . 17-10
17.8
Displaying the Content of the Diagnostic Buffer . . . . . . . . . . . . . . . . . . . . . . 17-11
17.9
Displaying Diagnostic Interrupts . . . . . . . . . . . . . . . . . . . . . . . . . . . . . . . . . . . . 17-14
17.10
Displaying DP Slave Diagnostics . . . . . . . . . . . . . . . . . . . . . . . . . . . . . . . . . . . 17-15
17.11
Displaying the User Memory Utilization . . . . . . . . . . . . . . . . . . . . . . . . . . . . . 17-16
17.12
Displaying Scan Cycle Times . . . . . . . . . . . . . . . . . . . . . . . . . . . . . . . . . . . . . . 17-18
17.13
Setting Time Information . . . . . . . . . . . . . . . . . . . . . . . . . . . . . . . . . . . . . . . . . . 17-19
17.14
Displaying Performance Data . . . . . . . . . . . . . . . . . . . . . . . . . . . . . . . . . . . . . . 17-20
17.15
Displaying Available Blocks . . . . . . . . . . . . . . . . . . . . . . . . . . . . . . . . . . . . . . . 17-21
17.16
Displaying Communication Connections . . . . . . . . . . . . . . . . . . . . . . . . . . . . 17-22
17.17
Displaying the Contents of Stacks (S7 CPUs Only) . . . . . . . . . . . . . . . . . . . 17-23
Introduction to M7 Programmable Control Systems . . . . . . . . . . . . . . . . . . . . . . . .
18-1
18.1
M7 Optional Software . . . . . . . . . . . . . . . . . . . . . . . . . . . . . . . . . . . . . . . . . . . . .
18-2
18.2
M7-300/M7-400 Operating Systems . . . . . . . . . . . . . . . . . . . . . . . . . . . . . . . .
18-5
Managing M7 Programmable Control Systems . . . . . . . . . . . . . . . . . . . . . . . . . . . . .
19-1
19.1
Preparing for Installation . . . . . . . . . . . . . . . . . . . . . . . . . . . . . . . . . . . . . . . . . .
19-2
19.2
Data Backup in Case of Power Failure . . . . . . . . . . . . . . . . . . . . . . . . . . . . . .
19-8
19.3
Installing M7 RMOS32 on a Memory Card . . . . . . . . . . . . . . . . . . . . . . . . . . .
19-9
Standard Software for S7 and M7 – STEP 7 User Manual
C79000-G7076-C552-01
xv
Contents
20
19.4
Installing M7 RMOS32 on Hard Disk . . . . . . . . . . . . . . . . . . . . . . . . . . . . . . . . 19-10
19.5
Installing M7 RMOS32 with MS-DOS on Hard Disk . . . . . . . . . . . . . . . . . . . 19-12
19.6
Installing M7 RMOS32 with MS Windows on Hard Disk . . . . . . . . . . . . . . . 19-14
19.7
Reinstalling the M7 Operating System . . . . . . . . . . . . . . . . . . . . . . . . . . . . . . 19-16
19.8
Updating the Operating System for Exchanging Modules in the Field . . . 19-18
19.9
Updating the Firmware . . . . . . . . . . . . . . . . . . . . . . . . . . . . . . . . . . . . . . . . . . . . 19-20
19.10
Downloading and Deleting Programs on the M7 Programmable Control
System . . . . . . . . . . . . . . . . . . . . . . . . . . . . . . . . . . . . . . . . . . . . . . . . . . . . . . . . . 19-23
19.11
M7-300/M7-400 Monitoring and Modifying Functions . . . . . . . . . . . . . . . . . 19-29
Archiving . . . . . . . . . . . . . . . . . . . . . . . . . . . . . . . . . . . . . . . . . . . . . . . . . . . . . . . . . . . . . . .
20-1
20.1
Archive Programs . . . . . . . . . . . . . . . . . . . . . . . . . . . . . . . . . . . . . . . . . . . . . . . .
20-2
20.2
Archiving Projects and Libraries . . . . . . . . . . . . . . . . . . . . . . . . . . . . . . . . . . . .
20-3
20.3
Retrieving Projects and Libraries . . . . . . . . . . . . . . . . . . . . . . . . . . . . . . . . . . .
20-5
21
Printing . . . . . . . . . . . . . . . . . . . . . . . . . . . . . . . . . . . . . . . . . . . . . . . . . . . . . . . . . . . . . . . . .
21-1
A
Opening and Editing Projects
from Older STEP 7 Versions . . . . . . . . . . . . . . . . . . . . . . . . . . . . . . . . . . . . . . . . . . . . . .
A-1
A.1
Opening Version 1 Projects . . . . . . . . . . . . . . . . . . . . . . . . . . . . . . . . . . . . . . . .
A-2
A.2
Opening and Editing Projects from Older STEP 7 Versions Other Than Version
1 ...............................................................
A-3
B
Objects and Object Hierarchy . . . . . . . . . . . . . . . . . . . . . . . . . . . . . . . . . . . . . . . . . . . .
B-1
C
Literature List . . . . . . . . . . . . . . . . . . . . . . . . . . . . . . . . . . . . . . . . . . . . . . . . . . . . . . . . . . .
C-1
xvi
Glossary . . . . . . . . . . . . . . . . . . . . . . . . . . . . . . . . . . . . . . . . . . . . . . . . . . . . . . . . . .
Glossary-1
Index . . . . . . . . . . . . . . . . . . . . . . . . . . . . . . . . . . . . . . . . . . . . . . . . . . . . . . . . . . . . .
Index-1
Standard Software for S7 and M7 – STEP 7 User Manual
C79000-G7076-C552-01
Part 1: Preparing for a
Programming Session
Product Overview
1
Installing and Uninstalling
2
User Interface
3
STEP 7 Projects
and Basic Operation
4
Creating and Editing Projects
5
Assigning Symbols
6
1-2
Standard Software for S7 and M7 – STEP 7 User Manual
C79000-G7076-C552-01
Product Overview
1
What is STEP 7?
STEP 7 is the software used for configuring and programming SIMATIC
S7-300/S7-400 and M7-300/M7-400 programmable logic controllers (PLCs)
and SIMATIC C7 automation computers. A C7 programmable controller
behaves in the same way as a SIMATIC S7-300 as regards programming and
configuring. STEP 7 comprises the standard software and optional software
packages which run under Windows 95 or Windows NT.
Standard Software
The STEP 7 standard software supports you in all phases of the creation
process of an automation task, such as:
S Setting up and managing projects
S Configuring and assigning parameters to hardware and communications
S Managing symbols
S Creating programs for S7 programmable logic controllers. (An optional
software package is available for creating programs for M7
programmable control systems.)
S Downloading programs to programmable logic controllers
S Testing the automation system
S Diagnosing plant failures
The STEP 7 software user interface has been designed to meet the latest
state-of-the-art ergonomics and makes it easy for you to get started.
Standard Software for S7 and M7 – STEP 7 User Manual
C79000-G7076-C552-01
1-1
Product Overview
Language
Representations in
the Standard
Software
The STEP 7 programming language representations Ladder Logic, Statement
List, and Function Block Diagram for S7-300/S7-400 are an integral part of
the standard software.
S Ladder Logic (or LAD) is a graphic representation of the STEP 7
programming language. Its syntax for the instructions is similar to a relay
ladder logic diagram: Ladder allows you to track the power flow between
power rails as it passes through various contacts, complex elements, and
output coils.
S Statement List (or STL) is a textual representation of the STEP 7
programming language, similar to machine code. If a program is written
in Statement List, the individual instructions correspond to the steps with
which the CPU executes the program. To make programming easier,
Statement List has been extended to include some high-level language
constructions (such as structured data access and block parameters).
S Function Block Diagram (FBD) is a graphic representation of the STEP 7
programming language and uses the logic boxes familiar from Boolean
algebra to represent the logic. Complex functions (for example, math
functions) can be represented directly in conjunction with the logic boxes.
Other programming languages are available as optional packages.
Optional
Languages for
SIMATIC S7
The following languages are available as optional packages for use in
programming the SIMATIC S7-300/S7-400 programmable logic controllers:
S S7 SCL is a high-level textual language which conforms to the
IEC 1131-3 standard. It contains language constructions similar to those
found in the programming languages Pascal and C. S7 SCL is therefore
particularly suitable for users who are used to working with high-level
programming languages. S7 SCL can be used, for example, to program
complex or frequently repeated functions.
S S7 GRAPH is a programming language used to program sequential
controls (steps and transitions). In this language, the process sequence is
divided into steps. The steps contain actions to control the outputs. The
transition from one step to another is controlled by switching conditions.
S S7 HiGraph is a programming language used to describe asynchronous,
non-sequential processes in the form of state graphs. To do this, the plant
is broken down into individual functional units which can each take on
different states. The functional units can be synchronized by exchanging
messages between the graphs.
S CFC for S7 and M7 is a programming language for linking existing
functions graphically. These functions cover a wide range of simple logic
operations through to complex closed-loop and open-loop controls. A
large number of functions of this type are available in the form of blocks
in a library. You program by copying the blocks into a chart and
connecting the blocks using lines.
1-2
Standard Software for S7 and M7 – STEP 7 User Manual
C79000-G7076-C552-01
Product Overview
Options for
SIMATIC M7
The following optional packages are available for use in programming
SIMATIC M7-300/M7-400 programmable control systems:
S M7-SYS contains the operating system M7 RMOS 32 and system
programs. It is a prerequisite for the use of the M7-ProC/C++ and CFC
for M7 packages.
S M7-ProC/C++ allows the Borland development environment for the
programming languages C and C++ to be integrated into the STEP 7
development environment
S CFC: see under “Optional Languages for SIMATIC S7”
S Borland C++ contains the Borland development environment
Notes on Optional
Packages
You can add to the functionality of the Standard package by means of the
following optional packages:
S Teleservice
This optional package allows you to operate a plant via the telephone
network.
S DOCPRO
With this package you can organize all the configuration data you create
with STEP 7 into wiring manuals. These make it easy to manage the
configuration data and allow the information to be prepared for printing
according to specific standards.
S Simulation
You can use this optional package to simulate S7 programmable
controllers connected to the programming device or PC for purposes of
testing.
S Programming languages
In addition to the STEP 7 programming languages included with the
Standard software package (Ladder Logic, Statement List, and Function
Block Diagram), the programming languages Graph 7, HiGraph, SCL,
and CFC are available as options.
S S7 PDIAG
This software package allows standardized configuration of process
diagnostics for SIMATIC S7-300/S7-400. Using process diagnostics you
can detect faults and faulty states outside the programmable controller
(for example, limit switch not reached).
Where to Find
More Information
The tables on the following pages show the basic tasks which are required in
a programming session and give a reference to the relevant chapter in this
manual.
Standard Software for S7 and M7 – STEP 7 User Manual
C79000-G7076-C552-01
1-3
Product Overview
Where to Find
More Information
for S7
Table 1-1
No specific sequence has to be observed when programming. However, there
are some basic tasks which are performed in most projects. Table 1-1 lists
these general tasks for creating S7 and M7 programs and gives a reference to
the relevant chapter.
General Procedure and Reference Sources
Activity
See
Creating and editing projects
Chapter 5
(using projects created with STEP 7 version 1 or 2)
(Appendix A)
Assigning symbols
Chapter 6
Configuring the hardware structure and
assigning parameters to modules
Chapter 7
Configuring communication
Chapters 8, 9, 10
Configuring messages
Chapter 12
Entering a program
Chapter 11,
Manuals on the programming languages
Creating and evaluating reference data
Chapter 14
Downloading programs to the programmable controller
Chapter 15
Debugging the program
Chapter 16,
Language-specific tests are described in the manuals
on the programming languages
Monitoring operation/diagnosing hardware
Chapter 17
Documenting the plant
Optional package manual
Options When
Creating S7
Programs
1-4
The various options you can select when creating your S7 program are
described in Table 1-2. For some options, certain prerequisites must be
fulfilled. Other options can be selected freely, according to your own choice,
for example, which programming language you use to create your user
program.
Standard Software for S7 and M7 – STEP 7 User Manual
C79000-G7076-C552-01
Product Overview
Table 1-2
Options When Creating Your S7 Program
Description
Option
Select the programming language:
S
S
S
S
Ladder Logic (LAD)
Function Block Diagram (FBD)
Select the programming language which best meets the requirements of
your project. You will find more information in the manuals for the
respective programming languages (see the Literature List in the
Appendix).
Statement List (STL)
Other programming languages
available as optional software
packages
Example: If you want to program using You can enter Statement List instructions directly in a block and the syntax
Statement List, select the input mode:
is checked after every statement.
You can also enter Statement List instructions in a text file. The syntax of
S Create a block using incremental
the instructions is then checked only when the file is compiled.
input mode
S Create a block as a text file (STL
source file)
Select the type of addressing to be used: There are two types of symbols:
S Absolute addressing
S Symbolic addressing
S Shared symbols which are used by all blocks in your program. These
symbols are assigned in the symbol table.
S Symbols which are used only within a particular block
(“block-specific” symbols). These symbols are created in the variable
declaration for the block in which they are used.
Select the type of parameter
assignment:
S Use the default parameters
S Assign parameters appropriate for
You will find more information on configuring the hardware and assigning
parameters to modules in Chapter 7. For which parameters you can assign,
refer to the online help or the relevant manuals for the hardware.
the process
Set the communication requirements
for your project:
If your automation task only uses one CPU, you do not need to consider
the topic of communication.
S No communication
S Global data communication
(more than one CPU)
S Communication via function
blocks (more than one CPU)
If you want to exchange data between the CPUs in your project, you must
create a global data table. In this table you assign addresses to the global
data which are to be sent or received by the CPUs.
In order that the CPUs can exchange global data, all programs must be
located in one project.
In a network, connections can easily be defined and assigned parameters
and be used when programming with communication function blocks.
Standard Software for S7 and M7 – STEP 7 User Manual
C79000-G7076-C552-01
1-5
Product Overview
Where to Find
More Information
for M7
Table 1-3
No specific sequence has to be observed when programming. However, there
are some basic tasks which are performed in most projects. Table 1-3 lists
these general tasks for creating S7 and M7 programs and gives a reference to
the relevant chapter.
General Procedure and Reference Sources
Activity
See
Creating and editing projects
Chapter 5
Assigning symbols
Chapter 6
Configuring the hardware structure and assigning parameters to modules Chapter 7
Configuring communication
Chapters 8, 9, 10
Creating and debugging the program
Manuals on the programming languages
Configuring messages
Chapter 13
Selecting and downloading the operating system, downloading
programs
Chapters 18, 19
Monitoring operation/diagnosing hardware
Chapter 17
Documenting the plant
Optional package manual
Options When
Creating M7
Programs
Table 1-4
The selection options for creating programs for M7 are summarized in
Table 1-4.
Options When Creating Your M7 Program
Option
Select the programming language:
S C/C++
S CFC (Continuous Function Chart)
Description
Select the programming language which best meets the requirements of
your project. You will find more information in the manuals for the
respective programming languages (see the Literature List in the
Appendix).
These programming languages are
available as optional software packages.
Select the type of addressing to be used: STEP 7 and the optional software package ProC/C++ both support
symbolic addressing.
S Absolute addressing
S Symbolic addressing
Select the type of parameter assignment: You will find more information on configuring the hardware and assigning
parameters to modules in Chapter 7. For which parameters you can assign,
S Use the default parameters
and for the default parameters, refer to the online help or the relevant
S Assign parameters appropriate for manuals for the hardware.
the process
1-6
Standard Software for S7 and M7 – STEP 7 User Manual
C79000-G7076-C552-01
2
Installing and Uninstalling
Overview
The Setup program allows you to install the STEP 7 software aided by
dialogs and menus. You call the Setup program using the standard
Windows 95 or Windows NT software installation procedure.
Newly shipped programming devices (PGs) have STEP 7 already installed.
This substantially reduces the time and effort needed to set up the device.
Chapter
Overview
Section
Description
Page
2.1
Requirements for Installation
2-2
2.2
Authorization and Rights of Usage
2-3
2.3
Guidelines for Handling Authorizations
2-5
2.4
Installing and Uninstalling the STEP 7 Software
2-7
2.5
Setting the PG/PC Interface
2-10
2.6
Multi-User Configuration in a Windows Network
2-12
Standard Software for S7 and M7 – STEP 7 User Manual
C79000-G7076-C552-01
2-1
Installing and Uninstalling
2.1
Requirements for Installation
Operating System
Microsoft Windows 95 or Windows NT.
Basic Hardware
Programming device or PC with:
S 80486 processor (or higher)
S Minimum 16 Mbytes RAM, 32 Mbytes recommended
S Color monitor, keyboard, and mouse which are supported by Microsoft
Windows 95/NT
A programming device (PG) is a personal computer with a special compact
design suitable for industrial use. It is fully equipped for programming
SIMATIC programmable control systems.
Memory Capacity
Memory capacity required on the hard disk:
S The standard package occupies 70 to 100 Mbytes. The memory required
depends on the installation options selected for the standard software.
S STEP 7 should have approximately 60 Mbytes including the main
memory available to create Swap files (meaning approximately
44 Mbytes if there are 16 Mbytes of main memory)
S You should reserve at least 50 Mbytes for your user data.
S The Setup requires at least 1 Mbyte of free memory on drive C: (Setup
files are deleted when the installation is completed).
Memory capacity required for the optional software packages:
S The optional software M7 ProC/C++ with the C development
environment requires approximately 100 Mbytes.
S The other optional STEP 7 packages each require between 10 Mbytes and
20 Mbytes.
Multipoint
Interface
(Optional)
A multipoint interface (MPI) between the programming device or PC and the
programmable logic controller is only required if you want to communicate
via the MPI with the programmable logic controller in STEP 7. You therefore
require:
S Either a PC/MPI cable which is connected to the communications port of
your device, or
S An MPI module which is installed in your device
Certain programming devices have the multipoint interface already built in.
External Prommer
(Optional)
2-2
An external prommer is only required if you want to program EPROMs with
a PC.
Standard Software for S7 and M7 – STEP 7 User Manual
C79000-G7076-C552-01
Installing and Uninstalling
2.2
Authorization and Rights of Usage
Overview
The STEP 7 programming software requires a product-specific authorization
(or license for use). The software is therefore copy-protected and can be used
only if the relevant authorization for the program or software package has
been found on the hard disk of the respective programming device or PC.
Different authorizations are required, for example, for STEP 7, STEP 7 Mini,
and for the optional software packages.
Authorization Disk
A read-only authorization disk is included with the scope of supply of the
software. It contains the authorization and the program required to display,
install, and remove the authorization called AUTHORS.
The number of authorizations possible is determined by an authorization
counter on the authorization disk. Every time you install an authorization, the
counter is decremented by 1. When the counter value reaches zero, you
cannot install any more authorizations using this disk.
!
What To Do If You
Lose the
Authorization...
Caution
Note the information in the README.TXT file on the authorization disk
and the guidelines in Section 2.3. If you do not adhere to these guidelines,
the authorization may be irretrievably lost.
An authorization may be lost, for example, if a hard disk defect occurs and
you did not have a chance to remove the authorization from the defective
hard disk.
If you lose your authorization, you can use the emergency license also
included on the authorization disk. The emergency license allows you to
continue running the software for a limited period. In this case, the time
remaining before the validity period runs out is displayed on the screen as
you start. Within this period you should make sure that you obtain a
replacement for your lost authorization from your local SIEMENS
representative.
Installing the
Authorization
during Your First
Installation
When installing your software for the first time, a message prompts you to
install the authorization. Follow the steps outlined below:
1. When prompted, insert the authorization disk in a drive.
2. Acknowledge the prompt.
The authorization is transferred to a physical drive and your computer
registers the fact that the authorization has been installed.
Standard Software for S7 and M7 – STEP 7 User Manual
C79000-G7076-C552-01
2-3
Installing and Uninstalling
Adding an
Authorization at a
Later Date
If you attempt to start the STEP 7 software and there is no authorization
available for the software, a message appears to tell you this. If you want to
install the authorization, use the program AUTHORS on the authorization
disk.
Note
Always enter drive C: as the destination drive for the authorization for
STEP 7 and STEP 7 Mini.
Removing an
Authorization
If you should need to repeat the authorization, for example, if you want to
reformat the drive on which the authorization is located, you must back up
the authorization first (uninstall it). You need the original authorization disk
to do this.
To transfer the authorization back to the authorization disk, follow the steps
outlined below:
1. Insert the original authorization disk in drive A:.
2. Start the program AUTHORS.EXE from the authorization disk.
3. Select the menu command Authorization " Remove.
4. In the dialog box, enter the drive on which the authorization is located
and confirm the dialog box. A list of all authorizations on the respective
drive is displayed.
5. Select the authorization you want to remove and confirm the dialog box.
If the process is completed without error, the following message appears:
“Authorization <Name> successfully removed from drive <X:>.”
6. Acknowledge the message.
The dialog box with the list of authorizations remaining on the drive is
then displayed. Close the dialog box if you do not want to remove any
more authorizations.
You can then use the disk again to install an authorization.
2-4
Standard Software for S7 and M7 – STEP 7 User Manual
C79000-G7076-C552-01
Installing and Uninstalling
2.3
Guidelines for Handling Authorizations
!
Caution
Read the notes in this chapter and in the README.TXT file on the
authorization disk. If you do not adhere to these guidelines, the authorization
may be irretrievably lost.
When to Remove
an Authorization
Before you format, compress, or restore your hard disk drive or before
installing a new operating system, you must remove any existing
authorizations.
Backup
If a backup copy of your hard disk contains copies of authorizations, there is
a danger that these copies may overwrite the valid installed authorizations
when you restore your backup data to the hard disk, thereby destroying them.
To prevent a valid authorization being overwritten by a backup copy, you
must do one of the following:
S Remove all authorizations before you make a backup copy
S Exclude the authorizations from the backup
Optimizing Your
Hard Disk
If you use an optimizing program which offers the possibility of moving
fixed blocks of data, only use this option once you have transferred all
authorizations from the hard disk back to the authorization disk.
Defective Sectors
When you install an authorization, a special cluster appears on the
destination drive which is sometimes marked as “defective”. Do not attempt
to restore this cluster as you may destroy the authorization.
Write Protection
The authorization disk must not be write-protected.
Copy Protection
Files on the authorization disk can be copied to another drive (for example,
hard disk) and used from there. Authorization using these copied files is not
possible, however; you will require the original authorization disk for this.
Standard Software for S7 and M7 – STEP 7 User Manual
C79000-G7076-C552-01
2-5
Installing and Uninstalling
Permitted Drives
Authorizations cannot be installed on the following drives/data media:
S CD-ROM drives
S RAM drives
S Floppy disks
S Compressed drives (such as DBLSPACE). For compressed drives you can
install the authorization on the respective host drive.
The authorization utility prevents authorizations being installed on illegal
drives.
Where Are
Authorizations
Stored?
A protected directory is created for the authorizations with the attributes
“system” and “hidden” to store the authorization files.
S These attributes must not be changed.
S The files must not be changed or deleted.
Otherwise the authorization will be irretrievably lost.
The protected directory ’AXNFZZ’ is created once per drive. It contains all
the authorizations installed on the drive. It is created when the first
authorization is installed and deleted when the last authorization is removed.
For each authorization, two files with the same name and different extensions
are created in the protected directory. These files are given the same name as
the authorization.
Number of
Authorizations
You can install as many authorizations on a drive as you wish, provided the
required memory capacity is available. These authorizations do not interfere
with each other.
Defective
Authorizations
Defective authorizations on a hard disk drive cannot be removed with the
AUTHORS program. They may even prevent you installing new and valid
authorizations. In this case contact your local Siemens representative.
Authorization
Program Version
Use the current version V 4.x of the authorization utility AUTHORS and not
an older version (V 1.x, V 2.x).
Note
As not all older authorizations can be recognized with V 4.x, you should
work with an older version of AUTHORS in these cases.
2-6
Standard Software for S7 and M7 – STEP 7 User Manual
C79000-G7076-C552-01
Installing and Uninstalling
2.4
Installing and Uninstalling the STEP 7 Software
Overview
STEP 7 contains a Setup program which executes the installation
automatically. Prompts on the screen guide you step by step through the
whole installation procedure.
The main stages in the installation are:
S Copying the data to your programming device
S Setting the drivers for EPROMs and communication
S Authorization (if required)
Note
Siemens programming devices (such as the PG 740) are shipped with the
STEP 7 software on the hard disk ready for installation.
Preparing for
Installation
Before you can start installing the software, Windows 95/NT must be started.
S You do not require an external data medium if the STEP 7 software was
shipped on the hard disk of your programming device.
S To install from floppy disk, insert disk 1 in the disk drive of your
programming device or PC (usually drive A: or drive B:).
S To install from CD-ROM, insert the CD-ROM in the CD-ROM drive of
your PC.
Starting
the
’
Installation
Program
To start the installation program, proceed as follows:
1. Start the dialog box for installing software under Windows 95/NT by
double-clicking on the “Add/Remove Programs” icon in the “Control
Panel”.
2. Click on “Install”.
3. Insert the disk (disk 1) or the CD-ROM and click on “Continue”.
Windows 95/NT searches automatically for the installation program
SETUP.EXE.
4. Follow the instructions displayed by the installation program step by step.
The program guides you step by step through the installation process. You
can switch to the next step or the previous step from any position.
During installation, queries are shown in dialog boxes for you to answer and
options are displayed for you to select. Read the following notes so you can
reply to the queries faster and easier.
Standard Software for S7 and M7 – STEP 7 User Manual
C79000-G7076-C552-01
2-7
Installing and Uninstalling
If a Version of
STEP 7 Is Already
Installed...
If the installation program finds another version of STEP 7 on the
programming device, it reports this and prompts you to decide how to
proceed:
S Abort the installation so that you can uninstall the old STEP 7 version
under Windows 95/NT and then start the installation again, or
S Continue the installation and overwrite the old version with the new
version.
Your software is better organized if you uninstall any older versions before
installing the new version. Overwriting an old version with a new version has
the disadvantage that if you then uninstall, any remaining components of the
old version are not removed.
Selecting the
Installation
Options
You have three options open to you to select the scope of the installation:
S Standard configuration: all languages for the user interface, all
applications, and all examples. Refer to the current Product Information
for the memory capacity required for this configuration.
S Minimum configuration: only one language, no examples. Refer to the
current Product Information for the memory capacity required for this
configuration.
S User-defined configuration: you can determine the scope of the
installation, selecting which programs, databases, examples, and
communication functions you want to install.
Using
Authorization
During installation, the program checks to see whether an authorization is
installed on the hard disk. If no authorization is found, a message appears
that the software can be used only with an authorization. If you wish, you can
run the authorization program immediately or continue the installation and
execute the authorization at a later date. In the first case, insert the
authorization disk when you are prompted to do so (see Sections 2.2 and 2.3).
Assigning
Parameters to
Memory Cards
During installation, a dialog box is displayed where you can assign
parameters to memory cards.
S If you are not using memory cards, you do not need an EPROM driver.
Select the option “No EPROM Driver”.
S Otherwise, select the entry which applies to your programming device.
S If you are using a PC, you can select a driver for an external prommer.
Here you must specify the port to which the prommer is connected (for
example, LPT1).
You can change the set parameters after installation by calling the program
“Memory Card Parameter Assignment” in the STEP 7 program group.
2-8
Standard Software for S7 and M7 – STEP 7 User Manual
C79000-G7076-C552-01
Installing and Uninstalling
Flash File Systems
In the dialog box for assigning memory card parameters, you can specify
whether a flash-file system should be installed.
The flash-file system is required, for example, when you write individual
files to or delete individual files from an EPROM memory card in SIMATIC
M7 without changing the remaining memory card content.
If you are using a suitable programming device (PG 720/PG 740/PG 760) or
external prommer and you want to use this function, select the installation of
the flash-file system.
Setting the PG/PC
Interface
During installation, a dialog box is displayed where you assign parameters to
the programming device/PC interface. Refer to Section 2.5 on page 2-10.
Completing the
Installation
If the installation was successful, a message appears on the screen to tell you
this.
If any changes were made to DOS files during the installation, you are
prompted to restart Windows. When you have done this, you can start the
basic STEP 7 application, the SIMATIC Manager.
You can also choose to start the SIMATIC Manager straight from the final
installation dialog.
If Errors Occur
during the
Installation
The following errors may cause the installation to fail:
S If an initialization error occurs immediately after starting Setup, the
program was probably not started under Windows.
S Not enough memory: you need to have at least 100 Mbytes of free space
on your hard disk for the standard software, regardless of the scope of
your installation.
S Bad disk: verify that the disk is bad, then call your local Siemens
representative.
S Operator error: start the installation again and read the instructions
carefully.
Result of the
Installation
Once the installation has been completed successfully, a program group is
created for STEP 7.
Uninstalling
STEP 7
Use the usual Windows procedure to uninstall STEP 7:
1. Start the dialog box for installing software under Windows by
double-clicking on the “Add/Remove Programs” icon in the “Control
Panel”.
2. Select the STEP 7 entry in the displayed list of installed software. Click
the button to “Add/Remove” the software.
3. If the dialog boxes “Remove Enabled File” appear, click the “No” button
if you are in doubt as to how to respond.
Standard Software for S7 and M7 – STEP 7 User Manual
C79000-G7076-C552-01
2-9
Installing and Uninstalling
2.5
Setting the PG/PC Interface
Overview
With the settings you make here, you set up the communication link between
the programming device/PC and the programmable logic controller. During
installation, a dialog box is displayed where you can assign parameters to the
programming device/PC interface. You can display the dialog box following
installation by calling the program “Setting PG/PC Interface” in the STEP 7
program group. This enables you to change the interface parameters
independently of the installation.
Basic Procedure
To operate an interface, you will require the following:
S Settings in the operating system
S Correct module parameters
If you are using a programming device via a multipoint interface (MPI)
connection, no further operating system-specific adaptations are required.
If you are using a PC with an MPI card or communications processors (CP),
you should check in the “Control Panel” of Windows 95/NT to ensure that no
interrupt conflicts or address area overlapping can occur, (see page 2-11).
In order to make it easier to assign parameters to the programming device/PC
interface, a set of predefined basic parameters (module parameters) are
displayed in a dialog box for you to select.
Module
Parameters
To set the module parameters, follow the steps outlined below (a more
detailed description can be found in the online help):
1. In the “Control Panel” double-click on “Setting PG/PC Interface”.
2. Set the “Access Point of Application” to “S7ONLINE”.
3. In the displayed list, select the required module parameter assignment, for
example, MPI module parameters for operating the interface on the MPI
bus. If the module parameters you require are not displayed, you must
install a module or protocol first using the “Install” button. The module
parameters are then created automatically.
4. Display the properties of the module parameter assignment.
5. Adapt the user-specific parameters in the properties of the module
parameter assignment.
Changes will be necessary if conflicts with other settings arise (for example,
with interrupt or address assignments). In this case, make the appropriate
changes with the hardware recognition and control panel in Windows 95/NT
(see also page 2-11).
2-10
Standard Software for S7 and M7 – STEP 7 User Manual
C79000-G7076-C552-01
Installing and Uninstalling
!
Caution
Do not remove the module parameter assignment “TCP/IP” if it is shown.
This could prevent non-STEP 7 applications from functioning correctly.
Checking the
Interrupt and
Address
Assignments
If you use a PC with an MPI card, you should always check whether the
default interrupt and the default address area are free and, if necessary, select
a free interrupt and/or address area.1
You can display the current assignments under Windows 95/NT as follows:
1. Open the “System” dialog box in the “Control Panel” and select the
“Device Manager” tab.
2. Select the entry “Computer” in the list displayed and click the button
“Properties”.
3. In another dialog box you can display the list of occupied interrupts (IRQ)
or the list of occupied address areas (I/O) by selecting the corresponding
option button.
Differences
between
Windows 95 and
Windows NT
You have to assign interrupts, address areas, and other resources under
Windows NT in a specific dialog box (refer to the online help for a detailed
description).
Standard Software for S7 and M7 – STEP 7 User Manual
C79000-G7076-C552-01
2-11
Installing and Uninstalling
2.6
Multi-User Configuration in a Windows Network
Overview
With STEP 7 you can work in a multi-user configuration via a network.
There are three different possible methods (Figure 2-1):
S The project is on a local drive and is also used from another workstation.
Example: Workstation 2 accesses project A.
S The project is on a project/group server.
Example: Workstation 1 accesses project C.
S The projects are distributed among the local drives and one or more
project/group servers.
Example: Workstation 2 accesses projects A, B, and C.
To operate STEP 7 in a network, you do not have to make any special
preparations in STEP 7. You should, however, note the information below to
achieve optimum performance.
PC network
STEP 7
workstation 1
STEP 7
workstation 2
Project A
Project B
Project C
Windows NT group server
Figure 2-1
Multi-User Configuration
Note on
Performance
When you configure process variables and messages in order to transfer them
to an operator control and monitoring system such as WinCC or ProTool at a
later stage, these data are stored in a database.
You can improve the speed when working with this database if you install a
database server on the project or group server. You will find a separate Setup
program on the installation CD for this purpose.
In addition to installing the software on the server, you must also perform a
number of other actions, depending on the server network type. You will find
instructions in the relevant Product Information.
2-12
Standard Software for S7 and M7 – STEP 7 User Manual
C79000-G7076-C552-01
3
User Interface
Overview
The software for configuring and programming in SIMATIC S7/M7/C7 is
designed according to the latest state-of-the-art ergonomics and is mainly
self-explanatory.
If you have not yet had experience of working with a user interface of this
type, in this chapter you can read about the most important operating
elements and become familiar with the terminology used.
As a user with knowledge of Windows 95/NT, you can simply read
Section 3.1 to learn about how to start STEP 7 and skip the remaining
sections in this chapter.
Chapter
Overview
Section
Description
Page
3.1
Starting the STEP 7 Software
3-2
3.2
User Interface: Windows
3-3
3.3
User Interface: Dialog Boxes
3-4
3.4
Calling the Help Functions
3-5
3.5
Saving and Restoring the Window Layout
3-6
3.6
Using Teleservice
3-7
Standard Software for S7 and M7 – STEP 7 User Manual
C79000-G7076-C552-01
3-1
User Interface
3.1
Starting the STEP 7 Software
Starting Up
When you start Windows 95/NT, you will find an icon for the SIMATIC
Manager, the starting point for the STEP 7 software on the Windows
interface.
The quickest method to start STEP 7 is to position the cursor on the icon and
double-click. The window containing the SIMATIC Manager is then opened.
From here you can access all the functions you installed, both in the standard
software and in the optional packages.
Alternatively you can also start the SIMATIC Manager via the “Start” button
in the taskbar in Windows 95/NT (entry under “SIMATIC/STEP 7”).
Note
You will find more information about standard Windows operation and
options in your Windows user’s guide or in the Windows 95/NT online help.
SIMATIC Manager
The SIMATIC Manager is the basic application for configuring and
programming. You can perform the following functions in the SIMATIC
Manager:
S Set up projects
S Configure and assign parameters to hardware
S Configure hardware networks
S Program blocks
S Debug and commission your programs
Access to the various functions is designed to be object-oriented, and
intuitive and easy to learn.
You can work with the SIMATIC Manager in one of two ways:
S Offline, without a programmable controller connected
S Online, with a programmable controller connected
Note the relevant safety notices in each case.
How to Proceed
from Here
You create automation tasks in the form of “Projects”. You will make it
easier for yourself if you read up on the following basic topics before you
start work:
S User interface
S Online help
S Some basic operating steps
3-2
Standard Software for S7 and M7 – STEP 7 User Manual
C79000-G7076-C552-01
User Interface
3.2
User Interface: Windows
Overview
The standard components of a window are shown in Figure 3-1:
System menu
(Maximize/Close etc.)
Title bar
Menu bar
Buttons for
Minimize Maximize
Title of active
window
Close
SIMATIC Manager
File
View
PLC
Options
Window
Help
Toolbar
S7 memory card
Accessible
nodes
Status bar
Figure 3-1
Workspace:
contains the information you
have displayed or are editing
Press F1 for help.
Components of a Window
Title Bar and Menu
Bar
The title bar and menu bar are always found at the top of a window. The title
bar contains the title of the window and icons for controlling the window.
The menu bar contains all menus available in the window.
Toolbar
The toolbar contains icons (or tool buttons) which provide shortcuts to
frequently used and currently available menu bar commands via a single
mouse click. A brief description of the function of the respective button is
displayed together with an additional explanation in the status bar when you
position the cursor briefly on the button.
Using the “Accessible Nodes” and “S7 Memory Card” buttons it is possible
to open a window in which either all accessible communication partners or
the contents of a memory card are displayed. The memory card must be
inserted in the slot on your programming device before its contents can be
displayed.
If neither of these access types are available in your current configuration,
the buttons are inactive and displayed in gray.
Status Bar
The status bar displays context-dependent information.
Standard Software for S7 and M7 – STEP 7 User Manual
C79000-G7076-C552-01
3-3
User Interface
3.3
User Interface: Dialog Boxes
Making Entries in
Dialog Boxes
Text boxes
to enter text using the
keyboard
In dialog boxes you can enter information which is required for executing a
particular task. The components which appear most frequently in dialog
boxes are explained using the example in Figure 3-2:
Search/Replace
Search For:
Replace With:
Q1.0
Q2.0
Whole Word/Cell Only
Match Case
Option buttons
to select one of a
number of choices
Check boxes
to select one or more
choices
Only Search in
From Cursor Down
From Cursor Up
Whole Table
Selection
0 All
1 Symbol
2 Address
3 Data Type
4 Comment
Search in Column
All
Search
Buttons
Figure 3-2
Search
Replace
Replace All
Cancel
Help
Example of a Dialog Box
List Boxes and
Combination
Boxes
Text boxes sometimes have an arrow pointing downwards beside them. This
arrow shows that there are more options available to choose from for this
box. Click on the arrow to open a list box or combination box. If you click on
an entry in the list, it is automatically displayed in the text box.
Tabbed Dialog
Boxes
The content of some dialog boxes is divided up into tabbed pages to organize
the information more clearly. The names of the tabbed pages are shown on
tabs along the top edge of the dialog box. To bring a particular tabbed page to
the foreground, you simply click on its tab.
Module Information
CPU Operating Mode:
Module Operating Mode:
Path: test01\Program (online)
Status:
Tabs
General
Diagnostic Buffer
Memory
Time System
Performance Data
Communication
STOP
Stacks
Events:
No.
1
2
Figure 3-3
3-4
Time
Date
09:15:22:842 11.12.95
18:00:22:378 08.12.95
Event
Power-on retentive
STOP due to power supply failure
Example of a Dialog Box with Tabs
Standard Software for S7 and M7 – STEP 7 User Manual
C79000-G7076-C552-01
User Interface
3.4
Calling the Help Functions
Online Help
The online help system provides you with information at the point where you
can use it most efficiently. You can use the online help to access information
quickly and directly without having to search through manuals. You will find
the following types of information in the online help:
S Contents: offers a number of different ways of displaying help
information
S Context-Sensitive Help: with the F1 key you access information on the
object you just selected with the mouse or on the active dialog box or
window
S Introduction: gives a brief introduction to the use, the main features, and
the functional scope of an application
S Getting Started: summarizes the basic steps you need to execute to get
starting with the application
S Using Help: provides a description of ways of finding specific
information in the online help
S About: provides information on the current version of the application
Via the Help menu you can also access topics which relate to the current
dialog situation from every window.
Calling the Online
Help
You can call the online help in one of the following ways:
S Select a menu command in the Help menu in the menu bar
S Click on the “Help” button in a dialog box. You are then shown help on
this dialog box
S Position the cursor in a window or dialog box on the topic you need help
with and press the F1 key or select the menu command Help "
Context-Sensitive Help.
S Use the question mark cursor in Windows
The last three of these ways of accessing the online help are known as
context-sensitive help.
Calling the Quick
Help
A quick help on buttons in the toolbar is displayed when you position the
cursor on a button and leave it there for a moment.
Changing the Font
Size
Using the menu command Options " Font in the help window you can set
the font size to “Small”, “Normal”, or “Large”.
Standard Software for S7 and M7 – STEP 7 User Manual
C79000-G7076-C552-01
3-5
User Interface
3.5
Saving and Restoring the Window Layout
Overview
The STEP 7 applications have a feature which enables you to save the current
window arrangement and restore it at a later stage.
What Is Saved?
When you save the window layout the following information is recorded:
S Position of the main window
S Opened projects and libraries and their respective window positions
S Order of any cascaded windows
Saving the
Window Layout
To save the current window arrangement, select the menu command Window
Save Settings.
"
Restoring the
Window Layout
To restore the saved window arrangement, select the menu command
Window " Restore Settings.
Note on Object
Hierarchy
When you restore a window, only the part of the hierarchy containing the
object that was selected when the window arrangement was saved is
displayed in detail.
3-6
Standard Software for S7 and M7 – STEP 7 User Manual
C79000-G7076-C552-01
User Interface
3.6
Using Teleservice
Overview
The optional software package for Teleservice allows you to establish an
online connection from a programming device or PC to a remote plant via
the telephone network. You can then process this remote plant as usual with
STEP 7.
Owing to the longer reaction times, it is recommended that this type of
operation only be used for service purposes.
Requirements
The requirements for Teleservice operation are as follows:
S The Teleservice optional software package must be installed.
S The remote plant must be connected to a telephone network via a
correctly set TS adapter and a modem.
S In STEP 7 you must specify the parameters for Teleservice under “Setting
the PG/PC Interface”.
S A local modem must be installed via Windows 95/NT and its properties
must be fully set up.
Calling the
Function
If the optional software is installed, you can start the Teleservice function
using the menu command Options " TeleService.
Note
You will find further information in the documentation and in the online help
for the optional software package.
Standard Software for S7 and M7 – STEP 7 User Manual
C79000-G7076-C552-01
3-7
User Interface
3-8
Standard Software for S7 and M7 – STEP 7 User Manual
C79000-G7076-C552-01
STEP 7 Projects and Basic Operation
Overview
4
Projects represent the sum of all data and programs within the scope of an
automation task. They are used to store the data and programs in an
organized manner. The data collected together in a project include the
following:
S Configuration data on the hardware structure and parameters for modules
S Configuration data for communication in networks
S Programs for programmable modules
The main tasks involved in creating a project are therefore preparing the
above data and creating the programs. STEP 7 does not require that the
components of a project are edited in a particular order. You can start with
any of the tasks.
Notes for the
Reader
The first part of this chapter describes the main components which make up a
project. Use this chapter to get familiar with the most important of the
objects in a STEP 7 project and the terminology used.
The second part of this chapter describes the basic operations with the objects
in a project, for example, opening, copying, and renaming objects.
A number of sample projects are included with the STEP 7 software.
Chapter
Overview
Section
Description
Page
4.1
Opening a Project
4-2
4.2
Components for Configuring Hardware and Networks
4-3
4.3
Components for Creating Software
4-4
4.4
Object-Oriented Operating Philosophy
4-6
4.5
Creating and Managing Objects
4-7
4.6
Selecting Objects in a Browser
4-10
Standard Software for S7 and M7 – STEP 7 User Manual
C79000-G7076-C552-01
4-1
STEP 7 Projects and Basic Operation
4.1
Opening a Project
Opening a Project,
Displaying its
Content
To open an existing project, enter the menu command File " Open. Then
select a project in the dialog boxes that follow. The project window is then
opened.
Components
The project window is split into two halves. The left half shows the hierarchy
of the objects contained in the project. The right half shows the objects which
are contained in the object open in the left half (see Figure 4-1).
Click in the left half of the window on the box containing a plus sign to
display the full structure of the project. You will then see something similar
to the structure shown in Figure 4-1.
SIMATIC Manager - Example
File
Edit
Insert
PLC
View
Options
Window
Help
Example –<Offline> (Project)
Example
SIMATIC 300-Station(1)
CPU314(1)
S7 Program(1)
Ä
Source Files
Symbols
Blocks
Source Files
Blocks
NUM
Press F1 for help.
Figure 4-1
Project Window (Example)
Object Hierarchy
Objects in the real world are related to each other. These relationships are
represented on the screen by showing them as part of a logical hierarchy of
objects (in a way similar to directories).
Project
At the top of the object hierarchy in Figure 4-1 is the object “Example” as
the icon for the whole project. This icon can be used to display the project
properties and serves as a container for networks (to configure networks),
stations (to configure the hardware), and for S7 or M7 programs (to create
software). The objects in the project are displayed in the right half of the
project window when you select the project icon. The objects at the top of
this type of object hierarchy (libraries as well as projects) form the starting
point in dialog boxes used to select objects.
4-2
Standard Software for S7 and M7 – STEP 7 User Manual
C79000-G7076-C552-01
STEP 7 Projects and Basic Operation
4.2
Components for Configuring Hardware and Networks
Overview
You will find the following objects for configuring hardware and networks in
a project:
Network
Figure 4-2
Networks
Station
Programmable
Module
Hardware
Components for Configuring Hardware and Networks
The icons for networks appear when you select the project icon. They
represent the information about a network of the given type and are used to
set network parameters and gain access to the network configuration
application (see Part 2 of this manual).
You can delete any network icons you do not require and create them again,
if necessary, using the menu command Insert " Subnet.
Station
The icon for a station represents a hardware configuration. If you select a
station in the left half of the project window, you will see the following
objects in the right half of the window:
S The “Hardware” object with which you can start the hardware
configuration application. This procedure is described in detail in Part 2
of this manual.
S One or more “Programmable Module” objects; they are only displayed in
stations that have already been configured.
For example, the configured SIMATIC 300 station in Figure 4-1 represents a
hardware structure (rack with slots) that contains a programmable module
CPU 314.
Standard Software for S7 and M7 – STEP 7 User Manual
C79000-G7076-C552-01
4-3
STEP 7 Projects and Basic Operation
4.3
Components for Creating Software
S7/M7 Programs
S7 and M7 programs are containers for the software and serve as a starting
point for creating software.
Content of an
S7 Program
The S7 program contains all the software for a programmable module from
the S7 range. It contains symbol information and containers for the blocks
and source files in the program.
S7 Program
Ä
ÄÄ
Blocks
S7 blocks
(e.g. FB1, OB1)
Source Files
Source files (STL, SCL,
GRAPH, HiGraph
source files)
Symbols
Figure 4-3
Possible Components in an S7 Program
The containers “Blocks” and “Source Files” can occur only once in an S7
program. You can delete any containers not required and insert them again if
you need them.
Blocks
You will require a container for S7 blocks for programming in Statement
List, Function Block Diagram, or Ladder Logic, for example. When you
open the blocks container, the S7 blocks in it are displayed. If you
double-click a block, the corresponding program code is displayed in an
editor window.
Source Files
You will need a container for source files for programming in the
programming languages which are available as optional software packages
and for programming STL source files.
Symbols
This object is used to define shared symbols. A symbol allows you to work
with meaningful symbolic names in your programs instead of absolute
addresses.
Charts
A “Charts” container containing the objects for CFC (Continuous Function
Chart) charts is necessary if you are using the CFC software option.
4-4
Standard Software for S7 and M7 – STEP 7 User Manual
C79000-G7076-C552-01
STEP 7 Projects and Basic Operation
Content of an
M7 Program
Figure 4-4 shows a possible structure of an M7 program.
M7 Program
Blocks
C Programs / C++ Programs
(for RMOS Operating System)
Blocks
(Only for DBs, VATs,
UDTs, system data
blocks)
DOS/Windows Programs
Charts
Symbols
Figure 4-4
Read On...
CFC Charts
Empty object,
created automatically
Possible Components in an M7 Program
In the first part of this chapter you learned about the most important objects
in a project. The second part teaches you about the basic activities and
actions in connection with objects.
Standard Software for S7 and M7 – STEP 7 User Manual
C79000-G7076-C552-01
4-5
STEP 7 Projects and Basic Operation
4.4
Object-Oriented Operating Philosophy
Aim: Simple
Handling
The graphic user interface is intended to make the handling of the software
intuitive. You will find objects in the software which are familiar to you from
your everyday working environment, for example, stations, modules,
programs, blocks.
The actions you execute when working with STEP 7 involve creating,
selecting, and manipulating objects of this type.
Differences to
ApplicationOriented Handling
With the existing type of application-oriented handling, you had to decide
which application was required to perform which task and then start the
application.
The principle used with object-oriented handling is to decide which object to
process and then open the object in order to edit it.
With object-oriented handling, no special knowledge of command syntax is
required. Objects are represented on the user interface by graphic symbols, or
icons, which you open using menu commands or mouse clicks.
When you open an object, the relevant software application is started
automatically to display or edit the content of the object.
Read On...
4-6
The next few pages describe some of the basic actions used to edit objects.
Take the time now to read up on these basic handling steps, as they will not
be described in detail further on in the manual.
Standard Software for S7 and M7 – STEP 7 User Manual
C79000-G7076-C552-01
STEP 7 Projects and Basic Operation
4.5
Creating and Managing Objects
Overview
Some basic processing steps are the same for all objects and do not depend
on the object type. These standard handling sequences are summarized here.
This knowledge of standard procedures is required to move on to other
sections in the manual.
The usual sequence of steps when handling objects is:
S Create an object
S Select an object
S Perform actions with the object (for example, copy, delete)
Setting the Path to
Create New
Projects/Libraries
Before you create new projects or libraries for the first time, you should set
the path where you want these objects to be created by selecting the menu
command Options " Customize. In the “SIMATIC Manager” tab of the
dialog box displayed you can specify a path name under which you want to
store new projects or libraries.
Creating Objects
The STEP 7 wizard “New Project” offers support with creating a new project
and inserting objects. Use the menu command File " “New Project” Wizard
to open the wizard. In the dialog boxes displayed you can set the structure of
your project and then have the wizard create the project for you.
If you do not wish to use the wizard, you can create projects and libraries
using the menu command File " New. These objects form the starting point
of an object hierarchy. You can create all other objects in the hierarchy using
the commands in the Insert menu, provided they are not created
automatically. The exception to this are the modules in a SIMATIC station
which are created when you configure the hardware or by using the “New
Project” wizard.
Opening Objects
The are a number of ways to open an object which has already been created:
S Double-click on the object icon
S Select the object and then the menu command Edit " Open Object
Once you have opened an object, you can create or change its contents. Here
you must distinguish between:
S Containers, or objects which can contain other objects (such as the
“Directory” object in the Windows Explorer which can contain
subdirectories and files), and
S Objects which do not contain other objects (such as the “File” object in
the Windows Explorer)
When you open an object of the second type, its contents are represented by a
suitable software component in a new window for editing purposes.
You cannot change objects whose contents are already being used elsewhere.
Standard Software for S7 and M7 – STEP 7 User Manual
C79000-G7076-C552-01
4-7
STEP 7 Projects and Basic Operation
Building an Object
Hierarchy
Use the “New Project” wizard to create the object hierarchy. When you open
a container, the objects it contains are displayed on the screen. You can now
create more objects in the container using the Insert menu, for example,
additional stations in a project. Only the commands for those objects which
can be inserted in the current container are active in the Insert menu.
Setting Object
Properties
Object properties are data belonging to the object which determine its
behavior. The dialog box for setting object properties appears automatically
when you create a new object and properties have to be set. The properties
can also be changed at a later date.
Using the menu command Edit " Object Properties, a dialog box is opened
in which you can display or set the properties for the selected object.
Using the menu command Edit " Special Object Properties, you can open
dialog boxes and enter data required for operator control and monitoring
functions and for configuring messages.
For example, in order to display the special object properties of a block for
operator control and monitoring, the block must be marked as being relevant
for operator control and monitoring, meaning that the system attribute
“s7_m_c” must be set to the value “true” in the “Attributes” tab of the block
properties.
Cutting, Copying,
Pasting
Most objects can be cut, copied, or pasted as usual under Windows. The
menu commands for these functions are found in the Edit menu.
You can also move or copy objects by dragging and dropping. If you attempt
to move or copy to an illegal destination, the cursor displays a prohibited
sign as a warning.
When you copy an object, the whole hierarchy beneath it is also copied. This
enables components you create in an automation task to be used again and
again.
Printing
First open the object to display its content. The print command is listed in the
first menu at the left edge of the window (for example, “File”). The
command opens a dialog box in which you can set the printer, the print
range, and the number of copies to be printed.
Some dialog boxes allow you to print parts of their contents. These dialog
boxes contain a “Print” button. Click this button to start a printout.
4-8
Standard Software for S7 and M7 – STEP 7 User Manual
C79000-G7076-C552-01
STEP 7 Projects and Basic Operation
Renaming Objects
You can change the name of an object directly or using the object properties.
S Directly:
When you slowly click twice on the name of a selected object or click F2,
a frame appears around the text. You can then change the name by typing
a new name via the keyboard.
S Using object properties:
Select the required object and select the menu command Edit " Object
Properties. Change the name in the dialog box. When you close the
properties dialog box, the object is renamed and displayed under its new
name.
If you are not allowed to change the name of an object, the input field is
shown in gray in the dialog box, the current name is displayed, and text
entries are not possible.
Standard Software for S7 and M7 – STEP 7 User Manual
C79000-G7076-C552-01
4-9
STEP 7 Projects and Basic Operation
4.6
Selecting Objects in a Browser
Overview
Selecting objects in a dialog box (browser) is an action which you will need
regularly for a large number of different edit steps.
Calling the
Browser
You call the browser dialog in the hardware configuration application, for
example, using menu commands such as File " New/Open (one exception is
the basic application window “SIMATIC Manager”).
Structure of a
Browser Dialog
In the browser you have the following selection options as shown in
Figure 4-5.
Entry Point: Here you select the
type of object in which you want to
start the search (such as “Project”,
“Library”, or entries which permit
access to drives or connected
programmable controllers).
View: You can switch
between the standard
view and the plant view.
Online/Offline: Here you can switch
between the offline view (selection of project
data on the PG/PC) and the online view
(selection of project data on the connected
programmable controller) – but only for the
Entry Point “Project”.
Browser: Click this button
to search for objects not
included in the list.
Open
Entry Point:
View:
Project
Standard Hierarchy
Project
Name:
Online
Offline
Storage Path:
example
C:\SIEMENS\STEP7\E
example
The hierarchical tree
structure of the objects
which can contain
other objects is
displayed here.
Browse...
MPI Network1
SIMATIC 300-Station1
Ethernet Subnet1
S7 Program
PROFIBUS Subnet1
The content of the object
selected in the left half of the
window is displayed here.
Object Name:
Object Type:
OK
Name: The recognized objects
of the type specified under Entry
Point are displayed here in a list
box. You can select a name
from the list or enter a name
using the keyboard.
Figure 4-5
4-10
All Editable
Cancel
Help
Object Type: You can enter a filter
criterion here to filter the list, restricting
the number of objects displayed to give
you a clearer overview.
Object Name: If you select an object, the
object name is entered here. You can also
enter the required name directly.
Browser for Selecting Objects
Standard Software for S7 and M7 – STEP 7 User Manual
C79000-G7076-C552-01
Creating and Editing Projects
Overview
5
This chapter describes how to create projects and create a project hierarchy
step by step.
You also learn how you can access projects offline (on the programming
device) and online (on the programmable controller).
Chapter
Overview
Section
Description
Page
5.1
Creating Projects
5-2
5.2
Inserting and Configuring Stations
5-4
5.3
Basic Procedure for Creating Software
5-6
5.4
Inserting Components for Creating Software in S7 and M7
Programs
5-7
5.5
Creating Software without Configured Hardware
5-9
5.6
Storing Projects
5-11
5.7
Access to Programmable Controllers within a Project
5-12
5.8
Access to Programmable Controllers without Project
Administration
5-15
5.9
Access to Programmable Controllers without Configured
Hardware
5-16
5.10
Adapting PG/PC Interfaces on the Programming Device to
Configured Network Settings
5-17
Standard Software for S7 and M7 – STEP 7 User Manual
C79000-G7076-C552-01
5-1
Creating and Editing Projects
5.1
Creating Projects
New Project
The easiest way to create a new project is by using the “New Project Wizard
which you open using the menu command File " “New Project” Wizard.
The wizard prompts you to enter the required details in dialog boxes and then
creates the project for you.
To create a project yourself, follow the steps outlined below:
1. In the SIMATIC Manager select the menu command File " New.
2. In the “New” dialog box select the option “New Project.”
3. Enter a name for the project and confirm your entry with “OK.”
Alternative
Procedures
When editing a project, you are flexible as to the order in which you perform
most of the tasks. Once you have created a project, you can choose one of the
following methods:
S First configure the hardware and then create the software for it, or
S Start by creating the software independent of any configured hardware.
Alternative 1:
Configure
Hardware First
If you want to configure the hardware first, follow the procedure described in
Section 5.2. Once you configured the hardware, the containers required for
creating software (“S7 Program” or “M7 Program”) are already inserted.
Then continue as described in Sections 5.3 and 5.4 by inserting the objects
required to create programs. Then create the software for the programmable
modules (Chapter 11).
Alternative 2:
Create Software
First
You can also create software without first having to configure the hardware;
this can be done later. The hardware structure of a station does not have to be
set for you to enter your programs.
1. Insert the required software containers (S7/M7 programs) in your project
(Section 5.5).
You simply have to decide whether the container should contain programs
for S7 or M7 hardware.
2. Then create the software for the programmable modules (Chapter 11).
3. Configure your hardware (Section 5.2 and Part 2 of this manual).
4. Once you have configured the hardware, you can link the M7 or S7
program to a CPU (Section 5.5).
You will find a description of how you use and debug programs without a
hardware configuration in Section 5.9.
5-2
Standard Software for S7 and M7 – STEP 7 User Manual
C79000-G7076-C552-01
Creating and Editing Projects
Note
Editing projects created in older versions of STEP 7
You will find information on opening and editing projects which were
created using STEP 7 version 1 or using other older STEP 7 versions in
Appendix A.
When you create a new project you can specify in the “New” dialog box
whether you want to create a project:
– To be edited with the current version of STEP 7, or
– To be edited with an older STEP 7 version.
Projects created in older STEP 7 versions can be saved as projects in the
format of and with the functions of the current STEP 7 version using the
menu command File " Save As and then be processed with the wider range
of functions available to this version.
Standard Software for S7 and M7 – STEP 7 User Manual
C79000-G7076-C552-01
5-3
Creating and Editing Projects
5.2
Inserting and Configuring Stations
Overview
In a project, the station represents the hardware structure of a programmable
controller and contains the data for configuring and assigning parameters to
individual modules.
Inserting a Station
New projects created with the “New Project” wizard already contain a
station.
To create a new station in a project, open the project so that the project
window is displayed (if not already displayed).
1. Select the project.
2. Create an object for the required hardware by using the menu command
Insert " Station.
In the submenu you can select one of the following:
S SIMATIC 300 station
S SIMATIC 400 station
S PC/programming device
S SIMATIC S5
S Other stations, meaning non-SIMATIC S7/M7 and SIMATIC S5
Click on the “+” sign in front of the project icon in the project window if the
station is not displayed.
Configuring the
Hardware
To configure the station, follow the steps outlined below:
1. Click on the new station. It contains the “Hardware” object.
2. Open the “Hardware” object. The “Hardware Configuration” window is
displayed.
3. In the “Hardware Configuration” window, plan the structure of the
station. A module catalog is available to help you. You open the catalog
using the menu command View " Catalog.
4. First, insert a rack from the module catalog in the empty window. Then
select the modules and place them in the rack slots. At least one CPU
must be configured per station.
You will find more information on configuring the hardware in Part 2 of this
manual.
5-4
Standard Software for S7 and M7 – STEP 7 User Manual
C79000-G7076-C552-01
Creating and Editing Projects
Results of the
Configuration
For each programmable module you create in your configuration, an S7 or
M7 program and a connection table (“Connections” object) are created
automatically once you have saved and exited the hardware configuration.
If these objects are not yet visible in the project window, click the “+” in
front of the station icon in the project window to display the module and
click the box in front of the module to display the S7/M7 program and the
“Connections” object.
Creating a
Connection Table
An (empty) connection table (“Connections” object) is created automatically
for each programmable module. The connection table is used to define
communication connections between programmable modules in a network.
When you open the connection table, a window opens displaying a table
where you can define connections (see Part 2 of this manual for more
information on defining connections).
Next Steps
Once you have created the hardware configuration, you can create the
software for your programmable modules. The basic procedure is outlined in
Section 5.3.
Standard Software for S7 and M7 – STEP 7 User Manual
C79000-G7076-C552-01
5-5
Creating and Editing Projects
5.3
Basic Procedure for Creating Software
Overview
The software for programmable modules is stored in program containers. For
SIMATIC S7 modules this object is called “S7 Program”, for SIMATIC M7
modules it is called “M7 Program”.
Figure 5-1 shows an example of an S7 Program in a programmable module in
a SIMATIC 300 station.
Project
SIMATIC 300 Station
Programmable Module
S7 Program
Figure 5-1
Procedure
S7 Program in the Project Structure
To create the software for your project, follow the steps outlined below:
1. Open the S7 program or M7 program.
2. Open the “Symbols” object in the S7 or M7 program and assign the
symbols. (This step can also be done later.) You will find more
information on assigning symbols in Chapter 6.
3. Open the “Blocks” container if you want to create blocks or the “Source
Files” container if you want to create a source file.
4. Insert a block or a source file using one of the following menu commands
(more details can be found in Section 5.4):
– Insert " S7 Block
– Insert " S7 Software
– Insert " M7 Software
5. Open the block or the source file and enter a program. You will find more
information on programs in the programming language manuals.
6. Document the project using the menu command Insert " Project
Documentation.
For documenting a STEP 7 project you can organize all the configuration
data you create with STEP 7 into wiring manuals. This function is only
available if the “DOCPRO” optional package is installed.
Depending on your task, you may not need to perform all these steps.
5-6
Standard Software for S7 and M7 – STEP 7 User Manual
C79000-G7076-C552-01
Creating and Editing Projects
5.4
Inserting Components for Creating Software in S7 and M7
Programs
Existing
Components
An S7/M7 program is created automatically for each programmable module
as a container for the software:
The following objects already exist in a newly created S7 program:
S Symbol table (“Symbols” object)
S A “Blocks” container for blocks, with the first block
S A “Source Files” container for programs in the form of source files
The following objects already exist in a newly created M7 program:
S Symbol table (“Symbols” object)
S A “Blocks” container
Creating S7 Blocks
If you want to create Statement List, Function Block Diagram, or Ladder
Logic programs, select the existing “Blocks” object and then click the menu
command Insert " S7 Software " Block. In the submenu, you can select the
type of block you want to create (such as a data block, user-defined data type
(UDT), function, function block, organization block, or variable table
(VAT)).
You can now open the (empty) block and start entering the Statement List,
Ladder Logic, or Function Block Diagram program. You will find more
information in the Statement List /232/, Ladder Logic /233/, and Function
Block Diagram /236/ Programming Manuals.
Note
The object “System Data” (SDB) which may exist in a user program was
created by the system. You can open it, but you cannot make changes to it
for reasons of consistency. It is used to make changes to the configuration
once you have loaded a program and to download the changes to the
programmable controller.
Using Blocks from
Standard Libraries
You can also use blocks from the standard libraries supplied with the
software to create user programs. You access the libraries using the menu
command File " Open. You will find more information on using standard
libraries and creating your own libraries in the online help.
Standard Software for S7 and M7 – STEP 7 User Manual
C79000-G7076-C552-01
5-7
Creating and Editing Projects
Creating Source
Files and CFC
Charts
If you want to create a source file in a particular programming language or a
CFC chart, select the existing “Source Files” or “Charts” object in the S7
program and then select the menu command Insert " S7 Software. In the
submenu, you can select the source file which matches your programming
language. You can now open the empty source file and start entering your
program.
Creating Programs
for M7
If you want to create programs for the RMOS operating system for a
programmable module in the M7 range, select the M7 program and then click
the menu command Insert " M7 Software. In the submenu, you can select
the object which matches your programming language or operating system.
You can now open the object you created to access the relevant programming
environment.
You will find a list of the optional software available for SIMATIC
M7-300/M7-400 in Chapter 1.
Creating a Symbol
Table
An (empty) symbol table (“Symbols” object) is created automatically when
the S7/M7 program is created. When you open the symbol table, the “Symbol
Editor” window opens displaying a symbol table where you can define
symbols (see Chapter 6 for more details).
Inserting External
Source Files
You can create and edit source files with any ASCII editor. You can then
import these files into your project and compile them to create individual
blocks.
1. Select the “Source Files” container to which you want to import the
source file.
2. Select the menu command Insert " External Source File.
3. Enter the source file name in the dialog box that appears.
The blocks created when the imported source file is compiled are stored in
the “Blocks” container.
5-8
Standard Software for S7 and M7 – STEP 7 User Manual
C79000-G7076-C552-01
Creating and Editing Projects
5.5
Creating Software without Configured Hardware
S7/M7 Program
without
Configured
Hardware
You can create containers for S7/M7 programs independent of a special
hardware configuration directly beneath the project and link them to a
specific hardware component later once you have completed your hardware
configuration.
Inserting a
Program
Independent of the
Hardware
To insert an S7/M7 program independent of the hardware configuration,
follow the steps outlined below:
1. Select the project icon in the project window.
2. Select the menu command
Insert " Program " S7 Program or
Insert " Program " M7 Program.
The S7 or M7 program is created beneath a project.
Project
S7 Program (not linked to hardware)
SIMATIC 300 Station
Programmable module
S7 Program (linked)
Figure 5-2
Linked and Unlinked S7 Programs in the Project Window
Within this container you can now create the software as describe in
Section 5.4.
Linking a Program
to a Programmable
Module
To link an S7/M7 program that was created independent of the hardware
configuration to a programmable module, follow the steps outlined below:
1. Select the unlinked S7 or M7 program.
2. Drag the selected program to the programmable module to which you
want to link the program and drop it there.
Result: Any program which already exists in the module is overwritten
when you confirm the prompt. Note that the configuration data (system
data) are also overwritten.
3. Once you have linked the program, open the configuration table for the
programmable module (see also Chapter 10) and save the configuration
again.
Standard Software for S7 and M7 – STEP 7 User Manual
C79000-G7076-C552-01
5-9
Creating and Editing Projects
Storing Unlinked
Programs in the
Project
5-10
When you delete a station or module that is linked to a program, a dialog box
is displayed. You can then choose whether the program should be deleted as
well or whether it should be stored in the project (without any hardware link).
Standard Software for S7 and M7 – STEP 7 User Manual
C79000-G7076-C552-01
Creating and Editing Projects
5.6
Storing Projects
Overview
In order to back up a project, you can save a copy of the project under
another name or archive the project.
Save As...
To save a copy of the project, follow the steps outlined below:
1. Open the project.
2. Select the menu command File " Save As. The “Save As” dialog box is
displayed.
3. Select the option with or without consistency check and close the dialog
box with “OK.” The “Save Project As” dialog box is displayed.
4. Under “Save In”, select the directory in which the project should be
stored.
5. In the “File Name” dialog box, enter a file name instead of the
asterisk (*). Do not change the file extension.
6. Close the dialog box with “OK”.
Note
Make sure that enough free memory is available on the selected drive. For
example, it is not advisable to select a disk drive to back up a project
because a project is generally too large to fit on a diskette. You need to
archive projects in order to store them on diskette. Archives can be split up
over a number of diskettes.
Archiving
You can store individual projects or libraries in compressed form in an
archive file. This compressed storage is possible on hard disk or transportable
data media (diskettes).
To access components of an archived project or library, the project must first
be extracted from the archive. The subject of archiving is described in detail
in Chapter 20.
Automatic
Archiving
You can set whether you want to create a backup (archive) copy when you
open a project by following the steps outlined below:
1. Select the menu command Options " Customize in the SIMATIC
Manager.
2. Select the option “Archive Project or Library Automatically on Opening”
in the “SIMATIC Manager” tab.
You should also note the settings you can make in the “Archive” tab.
Standard Software for S7 and M7 – STEP 7 User Manual
C79000-G7076-C552-01
5-11
Creating and Editing Projects
5.7
Access to Programmable Controllers within a Project
Overview
Within a project you can switch between viewing the project data on your
programming device or PC (offline) and the project data on your
programmable controller (CPU) (online).
Activities in the
Offline View
You use the offline view to create the project structure and to create and
select the objects for all types of project data.
Activities in the
Online View
You use the online view to access the programmable controller. You can
execute a number of functions available in the PLC menu (for example,
Clear/Reset, Operating Mode, Set Time and Date, Module Information) and
obtain information about the software downloaded to the programmable
controller.
Switching to the
Online View
Use the menu command View " Online to display a project window
containing the online view.
The Offline View of
the Project
Window
This setting is used when you first create a project. The data and programs in
the project on the programming device (PG/PC) are displayed in the
project window.
Project
SIMATIC 300 Station
Programmable module
S7 Program (linked)
Blocks
Source files
ÄÄ
Charts
Symbols
Connections
Programmable module
SIMATIC 300 Station
S7 Program (not linked to hardware)
Figure 5-3
5-12
Structure Displayed in an Offline Project Window
Standard Software for S7 and M7 – STEP 7 User Manual
C79000-G7076-C552-01
Creating and Editing Projects
The Online View of
the Project
Window
Project windows which display the online view show “<Online>” in the title
bar. In the online view of the project window in the “S7 Program” and “M7
Program” objects, you can view the software which was downloaded to the
CPU of a connected programmable controller. STEP 7 determines the
content of the objects “S7 Program” or “M7 Program” according to the
software downloaded on the programmable controller.
The programmable modules are displayed in the form of diagnostic symbols.
The meaning of these symbols is explained in the online help for the
SIMATIC Manager (menu command Help " Contents under “Handling”).
You can recognize the operating state of a CPU, for example, from its
diagnostic symbol.
The containers for source files and charts, the symbol table, and the
connection table are not displayed in the online view because they are not in
the programmable controller.
Project
SIMATIC 300 Station
Programmable module
S7 Program
Blocks
Programmable module
SIMATIC 300 Station
S7 Program (for PLC access without hardware config.)
Figure 5-4
Structure Displayed in an Online Project Window
Note
If you want to change settings for objects in the programmable controller, (for
example, parameter data of a module), these will not immediately come into
effect on the programmable controller. You first have to download the new
system data blocks in which the settings have been stored to the programmable
controller.
If you download a complete user program, the system data blocks are
downloaded automatically as part of this process. If you make changes to the
settings after a program was downloaded, you can reload the “System Data”
object to transfer the changed settings to the programmable controller.
Standard Software for S7 and M7 – STEP 7 User Manual
C79000-G7076-C552-01
5-13
Creating and Editing Projects
Non-Deletable
Objects
The following objects on the programmable controller are displayed in the
online view but cannot be deleted in the online view:
S System functions (SFCs)
S System function blocks (SFBs)
S System data blocks (SDBs)
Note on the
Optional Package
“PLC Simulation”
5-14
Using the optional software package for PLC simulation you can run and
debug your program on a simulated programmable controller. As the
simulation functions are realized completely by the STEP 7 software, you do
not require any S7 hardware (CPU or signal modules). With a simulated S7
CPU you can debug programs for S7-300 and S7-400 CPUs.
Standard Software for S7 and M7 – STEP 7 User Manual
C79000-G7076-C552-01
Creating and Editing Projects
5.8
Access to Programmable Controllers without Project
Administration
Overview
Within a project you can access the connected programmable controllers in
the online view of the project window. You cannot, however, display symbols
in the online view (refer to Chapter 6). STEP 7 also enables you to work
directly on a connected programmable controller online without project
administration. This function is intended for commissioning and service
purposes.
Requirement
The communication between the programming device and the programmable
controller must be set up.
Displaying
Connected
Programmable
Controllers
Click the “Accessible Nodes” button in the toolbar of the SIMATIC Manager
or select the menu command PLC " Display Accessible Nodes to open the
“Accessible Nodes” window (see Figure 5-5). All nodes which STEP 7 could
find in the network are visible in the window.
SIMATIC Manager – Accessible Nodes
File
Edit
Insert
Á
Á
PLC
View
Options
Window
Help
Accessible Nodes
Accessible Nodes
MPI=2 (Direct)
Blocks
Click here
SFC0
SFC21
SFC37
SFC40
SFC43
SFC49
SFC52
SFC57
SFC64
SFC1
SFC22
SFC38
SFC41
SFC46
SFC50
SFC55
SFC58
SFB5
Press F1 for help.
Figure 5-5
SFC20
SFC36
SFC39
SFC42
SFC47
SFC51
SFC56
SFC59
SFB30
NUM
Direct Access to the PLC without Project Administration
Available
Functions
When you have selected a node, you can execute the functions available in
the PLC menu for this node (such as Clear/Reset, Operating Mode, Set Time
and Date, Module Information).
Editing
Downloaded
Blocks
When you double-click a node, a “Blocks” object is displayed. All the blocks
downloaded to the programmable controller are contained in this object. You
can open and edit the blocks.
You can save any blocks on the programming device which were modified in
the block window using the menu command File " Save As or download
them to the programmable controller again with PLC " Download.
Standard Software for S7 and M7 – STEP 7 User Manual
C79000-G7076-C552-01
5-15
Creating and Editing Projects
5.9
Access to Programmable Controllers without Configured Hardware
Overview
If you create an S7/M7 program offline that is not linked to any hardware
(meaning it is located directly beneath the project), you can download this
program to a programmable controller without having to configure any
hardware first.
There are different procedures depending on whether one or more
programmable controllers are connected to your programming device.
If One
Programmable
Controller is
Connected
Starting from the offline project window, following the steps outlined below:
1. Use the menu command View " Online to open a window with the online
view of the project.
2. Select the menu command Window " Arrange to arrange the two
windows next to each other on the screen.
3. Open the S7 or M7 program in the online view window. It contains a
“Blocks” container.
Result: The correct programmable controller address is selected
automatically and the blocks on the programmable controller are
displayed.
4. In the offline window, select the objects you want to download to the
programmable controller.
5. Drag the selected objects to the “Blocks” container in the online window
and drop them there.
If a Number of
Programmable
Controllers are
Connected
Starting from the offline project window, following the steps outlined below:
1. Use the menu command View " Online to open a window with the online
view of the project.
2. Select the menu command Window " Arrange to arrange the two
windows next to each other on the screen.
3. Open the S7 or M7 program in the online view window. It contains a
“Blocks” container.
4. Open the “Blocks” container.
Result: The “Define Node Address“ dialog box appears. Now select a
node address in the list beside the input field. The list contains all the
available addresses. Once you have selected an address the blocks on the
programmable controller with the selected address are displayed.
5. In the offline window, select the objects you want to download to the
programmable controller.
6. Drag the selected objects to the “Blocks” container in the online window
and drop them there.
5-16
Standard Software for S7 and M7 – STEP 7 User Manual
C79000-G7076-C552-01
Creating and Editing Projects
5.10 Adapting PG/PC Interfaces on the Programming Device to
Configured Network Settings
Overview
You can access programmable controllers (for example, S7-300) from your
programming device (PG/PC) via various different networks (for example,
MPI, PROFIBUS, Industrial Ethernet). For this purpose you will need to
configure a PG/PC and the relevant programmable controllers as nodes in
one of these networks. Then assign your software configuration of the
programming device to a real programming device/PC using the menu
command described below. This transfers the settings made during
configuration to the modules installed in your programming device.
Advantage
The PG/PC interfaces on your programming device are adjusted to match the
configured settings. With these settings you specified in your project which
network the PG/PC interface should be operated on and specified the
appropriate parameters (for example, address, transmission rate).
This function makes it easy for you to fulfil the requirements for accessing
programmable controllers. Without the function you would need to call the
program “Setting the PG/PC Interface” (Section 2.5) and compare the
settings for the PG/PC interface yourself with your configured settings.
Requirement
You must have inserted a “programming device/PC” station in your project.
You must have created a node list for this programming device/PC and
assigned the module parameter sets installed in your programming device/PC
to the nodes.
Assigning a
Programming
Device/PC
In the SIMATIC Manager select the menu command PLC " Assign PG/PC.
If unique assignments are possible, you do not need to do anything else.
If unique assignments are not possible, a dialog box is displayed. In the
“Assignment” tab you can select a configured module for your PG/PC and a
configured network node (PG/PC).
A unique assignment may not be possible, for example, if more than one of
any type of module parameter assignment exists on your programming
device.
Undoing
Assignments
To undo all assignments, select the menu command PLC " Remove PG/PC
Assignment in the SIMATIC Manager.
Standard Software for S7 and M7 – STEP 7 User Manual
C79000-G7076-C552-01
5-17
Creating and Editing Projects
5-18
Standard Software for S7 and M7 – STEP 7 User Manual
C79000-G7076-C552-01
6
Assigning Symbols
Overview
Chapter
Overview
Note on How to
Use this Chapter
In a STEP 7 program you work with addresses such as I/O signals, bit
memory, counters, timers, data blocks, and function blocks. You can access
these addresses in your program absolutely (for example, I 1.1, M 2.0,
FB21), but your programs will be much easier to read if you use symbols for
the addresses (for example, Motor_A_On, or other identifiers according to
the code system used within your company or industry). An address in your
user program can then be accessed via this symbol.
Section
Description
Page
6.1
Symbols
6-2
6.2
Symbol Table
6-3
6.3
Incomplete and Non-Unique Symbols
6-5
6.4
Working with the Symbol Table
6-6
6.5
Defining Single Symbols in a Dialog Box
6-7
6.6
Exporting and Importing Symbol Tables
6-8
Following the sections which contain basic information about symbols, you
will learn the methods for defining shared symbols:
S You can enter symbols and their absolute addresses directly in a “symbol
table” (Section 6.4). This procedure is recommended if you want to enter
a number of symbols and for when you create the symbol table for a
project because you have the symbols which were already assigned
displayed on the screen, making it easier to keep an overview of the
symbols.
S You can open a dialog box in the window where you are entering a
program and define a new symbol or redefine an existing symbol
(Section 6.5). This procedure is recommended for defining individual
symbols, for example, if you realize that a symbol is missing or you want
to correct one while you are writing the program. This saves you
displaying the whole symbol table.
Standard Software for S7 and M7 – STEP 7 User Manual
C79000-G7076-C552-01
6-1
Assigning Symbols
6.1
Symbols
Overview
A symbol allows you to work with meaningful symbolic names instead of
addresses. You should distinguish between local and shared symbols.
Validity
A shared symbol is recognized throughout the whole user program, meaning
it can be used by all blocks in the program. The symbolic name must be
unique in the whole user program.
A block-specific or local symbol is only known to the block in which it was
defined. You can use the same symbol in different blocks for different
purposes.
Using Shared
Symbols
You can define shared symbols for inputs, outputs, counters, timers, bit
memory, and blocks. The following addresses are permitted:
S I/O signals (process image)
I, Q
S Peripheral inputs/outputs
PI, PQ
S Bit memory
M
S Timers, counters
T, C
S Logic blocks
FB, FC, SFB, SFC, OB
S Data blocks
DB
S User-defined data types
UDT
S Variable tables
VAT
Using Local
Symbols
You can use local, or block-specific symbols for block parameters (input,
output, and in/out parameters), for static or temporary data of a block.
Where Do You
Define Symbols?
Shared symbols are defined in the symbol table.
Note on How to
Use this Chapter
The emphasis in this chapter is on defining shared symbols. Creating local or
block-specific symbols is described in the context of the programming
language in the manuals for the various language packages.
6-2
Local symbols are defined in the variable declaration of a block when
entering the program.
Standard Software for S7 and M7 – STEP 7 User Manual
C79000-G7076-C552-01
Assigning Symbols
6.2
Symbol Table
Structure
An (empty) symbol table (“Symbols” object) is created automatically when
you create an S7 or M7 program. The structure can be seen in Figure 6-1.
Symbol Editor - S7_Pro1\SIMATIC 300-Station\CPU312...\Symbols
Table
Edit
Insert
View
Options
Window
Help
All
Ascending
A
Z
mw2
S7_Pro1\SIMATIC 300-Station\CPU312...\Symbols
1
2
Symbol
Sym-Q12.0
Sym-Q12.1
Figure 6-1
Address Data Type
Q 12.0 BOOL
Q 12.1 BOOL
Comment
Com_Q12.0
Com_Q12.1
Structure of the Symbol Table
Symbol
The symbolic name must not be longer than 24 characters. A symbol table
can contain a maximum of 16,000 symbols.
Address
An address is the abbreviation for a particular memory area and memory
location.
Example: I 12.1
The syntax of the address is checked as it is entered. A check is also made to
see whether the address may be assigned the specified data type.
Data Type
You can choose between a number of data types available in STEP 7. The
data type field already contains a default data type which you may change, if
necessary. If the change you make is not suitable for the address and its
syntax is incorrect, an error message appears as you exit the field.
Comment
You can assign comments to all symbols. The combination of brief symbolic
names and more detailed comments makes creating programs more effective
and makes your program documentation more complete. A comment can be
up to 80 characters in length.
O/M/C Columns
The columns O/M/C shows whether a symbol was assigned special object
properties:
S O means that the symbol can be operated and monitored with WinCC.
S M means that a symbol-related message (SCAN) was assigned to the
symbol.
S C means that communication capabilities have been assigned to the
symbol.
Standard Software for S7 and M7 – STEP 7 User Manual
C79000-G7076-C552-01
6-3
Assigning Symbols
Validity
The symbol table is only valid for the module to which you link the program.
If you want to use the same symbols in a number of different CPUs, you
yourself must ensure that the entries in the various symbol tables all match
up (for example, by copying the table).
Converting to
C Variables
You can select symbols in the symbol table for an M7 program and convert
them to corresponding C variables in conjunction with the ProC/C++
software option. You will find more information on this in the relevant user
manual /290/.
6-4
Standard Software for S7 and M7 – STEP 7 User Manual
C79000-G7076-C552-01
Assigning Symbols
6.3
Incomplete and Non-Unique Symbols
Purpose
Being able to store incomplete symbols means you can, for example, enter
only the symbol name first and then enter the corresponding address at a later
date. When you come to use the symbol for creating software (without an
error message appearing), you must have entered the symbolic name, the
address, and the data type.
Being able to store non-unique symbols in the symbol table means you can
copy entries in the symbol table.
This means you can interrupt your work on the symbol table at any time,
save the interim result, and complete your work another time.
How Non-Unique
Symbols Occur
Non-unique symbols occur when you insert a symbol in the symbol table
whose
S Symbolic name and/or
S Address
was already used in another symbol row. This means both the new symbol
and the existing symbol are non-unique.
This happens, for example, when you copy and paste a symbol in order to
change the details in the copy slightly.
Marking
Non-Unique
Symbols
In the symbol table, non-unique symbols are identified by highlighting them
graphically (bold type). This change in their representation means they still
require editing. You can either display all symbols or filter the view so that
only unique or non-unique symbols are displayed.
Making Symbols
Unique
A non-unique symbol becomes unique when you change the component
(symbol and/or address) which caused it to be non-unique. If two symbols are
non-unique and you change one of them to make it unique, the other one also
becomes unique.
Standard Software for S7 and M7 – STEP 7 User Manual
C79000-G7076-C552-01
6-5
Assigning Symbols
6.4
Working with the Symbol Table
Symbols from
Other Editors
You can also create the data for the symbol table with a table editor you are
familiar with (such as Microsoft Excel) and then import the file into the
symbol table (see Section 6.6).
Opening the
Symbol Table
There are a number of ways of opening a symbol table:
S Double-click the symbol table in the project window of the SIMATIC
Manager.
S Select the symbol table in the project window and select the menu
command Edit " Open Object.
The symbol table for the active program is displayed in its own window
where you can now create or change symbols. When you open a symbol table
for the first time after it was created, it is empty.
Inserting Symbols
To enter new symbols in the symbol table, position the cursor in the first
empty row of the table and fill out the cells. You can insert new empty rows
before the current row in the symbol table using the menu command Insert "
Symbol. You can copy and modify existing entries using the commands in
the Edit menu. Save and then close the symbol table. You can also save
symbols which have not been completely defined (see Section 6.3).
Sorting Symbols
The data records in the symbol table can be sorted alphabetically according
to symbol, address, data type, or comment.
You can change the way the table is sorted by selecting different sort criteria
in the view bar of the symbol table or by using the menu command View "
Sort to open a dialog box and define the sorted view.
Filtering Symbols
You can use a filter to select a subset of the records in a symbol table.
In the view bar of the symbol table you can set the display according to the
following filters:
S All symbols (unique and non-unique symbols)
S Unique symbols only, or
S Non-unique symbols only
You can select additional filters using the dialog box which you open with
the menu command View " Filter. You can define criteria which the records
must fulfil in order to be included in the filtered view. The individual criteria
are linked by an AND operation. The filtered records start with the specified
strings.
6-6
Standard Software for S7 and M7 – STEP 7 User Manual
C79000-G7076-C552-01
Assigning Symbols
6.5
Defining Single Symbols in a Dialog Box
Overview
The procedure described below shows you how you can change symbols or
define new symbols in a dialog box while programming blocks without
having to display the symbol table.
This procedure is useful if you only want to edit a single symbol. If you want
to edit a number of symbols, you should open the symbol table and work in it
directly.
Displaying
Symbols
You can toggle the display of the symbols in an open block in the block
window on and off using the menu command View " Symbolic
Representation.
Defining Symbols
To define a single symbol during programming, follow the steps outlined
below:
1. Make certain that the symbolic representation is switched on in the block
window (menu command View " Symbolic Representation).
2. Select the absolute address in the code section of your program to which
you want to assign a symbol.
3. Select the menu command Edit " Object Properties.
4. Fill out the dialog box and close it, confirming your entries with “OK”
and making sure you enter a symbol.
Result: The defined symbol is entered in the symbol table. Any entries
that would lead to non-unique symbols are rejected.
You can also edit individual symbols without first selecting an address (cf.
step 2.). To do this, select the menu command Insert " Symbols.
Editing in the
Symbol Table
By clicking the “Symbol Table” button in the above dialog box, you can
open the symbol table to edit it. This is useful if you realize that you have to
edit or enter more than one symbol.
Standard Software for S7 and M7 – STEP 7 User Manual
C79000-G7076-C552-01
6-7
Assigning Symbols
6.6
Exporting and Importing Symbol Tables
Application
You can export the current symbol table to a text file in order to be able to
edit it with any text editor.
You can also import tables created using another application into your
symbol table and continue to edit them there. The import function can be
used, for example, to include in the symbol table assignment lists created
with STEP 5/ST following conversion.
The file formats *.SDF, *.ASC, *.DIF, and *.SEQ are available to choose
from.
Exporting
You can export the whole symbol table, a filtered subset of the symbol table,
or rows selected in the table view.
The properties of symbols that you can set using the menu command Edit "
Special Object Properties are not exported.
To export the displayed symbol table to a file with one of the file formats
*.SDF, *.ASC, *.DIF, or *.SEQ (assignment list), follow the steps outlined
below:
1. Open the symbol table.
2. Use filters to select the symbols you want to export.
3. Select the menu command Table " Export.
4. Enter the required file format in the “Export” dialog box and enter the
name of the file to which you want to export the symbol table.
5. Confirm your entries with “Save”.
Handling
Non-Unique
Symbols when
Exporting
When you export, only those symbols you selected using a filter are exported
(for example, all symbols or only the unique symbols or the non-unique
symbols).
Importing
To import a symbol table which exists as one of the file formats *.SDF,
*.ASC, *.DIF, or *.SEQ, follow the steps outlined below:
1. Open the symbol table into which you want to import the data.
2. Select the menu command Table " Import.
3. Enter the file format in the “Import” dialog box and enter the name of the
file you want to import.
4. Confirm your entries with “Open”.
The properties of symbols that you can set using the menu command Edit "
Special Object Properties are not taken into consideration when importing.
6-8
Standard Software for S7 and M7 – STEP 7 User Manual
C79000-G7076-C552-01
Assigning Symbols
Example:
Importing an
“Excel” File
To import and export data to and from the Microsoft Excel application, use
the DIF file format.
To import data from Excel, follow the steps outlined below:
1. Create a table in Excel with the four columns “Symbol”, “Address”,
“Data Type”, and “Comment” and fill out the table.
2. Open the “Save As” dialog box using the menu command File " Save As.
3. In the dialog box, select the file extension “.DIF” (Data Interchange
Format).
4. Select the directory path and file name and close the dialog box.
5. Open the symbol table.
6. Open the dialog box using the menu command Table " Import.
7. In the dialog box, select the *.DIF file you just created and confirm the
entry with “Open”.
Notes on Working
with “Access”
Files
To import and export data to and from the Microsoft Access application, use
the SDF file format.
S In Access, select the file format “Text (with delimiters)”.
S Use the double inverted comma (”) as the text delimiter.
S Use the comma (,) as the cell delimiter.
Standard Software for S7 and M7 – STEP 7 User Manual
C79000-G7076-C552-01
6-9
Assigning Symbols
6-10
Standard Software for S7 and M7 – STEP 7 User Manual
C79000-G7076-C552-01
Part 2: Configuring and
Assigning Parameters to the
Hardware
Configuring and Assigning
Parameters to Modules
7
Configuring Networks
8
Configuring Global Data
Communication
9
Establishing Communication
Connections
10
6-12
Standard Software for S7 and M7 – STEP 7 User Manual
C79000-G7076-C552-01
Configuring and Assigning Parameters to
Modules
Overview
7
When you configure with STEP 7, you determine which modules you want
to use in your plant, independent of whether your plant already exists or not.
The procedure for configuring the central and distributed I/O is the same.
You can copy your configuration as often as you like to other STEP 7
projects, modify it as necessary, and download it to one or more existing
plants. When the programmable controller starts up, the CPU compares the
setpoint configuration created in STEP 7 with the actual configuration of the
plant. Any errors are therefore recognized immediately and reported.
When you assign parameters, you set the characteristics of the modules.
You do not need to set switches on the module for this, you simply enter the
parameters in the STEP 7 software. The parameters are downloaded to the
CPU and transferred by the CPU to the respective modules.
Modules can easily be replaced because the parameters set with STEP 7 are
automatically downloaded to the new module during startup.
When you address a module, you can change the addresses set by STEP 7.
This means you can determine which address the user program uses to access
the modules.
Chapter
Overview
Section
Description
Page
7.1
Creating the Configuration – An Overview
7-2
7.2
Basic Operation
7-4
7.3
Example 1: Central Structure
7-6
7.4
Example 2: Structure with Interface Submodules
7-9
7.5
Example 3: Structure of C7 Control Systems
7-10
7.6
Example 4: Expanding the Structure with Smart Connect
7-11
7.7
Example 5: Structure with a Distributed I/O
7-12
(PROFIBUS DP)
7.8
Example 6: Distributed I/O with Intelligent DP Slaves
7-15
7.9
Example 7: Configuring Multicomputing Operation
7-18
7.10
Assigning Module Parameters
7-20
7.11
Assigning Addresses
7-21
7.12
Saving, Downloading, Reading, Modifying, and Copying a
Configuration
7-23
7.13
Editing a Station Configuration
7-27
Standard Software for S7 and M7 – STEP 7 User Manual
C79000-G7076-C552-01
7-1
Configuring and Assigning Parameters to Modules
7.1
Creating the Configuration – An Overview
Introduction
This section contains an overview of how to configure the structure you have
planned and how to assign parameters to the modules in this structure.
You can configure and set parameters with STEP 7 for modules in a central
structure and for DP (distributed I/O) modules. The procedure is the same for
both.
Configuring
The term “configuring” refers to the arranging of racks, modules, and
interface submodules in a station window. Racks are represented by a
configuration table that permits a specific number of modules to be inserted,
just like a real rack.
In the configuration table, STEP 7 automatically assigns an address to each
module. You can change the addresses of the modules in a station if the CPU
in the station can be addressed freely (meaning an address can be assigned
freely to every channel of the module, independent of its slot).
When Should You
Configure Your
Hardware?
Configuration is necessary in the following cases:
S If you want to change the default parameters of a module
S For stations with a distributed I/O (PROFIBUS DP)
S For S7-400 stations with a number of CPUs or expansion racks
Assigning
Parameters
The term “assigning parameters” refers to the following:
S Setting parameters for programmable modules in a central structure and
in a network. For example, a CPU is a module to which you can assign
parameters and its watchdog time is a parameter you can set.
S Setting bus parameters, DP master and DP slave parameters for a master
system (PROFIBUS DP)
First-Time Users of
PROFIBUS DP
7-2
If you want to configure a DP network and have no experience of structuring
a distributed I/O, it is recommended that you read the Technical Overview
/21/ S7/M7 Programmable Controllers, Distributed I/O with PROFIBUS DP
and AS-i to give you an introduction to this topic.
Standard Software for S7 and M7 – STEP 7 User Manual
C79000-G7076-C552-01
Configuring and Assigning Parameters to Modules
Procedure
To configure and assign parameters to a structure, follow the procedure
shown in the figure below:
Arrange the racks
Place the modules and interface
submodules in the racks
Assign parameters to the modules
Save the configuration
Download the configuration to the
programmable controller
Figure 7-1
Requirements for a
New Configuration
Procedure for Configuring and Assigning Parameters
Before you enter a new configuration, you must do the following:
S Create a project
S Create the object you want to configure (a station) in the project
S Select this station
You can find more information on creating a project in Section 5.1.
Opening the
Application
To open the application for configuring a station, follow the steps outlined
below:
1. In the project window in the SIMATIC Manager, select the “Station”
object.
2. Select the menu command Edit " Open Object.
Alternatively: Double-click on the “Hardware” object.
The hardware configuration (HWConfig) application appears on the screen.
Standard Software for S7 and M7 – STEP 7 User Manual
C79000-G7076-C552-01
7-3
Configuring and Assigning Parameters to Modules
7.2
Basic Operation
Main Features of
the User Interface
Configuring a programmable controller involves the use of two windows:
S The station window in which you place the racks for the station structure
S The “Hardware Catalog” window from which you select the required
hardware components, for example, racks, modules, and interface
submodules
If the “Hardware Catalog” window is not displayed, select the menu
command View " Catalog. This command toggles the display of the
Hardware Catalog on and off.
Basic Operations
Independent of which structure a station has – you always configure using the
following steps:
1. Select a hardware component in the “Hardware Catalog” window.
2. Copy the selected hardware component to the station window using
drag & drop.
Placing a
Hardware
Component in a
Station Window
Figure 7-2 shows this operation:
HWConfig: Hardware Configuration – example\SIMATIC 300-Station(3)
Station
Edit
Insert
PLC
View
Options
Window
Help
example\SIMATIC 300-Station(3)
Station window
UR (0)
1
Hardware Catalog
2
3
Select Hardware
SIMATIC 300
RACK 300
Rail
6ES7 390-1???0-0AA0
Available in various lengths
?
Press F1 for help
Figure 7-2
7-4
Arranging a Rack
Standard Software for S7 and M7 – STEP 7 User Manual
C79000-G7076-C552-01
Configuring and Assigning Parameters to Modules
Detailed View of a
Rack
The lower part of the station window shows a detailed view of the
inserted/selected rack. The order numbers and addresses of the modules are
shown here in table form.
The table has the structure shown below for a central rack equipped with
modules:
Slot
1
2
3
4
5
6
7
8
9
10
11
Summary
Module
PS ...
CPU ...
IM ...
DI ...
DI ...
DO ...
FM ...
CP ...
AI ...
AI ...
Order No.
6ES7...
6ES7...
6ES7...
6ES7...
6ES7...
6ES7...
6ES7...
6ES7...
6ES7...
6ES7...
MPI Addr
I Address
Q Address
2
0...1
4...5
8...9
As usual in Windows applications, you can put together the whole
configuration in STEP 7 using drag & drop. The following sections show
examples of different hardware components to illustrate what you must look
out for.
Standard Software for S7 and M7 – STEP 7 User Manual
C79000-G7076-C552-01
7-5
Configuring and Assigning Parameters to Modules
7.3
Example 1: Central Structure
Configuring a
Central Structure
For a central structure you arrange the modules beside the CPU in a rack and
continue into additional expansion racks. The number of racks which can be
configured depends on the CPU you used.
Procedure
Just as you do in a real plant, you arrange your modules in racks with
STEP 7. The difference is that in STEP 7 racks are represented by
“configuration tables” that have as many rows as the rack has slots for
modules.
Transferring the
Structure to a
Configuration
Table
Figure 7-3 shows an example of how a real structure is converted into a
configuration table.
UR (0)
1
2
PS ...
CPU ...
IM ...
DI ...
3
4
5
DI ...
DO ...
6
7
8
FM ...
CP ...
9
AI ...
AI ...
10
11
Configuration table (upper part of the
station window)
Rack 0
Central structure
of an S7-300
Slot numbers:
Figure 7-3
7-6
1
2
3
4
5
6
7
8
9
10
From a Central Structure to a Configuration Table
Standard Software for S7 and M7 – STEP 7 User Manual
C79000-G7076-C552-01
Configuring and Assigning Parameters to Modules
Selecting a Rack
and Entering It in
the Configuration
Table
Requirement: the station window and “Hardware Catalog” window must be
open. To select and place a rack, follow the steps outlined below:
1. Select a suitable rack for your structure from the “Hardware Catalog”
window. Use the rail for SIMATIC 300 and a universal rack (UR1), for
example, for SIMATIC 400.
2. Drag the rack to the station window.
The rack appears in the form of a small configuration table in the upper
part of the station window. In the lower part of the window, the detailed
view of the rack appears with additional information such as the order
number, MPI address, and I/O addresses.
3. If you want to change the number of the rack:
Double-click the title of the rack in the upper part of the station window.
You can change the number in the “General” tab for the rack.
As an alternative to step 2. you can also double-click on the rack in the
“Hardware Catalog” window.
Selecting Modules
and Arranging
Them in the
Configuration
Table
To arrange modules in the rack, follow the steps outlined below:
1. Select a module from the “Hardware Catalog” window.
2. Drag the module to the appropriate row in the rack.
Note: You can arrange some components in the lower part of the station
window only (detailed view). These are:
– Terminal blocks for Smart Connect (TB...SC)
– SC submodules
– AS-i slaves
– Components for modular DP slaves (for example, modules for
ET 200M)
3. Repeat steps 1. and 2. until the rack is fully equipped.
As an alternative to step 2. you can also select an empty row and then
double-click the module in the “Hardware Catalog” window or select the
module and press RETURN.
Standard Software for S7 and M7 – STEP 7 User Manual
C79000-G7076-C552-01
7-7
Configuring and Assigning Parameters to Modules
Expanding a
Configuration
If you want to expand your configuration to include additional racks, follow
the steps outlined below:
1. Select a suitable (expansion) rack from the “Hardware Catalog” window.
2. Drag the racks to the station window one by one.
3. Assign modules to the rack as described under “Selecting Modules and
Arranging Them in the Configuration Table”.
Important: The interface modules (IM) must be inserted in all racks so
that connecting up is possible.
4. For S7-400 only: make the connections between the interface modules in
the racks:
– Double-click the send IM.
– Select the “Connection” tab.
This tabbed page shows all racks that have not been connected.
– Select each rack one at a time and connect it to the required interface
of the send IM (C1 or C2) using the “Connect” button.
Connection lines then show how the racks are connected together.
Special Case:
Configuring with
CR2
If you want to expand a configuration comprising of a segmented rack CR2
(S7-400) by adding racks, the following requirements must be fulfilled:
1. Configure the CR2 rack with the send IM.
2. Insert only the receive IMs in the expansion racks.
3. Make the connections between the interface modules (IMs) in the racks as
described above.
Only then can you insert modules in the expansion racks. Reason: Because
the address area for a CR2 with a number of CPUs exists more than once, the
expansion rack must first be assigned an address area (of a CPU).
7-8
Standard Software for S7 and M7 – STEP 7 User Manual
C79000-G7076-C552-01
Configuring and Assigning Parameters to Modules
7.4
Example 2: Structure with Interface Submodules
Using Interface
Submodules
You can use interface submodules in the following ways:
S Insert them directly in a CPU or communications processor (CP) if they
have interface submodule slots
S In M7 programmable control systems, insert them in an expansion
module (EXM) which is assigned to a CPU or a function module (FM)
When you have entered the CPU/EXM in the configuration table, more rows
with special numbers (for example, 2.1) appear below the relevant row.
These rows represent the interfaces or interface submodule slots.
Table 7-1 shows you some examples.
Table 7-1
Relationship between Interface Submodule and Configuration Table
Configuration
CPU with 2
interface submodule
slots, can take up to
2 interface
submodules
Example
Transferring the Example to the
Configuration Table
CPU 488-3
UR (0)
1
2
Interface Submodule
2.1
2.2
PS ...
CPU ...
...
...
M7-400
CPU or FM with
expansion module,
can take up to 3
interface
submodules
CPU
EXM
CPU EXM
UR (0)
1
2
M7-300
PS ...
3
3.1
CPU ...
EXM
IF ...
3.2
...
M7-400
Interface Submodules
Standard Software for S7 and M7 – STEP 7 User Manual
C79000-G7076-C552-01
7-9
Configuring and Assigning Parameters to Modules
7.5
Example 3: Structure of C7 Control Systems
Overview
In a C7 control system (C7 620), the following components are integrated in
one casing:
S SIMATIC 300 CPU
S Inputs and outputs (digital and analog)
S Interface module IM 360 for connecting further SIMATIC 300 modules
S Line-oriented operator panel with a printer port
Simplified
Procedure
The C7 control system is not mounted on a rail – this means you do not have
to arrange a rack.
Requirement
The station window and “Hardware Catalog” window must be visible.
Configuring C7
To configure a C7 control system, follow the steps outlined below:
1. Select a C7 control system from the “Hardware Catalog” window. These
systems can be found under SIMATIC 300.
2. Drag the C7 control system to the station window.
3. If you want to expand the C7 control system:
– Select rails as racks from the “Hardware Catalog” window.
– Drag the racks one by one to the station window.
– Arrange modules in each rack as described in Section 7.3.
Important: The interface modules (IM) must be inserted in all racks
so that connecting up is possible.
7-10
Standard Software for S7 and M7 – STEP 7 User Manual
C79000-G7076-C552-01
Configuring and Assigning Parameters to Modules
7.6
Example 4: Expanding the Structure with Smart Connect
Overview
Smart Connect consists of the following components:
S Interface module IM 464 (for S7-400 only)
S Terminal blocks (TB .. SC)
S Electronic submodules (each for one or two inputs or outputs)
Context
The inputs and outputs are located on the electronic submodules. Up to eight
electronic submodules can be plugged on a terminal block.
For interface module IM 464: Up to eight terminal blocks can be connected
to an IM 464 interface module via round-sheath ribbon cable. The electronic
submodules cannot, however, be configured (cannot have parameters
assigned).
For ET 200L: A terminal block can be connected to an ET 200L via
round-sheath ribbon cable. The terminal blocks and electronic submodules
are configured by dragging them from the “Hardware Catalog” window to
the detailed view of the DP slave ET 200L (table in the lower part of the
station window).
Standard Software for S7 and M7 – STEP 7 User Manual
C79000-G7076-C552-01
7-11
Configuring and Assigning Parameters to Modules
7.7
Example 5: Structure with a Distributed I/O (PROFIBUS DP)
Distributed I/O
The distributed I/O refers to master systems, comprising DP (distributed I/O)
master and DP slaves which are connected via a bus cable and communicate
with each other via the PROFIBUS DP protocol.
Information on
DP Slaves and
DP Master
As DP masters and DP slaves can be different devices, this section only
explains the basic procedure involved in configuring. You will find details on
functionality, access procedures etc. in the manuals for the specific devices
and in the online help for the special FCs (for example, DP-SEND and
DP-RECEIVE for CP 342-5), refer to /501/.
DP Master
You can use the following as DP masters:
S A CPU with an integrated or pluggable DP master interface (for example,
CPU 315-2 DP – integrated)
S An interface submodule which is assigned to a CPU/FM (for example,
IF 964-DP in the CPU 488-4)
S A communications processor (CP) in conjunction with a CPU (such as
CP 342-5, CP 443-5)
Selecting and
Arranging a
DP Master
To create a DP master system, follow the steps outlined below:
1. Select a DP master from the “Hardware Catalog” window (for example,
CPU 315-2 DP).
2. Drag the module to a suitable row in the rack.
The dialog box “Properties - PROFIBUS Node” is opened. Here you can
do the following:
– Create a new PROFIBUS subnet or select an existing subnet
– Set properties for the PROFIBUS subnet (transmission rate etc.)
– Set the PROFIBUS address for the DP master
3. Confirm your settings with “OK”.
The following symbol appears:
This symbol is the connector symbol for the DP slaves in the DP master
system.
Selecting and
Arranging
DP Slaves
When configuring DP slaves, there is a distinction between the following
types:
S Compact DP slaves
S Modular DP slaves
S “Intelligent” DP slaves
7-12
Standard Software for S7 and M7 – STEP 7 User Manual
C79000-G7076-C552-01
Configuring and Assigning Parameters to Modules
DP Slaves
You can use the following as DP slaves:
S Modules with integrated digital/analog input and outputs (compact DP
slaves, such as ET 200B)
S Interface modules with assigned S5 or S7 modules (modular DP slaves,
such as ET 200M)
S S7-300 stations with modules that support the function “intelligent slave”
(I slave) (for example, CP 342-5, CPU 315-2DP)
Selecting and
Arranging
Compact
DP Slaves
To configure a compact DP slave, follow the steps outlined below:
1. Select a compact DP slave (for example, ET 200B) from the “Hardware
Catalog” window.
2. Drag the DP slave to the following symbol for the DP master system:
The “Properties - PROFIBUS Node” dialog box is opened. Here you can
set the following:
– Properties for the PROFIBUS subnet (transmission rate etc.)
– The PROFIBUS address for the DP slave
3. Confirm your settings with “OK”.
A symbol is appended to the DP master system to represent the type of
the DP slave. The I/O structure of the compact DP slave is displayed as a
table in the lower part of the station window.
Changing the View
When you select the symbol for the DP master system (
), all
DP slaves in the DP master system are display in the lower part of the station
window. When you select a DP slave symbol, the structure of the DP slave is
displayed in the lower part of the station window. You can toggle between
these views very simply by using the
or
button which appears in
front of the name of the DP slave/DP master system.
Standard Software for S7 and M7 – STEP 7 User Manual
C79000-G7076-C552-01
7-13
Configuring and Assigning Parameters to Modules
Selecting and
Arranging Modular
DP Slaves
To configure a modular DP slave, follow the steps outlined below:
1. Select an interface module for a modular DP slave (for example, IM 153
for ET 200M) from the “Hardware Catalog” window.
2. Drag the interface module to the following symbol for the DP master
system:
The “Properties - PROFIBUS Node” dialog box is opened. Here you can
set the following:
– Properties for the PROFIBUS subnet (transmission rate etc.)
– The PROFIBUS address for the DP slave
3. Confirm your settings with “OK”.
A symbol is appended to the DP master system to represent the type of
the DP slave. The DP interface module and the slots for the modules of
the modular DP slave are visible in the lower part of the station window
(as a table).
4. Drag the modules from the “Hardware Catalog” window to the
appropriate slot (table in the lower part of the station window).
The modules which can be inserted are arranged in the hardware catalog
below each DP slave interface module.
ET 200L and
DP/AS-i Link
When configuring the DP slaves ET 200L and DP/AS-i Link (distributed
I/O/actuator-sensor interface), the following applies:
S ET 200L can be expanded using Smart Connect (SC) a channel at a time;
refer to Section 7.6
S DP/AS-i Link is configured with actuator-sensor interface slaves; see
below.
DP/AS-i Link
When placing a DP/AS-i Link, a configuration table is displayed
automatically in which you can place the actuator-sensor interface slaves
from the “Hardware Catalog” window.
If the DP Slave
does not Appear in
the “Hardware
Catalog” Window
If a DP slave does not appear in the “Hardware Catalog” window, you must
install the respective device database (DDB) file in the
\STEP7\S7DATA\GSD directory after starting STEP 7 and then select the
menu command Options " Update DDB Files. The DP slave then appears in
the “Hardware Catalog” window under “Additional Field Devices”.
7-14
Standard Software for S7 and M7 – STEP 7 User Manual
C79000-G7076-C552-01
Configuring and Assigning Parameters to Modules
7.8
Example 6: Distributed I/O with Intelligent DP Slaves
What Is an
Intelligent DP
Slave?
A feature of an intelligent DP slave is that input/output data are not supplied
directly from a real input/output on the DP master, but from a preprocessing
CPU – the CPU which, together with the communications processor and the
integrated PROFIBUS DP interface, forms the DP slave.
DP Master
Intelligent DP Slave
CPU 315-2DP
CPU
Address
area (I, Q,
M, ..)
PROFIBUS CP
I/O
PROFIBUS
Figure 7-4
Difference:
“Normal” DP
Slaves and
“Intelligent” DP
Slaves
Data Exchange Principle between DP Master and Intelligent DP Slave
In a “normal” DP slave such as a compact (ET 200B) or modular (ET 200M)
DP slave, the DP master accesses the distributed inputs/outputs.
In an intelligent DP slave, the DP master does not access inputs/outputs of
the intelligent DP slave but accesses the address area of the “preprocessing
CPU”. The user program for the preprocessing CPU must take care of data
exchange between the address area and the inputs/outputs.
Note: The configured input/output areas for data exchange between master
and slaves must not be “occupied” by I/O modules.
An Intelligent
DP Slave Cannot
Be a DP Master
You cannot configure an intelligent DP slave simultaneously as a DP master,
meaning that a CPU 315-2 DP configured as a DP slave cannot be a DP
master for other DP slaves at the same time.
Standard Software for S7 and M7 – STEP 7 User Manual
C79000-G7076-C552-01
7-15
Configuring and Assigning Parameters to Modules
Basic Procedure
Two steps are required to integrate an intelligent DP slave into a DP master
system:
Configuring the intelligent DP slave
(configuring a station as a DP slave)
Inserting the intelligent DP slave (configured
station) in a DP master system
Configuring the
CPU 315-2 DP as a
DP Slave
To configure the CPU 315-2 DP as an intelligent DP slave and insert it in a
DP master system, follow the steps outlined below:
1. Configure a station with the CPU 315-2 DP as a DP slave:
– Double-click on row 2.1 (interface) in the configuration table.
– Activate the check box “Use Controller as Slave” in the “Slave
Configuration” tab.
2. Configure a DP master (CPU with integrated PROFIBUS DP interface or
communications processor with PROFIBUS DP interface) in another
station.
3. Drag the CPU 315-2 DP from the “Hardware Catalog” window (container
for already configured stations) and drop it on the symbol for the DP
master system (
).
4. Double-click on the first row of the DP slave (the name of the DP slave
appears here, in this case CPU 315-2 DP) and select the “Connection”
tab. In this tab you determine which station should represent the
intelligent DP slave here.
5. Select the intelligent DP slave and click the “Connect” button.
6. Select the “Slave Configuration” tab and assign master and slave
addresses to each other.
Important: Input areas of the DP master are output areas of the DP slave
and vice versa.
7. Confirm your entries with “OK”.
Note
More details on the CPU 315-2 DP (address areas, diagnostics etc.) can be
found in /70/.
7-16
Standard Software for S7 and M7 – STEP 7 User Manual
C79000-G7076-C552-01
Configuring and Assigning Parameters to Modules
Configuring the
CP 342-5 as a
DP Slave
To configure a station with the CP 342-5 DP as an intelligent DP slave and
insert it in a DP master system, follow the steps outlined below:
1. Configure a station with the CP 342-5 DP as a DP slave. Select the option
“DP Slave” in the “Operating Mode” tab of the communications
processor.
2. Configure a DP master (CPU with integrated PROFIBUS DP interface or
communications processor with PROFIBUS DP interface) in another
station.
3. Drag the CP 342-5 DP from the “Hardware Catalog” window (container
for already configured stations) and drop it on the symbol for the DP
master system (
).
A dialog box appears in which you can select configured intelligent DP
slaves.
4. Confirm your selection with “OK”.
5. Then configure the DP identifiers and addresses for input/output areas for
the DP slave in the configuration table which appears. To do this, drag the
“Universal Module” from the “Hardware Catalog” window (container for
already configured stations) to the configuration table and then
double-click on the corresponding row.
Note
Data exchange between a “preprocessing CPU” and a CP 342-5 DP within
the DP slave is described in /501/ NCM S7 for PROFIBUS manual package
(particularly in Volume 1).
Standard Software for S7 and M7 – STEP 7 User Manual
C79000-G7076-C552-01
7-17
Configuring and Assigning Parameters to Modules
7.9
Example 7: Configuring Multicomputing Operation
What Is
Multicomputing?
Multicomputing is the synchronous operation of several (2 to 4) CPUs in a
suitable S7-400 central rack.
Synchronous
Operation
Synchronous operation means that the CPUs participating in multicomputing
are functioning as one CPU with regard to their operating modes and
transitions. The CPUs start up together, for example, provided you set the
same startup mode (restart or complete restart) everywhere, and they go into
STOP mode at the same time.
Synchronous operation does not mean that the same user program must be
executing in every CPU. The user program in each CPU executes
independent of the programs in the other CPUs. This means control tasks can
be run in parallel.
Address Areas and
Interrupts
The CPUs participating in multicomputing “share” a common address area
module by module. The address area of a module is always assigned
“exclusively” to one CPU.
The same characteristic also applies to interrupt assignments: hardware and
diagnostic interrupts for a module are always directed at one CPU only
(“Target CPU for Interrupt” parameter in the “Inputs” or “Outputs” tab of
configurable modules).
Setting
Multicomputing
Operation
7-18
Multicomputing operation results implicitly when you insert a second (third
or fourth) CPU with multicomputing capability in a rack which is suitable for
this purpose (for example, the rack UR1). You can see whether a CPU has
multicomputing capabilities in the information text at the bottom of the
“Hardware Catalog” window which appears for each module you select.
Standard Software for S7 and M7 – STEP 7 User Manual
C79000-G7076-C552-01
Configuring and Assigning Parameters to Modules
Procedure
The following section tells you what to look out for when configuring a
station for multicomputing:
1. Insert all the CPUs required for multicomputing.
2. Double-click on each of the CPUs and set the CPU number in the
“Multicomputing” tab (when you insert the CPUs, the CPU numbers are
assigned automatically in ascending order).
3. For all modules to be assigned to CPU 1, follow the steps outlined below:
– Arrange the modules at the intended position in the rack.
– Double-click on the module and select the “Addresses” tab.
– In the “CPU No.” box select the CPU 1.
4. Repeat the actions listed under step 3. in the same manner for the
modules which are to be assigned to the remaining CPUs.
The CPU assignment is displayed for modules which can trigger
interrupts in the “Inputs” or “Outputs” tab as the “Target CPU for
Interrupt”.
Display CPU
Assignment
You can highlight the modules assigned to a specific CPU using the menu
command View " Filter " CPU No.x Modules (x = CPU number). All
modules not assigned to CPU x are grayed out in this view (exception:
modules in the distributed I/O).
Alternatively, you can select the relevant CPU and select the pop-up menu
command Filter Assigned Modules.
Note
The set filter does not have an effect on the Print function and the “Address
Overview” dialog box.
Change CPU
Assignment
You can change the CPU assignment for all modules in the “Addresses” tab.
Downloading to a
Module
The station configuration can only be downloaded to all CPUs as a
“complete” configuration. This avoids inconsistent configurations.
Uploading to the
Programming
Device
The station configuration is uploaded one by one from all programmable
modules (CPU by CPU). You have the option of aborting the upload process
even if not all the configuration data (SDBs) were uploaded. In this case,
parameter assignment information will be lost.
Standard Software for S7 and M7 – STEP 7 User Manual
C79000-G7076-C552-01
7-19
Configuring and Assigning Parameters to Modules
7.10 Assigning Module Parameters
Assigning
Parameters
You can set the characteristics of configurable modules. Which parameters
can be set depends on the module.
Requirement
Before you assign parameters to a module, you must have arranged the
module in the rack.
How to Assign
Parameters to a
Module
To assign module parameters, follow the steps outlined below:
1. Double-click in the row of the rack containing the module whose
parameters you want to set, or select the module and then select the menu
command Edit " Object Properties. This step is only possible in the
detailed view in the lower part of the station window for DP slaves.
Result: A dialog box appears with one or more tabs containing
information about the module and the parameters you can set for the
module.
Other Ways of
Assigning
Parameters in
S7-300/S7-400
For S7-300 and S7-400 programmable controllers you can set the parameters
for some modules in the user program (for example, for analog modules).
You need to call the system functions (SFCs) WR_PARM, WR_DPARM, and
PARM_MOD in the user program to do this. These settings are lost following
a complete restart.
You will find more information about the system functions in the Reference
Manual System and Standard Functions/235/.
Other Ways of
Assigning
Parameters in
M7-300/M7-400
For M7-300 and M7-400 programmable control systems you can set the
parameters for signal modules in the C program. You need to call the M7 API
function “M7StoreRecord” in the C program to do this. This function
transfers the parameters to a signal module.
You will find more information about the M7 API functions in the manuals
on the system software for M7-300 and M7-400 /280/, /281/, /282/.
7-20
Standard Software for S7 and M7 – STEP 7 User Manual
C79000-G7076-C552-01
Configuring and Assigning Parameters to Modules
7.11 Assigning Addresses
Overview
There is a difference between assigning addresses to nodes and assigning
input/output addresses (I/O addresses).
Node addresses are addresses of programmable modules (MPI, PROFIBUS,
Industrial Ethernet addresses); they are required in order to be able to address
the various nodes in a subnet, for example, in order to download a user
program to a CPU.
Input/output (I/O) addresses are required in order to read inputs and set
outputs in the user program.
Assigning Node
Addresses
To assign a node address to a programmable module, follow the steps
outlined below:
1. Double-click on the row in the rack containing the module whose node
address you want to set, or select the module and select the menu
command Edit " Object Properties.
2. Select the “General” tab.
3. Click the required button under “Node” (for example, MPI).
4. Assign a node address to the module (the MPI address for an MPI subnet).
You can also create a new subnet (for example, MPI subnet) using this
dialog box, assign the module to a different subnet, or change the
properties of a subnet. You will find information on subnets in the
Chapter “Configuring Networks”.
Input/Output
Addresses
STEP 7 assigns input and output addresses when modules are placed in the
configuration table. This means every module has a start address (address of
the first channel); the addresses for the remaining channels are based on this
start address.
Requirement for
Assigning I/O
Addresses
In order to be able to assign or change input and output addresses, the
following requirements must be fulfilled:
S The module is inserted in a central rack or expansion rack and the CPU
must permit free address assignment.
S The module is inserted in a DP slave or the module is a DP slave
(compact DP slave).
Standard Software for S7 and M7 – STEP 7 User Manual
C79000-G7076-C552-01
7-21
Configuring and Assigning Parameters to Modules
Assigning
Input/Output
Addresses
To assign an input or output address to a module, follow the steps outlined
below:
1. Double-click on the row in the rack containing the module whose start
address you want to set, or select the module and select the menu
command Edit " Object Properties.
2. Select the “Addresses” tab.
3. Change the default start address.
Note
For modules within a local bus segment, formed by a function module
(S7-300) or for special function modules (S7-400), you have to assign a
further start address. In addition to the start address for the CPU, the module
then has a start address for the FM. In the overall view of the configuration
table, the start address from the point of view of the FM is always displayed
in this case.
Displaying the
Address Overview
You can display the input and output addresses:
1. Open the station whose addresses you want to display.
2. Select the menu command View " Address Overview.
3. In the “Address Overview” dialog box, select the module whose assigned
inputs and outputs you want to display (for example, CPU).
4. If required, you can filter the display by address type (for example, input
addresses only).
The address areas “Inputs” and “Outputs” are displayed with locations for the
modules (DP master system, PROFIBUS address, rack, slot, interface
submodule slot). Input addresses with the length 0 (for example, addresses of
interface modules) are marked with an asterisk (*).
7-22
Standard Software for S7 and M7 – STEP 7 User Manual
C79000-G7076-C552-01
Configuring and Assigning Parameters to Modules
7.12 Saving, Downloading, Reading, Modifying, and Copying a
Configuration
Overview
A configuration refers here to the central structure, all relevant master
systems, and all parameters assigned.
In this section you can read about how to save a completed configuration,
how to download it to the programmable controller, and how you can display
and modify an existing configuration. Central structures and distributed
structures (PROFIBUS DP) are not dealt with separately because the
procedures are the same for both.
Saving the
Configuration
You use the menu command Station " Save or Station " Save and Compile
to save the configuration.
With Station " Save and Compile, the configuration is saved in the current
project (as the “Station” object). The system data blocks (SDBs) are also
created and stored in the (offline) user program of the respective module
(“SDB carrier”, for example, CPU). The user program is located in the
“Blocks” container; the system data blocks are represented by the “System
Data” object.
Note
If you save incomplete or inconsistent configurations, no system data blocks
are created under “System Data”. If any existed there, they are retained.
With Station " Save no system data blocks are created. The save process is
shorter than Save and Compile, but you must note that inconsistencies can
arise between the configuration saved in the “Station” object and the
configuration saved in the system data.
Requirements for
Downloading
The configuration created must match the actual structure and the
configuration must be displayed on the screen.
A configuration can only be downloaded to the station if it is consistent and
free of errors. Only then can system data blocks (SDBs) be created which can
in turn be downloaded to the CPU.
You can check whether system data blocks can be created from the current
station configuration by using the menu command Station " Consistency
Check. If no SDBs can be created, STEP 7 displays the causes of the error.
Standard Software for S7 and M7 – STEP 7 User Manual
C79000-G7076-C552-01
7-23
Configuring and Assigning Parameters to Modules
Downloading the
Configuration to
the Programmable
Controller
To download the configuration to the programmable controller, follow the
steps outlined below:
1. Switch the CPU to the STOP mode.
2. Select the menu command PLC " Download.
STEP 7 then guides you through the process using dialog boxes.
Result: The configuration for the whole programmable controller is
downloaded to the CPU. CPU parameters become effective immediately, the
parameters for the other modules are transferred to the modules in STARTUP
mode.
Note
Partial configurations, for example, the configurations for individual racks,
cannot be downloaded to the programmable controller. For reasons of
consistency, STEP 7 always downloads the whole configuration to the
programmable controller.
Uploading a
Configuration
You can upload an existing configuration from the programmable controller
to the programming device, for example, to create a similar configuration on
the same basis or to change parameter settings.
Requirement: A connection must exist between the programmable controller
and the programming device.
1. Select the menu command PLC " Upload.
The dialog box for opening the configuration appears.
2. Select the project in which the configuration is to be stored later and
confirm with “OK”.
3. In the dialog box which then appears, set the node address, rack number,
and slot in the module from which the configuration should be read
(generally CPU). Confirm your settings with “OK”.
You can assign a station name to this configuration using the menu command
Station " Properties and then save it in the default project (menu command
Station " Save).
7-24
Standard Software for S7 and M7 – STEP 7 User Manual
C79000-G7076-C552-01
Configuring and Assigning Parameters to Modules
Specifying
Modules
When uploading a configuration to the programming device (without the
offline configuration existing on the programming device), STEP 7 cannot
determine exactly the order numbers of all the components.
You can specify the incomplete order numbers as follows:
1. Select the component you want to specify.
2. Select the menu command Options " Specify Module.
3. In the dialog box which then appears, select the order number that
corresponds exactly to the inserted component.
Note
By uploading the station configuration and then specifying the modules you
can also assign parameters to modules that are not yet included in the
“Hardware Catalog” window, but you should note that the parameter
assignment rules for STEP 7 are not checked.
Displaying Module
Status (System
Diagnostics)
You can display the current status of modules in a configured station.
Requirement: A connection must exist between the programmable controller
and the programming device.
1. Select the menu command Station " Open Online.
The “Diagnosing Hardware” window is opened with the station
configuration as it was determined from the modules (for example, CPU).
The status of the modules is indicated by means of symbols. Refer to the
online help for the meanings of the various symbols.
If modules are faulty or if configured modules are missing, these are
listed in a separate dialog box “Faulty Modules”. From this dialog box
you can navigate immediately to one of the displayed modules, for
example (“Go To” button) or display the module status (“Properties”
button).
2. Outside the “Faulty Modules” dialog box: Double-click the symbol for
the module whose status you want to display.
A dialog box with tabs (depending on the type of module) gives you a
detailed analysis of the module status.
3. Once you have closed the “Faulty Modules” dialog box, select the menu
command PLC " Faulty Modules to be able to analyze the status of
additional faulty modules.
Standard Software for S7 and M7 – STEP 7 User Manual
C79000-G7076-C552-01
7-25
Configuring and Assigning Parameters to Modules
Downloading the
Configuration to
Memory Card
Once you have saved and compiled an error-free and consistent
configuration, downloadable system data blocks (SDBs) are created
automatically. To download the system data blocks to a memory card, follow
the steps outlined below:
1. Insert the memory card in the slot on your programming device or PC.
2. Open the “S7 Memory Card” window in the SIMATIC Manager (menu
command File " S7 Memory Card " Open).
3. Open the relevant user program in the SIMATIC Manager in which the
SDBs are stored (“Blocks” container).
4. Drag the symbol for system data blocks to the “S7 Memory Card”
window.
7-26
Standard Software for S7 and M7 – STEP 7 User Manual
C79000-G7076-C552-01
Configuring and Assigning Parameters to Modules
7.13 Editing a Station Configuration
Overview
This section contains tips on making it easier to work with the hardware
configuration application.
Exchanging
Modules
If you already created a configuration and you want to replace a module with
parameters assigned (for example, CPU or analog module) by another
module without losing the parameters or connections you configured, follow
the steps outlined below:
1. Drag the module to the slot containing the CPU you want to replace.
2. Confirm you want to replace the module in the dialog box which appears.
If the message “The slot is already occupied” appears, you must activate the
function first using the menu command Options " Customize and selecting
the option “Enable Module Exchange”.
Selecting a
Number of Rows
If you want to select a number of rows in the configuration table, for
example, to delete a number of modules or insert a number of modules of the
same type, follow the steps outlined below:
S To select all rows:
– Select the menu command Edit " Select All
S To select a group of consecutive rows:
– Click on the first row of the group you want to select.
– Keep the SHIFT key pressed and click on the last row of the group you
want to select.
S To select a number of rows:
– Press CTRL, keep it pressed, and click on each row you want to select.
Moving Modules
You can move modules or other components to other suitable slots within the
station simply by dragging and dropping.
Handling Complex
Stations
If you have a complex station structure, for example, with a number of DP
slaves, you can minimize the display of the configuration tables.
1. Select the configuration table.
2. Press the right mouse button and select the menu command Minimize in
the pop-up menu.
You can also set this overview using the menu command Options "
Customize.
Standard Software for S7 and M7 – STEP 7 User Manual
C79000-G7076-C552-01
7-27
Configuring and Assigning Parameters to Modules
7-28
Standard Software for S7 and M7 – STEP 7 User Manual
C79000-G7076-C552-01
8
Configuring Networks
Overview
Whereas hardware configuration concentrates on configuring one station,
network configuration involves all the nodes involved in communication via
a network and the settings required for the network.
It does not matter whether you are intending to communicate in the network
using global data or communication function blocks in the user program: the
basis for communication is always a configured network.
When you configure a network, all the settings are checked for plausibility
and consistency. Any node addresses which are assigned twice and any
invalid settings are recognized as they are entered. This avoids any
unnecessary errors being made even before you switch on for the first time,
thus saving time and money.
This chapter tells you how to create a network configuration and which
network and station parameters have to be set.
Chapter
Overview
Section
Description
Page
8.1
Creating Network Configurations – An Overview
8-4
8.2
Configuring a Network in the SIMATIC Manager
8-5
8.3
Setting Your Network Configuration Graphically – Starting
NETPRO
8-7
8.4
Creating Network Configurations with Symbols in the
Network View
8-9
8.5
Opening and Editing the Network View with DP Slaves
8-11
8.6
Selecting Context Functions for Subnets, Stations, and
Modules in the Network View
8-13
8.7
Special Feature when Configuring MPI Subnets in S7-300
8-14
8.8
Changing Node Addresses and Downloading the
Configuration via the Network
8-15
Standard Software for S7 and M7 – STEP 7 User Manual
C79000-G7076-C552-01
8-1
Configuring Networks
Network and
Subnets
A plant network consists of one or more subnets with different network types
(PROFIBUS, Industrial Ethernet, MPI, point-to-point connection). The
individual stations are connected to these subnets.
Example of a Plant
Network
Figure 8-1 shows an example of a plant network. The network comprises two
MPI subnets and one PROFIBUS subnet.
Project
Programmable Controller
CPU
MPI
address
FM
CP
CPU
CPU
CPU
CP
MPI
address
PROFIBUS
address
First MPI subnet
PROFIBUS subnet
MPI address
CPU
CPU
CPU CP
Second MPI subnet
Figure 8-1
8-2
Example of a Plant Configuration
Standard Software for S7 and M7 – STEP 7 User Manual
C79000-G7076-C552-01
Configuring Networks
Network
Configurations
A network configuration can contain:
S One or more subnets in a project
S SIMATIC 300 and SIMATIC 400 stations in subnets
S PGs/PCs, SIMATIC S5 stations, and “other” stations also in subnets
S One or more subnets in a number of projects
“Other Stations”
“Other stations” in the current project are one of the following:
S Devices from other manufacturers or
S SIMATIC S7 stations which were configured and assigned parameters in
another project in STEP 7 and may be nodes in subnets in another
project
Note
If you connect a station to a subnet as an “other” station because it was
configured and had parameters assigned in another STEP 7 project, you must
assign this station the same node address as in the STEP 7 project where it
was configured and had its parameters assigned.
Standard Software for S7 and M7 – STEP 7 User Manual
C79000-G7076-C552-01
8-3
Configuring Networks
8.1
Creating Network Configurations – Overview
Two Possibilities
You have two possibilities for creating a network configuration:
S If you only want to configure one or two subnets, you can configure your
network quickly and easily in the SIMATIC Manager or in the
hardware configuration application.
S Using NETPRO makes it particularly easy to enter a network
configuration because it allows you to create a graphic view of your
network in which you can set all the properties for subnets and network
nodes.
If you want to use Industrial Ethernet communications processors, you must
also have the NCM S7 for Industrial Ethernet optional software package
installed. For some PROFIBUS communications processors you will require
the NCM S7 for PROFIBUS software option.
Procedures
The diagram below shows both methods for creating network configurations.
Plan your network topology (subnets, communication partners)
Create the network configuration
with the SIMATIC Manager
Create the network
configuration with NETPRO
Create a subnet in the
SIMATIC Manager
Create a network view
using the topology
Create the hardware
configuration for the stations
Connect nodes to subnets
Assign different addresses to
all nodes during the
configuration of the hardware
Enter network parameters
for the subnets
Enter network
parameters for each node
Save data for network configuration and download via network
Figure 8-2
Note
8-4
Procedures for Configuring a Network
You should view the above procedures as an example. There are several ways
of achieving your goal. For example, you can first create all the stations in
the SIMATIC Manager, configure the modules for these stations, and then
complete the network configuration with NETPRO.
Standard Software for S7 and M7 – STEP 7 User Manual
C79000-G7076-C552-01
Configuring Networks
8.2
Configuring a Network in the SIMATIC Manager
Settings for a
Network
Configuration
To configure a complete network you must do the following:
S Create the required subnets.
S Set the subnet properties/parameters (such as the subnet name and
transmission rate used) for each subnet.
S Set the network connection properties (such as the node address, the name
of the subnet to which the node is connected) for each networked module.
Creating a Subnet
With STEP 7 you can create as many MPI subnets, Industrial Ethernet
subnets, PROFIBUS subnets, and point-to-point subnets as you need.
To create a subnet, follow the steps outlined below:
1. Open the project in the SIMATIC Manager.
2. Select a subnet using the menu command Insert " Subnet " ....
Result: STEP 7 inserts in the project a subnet of the type you selected.
Setting Subnet
Properties
To set the subnet properties, follow the steps outlined below:
1. In your project, select the subnet for which you want to set the subnet
properties (for example, a PROFIBUS subnet).
2. Select the menu command Edit " Object Properties.
Result: Two tabbed pages are displayed in which you can set the name of
the network, the highest PROFIBUS address, and the transmission rate.
3. Enter the parameters for the subnet.
Note
For PROFIBUS subnets, you can either select a bus profile predefined by
STEP 7 or assign a user-defined bus profile. You will find information on
selecting a bus profile in the online help or manual for the module you are
using.
Standard Software for S7 and M7 – STEP 7 User Manual
C79000-G7076-C552-01
8-5
Configuring Networks
Setting Node
Properties and the
Network
Connection
Requirement: You must have the hardware configuration table open and have
entered a module in the table which has at least one interface for connecting
to a subnet (for example, a CPU). To set the node properties and the network
connection, follow the steps outlined below:
1. Select the module.
2. Double-click the row containing the module or select the menu command
Edit " Object Properties.
Result: The properties dialog box opens for the module.
3. Click the button for the required subnet under “Nodes”.
Result: A dialog box for setting network connection properties appears.
4. Set the parameters for the network connection. To do this, activate the
check box “The node is connected to the selected network” and select the
node address and subnet.
Note: If you do not activate this check box, the module is not assigned to
a subnet.
8-6
Standard Software for S7 and M7 – STEP 7 User Manual
C79000-G7076-C552-01
Configuring Networks
8.3
Setting Your Network Configuration Graphically – Starting NETPRO
Starting NETPRO
Requirement: Before you can start NETPRO you must have created a project
in the SIMATIC Manager. STEP 7 creates an MPI subnet automatically when
you create a new project.
To start NETPRO, follow the steps outlined below:
1. Open your project in the SIMATIC Manager.
2. Select a subnet (for example, the MPI network).
3. Start NETPRO by double-clicking on the subnet or by selecting the menu
command Edit " Open Object.
Result: A window appears with a view of the network configuration.
Stations whose hardware configuration you created before starting NETPRO
will already be arranged in the network view, as will modules which have an
interface for the connection to a subnet. You can show DP slaves using a
special menu command in the network view.
NETPRO: Configuring Networks – [Network to Project “Model”]
Network
Edit
PLC
Insert
SIMATIC 300-Station(1)
View
Options
Window
SIMATIC 400-Station(1)
SIMATIC 300-Station(2)
CPU
414
CPU
314
Help
CPU
314
MPI(1)
MPI
SIMATIC 300-Station(3)
CPU
314
SIMATIC 400-Station(2)
CPU
413
NUM
Ready
Figure 8-3
Creating the
Network View
Example of the Network Configuration View
Creating the graphic network view in NETPRO could hardly be easier. You
select the symbols for stations, DP slaves, and subnets from a catalog and use
drag & drop to place them on the screen. You configure the stations with the
required modules. You then connect the stations to the relevant subnet.
Standard Software for S7 and M7 – STEP 7 User Manual
C79000-G7076-C552-01
8-7
Configuring Networks
Entering Network
Parameters
By double-clicking on a station, DP slave, subnet, or connecting line, you
open the view/dialog box where you enter the hardware configuration of a
station, the parameters for a subnet, or the parameters for a network
connection.
You will find a detailed description of entering network parameters in the
online help.
8-8
Standard Software for S7 and M7 – STEP 7 User Manual
C79000-G7076-C552-01
Configuring Networks
8.4
Creating Network Configurations with Symbols in the Network View
Network View
Every network view essentially consists of four different symbols, which will
be explained in more detail in this section. Figure 8-4 shows a section of a
network view in which the different symbols have been entered.
NETPRO: Configuring Networks – [Network to Project “Model”]
Network
Edit
PLC
Insert
View
Options
Window
Help
SIMATIC 400-Station(1)
CPU CP
414 441
Symbol for Subnet
Symbol for Station
MPI(1)
MPI
Symbol for Network Connection
SIMATIC 300-Station(1)
CPU
314
Symbol for Node Interface
NUM
Ready
Figure 8-4
Network Configuration View
Subnet Symbol
Horizontal lines always depict a subnet. You can reach the properties dialog
box of a subnet by double-clicking one of these lines. In this dialog box, you
determine all the parameters relating to the subnet, for example, the name of
the subnet, the transmission rate used, and the highest node address in a
PROFIBUS subnet.
Station Symbol
Large squares depict a station. You can open the dialog box for “Hardware
Configuration” by double-clicking one of these stations. In this dialog box
you can change, for example, the parameters of the programmable modules
being used, such as the name and address of the node.
Node Interface
Symbol
Small squares depict interfaces of the module (nodes) for networking. Every
programmable module (CPU, CP, or FM) has one or more interface symbols.
For example, a station may contain a CPU and an Industrial Ethernet
communications processor (CP). Each of these modules has a symbol for an
interface because the CPU has an MPI interface and the CP has an Ethernet
interface.
Standard Software for S7 and M7 – STEP 7 User Manual
C79000-G7076-C552-01
8-9
Configuring Networks
Network
Connection
Symbol
Vertical lines depict a network connection of a node. You can open the
properties dialog box of a network connection by double-clicking one of
these lines. In this dialog box, you can determine the name of the node and,
if necessary, the node address.
Creating a Network
Connection
You can easily create a network connection with NETPRO:
S Click on the symbol for the node interface and hold the mouse button
pressed.
S Drag the mouse pointer to the subnet to which you want to connect the
interface.
Result: NETPRO inserts the symbol (vertical line) in the network view.
Creating a Network
Configuration
Requirement: You must be in the network view of NETPRO.
The following is a possible sequence of procedures for creating a network
configuration.
1. Open the “Catalog” window using the menu command View " Catalog.
2. In the “Catalog” window select a subnet, hold the mouse button pressed,
and drag the subnet to the window for the network view. Repeat this for
all subnets you require.
3. In the “Catalog” window select a station, hold the mouse button pressed,
and drag the station to the window for the network view. Repeat this for
all stations you require.
4. Save the network view.
5. Before you create the the network connection, you must arrange the
programmable modules (CPU, CP, FM) for each station in the
configuration table. To do this, double-click on the station and open the
configuration table for this station (hardware configuration, see
Chapter 7).
6. After you have arranged the programmable modules for a station, save the
hardware configuration.
7. Arrange the programmable modules for all the other stations and save the
hardware configuration.
8. Switch to the network view and drag the connection lines from the
stations to the subnets.
9. Double-click the subnet line and enter the network parameters for the
subnet. Repeat this for all subnets.
10. Double-click the network connection line and enter the network
parameters for the node. Repeat this for all nodes.
11. Save the network view.
12. Download the network configuration to the programmable controller via
the network (see Section 8.8).
8-10
Standard Software for S7 and M7 – STEP 7 User Manual
C79000-G7076-C552-01
Configuring Networks
8.5
Opening and Editing the Network View with DP Slaves
Displaying DP
Slaves
Requirement: You must be in the network view of NETPRO.
If you want to display previously configured DP slaves or network DP slaves,
toggle the view to show the DP slaves in the network view using the menu
command View " DP Slaves.
If you select the menu command again, the DP slaves are hidden again in the
network view.
Arranging
DP Slaves
Requirements: You must have assigned a DP master to a station when you
configured the hardware in the configuration table. You must be in the
network view in NETPRO.
Arrange the DP slave in the network view as follows:
1. In the network view, select the DP master in a station to which you want
to assign the DP slave.
2. Click in the “Catalog” window on “PROFIBUS–DP”.
3. Click through the hierarchy until you reach the required DP slave. Select
the DP slave, hold the mouse button pressed, and drag the DP slave to the
window for the graphic network view.
4. In the properties dialog box which opens automatically, assign a node
address for the DP slave.
Result: The DP slave appears in the network view together with its
network connection. DP slaves are represented in a similar way to a
station.
NETPRO: Configuring Networks – [Network to Project “Model”]
View
Network
Edit
Insert
PLC
Options
Window
Help
SIMATIC 400-Station(1)
CPU DP414 Mas
Symbol for DP Master (Selected)
MPI(1)
MPI
PROFIBUS(1)
PROFIBUS
ET 200L-SC 32DI
Ready
Figure 8-5
Symbol for DP Slave
NUM
Example of the View of a Network Configuration with DP Slaves
Standard Software for S7 and M7 – STEP 7 User Manual
C79000-G7076-C552-01
8-11
Configuring Networks
Assigning
Parameters to
DP Slaves
Once you have arranged a DP slave in the network view, assign its
parameters following the steps outlined below:
1. Select the DP slave in the network view.
2. Select the menu command Edit " Object Properties.
Result: An object properties dialog box is opened for the DP slave in
which you can change its parameters.
(By double-clicking the DP slave you change to the configuration table
view.)
Selecting a Master
System
You can select a whole master system to copy it, for example.
1. Select a DP master or a DP slave in the network view.
2. Select the menu command Edit " Select " Master System.
Highlighting a
Master System
You can highlight a master system in color.
1. Select a DP master or a DP slave in the network view.
2. Select the menu command View " Highlight " Master System.
8-12
Standard Software for S7 and M7 – STEP 7 User Manual
C79000-G7076-C552-01
Configuring Networks
8.6
Selecting Context Functions for Subnets, Stations, and Modules in
the Network View
Starting Global
Data Configuration
You can change to the global data configuration application from NETPRO
by following the steps outlined below:
1. Select an MPI subnet in the network view for which you want to
configure global data communication.
2. Select the menu command Options " Define Global Data.
Result: The GD table for the MPI subnet is opened (refer also to
Chapter 9 for information on global data communication).
Starting
Connection
Configuration
You can change to the connection configuration application from NETPRO
by following the steps outlined below:
1. In the network view, select a station or a programmable module (CPU,
FM) for which you want to configure communication connections.
2. Select the menu command Options " Configure Connections.
Result: The connection table for the module is opened (refer also to
Chapter 10 for information on configuring connections).
Highlighting the
Communication
Partners of a
Module
You can highlight the communication partners for which you have created
connections in the connection table. The communication partners are then
displayed in color.
1. Select a programmable module (CPU, FM) in the network view.
2. Select the menu command View " Highlight " Connections.
Note: The communication partners of only one programmable module
can be highlighted at any one time.
Displaying/
Changing the
Properties of a
Station
To display the properties of a station, follow the steps outlined below:
1. Select a station in the network view.
2. Select the menu command Edit " Object Properties.
Result: The object properties dialog box for the station is opened.
Displaying/
Changing the
Properties of a
Module
To display the properties of a module, follow the steps outlined below:
1. Select a module in a station in the network view.
2. Select the menu command Edit " Object Properties.
Result: The object properties dialog box for the module is opened.
Standard Software for S7 and M7 – STEP 7 User Manual
C79000-G7076-C552-01
8-13
Configuring Networks
Additional Context
Functions for a
Module
You can execute the following functions if you have selected a module in the
network view. You will find the menu commands for these functions in the
“PLC” menu in NETPRO:
S Display module information
S Change the operating mode of a module
S Clear/reset a module
S Set the date and time for a module
8.7
Special Feature when Configuring MPI Subnets in S7-300
Special S7-300
CP and FM
Characteristic
Communications processors (CP) and function modules (FM) with their own
MPI address have a special feature: their MPI address is calculated
automatically by the CPU according to the pattern shown in Figure 8-6:
Figure 8-6
CPU
CP
MPI
address
MPI
address+1
CP
MPI
address+2
Automatic MPI Address Assignment for Modules
STEP 7 takes this feature into account when you assign MPI addresses.
Rule
8-14
For this reason, when planning the MPI addresses for the CPUs, you must
leave MPI address “gaps” for function modules and communications
processors so that addresses cannot be assigned twice.
Standard Software for S7 and M7 – STEP 7 User Manual
C79000-G7076-C552-01
Configuring Networks
8.8
Changing Node Addresses and Downloading the Configuration via
the Network
Different Node
Addresses
In order that your network functions correctly, each node in a subnet must
have a different node address.
S MPI subnet with connection via the CPU
CPUs are shipped with the default node address 2. However, you can only
use this address once in a subnet, so you will have to change the default
node address for any other CPUs.
S PROFIBUS and Industrial Ethernet subnets with communications
processors
The CPs of the stations that are run via these subnets must be configured
and given node addresses. You should always assign this address via the
multipoint interface for the station before download and communication
processes can be performed via the subnet (for more information refer to
/500/ and /501/.
Changing the
Node Address
If you do have two or more modules in your actual structure with the same
node address, you can change the node address for a programmable module
(CPU or FM) by following the steps outlined below:
1. Switch the module to STOP and connect your programming device to the
interface on the programmable module via a connecting cable.
2. Open your project in the SIMATIC Manager.
3. Open the configuration table for the required station.
4. Double-click in the row containing the module. The dialog box
containing tabs for assigning parameters to the module appears.
5. Click the button for the required subnet in the “General” tab. The network
connection properties dialog box appears.
6. In the dialog, select the new node address, confirm your entry, close the
configuration table, and save the hardware configuration.
7. Download the configuration to the programmable controller using the
menu command PLC " Download.
Note
Before you download the configuration to the connected module, you must
specify the MPI address for the programmable controller. Note that when
changing the MPI address, you should enter the old MPI address here
(because this is still the valid node address at this point).
Standard Software for S7 and M7 – STEP 7 User Manual
C79000-G7076-C552-01
8-15
Configuring Networks
Requirement for
Downloading via
the Network
Only when all the modules in a network have different node addresses and
your actual structure matches the configuration in the software can you
download the configuration via the network (PROFIBUS or MPI) to the
programmable controller.
Checking
Consistency in
NETPRO
A configuration can only be downloaded to the programmable controller if it
is consistent and free of errors. We therefore recommend you use STEP 7 to
check the consistency of the network configuration before you download.
Any errors and their cause are displayed by STEP 7. Use the menu command
Network " Consistency Check in NETPRO to run the check.
Downloading the
Configuration to
the Programmable
Controller via the
Network
To download the configuration to a programmable controller via a network,
follow the steps outlined below:
1. Change to the configuration table view.
2. Connect your programming device to the PROFIBUS or MPI subnet.
3. Switch the CPU to which you want to download the configuration to
STOP mode.
4. Select the menu command PLC " Download To Module in the
configuration table view.
STEP 7 then guides you through the process using dialog boxes.
Result: STEP 7 always downloads the whole configuration (hardware
configuration and network configuration) to the programmable controller.
Downloading the
Configuration to
Other
Programmable
Controllers
8-16
If you want to connect nodes to networks which are not components of
SIMATIC S7/M7/C7 systems, such as SIMATIC S5 programmable
controllers, for example, then you must store the network configuration in
these nodes also. Refer to the documentation for the particular device you
intend to use as a node.
Standard Software for S7 and M7 – STEP 7 User Manual
C79000-G7076-C552-01
Configuring Global Data Communication
Overview
9
SIMATIC CPUs provide their own type of “internal” communication. This
chapter explains how, by defining “global data”, the barriers between
physically separate programmable controllers can disappear without anything
being added to the user program.
Global data communication is not programmed, but configured. Configuring
the exchange of global data is very simple; you just fill out a table. The data
are then transferred by the system.
Global data communication can function with up to 15 MPI nodes. It is
intended for use with small amounts of data which are generally transferred
cyclically. With some CPUs in the SIMATIC S7-400 range, event-driven
transfer is also possible with the use of system functions (SFCs).
This chapter describes how you configure global data communication.
Chapter
Overview
Section
Description
Page
9.1
Global Data
9-2
9.2
Opening a Global Data Table
9-3
9.3
Filling Out a Global Data Table
9-5
9.4
Compiling and Downloading a Global Data Table
9-6
9.5
Setting Scan Rates
9-8
9.6
Displaying and Editing the Global Data Status
9-10
9.7
Configuration Examples
9-11
Standard Software for S7 and M7 – STEP 7 User Manual
C79000-G7076-C552-01
9-1
Configuring Global Data Communication
9.1
Global Data
What Are Global
Data?
Global data (GD) are inputs, outputs, bit memory, timers, counters, and data
block areas (meaning all data that can be addressed by logic blocks apart
from the peripheral input and output areas and temporary local data). A
configurable part of the data can be exchanged between CPUs with the help
of global data communication.
GD Packet
Global data that have the same sender/receiver can be collected together in a
GD packet. The GD packet is sent in a frame. A GD packet is identified by a
GD packet number.
GD Circle
The CPUs that participate in exchanging GD packets form a GD circle. A
GD circle is identified by a GD circle number.
Global Data (GD)
Communication
Global data are exchanged between S7 CPUs in an MPI network. The global
data can be transferred via the MPI cable or via the communication bus of an
S7-400 station. The send CPU sends the global data to all nodes in the GD
circle. The receive CPUs do not have to know the send CPU. The receipt of
the global data is not acknowledged.
Figure 9-1 shows an example of GD communication in an MPI network: the
S7-400 CPU sends global data and the S7-300 CPUs receive global data.
PG
MPI
S7-400
S7-300
Figure 9-1
CPU
Communications
Resources
9-2
S7-300
Global Data Communication in an MPI Network
The communications resources of a CPU are the maximum number of global
data circles to which a CPU can belong. Refer to the technical specifications
for your CPU or the online help for the global data communication
application to find out its communications resources.
Standard Software for S7 and M7 – STEP 7 User Manual
C79000-G7076-C552-01
Configuring Global Data Communication
9.2
Opening a Global Data Table
Overview
For global data communication you create a global data table in STEP 7
which configures the data to be used in the data exchange.
Requirements
Before you fill out the global data table, the following requirements should
be fulfilled:
S A STEP 7 project must have been created in the SIMATIC Manager.
S An MPI network must be configured in the project.
S At least two modules capable of exchanging global data must be
configured and networked in the project.
S The modules must be connected for global data exchange via MPI
networks.
When you create a new STEP 7 project, an MPI network is created in it
automatically.
If you are exchanging global data via the communication bus only, the
modules do not need to be connected in a network.
Opening the
Global Data Table
To open a global data table, follow the steps outlined below:
1. Open your project and select the MPI subnet.
2. Select the menu command Options " Define Global Data.
Result: A new global data table is created or an existing table opened
which is displayed on the screen (see Figure 9-2).
GD: Defining Global Data - Global Data for Subnet ’MPI Subnet(1)’
GD Table
Edit
Insert
PLC
View
Window
Help
Global Data for Subnet ’MPI Subnet1’
GD Identifier
GD
GD
GD
GD
GD
GD
Editing
Figure 9-2
Offline
View of a New Global Data Table
Standard Software for S7 and M7 – STEP 7 User Manual
C79000-G7076-C552-01
9-3
Configuring Global Data Communication
Global Data Tables
for Subnets
Using the menu command GD Table " Open " Global Data for Subnet you
can open more global data tables from selectable subnets.
Global Data Tables
for CPUs
Using the menu command GD Table " Open " Global Data for CPU you
can display global data tables from the system data for existing CPUs online
and offline for service purposes or troubleshooting, for example.
9-4
Standard Software for S7 and M7 – STEP 7 User Manual
C79000-G7076-C552-01
Configuring Global Data Communication
9.3
Filling Out a Global Data Table
Entries in the
Global Data Table
In the global data table you enter which CPUs are to exchange data and the
address areas for the data to be exchanged.
As an option you can also specify:
S A scan rate which determines after how many CPU scan cycles the data
are to be sent or received
S An address area (double word) for status information
Creating connections as required for data exchange via communication
blocks is not necessary for global data communication.
Filling Out the
Global Data Table
You must fill out one column in the table for each CPU involved in global
data communication. This specifies the address areas for all CPUs taking part
in GD communication. To fill out a GD table, follow the steps outlined
below:
1. Enter all participating CPUs in the top row of the table by double-clicking
on the column header or using the menu command Edit " Assign CPU.
2. Select the CPU required in each case from the dialog box and confirm
with “OK”.
3. Enter the global data to be exchanged in the row beneath in the GD table.
You can select the edit mode for individual cells in the table with the F2
key.
4. Define a sender in each row of the GD table by selecting the respective
row and clicking the “Select As Sender” button in the toolbar.
5. The global data entered in a row can only be exchanged via a uniform
communication route: either via communication bus or via MPI cable.
Example
Figure 9-3 shows a simple communication example and the corresponding
entries in the GD table.
Station1/CPU1
Station2/CPU2
GD 1.1.1
IB100
MB202
Global data elements
MB200
QB100
GD 1.2.1
Global data table
GD Identifier
Station1/CPU1
Station2/CPU2
GD 1.1.1
GD 1.2.1
>> IB100
MB202
MB200
>> QB 100
>> : Indicates the sender
Figure 9-3
Example of Global Data Communication
Standard Software for S7 and M7 – STEP 7 User Manual
C79000-G7076-C552-01
9-5
Configuring Global Data Communication
9.4
Compiling and Downloading a Global Data Table
Overview
The data entered in the global data table must be compiled into a language
that the CPUs understand. Compiling the global data (GD) table is split into
two phases. Each phase is displayed in the status bar at the bottom edge of
the user interface.
Phase 1
During the first compilation of a global data table STEP 7 checks the
following:
S The validity of the CPUs entered in the header of the CPU columns.
S The syntax of the addresses you entered in the table cells.
S The size of the data areas for sender and receiver (the data area for the
sender and receiver must be the same size).
S That the global data in a row are exchanged either via the communication
bus only or via the MPI cable. Mixed operation is not possible.
The individual global data are collected together into “packets”.
Once the first compilation has been completed successfully, the GD table is
in phase 1. The active phase is displayed in the status bar of the window.
In phase 1 you can edit the following in the global data table:
S Status rows and
S Scan rates
The configuration data created in phase 1 are sufficient for global data
communication to function. The data can be downloaded to the CPUs from
the programming device database.
Phase 2
If you edit the status rows and/or the scan rate rows in phase 1, you have to
compile the GD table again so that the additional information is included in
the configuration data. Phase 2 is only necessary if you change the default
values for the scan rates or want to make entries in the status rows.
GD Table:
new or modified
1st compilation
GD Table
Phase 1
System data
Phase 1
Figure 9-4
9-6
Extend scan rates and
status rows
Extended
GD Table
GD Table
Phase 2
2nd compilation
Extended
system data
Phase 2
Compiling a Global Data Table
Standard Software for S7 and M7 – STEP 7 User Manual
C79000-G7076-C552-01
Configuring Global Data Communication
Compiling and
Downloading a
Global Data Table
The configuration is compiled into downloadable system data blocks (SDB)
that are stored in the “System Data” object in the user program of the
respective CPU. Follow the steps outlined below:
1. Use the menu command GD Table " Compile to compile the
configuration data required for global data communication.
2. Use the menu command PLC " Download to download the configuration
data to the CPUs.
Standard Software for S7 and M7 – STEP 7 User Manual
C79000-G7076-C552-01
9-7
Configuring Global Data Communication
9.5
Setting Scan Rates
Overview
Global data are exchanged as follows:
S The sender CPU sends the global data at the end of a scan cycle.
S The receiver CPU reads these data at the beginning of a scan cycle.
Using a scan rate, which you specify in the global data table, you can set the
number of scan cycles which must be executed before the CPUs start sending
or receiving data.
Setting the Time of
Exchange
To set the time the exchange should take place, follow the steps outlined
below:
1. Compile the global data table if it is not yet in phase 1 (see entry in status
bar).
2. Select the menu command View " Scan Rates if no scan rate row is
displayed in the table.
3. Enter the required scan rates. If you do not specify a scan rate, the default
setting is used.
4. Compile the global data table again (phase 2).
Selecting Suitable
Scan Rates
Small scan rates increase the frequency of the data exchange. The following
conditions should be maintained, however, to keep the communication load
on the CPUs at a low level:
For the sender of a GD packet:
S S7 300 CPUs: scan ratesender x scan cycle timesender >= 60 ms
S S7 400 CPUs: scan ratesender x scan cycle timesender >= 10 ms
For the receiver of a GD packet:
S Scan ratereceiver x scan cycle timereceiver < scan ratesender x scan cycle
timesender
This means: The data in a GD packet must be received more often than they
are sent otherwise a GD packet may be lost. Any loss of a GD packet is
reported in the GD status row if you configured it (see Section 9.6).
9-8
Standard Software for S7 and M7 – STEP 7 User Manual
C79000-G7076-C552-01
Configuring Global Data Communication
Exchanging Global
Data Using System
Functions
In S7-400 CPUs you can use the system functions SFC60 GD_SND and
SFC61 GD_RCV to send or receive global data packets at any point in the
user program either in addition to or instead of cyclic data transmission. The
requirement for this is that you have configured the data exchange, meaning
you must have created a global data table.
As the parameters for the SFCs, you enter the number of the global data
circle and the global data packet which are created when you configure the
global data table.
If you enter “0” as the scan rate in the global data table, the global data are
only transferred when the relevant SFC is called.
Structure of the
GD Identifier
During compilation of the global data table you created, all global data are
assigned a unique identifier (GD identifier).
This GD identifier is structured as follows:
GD 1. 1. 1.
Identifier for the data contained in the packet
GD packet number
GD circle number
Figure 9-5
Structure of the GD Identifier
Standard Software for S7 and M7 – STEP 7 User Manual
C79000-G7076-C552-01
9-9
Configuring Global Data Communication
9.6
Displaying and Editing the Global Data Status
Displaying the
Status
In order to be able to evaluate errors in global data communication using the
user program, message bits are set in a status word. For each global data
(GD) packet you can specify a status double word for each participating
CPU. Status double words have the ID “GDS” in the table.
Evaluating the
Status
If you assign the status double word (GDS) to a CPU address of the same
format (for example, MD120), you can evaluate the status in the user
program or in the status row. The status row can be toggled on and off with
the menu command View " GD Status.
Structure of the
Status Double
Word
The global data status is stored as the 32 bits of the double word. The
significance of a set bit is shown in Figure 9-6. A bit remains set until it is
reset by the user program or via a programming device operation.
Any bits not listed are reserved and have no significance at present.
The global data status occupies a double word; to make it clearer, MD120
has been used in Figure 9-6.
MD120
MB121
MB122
MB123
5 4 3 2 1 0 7 6 5 4 3 2 1 0 7 6 5 4 3 2 1 0
MB120
7 6 5 4
Area length error in
sender
DB not present in
sender
GD packet lost
Syntax error in GD packet
GD object missing in GD packet
GD object lengths in the sender and the
receiver are different
Area length error in receiver
DB not present in receiver
Receiver received new data
Figure 9-6
Sender executed restart/complete restart
Structure of the Global Data Status Word
Group Status
STEP 7 creates a group status (GST) for all global data packets.
The group status, which is also a double word with an identical structure to
the status double word (GDS), is formed by linking all the status double
words with an OR logic operation.
9-10
Standard Software for S7 and M7 – STEP 7 User Manual
C79000-G7076-C552-01
Configuring Global Data Communication
9.7
Configuration Examples
Example 1: One
CPU Sends Data to
Other CPUs
In the first configuration example, the CPU with the name Station1/CPU1
sends an array of 22 bytes to several selected CPUs in a network (as shown in
Figure 9-7). The configuration specifies that CPU1 of Station1 sends the data
starting at MB50 through MB71. The other CPUs receive the data at the
same or different addresses.
Station1/CPU1
22 bytes
Station2/CPU1
Figure 9-7
Station3/CPU1
Station4/CPU1
Example: One CPU Sends Data to a Number of Other CPUs
Table 9-1 shows the global data table for this configuration. The table
represents one global data circle. A CPU 314, for example, can handle four
circles of this type of configuration.
Table 9-1
One CPU Sends Data to a Number of Other CPUs
GD Identifier
GD 1.1.1
Station1/CPU1
»MB50:22
Station2/CPU1
MB50:22
Standard Software for S7 and M7 – STEP 7 User Manual
C79000-G7076-C552-01
Station3/CPU1
MB110:22
Station4/CPU1
MB110:22
9-11
Configuring Global Data Communication
Example 2: Two
CPUs Exchange
Data
In this configuration example, the CPU with the name Station1/CPU1 is
configured to send an array of 10 bytes starting at MB80 to the CPU with the
name Station2/CPU1 which stores the received data at MB20 through MB29.
CPU1 of Station2 is also configured as a sender and returns 20 bytes of data
from DB10 starting at address 0 to CPU1 of Station1 which stored the data at
the same address (see Figure 9-8).
Station1/CPU1
Figure 9-8
Station2/CPU1
Communication via Global Data
Table 9-2 shows the global data table for this configuration. The table
represents one global data circle. A CPU 314, for example, can handle four
circles of this type of configuration.
Table 9-2
Two CPUs Exchange Data
GD Identifier
Note
9-12
Station1/CPU1
Station2/CPU1
GD 1.1.1
»MB80:10
MB20:10
GD 1.2.1
DB10.DBB0:20
»DB10.DBB0:20
You will find more examples in the online help under “Examples for Global
Data Communication”.
Standard Software for S7 and M7 – STEP 7 User Manual
C79000-G7076-C552-01
Establishing Communication Connections
Overview
10
Communication connections are always required when you want to exchange
data using special communication blocks (SFBs, FBs, or FCs) in the user
program.
A communication connection defines the communications relationship for
any two nodes. Defining a connection makes programming the
communication for data exchange much easier. The setting is then valid for
all called communication blocks and need not be redefined every time.
This chapter describes how you define the required connections with STEP 7,
which particular features you should note, and which communication blocks
you can use in the user program.
Chapter
Overview
Section
Description
Page
10.1
Communication Connections – An Overview
10-2
10.2
Creating a Connection
10-4
10.3
Properties of S7 Connections
10-9
10.4
Properties of Point-to-Point Connections
10-12
10.5
Communication Connections to Partners in Other Projects
10-14
10.6
Communication Connections to Other Stations, PGs/PCs, or
SIMATIC S5 Stations
10-15
10.7
Downloading the Connection Table to the Programmable
Controller
10-17
Standard Software for S7 and M7 – STEP 7 User Manual
C79000-G7076-C552-01
10-1
Establishing Communication Connections
10.1 Communication Connections – An Overview
Overview
Setting the required communication connections is a requirement for data
exchange using special communication blocks (SFBs, FBs, or FCs) in the
user program.
A communication connection is a logical connection and identifies:
S The nodes involved in communication
S The type of connection (for example, S7, point-to-point, FDL, or ISO
transport link)
S Special properties (such as whether a connection remains permanently
configured, or whether it is set up/broken dynamically in the user
program)
Why Are
Connections
Specified?
The connection defines the communication properties between two nodes.
STEP 7 saves all the properties for a connection and assigns a unique name in
each connection for every communication partner, the so-called connection
ID. You only need to use this connection ID when you assign parameters to
communication blocks, thereby making programming much simpler.
Procedure
To create a communication connection, follow the procedure shown in the
figure below:
Create a project in the SIMATIC Manager.
Assign parameters to a subnet.
Specify which nodes are to exchange data.
Configure and connect at least 2
programmable modules (CPU/FM).
Enter the connections in the
connection table.
Set the object properties for the connections.
Download the configuration data to the
programmable modules involved in
communication.
Figure 10-1
10-2
Procedure for Configuring a Communication Connection
Standard Software for S7 and M7 – STEP 7 User Manual
C79000-G7076-C552-01
Establishing Communication Connections
Requirements
Before you can enter a connection in the connection table, you must have
done the following:
S Created a project
S Assigned parameters to a subnet
S Configured at least two programmable modules (CPU/function module)
in the project and connected them in a network (between which you want
to set up communication connections)
Opening the
Connection Table
You must have opened your project and have opened the station containing
the module for which you want to create the connection table.
To open a connection table, follow the steps outlined below:
1. Double-click on the programmable module.
2. Select the “Connections” object.
3. Double-click the object or select the menu command Edit " Open
Object.
Result: A window opens which contains the table for configuring
connections.
CPU414-2DP - Configuring Connections
Connection Table
Edit
Insert
Station:
SIMATIC 400-Station(2)
Local
ID (hex.)
Partner
ID (hex.)
1
2
4
5
Local Node
Help
View
Module:
CPU414-2DP(1)
Partner
Type
SIMATIC 400-Station(3)/CPU412-1(1)
SIMATIC 400-Station(3)/CPU416-1(1)
S7 Connection.
S7 Connection.
Row: 1 – Loc. ID:1
Ready
Figure 10-2
PLC
Active
Send Op. Mode
Connection Setup Messages
Yes
No
Yes
No
Sel. 1 of 2
View of the Connection Table
Every programmable module that can be a partner in a communication
connection has its own connection table.
In the list boxes in the upper part of the connection table screen, select the
station and the module for which you want to create a connection table (this
module is then known also as the “local node” or “local partner”).
Standard Software for S7 and M7 – STEP 7 User Manual
C79000-G7076-C552-01
10-3
Establishing Communication Connections
10.2 Creating a Connection
Overview
The connection table contains all the connections which originate from one
module. The table itself cannot be edited. This section explains how you
create a new connection. Using the same method, you can also modify an
existing connection.
Creating New
Connections
Requirement: you must have opened the connection table.
To create a new connection, follow the steps outlined below:
S Double-click an empty row in the connection table
or
S Select the menu command Insert " Connection
Result: The following dialog box appears on the screen.
New Connection
Connection Partner
Station:
SIMATIC 400-Station(2)
Module:
CPU414-2DP(2)
Connection
Type:
S7 Connection
Show Properties Dialog Box
OK
Figure 10-3
Add
Cancel
Help
Dialog Box for Creating a Connection
Connection
Partner
Select the station and the programmable module to which you want to create
a connection.
“Unspecified”
Connection
Partner
Select “unspecified” as the connection partner in the “Station” list box if:
S You only want to reserve the connection and not enter the partner yet,
S The connection partner is a programming device or PC with WinCC, or
S The connection partner is in another STEP 7 project.
You will find more information in Section 10.5.
Connection Type
10-4
In the “Type” list box, select the connection type you want to use.
Standard Software for S7 and M7 – STEP 7 User Manual
C79000-G7076-C552-01
Establishing Communication Connections
Selecting the
Connection Type
The connection type is dependent on the subnet and the transfer protocol via
which the connection is established, and on the automation family to which
the connection partners belong.
Which communication blocks (SFBs, FBs, or FCs) you can use depends on
the connection type.
The following table should make it easier for you to select the connection
type for the connection you want to establish.
Table 10-1
Selecting the Connection Type
Connection
Type
S7
Connection
Subnet Type
MPI,
PROFIBUS,
Industrial Ethernet
PTP Connection
Point-to-Point
(computer protocol
RK512/3964(R))
Connection between
SIMATIC ...
Communication
Blocks
S7 – S7, S7 – PG/PC1, SFBs USEND,
S7 – PG/PC with
URCV, BSEND,
WinCC2
BRCV, GET,
PUT, START,
with MPI also:
STOP,
M7 – M7, M7 – S7,
RESUME,
1
M7 – PG/PC
STATUS,
S7 – partner in another
USTATUS
project (S7, PG/PC
with WinCC)
S7 – S7, S7 – S5, S7 – SFBs BSEND,
non-Siemens device
BRCV, GET,
S7 – partner in another PUT, STATUS,
PRINT
project (S7,
non-Siemens device)
FMS Connection PROFIBUS
(FMS protocol)
S7 – S7, S7 – S5, S7 –
PG/PC,
S7 – non-Siemens
device, S7 – broadcast
to all nodes
FDL Connection
S7 – S7, S7 – S5, S7 – FCs AG-SEND,
PG/PC,
AG-RECEIVE
S7 – non-Siemens
device
PROFIBUS
(FDL protocol)
FBs READ,
WRITE,
IDENTIFY,
ACCESS,
OSTATUS,
S7 – partner in another REPORT
project (S7, S5,
PG/PC, non-Siemens
device)
S7 – partner in another
project (S7, S5,
PG/PC, non-Siemens
device)
Standard Software for S7 and M7 – STEP 7 User Manual
C79000-G7076-C552-01
10-5
Establishing Communication Connections
Table 10-1
Selecting the Connection Type, continued
Connection
Type
Subnet Type
ISO Transport
Connection
Industrial Ethernet
(ISO Transport
protocol)
Connection between
SIMATIC ...
Communication
Blocks
S7 – S7, S7 – S5, S7 – FCs AG-SEND,
PG/PC, S7 –
AG-RECEIVE
non-Siemens device,
S7 – unspecified
S7 – partner in another
project (S7, S5,
PG/PC, non-Siemens
device, unspecified)
ISO-on-TCP
Connection
Industrial Ethernet
(TCP/IP protocol)
S7 – S7, S7 – S5, S7 – FCs AG-SEND,
PG/PC, S7 –
AG-RECEIVE
non-Siemens device,
S7 – unspecified
S7 – partner in another
project (S7, S5,
PG/PC, non-Siemens
device, unspecified)
1
2
Blocks for
S7 Connections
PG/PC with SAPI-S7 programming interface (= C programming interface for access
to SIMATIC S7 components)
WinCC = software which turns a programming device/PC into an operator station (OS)
Table 10-2 shows an overview of the communication blocks of the type SFB
(system function block) which can be used for the connection type S7.
Table 10-2
System Function Blocks for S7 Connections
SFB
Blocks for PTP
Connections
10-6
Brief Description
SFB8
SFB9
USEND
URCV
Uncoordinated data exchange using a send and a receive SFB
SFB12
SFB13
BSEND
BRCV
Exchanging blocks of data of variable length between a send
SFB and a receive SFB
SFB14
GET
Reading data from a remote device
SFB15
PUT
Writing data to a remote device
SFB19
START
Activating a complete restart on a remote device
SFB20
STOP
Changing a remote device to the STOP mode
SFB21
RESUME
Activating a restart on a remote device
SFB22
STATUS
Querying the status of a remote device
SFB23
USTATUS
Unsolicited status from a remote device
For the point-to-point connection type you can use the SFBs BSEND, BRCV,
GET, PUT, and STATUS (see Table 10-2).
Standard Software for S7 and M7 – STEP 7 User Manual
C79000-G7076-C552-01
Establishing Communication Connections
You can also use the SFB PRINT for point-to-point connections:
Table 10-3
SFB PRINT for Point-to-Point Connections
SFB
SFB16
Brief Description
PRINT
Sending data to a printer
Further
Information on
SFBs
You will find more information on system function blocks in /235/.
Blocks for FMS
Connections
Table 10-4 shows an overview of the communication blocks of the type FB
(function block) which can be used for the connection type FMS connection.
Table 10-4
Function Blocks for FMS Connections
Brief Description
FB
READ
Reading variables from a remote device
WRITE
Writing variables to a remote device
IDENTIFY
Identifying the remote device for the user
ACCESS
Allows write and read accesses to be coordinated (disable, enable,
consistent transfer)
OSTATUS
Provides the status of a remote device on request from the user
REPORT
Reporting a variable to the remote device
Further
Information on
FBs
You will find more information on function blocks in the online help for the
FBs and in /501/.
Blocks for FDL,
ISO Transport,
ISO-on-TCP
Connections
Table 10-5 shows an overview of the communication blocks of the type FC
(function) which can be used for the connection types ISO Transport, FDL,
and ISO-on-TCP connection.
Table 10-5
Functions for FDL, ISO-on-TCP, and ISO Transport Connections
FC
Further
Information on
FCs
Brief Description
AG-SEND
Sends data via a configured connection to the communication partner
AG-RECV
Receives data via a configured connection from the communication
partner
You will find more information on the functions in the online help for the
FCs and in /500/ and /501/.
Standard Software for S7 and M7 – STEP 7 User Manual
C79000-G7076-C552-01
10-7
Establishing Communication Connections
Number of
Connections
The maximum number of connections that can be configured depends on the
communications resources of the module used. STEP 7 monitors the limits of
the module and displays a message if the module’s resources have been
exhausted.
Local and Partner
IDs
When you confirm and exit the “New Connection” dialog box, the partner
and the connection type appear in the connection table. STEP 7 also assigns
two IDs (connection IDs) for the configured connection, making it uniquely
identifiable.
The module from which the connection originates (the local partner or node)
receives a local ID; the module to which the connection links up is given a
partner ID. The connection IDs are specified as hexadecimal numbers.
You will need the local ID and the partner ID for programming the
communication blocks. You will find a sample program for exchanging data
via SFBs in /234/.
Should You Create
a Connection for
both the Local and
Connection
Partners?
When you create a connection in the connection table you must note the
following. You only enter the connection once, in the connection table for the
local node only:
S If STEP 7 only enters a “Local ID” for the connection in the connection
table (special cases are explained in the online help).
S If STEP 7 enters both a “Local ID” and a “Partner ID” for the connection
in the connection table (STEP 7 automatically enters the connection in
the connection table of the connection partner).
10-8
Standard Software for S7 and M7 – STEP 7 User Manual
C79000-G7076-C552-01
Establishing Communication Connections
10.3 Properties of S7 Connections
Overview
You use the connection type “S7 Connection” mainly to connect two
modules from the SIMATIC S7/M7 ranges.
In addition to the entry in the connection table, you can set special properties
for each S7 connection you configure.
Opening the
Dialog Box
To open the dialog box for the special connection properties, follow the steps
outlined below:
1. Select the required connection in the connection table.
2. Select the menu command Edit " Object Properties.
Result: The “Object Properties” dialog box appears.
Object Properties – Connection
Connection
Block Parameter ID
Configured Dynamic Connection
Active Connection Setup
W#16#1
Local ID:
ID
1
Send Operating Mode Messages
Default
Network Connections
Local
Partner
SIMATIC 400 Station(1)/CPU414-1(1)
SIMATIC 400 Station(2)/CPU413-1(1)
Via
CP/CPU:
CPU414-1(1) (R 0 / S 2)
CPU413-1(1) (R 0 / S 2)
Interface Type:
MPI
MPI
Node Address:
2
3
Addresses...
OK
Figure 10-4
Configured
Dynamic
Connection
Cancel
Help
Object Properties for S7 Connection
Activate this check box if you want to set up and break the connection in the
user program. This has the advantage that the network is only under load
when you need the connection. The check box can only be selected for a
SIMATIC M7 module. You trigger communication setup and break with the
M7 functions “M7KInitiate” and “M7KAbort” in the user program. The M7
functions are described in the manual /281/.
If the check box is not selected, the connection is automatically set up during
startup and remains connected until you switch off the node.
Standard Software for S7 and M7 – STEP 7 User Manual
C79000-G7076-C552-01
10-9
Establishing Communication Connections
Active Connection
Setup
Activate this check box if you want the local node to set up the connection.
The connection setup leads to the scan cycle time being slightly lengthened.
If you do not activate the check box, the partner (remote node) sets up the
connection.
Send Operating
Mode Messages
Activate this check box if you want the local node to send its operating status
messages (for example, STOP, RUN, DEFECTIVE) to the partner. The status
messages can be received in the partner via the SFB23 USTATUS.
Local ID
The local ID of the node from which the connection is viewed (local partner)
is displayed. You can change the local ID. This will be necessary if you
already programmed communication blocks and you want to use the local ID
specified there for the connection.
Default
You can use the “Default” button to reset the changed local ID back to the ID
that was previously valid.
Network
Connections
This part of the dialog box shows the route which the connection from the
local partner to the connection partner takes. You can select the route
depending on the modules with communication capability and how they are
networked. You will find special cases explained in the online help.
Example: the local node is a CPU which is a node in an MPI subnet and in a
PROFIBUS subnet; its connection partner is a CPU which is also a node in
the same MPI and PROFIBUS subnets. In this case you can choose whether
the connection “runs” via the MPI subnet or the PROFIBUS subnet.
Local: Displays the local partner for the connection.
Partner: Displays the connection partner for the connection.
The following are displayed for both the local partner and the connection
partner:
Via CP/CPU: For the local node you can select via which module you want
the connection to “run” (by specifying the rack and slot of the module).
STEP 7 immediately matches up the selection boxes “Interface Type” and
“Via CP/CPU” for the local and the connection partners. You can change the
module of the connection partner only for the set interface type.
Interface Type: For the local node you can select via which interface of the
module you want the connection to “run” (for example, PROFIBUS or MPI
of a CPU). STEP 7 immediately matches up the selection boxes “Via
CP/CPU” and “Interface Type” for the local and the connection partners. You
cannot change the interface type of the connection partner.
Node Address: The node address of the module directly connected to the
subnet (for example, MPI address of the CPU) is displayed here.
Addresses: You can use this button to open a dialog box in which you can
enter address information depending on the connection partner you are using.
10-10
Standard Software for S7 and M7 – STEP 7 User Manual
C79000-G7076-C552-01
Establishing Communication Connections
Partner PG/PC
with SAPI-S7
Interface
You can create S7 connections to PGs/PCs with an SAPI-S7 interface within
a project. When you create the S7 connection you must select the PG/PC you
already created in the SIMATIC Manager as the connection partner (refer to
Section 10.6 for the procedure). You enter special address information for the
PG/PC in the “Address Details” dialog box.
Partner PG/PC
with WinCC
You can create S7 connections to PGs/PCs with WinCC within a project or
beyond project boundaries. When you create the S7 connection you must
select “Unspecified” as the connection. You enter special address information
for WinCC in the “Address Details” dialog box.
S7 Connection
within a C7 630
Station
A C7 630 station comprises a PC with an S7-400 CPU with an MPI and a
PROFIBUS interface and an Ethernet CP. A C7 630 station contains
Windows NT, STEP 7, and WinCC. For C7 630 stations you can create
connections just as you can for other S7-400 stations with an S7-400 CPU.
You can also create an S7 connection whose communication partner is
located within the C7 630 station. This means you configure the S7-400 CPU
as the local node and “Unspecified” as the connection partner for the PC with
WinCC.
Standard Software for S7 and M7 – STEP 7 User Manual
C79000-G7076-C552-01
10-11
Establishing Communication Connections
10.4 Properties of Point-to-Point Connections
Overview
You can use the connection type “PTP” mainly to connect two point-to-point
CPs or to connect one point-to-point CP to a printer.
In addition to the entry in the connection table you must set special
properties for each point-to-point connection you configure.
Opening the
Dialog Box
To open the dialog box for the special connection properties, follow the steps
outlined below:
1. Select the required point-to-point connection in the connection table.
2. Select the menu command Edit " Object Properties.
Result: The “Object Properties” dialog box appears.
Object Properties – Connection
Connection
Block Parameter ID
Configured Dynamic Connection
W#16#1400
Local ID:
ID
1400
Active Connection Setup
Default
Send Operating Mode Messages
Communication Direction
1: Local –> Partner
2: Partner –> Local
3: Local <–> Partner
Network Connections
Local
Partner
SIMATIC 400 Station(1)/CPU416-1(1)
Via PTP CP:
CP441-2 (R 0/S 11)
Interface Type:
PTP
Interface:
IF_1/RK512
Connection Selected Using
RK512 CPU No.:
OK
Figure 10-5
Object Properties
10-12
2 OK
Other Station(3)
RK512 CPU No.:
Cancel
4
4
Help
Object Properties for a Point-to-Point Connection
In addition to the check boxes for “Connection”, the “Local ID” input box,
and the “Default” button described in Section 10.3, you can specify other
connection properties here.
Standard Software for S7 and M7 – STEP 7 User Manual
C79000-G7076-C552-01
Establishing Communication Connections
Communication
Direction
Here you specify in which direction communication is to link up by
activating the appropriate check box.
Network
Connections
This part of the dialog box shows the route which the connection from the
local partner to the connection partner takes. You can select the route
depending on the configured point-to-point communications processors.
Example: the local node is a station which contains two point-to-point
communications processors. In this case you can select via which
communications processor you want the connection to “run”.
Local: Displays the local partner for the point-to-point connection.
Partner: Displays the connection partner for the point-to-point connection.
Via PTP CP: For the local node you can select via which PTP
communications processor you want the connection to “run” (by specifying
the rack and slot of the CP).
Interface Type: Displays the interface type “PTP”.
Interface: SIMATIC S7 communications processors have a number of
channels (interfaces) via which point-to-point connections can be set up. The
channel and the protocol used for the channel are displayed. You can select
the channel, and you configured the protocol with the special configuration
software for the CP. The following protocols are possible:
S RK512 protocol
S 3964(R) protocol
S ASCII driver
S Special driver, or
S Printer driver
Connection
Selected Using
RK512...
Programmable controllers with multicomputing capability (such as the
S7-400) can contain more than one CPU. For this reason, you must specify a
CPU number via which the partner can access the connection.
If you selected Partner –> Local or Local <–> Partner as the
communication direction and want to receive message frames via an SFB,
enter the number of the CPU (1 to 4) here via which the partner can access
the connection.
RK512 CPU No.
Specify a CPU number to which the connection is to “run”.
If you selected Local –> Partner or Local <–> Partner as the
communication direction and want to receive message frames via an SFB,
enter the number of the CPU (1 to 4) here to which the connection “runs”.
Sending and
Receiving Frames
(with RK512)
If you want to send and receive message frames via system function blocks
you must fill out both the “Connection Selected Using...” and “RK512
CPU No.” boxes.
Standard Software for S7 and M7 – STEP 7 User Manual
C79000-G7076-C552-01
10-13
Establishing Communication Connections
10.5 Communication Connections to Partners in Other Projects
Two Possibilities
There are two methods of setting up connections to connection partners
which were configured in other STEP 7 projects:
S Set up a connection to an “other station” (see Section 10.6)
S Set up a connection to an “unspecified” connection partner
You must configure an “other station”, a PG/PC, and a SIMATIC S5 station
as subnet nodes in the current STEP 7 project. This is not necessary for an
“unspecified” partner.
Possible
Connection Types
The following table shows an overview of the possible connection partners in
another project depending on the connection type. It also shows which
connection partners you can configure.
Table 10-6
Connection Partners in Other Projects
Connection
Type
Partner in Other Project
Can Be ...
Configure Connection to
Connection Partner ...
S7 Connection
PG/PC with WinCC1,
S7 CPU/FM
“Unspecified”
PTP Connection
S7 station,
“Unspecified”
non-Siemens device
FMS Connection S7 station,
FDL Connection
S5 station,
“Other station” (for S7 station or
non-Siemens device),
PG/PC,
“S5 station”,
non-Siemens device
or “PG/PC”
created in the SIMATIC Manager
ISO Transport
Connection
S7 station,
S5 station,
“Other station” (for S7 station or
non-Siemens device),
ISO-on-TCP
Connection
PG/PC,
“S5 station”,
non-Siemens device
or “PG/PC”
created in the SIMATIC Manager,
or “Unspecified”
1
Special Cases for
PTP Connections
10-14
WinCC = software which turns a programming device/PC into an operator station (OS)
In contrast to the S7 connections, for configuring PTP connections to
unspecified partners it is not a requirement that the local node is in a
network. You must simply make sure you connect the communication
partners in your real plant before you attempt to use the connection.
Standard Software for S7 and M7 – STEP 7 User Manual
C79000-G7076-C552-01
Establishing Communication Connections
Creating a
Connection to an
“Unspecified”
Partner
FMS, FDL, ISO Transport, and ISO-on-TCP connections are described in
/500/ und /501/.
You create an S7 or point-to-point connection to an “unspecified” connection
partner by following the steps outlined below:
1. Create an S7 or point-to-point connection to an “unspecified” partner (see
Section 10.2 for procedure).
2. For point-to-point connections: in the object properties dialog box for the
PTP connection change the name of the partner from “unspecified” to a
suitable name (the name is also entered in the connection table).
The following steps are only necessary for an S7 connection:
3. Open the object properties dialog box for the S7 connection.
4. Click the “Addresses” button in the object properties dialog box.
Depending on the connection partner, different settings are necessary in the
“Address Details” dialog box. You will find more information on filling out
the dialog box in the online help.
10.6 Communication Connections to Other Stations, PGs/PCs, or
SIMATIC S5 Stations
Overview
Data exchange via communication blocks is possible both within a STEP 7
project and beyond project boundaries between the following:
S SIMATIC S7 stations and “other” stations
S SIMATIC S7 stations and programming devices/PCs
S SIMATIC S7 stations and SIMATIC S5 stations
“Other” Stations
“Other” stations in the active project are either:
S Devices from other manufacturers, or
S SIMATIC S7 stations that were configured and had parameters assigned
with STEP 7 in another project.
Possible
Connection Types
The connection types you can use for “other stations”, PGs/PCs, and
SIMATIC S5 stations are listed in Tables 10-1 and 10-6.
Standard Software for S7 and M7 – STEP 7 User Manual
C79000-G7076-C552-01
10-15
Establishing Communication Connections
Establishing a
Connection
To establish a connection to an “other” station (or to a PG/PC or a SIMATIC
S5 station), follow the steps outlined below:
1. In your open project, create an “other” station using the menu command
Insert " Station " Other Station.
2. Select the menu command Edit " Object Properties.
Result: The “Object Properties” dialog box appears on the screen (for a
PG/PC the “Assignment” tab also appears).
Object Properties – Other Station
General
Node List
Name
Type
Address
PROFIBUS Node(1)
PROFIBUS Node
2
New...
Properties...
OK
Figure 10-6
Delete
Cancel
Help
Object Properties for Other Stations
3. Click the “New” button in the “Node List” property sheet and in the
following dialog boxes specify the subnet whose node is to be the “Other
Station”.
For the connection partner “PG/PC”: you must then assign an interface of
your programming device/PC to the configuration. You will find the exact
procedure described in the online help.
4. Open the connection table (see Section 10.1).
5. Create a new connection using the menu command Insert " Connection
(see Section 10.2).
6. Select the “Other Station” you created, the “PG/PC”, or the “SIMATIC
S5” station as the connection partner.
7. Specify the connection type and confirm your entries.
8. Select the row for the connection in the connection table and select the
menu command Edit " Object Properties.
10-16
Standard Software for S7 and M7 – STEP 7 User Manual
C79000-G7076-C552-01
Establishing Communication Connections
9. In the dialog box, specify the object properties for the connection.
For S7 connections to a programming device/PC with an SAPI-S7
programming interface: You must make a number of settings in the
“Address Details” dialog box, including entering the name of the
connection and the virtual field device name of the programming
device/PC. You will find more information on filling out the dialog box in
the online help.
Additional
Procedure for
“PG/PC” with SAPI
Partner
When you have created an S7 connection to a programming device/PC with
an SAPI-S7 programming interface, you must generate the local database
(LDB). This means you save the connection data for the S7 connection in a
binary or ASCII format in a file. You then load the file into the programming
device/PC.
You generate the local database in the object properties dialog box for the
programming device/PC in the “Node List” tab. You open this dialog box by
double-clicking the icon for the PG/PC in the SIMATIC Manager. How you
load the file into the programming device/PC is described in the
documentation on configuring your PG/PC.
10.7 Downloading the Connection Table to the Programmable Controller
Overview
When you save the connection table, connection data are created that you
must download to the corresponding programmable module. Downloading to
the CPU or FM is possible via a PG/PC which is a node in the MPI,
PROFIBUS, or Industrial Ethernet subnet.
Note
If STEP 7 only enters a “Local ID” for the connection in the connection
table, then you only download the connection table to the local node. You
will find any special cases explained in the online help.
If STEP 7 enters a “Local ID” and a “Partner ID” for the connection in the
connection table, you must download both connection tables, each to its
respective communication partner.
Three Possibilities
for Downloading
You have a choice of three methods of downloading the connection data for a
local node to a programmable controller:
S Downloading to the local station
S Downloading to local and partner stations
S Downloading selected connections
Standard Software for S7 and M7 – STEP 7 User Manual
C79000-G7076-C552-01
10-17
Establishing Communication Connections
Requirements
The programming device or PC must be a node in the MPI, PROFIBUS, or
Industrial Ethernet subnet via which the connection data are to be
downloaded to the programmable modules. You must have assigned unique
node addresses to all subnet nodes (see Section 8.8).
You must have switched the programmable module(s) in the station(s) and –
if present – the communications processor(s) via which the connections “run”
to STOP mode.
You must be in the connection table view.
Downloading to
Local Stations
In programmable controllers with multicomputing capability (such as
S7-400) a number of CPUs can be inserted in a station. Each of these CPUs
can have its own connection table.
Using the menu command PLC " Download " Local Station the connection
tables of the local station, more than one if there is more than one CPU in the
station, are downloaded to the CPUs in the local station (to each CPU its own
connection table). This menu command can be used for all types of
connection.
Downloading to
Local and Partner
Stations
Using the menu command PLC " Download " Local and Partner Stations
you can download the current connections tables from the local station to the
CPUs in the local station and to the CPUs of all stations which are
connection partners in the local station. This menu command can be used for
all types of connection.
In the partner stations the complete connection tables are downloaded to the
CPUs, meaning connections may be downloaded which do not lead to the
local station.
Downloading the connection tables to the local station and the partner
stations is always useful because it saves time if you have changed the
connection table for a CPU in the local station.
Downloading
Selected S7
Connections
Using the menu command PLC " Download " Selected S7 Connections you
can download selected S7 connections from the connection table of the local
partner to the respective CPU in the local station. This menu command is
only to be used for connections of the type S7 connection.
You select the S7 connections you want to download by clicking the
corresponding rows in the connection table.
Deleting
Connections in the
Programmable
Controller
10-18
To delete all connections of a CPU, you have to download an empty
connection table to the respective CPU. (You must be in the connection table
view for this CPU when you start downloading for the “Local Station” or
“Local and Partner Stations”.)
Standard Software for S7 and M7 – STEP 7 User Manual
C79000-G7076-C552-01
Part 3: Working with
S7 Programmable Controllers
Creating User Programs
11
Creating and Displaying
Messages
12
Operator Control and Monitoring
of Variables
13
Displaying Reference Data
14
Downloading and Uploading
User Programs
15
Debugging User Programs
16
Diagnosing Hardware
17
10-20
Standard Software for S7 and M7 – STEP 7 User Manual
C79000-G7076-C552-01
11
Creating User Programs
Overview
To create an S7 program you will need to choose a suitable STEP 7
programming language. You have the choice of a number of different
languages and editors.
Creating a program in some programming languages (Ladder Logic,
Statement List, Function Block Diagram, S7-SCL) allows you to create all
the types of block required for a user program. With others (S7-Graph,
S7-HiGraph) you can create only certain types of block. But with all the
editors the aim is the same; to create a functioning user program consisting of
blocks.
This chapter provides you with an overview of the main possibilities
available for creating programs. The operation of the various editors, the
debugging functions specific to the languages, and the syntax and instruction
range for each language are described in the manuals for the various
languages.
Creating M7 programs is described in Chapter 18.
Chapter
Overview
Section
Description
Page
11.1
Programming S7 CPUs
11-2
11.2
Selecting the Programming Language and the Editor
11-4
11.3
Programming Blocks with Ladder Logic, Statement List,
and Function Block Diagram
11-5
11.4
Programming Source Files with Statement List and S7-SCL
11-7
11.5
Programming Blocks with S7-Graph
11-8
11.6
Programming Source Files with S7-HiGraph
11-9
11.7
Programming in the CFC Programming Language
Standard Software for S7 and M7 – STEP 7 User Manual
C79000-G7076-C552-01
11-11
11-1
Creating User Programs
11.1 Programming S7 CPUs
Requirements
In order to be able to create a new S7 program, create a project in the
SIMATIC Manager. There are two different methods of setting up an S7
program which contains, among other things, the user program:
S You create the program independent of the hardware. In this case you
insert the object for your S7 program directly beneath the project. You
can then link a program created in this way to a programmable module in
a station at a later stage.
S You edit the S7 program linked to a module (see Figure 11-1). In this
case you must have at least one SIMATIC 300 (or 400) station available
in the project which should be configured so that it contains at least one
programmable module (S7 CPU). The S7 program is then inserted in the
project automatically when you insert the CPU.
If you want to work with shared symbols, edit the symbol table containing
the assignment of absolute addresses and symbolic names for your S7
program first. The symbols for blocks can also be assigned in this table.
So that the program will be able to run on the CPU, you must also have
configured and assigned all the necessary parameters to your hardware.
This can be done either before or after you create the program.
Blocks, Source
Files, and Charts
You can store the S7 program in the form of blocks (in the “Blocks”
container), source files, or charts. Source files are created with a text or
graphic editor. Charts are special graphic source files created with the
programming language CFC. Source files and charts serve only as a basis for
creating blocks in S7 programming, because only blocks can be downloaded
to an S7 CPU. Whether you create a source file, a block, or a chart depends
on the programming language you choose and the language editor you use.
Figure 11-1 shows which language editors you use to create which objects in
a program.
User Program for
an S7 CPU
You can download only the user program with its blocks to the CPU.
Depending on the requirements, the blocks may include organization blocks
(OBs), function blocks (FBs), functions (FCs), and data blocks (DBs). The
user-defined data types (UDTs) you create yourself simplify the
programming process but they are not downloaded to the CPU.
The “System Data” object may also appear in the “Blocks” container of a
user program. This contains system data blocks (SDBs) with system
information.
11-2
Standard Software for S7 and M7 – STEP 7 User Manual
C79000-G7076-C552-01
Creating User Programs
Project1
SIMATIC 300-Station1
Module (S7 CPU)
Connections
S7 Program
Symbols
Object:
Blocks
Possible Languages:
FB x
LAD/FBD/STL/SCL/GRAPH
OB x
LAD/FBD/STL/SCL
FC x
LAD/FBD/STL/SCL/HiGraph1)
DB x
DB Editor/SCL/
HiGraph2)/GRAPH3)
UDT
DB Editor
VAT
Monitoring Variables
(Chapter 16)
System Data
Source Files
SDB x
STL source file
SCL source file
HiGraph source file
GRAPH source file4)
Charts
Figure 11-1
.......
CFC (for M7)
1) Created by compiling the corresponding source
file, a double-click opens LAD or STL.
3) Created according to the FB created with
S7-Graph.
2) Created by compiling the corresponding source
file.
4) Can be created with the editor for
S7-Graph.
S7 Program in the Project Structure with Relevant Language Editors
Where to Find
Further
Information
You will find more information on creating programs in the Programming
Manual /234/ or in the introductory sections in the manuals on the
programming languages.
Setting up projects and handling objects in the SIMATIC Manager is
described in the Chapters 3, 4, and 5 of this manual.
Standard Software for S7 and M7 – STEP 7 User Manual
C79000-G7076-C552-01
11-3
Creating User Programs
11.2 Selecting the Programming Language and the Editor
Programming
Languages
There are a number of programming languages available for you to create the
S7 program. These are:
S Ladder Logic (LAD) or Function Block Diagram (FBD)
S Statement List (STL)
You can also purchase the following programming languages as optional
packages:
S S7-SCL (Structured Control Language)
S S7-Graph (Sequential Control Systems)
S S7-HiGraph (State Graphs)
S CFC (Continuous Function Chart)
S C for M7
This gives you the choice of a number of different programming philosophies
(machine code or high-level languages) and the choice of either textual or
graphic programming.
Incremental Input
and Text Editors
Depending on the programming language, you have the choice of
incremental input mode editors or free-edit mode (text) editors:
S Incremental editors for Ladder Logic, Function Block Diagram,
Statement List, or S7-Graph: in the incremental input mode editors for
Ladder, FBD, STL, and S7-Graph, you create blocks which are stored in
the user program. Incremental means that each entry you make is checked
immediately. The usage of addresses and symbols is checked, as is the
particular syntax of the programming language.
S Free-edit (text) editors for Statement List, S7-SCL, or S7-HiGraph: in
free-edit mode editors, you create source files which are then
subsequently compiled into blocks. For compilation it is important that
the particular syntax for the programming language has been adhered to.
A syntax check is run only when you select the consistency check
command or when the source file is compiled into blocks.
Setting the
Programming
Language or the
Editor
You set which programming language and which type of editor you want to
use to create a block or a source file in the object properties when you create
the particular block or source file. This entry determines which editor is
started when the block or source file is opened.
Starting the Editor
You start the appropriate language editor in the SIMATIC Manager by
double-clicking the corresponding object (block, source file, etc.), by
selecting the menu command Edit " Open Object, or by selecting the
corresponding button in the toolbar.
11-4
Standard Software for S7 and M7 – STEP 7 User Manual
C79000-G7076-C552-01
Creating User Programs
11.3 Programming Blocks with Ladder Logic, Statement List, and
Function Block Diagram
What Is Ladder
Logic Based On?
The graphic programming language Ladder Logic (LAD) is based on the
representation of circuit diagrams. The elements of a circuit diagram, such as
normally closed contacts and normally open contacts, are linked together to
form networks. One or more networks form the code section of a logic block.
Network 1: Enable conditions
#Start
#Coil
#Stop
#Coil
Network 2: Motor control
#Coil
T6
S_ODT
#Reset
S
#Reset_Time
TV
#Coil
R
#Error
S
Q
BI
BCD
#Current_Time_bin
#Reset_Time_BCD
Network 3: Start lamp
#Start_lamp
#Reset
#Error
Network 4: Stop lamp
#Stop_lamp
#Reset
Figure 11-2
What Is Function
Block Diagram
Based On?
Example of Networks in Ladder Logic
The programming language Function Block Diagram (FBD) uses the graphic
logic symbols familiar from Boolean algebra to represent logic.
Network 1: Green phase for pedestrians
>=1
&
I0.0
>=1
I0.1
&
T6
M0.0
=
M0.0
T5
Figure 11-3
Example of a Network in Function Block Diagram
Standard Software for S7 and M7 – STEP 7 User Manual
C79000-G7076-C552-01
11-5
Creating User Programs
What Is Statement
List Based On?
The programming language representation Statement List (STL) is a textual
language similar to machine code, whose instructions execute simple
operations. A number of instructions can be linked together to form
networks.
Network
A(
O
O
)
AN
=
1: Control drain valve
#Open
#Coil
#Close
#Coil
Network 2: Display “Valve open”
A
#Coil
=
#Disp_open
Network 3: Display “Valve closed”
AN
#Coil
=
#Disp_closed
Figure 11-4
Example of Networks in Statement List
Blocks Created
With the incremental editors for Ladder Logic, Function Block Diagram, or
Statement List, you program blocks which are stored in the container for
your user program. You can create logic blocks (OBs, FBs, FCs), data blocks
(shared or instance DBs), or user-defined data types (UDTs). As data blocks
and user-defined data types have no code section, the programming language
is significant only for logic blocks.
Relationship to
Other Editors
If blocks contain no errors, you can switch between representing your blocks
in either Ladder Logic, Function Block Diagram, or Statement List. Program
parts that cannot be displayed in the language you switch to are shown in
Statement List.
You can create blocks from source files in Statement List and also decompile
them back into source files.
Symbolic Access
If you do not want to use absolute addresses in your program, you can use
symbolic access to address the following:
S Signals or blocks using the symbols in the symbol table
S Local variables and parameters which you define for logic blocks in the
variable declaration table
11-6
Standard Software for S7 and M7 – STEP 7 User Manual
C79000-G7076-C552-01
Creating User Programs
11.4 Programming Source Files with Statement List and S7-SCL
What Is SCL Based
On?
The programming language SCL (Structured Control Language) is a
high-level textual language whose language definition conforms generally to
the International Electrotechnical Commission’s IEC 1131–3 standard. The
PASCAL-type language simplifies, for example, the programming of loops
and conditional branches, in contrast to Statement List, by its high-level
language commands. SCL is therefore suitable, for example, for calculations
involving formulae, complex optimization algorithms, or the management of
large quantities of data.
FUNCTION_BLOCK FB20
VAR_INPUT
ENDVALUE : INT;
END_VAR
VAR_IN_OUT
IQ1: REAL;
END_VAR
VAR_OUTPUT
CONTROL: Bool;
END_VAR
VAR
INDEX : INT;
END_VAR
BEGIN
CONTROL:=FALSE;
FOR INDEX:= 1 TO ENDVALUE DO
IQ1:= IQ1 * 2;
IF IQ1 >10000 THEN
CONTROL := TRUE
END_IF
END FOR
END_FUNCTION_BLOCK
Figure 11-5
Source File in SCL (Function Block with Loop and Condition)
What Is Statement
List Based On?
The programming language representation Statement List (STL) is a textual
language similar to machine code, whose instructions execute simple
operations. A number of instructions can be linked together to form networks
(see Section 11.3).
Source Files and
Blocks Created
The text editors for Statement List and SCL allow you to enter your program
in a source file. The source files are stored in the source files container of
your S7 program as an STL source file or SCL source file. A source file can
contain the code for one or more blocks. With this editor you can create code
for OBs, FBs, FCs, DBs, and UDTs, meaning for a whole user program.
Only when you compile the source file are the respective blocks created and
stored in the user program.
Symbolic Access
If you do not want to use absolute addresses in your program, you can use
symbolic access to address signals or blocks using the symbols in the symbol
table.
Standard Software for S7 and M7 – STEP 7 User Manual
C79000-G7076-C552-01
11-7
Creating User Programs
11.5 Programming Blocks with S7-Graph
What Is S7-Graph
Based On?
The graphic programming language S7-Graph allows you to program
sequential controls as a series of steps. This includes creating a series of
steps, determining the contents of each step, and determining the transitions.
You program the contents of the steps in a special programming language
(similar to Statement List), and you enter the transitions in a Ladder Logic
editor (a streamlined version of the Ladder Logic instruction set).
S4
I1.1
M2.1
I1.1
M2.1
Rinse
D
Q 1.1
TIME#0D_0H_
0M_20S_0MS
T4
T5
S5
I1.3
T6
S6
I1.1
Prewash
N
Q 1.3
Q 1.0
N
N
Q 1.5
Return
N
Q 1.4
M2.2
T7
Figure 11-6
Blocks Created
Example of Sequential Control in S7-Graph
With the S7-Graph editor, you program the function block that contains the
step sequencer. A corresponding instance data block contains the data for the
sequencer, for example, FB parameters, step and transition conditions. You
can have this instance data block created automatically in the S7-Graph
editor.
The function block created in this way with its instance data block cannot
execute alone, so you must call it from another logic block in your user
program which you create in another programming language such as Ladder
Logic, Function Block Diagram, or Statement List.
Symbolic Access
If you do not want to use absolute addresses in your program, you can use the
entries in the symbol table for the S7 program.
Source File
A textual source file (Graph source file) can be generated from a function
block created in S7-Graph which can be interpreted by operator panels or
operator interface text displays to display the sequencer.
11-8
Standard Software for S7 and M7 – STEP 7 User Manual
C79000-G7076-C552-01
Creating User Programs
11.6 Programming Source Files with S7-HiGraph
What Is
S7-HiGraph Based
On?
The graphic editor for S7-HiGraph allows you to program some of the blocks
in your program as state graphs. This enables you to break down your plant
into independent functional units which can all take on different states. You
define transitions for switching between the states. You describe the actions
which are assigned to the states and the conditions for the transitions between
the states in a zoom-type language similar to Statement List.
You create a graph for each functional unit which describes the behavior of
this functional unit. The graphs for a plant are grouped together as graph
groups. Messages can be exchanged between the graphs, meaning the
functional units can be synchronized.
Position:
cam-operated switch
Index withdrawn
1 2 4
Turn counter-clockwise
Coordinator
Workpiece
0
1
1
3
1
Turn clockwise
1
1
2
Motor
Index inserted
Loosen/tighten
counter bearing
2
1
Graph for coordinating the
functional units
Counter bearing
0
Index
1
0
Motor
1
0
3
1
1
1
3
1
1
1
3
1
1
1
1
1
1
1
2
2
2
Graphs for individual functional units
Figure 11-7
Creating Graphs for Functional Units (Example)
Standard Software for S7 and M7 – STEP 7 User Manual
C79000-G7076-C552-01
11-9
Creating User Programs
Source Files and
Blocks Created
The graph groups created with the editor are stored as HiGraph source files
in the source file container of your S7 program. You then compile this graph
group into blocks. HiGraph creates a function (FC) and a shared data block
(DB) for each graph group, which are stored in the user program. The
requirement for this is that you must have entered a symbol for the function
and the data block for each graph group in the symbol table. The symbolic
name for the function must match the name of the graph group, the symbolic
name for the data block is derived from this.
The syntax and the formal parameters are checked when the last entry has
been made in a graph (when the active window is closed). The addresses and
symbols are not checked until the graph is compiled.
The function created in this way with its data block cannot execute alone so
you must call it from another logic block in your user program which you
create in another programming language such as Ladder Logic, Function
Block Diagram, or Statement List.
Symbolic Access
11-10
You can use the entries in the symbol table for the S7 program for symbolic
addressing.
Standard Software for S7 and M7 – STEP 7 User Manual
C79000-G7076-C552-01
Creating User Programs
11.7 Programming in the CFC Programming Language
Overview
The optional software package CFC (Continuous Function Chart) is a
programming language for linking complex functions graphically.
To use CFC you do not require any detailed programming knowledge or
specific knowledge of programmable control, and you can concentrate on the
technology used in your branch of industry.
Entering Programs
in CFC
The control program created with CFC is represented in the form of charts.
They determine how the program executes by linking blocks and signals and
by defining run properties.
CFC - [democfc\SIMATIC 400-Station(1)\CPU416-1(1)\...\cfc_cntrl2]
Chart
Insert
Edit
PLC
Debug
View
Options
Window
Help
Text
BIT_LGC
COMPARE
CONTROL
CONVERT
PULSE
MATH_FP
MULTIPLX
TIME
WRD_LGC
S7 Program(1)
Libraries
Libraries
1
Press F1 for help.
Figure 11-8
OB35 cfc_cntrl1.2
Example of Graphic Links with CFC
Predefined Blocks
You do not need to program many standard functions yourself, instead you
can use libraries containing standard blocks (for example, for logic, math,
control, and data processing functions).
Integrated Test
Function
The integrated test functions in CFC allow variable values to be recorded
exactly to the cycle, for example, and values to be displayed in charts.
Standard Software for S7 and M7 – STEP 7 User Manual
C79000-G7076-C552-01
11-11
Creating User Programs
11-12
Standard Software for S7 and M7 – STEP 7 User Manual
C79000-G7076-C552-01
Creating and Displaying Messages
Overview
12
This chapter contains descriptions of the following:
S How you create block-related messages, symbol-related messages
(SCAN), and user-defined diagnostic messages with their texts and
attributes
S How you can edit these messages in different languages
S How you transfer the data generated when you configure the messages
with the help of the transfer program S7/WinCC Mapper (part of the
software package “Process Control System PCS7”) to the database of a
programmable logic controller
S How you display CPU messages (system diagnostics messages)
Both the messages you configure and the CPU messages provide you with
support for system and plant diagnostics without you having to invest much
effort in programming.
These messages allow you to detect errors quickly, locate them exactly, and
remedy them. This significantly shortens the down-times in a plant.
Chapter
Overview
Section
Description
Page
12.1
Configuring Messages – An Overview
12-2
12.2
Assigning and Editing Block-Related Messages
12-4
12.3
Assigning and Editing Symbol-Related Messages
12-11
12.4
Creating and Editing User-Defined Diagnostic Messages
12-15
12.5
Translating and Editing User Texts
12-18
12.6
Transferring Configuration Data to the Programmable
Controller
12-19
12.7
Displaying CPU Messages and User-Defined Diagnostic
Messages
12-23
Standard Software for S7 and M7 – STEP 7 User Manual
C79000-G7076-C552-01
12-1
Creating and Displaying Messages
12.1 Configuring Messages – An Overview
Overview
With the “S7 Message Configuration” application you can create and edit
event-dependent messages and message templates with their corresponding
message texts and message attributes.
You can also specify which display devices you want to display the
messages.
What Type of
Messages Exist?
You can create and edit the following messages with the “Message
Configuration” function:
1. Block-related messages (see Section 12.2)
These are assigned to a function block (FB). You can use so-called
message blocks in which a message function is already programmed to
create a block-related message.
2. Symbol-related messages (see Section 12.3)
These are assigned to a Boolean signal in the symbol table. With a
symbol-related message you can scan a signal in a predefined time frame
to determine whether a signal change has taken place.
3. User-defined diagnostic messages (see Section 12.4)
These are made possible via a system function (SFC52). Using SFC52,
you can write an entry in the diagnostic buffer and send a corresponding
message which you create using the message configuration application.
Message Number
Block-related and symbol-related messages are allocated a unique 32-bit
message number automatically by the system which you cannot change.
For user-defined diagnostic messages, you can allocate the message number
yourself. The system will, however, suggest a suitable message number for
you.
Message and
Message Template
The difference between a message and a message template is that a message
template is the template for a message. A message template is therefore not
allocated a message number.
You can create message templates for block-related messages in function
blocks (FBs) and pass them on, together with their texts and attributes, as
templates to instance data blocks you associate later. This makes it easy to
create messages of the same type with identical texts and attributes which
you can then modify later according to the instance.
12-2
Standard Software for S7 and M7 – STEP 7 User Manual
C79000-G7076-C552-01
Creating and Displaying Messages
“Save” and “OK”
in Message
Configuration
The dialog boxes in message configuration have either the “Save” button or
the “OK” button, depending on the application that called them.
If you exit a dialog box by means of the “Save” button, the data you
configured are saved permanently.
If you exit a dialog box by means of the “OK” button, the data you
configured are stored in the memory of the application that called the
function, but they are not saved permanently. These data must then be saved
again within the calling application.
Note
If you exit the calling application without saving the data there, the data may
be lost.
Standard Software for S7 and M7 – STEP 7 User Manual
C79000-G7076-C552-01
12-3
Creating and Displaying Messages
12.2 Assigning and Editing Block-Related Messages
Overview
With this function you can assign one or more messages to blocks. You can
create block-related messages easily and quickly by using system function
blocks (SFBs) and system functions (SFCs) as message blocks.
Which Message
Blocks Exist?
You have the choice of the following message blocks, each of which contains
a programmed message function:
S SFB33: “ALARM”
S SFB34: “ALARM_8”
S SFB35 “ALARM_8P”
S SFB36 “NOTIFY”
S SFC18: “ALARM_S” and SFC17: “ALARM_SQ”
S SFB37: “AR_SEND” (to send archives)
You will find detailed information on the above blocks in the Reference
Manual /235/.
When to Use
Which Message
Block?
The table below helps you to decide which message block you should select
for your task. Selecting a message block depends on the following:
S The number of channels available in the block
S The option of acknowledging messages
S The option of specifying accompanying values
The last column in the table shows you the system attribute for the message
block.
Message Block:
Symbol and No.
12-4
Channel
of the
Block
Acknowledgement
Accompanying
Values
Corresponding
System
Attribute
NOTIFY
/SFB36 1 channel No
Up to 10
accomp. values
notify
ALARM
/SFB33 1 channel Possible
Up to 10
accomp. values
alarm
ALARM_S
/SFC18 1 channel No
1 accomp. value
alarm_s
ALARM_SQ /SFC17 1 channel Possible
1 accomp. value
alarm_s
ALARM_8
/SFB34
8
channels
Possible
No
alarm_8
ALARM_8P
/SFB35
8
channels
Possible
Up to 10
accomp. values
alarm_8p
AR_SEND
/SFB37 1 channel Used to send an archive
ar_send
Standard Software for S7 and M7 – STEP 7 User Manual
C79000-G7076-C552-01
Creating and Displaying Messages
Requirements
Before you can create a block-related message, you must have done the
following:
S Created a project and an S7 program in the SIMATIC Manager
S Created the function block (FB) in your S7 program to which you want to
assign the message
You will find the exact procedure for creating projects and related objects in
Chapter 5.
Basic Procedure
To configure block-related messages, follow the steps outlined below:
Select a suitable message block for your
task.
See table on
previous page
Select the function block (FB) to which you
want to assign the message and open it.
Step 1
Fill out the variable declaration table for the
function block and assign system attributes to
the variables.
Steps 2 to 4
Fill out the code section of the function block
and save the block.
Steps 5 and 6
Open the message configuration
application.
Step 7
In the function block create the message template
with texts, attributes, and display devices.
Steps 8 and 9
Associate instance DBs with the FB and
change these according to your requirements.
Steps 10 to 13
Transfer the data you configured to the
WinCC database.
Section 12.6
Figure 12-1
Procedure for Configuring Block-Related Messages
Standard Software for S7 and M7 – STEP 7 User Manual
C79000-G7076-C552-01
12-5
Creating and Displaying Messages
Procedure
To create block-related messages, follow the steps outlined below:
1. In the SIMATIC Manager select the function block (FB) for which you
want to create a block-related message and open the block by
double-clicking.
Result: The selected block is opened and displayed in the
“LAD/STL/FBD” window.
2. Fill out the variable declaration table. For every message block that is
called in the function block you must declare variables in the calling
function block.
To do this, enter the following variables in the “Declaration” column of
the variable declaration table (see Figure 12-2):
– Under the declaration type “in”, enter a symbolic name for the
message block input, for example “Mess01” (for message input 01)
and the type (must be “DWORD”)
– Under declaration type “stat”, enter a symbolic name for the message
block to be called, for example, “alarm” and the corresponding type
(here “SFB33”)
3. Select the name of the variables that you want to assign system attributes
to, for example, “Mess01”, and open the dialog box for entering system
attributes using the menu command Edit " Object Properties.
Enter the following system attributes in the table displayed:
– Attribute: “S7_server” and value: “alarm_archiv”
– Attribute: “S7_a_type” and value: “< message block type >”, for
example, “alarm” if you want to call SFB33 as a message block.
Note
When you enter the system attributes, a syntax check is run and the incorrect
entries are marked in red.
Result: If the “Name” column is not selected, a “flag” appears as a
symbol indicating that you have assigned system attributes to the
variables with this name. The selected block is then set as a message-type
block.
12-6
Standard Software for S7 and M7 – STEP 7 User Manual
C79000-G7076-C552-01
Creating and Displaying Messages
4. Exit the dialog box with “OK”. If you want to assign more system
attributes, repeat steps 3 and 4.
You will find detailed information on the variable declaration table and
on assigning system attributes for blocks and parameters in the manuals
/232/, /233/, and /236/.
5. In the code section of the function block, insert the call for the chosen
message block, here “CALL alarm”, and confirm your entry with
RETURN.
Result: The input variables for the called message block (here SFB33)
are displayed in the code section of the function block.
6. Assign the symbolic name you set in step 2. for the message block input
to the variable “EV_ID”, here “Mess01”, as shown in Figure 12-2. Save
the block with the menu command File " Save and close the block.
LAD/STL/FBD: -[messtest\S7 Program❲1❳\...\FB1 - <Offline>]
File
Edit
Address
0.0
Insert
PLC
Debug
Decl.
Name
Type
in
Mess01
DWORD
alarm
SFB33
View
Options
Init. Value
Window
Help
Comment
DW#16#0
out
in_out
4.0
stat
temp
FB1 : ???
???
Network 1 : ???
???
CALL #alarm
EN_R
:=
SIG
:=
ID
:=
EV_ID
:=#Mess01
SEVERITY :=
DONE
:=
ERROR
:=
STATUS
:=
ACK_DN
:=
ACK_UP
:=
SD_1
:=
File/block saved
Figure 12-2
Example of a Filled Out Variable Declaration Table and Code Section in
a Message-Type Function Block
Standard Software for S7 and M7 – STEP 7 User Manual
C79000-G7076-C552-01
12-7
Creating and Displaying Messages
7. Now open the “Message Configuration” dialog box using the menu
command Edit " Special Object Properties " Message in the SIMATIC
Manager.
Message Configuration
Contents Of: M_attribute\S7 Program(1)\...
IN_alarm_8
SUB
Sub_No._1
1
SUB
Sub_No._2
2
SUB
Sub_No._3
3
SUB
Sub_No._4
4
SUB
General
SUB
1
SUB
2
SUB
3
SUB
Sub_No._5
Sub_No._6
5
SUB
6
4
SUB
5
SUB
Sub_No._7
Sub_No._8
7
SUB
8
Text
SUB
6
Message
Text Language:
ProTool Message WinCC Mess
alarm_8
Sub_No._1
Sub_No._2
Sub_No._3
Sub_No._4
Sub_No._5
Sub_No._6
1
1
1
1
1
1
English
New Message
New Device
Delete
Generate SDB
Attributes
For Standard Message within a Group
Display Class:
Disable
0
Type of Acknowledgement
Alarm Message
Event Message
OK
Figure 12-3
Cancel
Help
“Message Configuration” Dialog Box with Multi-Channel Message
Block
8. Double-click on the message type displayed and enter the required
message attributes and message text in the “Attributes” and “Text” tabs.
If you selected a multi-channel message block (for example,
“ALARM_8”), you can assign a different message text to each
sub-number. The attributes apply to all sub-numbers.
9. Assign the required display devices to the message template by clicking
the “New Device” button and selecting the required display devices in the
“Add Display Device” dialog box that opens.
In the following tabbed pages enter the required texts and attributes for
the display devices. Exit the dialog box with “OK” and close the
“LAD/STL/FBD” window.
Note
When editing the display device-specific texts and attributes, please read the
documentation supplied with your display device.
When you create a new display device, an existing “general text” is
automatically used as the default for texts for the corresponding display
device.
12-8
Standard Software for S7 and M7 – STEP 7 User Manual
C79000-G7076-C552-01
Creating and Displaying Messages
10. When you have created a message template, you can associate instance
data blocks with it and edit the messages for these data blocks in each
instance.
To do this, in the SIMATIC Manager open the block that your configured
function block should open, for example “OB1”, by double-clicking on it.
In the open code section of the OB, enter the call (“CALL”) and the name
and number of the function block to be called and data block that you
want to associate with the FB as an instance. Confirm your entry with
RETURN.
Example: Enter “CALL FB1, DB1”. If DB1 does not yet exist, confirm
the prompt whether the instance data block should be created with “Yes”.
Result: The instance data block is created. In the code section of the
organization block the input variables of the associated function block,
here “Mess01” and the message number allocated by the system, here “1”
are displayed (see Figure 12-4).
LAD/STL/FBD: -[TEST\S7 Program❲1❳\...\OB1 - <Offline>]
File
Edit
Address
Insert
PLC
Debug
View
Decl.
Name
Type
0.0
temp
Default
ARRAY(1..20)❳
*1.0
temp
Options
Init. Value
Window
Help
Comment
BYTE
OB1 : ???
???
Network 1 : ???
???
CALL FB1 , DB1
Mess01
:=DW#16#1
Press F1 for help.
Figure 12-4
Example of the Display of the Function Block Input Variables in the
Organization Block
11. Save the organization block with the menu command File " Save and
close the “LAD/STL/FBD” window.
12. Select the created instance data block in the SIMATIC Manager, for
example “DB1” and open the message configuration application with the
menu command Edit " Special Object Properties " Message.
Result: The “Message Configuration” dialog box is opened and the
selected instance data block with the message number allocated by the
system is displayed.
Standard Software for S7 and M7 – STEP 7 User Manual
C79000-G7076-C552-01
12-9
Creating and Displaying Messages
13. Enter the required changes in for the corresponding instance data block in
the appropriate tabs and add any additional display devices if required.
Exit the function with “OK”.
Result: The message configuration for the selected instance data block is
completed.
You will find more information on creating instance data blocks in the
manuals /232/, /233/, and /236/.
14. Transfer the data you configured as described in Section 12.6.
12-10
Standard Software for S7 and M7 – STEP 7 User Manual
C79000-G7076-C552-01
Creating and Displaying Messages
12.3 Assigning and Editing Symbol-Related Messages
Overview
With a symbol-related message you can scan a signal in a predefined time
frame to determine whether a signal change has taken place in order to send a
message.
Symbol-related messages (SCAN) are assigned directly to a signal in the
symbol table. Permitted signals are all Boolean addresses: inputs (I), outputs
(Q), and bit memory (M). You can assign these signals different attributes,
messages texts, and up to 10 accompanying values with the message
configuration function. You can make it easier to select signals in the symbol
table by setting filters.
Requirements
Before you can create a symbol-related message, you must have done the
following:
S Created a project and an S7 program in the SIMATIC Manager
S Entered the signal to which you want to assign the message (SCAN) in
the symbol table in the S7 program
S Selected the row in the symbol table in which the respective signal (I, Q,
M) is located
You will find the exact procedure for creating projects and related objects in
Chapter 5.
Basic Procedure
To configure symbol-related messages, follow the steps outlined below:
Select the row containing the required
signal in the symbol table.
Steps 1 and 2
Open the message configuration
application.
Step 3
Fill out the tabs displayed.
Save your configuration data by
generating a system data block.
Steps 4 to 10
Steps 11 and 12
Download the generated SDB to your
programmable controller.
Step 13
Transfer the data you configured to the
WinCC database.
Section 12.6
Figure 12-5
Procedure for Configuring Symbol-Related Messages
Standard Software for S7 and M7 – STEP 7 User Manual
C79000-G7076-C552-01
12-11
Creating and Displaying Messages
Procedure
To create symbol-related messages, follow the steps outlined below:
1. In the SIMATIC Manager select the required symbol table in the
corresponding project and S7 program and open the symbol table.
2. Choose the signal to which you want to assign a symbol-related message
and select the whole row. Permitted signals are inputs (I), outputs (Q), and
bit memory (M) of the data type “BOOL”.
3. Open the message configuration application with the menu command
Edit " Special Object Properties " Message.
Result: The message configuration application and the “Attributes” tab
are opened.
4. Fill out the “Attributes” and “Text” tabbed pages. In the “SCAN
Attributes” tab, the signal selected in the symbol table via which you
gained entry to the message configuration application is displayed as an
absolute address and as a symbolic address, as shown in Figure 12-6.
Message Configuration
Contents Of: C:\Siemens\step7\s7proj\S7prog\
S Symbols
S
Symbolic Address
Valve voltage
Message
Text Language
Display Dev..
English
New Message
General Data
New Device
Delete
Generate SDB
Attributes
Text
SCAN Attributes
SCAN Accom. Values
Filter
For a Standard SCAN Message:
Absolute Address:
I
1.1
Symbolic Address:
Valve voltage
SCAN Increment:
100 ms
OK
Figure 12-6
Cancel
Help
“SCAN Attributes” in Message Configuration
Note
Ensure that the check mark is set in the “Message” check box, otherwise the
message you are currently editing will be deleted when you exit the message
configuration dialog box.
If you want to delete a message, delete the check mark in the “Message”
check box by clicking it.
5. Enter the required watchdog time in the “SCAN Increment” box. Take the
performance of your CPU into account here because the watchdog time
entered here may affect the scan cycle time.
12-12
Standard Software for S7 and M7 – STEP 7 User Manual
C79000-G7076-C552-01
Creating and Displaying Messages
6. The “Filter” tab offers you support in selecting address types and data
types from the symbol table which you want to insert as accompanying
values. Set the required filters here.
7. Now select the box for accompanying value 1 in the “SCAN
Accompanying Values” tab and click on the “Add” button.
Result: The symbol table is opened and displayed with the filter settings
you made.
8. In the symbol table, select the row containing the address you want to
insert as an accompanying value (for example, M 1.0) and click on the
“Add” button.
Result: The selected address is added in the “SCAN Accompanying
Values” tab as an accompanying value, as shown in Figure 12-7.
Message Configuration
Contents Of: C:\Siemens\step7\s7proj\S7prog\
S Symbols
S
Symbolic Address
Valve voltage
Message
Text Language
Display Dev..
Deutsch
New Message
General Data
New Device
Delete
Generate SDB
Attributes
Text
SCAN Attributes
SCAN Accom. Values
Filter
For a Standard SCAN Message:
Accom. Value 1:
MB
10
Add
Accom. Value 6:
Accom. Value 2:
Accom. Value 7:
Accom. Value 3:
Accom. Value 8:
Accom. Value 4:
Accom. Value 9:
Accom. Value 5:
Accom. Value 10:
Representation
Absolute
Symbolic
Cancel
OK
Figure 12-7
Delete
Help
“SCAN Accompanying Values” in Message Configuration
Note
You will find more information on how to insert these accompanying values
in message texts in the topic “Inserting Accompanying Values” in the online
help for message configuration.
Standard Software for S7 and M7 – STEP 7 User Manual
C79000-G7076-C552-01
12-13
Creating and Displaying Messages
9. If you want to add a number of SCAN accompanying values, repeat the
procedure in steps 6 to 8 and exit the message configuration with “Save”.
Result: In the symbol table displayed, all addresses which have a
message allocated to them have a cross in the “M” column.
10. If you want to create more SCAN messages, repeat steps 1 to 9.
11. When you have finished configuring all your messages, click on the
“Generate SDB” button to save the configured data in one or more system
data blocks (SDBs).
Result: All the data saved in the message configuration database are
written in one or more SDBs.
12. Exit the message configuration application with “Save”.
13. In the SIMATIC Manager, select the “System Data” container in the
corresponding S7 program under “Blocks” which contains the generated
SDBs and download the container to the required CPU using the menu
command PLC " Download.
14. Transfer the data you configured as described in Section 12.6.
12-14
Standard Software for S7 and M7 – STEP 7 User Manual
C79000-G7076-C552-01
Creating and Displaying Messages
12.4 Creating and Editing User-Defined Diagnostic Messages
Overview
Using this function you can write a user entry in the diagnostic buffer and
send a corresponding message which you create in the message configuration
application. User-defined diagnostic messages are created by means of the
system function SFC52 (WR_USMSG) which is used as a message block.
You must insert the call for the SFC52 in your user program and allocate it
the message number.
In contrast to block-related and symbol-related messages, user-defined
diagnostic messages can only be displayed on a programming device. You
cannot therefore assign display device to these messages in the message
configuration application.
Requirements
Before you can create a user-defined diagnostic message, you must have
done the following:
S Created a project in the SIMATIC Manager
S Created the S7 program in the project and created the CPU to which you
want to assign the message
You will find the exact procedure for creating projects and related objects in
Chapter 5.
Basic Procedure
To configure user-defined diagnostic messages, follow the steps outlined
below:
In the SIMATIC Manager, select the
required S7 program and start the
message configuration application.
Step 1
Create a new message.
Step 2
Fill out the displayed tabbed pages.
Steps 3 and 4
Edit or copy existing diagnostic messages.
Steps 5 and 6
Figure 12-8
Procedure for Configuring User-Defined Diagnostic Messages
Standard Software for S7 and M7 – STEP 7 User Manual
C79000-G7076-C552-01
12-15
Creating and Displaying Messages
Procedure
To create a user-defined diagnostic message, follow the steps outlined below:
1. In the SIMATIC Manager, select the required S7 program and start the
message configuration application using the menu command Edit "
Special Object Properties " Message.
2. Select the displayed S7 program and click on the “New Message” button
on the right.
Result: A new user-defined diagnostic message with the designation
“WR_USMSG (<No.>)” is inserted and the “Identification” tab is
displayed, as shown in Figure 12-9.
Message Configuration
Contents Of: C:\siemens\step7\S7proj\S7prog
S7_Program (1)
Message
1
WR_USMSG (. WR_USMSG
English
Text Language
Formal Paramet... Message Block Message Num..
New Message
A001
New Device
Delete
Generate SDB
Text
Identification
For a User-Defined Diagnostic Message:
Error Class
Input In
Message Number:
1
Message Name:
WR_USMSG (1)
Hex
Decimal
OK
Figure 12-9
A
Cancel
B
Help
“Identification” Tab in Message Configuration
3. Fill out the “Identification” and “Text” tabs for a new message. Enter a
message number if you do not want to use the number proposed by the
system and enter a message name (identification) and the message text for
the incoming and outgoing message.
You will find additional information in the online help for the message
configuration application.
12-16
Standard Software for S7 and M7 – STEP 7 User Manual
C79000-G7076-C552-01
Creating and Displaying Messages
Note
Ensure that the message number you allocate matches the number you used
in your user program for the corresponding SFC52 call. This is not checked
by the system.
4. Exit the dialog box with “OK”.
5. If you want to edit existing user-defined diagnostic messages, select the
appropriate S7 program and the required message, and edit the entries as
described in steps 1 to 3.
6. If you want to copy user-defined diagnostic messages, you must copy the
whole S7 program that contains the relevant messages.
Standard Software for S7 and M7 – STEP 7 User Manual
C79000-G7076-C552-01
12-17
Creating and Displaying Messages
12.5 Translating and Editing User Texts
Overview
With this function you can translate messages and user texts into any
language. You can then display user texts in the language of your choice.
Requirements
You can only translate user texts into the languages you have installed on
your programming device or PC under Windows 95.
Procedure
To translate user texts, follow the steps outlined below:
1. In the SIMATIC Manager, set the language into which you want to
translate your user texts using the menu command Options " Display
Language.
2. In the “Add/Delete Language, Set Standard Language” dialog box which
appears, select the required language from the list of available languages
and click the “–>” button to install this language as a new language in the
project. For each additional language, a new column is added in the text
list.
3. Repeat step 2. for all required languages and exit the dialog box with
“OK”.
4. In the SIMATIC Manager, select the block for which you want to translate
or edit user texts and call the text translation function in the SIMATIC
Manager with the menu command Options " Translate Texts.
5. Set the object type “All” and exit the dialog box with “OK”.
Result: The text list for the selected block is displayed in the selected
languages.
6. Translate or edit the user texts. The various options in the Edit menu are
available here (such as Search, Replace, Sort etc.). Note that you can only
format the message texts for operator panels created in the message
configuration application with the help of the icons in the button.
7. When you have finished translating and editing, save the text list using
the menu command File " Save.
8. You can use the menu command File " Print to print out the text list.
9. Exit the function when you have translated or edited all the required texts
by means of the menu command File " Exit.
12-18
Standard Software for S7 and M7 – STEP 7 User Manual
C79000-G7076-C552-01
Creating and Displaying Messages
12.6 Transferring Configuration Data to the Programmable Controller
Overview
Using the transfer program S7/WinCC Mapper you transfer the message
configuration data generated to the WinCC, OSx, or COROS LS_B database.
You have the choice of a number of different transfer options. You can, for
example, select an address and text comparison to ensure that the current
data are transferred.
Requirement
Before you start the transfer, the following requirements must be fulfilled:
S You have installed the setup program PLC-OS connection configuration
S You have generated the configuration data for creating messages as
described in Section 12.2.
Inserting Operator
Station Objects
For each operator control and monitoring system on which messages are to
be displayed, you must create an OS object in the SIMATIC Manager by
following the steps outlined below:
1. Open your STEP 7 project.
2. Select the menu command Insert " WinCC Object " Operator Station.
Note
Note that the number of operator stations for which the data are to be
transferred influences the duration of the transfer.
Selecting the
Transfer Options
The following options are available to you when transferring the
configuration data to the selected programmable controller, as shown in
Figure 12-10:
S Transfer data:
– Variables and messages: This option is already activated when you
open the dialog box for the first time. If you deactivate the option, no
transfer is executed. This is useful if you want to run the address and
text update or name update without a transfer to test whether your
settings are correct for creating messages.
– SFC visualization: You use this option to transfer SFC data to WinCC.
S Size of transfer:
You can transfer all configuration data or only the modified configuration
data to the operator station. If you select the option “All” you can delete
all previously transferred data at the same time if you click “With
Memory Reset on OS”.
Standard Software for S7 and M7 – STEP 7 User Manual
C79000-G7076-C552-01
12-19
Creating and Displaying Messages
Wizard: Transfer PLC Data to Operator Station
4(5)
Select the transfer options.
Transfer Data
Variables and Messages
Create Logs
Cross-Reference Lists
SFC Visualization
Transfer Log
Size of Transfer
Changes Only
With Memory Reset on OS
All
Update
Variable Names
Addresses, Units, IDs, Operator Texts
< Back
Figure 12-10
Continue >
Complete
Exit WinCC After
Transfer
Cancel
Help
Selecting the Transfer Options
S Update:
– Variable names: As the symbolic names under which the information
for the programmable controller is stored are formed from names that
can be changed, name conflicts may arise if the symbolic names are
changed or new symbols or blocks are created. The name comparison
during transfer recognizes possible conflicts and changes the names if
necessary.
– Addresses, units, IDs, operator texts: Select this option to ensure that
the current configuration data are transferred at the time of transfer.
This is important if any changes were made to variable addresses or
system attributes for the text entry (for example, S7_shortcut, S7_unit)
between configuring and transferring the data.
Note
Note that running the address and text update and the name update will
increase the transfer time. If you only made small changes, such as changes
to the upper or lower limit of a block parameter, you do not need to activate
these options.
S Create logs:
– Cross-reference lists: This option is not relevant for message
configuration.
– Transfer log: If you select this option, a report is created for the
transfer of the configuration data.
S Exit WinCC after transfer: Activate this option if you do not want to
continue working with WinCC after transferring the configuration data.
12-20
Standard Software for S7 and M7 – STEP 7 User Manual
C79000-G7076-C552-01
Creating and Displaying Messages
Starting the
Transfer Program
To start the transfer program, you have two possibilities:
S Select the menu command Options " PLC-OS Connection Data "
Transfer in the SIMATIC Manager,
or
S Open the S7/WinCC Mapper via Start " Simatic " STEP 7 " PLC-OS
Engineering from the Windows start menu.
Transferring the
Data
To transfer the configuration data to the programmable controller, follow the
steps outlined below:
1. Open the STEP 7 project for which you want to transfer the data.
2. In the SIMATIC Manager select the menu command Options " PLC-OS
Connection Data "Transfer.
Result: The dialog box “Wizard: Transfer PLC Data to Operator Station”
is opened on page 1/5. Below is an introduction.
3. Click the “Continue” button and open page 2/5. Select the programmable
controller here on the left and the operator stations to which you want to
transfer data on the right by clicking them.
4. Click the “Continue” button and open page 3/5. Select the assignment of
the programs to the operator stations here as shown in the example in
Figure 12-11.
Wizard: Transfer PLC Data to Operator Station
Which programs do you want to assign to which operator stations?
Operator Stations:
S7/M7 Programs:
S7/M7 Program
3(5)
Subnet Type
Connections
OS(3)
STANTYPE
DRIVE
STANDARD
MLC
INST
PROFIBUS
PROFIBUS
5
15
–>
FURN
DRIVE
PROFIBUS
23
80
<–
PROFIBUS
Connection
< Back
Figure 12-11
Continue >
Complete
Cancel
Help
Assigning Programs to the Operator Stations
Standard Software for S7 and M7 – STEP 7 User Manual
C79000-G7076-C552-01
12-21
Creating and Displaying Messages
5. To assign a program to an operator station, select the required program
and drag it while holding the left mouse button pressed to the operator
station which you want to display the messages for this program. You can
also use the buttons between the two list boxes to add and remove
programs.
6. Repeat this procedure until you have assigned all programs whose
messages you want to be displayed to the appropriate operator station.
You can assign a number of programs to one operator station or a number
of operator stations to one program.
7. If no data are to be transferred for an operator station, click on the check
box in front of the respective operator station to deactivate it.
8. In page 3/5, click the “Connection” button to specify which network
connection is to be used for communication between the operator station
and the programmable controller. In the “Select Network Connection”
dialog box which appears, all configured network connections are listed.
Select the required connection and exit the dialog box with “OK”.
9. Click the “Continue” button and open page 4/5. Select the required
transfer options here. These are described in more detail at the start of this
section and in the online help for the Mapper.
10. Click the “Continue” button and open page 5/5. The transfer options you
selected are displayed here again.
11. Check the settings displayed and correct them if necessary by going back
and selecting the option again. When you are sure that your settings are
correct, click the “Transfer” button to start the transfer.
12. Click the “OK” button and confirm with “Yes” the prompt that any data
in the programmable controller should be overwritten. The data transfer is
started and the “Transfer” dialog box shows the currently active operation
and the progress of the transfer. You can stop the transfer at any time by
clicking the “Cancel” button.
Displaying the
Transfer Log
If you selected the “Transfer Log” option on page 4/5, a report is created
which provides information about the following: existing PLC-OS
connections, errors which occurred during transfer, variable names etc. To
display the transfer log, follow the step outlined below:
S Select the menu command Options " PLC-OS Connection Data "
Display Log in the SIMATIC Manager.
12-22
Standard Software for S7 and M7 – STEP 7 User Manual
C79000-G7076-C552-01
Creating and Displaying Messages
12.7 Displaying CPU Messages and User-Defined Diagnostic Messages
Overview
With the “CPU Messages” function, you can display asynchronous messages
on system error events and messages defined by the user. (Refer also to the
description of the system functions SFC17, SFC18, and SFC52 in the
Reference Manual /235/.)
You can also start the message configuration application from the CPU
Messages application using the menu command Options " Configure
Messages and create user-defined diagnostic messages (see Section 12.4).
The requirement for this is that you started the CPU Messages application via
an online project.
Display Options
With the “CPU Messages” function, you can decide whether and how online
messages for selected CPUs are displayed.
You can set the display of the CPU messages to do either of the following:
S The messages are collected in the background in an archive
S The window displaying the messages automatically comes to the
foreground when a new message arrives
In the “CPU Messages” window, you can browse through the messages in the
archive. Some examples are shown in Figure 12-12:
CPU Messages
File
Edit
PLC
View
Options
Help
Event ID: 16# 4303
Date: 12.02.97
Time 09:08:47:374
Class A/S7 Program(1)
STOP caused by stop switch being activated
Previous op. mode: RUN
Requested op. mode: STOP (internal)
.............................................................................
Event ID: 16# 9C41
Alarm message incoming
Date: 18.02.97
Time:10:49:17:155
cpu414_SQ/S7 Program(1)
Alarm_SQ 05 Test
.............................................................................
Event ID: 16# 9C41
Alarm message outgoing
Date: 18.02.97
Time:10:49:17:155
.............................................................................
Event ID: 16#1
Event message incoming
Date: 18.02.97
Time:10:51:18:251
cpu414/S7 Program(1)
Alarm_S
Ready
Figure 12-12
NUM
Example of Message Display in CPU Messages
Standard Software for S7 and M7 – STEP 7 User Manual
C79000-G7076-C552-01
12-23
Creating and Displaying Messages
Archive Function
There is an archive to back up the messages in which between 40 and 2000
CPU messages can be stored. If the set archive size is exceeded, the oldest
message in the archive is deleted to make space for the new message.
Procedure
To configure CPU messages for selected modules, follow the steps outlined
below:
1. In the SIMATIC Manager, start the CPU Messages application via an
online project. To do this, select an S7 program online and call the CPU
Messages application for the selected CPU using the menu command
PLC " CPU Messages.
Result: The dialog box “Customize” appears which lists the registered
CPU.
2. You can extend the list of registered CPUs by repeating step 1. for other
programs or interfaces.
3. Click the check box in front of the list entries and specify which messages
should be received for the module:
A: activates ALARM_S messages (event and alarm messages)
W: activates user and system diagnostics messages.
You will find more information on the settings in the CPU Messages
online help.
4. Set the mode in which you want the incoming messages to be displayed:
– Top: The window containing the CPU messages appears in the
foreground. The window is topped every time a new message is
received.
– Background: The CPU messages are received in the background. The
window remains in the background when new messages are received
and can be brought to the foreground if required.
– Ignore: The CPU messages are not displayed and, in contrast to the
other two modes, not archived.
5. Set the size of the archive. You can set between 40 and 2000 messages.
6. Close the dialog box when you have completed your settings. As soon as
the above messages occur, they are written in the archive and displayed in
the form you selected.
12-24
Standard Software for S7 and M7 – STEP 7 User Manual
C79000-G7076-C552-01
Operator Control and Monitoring of
Variables
Overview
13
STEP 7 provides a user-friendly operator control and monitoring interface for
variables in your process or programmable controller using WinCC.
The advantage of this method over previous methods is that you no longer
need to configure data separately for each operator station (OS), you simply
configure once using STEP 7. You can transfer the data generated when you
configure with STEP 7 to the WinCC database using the transfer program
S7/WinCC Mapper (part of the software package “Process Control System
PCS7”), during which the consistency of the data and their compatibility with
the display device are checked. WinCC uses the data in variable blocks and
graphic objects.
Using STEP 7, you can configure or modify operator control and monitoring
attributes for the following variables:
S Input, output, and in/out parameters in function blocks
S Bit memory and I/O signals
S Parameters for CFC blocks in CFC charts
Chapter
Overview
Section
Description
Page
13.1
Overview
13-2
13.2
Configuring Operator Control and Monitoring Attributes
with Statement List, Ladder Logic, and Function Block
Diagram
13-3
13.3
Configuring Operator Control and Monitoring Attributes
via the Symbol Table
13-5
13.4
Changing Operator Control and Monitoring Attributes with
CFC
13-7
13.5
Transferring Configuration Data to the Programmable
Controller
13-8
Standard Software for S7 and M7 – STEP 7 User Manual
C79000-G7076-C552-01
13-1
Operator Control and Monitoring of Variables
13.1 Overview
Basic Procedure
The procedure for configuring operator control and monitoring variables is
dependent on the selecting programming/configuration language and the type
of variables you want to control and monitor. The basic procedure always
includes the following steps, however:
1. Assign system attributes for operator control and monitoring to the
parameters of a function block or to the symbols in a symbol table.
The step is not required in CFC because you take blocks that have already
been prepared from a library.
2. Assign the variables you want to control and monitor with the required
attributes, such as limit values, substitute values, and logging properties in
a dialog box.
3. Transfer the configuration data generated with STEP 7 to your display
system (WinCC) by means of the S7/WinCC Mapper.
Naming
Conventions
For the configuration data for WinCC to be saved and transferred, they are
stored under a unique name automatically assigned by STEP 7. The names of
the variables for operator control and monitoring, the CFC charts, and the S7
programs form part of this name and for this reason are subject to certain
conventions:
S The names of the S7 programs in an S7 project must be unique (different
stations may not contain S7 programs with the same name).
S The names of the variables, S7 programs, and CFC charts may not contain
underlines, blanks, or special characters.
13-2
Standard Software for S7 and M7 – STEP 7 User Manual
C79000-G7076-C552-01
Operator Control and Monitoring of Variables
13.2 Configuring Operator Control and Monitoring Attributes with
Statement List, Ladder Logic, and Function Block Diagram
Overview
Using the procedure described below, you can make function block parameters
suitable for operator control and monitoring and assign the required O, C, and
M attributes to associated instance DBs or shared DBs in your user program.
Requirement
You must have created a STEP 7 project, an S7 program, and a function block.
Assigning System
Attributes to
Function Block
Parameters
When you configure operator control and monitoring attributes with STL,
Ladder, and FBD, you must first assign the system attribute “s7_m_c” to all
parameters of a function block that you want to prepare for control and
monitoring. Follow the steps outlined below:
1. Open the function block (FB).
2. Select the parameter in the variable declaration table that you want to
prepare for control and monitoring.
3. Using the right mouse button, select the menu command Object
Properties. In the “Parameter Properties” dialog box, enter the string
“s7_m_c” in the “System Attribute” column and “true” in the “Value”
column of an empty row.
Parameter Properties
System Attribute
S7_m_c
1
2
3
4
5
6
7
8
9
10
Value
true
Insert Row
OK
Figure 13-1
Delete Row
Cancel
Help
“Parameter Properties” Tab
4. If required, enter other system attributes for the parameter. You will find a
complete list of the system attributes in the online help.
5. Exit the dialog box by clicking “OK”.
6. Repeat this procedure for all parameters you want to prepare for control
and monitoring.
Standard Software for S7 and M7 – STEP 7 User Manual
C79000-G7076-C552-01
13-3
Operator Control and Monitoring of Variables
Assigning WinCC
Attributes to Data
Blocks
To assign WinCC attributes to the instances of a function block or to shared
data blocks, follow the steps outlined below:
1. In the SIMATIC Manager or LAD/STL/FBD Editor, create one or more
instance data blocks or shared data blocks that are associated with the
prepared function block.
2. Select a data block in the SIMATIC Manager.
3. Select the menu command Edit " Special Object Properties " Operator
Control and Monitoring.
4. In the “Operator Control and Monitoring” dialog box, activate the
“Operator Control and Monitoring” check box.
5. Select the “General” tab.
The name of the data block is displayed here as it appears in WinCC (S7
program name_DBno. or S7 program name_symbolic name of DB).
If necessary, enter additional information on the data block in the
“Comment” box.
6. Now select the “WinCC Attributes” tab to edit the WinCC attributes of the
respective data block.
Operator Control and Monitoring
OC&M Capability
General
WinCC Attributes
Parameter AS Data ..
OS Data Type
Adapt Format
U_HL
REAL
Floating-point 32-bit_IEEE754
FloatTOFloat
4
-3.4
U_LL
REAL
Floating-point_32-bit_IEEE754
FloatTOFloat
4
-3.4
LINK_ON
REAL
Binary variable
BTRACK
REAL
Binary_variable
U
REAL
Floating-point 32-bit_IEEE754
FloatToFloat
4
-3.4
V
REAL
Floating-point_32-bit_IEEE754
FloatToFloat
4
-3.4
QERR
REAL
Binary_variable
1
QOP_EN
REAL
Binary_variable
1
1
1
OK
Figure 13-2
Length
Cancel
Help
“Operator Control and Monitoring” Dialog Box, “WinCC Attributes”
Tab
7. In the table shown, enter the required attribute values for all function block
parameters to be used in operator control and monitoring.
Refer to the online help for the meanings of the WinCC attributes.
8. Close the dialog box by clicking the “OK” button.
9. Repeat steps 2. to 8. for each data block.
13-4
Standard Software for S7 and M7 – STEP 7 User Manual
C79000-G7076-C552-01
Operator Control and Monitoring of Variables
13.3 Configuring Operator Control and Monitoring Attributes via the
Symbol Table
Overview
Independent of the programming language used, you can configure the
following variables using the procedure described below:
S Bit memory
S I/O signals
Requirement
Before you start, the following requirements must be fulfilled:
S You have created a project in the SIMATIC Manager.
S An S7 program with a symbol table must exist in this project.
S The symbol table must be open.
Procedure
To configure operator control and monitoring attributes via the symbol table,
follow the steps outlined below:
1. Select the row in the symbol table containing the symbol.
2. Select the menu command Edit " Special Object Properties " Operator
Control and Monitoring.
3. In the “Operator Control and Monitoring” dialog box, activate the
“Operator Control and Monitoring” check box.
4. Select the “General” tab.
The name of the symbol is displayed here as it appears in WinCC (S7
program name_symbol).
If necessary, enter additional information on the symbol in the “Comment”
box.
5. Now select the “WinCC Attributes” tab to edit the WinCC attributes of the
selected symbol.
Standard Software for S7 and M7 – STEP 7 User Manual
C79000-G7076-C552-01
13-5
Operator Control and Monitoring of Variables
Operator Control and Monitoring
OC&M Capability
General
WinCC Attributes
Parameter AS Data ..
Symbol1
BOOL
OS Data Type
OK
Figure 13-3
Adapt Format
Length
1
Binary variable
Cancel
Help
“Operator Control and Monitoring” Dialog Box, “WinCC Attributes”
Tab
6. In the table shown, enter the required attribute values.
Refer to the online help for the meanings of the WinCC attributes.
7. Close the dialog box by clicking the “OK” button.
Result: In the “O” column in the symbol table an “X” appears for the
edited symbol to show that this symbol has operator control and monitoring
capability.
8. Save the symbol table.
Note
Note that the data entered for control and monitoring are only stored when you
save the symbol table. If you exit the symbol editor without saving the symbol
table, your entries for the WinCC attributes are abandoned.
13-6
Standard Software for S7 and M7 – STEP 7 User Manual
C79000-G7076-C552-01
Operator Control and Monitoring of Variables
13.4 Changing Operator Control and Monitoring Attributes with CFC
Overview
With CFC, you create your user program by selecting blocks that already have
operator control and monitoring capabilities from a library, and placing and
linking them in a chart.
In the CFC manual /254/ you will find detailed information on how to assign
operator control and monitoring attributes to blocks.
Requirement
You have inserted an S7 program in a STEP 7 project, created a CFC chart, and
placed blocks in it.
Procedure
To change the preset WinCC attributes of CFC block parameters, follow the
steps outlined below:
1. Select the block.
2. Select the menu command Edit " Object Properties to edit the properties
of the CFC block.
Object Properties - Block: CFC.1
General
Run Properties
Type:
FB1
Name
1
Connections
Comment:
Inputs:
4
Internal ID:
FB1
DB11
Instance DB
To Be Integrated in OB/Priority Classes:
Name (Header):
Family:
Author:
Special Object Properties
OC&M Capability
Operator Control & Monitoring...
OK
Figure 13-4
Cancel
Message...
Help
“Object Properties” Dialog Box
3. Click the “Operator Control and Monitoring” button.
4. If necessary, change the attribute values already entered in the table
displayed in the “Operator Control and Monitoring” dialog box.
Refer to the online help for the meanings of the WinCC attributes.
5. Close the dialog box by clicking the “OK” button.
Standard Software for S7 and M7 – STEP 7 User Manual
C79000-G7076-C552-01
13-7
Operator Control and Monitoring of Variables
13.5 Transferring Configuration Data to the Programmable Controller
Overview
Using the transfer program S7/WinCC Mapper you transfer the configuration
data for operator control and monitoring generated to the WinCC database.
You have the choice of a number of different transfer options. You can, for
example, select an address and text comparison to ensure that the current
WinCC attributes are transferred.
Requirement
Before you start the transfer, the following requirements must be fulfilled:
S You have installed the setup program PLC-OS connection configuration
S You have generated the configuration data for operator control and
monitoring as described in Sections 13.2, 13.3, and 13.4
Inserting Operator
Station Objects
For each operator control and monitoring system, you must create an OS
object in the SIMATIC Manager by following the steps outlined below:
1. Open your STEP 7 project.
2. Select the menu command Insert " WinCC Object " Operator Station.
Note
Note that the number of operator stations for which the data are to be
transferred influences the duration of the transfer.
Selecting the
Transfer Options
The following options are available to you when transferring the configuration
data to the selected programmable controller, as shown in Figure 13-5:
S Transfer data:
– Variables and messages: This option is already activated when you open
the dialog box for the first time. If you deactivate the option, no transfer
is executed. This is useful if you want to run the address and text update
or name update without a transfer to test whether your settings are
correct for creating messages.
– SFC visualization: You use this option to transfer SFC data to WinCC.
S Size of transfer:
You can transfer all configuration data or only the modified configuration
data to the operator station. If you select the option “All” you can delete all
previously transferred data at the same time if you click “With Memory
Reset on OS”.
13-8
Standard Software for S7 and M7 – STEP 7 User Manual
C79000-G7076-C552-01
Operator Control and Monitoring of Variables
Wizard: Transfer PLC Data to Operator Station
4(5)
Select the transfer options.
Transfer Data
Variables and Messages
SFC Visualization
Create Logs
Cross-Reference Lists
Transfer Log
Size of Transfer
Changes Only
With Memory Reset on OS
All
Update
Variable Names
Addresses, Units, IDs, Operator Texts
< Back
Figure 13-5
Continue >
Complete
Exit WinCC After
Transfer
Cancel
Help
Selecting the Transfer Options
S Update:
– Variable names: As the symbolic names under which the information
for the programmable controller is stored are formed from names that
can be changed, name conflicts may arise if the symbolic names are
changed or new symbols or blocks are created. The name comparison
during transfer recognizes possible conflicts and changes the names if
necessary.
– Addresses, units, IDs, operator texts: Select this option to ensure that
the current configuration data are transferred at the time of transfer.
This is important if any changes were made to variable addresses or
system attributes for the text entry (for example, S7_shortcut, S7_unit)
between configuring and transferring the data.
Note
Note that running the address and text update and the name update will
increase the transfer time. If you only made small changes, such as changes to
the upper or lower limit of a block parameter, you do not need to activate
these options.
S Create logs:
– Cross-reference lists: This option is not relevant for message
configuration.
– Transfer log: If you select this option, a report is created for the transfer
of the configuration data.
S Exit WinCC after transfer: Activate this option if you do not want to
continue working with WinCC after transferring the configuration data.
Standard Software for S7 and M7 – STEP 7 User Manual
C79000-G7076-C552-01
13-9
Operator Control and Monitoring of Variables
Starting the
Transfer Program
To start the transfer program, you have two possibilities:
S Select the menu command Options " PLC-OS Connection Data "
Transfer in the SIMATIC Manager,
or
S Open the S7/WinCC Mapper via Start " Simatic " STEP 7 " PLC-OS
Engineering from the Windows start menu.
Transferring the
Data
To transfer the configuration data to the programmable controller, follow the
steps outlined below:
1. Open the STEP 7 project for which you want to transfer the data.
2. In the SIMATIC Manager select the menu command Options " PLC-OS
Connection Data "Transfer.
Result: The dialog box “Wizard: Transfer PLC Data to Operator Station” is
opened on page 1/5. Below is an introduction.
3. Click the “Continue” button and open page 2/5. Select the programmable
controller here on the left and the operator stations to which you want to
transfer data on the right by clicking them.
4. Click the “Continue” button and open page 3/5. Select the assignment of
the programs to the operator stations here as shown in the example in
Figure 13-6.
Wizard: Transfer PLC Data to Operator Station
Which programs do you want to assign to which operator stations?
Operator Stations:
S7/M7 Programs:
S7/M7 Program
3(5)
Subnet Type
Connections
OS(3)
STANTYPE
DRIVE
STANDARD
MLC
INST
PROFIBUS
PROFIBUS
5
15
–>
FURN
DRIVE
PROFIBUS
23
80
<–
PROFIBUS
Connection
< Back
Figure 13-6
13-10
Continue >
Complete
Cancel
Help
Assigning Programs to the Operator Stations
Standard Software for S7 and M7 – STEP 7 User Manual
C79000-G7076-C552-01
Operator Control and Monitoring of Variables
5. To assign a program to an operator station, select the required program and
drag it while holding the left mouse button pressed to the operator station
which you want to display the messages for this program. You can also use
the buttons between the two list boxes to add and remove programs.
6. Repeat this procedure until you have assigned all programs whose
messages you want to be displayed to the appropriate operator station. You
can assign a number of programs to one operator station or a number of
operator stations to one program.
7. If no data are to be transferred for an operator station, click on the check
box in front of the respective operator station to deactivate it.
8. In page 3/5, click the “Connection” button to specify which network
connection is to be used for communication between the operator station
and the programmable controller. In the “Select Network Connection”
dialog box which appears, all configured network connections are listed.
Select the required connection and exit the dialog box with “OK”.
9. Click the “Continue” button and open page 4/5. Select the required transfer
options here. These are described in more detail at the start of this section
and in the online help for the Mapper.
10. Click the “Continue” button and open page 5/5. The transfer options you
selected are displayed here again.
11. Check the settings displayed and correct them if necessary by going back
and selecting the option again. When you are sure that your settings are
correct, click the “Transfer” button to start the transfer.
12. Click the “OK” button and confirm with “Yes” the prompt that any data in
the programmable controller should be overwritten. The data transfer is
started and the “Transfer” dialog box shows the currently active operation
and the progress of the transfer. You can stop the transfer at any time by
clicking the “Cancel” button.
Displaying the
Transfer Log
If you selected the “Transfer Log” option on page 4/5, a report is created which
provides information about the following: existing PLC-OS connections, errors
which occurred during transfer, variable names etc. To display the transfer log,
follow the step outlined below:
S Select the menu command Options " PLC-OS Connection Data "
Display Log in the SIMATIC Manager.
Standard Software for S7 and M7 – STEP 7 User Manual
C79000-G7076-C552-01
13-11
Operator Control and Monitoring of Variables
13-12
Standard Software for S7 and M7 – STEP 7 User Manual
C79000-G7076-C552-01
14
Displaying Reference Data
Overview
You can create and evaluate reference data to make it easier to debug and
modify your user program. In this chapter you can read about the following
topics:
S Which reference data you can display for a user program
S How you can filter the displayed lists to meet your particular
requirements
Chapter
Overview
Section
Description
Page
14.1
Overview
14-2
14.2
Generating and Deleting Reference Data
14-3
14.3
Displaying Reference Data
14-4
14.4
Notes on Displaying Reference Data
14-5
14.5
Displaying Cross References
14-6
14.6
Displaying Program Structures
14-8
14.7
Displaying Assignments
14-10
14.8
Displaying Unused Symbols
14-12
14.9
Displaying Addresses without Symbols
14-13
Standard Software for S7 and M7 – STEP 7 User Manual
C79000-G7076-C552-01
14-1
Displaying Reference Data
14.1 Overview
What Types of
Reference Data Are
There?
The reference data for a selected user program comprise the following lists:
S Cross-reference list
S Assignment list (for inputs, outputs, and bit memory, and for timers and
counters)
S Program structure
S List of unused symbols
S List of addresses without symbols
It is possible to create and display one or more of the lists for one user
program or for more than one user program.
How to Use
Reference Data
You use the reference data for the following:
S As an overview of your whole user program
S As the basis for changes and tests
S To complement your program documentation
Table 14-1 shows an overview of which reference lists contain which
information.
Table 14-1
Overview of Reference Data
List
14-2
Purpose
Cross-Reference List
Overview of the addresses in the memory areas I, Q, M, P, T,
C used and access to DBs, FBs, FCs, SFBs, and SFCs in the
user program
Assignment List
Overview of which bits of the addresses in the memory areas
I, Q, and M, and which timers and counters (T and C) are
already occupied within the user program; forms an
important basis for troubleshooting or changes in the user
program
Program Structure
Call hierarchy of the blocks within a user program and an
overview of the blocks used and their nesting levels
List of Unused
Symbols
Overview of all symbols which are defined in the symbol
table but not used in the parts of the user program for which
reference data are available
List of Addresses
without Symbols
Overview of all absolute addresses which are used in the
parts of the user program for which reference data are
available but for which no symbol has been defined in the
symbol table
Standard Software for S7 and M7 – STEP 7 User Manual
C79000-G7076-C552-01
Displaying Reference Data
14.2 Generating and Deleting Reference Data
Overview
The following possibilities are available for generating reference data:
S You can generate or update the reference data before displaying them.
S You can set whether the reference data are generated automatically when
a source file is compiled or a block created in incremental edit mode is
saved.
One option does not exclude the other; they can be used in conjunction.
Generating
Reference Data
Before Displaying
Them
Before you display the reference data, a check is made to see whether the
current reference data are up-to-date. If not, a dialog box appears to inform
you that the reference data are inconsistent. You can then decide whether you
want to update the reference data and to what extent. You then have the
following possibilities:
S For modified blocks only
The reference data are updated for any modified or new blocks;
information on any blocks deleted is removed from the reference
database.
S For all blocks
The reference data are generated again from scratch for all blocks.
S Do not update
The reference data are not updated.
In order to update the reference data, the blocks are recompiled. The
appropriate compiler is called to compile each block. Using the menu
command View " Update you can refresh the view of the reference data
already displayed in the active window.
Generating
Reference Data on
Compiling/Saving
To update the reference data each time you compile a block, follow the steps
outlined below:
1. Select the menu command Options " Customize in the “LAD/STL/FBD”
window.
2. Select the “Create Block” tab in the dialog box.
3. Select the option “Generate Reference Data” and confirm your entry with
“OK”.
The reference data are then generated automatically when a source file is
compiled or a block created in incremental edit mode is saved.
Deleting Reference
Data
To delete reference data you can also use the menu command Options "
Reference Data " Delete in the SIMATIC Manager.
Standard Software for S7 and M7 – STEP 7 User Manual
C79000-G7076-C552-01
14-3
Displaying Reference Data
14.3 Displaying Reference Data
Overview
The following possibilities are available for displaying reference data:
S Open a block in the “Blocks” container and select the menu command
Options " Reference Data in the window of the corresponding language
editor. A working window is opened in which the cross-reference list is
displayed (default setting),
or
S Select a “Blocks” container in the offline view of a project and then select
the menu command Options " Reference Data " Display in the
SIMATIC Manager.
To display the reference data immediately in the required view and with
the required filter, select the menu command Options " Reference Data
" Filter and Display in the SIMATIC Manager.
If the reference data are incomplete, a dialog box is displayed from which
you can start an update of the reference data (Section 14.2).
Note
You can display the reference data for a block compiled with the setting
“Create Reference Data” (in the LAD/STL/FBD Editor) directly from the
language editor to get a current overview of your user program.
Changing the
Preset View
The reference data are displayed in a window in the default view
“Cross-Reference List”.
To change the default, follow the steps outlined below:
1. Select the menu command View " Filter.
2. Select the “Customize” tab in the dialog box displayed.
3. Select the view you want to be opened first.
4. If the default is to apply to other programs and to other work sessions
using the application, select the option “Save as Standard”.
5. Close the dialog box with “OK”.
Switching the View
You can switch to another view of the reference data using the commands in
the “View” menu or the corresponding buttons in the toolbar (see
Sections 14.5 to 14.9).
Using the menu command Window " New Window you can open additional
windows and display other views of the reference data (for example, List of
Unused Symbols).
Note on Displaying
Reference Data
14-4
The following section contains general information on displaying reference
data. The sections which follow then illustrate the various methods of
displaying reference data and explain the information shown in each window.
Standard Software for S7 and M7 – STEP 7 User Manual
C79000-G7076-C552-01
Displaying Reference Data
14.4 Notes on Displaying Reference Data
Status Bar
In the status bar of the working window is a short description of the current
menu command or messages about actions being executed.
Searching for
Entries
Using the menu command Edit " Search, you can search for specific text
strings in the active window. The search string can be searched from the
cursor position up or down, or in the whole document (see Figure 14-1).
Note that this is purely a text search function where you must enter the
search string exactly to the character.
Sorting Entries in
a List
You can sort the list entries by clicking on the column title: columns
containing letters (such as symbols) are sorted into alphabetical order,
columns containing numbers are sorted into ascending order.
Changing the
Representation
(Filter)
The representation of the reference data can be changed specifically for each
open window using the menu command View " Filter, meaning you can
adapt the contents of the lists to match the current information requirements.
Saving the
Settings
The filter settings you make apply to all windows containing reference data
on the current program. To save the settings for future work sessions, follow
the steps outlined below:
1. Select the menu command View " Filter. A dialog box is displayed
showing the property sheet for the current view.
2. Make the required settings.
3. Select the option “Save as Standard” in the dialog box.
4. Close the dialog box with “OK”.
The settings are retained until the next time you set the options.
Standard Software for S7 and M7 – STEP 7 User Manual
C79000-G7076-C552-01
14-5
Displaying Reference Data
14.5 Displaying Cross References
Displaying Cross
References
The cross-reference list is the default view when you display reference data.
You can change this default (see Section 14.3).
To access the cross-reference list from other views in the reference data
application, use the menu command View " Cross References or click the
corresponding button in the toolbar.
Uses
You are shown an overview of the use of addresses in the memory areas I, Q,
M, P, T, C, and DBs, FBs, FCs, SFBs, and SFCs within the user program. The
search function makes it easier for you to find specific addresses and
symbols.
Cross-Reference List for proj\test\blocks\blocks
Address
Q96.0
Q97.1
Q98.2
Q99.3
Q100.4
Q101.5
Q102.6
Q103.7
Q104.0
Q105.1
Q182.6
Q183.7
Q184.0
Q185.1
Q186.2
Q187.3
Q188.4
Q189.5
Q190.6
Q191.7
Q268.4
Q269.5
Q270.6
Q271.7
Q272.0
Q273.1
Q274.2
Q275.3
Q276.4
Figure 14-1
Structure of
Cross-Reference
Lists
Symbol
Block
Type
FB1
FB1
FB1
FB1
FB1
FB1
FB1
FB1
FB1
FB1
FC1
FC1
FC1
FC1
FC1
FC1
FC1
FC1
FC1
FC1
OB1
OB1
OB1
OB1
OB1
OB1
OB1
OB1
OB1
R
R
R
R
W
R
R
R
R
R
2
2
2
2
2
2
2
2
2
2
2
2
2
2
2
2
2
2
2
Language Details
STL
STL
STL
STL
STL
STL
STL
Search
STL
STL
Search For...
STL
Address
Nw
Nw
Nw
Nw
Nw
Nw
Nw
Nw
Nw
Nw
1
2
3
4
5
6
7
8
9
8
Symbol
Ln
Ln
Ln
Ln
Ln
Ln
Ln
Ln
Ln
Ln
Name:
MB135
Whole Word Only
Match Case
Search
From Cursor Down
From Cursor Up
Whole Document
Search
Cancel
Help
Example of Cross References (with Statement List Language Details)
Each line displayed in the window corresponds to a cross reference list entry.
The entry contains the columns Address, Symbol, Block, and Type. As an
option you can also display the column “Language Details”. The information
in this column depends on the programming language the block was created
in.
The meaning of each of the column entries is explained in Table 14-2.
14-6
Standard Software for S7 and M7 – STEP 7 User Manual
C79000-G7076-C552-01
Displaying Reference Data
Table 14-2
Columns in the Cross-Reference List
Content/Meaning
Column
Address
Absolute address or block name
Symbol
Symbolic address name
Block
Block in which the address is used
Type
Whether read (R) or write (W) access
Language Details
Language-dependent (block) information in abbreviated
form. The abbreviations are explained in the online help.
Sorting
The cross-reference list default option is to sort by memory areas. If you
click a column header with the mouse, you can sort the entries of this column
by the default sort criteria.
Filter Settings
With the menu command View " Filter you open the “Filter” dialog box.
Select the “Cross References” tab and set the row and column properties
according to your requirements. You can set which columns you want to
hide. The default setting is for all columns to be displayed.
You can set the column width in the cross-reference list shown on the screen
as required using the mouse.
Jumping from the
Cross-Reference
List to a Place in
the Program
To jump from the cross-reference list to the relevant part of the program:
S Double-click with the left mouse button on the address.
Alternative procedure:
1. Select an address in the cross-reference list.
2. Click the right mouse button to open a context-sensitive menu.
3. Select the menu item “Go To Location”.
The command in the context-sensitive menu is also available in the menu
bar:
Edit " Go To " Location
Displaying the
Locations from
LAD/STL/FBD
If you opened a block online or offline and selected an address, you can
display an overview of all the locations where the address is used by means
of the menu command Edit " Go To " Location. The requirement for this is
that you have generated reference data for this program.
Standard Software for S7 and M7 – STEP 7 User Manual
C79000-G7076-C552-01
14-7
Displaying Reference Data
14.6 Displaying Program Structures
Displaying the
Program Structure
To activate the program structure, select the menu command View "
Program Structure or click the corresponding button in the toolbar.
Uses
The program structure has a graphic display form. The call hierarchy (nesting
levels) of the blocks within the user program are displayed, giving an
overview of the blocks used, their dependencies, and their local data
requirement.
Selecting a
Representation
Type
With the menu command View " Filter you open the “Filter” dialog box. In
the “Program Structure” tab you can choose between the following two
representations to display the program structure:
S Tree structure
S Parent/child structure (table form)
You can specify whether you want all blocks to be displayed or whether the
hierarchy should start from a specific start block.
Tree Structure
Recursions in the call are recognized and indicated visually in the tree
structure. The significance of the graphic elements used in the program
structure (for example, of blocks not called) is explained in the online help.
Program Structure for proj\test\blocks\blocks
S7 Program
OB1 <Maximum: 66>
FB10, DB101 [42]
DB10(dbten) [42]
FC10
DB10(dbten) [66]
SFB0(CTU), DB100 [66]
SFC52(WR_USMSG) [66]
FC10
DB10(dbten) [66]
SFB0(CTU), DB100 [66]
SFC52(WR_USMSG) [66]
SFB0(CTU), DB100 [42]
SFC52(WR_USMSG) [42]
Figure 14-2
14-8
Example of a Program Structure – Displayed as a Tree
Standard Software for S7 and M7 – STEP 7 User Manual
C79000-G7076-C552-01
Displaying Reference Data
Maximal Local
Data Requirement
To give you a quick overview of the local data requirement of the
organization blocks in the user program displayed, the following can be
displayed in the tree structure:
S The maximum local data requirement per OB and
S The local data requirement per path
You can activate and deactivate this display in the “Program Structure” tab.
To display the local data requirement of a selected block, click the right
mouse button and select the “Block Information” menu item in the
context-sensitive menu.
Parent/Child
Structure
If you selected the “parent/child structure”, the called block and the block to
be called are displayed.
Depending on the settings in the “Program Structure” tab, more information
can be displayed.
Jumping from the
Program Structure
to a Place in the
Program
To jump from the program structure to the relevant part of the program,
follow the steps outlined below:
1. Select a block.
2. Click the right mouse button. A context-sensitive menu appears.
3. Select the menu item “Go To Block” to open the block itself,
or
Select the menu item “Go To Location” to open the calling block and
position the cursor on the call for the selected block.
The menu item “Go To Location” can only be selected if there is a calling
block (higher in the nesting level) for the selected block.
The commands in the context-sensitive menu are also available in the menu
bar:
Edit " Go To " Block and
Edit " Go To " Location
Standard Software for S7 and M7 – STEP 7 User Manual
C79000-G7076-C552-01
14-9
Displaying Reference Data
14.7 Displaying Assignments
Displaying
Assignment Lists
To activate one of the assignment lists, select one of the menu commands:
View " Assignment " Inputs, Outputs, and Bit Memory
View " Assignment " Timers and Counters
or click the corresponding button in the toolbar.
Uses
You are shown an overview of which bits of the addresses in the memory
areas I, Q, and M, or which timers (T) and counters (C) within the user
program are already assigned. This list forms an important basis for
troubleshooting or making corrections in a user program.
Structure of the
Assignment Lists
There are two assignment lists: one list displays only the memory areas input
(I), output (Q), and bit memory (M), and the other list displays the timers (T)
and counters (C).
Each row contains one byte of the memory area in which the eight bits are
coded according to their access. You can also set whether the access is byte,
word, or double word access. The meaning of the access codes is explained
in Table 14-3.
Table 14-3
Access Codes in the Assignment List for Inputs, Outputs, and Bit
Memory
Meaning
Access Code
.
Address is not accessed and therefore not assigned
d
Address is being used directly
X
Address is being used indirectly (byte, word, or double word
access)
In each row of the assignment list for timers and counters, 10 timers or
counters are displayed and coded as in Table 14-4.
Table 14-4
Access Codes in the Assignment List for Timers and Counters
Access Code
14-10
Meaning
.
Address is not accessed and therefore not assigned
X
Address is being used
Standard Software for S7 and M7 – STEP 7 User Manual
C79000-G7076-C552-01
Displaying Reference Data
Sorting
These lists are sorted alphabetically. You can sort the entries by clicking the
column title.
Filter Settings
With the menu command View " Filter open the “Filter” dialog box and
select the “Assignments” tab. Select the memory areas you want displayed in
the assignment list. For each memory area (inputs, outputs, bit memory,
timers, counters) you can specify a range of addresses to which you want to
restrict the display.
Standard Software for S7 and M7 – STEP 7 User Manual
C79000-G7076-C552-01
14-11
Displaying Reference Data
14.8 Displaying Unused Symbols
Displaying Unused
Symbols
To activate the unused symbol list display, select the menu command View "
Unused Symbols or click the corresponding button in the toolbar.
Uses
You are shown an overview of all the symbols with the following
characteristics:
1. The symbols defined in the symbol table.
2. The symbols not used in the parts of the user program for which reference
data exist.
Structure of the
List of Unused
Symbols
Each row displayed in the window corresponds to an entry in the list. The
entry contains the columns Symbol, Address, Data Type, and Comment.
The display of any columns can be deactivated in the “Unused Symbols” tab
of the “Filter” dialog box. You open this dialog box with the menu command
View " Filter.
The meaning of each of the column entries is explained in Table 14-5.
Table 14-5
Columns in the List of Unused Symbols
Column
Sorting
14-12
Content/Meaning
Symbol
Symbolic address name
Address
Absolute address
Data Type
Data type of the address, for example, BOOL, INT, etc.
Comment
Comment from the symbol table
You can sort the entries by clicking the column header.
Standard Software for S7 and M7 – STEP 7 User Manual
C79000-G7076-C552-01
Displaying Reference Data
14.9 Displaying Addresses without Symbols
Displaying
Addresses without
Symbols
To activate the list of addresses without symbols display, select the menu
command View " Addresses Without Symbols or click the corresponding
button in the toolbar.
Uses
You are shown an overview of all the absolute addresses which are used in
the user program, but for which no symbol has been defined in the symbol
table.
Structure of the
List of Addresses
without Symbols
Each row displayed in the window corresponds to an entry in the list. The
entry contains the columns Address and Number of uses. The meaning of
each of the column entries is explained in Table 14-6.
Table 14-6
Columns in the List of Addresses without Symbols
Content/Meaning
Column
Sorting
Address
Absolute address
Number
Number of times the address is used in the user program
The list is sorted according to address.
Standard Software for S7 and M7 – STEP 7 User Manual
C79000-G7076-C552-01
14-13
Displaying Reference Data
14-14
Standard Software for S7 and M7 – STEP 7 User Manual
C79000-G7076-C552-01
15
Downloading and Uploading
User Programs
Overview
Once you have configured your system, assigned parameters, and created the
program, you can download complete user programs or individual blocks to
the programmable controller.
To download the system data created when the hardware was configured, the
networks configured, and the connection table created to the programmable
controller, you download the object “System Data”.
You can select the above-mentioned objects in the project window and
download them from the SIMATIC Manager (PLC menu). In the menu bar of
the window in which you are editing the contents of an object of this type,
there is also a command for downloading this object.
Chapter
Overview
Section
Description
Page
15.1
Displaying and Changing the Operating Mode
15-2
15.2
Memory and Load Concept
15-4
15.3
Resetting the CPU in a Programmable Controller
15-6
15.4
Downloading User Programs from a Programming Device
to a Programmable Controller
15-7
15.5
Downloading Blocks from a Programming Device to a
Programmable Controller
15-8
15.6
Deleting Blocks on the CPU in a Programmable Controller
15-9
15.7
Reloading Blocks from a Programming Device to a
Programmable Controller
15-10
15.8
Editing Blocks from the CPU in the Programming Device
15-11
15.9
Compressing the User Memory (RAM)
15-12
15.10
Saving the RAM Contents of the CPU to the Integrated
EPROM
15-13
15.11
Saving Blocks and User Programs on a Memory Card
15-14
Standard Software for S7 and M7 – STEP 7 User Manual
C79000-G7076-C552-01
15-1
Downloading and Uploading User Programs
15.1 Displaying and Changing the Operating Mode
Overview
Operating modes describe the behavior of the CPU at a particular point in
time. The most important operating modes are RUN, STARTUP (complete
restart or restart), HOLD, and STOP. An exact description of the operating
modes and transitions can be found in the Programming Manual for S7-300
and S7-400 /234/.
Operating Mode
Transitions
Operating mode transitions are caused by events in the program sequence or
by the user intervening.
RUN → STOP
Set the operating mode from RUN to STOP before you do the following:
S Download user programs to the CPU (Sections 15.4, 15.5)
S Execute a memory reset on the CPU (Section 15.3)
S Compress the user memory (Section 15.9)
STOP → RUN
(Complete Restart)
If you execute a complete restart in the STOP mode, the program is restarted
and first processes the startup program (in the block OB100) in STARTUP
mode. If the startup is successful, the CPU changes to RUN mode.
A complete restart is required after the following:
S Memory reset
S Downloading the user program in the STOP mode
S I stack or B stack overflow
S Troubleshooting, after the CPU has gone into STOP as the result of a
programming error in the user program
S Complete restart being interrupted (by power down or switching the mode
selector on the CPU)
S Exceeding the interrupt time limit for a restart
STOP → RUN
(Restart)
If you execute a restart in the STOP mode, the program is restarted at the
point of interruption. If the restart is successful, the CPU changes into RUN
mode. A restart is only possible for S7-400 CPUs and only permitted here if
the program was not edited in the STOP mode.
Note: In the object properties for a CPU you can set whether a restart or
complete restart is executed after “power on”.
15-2
Standard Software for S7 and M7 – STEP 7 User Manual
C79000-G7076-C552-01
Downloading and Uploading User Programs
Operating Mode
Priority
If a number of operating mode transitions are requested simultaneously, the
operating mode with the highest priority is selected. The order of priority
from highest to lowest is: STOP - HOLD - STARTUP - RUN. The HOLD
state has a special function and is entered only for test purposes in STARTUP
or RUN mode.
If, for example, the mode selector on the CPU is set to RUN and you attempt
to switch the CPU to STOP from the programming device, the CPU goes into
STOP because this operating mode has the highest priority.
If the mode selector on the CPU is switched to STOP, you cannot execute a
change to any other operating mode from the programming device.
Displaying and
Changing the
Operating Mode
To display and change the operating mode from the programming device,
follow the steps outlined below:
1. Establish an online connection to the programmable controller using one
of the following methods:
– Switching the view in the project window to online and select the
module or S7 or M7 program,
or
– Select the object “MPI=...” in the “Accessible Nodes” window.
2. Open the corresponding dialog box with the menu command PLC "
Operating Mode. The current operating mode is displayed.
Operating Mode
Path:
Accessible Nodes\MPI=2
Current Operating Mode:
Complete
Restart
Complete Restart
RUN
Restart
Restart
Stop
Current Keyswitch Position:
RUN
Last Operating Mode:
STARTUP
Cancel
Figure 15-1
Help
“Operating Mode” Dialog Box
3. Click the appropriate button to switch the operating mode. A button is
deactivated (shown in paler color) if a change to that operating mode is
not permitted in the current situation.
Standard Software for S7 and M7 – STEP 7 User Manual
C79000-G7076-C552-01
15-3
Downloading and Uploading User Programs
15.2 Memory and Load Concept
Memory
Configuration
The memory of an S7 CPU can be divided into three areas, as follows:
S The load memory is used to store the user program without the symbol
table and the comments (these remain in the memory of the programming
device). The load memory can either be RAM, ROM, or EPROM
memory, depending on the programmable controller. Blocks that are not
marked as required for startup will be stored only in the load memory.
S The work memory (integrated RAM) is used to store the parts of the user
program required for program processing. All program execution involves
interaction with the work memory and the system memory.
S The system memory contains the additional memory elements which
every CPU provides for the user program, such as the process-image input
table and output table, bit memory, counters, and timers. The system
memory also contains the block stack, interrupt stack, and local data
stack.
Features of S7-300
The load memory can also have an integrated EEPROM part as well as an
integrated RAM part (for example, the CPU 312 IFM and CPU 314 IFM).
Features of S7-400
The use of a memory card (RAM or EEPROM) is invaluable for extending
the load memory. The integrated load memory is a RAM memory and is
mainly used to reload and correct blocks.
Note
When you first load or format EPROMs, an application code is entered in
the code bit memory of the EPROM. For example, the code for S7 is
MC5+_BST and M7-DOS for M7.
EPROMs with the application code MC5+_BST can be used in the
above-mentioned context. The application code is automatically written
when you erase the memory card on the programming device so you can
rewrite it.
EPROMs with the application code M7-DOS are intended for use in M7
systems and behave in the same way as a DOS drive. The application code is
automatically written when you format the memory card with the program
ftlforms (only possible on the PG 720/740/760 or M7 systems).
15-4
Standard Software for S7 and M7 – STEP 7 User Manual
C79000-G7076-C552-01
Downloading and Uploading User Programs
Consequences of
the Load Memory
Structure
The division of the load memory of a CPU into RAM and EEPROM areas
determines the methods available for downloading your user program or the
blocks in your user program. Table 15-1 illustrates the possibilities:
Table 15-1
Load Memory Structure and Methods of Loading
Memory Type
RAM
Method of Loading
Type of Communication
between PG and PLC
Downloading and deleting
individual blocks
PG-PLC connection
Downloading and deleting
a complete user program
PG-PLC connection
Reloading individual
blocks
PG-PLC connection
Integrated (S7-300 only) or Downloading complete
plug-in EPROM
user programs
PG-PLC connection
Plug-in EPROM
External loading of the
EPROM and inserting the
memory card
Downloading complete
user programs
Programs stored in the RAM are lost when you execute a memory reset on
the CPU or remove the RAM memory card.
Programs on EEPROM memory cards are not lost following a memory reset
and can be transported by removing and inserting the memory card.
Retentive Data
To prevent data loss following power down or a memory reset, you can set up
retentive memory areas. You will find more information in the chapter
“Memory Areas of the S7 CPUs” in the Programming Manual for S7-300 and
S7-400 /234/ and in the online help on assigning parameters to CPUs.
Standard Software for S7 and M7 – STEP 7 User Manual
C79000-G7076-C552-01
15-5
Downloading and Uploading User Programs
15.3 Resetting the CPU in a Programmable Controller
Uses
Before you download your user program, you should reset the CPU to ensure
that no “old” blocks are still on the CPU.
If you have performed a memory reset, you can download a new user
program from an EEPROM memory card to a CPU (see “Result...” below).
Procedure
You can execute a memory reset on a CPU on-line from the programming
device using the menu command PLC " Clear/Reset. To do this, the CPU
must be in STOP.
The memory reset function can also be executed via the mode selector on the
CPU (MRES position).
To reset a CPU using STEP 7, follow the steps outlined below:
1. In the online project window, select the S7/M7 program
or
In the “Accessible Nodes” window, select the object “MPI=...”.
2. Call the memory reset function with the menu command PLC "
Clear/Reset and confirm the action.
Result of the
Memory Reset
A memory reset involves the following process on the CPU:
S The CPU is reset and the whole user program in the work memory and
the RAM load memory is deleted.
S The system parameters and the CPU and module parameters are reset to
default values.
S The CPU deletes all existing connections.
S If data are present on an EPROM (memory card or integrated EPROM),
the CPU copies the EPROM contents back to the RAM area of the
memory following the memory reset.
The diagnostic buffer and the time and date are not reset.
When you download the user program, all the required information is
transferred to the programmable controller.
Parameters of the
Multipoint
Interface
15-6
If a memory card is inserted during a memory reset, the MPI parameters on
the memory card become valid.
If no memory card is inserted, the MPI parameters on the module are
retained and remain valid, retaining the module’s communication capability.
Standard Software for S7 and M7 – STEP 7 User Manual
C79000-G7076-C552-01
Downloading and Uploading User Programs
15.4 Downloading User Programs from a Programming Device to a
Programmable Controller
Uses
During, for example, the final phase of the program test, or to run the
finished user program, you will want to download a complete user program
to the programmable controller. You can do this in the SIMATIC Manager.
Note
You can download user programs to a CPU in both the STOP and RUN-P
modes. However, when downloading in the RUN-P mode, remember that the
program is transferred block by block. If you overwrite an “old” user
program by downloading a new one, conflicts may occur.
Function
The complete user program is downloaded to the load memory; the parts
relevant to program execution are also loaded into the work memory.
Figure 15-2 illustrates downloading programs to a CPU:
CPU
Load Memory
PG
EPROM
Download
the
complete
program to
the CPU
Figure 15-2
Requirements
RAM
Work Memory
RAM
Parts of the
program
relevant to
program
execution
Downloading a User Program from the Programming Device to a CPU
The following requirements must be fulfilled for downloading:
– There must be a connection between your programming device and
programmable controller.
– The program you are downloading has been compiled without errors.
Procedure
To download a program to the CPU, select the “Blocks” container you want
to download in the project window and select the menu command PLC "
Download.
Standard Software for S7 and M7 – STEP 7 User Manual
C79000-G7076-C552-01
15-7
Downloading and Uploading User Programs
15.5 Downloading Blocks from a Programming Device to a
Programmable Controller
Uses
When creating and debugging a user program, it is often necessary to
download individual logic blocks and data blocks to the CPU and to run them
under test conditions.
Note
You can download blocks from the programming device to the CPU in the
STOP or RUN-P mode. If, however, the parameters of a block are changed
in the RUN-P mode, the CPU changes to STOP. Note the correct block call
sequence when downloading in the RUN-P mode. The CPU will change to
STOP if it attempts to call blocks that do not exist.
Function
Individual blocks are always downloaded to the RAM load memory. At the
same time, the parts of the blocks relevant for program execution are loaded
into the work memory.
What Must Be
Loaded?
To test individual blocks, you must download at least one organization block
(OB), the function blocks (FBs) and functions (FCs) called by the OB, and
the data blocks (DBs) being used.
Downloading with
the SIMATIC
Manager
You can download the selected components of a user program to the
programmable controller using the menu command PLC " Download.
You can download blocks or the object “System Data” individually. Blocks
which are to be downloaded must have been compiled without errors.
If a block already exists in the RAM of the CPU, confirm the prompt asking
whether or not the block should be overwritten.
Downloading
when Processing
Individual Objects
When configuring hardware and networks and when programming blocks,
you can download the object you were currently editing directly using the
menu command in the main window of the application you are working with
(PLC " Download).
For example, in the “Programming Blocks” window, you can download the
currently open block to the programmable controller (menu command PLC "
Download).
15-8
Standard Software for S7 and M7 – STEP 7 User Manual
C79000-G7076-C552-01
Downloading and Uploading User Programs
15.6 Deleting Blocks on the CPU in a Programmable Controller
Uses
It may be necessary to delete blocks on the CPU during the test phase of the
user program.
Blocks on the CPU
Blocks are stored in the user memory of the CPU either in the EPROM or
RAM (depending on the CPU and the load procedure).
Deleting Blocks in
an EPROM
The blocks stored in the EPROM can be removed by one of the following
methods:
S Delete them by using the menu command PLC " Download to EPROM
Memory Card on CPU if these CPUs have a slot for memory cards and
support this function (for example, CPU 416). This function is only
allowed when the CPU is in STOP mode.
S The integrated EPROM of the CPU 312 is erased by overwriting the
EPROM again with the current RAM content in which all user blocks had
been deleted.
Deleting Blocks in
the RAM
Blocks stored in the RAM can be deleted directly by removing them from the
open CPU. The occupied space in the load or work memory becomes free
and can be used again.
Note
You can delete blocks both in the STOP and RUN-P modes.
If you delete in the RUN-P mode, however, remember the following point:
when the user program attempts to access a deleted block, either the CPU
changes to STOP or an error OB is called.
Procedure
To delete blocks on the CPU directly, open the project window, switch to the
online view, and select the blocks you want to delete in the online project
window. Then select the menu command File " Delete or press DEL.
Standard Software for S7 and M7 – STEP 7 User Manual
C79000-G7076-C552-01
15-9
Downloading and Uploading User Programs
15.7 Reloading Blocks from a Programming Device to a Programmable
Controller
Uses
You can overwrite blocks contained in the load memory (RAM or EPROM)
or work memory with a new version (known as reloading). The existing
version then becomes invalid.
Blocks in the RAM
The existing block in the RAM is deleted by the reload function and the
modified block is downloaded to the RAM. If the new version is longer than
the existing version, gaps may occur in the load and work memory (see
Section 15.9 “Compressing the User Memory (RAM)”).
Blocks in the
EPROM
The existing block cannot be deleted in the EPROM and is simply marked as
invalid when a new version is reloaded. The replacement block is loaded in
the RAM.
Procedure
This is the same as when downloading a block (see Section 15.5).
Note
Remember that if there is a power failure without battery backup or if you
perform a memory reset, the “old” blocks become valid again.
15-10
Standard Software for S7 and M7 – STEP 7 User Manual
C79000-G7076-C552-01
Downloading and Uploading User Programs
15.8 Editing Blocks from the CPU in the Programming Device
Uses
Being able to upload blocks from the CPU to the programming device has
the following uses:
S During the test phase, you can correct a block directly on the CPU and
document the result.
S You can upload the current contents of blocks from the RAM load
memory of the CPU to your programming device via the load function.
Two Distinct Cases
When uploading blocks from the CPU to the programming device, remember
that there are two distinct situations:
S In the first situation: the user program to which the blocks belong is
located on the programming device.
S In the second situation: the user program to which the blocks belong is
not on the programming device. This means that the program sections
listed below, that cannot be downloaded to the CPU, are not available.
These components are:
– The symbol table with the symbolic names of the addresses and the
comments
– Network comments of a Ladder Logic or Function Block Diagram
program
– Line comments of a Statement List program
– User-defined data types
User Program in
the Programming
Device
To edit blocks from the CPU, open the project window and switch to the
online view. If you now select a “Blocks” container in the online project
window, the list of downloaded blocks is displayed. You can now select,
open, and edit blocks. Using the menu command File " Save As, you can
save the changes offline on the programming device: with PLC " Download,
you can download the modified blocks to the programmable controller.
User Program not
in the
Programming
Device
To edit blocks from the CPU, follow these steps: click the “Accessible
Nodes” button in the SIMATIC Manager. Select the node (“MPI=...” object)
from the list displayed and open the “Blocks” container to display the blocks.
You can now open blocks and edit, monitor, or copy them as required. Then
select the menu command File " Save As and enter the path for the
programming device where you want to store the blocks in the dialog box.
With PLC " Download you can download the modified blocks to the
programmable controller.
Standard Software for S7 and M7 – STEP 7 User Manual
C79000-G7076-C552-01
15-11
Downloading and Uploading User Programs
15.9 Compressing the User Memory (RAM)
Uses
After deleting and reloading blocks, gaps can occur in the user memory (load
and work memory) and reduce the usable memory area. With the compress
function, the existing blocks are rearranged in the user memory without gaps,
and a continuous free memory is created. Figure 15-3 shows a diagram of
how occupied blocks of memory are shifted together by the compress
function.
Memory occupied before compressing
Memory occupied after compressing
Occupied memory
Free memory
Figure 15-3
Ways of
Compressing the
Memory
Shifting Occupied Blocks of Memory Using “Compress Memory”
There are two methods of compressing the user memory, as follows:
S If there is insufficient memory available when you are downloading to the
programmable controller, a dialog box appears informing you of the error.
You can compress the memory by clicking the corresponding button in
the dialog box.
S As a preventative measure, you can display the memory utilization and
compress the memory if gaps are present in the occupied memory.
Selecting STOP
Mode
You can only close all the gaps in memory when you compress in the STOP
mode. In the RUN-P mode (mode selector setting), the blocks currently being
processed cannot be shifted since they are open. The compress function does
not work in the RUN mode (mode selector setting) (write protection!).
Compressing to
Prevent Errors
In the “Memory” tab in the dialog box you open with the menu command
PLC " Module Information, you can display the memory utilization and
decide whether you want to compress the memory (see Section 17.11).
15-12
Standard Software for S7 and M7 – STEP 7 User Manual
C79000-G7076-C552-01
Downloading and Uploading User Programs
15.10 Saving the RAM Contents of the CPU to the Integrated EPROM
Uses
For CPUs which have an integrated EPROM, you can copy the content of the
RAM to this EPROM so the data are not lost following power down or a
memory reset.
Procedure
To copy the content of the RAM to the integrated EPROM, follow the steps
outlined below:
1. Using the menu command View " Online, open a window containing the
online view of an open project,
or
Display the “Accessible Nodes” window by clicking the “Accessible
Nodes” button in the toolbar or selecting the menu command PLC "
Display Accessible Nodes.
2. Select the S7 or M7 program in the online view of the project window or
the node in the “Accessible Nodes” window.
3. Select the menu command PLC " Save RAM to ROM.
The content of the RAM memory is copied to the integrated EPROM.
Standard Software for S7 and M7 – STEP 7 User Manual
C79000-G7076-C552-01
15-13
Downloading and Uploading User Programs
15.11 Saving Blocks and User Programs on a Memory Card
Uses
Memory cards are portable data media. They contain electrically erasable
flash EPROMs as memory chips. The data stored on them are retained
following power down and when the CPU is reset. Memory cards are written
in the slot on the programming device and then inserted in a CPU.
Memory Card
Contents
If you click the “S7 Memory Card” button in the toolbar in the SIMATIC
Manager, the object structure on the memory card is displayed in a window.
The memory card must be in the slot on the programming device (PG) or the
external prommer (for PCs) to do this.
Saving to Memory
Card
To save blocks or user programs to a memory card, follow the steps outlined
below:
1. Check that the memory card is inserted in the programming device slot
and click the “S7 Memory Card” button in the toolbar in the SIMATIC
Manager.
2. Select individual blocks or the “Blocks” container that you want to save
in the project window or the online project window.
3. Drag the selected objects using the mouse to the window displaying the
content of the memory card or copy the objects using the menu
commands Edit " Copy and Edit " Paste.
4. If a block already exists on the memory card, an error message is
displayed. In this case, delete the content of the memory card and repeat
steps 2. and 3.
Result: The executable blocks are saved on the memory card.
Erasing a Memory
Card
You can only erase the whole content of a memory card in S7. You cannot
delete individual blocks. For M7 however, individual objects can be deleted
from memory cards using the flash-file system. To erase a memory card,
follow the steps outlined below:
1. Check that the memory card is inserted in the programming device slot
and click the “S7 Memory Card” button in the toolbar in the SIMATIC
Manager.
In the left half of the window that appears, the container is visible which
represents the content of the memory card. In the right half of the
window, the objects in the memory card container are displayed.
2. In S7, delete the container in the left half of the window; in M7, delete
the container or individual objects from the container.
15-14
Standard Software for S7 and M7 – STEP 7 User Manual
C79000-G7076-C552-01
16
Debugging User Programs
Overview
This chapter explains the following topics:
S How to display the current values of variables in your user program or the
CPU (monitor)
S How to assign fixed values to variables in a user program or a CPU
(modify)
S How to create a variable table for the variables you want to display or
modify
This application offers valuable support when commissioning a plant and
gives you an overview of the status of the variables in your system.
Chapter
Overview
Section
Description
Page
16.1
Overview
16-2
16.2
Creating a Variable Table
16-4
16.3
Editing a Variable Table
16-5
16.4
Establishing Connections to CPUs
16-7
16.5
Setting Triggers
16-8
16.6
Monitoring and Modifying Variables
16-9
16.7
Information on Forcing Variables
16-10
16.8
Creating and Deleting Force Jobs
16-12
16.9
Enabling Peripheral Outputs (PQ)
16-13
Note
This chapter describes testing a program with regard to the variables in the
program.
To test the program sequence step by step, you can use the “program status”.
You will find the commands for this function in the window of the respective
editor under the Debug menu. The exact procedure is described in the
Reference Manuals for the programming languages.
Standard Software for S7 and M7 – STEP 7 User Manual
C79000-G7076-C552-01
16-1
Debugging User Programs
16.1 Overview
Application
In order to debug user programs, the following methods are available for
intervening in the program process:
1. At trigger points you can display (monitor) the values of variables or
assign values to (modify) variables. The variables you can monitor and
modify are: inputs, outputs, bit memory, timers, counters, peripheral
outputs, and elements of data blocks.
2. Apart from timers and counters and for elements of individual data
blocks, you can assign fixed values that the user program cannot change
(forcing). The requirement for this is that the CPU supports this function
(for example, the S7-400).
Uses
If the user program was already compiled and downloaded to a CPU, you can
scan elements of individual data blocks and variables to, for example:
S Commission a plant or part of a plant
S Test whether the plant runs together with other parts of plants or user
programs
If you set a meaningful trigger point and trigger frequency, you can get a
good overview of the status of the variables in your system.
If no user program was downloaded to the CPU, you can check that the
hardware was installed correctly (for example, whether or not the I/O is
available).
16-2
Standard Software for S7 and M7 – STEP 7 User Manual
C79000-G7076-C552-01
Debugging User Programs
!
Caution
Make sure that no dangerous situations can occur before you execute the
“Modify” or “Force” functions.
Modifying is only possible if the mode selector on the CPU is set to RUN-P
or STOP.
Before you start the Force function, you should check that nobody is
executing this function on the same CPU at the same time.
A force job can only be deleted or terminated with the menu command
Variable " Stop Forcing. Closing the force values window or exiting the
Monitoring and Modifying Variables application does not delete the force
job.
Forcing cannot be undone, meaning the menu command Edit " Undo is not
possible.
You will find a summary of the differences between forcing and modifying
variables in Section 16.7.
If a CPU does not support the Force function, all the menu commands
relating to forcing in the Variable menu are deactivated.
Basic Procedure
To use the “Monitor” and “Modify” functions, follow the steps outlined
below:
1. Create a new variable table or open an existing variable table.
2. Edit or check the contents of the variable table.
3. Establish an online connection between the active variable table and the
required CPU using the menu command PLC " Connect To " ....
4. Using the menu command Variable " Trigger, select a suitable trigger
point and set the trigger frequency.
5. The menu commands Variable " Monitor and Variable " Modify toggle
the Monitor and Modify functions on and off.
6. Save the completed variable table using the menu command Table " Save
or Table " Save As so you can open it again when required.
Aborting with ESC
If you press ESC while the Monitor or Modify function is active, the function
is terminated without a prompt.
Standard Software for S7 and M7 – STEP 7 User Manual
C79000-G7076-C552-01
16-3
Debugging User Programs
16.2 Creating a Variable Table
What Is the
Variable Table
For?
You require variable tables to monitor and modify variables. Enter the
variables you want to monitor or modify in the variable table.
Uses
You can save the variable table, print it out, and use it for future purposes.
You can define the following:
S The format (binary, decimal, hexadecimal) in which the value of the
variables is displayed
S The values with which the selected variables are to be modified
Procedure
To create a variable table, you can choose from one of the following
methods:
S In the SIMATIC Manager, select the “Blocks” container and create a
variable table object with the menu command Insert " S7 Block "
Variable Table (VAT). In the dialog box, you can give the table a name.
You can open the variable table by double-clicking the object.
S In the online view, select an S7/M7 program. You create an unnamed
variable table using the menu command PLC " Monitor/Modify
Variables.
S In the list of Accessible Nodes, select a connection. You create an
unnamed variable table using the menu command PLC "
Monitor/Modify Variables.
S If you are already working in the “Monitoring and Modifying Variables”
window, you can create new tables which are not linked to an S7/M7
program using the menu command Table " New. You can open existing
tables with Table " Open.
S If you are already working in the “Monitoring and Modifying Variables”
window, you can also use the corresponding buttons in the toolbar to
create or open variable tables.
Note
The variable table name “VAT0” is reserved for internal purposes and cannot
be assigned to tables you created yourself.
16-4
Standard Software for S7 and M7 – STEP 7 User Manual
C79000-G7076-C552-01
Debugging User Programs
16.3 Editing a Variable Table
Example of a
Variable Table
Figure 16-1 shows an example of a variable table which has been filled out.
Monitoring and Modifying Variables - Project\SIMATIC 300-Station(1)\CPU 314(A) ... \VAT1
Table
Edit
Insert
PLC
Variable
View
Options
Window
Help
Project1\SIMATIC 300-Station(1)\CPU 314(A) ... \VAT1
Address
Symbol
Monitor Format Monitor Value
//
Inputs:
I
0.1 ”switch_le_sin” BOOL
IB
1
–––
HEX
//
Bit Memory:
M
0.1 ”gr_int”
BIN
MW
1
–––
DEC
//
Outputs:
Q
0.1 ”gr_ped_sim”
BIN
QD
1
–––
DEC
//
I/O:
PIB
2
–––
HEX
PQW
3
–––
HEX
//
Counters:
–––
C
1
COUNTER
//
Data Word:
DB1.DBW 1
–––
DEC
//
Timers:
–––
T
1
SIMATIC_TIME
–––
T
4
SIMATIC_TIME
false
B#16#06
2#1
1
2#0
l#0
2#1
No monitor value
No monitor value
C#0
//C#1
No monitor value
S5T#0ms
S5T#0ms
//S5T#20ms
OVR
’MPI = 2 (Direct)’
Figure 16-1
Modify Value
Online
Edit
7 / 23
Example of a Variable Table Filled Out
Editing the Table
Within a variable table, you can edit the cells for Address, Symbol, Monitor
Format, and Modify Value.
S You enter the variable you want to modify with your address or as a
symbol. If the corresponding symbol is defined in the symbol table, the
symbol column or the address column is filled out automatically.
S The monitor format defines the format in which the calculated monitor
value is to be displayed in the column to the right of it. You select the
format using the menu command View " Select Monitor Format " ... or
by clicking the cell in the table a number of times to scroll through the
options until the required format is displayed.
Standard Software for S7 and M7 – STEP 7 User Manual
C79000-G7076-C552-01
16-5
Debugging User Programs
Syntax Check
When you enter variables in the variable table, a syntax check is run before
you exit the row. If you made a syntax error when you entered the variables,
it is shown in red and an error message in the status bar informs you of the
error.
Comment Lines
Comment lines are introduced by the comment marker “//”. Using the menu
command Edit " Comment Line or the corresponding button in the toolbar,
you can display a table row temporarily as a comment line.
Modify Value
Valid/Invalid
If you place a comment marker “//” in the column Modify Value before the
value of the variable you want to modify, you make this value invalid
(deactivate it.) When the comment marker is deleted, the value becomes
valid again and can be modified.
Selecting
Columns/Column
Size
You can display and hide individual columns in the table using the
commands in the menu View, depending on which columns you require.
Only those columns marked with a check mark in the View menu are
displayed.
Setting the
Column Width
You can change the width of a column with the mouse:
1. Position the cursor on a vertical line dividing the columns in the header
row.
2. Press the left mouse button.
3. Drag the line horizontally to the left or right.
4. Release the mouse button again.
With the menu command View " Optimize Column Widths you can set the
optimum column width for the whole variable table calculated depending on
the length of the table entries.
Maximum Size
16-6
A variable table can have a maximum of 255 characters per row. A carriage
return into the next row is not possible. The table size is limited to a
maximum of 1024 rows.
Standard Software for S7 and M7 – STEP 7 User Manual
C79000-G7076-C552-01
Debugging User Programs
16.4 Establishing Connections to CPUs
Overview
To be able to monitor, modify, or force variables, an online connection to a
CPU is required. If you have several different variable tables open, an online
connection to a CPU must be established for each table. Each variable table
can be connected to any CPU.
If an online connection exists, the word “Online” appears in the status bar for
the window.
Establishing an
Online Connection
to a CPU
If there is no online connection, you define one to the required CPU using the
menu command PLC " Connect To " ... in order to monitor or modify the
variables. Alternatively you can also click the corresponding buttons in the
toolbar (Figure 16-2).
ON
Connection to the configured CPU
ON
Connection to a directly connected CPU (e.g. MPI=2(Direct))
Figure 16-2
Breaking an Online
Connection to a
CPU
Toolbar Buttons for Establishing Connections
Using the menu command PLC " Disconnect you interrupt the connection
between the variable table and the CPU.
Standard Software for S7 and M7 – STEP 7 User Manual
C79000-G7076-C552-01
16-7
Debugging User Programs
16.5 Setting Triggers
Overview
By selecting a trigger point, you determine the point in time at which the
modify values are assigned to the variables and at which the monitor values
of variables are displayed.
Setting Trigger
Points and Trigger
Frequency
Using the menu command Variable " Trigger you can do the following:
S Select one of the following trigger points: “Start of Cycle”, “End of
Cycle”, or “Transition to STOP” (see Figure 16-3)
S Select “Once” or “Every Cycle” as the trigger frequency
Process-image input table
Trigger point “Start of Cycle”
OB1
Trigger point
“Transition to STOP”
Trigger point “End of Cycle”
Process-image output table
Figure 16-3
Trigger Points
The following applies to trigger points when modifying variables:
S If you set “Once” as the trigger frequency, a message appears if the
selected variables cannot be modified.
S With the trigger frequency “Every Cycle”, no message appears.
If you set the same trigger point when monitoring and modifying, the
monitor value is displayed before modifying because the Monitor function is
executed before the Modify function. To display the modified value, you
should set the trigger point for monitoring to “Start of Cycle” and the trigger
point for modifying to “End of Cycle”.
Trigger
Immediately
16-8
You can also display the values of selected variables once with the menu
command Variable " Update Monitor Values or modify selected variables
once with the menu command Variable " Activate Modify Values. This
command is taken to mean “trigger immediately” and is executed as quickly
as possible without reference to any point in the user program. These
functions are mainly used for monitoring and modifying in STOP mode.
Standard Software for S7 and M7 – STEP 7 User Manual
C79000-G7076-C552-01
Debugging User Programs
16.6 Monitoring and Modifying Values
Overview
Using the Monitor function, you can monitor selected variables at
predefined trigger points.
Using the Modify function, you can assign a value to selected variables at
predefined trigger points to modify the variable.
!
Caution
Make sure that no dangerous situations can occur before you execute the
“Modify” function.
Modifying is only possible if the mode selector on the CPU is set to RUN-P
or STOP.
Monitoring
Variables
The following methods are available to you for monitoring variables:
S Activate the Monitor function with the menu command Variable "
Monitor. The values of the selected variables are displayed in the
variable table in accordance with the trigger point and trigger frequency
set.
If you set the trigger frequency “Every Cycle”, you can toggle the
Monitor function off again with the menu command Variable " Monitor.
S You can update the values of the selected variables once and immediately
using the menu command Variable " Update Monitor Values. The
current values of the selected variables are displayed in the variable table.
Modifying
Variables
The following methods are available to you for modifying variables:
S Activate the Modify function with the menu command Variable "
Modify. The user program applies the modify values for the selected
variables from the variable table in accordance with the trigger point and
trigger frequency set.
If you set the trigger frequency “Every Cycle”, you can toggle the Modify
function off again with the menu command Variable " Modify.
S You can update the values of the selected variables once and immediately
using the menu command Variable " Activate Modify Values.
The functions Force and Enable Peripheral Output (PQ) provide other
possibilities.
Standard Software for S7 and M7 – STEP 7 User Manual
C79000-G7076-C552-01
16-9
Debugging User Programs
16.7 Information on Forcing Variables
Overview
You can assign fixed values to individual variables of a user program so that
they cannot be changed or overwritten even by the user program executing in
the CPU. The requirement for this is that the CPU supports this function (for
example, the S7-400). Otherwise the menu commands for the Force functions
are deactivated.
Uses
By assigning fixed values to variables you can set specific situations for your
user program and use this to test the programmed functions.
General Notes
You should note the following important information before you execute
the Force function.
!
Warning
Beware of injury to personnel and damage to property.
Make sure that no dangerous situations can occur before you execute the
“Force” function.
Before you start the Force function, you should check that nobody is
executing this function on the same CPU at the same time.
!
Force Window
Caution
Forcing cannot be undone, meaning the menu command Edit " Undo is not
possible.
You must open only one single “Force Values” window for a CPU. The
variables together with their respective force values for the active force job
are displayed in this window. If no force job is active, the window is empty.
The name of the active online connection to a CPU is displayed in the title
bar of the “Force Values” window.
Force Values: MPI = 4 (Direct)
Address
Format
Force Value
MW 100
Q 20.1
HEX
BIN
W#16#0001
2#0
Figure 16-4
16-10
Force Window
Standard Software for S7 and M7 – STEP 7 User Manual
C79000-G7076-C552-01
Debugging User Programs
Differences
between Forcing
and Modifying
Table 16-1
The following table summarizes the differences between forcing and
modifying.
Comparison of the Differences between Forcing and Modifying
Feature / Function
Force
Modify
Peripheral inputs (PIB, PIW, PID)
Yes
No
Timers and counters (T, C)
No
Yes
Data blocks (DB)
No
Yes
Defining triggers
always
trigger immediately
Yes
affects all force
values
Yes
User program cannot overwrite the modify/force values
No
Yes
Replacing the force value effective without interruption
Yes
No
The variables retain their values when the application is exited
Yes
No
The variables retain their values after the connection to the CPU is
broken
Yes
No
Addressing errors permitted:
e.g.
IW1
modify/force value: 1
IW1
modify/force value: 0
No
Yes
the last becomes
effective
Function only affects variable in visible area of active window
Standard Software for S7 and M7 – STEP 7 User Manual
C79000-G7076-C552-01
16-11
Debugging User Programs
16.8 Creating and Deleting Force Jobs
Displaying the
Force Window
To prepare to start a force job, follow the steps outlined below:
1. Create a new variable table or open an existing variable table.
2. Use the menu command PLC " Connect To to establish a connection to
the required CPU.
3. Use the menu command Variable " Display Force Values to open the
“Force Values” window in which the current status of the selected CPU is
displayed.
If no force job is currently active, the window is empty.
If a force job is active already, the variables together with the corresponding
force values are displayed in bold face.
Creating a Force
Job
To create a force job, follow the steps outlined below:
1. In the “Address” column of the force window, enter the variables you
want to force.
2. In the “Force Value” column, enter the values which you want to assign to
the variables.
3. Start forcing with the menu command Variable " Force.
If no force job is currently active, the variables are assigned the force values.
!
Deleting a Force
Job
!
16-12
Caution
If a force job is active already, you must decide whether you want to replace
the existing force job. If you did not start the existing force job, contact
whoever started it before you replace it.
A force job can only be deleted or terminated with the menu command
Variable " Stop Forcing.
Caution
Closing the force values window or exiting the “Monitoring and Modifying
Variables” application does not delete the force job.
Standard Software for S7 and M7 – STEP 7 User Manual
C79000-G7076-C552-01
Debugging User Programs
16.9 Enabling Peripheral Outputs (PQ)
Overview
With the Enable Peripheral Output function you can enable I/O outputs
(PQB, PQW, PQD) in order to modify them in STOP mode with the menu
command Variable " Activate Modify Values.
Procedure
To enable peripheral outputs, follow the steps outlined below:
1. Use the menu command Table " Open to open the variable table (VAT)
that contains the I/O outputs you want to modify or activate the window
for the relevant variable table.
2. Select the menu command PLC " Connect To to establish a connection
to the required CPU so you can modify the I/O outputs of the active
variable table.
3. Open the “Operating Mode” dialog box with the menu command PLC "
Operating Mode and switch the CPU to STOP mode.
4. Switch the “Enable Peripheral Outputs” mode on with the menu
command Variable " Enable Peripheral Output.
5. Enter the appropriate values for the peripheral outputs you want to
modify in the “Modify Value” column.
6. Use the menu command Variable " Activate Modify Values to modify
the peripheral outputs.
7. You can enter more peripheral outputs and change the modify values.
Then start again with step 6.
8. Select the menu command Variable " Enable Peripheral Output to
switch off this mode again.
Aborting with ESC
If you press ESC while the “Enable Peripheral Output” function is active, the
function is terminated without a prompt.
Note
The menu command Variable " Enable Peripheral Output is only relevant
in STOP mode.
The “Enable Peripheral Outputs” mode remains active until there is a mode
transition.
Standard Software for S7 and M7 – STEP 7 User Manual
C79000-G7076-C552-01
16-13
Debugging User Programs
16-14
Standard Software for S7 and M7 – STEP 7 User Manual
C79000-G7076-C552-01
17
Diagnosing Hardware
Overview
This chapter describes the following topics:
S Displaying online information from a module and evaluating the causes
of a module fault
S Determining the causes for errors in user program processing with the
help of the diagnostic buffer and the stack contents
S Checking whether a user program can run on a particular CPU
Diagnosing the hardware offers support with troubleshooting without you
having to spend any additional time programming, and enable you to
recognize errors and faults quickly, locate them exactly, and correct them.
This reduces considerably the down-times resulting from faults.
Chapter
Overview
Section
Description
Page
17.1
Displaying Module Information from the SIMATIC
Manager
17-2
17.2
Displaying Module Information from Configuration Tables
17-3
17.3
Diagnostics Symbols
17-4
17.4
Troubleshooting
17-6
17.5
Module Type-Dependent Information
17-7
17.6
Tabs in the “Module Information” Dialog Box
17-8
17.7
Displaying General Module Data
17-10
17.8
Displaying the Content of the Diagnostic Buffer
17-11
17.9
Displaying Diagnostic Interrupts
17-14
17.10
Displaying DP Slave Diagnostics
17-15
17.11
Displaying the User Memory Utilization
17-16
17.12
Displaying Scan Cycle Times
17-18
17.13
Setting Time Information
17-19
17.14
Displaying Performance Data
17-20
17.15
Displaying Available Blocks
17-21
17.16
Displaying Communication Connections
17-22
17.17
Displaying the Contents of Stacks (S7 CPUs Only)
17-23
Standard Software for S7 and M7 – STEP 7 User Manual
C79000-G7076-C552-01
17-1
Diagnosing Hardware
17.1 Displaying Module Information from the SIMATIC Manager
Overview
To display the status of the module, you will require an online connection to
the programmable controller, either via the online view of a project or via the
“Accessible Nodes” window.
Starting Point:
Project
Starting from an open project in the SIMATIC Manager, follow the steps
outlined below:
1. Display the project window with its online view.
2. Select a station.
3. Select a module or the S7 program in the station.
4. Select the menu command PLC " Module Information.
The “Module Information” dialog box is displayed.
Starting Point:
Accessible Nodes
Starting from the “Accessible Nodes” window, follow the steps outlined
below:
1. Select a node in the “Accessible Nodes” window.
2. Select the menu command PLC " Module Information.
The “Module Information” dialog box is displayed.
SIMATIC Manager (Online)
Project
Module Information
S7 Program
Station
CPU
(6ES7...)
Call from SIMATIC Manager
HWConfig: Diagnosing Hardware
UR (0)
Accessible Nodes
Accessible Nodes
1
PS 307 5A
2
CPU 314
3
AI-300
MPI=2
Call from Accessible Nodes
Call from Configuration Tables (see 17.2)
“Module Information”
“Diagnosing Hardware”
Figure 17-1
17-2
Opening the “Module Information” and “Diagnosing Hardware” Dialog Boxes
Standard Software for S7 and M7 – STEP 7 User Manual
C79000-G7076-C552-01
Diagnosing Hardware
17.2 Displaying Module Information from Configuration Tables
Overview
Using this method you can display the “Module Information” dialog box also
for modules without their own MPI interface.
Configuration
Table
The configuration table (online) in the “Diagnosing Hardware” window
contains an overview of the structure of a station on the level of racks and DP
(distributed I/O) stations with their modules. A graphic symbol beside each
module provides information on its current status.
Displaying the
Configuration
Table (Online)
Starting from the online project view in the SIMATIC Manager, follow the
steps outlined below:
1. Select the relevant station.
2. Then open the “Hardware” object in the station (with a double-click or
the menu command Edit " Open Object).
Starting from the “Accessible Nodes” window, follow the steps outlined
below:
1. Select a node.
2. Select the menu command PLC " Diagnose Hardware.
In both cases, the window with the configuration table is displayed. If a
module has a fault, a red mark is shown beside the module symbol. (This
mark also appears in the online view of the SIMATIC Manager if a module
displayed has a fault.)
Updating the
Configuration
Table
To update the display in the configuration table, the corresponding window
must be active. Then press F5 or select the menu command View " Update in
the window.
Note
If the configuration table is already open offline in the “HWConfig” window,
you can also get an online view of the configuration table using the menu
command Station " Open Online.
Displaying Module
Information
To display the “Module Information” dialog box, follow the steps outlined
below:
1. Select a module in the configuration table.
2. Select the menu command PLC " Module Information.
Alternatively, you can double-click the module.
Depending on the diagnostics capability of the module, a varying number of
tabs are displayed in the “Module Information” dialog box. The “General”
tab is displayed for every module.
Standard Software for S7 and M7 – STEP 7 User Manual
C79000-G7076-C552-01
17-3
Diagnosing Hardware
17.3 Diagnostics Symbols
Overview
Diagnostics symbols make it easier for you to detect a fault. You can see by a
glance at a module symbol whether diagnostic information is available. If
there are no faults present, the symbols for the module types are displayed
without additional diagnostics symbols.
Diagnostics
Symbols for
Modules
If diagnostic information is available for a module, a diagnostics symbol is
displayed in addition to the module symbol or the module symbol is
displayed with reduced contrast.
Table 17-1
Diagnostics Symbols for All Modules (Example: CPU)
Diagnostics Symbol
Meaning
Red diagonal line across the
module symbol
Setpoint-actual mismatch in the configuration:
the configured module is not available or a
different module type is inserted.
Red dot with white cross
Fault: module has a fault.
Possible causes: diagnostic interrupt, I/O
access error, or error LED detected.
Module displayed with reduced
contrast
Diagnosis not possible because no online
connection exists or the CPU cannot supply
diagnostic information for the module (for
example, power supply, or submodule).
Yellow triangle with
exclamation mark
The module has diagnostic information on a
secondary module.
!
17-4
Standard Software for S7 and M7 – STEP 7 User Manual
C79000-G7076-C552-01
Diagnosing Hardware
Diagnostics
Symbols for
Operating Modes
Table 17-2
The module operating modes (provided they have an operating mode) are
shown using the symbols in Table 17-2.
Diagnostics Symbols for Operating Modes (Example: CPU)
Symbol
Description
Mode
Green triangle above a double
line
STARTUP
Red triangle in a white circle
STOP
Red triangle with white filling
in a white circle
STOP
triggered by STOP mode on another CPU in
multicomputing operation
Blue diamond with vertical bar
RUN
Purple circle in a white circle
Table 17-3
HOLD
Diagnostics Symbols for Operating Modes and Forcing
Symbol
Description
Red symbol for a screw clamp
above the module
Mode
Variables are being forced on this module,
meaning variables in the user program for the
module are assigned fixed values that cannot
be changed by the program.
The symbol for forcing can also appear in
combination with other symbols (here with
the symbol for RUN mode).
Standard Software for S7 and M7 – STEP 7 User Manual
C79000-G7076-C552-01
17-5
Diagnosing Hardware
17.4 Troubleshooting
Overview
With the help of diagnostics symbols you can recognize quickly whether
diagnostic information is present and see which module(s) is/are causing the
fault.
Displaying
Diagnostics
Symbols
Diagnostics symbols are displayed in the project window in the online view
and in the hardware configuration window with the online view of
configuration tables.
Basic Procedure
Use the following procedure to locate faults:
1. Start troubleshooting in the online view of your project and find which
station(s) contain modules with a diagnostics symbol (project view).
2. Then find out in the configuration tables which module(s) in this station
have diagnostic information available (station view).
3. Now display the diagnostic information for the respective module
(module view).
Detailed Procedure
To display diagnostic information, follow the steps outlined below:
1. Select the online view in the SIMATIC Manager.
2. Open all stations so that the programmable modules configured in the
stations are displayed.
3. Find out which CPU has a diagnostics symbol displayed that indicates a
fault.
4. Select the corresponding station and select the menu command Edit "
Open Object or double-click on the “Hardware” object.
The configuration table(s) for the station is/are displayed. Modules for
which diagnostic information is available are marked with the appropriate
diagnostics symbol.
5. Click a module for which a diagnostics symbol is displayed.
The “Module Information” dialog box is displayed for the relevant
module type.
Now you can analyze the information in the “Module Information” dialog
box to decide what measures to take.
17-6
Standard Software for S7 and M7 – STEP 7 User Manual
C79000-G7076-C552-01
Diagnosing Hardware
17.5 Module Type-Dependent Information
Overview
Using the “Module Information” dialog box you can display current module
information. The scope of this information depends on the type of module
selected. The dialog box displays only those tabs that are relevant to the
module.
In addition to the information in the tabbed property sheets, the operating
mode is displayed for modules with an operating mode. When you open the
dialog box from the configuration tables online, the status of the module
from the viewpoint of the CPU is displayed (for example, OK, fault, module
not available).
Information on
Module Types
Table 17-4
Table 17-4 shows which property tabs are present in the “Module
Information” dialog box for each module type.
Module Information for Module Types
Tab
CPU or
M7 FM
Module with
System
Diagnostics
Capability
Module
with
Diagnostics
Capability
Module
without
Diagnostics
Capability
DP
Standard
Slave
General
X
X
X
X
X
Diagnostic Buffer
X
X
Diagnostic Interrupt
X
Memory
X
Scan Cycle Time
X
Time System
X
Performance Data
X
Stacks
X
Communication
X
X
DP Slave Diagnostics
Examples of
Module Types
X
Modules with system diagnostics capability are, for example, FM 351 and
FM 354.
Modules with diagnostics capability are most analog signal modules.
Modules without diagnostics capability are most digital signal modules.
Standard Software for S7 and M7 – STEP 7 User Manual
C79000-G7076-C552-01
17-7
Diagnosing Hardware
17.6 Tabs in the “Module Information” Dialog Box
Information
Functions
Table 17-5
Table 17-5 shows an overview of the tabs in the “Module Information” dialog
box. When displayed in an active situation, only those tabs relevant to the
selected module are displayed (see Table 17-4).
Overview of the Information Functions
Function
Information
Use
General
Identification data on the selected module
such as the type, order number, release, slot
in the rack
The online information from the inserted
module can be compared with the data for
the configured module.
Diagnostic Buffer
Overview of events in the diagnostic buffer
and detailed information on the selected
event
To find the cause of a CPU STOP and
evaluate the events on the selected module
leading to it
Diagnostic Interrupt
Diagnostic data for the selected module
To evaluate the cause of a module fault
DP Slave Diagnostics
Diagnostic data for the selected DP standard To evaluate the cause of a fault in a DP slave
slave acc. to EN 50170
Memory
Current utilization of the work memory and Before downloading new or extended
the load memory of the selected CPU or
blocks to a CPU
M7 function module
Scan Cycle Time
Duration of the longest, shortest, and last
scan cycle of the selected CPU or
M7 function module
To keep a check on the configured minimum
cycle time, and the maximum and current
cycle times
Time System
The current time, operating hours, and
information about synchronizing clocks
(synchronization intervals)
To display and set the time and date of a
module and to check the time
synchronization
Performance Data
Memory configuration, address areas, and
Before and during the creation of a user
the available blocks for the selected module program and to check whether an existing
(CPU/FM)
user program is compatible with a specific
module
Blocks (can be opened Display of all block types available in the
from the “Performance scope of supply of the selected module.
Data” tab)
List of OBs, SFBs, and SFCs you can use
for this module
Communication
Transmission rates and overview of the
communication connections,
communication load, and maximum frame
size
To determine how many and which CPU or
M7 FM connections are possible and how
many are in use
Stacks
Display of the contents of the B stack,
I stack, L stack, and nesting stack. You can
also switch to the block editor.
To determine the cause of a transition to
STOP and to correct a block
17-8
Standard Software for S7 and M7 – STEP 7 User Manual
C79000-G7076-C552-01
Diagnosing Hardware
Additional
Information
For each tab, the following information is displayed:
S Online path to the selected module
S Operating mode of the relevant CPU (for example, RUN, STOP)
S Status of the selected module (for example, fault, OK)
S Operating mode of the selected module (for example, RUN, STOP) if the
module has its own operating mode (for example, CP 342-5)
The CPU operating mode and the status of the selected module cannot be
displayed if the module information function was started from the
“Accessible Nodes” window.
Updating the
Display
Every time you change to a different tab in the “Module Information” dialog
box, the data are read out from the module again. While one tabbed property
sheet is displayed, its contents are not updated automatically. If you click the
“Update” button, the data are read from the module again without you
changing to another tab.
Note
The display texts for which the module cannot supply data are deactivated
and no values are displayed.
Displaying a
Number of
Modules
Simultaneously
You can display the module information for a number of modules
simultaneously. To do this, you must switch to the appropriate module
context, select another module, and proceed as already described in
Sections 17.1 and 17.2. Another “Module Information” dialog box is then
displayed. Only one dialog box can be opened for each module. It is
therefore not possible to compare the status of one module at two different
times.
Standard Software for S7 and M7 – STEP 7 User Manual
C79000-G7076-C552-01
17-9
Diagnosing Hardware
17.7 Displaying General Module Data
“General” Tab
The “General” tabbed property sheet displays the identification data and
information about the current status of the selected module (see Figure 17-2):
Module Information
Path: project\station\CPU
CPU Operating Mode:
STOP
Status: Fault
Module Operating Mode:
–––
General Diagnostic Buffer Memory Scan Cycle Time Time System
Module
identification
data
Module
Communication
Stacks
Location Information
System ID:
S7-300
Description:
S7 FM-POS
Can be Assigned
Parameters:
Yes
Order Number:
6ES7 351-1AH00-0AE0
Version:
1
Actual Type:
Perf. Data
Rack:
1
Slot:
5
Address:
I 400
Module Width:
1
FM Positioning
Setpoint Type: FM Positioning
Status:
Close
Figure 17-2
Uses
Module failed (diagnostic interuppt recognized)
Update
Print
Help
“General” Tab
You can use this function in the following situations:
S When you need to know the type, release, and order number of a module
S When you want to check the slot and address information
S When you want to check whether the configured module (setpoint type)
matches the type of the module inserted in the rack (actual type)
S When you require information about the status of the module to get
information about any faults
17-10
Standard Software for S7 and M7 – STEP 7 User Manual
C79000-G7076-C552-01
Diagnosing Hardware
17.8 Displaying the Content of the Diagnostic Buffer
Diagnostic Buffer
Every CPU and every module with system diagnostics capability (such as the
FM 354) has a diagnostic buffer in which exact information on all diagnostic
events is entered in the order in which they occur. The content of the
diagnostic buffer is retained following a memory reset.
Diagnostic Events
The following entries are displayed as diagnostic events, for example:
S Faults on a module
S System errors in the CPU
S Operating mode transitions (for example, from RUN to STOP)
S Errors in the user program
S User messages entered in SFC52 (see /234/)
Uses
Using the diagnostic buffer, errors in the system can still be analyzed at a
later time to find the cause of a STOP or to trace back and categorize the
occurrence of individual diagnostic events.
Organizing the
Diagnostic Buffer
The diagnostic buffer is designed as a cyclic buffer for a maximum of entries
dependent on the module. This means that when the maximum number of
entries is reached, the next diagnostic buffer event causes the oldest entry to
be deleted. All entries then move back one place. This means that the newest
entry is always the first entry in the diagnostic buffer. For the S7-300
CPU 314, for example, the maximum number of entries is 100 (see
Figure 17-3).
Position
101st E
1
2
100th 99th
3
4
99
100
98th
97th
2nd
1st
E = Event entry
Figure 17-3
Organization of the Entries in the Diagnostic Buffer
The number of entries displayed in the diagnostic buffer is dependent on the
module and its current operating mode.
Standard Software for S7 and M7 – STEP 7 User Manual
C79000-G7076-C552-01
17-11
Diagnosing Hardware
Module Information
Path: project\station\CPU
CPU Operating Mode:
STOP
Status:
Module Operating Mode:
–––
General Diagnostic Buffer Memory Scan Cycle Time Time System
Perf. Data
Communication
Stacks
Display All Entries (may affect the scan cycle time)
Events:
No. Time
Date
Event
1
2
3
4
5
6
7
8
11.12.95
08.12.95
08.11.95
08.11.95
08.11.95
08.11.95
08.11.95
08.11.95
Power on retentive
STOP due to power supply failure
STOP because programming error OB not loaded
FC not loaded
Mode transition from STARTUP to RUN
Manual complete restart request (OB100)
Mode transition from STOP to STARTUP
Power on retentive
09:15:22:842
18:00:22:378
08:22:44:215
08:22:44:215
08:22:44:212
08:22:44:212
08:22:44:197
08:22:38:842
Details on Event:
3 of 100
Event ID:
16#4562
STOP because programming error OB not loaded
Previous operating mode: RUN requested operating mode: STOP (internal)
Priority class/OB number responsible: 1 / 1
FC-REF Block number 4
Save As
Open Block
Close
Figure 17-4
Displaying the
Diagnostic Buffer
Update
Help on Event
Print
Help
“Diagnostic Buffer” Tab
The upper list box contains a list of all the diagnostic events that occurred
with the following information:
S Serial number of the entry (the newest entry has the number 1)
S Time and date of the diagnostic event
The time and date of the module are displayed if the module has an
integrated clock. For the time data in the buffer to be valid, it is important
that you set the time and date on the module and check it regularly (see
Section 17.13).
S Short description of the diagnostic event
In the lower text box, all the additional information is displayed for the event
selected in the list in the upper window. This information includes:
S Event number
S Description of the event
S Mode transition caused by the diagnostic event
S Reference to the location of the error in a block (block type, block
number, relative address) which caused the entry in the buffer
S Event state being entered or left
S Additional information specific to the event
17-12
Standard Software for S7 and M7 – STEP 7 User Manual
C79000-G7076-C552-01
Diagnosing Hardware
Saving Contents in
a Text File
Using the “Save As” button you can save the content of the diagnostic buffer
as an ASCII text file.
Correcting Errors
With the “Help on Event” button you can display additional information on
the event selected in the upper list box. With diagnostic buffer entries which
reference an error location (block type, block number, relative address), you
can open the block which caused the event in order to correct the cause of the
error.
Select the diagnostic event in the upper list box and click the “Open Block”
button. The block is opened in the appropriate editor (for example, Statement
List) with the cursor pointing to the point in the program which caused the
error.
Special Cases
The diagnostic buffer stores all diagnostic events up to its maximum
capacity. All events in the buffer are retained even if another user program is
loaded.
Therefore it is possible that older diagnostic buffer entries may refer to
blocks which are no longer present in the CPU. In the worst case, there may
be a new block in the CPU with the same name which did not, however,
cause the diagnostic message.
In rare cases, the following situations can occur:
S The diagnostic event is older than the date of the last block change:
The “Open Block” dialog box appears with the message that the block has
been modified. This may also mean that the block is simply a block with
the same name belonging to another program.
– You can still open the block online in the CPU and edit it if necessary,
or
– You can select the block offline in the correct program and edit it
offline.
S The block that caused the event is no longer on the CPU:
The “Open Block” dialog box appears with the message that the
referenced block does not exist in the CPU. The block was deleted after
the time of the diagnostic event entry.
You can select the block offline in the correct program and edit it offline.
Note
If you edited a block offline, you must then download it to the CPU so that
the changes become effective in your program.
Standard Software for S7 and M7 – STEP 7 User Manual
C79000-G7076-C552-01
17-13
Diagnosing Hardware
17.9 Displaying Diagnostic Interrupts
Overview
For modules with diagnostic capability, information on any module faults
that may have occurred is displayed in this tabbed property sheet.
Standard Module
Diagnostics
In the “Standard Module Diagnostics” window, internal and external module
faults and the corresponding diagnostic information are displayed.
Examples of possible displays are:
S Module failed
S Channel error
S Missing external auxiliary voltage
S Module without parameters
Channel-Specific
Diagnostics
In this window, diagnostic data on channel faults that occurred are displayed.
Specific diagnostic information is displayed for each channel with a fault.
Examples of possible displays are:
S Digital input configuration/parameter assignment error
S Digital input wirebreak
S Analog input reference channel error
17-14
Standard Software for S7 and M7 – STEP 7 User Manual
C79000-G7076-C552-01
Diagnosing Hardware
17.10 Displaying DP Slave Diagnostics
Overview
The “DP Slave Diagnostics” tabbed page provides information diagnostic
data on slaves structured according to EN 50170, part 3, PROFIBUS.
Standard Slave
Diagnostics
General and device-specific diagnostic information on the slave is displayed.
S General diagnostic information on the slave
This information relates to the slave starting up correctly or failing. In
particular, errors such as “Slave cannot be accessed”, configuration errors,
or parameters assignment errors are displayed here.
S Device-specific diagnostic texts on the slave
The diagnostic texts displayed are evaluated for a specific device on the
basis of the device database (DDB) file. If the diagnostic message is not
stored in the device database file, the diagnosis cannot be displayed in
clear text.
Channel-Specific
Diagnostics
Channel-specific diagnostic texts for configured submodules of the DP
standard slave are displayed here:
The exact channel triggering the message is displayed for each diagnostic
message entered.
A channel is described uniquely by:
S The slot in the module and
S The channel number
Device-specific diagnostic texts are evaluated on the basis of the device
database file. If the diagnostic message is not stored in the device database
file, the diagnosis cannot be displayed in clear text.
Hexadecimal
Format
With the “Hex. Format” button you can also output the whole diagnostic
frame in hexadecimal format.
Standard Software for S7 and M7 – STEP 7 User Manual
C79000-G7076-C552-01
17-15
Diagnosing Hardware
17.11 Displaying the User Memory Utilization
“Memory” Tab
In the “Memory” tabbed page, you can display the utilization of the work
memory and the load memory and the size of the largest contiguous free
memory area for each CPU or M7 FM 356/FM 456 (depending on the CPU).
The memory utilization is shown both as a percentage in a bar diagram and
as an absolute value in a table. A value shown grayed out (deactivated)
means that the size of this area cannot be determined by the selected
CPU/FM or that this type of memory is not available in the CPU (for
example, read-only memory in the example in Figure 17-5).
Module Information
Path: project\station\CPU
CPU Operating Mode:
STOP
Status:
Module Operating Mode:
–––
General
Diagnostic Buffer Memory Scan Cycle Time Time System
Work Memory
Perf. Data
Communication
Stacks
Load Memory
Read/Write Memory (RAM):
Read/Write Memory (RAM):
Read-Only
Read-Only Memory (ROM):
(ROM):
98%
26%
Maximum: 24576 Bytes
Used:
6390 Bytes
Free:
18186 Bytes
Size of Free Block:0 Bytes
Maximum:
Used:
Free:
Size of Free Block:
40960 Bytes
40002 Bytes
958 Bytes
0 Bytes
0 Bytes
0 Bytes
0 Bytes
0 Bytes
Compress
Close
Figure 17-5
Uses
Update
Print
Help
“Memory” Tab
You can use this function if you want to download a user program to a
CPU/FM and check whether the current capacity of the load memory in this
CPU/FM is sufficient.
You can also use this function if you want to add an object to an existing
project and want to know whether there is sufficient continuous free memory
for this expansion.
17-16
Standard Software for S7 and M7 – STEP 7 User Manual
C79000-G7076-C552-01
Diagnosing Hardware
Compressing (for
SIMATIC S7 Only)
When you copy and delete blocks, gaps are left in the memory. Using the
“Compress” function, the occupied blocks in the work and load memory are
moved so that the gaps are closed up creating one large area of free memory
space.
Compressing is only possible if it is supported by the respective type of
module.
Only if you compress the memory in STOP mode are all the gaps closed up.
In RUN mode, the blocks currently being processed are not moved so that
some gaps may remain even after compressing.
Standard Software for S7 and M7 – STEP 7 User Manual
C79000-G7076-C552-01
17-17
Diagnosing Hardware
17.12 Displaying Scan Cycle Times
“Scan Cycle Time”
Tab
In the “Scan Cycle Time” tabbed page, the following information is
displayed for the CPU (or M7 FM 356/FM 456):
Module Information
Path: project\station\CPU
CPU Operating Mode:
STOP
Status:
Module Operating Mode:
–––
General
Diagnostic Buffer
Memory Scan Cycle Time Time System
20 ms
Shortest Cycle Time:
30 ms
Current Cycle Time:
55 ms
Longest Cycle Time:
71 ms
Figure 17-6
Uses
Communication
Stacks
100 ms
Configured Minimum Scan Cycle Time
Close
Perf. Data
Update
Configured Maximum Scan Cycle Time
Print
Help
“Scan Cycle Time” Tab
This property sheet provides you with information about the scan cycle times
for the user program.
If the duration of the longest cycle time is close to the configured maximum
scan cycle time, there is a danger that fluctuations in the cycle time might
cause a time error. This can be avoided if you extend the maximum cycle
time (watchdog time) of the user program.
If the duration of the shortest cycle is less than the configured minimum scan
cycle time, the cycle is automatically extended by the CPU/FM to the
configured minimum cycle time so that no time error can occur.
Setting the Scan
Cycle Time
17-18
You can set the maximum and minimum cycle times when you configure the
hardware. To do this, double-click in the offline view of the configuration
table on the CPU/FM to define its properties. You can enter the appropriate
values in the “Cycle/Clock Memory” tab.
Standard Software for S7 and M7 – STEP 7 User Manual
C79000-G7076-C552-01
Diagnosing Hardware
17.13 Setting Time Information
“Time System” Tab
The following information is displayed in the “Time System” tabbed page:
Module Information
Path: project\station\CPU
CPU Operating Mode:
STOP
Status:
Module Operating Mode:
–––
General
Diagnostic Buffer
Memory Scan Cycle Time Time System Perf. Data
Clock
Time system of the
selected CPU
Information on time
synchronization with
other systems
Communication
Stacks
Clock Synchronization
Time on Module:
Date on Module:
Correction Factor:
Resolution:
Time Format:
Real-Time Clock:
11:57:40:010
17.10.95
0
1 ms
BCD
Available
Interval
Master/Slave
in PLC:
---
---
on MPI:
---
---
on MFI:
---
---
Run-Time Meter:
Display of operating
hours elapsed
No.
Elapsed Hours
Status
Overflow
1
465
Not Running
Yes
Close
Figure 17-7
Update
Print
Help
“Time System” Tab
Uses
This property sheet displays the time base and correction factor with which
the module operates, and the time and date of the selected module. You are
also shown information about time synchronization and the run-time meter.
Setting the Time
and Date
With the menu command PLC " Set Time and Date in the SIMATIC
Manager, the editors, or in the hardware configuration application, you can
set the time and the date on the selected module. Enter the required values
for date and time in the input boxes shown in Figure 17-8:
Set Time and Date
Path: example\program (online)
Time on the Module:
11 : 51 : 02
Date on the Module:
17 . 10 . 96
OK
Figure 17-8
Cancel
Help
Setting the Date and Time for a Module
Standard Software for S7 and M7 – STEP 7 User Manual
C79000-G7076-C552-01
17-19
Diagnosing Hardware
17.14 Displaying Performance Data
“Performance
Data” Tab
The “Performance Data” tabbed page shows you the data for the selected
module (see Figure 17-9):
Module Information
Path: project\station\CPU
CPU Operating Mode:
STOP
Status:
Module Operating Mode:
–––
General
Diagnostic Buffer
Memory Scan Cycle Time Time System
Memory Configuration
Work Memory:
Perf. Data
Communication
Stacks
Functional Capability
Blocks...
24576 Bytes
Integrated
Load Memory:
40960 Bytes
Maximum Slot-In
Load Memory:
1048576 Bytes
Address Areas:
Address Type
Number and address area
of inputs, outputs, timers,
counters, bit memory, and
number of temporary local
data
Number
Range From
Process Image Inputs
1024 (Bit)
I0.0
Process Image Outputs
1024 (Bit)
Q0.0
Q127.7
Bit Memory
2048 (Bit)
M0.0
M255.7
Timers
128
T0
T127
Counters
64
C0
C63
Local Data
1536 (Byte)
Close
Figure 17-9
Uses
17-20
Update
Print
To
I127.7
Help
“Performance Data” Tab
You can use this function when you download a user program to a CPU and
want to check first whether the CPU has the necessary requirements, for
example, regarding the size of the load memory or the size of the process
image.
Standard Software for S7 and M7 – STEP 7 User Manual
C79000-G7076-C552-01
Diagnosing Hardware
17.15 Displaying Available Blocks
“Blocks” Dialog
Box
You open the “Blocks” dialog box using the “Blocks” button in the
“Performance Data” tabbed page. All the block types that can be processed
by the module are displayed:
S User Blocks:
The maximum number of organization blocks (OBs), function blocks
(FBs), functions (FCs), and data blocks (DBs) and their maximum
permitted total block length. The available OBs are listed with a
description of their function.
S System Blocks:
The number of system functions (SFCs) and system function blocks
(SFBs) and their maximum permitted total block length. The available
SFCs and SFBs are listed with their symbol and their block family.
Note
It is not the blocks currently available in the module that are displayed, but
the standard blocks provided by the module (SFCs/SFBs) or which can be
processed by the module (OBs). You can display which blocks are currently
downloaded to the module in the SIMATIC Manager.
Blocks
Block Type
Number
Max. Length
Properties
User Blocks
OB:
13
63 KB
FC:
128 63 KB
FB:
128 63 KB
DB:
128 63 KB
System Blocks
SFC:
36
SFB:
0
Close
Figure 17-10
Uses
No.
Function
OB1
Open cycle
OB10
Time-of-day interrupt Start event: Time-of-day signal
OB20
Time-delay interrupt
Start event: Startup, End...
Start event: Timer signal
No.
Name
Family
SFC0
SET_CLK
CLK_FUNC
SIMATIC
SFC1
READ_CLK
CLK_FUNC
SIMATIC
No.
Print
Name
Family
Author
Author
Help
“Blocks” Dialog Box
Before you download a new user program to the CPU, you need to check, for
example, which standard blocks your user program contains or can call to
ensure that it can run on the selected CPU.
Standard Software for S7 and M7 – STEP 7 User Manual
C79000-G7076-C552-01
17-21
Diagnosing Hardware
17.16 Displaying Communication Connections
“Communication”
Tab
The “Communication” tabbed page displays information about, for example,
the number and current status of the communication connections of the CPU
or M7 FM 356/FM 456:
Module Information
Path: project\station\CPU
CPU Operating Mode:
STOP
Status:
Module Operating Mode:
–––
General
Diagnostic Buffer Memory Scan Cycle Time Time System
Transmission Rates
Rate Set
Maximum Rate
Multipoint Interface (MPI):
187500 bps
1875000 bps
Communication Bus (C Bus):
187500 bps
187500 bps
Connection Overview
Max. Number of Communication Connections:
4
Reserved
Used
Connections to PG:
1
1
Connections to OI:
1
0
Configured Connections:
0
0
Frame
Communication Load
Configured Maximum Load:
Close
Figure 17-11
Update
Stacks
Perf. Data Communication
20%
Print
Max. PDU Size
240 Bytes
Help
“Communication” Tab
Uses
This function enables you to check the communication connections and
obtain information on possible connections or connections currently in use
between the selected CPU/FM and the connected devices.
Connection
Overview
In addition to the maximum number of communication connections for the
module, the reserved connections and connections in use between the
CPU/FM 356/FM 456 and programming devices or operator interface
systems are displayed. Under “Configured Connections”, the connections for
the CPU/FM 356/FM 456 that can be configured via communication function
blocks are displayed.
Communication
Load
The maximum configured CPU load from communication functions can lie
between 5% and 50%. This setting is made with the CPU parameters. The
value set here specifies the maximum value for the percentage of the CPU’s
functions which can be taken up by communication tasks.
Frame
The maximum size of the layer 7 protocol data unit (PDU) is displayed here.
17-22
Standard Software for S7 and M7 – STEP 7 User Manual
C79000-G7076-C552-01
Diagnosing Hardware
17.17 Displaying the Contents of Stacks (S7 CPUs Only)
“Stacks” Tab
The “Stacks” tabbed page displays the contents of the B stack (block stack).
The CPU must have switched to the STOP mode resulting from a
programming error or a stop command for this. You can display the contents
of the other stacks using the “I Stack”, “L Stack”, and “Nesting Stack”
buttons.
Uses
The stack contents give you information on which instruction in which block
led to the CPU going into STOP.
You obtain further information about the events which led to the STOP in the
CPU from the diagnostic buffer (see Section 17.8).
B Stack
The B stack, or block stack, lists all the blocks that were called before the
change to the STOP mode and which were not completely processed.
Opening a Block in
the B Stack
With the “Open Block” button you can open the block selected in the B stack
list online and edit it. The cursor is pointing to the place in the program
where processing will continue after the jump to the called block.
I Stack
When you click the “I Stack” button, the data at the interrupt location are
displayed.
The I stack, or interrupt stack, contains the data or the states which were
valid at the time of the interrupt, for example:
S Accumulator contents and register contents
S Open data blocks and their size
S Content of the status word
S Priority class (nesting level)
S Interrupted block
S Block in which program processing continues after the interrupt
Opening a Block in
the I Stack
Click the “Open Block” button. The block is opened in the program editor
with the cursor pointing to the place in the program which caused the error
and you can edit the block as required to correct it.
L Stack
For every block listed in the B stack, you can display the corresponding local
data by selecting the block and clicking the “L Stack” button.
The L stack, or local data stack, contains the local data values of the blocks
the user program was working with at the time of the interrupt.
Standard Software for S7 and M7 – STEP 7 User Manual
C79000-G7076-C552-01
17-23
Diagnosing Hardware
In-depth knowledge of the system is required to interpret and evaluate the
local data displayed. The first part of the data displayed correspond to the
temporary variables for the block.
Nesting Stack
When you click the “Nesting Stack” button, the content of the nesting stack
at the interrupt point is displayed.
The nesting stack is a memory area which the logic operations A(, AN(, O(,
ON(, X(, and XN( use.
The button is only active if open bracket expressions existed at the time of
the interruption.
17-24
Standard Software for S7 and M7 – STEP 7 User Manual
C79000-G7076-C552-01
Part 4: Working with
M7 Programmable Control
Systems
Introduction to M7
Programmable Control Systems
18
Managing M7 Programmable
Control Systems
19
17-26
Standard Software for S7 and M7 – STEP 7 User Manual
C79000-G7076-C552-01
Introduction to M7 Programmable
Control Systems
Overview
18
With STEP 7 and the M7 optional software package, you can use high-level
languages such as C or C++ and graphic programming software such as CFC
(Continuous Function Chart) to create applications for the M7-300/M7-400
automation computer.
This chapter describes the methods you can use to create applications for
M7-300/M7-400 automation computers.
To create these programs, you will require an M7 operating system and a
development environment for M7 applications, in addition to STEP 7. You
will find these software components in the M7 optional software.
Chapter
Overview
Section
Description
Page
18.1
M7 Optional Software
18-2
18.2
M7-300/M7-400 Operating Systems
18-5
Standard Software for S7 and M7 – STEP 7 User Manual
C79000-G7076-C552-01
18-1
Introduction to M7 Programmable Control Systems
18.1 M7 Optional Software
Overview
STEP 7 provides you with the basic functions you require to do the
following:
S Create and manage projects
S Configure and assign parameters to the programmable control system
hardware
S Configure networks and connections
S Manage symbol data
These functions are provided regardless of whether you are using a
SIMATIC S7 or SIMATIC M7 programmable controller.
The different operating systems and executable software used in
SIMATIC S7 and SIMATIC M7 programmable controllers affect the way you
program applications.
To create M7 applications you will require the M7 optional software in
addition to STEP 7.
Table 18-1
Optional Software for M7 Programming
Optional Software
Content
M7-SYS
S M7 RMOS32 operating system
S M7-API system library
S Support for MPI
CFC
Programming software for CFC (Continuous
Function Chart) programs
M7-ProC/C++
S Link for the Borland development environment
in STEP 7
S Symbol import editor and generator
S Organon debugging tool xdb386
Borland C++
Borland C/C++ development environment
In conjunction with the M7 optional software, STEP 7 can also support the
following additional tasks:
S Downloading data to the programmable control system via the multipoint
interface (MPI)
S Requesting information about the programmable control system
S Making particular settings on the programmable control system and
resetting the programmable control system
18-2
Standard Software for S7 and M7 – STEP 7 User Manual
C79000-G7076-C552-01
Introduction to M7 Programmable Control Systems
Dependencies
Figure 18-1 illustrates the dependencies of the M7 optional software:
C/C++ Programs
CFC Programs
CFC
M7-ProC/C++
Borland C++
M7-SYS
Figure 18-1
M7 Software Options – Dependencies for M7 Programming
Table 18-2
Summary
To create...
You will require the M7 software
option...
C/C++ programs
1. M7-SYS
2. M7-ProC/C++
3. Borland C++
CFC programs
1. M7-SYS
2. CFC
3. Borland C++
Standard Software for S7 and M7 – STEP 7 User Manual
C79000-G7076-C552-01
18-3
Introduction to M7 Programmable Control Systems
Which Software
Offers Which Type
of Support?
The specific tools required to create M7 applications are partly integrated in
STEP 7 and partly in the M7 software options. Table 18-3 shows you which
software package supports which tasks:
Table 18-3
Software Involved in Creating M7 Programs
Software
Support Offered
STEP 7
S
S
S
S
S
M7-SYS
The M7 operating system and M7 system software
utilities help with the following:
S Controlling program processing
S Managing memory and resources
S Access to computer hardware and SIMATIC hardware
S Handling interrupts
S Diagnostics
S Status monitoring
S Communication
M7-ProC/C++
S By integrated code creation (integrating the Borland
Installing the M7 operating system
Managing the M7 programmable control system
Downloading, starting, and deleting the M7 programs
Displaying status and diagnostic data
Resetting the CPU
development environment into STEP 7)
S By linking project symbols into the source code
S By integrated debugging functions
18-4
Borland C++
S Creating C and C++ programs
CFC
S Creating, testing, and debugging CFC programs
S Starting and running CFC programs
Standard Software for S7 and M7 – STEP 7 User Manual
C79000-G7076-C552-01
Introduction to M7 Programmable Control Systems
18.2 M7-300/M7-400 Operating Systems
Overview
The standardized AT computer architecture of the M7-300/M7-400
automation computers means they form a freely programmable expansion to
the SIMATIC automation system. You can create SIMATIC M7 applications
in a high-level language such as C or graphically with CFC.
Standard
Operating Systems
The utilities offered by the operating system are of prime importance for
applications created using the high-level languages C and C++. The
operating system takes on the following tasks for the application:
S Accessing the hardware
S Managing resources
S System integration
S Communication with other components in the system
For AT-compatible computers, MS-DOS and MS Windows have established
themselves as the standard operating systems.
Real-Time
Operating System
These standard operating systems are, however, not particularly suited to
solving automation tasks. Using MS-DOS and Windows alone, it is not
possible to solve real-time automation tasks, use the hardware specific to
SIMATIC S7 and M7, or access system data. For this reason, the real-time
operating system RMOS (Realtime Multitasking Operating System) is used
with the SIMATIC M7 automation computer. RMOS has been extended to
include a call interface, the M7-API (Application Programming Interface) to
integrate it into the SIMATIC system.
Operating System
Configuration for
M7
The real-time operating system M7 RMOS32 is used for 32-bit applications
in time-critical, real-time, and multitasking solutions. It is available in the
following configurations for M7 modules:
S M7 RMOS32
S M7 RMOS32 with MS-DOS
S M7 RMOS32 with MS Windows (and MS-DOS)
The operating system configuration you choose for your M7 programmable
control system depends on a number of factors, for example:
S Which types of applications are to run on the M7 programmable control
system
S Which M7 modules you are using (see Table 18-4)
Standard Software for S7 and M7 – STEP 7 User Manual
C79000-G7076-C552-01
18-5
Introduction to M7 Programmable Control Systems
M7 Applications
Depending on the operating system configuration chosen, the following types
of applications can run on an M7 programmable control system:
S Pure M7 RMOS32 programs for time-critical, real-time, and multitasking
solutions
S MS-DOS and/or MS Windows programs:
This means that, in addition to RMOS programs, you can also run
standard MS-DOS and MS Windows applications and your own MS-DOS
and MS Windows applications on your programmable control system.
Which Operating
System on Which
M7 Module?
Table 18-4
Possible Operating System Configurations on M7 Modules
M7 Module
M7 RMOS32
M7 RMOS32
with MS-DOS
M7 RMOS32
with
MS Windows
FM356-4 (4 MB)
Yes
Limited*
No
FM356-4 (8 MB)
Yes
Yes
Yes
CPU388-4 (8 MB)
Yes
Yes
Yes
FM456-4 (4 MB)
Yes
Limited*
No
FM456-4 (8 MB)
Yes
Yes
Yes
FM456-4 (16 MB)
Yes
Yes
Yes
CPU486-3 (8 MB)
Yes
Limited*
No
CPU486-3 (16 MB)
Yes
Yes
Yes
CPU486-3 (32 MB)
Yes
Yes
Yes
CPU488-3 (8 MB)
Yes
Yes
Yes
CPU488-3 (16 MB)
Yes
Yes
Yes
CPU488-3 (32 MB)
Yes
Yes
Yes
M7-300
M7-400
* Limited means that a warm restart in MS-DOS (Ctrl-Alt-Del) is not
possible.
Refer to the M7-SYS Product Information for the configurations that have
been approved for use.
Hardware configurations with PROFIBUS DP are supported only with the
following operating systems:
S M7 RMOS32 with at least 8 Mbytes main memory
S M7 RMOS32 with MS-DOS/Windows and 16 Mbytes main memory
18-6
Standard Software for S7 and M7 – STEP 7 User Manual
C79000-G7076-C552-01
Introduction to M7 Programmable Control Systems
Additional
Hardware
M7 RMOS32 with MS Windows can only be used on M7 modules that are
equipped with the following additional hardware:
S Hard disk via the expansion modules MSM378 or MSM478
S VGA monitor and keyboard via the interface submodule IF962-VGA
M7 RMOS32 with MS-DOS can only be used on M7 modules which are
equipped with the following additional hardware:
S VGA monitor and keyboard via the interface submodule IF962-VGA
Mass Memory
M7 CPUs and M7 application modules have the following types of mass
memory available (see Table 18-5):
S Memory cards
S Hard disk and floppy disk
All programmable M7 modules can be equipped with a hard disk and a
3.5” floppy disk drive as an option by means of the MSM expansion
modules. You can access the floppy disk drive and the memory card both
on the PC/programming device and on the M7 programmable control
system.
S On-board silicon disk (OSD)
This type of mass memory behaves like a hard disk drive on which
applications can be saved. Some M7-400 modules are equipped with an
optional OSD.
Table 18-5
Mass Memory in M7 Programmable Control Systems (Current Status)
Mass Memory
Capacity
M7-300 Module
M7-400 Module
Hard disk
512 MB
MSM378
MSM478
3.5” floppy disk
1.44 MB
MSM378
MSM478
Memory card
1, 2, 4, 8, 16 MB
CPU 388-3
FM 356-4
CPU 488/486-3
FM 456-4
OSD
4 MB
–
Optional in
FM 456-4
A 1-Mbyte memory card is not suitable for installing an operating system.
Only use this type for transferring programs.
Standard Software for S7 and M7 – STEP 7 User Manual
C79000-G7076-C552-01
18-7
Introduction to M7 Programmable Control Systems
18-8
Standard Software for S7 and M7 – STEP 7 User Manual
C79000-G7076-C552-01
19
Managing M7 Programmable
Control Systems
Overview
When you edit projects that contain programmable modules (CPUs and
function modules) in a SIMATIC M7 automation computer, STEP 7 helps
you with the following administration tasks:
S Installing the operating system
S Updating the firmware
S Updating the operating system for exchanging modules in the field
S Downloading applications to the programmable control system
S Deleting software components from the programmable control system
S Displaying and changing module information
Chapter
Overview
Section
Description
Page
19.1
Preparing for Installation
19-2
19.2
Data Backup in Case of Power Failure
19-8
19.3
Installing M7 RMOS32 on Memory Card
19-9
19.4
Installing M7 RMOS32 on Hard Disk
19-10
19.5
Installing M7 RMOS32 with MS-DOS on Hard Disk
19-12
19.6
Installing M7 RMOS32 with MS Windows on Hard Disk
19-14
19.7
Reinstalling the M7 Operating System
19-16
19.8
Updating the Operating System for Exchanging Modules in
the Field
19-18
19.9
Updating the Firmware
19-20
19.10
Downloading and Deleting Programs on the M7
Programmable Control System
19-23
19.11
M7-300/M7-400 Monitoring and Modifying Functions
19-29
Standard Software for S7 and M7 – STEP 7 User Manual
C79000-G7076-C552-01
19-1
Managing M7 Programmable Control Systems
19.1 Preparing for Installation
Purpose of the
Installation
The purpose of the installation is to transfer a complete operating system
configuration including the M7 system software to the destination medium;
the mass storage of an M7 system.
This section provides an overview of the installation methods and the basic
procedure involved. You will find step-by-step installation procedures in each
of the following sections and in the online help for managing M7 systems.
Installation
Methods
Depending on the mass storage for the M7 programmable control system,
there are two alternative installation methods:
1. Installation on hard disk. For the first type of installation, no executable
operating system is installed on the M7 programmable control system; no
MPI connection is possible.
2. Installation on memory card. There is space on a memory card for a
complete M7 RMOS32 operating system with applications (see
Table 18-4).
Basic Procedure
To install an operating system, follow the steps outlined below:
1. Select the object “M7 Program” in your project.
2. Select the menu command PLC " Manage M7 System.
3. Open the “Install Operating System” tab.
4. Select the following options (see Figure 19-1):
– Operating system configuration
– Version of the operating system on the programming device (only if
you have a number of versions of M7-SYS installed on your
programming device or PC)
– Medium
– Local drive and partner drive if you use the “MPI/RFS” medium
5. Click the “Install” button.
All other activities depend on the operating system configuration selected
and on the destination medium.
19-2
Standard Software for S7 and M7 – STEP 7 User Manual
C79000-G7076-C552-01
Managing M7 Programmable Control Systems
Managing M7 PLC Systems
Medium:
MPI/RFS
Local Drive:
F:
Install Op. System
Programs
Partner Drive:
C:
Update Firmware
Operating System Version in Programming Device:
V02.00.08
Operating System Version in PLC System:
V01.02.00
Possible Configurations:
Indirect
M7 RMOS32
M7 RMOS32 & MS-DOS
M7 RMOS32 & MS-Windows
Data Medium for
Updating
Create
Direct
Install
Close
Figure 19-1
Operating System
Version
Help
“Install Operating System” Tab
On the programming device:
Select the version of the operating system here that you want to install on
your M7 programmable control system. This step is only necessary if you
have a number of versions of the M7-SYS optional package installed on your
programming device.
On the programmable control system:
If an online connection to the programmable control system is possible, this
tab shows the current operating system version on the PLC system if it can be
determined.
Standard Software for S7 and M7 – STEP 7 User Manual
C79000-G7076-C552-01
19-3
Managing M7 Programmable Control Systems
Selecting the
Operating System
Select an operating system configuration from the list box “Possible
Configurations”. Your choice of operating system configuration depends on
the types of applications which are to run on the M7 programmable control
system. Table 19-1 shows you when to select which operating system. You
should also note the hardware dependencies in Table 18-4.
Table 19-1
Operating System Configurations
Operating System Configuration
Applications
M7 RMOS32 applications only
M7 RMOS32
M7 RMOS32 and MS-DOS applications
M7 RMOS32 & MS-DOS
M7 RMOS32, MS-DOS and
MS Windows applications
M7 RMOS32 & MS Windows
The memory capacity requirement for M7 RMOS32 without
MS-DOS/Windows is a maximum of 2 Mbytes on the destination medium.
You must also add the memory requirement for your applications. Table 19-2
shows you which mass storage types you can select for the various operating
system configurations.
Table 19-2
Possible Mass Storage for M7 Operating Systems
Operating System
Mass Storage
Hard Disk
Memory Card
OSD
M7 RMOS32
Yes
Yes
No
M7 RMOS32 with MS-DOS
Yes
Yes
No
M7 RMOS32 with
MS Windows
Yes
No
No
Refer to the M7-SYS Product Information for details on which operating
system configurations on which mass storage types have been approved for
use.
19-4
Standard Software for S7 and M7 – STEP 7 User Manual
C79000-G7076-C552-01
Managing M7 Programmable Control Systems
Selecting the
Installation
Medium
In the “Medium” selection box, the following installation media are
available for you to choose from:
1. MPI/RFS:
Select “MPI/RFS” (RFS = Remote File System) if the operating system is
to be installed on the hard disk of the M7 programmable control system.
To be able to use this installation medium, an MPI connection must exist
between the programming device and the programmable control system.
In general, the operating system is installed on the hard disk of the M7
programmable control system via MPI/RFS. For less extensive operating
system configurations, for example, M7 RMOS32 alone, a memory card
will be adequate.
For installation via MPI/RFS, you will always require a boot medium
(see page 19-6).
2. Memory Card
Select “Memory Card” if the operating system is to be installed on the
memory card. The operating system and the applications are transferred
from the programming device to the memory card. Then the memory card
is inserted in the M7 programmable control system and the programmable
control system is booted from the memory card.
To be able to use a memory card, you will require a PG 720, PG 740, or
PG 760 programming device or a PC with external prommer.
Note
A 1.44-Mbyte floppy disk can hold a minimum M7 RMOS32 system, but is
not intended as a destination medium for installing the operating system on
the M7-300/M7-400. You can use a floppy disk as the boot medium or data
medium for applications.
Standard Software for S7 and M7 – STEP 7 User Manual
C79000-G7076-C552-01
19-5
Managing M7 Programmable Control Systems
Selecting the Local
Drive and Partner
Drive
If you use the transfer medium “MPI/RFS” (RFS = Remote File System) for
the installation:
Under Windows 95 an MPI connection is established between the local
drive of a PC/programming device and a drive on the M7 programmable
control system.
Under Windows NT a different communication mechanism is used for the
Remote File System than under Windows 95. A local drive is no longer
required for the connection to the programmable control system, but the
“partner” drive is addressed directly. In the “Managing M7 PLC Systems”
dialog box you only need to specify the partner drive if you select MPI/RFS
and not a local drive. The “Local Drive” box is deactivated under
Windows NT.
Local Drive (only on Programming Devices/PCs with Windows 95):
In this list box, the free drives available on the PC/programming device are
displayed for you to choose from.
Partner Drive:
In this list box, the drives on the M7 programmable control system, from
which you can select the required mass storage medium, are displayed. The
drives are usually assigned as follows (unless other settings have been made):
Table 19-3
Drive Assignments on the M7 Programmable Control System (Default)
Drive
Partner Drive Identifier
MS-DOS
M7 RMOS32
Floppy disk
A:
A: or B:
Memory card
B:
M0:
C:, D:, ...
C:, D:, ...
D:, E:, ... with hard disk
C: without hard disk
M1:
Hard disk
On-board silicon disk
Boot Medium
If you install the operating system on the hard disk of the M7 programmable
control system, you will also need a boot medium. The boot medium is a data
medium from which the programmable control system boots when the power
supply is switched on. The boot medium contains a minimum M7 RMOS32
operating system. On booting, the parts of the operating system required to
run the applications and for communication are loaded into the work
memory.
When the system has started from the boot medium, an MPI connection
between the PC/programming device and the M7 programmable control
system can be established.
Bootable data media for M7 programmable control systems are:
S 3.5”/1.44-Mbyte floppy disks, or
S Memory cards 2 Mbytes
19-6
Standard Software for S7 and M7 – STEP 7 User Manual
C79000-G7076-C552-01
Managing M7 Programmable Control Systems
Installing MS-DOS
and MS Windows
Before you install one of the operating system configurations with MS-DOS
or MS Windows, you must install these operating systems from floppy disk
directly onto the M7 programmable control system in the following order
(see also /282/):
1. Install MS-DOS V6.22 if you want to install RMOS with MS-DOS or
MS Windows.
2. Install MS Windows V3.1X if you want to install RMOS with
MS Windows.
You can then install M7 RMOS32 as described in the following sections.
Partitioning the
Hard Disk
If you install the operating system on your hard disk, we recommend you
create two partitions to ensure that data are not lost following a power failure
(see Section 19.2). You can partition the hard disk with the following
commands:
S hdpart under M7 RMOS32 (see Chapter 5 in /282/)
S fdisk under MS-DOS
Formatting the
Destination
Medium
In general, the destination medium is formatted before the operating system
is installed for the first time. With the M7 operating system configurations,
you must format the destination medium in the following cases:
Operating System
Destination Medium is Formatted...
M7 RMOS32
Before each new installation or reinstallation because
M7 RMOS32, when it runs without MS-DOS, must
always be written at the start of the memory
M7 RMOS32 with
MS-DOS/Windows
Before MS-DOS is installed for the first time
During the installation of M7 RMOS32 without MS-DOS or MS Windows,
you will be prompted to format the destination medium hard disk. Follow the
instructions displayed in the dialog box.
Standard Software for S7 and M7 – STEP 7 User Manual
C79000-G7076-C552-01
19-7
Managing M7 Programmable Control Systems
19.2 Data Backup in Case of Power Failure
Concept
The M7-300/400 automation computer has a number of different mass
storage media: hard disk, floppy disk, memory card, and on-board silicon
disk whose file systems are managed by the operating system. You should
note that if there is a power-down during write access to the mass storage
media, the consistency of the file system may be endangered. As the system
software (operating system, configuration files, etc.) are also located on a
mass storage medium, a power failure during write access may mean that the
system can no longer be booted.
To resolve this problem, we recommend you always work with at least two
mass storage media (or two partitions on the hard disk):
S One which contains the operating system and the files relevant to the
system and which is not accessed using write access during operation, and
S One which contains the user programs and the read-only, backup, and
load memory areas and to which write access is permitted during
operation.
Basic Procedure
To ensure the consistency of the data on the mass storage media in the case
of a power failure, you have the following possibilities:
S Install the operating system on its own partition on the hard disk or on its
own mass storage medium. Make sure that write access to the partition or
the mass storage for the operating system is not possible during operation.
This ensures that the operating system and the system data remain intact,
even after a power failure so that a cold restart is always possible.
S Do not place the directories for the backup memory, the permanent load
memory, and the read-only memory on the same drive as the operating
system but on the drive on which you write during normal operation. To
do this you must assign the appropriate path names to the environment
variables BACKDIR, RAMDIR, and ROMDIR in the file \ETC\INITTAB
on the boot drive.
S Do not install the applications on the same drive as the operating system.
19-8
Standard Software for S7 and M7 – STEP 7 User Manual
C79000-G7076-C552-01
Managing M7 Programmable Control Systems
19.3 Installing M7 RMOS32 on a Memory Card
Starting Point
Your M7 programmable control system has no hard disk or floppy disk
drives.
Requirement
In this case, you can use the memory card as the destination medium. There
is space on a memory card for a complete M7 RMOS32 operating system
with applications (see Table 19-2).
You will require the following:
S A memory card drive on your PG 720/PG 740/PG 760 or a PC with an
external prommer
S A memory card 2 Mbytes
Procedure
To start up an M7 RMOS32 operating system on a memory card, the
following steps are necessary:
1. In your project, select the M7 program which is linked to the M7
CPU/FM.
2. Start the M7 management function with the menu command PLC "
Manage M7 System.
3. Open the “Install Operating System” tab.
4. Install an M7 RMOS32 operating system locally on the memory card by
making the following selections:
Medium: “Memory Card”
Possible Configuration: “M7 RMOS32”
5. Click the “Install” button. The dialog box displays messages about the
current processes.
Result: The operating system and the complete M7 system software are
transferred to the memory card.
6. Transfer your application with all the relevant project data locally to the
memory card. Switch to the “Programs” tab to do this and proceed as
described under “Downloading M7 Programs via Data Medium” on
page 19-26. This step is optional.
7. Insert the memory card in the M7 programmable control system and start
it using the mode selector. Adjust the BIOS Setup if required.
Result: The M7 programmable control system boots with the new
operating system. Your application is started.
Installing RMOS
with MS-DOS
The installation of M7 RMOS32 with MS-DOS on memory card is described
in /282/.
Standard Software for S7 and M7 – STEP 7 User Manual
C79000-G7076-C552-01
19-9
Managing M7 Programmable Control Systems
19.4 Installing M7 RMOS32 on Hard Disk
Starting Point
When shipped, there is no executable operating system installed on the M7
programmable control system and no MPI connections are possible.
Requirement
To install M7 RMOS32 on the hard disk of the M7 programmable control
system, you will require the following:
S A mass storage module MSM 378/478 in your M7 programmable control
system
S A boot medium (1.44-Mbyte floppy disk or memory card 2 Mbytes)
Procedure
To install M7 RMOS32 on the hard disk of the M7 programmable control
system, follow the steps outlined below:
1. In your project, select the M7 program linked to the M7 CPU/FM.
2. Start the M7 management function with the menu command PLC "
Manage M7 System.
3. Open the “Install Operating System” tab.
4. Make the following selections:
Medium: “MPI/RFS”
Possible Configuration: “M7 RMOS32”
Local Drive (only on programming devices/PCs with Windows 95): the
first free drive, for example, F:
Partner Drive: C: for hard disk
5. Click the “Install” button.
19-10
Standard Software for S7 and M7 – STEP 7 User Manual
C79000-G7076-C552-01
Managing M7 Programmable Control Systems
The dialog boxes then display messages about the current processes and tell
you how to proceed. You must perform the following steps:
6. Select a boot medium (floppy disk or memory card).
Result: A minimum M7 RMOS32 operating system is installed on the
selected boot medium.
7. Insert the boot medium in the drive on the M7 programmable control
system and start the M7 system.
Result: The M7 programmable control system boots with the new
operating system and an MPI connection is established between the
PC/programming device and the M7 programmable control system.
8. Partition the hard disk via the RTI (Remote Terminal Interface) or on the
local console of the M7 programmable control system (optional, see
Section 19.2) and format it (see /282/).
Result: The hard disk is partitioned and formatted. Then the
M7 RMOS32 operating system and any applications are installed on the
hard disk of the M7-300/M7-400 via the MPI connection.
To download your application to the M7 programmable control system,
open the “Programs” tab and follow the procedure described under
“Downloading M7 Programs via MPI/RFS” on page 19-25.
9. Start the M7 programmable control system again using the mode selector
and adjust the BIOS Setup if required.
Result: The M7 system boots with the new operating system from the
hard disk. Your application is started (if it exists).
Standard Software for S7 and M7 – STEP 7 User Manual
C79000-G7076-C552-01
19-11
Managing M7 Programmable Control Systems
19.5 Installing M7 RMOS32 with MS-DOS on Hard Disk
Starting Point
When shipped, there is no executable operating system installed on the M7
programmable control system and no MPI connections are possible.
Requirement
To install M7 RMOS32 with MS-DOS on the hard disk of the M7
programmable control system, you will require the following:
S A mass storage module MSM 378/478 in your M7 programmable control
system
S A boot medium (1.44-Mbyte floppy disk or memory card 2 Mbytes)
S MS-DOS installation disks. MS-DOS V6.22 must be installed on the
hard disk of the M7 programmable control system.
19-12
Standard Software for S7 and M7 – STEP 7 User Manual
C79000-G7076-C552-01
Managing M7 Programmable Control Systems
Procedure
To install M7 RMOS32 with MS-DOS on an M7 programmable control
system with a hard disk, follow the steps outlined below:
1. In your project, select the M7 program linked to the M7 CPU/FM.
2. Start the M7 management function with the menu command PLC "
Manage M7 System.
3. Open the “Install Operating System” tab.
4. Make the following selections:
Medium: “MPI/RFS”
Possible Configuration: “M7 RMOS32 & MS-DOS”
Local Drive (only on programming devices/PCs with Windows 95): the
first free drive, for example, F:
Partner Drive: C: for hard disk
5. Click the “Install” button.
The dialog boxes then display messages about the current processes and
tell you how to proceed. You must perform the following steps:
6. Select a boot medium (floppy disk or memory card).
Result: A minimum M7 RMOS32 operating system is installed on the
selected boot medium.
7. Select drives for the operating system and the data (see Section 19.2).
8. Insert the boot medium in the drive on the M7 programmable control
system and start the M7 programmable control system.
Result: The M7 system boots with the new operating system and an MPI
connection is established between the PC/programming device and the
M7 system. Then M7 RMOS32 with MS-DOS and any applications are
installed on the hard disk of the M7-300/M7-400 via the MPI connection.
To download your application to the M7 programmable control system,
open the “Programs” tab and follow the procedure described under
“Downloading M7 Programs via MPI/RFS” on page 19-25.
9. Start the M7 programmable control system again using the mode selector
and adjust the BIOS Setup if required.
Result: The M7 system boots with the new operating system from the
hard disk. Your application is started (if it exists).
Standard Software for S7 and M7 – STEP 7 User Manual
C79000-G7076-C552-01
19-13
Managing M7 Programmable Control Systems
19.6 Installing M7 RMOS32 with MS Windows on Hard Disk
Starting Point
When shipped, there is no executable operating system installed on the M7
programmable control system and no MPI connections are possible.
Requirement
To install M7 RMOS32 with MS Windows on the hard disk of the M7
programmable control system, you will require the following:
S A mass storage module MSM 378/478 in your M7 programmable control
system
S A boot medium (1.44-Mbyte floppy disk or memory card 2 Mbytes)
S MS-DOS and MS Windows installation disks. MS-DOS V6.22 and
MS Windows V3.11 must be installed on the hard disk of the M7
programmable control system.
19-14
Standard Software for S7 and M7 – STEP 7 User Manual
C79000-G7076-C552-01
Managing M7 Programmable Control Systems
Procedure
To install M7 RMOS32 with MS Windows on an M7 programmable control
system with a hard disk, follow the steps outlined below:
1. In your project, select the M7 program linked to the M7 CPU/FM and
start the M7 management function with the menu command PLC "
Manage M7 System.
2. Open the “Install Operating System” tab and make the following
selections:
Medium: “MPI/RFS”
Possible Configuration: “M7 RMOS32 & MS-Windows”
Local Drive (only on programming devices/PCs with Windows 95): the
first free drive, for example, F:
Partner Drive: C: for hard disk
3. Click the “Install” button.
The dialog boxes then display messages about the current processes and
tell you how to proceed. You must perform the following steps:
4. Select a boot medium (floppy disk or memory card).
Result: A minimum M7 RMOS32 operating system is installed on the
selected boot medium.
5. Select drives for the operating system and the data (see Section 19.2).
6. Insert the boot medium in the drive on the M7 programmable control
system and start the M7 programmable control system.
Result: The M7 system boots with the new operating system and an MPI
connection is established between the PC/programming device and the
M7 system. Then M7 RMOS32 with MS Windows and any applications
are installed on the hard disk of the M7-300/M7-400 via the MPI
connection.
To download your application to the M7 programmable control system,
open the “Programs” tab and follow the procedure described under
“Downloading M7 Programs via MPI/RFS” on page 19-25.
7. Start the M7 programmable control system again using the mode selector
and adjust the BIOS Setup if required.
Result: The M7 system boots with the new operating system from the
hard disk. Your application is started (if it exists).
Starting Windows
Automatically
To start Windows automatically when the system boots from the hard disk,
edit the AUTOEXEC.BAT file as follows:
1. Change the entry
remap.bat
to
call remap.bat
2. Enter the call win in the last line.
Standard Software for S7 and M7 – STEP 7 User Manual
C79000-G7076-C552-01
19-15
Managing M7 Programmable Control Systems
19.7 Reinstalling the M7 Operating System
Starting Point
If an operating system already exists on the hard disk of the M7
programmable control system, you can run a reinstallation via “MPI/RFS”,
which means changing, expanding, or upgrading the operating system on
your M7 programmable control system.
Procedure for
Reinstalling on
Hard Disk
Table 19-4 shows you what to do in each case when reinstalling on the hard
disk. The procedure is the same as the procedure for a new installation and
was already described in Sections 19.4, 19.5, and 19.6.
Table 19-4
Reinstallation
Existing
Operating
System
When You Reinstall...
M7 RMOS32
M7 RMOS32 with
MS-DOS
M7 RMOS32 with
MS Windows
M7 RMOS32
As for a new
installation of
M7 RMOS32
Format the
destination medium,
install MS-DOS
locally, and reinstall
M7 RMOS32
Format the destination
medium, install
MS-DOS and
MS Windows locally,
and reinstall
M7 RMOS32
M7 RMOS32
with MS-DOS
As for a new
installation of
M7 RMOS32
Only a new
M7 RMOS32
component is
reinstalled
Install MS Windows
locally and reinstall
M7 RMOS32
M7 RMOS32
with
MS Windows
As for a new
installation of
M7 RMOS32
Format the
destination medium,
install MS-DOS
locally, and reinstall
M7 RMOS32
Only a new
M7 RMOS32
component is
reinstalled
Note
If you reinstall M7 RMOS32 with MS Windows via MPI/RFS, Windows
must not be started already on the programmable control system.
If you reinstall M7 RMOS32 with MS Windows on an M7 programmable
control system with M7 RMOS32 with MS-DOS, M7 RMOS32 must not be
started, meaning you must boot the M7 from a DOS boot disk before you
install MS Windows 3.11.
19-16
Standard Software for S7 and M7 – STEP 7 User Manual
C79000-G7076-C552-01
Managing M7 Programmable Control Systems
Reinstalling on
Memory Card
Reinstalling M7 RMOS32 on memory card is always a new installation. For
M7 RMOS32 with MS-DOS, only the RMOS component is usually
reinstalled.
Note that only a limited number of write accesses are permitted on both types
of memory media.
Further
Information
You will find more detailed descriptions of the individual steps and on
installing the operating system configurations in:
S The online help on managing M7 programmable control systems
S The user manual for the M7-SYS optional software package /282/
Standard Software for S7 and M7 – STEP 7 User Manual
C79000-G7076-C552-01
19-17
Managing M7 Programmable Control Systems
19.8 Updating the Operating System for Exchanging Modules in the
Field
Uses
In STEP 7 you can create a set of disks or memory cards with which you can
update the operating system on the hard disk when you exchange modules in
the field without requiring a programming device.
Requirement
In order to create the data medium for the update, you will require the project
which contains the hardware configuration with the module you are going to
exchange.
Procedure
To create the data medium for the update, follow the steps outlined below:
1. In the “Managing M7 PLC Systems” dialog box, select the “Installing
Operating System” tab.
2. In the “Medium” box, select the data medium for the update: floppy disk
or memory card.
3. In the “Possible Configurations” list box, select the required operating
system.
4. In the “Operating System Version in the Programming Device” list box,
select the version of the operating system that you want to update.
5. Click the “Data Medium for Updating - Create” button. Follow the
instructions for creating more data media.
Result: A set of data media is created. The process is completed with a
corresponding message.
Updating the
Operating System
in the Field
To update the operating system, follow the steps outlined below:
1. Insert the first data medium in the exchanged M7 module and boot it. If
you boot the M7 module from this data medium, the operating system on
the hard disk is updated automatically. Follow the prompt (via LED) to
insert the other data media. The update is completed when the following
LEDs are lit continuously:
– The USR LED on the M7-300 CPU/FM
– The USR1 LED on the M7-400 CPU/FM
2. Remove the data medium from the M7 programmable control system and
boot it from the hard disk.
Note
The data media created do not contain a complete operating system. They
cannot be used for normal operation of the SIMATIC M7 but only for
updating the operating system on the hard disk.
19-18
Standard Software for S7 and M7 – STEP 7 User Manual
C79000-G7076-C552-01
Managing M7 Programmable Control Systems
Updating the
Operating System
on Memory Card
When you exchange modules whose operating system was installed on
memory card, you must run a reinstallation (see Section 19.7).
In Case of Error
In case of error, the following LEDs indicate faults:
LED
Meaning
What You Should Do...
SF LED on the M7-300
INTF LED on the M7-400
light up
Internal fault
Create the data medium for the
update again and repeat the update.
SF LED on the M7-300
INTF LED on the M7-400
flash
Incorrect floppy
disk
Insert the correct floppy disk or
create the data medium for the
update again if necessary.
Standard Software for S7 and M7 – STEP 7 User Manual
C79000-G7076-C552-01
19-19
Managing M7 Programmable Control Systems
19.9 Updating the Firmware
Overview
On the M7-300/M7-400 CPUs and application modules there is firmware
specific to the module, such as the BIOS. You can update the firmware via
the programmable control system management.
The firmware can either be updated independently of or in conjunction with
the system software for M7-300/M7-400.
In the “Update Firmware” tab, the version of the firmware in the
programmable control system and in the programming device are displayed.
This makes it easier to check whether an update of the firmware is necessary:
an update is only necessary if the firmware version in the programmable
control system is older than the firmware version in the programming device.
If you install the operating system via MPI/RFS, the firmware version is
checked automatically. If the firmware version on the M7 programmable
control system does not match the operating system installed, a message is
displayed to inform you of this.
Note
Read the notes on compatibility in the M7-SYS Product Information.
Requirement
To update the firmware of an M7-300/M7-400 CPU or function module, you
will require a boot medium (floppy disk or memory card).
The update must be performed within the context of a project which contains
the M7 stations (CPUs or FMs) with a selected “M7 Program”.
!
Caution
Hardware damage:
Do not switch off the line power during the update otherwise the module
may be damaged.
Data loss:
Following a firmware update you must call the BIOS Setup (see Section 12.4
in the S7-400/M7-400 Programmable Controllers Module Specifications
Reference Manual /101/ and Chapter 10 in the M7-300 Programmable
Controller Hardware and Installation Manual). If you want to work with the
default values, you should save them. If you changed any settings in the
BIOS Setup before the update, these will have been lost and must be entered
again.
19-20
Standard Software for S7 and M7 – STEP 7 User Manual
C79000-G7076-C552-01
Managing M7 Programmable Control Systems
Managing M7 PLC Systems
Medium:
Floppy A:
Local Drive:
F:
Partner Drive:
C:
Programs Install Op. System Update Firmware
Operating System Version in Programming Device:
Firmware Version in PLC System
Firmware Version in Programming Device
Hardware Version:
V02.00.08
A1.05
A9.99
1
To update the firmware on the M7 system, you require a special boot
medium (floppy disk or memory card).
When you boot the M7 PLC system with this data medium, the firmware
is updated automatically.
Select and create a suitable data medium.
Boot Medium
Create
Close
Figure 19-2
Versions
Help
“Update Firmware” Tab
“Operating System Version in Programming Device” list box:
Select the version of the operating system here that you want to install or
already have installed on your M7 programmable control system. This step is
only necessary if you have a number of versions of the M7-SYS optional
package installed on your programming device.
Firmware version, hardware version:
The following versions are displayed if an MPI connection to the M7
programmable control system exists:
S The current firmware version in the programming device
S The firmware version available in the programmable control system
S The hardware release of the programmable control system
Standard Software for S7 and M7 – STEP 7 User Manual
C79000-G7076-C552-01
19-21
Managing M7 Programmable Control Systems
Procedure
To update the firmware of an M7 programmable control system, follow the
steps outlined below:
1. In your project, select the M7 program container linked to the M7 module
(CPU/FM).
2. Select the menu command PLC " Manage M7 System.
3. Open the “Update Firmware” tab (see Figure 19-2).
4. Select the boot medium; floppy disk or memory card.
5. Select the version of the operating system from the “Operating System
Version in Programming Device” list box. This step is only necessary if
you have a number of versions of the M7-SYS optional package installed
on your programming device.
6. Click the “Create” button.
Result: The boot medium is formatted (with a warning) and the new
firmware is installed on it.
7. Insert the boot medium in the M7 programmable control system and start
the M7 CPU/FM.
Result: If you boot the M7 programmable control system with this data
medium, the firmware is updated automatically. The update is completed
when the following LEDs are lit continuously:
– The USR LED on the M7-300 CPU/FM
– The USR1 LED on the M7-400 CPU/FM
8. Remove the boot medium from the M7 programmable control system and
boot it from the preset mass storage medium (memory card, hard disk,
etc.).
Note
If the firmware on the boot medium is incompatible with the module type or
older than the existing firmware version, the firmware is not updated and
the error LED (SF LED on the M7-300 and INTF LED on the M7-400)
lights up.
In Case of Error
In case of an error, you should follow the steps outlined below:
1. Remove the boot medium from the M7 programmable control system.
2. Check whether the version of the BIOS of the M7-300/M7-400 module is
higher than the version of the new firmware. In this case, an update is not
necessary and also not possible.
3. Check that the station for the current project matches the module type of
the M7 programmable control system. If this is not the case, adapt your
project and run the firmware update again.
19-22
Standard Software for S7 and M7 – STEP 7 User Manual
C79000-G7076-C552-01
Managing M7 Programmable Control Systems
19.10 Downloading and Deleting Programs on the M7 Programmable
Control System
Uses
STEP 7 enables you to use the M7 management functions to do the
following:
S Download M7 applications with all the relevant project data either
individually or together with the operating system to the M7
programmable control system
S Delete any software components (M7 programs) from the M7
programmable control system
You can also download and manage M7 programs on the M7 programmable
control system with some of the development tools included with the M7
software options, for example, CFC or the Organon debugging tool (refer to
the documentation for the relevant software option). The programs are not
transferred permanently to the mass storage medium in this way, they are
simply downloaded temporarily to the main memory of the M7
programmable control system.
Requirement
In order to download applications to the M7 programmable control system
via MPI, an operating system must already be available with which the
M7-300/M7-400 can start up and establish an MPI connection to the
PC/programming device.
As an alternative, you can also install your application together with the
operating system.
Procedure
To download an application to the M7 programmable control system, follow
the steps outlined below:
1. Select an M7 program container linked to an M7 module (CPU or FM).
2. Select the menu command PLC " Manage M7 System.
3. Open the “Programs” tab.
4. Make the following selections (see Figure 19-3):
– Programs on the programming device
– Download and destination media
– Local drive and partner drive if you use the medium “MPI/RFS”
5. Click the “Install” button.
All other activities depend on the medium you select.
Selecting
Programs
In the “Programming Device” list box, all the C and C++ programs are listed
which are linked to the M7 PLC system within your project. You can select
one or more of these to download. The list box “PLC System” displays the
programs already downloaded to the programmable control system.
Standard Software for S7 and M7 – STEP 7 User Manual
C79000-G7076-C552-01
19-23
Managing M7 Programmable Control Systems
Note
Before you download a DOS or Windows program, you must select all the
components to be downloaded with the “Add” button in the “Components”
tab of the “Properties” dialog box of the program and specify the destination
path if necessary. If the “Component” and “Install in Destination Path”
boxes remain empty, nothing is downloaded to the programmable control
system.
Download Media
There are two methods for downloading M7 applications in STEP 7:
S Online via MPI/RFS
S Offline via floppy disk or memory card
Selecting the Local
Drive and Partner
Drive
If you use the download medium “MPI/RFS” for the installation, you can
select a local drive and a partner drive, just as you can for the operating
system installation (see page 19-6).
Managing M7 PLC Systems
Medium:
Floppy A:
Local Drive:
F:
Install Op. System
Partner Drive:
Programs
Programming Device:
C:
Update Firmware
PLC System:
DOS/WIN Program: 5
M7 C++ Program: 1
Install >
Delete
Close
Figure 19-3
Help
“Programs” Tab
Note
If the operating system is installed on the hard disk, we recommend you
install the applications on a different drive from the operating system to
ensure that data are not lost following a power failure (see Section 19.2).
19-24
Standard Software for S7 and M7 – STEP 7 User Manual
C79000-G7076-C552-01
Managing M7 Programmable Control Systems
Downloading M7
Programs via
MPI/RFS
When downloading online, the relevant program parts are downloaded
directly via MPI to the mass storage in the programmable control system and
the relevant start batch files are entered in the \ETC\INITTAB file on the
programmable control system so that the programs are started automatically
the next time the system is booted. In addition, a special description file
containing all the necessary information about displaying and deleting the
program is downloaded for every M7 program. The name of this description
file is formed automatically from the name of the program after checking
that the file name is always unique on the programmable control system.
To download M7 programs via MPI/RFS to the M7 programmable control
system, follow the steps outlined below:
1. Start the M7 programmable control system. You can use a bootable disk
or a memory card to boot the system.
2. Start the M7 management function with the menu command PLC "
Manage M7 System.
3. Open the “Programs” tab.
4. Make the following selections (see Figure 19-3):
– Medium: “MPI/RFS”
– Local Drive (only on programming devices/PCs with Windows 95):
the first free drive, for example, F:
– Partner Drive: C: for hard disk
(refer to the notes in Section 19.2).
– The required applications from the “Programming Device” list box.
5. Click the “Install” button.
Result: An MPI connection to the M7 programmable control system is
established and the selected software components are downloaded to the
programmable control system drive. The downloaded programs are
displayed in the “PLC System” box.
The programs are started automatically the next time the system is
booted.
While these steps are being executed, messages appear in the dialog box,
informing you of what is currently happening.
!
Caution
If files with the same name are present on the programmable control system,
these are overwritten during the download process. There is no automatic
rename function and no automatic backup.
Standard Software for S7 and M7 – STEP 7 User Manual
C79000-G7076-C552-01
19-25
Managing M7 Programmable Control Systems
Downloading M7
Programs via Data
Medium2
When downloading offline, all files are first copied to a floppy disk or a
memory card. An installation file M7SWINS.BAT is also created on the data
medium which is used to download the most recently selected programs from
the floppy disk or memory card to the mass storage medium of the M7
programmable control system. The M7SWINS.BAT file must be executed
under the CLI of M7 RMOS32.
Note
If you download to an M7 programmable control system with
M7 RMOS32/DOS offline via memory card, you must change the entry in
the M7SWINS.BAT file
M7INSTDRIVE=M0:
to
M7INSTDRIVE=B:
To download M7 programs offline via a data medium, follow the steps
outlined below:
1. Start the M7 management function with the menu command PLC "
Manage M7 System.
2. Insert the disk in the drive on the PC/programming device.
3. Open the “Programs” tab.
4. Make the following selections (see Figure 19-3):
– Medium: “Floppy Disk” or “Memory Card”
– The required applications from the “Programming Device” list box.
5. Click the “Install” button.
Result: The selected software components are transferred to the data
medium.
6. Insert the data medium in the M7 programmable control system.
7. Start the CLI locally on the M7-300/M7-400 or via the Remote Terminal.
8. Call the M7SWINS.BAT batch file on the disk to copy the software
components to the hard disk. The M7SWINS.BAT file always copies to
the currently active drive. This means you should enter the following to
transfer from floppy disk to hard disk, for example:
cd c:\
A:\m7swins.bat
19-26
Standard Software for S7 and M7 – STEP 7 User Manual
C79000-G7076-C552-01
Managing M7 Programmable Control Systems
!
Caution
If files with the same name are present on the programmable control system,
these are overwritten during the transfer process.
9. The batch files to start the programs are not entered automatically in the
\ETC\INITTAB of the M7 programmable control system. Instead, a
temporary \ETC\INITTAB.INS file containing all the necessary entries is
created on the data medium. In order to start the programs automatically
the next time the M7-300/M7-400 system starts up, you must copy these
entries to the \ETC\INITTAB file in the M7 programmable control system
using an editor.
Guidelines for
Downloading
Offline
When you download M7 programs offline via data medium to the
programmable control system, a special description file containing all the
necessary information about displaying and deleting the program is stored on
the data medium for each M7 program. The name of this description file is
formed automatically from the name of the program. In order to check that
the file name is always unique on the programmable control system, one of
the following conditions must be fulfilled:
S The first five characters of the names of the programs defined for an M7
CPU or an M7 function module are different.
S All programs belonging to a CPU or a function module are always copied
to the data medium and downloaded from there to the M7 programmable
control system.
Note
If these conditions are not fulfilled, there is a danger that when you access
the programmable control system via the MPI at a later time, a software
component may not be displayed in the “PLC System” selection list and
cannot therefore be deleted.
Deleting M7
Programs
To delete M7 programs online from the M7 programmable control system,
follow the steps outlined below:
1. Execute steps 1. through 4. as for downloading applications via MPI/RFS.
2. Select the software components you want to delete in the “PLC System”
list box.
3. Click the “Delete” button.
Result: The selected software components are deleted from the
programmable control system drive.
Standard Software for S7 and M7 – STEP 7 User Manual
C79000-G7076-C552-01
19-27
Managing M7 Programmable Control Systems
Starting M7
Programs
The following methods are possible for starting applications on the M7
programmable control system:
1. Via the local console or via the Remote Terminal Interface (RTI) while
the system is running. Operating the RTI is described in the M7-SYS User
Manual.
2. Via an entry in the \ETC\INITTAB file when the system starts up. This
file is read immediately after the operating system is booted. It contains
the calls for all the programs which must be executed automatically on
system startup.
When you install the applications together with the operating system or
via “MPI/RFS”, they are entered in the \ETC\INITTAB file automatically.
When programs are downloaded without the operating system via data
medium (floppy disk or memory card), you must make the entries
yourself if you want the programs to be executed automatically on system
startup. You will find the appropriate entries in the temporary
\ETC\INITTAB.INS file.
19-28
Standard Software for S7 and M7 – STEP 7 User Manual
C79000-G7076-C552-01
Managing M7 Programmable Control Systems
19.11 M7-300/M7-400 Monitoring and Modifying Functions
Information
Functions
Using the menu command PLC " Module Information, you can display the
following information about the M7 CPUs on the PC or programming device:
S Time system and CPU time
S M7 CPU data
S User memory utilization
S CPU scan cycle times
S Communication connection status
S Diagnostic buffer content
What Is Different in
M7?
In contrast to the S7 modules, you cannot display the following information
for M7 CPUs:
S Block data
S Stack contents
The corresponding tabs and boxes are present on the user interface, but are
empty.
CPU Messages
Using the “CPU Messages” function, asynchronous messages on error events
and user-defined messages can be displayed (see Section KEIN MERKER).
Settings
You can make the following settings on the M7 CPU, just as for an S7 CPU:
S Change the operating mode, reset the CPU (see Chapter 15)
S Set the date and time (see Chapter 17)
Monitoring and
Modifying
Variables
With the menu command PLC " Monitor/Modify Variables, the following
functions are available for editing the variable table (see Chapter 16):
S Displaying the content of data blocks, inputs, outputs, and bit memory
S Writing the content of data blocks, inputs, outputs, and bit memory
Note
Forcing variable values is not supported in SIMATIC M7.
Standard Software for S7 and M7 – STEP 7 User Manual
C79000-G7076-C552-01
19-29
Managing M7 Programmable Control Systems
19-30
Standard Software for S7 and M7 – STEP 7 User Manual
C79000-G7076-C552-01
Part 5: Final Tasks
Archiving
20
Printing
21
19-32
Standard Software for S7 and M7 – STEP 7 User Manual
C79000-G7076-C552-01
20
Archiving
Overview
Chapter
Overview
You archive your user programs, projects, and libraries using the SIMATIC
Manager.
Section
Description
Page
20.1
Archive Programs
20-2
20.2
Archiving Projects and Libraries
20-3
20.3
Retrieving Projects and Libraries
20-5
Standard Software for S7 and M7 – STEP 7 User Manual
C79000-G7076-C552-01
20-1
Archiving
20.1 Archive Programs
Uses
You can store projects or libraries in compressed form in an archive file. This
makes it possible to store the compressed data on hard disk or on
transportable data media (floppy disks).
The archive function provides you with an interface to call your preferred
archive program.
Possible Archive
Programs
You can use the following archive programs:
S pkzip from version 2.04g
S arj from version 2.41a
S lha from version 2.13
S winzip from version 6.0
Requirements
You must have installed the archive program in your system. Its use within
STEP 7 is described in Section 20.2.
S All the data for the project without exception must be in the project
directory or a subdirectory of the project. When working with the C
development environment, it is possible to store data in other locations,
but these data would then not be included in the archive file.
S The file names must fulfil the DOS name conventions (eight characters
for the name plus three characters for the extension) because the archive
programs are generally DOS programs.
Note
While archiving and retrieving with DOS archive programs (pkzip, arj, lha),
a DOS window is open. You can only continue working in the SIMATIC
Manager again once it is closed. In the properties for the archive program,
you can set whether you want the DOS window to be closed automatically
when archiving/retrieving is finished. To do this, select the archive program,
for example, in the Windows 95 Explorer and select the menu command File
" Properties. Then select the “Program” tab in the dialog box. Activate the
“Close on Exit” option and click “OK”.
20-2
Standard Software for S7 and M7 – STEP 7 User Manual
C79000-G7076-C552-01
Archiving
20.2 Archiving Projects and Libraries
Setting the
Preferred Archive
Program
To set an archive program, follow the steps outlined below:
1. In the SIMATIC Manager, select the menu command Options "
Customize. A dialog box is displayed.
2. In the “Archive” tabbed page, select your preferred archive program.
The default is the archive program arj.
Setting the Search
Path for Archive
Programs
The standard configuration of STEP 7 assumes that the archive programs are
installed in the DOS search path. If the archive programs are installed
elsewhere, follow the steps outlined below:
1. In the SIMATIC Manager, select the menu command Options "
Customize. A dialog box is displayed.
2. Using the “Configure” button in the “Archive” tabbed page, open the
“Archive Configuration” dialog box.
3. Enter the path name for the archive program in the “Program Path” box or
select it using the “Browse” button.
4. Close the dialog boxes with “OK”.
Setting Target
Directories
You can also set target directories for archiving and for retrieving. This saves
you entering the directories during the archive or retrieve process.
To set target directories, follow the steps outlined below:
1. In the SIMATIC Manager, select the menu command Options "
Customize.
2. In the dialog box, select the “Archive” tab.
3. Activate the option “Use” under “Target Directory for Archiving” and/or
“Target Directory for Retrieving”.
4. Enter the path in the relevant text box or select a directory via the
“Browse” button.
For retrieving, you can choose to have the target directory option checked
in every case.
5. Close the dialog box with “OK”.
Standard Software for S7 and M7 – STEP 7 User Manual
C79000-G7076-C552-01
20-3
Archiving
Archiving Projects/
Libraries
To create an archive, follow the steps outlined below:
1. Check that no windows are open containing the project you want to
archive and that the library you want to archive is closed.
2. Select the menu command File " Archive.
3. In the next dialog box, select the project or library you want to archive
and confirm your entry.
4. Depending on your archive settings (under Options " Customize,
“Archive” tab), another dialog box is displayed. Here you can set the
target directory, the file name, and the file type for the archive file.
STEP 7 uses the file type (extension) to determine which archive program
to use (for example, “.zip” for PKZIP).
5. You can set additional archiving options in another dialog box (for
example, saving to more than one floppy disk). The dialog box is
displayed only if you activated the option to enable additional archive
settings and if your archive program supports other options.
A DOS window is opened in which the archive process is run. The
project/library is compressed and stored in the target directory.
Copying to Floppy
Disk
20-4
You can archive a project/library as described above and then copy the
archive file to a floppy disk. It is also possible to select a floppy disk drive in
the “Archive” dialog box as the target directory.
Standard Software for S7 and M7 – STEP 7 User Manual
C79000-G7076-C552-01
Archiving
20.3 Retrieving Projects and Libraries
Overview
Projects in archives cannot be edited directly. To edit archived projects or
libraries you must retrieve the data from the archive.
Editing Archived
Projects/Libraries
To edit archived projects/libraries, follow the steps outlined below:
1. In the SIMATIC Manager, select the menu command File " Retrieve.
2. In the dialog box, select the archive file which contains the compressed
project/library.
Whether the following dialog boxes are displayed depends on your
settings in the “Archive” tab that you call with the menu command
Options " Customize.
3. In the next dialog box, select the target directory to which you want to
retrieve the project/library data.
Note
The directory names in the path may not be longer than eight characters.
4. You can set other options for retrieving data in another dialog box.
When the dialog box is closed, a DOS window is opened in which the
retrieve process is run.
During retrieval, the project or library is created and its contents are entered
from the archive. You can now open the project/library and edit it or copy
parts of it to other projects.
Opening Retrieved
Projects or
Libraries
Retrieved projects/libraries are not displayed for selection in the dialog box
when you first attempt to open them. To display them, follow the steps
outlined below:
1. Click the “Browse” button.
2. Select the project or library in the dialog box.
When you want to open a project or a library again, the retrieved object is
then displayed in the selection box. Selecting a project or library via the
“Browse” button is only possible when you first attempt to open them.
Standard Software for S7 and M7 – STEP 7 User Manual
C79000-G7076-C552-01
20-5
Archiving
20-6
Standard Software for S7 and M7 – STEP 7 User Manual
C79000-G7076-C552-01
21
Printing
Uses
Once you have finished creating the program for your automation task, you
can print out all the important data for project documentation purposes using
the print functions integrated in STEP 7.
Project Parts
Which Can Be
Printed
You can print the following parts of a project:
S Blocks in Ladder Logic, Statement List, Function Block Diagram
representation or in other languages (optional software)
S Symbol table with the symbolic names for absolute addresses
S Configuration table with the arrangement of modules in the
programmable controller and the module parameters
S Diagnostic buffer content
S Variable table with monitor formats, and monitor and modify values
S Reference data; such as cross-reference lists, assignment lists, program
structures, lists of unused addresses, lists of addresses without symbols
S Global data table
S Module information with the module status
S Documents in optional packages, for example programming languages
Basic Procedure
To print out a part of a project, follow the steps outlined below:
1. Open the appropriate object to display the information you want to print
on the screen.
2. Open the “Print” dialog box using the menu command File " Print in the
application window.
Depending on which application you are in, the first entry in the menu bar
may not be “File”, but the object processed by the application, such as
“Symbol Table”.
3. If necessary, change the print options (printer, print range, number of
copies etc.) in the dialog box and close it. You will find more information
on print settings in the online help.
Blocks do not need to be opened. You can print them directly in the
SIMATIC Manager using the menu command File " Print.
Standard Software for S7 and M7 – STEP 7 User Manual
C79000-G7076-C552-01
21-1
Printing
Printer Setup
To set up a printer and set the paper format (landscape or portrait), select the
menu command File " Print Setup.
Setting the Page
Format
To set the page format for the printout (for example, A4, A5, Letter), select
the menu command File " Page Setup.
Adjust the form you use to print out your data to the required paper format. If
the form is too wide, the right edge will be printed on a new page.
Setting Headers
and Footers
You can set the headers and footers for your documents in the SIMATIC
Manager using the menu command File " Headers and Footers.
Print Preview
With the menu command File " Print Preview you can display a preview of
how your page will look when printed.
DOCPRO Optional
Package
To create, edit, and print standardized wiring manuals you can use the
optional software package DOCPRO. This creates plant documentation that
fulfils the DIN and ANSI standards.
21-2
Standard Software for S7 and M7 – STEP 7 User Manual
C79000-G7076-C552-01
Appendix
Opening and Editing Projects
from Older STEP 7 Versions
A
Objects and Object Hierarchy
B
Literature List
C
U-4
Standard Software for S7 and M7 – STEP 7 User Manual
C79000-G7076-C552-01
Opening and Editing Projects
from Older STEP 7 Versions
Chapter
Overview
Section
Description
A
Page
A.1
Opening Version 1 Projects
A-2
A.2
Opening and Editing Projects from Older STEP 7 Versions
Other Than Version 1
A-3
Standard Software for S7 and M7 – STEP 7 User Manual
C79000-G7076-C552-01
A-1
Opening and Editing Projects from Older STEP 7 Versions
A.1
Opening Version 1 Projects
Overview
In the SIMATIC Manager, you can reuse projects created with version 1 of
STEP 7. STEP 7 converts the version 1 project into a new version 2 project.
You can then save the project as a version 2 project or as a version 3 project.
The following components of a version 1 project are retained:
S Project structure with programs
S Blocks
S STL source files
S Symbol table
S Hardware configuration
The program components which are retained can be copied to other projects.
Block Version
The individual blocks remain as version 1 blocks as regards their properties.
The code generated in version 1 remains unchanged and the blocks cannot
therefore be used in conjunction with multiple instances.
If you want to convert the blocks to version 2 blocks (with multiple instance
capability), generate STL source files from the blocks and then compile the
source files into blocks again.
Procedure
To open a version 1 project, follow the steps outlined below:
1. Select the menu command File " Open Version 1 Project in the
SIMATIC Manager.
2. In the dialog box “Open S7 Project”, select the version 1 project you want
to use. You recognize a version 1 project by its file extension *.s7a (see
default for “type”.)
3. In the “New Project” dialog box, enter the name you want to give the
project in version 2.
4. In a further step you are prompted whether you want to open the project
as a version 2 project or a project from the current version. Depending on
how you answer this prompt, the project is opened either in version 2 or
the current version.
Result: STEP 7 converts the version 1 project to a version 2 project. The new
project is opened in the SIMATIC Manager.
A-2
Standard Software for S7 and M7 – STEP 7 User Manual
C79000-G7076-C552-01
Opening and Editing Projects from Older STEP 7 Versions
A.2
Opening and Editing Projects from Older STEP 7 Versions Other
Than Version 1
Overview
With the menu command File " Open you can open projects from older
STEP 7 versions.
When you open a project from an old version of STEP 7, you only have the
functional scope of that STEP 7 version available to you.
Converting to a
Project for the
Current Version
With the menu command File " Save As you can save the project as a project
for the current version if you select the file type “STEP 7 Project” in the
corresponding dialog box.
Note
Projects saved in a newer STEP 7 version cannot be saved as projects under
an older STEP 7 version.
Standard Software for S7 and M7 – STEP 7 User Manual
C79000-G7076-C552-01
A-3
A-4
Standard Software for S7 and M7 – STEP 7 User Manual
C79000-G7076-C552-01
Objects and Object Hierarchy
Overview
B
Objects have the following functions:
S Containers
S Carriers of functions which act on the object (for example, which start a
particular application)
S Carriers of object properties
Tables B-1 and B-2 show an overview of the most important objects and their
icons used on the user interface:
The objects listed in the tables are objects which appear in the STEP 7
Standard software (with the exception of charts). If you have installed the
optional software, other objects may appear which are described in the
documentation on the respective software option.
Objects as Carriers
of Properties
Objects can carry both functions and properties (such as options). When you
select an object, you can perform one of the following functions with it:
S Edit the object using the menu command Edit " Open Object
S Open a dialog box using the menu command Edit " Object Properties
and set object-specific options
A container can also be a carrier of properties.
Note
If you want to change the settings for an object in the programming device
(such as the parameters for a module), these are not initially active on the
programmable controller. For this to happen, the system data blocks in
which these settings are stored first have to be downloaded to the
programmable controller.
If you download the whole user program, the system data blocks are
automatically downloaded. If you make changes to the settings after you
downloaded a program, you can reload the object “System Data” to update
the settings on the programmable controller.
Standard Software for S7 and M7 – STEP 7 User Manual
C79000-G7076-C552-01
B-1
Objects and Object Hierarchy
Containers
Table B-1
Icon
A container (or directory) can contain other containers (subdirectories) or
objects. These are displayed when you open the container.
Container Objects
Object
Description
Project
Represents the total sum of all data and programs (At the head of an
in an automation task
object hierarchy)
Library
Can contain S7/M7 programs and is used to store (At the head of an
blocks to be used more than once
object hierarchy)
SIMATIC 300 station
SIMATIC 400 station
Represents components of the hardware
configuration with one or more prog. modules
Project
CPUxxx
CPxxx
FMyyy
Represents a programmable module (CPU,
communications processor, or function module)
Station
S7 program
Container for software for S7 CPUs
Programmable module
or project
M7 program
Container for software for M7 CPUs
Programmable module
or project
Program
Container for software for non-CPU modules (for Programmable module
example, programmable CP or FM modules)
or project
Blocks
(in offline view)
Container for blocks
(see under blocks for a list)
S7 program
Blocks
(in online view)
Contains the executable files which are
downloaded to the programmable controller
S7/M7 program
(online)
Source files
Container for source files (programs) in text form
(such as STL source files)
S7 program
Charts*
Container for graphic CFC source files (charts)
S7/M7 program
SW
Found in Container
Note:
The system data of modules that have no retentive
memory (e.g. CP 441) are downloaded via the
CPU for the station. These modules do not,
therefore, have a “System Data” object assigned
to them and they are not displayed in the project
hierarchy.
* The container “Charts” and the object “Chart” are required for the optional software package CFC.
B-2
Standard Software for S7 and M7 – STEP 7 User Manual
C79000-G7076-C552-01
Objects and Object Hierarchy
Objects as Carriers
of Functions
When you open an object, a window is displayed in which you can edit the
object.
An object is either a container or a carrier of functions. An exception to this
is stations: they are both containers (for programmable modules) and carriers
of functions (used to configure the hardware).
S If you double-click a station, the objects contained in it are displayed: the
programmable modules and the station configuration (station as a
container)
S If you open a station with the menu command Edit " Open Object, you
can configure this station and assign parameters to it (station as the carrier
of a function). The menu command has the same effect as a double-click
on the “Hardware” object.
Table B-2
Icon
ÄÄ
ÁÁ
ÁÁ
ÁÁ
Á
ÁÁ
Objects as Carriers of Functions and Properties
Object
Description/Content
Found in Object
Network
Used to start the utility for configuring a
network and for setting network properties
Project
Hardware
Used to start the utility for hardware
configuration
Station
Programmable module
This object represents the parameter assignment Station
data of a programmable module
Connections
Used to define connections in a network
Module
Symbols
Used to assign symbols to addresses and other
variables
S7/M7 program
Block (offline)
There are:
Blocks
Block (online)
S
S
S
S
Logic blocks (OB, FB, FC, SFB, SFC)
Data blocks (DB)
User-defined data types (UDT)
Variable tables (VAT)
System data (SDB)
This object represents system data blocks
Blocks
Source file
(such as STL source file)
Source file program in text form
Source files
C program*
C source program, C++ source program,
DOS/Windows program
M7 program
Chart
Graphic CFC source file
Charts
* The optional software package C for M7 is required to create C programs.
Standard Software for S7 and M7 – STEP 7 User Manual
C79000-G7076-C552-01
B-3
Objects and Object Hierarchy
B-4
Standard Software for S7 and M7 – STEP 7 User Manual
C79000-G7076-C552-01
C
Literature List
/21/
Technical Overview: S7/M7 Programmable Controllers,
Distributed I/O with PROFIBUS-DP and AS-i
/30/
Primer: S7-300 Programmable Controller,
Quick Start
/70/
Manual: S7-300 Programmable Controller,
Hardware and Installation
/71/
Reference Manual: S7-300 and M7-300 Programmable Controllers,
Module Specifications
/72/
Instruction List: S7-300 Programmable Controller
/100/ Manual: S7-400/M7-400 Programmable Controllers,
Hardware and Installation
/101/ Reference Manual: S7-400/M7-400 Programmable Controllers,
Module Specifications
/102/ Reference Guide: S7-400 Instruction List,
CPU 412, 413, 414, 416
/230/ Converter Manual: Standard Software for S7,
From S5 to S7
/232/ Manual: Statement List (STL) for S7-300 and S7-400,
Programming
/233/ Manual: Ladder Logic (LAD) for S7-300 and S7-400,
Programming
/234/ Programming Manual: System Software for S7-300 and S7-400,
Program Design
/235/ Reference Manual: System Software for S7-300 and S7-400,
System and Standard Functions
/236/ Manual: Function Block Diagram (FBD) for S7-300 and S7-400,
Programming
/249/ Manual: CFC Continuous Function Charts
Volume 2: S7/M7
/250/ Manual: Structured Control Language (SCL) for S7-300 and S7-400,
Programming
/251/ Manual: GRAPH for S7-300 and S7-400,
Programming Sequential Control Systems
Standard Software for S7 and M7 – STEP 7 User Manual
C79000-G7076-C552-01
C-1
Literature List
/252/ Manual: HiGraph for S7-300 and S7-400,
Programming State Graphs
/253/ Manual: C Programming for S7-300 and S7-400,
Writing C Programs
/254/ Manual: CFC Continuous Function Charts,
Volume1
/262/
Getting Started : Process Control System PCS 7
/270/ Manual: S7-PDIAG for S7-300 and S7-400,
Configuring Process Diagnostics for LAD, STL, and FBD
/271/ Manual: NETPRO,
Configuring Networks
/280/ Programming Manual: System Software for M7-300 and M7-400,
Program Design
/281/ Reference Manual: System Software for M7-300 and M7-400,
System and Standard Functions
/282/ User Manual: System Software for M7-300 and M7-400,
Installation and Operation
/290/ User Manual: ProC/C++ for M7-300 and M7-400,
Writing C Programs
/291/ User Manual: ProC/C++ for M7-300 and M7-400,
Debugging C Programs
/500/ Manual: SIMATIC NET,
NCM S7 for Industrial Ethernet
/501/ Manual: SIMATIC NET,
NCM S7 for PROFIBUS
/800/ DOCPRO
Creating Documentation (CD only)
/801/ TeleService for S7, C7, and M7
Remote Maintenance for Automation Systems (CD only)
/802/ PLC Simulation for S7-300 and S7-400 (CD only)
/803/ Reference Manual: Standard Software for S7-300 and S7-400,
STEP 7 Standard Functions, Part 2 (CD only)
C-2
Standard Software for S7 and M7 – STEP 7 User Manual
C79000-G7076-C552-01
Glossary
A
Absolute Address
An absolute address includes the address identifier and the physical memory
location where the address is stored. Examples: Input I 12.1; Memory Word
MW25; Data Block DB3.
Absolute
Addressing
With absolute addressing, the memory location of the address to be processed
is given. Example: The address Q 4.0 describes bit 0 in byte 4 of the
process-image output area.
Address
An address is part of a STEP 7 statement and specifies what the processor
should execute the instruction on. Addresses can be absolute or symbolic.
Assigning
Parameters
Assigning parameters means setting the behavior of a module.
B
Backup
In SIMATIC S7, information stored in the RAM areas (in the work memory)
can be:
S Saved by means of a backup battery; in this case the contents of the work
memory and the read/write memory area of the load memory are retained,
as are counters, timers, and the bit memory (the area can have parameters
assigned)
S Saved without a backup battery (less maintenance); in this case a
maximum (CPU-specific) number of data from the work memory, the
read/write memory area of the load memory, and a maximum number of
counters, timers, and memory bits can be saved permanently in the
backup buffer of the CPU.
Standard Software for S7 and M7 – STEP 7 User Manual
C79000-G7076-C552-01
Glossary-1
Glossary
Bit Memory (M)
A memory area in the system memory of a SIMATIC S7 CPU. This area can
be accessed using write or read access (bit, byte, word, and double word).
The bit memory area can be used by the user to store interim results.
Block
Blocks are part of the user program and can be distinguished by their
function, their structure, or their purpose. STEP 7 provides the following
types of blocks:
S Logic blocks (FB, FC, OB, SFB, SFC)
S Data blocks (DB, SDB)
S User-defined data types (UDT)
C
Central Processing
Unit (CPU)
The CPU is the central module in the programmable controller in which the
user program is stored and processed. It consists of an operating system,
processing unit, and communication interfaces.
CFC
CFC (Continuous Function Chart) is a programming language used to
describe continuous processes more clearly by graphically interconnecting
complex functions.
Chart
A special graphic source file which is created using the programming
language Continuous Function Chart (CFC). A chart is stored in the container
“charts” beneath the S7 program or the M7 program.
Communication
Function Block
(CFB)
The communication function blocks are system function blocks for
exchanging data and for program management.
Examples for data exchange:
S SEND
S RECEIVE
S GET
Examples for program management:
S Switching the CPU of the communication partner to STOP
S Scanning the status of the CPUs of the communication partner
Compiling
Glossary-2
This process creates an executable user program from a source file.
Standard Software for S7 and M7 – STEP 7 User Manual
C79000-G7076-C552-01
Glossary
Complete Restart
In S7: When a CPU starts up (for example, when the mode selector is moved
from STOP to RUN or when power is turned on), before cyclic program
processing starts (OB1), either the organization block OB101 (restart; only in
the S7-400) or OB100 (complete restart) is processed first. In a complete
restart the process-image input table is read in and the STEP 7 user program
processed starting with the first statement in OB1.
In M7: In a complete restart the process-image input table is read in. User
programs continue to be processed and informed of the operating states
STARTUP and RUN.
Configuring
Configuring is the selection and putting together of the individual
components of a programmable logic controller (PLC), and the installation of
the required software (for example, the operating system on an M7
automation computer) and adapting it to the specific task (such as assigning
parameters to the modules.)
Connection Table
The connection table defines the communication links between
programmable modules in a network.
Consistent Data
Consistent data are data which belong together and may not be separated, for
example, time data.
Control Command
FREEZE
The DP master sends the control command FREEZE to a group of DP slaves
causing the DP slaves to freeze the current states of their inputs.
Control Command
SYNC
The DP master sends the control command SYNC to a group of DP slaves
causing the DP slaves to synchronize the current states of their outputs.
Counter (C)
Counters are an area in the system memory of the CPU. The contents of these
counters can be changed using STEP 7 instructions (for example, up counter,
down counter).
Cross-Reference
List
The cross-reference list gives you an overview of the addresses from the
memory areas I, Q, M, T, C, P, and DB used within an S7 program.
D
Data Block (DB)
Data blocks are areas in the user program which contain user data. There are
shared data blocks which can be accessed by all logic blocks, and there are
instance data blocks which are associated with a particular function block
(FB) call.
Standard Software for S7 and M7 – STEP 7 User Manual
C79000-G7076-C552-01
Glossary-3
Glossary
Default Value
The default value is a basic setting which is used when no alternative value is
entered.
Diagnostic Buffer
The diagnostic buffer is a retentive area of memory within the CPU which
stores the diagnostic events in the order they occurred.
Diagnostic Event
A diagnostic event causes an entry in the diagnostic buffer of the CPU. The
events are distinguished according to whether they are:
S Faults on a module
S Faults in the wiring of the process
S System errors in the CPU
S Operating mode transitions of the CPU
S Errors in the user program
S User-defined diagnostic events
Direct Addressing
With direct addressing, the address is assigned the memory location of the
value with which the instruction is to work. The address can be absolute or
symbolic.
Download
Downloading is the transfer of load objects (such as logic blocks) from the
programming device to the load memory of a connected programmable
module.
Distributed I/O ID
A unique code for the slots in a DP slave. The ID contains the module type,
the length of the address area, and consistency (byte, word).
Example: 2DI for a two-channel digital input module.
DP Master
A DP (distributed I/O) master is a master that conforms to the PROFIBUS
DP standard EN 50170 (previously DIN E 19245).
DP Slave
A DP (distributed I/O) slave is a slave that is run on the PROFIBUS using the
PROFIBUS DP protocol.
F
Free-Edit Mode
Glossary-4
In free-edit mode, the blocks or the whole user program are edited in a source
file. A syntax check is run when the block or program is compiled. Free-edit
mode is possible in the programming languages Statement List and S7-SCL.
Standard Software for S7 and M7 – STEP 7 User Manual
C79000-G7076-C552-01
Glossary
Function (FC)
According to the International Electrotechnical Commission’s IEC 1131–3
standard, functions are logic blocks that do not reference an instance data
block, meaning they do not have a ’memory’. A function allows you to pass
parameters in the user program, which means they are suitable for
programming complex functions that are required frequently, for example,
calculations.
Note: As there is no memory available, the calculated values must be
processed immediately following the FC call.
Function Block
(FB)
According to the International Electrotechnical Commission’s IEC 1131–3
standard, function blocks are logic blocks that reference an instance data
block, meaning they have static data. A function block allows you to pass
parameters in the user program, which means they are suitable for
programming complex functions that are required frequently, for example,
control systems, operating mode selection.
Function Block
Diagram (FBD)
Function Block Diagram is a graphic representation of the STEP 7
programming language. FBD uses the logic boxes familiar from Boolean
algebra to represent logic.
Function Module
(FM)
A function module (FM) is a module which relieves the CPU in the S7-300
and S7-400 programmable logic controllers of time-critical and
memory-intensive process signal processing tasks. Function modules
generally use the internal communication bus for a fast exchange of data with
the CPU. Examples for function module applications are: counting,
positioning, closed-loop control.
G
Gateway
The connecting point between two subnets in a network. A gateway can also
be the connecting point between networks/subnets with different
characteristics (for example, between PROFIBUS and Industrial Ethernet.)
Global Data
Communication
Global data communication is a procedure with which global data are
transferred between CPUs (without communication function blocks (CFBs).)
H
HOLD
The HOLD state is reached from the RUN mode via a request from the
programming device. Special test functions are possible in this mode.
Standard Software for S7 and M7 – STEP 7 User Manual
C79000-G7076-C552-01
Glossary-5
Glossary
I
I/O, Distributed
(DP)
The distributed I/O consists of analog and digital modules which are located
at a physical distance from the central rack. Characteristic of the distributed
I/O is the modular rack system whose aim it is to save connecting wires,
thereby saving costs by placing the I/O modules close to the process.
Incremental Input
Mode
In incremental input mode, every line or every element of a block is checked
immediately for errors such as syntax errors. Any errors are displayed and
must be corrected before you finish entering the block. Programs entered
with the programming languages Statement List, Ladder Logic, Function
Block Diagram, S7-Graph, and S7-HiGraph allow incremental input.
Instance Data
Block
An instance data block stores the formal parameters and static data for
function blocks. An instance data block can be associated with a function
block call or a call hierarchy of function blocks.
Instruction
An instruction is part of a STEP 7 statement and specifies what the processor
should do.
Interrupt
SIMATIC S7 recognizes 28 different priority classes which control the
processing of the user program. These priority classes include interrupts, such
as hardware interrupts. When an interrupt occurs, the relevant organization
block is called automatically by the operating system in which the user can
program the required reaction to the interrupt (for example, in a function
block (FB).)
SIMATIC M7 supports the triggering, recognizing, and processing of
diagnostic interrupts and hardware interrupts. The reaction to interrupts is
freely programmable.
L
Ladder Logic
(LAD)
Ladder Logic is a graphic representation of the STEP 7 programming
language. Its syntax corresponds to the representation of a circuit diagram.
Library
A library is a container for blocks, source files, and charts with multiple
usage.
Load Memory
The load memory is part of a programmable module. It contains objects
created by the programming device (load objects.) It can be either a plug-in
memory card or an integrated memory. In SIMATIC M7 the load memory
can be defined as a directory on the hard disk.
Glossary-6
Standard Software for S7 and M7 – STEP 7 User Manual
C79000-G7076-C552-01
Glossary
Logic Block
In SIMATIC S7, a logic block is a block that contains part of the STEP 7 user
program. The other type of block is a data block which contains only data.
The following list shows the types of logic blocks:
S Organization block (OB)
S Function block (FB)
S Function (FC)
S System function block (SFB)
S System function (SFC)
Blocks are stored in the “blocks” container beneath the S7 program.
M
M7 Program
An M7 program is a container for charts and C programs for M7
programmable modules which also contains the symbol table.
Memory Card
A memory card is a memory submodule in credit-card format for
programmable modules and CPUs which can store the user program and
parameters.
Memory Reset
(MRES)
The memory reset function deletes the following memories in the CPU:
S Work memory
S Read/write area of the load memory
S System memory
In S7/M7/C7 the MPI parameters and the diagnostic buffer are retained. In
M7 the operating system is also rebooted if the M7 was reset via the mode
selector. In SIMATIC MMI devices, all buffers are cleared. The MPI address
is reset to the default value.
Message Table
The message table defines the text for messages and assigning these
messages to message events.
Mode Selector
You use the mode selector to set the required operating mode on the CPU.
MPI Address
In an MPI network, every programmable module must have its own unique
MPI address assigned.
Multiple Instance
Using multiple instances, the instance data block can handle the data for a
number of function blocks in a call hierarchy.
Standard Software for S7 and M7 – STEP 7 User Manual
C79000-G7076-C552-01
Glossary-7
Glossary
Multipoint
Interface (MPI)
The multipoint interface is the programming device interface in SIMATIC
S7/M7. It allows a number of programming devices, text display operator
interfaces, and operator panels to be accessed from one or more CPUs. The
nodes on the MPI can communicate with each other.
N
Network
A network is a number of nodes linked together by connecting cables for the
purpose of communication.
Node Address
The node address is the “postal address” of a device (for example,
programming device) or a programmable module (for example, CPU) when
these devices communicate in a network (such as MPI, PROFIBUS).
O
On-Board Silicon
Disk (OSD)
An OSD (On-board Silicon Disk) is a special retentive work memory which
does not lose its contents even if the power supply fails. The OSD is
integrated directly in the M7 CPU.
Online/Offline
When online, a data link between the programming device and the
programmable logic controller exists; when offline, no connection exists.
Operating Mode
The operating mode for the CPU can be selected using the mode selector.
The following operating modes exist:
S RUN with access rights to the STEP 7 user program using, for example,
the programming device (RUN-P)
S RUN with access protection (RUN)
S STOP
S Memory reset (MRES)
Operating State
The SIMATIC S7/M7 programmable logic controllers recognize the
following operating states: STOP, STARTUP, RUN, and HOLD.
Operating System
A collective term for all functions which, in conjunction with the hardware,
control and monitor the execution of the user programs, the distribution of
the operational equipment among the individual user programs, and the
maintenance of the operating mode (for example, MS-DOS).
Glossary-8
Standard Software for S7 and M7 – STEP 7 User Manual
C79000-G7076-C552-01
Glossary
Organization Block
(OB)
Organization blocks form the interface between the S7 CPU operating system
and the user program. The sequence in which the user program should be
processed is laid down in the organization blocks.
P
Process Image
The signal states of the digital input and output modules are stored in the
CPU in a process image. There is a process-image input table (PII) and a
process-image output table (PIQ).
Process-Image
Input Table (PII)
The process image of the inputs is read in from the input modules by the
operating system before the user program is processed.
Process-Image
Output Table (PIQ)
The process image of the outputs is transferred to the output modules at the
end of the user program by the operating system.
Program
Collective term for S7 and M7 programs.
Programmable
Logic Controller
(PLC)
A programmable logic controller is the controller or any of its components on
which the user program is run. Programmable logic controllers are, for
example, SIMATIC S7, M7, and C7.
Programmable
Logic Control
Programmable logic control is the automation technique using electronic
controllers whose function is stored in the control device as a program. The
structure and the wiring of the device are not therefore dependent on the
function of the controller.
A programmable logic controller has the structure of a computer; it consists
of a CPU with memory, I/O modules, and internal bus system. The I/O and
the programming language are set up according to the requirements of
control engineering.
Programmable
Module
Programmable modules are CPUs, function modules (FMs), and
communications processors (CPs). CPUs, FMs, and CPs can process user
programs; they communicate with each other via the communication bus (C
bus).
Programming
Device
The device used to create user programs for the programmable controller. For
example, this device may be a Siemens programming device (PG) with
Windows and the STEP 7 software or a PC.
Standard Software for S7 and M7 – STEP 7 User Manual
C79000-G7076-C552-01
Glossary-9
Glossary
Programming
Device (PG)
A personal computer with a special compact design, suitable for industrial
conditions. A SIEMENS programming device is completely equipped for
programming the SIMATIC programmable logic controllers.
Programming
Language
A programming language is used to create user programs and provides a
specific ’vocabulary’ for this purpose in the form of text instructions or
graphic elements. These instructions are entered by the user using an editor
and compiled into an executable user program.
Project
A project is a container for all objects in an automation task, independent of
the number of stations, modules, and how they are connected in a network.
R
RAM
The Random Access Memory or RAM is a read/write memory in which each
memory location can be addressed individually and have its contents
changed. RAM is used as a memory for data and programs.
Reference Data
Reference data are used to check your S7 program and include the
cross-reference list, the assignment lists, the program structure, the list of
unused addresses, and the list of addresses without symbols.
Restart
When a CPU starts up (for example, when the mode selector is moved from
STOP to RUN or when the power is turned on), before cyclic program
processing starts (OB1), either the organization block OB100 (complete
restart) or the organization block OB101 (restart; only in the S7-400) is
processed first. In a restart the process-image input table is read in and the
STEP 7 user program processing is restarted at the point where it was
interrupted by the last stop (STOP, power off). A restart is not possible in M7.
Retentive
Data are called retentive if they have the same value after a power supply
failure as before the power supply failed. The data are backed up in two
ways:
S Voltage backup
S Backup memory (see also Backup)
RUN
Glossary-10
In the RUN mode the user program is processed and the process image is
updated cyclically. In addition, all digital outputs are enabled.
Standard Software for S7 and M7 – STEP 7 User Manual
C79000-G7076-C552-01
Glossary
S
S7 Program
An S7 program is a container for blocks, source files, and charts for S7
programmable modules which also contains the symbol table.
SAPI-S7 Interface
This interface is a C programming interface of a programming device or PC
for access to SIMATIC S7 components.
Scan Cycle Time
The scan cycle time is the time the CPU takes to run the user program once
through.
SCL
SCL (Structured Control Language) is a high-level programming language
similar to Pascal and in accordance with the International Electrotechnical
Commission’s IEC 1131–3 standard, used to program complex tasks in
programmable logic control, such as algorithms, data processing tasks.
Shared Data
Shared data are data which can be accessed from any logic block (function
(FC), function block (FB), organization block (OB)). These are bit memory
(M), inputs (I), outputs (Q), timers (T), counters (C), and elements of data
blocks (DB). You can access shared data either absolutely or symbolically.
SIMATIC Manager
The SIMATIC Manager is the graphical user interface for SIMATIC users
under Windows 95.
Source File
A source file (text file) is part of a program which is created with a graphic
or text-oriented editor and is compiled into an executable S7 user program or
the machine code for M7.
STARTUP
The CPU goes through the STARTUP state during the transition from the
STOP mode to the RUN mode. It can be set using the mode selector on the
CPU, following power-on, or by an operation on the programming device.
There is a distinction between the STARTUP types restart and complete
restart. In S7-300 a complete restart is executed. In S7-400 either a restart or
a complete restart is executed depending on the position of the reset switch.
In M7-300/M7-400 a complete restart is executed.
Statement
A statement is the smallest independent part of a user program created in a
textual language. It represents a command for the processor.
Statement List
(STL)
Statement List is a textual representation of the STEP 7 programming
language, similar to machine code.
Standard Software for S7 and M7 – STEP 7 User Manual
C79000-G7076-C552-01
Glossary-11
Glossary
Station
In network communications, a station is a device which can be connected as
a complete unit to one or more subnets, such as, programmable logic
controller, programming device, operator station.
Station
Configuration
The configuration data and parameters for a station are stored in system data
blocks (SDB).
STOP
The following events switch the CPU into STOP mode:
S Moving the mode selector to the STOP position
S An internal error in the CPU
S An operation on the programming device
All modules are switched to a safe state.
In S7: In STOP the user program is not processed. Certain programming
functions and operator interface functions are also possible.
In M7: In STOP user programs can continue to be processed.
Subnet
A subnet comprises all nodes in a network which are connected without
gateways. A subnet can contain repeaters.
Symbol
A symbol is a name defined by the user, taking syntax rules into
consideration. This name can be used in programming and in operating and
monitoring once you have defined it (for example, as a variable, a data type,
a jump label, or a block).
Example: Address: I 5.0, Data Type: BOOL, Symbol: Emer_Off_Switch
Symbol Table
A table used to assign symbols (or symbolic names) to addresses for shared
data and blocks.
Examples:
Emer_Off (Symbol), I 1.7 (Address)
Controller (Symbol), SFB24 (Block)
Symbolic
Addressing
Using symbolic addressing, the address to be processed is entered as a
symbol and not as an address. The assignment of a symbol to an address is
made in the symbol table.
Syntax Check
In incremental input mode for STEP 7 programs, a syntax check is run after
each line has been completed. This means that the software checks whether,
for example, a STEP 7 statement has been entered correctly. In free-edit
mode, the syntax check is run during compilation.
System Data
“System Data” is an object containing the configuration data and parameters
of a station.
Glossary-12
Standard Software for S7 and M7 – STEP 7 User Manual
C79000-G7076-C552-01
Glossary
System Data Block
(SDB)
System data blocks are data areas for a programmable module which contain
the system settings and module parameters. The system data blocks are
created and modified when you configure a station.
System Error
System errors are errors which can occur within a programmable logic
controller (and are not related to the process). Some examples of system
errors are program errors in the CPU and defects on modules.
System Function
(SFC)
A system function (SFC) is a function integrated in the CPU operating
system which can be called in the user program when required.
System Function
Block (SFB)
A system function block (SFB) is a function block integrated in the CPU
operating system which can be called in the STEP 7 user program when
required, just like a function block (FB).
System Memory
The system memory is integrated in the S7 CPU and executed in the form of
RAM. The address areas (timers, counters, bit memory etc.) and data areas
required internally by the operating system (for example, backup for
communication) are stored in the system memory. In M7 the system memory
is not a separate area, but is integrated in the user memory.
T
Timer (T)
Timers are an area in the system memory of the CPU. The contents of these
timers is updated by the operating system asynchronously to the user
program. You can use STEP 7 instructions to define the exact function of the
timer (for example, on-delay timer) and start processing it (Start).
U
Upload
Uploading is the transfer of load objects (such as logic blocks) from the load
memory of a connected programmable module to the programming device.
User Program
The user program contains all the statements and declarations and the data
required for signal processing to control a plant or a process. The program is
linked to a programmable module (for example, CPU, FM) and can be
structured in the form of smaller units (blocks in S7 and tasks in M7.)
Standard Software for S7 and M7 – STEP 7 User Manual
C79000-G7076-C552-01
Glossary-13
Glossary
V
Variable
A variable defines an item of data with variable content which can be used in
the STEP 7 user program. A variable consists of an address (for example,
M 3.1) and a data type (for example, BOOL), and can be identified by means
of a symbolic name (for example, BELT_ON).
Variable Table
(VAT)
The variable table is used to collect together the variables that you want to
monitor and modify and set their relevant formats.
Virtual Field
Device (VFD)
A VFD (Virtual Field Device) is a simulation of a programmable controller
in a device-neutral description. The data and the behavior of the
programmable controller are described from the viewpoint of a
communication partner.
A number of VFDs can be assigned to one physical device. They are
configured with a suitable configuration tool. A VFD is uniquely identified
by its name. A number of connections can be configured for a VFD which
can all be uniquely identified by their name.
W
Watchdog Time
If the processing time for the user program exceeds the set watchdog time,
the operating system produces an error message and the CPU goes into
STOP.
Work Memory
The work memory is the RAM (Random Access Memory) in the CPU, which
the processor accesses while executing the user program.
Glossary-14
Standard Software for S7 and M7 – STEP 7 User Manual
C79000-G7076-C552-01
Index
A
Access codes, reference data, 14-10
Access to programmable controller
with project administration, 5-12
without configured hardware, 5-16
without project administration, 5-15
Accessible nodes, 5-15
Address, assigning, 7-21
Address assignment, checking, 2-11
Address overview, 7-22
Addresses, without symbols, 14-13
Addresses without symbols, displaying, 14-13
Archive programs, 20-2
Archive settings, 20-3
Archiving, 20-4
project, 5-11
Assigning parameters, 7-2
in the user program, 7-20
modules, 7-20
Assignment list
I,Q,M, 14-10
T,C, 14-10
Assignment lists, displaying, 14-10
Authorization, 2-3
original disk, 2-4
transferring, 2-4
AUTHORS.EXE, 2-4
Available blocks, displaying, 17-21
B
B stack, 17-23
Block stack, 17-23
Block version, A-2
Block-related message
assigning and editing, 12-4
overview, 12-5
procedure, 12-6
requirements, 12-5
Standard Software for S7 and M7 – STEP 7 User Manual
C79000-G7076-C552-01
Blocks
creating with LAD/STL, 11-6
creating with S7-Graph, 11-8
creating with S7-HiGraph, 11-10
creating with SCL/STL, 11-7
deleting, 15-9
downloading, 15-8
inserting, 5-7
reloading, 15-10
saving to memory card, 15-14
uploading, 15-11
Boot medium, 19-6
BRCV, 10-6
Browser, 4-10
BSEND, 10-6
Buttons, toolbar, 3-3
C
C7 control system
configuring, 7-10
structure, 7-10
CFC, 11-11
CFC program, 18-1
Channel-specific diagnostics, 17-14
Chart, 11-2
Combination box, 3-4
Comment line, 16-6
Comment marker, 16-6
Communication blocks, 10-6
for communication connections, 10-5
Communication configuration, examples,
9-11–9-14
Communication connection, creating, 10-8
Index-1
Index
Communication connections
checking, 17-22
communication blocks, 10-5
creating, 10-4
displaying, 17-22
number, 10-8
overview, 10-1
procedure, 10-2
Communication load, CPU, 17-22
Communications processor, 7-12
Communications resources, 9-2, 10-8
Compiling, global data table, 9-6
Compressing
in RUN mode, 17-17
in STOP mode, 17-17
user memory, 15-12, 17-17
Configuration
downloading, 7-24
expanding, 7-8
saving, 7-23
uploading, 7-24
Configuration data, 13-2
requirements for transfer, 12-19, 13-8
transferring, 12-19, 13-8
Configuration table
master system, 7-13
opening, 7-3
Configuring, 7-2
central structure, 7-6
global data communication, 9-3
modules, 7-1
network, 8-1, 8-5
Configuring CPU messages, procedure, 12-24
Configuring messages, 12-2
Connection
configured dynamic, 10-9
creating, 10-4, 10-8
point-to-point, 10-12
S7, 10-9
Connection ID, 10-8
Connection partner, 10-4
Connection table, 5-5, 10-3
downloading, 10-17
Connection to CPU, establishing, 16-7
Connection type, 10-4
Connections
other stations, 10-15
PG/PC, 10-15
SIMATIC S5 stations, 10-15
to partners in other projects, 10-14
Consistency check, 7-23
Content, diagnostic buffer, 17-12
Index-2
Context-sensitive help, 3-5
Copy protection, 2-3
CP 342-5 DP, 7-17
CPU 315-2 DP, 7-16
CPU data, 17-10
CPU identification data, 17-20
CPU messages
archive, 12-24
configuring, 12-24
displaying, 12-23
M7-300/M7-400, 19-29
CPU performance data, 17-20
Creating
configuration, 7-2
connection, 10-8
S7 and M7 programs, 1-4, 5-6
Creating network configurations, procedure,
8-10
Creating programs, general procedure, 1-4
Cross-reference list, 14-6
Cyclic buffer (diagnostics), 17-11
D
Data block, 11-6
DB. See Data block
DDB file, 7-14, 17-15
Debugging, user program, 16-2
Deleting, blocks on the CPU, 15-9
Device database file, 7-14, 17-15
Diagnosing hardware. See System diagnostics
Diagnostic buffer
content, 17-11, 17-12
organization, 17-11
Diagnostic event, 17-11
Diagnostics. See System diagnostics
Diagnostics symbols, 17-4
Dialog boxes, 3-4
tabs, 3-4
Display module status. See System diagnostics
Display options, CPU messages/user-defined
diagnostic messages, 12-23
Displaying
available blocks, 17-21
connected programmable controllers, 5-15
CPU properties, 17-10
CPU time system, 17-19
module information, 17-2
stack contents, 17-23
Displaying module information,
M7-300/M7-400, 19-29
Standard Software for S7 and M7 – STEP 7 User Manual
C79000-G7076-C552-01
Index
Distributed I/O, 7-12
Download medium, 19-24
Downloading
blocks, 15-8
configuration, 7-24
connection table, 10-17
M7 application, 19-25
user program, 15-7
DP master, 7-12
arranging, 7-12
selecting, 7-12
DP slave, 7-12, 7-13
arranging, 7-13
diagnostics, 17-15
intelligent, 7-15
selecting, 7-13
DP slaves
arranging, 8-11
displaying, 8-11
E
Editing, archived project/library, 20-5
Editor
free-edit, 11-4
incremental input, 11-4
Emergency license, 2-3
Enable peripheral outputs, 16-13
Erasing, memory card, 15-14
Errors, installation, 2-9
Establishing connection to CPU, 16-7
Expansion module (EXM), 7-9
Exporting, symbol table, 6-8
F
Faulty modules. See System diagnostics
FB. See Function block
FBD. See Function Block Diagram
FC. See Function
FDL connection, 10-5, 10-14
Flash file system, 2-9
FMS connection, 10-5, 10-14
Force, 16-12
Force job
creating, 16-12
deleting, 16-12
Force values window, 16-10
displaying, 16-12
Forcing and modifying, differences, 16-11
Forcing variables, 16-10
Standard Software for S7 and M7 – STEP 7 User Manual
C79000-G7076-C552-01
Formatting, M7 destination medium, 19-7
Function block, 11-8
Function Block Diagram, 11-5
Function blocks
for communication connections, 10-5
for FMS connections, 10-7
Functional unit, S7 HiGraph, 11-9
Functions
for communication connections, 10-5
for FDL connections, 10-7
for ISO Transport connections, 10-7
for ISO-on-TCP connections, 10-7
G
GD, 9-2
GD circle, 9-2
GD communication, 9-2
See also Global data communication
GD packet, 9-2
GD status, 9-10
GD_RCV, 9-9
GD_SND, 9-9
GDS. See GD status
GET, 10-6
Global data, 9-2
Global data communication, 9-1, 9-2
configuration example, 9-11
configuring, 9-3
debugging, 9-10
example, 9-5
Global data table, 9-3
compiling, 9-6
GRAPH, 11-8
Graph group, 11-9
Group status, global data, 9-10
GST. See Group status
H
Help (online)
calling, 3-5
contents, 3-5
HiGraph, 11-9
HiGraph source file, 11-10
I
I stack, 17-23
Icons, STEP 7 objects, B-1
Index-3
Index
Importing
external source file, 5-8
symbol table, 6-8
Industrial Ethernet, 5-17, 10-5
Input/output address, 7-21
assigning, 7-22
Inserting
block, 5-7
station, 5-4
Installation requirements, 2-2
Installing, STEP 7, 2-7
Instance data block, 11-8
Intelligent DP slave, 7-15
Interface module, 7-9, 7-12
Interrupt assignment, checking, 2-11
Interrupt stack, 17-23
ISO Transport connection, 10-6, 10-14
ISO-on-TCP connection, 10-6, 10-14
L
L stack, 17-23
LAD. See Ladder Logic
Ladder Logic, 11-5
Language editor, starting, 11-4
Language editors, 11-2
Library, 5-7
archiving, 20-4
retrieving, 20-5
List box, 3-4
List entries, sorting, 14-5
Load memory, 15-4
Local data requirement, maximum, 14-9
Local data stack, 17-23
Local ID, 10-4, 10-8
Local node, 10-3
Local symbols, 6-2
Logic block, 11-6
M
M7, modules, 18-6
M7 application
deleting, 19-27
downloading to PLC system, 19-23
downloading via data medium, 19-26
downloading via MPI, 19-25
starting, 19-28
Index-4
M7 operating system
installing, 19-2
installing on hard disk, 19-10, 19-12, 19-14
installing on memory card, 19-9
reinstalling, 19-16
selecting, 19-4
M7 program, 5-6
assigning programmable module, 5-9
storing in project, 5-10
without configured hardware, 5-9
M7 programmable control system
boot medium, 19-6
destination medium, 19-2, 19-5
M7-300/M7-400 operating systems, 18-5
Mass memory, 18-7
Master system
highlighting, 8-12
in NETPRO, 8-12
selecting, 8-12
Memory and load concept, 15-4
Memory areas, 15-4
Memory card, 15-5, 15-14
assigning parameters, 2-8
downloading configuration, 7-26
erasing, 15-14
Memory reset, CPU, 15-6
Memory structure, CPU, 15-4
Memory utilization, 17-16
Message blocks, overview, 12-4
Message configuration, assigning display device, 12-8
Message number, 12-2
Message template, 12-2
Messages, 12-2
Modifying variables, 16-9
Module
arranging, 7-7
assigning parameters, 7-20
selecting, 7-7
specifying, 7-25
Module catalog, 5-4
Module information, displaying, 17-2
Monitoring variables, 16-9
Monitoring/modifying variables,
M7-300/M7-400, 19-29
MPI, 2-2, 5-17, 10-5
MPI address
communications processors, 8-14
function modules, 8-14
Standard Software for S7 and M7 – STEP 7 User Manual
C79000-G7076-C552-01
Index
Multi-user configuration, 2-12
Multicomputing, 7-18
Multipoint interface, 2-2
N
Naming conventions, for configuration data,
13-2
Nesting stack, 17-24
NETPRO
context functions, 8-13
displaying communication partners, 8-13
displaying DP slaves, 8-11
network configuration, 8-7
screen view, 8-7
starting, 8-7
starting connection configuration, 8-13
starting global data configuration, 8-13
Network, 8-2
Network configuration, 8-1, 8-3
downloading, 8-16
MPI subnet, 8-14
possibilities, 8-4
procedure, 8-4
with NETPRO, 8-7
with STEP 7, 8-5
Network connection
creating, 8-10
point-to-point connection, 10-13
S7 connection, 10-10
setting properties, 8-6
symbol, 8-10
Network parameters
changing, 8-8
entering, 8-8
Network properties, 8-5
Network view, 8-9
creating, 8-7
Networks (program), examples, 11-5
Node, local, 10-3
Node address
assigning, 7-21
changing, 8-15
Node interface, symbol, 8-9
Non-unique symbols, 6-5
Standard Software for S7 and M7 – STEP 7 User Manual
C79000-G7076-C552-01
O
Object
cutting, copying, pasting, 4-8
functions, B-3
opening, 4-7
properties, 4-8
renaming, 4-9
selecting, 4-10
Object hierarchy, B-1
building, 4-8
Object icons, B-1
Offline view, 5-12
Older projects, A-3
Online connection, to CPU, 16-7
Online help
calling, 3-5
contents, 3-5
Online view, 5-12, 5-13
non-deletable objects, 5-14
Operating mode, 15-2
diagnostics symbols, 17-5
displaying/changing, 15-2
Operating status messages, sending, 10-10
Operator control and monitoring
attributes, 13-1
configuring attributes, 13-3, 13-5
variables, 13-1
Operator control and monitoring attributes,
changing with CFC, 13-7
Optional packages, 1-3
Optional software, 18-2
OS object, inserting, 12-19, 13-8
Other station, 10-14
definition, 8-3
Other stations, 10-15
P
Parameters, assigning to modules, 7-20
Partner ID, 10-4, 10-8
Peripheral output, enabling, 16-13
PG/PC interface, 2-10
adapting, 5-17
Index-5
Index
Point-to-point connection, 10-5, 10-14
network connection, 10-13
unspecified partner, 10-14
PRINT, 10-7
Printing, 4-8
blocks, 21-1
configuration table, 21-1
diagnostic buffer content, 21-1
global data table, 21-1
module information, 21-1
project documentation, 21-1
reference data, 21-1
symbol table, 21-1
variable table, 21-1
Procedure
creating network configurations, 8-10
transferring data, 12-21, 13-10
PROFIBUS, 5-17, 10-5
PROFIBUS address, 7-13
Program structure
displaying, 14-8
layout, 14-8
parent/child, 14-9
tree, 14-8
Programmable controller, 5-13
Programming device, 5-12
Programming device/PC interface, 2-10
Programming language
CFC, 11-11
S7-Graph, 11-8
S7-HiGraph, 11-9
SCL, 11-7
setting, 11-4
Programming languages, 1-2, 11-4
Programming S7 CPU, 11-2
Programming steps
M7, 1-6
S7, 1-4
Project, 11-2
archiving, 20-4
creating, 5-2
from older STEP 7 versions, 5-3, A-3
opening, 4-2
procedure, 5-2
retrieving, 20-5
saving, 5-11
Project view, 5-12
Project window
offline, 5-12
online, 5-13
PUT, 10-6
Index-6
R
Rack, 7-6
arranging, 7-7
segmented, 7-8
selecting, 7-7
Rack (detailed view), 7-5
RAM, saving, 15-13
Reference data, 14-2
displaying, 14-4
generating, 14-3
representation, 14-5
use, 14-2
Reference data display, saving settings, 14-5
Reloading blocks, 15-10
Remote file system
Windows 95, 19-6
Windows NT, 19-6
Renaming, object, 4-9
RESUME, 10-6
Retrieving, 20-5
RK512, 10-13
Run-time meter, 17-19
S
S7 connection, 10-5, 10-9, 10-14
network connection, 10-10
S7 message configuration, overview, 12-2
S7 program, 5-6
assigning programmable module, 5-9
storing in project, 5-10
without configured hardware, 5-9
S7-Graph, 11-8
S7-HiGraph, 11-9
S7-SCL, 11-7
S7/WinCC Mapper
starting, 12-21, 13-10
transferring data, 12-21, 13-10
Save concept, in message configuration, 12-3
Saving
configuration, 7-23
CPU RAM to integrated EPROM, 15-13
to memory card, 15-14
Scan cycle times, 17-18
Scan rate, 9-8
SCL, 11-7
SDB. See System data block
Sequential control, 11-8
Setting the date, 17-19
Setting the time, 17-19
Standard Software for S7 and M7 – STEP 7 User Manual
C79000-G7076-C552-01
Index
Setting the time system, 17-19
Setting trigger, 16-8
SFB. See System function block
SFB12 BSEND, 10-6
SFB13 BRCV, 10-6
SFB14 GET, 10-6
SFB15 PUT, 10-6
SFB16 PRINT, 10-7
SFB19 START, 10-6
SFB20 STOP, 10-6
SFB21 RESUME, 10-6
SFB22 STATUS, 10-6
SFB23 USTATUS, 10-6
SFB8 USEND, 10-6
SFB9 URCV, 10-6
SFC60 GD_SND, 9-9
SFC61 GD_RCV, 9-9
Shared symbols, 6-2
SIMATIC Manager, 3-2
Simulation, 5-14
Smart Connect, 7-11
Software, creating, 5-6
Source file, 11-2, 11-10
creating with SCL/STL, 11-7
external, 5-8
S7-Graph, 11-8
SCL, 11-7
STL, 11-7
Stack contents, displaying, 17-23
Standard diagnostics, 17-14
Standard library, 5-7
Standard software, 1-1
START, 10-6
Start address, 7-21
State graph, 11-9
Statement List, 11-6
Station, 5-4
configuring, 5-4
creating, 5-4
other, 8-3
symbol, 8-9
Station window, 7-4
STATUS, 10-6
Status bar, example, 3-3
Status information, 17-8
Standard Software for S7 and M7 – STEP 7 User Manual
C79000-G7076-C552-01
STEP 7
definition, 1-1
installation, 2-7
installation errors, 2-9
programming languages, 1-2
Standard software, 1-1
starting the software, 3-2
user interface, 3-3
STL. See Statement List
STOP, 10-6
Structure, central, 7-6
Structured Control Language, 11-7
Subnet, 8-2
creating, 8-5
setting properties, 8-5
symbol, 8-9
Symbol
defining, 6-7
for network connection, 8-10
for node interface, 8-9
for station, 8-9
for subnet, 8-9
local, 6-2
shared, 6-2
Symbol table, 6-3, 11-2
editing, 6-6
importing, 6-8
importing/exporting, 6-8
Symbol-related message
assigning accompanying values, 12-13
assigning and editing, 12-11
assignment to symbol table, 12-11
overview, 12-11
procedure, 12-12
requirements, 12-11
signals, 12-11
Symbols
for diagnostics, 17-4
for operating mode, 17-5
operator control and monitoring, 13-6
unused, 14-12
System attributes
assigning, 12-6, 13-3
in symbol table, 6-3
System data block, 11-2
Index-7
Index
System diagnostics, 7-25, 17-1
System function blocks
for communication connections, 10-5
for PTP connections, 10-7
for S7 connection, 10-6
System memory, 15-4
T
Tabs, 3-4
Text editor, 11-4
Time synchronization, 17-19
Time system, displaying, 17-19
Toolbar, buttons, 3-3
Transfer log, 12-20, 13-9
displaying, 12-22, 13-11
Transferring data, procedure, 12-21, 13-10
Translating, user texts, 12-18
Trigger, 16-8
Trigger points, 16-2
Troubleshooting, 17-6
U
Uninstalling, STEP 7, 2-9
Unspecified connection partner, 10-4
Unspecified partner, PTP connection, 10-14
Unused symbols, displaying, 14-12
Uploading
blocks, 15-11
configuration, 7-24
URCV, 10-6
USEND, 10-6
User memory
compressing, 15-12, 17-17
displaying, 17-16
User memory utilization, 17-16
Index-8
User program, 11-2
creating, 11-1
debugging, 16-2
downloading, 15-7
User texts
procedure, 12-18
requirements, 12-18
translating and editing, 12-18
User-defined data type, 11-6
User-defined diagnostic message
creating and editing, 12-15
displaying, 12-23
overview, 12-15
procedure, 12-16
requirements, 12-15
USTATUS, 10-6
V
Variable, operator control and monitoring, 13-1
Variable table, 16-4
column width, 16-6
displaying columns, 16-6
editing, 16-5
maximum size, 16-6
saving, 16-3
syntax check, 16-6
uses, 16-4
Variables
modifying, 16-9
monitoring, 16-9
Version 1 project, A-2
W
WinCC attribute, assigning, 13-4
Windows NT, 2-12
Work memory, 15-4
Standard Software for S7 and M7 – STEP 7 User Manual
C79000-G7076-C552-01
Siemens AG
AUT E 146
Östliche Rheinbrückenstr. 50
D-76181 Karlsruhe
Federal Republic of Germany
From:
Your Name: _ _ _ _
Your Title: _ _ _ _
Company Name:
_
Street:
_
City, Zip Code_
Country:
_
Phone:
_
_
_
_
_
_
_
_
_
_
_
_
_
_
_
_
_
_
_
_
_
_
_
_
_
_
_
_
_
_
_
_
_
_
_
_
_
_
_
_
_
_
_
_
_
_
_
_
_
_
_
_
_
_
_
_
_
_
_
_
_
_
_
_
_
_
_
_
_
_
_
_
_
_
_
_
_
_
_
_
_
_
_
_
_
_
_
_
_
_
_
_
_
_
_
_
_
_
_
_
_
_
_
_
_
_
_
_
_
_
_
_
_
_
_
_
_
_
_
_
_
_
_
_
_
_
_
_
_
_
_
_
_
_
_
_
_
_
_
_
_
_
_
_
_
_
_
_
_
_
_
_
_
_
_
_
_
_
_
_
_
_
_
_
_
_
_
_
_
_
_
_
_
_
_
_
✄
Please check any industry that applies to you:
❒
Automotive
❒
Pharmaceutical
❒
Chemical
❒
Plastic
❒
Electrical Machinery
❒
Pulp and Paper
❒
Food
❒
Textiles
❒
Instrument and Control
❒
Transportation
❒
Nonelectrical Machinery
❒
Other _ _ _ _ _ _ _ _ _ _ _
❒
Petrochemical
Standard Software for S7 and M7 – STEP 7 User Manual
C79000-G7076-C552-01
1
Remarks Form
Your comments and recommendations will help us to improve the quality and usefulness
of our publications. Please take the first available opportunity to fill out this questionnaire
and return it to Siemens.
Please give each of the following questions your own personal mark within the range
from 1 (very good) to 5 (poor).
1.
Do the contents meet your requirements?
2.
Is the information you need easy to find?
3.
Is the text easy to understand?
4.
Does the level of technical detail meet your requirements?
5.
Please rate the quality of the graphics/tables:
Additional comments:
_ _ _ _ _ _ _ _ _ _
_ _ _ _ _ _ _ _ _ _
_ _ _ _ _ _ _ _ _ _
_ _ _ _ _ _ _ _ _ _
_ _ _ _ _ _ _ _ _ _
_ _ _ _ _ _ _ _ _ _
_ _ _ _ _ _ _ _ _ _
_ _ _ _ _ _ _ _ _ _
_ _ _ _ _ _ _ _ _ _
_ _ _ _ _ _ _ _ _ _
_ _ _ _ _ _ _ _ _ _
_ _ _ _ _ _ _ _ _ _
2
_
_
_
_
_
_
_
_
_
_
_
_
_
_
_
_
_
_
_
_
_
_
_
_
_
_
_
_
_
_
_
_
_
_
_
_
_
_
_
_
_
_
_
_
_
_
_
_
_
_
_
_
_
_
_
_
_
_
_
_
_
_
_
_
_
_
_
_
_
_
_
_
_
_
_
_
_
_
_
_
_
_
_
_
_
_
_
_
_
_
_
_
_
_
_
_
_
_
_
_
_
_
_
_
_
_
_
_
_
_
_
_
_
_
_
_
_
_
_
_
_
_
_
_
_
_
_
_
_
_
_
_
_
_
_
_
_
_
_
_
_
_
_
_
_
_
_
_
_
_
_
_
_
_
_
_
_
_
_
_
_
_
_
_
_
_
_
_
_
_
_
_
_
_
_
_
_
_
_
_
_
_
_
_
_
_
_
_
_
_
_
_
_
_
_
_
_
_
_
_
_
_
_
_
_
_
_
_
_
_
_
_
_
_
_
_
_
_
_
_
_
_
_
_
_
_
_
_
_
_
_
_
_
_
_
_
_
_
_
_
_
_
_
_
_
_
_
_
_
_
_
_
_
_
_
_
_
_
_
_
_
_
_
_
_
_
_
_
_
_
_
_
_
_
_
_
_
_
_
_
_
_
_
_
_
_
_
_
_
_
_
_
_
_
_
_
_
_
_
_
Standard Software for S7 and M7 – STEP 7 User Manual
C79000-G7076-C552-01