1
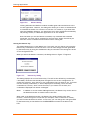
RealLink for Windows
V3.0
User Manual
All trademarks including but not limited to brand names, logos and product names referred to in this document are trademarks or
registered trademarks of Northgate Information Solutions UK Limited (Northgate) or where appropriate a third party.
This document is protected by laws in England and other countries. Unauthorised use, transmission, reproduction, distribution or
storage in any form or by any means in whole or in part is prohibited unless expressly authorised in writing by Northgate. In the event
of any such violations or attempted violations of this notice, Northgate reserves all rights it has in contract and in law, including
without limitation, the right to terminate the contract without notice.
© Copyright Northgate Information Solutions UK Limited, 2010.
Document No. UM70006276DR1
August 2010
Northgate Information Solutions UK Limited
Peoplebuilding 2
Peoplebuilding Estate
Maylands Avenue
Hemel Hempstead
Herts
HP2 4NW
Tel: +44 (0)1442 232424
Fax: +44 (0)1442 256454
www.northgate-is.com
Contents
Chapter 1
About this Manual
Purpose of this Manual ................................................................12
Related Documents ..............................................................13
Glossary..................................................................................14
Conventions .............................................................................16
User Comments .........................................................................18
Chapter 2
Introduction to RealLink
Overview.................................................................................20
RealLink Concepts......................................................................21
Configuration Files ...............................................................21
The Terminal Window ...........................................................21
The User Interface Management System .....................................22
Chapter 3
Installation
Introduction .............................................................................25
Installing the PC Software ............................................................26
Hardware and Software Requirements........................................26
Using the Setup Program ........................................................27
RealLink Files .....................................................................30
Configuring RealLink...................................................................32
The RFW.INI File..................................................................32
Command Line Parameters .....................................................32
SovereignX DLLs ..................................................................33
Host Software...........................................................................34
Reality Item Size .................................................................34
Chapter 4
Getting Started
Introduction .............................................................................35
Setting up a Session....................................................................36
Chapter 5
Using RealLink
Starting RealLink .......................................................................39
The Status Bar ....................................................................39
Connecting to a Host ............................................................40
Terminating a Session .................................................................42
Closing RealLink ..................................................................42
Using the Mouse and the Keyboard..................................................43
Editing Functions .................................................................43
Advanced Editing Functions ....................................................45
Mouse Shortcuts ..................................................................48
Function Keys .....................................................................48
History Pages......................................................................49
The Pause Key ....................................................................50
Entering Diacritical Characters ................................................50
V3.0
Contents-3
Contents
The Command Line Editor ............................................................51
Repeating your Last Command .................................................51
Repeating a Previous Command................................................51
Changing a Command............................................................52
Selecting Text to Edit ...........................................................52
Pre-loaded Commands...........................................................52
Using Replace to Edit Commands ..............................................53
Obtaining Help..........................................................................55
Help Menu .........................................................................55
Context-sensitive Help ..........................................................56
Reality Help .......................................................................56
Running Applications ..................................................................57
Controlling UIMS Applications ..................................................57
Resetting the Terminal Emulator ..............................................59
Printing ..................................................................................60
Printer Setup ......................................................................60
Print Window......................................................................62
Print Selection ....................................................................62
Direct Printing ....................................................................62
Spooled Printing ..................................................................62
Printing to a File .................................................................62
Chapter 6
Setting up Sessions
Configuration Files .....................................................................66
Creating a New Configuration File.............................................66
Modifying an Existing Configuration ...........................................67
Saving your Configuration File .................................................68
The Default Configuration ......................................................69
Setting up a Network Session.........................................................70
Setting Up an Asynchronous Session.................................................71
Asynchronous Dialog .............................................................71
Baud Rate....................................................................71
Parity .........................................................................71
Data Format .................................................................71
Flow Control.................................................................72
Stop bits .....................................................................72
Drop DTR on Exit ...........................................................72
Terminal Emulation ....................................................................73
Prism Emulation ..................................................................73
ANSI Emulations ..................................................................74
VT220 Emulation .................................................................74
Terminal Preferences..................................................................76
Page Size ..........................................................................76
History Pages......................................................................76
Function Keys .....................................................................76
Cursor Type .......................................................................77
Other Options .....................................................................77
Contents-4
V3.0
Contents
Screen Attributes.......................................................................79
Attribute Mapping ................................................................79
Font Control.......................................................................80
Chapter 7
File Transfer
Introduction .............................................................................84
LanFTU ...................................................................................85
Reality Host Utilities...................................................................89
HOST-WS ...........................................................................89
WS-HOST ...........................................................................90
PASS-DOS and SPASS-DOS .......................................................92
UNIX Host Utilities .....................................................................95
Chapter 8
Macros
Introduction .............................................................................98
Script Objects.....................................................................98
Menu Commands..................................................................98
Toolbars............................................................................99
Function-key and Mouse Button Definitions..................................99
Writing a Simple Macro................................................................100
Loading a Macro ........................................................................103
The Macro Select Command ....................................................103
Loading a Macro from the Command Line ....................................104
The Script Language ...................................................................105
Object Definitions................................................................105
Flow Control ......................................................................107
Strings ..............................................................................109
Comments .........................................................................109
Command Reference...................................................................97
Reserved Words.........................................................................97
Error Messages ..........................................................................98
Load-time Errors..................................................................98
Run-time Errors...................................................................98
Tokens .............................................................................99
Chapter 9
Problem Solving
Introduction .............................................................................101
Problems Running RealLink ...........................................................102
Asynchronous Communication Problems............................................104
Problems with LAN Sessions ..........................................................106
File Transfer Problems ................................................................107
LanFTU .............................................................................107
HOST-WS and WS-HOST..........................................................108
PASS-DOS and SPASS-DOS .......................................................108
V3.0
Contents-5
Contents
Appendix A The RFW.INI File
The Structure of the INI File .........................................................111
[RealLink] Section ................................................................110
[Editline] Section.................................................................114
[SaveCmds] Section ..............................................................115
[SaveReps] Section ...............................................................115
DLL Sections.......................................................................116
[executives] Section .............................................................116
[macros] Section..................................................................116
[WLANFTU] Section ..............................................................117
[rfwprint.dll] Section ............................................................117
[CharacterSets] Section .........................................................117
[CharacterMappings] Section ...................................................117
Key Codes ...............................................................................110
Appendix B ANSI Escape Sequences
Supported Escape Sequences.........................................................113
Page Manipulation Commands........................................................121
MDDPL ..............................................................................121
MDSDF ..............................................................................121
Video Attributes ........................................................................123
SGR .................................................................................123
RealLink Escape Sequences...........................................................124
Append .............................................................................124
Caps Lock Control ................................................................124
Clear History ......................................................................124
Copy ................................................................................124
Copy Table ........................................................................124
Copy Window......................................................................124
Draw ................................................................................125
Draw Rectangle ...................................................................127
Fill Rectangle .....................................................................127
MDISTEM ...........................................................................128
MDRDS ..............................................................................129
Num Lock Control ................................................................129
Paste ...............................................................................129
PC Status Report .................................................................129
Process Attributes................................................................130
Screen Update ....................................................................130
Set Selection ......................................................................130
Stream .............................................................................131
Appendix C File Transfer Filters
Filters ....................................................................................133
Filter Items ........................................................................133
Filter Attributes ..................................................................133
Character Translation Attributes ..............................................134
Contents-6
V3.0
Contents
HOST-WS Filters ..................................................................134
WS-HOST Filters ..................................................................135
The DIF Format .........................................................................138
DIF header items .................................................................138
Appendix D Connecting via a Terminal Server
Configuring the Terminal Server ...............................................140
Configuring the Host .............................................................141
Appendix E Application Help
The Help Application Command .....................................................143
Context-sensitive Help ..........................................................143
Writing a Help Application......................................................143
Appendix F Dynamic Data Exchange
Introduction .............................................................................147
Clients and Servers...............................................................147
Topics and Items .................................................................147
DDE Messages .....................................................................147
Configuring RealLink for DDE ...................................................148
Using DDE................................................................................149
Initiating a DDE Conversation ..................................................149
Terminating a DDE Conversation...............................................149
Sending Data to RealLink........................................................149
Obtaining Data from RealLink ..................................................149
Controlling RealLink .............................................................152
Index
List of Figures
Figure 5-1.
Figure 5-2.
Figure 5-3.
Figure 5-4.
Figure 5-5.
Figure 5-6.
Figure 5-7.
Figure 5-8.
Figure 5-9.
Figure 5-10.
Figure 6-1.
Figure 6-2.
Figure 6-3.
Figure 6-4.
Figure 6-5.
V3.0
RealLink Application Window.......................................39
Connect Dialog ........................................................40
Configure Table Dialog ..............................................46
Set Coordinate Format Dialog ......................................47
Command Line Editor ................................................51
Resume Dialog ........................................................57
Restore Key Dialog ...................................................58
Send Restore Key As Dialog .........................................59
Printer Font Dialog ...................................................61
Stream to File Dialog ................................................63
Setup Menu ............................................................65
File Open Dialog ......................................................67
File Save As Dialog ...................................................68
Communications Dialog..............................................70
Asynchronous Dialog .................................................71
Contents-7
Contents
Figure 6-6.
Figure 6-7.
Figure 6-8.
Figure 7-1.
Figure 7-2.
Figure 7-3.
Figure 7-4.
Figure 7-5.
Figure 8-1.
Figure 8-2.
Terminal Emulation Dialog ..........................................73
Terminal Preferences Dialog........................................76
Attribute Mapping Dialog............................................80
LanFTU Parameter Selection Dialog ...............................85
LanFTU Browse Dialog ...............................................87
RZ File Transfer Dialog ..............................................95
File Transfer Path Dialog ............................................95
SZ File Transfer Dialog...............................................96
Macro Select Dialog ..................................................103
Pull-down and Cascading Menus ...................................106
List of Tables
Table 2-1.
Table 5-1.
Table 5-2.
Table 6-1.
Table 7-1.
Table 8-1.
Table A-1.
Table A-2.
Table B-1.
Table B-2.
Table B-3.
Table F-1.
Contents-8
Keys for Horizontal Scrolling........................................21
Function Keys .........................................................48
Direct Print Modes....................................................61
VT220 Key Equivalents...............................................74
File Transfer Utilities ................................................84
Message Box Styles ...................................................112
Key Codes..............................................................110
Key Modifiers ..........................................................111
ANSI Escape Sequences ..............................................113
Additional Functions for DEC VT220 Support.....................118
Colour Options ........................................................126
DDE Messages..........................................................147
V3.0
Chapter 1
About this Manual
This chapter defines the purpose and intended readership of this manual,
and outlines the contents of each chapter. Conventions and references used
in the manual are also listed.
1-11
Purpose of this Manual
Purpose of this Manual
RealLink for Windows provides the Microsoft Windows user with a terminal emulator
for connecting to various types of host system. In particular, RealLink provides
features aimed at the users of UNIX, Reality, Sovereign and SovereignX. This manual is
intended for the user of a Northgate Personal Computer, or an IBM PC or 100%
compatible, and describes the operating procedures for RealLink. It is assumed that
the user is familiar with Microsoft Windows, and with the use of UNIX, Reality or
Sovereign on a normal terminal.
This manual contains the following chapters and appendices:
Chapter 1, About this Manual.
Chapter 2, Overview, provides a description of RealLink.
Chapter 3, Installation, tells you how to install RealLink on your PC and how to
configure Reality accounts to use the UIMS DataBasic API.
Chapter 4, Getting Started, tells you how to get up and running as quickly as possible.
Chapter 5, Using RealLink, describes how to start RealLink, connect to a host system
and use the various features of the RealLink terminal emulator.
Chapter 6, Setting up Sessions, describes in detail the configuration file options.
Chapter 7, File Transfer, describes the file transfer utilities provided with and
supported by RealLink.
Chapter 8, Macros, describes how to write RealLink macros, and gives full details of
the RealLink macro language and the commands you can use.
Chapter 9, Problem Solving, describes some of the more common operating problems
encountered and suggests how they might be overcome.
Appendix A, The RFW.INI File, describes the RFW.INI file and the configuration
options that it offers. It also lists the key codes for the keys which can be used when
defining keys in this file.
Appendix B, ANSI Escape Sequences, lists the escape sequences that are recognised
by a Prism terminal in ANSI Mode.
Appendix C, File Transfer Filters, describes how to create your own filters for use
with the HOST-WS and WS-HOST commands, and provides additional information about
the PASS-DOS command.
Appendix D, Connection via a Terminal Server, describes how to configure a terminal
server so that you can transfer files to and from a UNIX host using the Zmodem file
transfer commands.
Appendix E, Application Help, describes how you can use RealLink to display on-line
help for your applications.
Appendix F, Dynamic Data Exchange, describes how other Windows applications can
communicate with RealLink by means of Dynamic Data Exchange (DDE).
1-12
V3.0
Purpose of this Manual
Related Documents
Microsoft Windows User's Guide
PCi Standard Network Interface, Installation Guide
UNIX Connect, System Administration Guide
Prism Terminal Manuals
Models 12120, 12140, 12121 and 12141 Terminal Reference Manual
Models 12120, 12140, 12121 and 12141 Programmer's Reference Manual
Reality Manuals
Volumes 1 to 4.
SovereignX Manuals
Volume 2.
UIMS Manuals
DataBasic API, Reference Manual
DataBasic API, Quick Reference Guide
DataBasic API, Programmer's Guide
About this Manual
1-13
Glossary
Glossary
The following terms and abbreviations are used in this manual:
API
Application Programming Interface. The functions and subroutines that provide the
application programmer with access to a particular subsystem.
DDE
Dynamic Data Exchange - a message exchange protocol used in the Microsoft Windows
environment.
Ethernet
A widely-used local area network standard.
GUI
Graphical User Interface.
Hybrid Application
A character-display application which has been modified to use the UIMS API to exploit
some GUI functionality.
LAN
Local Area Network.
PCi
PC Integration.
Reality Environment
The Northgate Reality operating environment.
SNI
Standard Network Interface, part of the Northgate PC Integration software.
Solid Colour
A colour which is directly supported by your display adapter. Non-solid colours are
produced by using patterns of coloured dots to simulate colours that are not directly
supported. In order to ensure readability, RealLink uses only solid colours when
displaying text in its Terminal window.
Terminal page
The equivalent of the screen of a normal terminal. All output directed to the screen by
an application goes to the terminal page, and any cursor positioning commands are
relative to the top left-hand corner of this page. Note that this is not the same as the
Terminal window, which might not be displaying any part of the terminal page. See
Chapter 2 for more information.
Terminal window
The area of the RealLink window which is inside the menu bar, any scroll bars and the
window's border.
1-14
V3.0
Glossary
UIMS
User Interface Management System.
UIMS Application
An application which uses the UIMS API to fully exploit the Windows Graphical User
Interface.
UIMS API
The Application Programming Interface for the Northgate User Interface Management
System. The functions and subroutines that provide the application programmer with
access to the UIMS functionality.
About this Manual
1-15
Conventions
Conventions
This manual uses the following conventions:
Text
Bold text shown in this typeface is used to indicate input which
must be typed at the terminal.
Text
Text shown in this typeface is used to show text that is output to
the screen.
Bold text
Bold text in syntax descriptions represents characters typed exactly
as shown. For example:
RFW
Text
Characters or words in this italic font indicate parameters which
must be supplied by the user. For example, in
RFW filename
the parameter filename is italicised to indicate that you must
supply the name of an actual file on your system.
Italic text is also used for titles of documents referred to by this
document.
{Braces}
Braces enclose options and optional parameters. For example, in
RFW {config-file}
the parameter config-file is placed in braces to indicate that you
can supply the name of an actual file, but that you do not have to.
[param | param]
Parameters shown separated by vertical lines within square
brackets in syntax descriptions indicate that at least one of these
parameters must be selected. For instance,
/W[0 | 1]
indicates that either a 0 or a 1 must follow the /W switch (but not
both).
1-16
...
In syntax descriptions, indicates that the parameters preceding can
be repeated as many times as necessary.
SMALL CAPITALS
Small capitals are used for the names of keys such as RETURN.
CTRL+X
Two (or more) key names joined by a plus sign (+) indicate a
combination of keys, where the first key(s) must be held down
while the second (or last) is pressed. For example, CTRL+X indicates
that the CTRL key must be held down while the X key is pressed.
Enter
To enter means to type text then press RETURN. For instance, 'Enter
the WHO command' means type WHO, then press return.
V3.0
Conventions
In general, the RETURN key (shown as ENTER or on some
keyboards) must be used to complete all terminal input unless
otherwise specified.
Type
To type text or a key sequence means to press the keys concerned,
but not to press RETURN afterwards.
Press
Press single key or key combination but do not press RETURN
afterwards.
0xnn
This denotes the hexadecimal value, nn. For example, 0xA9
denotes the hexadecimal value A9 (decimal 169).
This symbol indicates how to carry out a task from the keyboard.
This symbol indicates how to carry out a task with the mouse.
About this Manual
1-17
User Comments
User Comments
A Comment Sheet is included at the front of this manual. If you find any errors or have
any suggestions for improvements in the manual please complete and return the form.
If it has already been used, send your comments to CJPS Technical Publications at the
address on the title page, or email [email protected].
1-18
V3.0
Chapter 2
Introduction to RealLink
This chapter provides an overview of RealLink for Windows.
2-19
Overview
Overview
RealLink provides the following features for the Microsoft Windows user:
Emulation of Northgate Prism P12 and P14 terminals (including ANSI terminal
emulation). This emulation includes printer support, plus up to 255 history pages
(depending on available memory) and mapping of monochrome terminal
attributes into colour. Extensions that provide support for Northgate Sovereign
and SovereignX systems are available separately.
Various ways of printing to a Windows printer are available, including: screen
dump of the RealLink window; printing of selected text from the RealLink window
or any back-page; direct printing from a host application; and PORT-DESPOOL.
Connection can be via asynchronous link and/or local area network.
Note:
In most cases, the PCi Standard Network Interface (supplied with your
RealLink package) must be loaded before network connections can be
used.
Several instances of RealLink can be run at the same time, thus allowing
simultaneous access to different systems or multiple connections to the same
system.
Data can be transfered between Reality and DOS, and UNIX and DOS in a variety
of formats to suit particular requirements.
A mouse can be used to select from application menus, with no changes to
existing host applications.
Macros can be written to automate frequent or complicated tasks.
Other Windows applications can communicate with RealLink by using the Windows
Dynamic Data Exchange (DDE) protocol.
An integral User Interface Management System (UIMS) allows host applications to
be written to take advantage of the Windows Graphical User Interface. Existing
applications can easily be converted to use certain UIMS features.
Other Windows applications can be launched and driven from within host
applications. DOS directories can be created and deleted, and DOS files deleted.
Full functionality of the RealLink software resides partly on the PC and partly on the
host system. The RealLink package consists of:
PC software providing terminal emulation. This is supplied on CD ROM.
Host software that, when used in conjunction with the RealLink PC software,
provides file transfer facilities and allows you to run applications which use the
UIMS. This is supplied with Reality V9.0.
Note:
2-20
The UIMS host software includes DataBasic subroutines which allow your host
applications to launch and drive other Windows applications.
V3.0
RealLink Concepts
RealLink Concepts
Configuration Files
The configuration for a connection to a host is determined by the settings in a
configuration (CFG) file. This specifies all the relevant parameters for that session,
including the following:
Whether the connection will be made via an asynchronous link or via the local
area network.
To which host connection will be made.
For an asynchronous session, which serial port will be used and the correct
communications set-up.
Which type of terminal emulation will be used.
The number of lines and columns on the terminal page (see below).
Note:
Refer to Chapter 6 for details of the parameters that can be set for each
session.
The Terminal Window
The terminal window is the area of the RealLink window which is inside the window
border and below the menu bar, but excluding any scroll bars. This area is used for
typing input to the host and for displaying text output from the host. The default
configuration gives you an 80 character by 25 line display in the default font with no
vertical scroll bar.
The number of lines and columns that can be displayed is determined by the font size
and the size of the terminal window, while the latter is limited in size by the screen
resolution and whether or not scroll bars are displayed. For example, on a standard
VGA display (640 by 480 pixels), 80 characters can only be displayed in the default font
if the terminal window occupies the whole of the available screen width. Adding a
vertical scroll bar reduces the width of the terminal window by two columns.
When you start RealLink, the terminal window is always made wide enough to display
80 characters in the default font, with the vertical scroll bar disabled. If, however, the
terminal window is not wide enough to display the required number of characters,
RealLink will automatically supply a horizontal scroll bar at the bottom of the window.
This will happen if you, for example, select a wider font, select 132-column mode, or
reduce the width of the window. The height of the RealLink window is automatically
adjusted to allow for the presence or absence of a horizontal scroll bar, so that the
correct number of lines is always displayed. When the horizontal scroll bar is present,
you can use the following key combinations to scroll the terminal window horizontally:
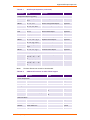
Table 2-1.
Keys for Horizontal Scrolling
Key Combination
Result
CTRL+PAGE UP
Scrolls left by one character less than the width of the
terminal window.
CTRL+ALT+PAGE UP
Scrolls left one character.
CTRL+PAGE DOWN
Scrolls right by one character less than the width of the
terminal window.
Introduction to RealLink
2-21
RealLink Concepts
CTRL+ALT+PAGE DOWN
Scrolls right one character.
If the height of the terminal window is reduced (or if a larger font is selected), only
part of the terminal page can be displayed. Normally, the bottom part of the page is
shown, but you can use the PAGE UP and PAGE DOWN keys, or the vertical scroll bar, to
scroll up if required. Note that the vertical scroll bar is not provided automatically;
but can be enabled with the Terminal Preferences command on the Setup menu. The
terminal window scrolls automatically when the cursor attempts to move below the
bottom edge (for example, if you press RETURN when you are at the bottom of the
window).
RealLink provides a range of font sizes, and also includes an auto-size option. With this
selected, changing the size of the window automatically selects the largest font that
will allow a full terminal page (see below) to be displayed. Once this has been done,
the size of the terminal window is adjusted to display a full terminal page. Similarly, if
you increase or decrease the size of the font, the size of the terminal window is
adjusted to display a full terminal page.
The Terminal Page
The RealLink terminal page is the equivalent of the screen of a normal terminal. All
output directed to the screen by an application goes to the RealLink terminal page,
and any cursor positioning commands are relative to the top left-hand corner of this
page. When you set up a RealLink configuration, you can specify the number of
columns and lines available on the terminal page – the default is 80 columns by 24
lines.
Note that the terminal page is not the same as the terminal window. The terminal
window can be changed in size and can be scrolled to display up to 255 history pages
(refer to chapters 5 and 6). The terminal page becomes larger when you make the
RealLink window larger, but it cannot be made smaller than the size set using the
Setup Terminal Preferences command. If the RealLink window is reduced in size, or if
the text font is made larger, only part of the terminal page can be displayed – this is
normally the bottom part, though you can scroll to any part of the terminal page. If
you minimise the window, or scroll to a history page, no part of the terminal page is
displayed; however, screen output from an application is still printed to the terminal
page, and can be displayed by restoring the window, or by returning to the current
page, as appropriate.
System Messages
System messages received from the host will be displayed in the bottom line of the
RealLink terminal window in the same way as on Northgate Prism P12 and P14
terminals.
The User Interface Management System
RealLink includes a User Interface Management System (UIMS) which provides a way for
programmers to create applications on Reality which make use of the facilities
provided by the Microsoft Windows graphical user interface. This software consists of
the following components:
2-22
An Application Programming Interface for DataBasic (DataBasic API). This provides
the commands that programmers use to access the RealLink user interface when
developing applications in DataBasic on a host system. In turn, RealLink provides
access to the graphical user interface functionality of the Microsoft Windows
environment.
V3.0
RealLink Concepts
A resource compiler for use by application programmers. This allows the graphical
objects used by an application to be defined on the PC rather than the host, thus
improving performance by sharing the processing and reducing communication
between the two systems. In addition, resources created in this way are loaded
only when the application is run, allowing a programmer to produce different
versions of an application, without having to change the host program.
There are three types of application program which make use of the UIMS DataBasic
API: true UIMS applications; NewView applications and ‘hybrid’ applications.
A UIMS application is one which uses only the advanced user-interface functions of
the RealLink software for input and output.
A NewView application is a character-display application whose presentation has
been improved by the addition of some advanced user-interface functionality.
The NewView features of UIMS allow existing applications to be converted with
minimal changes to the original code.
A hybrid application is also an improved character-display application. It uses
more features of UIMS than are available in NewView, but still relies largely on
standard character input and output for its user interface.
The User Interface Management System is described in detail in the UIMS manuals
listed in the Related Documents section in Chapter 1.
Introduction to RealLink
2-23
Chapter 3
Installation
This chapter tells you how to install RealLink on your PC and how to
configure Reality accounts to use the UIMS DataBasic API.
3-24
Introduction
Introduction
The RealLink software is in three parts:
1.
Windows software which must be installed on the PC or on a Network Server as
described in the procedure on page 3-27. If you install the software on a Network
Server, you can then set up individual workstations to use RealLink.
2.
RealLink host software which provides the HOST-WS, WS-HOST, PASS-DOS and
SPASS-DOS file transfer utilities (see Chapter 7). These are the only methods
available for transferring Reality files via asynchronous links; they can, however,
also be used over local area networks.
3.
UIMS host software which allows you to run UIMS and NewView applications.
The RealLink and UIMS host software is supplied with Reality V9.0.
The steps that System Managers must carry out to configure accounts to use the
RealLink and UIMS host software are described on page 3-33.
Installation
3-25
Installing the PC Software
Installing the PC Software
Hardware and Software Requirements
To use RealLink, your PC must meet the following minimum requirements:
A PC with Windows 7, XP, 2000, NT 4.0, ME or 98.
Note:
RealLink can be used on 64-bit versions of Windows 7 Professional,
Enterprise or Ultimate running in Windows XP mode. See Installation on
64-bit versions of Windows 7 on page 27 for details.
A CD ROM drive.
You will require at least 5Mb of free space on your hard disk.
Host Connection
Connection to a Northgate host may be via an asynchronous link or a local area
network.
Connection via asynchronous link can be local (direct connection), remote (via
telephone links and modems) or via a suitable wide area network.
The PC can be connected to a TCP/IP LAN.
Asynchronous Connection:
Host:
Northgate UNIX system,
– or –
Northgate SOVEREIGN system,
PC:
At least one free serial port for connection to the host.
LAN Connection:
Host:
Any host that supports a Telnet connection via a Local Area Network,
– or –
A Northgate UNIX system running UNIX-Connect version 1.3 Rev F or later,
– or –
A PC with Windows NT/2000 running Reality V9.0 or later.
PC:
A suitable LAN card or dial-up connection.
PCi Standard Network Interface software.
Installation on a Network Server
You can install RealLink on a stand-alone PC or on a Network Server. If you are
installing on a Network Server, you have two options:
1.
3-26
You can perform a Server installation (when prompted, choose the Server option
for your network) onto a shared network drive. Once you have done this, an
installation program option allows you to set up networked Workstations to use
RealLink (see page 3-29).
V3.0
Installing the PC Software
When using a Server installation option, you should note the following:
2.
If your users are running shared copy of Windows, the shared Windows
directory must not be a root-mapped drive.
If your users are running shared copy of Windows, and you are upgrading a
previous version of RealLink, all users must exit from Windows before you
start the installation.
You can copy the contents of the RealLink CD to a network drive and perform a
Local installation from there, instead of from the CD. If you have to install
RealLink on a number of PCs, this can be quicker than installing from CD, and
means that users at remote sites can install RealLink from the network.
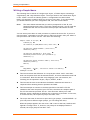
Installation on 64-bit versions of Windows 7
RealLink can be used on 64-bit versions of Windows 7 Professional, Enterprise or
Ultimate, but must be run in Windows XP mode. This must be installed as follows:
1.
Check that your PC is able to run in XP mode by following the instructions at
http://www.microsoft.com/windows/virtual-pc/support/configure-bios.aspx.
2.
If you can run in XP mode, download and install Windows XP Mode and Windows
Virtual PC.
3.
Start the Windows XP Mode virtual machine by selecting All Programs > Windows
Virtual PC > Windows XP Mode from the Start menu. Click the XP Mode Virtual
Machine to select it.
4.
Insert RealLink CD into your CD drive. From within Windows XP Mode, browse to
the CD using Windows Explorer.
5.
Run the program SETUP.EXE to install RealLink (follow the instructions in Using
the Setup Program below, starting from step 3).
6.
To make the WinSNI Configuration Editor available from the Windows 7 Start
Menu, copy the shortcut C:\Documents and Settings\XPMUser\Start
Menu\Programs\WINSNI Configuration Editor in Windows XP Mode to
C:\Documents and Settings\All Users\Start Menu\Programs on Windows 7.
You will then be able to start both RealLink and the WinSNI Configuration Editor
from either Windows 7 or Windows XP Mode. Note, however, that you can only
start them from Windows 7 if Windows XP Mode is not running.
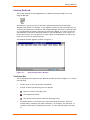
Using the Setup Program
The RealLink Setup program decompresses the RealLink program and other files and
copies them to your hard disk.
The following procedure describes how to install RealLink.
1.
Close any open applications.
Note:
Installation
If you are installing RealLink on a Network Server, you must be running
Windows from the server.
3-27
Installing the PC Software
2.
Insert RealLink CD into your CD drive. The installation program should start
automatically; if it does not start, select Run from the Start menu and enter the
following command:
drive:\SETUP
where drive is the letter of the drive containing the RealLink CD.
3.
When Setup starts, follow the instructions on the screen. When prompted, select
RealLink & PCSNI Software and then Full Install. When a welcome message
appears, click OK.
4.
You will then be asked the following:
Whether you want to install RealLink on your PC (Local) or on a Network
Server. If you are installing on a Network Server, refer to the notes on page
3-26.
For the 24-character Software Key supplied with your RealLink software.
Note:
Setup only asks you for the Software Key the first time you use your
RealLink installation CD. If you have a multi-user licence and are
installing on the second or subsequent PC, or if you are re-installing
RealLink, you will see a copyright message.
The name of your company. If you have a single-user licence, you will also be
asked for your name.
To select the files you want to install (local installation only). You can
choose from the following:
Rfw
The RealLink program.
Resource Compiler
You will only require this if you intend developing UIMS
applications.
Examples
Example macros and DataBasic programs. See page 3-30
for details.
Wlanftu
The LanFTU file transfer utility (see Chapter 7).
RPQs
These provide the Terminal Executive facilities needed by
certain applications. Your Northgate representative will
tell you which, if any, of these you need.
Sovereign Extensions
These provide additional facilities for use with Northgate
Sovereign and SovereignX systems (you can only install
these if you have purchased the appropriate software
key).
Note:
3-28
If you select this option when upgrading from an
earlier version of RealLink, you will be prompted
for your Sovereign Extensions software key.
To choose a drive on which to install RealLink.
V3.0
Installing the PC Software
For the name of a directory in which to install RealLink.
Note:
If you are installing RealLink on a Network Server, this directory
must be on a remote disk drive.
Whether or not you want to overwrite your default configuration file
(RFWDEF.CFG). If you have changed your default configuration, you should
answer No. If you answer Yes, your old default configuration file will be
renamed RFWDEF.OLD.
Whether or not you want to overwrite the printer table files, RFWPRINT.XLT
and SXPRINT.XLT (SovereignX extensions only). If you are using modified
printer tables, you should answer No. If you answer Yes, your old printer
table files will be renamed RFWPRINT.OLD and SXPRINT.OLD respectively.
When the installation is complete, the Program Manager will include a RealLink group,
containing the RFW icon.
Installing RealLink on a Network Workstation
If you have installed RealLink on a Network Server, you will need to set up each
workstation on which it will be used. This is done by running Setup from the RealLink
program directory on the Server.
1.
From the workstation to be set up, log on as a network supervisor.
2.
Start Windows on the Network Server.
3.
Start the Windows File Manager and select the RealLink program directory on the
Network Server.
4.
Select the file SETUP.EXE in this directory.
5.
Select the Run command from the File directory. When the run dialog appears,
press the END key, and type SPACE followed by “/n” (in lower case):
SETUP.EXE /n
Then click the OK button.
6.
When Setup starts, follow the instructions on the screen. You will be asked the
following:
To choose a local drive on which to install RealLink.
For the name of a directory in which to install RealLink's user files.
RealLink Files
When you run the RealLink Setup program, the RealLink files are installed in the
directory you specify; the directory is created if it does not already exist. Two subdirectories are also created to hold the RealLink resource and help files.
In addition, two files are created in other directories. The RealLink initialisation file,
RFW.INI is installed in your Windows program directory, and the font file appropriate
to your display type (RFWEGA.FON or RFWVGA.FON) is installed in the Windows
SYSTEM sub-directory.
Installation
3-29
Installing the PC Software
Note:
When you install RealLink on a network, the font file is installed on the
workstation, not on the server.
Examples
If, when you install RealLink, you select the examples option, the following files are
installed:
Macro Examples (user directory) –
APPLIC1.MAC
APPLIC2.MAC
EXAMPLE.MAC
Button bar bitmaps for macro examples (user directory) –
VCRBEGIN.BMP
VCREND.BMP
VCRFFWD.BMP
VCRFWD.BMP
VCRPAUSE.BMP
VCRPLAY.BMP
VCRREV.BMP
VCRSTOP.BMP
DDE Examples (EXAMPLES directory) –
RFW_DDE2.XLM
Excel macro sheet.
RFWDDE.DOC Word for Windows 2.0/6.0 template.
RFWDDE95.DOC
Word 95 template.
DataBasic Examples (EXAMPLES directory) –
These examples fall into two categories:
DataBasic source code for UIMS subroutines. These are intended to show
programmers how UIMS functions on the PC are called from a Reality host. The
same method can be used on hosts that do not support DataBasic.
EXECUTE
GETRESP
ISUIMSC
SENDKEYS
SYSTEMCO
RFWDEFS
RFWKEYS
Examples that demonstrate the use of the Execute, SendKeys and
SystemCommand subroutines:
SEARCH.WIN
WEX
WEXW
WHAT.IS
3-30
The UIMS Execute subroutine.
Called by the Execute, SendKeys and SystemCommand
subroutines.
The UIMS IsUimsCapable subroutine.
The UIMS SendKeys subroutine.
The UIMS SystemCommand subroutine.
Constant definitions for Execute, IsUimsCapable and
SystemCommand.
Constant definitions for SendKeys.
Demonstrates
Demonstrates
Demonstrates
Demonstrates
Execute and SendKeys.
Execute.
Execute.
SystemCommand.
V3.0
Configuring RealLink
Configuring RealLink
The RFW.INI File
The RFW.INI created in your Windows program directory is used to store user-definable
initialisation parameters. These are described in Appendix A.
Command Line Parameters
When you start RealLink, you can include various command line parameters and
switches. These allow you to:
Load a configuration file and automatically connect to the specified host.
Prompt for a configuration file when RealLink starts.
Set the number of history lines or pages, overriding the setting in any
configuration file.
Load a dynamic-link library to provide special functionality.
Control whether or not the RealLink window appears (for use when debugging
UIMS applications).
Execute a macro when RealLink starts.
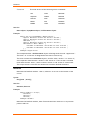
The complete syntax of the RFW command is as follows:
RFW {config-file} {/C} {/Ldll-name {...}} {/W1}{/Mmacro-file {...}}
The parameters and switches in the above have the following functions:
config-file
Is the name of a configuration file which will be loaded and used to
make the initial connection.
/C
Specifies that the Connect dialog should be displayed when
RealLink starts.
/Ldll-name
Specifies that the dynamic-link library, dll-name, should be loaded.
/W1
Specifies that the RealLink window is to remain visible when a UIMS
application is started. This switch is for use when debugging UIMS
applications.
/Mmacro-file
Specifies that the macro file, macro-file, should be loaded when
RealLink is started. See Chapter 8 for more details.
The command line parameters and switches can be entered in two ways:
By selecting the Run command from the Program Manager File menu and entering the
RFW command followed by the required parameters
By changing the properties of the RFW icon. You can also take copies of the RFW icon
and give each icon different properties.
Installation
3-31
Configuring RealLink
SovereignX DLLs
The RealLink Sovereign extensions include dynamic-link libraries that change the
keyboard mapping to emulate a SovereignX data entry keyboard. Each DLL has a name
with the form:
KBDDECountry.DLL
where Country is the international dialling code for the country concerned. For
example, the U.K. data entry DLL is called KBDDE44.DLL.
If you need to use SovereignX data entry, you should load the appropriate DLL when
you start RealLink, by using the /L option as described above. For example, to load
the U.K. data entry DLL, start RealLink as follows:
RFW /LKBDDE44.DLL
3-32
V3.0
Host Software
Host Software
The RealLink and UIMS host software must be installed by a Northgate service
engineer. Once the software is installed, System Managers must configure their
systems to allow users to access the software.
When the RealLink host software is installed, an account called REALLINK is created,
containing the HOST-WS, WS-HOST, PASS-DOS and SPASS-DOS file transfer utilities.
Similarly, when the UIMS host software is installed, a UIMS account is created,
containing the catalogued subroutines for the DataBasic API. When the software is first
installed, however, the utilities and subroutines respectively are available only from
these accounts. Before you can use the file transfer utilities or UIMS applications from
any other account, the account must be set up so that it has access to the appropriate
software. You can add RealLink and UIMS to several accounts at once by using the
SETUP-ACCOUNT command. Refer to the Reality Reference Manual, Volume 3:
Administration for details.
Reality Item Size
By default, the largest item that can be created on the host with the WS-HOST
command is approximately 30,000 bytes. If the data exceeds this maximum size, the
excess data will be written to overflow items with an incrementing suffix of .0001,
.0002 etc. appended to the item-id.
If you need to create items larger than 30,000 bytes with WS-HOST, you can configure
RealLink to permit this.
Warning
The maximum item size must not be set to larger than 30,000 bytes on host systems
with operating system releases prior to release 7.0.
The maximum item size is determined by the contents of attribute 51 of item
RL.OPTIONS in the file RL.BP in the RealLink account. If this attribute does not exist,
the maximum item size defaults to 30,000 bytes.
The user can reduce the set maximum item size by using a filter (refer to Appendix C
for details).
Workspace Configuration
The larger the item, the longer Reality will require to create it. However, the time
taken also depends on the maximum amount of workspace that is available and the
size of the Workspace Increment. The larger these two parameters are, the quicker
the item will be created.
Users who expect to regularly create items larger than 30,000 bytes should have a
Security Profile which defines a Workspace Increment of 256 or larger and a Logon
Workspace of a similar size. The Maximum Workspace Size should be as large as
possible. Refer to the description of the SSM command in your Reality system
documentation for details of how to set these parameters.
Installation
3-33
Chapter 4
Getting Started
This chapter shows you how to get started with RealLink once you have
installed the PC software. It covers the basics of setting up an initial
network or asynchronous session, and shows you how to start RealLink and
how to close it down when you have finished.
4-34
Introduction
Introduction
When you start RealLink or create a new configuration, a default configuration is
selected. This is suitable for communication with all Reality systems and in most cases
you will not need to change anything. However, successful communication between
two computer systems depends on their both using the same communications
parameter settings. If you experience any problems with an asynchronous session, you
should check that the host and the PC are both using the same settings for the
following:
Baud rate
Parity
Data format (number of data bits)
Number of stop bits
Type of flow control
For asynchronous connections, your host system manager will tell you the current
settings for the port you are using.
In addition, for both Network and asynchronous sessions, you should check that you
are using the correct terminal emulation – the default is ANSI emulation. Note,
however, that an incorrect setting may only give problems with some applications.
Refer to Chapter 6 for more information about these parameters. Chapter 5 describes
in detail how to use RealLink, while Chapter 9 describes some common problems and
suggests solutions.
Getting Started
4-35
Setting up a Session
Setting up a Session
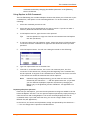
To set up a session proceed as follows:
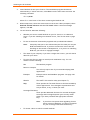
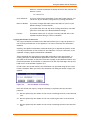
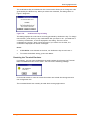
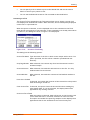
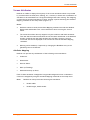
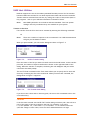
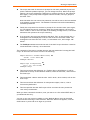
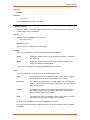
1.
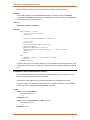
Start RealLink by double-clicking the RFW icon.
The title bar of the RealLink window appears as follows:
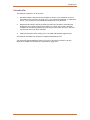
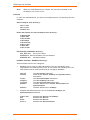
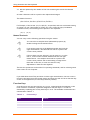
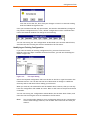
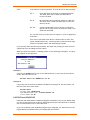
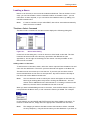
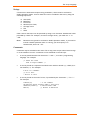
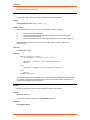
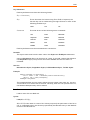
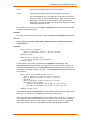
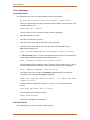
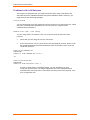
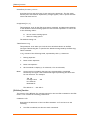
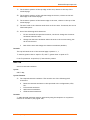
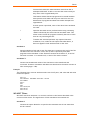
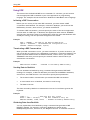
2.
Pull down the Connection menu and select the Connect command. You will see a
dialog box similar to the following:
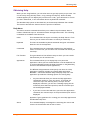
3.
The default configuration selects asynchronous port COM1 – if you are using COM2,
3 or 4 enter this in the Filename or Network Name text box. For a network
session, replace the port number with the network name of the host to which you
intend connecting.
There are a number of parameters that you can set up, but this is sufficient to
allow you to connect to your host.
Notes:
4-36
Network connections are only available if RealLink is used in combination
with the PCi Standard Network Interface.
For Network connections you will be able to connect to any host that can be
resolved by TCP/IP, provided it supports the default protocol. The host does
not have to appear in your SNI configuration file. Hosts that do not support
the default protocol must, however, have an entry in the SNI configuration
file – refer to the PCi Standard Network Interface Installation Guide for
details.
4.
Click the OK button to connect to your host system – the Logon prompt appears
(for asynchronous sessions to Reality systems, you must press ENTER). You can now
log on and use the system in the normal way.
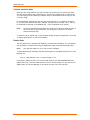
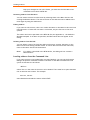
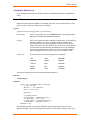
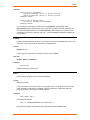
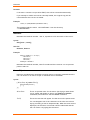
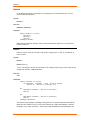
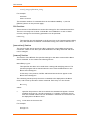
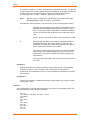
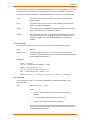
5.
When you have finished using the host, log off in the normal way and then close
RealLink by selecting Exit from the File menu. The following message appears:
V3.0
Setting up a Session
Caution
You should never disconnect without first logging off from the host. In the case of
an asynchronous connection, this will simply leave you logged on – you can
reconnect at a later time and continue where you left off, though this is not
recommended for reasons of security. In the case of a LAN connection, however,
the host will be disconnected and any open files closed – this could result in loss
of data.
Select OK to disconnect from the host, or Cancel to continue the current session.
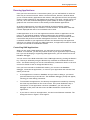
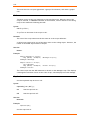
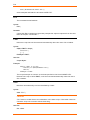
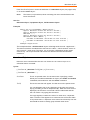
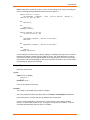
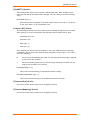
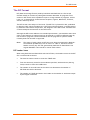
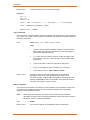
6.
You will now see the following dialog:
You must now decide whether to save the configuration information:
If you intend connecting to the host regularly, or have changed any
configuration parameters as described in Chapter 6, click Yes to save your
configuration.
If you do not want to keep the new configuration, click No.
You can return to RealLink by clicking Cancel. You will not lose your configuration
information, but will need to use the Connect command to re-establish your
connection.
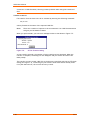
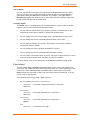
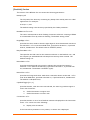
7.
If you answer Yes to the previous message, you will see the following dialog box:
This allows you to choose a name for your configuration file – a name is suggested
at the top of the dialog, but you can change this to any valid DOS filename. You
are recommended to use the extension .CFG, so that the file will be listed in the
Getting Started
4-37
Setting up a Session
Connect and File Open dialog boxes. If you do not specify an extension, .CFG will
be added automatically.
Next time you want to log on to this host, you can simply select the Connect command
and then choose your CFG file from the list that appears.
4-38
V3.0
Chapter 5
Using RealLink
This chapter describes how to start RealLink, connect to a host system and
use the various features of the RealLink terminal emulator.
5-38
Starting RealLink
Starting RealLink
The normal method of starting RealLink is by double-clicking the RFW icon in the
Program Manager.
Alternatively, you can use any of the other methods described in the Microsoft
Windows User Guide. For example, if you regularly connect to one particular host, you
could use the Properties command on the Program Manager File menu to add the name
of a configuration file and any switches you need (see Chapter 3), so that you will be
automatically connected to that host whenever you start RealLink. If you connect to
more than one host, you can take one or more copies of the RealLink icon and set up
each one to connect to a different host.
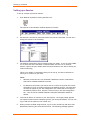
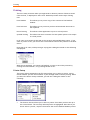
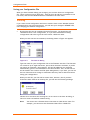
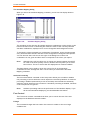
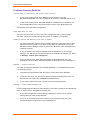
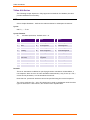
The RealLink window appears as shown in Figure 5-1.
Figure 5-1.
RealLink Application Window
The Status Bar
This is displayed at the bottom of the RealLink window as shown in Figure 5-1. It shows
the following:
A brief report on the current state of RealLink.
A panel in which the following icons can appear:
Pause is in effect (see page 5-50).
The keyboard is locked.
The Stream to File option is selected (see page 5-63).
A Compose button. This allows you to enter diacritical characters. These are
constructed by combining two other characters – for example, the character “ä”
could be constructed by combining the letter “a” with a double-quote character
(").
Using RealLink
5-39
Starting RealLink
When selected, the Compose button is displayed in a different colour to the rest
of the status bar.
Caps and Num buttons. These have the same effect as the CAPS LOCK and NUM
LOCK keys on the keyboard. When selected, they are displayed in a different
colour to the rest of the status bar.
You can hide the Status bar, if required, by using the Status Bar command on the
Setup menu.
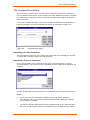
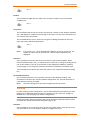
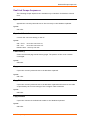
Connecting to a Host
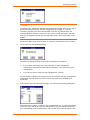
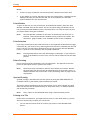
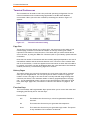
Once you have started RealLink, you can connect to a remote host. There are two
ways of doing this:
You can select the Connect command from the Connection menu. The dialog box
shown in Figure 5-2 will appear.
Figure 5-2.
Connect Dialog
This command allows you to select a configuration file and then attempts to
establish a connection using the information from this file. Note, however, that
you do not need a configuration file to make a connection. If you enter the name
of a host for which there is no configuration file, a new configuration will be
created using the default settings stored in the file RFWDEF.CFG and a connection
will be attempted. If you want to retain this new configuration for later use, you
should save it before attempting a new connection or leaving RealLink. Chapter 6
describes how to save your configuration and how to change your default settings
by modifying the RFWDEF.CFG file.
Note:
If you start RealLink with the /C command line switch, the Connect
dialog will be displayed automatically.
You can start RealLink with the appropriate configuration file already loaded. This
is done by including the name of the configuration file in the RFW command line.
For example, the command
C:\RFW\RFW.EXE ACCOUNTS.CFG
starts RealLink with the file ACCOUNTS.CFG already loaded. Connection to the
host system specified in this file will be established automatically, ready for you
to log on.
If you regularly connect to a particular host system, you can use the Properties
command on the Program Manager File menu to add the name of a configuration
5-40
V3.0
Starting RealLink
file to the command line for your RFW icon. You can also create additional RFW
icons and set up each for connection to a different host.
Note:
There are various switches that you can use on the RFW command line,
in addition to the name of a configuration file. These are summarised in
Chapter 3 and described in detail with the features to which they
relate.
Once the connection has been successfully made, you will be presented with the logon
text and prompt produced by the host to which you are connected. You can now log on
and run applications in the same way as you would from a normal terminal.
Network Connections
Network connections are only available if RealLink is used in combination with the PCi
Standard Network Interface. If you attempt to start a Network session, but have not
installed the PCSNI network interface software, you will see a warning message – refer
to the PCi Standard Network Interface Installation Guide for details.
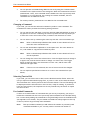
Using Multiple Connections
Although you can load only one configuration file into RealLink at a time, it is possible
to connect to a second host (or to a second account on the same host) by starting a
second instance of RealLink. The number of instances that you can use simultaneously
depends on the amount of memory you have in your PC, and the other Windows
applications that are running.
When you are using more than one instance of RealLink, the names of the
configuration files for the different sessions will appear on the Connection menu. The
sessions are numbered 1, 2, 3, etc. in the order in which they were started; the
current session is not listed. You can quickly swap to another session by selecting the
appropriately numbered command from the Connection menu.
ALT+1, ALT+2, etc.
The Connect New RfW command on the Connection menu will start a new instance of
RealLink. The Connect dialog (see Figure 5-2) is displayed to allow you to enter a host
name or choose a configuration file.
Using RealLink
5-41
Terminating a Session
Terminating a Session
When you have finished working on the host system you should log off and disconnect
by selecting the Disconnect command from the Connection menu. The following
message will appear.
Caution
You should never disconnect without first logging off from the host. In the case of an
asynchronous connection, this will simply leave you logged on – you can reconnect at a
later time and continue where you left off, though this is not recommended for
reasons of security. In the case of a LAN connection, however, the host will be
disconnected and any open files closed – this could result in loss of data.
Select OK to disconnect from the host, or Cancel to continue the current session.
Note:
You can have only one configuration file loaded at a time. If you attempt to
start a new session without first disconnecting, the message shown above
will appear. Select OK to disconnect from the current host and start a new
session, or Cancel to continue the current session.
Closing RealLink
You close RealLink in the same way as any other Windows application:
By selecting Exit from the File menu.
By selecting Close from the System menu
Double-click the System menu box.
Press ALT+X.
Note:
You cannot close RealLink by pressing ALT+F4, since this key combination is
used by the terminal emulator.
If you have an open connection, you will be asked if you want to disconnect. Similarly,
if you have changed the configuration in any way and have not saved the configuration
file, you will be asked if you want to save your changes.
5-42
V3.0
Using the Mouse and the Keyboard
Using the Mouse and the Keyboard
In common with other Windows applications, RealLink can be controlled using both a
mouse and the keyboard. You can select menus and commands in the same way as you
would in any other Windows application and, once you have connected to a host, you
can use the keyboard in the same way as on a normal terminal. The cursor appears as
a flashing underline, a vertical bar, or a solid block, depending on the setting chosen
in the Terminal Preferences dialog.
Editing Functions
In addition to the normal terminal functions, RealLink allows you to select text
displayed in the terminal window, copy it to the Windows clipboard and paste it back
into RealLink or into any other Windows application. Similarly, you can paste text from
the clipboard into RealLink.
There are many uses for the RealLink editing functions. The following list gives just a
few suggestions:
You can repeat previously executed commands by copying them from the screen
and pasting them back into RealLink.
You can prepare complex commands in a text editor such as Notepad, and then
transfer them to RealLink via the clipboard.
You can copy the output of an English command into a report or other document
which is being prepared with Windows Write or some other word processor.
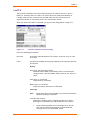
Selecting Text
You can select text in the terminal window with either the mouse or the keyboard.
Selection with the mouse is the same as in any other Windows application – point to
the start of the required text, hold down the left mouse button, and drag the mouse
to the end of the text. To select text with the keyboard, however, you must change
RealLink into selection mode, as follows:
1.
Press the Mode key to set the keyboard into selection mode. The Mode key is
normally SCROLL LOCK, but is defined in the RFW.INI file and can therefore be
changed if required (for details, see Appendix A).
2.
Move the cursor to the start or end of the section of text that you want to select.
3.
Hold down the SHIFT key and move the cursor to the opposite end of the text
section.
4.
Release the SHIFT key.
5.
Press the Mode key again to return the keyboard to its normal mode of operation.
While in selection mode you can use the following keys to
move the selection cursor and select text:
The up, down, left and right cursor keys.
HOME moves the cursor to the start of the current line. If the cursor
is already at the start of a line, HOME moves the cursor to the top
of the RealLink window.
Using RealLink
5-43
Using the Mouse and the Keyboard
END moves the cursor to the end of the current line. If the cursor is
already at the end of a line, END moves the cursor to the end of the
last line in the RealLink window.
PAGE UP moves the cursor to the previous page.
PAGE DOWN moves the cursor to the next page.
CTRL+HOME moves the cursor to the start of the oldest history line.
CTRL+END moves the cursor to the end (column 80 or 132) of the
last line of the current terminal page.
Whether you use the mouse or the keyboard, text which is selected is shown
highlighted; that is, shown in white letters against a dark background, or in dark
letters against a coloured background. How selected text appears depends on your
screen colours.
Note:
While you are selecting text, the terminal emulator window will scroll if the
pointer or cursor is taken beyond the edge of the window.
Column Selection
The method described above selects text line by line. For example, if you position the
cursor in the middle of a line, then hold down SHIFT and move the cursor down one
line, the text from the original cursor position to the end of that line will be selected,
plus that from the start of the next line to the new cursor position. There are,
however, occasions when you want to select a column of text from the middle of the
display. RealLink provides a column selection mode which allows you to do this.
You place RealLink into column selection mode by holding down the ALT key as you
start to make your selection. For example, to select a column of text with the mouse,
hold down the ALT key before starting to drag the mouse pointer. Once you have
started dragging you can release the ALT key.
Copying your Selection to the Clipboard
Once you have made your selection, you can use the Copy or Append command on the
Edit menu to copy the text onto the clipboard.
Copy replaces the current contents of the clipboard with the selected text.
CTRL+INSERT
If there is already text on the clipboard, Append adds the selected text to the
end. If, however, the clipboard contains data in another format (a bitmap, for
instance), Append is not available.
Note:
ALT+INSERT
You can also use the advanced editing functions described on pages 5-45 to
5-48.
Once on the clipboard, the text can be pasted back into RealLink or into other
Windows applications.
5-44
V3.0
Using the Mouse and the Keyboard
When copying text to the clipboard there are a number of points of which you should
be aware:
The Strip Spaces command on the Edit menu allows you to choose whether or not
trailing spaces at the ends of lines are deleted. This applies to both normal (line)
and column selection modes.
A selection that extends for more than one line will have a carriage return
character added to the end of each line. Similarly, if a selection ends in the lefthand margin, it will be terminated with a carriage return.
Only standard characters can be copied. Special characters, such as line drawing
or video attribute characters, will be converted to spaces.
Text which is displayed with the Blank screen attribute will be converted to
spaces.
Paste
This command copies text from the clipboard to the current cursor position. Each
character is sent to the host system as though it was typed from your PC keyboard.
Previously entered host commands can be copied and re-entered using Paste. The text
on the clipboard can be text that has been copied within RealLink or from another
Windows application. If there is no text-format data on the clipboard, this command
will not be available.
SHIFT+INSERT
Advanced Editing Functions
In addition to the simple Copy and Paste commands described above, you can use the
advanced editing functions described below.
Copy Window
If the text you wish to copy occupies the complete RealLink window, you can use the
Edit Copy Window command. This copies all the text you can currently see in the
RealLink window to the clipboard. There is no need to select the text you require
before using this command.
Copying Tables
The Copy Table command on the Edit menu allows you to copy text that is formatted
as a table on the RealLink screen to the clipboard in a format suitable for pasting into
other Windows applications. The text is converted as specified by the Configure Table
command.
The Configure Table command on the Edit menu allows you to specify a format for
tables copied from the RealLink window to the clipboard. When you select this
command, the dialog box shown in Figure 5-3 appears.
Using RealLink
5-45
Using the Mouse and the Keyboard
Figure 5-3.
Configure Table Dialog
This dialog has the following options:
Parsing Separator Enter the character or characters that separate the columns of the
table on the screen.
Note:
To specify a control or non-printable character, enter a
backslash, followed by two upper case hexadecimal digits
representing the ASCII code for the character. For
example:
Tab
\09
Carriage return
\0D
Line feed
\0A
Backslash
\5C
When the text is copied to the clipboard, leading and trailing
occurrences of the Parsing Separator will be ignored.
Paste Column Separator
Enter the character or characters that will separate the columns of
the table when they are copied to the clipboard.
Paste Row Separator
Enter the character or characters that will separate the rows of the
table when they are copied to the clipboard.
Not formatted on display
If this option is not selected, the table to be copied is assumed to
be displayed as a table in the RealLink window. Consecutive
multiple Parsing Separators on the screen will be converted to a
single Paste Column Separator on the clipboard.
With this option selected, each occurrence of the Parsing Separator
will be converted to a Paste Column Separator.
For example, if the Parsing Separator is set to an asterisk (*) and
the Paste Column Separator to a caret (^), with Not formatted on
display not selected, the following table on the screen:
22***RealLink
will be copied to the clipboard as:
22^RealLink
5-46
V3.0
Using the Mouse and the Keyboard
However, with Not formatted on display selected, each asterisk will
become a caret:
22^^^RealLink
Save as Default
If you use a particular combination of the above table options, you
can save it as your default configuration by clicking this button.
Reset to Default
If you have changed the table options and want to return to your
default settings, click this button.
If you hold down the CTRL key while clicking this button, the table
options are returned to the RealLink default settings.
Execute
This button allows you to copy the currently selected text to the
clipboard without having to return to RealLink.
Copying the Position of the Cursor
The Copy Coordinates command on the Edit menu allows you to copy the position of
the currently selected text to the clipboard. If no text is selected, the command is
disabled.
Similarly, the Append Coordinates command allows you to append the position of the
currently selected text to the contents of the clipboard. If no text is selected, or the
clipboard is empty, Append Coordinates is disabled.
These commands are useful when writing DDE commands in other applications, or
creating hot spots in UIMS NewView applications. Note that vertical positions are
specified as the number of characters from the top edge of the RealLink window, and
horizontal positions as the number of characters from the left-hand edge; the top lefthand corner of the window is position 0, 0.
In both cases, the format used for the coordinates is as specified using the Set Coord.
Format command. When you select this command, the dialog box shown in Figure 5-4
appears.
Figure 5-4.
Set Coordinate Format Dialog
Enter the format you require, using the following to represent the start and end
positions:
X1
Will be replaced by the number of the column containing the start of the selected
text.
X2
Will be replaced by the number of the row containing the start of the selected
text.
Y1
Will be replaced by the number of the column containing the end of the selected
text.
Using RealLink
5-47
Using the Mouse and the Keyboard
Y2
Will be replaced by the number of the row containing the end of the selected
text.
All other characters will be copied to the clipboard unchanged.
The default format is:
(StartColumn,StartRow) (EndColumn,EndRow)
For Example, if the format “(X1,Y1) (X2,Y2)” is specified, and text is selected starting
at column 10, row 5 and ending in column 35, row 9, when the Copy Coordinates
command is used, the following will be placed on the clipboard:
(10,5) (35,9)
Mouse Shortcuts
You can carry out the following operations using the mouse:
You can select a complete word (delimited by spaces) by
double-clicking the left mouse button.
If you select some text in the RealLink window and click the
right mouse button, the selected text will be copied to the
current cursor position.
If do not have any text selected, you can point to, or to the
left of, a word in the terminal window and click the right
mouse button – the complete word will be copied to the
current cursor position with a terminating carriage return.
Note that in this case, a word can consist of only
alphanumeric characters and hyphens.
The last two operations can be useful for repeating commands, and for selecting items
from a menu or list of options.
If you hold down the ALT key and then click the right mouse button, the text cursor is
moved to the same line as the mouse pointer and then the code for the F6 function key
is sent to the application (as if this key had been pressed).
Function Keys
Some PCs have only ten function keys (F1 to F10), compared with the eighteen on the
Prism terminal. In RealLink, operations assigned to function keys F11 to F18 are
obtained by combining the ALT key with keys F1 to F8. The available combinations are
summarised in Table 5-1.
Table 5-1.
5-48
Function Keys
Prism
RealLink
F1 to F10
F1 to F10
F11 to F20
ALT+F1 to ALT+F10
SHIFT+F1 to SHIFT+F10
SHIFT+F1 to SHIFT+F10
V3.0
Using the Mouse and the Keyboard
SHIFT+F11 to SHIFT+F20
ALT+SHIFT+F1 to ALT+SHIFT+F10
CTRL+F1 to CTRL+F10
CTRL+F1 to CTRL+F10
–or–
CTRL+SHIFT+F1 to CTRL+SHIFT+F10
CTRL+F11 to CTRL+F14
ALT+CTRL+F1 to ALT+CTRL+F4
–or–
ALT+CTRL+SHIFT+F1 to ALT+CTRL+SHIFT+F4
CTRL+SHIFT+F1 to CTRL+SHIFT+F10
CTRL+F1 to CTRL+F10
–or–
CTRL+SHIFT+F1 to CTRL+SHIFT+F10
CTRL+SHIFT+F11 to CTRL+SHIFT+F14
ALT+CTRL+F1 to ALT+CTRL+F4
–or–
ALT+CTRL+SHIFT+F1 to ALT+CTRL+SHIFT+F4
Notes:
The Windows functions assigned to these key combinations are not available in
RealLink. For example, you cannot close RealLink by pressing ALT+F4, nor can you
obtain help by pressing F1 (refer to the appropriate sections of this chapter for
alternatives).
Function keys F19 and F20 are included for compatibility with the Northgate P30
terminal.
If you are running RealLink on Windows 95, the key combinations ALT+F6 and
ALT+SHIFT+F6 are not available. To obtain the P12 combinations F16 and SHIFT+F16,
select Compose (see page 5-50) and then press F16 or SHIFT+F16 are appropriate.
CTRL+F15 to CTRL+F20 and CTRL+SHIFT+F15 to CTRL+SHIFT+F20 cannot be used
on RealLink.
History Pages
RealLink automatically retains information that has scrolled out of its terminal
window. The number of lines retained is set with the Terminal Preferences command
on the Setup menu: the default is 168; the maximum 6120.
As an alternative to the number of history lines, you can specify the number of history
pages to be retained. Note, however, that the history page size depends on both the
number of columns and the number of lines specified in the configuration.
The following keys allow you to view the history pages:
PAGE UP
Displays the previous (next older) history
page.
ALT+PAGE UP
Scrolls the display up one line.
PAGE DOWN
Displays the next (more recent) history page.
ALT+PAGE DOWN
Scrolls the display down one line.
Using RealLink
5-49
Using the Mouse and the Keyboard
ALT+END
Displays the current page.
ALT+HOME
Displays the oldest history page.
Note:
These keys can only be used to access history pages when the
keyboard is not in selection mode. The keyboard mode is set
using the Mode key (see page 5-43).
If the vertical scroll bar is enabled, you can also use the mouse
to access the history pages.
The Pause Key
The PAUSE key has the same function as the HOLD key on a Prism terminal. It prevents
the screen display changing until PAUSE is pressed a second time. While pause in in
effect, an icon is displayed in the status bar, together with the message “Press 'Pause'
again to continue”.
Entering Diacritical Characters
The Prism terminal has a COMPOSE CHARACTER key that allows you to enter diacritical
characters – characters that are constructed by combining two other characters. For
example, you could construct the character “ä” by pressing COMPOSE CHARACTER,
followed by the letter “a” and the double-quote character (").
In RealLink you can produce the same effect by using either the Compose button on
the status bar, or the right-hand ALT key (labelled ALT GR on most PC keyboards).
5-50
V3.0
The Command Line Editor
The Command Line Editor
There are many occasions when you will want to repeat a previous host command, or
use a command that is similar to one you have just used. RealLink includes a command
line editor which allows you to select a previous command and change it as required
before execution.
To use the command line editor, select the Line Edit command from the Edit menu, or
press CTRL+RETURN. You will see a dialog box similar to that shown in Figure 5-5.
Figure 5-5.
Command Line Editor
Repeating your Last Command
The Line edit box at the top of the dialog will contain the last command you entered.
To repeat this command, simply click the OK button.
Repeating a Previous Command
If you click the down-arrow in the box to the right of the Line edit box, or press
ALT+DOWN ARROW, a list of the previous commands you have used will be displayed. For
example:
Use the UP and DOWN cursor keys to select a command and then click OK to execute it.
Notes:
If you press CTRL+SHIFT+RETURN to display the Line Edit dialog, instead of
CTRL+RETURN, the list of previously used commands will be displayed, ready for
you to select a command.
The list box normally displays the last 20 commands used. If you need more than
this, you can set a larger number in the RFW.INI file. See Appendix A for details.
Using RealLink
5-51
The Command Line Editor
You can prevent commands being added to the list by using the Command Stack
command on the System menu of the dialog box. When this command is selected
(marked with a tick), each command used is added to the list of previously used
commands. If it is not selected, the existing list remains available, but new
commands are not added to the list.
For security reasons, passwords are not added to the command stack.
Changing a Command
If you wish, you can edit the selected command to produce a new command. The
command line editor provides the following editing facilities:
You can use the LEFT and RIGHT cursor keys and the HOME and END keys to move to
any position in the line. Combining the cursor keys with the CTRL key allows you
to move the cursor one word at a time, instead of one character at a time.
You can select text by combining the SHIFT key with the cursor movement keys.
Note:
You can use the Windows clipboard to cut and paste text. Use SHIFT+DELETE to
cut, CTRL+INSERT to copy and SHIFT+INSERT to paste.
Note:
Refer to the Microsoft Windows User Guide for more details of how to
use the clipboard.
You can change the case of the selected text. Click the Upper button to change it
to upper case, and the Lower button to change it to lower case. The Toggle
button changes all upper case characters to lower case, and all lower case
characters to upper case.
Note:
Refer to the Microsoft Windows User Guide for more details of how to
move the cursor and select text.
If there is no text selected, the case of entire line will be changed.
You can replace specified text wherever it occurs in the command line (see
below).
Selecting Text to Edit
If you wish, you can select text to edit from the RealLink window. Either select the
text you require as described on page 5-43, or point to a line of text with the mouse.
Then hold down the CTRL key and click the left mouse button. The Line Edit dialog will
be displayed with the selected text in the Line box, ready for editing. If you did not
have any text selected, the complete line of text pointed to by the mouse is copied
into the Line box.
Pre-loaded Commands
If there are a small number of commands that you use very frequently, you can preload those commands into the list of previously used commands in the Line Edit dialog
box. You do this by adding the commands to the [SaveCmds] section of the RFW.INI file
(see Appendix A for details). The pre-loaded commands will always appear at the top
of the list, before any previously used commands.
Note:
5-52
Each pre-loaded command you add reduces the number of previously used
commands available to you. You may need to increase the number of
V3.0
The Command Line Editor
commands retained by changing the MaxHist parameter in the [Editline]
section of RFW.INI.
Using Replace to Edit Commands
The Line Edit dialog also includes a Replace feature that allows you to find text in your
command line, and replace it with something different. To use this feature, do the
following:
1.
Select the command you wish to edit.
2.
Select the part of the command that you want to search. If you do not make a
selection, RealLink searches the entire command.
3.
In the Replace text box, type the text to be replaced.
Tip:
Use the clipboard to copy text from the old command into the Replace
text box (see above).
4.
If required, select the Case Sensitive option. Select this option to find only those
occurrences with the combination of uppercase and lowercase letters you have
specified.
5.
Click the Replace button. You will see a dialog box similar to the following:
6.
Type the replacement text in the With: box.
7.
Click OK. If, in the Line text box, the cursor is an insertion point, the first
occurrence of the search text, starting from the beginning of the command line,
will be replaced. If any part of the command line is selected, the first occurrence
of the search text within the selected text will be replaced.
Note:
Instead of using the Replace dialog, you can enter the text to find,
followed by the characters “->” and the replacement text. (If you wish
you can redefine the Replace separator characters by changing the
RepStr entry in the [EditLine] section of RFW.INI – see Appendix A for
details.)
Repeating a Replace Operation
Each time you use Replace, your search and replacement strings are added to the list
below the Replace text box. You can repeat a Replace operation by simply selecting it
from the list box and clicking Replace. The list box normally displays the last 20
commands used; if you need more than this, you can set a larger number in the
RFW.INI file (see Appendix A).
In the list box, the search and replacement strings are separated by the characters “>”. You can change this if required in the RFW.INI file.
Using RealLink
5-53
The Command Line Editor
Pre-loaded Replace Strings
If you frequently make the same changes when editing host commands, you can preload the necessary replace commands into the list of previously used Replace
operations in the Line Edit dialog box. You do this by adding the replace commands to
the [SaveReps] section of the RFW.INI file (see Appendix A for details). The pre-loaded
commands will always appear at the top of the list, before any previously used
commands.
Note:
5-54
Each pre-loaded replace command you add, reduces the number of
previously used commands available to you. You may need to increase the
number of commands retained by changing the MaxRep parameter in the
[Editline] section of RFW.INI.
V3.0
Obtaining Help
Obtaining Help
While you are using RealLink, you will often want to get help quickly as you work. You
can do this by using the Help menu, or by pressing the Help key. When the Help
window appears you can display the procedure for a task, get a definition for a term
you don't understand, or see information about any RealLink command.
The Windows Help system is described fully in the Microsoft Windows User's Guide.
This section describes the features that are specific to RealLink.
Help Menu
This menu contains commands that allow you to obtain help information about a
number of RealLink topics or information about the application itself. The following
commands are available from this menu:
Index
This command lists the topics covered by the Help feature. From
this list you can select the feature on which you need help.
Keyboard
This lists the available keyboard commands and gives information
about the use of the keyboard.
Commands
This command lists the commands available from the RealLink
menus. From this list you can select the command with which you
need help.
File Transfer
This gives details of the different ways in which you can transfer
files between your PC and the host.
Application
This command allows you to display help on a particular
application. When you first install RealLink it will be disabled, but
it can be enabled by setting the Help parameter in the [RealLink]
section of the RFW.INI file (see Appendix A).
The RFW.INI Help parameter must specify the name of a Help
application. RealLink includes an example Help application –
RFWHELP – which uses Windows Help to display a help file. This
application provides the following options for viewing help:
Any text selected when you choose the Help Application
command is used as a “topic key-word”. If the help file
contains a topic with that key-word, the topic will be
displayed; otherwise, you will see a message saying that an
invalid key-word has been specified, and the contents topic
will be displayed instead.
If you have no text selected when you select the Application
command, the contents topic of the specified help file will be
displayed.
Appendix E gives guidelines for creating your own Help applications
and Windows Help files.
About
Using RealLink
This command displays a message box containing the version and
revision of the software and its date of issue.
5-55
Obtaining Help
Context-sensitive Help
When you are using RealLink you may find that you need help, but cannot pull down
the Help menu without first cancelling your current task. Under these circumstances,
you can simply press the Help key to obtain help on the RealLink feature that you are
currently using.
In most Windows applications, the Help key is function key F1. In RealLink, however,
F1 is used by the terminal emulator. Instead, the Help key is normally CTRL+?, but can
be redefined if required in the RFW.INI file – refer to Appendix A for details.
Note:
On some keyboards you hold down the SHIFT key to obtain a question mark. If
this is the case on your keyboard, you must press CTRL+SHIFT+? to obtain
context-sensitive help.
To make it easy to obtain help, every RealLink dialog includes a Help button. Click this
to display help specific to the current dialog.
Reality Help
The file QRGnn.HLP, supplied with RealLink, provides help on Reality. You can display
the information in this file by using the Application help command described above.
Note:
The help file might not cover your version of Reality.
To make Reality help available, add the following line to the [RealLink] section of your
RFW.INI file:
Help=C:\RFW\RFWHELP.EXE C:\RFW\HLP\QRGnn.HLP
If necessary, substitute the correct drives and paths for the files RFWHELP.EXE and
QRGnn.HLP. Also, you must substitute the correct version number for the letters nn in
QRGnn.HLP; use the File Manager to see which version of the file you have.
5-56
V3.0
Running Applications
Running Applications
Once you have connected to a remote host system, you can use RealLink in much the
same way as a normal terminal. Unlike a normal terminal, however, RealLink allows
you to run both ordinary applications and utilities, and applications which are specially
written to take advantage of the Windows environment. The latter, though running on
the host, use a User Interface Management System (UIMS) on the PC to generate a
graphical user interface similar to that used by normal Windows applications.
An ordinary application is run within the RealLink terminal emulator window,
appearing in the same way as it would on a normal terminal. The RealLink menu bar
remains displayed and most of its commands can be used.
A UIMS application is run in its own application window. When an application of this
type is run, the RealLink window is made invisible and a new window is created.
However, RealLink remains active. It monitors information that is received from the
remote host and performs a window-management function. The menu bar and
commands available in your application's window are determined by the application
which you run. When you leave your UIMS application, its application window is closed
and you are returned to the RealLink window.
Controlling UIMS Applications
While you are using a UIMS application, you may need to return to the RealLink
window. In normal use, you will only need to do this if your application stops working,
but if you are developing or supporting UIMS applications, you will need access to the
DataBasic debugger.
You can return to the RealLink window from a UIMS application by pressing the Restore
key. This key is defined by using the Restore Key command on the RealLink Control
menu – the default setting is to use the CTRL+BREAK key combination. Refer to the next
section for details of how to change the Restore key.
Once you have returned to the RealLink window, you can enter the DataBasic
debugger, terminate the application, or return to your application and continue from
where you left off:
If the application is written in DataBasic and you want to debug it, you should
press the Restore key a second time. The DataBasic debugger prompt will appear,
allowing you enter debug commands.
To terminate the application, first destroy the application's window by selecting
the Clean-up command from the Control menu. Then press the Restore key a
second time. If the application is written in DataBasic, you will enter the
debugger at this point and must enter the END command to terminate the
application.
If you want to return to the application, use the Control Resume command. The
dialog box shown in Figure 5-6 will appear.
Using RealLink
5-57
Running Applications
Figure 5-6.
Resume Dialog
Clicking OK makes the RealLink window invisible again and switches back to the
current application. However, the dialog also allows you to enter a command and
a command terminator for execution on the host. For instance, if you have been
using the DataBasic debugger, you should use the G (GO) command terminated by
CR (carriage return) to restart the application in its own window.
Note that when you use the Resume command, any command and command
terminator you enter will be retained for use next time. Always check that you
have the correct command and terminator before clicking OK.
Setting the Restore Key
The default Restore key is CTRL+BREAK, but if you wish, you can change it by using the
Restore Key command on the Control menu. You can also change the code generated
by the Restore key by using the Send Restore Key As command. The settings are saved
in the configuration file.
When you select the Restore command, the dialog shown in Figure 5-7 appears:
Figure 5-7.
Restore Key Dialog
This dialog displays the current Restore key. This will be the default key combination,
CTRL+BREAK, unless this has already been changed for the current configuration. To
change the selection, press the key or key combination that you want to use - provided
this is a valid key combination, it will be displayed in the dialog. There are some
combinations, however, which cannot be used; if you choose one of these, the
combination displayed will remain unchanged.
Note:
In addition to its use within UIMS applications, the Restore key can be used in
the RealLink window to send a break to the host.
When used in the RealLink window, the Restore Key sends a break to the host.
However, with some types of connection (for example, when connected via Telnet),
you will find that break has no effect. In this case, you can change the code generated
by the Restore key to that defined in the REALBREAK environment variable on the
host.
5-58
V3.0
Running Applications
The Send Restore Key As command on the Control menu allows you to change the code
generated by the Restore Key. When you select this command, the dialog shown in
Figure 5-8 appears:
Figure 5-8.
Send Restore Key As Dialog
This dialog displays the code that is currently generated by the Restore key. To change
the selection, press the key or key combination that you want to use - provided this is
a valid key combination, it will be displayed in the dialog. There are some
combinations, however, which cannot be used; if you choose one of these, the
combination displayed will remain unchanged.
Notes:
If REALBREAK is not defined on the host, set the Restore key to send CTRL+C.
To restore the default setting, press CTRL+BREAK.
Resetting the Terminal Emulator
If necessary, you can reset the RealLink terminal emulator by selecting the Terminal
Reset command from the Control menu. You will see the following message:
Click the OK button to reset the terminal emulator and reload the settings stored in
the configuration file.
This command should not normally be used while running applications.
Using RealLink
5-59
Printing
Printing
There are many occasions when you might wish to obtain a printout of data received
from the host, or displayed on the screen. RealLink provides various ways of doing
this:
Print Window
This allows you to print a copy of the contents of the RealLink
window.
Print Selection
This allows you to print text you have selected with the mouse or
the keyboard.
Direct Printing
This allows a host application to print to a local printer.
Spooled Printing
This allows the entire contents of a host spooler queue to be output
to a local printer.
In all cases, print output is directed to the currently selected Windows printer. If you
want to print to a file, you can use the Control Panel to direct the printout to the FILE:
device.
Note that in all cases, while printing is in progress a dialog box similar to the following
is displayed:
While this is displayed, you cannot use RealLink, except to cancel the printout by
clicking the Cancel button, or by pressing RETURN or ESC.
Printer Setup
The Printer Setup command on the File menu allows you to select a printer, and to
decide whether you will use emulation or pass-through mode for direct printing. When
you select the Printer Setup command, you will see a dialog box similar to the
following:
5-60
The Printers list box allows you to select a printer from those you have set up in
the Control Panel. The currently selected printer is highlighted. Note that if you
do not select a printer, output is directed to the current default Windows printer.
V3.0
Printing
The Setup button allows you the change the configuration of the selected printer.
Because different printers have different capabilities, the dialog box that appears
depends on the type of printer that is selected. Refer to your Microsoft Windows
User's Guide for more information on setting printer options.
The Direct Print Mode buttons allow you to select whether the print data from the
host will be passed directly to the printer driver (Pass-through), or whether
RealLink will control basic cursor positioning (Emulate). The advantages and
disadvantages of these modes are listed in Table 5-2. Note that Emulate mode is
recommended for general use.
Table 5-2.
Direct Print Modes
Mode
Advantages
Disadvantages
Emulate
Guaranteed to print
successfully
Control characters other than carriage
return, line feed, form feed and
backspace will be printed literally, with
the result that the printed output may be
incorrectly formatted and may contain
some incorrect characters.
Pass-through
Printed output will
always be correctly
formatted.
Not all Windows printer drivers support
Pass-through printing. If the selected
printer driver does not support this
mode, a message will be displayed on
attempting to print.
Note:
When printing in Pass-though mode, the print progress dialog is unable
to show the number of the page that is being printed. “Page 1” remains
displayed throughout the print operation.
The Print Window Mode options are provided for future enhancement. The
Graphic option is not available on this version of RealLink.
The Font button allows you to choose the font used for your printout. When you
click the button, you will see a dialog similar to that shown in Figure 5-9.
Figure 5-9.
Printer Font Dialog
Choose a font, a style and a point size from the lists. Your selection will be saved
in the RFW.INI file (see Appendix A) and used whenever you print.
Using RealLink
5-61
Printing
Notes:
If there no entry in RFW.INI, the selected printer's default font will be used.
If you change to a printer that does not have the selected font, a message will be
displayed to warn you that the selected font is not available; the selected
printer's default font will then be used.
Print Window
To print all the text you can currently see in the RealLink window, select the Print
Window command from the File menu. The text is printed using the default font for
the currently selected Windows printer. Note that there is no need to select the text
you require before using this command.
Note:
The Print Window command on the menu is followed by the word 'text' in
brackets. This indicates that the window will be printed in text mode. The
alternative, graphics mode, is not available on this version of RealLink.
Print Selection
If you have selected some text with the mouse or the keyboard (as described on pages
5-43 and 5-44), you can print it by selecting the Print Selection command from the File
menu. The text is printed using the default font for the currently selected Windows
printer. If there is no text selected, this command is disabled.
Note:
Printing always starts at the left-hand margin of the paper. If your selection
starts in the middle of a line of text, this line will be shifted to the left when
printed.
Direct Printing
Direct printing must be initiated by your host application. The application uses the
printer as the output device in place of the screen.
Note:
The Printer Setup command on the File menu allows you to select whether
the print data from the host will be passed directly to the printer driver, or
whether RealLink will control basic cursor positioning. Refer to page 5-60 for
more details.
Spooled Printing
Spooled printing is initiated from the host system by using the PORT-DESPOOL TCL
command. Refer to your Reality system manuals for details.
The Printer Setup command on the File menu allows you to select whether the print
data from the host will be passed directly to the printer driver, or whether RealLink
will format the print data.
Note:
The 'X' option is recommended when using a shared network printer.
Printing to a File
Under some circumstances, you might need to print to a file rather than to a printer.
There are several ways in which you can do this:
5-62
You can use the Control Panel to connect your printer to the Windows FILE:
device.
V3.0
Printing
You can specify a file to which to print in the WIN.INI file and use the Control
Panel to connect your printer to this.
You can use the RealLink Stream to File command as described below.
Streaming to a File
The Stream To File command on the Tools menu allows you to obtain a record of all
text displayed in the RealLink window. When selected, all text subsequently displayed
is also sent to a specified file.
When this option is selected, a tick is displayed next to the command on the Tools
menu and an icon appears in the status bar. If the command is not already ticked when
you select it, the dialog box shown in Figure 5-10 is displayed.
Figure 5-10.
Stream to File Dialog
This dialog has the following options:
Stream File Name Type the name of the file to which screen output will be sent. If no
path is specified, the file will be created in your RealLink user
directory.
Strip Page Breaks When selected, this removes any form feed characters from the
streamed output.
Stream Selection
When selected, this sends the selected text to the file. It is only
enabled when text is selected.
Stream Window
When selected, this sends the contents of the RealLink window to
the file.
Print when finished
If selected, this causes the contents of the stream file to be printed
when streaming is turned off.
Clear Stream File If selected, this option clears the stream file before sending any
more display data. If it is not selected, the display data will be
appended to any existing contents.
Stream on Form Feeds
When this option is selected, data will be sent to the file each time
a form-feed character is received, instead of on each line-feed.
This option is intended for capturing complete screen displays from
applications that do not send data to the screen line-by-line.
Using RealLink
5-63
Chapter 6
Setting up Sessions
This chapter describes in detail how to set up Network and Asynchronous
sessions. It covers those parameters that are essential to communication
between a PC and a host system, and also those which are a matter of
personal preference.
6-64
Introduction
Introduction
There are many parameters which can be set up using RealLink and the various host
configuration utilities. There are only a few, however, which are essential to
communication between a PC and a host system. Almost all the commands you will
need are found on the RealLink Setup menu (Figure 6-1), with the remainder on the
Font menu.
Figure 6-1.
Setup Menu
The third item on the Setup menu, Communications is used to set up both network and
asynchronous sessions. The remaining items are common to both network and
asynchronous links.
Setting up Sessions
6-65
Configuration Files
Configuration Files
When you start RealLink and connect to a host, you need a configuration to specify
parameters such as the type of terminal emulation, the host name or port number,
and the number of lines and columns displayed in the RealLink window. The default
RealLink configuration can be used in many cases without modification, but you may
need to make changes in order to connect successfully and, as you become familiar
with RealLink, you may want set up your own preferred configuration.
All the parameters mentioned above can be saved, together with other settings, in
configuration files stored on your PC. When you want to connect to a particular host,
you simply select the appropriate configuration file and initiate the connection. The
contents of the file are used to configure RealLink for connection to the specified host
and to set up your various preferences.
This chapter shows you how to create, modify and save configuration files, and
describes the different parameters and preferences you can set.
Creating a New Configuration File
You create a new configuration file by selecting the New command from the File
menu, or by starting RealLink without specifying a configuration file.
Notes:
You can have only one configuration file loaded at a time. If you are currently
connected to a host system, creating the new configuration file will necessitate
breaking your connection to the host. The following message will appear.
Caution
You should never disconnect without first logging off from the host. In the case of
an asynchronous connection, this will simply leave you logged on – you can
reconnect at a later time and continue where you left off, though this is not
recommended for reasons of security. In the case of a LAN connection, however,
the host will be disconnected and any open files closed – this could result in loss
of data.
Select OK to disconnect from the host and create a new configuration file, or
Cancel to continue the current session.
6-66
If you already have a configuration file loaded and you have made some changes
that have not yet been saved, you will see the following message:
V3.0
Configuration Files
Click Yes to save the file, No to lose your changes or Cancel to continue working
with the loaded configuration file.
Once you have disconnected any open session, and saved or discarded any changes to
the previous configuration file, a new, default configuration will be created and the
title of the RealLink window will change to the following:
You can now set up your new configuration as described in the sections which follow,
and then save the file using the Save As command on the File menu.
Modifying an Existing Configuration
If you want to modify an existing configuration file, you must first load it into
RealLink. Select the Open command from the File menu; you will see the dialog box
shown in Figure 6-2.
Figure 6-2.
File Open Dialog
Select the required configuration file from the list on the left or type file name in the
Filename text box. You can also use the list of directories to change to a different
directory and/or disk drive before making your selection.
When you click OK, the selected file will be loaded. Note, however, that you can only
have one configuration file loaded at a time. Refer to the notes in the previous section
for details.
You can now set up your configuration as described in the sections which follow, and
then save the file using the Save As command on the File menu.
Note:
You can also make changes to your configuration while you are connected to
a host. Some settings, however, will not take effect until the next time you
connect.
Setting up Sessions
6-67
Configuration Files
Saving your Configuration File
When you have finished making your changes, you can save them in a configuration
file. There are three ways of doing this – with the Save As and Save commands on the
File menu, and the Save Window Position command on the Font menu.
Warning
If you create a new configuration and save it with the Save or Save Window Position
command before you have used Save As, you will save your changes in RFWDEF.CFG,
thus changing your default configuration.
By selecting the Save As command from the File menu. You should use this
command to save a new configuration, or if you have modified an existing
configuration and want to give the new version a different name.
When you click the Save As command, the dialog shown in Figure 6-3 appears.
Figure 6-3.
File Save As Dialog
Type the name for your configuration file in the Filename text box. The filename
can consist of up to eight characters, plus a three character extension; if you do
not specify an extension, the extension .CFG will be added to your filename
automatically (you are recommended to use the extension .CFG, so that the file
will be listed in the Connect and File Open dialog boxes). If you wish, you can use
the list of directories to change to a different directory and/or disk drive before
saving your configuration.
When you click OK, your file will be saved. Note, however, that if you have
chosen the same name as an existing file, you will see the following message:
Choose Yes to overwrite the existing file, No to return to the Save As dialog, or
Cancel to return to RealLink without saving.
Note:
6-68
You cannot use a filename that is the same as a DOS device name. For
example, you cannot use the filenames COM1.CFG or COM2.CFG.
V3.0
Configuration Files
By selecting the Save command from the File menu. You will normally use this
command to save changes to an existing configuration; the file will be saved
without prompting you for a file name.
By selecting the Save Window Position command from the Font menu (see page
6-81). You will normally use this command to save only the size and position of
the RealLink window. You should be aware, however, that any other configuration
settings that you have changed will also be saved.
The Default Configuration
Whenever you create a new configuration, it is based on the default RealLink
configuration, stored in the file RFWDEF.CFG. The information in this file is loaded
when you start RealLink without specifying a configuration file, when you select the
New command from the File menu, and when you create a new configuration file by
entering a host name in the Connect dialog.
If you wish, you can change your default configuration by selecting the required
configuration options and then saving these as RFWDEF.CFG.
Note:
To restore the original defaults, delete the file RFWDEF.CFG and then use
File New to create a new configuration. A message will appear, warning you
that RFWDEF.CFG cannot be found. Click OK and then use File Save As to
save the configuration to a new RFWDEF.CFG file.
Setting up Sessions
6-69
Setting up a Network Session
Setting up a Network Session
To set up a network session do the following:
1.
Select the Communications command from the Setup menu (Figure 6-1). You will
see the dialog box shown in Figure 6-4.
Figure 6-4.
Communications Dialog
2.
Choose LAN from the list of Protocols:
3.
In the Host Name or Serial Port text box, enter the network name of the host to
which you wish to connect:
For Network connections you will be able to connect to any host that can be
resolved by TCP/IP, provided it supports the default protocol. The host does not
have to appear in your SNI configuration file. Hosts that do not support the
default protocol must, however, have an entry in the SNI configuration file – refer
to the PCi Standard Network Interface Installation Guide for details.
This is the minimum necessary to set up a network session. You can now click OK to
accept your changes and then use the File Save or Save As command to save your
modified CFG file.
Note:
6-70
If all your connections will be use the TCP/IP protocol, you can set the
EnableCallback setting in the WINSNI.INI file. This will reduce CPU usage,
and thus improve the performance of other PC applications. Refer to the PCi
Standard Network Interface Installation Guide for details.
V3.0
Setting Up an Asynchronous Session
Setting Up an Asynchronous Session
Setting up an asynchronous session is less straight forward than for a network session,
as there are more parameters which must be set before the session can be used.
The first thing that must be done is to specify the asynchronous port that you will use.
1.
Select the Communications command from the Setup menu. You will see the
dialog box shown in Figure 6-4.
2.
Choose Asynchronous Port from the list of Protocols.
3.
In the Host Name text box, enter the asynchronous line used for the connection:
COM1, COM2, COM3 or COM4.
Asynchronous Dialog
You must now set the communication parameters for the line. Click the Asynchronous
button; the dialog box which appears (see Figure 6-5) allows you to set the parameters
described in the sections which follow.
Figure 6-5.
Asynchronous Dialog
Baud Rate
RealLink can be set to operate at any baud rate which is available on the PC. The baud
rate selection buttons offer the following:
110, 300, 600, 1200, 2400, 4800, 9600, 19200
A communication speed of 19,200 baud is possible on most PCs, but it should be noted
that IBM specify the maximum data rate for the Asynchronous Adaptors as 9600 baud.
If you experience problems when running at 19,200 you should switch to a lower
speed.
Parity
These selection buttons give you a choice of odd, even, space or mark parity. You can
also choose to have no parity bit.
Setting up Sessions
6-71
Setting Up an Asynchronous Session
Data Format
These selection buttons allow you to set the number of data bits for each character.
Flow Control
There are basically two types of flow control:
By the control characters XON/XOFF.
By the RS232 signals RTS/CTS
RealLink is able to use either of these methods to control the flow from and to the
host. You should ascertain from your local support centre whether your system
attaches terminals using XON/XOFF or RTS/CTS.
PC flow control is selected by means of the Receive and Transmit Flow Control
selection buttons in the Asynchronous dialog box. These offer the following:
No flow control
RTS (receive)/CTS (transmit)
XON/XOFF
Note:
When connecting to SovereignX systems, you should use XON/XOFF flowcontrol for receive only. If you need transmit flow-control, use CTS.
You can use the same method of flow-control for both transmit and receive
when connecting to Reality and UNIX systems.
Stop bits
This option allows selection of one, one and a half or two stop bits to be added to
each character.
Drop DTR on Exit
This option allows you to specify whether the DTR (Data Terminal Ready) signal on the
RS232 interface is to be turned off or left on whenever RealLink is closed.
For direct lines, DTR should normally be turned off. On network or modem
connections, however, this could cause the line to drop, or result in a disconnection
from the network. If you wish to maintain the connection, you should not select this
option.
6-72
V3.0
Terminal Emulation
Terminal Emulation
The Terminal Emulation command on the Setup menu allows you to set the type of
terminal emulation and the character set (nationality) used. When selected, the
following dialog box appears:
Figure 6-6.
Terminal Emulation Dialog
Three of the terminal emulations offered by this dialog are the same as those offered
by the Northgate P12/P14 terminals – Prism (P12), ANSI 7-bit and ANSI 8-bit. The
fourth is a DEC VT220 emulation. In each case, the emulation of the terminal is
implemented as far as is possible given the physical characteristics of the PC. The
majority of the escape and control sequences recognised by the selected terminal are
handled by RealLink.
For each type of emulation, the list box allows you to choose which national character
set to use. You can also use the Multinational check box to choose whether or not the
Extension character set will be the Standard National Extension character set or the
Multinational character set.
Note:
The UK and British character sets, are very similar, but in the former,
characters 35 and 36 are the hash (#) and pound (£) symbols respectively,
while in the latter, character 35 is the pound (£) symbol and 36 the dollar
($).
The Reply as a P30 and not as a P12 check box sets the terminal type returned by
RealLink when this information is requested by a host application. You should normally
select this option if you are connecting to a Sovereign system, but otherwise leave it
unselected.
Prism Emulation
In P12 (Prism) mode, RealLink emulates a Prism terminal. It supports most of the
functions available on a Prism terminal, including cursor positioning, screen printing,
direct printing, PORT-DESPOOL or PORTOUT despooling, and Sovereign mode.
However, you should note the following differences:
Function keys
Setting up Sessions
6-73
Terminal Emulation
The keyboards of early PCs have only ten function keys (F1 to F10), compared
with the eighteen on the Prism terminal. In RealLink Prism emulation, operations
assigned to function keys F11 to F18 are obtained by combining the ALT key with
keys F1 to F8. Refer to Chapter 5 for a list of the available combinations.
History Pages
The maximum number of history pages is normally 255 (6120 lines). Fewer will be
available, however, if the number of lines and/or columns in the RealLink window
is increased, or if insufficient memory is available. See page 6-76 for details.
Sovereign mode
Sovereign mode is only available if you have purchased the RealLink Sovereign
extensions.
The following Prism functions are not available in RealLink:
Multiple Active Screens
Hard-copy Printing
Downloading of Character Sets from the host
Support for Terminal Executive programs downloaded by the host. However, most
of the facilities provided by the SP terminal executive are standard features in
RealLink, and the features of other terminal executive programs are provided by
means of Dynamic Link Libraries (DLLs) that can be loaded when you install
RealLink (see Chapter 3).
Note:
The AutoPrint feature of the SP terminal executive is not supported.
ANSI Emulations
These emulate a Prism terminal operating in the corresponding ANSI mode. Refer to
the Prism Terminal Programmer's Reference Manual for details.
VT220 Emulation
This is similar to ANSI 7-bit emulation, but cursor movement is the same as on a DEC
VT220 terminal. RealLink also provides escape sequences for VT220 support (see
Appendix B).
Table 6-1 lists the VT220 keys that have no equivalent on the PC keyboard, and the
corresponding RealLink keys.
Table 6-1.
6-74
VT220 Key Equivalents
VT220
RealLink
FIND
INSERT
SELECT
DELETE
INSERT HERE
HOME
PREV SCREEN
END
REMOVE
PAGE UP
NEXT SCREEN
PAGE DOWN
V3.0
Terminal Emulation
PF1
F1
PF2
F2
PF3
F3
PF4
F4
HELP
ALT+F5
DO
ALT+F6
Note that the functions of the INSERT, DELETE, HOME, END, PAGE UP and PAGE DOWN keys
are determined by the application you are running. You can use the HOME, END,
PAGE UP and PAGE DOWN keys to view history pages (as described in Chapter 5) or scroll
the terminal window horizontally (see Chapter 2) by clicking the Compose button on
the status bar before pressing the key or key combination you require.
Setting up Sessions
6-75
Terminal Preferences
Terminal Preferences
This command can be used to select the preferred operating configuration for the
terminal emulation and to make settings applicable to the Microsoft Windows
environment. When you select this command, the dialog box shown in Figure 6-7
appears.
Figure 6-7.
Terminal Preferences Dialog
Page Size
This group of functions allows you to select 80 or 132 characters as the width of the
terminal page, and also to increase the number of lines (by entering the number
required in the Number of Lines text box). The values that you select should also be
set on the host, by using the TERM TCL command (refer to your Reality system manuals
for details).
Note that the number of characters and lines actually displayed depends on the size of
the RealLink window and the selected character size. If there are more columns than
will fit in the window, a scroll bar appears across the bottom to allow the full width to
be viewed. A scroll bar can also be displayed down the right-hand side of the RealLink
window (see below), to allow history pages to be viewed.
History Pages
This option allows you to specify the amount of screen history that will be retained
when you are using RealLink. You can specify this as either a number of pages or a
number of lines. The page or line size is that currently selected using the Page Size
functions (see above). The maximum number of history pages depends on the page
size – for the standard 80 column, 24 line screen this maximum is 255 pages or 6120
lines; with larger page sizes, this number is reduced. The default is 7 pages or 167
lines.
Function Keys
The Function Keys and Programmable Keys options allow you to control the codes and
messages generated by the PC function keys.
Function Keys:
6-76
Off
This disables the function keys, unless Programmable Enabled is
selected.
On
This causes the function keys to generate data sequences.
Short
This causes the function keys to generate single codes. This option
is only available if P12 emulation is selected.
V3.0
Terminal Preferences
Programmable Keys:
Disable
If this option is selected, all function keys will generate the codes
defined by the previous three options.
Enable
This option enables function key messages which have been
programmed by the host. If a message has been defined for a
particular key, this will override the code defined using the first
three options.
Cursor Type
The Cursor options set the character used for the text cursor in the RealLink window.
You can select an underline character (Line), a vertical bar (Bar) or a solid block
character (Block).
Other Options
The group of check boxes on the right of the dialog allow you to select other options.
Show Vertical Scrollbar
The Show vertical scroll bar option allows you to display or hide the vertical scroll bar
on the right-hand side of the RealLink window. Check this box if you want to use your
mouse to scroll back to any history pages. Note that you do not need a scroll bar to
view the history pages; the PAGEUP and PAGEDOWN keys will scroll the history page
even if no scroll bar is displayed.
Enable Bell
The Enable Bell option enables or disables the bell in RealLink. Check this box if you
want to receive audible warnings from RealLink.
Swap Text Colours
The Swap Text Colours option allows you to swap the colours used for the foreground
and background in the RealLink window. If this box is checked, the foreground and
background colours of each screen attribute will be swapped when displayed on the
screen. For example, if your screen normally displays black text on a white
background, this feature will change the display to white text on a black background.
Note, however, that the attribute settings (as set in the Attribute Mapping dialog – see
page 6-79) remain unchanged.
End-of-Line Wrap
The End-of-line wrap option controls whether or not the cursor will move to the start
of the next line when the right margin of the terminal page is reached (note that if the
RealLink window is smaller than the terminal page, the window will scroll). If the box
is not checked, the cursor remains in the last column and all characters typed are
displayed at this position. The default is to wrap.
This option is only available in ANSI emulation. In Prism mode line wrapping is always
enabled.
Set CapsLock
This option determines the state to which the CAPS LOCK is set when the CFG file is
opened. Check this box if you want the CAPS LOCK to be set when you connect to the
host.
Setting up Sessions
6-77
Terminal Preferences
On opening a CFG file, a record is kept of the CAPS LOCK settings both inside and
outside RealLink. This is kept up to date as you move between RealLink and other
applications, to ensure that the CAPS LOCK state is always what you expect.
Auto Size
When selected, this option changes the size of the font used in the RealLink window to
suit the size of the window. It then adjusts the size of the window to display a
complete terminal page, as set using the Terminal Preferences command on the Setup
menu.
This option is the same as the Auto Size command on the Font menu.
Restore Window Position
When selected, this option causes the position and size of the RealLink window to be
set to that saved in the currently loaded configuration file. If it is not selected, the
RealLink default will be used. However, changing this option does not take effect until
you next load the configuration file.
This option is selected automatically by the Save Window Position command on the
Font menu.
6-78
V3.0
Screen Attributes
Screen Attributes
RealLink is unable to display the majority of the screen attributes which are provided
by a monochrome terminal (dim, flashing, etc.). Instead, it allows each combination of
attributes to be translated into a foreground/background colour setting. This mapping
of monochrome terminal attributes to colour settings is performed using the Attribute
Mapping command on the Setup menu (Figure 6-1).
Notes:
RealLink colours set with the Attribute Mapping command override the Window
Background and Window Text colours which have been set using the Control
Panel.
The terminal emulator directly supports only the underline and blink attributes.
Text that has the underline attribute set will be shown underlined in the RealLink
window, and that with the blink attribute set will flash. However, the text
concerned will also be displayed in the colours set with the Attribute Mapping
command.
Blinking can be disabled, if required, by changing the BlinkRate entry in the
[RealLink] section of RFW.INI.
Attribute Mapping
RealLink can process any combination of the following screen attributes:
Underline.
Blank Video.
Reverse Video.
Blink (or Flashing).
Reduced Intensity (or Dim).
Each of these attributes is assigned a foreground/background colour combination.
Colours are assigned by using the Attribute Mapping command on the Setup menu.
Note:
Reallink can also process the following line attributes:
Double width.
Double height, double width.
Setting up Sessions
6-79
Screen Attributes
The Attribute Mapping Dialog
When you select the Attribute Mapping command, you will see the display shown in
Figure 6-8.
Figure 6-8.
Attribute Mapping Dialog
The Attribute list box lists the 32 possible attribute combinations, while the box in the
bottom left-hand corner of the dialog box shows the name of the currently selected
attribute combination, displayed in its current foreground and background colours.
To change the colours assigned to a combination of attributes, select the appropriate
entry in the Attribute list box and then choose foreground or background as required.
You can then use the scroll bars on the right of the dialog box to select the
combination of red, green and blue which corresponds to the colour you require.
Note:
Although the scroll bars allow you to choose any setting between 0 and 225
for each of the three primary colours, RealLink will only allow you to select
solid colours. This is to ensure that the displayed text remains readable.
The Reset button can be used to return the colours for all of the attribute
combinations to the settings that were current when you selected the Attribute
Mapping command.
Attribute Processing
The Process Attributes command on the Setup menu allows you to enable or disable
the processing of screen attribute control sequences received by RealLink. If attribute
processing is enabled (indicated by a tick on the Setup menu beside the command),
attribute control sequences are processed. If attribute processing is disabled, attribute
control sequences are ignored.
Note:
Attribute processing reduces the performance of the RealLink display. If you
do not need attributes displayed, you should disable this feature.
Font Control
The Font menu contains commands that allow you to control the size of the text
displayed in the RealLink terminal window.
Enlarge
This command changes the font used in the terminal window to the next larger
available size.
6-80
V3.0
Screen Attributes
ALT+.
Reduce
This command changes the font used in the terminal window to the next smaller
available size.
ALT+.
Very Small
This command reduces the font used in the terminal window to the smallest available
size, and displays a complete terminal page at this size. The menu bar and status bars
are removed from the window.
This command allows you to monitor the progress of background tasks on the host,
while using other Windows applications.
ALT+.
Note:
If you press ALT+ while the RealLink window is at the very small size, the
window is restored to its previous size, and the menu and status bars
displayed.
Auto Size
This command controls the size of the text shown in the terminal window. When
selected (marked with a tick), it causes the size of the font to change according to the
size of the window. The size of the window is then adjusted to display a complete
terminal page, as set using the Terminal Preferences command on the Setup menu.
This command is the same as the Auto Size option in the Terminal Preferences dialog
box.
Save Window Position
This command saves the current position and size of the RealLink window. This
information is saved in the currently loaded configuration file, and will therefore be
used whenever this file is loaded.
Note:
Any other settings that have been changed will also be saved.
Warning
If, when creating a new configuration, you use Save Window Position before you have
saved your configuration with the Save As command, you will save your changes in
RFWDEF.CFG, thus changing your default configuration.
Saving the window position automatically selects the Restore Window Position option
in the Setup Terminal Preferences dialog (see page 6-76).
Maximise
This command is not on the Font menu, but on the System menu; click the box in the
top left-hand corner of the RealLink window to display this menu.
Setting up Sessions
6-81
Screen Attributes
Selecting this command expands the RealLink window to fill the whole screen. If the
Font Auto Size command is selected, the largest font available is also selected.
6-82
Click
in the upper-right corner of the RealLink window.
– or –
Double-click the window's title bar.
Press ALT+ .
V3.0
Chapter 7
File Transfer
You are unlikely to have a file format available that is common to DOS and
the hosts to which you connect. In order that information from PC files can
be used by programs on your host, and vice versa, RealLink provides a
number of file transfer utilities. This chapter describes the following:
A fast LAN file transfer utility for transfer between Reality or
Sovereign, and the PC. This is available from the RealLink Tools menu.
Reality host utilities for transfer over asynchronous links or local area
networks.
UNIX host utilities for transfer over asynchronous links or local area
networks.
7-83
Introduction
Introduction
The file transfer utility you should use depends on the type of host or environment to
which you are connecting and the type of connection to that host. The available
options are summarised in Table 7-1.
Table 7-1.
File Transfer Utilities
Host/Environment
Type of Connection
File Transfer Utility
Reality.
DDATCP.
LanFTU, WS-HOST,
HOST-WS, PASS-DOS,
SPASS-DOS.
Telnet.
WS-HOST, HOST-WS,
PASS-DOS, SPASS-DOS.
UNIX.
DDATCP, Telnet.
zmodem.
SOVEREIGN
DDATCP (replug via UNIX).
LanFTU (with Sovereign
extensions).
SovereignX
DDATCP.
LanFTU (with Sovereign
extensions).
SovereignX UNIX
environment.
DDATCP.
LanFTU (with Sovereign
extensions), zmodem.
Refer to the PCi Standard Network Interface, Installation Guide for information about
the different connection types.
7-84
V3.0
LanFTU
LanFTU
The LanFTU command on the Tools menu allows you to transfer files to or from a
Reality or Sovereign host via a LAN. You can do this at any time while RealLink is
running: while you are connected via the LAN; while you are connected via an
asynchronous link; or even while you are not connected to a host.
When you select the LanFTU command, you will see the dialog shown in Figure 7-1.
Figure 7-1.
LanFTU Parameter Selection Dialog
Enter the following information:
Direction
Choose the required direction of transfer: from host to PC or from
PC to host.
Filter
The options available in this group depend on the setting of the File
server field.
Reality:
ASCII data, AM converted to CRLF –
Attribute marks (0xFE) in the Reality file are converted into
carriage return, line feed (0x0D, 0x0A) in the PC file, and vice
versa.
ASCII data, no conversion –
Copies with no translation.
Binary data, no conversion –
Copies raw binary data with no translation.
Sovereign:
Note:
These options are only available if you have purchased the
RealLink Sovereign extensions:
Text data file transfer –
Depends on whether you are transferring data to or from a
Sovereign or a UNIX data file, and the direction of transfer:
File Transfer
when transferring data from a Sovereign file to the PC,
each record copied from the host is terminated with
carriage return, line feed (0x0D, 0x0A);
7-85
LanFTU
when transferring data from the PC to a Sovereign file, a
record is created for each line of the PC file and carriage
return, line feed pairs are discarded;
in a UNIX file, newline characters are converted to
carriage return, line feed (0x0D, 0x0A) in the PC file, and
vice versa.
Note:
UNIX files can only be transferred to and from
the UNIX environment on a SovereignX host.
Binary data file transfer –
Copies raw binary data with no translation.
File server
Host system
Choose one of the following:
Reality – for transfer to or from a Northgate Series 19 host or a
UNIX host running Reality.
Sovereign – for transfer to or from a Northgate Sovereign or
SovereignX host. This option is only available if you have
purchased the RealLink Sovereign extensions.
The name of the required Reality or Sovereign host. This must be
the name of a valid DDA connection listed in the SNI configuration
file on your PC. If you click the down-arrow to the right of the
field, you will see a list of the available connections. Refer to the
PCi Standard Network Interface Installation Guide for details of
how to set up your SNI configuration file.
Note:
The connection you choose must use the DDA protocol.
LanFTU cannot be used on character mode (Telnet or ACI)
connections.
Host user id
The ID of a valid user on the host system.
Host account
The name of the account on this host, to or from which you wish to
transfer the data.
Host file name
The name of the required file in this account.
Note that if you are transferring to or from a SovereignX UNIX
environment, the file name must be in the form
ResourceName:FileName
where ResourceName is the name of a SovereignX UNIX resource
created with the Resource Maintenance (RM) utility. Refer to your
SovereignX manuals for more details.
Host item id (Reality only)
The Reality item-id of the item containing, or to receive the
transferred data.
If you are transferring from host to PC, you can use an asterisk (*)
to specify the entire file. The items will be concatenated, with a
separator that depends on the filter selected:
7-86
V3.0
LanFTU
Note:
ASCII data, AM converted to CRLF – items are separated with
carriage return, line feed.
ASCII data, no conversion or Binary data, no conversion – the
file starts with an attribute containing header information and
each item is preceded by an attribute containing the name of
the item.
The Caps check boxes to the right of these five fields allow text entered to
automatically be converted to upper case. This makes setting the CAPS LOCK
unnecessary when entering Reality and Sovereign system names, etc.
Max Rec Size (Sovereign only)
The size of the largest record to be transferred (16384 bytes
maximum).
PC filename
The full path name of the PC file containing, or to receive the data
to be transferred. If you wish, you can click the Browse button and
select a file from the dialog which appears (shown in Figure 7-2).
Figure 7-2.
LanFTU Browse Dialog
When you click the Transfer data button, you will be prompted for your user-id and
account passwords. For example:
Clicking OK will then establish the connection with the host and transfer the data. A
message will appear when the transfer is complete and you will then be returned to
the LanFTU Parameter Selection dialog.
If you wish, you can carry out a number of transfers before closing LanFTU. The first
transfer establishes the connection to the host, and this connection is then used for
any subsequent transfer, until you either close LanFTU by clicking the Exit button, or
enter a different host system name. You are only prompted for your passwords when
the connection is first established.
Note that you can return to RealLink (or select a different application entirely)
without closing LanFTU.
File Transfer
7-87
LanFTU
When you leave LanFTU, your settings are retained for use as defaults the next time
you use the command.
7-88
V3.0
Reality Host Utilities
Reality Host Utilities
The Reality file transfer utilities are host programs which must be run once you are
logged on. They can be used for transfer via both asynchronous lines and Local Area
Networks. The following utilities are available:
HOST-WS
This copies items from a Reality file into a DOS file on the PC.
WS-HOST
This copies data held in a DOS file on the PC, into items in a Reality
file.
PASS-DOS
An English command that allows Reality data to be selected and
processed through the file dictionary items. The result is written to
a DOS file in the specific format expected by the DOS program
which will subsequently access it (for example, in DIF format).
SPASS-DOS
An English command, equivalent to the PASS-DOS command, but
which allows the data items to be sorted.
HOST-WS
The HOST-WS command copies one or more items from a Reality file into a DOS file on
the PC. Its syntax is as follows:
HOST-WS host-file host-item DOS-file {filter}
where
host-file
is the name of the host file.
host-item
is the name of the item to be copied from this file. Note that you
can use an asterisk (*) to specify the currently active select list; if
there is no active select list, the entire file is selected.
DOS-file
is the name of the DOS file on the PC into which the data will be
copied.
filter
is the name of a filter (optional). This can be one of the following:
File Transfer
FLT-C
Recovers DOS data stored in compressed format on
the host. The same filter is used with WS-HOST to
store the data on the host.
FLT-D
Saves data in Reality format in a DOS file. The data
may be recovered by using the same filter with
WS-HOST.
FLT-DOWN
Copies standard ASCII text, converting attribute
marks to carriage-return/line-feed, and value and
sub-value marks to spaces. Carriage-return/line-feed
is appended to each item and a DOS end-of-file mark
at the end of the file.
FLT-I
Performs the same conversion as FLT-DOWN, except
that the item-id is included in the DOS file. No DOS
end-of-file mark is added.
7-89
Reality Host Utilities
FLT-NULL
Copies with no translation.
FLT-X
Performs the same conversion as FLT-DOWN, except
that no carriage-return/line-feed or DOS end-of-file
mark are added.
You can also write your own filters if required – refer to Appendix C
for details.
If no filter is specified to HOST-WS, a default filter is used. This
copies standard ASCII text, converting attribute marks to carriagereturn/line-feed, and value and sub-value marks to spaces.
Carriage-return/line-feed is appended to each item.
If you specify fewer than three parameters, HOST-WS will prompt you until you have
supplied all four (including the filter name).
When you start the transfer, a message similar to the following will appear, to report
the progress of the operation.
Example 1
Copy the item 1769 from the host file STAFF to the DOS file MEMBER.TXT in the
current DOS directory. Use the filter FLT-I.
HOST-WS STAFF 1769 MEMBER.TXT FLT-I
Example 2
Copy the item ACCOUNTS from the host file SYSTEMS. HOST-WS prompts for a DOS file
name and the name of a filter as shown.
HOST-WS SYSTEMS ACCOUNTS
To WORKSTATION file: C:\SYSTEMS\ACCT.TXT
Filter Name: FLT-DOWN
WS-HOST
The WS-HOST command copies data from a DOS file on the PC, into an item in a
Reality file. It has the following syntax:
WS-HOST host-file host-item DOS-file {filter}
where
7-90
host-file
is the name of the host file.
host-item
is the name of the item in this file into which the data will be
copied.
DOS-file
is the name of the DOS file on the PC from which the data will be
copied.
V3.0
Reality Host Utilities
filter
is the name of a filter (optional). This can be one of the following:
FLT-C
Saves DOS data on the host in compressed format.
The same filter may be used with HOST-WS to
recover the data.
FLT-D
Recovers data saved in Reality format in a DOS file.
The same filter is used with HOST-WS to store the
data on the PC.
FLT-UP
Copies standard ASCII text. Tabs are converted to
spaces and carriage-returns to attribute marks. Linefeeds are discarded.
You can also write your own filters if required – refer to Appendix C
for details.
If no filter is specified to WS-HOST, a default filter is used. This
copies standard ASCII text, converting tabs to spaces and carriagereturns to attribute marks, and discarding line-feeds.
If you specify fewer than three parameters, WS-HOST will prompt you until you have
supplied all four (including the filter name).
When you start the transfer, a message similar to the following will appear, to report
the progress of the operation.
Example 1
Copy the file MEMBER.TXT in the current DOS directory to item 1327 in the host file
STAFF. Use the filter FLT-UP.
WS-HOST STAFF 1327 MEMBER.TXT FLT-UP
Example 2
Copy a DOS file to the host file DEPTS. WS-HOST will prompt for the item name, the
DOS file name and a filter name.
WS-HOST DEPTS
To HOST Item: PRODUCTION
From WORKSTATION File: C:\DEPTS\OUTPUT.TXT
Filter Name: FLT-UP
PASS-DOS and SPASS-DOS
PASS-DOS and SPASS-DOS are additional English commands. They convert Reality data
into the format required by a specific DOS program and then use HOST-WS to transfer
the converted data to one or more DOS files.
If you are unfamiliar with the Reality English query language, you should refer to the
English Reference Manual before proceeding with this section.
File Transfer
7-91
Reality Host Utilities
Command Format
PASS-DOS is equivalent to the English command LIST, while SPASS-DOS is equivalent to
SORT. Both commands can use any of the normal English clauses.
One additional clause, INTO, is required to define the type of conversion required and
the target DOS file. The keyword INTO must be followed by a quoted string containing
this additional information. The INTO clause can be used anywhere in the English
sentence, with the exception that any FOOTING clause must come after the INTO
clause. If a FOOTING clause precedes the INTO clause, it will be treated as an INTO
clause, with unpredictable results.
The format of the INTO clause is as follows:
INTO "filter drive:{path}DOS-file"
where:
filter
is the name of a filter that will convert the data into the required
format. The available filters are listed below.
drive:{path}DOS-file
is the name of the destination file. Note that you must specify the
drive letter, but that the directory path is optional. If you do not
specify a path, the file will be created in the current directory.
Note that the following Output Format Modifiers are ignored:
TOTAL
GRAND-TOTAL
BREAK-ON
DBL-SPC
Filters
The file created will be in the format required by a specific target DOS application.
You should consult the documentation for your DOS application to determine which
data formats it can import.
Note:
Many DOS packages are able to import data in the format known as DIF - Data
Interchange Format. The DIF format is discussed in Appendix C.
The following filters are available for use with PASS-DOS and SPASS-DOS:
7-92
BDIF
Creates a basic form of DIF file without a DIF TABLE item and
without LABEL items. It can be used for any program which does
not properly handle these optional DIF fields.
CD
Creates a file in the comma-delimited format used as input to a
number of PC packages. Column headings (attribute names) are not
included. Each attribute is enclosed in double quotes.
CDH
This is similar to the CD filter, but the first line of the file contains
column headings. This format is suitable for use as input to the mail
merge features of PC applications such as Microsoft Word for
Windows.
V3.0
Reality Host Utilities
DIF
Creates a file in the full DIF format which includes a TABLE item
and LABEL items.
DW3
Creates a file in a DIF format, suitable for input to the IBM
Displaywrite 3 package. Displaywrite 3 accepts several forms of
mail-merge data but the DIF format is the preferred one.
LOTUS
Creates a DIF file for input to Lotus 1-2-3 which puts the attribute
names at the top of the columns. The DOS file will have the forced
extension of .DIF.
MMATE
Creates a DIF file for input to MultiMate 3.4 onwards for mail-merge
lists.
MPLAN
Creates a file in the SYLK format for input to Multiplan. The DOS
file will have the forced extension of .SL.
MSBASIC
Creates a comma-delimited file in a format which can be read by
Microsoft BASIC programs using the INPUT# statement. The data is
preceded by a section which includes field names, left/right
justification and length from the Reality dictionary items.
SAMNA
Creates a file in the DIF format required for input to the Samna
word processing package for incorporation into its internal mailmerge records format. The format is also used for the Samna
Decision Graphics package.
SYLK
Creates a file in the SYLK format, as for the MPLAN filter, but
without the forced .SL extension.
WPF
Creates a file in the WordPerfect mail-merge format.
WSMM
Creates two files, one containing the WordStar mail-merge data
and the other containing the template for insertion into a WordStar
merge document naming the fields. The template file is given the
extension .TMP.
Note:
All the filters listed above discard headings and footings, whether generated
by default or by the inclusion of specific HEADING or FOOTING clauses.
Data Presentation
Because PASS-DOS and SPASS-DOS are true English verbs, all data output to the DOS
file is processed through attributes seven and eight of the dictionary item. It appears
the same in the DOS file as it would on the screen as a result of a similar LIST or SORT
command.
Attributes nine and ten of the dictionary item will also affect the data extracted from
the Reality file:
Attribute nine is used to determine whether the data is to be treated as numeric
or alphabetic by the DOS program. In these instances, L is assumed to be
alphabetic while R is assumed to be numeric if the data is also numeric in
content.
Attribute ten often determines the cell size for DOS spreadsheet files such as
those in the SYLK format.
File Transfer
7-93
Reality Host Utilities
Example 1
Create a file containing the attributes NAME and DEPT taken from the STAFF file. The
DOS file will have the name MERGE.DAT and be in WordPerfect Mail-Merge format. It
will be created in the \WP directory on drive C:.
PASS-DOS STAFF INTO "WPF C:\WP\MERGE.DAT" NAME DEPT
Example 2
Create a DOS file called STAFF.DTA in the \WS directory on drive C:. The file will
contain the same information as in the previous example, but will be in WordStar MailMerge format. A WordStar template file with the name STAFF.TMP is also created.
PASS-DOS STAFF INTO "WSMM C:\WS\STAFF.DTA" NAME DEPT
7-94
V3.0
UNIX Host Utilities
UNIX Host Utilities
RealLink supports the use of the industry standard Zmodem protocol for file transfer
between UNIX hosts and the PC over both asynchronous links and local area networks.
Transfer must be initiated from the host, by calling the rz (PC to host) and sz (host to
PC) programs – refer to your UNIX documentation for details of these.
Note:
Most UNIX systems do not include rz and sz as standard. Your host system
manager will tell you whether they are available on your system.
Transfer to the Host
File transfer from the PC to the host is initiated by entering the following command:
rz
Note:
There are a number of options to the rz command. Your UNIX documentation
will give you full details of these.
When you press RETURN, you will see the dialog box shown in Figure 7-3.
Figure 7-3.
RZ File Transfer Dialog
Enter the name of the file you wish to transfer and click the OK button. As the transfer
proceeds, the number of bytes transferred are shown on the right-hand side of the
dialog. When the transfer is complete, the dialog box will disappear and you will be
returned to the UNIX prompt.
The Set FTU Path command on the Tools menu allows you to specify the PC drive and
directory containing the file to be transferred. When you select this command, the
dialog shown in Figure 7-4 appears.
Figure 7-4.
File Transfer Path Dialog
If you do not set a drive and/or directory path, the source file is assumed to be in the
current directory.
Caution
If the file name entered into the RZ File Transfer dialog includes a path, this will form
part of the name of the file created on the host. For example, if you enter
C:\STAFF\MEMBER.TXT, a file called c:\staff\member.txt is created on the host
(note the change to lower case). Since the colon and backslash are not legal
File Transfer
7-95
UNIX Host Utilities
characters in UNIX filenames, this may present problems when using the transferred
files.
Transfer to the PC
File transfer from the host to the PC is initiated by entering the following command:
sz filename
where filename is the name of the required UNIX file.
Note:
There are a number of options to the sz command. Your UNIX documentation
will give you full details of these.
When you press RETURN, you will see a message similar to that shown in Figure 7-5.
Figure 7-5.
SZ File Transfer Dialog
As the transfer proceeds, the number of bytes transferred are displayed. When the
transfer is complete, the dialog box will disappear and you will be returned to the
UNIX prompt.
The transfer process creates a DOS file in the directory specified with the Set FTU Path
dialog (see Figure 7-4), overwriting any file with the same name which already exists.
If no path has been set, the current directory is used.
7-96
V3.0
Chapter 8
Macros
RealLink macros allow you to automate tasks that you carry out frequently
and that are time consuming if carried out by hand. This chapter describes:
The parts of a macro.
How to write a simple macro.
How to load a macro into RealLink so that you can use it.
It also contains a detailed description of the RealLink macro language and
the commands you can use, together with a list of the error messages that
you might see when you are writing and testing macros.
8-97
Introduction
Introduction
A RealLink macro is a text file containing one or more object definitions. An object
can be an executable script, a toolbar definition, or a function-key definition.
A macro file can be produced using any text editor or word processor (provided it is
saved in ASCII format). The Macro Select command on the Macro menu includes an Edit
button that allows you to edit existing macros with the Windows Notepad utility.
Script Objects
A script object consists of a sequence of commands that carry out actions, such as:
Connecting to a host.
Prompting the user for a password.
Sending text to the connected host.
Waiting for the host to send a particular text string to the terminal.
Displaying messages.
There are several ways of executing a script:
You can assign the script to a menu command, so that it will be executed when
the user selects that command.
You can assign the script to a Toolbar button; it will then be executed when the
user clicks the button.
You can assign the script to a function key (or key combination).
You can assign the script to a mouse button (with or without one or more modifier
keys).
You can give the script a special name which will cause it to be executed
automatically when you select the macro from the menu.
You can call it from another script, provided the macro containing the called
script is currently loaded.
Menu Commands
RealLink macros allow you to define additional menus, either on the menu bar (pulldown menu), or to appear at the current position of the mouse pointer (pop-up
menus). Both types of menu will normally contain commands that execute script
objects or individual macro commands, but can also include further 'cascaded' menus.
Your macro can dynamically modify the menus that you have defined. You can add
extra commands, change existing ones and disable commands that are inappropriate.
Note:
8-98
You cannot change the standard RealLink menus.
V3.0
Introduction
Toolbars
A Toolbar is an area of the RealLink window containing one or more buttons that can
be clicked by the user to execute script objects or individual macro commands. The
buttons on a Toolbar can have text captions, or graphic icons.
Any Toolbar defined in a macro file is added to the RealLink window when the macro is
loaded. Up to two Toolbars can be displayed in the RealLink window at the same time:
one at the top of the window, just below the menu bar, and the other at the bottom,
below the status bar.
Function-key and Mouse Button Definitions
A macro file can include definitions for the mouse buttons and the keyboard function
keys, when used on their own and in combination with the SHIFT, CTRL and ALT keys.
You can assign script objects or individual macro commands to these buttons and keys.
Any definitions defined in a macro file become available when the macro is loaded.
Macros
8-99
Writing a Simple Macro
Writing a Simple Macro
The following macro consists of a single script object, a Toolbar object containing a
single button, and a key-definition object. The script allows a user called JIM to log on
to the “STAFF” account on a Reality system. A configuration file called called
HOST1.CFG has been created to allow you to log on to the host. To try this example,
you should substitute your own configuration file, user and account names.
Note:
The macro below assumes that you will be prompted for a User ID, user
password and account name. If you have a default account, you can omit the
statements that wait for the account name prompt and send the account
name.
You can use any text editor or word processor to produce the macro file. If you use a
word processor, remember to save the macro in ASCII text format. Start your editor or
word processor and create a new file. Then enter the following:
Object Staff Is Script;
Timeout(5);
On Connect("C:\RFW\HOST1.CFG") Goto Fail;
On WaitFor("LOGON PLEASE:") Goto Fail;
SendLine("JIM");
On WaitFor("Password:") Goto Fail;
Password("Please enter your password.");
SendLine("");
On Waitfor("Enter account name:") Goto Fail;
SendLine("STAFF");
Return;
Fail:
Msg(INFO1, "Staff", "Failed to connect to HOST1");
EndObject Staff.
This line introduces the definition of a script object called “Staff”. Note that,
with one exception which will be mentioned later, all macro statements must end
in a semicolon. Note also that the script language is not case sensitive; the
following are all equivalent: Object, object, OBJECT, obJEct.
This line sets the time in seconds that the Waitfor statement will wait for a
response before assuming that an operation has failed.
This line attempts to connect to the host specified in the HOST1.CFG file
(substitute the name and path of your CFG file). Note that the complete path of
the CFG file must be specified. The On...Goto structure allows you to take
different actions, depending on whether the connection is successful. In this case,
if connection fails, the script will jump to the label “Fail”.
The script now waits for the host to print the log-on prompt, “LOGON PLEASE:” (if
your host prints a different logon prompt, you can change this text).
When the prompt appears, the user name “JIM” is sent to the host; SendLine will
append a carriage return. If, however, the prompt is not displayed within 5
seconds, the script jumps to the label “Fail”.
8-100
V3.0
Writing a Simple Macro
The script now waits for the host to prompt for the user's password (if your host
prints a different password prompt, you can change this text). When the prompt
appears, the script will display a dialog box to prompt the user for the password.
Once again, if the prompt fails to appear within 5 seconds, the script jumps to
the label “Fail”.
Note that when the user enters the password, this will be sent to the host without
a terminating carriage return. The Password command is therefore immediately
followed by SendLine.
Finally the script waits for the host to prompt for the account name (once again,
you can change this text if necessary). When the prompt appears, the account
name “STAFF” is sent to the host (with a terminating carriage return). The Return
statement then prevents the script continuing.
If at any point, the script has jumped to the label “Fail” on the previous line, a
message box will be displayed, to tell the user that the connection failed. The
message box will have the title “Staff”, an information icon, and a single “OK”
button.
The EndObject statement marks the end of the Staff script. Note that it must be
terminated with a full stop, not a semicolon.
The remainder of the macro provides the user with two methods of running the Staff
script. At the end of the macro file enter the following:
Object Button Is Toolbar Above Plain;
"Staff" = Call Staff;
EndObject Button.
Object Keys Is Keyactions;
Ctrl + F5 = Call Staff;
EndObject Keys.
This line introduces the definition of a Toolbar object called Button. It will be
positioned at the top of the RealLink window, below the menu bar, and will have
the Plain style.
This line defines a button with the title “Staff” which, when clicked, will run the
Staff script.
This line introduces the definition for a Keyactions object; that is, a list of
function-key definitions.
This line specifies that the Staff script will be run when the user presses the
CTRL+F5 key combination.
When you have entered all the above, save your macro in a file called STAFF.MAC, in
your RealLink directory.
You can try out your macro by adding it to the RealLink Macro menu as described
below and then selecting it from the menu. When the button bar appears, click the
Staff button or press CTRL+F5 to logon to your host.
Macros
8-101
Writing a Simple Macro
Notes:
If you change the name of the script to FIRST, it will be executed automatically
when the macro is loaded.
You can find other example macros in your RealLink program directory.
8-102
V3.0
Loading a Macro
Loading a Macro
Before it can be used, a macro must be loaded into RealLink. This can be done in two
ways: you can use the Macro Select command to add it to the Macro menu – you can
then select it when required; or you can load it when RealLink starts, by adding it to
the RFW command line.
Note:
If a macro contains a script called FIRST, this will be executed automatically
when the macro is loaded.
The Macro Select Command
The Macro Select command on the Macro menu displays the following dialog box:
Figure 8-1.
Macro Select Dialog
On the left of this dialog box, is a list of the macro files found on the disk. The files
listed will be those found in the directory specified in the RFW.INI file (see
Appendix A). On the right of the dialog box the macros currently available on the
Macro menu are listed.
Adding a Macro to the Menu
To add a macro to the Macro menu, select the macro required from the Macros list and
then click the Add button. The macro you have selected will appear in the Menu list.
The Macro menu can include up to nine macros. If you wish you can select several
macros and add them to the menu in one operation. Any macros that are already on
the menu will not be added a second time.
Note:
You can choose the order in which your macros will appear on the menu by
selecting an existing Menu entry before clicking the Add button – the new
macros will be added before the selected macro. If nothing is selected in the
Menu list, the new macros are added to the end of the list.
When you have finished adding macros to the menu, click the Done button. When you
next pull down the Macro menu, it will contain the macros you added. For example:
In this example, the ACCOUNTS and STAFF macros have been added to the menu. To
load one of these macros, simply select the appropriate command from the menu.
Note:
Macros
The changes you make to the Macro menu with the Macro Select command
are only temporary – they will be lost when you close RealLink. If you want to
8-103
Loading a Macro
keep your changes for use in the future, you must use the Save Macro List
command to save them in RFW.INI.
Removing a Macro from the Menu
You can remove macros from the menu by selecting them in the Menu list box and
clicking the Remove button. The macros remain on the disk and can be added to the
menu again by using the Add button.
Editing a Macro
If you want to edit a macro, select it in either the Macro or the Menu list box and click
the Edit button. If more than one macro is selected, only the first one in the list is
opened.
The editor used can be specified in the RFW.INI file (see Appendix A) - the default is
Windows Notepad. If no editor is specified, the Edit button does not appear in the
dialog.
Deleting a Macro from the Disk
You can delete a macro file from the disk by selecting it in either the Macro or the
Menu list box and clicking the Edit button. If macros are selected in both list boxes,
those in the Macro list box will be deleted.
Note:
If no editor is specified in the RFW.INI file, the dialog will not contain a
Delete button.
Loading a Macro from the Command Line
If you want a macro to be loaded when you start RealLink, you can use the Program
Manager Properties command to add the /M switch to the RFW command line. The
syntax of this switch is as follows:
/MMacro
where Macro is the name of the macro to be loaded. There must be no space between
the /M and the macro name. For example:
RFW.EXE /MSTAFF
starts RealLink and loads the macro called STAFF.
8-104
V3.0
The Script Language
The Script Language
Object Definitions
A RealLink macro is an ASCII text file containing one or more object definitions. An
object definition has the format:
Object Name Is Type {Options} ;
Instruction ;
{ ... }
EndObject Name .
where:
Name is a unique name, identifying the object.
Type is the type of object: Keyactions, Mouseactions, PopupMenu,
PulldownMenu, Script or Toolbar.
Options is one or more object-dependent optional parameters.
Instruction is a macro command. You can include any number of macro commands
between the Object and EndObject statements.
Each command except EndObject must be terminated with a semicolon. The
EndObject command must be terminated with a full stop.
There is no hard and fast rule for the layout of an object definition. The statements
need only be separated from each other by white space (spaces, tabs and newlines).
The programming style used in this chapter is recommended, however, since it makes
clear the structure of the macro.
Notes:
If a macro contains a script called FIRST, this will be executed automatically
when the macro is loaded.
A called script need not be part of the same macro as the calling object.
However, the names of all loaded objects must be unique. Additional macro files
can be loaded by using the Load statement.
Other types of object are defined within the Object...EndObject structure:
A Toolbar object will contain one or more Button objects.
A PopupMenu or PulldownMenu object will contain one or more Menu or
MenuItem objects (see below).
You can also use the Define command to create Button and MenuItem objects.
Pull-down Menus
The PulldownMenu object allows you to add menus to the RealLink toolbar – the
menus you add will appear to the right of the Help menu. In most cases your menus
will contain only menu commands (menu items) which execute macro scripts or
individual macro commands, but they can also include sub-menus (cascading menus),
containing more commands. Figure 8-2 shows a possible structure.
Macros
8-105
The Script Language
Figure 8-2.
Pull-down and Cascading Menus
Each menu command is a separate MenuItem object, that defines the text to appear
on the menu for that item and the macro command or script to be executed. A
MenuItem definition has the following syntax:
{ ItemName Is } MenuItem Title$ [ Do | = ] Instruction ;
where:
ItemName is a unique name to identify the object. MenuItem names are optional.
Title$ is the text to appear on the menu.
If required, you can designate one character in this text to act as a selector
character (shown underlined when displayed) that the user can type to choose the
command. This is done by preceding the character concerned with an ampersand
(&).
Instruction is a macro command.
You can also create separator items on your menus. These appear as horizontal lines
across the menu and are used to divide the menu into groups of related commands.
Separator items cannot be selected by the user. To create a separator item, give your
menu item the title “-” (a hyphen); since the user cannot select a separator item, you
can omit everything following the title:
{ ItemName Is } MenuItem "-";
Cascaded menus are Menu objects, containing MenuItem objects and, if required,
other Menu objects. A Menu object definition has the following syntax:
{ MenuName Is } Menu Title$ {
MenuItemDefinition ;
{ ... }
};
where:
ItemName is a unique name to identify the object. Menu names are optional.
Title$ is the text to appear on the menu. As with MenuItem objects, you can use
an ampersand to designate one character of the title as a selector character.
MenuItemDefinition is a MenuItem or Menu object definition. You can include any
number of menu-item definitions between the Object and EndObject statements.
8-106
V3.0
The Script Language
Pop-up Menus
You can also define menus that are not attached to the RealLink menu bar. These
'pop-up' menus are not normally available to the user, but can be displayed when
required by calling the Draw macro command. For example, you might define a
Mouseactions object that draws a pop-up menu when the user clicks the right-hand
mouse button with the CTRL key held down.
Changing Objects
The Define macro command allows you to modify buttons, menus, menu items and
toolbars, and to create new buttons and menu items.
You can add new menu items to a pull-down, pop-up or cascaded menu. The
menu items can be newly created or moved from another menu.
You can change the title of a pull-down menu, cascaded menu or menu item.
You can change the macro command associated with a menu item.
You can add new buttons to a toolbar. The buttons can be newly created or
moved from another toolbar.
You can change the title or graphic displayed on a button.
You can change the macro command associated with a button.
You can create a new object with no parent. The type of object (button or menu
item) will be determined when you add it to a menu or toolbar.
For more details, refer to the description of the Define command on page 8-100.
Flow Control
The On...Goto, Goto and Return statements allow you to control the execution of
your script. On...Goto lets you branch to different parts of a script, depending on the
result of an action. Goto branches unconditionally to another part of the script.
Return terminates execution of the script and returns control to RealLink, or to the
calling script as appropriate.
The following shows a typical On...Goto structure:
On Action Goto Destination1, Destination2 ;
Statements /* executed if neither destination is selected */
Goto End ;
Destination1
Statements /* executed if destination 1 is selected */
Goto End ;
Destination2
Statements /* executed if destination 2 is selected */
Return ;
End
Statements /* continuation of script */
Macros
8-107
The Script Language
In this example, the Action command returns a value which is used by the On...Goto
statement to select one of the destinations in the list. If the return value is 0,
destination 1 is selected and the script branches to that point. If the return value is 1,
destination 2 is selected, and so on. If there is no destination in the list that
corresponds to the value returned, the script does not branch.
The Goto statements at the end of the first two sections cause the script to branch to
a section that is executed irrespective of the result of the Action command. Note,
however, that because the third section (destination 2) ends in a Return statement, in
this case the script will not continue beyond this point, but will return to RealLink or
to the calling script.
All macro commands return values that can be used in an On...Goto statement
(normally 1 for success or 0 for failure). The following statements, however, return
values that specify the completion status in greater detail:
Connect
Disconnect
Msg
WaitFor
Refer to the descriptions of these commands for details of their return values.
User defined scripts can also return values if required. The Return statement accepts
an optional integer parameter which is returned to the calling script.
Labels
The Goto and On...Goto statements require you to specify lines to which to branch.
These lines must be identified by labels.
The syntax of a label is as follows:
Identifer :
where Identifier is a string consisting of any combination of letters and digits up to a
total of 100 characters, starting with a letter. For example:
Fail:
B2:
disconnect:
When a label is used in a Goto or On...Goto statement, the identifier must be used
without the terminating colon: For example:
Goto Exit
.
.
.
Exit:
Note that you must use the same combination of upper and lower case letters as in the
label definition.
Labels may appear at any position in a line, but it is suggested that, for clarity, they
should be the first item on a line.
8-108
V3.0
The Script Language
Strings
Certain macro statements require string parameters, which must be enclosed in
double quotation marks. Control characters can be included in the text by using the
following sequences:
/a
/b
/f
/n
/r
/t
//
Alert (bell)
Backspace
Form feed
Newline (line feed)
Carriage return
Tab
Slash
Other control characters can be specified by using a two-character hexadecimal value
preceded by a slash. For example, to send a carriage return, you could use "/r" or
"/0D".
Note:
Because a string must be enclosed in double quotation marks, if you need to
include a double quotation mark in a string, you must specify it in
hexadecimal; that is as "/22".
Comments
Comments may be included in the macro file at any point except within literal strings
or in the middle of a word. A comment can be indicated in several ways:
It can be placed between the characters '/*' and '*/', as in the C programming
language. For example:
/* These two lines
form a single comment */
It can be placed on a separate line which starts with an asterisk (*), a hash (#) or
two slashes (//). For example:
# This is a comment.
// So is this.
* And so is this.
It can be placed on the end of a line, if preceded by the characters '*', '#' or '//'.
For example:
Timeout(5);
* 5 sec timeout
On Waitfor("Enter account name:") Goto Fail;
SendLine("STAFF");
# Send account name
Return;
// Return to RealLink
Macros
8-109
Button Object
Command Reference
The following sections list the RealLink macro commands and objects in alphabetical
order.
Button Object
Defines a button that will appear on a Toolbar. The user can click the button to run a
macro script or execute a single macro command.
Syntax
{ ButtonName Is } String$ { [ Do | = ] Instruction } ;
ButtonName
This is an optional name for the Button object. Specifying a name
allows you to enable and disable the button.
String$
This can be either the text to appear on the button, or the name of
a bitmap (.BMP), icon (.ICO), program (.EXE) or Dynamic Link
Library (.DLL) file containing a graphic to display on the button.
Unless you specify the path name of the file in full, it is assumed to
be in the directory specified by the Bitmaps entry in the RealLink
section of the RFW.INI file. In the case of icon, program and DLL
files containing more than one icon, the first one will be used.
Instruction
This must be one of the following macro commands:
Call
Draw
Maximise
CapsLock
Enable
Minimise
Connect
Exec
NumLock
Define
Exit
SendLine
Disable
Load
SendText
The button definition must be terminated with a semicolon.
See also
Toolbar object.
Example
Object Top is ToolBar Above Recessed;
// text buttons
"Reality" = Call Reality;
"Unix" = Call Unix;
Space(10);
// bitmap buttons
"vcrplay.bmp" = SendLine("play");
"vcrstop.bmp" = Call Stop;
"vcrpause.bmp" = SendLine("pause");
"vcrend.bmp" = SendLine("end");
EndObject Top.
This example defines a recessed toolbar that will be displayed at the top of the
RealLink window. The first two buttons will have the text labels “Reality” and “Unix”.
Macros
8-97
Call
There will then be a 10 pixel gap before a group of four buttons, each with a graphic
icon.
Call
Transfers control to the first statement in the specified script. When the end of the
script is reached, or a Return statement is encountered, control returns to the calling
script at the statement following the Call.
Syntax
Call ScriptName ;
ScriptName is the name of the script to call.
Remarks
The case of the script name must be the same as in the script definition.
A called script need not be part of the same macro as the calling object. However, the
names of all loaded objects must be unique.
See Also
Return.
Example
Object Message is Script;
Msg (INFO1, "Example", "Message script");
EndObject Message.
Object Caller is Script;
Call Message;
Msg (INFO1, "Example", "Caller script");
EndObject Caller.
The Caller script uses the Call statement to branch to the Message script. This displays
a message box and then returns to the Caller script, which displays a second message.
CapsLock
Sets the keyboard caps lock on or off.
Syntax
CapsLock( [ On | Off ] ) ;
On
Sets the caps lock on.
Off
Sets the caps lock off.
See Also
NumLock.
Example
CapsLock(On);
Sets the caps lock on.
8-98
V3.0
Connect
Connect
Establishes a connection to a host, using either a specified configuration file, or that
which is currently loaded.
Syntax
Connect(Config$) ;
On Connect(Config$) Goto Label {, Label {...}} ;
On Connect() Goto Label {, Label {...}} ;
Remarks
In the first two forms of the command, Config$ must be the full path name of a
RealLink configuration file enclosed in double quotes. If you supply a null string ("")
instead of the name of a configuration file, the Connect dialog box is displayed for the
user to select a configuration file. Note that if there is a connection already open, it is
disconnected.
The second form of the command allows you to take different actions, depending on
whether or not the connection was successful.
The third form of the command tests whether a connection is already open. If not, it
attempts to connect using the currently loaded configuration file.
Return Values
0
1
2
The connection failed for reasons other than specified in 2 below.
Connection was established successfully, or was already open.
The configuration file could not be found or is invalid.
See Also
Disconnect, On...Goto.
Examples
On Connect("C:\RFW\ACCOUNTS.CFG") Goto fail, connected;
Attempts a connection using the configuration file “C:\RFW\ACCOUNTS.CFG”. If
successful, the script branches to the label “connected”. If the connection fails, the
script branches instead to the label “fail”.
On Connect("") Goto fail, connected;
Displays the Connect dialog box for the user to select a configuration file. If the user
clicks OK, a connection is attempted using the selected configuration file. If
successful, the script branches to the label “connected”. If the connection fails, the
script branches instead to the label “fail”.
On Connect() Goto fail, connected;
Tests for an existing connection. If there is none, attempts to connect using the
currently loaded configuration file. If, on return, a connection exists, the script
branches to the label “connected”; otherwise it branches to “fail”.
Macros
8-99
Define
Define
This command allows you to create a new MenuItem or Button object, to change the
appearance or function of an existing menu or button object, or to move an object
from one parent object to another.
Syntax
Define Object { In Parent } { String$ } { [ Do | = ] Instruction } ;
Object
This must be the name of a MenuItem or Button object to be
created or modified, or of a PulldownMenu or Menu object to be
modified. If the object already exists, it will be modified as
specified.
A newly created object will be of the type appropriate to the
parent specified – if Parent specifies a PopupMenu,
PulldownMenu, or Menu, a new MenuItem object will be created;
similarly, if Parent specifies a Toolbar, a new Button object will be
created.
When attaching an existing object to a new parent, the object must
be of the type appropriate to its new parent – if Parent specifies a
PopupMenu, PulldownMenu, or Menu, Object must be a
MenuItem; similarly, if Parent specifies a Toolbar, Object must be
a Button.
Parent
This optional parameter is the name of an existing toolbar or menu.
Note that this parameter is only necessary when creating a new
object or attaching an object to a new parent.
String$
This can be either the text to appear on the button or menu, or the
name of a bitmap (.BMP), icon (.ICO), program (.EXE) or Dynamic
Link Library (.DLL) file containing a graphic to display on the
button. Unless you specify the path name of the file in full, it is
assumed to be in the directory specified by the Bitmaps entry in
the RealLink section of the RFW.INI file. In the case of icon,
program and DLL files containing more than one icon, the first one
will be used.
Instruction
This must be one of the following macro commands:
Call
Draw
Maximise
CapsLock
Enable
Minimise
Connect
Exec
NumLock
Define
Exit
SendLine
Disable
Load
SendText
Remarks
If you are creating a new object and do not specify a parent, the type of object
(button or menu item) is not determined until you add it to a menu or toolbar.
See Also
Toolbar object, PulldownMenu object, PopupMenu object.
8-100
V3.0
Delay
Examples
Define mitLogoff In pdnHost "&Log off" Do SendLine("OFF");
Creates a new object menu item called mitLogoff and attaches it to the menu
pdnHost. The new item will have the title “Log off” with “L” as its selector key, and
will send the command “OFF” to the host.
Define btnStats "Statistics" Do Call scrStats;
Redefines the btnStats button to have the title “Statistics” and call the scrStats script.
Define pdnHost "&Host";
Defines a new title for the pull-down menu pdnHost.
Delay
Pauses execution of the script.
Syntax
Delay(Wait) ;
Wait is the time to wait, in seconds.
See Also
WaitFor.
Example
Object MinWin is Script;
Minimise;
Delay(5);
Restore;
EndObject MinWin.
Minimises the RealLink window, waits 5 seconds and then restores it to its previous
position and size.
Disable
Disables the specified object. When disabled, the object will not react to mouse clicks
or key-presses as appropriate.
Syntax
Disable(Object) ;
Object must be the name of the macro object to be disabled. Note that you cannot
disable a Script object.
See Also
Enable, Object...EndObject.
Example
Disable(Top)
Macros
8-101
Disconnect
Disables the object called 'Top'.
Disconnect
Pauses the script until the current session has been disconnected.
Syntax
On Disconnect() Goto Label {, Label {...}} ;
Return Value
When disconnection occurs, one of the following values is returned:
0
1
2
3
The user has closed RealLink.
The user has disconnected the session with the Disconnect command.
The connection has failed.
The host has disconnected. This might be because the user has logged off.
Note that other scripts can be run from a toolbar while a script is waiting for
disconnection.
See Also
Connect, On...Goto.
Example
Object Disconn is Script;
On Disconnect() Goto exit, exit, fail;
Msg(INFO1, "Example", "Host has disconnected");
Return;
fail:
Msg(INFO1, "Example", "Host connection failed");
exit:
Return;
EndObject Disconn.
This script waits for disconnection and, if this occurs within RealLink, simply returns.
If, however, the host has disconnected or the connection has failed, it displays an
appropriate message before returning.
Draw
Draws a pop-up menu at the current position of the mouse pointer.
Syntax
Draw(PopupMenu) ;
PopupMenu must be the name of a PopupMenu object.
See Also
PopupMenu object.
8-102
V3.0
Enable
Example
Object Popup is PopupMenu ;
Popup1 Is MenuItem "Action 1" Do Call Action1 ;
Popup2 Is MenuItem "Action 2" Do Call Action2 ;
EndObject Popup.
Object Mouse Is Mouseactions;
Ctrl+Click, Button3 Do Draw(Popup) ;
EndObject Mouse.
In this example, two objects are defined: a PopupMenu called Popup and a
Mouseactions object called Mouse (the scripts Action1 and Action2 are assumed to
have been defined elsewhere). The Mouseactions object defines an action for the
combination of button 3 and the CTRL key – it uses the Draw command to display the
pop-up menu.
Enable
Enables the specified macro object. If the object was previously disabled, it will once
again react to mouse clicks or key-presses as appropriate.
Syntax
Enable(Object) ;
Object must be the name of the macro object to be disabled.
See Also
Disable, Object...EndObject.
Example
Enable(Top)
Enables the object called 'Top'.
Exec
Starts another program under Microsoft Windows.
Syntax
Exec(Program$) ;
Program$ must be the exact name of the program file, including the extension and
path required to find the file, together with any switches or arguments that the
program accepts, all enclosed in double quotes.
Examples
Exec("EXCEL.EXE");
Starts Microsoft Excel.
Exec("C:\WINWORD\WINWORD.EXE REPORT.DOC");
Starts Microsoft Word for Windows and loads the document REPORT.DOC.
Macros
8-103
Exit
Exec("NOTEPAD.EXE NOTES.TXT");
Starts Notepad and loads the document NOTES.TXT.
Exit
This command closes RealLink.
Syntax
Exit ;
Remarks
Calling the Exit command may generate prompts that require responses from the user.
Refer to Chapter 4 for details.
FIRST
Defines a script that will be executed automatically when the macro file is loaded.
Syntax
Object FIRST Is Script ;
Instruction ;
{ ... }
EndObject FIRST .
See Also
Script object.
Example
Object FIRST is Script;
Connect("C:\RFW\ACCOUNTS.CFG");
Return;
EndObject FIRST.
This script attempts to connect to the host specified in the file ACCOUNTS.CFG.
Because the script is called FIRST, it will be executed automatically when the macro
file is loaded.
Goto
Branches unconditionally to a line identified by a label.
Syntax
Goto Label ;
Caution
Label must be a label that occurs elsewhere in the same script. If the label cannot be
found the script will continue without branching.
See Also
On...Goto.
8-104
V3.0
Hide
Example
Object Branches is Script;
On Msg(ALERT, "Example", "Stop - press a button",
"Button 1", "Button 2") Goto B1, B2;
B1:
Msg(INFO1,"Example", "Button 1 pressed");
Goto End;
B2:
Msg(INFO1,"Example", "Button 2 pressed");
End:
Return;
EndObject Branches.
This script displays a message, asking the user to choose between two buttons. When
the user makes a choice, the script branches to a label and displays a second message.
In the case of button 1, the Goto statement causes the script to branch to the End:
label, thus preventing the button 2 message being displayed as well as that for button
1.
Hide
Hides the RealLink window.
Warning
When the RealLink window is hidden, it cannot be accessed by the user. If you use this
command, you must ensure that your macro shows the window again.
Syntax
Hide ;
See Also
Show.
Example
Object HideWin is Script;
Msg(INFO1, "Example", "Hide RFW for 5 seconds");
Hide;
Delay(5);
Show;
Return;
EndObject HideWin.
This example hides the RealLink window and then, 5 seconds later, displays it again.
Macros
8-105
InputText
InputText
Displays a dialog box requesting a single item of data, and when the user clicks OK,
sends the text entered to the host.
Syntax
InputText(Prompt$ {, Default$ {, Title$ }}) ;
Prompt$ is text that will be displayed in the dialog box to indicate the kind of
information that should be entered.
Default$ is text that will initially appear in the entry field of the dialog box. This text
is sent to the host if the user chooses OK without first typing anything.
Title$ is the title displayed in the title bar of the dialog box; if Title$ is omitted, the
title bar remains blank.
Return Value
If the user clicks the OK button or presses RETURN, the text entered is sent to the host
and InputText returns 1. If the user clicks the Cancel button or presses the ESC key,
nothing is sent to the host and InputText returns 0.
Remarks
The text entered is sent to the host without a terminating carriage return.
See Also
Password, SendLine, SendText.
Example
SendText("SORT GUESTS BY ARRIVAL-DATE WITH ARRIVAL-DATE GE /22");
InputText("Enter the starting date:", "", "Guests");
SendText("/22 AND LE /22");
InputText("Enter the finishing date:", "", "Guests");
SendLine("/22");
This example constructs an English query that lists the guests due to arrive at a hotel.
The InputText command is used to prompt for starting and finishing dates for the
report. Note the characters specified in hexadecimal ("/22"): these are the double
quotation marks that must enclose the dates when they are used in the English
statement (refer to page 8-109 for more details).
Keyactions Object
Assigns actions to the keyboard function keys.
Syntax
Object Name Is Keyactions;
KeyDefinition ;
{ ... }
EndObject Name.
Name must be a unique name for the object.
8-106
V3.0
Load
Key Definitions
Each key definition must have the following format:
Key = Instruction ;
This is the name of a function key (F1 to F15). If required, the
function key can be combined by plus signs with one or more of the
following modifier keys:
Key
Shift
Instruction
Ctrl
Alt
This must be one of the following macro commands:
Call
Draw
Maximise
CapsLock
Enable
Minimise
Connect
Exec
NumLock
Define
Exit
SendLine
Disable
Load
SendText
Each key definition must be terminated with a semicolon.
Remarks
The object name must have the same case in the Object and EndObject statements.
Only one Keyactions object can be active at a time. If you load a macro that defines a
new Keyactions object, the previous one will be disabled until the new macro is
unloaded.
See also
Mouseactions object, PopupMenu object, PulldownMenu object, Toolbar object.
Example
Object KeyTable is Keyactions ;
Ctrl + Shift + F12 = SendText("Control+Shift+F12");
Shift + F12 = Exec("notepad");
EndObject KeyTable.
This example defines two key actions. When the user presses CTRL+SHIFT+F12, the text
"Control+Shift+F12" will be sent to the host. Similarly, when the user presses SHIFT+F12,
the Windows Notepad utility will be started.
Load
Loads a macro file into RealLink.
Syntax
Load(MacroFile$) ;
MacroFile$ is the name of a macro file. Unless you specify the path name of the file in
full, it is assumed to be in the directory specified by the MacroDir entry in the RealLink
section of the RFW.INI file.
Macros
8-107
Maximise
Remarks
If the macro contains a script called FIRST, this will be executed automatically.
If you attempt to load a macro that is already loaded, the original copy will be
removed before the new one is loaded.
Example
Load("C:\RFW\MACROS\ACCOUNTS.MAC")
This example loads the macro “ACCOUNTS.MAC” from the directory
“C:\RFW\MACROS”.
Maximise
Maximises the RealLink window – that is, expands it to fill the whole of the screen.
Syntax
Max{[imise | imize]} ;
See Also
Minimise, Restore.
Example
Object MaxWin is Script;
Maximise;
Delay(5);
Restore;
EndObject MaxWin.
Maximises the RealLink window, waits 5 seconds and then restores it to its previous
position and size.
Menu Object
Defines a cascaded menu (attached to another menu) containing commands that the
user can select to run macro scripts or individual macro commands.
Syntax
{ MenuName Is } Menu Title$ {
MenuItemDefinition ;
{ ... }
};
MenuName
This is an optional name for the menu. Specifying a name allows
you to enable and disable an object (see Enable and Disable
commands) and redefine it with the Define command.
Title$
This is the text that will appear for that item on the parent menu.
You can designate one of the characters in the title as a selector
key by preceding it with an ampersand (&). When the menu item is
displayed, the character concerned is shown underlined and the
user can select it by typing that character.
8-108
V3.0
MenuItem Object
Each MenuItemDefinition can be the definition of a MenuItem object (see page 8-109)
or of another Menu object.
Note:
The braces (curly brackets) shown enclosing the menu item definitions are
literal characters.
See also
MenuItem object, PopupMenu object, PulldownMenu object.
Examples
Object App Is PulldownMenu "&Application" ;
App1 Is MenuItem "Action &1" Do Call Action1
App2 Is MenuItem "Action &2" Do Call Action2
MenuItem "-" ;
App3 Is MenuItem "Action &3" Do Call Action3
MoreItems Is Menu "&More" {
Cascade1 Is MenuItem "Action &4" Do Call
Cascade2 Is MenuItem "Action &5" Do Call
} ;
EndObject Application.
;
;
;
Action4 ;
Action5 ;
This example defines a PulldownMenu object called App with the title “Application”.
This menu includes a cascaded menu with the title “More”, which contains “Action 4”
and “Action 5” menu items. The letter “M” in the title is designated as the menu's
selector key. The scripts Action4 and Action5 are assumed to have been defined
elsewhere.
MenuItem Object
Defines a menu command that the user can choose to run a macro script or an
individual macro command.
Syntax
{ ItemName Is } MenuItem Title$ [ Do | = ] Instruction ;
{ ItemName Is } MenuItem "-" ;
ItemName
This is an optional name for the menu item. Specifying a name
allows you to enable and disable an object (see Enable and Disable
commands) and redefine it with the Define command.
Title$
This is the text that will appear for that item on the parent menu.
You can designate one of the characters in the title as a selector
key by preceding it with an ampersand (&). When the menu item is
displayed, the character concerned is shown underlined and the
user can select it by typing that character.
If a single hyphen is used as the title of a menu item, a separator
item is created. This appears as a continuous line across the width
of its parent menu. A separator item cannot be selected by the user
and should be used to visually group related menu items.
Macros
8-109
Minimise
Instruction
This must be one of the following macro commands:
Call
Draw
Maximise
CapsLock
Enable
Minimise
Connect
Exec
NumLock
Define
Exit
SendLine
Disable
Load
SendText
See also
Menu object, PopupMenu object, PulldownMenu object.
Example
Object App Is PulldownMenu "&Application" ;
App1 Is MenuItem "Action &1" Do Call Action1
App2 Is MenuItem "Action &2" Do Call Action2
MenuItem "-" ;
App3 Is MenuItem "Action &3" Do Call Action3
MoreItems Is Menu "&More" {
Cascade1 Is MenuItem "Action &4" Do Call
Cascade2 Is MenuItem "Action &5" Do Call
} ;
EndObject Application.
;
;
;
Action4 ;
Action5 ;
This example defines a PulldownMenu object called App with the title “Application”.
The letter “A” in the title is designated as the menu's selector key.
The menu contains three MenuItem objects, with the titles “Action 1” to “Action 3”,
and a separator item between “Action 2” and “Action 3”. There is also a cascaded
menu with the title “More”, which contains “Action 4” and “Action 5” menu items.
The scripts Action1 to Action5 are assumed to have been defined elsewhere.
Minimise
Minimises the RealLink window - that is, reduces it to an icon at the bottom of the
screen.
Syntax
Min{[imise | imize]} ;
See also
Maximise, Restore.
Example
Object MinWin is Script;
Minimise;
Delay(5);
Restore;
EndObject MinWin.
Minimises the RealLink window, waits 5 seconds and then restores it to its previous
position and size.
8-110
V3.0
Mouseactions Object
Mouseactions Object
Assigns actions to the mouse buttons.
Syntax
Object Name Is Mouseactions;
ButtonDefinition ;
{ ... }
EndObject Name.
Name must be a unique name for the object.
Button Definitions
Each button definition must have the following format:
{ KeyMods + } [ Click | DblClick ] , Button [ Do | = ] Instruction ;
KeyMods
This is one or more of the following modifier keys, combined, if
necessary, by plus signs.
Shift
Button
Ctrl
Alt
This can be either the number of the required mouse button (1, 2
or 3) or the keyword Button followed, without a space, by the
button number (for example, Button3). Buttons 1 and 3 are
normally the primary and secondary mouse buttons respectively
(the primary button is normally on the left of the mouse, and the
secondary on the right, but left-handed users can use the Control
Panel to swap them if required). Button 2 specifies the centre
button on a three button mouse.
To avoid conflicts with RealLink mouse actions, button 1 must
always be combined with one or more modifier keys. Button 3 can
be used without modifier keys, but doing so will disable some
RealLink functions.
Instruction
This must be one of the following macro commands:
Call
Draw
Maximise
CapsLock
Enable
Minimise
Connect
Exec
NumLock
Define
Exit
SendLine
Disable
Load
SendText
Each button definition must be terminated with a semicolon.
Remarks
The object name must have the same case in the Object and EndObject statements.
Only one Mouseactions object can be active at a time. If you load a macro that
defines a new Mouseactions object, the previous one will be disabled until the new
macro is unloaded.
Macros
8-111
Msg
See also
Keyactions object, PopupMenu object, PulldownMenu object, Toolbar object.
Example
Object Popup is PopupMenu ;
Popup1 Is MenuItem "Action 1" Do Call Action1 ;
Popup2 Is MenuItem "Action 2" Do Call Action2 ;
EndObject Popup.
Object Mouse Is Mouseactions;
Ctrl+Click, Button3 Do Draw(Popup) ;
EndObject Mouse.
In this example, two objects are defined: a PopupMenu called Popup and a
Mouseactions object called Mouse (the scripts Action1 and Action2 are assumed to
have been defined elsewhere). The Mouseactions object defines an action for the
combination of button 3 and the CTRL key – it uses the Draw command to display the
pop-up menu.
Msg
Displays a message box.
Syntax
Msg(Style, Title$, Message$) ;
On Msg(Style, Title$, Message${, Caption1${, Caption2$ {...}}}) Goto Label1
{, Label2 {...}} ;
Syntax Elements
Style
must be one of the styles listed in Table 8-1.
Table 8-1.
Message Box Styles
Style
Appearance
INFO
Information icon and user defined buttons.
INFO1
Information icon and single OK button.
WARN
Warning icon and user defined buttons.
WARN2
Warning icon; OK and Cancel buttons
WARN3
Warning icon; Yes, No and Cancel buttons
ALERT
Alert icon and user defined buttons.
ALERT2
Alert icon; Retry and Cancel buttons
ALERT3
Alert icon; Abort, Retry and Ignore buttons
QUERY
Query icon and user defined buttons.
QUERY2
Query icon; OK and Cancel buttons
QUERY3
Query icon; Yes, No and Cancel buttons
Icon
The INFO, WARN, ALERT and QUERY styles allow you to specify the
number and captions of the buttons. See below.
8-112
V3.0
NumLock
Title$
is the title to appear on the message box.
Message$
is the message that will be displayed. A newline character – "/0A" –
can be used to start a new line where required.
Caption1$, Caption2$
are the captions to appear on the buttons. The number of buttons
depends on the number of caption strings, up to a maximum of
three.
Note:
The left-most button is always the default.
Return Value
The Msg command returns the number of the button that was clicked by the user: 0 for
the first button, 1 for the second button, etc. This can be used in the On...Goto
statement to branch to different parts of the script, depending on which button was
clicked. Note, however, that because of this, the first form of the command should
only be used for message boxes with a single button, as there is no way of detecting
which button was clicked.
See Also
Input Text, Password.
Examples
Msg(INFO1, "Example", "This is a message");
Displays a message box with an information icon and a single OK button.
On Msg(ALERT2, "Example", "Connection failed") Goto retry, cancel;
Displays a message box with an Alert icon, and Retry and Cancel buttons. When the
user responds, the script branches to the retry or cancel label as appropriate.
On Msg(QUERY, "Example", "Macro paused", "Continue", "Quit") Goto
continue, quit;
Displays a message box with a Query icon, and two buttons: Continue and Quit. When
the user responds, the script branches to the continue or quit label as appropriate.
NumLock
Sets the keypad number lock on or off.
Syntax
NumLock( [ On | Off ] ) ;
On
Sets the number lock on.
Off
Sets the number lock off.
See Also
CapsLock.
Macros
8-113
Object...EndObject
Example
NumLock(Off);
Sets the number lock off.
Object...EndObject
Defines a RealLink macro object.
Syntax
Object Name Is Type { Options };
Instruction ;
{ ... }
EndObject Name .
Name is a user-defined identifier. Note that all macro names must be unique – this is
particularly important when more than one macro file is loaded.
Type must be one of the following object types: Keyactions, Menu, Mouseactions,
PopupMenu, PulldownMenu, Script or Toolbar.
Options is one or more object-dependent optional parameters. See the descriptions of
the different object types for details of these parameters.
See also
FIRST, Keyactions object, Mouseactions object, PopupMenu object, PulldownMenu
object, Script object, Toolbar object.
On...Goto
Branches to one of a number of lines specified by labels.
Syntax
On Expression Goto Label {, Label {...}} ;
Remarks
The Expression parameter must be one of the following functions:
Call
Connect
Disconnect
Msg
WaitFor
The value of Expression determines to which label the script branches. For example, if
Expression returns 0, the script will branch to the first label in the list. Similarly, if
Expression returns 2, the script will branch to the third label in the list. If the value
returned by expression does not have a corresponding label, the script continues
without branching.
8-114
V3.0
Password
Caution
Each of the labels must occur elsewhere in the same script. If a label cannot be found
the script will continue without branching.
See also
Goto, Script object, Return.
Example
Object Branches is Script;
On Msg(ALERT, "Example", "Stop - press a button",
"Button 1", "Button 2", "Button 3") Goto B1, B2;
Msg(INFO1,"Example", "Button 3 pressed");
Goto End;
B1:
Msg(INFO1,"Example", "Button 1 pressed");
Goto End;
B2:
Msg(INFO1,"Example", "Button 2 pressed");
End:
Return;
EndObject Branches.
This script displays a message, asking the user to choose between two buttons. When
the user makes a choice, the script branches to a label and displays a second message.
Note, however, that in the case of button 3, there is no associated label, so the script
does not branch.
Password
Displays a dialog box that prompts the user for a password. The text entered by the
user is not displayed in the dialog, but is replaced by asterisks. When the user clicks
the OK button or presses RETURN, the text is sent to the host.
Syntax
Password(Prompt$ {, Default$ {, Title$ }}) ;
Syntax Elements
Prompt$
is a text string to be displayed in the dialog box.
Default$
is text (replaced by asterisks) that will initially appear in the entry
field of the dialog box. This text is sent to the host if the user
chooses OK without first typing anything.
Title$
is the text to be displayed in the title bar of the dialog box. If no
title is specified, the title “Password” is displayed.
Return Value
If the user clicks the OK button or presses RETURN, the text entered is sent to the host
and Password returns 1. If the user clicks the Cancel button or presses the ESC key,
nothing is sent to the host and Password returns 0.
Macros
8-115
PopupMenu and PulldownMenu Objects
The text entered is sent to the host without a terminating carriage return.
Remarks
You should normally use the Password command in conjunction with the WaitFor
command. Use WaitFor to detect the host's password prompt, and then use Password
to prompt the user for the password.
See also
InputText, SendLine, SendText.
Example
Object Reality is Script;
// set the Waitfor timeout
Timeout(5);
On Connect("C:\RFW\ACCOUNTS.CFG") Goto fail;
// user logon
SendLine("");
On WaitFor("LOGON PLEASE:") goto fail;
SendLine("PAULSH");
On WaitFor("Password:") goto fail;
Password("Please enter your password:", "", "Payroll system");
SendLine("");
Return;
fail:
Msg(INFO1,"Reality", "Logon to Reality failed");
Return;
EndObject Reality.
Connects and logs on to the host defined in the ACCOUNTS.CFG configuration file. The
script waits for the host to prompt for a password, and then displays a Password dialog
box.
PopupMenu and PulldownMenu Objects
These commands define menus containing commands that the user can select to run
macro scripts and individual macro commands.
A pull-down menu appears on the menu bar beside the normal RealLink menus.
A pop-up menu is not attached to the menu bar or another menu and is not available
to the user until it is displayed with the Draw command.
Syntax
Object Name Is PopupMenu ;
MenuItemDefinition ;
{ ... }
EndObject Name .
Object Name Is [ PulldownMenu | Menu ] Title$;
MenuItemDefinition ;
{ ... }
EndObject Name .
8-116
V3.0
PopupMenu and PulldownMenu Objects
Name
This must be a unique name for the menu object.
Title$
This is the text that will appear on the RealLink menu bar.
You can designate one of the characters in the title as a selector
key by preceding it with an ampersand (&). When the menu title is
displayed on the menu bar, the character concerned is shown
underlined. The user can select the menu by pressing the ALT key,
followed by the selector key.
MenuItemDefinition is one or more Menu or MenuItem object definitions (see pages
8-108 and 8-109 respectively).
Remarks
The object name must have the same case in the Object and EndObject statements.
See also
Draw, Keyactions object, Menu object, MenuItem object, Mouseactions object,
Toolbar object.
Examples
Object Popup Is PopupMenu ;
Popup1 Is MenuItem "Action 1" Do Call Action1 ;
Popup2 Is MenuItem "Action 2" Do Call Action2 ;
EndObject Popup.
Object Mouse Is Mouseactions;
Ctrl+Click, Button3 Do Draw(Popup) ;
EndObject Mouse.
In this example, two objects are defined: a PopupMenu called Popup and a
Mouseactions object called Mouse (the scripts Action1 and Action2 are assumed to
have been defined elsewhere). The Mouseactions object defines an action for the
combination of button 3 and the CTRL key – it uses the Draw command to display the
pop-up menu.
Object App Is PulldownMenu "&Application" ;
App1 Is MenuItem "Action &1" Do Call Action1
App2 Is MenuItem "Action &2" Do Call Action2
MenuItem "-" ;
App3 Is MenuItem "Action &3" Do Call Action3
MoreItems Is Menu "&More" {
Cascade1 Is MenuItem "Action &4" Do Call
Cascade2 Is MenuItem "Action &5" Do Call
} ;
EndObject Application.
;
;
;
Action4 ;
Action5 ;
This example defines a PulldownMenu object called App with the title “Application”.
The letter “A” in the title is designated as the menu's selector key.
The menu contains three MenuItem objects, with the titles “Action 1” to “Action 3”,
and a separator item between “Action 2” and “Action 3”. There is also a cascaded
menu with the title “More”, which contains “Action 4” and “Action 5” menu items.
The scripts Action1 to Action5 are assumed to have been defined elsewhere.
Macros
8-117
Restore
Restore
If the RealLink window is minimised or maximised, this command restores it to its
previous size and position.
Syntax
Restore ;
See also
Maximise, Minimise.
Example
Object MinWin is Script;
Minimise;
Delay(5);
Restore;
EndObject MinWin.
Minimises the RealLink window, waits 5 seconds and then restores it to its previous
position and size.
Return
Returns control from the current script to the calling script, if any, or to RealLink if
there is none.
Syntax
Return ;
Return(Value) ;
Value is an integer value to be returned to the calling script (if any). This value can be
tested with the On...Goto statement.
See also
Call.
Examples
Object Branches is Script;
On Msg(ALERT, "Example", "Stop - press a button",
"Button 1", "Button 2") Goto B1, B2;
B1:
Msg(INFO1,"Example", "Button 1 pressed");
Return;
B2:
Msg(INFO1,"Example", "Button 2 pressed");
Return;
EndObject Branches.
The above script displays a message, asking the user to choose between two buttons.
When the user makes a choice, the script branches to a label and displays a second
message. In the case of button 1, after the second message has been displayed, the
8-118
V3.0
Script Object
Return statement causes the script to return to the calling script, thus preventing the
button 2 message being displayed as well as that for button 1.
Object Choice is Script;
On Msg(ALERT, "Example", "Stop - press a button", "Button 1",
"Button 2") Goto B1, B2;
B1:
Return(1);
B2:
Return(2);
EndObject Choice.
Object Branches is Script;
On Choice Goto B1, B2;
B1:
Msg(INFO1,"Example", "Button 1 pressed");
Goto End;
B2:
Msg(INFO1,"Example", "Button 2 pressed");
End:
Return;
EndObject Branches.
In this example, the first script (Choice) displays a message, asking the user to choose
between two buttons. When the user makes a choice, the script branches to a label
and returns a value representing the button that was pressed. The second script calls
the Choice script and, depending on the value returned, branches to one of two labels
and displays an appropriate message.
Script Object
Defines a macro script.
Syntax
Object Name is Script ;
Instruction ;
{ ... }
EndObject Name .
Name is the name of the script.
Remarks
The names of all loaded objects must be unique.
The script name must have the same case in the Object and EndObject statements.
Each instruction in a script must be terminated with a semicolon.
A script can be assigned to a function key, mouse button, menu item or toolbar
button, or called from another script. If you give a script the name FIRST, it will be
executed automatically when the macro is loaded.
Macros
8-119
SendLine
See also
Button object, Keyactions object, Menu object, MenuItem object, Mouseactions
object, PopupMenu object, PulldownMenu object, Toolbar object.
Example
Object Accounts is Script;
Connect("C:\RFW\ACCOUNTS.CFG");
Return;
EndObject Accounts.
This script attempts to connect to the host specified in the file ACCOUNTS.CFG.
SendLine
Sends a text string to the connected host and appends a carriage return character.
Syntax
SendLine(String$) ;
String$ is the text to be sent, enclosed in double quotes.
Remarks
Control characters can be included in the text if required – see page 8-109 for details.
See also
SendText, InputText, Password.
Example
Object Reality is Script;
// set the Waitfor timeout
Timeout(5);
On Connect("C:\RFW\ACCOUNTS.CFG") Goto fail;
// user logon
SendLine("");
On WaitFor("LOGON PLEASE:") goto fail;
SendLine("PAULSH");
On WaitFor("assword:") goto fail;
Password("Reality Password");
Sendline("");
Return;
fail:
Msg(1,"Reality", "Logon to Reality failed");
Return;
EndObject Reality.
Connects and logs on to the host defined in the ACCOUNTS.CFG configuration file. The
script waits for the host to display the “LOGON PLEASE:” prompt, and then sends the
text "PAULSH".
8-120
V3.0
SendText
SendText
Sends a text string to the connected host.
Syntax
SendText(String$) ;
String$ is the text to be sent, enclosed in double quotes.
Remarks
Control characters can be included in the text if required – see page 8-109 for details.
See also
SendLine, InputText, Password.
Example
Object Reality is Script;
// set the Waitfor timeout
Timeout(5);
On Connect("C:\RFW\ACCOUNTS.CFG") Goto fail;
// user logon
SendLine("");
On WaitFor("LOGON PLEASE:") goto fail;
SendText("PAULSH/0D");
On WaitFor("assword:") goto fail;
Password("Reality Password");
Sendline("");
Return;
fail:
Msg(1,"Reality", "Logon to Reality failed");
Return;
EndObject Reality.
Connects and logs on to the host defined in the ACCOUNTS.CFG configuration file. The
script waits for the host to display the “LOGON PLEASE:” prompt, and then sends the
text "PAULSH" followed by a carriage return.
Show
If the RealLink window is hidden, this command displays it again.
Syntax
Show ;
See also
Hide.
Example
Object HideWin is Script;
Msg(INFO1, "Example", "Hide RFW for 5 seconds");
Hide;
Delay(5);
Macros
8-121
Space
Show;
Return;
EndObject HideWin.
This example hides the RealLink window and then, 5 seconds later, displays it again.
Space
This command generates space between two adjacent toolbar buttons. It can only be
used in the definition of a Toolbar object.
Syntax
Space(Count) ;
Count is the amount of space to add between the buttons, in pixels.
See Also
Toolbar object.
Example
Object Top is ToolBar Above Recessed;
// text buttons
"Reality" = Call Reality;
"Unix" = Call Unix;
Space(10);
// bitmap buttons
"vcrplay.bmp" = SendLine("play");
"vcrstop.bmp" = Call Stop;
"vcrpause.bmp" = SendLine("pause");
"vcrend.bmp" = SendLine("end");
EndObject Top.
In this example the space between the second and third buttons is increased by 10
pixels.
Timeout
This command sets the time that the WaitFor command will wait for a response from
the host before returning.
Syntax
Timeout(Wait) ;
Wait is the length of time to wait in seconds.
Remarks
The WaitFor timeout affects all macros and scripts in the current instance of RealLink.
If you do not set the timeout, the WaitFor command will wait for 20 seconds.
If you set the timeout to 0, the WaitFor command will never timeout.
8-122
V3.0
Toolbar Object
See Also
WaitFor.
Example
Timeout(5);
Sets the WaitFor timeout to 5 seconds.
Toolbar Object
Defines a toolbar containing buttons that the user can click to run macro scripts or
execute single macro commands.
Syntax
Object Name is Toolbar {Position} {Style} ;
ButtonDefinition ;
{ ... }
EndObject Name .
Name must be a unique name for the object.
Position
The Position parameter can be either of the following keywords:
Above
Display the toolbar at the top of the RealLink window, just below
the menu bar.
Below
Display the toolbar at the bottom of the RealLink window, just
below the status bar (if displayed).
If the Position parameter is omitted, the Below position is used.
Style
The Style parameter can be any one of the following keywords:
Plain
The toolbar will not be recessed or raised. There will be a small
space between the buttons and the edge of the Toolbar.
Recessed
The toolbar will appear to be recessed slightly into the RealLink
window. There will be a small space between the buttons and the
edge of the Toolbar.
Raised
The toolbar will appear to be raised slightly above the surface of
the RealLink window. There will be a small space between the
buttons and the edge of the Toolbar.
None
The toolbar will not be recessed or raised. There will be no space
between the buttons and the edge of the Toolbar.
If the Position parameter is omitted, the None style is used.
Note that the space between adjacent buttons can be increased by using the Space
command.
Macros
8-123
Update
Button Definitions
ButtonDefinition is a Button object definition (see page 8-97).
Remarks
The object name must have the same case in the Object and EndObject statements.
Caution
Only two Toolbar objects can be active at a time: one at the top of the RealLink
window, and the other at the bottom. If you load a macro that defines a new Toolbar
object in a position already occupied by a toolbar from another macro, the previous
macro will be unloaded, making its objects no longer available.
See also
Button object, Keyactions object, Mouseactions object, PopupMenu object,
PulldownMenu object, Space.
Example
Object Top is ToolBar Above Recessed;
// text buttons
"Reality" = Call Reality;
"Unix" = Call Unix;
Space(10);
// bitmap buttons
"vcrplay.bmp" = SendLine("play");
"vcrstop.bmp" = Call Stop;
"vcrpause.bmp" = SendLine("pause");
"vcrend.bmp" = SendLine("end");
EndObject Top.
This example defines a recessed toolbar that will be displayed at the top of the
RealLink window. The first two buttons will have the text labels "Reality" and "Unix".
There will then be a 10 pixel gap before a group of four buttons, each with a graphic
icon.
Update
The Update statement controls most RealLink display changes while a macro is
running. When screen updating is turned off, RealLink still allows the macro to display
or retrieve information using the InputText, Msg and Password statements. You can
increase the speed of some macros by preventing screen updates.
Warning
RealLink does not provide a menu command to restore screen updating. If you disable
screen updating, you must ensure that your script restores updating before
terminating.
Syntax
Update [ Off | On ] ;
8-124
V3.0
WaitFor
On
Switches screen updates on. The screen updates normally while the macro is
running.
Off
Disables screen updates. The screen does not update while the macro is
running.
Example
Object Reality is Script;
// Disable screen updating
Update Off ;
// set the Waitfor timeout
Timeout(5);
On Connect("C:\RFW\ACCOUNTS.CFG") Goto fail;
// user logon
SendLine("");
On WaitFor("LOGON PLEASE:") goto fail;
SendLine("PAULSH");
On WaitFor("Password:") goto fail;
Password("Please enter your password:", "", "Payroll system");
Sendline("");
Goto end;
fail:
Msg(INFO1,"Reality", "Logon to Reality failed");
end:
// Re-enable screen updating
Update On ;
Return;
EndObject Reality.
This example disables screen updating while it connects to a host system. The
Password command is unaffected by this and will display a dialog to request the user's
password. The script restores screen updating on completion.
WaitFor
Waits for the host to display a specified text string.
Note:
You should specify as long a text string as possible, to reduce the possibility
of matching the wrong text.
Syntax
WaitFor(Text1${, Text2$ {...}}) ;
On WaitFor(Text1${, Text2$ {...}}) Goto Label {, Label {...}} ;
Text1$, Text2$, etc. are alternative text strings.
Return Value
The second form of WaitFor returns a value that represents which of the text strings
was received from the host: 1 for the first string in the list, 2 for the second, etc. If
the wait timeout (set by the Timeout command) is exceeded without any of the
strings having been received, WaitFor returns 0.
Macros
8-125
WaitFor
See also
Delay, On...Goto, Timeout.
Example
Object Reality is Script;
// set the Waitfor timeout
Timeout(5);
On Connect("C:\RFW\ACCOUNTS.CFG") Goto fail;
// user logon
SendLine("");
On WaitFor("LOGON PLEASE:", "user id :") goto fail;
SendText("PAULSH/0D");
On WaitFor("assword:") goto fail;
Password("Reality Password");
Sendline("");
Return;
fail:
Msg(INFO1,"Reality", "Logon to Reality failed");
Return;
EndObject Reality.
Connects and logs on to the host defined in the ACCOUNTS.CFG configuration file. The
script waits for the host to prompt for a user id, and then sends the text "PAULSH"
followed by a carriage return. It then waits for the host to prompt for a password and,
when this occurs, displays a Password dialog box.
8-126
V3.0
Reserved Words
Reserved Words
The following lists the reserved words used by the RealLink Script Language:
Above
ALERT
ALERT2
ALERT3
Alt
Below
Button1
Button2
Button3
Call
CapsLock
Click
Connect
Control
Ctl
Ctrl
DblClick
Define
Delay
Disable
Disconnect
Do
Draw
Macros
Enable
EndObject
Exec
Exit
F1
F2
F3
F4
F5
F6
F7
F8
F9
F10
F11
F12
F13
F14
F15
Goto
Hide
INFO
INFO1
InputText
Is
Keyactions
Load
Max
Maximise
Maximize
Menu
MenuItem
Min
Minimise
Minimize
Mouseactions
Msg
None
NumLock
Object
Off
On
Password
Plain
PopupMenu
PulldownMenu
QUERY
QUERY2
QUERY3
Raised
Recessed
Restore
Return
Script
SendLine
SendText
Shift
Show
Space
Timeout
Toolbar
Update
WaitFor
WARN
WARN2
WARN3
8-97
Error Messages
Error Messages
Load-time Errors
The following errors can occur when loading a macro into RealLink:
An error has occurred in script file 'filename' - Parse Status 1
This error indicates that the macro file has not been loaded. It will normally occur
following another error.
Cannot open file -
filename
The macro file filename cannot be found. Check the following:
That the filename is correct.
That the file extension is correct.
That the correct drive and directory have been specified.
That the correct drive and directory are specified in the MacroDir entry in
RFW.INI (see Appendix A).
Error - Can only define Button 1 with Control or Shift: on line
nn
In a Mouseactions object, you have attempted to define an action for the primary
mouse button without any modifier keys (see page 8-111).
Error - identifier already exists:
object on line nn
You have used an object identifier that is already in use by another object. If your
macro normally loads successfully, check any macros that are already loaded.
Error - identifier mismatch :
object on line nn
The object name object used in an EndObject statement does not match the
name used in the corresponding Object statement.
parse error, expecting 'token1' or 'token2' ... or 'token5' near token
'token6' on line nn
The macro parser expected to find token1 or token2, etc. but instead found
token6.
parse error near token 'token' on line
nn
An unrecognised error has been found.
parser stack overflow
Contact your Northgate representative.
Run-time Errors
The following errors can occur when running a macro:
8-98
V3.0
Error Messages
Call stack full
Your macro is too complex. Reduce the number of nested Call, Disconnect and
Waitfor statements.
Tokens
The token parameters shown in the error messages listed above might be any of the
reserved words listed on page 8-97, or one of the following:
COLON
The colon (:) that terminates a label definition.
EQUAL
The equals sign in a button or key definition.
IDENTIFIER
A label.
INTEGER
A number.
COMMA
A comma.
PERIOD
The full stop that terminates an EndObject statement.
SEMICOLON
The semicolon that terminates a command .
LPAR
The opening parenthesis that introduces a list of parameters.
PLUS
A plus sign (+) used in a key-combination definition.
RPAR
The closing parenthesis that terminates a list of parameters.
STRING
A literal string enclosed in double quotes.
Macros
8-99
Chapter 9
Problem Solving
This chapter describes some of the more common operating problems
encountered and suggests how they might be overcome.
9-100
Introduction
Introduction
The types of problem are covered under the following headings:
Problems running RealLink.
Asynchronous communication problems.
Problems with LAN sessions.
File transfer problems
If you are unable to overcome the problem, you should contact your local support
centre.
Problem Solving
9-101
Problems Running RealLink
Problems Running RealLink
A blank page is ejected at the end of each printout
If this occurs when you use Print Window or Print Selection, set the
WindowPrintAppendFF entry in the [rfwprint.dll] section of the RFW.INI file to 0.
If this occurs when you use the PORT-DESPOOL or PORTOUT TCL command, set
the PrintAppendFF entry in the [rfwprint.dll] section of the RFW.INI file to 0.
The RFW.INI file is described in Appendix A.
Back-page does not work
The most obvious reason for this is that your configuration has no history pages
specified. Check your terminal preferences (refer to Chapter 6 for details).
Double-clicking the RealLink Icon has no effect
You have insufficient memory and/or system resources. Close down one or more
applications and try again. If you have closed down all applications except the
Windows Program Manager, and still cannot start RealLink, check that RealLink is
installed correctly.
If your PC beeps twice when you double-click the RealLink icon, the Country
setting in the WIN.INI file may not match that of the RealLink message file. Refer
to Message – Cannot open message file.
If your PC beeps three times when you double-click the RealLink icon, your
message file is out of date. Reinstall RealLink to obtain the correct message file.
Message – Cannot find font
You have not restarted Windows since installing RealLink, or the RealLink fonts were
not installed properly.
1.
Close down any applications and then return to DOS and restart Windows.
2.
If this does not work, use the Control Panel to install the appropriate font. You
will find the font files in the \WINDOWS\SYSTEM directory.
3.
If you cannot find the font files, you will need to reinstall RealLink.
Message – Cannot open message file
If this message appears when you start RealLink, the Country setting in the WIN.INI file
does not match that of the RealLink message file.
If you have changed the country setting temporarily, return it to its original
setting when you need to use RealLink.
If you do not intend to restore the country to its previous setting, you must
reinstall RealLink to obtain the correct message file.
9-102
V3.0
Problems Running RealLink
Message – Cannot open the CFG file
The CFG file you specified does not exist. Check that you typed its name
correctly.
You have run out of memory. Close down some applications and try again.
Message – Filename will be truncated Ok?
You have attempted to give a configuration file a name longer than 8 characters. If
you click the OK button, the name will be truncated to the first eight characters. Click
Cancel to return to the previous dialog and re-enter the file name.
Message – Illegal Filename: Device names cannot be used
You have attempted to give a configuration file the name of a DOS device. The
following names cannot be used: CLOCK$, CON, AUX, COMn (where n = 1 to 4), LPTn
(where n = 1 to 3), NUL and PRN.
Printing does not work
The last page of each printout is not ejected
If either of these occurs when you use Print Window or Print Selection, set the
WindowPrintAppendFF entry in the [rfwprint.dll] section of the RFW.INI file to 1.
If either of these occurs when you use the PORT-DESPOOL or PORTOUT TCL
command, set the PrintAppendFF entry in the [rfwprint.dll] section of the RFW.INI
file to 1.
The RFW.INI file is described in Appendix A.
With the CAPS LOCK selected, the SHIFT key has no effect
Set the CapsShiftToggle entry in the [RealLink] section of the RFW.INI file to 1. The
RFW.INI file is described in Appendix A.
Problem Solving
9-103
Asynchronous Communication Problems
Asynchronous Communication Problems
No response from the Host
Communication might have been paused, either with the PAUSE key or CTRL+S.
Press CTRL+Q to reverse the action of CTRL+S. If the host does not respond, try
pressing PAUSE – the host should either respond, or the message “Press 'Pause'
again to continue” will appear in the status bar. If the message appears,
communication was not paused; press PAUSE again to restore the previous state.
Check all cable connections.
Ensure that the baud rate set in the CFG file is correct for the port to which you
are attached.
Ensure that the data word length, parity and stop bit settings in the CFG file are
correct for the port.
Ensure that the correct COM port has been selected in the CFG file.
Ensure that the same method of flow control is being used on the PC and host.
Ensure that the Enable Callback Feature option is not selected in the WINSNI.INI
file. Refer to the PCi Standard Network Interface Installation Guide for details.
If all else fails, connect a standard terminal to the cable and note whether the
problem persists. If it does you have a cable or connection problem, not a RealLink
problem.
Garbled response from the Host
Ensure that you are using the correct terminal emulation. Note that the default
terminal emulation is ANSI 7-bit.
Ensure that the baud rate selected in the CFG file is correct for the port to which
you are attached.
Ensure that the data word length, parity and stop bit settings selected are correct
for the port.
Message: Hardware error or not present
You have selected a port that is not installed on your PC.
You have attempted to connect via a communications port that is already in use;
for instance, by a serial mouse.
Check that you are using the correct communications port.
Message: Invalid System Name
You are attempting to use the Northgate LAN protocol for an asynchronous connection.
Check that your communications parameters are correct.
9-104
V3.0
Asynchronous Communication Problems
Message: Invalid Stream
The name of the port you have specified is invalid. Check that your communications
parameters are correct (see also “Problems with LAN Sessions”).
Modem occasionally disconnects the Line
Some modems disconnect from the line if they detect that RealLink has dropped the
DTR (Data Terminal Ready) signal for a few microseconds. Strap DTR high at the
modem end so that the modem always sees the DTR signal.
Characters are occasionally lost
At high baud rates, the Windows asynchronous driver can sometimes lose characters.
Find the [386Enh] section in the SYSTEM.INI file, and add the line:
COMnFIFO=1
where n is the number of the port you are using.
Note:
Although this setting is in the [386Enh] section, it is also used when running
Windows in Standard mode.
Problem Solving
9-105
Problems with LAN Sessions
Problems with LAN Sessions
The majority of problems that you might encounter when using a LAN session are
described in the PCi Standard Network Interface Installation Guide. However, you
might also see the following messages:
Invalid Stream
You are attempting to use the Asynchronous Port protocol for a LAN connection. Check
that your communications parameters are correct (see also “Asynchronous
Communication Problems”).
Network Error, DDA -> ACI replug
You are using LanFTU to transfer a file over a connection that uses the Telnet
protocol.
Check that you are using the correct connection.
If the connection is correct, check that it uses the DDATCP protocol. Refer to the
PCi Standard Network Interface Installation Guide for details of how to set the
connection protocol.
Cannot find CCIDDA21.DLL
followed by
Unable to load CCIDDA21.DLL error 2
–or–
Cannot find CCITCP.DLL
followed by
Unable to load CCITCP.DLL error 2
If either of these pairs of messages appear, you are attempting to use a
connection protocol that is no longer supported. Select the Communications
command from the Setup menu. Then select the LAN protocol and click OK. Save
your configuration file.
9-106
V3.0
File Transfer Problems
File Transfer Problems
The problems you might encounter when transferring files depend on the utility you
are using.
LanFTU
Message: Record size too large
When transferring data to a Sovereign file, a record has been found that is larger
than that specified in the Max Rec Size field. Increase the maximum record size.
When transferring data from a Sovereign file, a record has been found that is
larger than the data transfer buffer on the PC. Set the BLOCKSIZE entry in the
[WLANFTU] Section of RFW.INI to a larger value (refer to Appendix A for details).
Message: Stop -
DOSfile contains no data
The length of the source DOS file is zero. Check that you have typed the DOS file name
correctly.
Message: Stop - Can't find
DOSfile
The source DOS file does not exist. Check that you have typed the DOS file name
correctly.
Message: Unable to transfer data - error 20 (CONNECT)
LanFTU was unable to connect to the host. This message will normally be preceded by
a network message that indicates the cause. These messages are described on page
9-106 and in the PCi Standard Network Interface Installation Guide.
Message: Unable to transfer data - error 54 (DOSOPEN)
The destination DOS file already exists and cannot be overwritten.
Check that you have typed the file name correctly.
Check that the file concerned is not read only.
Message: Unable to transfer data - error 55 (DISKWRITE)
An error occurred while writing to the destination DOS file. Use a disk maintenance
program to check for and repair any disk errors.
Message: Unable to transfer data - error 60 (BINARY)
You have attempted to transfer a binary DOS file to the host, using an ASCII filter.
Check your LanFTU settings.
Message: Unable to transfer data - error 61 (ROSOPEN)
The specified Reality file could not be opened. Check that you have typed the file
name correctly.
Problem Solving
9-107
File Transfer Problems
Message: Warning - 0 bytes transferred to
DOSfile
The source Reality item does not exist. Check that you have typed the item name
correctly.
HOST-WS and WS-HOST
Message: COULDN'T OPEN FILE 'filename'
The Reality file does not exist. Check that you have typed the file name correctly.
Message: COULDN'T READ ITEM 'itemname' (HOST-WS)
The Reality item does not exist. Check that you have typed the item name correctly.
Message: COULDN'T READ ITEM 'RL.BP','filter'
The filter you have specified does not exist. Check that you have typed the filter name
correctly.
Message: INVALID FILTER ITEM
You have attempted to use a filter which cannot be used with HOST-WS or WS-HOST.
Check that you have typed the filter name correctly.
Message: TRANSMISSION ERROR 'filename,itemname'
HOST-WS:
The DOS directory you have specified does not exist. Check that you have typed
the DOS path and file name correctly.
The DOS file already exists and is read only. Check that you have typed the DOS
path and file name correctly. If you have, use the Windows File Manager to
change the properties of the file.
WS-HOST:
The DOS file you have specified does not exist. Check that you have typed the
DOS path and file name correctly.
PASS-DOS and SPASS-DOS
Because these utilities use HOST-WS to transfer the converted data to the PC, many of
the HOST-WS error messages are also applicable to PASS-DOS and SPASS-DOS. You
might also see messages generated by TCL and English. The following are additional
problems and error messages that apply specifically to the PASS-DOS and SPASS-DOS.
Message: CONVERSION FILTER NOT FOUND 'filter'
The filter you have specified does not exist. Check that you have typed the filter
name correctly.
You have included a FOOTING clause before the INTO clause. Reverse the order of
these clauses.
9-108
V3.0
File Transfer Problems
Message: INVALID CONVERSION FILTER FORMAT 'filter'
You have attempted to use a filter which cannot be used with PASS-DOS or SPASS-DOS.
Check that you have typed the filter name correctly.
No data is transferred
If no error messages appear, but no data is transferred, the most likely cause is that
you have omitted the drive letter in the DOS file specification.
Problem Solving
9-109
Appendix A
The RFW.INI File
This Appendix describes the RFW.INI file and the configuration options that
it offers. It also lists the key codes that can be used in RFW.INI to define
the Help and Mode keys.
A-110
The Structure of the INI File
The Structure of the INI File
The RFW.INI file determines the initial configuration whenever RealLink is started. It is
an ASCII file and can be edited with any text editor (Windows Notepad, for example).
The file consists of a number of sections, each of which begins with a section name
enclosed in square brackets. The sections present in the default file are as follows:
[RealLink]
[Editline]
[SaveCmds]
[SaveReps]
[ccicom.dll]
[ccidda.dll]
[executives]
[macros]
[WLANFTU]
[rfwprint.dll]
[CharacterSets]
[CharacterMappings]
The sections can appear in any order, and the parameters can appear in any order
within each section. Section and parameter names are not case sensitive – the
following are identical: rfwdir, RFWDIR, RfwDir.
The RFW.INI File
A-111
[RealLink] Section
This section of the RFW.INI file can contain the following parameters:
Bitmaps=path
The full path of the directory containing any bitmap files used by macros or UIMS
applications. For example:
Bitmaps=c:\RFW
The default setting is the directory specified by the rfwbin parameter.
BlinkRate=milliseconds
The rate in milliseconds at which flashing characters will blink. A setting of 500ms
is recommended. Zero (0) means no flashing. The default setting is 500.
BrightEdge=colour
Specifies the colour used to draw the light edges of three-dimensional controls on
the status bar. colour must be an RGB value, specified in decimal or, if prefixed
with 0x, hexadecimal. The default value is 0xFFFFFF (white).
BusyTimerRate=value
This specifies the flash rate for the attention indicator on the RealLink icon, and
the frequency at which RealLink will sample host activity when iconised. The
default setting is 0.
ButtonBack=colour
Specifies the background colour used to indicate that a status bar button is
selected. colour must be an RGB value, specified in decimal or, if prefixed with
0x, hexadecimal. The default is 0x7FFFFF (cyan).
ButtonText=colour
Specifies the foreground colour used when a status bar button is selected. colour
must be an RGB value, specified in decimal or, if prefixed with 0x, hexadecimal.
The default is 128 (dark blue).
CapsShiftToggle=[ 0 | 1 ]
Specifies whether, with the CAPS LOCK selected, the SHIFT key produces upper or
lower case characters.
0
1
Shifted characters are upper case.
Shifted characters are lower case.
ConnectList=value
Specifies whether or not a list of RealLink sessions is displayed on the Connection
menu. value can be set to the following:
0
Display a list of sessions.
If the ConnectList parameter is not present, no session list is displayed.
A-110
[RealLink] Section
DarkEdge=colour
Specifies the colour used to draw the dark edges of three-dimensional controls on
the status bar. colour must be an RGB value, specified in decimal or, if prefixed
with 0x, hexadecimal. The recommended values are
VGA 0x808080 (dark grey)
EGA 0 (black)
The default setting is 0x808080 (dark grey).
DefColSelMode=value
This specifies the default text selection mode: 0 for line mode, or 1 for column
mode. In either case, pressing the ALT key while selecting text, switches RealLink
into the other mode. The default setting is 0.
Help=HelpProgram {parameters}
This specifies a program that will be called when the Application command on the
Help menu is selected. The program name can be followed by any applicationspecific parameters, such as the name of a help file. For example:
Help=C:\RFW\RFWHELP C:\RFW\HLP\QRGC1.HLP
This specifies the program C:\RFW\RFWHELP as the help application and
C:\RFW\HLP\QRGC1.HLP as the help file.
The application command line can also include the following parameters:
$C or $c
When the help application is called, these characters are
replaced with the name of the configuration (CFG) file that is
currently loaded.
$[S | s] ( Column, Row, Count )
When the help application is called, these characters are
replaced with text currently displayed in the RealLink window,
as specified by the Column, Row and Count parameters.
Refer to Appendix E for more details of these parameters.
If no program is specified, the Help Application command is disabled.
helpkey=keycode
This specifies which key is used as the Help key; that is, the key that displays
context-sensitive help; Chapter 5 describes the use of this key.
The available key code values are listed on pages A-110 to A-111. The default is
4159 (CTRL+?).
helppath=path
The full path of the directory containing the RealLink help files. For example:
helppath=C:\RFW\HLP
The RFW.INI File
A-111
[RealLink] Section
If this entry is not present, no help will be available.
Identity=string
This specifies the response string returned in response to a VT220 inquiry
command from the host. The default is "MDC-P9".
LeaveAlone=value
By default, if the user presses ALT+RETURN, RFW.INI will be displayed for editing in
the Windows Notepad text editor. Setting the LeaveAlone entry to 1 disables this.
LoadDlls=list
Specifies DLLs to be loaded when RealLink is started. list is a list of DLL names,
separated by semicolons. The DLLs are assumed to be in the directory specified
by the rfwbin parameter unless otherwise specified. The suffix '.dll' will be added
if none is supplied. A DLL name may be immediately followed by a parameter
string within parentheses.
For example:
LoadDlls=gen-ex1(S)
loads the DLL, gen-ex1, with the parameter “S”. This displays the current cursor
position in the right most section of the status bar.
MacroDir=path
The full path of the directory containing your macro script files. For example:
MacroDir=C:\RFW
If this entry is not present, the directory specified by the rfwdir parameter is
used.
MaximumPasteRateInCPS=value
This specifies the maximum rate (in characters per second) at which data pasted
into RealLink will be transferred to the host. If you find that you lose characters
when you transfer large amounts of data to the host, try setting this entry to 300.
modekey=keycode
This specifies the key used to switch between normal and text selection mode.
The available key code values are listed on pages A-110 to A-111. The default is
266 (SCROLL LOCK).
multinatxlt={path}filename
The path (optional) and name of the '.xlt' file that RealLink uses for character
translation of characters transmitted to remote hosts in multi-national keyboard
mode. The default is:
multinatxlt=rfwtx
A-112
V3.0
[RealLink] Section
natxlt={path}filename
The path (optional) and name of the '.xlt' file that RealLink uses for character
translation of characters transmitted to remote hosts in national keyboard mode.
If this entry is not present, or is set to null, RealLink will automatically use the
correct translation table for the selected nationality. The default setting is null.
resourcepath=path
The full path of the directory containing the RealLink resource files. For example:
resourcepath=C:\RFW\RES
rfwbin=path
The full path of the RealLink program directory. For example:
rfwbin=c:\RFW
For local installations, this will be a directory on your PC; for network
installations, it will be a directory on the server system.
rfwdir=path
The full path of your RealLink user directory (containing the RealLink message file
and your configuration files). For example:
rfwdir=C:\RFW
For local RealLink installations, this directory will be the same as 'rfwbin' (see
above); for network installations it will be a directory on your PC.
StatusBar=[ 0 | 1 ]
This parameter is set by the Setup Status Bar command, and determines whether
or not the RealLink Status Bar will be displayed. It can be set to the following
values:
0
1
Do not display the Status Bar.
Display the Status Bar.
The default setting is 0.
StatusColour=colour
Specifies the background colour used on the status bar. colour must be an RGB
value, specified in decimal or, if prefixed with 0x, hexadecimal. The
recommended values are
VGA 0xc0c0c0 (light grey)
EGA 0xFFFFFF (white)
The default setting is 0xc0c0c0 (light grey).
The RFW.INI File
A-113
[Editline] Section
StatusFont=fontname-pointsize
Specifies the font and point size of text used on the status bar. The font name
and the point size must be separated by a single hyphen, with no spaces. Default
value is MS Sans Serif-10
StripSpaces=[ 0 | 1 ]
This parameter is set by the Edit Strip Spaces command, and determines whether
or not RealLink removes trailing spaces on text selection operations. It can be set
to the following values:
0
1
Do not remove trailing spaces.
Remove trailing spaces.
The default setting is 0.
TableFormat=string
This parameter is set when you click the Save as Default button in the Edit
Configure Table dialog box. It specifies the default settings used by the Edit Copy
Table command.
string consists of the following fields, separated by tilde (~) characters:
1.
Parsing separator.
2.
Paste column separator.
3.
Paste row separator.
4.
Not formatted on display (1 for selected, 0 for not selected).
Note:
Control and non-printable characters are represented by a backslash
followed by two upper case hexadecimal digits representing the ASCII code
for the character. For example:
Tab \09
Carriage return
Line feed \0A
Backslash \5C
\0D
The default is "~ ~\09~\0D~0".
[Editline] Section
This section of the RFW.INI file contains settings for the Line Edit command on the Edit
menu. It can contain the following parameters:
CmdStack=value
Determines the behaviour of the Line Edit command. stack can be set to the
following:
0
A-114
Line Edit is enabled, but does not stack commands.
V3.0
[SaveCmds] Section
1
Line Edit is enabled, and commands used are added to the list of commands
in the Line Edit dialog.
Note:
If the CmdStack parameter is not present, the Line Edit command is
disabled and cannot be used.
MaxHist=commands
Specifies the maximum number of commands that can be displayed in the Line
Edit dialog. The default is 20.
MaxRep=strings
Defines the maximum number of replacement strings that can be displayed in the
Line Edit dialog. The default is 20.
Password=string
Specifies a string of characters that will be recognised as the host's password
prompt. When the host displays this string, any text entered by the user in
response, up to the next carriage return, will not be added to the list of
commands in the Line Edit dialog. The default is “PASSWORD”. Note that string is
not case sensitive.
RepStr=string
Specifies a string of up to three characters that is used to separate search strings
from replacement strings in the Replace list box. The default is:
RepStr=->
[SaveCmds] Section
The entries in this section of the RFW.INI file define commands to be pre-loaded into
the list of previously used commands in the Line Edit dialog box. Each entry must be in
the format:
Cn=string
where:
n
specifies the position in the list at which the command will appear. Position
numbers must start at 1 and be contiguous. If a number is omitted, commands
after the omitted number will not be loaded. The maximum number of
commands that can be loaded is MaxHist - 1 (see the [Editline] section above).
string is the command to be loaded, including any parameters and options.
For example:
C1=TERM ,,,,,,,,4
C2=LOGTO MX-1
[SaveReps] Section
The entries in this section of the RFW.INI file define commands to be pre-loaded into
the list of previously used Replace commands in the Line Edit dialog box. Each entry
must be in the format:
The RFW.INI File
A-115
DLL Sections
search_string=replacement_string
For example:
ME=BASIC
BASIC=CATALOG
The maximum number of commands that can be loaded is MaxRep - 1 (see the
[Editline] section on the previous page).
DLL Sections
These sections of the RFW.INI file contain the settings for the communications DLLs.
There are currently two of these: CCICOM.DLL and CCIDDA.DLL. In each of these
sections, settings for the following parameters can be specified:
title=string
This specifies the title displayed in the Protocol list in the Communications dialog
box, and elsewhere in RealLink. The default setting is the name of the DLL file.
[executives] Section
The entries in this section specify the DLLs required by various RPQs and terminal
executives. These are set when you install RealLink or the RPQ concerned and must
not be changed.
[macros] Section
This section of the RFW.INI file specifies settings for the Macro menu and the Macro
Select command. It can contain the following entries:
MacroEdit=program
This specifies the editor to be used when creating and modifying macros. The
specified program will be started when the user clicks the Edit button in the
Macro Select dialog box.
If this entry is not present, the Edit and Delete buttons do not appear in the
Macro Select dialog box.
The remaining entries specify the macro commands to be displayed on the Macro
menu, and are set by the Macro Select command. Each entry is in the format:
Mn=string
where:
n
specifies the position in the list at which the command will appear. Position
numbers must start at 1 and be contiguous. If a number is omitted, macros
after the omitted number will not be loaded. A maximum of nine macros can
be displayed on the Macro menu.
string is the name of the macro file.
For example:
M1=Applic1
M2=Applic2
A-116
V3.0
[WLANFTU] Section
[WLANFTU] Section
The entries in this section are set by the LanFTU application. Most of these are set
when you use LanFTU and must not be changed. You can, however, set the following
entry:
BLOCKSIZE=kilobytes
Specifies the size in kilobytes of the data transfer buffer on the PC. It can be set
to any value from 1 to 32. The default is 32.
[rfwprint.dll] Section
The following parameters are set by the Printer Font dialog and specify the font used
when printing. If no font is specified, the selected printer's default font is used.
FaceName=fontname
PointSize=value
Bold=[ 0 | 1 ]
Italic=[ 0 | 1 ]
The remaining two entries control whether or not a form feed character (new page
command) is sent to the printer when printing completes. In both cases, value can be
set to the following:
0
Do not send a terminating form feed. Try this setting if a blank page is ejected
at the end of your printout.
1
Send a terminating form feed. Try this setting if nothing is printed or the last
page of your printout is not ejected.
PrintAppendFF=[ 0 | 1 ]
This is the form feed setting for Spooled and Direct printing.
WindowPrintAppendFF=[ 0 | 1 ]
This is the form feed setting for Print Window and Print Selection.
[CharacterSets] Section
The entries in this section must not be changed by the user.
[CharacterMappings] Section
The entries in this section must not be changed by the user.
The RFW.INI File
A-117
Key Codes
This section lists the key codes (in hexadecimal) for all of the characters available
from within RealLink for Windows. You will need these codes if you redefine the Mode
and/or Help keys.
Table A-1.
Key Codes
Key
Description
Code
Key
Description
Code
backspace
0x08
.
period
0x2E
tab
0x09
/
slash
0x2F
clear
0x0C
0
zero
0x30
return
0x0D
1
one
0x31
ESC
escape
0x1B
2
two
0x32
space
0x20
3
three
0x33
!
exclamation mark
0x21
4
four
0x34
"
double quote
0x22
5
five
0x35
#
number sign
0x23
6
six
0x36
$
dollar
0x24
7
seven
0x37
%
percent
0x25
8
eight
0x38
&
ampersand
0x26
9
nine
0x39
'
apostrophe
0x27
:
colon
0x3A
(
left parenthesis
0x28
;
semicolon
0x3B
)
right parenthesis
0x29
<
less than
0x3C
*
asterisk
0x2A
=
equals
0x3D
+
plus
0x2B
>
greater than
0x3E
,
comma
0x2C
?
question mark
0x3F
-
minus
0x2D
@
at symbol
0x40
A
0x41
X
0x58
B
0x42
Y
0x59
C
0x43
Z
0x5A
D
0x44
[
left bracket
0x5B
E
0x45
\
backslash
0x5C
F
0x46
]
right bracket
0x5D
G
0x47
^
circumflex
0x5E
H
0x48
_
underscore
0x5F
I
0x49
`
left quote
0x60
J
0x4A
'
right quote
0x61
K
0x4B
{
left brace
0x7B
L
0x4C
|
bar
0x7C
(continued)
A-110
Key Codes
Table A-1
Key
Key Codes (continued)
Code
Key
Description
Code
M
0x4D
}
right brace
0x7D
N
0x4E
~
tilde
0x7E
O
0x4F
DELETE
delete
0x7F
P
0x50
up
0x100
Q
0x51
down
0x101
R
0x52
left
0x102
S
0x53
right
0x103
T
0x54
PG UP
page up
0x104
U
0x55
PG DN
page down
0x105
V
0x56
INSERT
insert
0x106
W
0x57
HOME
Home
0x107
end
0x108
F7
function key 7
0x206
help
0x109
F8
function key 8
0x207
scroll lock
0x10A
F9
function key 9
0x208
cancel
0x110
F10
function key 10
0x209
F1
function key 1
0x200
F11
function key 11
0x20A
F2
function key 2
0x201
F12
function key 12
0x20B
F3
function key 3
0x202
F13
function key 13
0x20C
F4
function key 4
0x203
F14
function key 14
0x20D
F5
function key 5
0x204
F15
function key 15
0x20E
F6
function key 6
0x205
END
SCROLL
LOCK
Description
There are also a number of keys which can be used on their own or held down to
modify other keys. If one of these keys is used as a modifier, its modifier value should
be added to the key code of the key with which it is combined. These keys are listed in
Table A-2.
Table A-2.
Key
Key Modifiers
Description
Code
Modifier
CAPS LOCK
0x01
0x8000
NUM LOCK
0x02
0x4000
SHIFT
0x03
0x2000
CTRL
Control key
0x04
0x1000
ALT
Alt key
0x05
0x0800
The RFW.INI File
A-111
Appendix B
ANSI Escape Sequences
This appendix lists the escape sequences that are recognised by a Prism
terminal in ANSI Mode and indicates whether or not they are fully
supported by RealLink. It gives details of those sequences which are not
fully supported. For full details of these escape sequences, refer to the
Models 12120, 12140, 12121 and 12141 Programmer’s Reference Manual.
It also lists those escape sequences which are required for support of DEC
VT220 emulation, and sequences that are unique to RealLink.
B-113
Supported Escape Sequences
Supported Escape Sequences
Table B-1.
Mnemonic
ANSI Escape Sequences
Syntax
Function
Control Functions
ESC
ESC (hex 1B)
Escape
Supported
CSI
CSI (hex 9B or ESC [ )
Control Sequence Introducer
Supported
DCS
DCS (hex 90)
Device Control String
Supported
ST
ST (hex 9C or ESC \ )
String Terminator
Supported
CAN
CAN (hex 18)
Cancel
Supported
SUB
SUB (hex 1A)
Substitute
Supported
SM
CSI
Pm ; ... Pm h
Set Mode
Supported
RM
CSI
Pm ; ... Pm l
Reset Mode
Supported
Formatting Data
CR
CR (hex 0D)
Carriage Return
Supported
LF
LF (hex 0A)
Line Feed
Supported
IND
IND (hex 84)
Index (=LF)
Supported
VT
VT (hex 0B)
Vertical Tab (=LF)
Supported
NEL
NEL (hex 85)
Next Line (=CRLF)
Supported
RI
RI (hex 8D)
Reverse Index
Supported
FF
FF (hex 0C)
Form Feed
Supported
BS
BS (hex 08)
Backspace
Supported
REP
CSI
Repeat
Supported
Pn b
Cursor Manipulation
CUU
CSI
Pn A
Cursor Up
Supported
CUD
CSI
Pn B
Cursor Down
Supported
CUF
CSI
Pn C
Cursor Forward
Supported
CUB
CSI
Pn D
Cursor Back
Supported
CNL
CSI
Pn E
Cursor Next Line
Supported
CPL
CSI
Pn F
Cursor Preceding Line
Supported
CUP
CSI
Pl ; Pc H
Cursor Position
Supported
HVP
CSI
Pi ; Pc f
Horizontal and Vertical Position
Supported
CHA
CSI
Pc G
Cursor Horizontal Absolute
Supported
HPA
CSI
Pc `
Horizontal Position Absolute
Supported
HPR
CSI
Pn a
Horizontal Position Relative
Supported
HPB
CSI
Pn j
Horizontal Position Backward
Supported
VPA
CSI
Pi d
Vertical Position Absolute
Supported
(continued)
B-114
V3.0
Supported Escape Sequences
Table B-1.
Mnemonic
ANSI Escape Sequences (continued)
Syntax
Function
Cursor Manipulation (cont.)
VPR
CSI
Pn e
Vertical Position Relative
Supported
VPB
CSI
Pn k
Vertical Position Backward
Supported
MDRVAM
CSI < 6 l (or h)
Relative Vertical Addressing
Mode
Supported
MDVCM
CSI < 4 l (or h)
Visible Cursor Mode
Supported
Cursor Tabulation
HTS
HTS (hex 88)
Horizontal Tab Set
Supported
HTSA
CSI
Pc ; ... Pc sp N
Horizontal Tab Set Absolute
Supported
TBC
CSI
Pc g
Tab Clear
Supported
CTC
CSI
Po w
Cursor Tabulation Control
Supported
HT
HT (hex 09)
Horizontal Tab
Supported
CHT
CSI
Pn I
Cursor Horizontal Tab
Supported
CBT
CSI
Pn Z
Cursor Backward Tab
Supported
Character-Set Selection
MDMNM
CSI < 16 l (or h)
Multinational Mode
Supported
SCS0
ESC ( Dscs
Select Character Set in G0
Supported
SCS1
ESC ) Dscs
Select Character Set in G1
Supported
SCS2
ESC * Dscs
Select Character Set in G2
Supported
SCS3
ESC + Dscs
Select Character Set in G3
Supported
LS0
SI (hex 0F)
Lock Shift G0
Supported
LS1
SO (hex 0E)
Lock Shift G1
Supported
LS2
ESC n
Lock Shift G2
Supported
LS3
ESC o
Lock Shift G3
Supported
LS1R
ESC ~
Lock Shift G1, Right
Supported
LS2R
ESC }
Lock Shift G2, Right
Supported
LS3R
ESC |
Lock Shift G3, Right
Supported
MDSS1
PU2 (hex 92)
Single Shift G1
Supported
SS2
SS2 (hex 8E)
Single Shift G2
Supported
SS3
SS3 (hex 8F)
Single Shift G3
Supported
Video Attributes
MDSCA
CSI
Pa % {
Select Character Attribute
Supported
SGR
CSI
Pa ; ... Pa m
Select Graphic Rendition
See page
B-124
MDSLA
CSI
Pa % |
Select Line Attributes
Supported
(continued)
ANSI Escape Sequences
B-115
Supported Escape Sequences
Table B-1.
Mnemonic
ANSI Escape Sequences (continued)
Syntax
Function
ICH
CSI
Pn @
Insert Character
Supported
DCH
CSI
Pn P
Delete Character
Supported
IL
CSI
Pn L
Insert Line
Supported
DL
CSI
Pn M
Delete Line
Supported
IRM
CSI 4 l (or h)
Insertion Replacement Mode
Supported
ECH
CSI
Pn X
Erase Character
Supported
EF
CSI
Pe N
Erase in Field
Supported
EL
CSI
Pe K
Erase in Line
Supported
ED
CSI
Pe J
Erase in Display
Supported
EM
CSI 6 l (or h)
Erasure Mode
Supported
MDDEM
CSI < 5 l (or h)
Data Erasure Mode
Supported
Editing
Page Manipulation
B-116
MDDPL
CSI
w
Pp ; Pl ; Pc ; Pe % Define Page Layout
See page
B-122
MDSDF
CSI
Pp ; Pc ; Pf % x
Set Display Format
See page
B-125
MDSSA
CSI
Ps ; Pe % v
Set Scrolling Area
Supported
MDWSM
CSI < 14 l (or h)
Wide Screen Mode
Supported
PPA
CSI
Pp sp P
Page Position Absolute
Ignored
PPR
CSI
Pn sp Q
Page Position Relative
Ignored
PPB
CSI
Pn sp R
Page Position Backward
Ignored
MDSPSM
CSI < 11 l (or h)
Save Page State Mode
Ignored
MDSPS
CSI % y
Save Page State
Ignored
MDRPS
CSI % z
Restore Page State
Ignored
MDPDA
CSI
Pp % p
Page Display Absolute
Ignored
NP
CSI
Pn U
Next Page
Ignored
PP
CSI
Pn V
Preceding Page
Ignored
MDNS
CSI % q
Next Screen
Ignored
MDPS
CSI % r
Preceding Screen
Ignored
MDSDL
CSI % s
Screen Data Left (Screen )
Ignored
MDSDR
CSI % t
Screen Data Right (Screen )
Ignored
SU
CSI
Pn S
Scroll Up (Scroll Forward)
Ignored
SD
CSI
Pn T
Scroll Down (Scroll Back)
Ignored
SL
CSI
Pn sp @
Scroll Left (Scroll )
Ignored
SR
CSI
Pn sp A
Scroll Right (Scroll )
Ignored
V3.0
Supported Escape Sequences
(continued)
ANSI Escape Sequences
B-117
Supported Escape Sequences
Table B-1
Mnemonic
ANSI Escape Sequences (continued)
Syntax
Function
Page Manipulation (cont.)
MDAPDM
SCI < 7 l (or h)
Active Page Display Mode
Ignored
MDSKAM
CSI < 13 l (or h)
Screen/Scroll Keys Action Mode
Supported
System Message Start
Supported
System Messages
MDSMS
CSI
MDSMDM
CSI < 8 l (or h)
System Message Display Mode
Supported
MDSAK
CSI
Pk ~
Special Action Key
Supported
MDSAKS
CSI
Pk }
Special Action Key with Shift
Supported
MDSAKC
CSI
Pk {
Special Action Key with Control
Supported
KAM
CSI 2 l (or h)
Keyboard Action Mode
Supported
MDDFK
DCS
Define Function Key
Supported
Pc % }
Keyboard
Pk % p Sk ST
Note:
MDEKM
CSI < 17 l (or h)
In VT220 mode,
function keys F1 to F4
cannot be redefined.
Extended Keypad Mode
Supported
Communications
XON
XON (hex 11)
Transmission On
Supported
XOFF
XOFF (hex 13)
Transmission Off
Supported
S7C1T
ESC sp F
Select 7-bit C1 code
Transmission
Supported
S8C1T
ESC sp G
Select 8-bit C1 code
Transmission
Supported
MDPOC
CSI<Po ; Ps ; Pe i
Printer Output Control
Supported
MC
CSI
Media Copy
Supported
Printing
Po i
Terminal Control
MDSTR
CSI & P
Soft Terminal Reset
Supported
RIS
ESC c
Reset to Initial State (Hard
Terminal Reset)
Supported
MDEM
CSI < 12 l (or h)
MDC Mode
Supported
BEL
BEL (hex 07)
Bell
Supported
Report on Device Configuration
Supported
Device Attributes
Supported
Terminal Configuration Report
Supported
Configuration Reporting
MDRDC
CSI <
DA
CSI
MDTCR
CSI < 10 ; Pm ; Pb ;
Pn ; Pv c
Ps c
Ps c
(continued)
B-118
V3.0
Supported Escape Sequences
Table B-1
Mnemonic
ANSI Escape Sequences (continued)
Syntax
Function
Configuration Reporting (cont.)
MDSCR
CSI < 11 ;
; Pf c
Pp ; Pl ; Pc
Screen Configuration Report
Supported
MDPCR
CSI < 12 ;
Pt c
Printer Configuration Report
Supported
MDKCR
CSI < 13 ;
Pl ; Pn c
Keyboard Configuration Report
Supported
Device Status Report
Supported
Report on Device Status
Supported
Cursor Position Report
Supported
Status Reporting
DSR
CSI
MDRDS
CSI <
CPR
CSI
MDKSR
CSI < 13 ;
Pm ; Pg n
Keyboard Status Report
Supported
MDPSR
CSI < 12 ;
Pg ; Pb n
Printer Status Report
Supported
MDSSR
CSI < 11 ;
; Pq n
Pp ; Pl ; Pc
Screen Status Report
Supported
MDTSR
CSI < 10 ;
Pe ; Pg n
Terminal Status Report
Supported
Load Character Shapes
Ignored
Load Character Map
Ignored
Pt n
Ps n
Pl ; Pc R
Downloaded Character Sets
MDLCS
DCS
Pb ; Pc ; Pe % q
Dscs S1 ; S2 ; ... Sn
ST
MDLCM
DCS
Pb ; Pc ; Pe % r
Dscs S1 ; S2 ; ... Sn
ST
Note:
Terminal Executives cannot be downloaded.
Table B-2.
Mnemonic
Additional Functions for DEC VT220 Support
Function
Notes
Cursor Manipulation
DECTCEM
Text Cursor Enable Mode
As MDVCM
Supported
DECOM
Origin Mode
As MDRVAM
Supported
DECSEL
Selective Erase in Line
Sets MDDEM and uses
EL
Supported
DECSED
Selective Erase in Display
Sets MDDEM and uses
ED
Supported
Subset of MDSCA
Supported
Editing
Video Attributes
DECSCA
Select Character Attribute
DECDHL
Double Height Line
Ignored
DECDWL
Double Width Line
Ignored
DECSWL
Single Width Line
Ignored
ANSI Escape Sequences
B-119
Supported Escape Sequences
(continued)
B-120
V3.0
Supported Escape Sequences
Table B-2
Mnemonic
Additional Functions for DEC VT220 Support (continued)
Function
Notes
Page Manipulation
DECSTBM
Set Top and Bottom Margins
Identical to MDSSA
Supported
DECSC
Save Cursor
Identical to MDSPS
Supported
DECRC
Restore Cursor
Identical to MDRPS
Supported
DECCOLM
Column Mode
Identical to MDWSM
Supported
DECKPAM
Keypad Application Mode
Sets MDEKM
Supported
DECKPNM
Keypad Numeric Mode
Resets MDEKM
Supported
DECCKM
Cursor Key Mode
Keyboard
Supported
Communications
DECSCL
Set Compatibility Level
Level 2 options only
Supported
Printer Control Sequence
Subset of MDPOC
Supported
Printing
Terminal Control
DECSTR
Soft Terminal Reset
Identical to MDSTR
Supported
DECANM
ANSI Mode
Similar to MDP8EM
Supported
Primary Device Attributes (DEC)
Setup option
Supported
Reporting
Secondary Device Attributes
(DEC)
Device Status Reporting (DEC)
ANSI Escape Sequences
Supported
Printer only
Supported
B-121
Page Manipulation Commands
Page Manipulation Commands
The following escape sequences are supported on RealLink for Windows, but with
reduced functionality.
MDDPL
Define Page Layout – specifies the structure of a page.
Syntax
CSI Pp ; Pl ; Pc ; Ps ; Pe ; Pf % w
Syntax Elements
Pp
Page number. Ignored – page 1 is always selected.
Pl
Number of lines. Default value = 24.
Pc
Number of columns. Default value = 80 or 132 (see MDSDF).
Ps
Start of scrolled area. Ignored.
Pe
End of scrolled area. Ignored.
Pf
Format options. Ignored.
Remarks
This escape sequence defines the layout of a page. The layout parameters remain in
force until another escape sequence for the page is received or a reset occurs.
This escape sequence has no immediate effect and must be followed by an MDSDF
sequence to action the definition. No data or escape sequences may be sent to the
terminal between the MDDPL and MDSDF sequences.
MDSDF
Set Display Format – defines the display buffer and video formats.
Syntax
CSI Pp ; Pc ; Pf % x
Syntax Elements
Pp
Number of pages. Ignored.
Pc
Number of display columns. Value: 80 or 132. Default = 80.
Pf
Format options. Ignored. Single Active Page (SAP) format is always selected.
Remarks
Reinitialises the video display and the buffers to the new format specified in this
escape sequence, and in any preceding MDDPL sequence defining the page one layout
(see above).
B-122
V3.0
Page Manipulation Commands
All pages are cleared by this escape sequence. They are also reinitialised to place the
cursor in the top left-hand corner, and to set the current per-character video
attributes to normal. Page one is made the current ‘active’ page and the current
‘display’ page.
ANSI Escape Sequences
B-123
Video Attributes
Video Attributes
The following escape sequence is fully supported on RealLink for Windows, but also
provides additional functionality.
SGR
Select Graphic Rendition – defines the video attributes for subsequent characters.
Syntax
CSI Pa ; ... Pa m
Syntax Elements
Pa
Attribute (selective). Default value = 0.
Pa Effect
Pa Effect
Pa Effect
0
Clear all attributes
30
Black foreground
40
Black background
1
Bold
31
Red foreground
41
Red background
4
Underline
32
Green foreground
42
Green background
5
Flashing
33
Yellow foreground
43
Yellow background
7
Reverse video
34
Blue foreground
44
Blue background
22
Normal intensity
(not bold)
35
Magenta
foreground
45
Magenta background
24
Not underline
36
Cyan foreground
46
Cyan background
25
Not flashing
37
White foreground
47
White background
27
Not reverse video
Remarks
This is an alternative to MDSCA for specifying character attributes. Unlike MDSCA, a
new sequence does not turn off other attributes automatically. Only if zero (or ‘null’)
is used as the parameter, are the attributes turned off.
Note that the ‘protected’ attribute cannot be specified using this control sequence.
The colour attributes (Pa = 30 to 47) should not be used in combination with the other
types of attributes. If this is done, the results will be unpredictable.
B-124
V3.0
RealLink Escape Sequences
RealLink Escape Sequences
The following escape sequences are available only on RealLink for Windows 2.0 and
later.
Append
Appends the currently selected text to that currently on the Windows clipboard.
Syntax
CSI 3 % n
Caps Lock Control
Controls the CAPS LOCK setting on the PC.
Syntax
to set the CAPS LOCK on.
CSI < 3 1 h
CSI < 3 1 l
to set the CAPS LOCK off.
Default value – as set by the user.
Clear History
Clears the terminal page and all history pages. The position of the cursor remains
unchanged.
Syntax
CSI 0 % n
Copy
Copies the currently selected text to the Windows clipboard.
Syntax
CSI 1 % n
Copy Table
Copies the currently selected text to the Windows clipboard and formats it as a table
as specified by the current settings of the Configure Table command.
Syntax
CSI 5 % n
Copy Window
Copies the contents of the RealLink window to the Windows clipboard.
Syntax
CSI 2 % n
ANSI Escape Sequences
B-125
RealLink Escape Sequences
Draw
Draws boxes and/or lines in the terminal window.
Syntax
CSI BoxDefinition {LineDefinition {...}} % b
BoxDefinition must consist of the following:
{options ;} Hs ; Vs ; He ; Ve
Hs The character position of the left-hand edge of the rectangle, relative to the
left-hand edge of the terminal page.
Vs The character position of the top edge of the rectangle, relative to the top
of the terminal page.
He The character position of the right-hand edge of the rectangle, relative to
the left-hand edge of the terminal page. If He is the same are Hs, a vertical
line is drawn.
Ve The character position of the bottom edge of the rectangle, relative to the
top of the terminal page. If Ve is the same are Vs, a horizontal line is
drawn.
Vs must be greater than or equal to Hs, and Ve greater than or equal to He.
Each LineDefinition must consist of the following:
; {options ;} Hc
Hc The character position of a vertical line, relative to the left-hand edge of the
terminal page. The line will be the same height as the box defined in the box
definition.
Options
In each case, options can consist or one or more of the following, separated by
semicolons:
200
Erase (toggle). The box or line is erased, instead of drawn.
201
Merge (toggle). Where the box or line to be drawn or erased overlaps existing
lines, the appropriate composite character is formed. Note that this option is
the default for line definitions.
202
Horizontal (toggle). Causes horizontal lines to be drawn, instead of vertical.
Line position parameters are interpreted as character row positions relative
to the top of the terminal page. The lines will be the same width as the box
defined in the box definition. Ignored if used in the box definition.
203
Keep ends (toggle). This option is similar to Erase, but where the ends of the
lines intersect with the box, the lines forming the box are retained.
204
Do not draw (toggle). The box or line is neither drawn nor erased. This option
is useful when drawing additional lines, or removing lines from an existing
box.
B-126
V3.0
RealLink Escape Sequences
205
Fill. Clears the contents of the box to spaces, using the current character
attribute. If required, the colour can be changed by using the colour options
listed in Table B-3 below. Note that if this option is used after drawing lines
within the box, these lines will be erased.
206
Attribute. Sets the attributes of the inside of the box to the current settings
without erasing data.
207
End (toggle). Draws lines with Ts on the ends.
Table B-3.
Colour Options (ANSI Mode only)
Foreground
Normal
Background
Bold
Normal
Bold + Inverse
300
Black
308
Black
400
Black
408
Black
301
Red
309
Red
401
Red
409
Red
302
Green
310
Green
402
Green
410
Green
303
Yellow
311
Yellow
403
Yellow
411
Yellow
304
Blue
312
Blue
404
Blue
412
Blue
305
Magenta
313
Magenta
405
Magenta
413
Magenta
306
Cyan
314
Cyan
406
Cyan
414
Cyan
307
White
315
White
407
White
415
White
Remarks
A Draw sequence can include up to 32 parameters. The four box-position
parameters are mandatory.
The top left-hand corner of the terminal page is position 1, 1.
Except for the colour options listed in Table B-3, options used in the box
definition do not affect line definitions.
Sequences are evaluated from left to right. Once set, an option remains effective
for all line definitions until the end of the sequence. The options marked “toggle”
reverse the state of the appropriate attribute each time they occur in the
sequence.
Examples
CSI 10;5;40;20%b
Draws a box 31 characters wide by 16 high, starting 10 characters from the left of the
terminal window and 5 character rows from the top.
CSI 20;10;60;20;40;50%b
Draws a box 41 characters wide by 11 high, starting 20 characters from the left of the
terminal window and 10 character rows from the top. The box will contain two vertical
lines, one 40, and the other 50 characters from the left-hand edge of the terminal
window.
CSI 30;6;50;22;202;10%b
ANSI Escape Sequences
B-127
RealLink Escape Sequences
Draws a box 21 characters wide by 17 high, starting 30 characters from the left of the
terminal window and 6 character rows from the top. The box will contain a horizontal
line, 10 rows from the top edge of the terminal window.
CSI 204;30;6;50;22;202;203;10%b
If used after the preceding sequence, this erases the horizontal line, leaving the box
unaffected. Note that the 204 (do not draw) is part of the box definition and does not
affect the line.
CSI 15;10;15;20;40;50%b
Draws three vertical lines 11 characters high, starting 10 character rows from the top
of the terminal window. The lines are positioned 15, 40 and 50 characters from the
left-hand edge. Note that the first line (position 15) is in fact a zero width box.
Draw Rectangle
Draws a rectangle in the terminal window.
Syntax
CSI Hs ; Vs ; He ; Ve % o
Syntax Elements
Hs The character position of the left-hand edge of the rectangle, relative to the lefthand edge of the terminal page.
Vs The character position of the top edge of the rectangle, relative to the top of the
terminal page.
He The character position of the right-hand edge of the rectangle, relative to the
left-hand edge of the terminal page.
Ve The character position of the bottom edge of the rectangle, relative to the top of
the terminal page.
Remarks
The top left-hand corner of the terminal page is position 1, 1.
Vs must be greater than or equal to Hs, and Ve greater than or equal to He.
The Draw Rectangle escape sequence cannot be used to draw lines.
Fill Rectangle
Fills an area of the terminal window with a specified character and/or attribute.
Syntax
CSI Hs ; Vs ; He ; Ve {; Pf {; Po }} % f
Syntax Elements
Hs The character position of the left-hand edge of the area, relative to the left-hand
edge of the terminal page.
B-128
V3.0
RealLink Escape Sequences
Vs The character position of the top edge of the area, relative to the top of the
terminal page.
He The character position of the right-hand edge of the area, relative to the lefthand edge of the terminal page.
Ve The character position of the bottom edge of the area, relative to the top of the
terminal page.
Pf
The ASCII code of the character with which to fill the area. If omitted, the area is
filled with spaces.
Po One of the following ASCII characters:
1
Fill the area with the specified character, but do not change the character
attributes within the area.
2
Change the character attributes within the area to the current setting, but
do not fill the area.
3
Both fill the area and change the character attributes (default).
Remarks
The top left-hand corner of the terminal page is position 1, 1.
Vs must be greater than or equal to Hs, and Ve greater than or equal to He.
If the Po parameter is specified, Pf must also be present.
MDISTEM
Selects a terminal emulation.
Syntax
CSI Pe & q
Syntax Elements
Pe The required terminal emulation. This must be one of the following ASCII
characters:
0
1
2
3
Reset the terminal emulation to that specified in the configuration (CFG)
file.
P12 terminal emulation.
ANSI terminal emulation.
VT220 terminal emulation.
Remarks
7- and 8-bit ANSI emulation must be selected by using this sequence in conjunction
with S7C1T and S8C1T (see page B-118).
ANSI Escape Sequences
B-129
RealLink Escape Sequences
MDRDS
Requests a report on the status of a sub-device.
Syntax
CSI < Ps n
Syntax Elements
Ps Sub-device identifier (selective). Default value = 0.
In addition to the values supported by the Prism terminal (described in the Models
12120, 12140, 12121 and 12141 Programmer’s Reference Manual), RealLink
supports the following value for Ps:
4
PC status report.
Num Lock Control
Controls the NUM LOCK setting on the PC.
Syntax
to set the NUM LOCK on.
CSI < 3 4 h
CSI < 3 4 l
to set the NUM LOCK off.
Default value – as set by the user.
Paste
Copies text from the clipboard to the current cursor position. Each character is sent to
the host system as though it was typed from your PC keyboard. The text is terminated
with a NULL character (0x00).
Syntax
CSI 4 % n
PC Status Report
Reports the status of the PC. This escape sequence is generated by RealLink in
response to an MDRDS escape sequence with sub-device identifier 4.
Syntax
CSI < 14 ; Pk ; Pc n
Syntax Elements
Pk Keyboard status (additive):
1
2
CAPS LOCK on.
NUM LOCK on.
Pc Clipboard status (additive):
1
2
B-130
There is text selected within the RealLink window. The Copy, Append and
Copy Table sequences are available.
There is text on the clipboard.
V3.0
RealLink Escape Sequences
Process Attributes
Controls whether character attributes are processed by RealLink.
Syntax
to enable attribute processing.
CSI < 3 2 h
CSI < 3 2 l
to disable attribute processing.
Default value – as specified in the configuration (CFG) file.
Screen Update
Controls output to the terminal page.
Syntax
to disable screen update.
CSI < 3 0 h
CSI < 3 0 l
to enable screen update.
Default value – enabled.
Remarks
When screen update is disabled, output to the terminal page, though not displayed, is
copied into the history pages and can be displayed by re-enabling screen update.
Set Selection
Selects text within the RealLink window.
Syntax
CSI Hs ; Vs ; He ; Ve ; Sf % m
Syntax Elements
Hs The horizontal character position of the start of the selection, relative to the lefthand edge of the terminal page.
Vs The vertical character position of the start of the selection, relative to the top of
the terminal page.
He The horizontal character position of the end of the selection, relative to the lefthand edge of the terminal page.
Ve The vertical character position of the end of the selection, relative to the top of
the terminal page.
Sf
The required text selection mode:
0
Line mode.
1
Column mode.
Remarks
The top left-hand corner of the terminal page is position 1, 1.
In line mode, either Ve must be greater than Vs, or Ve must be equal to Vs and He
greater than Hs.
ANSI Escape Sequences
B-131
RealLink Escape Sequences
In column mode, He must be greater than or equal to Hs, and Ve greater than or equal
to Vs.
Stream
Directs screen output to a file.
Syntax
DCS Sm % s Sc ST
Syntax Elements
Sm Stream mode:
0
1
2
3
Sc
Turn off streaming.
Start streaming.
Stream window (immediate).
Stream selection (immediate).
A string of characters containing the following:
FileName , Clear , StripFF , Print , OnFF
where
B-132
FileName
Is the name of the file to which screen output will be sent. If
no path is specified, the file will be created in your RealLink
user directory.
Clear
1 – Clear the stream file before sending any more display data.
0 – The display data is appended to any existing contents.
StripFF
1 – Remove any form feed characters from the streamed
output.
0 – Do not remove form feed characters.
Print
1 – When streaming is turned off, print the stream file.
0 – Do not print the stream file.
OnFF
1 – Send data to the file on receipt of each form-feed
character.
0 – Send data to the file on receipt of each line-feed
character.
V3.0
Appendix C
File Transfer Filters
This appendix describes how to create your own filters for use with the
HOST-WS and WS-HOST commands. It also includes information on the
format produced by the PASS-DOS DIF filter.
C-136
Filters
Filters
The Reality host file transfer programs (HOST-WS, WS-HOST, PASS-DOS and SPASS-DOS)
generally perform some kind of reformatting of the data as it passes from Reality to
DOS or vice-versa. In some cases, the reformatting involves as little as changing the
end of line characters between the two systems, while in other cases, very
sophisticated reformatting and reorganisation of the data is performed. The type of
reformatting to be performed is specified to the data transfer program in the form of
a filter.
Filter Items
Filters are held as individual items in the file RL.BP in the REALLINK account. The
name of the filter is the item-id in RL.BP. Each account which has been configured to
use RealLink has access to this file.
A sorted list of all filters currently held in RL.BP can be displayed by using the
LIST-FILTERS command. Those that are supplied for use with HOST-WS, WS-HOST,
PASS-DOS and SPASS-DOS are listed in Chapter 7.
Filter Attributes
The first four attributes of a filter have the same significance for all four file transfer
commands. Attributes five onwards have formats defined by the particular command
being used.
Note:
Although the first four attributes of PASS-DOS and SPASS-DOS filters are
described here, filters of this type are beyond the scope of this manual. The
section on PASS-DOS and SPASS-DOS lists the filters that are available for
these commands.
Attribute 1
Contains the string "FLT" which uniquely identifies the item as a filter.
Attribute 2
Contains a free-text description of the use of the filter.
Attribute 3
Indicates the command to which the filter belongs, as follows:
WSHWS
Specifies a filter used by WS-HOST or HOST-WS.
PD-xxx
Specifies a filter used by PASS-DOS and SPASS-DOS. xxx is the
type of conversion that the filter is designed to handle; for
example, DIF.
If this attribute contains anything other than the above, the filter cannot be used
with RealLink for Windows.
Attribute 4
The revision level of the filter. This provides a check on the compatibility of the
filter for future enhancements to the programs which use it.
File Transfer Filters
C-137
Filters
As a general rule, attributes four onwards can contain a comment field, separated
from the filter data by a single value mark ( ] ). All programs which use these
attributes extract the first multi-value only.
Character Translation Attributes
Some filters provide for the translation of individual characters during the transfer.
The translation is performed on a one to many basis and is specified by character
translation attributes held in the filter.
Each translation attribute consists of two parts separated by the '>' character. The
left-hand part represents the character to be translated, while the right-hand part
contains a list of the required output characters. If nothing follows the '>', the
character concerned is translated to a null string; i.e. it is discarded. Each character is
specified as two hexadecimal digits and the output characters are separated by
commas.
Example 1
The following character translation attributes convert Reality attribute marks to
Carriage Return (CR) followed by Line Feed (LF), and value marks to spaces; sub-value
marks are discarded:
FE>0D,0A
FD>20
FC>
Example 2
The following character translation attributes translate DOS data so that CR becomes
an attribute mark, and LF and DOS end-of-file characters (0x1A) are discarded:
0D>FE
0A>
1A>
HOST-WS Filters
HOST-WS uses filter attributes 1 to 4 which conform to the filter format described in
the previous section. The significance of filter attributes five onwards are:
Attribute 5
Contains one of the following conversion option letters:
null
Appends an attribute mark to the item and performs any
required character translation defined by attributes seven
onwards.
C
Specifies that the data in the host file is in compressed form
and was uploaded by WS-HOST using a similar C type filter.
Compressed mode is intended for temporary storage of PC files
on the host when no host access is required to those files.
If the C option is specified, none of the other filter attributes
are used.
D
C-138
Specifies that the item or items are to be downloaded in their
Reality format for storage in a PC file. No translation of
characters is performed. The PC file is created in a special
V3.0
Filters
format which stores the items and their item-ids so that a
subsequent WS-HOST is able to recreate the items exactly as
they were in the original Reality file.
This feature allows data and programs to be moved between
host systems via PC disks and can prove useful for low-cost
distribution of programs and data files within multiple-host
organisations.
If the D option is specified, none of the other filter attributes
are used.
I
Specifies that each item is prefixed with a string containing
"#####" followed by the item-id and an attribute mark. This
allows a user-written PC program to identify the start of each
item as it is processing the file.
X
Transfers the item and performs any required character
translation, but, unlike the null option described above, it
does not append a final attribute mark to the item.
Attribute 6
Controls whether a DOS end of text file character is written at the end of the file.
The DOS end of file character is 26 (CTRL+Z) and is required by some DOS
programs such as Wordstar. If this attribute contains the character Z, an end of
file mark is written. If it contains null, no end of file mark is written.
Attributes 7+
Contain the hexadecimal values of the characters to be transferred and
converted. Character translation attributes are described in the earlier section on
filter items (page C-138).
Example
The following filter converts attribute marks into CR/LF pairs, and value and sub-value
marks into spaces:
001
002
003
004
005
006
007
008
009
FLT
DEFAULT INTERNAL HOST-WS FILTER
WSHWS
1
FE>0D,0A
FD>20
FC>20
WS-HOST Filters
WS-HOST uses filter attributes 1 to 4 which conform to the format described in the
section on filter items. The significance of filter attributes five onwards are:
Attribute 5
Contains the option identifier or specifies the maximum size of host items that
will be created.
File Transfer Filters
C-139
Filters
If attribute 5 contains a number, this defines the maximum item size; the default
(used if attribute 5 is null) is approximately 30,000 bytes. If the data exceeds this
maximum size, the excess data will be written to overflow items with an
incrementing suffix of .0001, .0002 etc. appended to the item-id.
Note:
The host can be configured so that WS-HOST can create items larger
than 30,000 bytes. Refer to Chapter 3 for details.
Alternatively, filter attribute 5 can contain one of the following option letters:
C
Specifies that the data is to be copied in compressed form for
subsequent downloading by HOST-WS using a similar C type
filter. Compressed mode is intended for temporary storage of
PC files on the host when no host access is required to those
files.
If the C option is specified, no other filter attributes are used.
D
Specifies that the data to be copied is in Reality format as
downloaded by HOST-WS using a similar D type filter. No
translation of characters is performed. Note that this option
allows more than one item to be created.
This feature allows data and programs to be moved between
host systems via PC disks and can prove useful for low-cost
distribution of programs and data files within multiple-host
organisations.
If the D option is specified, none of the other filter attributes
are used.
Attribute 6
Defines the action to be taken if the host item already exists. If this attribute
contains the letter O (for overwrite), the existing item is automatically
overwritten. If the attribute is null, you are prompted for permission to perform
the overwrite.
Attributes 7+
Contain the character translation attributes as described in the section on filter
items (page C-138).
Example
The following filter converts tabs into spaces, CR/LF pairs into attribute marks, and
discards DOS end-of-file and 0xFF characters:
001
002
003
004
005
006
007
008
009
010
011
C-140
FLT
DEFAULT INTERNAL WS-HOST FILTER
WSHWS
1
30000
09>20
0A>
0D>FE
1A>
FF>
V3.0
The DIF Format
The DIF Format
DIF (Data Interchange Format) used by PASS-DOS and SPASS-DOS is a file format
devised initially as a means of passing data between dissimilar PC programs. Files
written in DIF format are acceptable as input to a large number of programs, such as
Lotus 1-2-3, Samna Word, Samna Decision Graphics, Logistix, Multimate, TK-Solver,
Visicalc and many others.
The DIF format is the subject of the book “The DIF File” by Donald H. Beil, published
by Prentice-Hall, which reproduces the “DIF Technical Specification” originally issued
by Software Arts Products Corporation, the designers of the DIF format. The book also
contains examples and tutorials on the DIF format.
Although the DIF format adheres to a standard specification, you should be aware that
some of the features are optional and can be ignored or treated in different ways by
the various PC programs. The documentation for the programs in question should
normally deal with how DIF is supported.
Note:
The export of multi-values to DIF files is not directly supported by RealLink.
Conventional spreadsheets, such as Lotus 1-2-3 Rev. 2, therefore cannot
handle correctly any .DIF file generated by PASS-DOS or SPASS-DOS if the
original database is structured to contain multi-values.
DIF header items
When using PASS-DOS and SPASS-DOS with the DIF filter, the header section of the DIF
file is constructed as follows:
The host file name is used to create the TABLE item.
From the dictionary items for the attributes specified, attribute three (the tag
field) is used to create the LABEL item.
The number of item-ids found in the select list determines the number of
VECTORS that will be declared.
The number of TUPLES declared in the header is the number of attributes output
by the English command.
File Transfer Filters
C-141
Appendix D
Connecting via a Terminal Server
This appendix describes how to configure a Northgate Multi-protocol
Terminal Server so that you can transfer files to and from a UNIX host using
the Zmodem file transfer commands.
D-142
Connecting via a Terminal Server
If your PC is connected to a UNIX host via an asynchronous link and a Northgate Multiprotocol Terminal Server, you will need to configure the terminal server and the host
correctly, so that you can use the Zmodem file transfer commands (sz and rz).
Note:
The configuration given below can also improve the performance of the
WS-HOST command when transferring files to a Reality database via a
Northgate Multi-protocol Terminal Server.
Configuring the Terminal Server
This section lists the settings which must be made on the Terminal Server. The manual
supplied with your Terminal Server describes the configuration process.
Before starting, you will need to find out whether you whether you should use an OSI
or Telnet connection. The system administrator for your UNIX host can give you this
information.
Host Entry
Add a host entry with the following settings:
OSI Connection:
Host name:
Connection type:
Ethernet address:
Host LSAP:
Host TSAP:
Host type:
Source LSAP:
Source TSAP:
Enter the name by which users will identify the UNIX host.
ISO
Enter the Ethernet address of the UNIX host.
FE
0202
Pipe
FE
0202
Telnet Connection:
Host name:
Connection Type:
Ethernet Address:
Destination Port:
Negotiate Binary Mode:
Negotiate Remote Echo:
Enter the name by which users will identify the UNIX host.
Telnet
Enter the IP address of the UNIX host.
23 (confirm this with your UNIX system administrator).
Yes
Yes
Set any other parameters as required for this connection.
User Entry
Add a user entry to the Name Table. This must have the following settings:
Attention Key:
Auto-logon user:
Auto-logout:
Connection type:
Host name:
Disabled.
Yes
Yes
Specify ISO or Telnet, depending on the type of
connection defined above.
Enter the host name as defined above.
Set any other parameters as required for this user entry.
Connecting via a Terminal Server
D-143
Connecting via a Terminal Server
Configuring the Host
In addition to the above, you will need a character-mode, null-network listening entry
in the ROUTE-FILE on your UNIX host. The UNIX Connect, System Administration Guide
describes how to create this entry.
D-144
V3.0
Appendix E
Application Help
This appendix describes how you can use RealLink to display on-line help
for your applications.
E-145
The Help Application Command
The Help Application Command
The RealLink Help menu includes a command called Application. This is provided so
that RealLink can give the user help, not only for its own commands and dialogs, but
also for applications running on your host system. When you first install RealLink, the
Application command is disabled, but it can be enabled by setting the Help entry in
the [RealLink] section of RFW.INI.
To use the Application command, you must provide a Help application for RealLink to
call. For instance, if your help text is in a Windows Help file, you can use the Windows
Help application, WINHELP.EXE. Edit your RFW.INI file and add the following line to
the [RealLink] section:
Help=WINHELP
HelpFile
where HelpFile is the name of the Windows Help file for your application. Any
command line parameters required by your help application can be included in the
Help entry.
Note:
RealLink includes a Windows Help file, QRGnn.HLP, which provides help on
Reality. The letters nn are replaced by the version number of the help file.
Note, however, that the help file might not cover your version of Reality.
Context-sensitive Help
Using the WINHELP application as described above will provide you with help for your
host applications, but you will need to search through the help file for the topic you
require. On-line help is much more useful, however, if it can give the user contextsensitive help.
RealLink provides a context-sensitive capability by appending any text that is selected
in the RealLink window to the command line of your Help application. For example, if
you have configured the Application command to display the file
C:\RFW\HLP\QRGC1.HLP and you have the text “WHO” selected in the RealLink
window, when you select the Application command, the following parameters will be
passed to your Help application:
C:\RFW\HLP\QRGC1.HLP WHO
WINHELP.EXE is unable to make use of this additional information, and simply displays
it in the title of the Help window. However, the Help application, RFWHELP.EXE,
supplied with RealLink, passes the extra parameter to WINHELP as a “Help Keyword”.
If the keyword can be found in the help file, the help topic associated with that
keyword is displayed.
For example, if the [RealLink] section of your RFW.INI file contains the following line:
Help=C:\RFW\RFWHELP C:\RFW\HLP\QRGC1.HLP
and you have selected the word “WHO” in the RealLink window, when you select the
Application command from the Help menu, a description of the Reality WHO command
will be displayed.
Writing a Help Application
If neither WINHELP nor RFWHELP provides the facilities you require, you can write
your own Help application. For example, you may already have help text available for
E-146
V3.0
The Help Application Command
your application, but not in the Windows Help format. To display this text, you could
write a special Help application.
When writing your Help application, you should be aware of the following:
When the help application is called by RealLink, it will be passed any command-line
parameters specified in RFW.INI.
If any text is selected within the RealLink window, this will be appended to the
command line. In RFWHELP.EXE, this text is used as a help keyword to display contextsensitive help. The appended text is separated from the command-line parameters
with a space.
To help you to write your own Help applications, the source code for RFWHELP.EXE is
provided in the RealLink help directory. The source file is called RFWHELP.CPP.
Note:
If you use the Windows Help application (WINHELP.EXE) to display your help
text (as in RFWHELP.EXE), you will find that, in Windows 3.1, attempting to
display the help for a non-existent keyword simply produces an error
message. The Help file concerned is not opened.
The user will find it more helpful if the help contents page is displayed, and
you should therefore open the contents page of the Help file before
attempting to find any keyword entry. This will ensure that, if the keyword
cannot be found, the user will at least see the Help contents page.
Replaceable Parameters
The Help entry in RFW.INI can include special parameters that will help you to make
your help context sensitive. These parameters are as follows:
$C or $c
When the help application is called, these characters are replaced
with the name of the configuration (CFG) file that is currently
loaded.
$[ S | s ] ( Column, Row, Count )
When the help application is called, these characters are replaced
with text currently displayed in the RealLink window, as specified
by the Column, Row and Count parameters.
Column is the horizontal position of the start of the text, in
character positions from the left-hand edge of the window. The
left-most column is numbered 0.
Row is the vertical position of the start of the text, in character
rows from the top edge of the window. The top row is numbered 0.
Count is the number of characters required.
For example, RFW.INI might contain the following Help setting:
Help=C:\RFW\RFWHELP $C $S(0,0,10)
Then, if the current configuration file is ACCOUNTS.CFG and the first 10 characters of
the top line of the RealLink window contain the text “Petty Cash”, The RFWHELP
application will be called as follows:
C:\RFW\RFWHELP ACCOUNTS.CFG "Petty Cash"
Application Help
E-147
The Help Application Command
Note:
Any text that is selected in the RealLink window will be appended to the help
application command line.
Your help application can use this additional information in various ways. You might,
for example, produce a help file for each host application – you could then use the
name of the configuration file to decide which help file to display. Or you could
display different help topics, depending on the text displayed at a particular location
on the screen.
E-148
V3.0
Appendix F
Dynamic Data Exchange
This appendix describes how other Windows applications can communicate
with RealLink by means of Dynamic Data Exchange (DDE).
F-149
Introduction
Introduction
RealLink provides two ways to exchange data with other applications: the Clipboard,
and Dynamic Data Exchange (DDE). The Clipboard requires you to copy and paste each
time you want to exchange data. DDE, however, allows one application to call on the
resources of another and to control the operation of that program.
Clients and Servers
When an application initiates a DDE conversation, it is called the client; the
responding application is called the server. These roles are maintained throughout the
conversation and govern the types of message each application can send. Programs
can be engaged in several simultaneous DDE conversations, acting as the client in one
and the server in another. Windows controls these conversations, assigning each
conversation a unique channel number and passing the various messages to the correct
applications.
This appendix describes how to use RealLink as a server. It assumes that you will be
writing macros in another application, such as Word for Windows or Excel, and
describes the different DDE commands that RealLink understands.
Topics and Items
Each DDE conversation is established on a particular topic, usually a data file of some
kind, with the conversation thereafter limited to the data items associated with that
topic. In the case of RealLink, this data file is the configuration file used to establish a
connection to a host system. The items in a conversation with RealLink are host
commands and the data returned by the host for display in the RealLink window.
DDE Messages
The following table lists the DDE messages to which RealLink will respond.
Table F-1.
F-150
DDE Messages
Message
Description
RealLink Options
INITIATE
Sent by another application to
RealLink, indicating that the
client wants to start a DDE
conversation.
"RFWDDE" must be specified as
the application and the name of a
configuration (CFG) file as the
topic.
REQUEST
Sent by a client application
requesting the transfer of a data
item.
Valid items are the current cursor
position, and all or part of one or
more rows of text displayed on
the screen.
POKE
Unsolicited data sent by a client
application.
The data is sent to the host as if
it had been typed at the
keyboard.
EXECUTE
A string sent by a client
application, representing
commands to be carried out by
RealLink.
Valid commands allow data
transmitted by the host to be
collected in a buffer, and the
restoration of normal operation.
TERMINATE
Sent by a client application to
end a DDE conversation.
A second DDE conversation cannot
be started until the first has been
terminated.
V3.0
Introduction
Configuring RealLink for DDE
If you intend using RealLink’s DDE server functions, you must load the DLL,
RFWDDE.DLL. This can be done from the command line by using the /L switch as
described in Chapter 3, or by setting the LoadDlls parameter in the [RealLink] section
of the RFW.INI file as described in Appendix A.
For example, the following command line starts RealLink and loads the RFWDDE DLL:
C:\RFW\RFW.EXE /LC:\RFW\RFWDDE.DLL
The following entry in the [RealLink] section of RFW.INI ensures that the RFWDDE DLL
is loaded whenever RealLink is started:
LoadDlls=RFWDDE
Dynamic Data Exchange
F-151
Using DDE
Using DDE
This section lists the RealLink DDE Server commands. To call these, you will need to
use the appropriate DDE commands in your client application or programming
language. The examples all use the Word for Windows 2.0 WordBASIC macro language.
Initiating a DDE Conversation
Before you can use any of the other DDE commands, you must initiate a DDE
conversation with RealLink. For example, in Word for Windows, you would call the
DDEInitiate() function, while in Excel, you would use INITIATE.
To initiate a DDE conversation, you must specify the name of the server application
and the name of a DDE topic. In RealLink, the application name must be “RFWDDE”,
and the topic must be the name of a configuration (CFG) file. Note that RealLink must
already be running, with the specified configuration file loaded.
Example
App$ = "RFWDDE" ' The name of the RealLink DDE Server
Topic$ = "ACCOUNTS" ' The ACCOUNTS.CFG configuration file
ChanNum = DDEInitiate(App$, Topic$)
Terminating a DDE Conversation
When your DDE conversation is over, you must terminate it. If you do not do this, you
will not be able to reconnect for a subsequent conversation. In Word for Windows, you
would call either DDETerminate or DDETerminateAll, while in Excel, you would use
TERMINATE. Note that you must specify the channel number returned when you
initiated the conversation.
Example
DDETerminate ChanNum
' ChanNum is returned by DDEInitiate()
Sending Data to RealLink
You can send data to RealLink by using a command that generates a DDE POKE
message. For example, in Word for Windows you would use the DDEPoke statement,
and in Excel, the POKE function. You will need to specify three parameters:
The channel number returned when you initiated the DDE conversation.
A conversation item. In RealLink, this must be a null string.
The data to be sent.
The data received by RealLink is transmitted to host as if it had been typed at the
keyboard.
Example
Item$ = ""
' Item must be a null string
Data$ = "WHO" + Chr$(13)
' The host command to carry out
DDEPoke ChanNum, Item$, Data$
' ChanNum returned by DDEInitiate()
Obtaining Data from RealLink
You can request data from RealLink by using a command that generates a DDE
REQUEST message. For example, in Word for Windows you would use the
DDERequest$() function, and in Excel, the REQUEST function. A command consists of
F-152
V3.0
Using DDE
an Item string containing the command name together with any parameters. You must
also specify the channel number returned when you initiated the DDE conversation.
RealLink provides four DDE server commands that return data to a client application:
Cursor
This returns the current position of the cursor on the RealLink
terminal page.
Row
This returns all or part of a row of text displayed at a specified
position on the terminal page.
Table
This returns the text displayed in a specified area of the terminal
page, and formats it for inclusion in a table.
RxBuff
This returns the contents of the buffer in which RealLink receives
data from the host. It can be used to obtain the result of a host
command without that result being displayed in the RealLink
window.
Cursor Command
This returns the current position of the cursor on the RealLink terminal page.
Item
Cursor
Return value
A string containing "column , row". Positions are in characters,
relative to the terminal page, where the top left-hand corner of the
terminal page is position 0, 0.
Example:
Item$ = "Cursor"
CurPos$ = DDERequest$(ChanNum, Item$)
Comma = InStr(CurPos$, ",")
Col = Val(Left$(CurPos$, Comma - 1))
Row = Val(Mid$(CurPos$, Comma + 1))
MsgBox "Column =" + Str$(Col) + Chr$(13) + "Row =" + Str$(Row)
Row Command
This returns all or part of a row of text displayed at a specified position on the
terminal page.
Item
Row column , row , length
where
column is the horizontal position of the first character
required.
row is the vertical position of the row required.
length is the number of characters required.
The column and row parameters must be specified in characters,
relative to the terminal page, where the top left-hand corner of the
terminal page is position 0, 0.
Dynamic Data Exchange
F-153
Using DDE
Return value
A string containing text from terminal page.
Example:
Col = 0
Row = 21
Length = 40
Item$ = "Row" + Str$(Col) + "," + Str$(Row) + "," + Str$(Length)
User$ = DDERequest$(ChanNum, Item$)
MsgBox User$, "RFWDDE"
Table Command
This returns the text displayed in a specified area of the terminal page, and formats it
for inclusion in a table. Three formats are available: tab separated, comma separated
and space separated.
Table column , row , width , height , format
Item
where
column is the horizontal character position of the left-hand
edge of the area required, relative to the left-hand edge of
the terminal page (position 0).
Return value
row is the vertical character position of the top edge of the
area required, relative to the top edge of the terminal page
(position 0).
width is the width of the area required in characters.
height is the height of the area required in characters.
format must be one of TAB, COMMA or SPACE.
A string containing text from terminal page, formatted as
requested. Lines of text are separated by carriage return
characters (0x0D). Leading and trailing spaces are discarded and
multiple embedded spaces are replaced by the specified format
character: tab (0x09), comma or space.
RxBuff Command
This returns the contents of the buffer in which RealLink receives data from the host.
It can be used to obtain the result of a host command without that result being
displayed in the RealLink window.
Note:
When using this command, you must use the TE Processing command
described on page F-156 to ensure that RealLink retains the data received in
the buffer until it is retrieved by RxBuff.
Item
RxBuff
Return value
The current contents of the RealLink receive data buffer.
F-154
V3.0
Using DDE
Note:
The data is sent to RealLink from the host in packets. This
means that more than one call to RxBuff may be required
to retrieve all the data. Also, while RealLink is waiting for
the next packet, the buffer will be empty. It is therefore
recommended that the RxBuff command be placed in a
loop, which terminates when either a specified character
is received, or if no data is returned within a specified
time. This is illustrated in the example below.
Example:
REM Declare the timer function
Declare Function GetTickCount Lib "user" As Long
.
.
.
REM Route the data to the receive buffer
DDEExecute ChanNum, "TEProcessing 0"
REM Perform the host command
Item$ = ""
Data$ = "LISTF4" + Chr$(13)
DDEPoke ChanNum, Item$, Data$
REM Initialise strings for received data
RxBuff$ = ""
' For received data
Result$ = ""
' For cumulative total
REM Set the timeout to 10 secs
Timeout = GetTickCount + 10000
REM Loop until either the TCL prompt is received,
REM or the timeout expires
While Right$(RxBuff$, 1) <> ":" And GetTickCount < Timeout
REM Fetch the contents of the buffer
RxBuff$ = DDERequest$(ChanNum, "RxBuff")
REM Append the buffer contents to the received
REM data string
Result$ = Result$ + RxBuff$
REM If the data isn't NULL, reset the timeout
If RxBuff$ <> "" Then Timeout = GetTickCount + 10000
Wend
REM Restore normal TE operation
DDEExecute ChanNum, "TEProcessing 1"
REM Do something with the received data
Insert Result$
Controlling RealLink
You can control RealLink by using a command that generates a DDE EXECUTE message.
For example, in Word for Windows you would use the DDEExecute statement, and in
Excel, the EXECUTE function. A command consists of an Item string containing the
command name together with any parameters. You must also specify the channel
number returned when you initiated the DDE conversation.
RealLink provides only one execute command, described below:
Dynamic Data Exchange
F-155
Using DDE
TE Processing Command
This allows you to specify whether data received from the host should be displayed on
the terminal page or retained in a buffer until retrieved by an RxBuff request, or
normal operation is restored.
Execute String
TE Processing [0 | 1]
If the parameter is set to 0, data processing is disabled. Data
subsequently received from the host is retained in a buffer.
If the parameter is set to 1, data processing is re-enabled. Any
data in the buffer is displayed on the terminal page and
normal operation is restored.
Normal operation is also restored when the DDE conversation is
terminated.
Example:
REM Route the data to the receive buffer
DDEExecute ChanNum, "TEProcessing 0"
See also the RxBuff example on page F-155.
F-156
V3.0
Index
/C command line switch 40
/L command line switch 151
/M command line switch 104
A
Abbreviations 14
About command 55
Adding
macros to the Macro menu 103
RealLink to other accounts 33
Advanced editing functions 45 to 48
ALT GR key 50
ALT key 44, 48, 74, 107, 111
ALT+1, ALT+2, etc. 41
ALT+DOWN ARROW 51, 81
ALT+END 50
ALT+F4 42, 49
ALT+HOME 50
ALT+INSERT 44
ALT+LEFT ARROW 81
ALT+PAGE DOWN 50
ALT+PAGE UP 49
ALT+RIGHT ARROW 82
ALT+UP ARROW 81
ALT+X 42
ANSI
emulation 20, 74, 77
escape sequences 114 to 35
API
DataBasic 22
defined 14
Append
command 44
escape sequence 127
Append Coordinates command 47
Application command, Help menu 55, 146
Application name, DDE 152
Applications
controlling 57 to 58
hybrid 23
NewView 23
running 57
UIMS 23, 57
Windows Help 146
V3.0
Asynchronous connection 26
problem solving 104
Asynchronous dialog 71 to 72
Asynchronous Port protocol 71
Asynchronous sessions, setting up 71
Attribute Mapping
command 79
dialog 80
Attribute processing 80
Auto Size command 78, 81
Auto-size, font 22, 78
B
Back pages – see History pages
Background colours 77, 80
Baud rate 35, 71
Bell 77
Break 58
Button, macro object 97, 124
C
Call, macro command 97, 98, 100, 107,
110, 111, 114
Caps Lock escape sequence 127
CAPS LOCK key 40
initial state 77
CapsLock, macro command 97, 98, 100,
107, 110, 111
CFG file – see Configuration file
Changing
host commands 52
screen colours 79
Character set 73
Character translation attributes 138, 139
Clean-up command 57
Clear History escape sequence 127
Clipboard 43, 52, 53
copying text to 44
pasting text from 45
Closing RealLink 36, 42
Colours 77
Column selection 44
Columns, number of 76
157
Index
Command line editor – see Editing host
commands
Command line parameters 31 to 32
/C switch 40
/L switch 151
/M switch 104
configuration file 40
Connect dialog 40
loading a macro 104
Command Stack command 52
Commands
editing – see Editing host commands
Help command 55
pre-loaded 52
Comments, script language 109
Communication parameters 70 to 72
Communications
command 70, 106
dialog 70, 71
Compose button, status bar 39, 50, 75
COMPOSE CHARACTER key (Prism terminal)
50
Configuration file 21, 66, 102
asynchronous connection 104
CAPS LOCK setting 77
command line parameter 31
Connect dialog 40
creating 66
DDE topic 150, 152
modifying 67
saving 68
Configuration, default 21, 69
Configure Table command 45
Configuring RealLink 31 to 32, 111 to 12
for DDE 151
Connect
command 36, 37, 40
dialog 31, 36, 40, 69
macro command 108, 97, 99, 100,
107, 110, 111, 114
Connect New RfW command 41
Connecting 36, 40
via a Terminal server 142 to 44
Connection menu
1, 2, 3, 4 commands 41
Connect 36, 40
Connect New RfW 41
Disconnect 42
multiple sessions 41
Context-sensitive help 56, 146
Control menu 57 to 59
Controlling
applications 57 to 58
RealLink via DDE 155
Conventions 16
Copy
command 44
escape sequence 127
Copy Coordinates command 47
158
Copy Table
command 45
escape sequence 127
Copy Window
command 45
escape sequence 127
Copying text to the clipboard 44
CTRL key 47, 52, 107, 111
CTRL+ALT+PAGE DOWN 22
CTRL+ALT+PAGE UP 21
CTRL+BREAK 58, 59
CTRL+C 59
CTRL+END 44
CTRL+HOME 44
CTRL+INSERT 44, 52
CTRL+PAGE DOWN 22
CTRL+PAGE UP 21
CTRL+Q 104
CTRL+RETURN 51
CTRL+S 104
CTRL+SHIFT+RETURN 51
CTS 72
Cursor
DDE server command 153
keys 51, 52
options 77
position 153
D
Data entry
SovereignX 32
Data format 35, 72
DataBasic API 22
DDE 20, 150 to 56
application name 152
controlling RealLink 155
Cursor command 153
cursor position 153
defined 14
initiating a conversation 152
obtaining data from RealLink 152
Row command 153
RxBuff command 154
sending data to RealLink 152
server commands 152
Table command 154
TE Processing command 154, 156
terminating a conversation 152
using 152 to 56
DDE messages 150
EXECUTE 150, 155
INITIATE 150, 152
POKE 150, 152
REQUEST 150, 152
TERMINATE 150, 152
Default
configuration 21, 69
history lines 49
V3.0
Index
Default (continued)
HOST-WS filter 90
Restore key 57, 58
settings 40
Windows printer 60
WS-HOST filter 91
Default protocol 36, 70
Define, macro command 97, 100, 107,
110, 111
Delay, macro command 101
DELETE key
VT220 mode 74
Deleting a macro from the disk 104
Diacritical characters 39
DIF format 92, 141
Direct
print mode 61
printing 62
Disable, macro command 97, 100, 101,
107, 110, 111
Disconnect
command 42
macro command 108, 102, 114
DLL
loading 31
SovereignX data entry 32
Documents, related 13
Draw escape sequence 128
Draw Rectangle escape sequence 130
Draw, macro command 97, 100, 102, 107,
110, 111
Drop DTR on Exit 72
DTR 72, 105
Dynamic Data Exchange – see DDE
Dynamic-link library – see DLL
E
Edit menu 44 to 48
Editing functions 43 to 48
advanced 45 to 48
Editing host commands 50 to 54
changing a command 52
Command Stack command 52
pre-loaded commands 52
repeating commands 51
Replace 53 to 54
selecting text to edit 52
Editing macros 104
Emulate print mode 61
Enable bell 77
Enable, macro command 97, 100, 103,
107, 110, 111
END debug command 57
END key 44, 52
VT220 mode 74
End-of-line wrap 77
Enlarge command 80, 81
V3.0
Error messages
see also Problem solving
An error has occurred in script file
'filename' 98
Call stack full 99
Cannot find CCIDDA21.DLL 106
Cannot find CCITCP.DLL 106
Cannot find font 102
Cannot open file - filename 98
Cannot open message file 102
Cannot open the CFG file 102
CONVERSION FILTER NOT FOUND 'filter'
108
COULDN'T OPEN FILE 'filename' 108
COULDN'T READ ITEM 'itemname' 108
COULDN'T READ ITEM 'RL.BP','filter' 108
Error - Can only define Button 1 with
Control or Shift 98
Error - identifier already exists 98
Error - identifier mismatch 98
Filename will be truncated Ok? 103
Hardware error or not present 104
Illegal Filename - Device names cannot
be used. 103
INVALID CONVERSION FILTER FORMAT
'filter' 109
INVALID FILTER ITEM 108
Invalid Stream 105, 106
Invalid System Name 104
Network Error, DDA -> ACI replug 106
parse error near token 98
parse error, expecting 'token' 98
parser stack overflow 98
Record size too large 107
Stop - Can't find DOSfile 107
Stop - DOSfile contains no data 107
TRANSMISSION ERROR
'filename,itemname' 108
Unable to load CCIDDA21.DLL error 2
106
Unable to load CCITCP.DLL error 2 106
Unable to transfer data - error 20
(CONNECT) 107
Unable to transfer data - error 54
(DOSOPEN) 107
Unable to transfer data - error 55
(DISKWRITE) 107
Unable to transfer data - error 60
(BINARY) 107
Unable to transfer data - error 61
(ROSOPEN) 107
Warning - 0 bytes transferred to DOSfile
108
Escape sequences 114 to 35
Append 127
Caps Lock 127
Clear History 127
Copy 127
Copy Table 127
159
Index
Escape sequences (continued)
Copy Window 127
Draw 128
Draw Rectangle 130
Fill Rectangle 130
MDDPL 124
MDISTEM 131
MDRDS 133
MDSDF 124
Num Lock Control 133
Paste 133
PC Status Report 133
Process Attributes 134
RealLink 127 to 35
Screen Update 134
Set Selection 134
SGR 126
Stream 135
VT220 121 to 23
Ethernet, defined 14
Example
files 30
macro 100 to 102
Exec, macro command 97, 100, 103, 107,
110, 111
EXECUTE, DDE message 150, 155
Executing a script 98
Exit
command 36, 42
macro command 97, 100, 104, 107,
110, 111
F
F1 key 49
File menu
Exit 36, 42
New 66, 69
Open 67
Print Selection 62
Print Window 62
Printer Setup 60, 62
Save 69
Save As 67, 68
File Open dialog box 67
File transfer 25, 84 to 96
Help command 55
HOST-WS 89 to 90, 91
LAN 84 to 88
LanFTU command 84 to 88
PASS-DOS 91 to 94
problem solving 107
Reality host utilities 89
rz 95 to 96
setting the DOS path 95
SPASS-DOS 91 to 94
sz 96
UNIX host utilities 95
160
File transfer (continued)
WS-HOST 90 to 91
Zmodem 95 to 96
Files
CFG – see Configuration file
configuration – see Configuration file
examples 30
font 29
Help 146
macro 31
QRGnn.HLP 56
RFW.INI – see RFW.INI file
RFWDDE.DLL 151
RFWDEF.CFG 29, 40, 69
RFWEGA.FON 30
RFWHELP.CPP 147
RFWHELP.EXE 56, 146
RFWPRINT.XLT 29
RFWVGA.FON 30
RL.BP 33, 137
SETUP.EXE 29
SNI configuration 86
SovereignX DLLs 32
SXPRINT.XLT 29
WINHELP.EXE 146
Fill Rectangle escape sequence 130
Filters 137 to 40
attribute 5 138, 139
attribute 6 139, 140
attributes 1 to 4 137
attributes 7+ 139, 140
character translation attributes 138,
139
HOST-WS 89, 138
LanFTU command 85
LIST-FILTERS command 137
PASS-DOS 92 to 93
SPASS-DOS 92 to 93
WS-HOST 91, 139
FIRST macro script 102, 103, 105, 104
Flow control
asynchronous connections 35, 72
script language 107
Font
auto-size 22, 78
files 29
Font menu 65, 80
Auto Size 78, 81
Enlarge 80, 81
Save Window Position 69, 78, 81
Very Small 81
FOOTING clause 92
Foreground colours 77, 80
Function keys 48
defining 99
options 76
Prism mode 74
VT220 mode 75
V3.0
Index
G
L
Getting started 35 to 38
Glossary 14
GO, DataBasic debugger command 58
Goto, macro command 107, 104
GUI, defined 14
Labels, script language 108
LAN sessions, problem solving 106
LAN, defined 14
LanFTU command 84 to 88
browse dialog 87
problem solving 107
Line wrapping 77
Lines, number of 76
LIST-FILTERS, TCL command 137
Load, macro command 105, 97, 100, 107,
110, 111
Loading a macro 103 to 4
from the command line 31, 104
Load-time errors, macros 98
Logon workspace 33
H
Hardware requirements 26
Help
context sensitive 56, 146
files 146
key 55, 56, 110
menu 55, 146
Reality 56
window 55
writing a Help application 146
Hide, macro command 105
History pages 20, 49, 76
HOLD key (Prism terminal) 50
HOME key 44, 52
VT220 mode 74
Horizontal scroll bar 21
Host
connection 26
software 33
Host Name or Serial Port 70, 71
HOST-WS 25, 33, 89 to 90, 91
default filter 90
filters 89
problem solving 108
Hybrid application 23
defined 14
I
Index command, Help menu 55
INITIATE, DDE message 150, 152
Initiating a DDE conversation 152
InputText, macro command 106
INSERT key
VT220 mode 74
Installing RealLink 27
on a Network Server 26
on a network workstation 29
INTO clause 92
Item size, Reality 33
K
Keyactions, macro object 105, 106
Keyboard
Help command 55
selection mode 43
V3.0
M
Macro commands
Call 97, 98, 100, 107, 110, 111, 114
CapsLock 97, 98, 100, 107, 110, 111
Connect 108, 97, 99, 100, 107, 110,
111, 114
Define 97, 100, 107, 110, 111
Delay 101
Disable 97, 100, 101, 107, 110, 111
Disconnect 108, 102, 114
Draw 97, 100, 102, 107, 110, 111
Enable 97, 100, 103, 107, 110, 111
Exec 97, 100, 103, 107, 110, 111
Exit 97, 100, 104, 107, 110, 111
Goto 107, 104
Hide 105
InputText 106
Load 105, 97, 100, 107, 110, 111
Maximise 97, 100, 107, 108, 110, 111
Minimise 97, 100, 107, 110, 111
Msg 108, 112, 114
NumLock 97, 100, 107, 110, 111, 113
Object...EndObject 105
On...Goto 107, 114
Password 115
Restore 118
Return 107, 98, 118, 119
SendLine 97, 100, 107, 110, 111, 120
SendText 97, 100, 107, 110, 111, 121
Show 121
Space 122, 123
Timeout 122, 125
Update 124
WaitFor 108, 114, 116, 122, 125
Macro errors 98 to 99
see also Error messages
load-time errors 98
run-time errors 98
tokens 99
Macro files 31
161
Index
Macro menu
Macro Select 98
Save Macro List 104
Macro objects
Button 97, 124
Keyactions 105, 106
Menu 108
MenuItem 109
Mouseactions 105, 111
PopupMenu 105, 116
PulldownMenu 105, 116
Script 98, 105, 119
Toolbar 105, 97, 122, 123
Macro script, FIRST 102, 103, 105, 104
Macro Select command 98
Macros 98 to 99
adding to the Macro menu 103
deleting from the disk 104
editing 104
example 100 to 102
function-key definitions 99
loading 103 to 4
loading from the command line 31,
104
menu commands 98
mouse button definitions 99
removing from the Macro menu 104
Toolbars 99
Maximise
command 81
macro command 97, 100, 107, 108,
110, 111
Maximum workspace size 33
MDDPL escape sequence 124
MDISTEM escape sequence 131
MDRDS escape sequence 133
MDSDF escape sequence 124
Menu
macro object 108
separator item 109
Menu commands, defining 98
MenuItem, macro object 109
Messages, error – see Error messages
Minimise, macro command 97, 100, 107,
110, 111
Mode key 43, 110
Modifier keys 112
Mouse 43
selecting text to edit 52
shortcuts 48
Mouse buttons, defining 99
Mouseactions, macro object 105, 111
Msg, macro command 108, 112, 114
Multinational character set 73
Multiple connections 41
162
N
Nationality 73
Network
connections 36, 41
server 26
sessions 70
workstation 29
New command 66, 69
NewView application 23
Num Lock Control escape sequence 133
NUM LOCK key 40
NumLock, macro command 97, 100, 107,
110, 111, 113
O
Object definitions, script language 105
Object...EndObject, macro command 105
Obtaining data from RealLink via DDE, 152
Obtaining help 55
On...Goto, macro command 107, 114
Open command 67
P
P12 – see Prism emulation
P12/P14 terminal 73
PAGE DOWN key 22, 44, 49
VT220 mode 75
Page size 76
PAGE UP key 22, 44, 49
VT220 mode 74
Parity 35, 71
PASS-DOS 25, 33, 89, 91 to 94
DIF filter 141
filters 92 to 93
FOOTING clause 92
INTO clause 92
problem solving 108
Pass-through, print mode 61
Password, macro command 115
Paste
command 45
escape sequence 133
Pasting text from the clipboard 45
PAUSE key 50, 104
PC Status Report escape sequence 133
PCi
defined 14
Standard Network Interface 36, 41
Point size, used within terminal window
80, 81
POKE, DDE message 150, 152
PopupMenu, macro object 105, 116
PORT-DESPOOL, TCL command 20, 62
Pre-loaded
commands 52
replace strings 54
V3.0
Index
Print mode 61
Print Selection command 62
Print Window command 62
Print Window Mode 61
Printer font, selecting 61
Printer Setup command 60, 62
Printer, selecting 60
Printing 20, 60 to 63
problems 102, 103
to a file 62
Prism emulation 20, 73
function keys 74
Problem solving 101 to 6
a blank page is ejected at the end of
each printout 102
asynchronous communications 104
back-page does not work 102
characters are occasionally lost 105
double-clicking the RealLink Icon has no
effect 102
file transfer 107
garbled response from the host 104
HOST-WS 108
LAN sessions 106
LanFTU 107
modem occasionally disconnects the
line 105
no data is transferred 109
no response from the host 104
PASS-DOS 108
printing does not work 103
running RealLink 102
SHIFT key has no effect 103
SPASS-DOS 108
the last page of each printout is not
ejected 103
WS-HOST 108
Process Attributes
command 80
escape sequence 134
Program Manager 31
Programmable keys options 76
Protocol
Asynchronous Port 71
default 36, 70
PulldownMenu, macro object 105, 116
Q
QRGnn.HLP file 56
R
REALBREAK environment variable 58
Reality
commands – see TCL commands
item size 33
systems 35
workspace recommendations 33
V3.0
Reality Environment, defined 14
Reality Help 56
RealLink
adding to other accounts 33
configuration files 21
escape sequences 127 to 35
getting started 35 to 38
host software 25
problem solving 102
software 20
starting 36
starting 39
Related documents 13
Removing a macro from the Macro menu
104
Repeating
a replace operation 53
commands 51
Replace 53 to 54
pre-loaded replace strings 54
repeating 53
separator 53
Replaceable parameters, Help application
147
Reply as a P30 and not as a P12 73
REQUEST, DDE message 150, 152
Reserved words, script language 97
Reset button, Attribute Mapping dialog 80
Resetting the terminal emulator 59
Resource compiler 23
Restore
key 57
macro command 118
window position 78
Restore Key command 57, 58
Resume command 57
Return, macro command 107, 98, 118,
119
RFW command line 31
RFW.INI file 29, 31, 102, 103, 111 to 12
application help 55, 146
bitmaps directory 97, 100
blink rate 79
command stack size 51
Help key 56
loading DLLs 151
macro editor 104
macro list 104
macros directory 103, 107, 98
Mode key 43
pre-loaded commands 52
pre-loaded Replace strings 54
printer font 61
Reality help 56
Replace separator 53
Replace stack size 53, 54
Sovereign file transfer 107
RFWDDE 152
RFWDDE.DLL file 151
163
Index
RFWDEF.CFG file 29, 40, 69
RFWEGA.FON file 30
RFWHELP application 55
RFWHELP.CPP file 147
RFWHELP.EXE file 56, 146
RFWPRINT.XLT file 29
RFWVGA.FON file 30
RL.BP file 137
RL.OPTIONS item 33
Row, DDE server command 153
RTS 72
Running applications 57
Run-time errors, macros 98
RxBuff, DDE server command 154
rz, UNIX command 95 to 96
S
Save As command 67, 68
Save command 69
Save Macro List command 104
Save Window Position command 69, 78,
81
Screen
attributes 79
colours 79
Screen Update escape sequence 134
Script
executing 98
macro object 98, 105, 119
Script language 105 to 9
comments 109
error messages 98 to 99
flow control 107
labels 108
object definitions 105
reserved words 97
strings 109
Scroll bars 50, 77
horizontal 21
vertical 21, 22
SCROLL LOCK key 43
Scrolling 22
Selecting
a printer 60
a printer font 61
columns of text 44
text 43
text to edit 52
Send Restore Key As command 58, 59
Sending data to RealLink, DDE 152
SendLine, macro command 97, 100, 107,
110, 111, 120
SendText, macro command 97, 100, 107,
110, 111, 121
Separator item, menu 109
Server commands, DDE 152
Set CapsLock 77
Set Coord. Format command 47
164
Set Selection escape sequence 134
Setting up
asynchronous sessions 71
network sessions 70
printers 61
Setup menu 65
Attribute Mapping 79
Communications 70, 106
Process Attributes 80
Status Bar 40
Terminal Emulation 73
Terminal Preferences 22
Setup program 27
SETUP.EXE file 29
SETUP-ACCOUNT, TCL command 33
SGR escape sequence 126
SHIFT key 43, 52, 56, 107, 111, 103
SHIFT+DELETE 52
SHIFT+INSERT 45, 52
Show vertical scroll bar 77
Show, macro command 121
SNI
configuration file 86
defined 14
Software installation 27
on a network workstation 29
Software Key 28
Software requirements 26
Solid colour 80
defined 14
Sovereign mode 20
SovereignX DLLs 32
Space, macro command 122, 123
SPASS-DOS 25, 33, 89, 91 to 94
DIF filter 141
filters 92 to 93
FOOTING clause 92
INTO clause 92
problem solving 108
Spooled printing 62
Starting RealLink 36, 39
Statements – see Macro commands
Status bar 39, 50
Status Bar command 40
Stop bits 35, 72
Stream escape sequence 135
Stream To File command 63
Streaming to a file 63
Strings, script language 109
Strip Spaces command 45
Swap text colours 77
SXPRINT.XLT file 29
System menu
Close 42
Command Stack 52
Maximise 81
System messages 22
sz, UNIX command 96
V3.0
Index
T
Table, DDE server command 154
TCL commands
HOST-WS 25, 33, 89 to 90, 91
LIST-FILTERS 137
PASS-DOS 25, 33, 91 to 94
PORT-DESPOOL 20, 62
SETUP-ACCOUNT 33
SPASS-DOS 25, 33, 91 to 94
TERM 76
WS-HOST 25, 33, 90 to 91
TCP/IP
LAN connection 26
network connections via 36, 70
TE Processing, DDE server command 154,
156
TERM, TCL command 76
Terminal emulation 35, 73, 104
ANSI 74, 77
command 73
dialog 73
preferences 76
Prism 73
VT220 74
Terminal page 22
defined 14
Terminal Preferences command 22, 49
Terminal Preferences dialog 76 to 78
Cursor 43
Terminal Reset command 59
Terminal server, connecting via 142 to 44
Terminal window 21
defined 14
height 22
width 21
TERMINATE, DDE message 150, 152
Terminating
applications 57
DDE conversations 152
Text colours, swapping 77
Text cursor 77
Timeout, macro command 122, 125
Tokens, in macro error messages 99
Toolbar
definition 99
macro object 100, 105, 97, 122, 123
Tools menu
LanFTU 84 to 88
Set FTU Path 95
Stream To File 63
Type size 80, 81
auto-select 78
UIMS (continued)
host software 25
resource compiler 23
UIMS API, defined 15
UIMS application 23, 31, 57
defined 15
UNIX commands
rz 95 to 96
sz 96
Update, macro command 124
User Interface Management System – see
UIMS
Using
DDE 152 to 56
the mouse and the keyboard 43
V
Vertical scroll bar 21, 22, 50, 77
Very Small command 81
VGA display 21
VT220
emulation 74
escape sequences 121 to 23
W
WaitFor, macro command 108, 114, 116,
122, 125
Window, restore position 78
Windows Help application 146
WINHELP.EXE file 146
Workspace
increment 33
recommendations 33
Writing a Help application 146
using replaceable parameters 147
WS-HOST 25, 33, 89, 90 to 91
default filter 91
filters 91
item size 33
problem solving 108
X
XON/XOFF 72
Z
Zmodem 95 to 96
setting the DOS path 95
U
UIMS 20, 22
DataBasic API 22
defined 15
V3.0
165