1
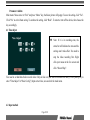
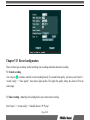
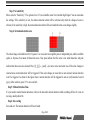
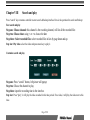
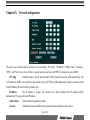
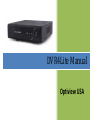
DVR4Lite Manual Optiview USA Note: ·Put DVR on a horizontal plane where there is no vibration ·Select appropriate location to provide good ventilation and prevent overheating of the device. ·Do not place the DVR in a high humid or dusty area. ·Use power surge protection to prolong the life span of the DVR and other components such as hard drive. ·Install the device in suitable normal room temperature environment. Page 2/28 Page 3/28 CONTENT CHAPTER I BRIEF INRODUCTION …………………………………………………… ………………………………….. 5 CHAPTER II TURN ON .................................................................................................................................................................................. 5 CHAPTER III REMOTE CONTROLLER .................................................................................................................................................... 6 CHAPTER IV MOUSE OPERATION ............................................................................................................................................................ 8 CHAPTER V ICON INSTRUCTION ............................................................................................................................................................ 9 CHAPTER VI BASIC OPERATION............................................................................................................................................................. 10 6.1 TIME ADJUST ............................................................................................................................................................................................ 11 6.2 INPUT METHOD .......................................................................................................................................................................................... 12 6.3 FAST COPY PARAMETER ............................................................................................................................................................................. 12 CHAPTER VII RECORD CONFIGURATION ........................................................................................................................................... 10 7.1 NORMAL RECORDING ................................................................................................................................................................................. 13 7.2 TIMING RECORDING ................................................................................................................................................................................... 13 7.3 MOTION DETECTION RECORDING................................................................................................................................................................ 15 CHAPTER VIII SERACH AND PLAY .................................................................................................................................................... 14 CHAPTER IX NETWORK CONFIGURATION ....................................................................................................................................... 15 CHAPTER X MANAGER TOOLS ............................................................................................................................................................. 17 10.1 LOAD DEFAULT ........................................................................................................................................................................................ 21 10.2 UPDATE FIREWARE ................................................................................................................................................................................... 21 10.3 DISC MANAGEMENT................................................................................................................................................................................. 21 10.4 SYSTEM LOG ........................................................................................................................................................................................... 21 10.5 SYSTEM INFORMATION............................................................................................................................................................................. 18 CHAPRER XI TROUBLE SHOOTING..................................................................................................................... .................................... 19 Page 4/28 Chapter I Brief Introduction This DVR system is already pre-installed with a pre-formatted hard drive. All settings were already preconfigured to record after being plugged in to your AC outlet. This DVR was set to record video only when there is motion detected by the DVR system in order to save more hours of video to the hard drive. There are no other settings needed to be setup prior to being turned ON, this unit is ready to record upon purchased. The only setting you might need to change is the time setting (depending on what time zone location). See page 11 to learn how to change the time on your DVR system. Chapter II Turn on Plug in the power cord of the DVR4Lite to an AC wall outlet, 120 Volts AC. It is highly recommended to use a power surge protector to help prolong the life span of the DVR system and its hard drive. Page 5/28 Chapter III S/N Remote controller Function Video recording symbol Playing symbol Next frame Remarks Start/stop video recording. The green round icon indicates manual recording state. Play/stop the recording. It turns green while playing recording. Indicates two functions: pause or move to the next frame. It will appear in the Page 6/28 symbol image while it pause or is in frame step playing. FR symbol Indicates fast rewind. Followed such as x4, indicate the fast reward speed FF symbol Indicates fast forward, followed such as x2, indicate the fast forward speed Last track While back play the recording, it will enter last recording file quickly. First track While back play the recording, it will enter first recording file quickly. Direction key Press this key to move cursor left Direction key Press this key to move cursor right Direction key Press this key to move cursor up Direction key Press this key to move cursor down Enter Menu/Confirm Exit Exit Timing Timing Enable or cancel timing recording Search Search Enter search interface Info Info Switch to the 4 screen mode Backspace/ single 0、1、2… Numerical key/character Enter into device menu and confirm setting Quit the menu Check the device information list Display in 4 screen while monitoring or recording Display the video in single screen while monitoring or recording; Backspace while input number or characters. Input numbers or characters; switch recording screen Page 7/28 Chapter IV Mouse operation Insert mouse into USB port, the symbol turn green to indicate that it can be use. Click left to confirm a menu selection, click right to select an option. Move cursor to the bottom of the screen to show disclose the hidden menu. Click right key, the control menu will pop up and display a list as shown below: (Note: click right key to back to previous page) No. Name Remarks 1 Parameter setting Same as menu key 2 Video info Same as search key 3 System info Check the inner information of the device 4 Activate timing 5 Stop timing 6 Enable recording Start recording manually 7 Stop recording Stop recording manually 8 Playback recording Activate timing function. Only activate this function can you start timing recording. Stop timing function, and timing recording will change to common recording. Playback the recorded video Page 8/28 Chapter V Icon instruction Press “display” key continuously on remote controller and to view the different symbols displayed on the screen, showing different information. Video recording symbol The green round icon indicates manual recording state Video recording symbol The yellow round icon indicates timing recording state. Playing symbol Indicates the recording is being played FF symbol FR symbol Timing symbol USB Symbol Indicates fast forward, followed such as x2, indicate the fast forward speed Indicates fast rewind. Followed such as x4, indicate the fast reward speed Indicates the video recorder is in timing state Indicates the USB interface is connected HDD Indicate HDD connect Single frame symbol Indicates pause in single frame playing state. **/**/** Time display the playing time or recording time. Page 9/28 Chapter VI Basic operation Press “Menu” and input correct PSWD (default PWD “88888888”) to enter main menu Menu operation In the setting area, you can enter submenu by pressing menu key or input numerical key to change setting directly. In System settings menu, press [↑], [↓], [←], [→] key to move cursor and press [Menu] key to confirm selection. In main menu, press [↑], [↓], [←], [→] key to select items in main menu and press [Menu] key to enter the submenu and set the parameters. In the submenu, press [↑], [↓], [←], [→] key to select items in main menu and press [Menu] key to enter the submenu and set the parameters. There are numerical keys in the menu. It can be revised by the numerical keys on front panel. The operation will be canceled if you press “Cancel” button. Press “OK” and the setting will be saved and back to previous menu. Page 10/28 Parameter validate Main menu: Move cursor to “Exit” and press “Menu” key, the below picture will popup: To save the setting, click “Yes”. Click “No” to exit without saving. To continue the setting, click “Back”. To restart or turn off the device, then choose the key accordingly. 6.1 Time adjust Note: If it is in recording state, the status bar will indicate the state and the settings won’t take effect. You need to stop the video recording first. Right click your mouse at the live screen and click “Record Stop”. You need to set date/time before record video. Only set time can you search recorded files timely. Press [Menu] key to enter “Time Adjust” in “Basic Config”; Input correct time, save and exit the main menu. 6.2 Input method Page 11/28 In menu operation interface, enter text edit box (e.g. “Channel Name” box in “Video Config”) and input method will be displayed in status bar at the bottom of the screen, as shown below: Press [Menu] key on remote controller to switch input method. For example, to input numbers, switch the input method to “123” and then press 0-9. To change input method, press [Menu] key. Available input methods include: capitalized letter, small letter, number and location (see “Location input method” in appendix). To input letters, press numerical keys 1-9. Press a key consecutively to switch letters. After input the letter, wait for 1 second to input next letter. 6.3 Fast copy parameter There are two colors to indicate “copy” in the menu. The light colored area is the copied content and not in this area is not copied, such as the light area in “live config” and “record config”. Channel parameter copy: copy parameter of a channel to other channel or all channels, other channel will work the same way as the former one. Choose a channel in “copy to” and press “copy” button. Then it work. Different channel parameter can be copied separately. Parameters save: All the settings should be saved before exit. Select the “confirm” in video config, the content will be saved and back to main menu. Page 12/28 Chapter VII Record configuration There are three types recording: normal recording, time recording and motion detection recording. 7.1 Normal recording User can press on remote controller to start recording directly. If you need better quality, you have to enter “menu”-> “record config” -> “video quality”, then choose higher quality. The higher the quality setting, the clearer will be the video image. 7.2 Time recording – note: Stop all recording before you activate timer recording. Enter “menu” -> “record config” -> Schedule Record -- “Set up” Page 13/28 Date Ten options are available. According to weekdays, from Monday to Friday, or from Saturday to Sunday, or other weekdays separately, users can set it at their own preference. From The time for start recording. The recording will be start at specified time. The format is 24-hour. Press numerical keys on remote controller to input time. To The time for stop recording. The recording will be stopped at specified time. The format is 24-hour. Press numerical keys on remote controller to input time. Save setting After setting, click “OK” to save and exit. Note: In the timing recording, the date can be overlapping. If one channel is both setting for timing recording and normal recording under the same date setting, the device will follow common recording. Activate timer recording Press [Timing] button on remote controller to start timing recording. The timing symbol will be displayed on the monitor Page 14/28 Stop timing recording To stop timing recording, press [Timing] button on remote controller first. If password protection is enabled, the “Input PWD” dialogue box popup. (Default password: 88888888) Enter valid password to stop timing recording. The timing symbol in the image will also disappear. If password protection is disabled, press [Timing] button to stop timing recording directly. Prompt: Manual recording will be invalid in timing recording process. Timing recording will be saved in hard disk as alarm recording. 7.3 Motion detection recording In monitoring status, it can detect removable objects. By analysis of the video, it detect whether the monitoring scene is changed. If it changes, user can do something to deal with it according to setting this function. Motion detection work by analysis of the video pixel changes. Light change or big video signal interference will also be regarded as monitoring object moving, which will affect the motion detection. So it needs to set the parameter considering all the aspects, and try to get the best effect. From “Menu”-> “Live config”, enter into motion detection setting. Step 1: Select channel Enter “Live Config” interface. Move cursor to “Channel” to select the image to perform motion detection setting. Press [Menu] to confirm. Step 2: Activate motion detection Press [Menu] key to select “Motion detection” to activate mask alarm. Page 15/28 Step 3: Set sensitivity Move cursor to “Sensitivity”. Five options (level 1-5) are available, lower<low<normal<high<higher. You can customize the settings. If the sensitivity is low, the motion detection alarm will be activated only when the change of scene is obvious; if the sensitivity is high, the motion detection alarm will be activated when the scene changes slightly. Step 4: Set motion detection area The whole image is divided into 48 (6×8) panes. User can select two neighbor pans or independent pan, and the available option is 48 panes, that means 48 detection zones. Grey pane indicate that this zone is not under detection; red pans indicate that these areas are selected; Press [↑], [↓], [←], and [→] to move cursor and select area. If the color changes at selected areas, motion detection will be triggered. If the color changes at areas that are not selected, motion detection won’t be triggered. As shown in the figure above: motion detection will be triggered in area A (red) instead of area B (grey). After selection, press “0” to save and exit. Step 5: Motion Detection Time It is just used in normal motion detection, refers to the time after motion detection while recording still last. It is not set too long, usually about 30s Step 6: Save setting Save and exit. The motion detection will be activated. Page 16/28 Chapter VIII Search and play Press “search” key on remote controller to enter search & backup interface. Here is the operation for search and backup: Fast search and play Step one: Choose channel: this channel is the recording channel, will list all the recorded files Step two: Choose time: using < or > to choose the date Step three: Select recorded files: select recorded files in lists by page down and up. Step four: Play video: select the video and press menu key to play it. Customize search and play Step one: Press “search” button, left picture will popup: Step two: Choose the channel to play Step three: input the recording time in the time box Step four: Press “play”, it will play the video recorded in this time period. If no video, it will play the video next to this time. Page 17/28 USB backup Insert U disc strive into USB interface. When the USB symbol turns green, it can backup. Two methods are available for backup: backup by video clips and backup by time. Backup by video clips: select the files in the list and press “Back up Clip” button. Backup by time: Step one: insert USB stick into the USB interface Step two: press “backup”, right window will popup Step three: Enter the recorded time in the date Step four: Select the file in “channel” Step five: Press “backup” Page 18/28 Chapter IX Network configuration The device can connect kinds of network to view recording. “IP config”, “IP address”, “Subnet mask”, “Gateway”, “DNS”, and “Port” have to be set. If dial to connect network, user has to set PPPOE. Taiwanese has to set DDNS. IP Config Available modes to get IP: Auto and Static. DHCP protocol is used to get IP automatically. The LAN must have DHCP server, otherwise the recorder can’t get IP. While get IP automatically, the device cannot provide actual IP address (IP are all 0 while it failed to get). IP address This IP address is unique. The recorder can’t detect whether there IP address conflict automatically. Please specify valid IP address. Subnet Mask Used to mark net segments of subnet. Gateway Communicate between different net segments. Gateway address needs to be set. Page 19/28 DNS It is special domain name service software. The device will get a dynamic IP address when it accesses network in PPPOE protocol. If this IP address is bound to S/N and/or name of device, DNS server will analyze S/N and/or name of device to the IP address. Input the IP address of domain server in “DNS address”. Port It’s the special port for transmit information. Video stream port: 3358; Command data port: 3357; IE browse port: 80. If client software is installed in PC, you need to configure the port before access the recorder with PC. Configure video transmission and information transmission before view the video and information. You need to input the port to access the recorder in IE. WEB port must be same to IE port. PPPOE With PPPOE, you may connect the PC to remote access device with simple bridging access device. Enter account and password to transfer information through this network, e.g. ADSL should use this server to connect. You need to buy a ADSL modular adjuster to dial up. DDNS Dynamic domain name service. Map user's dynamic IP address to a static DNS. When user accesses network, the client will send the dynamic IP of host to the server application in server host. DNS is necessary in “DDNS setting” of this video recorder. Prompt: When you input password, it is visible for you to check and memorize. When the input is finished or cursor is moved away from the password box, it will turn into star symbols. Note You can see the setting IP address by pressing the “info” key on remote controller. Page 20/28 Chapter X Manager tools 10.1 Load default Restore default settings. It will take effect when the device is restarted. (IP and gateway are also reset.) 10.2 Update fireware Update the software. Check whether the date and main board of original software is congruent with update. The update will fail if they don’t have same function. You can update by use U disc or by network. Stop recording before upgrade. 10.3 Disc management This function provides storage information list and management for the HDD data. When problem occurs on hard disc, the system will stop working and warn to restart the machine. Please ask engineers to check. Format HDD: clear the data in the HDD and format it quickly. Press this key “execute” to confirm. This instruction refers to selected HDD, and after that all data in it will be deleted. Data recovery: If something is canceled carelessly, you need to click “data recovery” to restore the data in hard disk. Input the password (default: 88888888). Click “Back” to cancel the operation; or click “Execute” to restore the data. Even the data recovered, it might be a little different from the original. 10.4 System log It will show all logs according to time. You should open this log function in “Basic Config” and then you can write log in. By checking logs, you can check the operations used before accordingly. 10.5 System information Check the related information of the device itself. Page 21/28 DVR Type: the model number of this machine. Version: the software version NO Video format: the output TV modular Production date: the production date for software Resolution: the video resolution of present recording video Work HDD: the working disk. HD disk: the connecting HDD. Red—HDD is working; Blue— HDD is installed but not at working; Empty—HDD uninstalled. CD/DVD-RW: in blue: it is connected. HDD Capacity: the total capacity (in GByte) for all the installed equipment, except burner. Free: the spare capacity (in GByte) Record from: Y/M/D H/M/S To: Y/M/D H/M/S Note: It’ the earliest data and latest data saved. If some mistakes occur during recording, the saved data might be wrong. Cover type: the recycle method for HDD (Auto/Manual are optional.) Covered: the recycled times MAC Address: the MAC address for network IC. Main board: the main board series NO. IP address: the IP address for the DVR. If it uses the dynamic ADSL, this IP address will be the WAN IP address. Page 22/28 Chapter XI Trouble shooting Thanks for purchasing the product of our company. We will provide services for you wholeheartedly. If any fault occurs, please check according to the following procedures. If the problem still can’t be solved, please call the hot line or send e-mail. If you have many questions, please write them down and send to us. We will reply in time. Common detecting methods: [1] Replace (replace power supply or hard disk, etc) [2] Minimum load (remove hard disk, video, audio, alarm input/output) [3] Upgrade (solve the problems of peripheral devices) (I) Start, self detection, breakdown 1. Why the DVR isn’t started when power supply is connected? ①Check whether the power switch at the rear is “ON”; ②Check whether the indicator on front panel is lit. 2. Why system stays in self detection after boot logo? Check whether the HDD is connected properly and whether the HDD and cable are in good condition. To check the HDD, remove it and turn on the DVR. The DVR may be turned on normally even without the HDD and displays “No HDD, continue?” Click “Yes” to operate the DVR. Page 23/28 3. Why the boot process is slow? ①The system will search the data when boots. If too many data are saved in the HDD, it will take longer time; ② The error of HDD will make the DVR to detect the HDD repeatedly. 4. Why the DVR restarts repeatedly after self detection? ①Check the HDD. If the HDD hasn’t been formatted or the HDD has fault, the DVR will be restarted; ②Check the power supply of DVR; ③Pull out the network cable and restart the DVR. Serious network fault may cause the DVR to restart repeatedly. 5. Why the DVR restarts repeatedly after long time running? ①Check whether the HDD sectors are damaged; ②Check whether the video signals are normal. If it is confirmed that abnormity ever occurred and it still restarts when video input is stopped, please cut off the power of DVR and connect again later; ③Check the power supply of DVR. 6. Why I can’t control the DVR with remote controller? ①If the infrared indicator on front panel isn’t lit, please check whether the battery has electricity or whether the remote controller is damaged. 7. Why breakdown occurs in the normal video playing or viewing process? Check whether the HDD is connected properly; replace the HDD if it is damaged. Page 24/28 8. Why the monitor (TV set) has no image or can’t be started after update? Keep the power supply stable in the upgrading process. If the power supply is cut off, the update will be failed or even the DVR can’t be started. Then, please update the DVR again. If the update fails or can’t update, please contact the supplier. (II) Image display/monitoring 1. Why the images in monitor or TV set are black and white? Check whether the systems of video input, DVR and monitor or TV set are uniform. If not, select “Auto” for monitor or TV set. 2. Why the monitor doesn’t display anything? ①There is a black screen process (about 30 seconds) when the DVR is starting; ②If there is no image displayed when the DVR is started for a long time (more than 60 seconds), please check whether the monitor is turned on and whether the video cable is connected properly. If there is no problem, please check whether the VDF display on front panel of DVR is lit; if it is normal, the system communication is normal. Then, connect the video signals to the monitor directly to check whether there is signal and whether the circuit has fault. Page 25/28 3. Why the images are distorted? ①Check whether the video connection is short circuit or open circuit, or has false welding or poor connection; ② Video cable is interfered with by strong electricity; do not install the video cable and the strong electricity circuitry together and also choose qualified shielded cable; ③In the whole system, connect only the center DVR to earth; otherwise, it will cause common mode interference; connect the grounding screw at the rear side of DVR to earth; ④Check whether the DVR, monitor or the circuitry is aged. (III) Video recording/playing, recording data, backup 1. Why the recording has no audio? ①Check whether “Mute” is activated; ②Check whether “Audio” is selected in the settings of video recording; ③ Check the audio input cable. 2. Why I can’t perform timing recording or can’t record any data within the period? ①The period of timing recording is invalid. The time points should be within 00:00-24:00 and the end time must be later than the beginning time; ②The power supply is cut off in the timing recording process; ③The desired data have been overwritten; ④The HDD has physical damage or logical error and the data can’t be read normally. 3. Why I can’t perform moving recording or alarm recording? Page 26/28 ①The time period of moving recording or alarm recording is invalid. The end time must be later than the beginning time; ②No motion detection area is selected; no alarm recording channel is selected; ③The sensitivity of motion detection is too low; the alarm isn’t triggered correctly; please check the alarm input and triggering device. 4. Why the recording isn’t continuous? ①If manual recording or timing recording is selected, check whether the power supply was cut off or voltage was abnormal during the recording process; ②If motion detection recording or alarm recording is selected, check whether alarm occurred. The alarm will trigger the recording and record according to the preset time. 5. Why “Auto-overwrite” is invalid when recording is activated? ①Check whether the “Overwriting mode of recording” is “Auto cycle”; ②Check whether the HDD has logical error or physical damage. If there is logical error, connect the HDD to PC and delete the partition information or repair the HHD and connect it to the DVR. If there is physical damage, replace the HDD. 6. Why there is no response after click “Backup” when I use client software to backup DVR data? Check whether firewall is enabled. The client software may not backup the DVR data if firewall is enabled. 7. Why the time skips when I play the recording files? It is usually caused by the adjustment of time. To avoid this situation, please check whether the data need to be saved before adjusting the time. If not, please format the HDD when the DVR is started after time is adjusted. Page 27/28 8. Why the image playing is slow? ①Check whether slow playing is enabled. The DVR supports 1/2, 1/4, 1/8 and 1/16 speed slow playing; ②Check whether the HDD is connected properly and whether the HDD has bad sectors. The bad sectors of HDD may cause image intermission or screen mess. Page 28/28