1
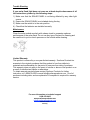
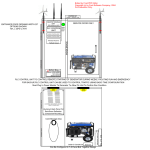
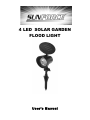
4 LED SOLAR GARDEN FLOOD LIGHT User’s Manual Your unit features: High quality crystalline solar panel Water proof design provides longer life in all weather conditions Automatic sensor turns the light on at dusk 4 Ultra bright LED’s Location of the SOLAR PANEL 1) For optimal results, place the solar panel in a position where it can get direct sunlight and will be generally free from cover and shade. 2) Make sure that the photo sensor near the solar cell is not going to be affected by any other light source. If there is a light source cast over the photo sensor during the evening the floodlights will not illuminate. 3) The solar panel must be left to charge for 2 sunny days before best results are achieved. Assembly Instructions 1) Carefully remove the solar lamp and all the fittings out of the box. 2) Assemble the mounting poles and stake for the solar panel. Push the stake directly into the ground (DO NOT hammer). Slot the head on the mounting pole carefully. 3) Screw the lamp heads to the base stakes. 4) Allow to charge for two fully sunny days before using the floodlights 5) Adjust the switch on the underside of the solar panel to the “AUTO” position. Operation Instructions 1) For daily / normal operation, turn the switch to the “AUTO” position. It will automatically turn on during the night time. 2) The performance of the solar garden light system will vary with the time of year. It will release more light when it has had a full day in the sun rather than a day in overcast weather. Replacing the Batteries For best results rechargeable Ni-Cd batteries should be replaced every 12 months. 1) Unscrew the 3 screws on the front of the unit. 2) Remove the old batteries. Make sure to replace with rechargeable batteries of the same type and size. Install the new batteries in to the battery compartment, ensuring the correct polarity is observed. 3) Reassemble the unit. Trouble Shooting If your solar flood light does not come on at dusk despite observance of all the instructions, please try the following steps: 1) Make sure that the SOLAR PANEL is not being affected by any other light source. 2) Ensure the SOLAR PANEL is not shaded during the day. 3) Make sure the switch is in the auto position. 4) Check that the batteries are installed correctly. Maintenance Clean the solar module regularly with a damp towel to guarantee optimum performance of the solar panel. Do not use any type of solvent for cleaning and be careful not to put too much pressure on the module while cleaning. Limited Warranty This product is covered by a one year limited warranty. Sunforce Products Inc warrants to the original purchaser that this product is free from defects in materials and workmanship for the period of one year from date of purchase. This warranty does not apply in the event of misuse or abuse of the product or as a result of unauthorized repairs or alterations. To obtain warranty service please contact Sunforce Products for further instruction, at 1-888-478-6435 or email [email protected]. Proof of purchase including date, and an explanation of complaint is required for warranty service. For more information or technical support 1-888-478-6435 www.sunforceproducts.com [email protected] MADE IN CHINA 052810(2)