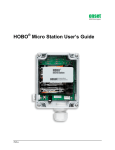
Download Manual - Forestry Suppliers, Inc.
Transcript
Contacting Onset For support, please contact the company that you bought the products from: Onset Computer Corporation or an Onset Authorized Dealer. Onset Computer Corporation 470 MacArthur Blvd. Bourne, MA 02532 Mailing Address: P.O. Box 3450 Pocasset, MA 02559‐3450 Phone: 1‐800‐LOGGERS (1‐800‐564‐4377) or 508‐759‐9500 Fax: 508‐759‐9100 Hours of Operation: 8AM to 5PM ET, Monday through Friday Email: loggerhelp@onset or [email protected] Main Onset Web site: www.onsetcomp.com Copyrights and Trademarks © 2009 Onset Computer Corporation. All rights reserved. Onset, HOBO, HOBOlink, HOBOware, BoxCar, and FlexSmart are trademarks or registered trademarks of Onset Computer Corporation for its data logger products and configuration/interface software. Macintosh is a registered trademark of Apple, Inc. Microsoft and Windows are registered trademarks of Microsoft Corporation. All other trademarks are the property of their respective companies. Doc#: 11866‐E Part#: MAN‐U30‐NRC Contents About the HOBO U30/NRC Station .............................................................. 1 Introduction ........................................................................................................................................................................... 1 Key Features .......................................................................................................................................................................... 2 U30 Station Components .................................................................................................................................................. 3 Smart Sensors ........................................................................................................................................................................ 5 The Analog Sensor Port ..................................................................................................................................................... 6 Setup and Test ............................................................................................ 8 Initial Setup and Test .......................................................................................................................................................... 8 Installing Mounting Plates ............................................................................................................................................... 9 Connecting Smart Sensors ............................................................................................................................................ 10 Connecting Analog Sensors ........................................................................................................................................... 12 Connecting the Battery ................................................................................................................................................... 13 Connecting the HOBO U30 Station to HOBOware Pro ....................................................................................... 14 Configuring Analog Sensor Ports or a TRMSA Module ...................................................................................... 15 Launching the HOBO U30/NRC ................................................................................................................................... 16 Configuring Alarms on the U30/NRC ....................................................................................................................... 17 Alarms Dialog for the U30 Station ............................................................................................................................. 18 Alarm Configuration Dialog for the U30/NRC ...................................................................................................... 19 Installing the HOBO U30 Station in the Field............................................. 20 Field Installation Procedure ......................................................................................................................................... 20 Connecting Grounding Wire ......................................................................................................................................... 21 Installing Weatherproof Cable Channels ................................................................................................................ 22 Connecting Solar or AC Power ..................................................................................................................................... 25 Connecting Equipment to the Relay Contact ......................................................................................................... 26 Mounting the HOBO U30 Station to a Pole ............................................................................................................. 27 The U30 Relay Contact .............................................................................. 28 An Overview of the U30 Relay Contact .................................................................................................................... 28 Changing the State of the U30 Relay Contact ........................................................................................................ 30 Relay Example ‐ Start Device ....................................................................................................................................... 31 Relay Contact Example ‐ Stop Device ....................................................................................................................... 32 HOBO U30/NRC ii User’s Manual Maintenance .............................................................................................. 33 General Maintenance ....................................................................................................................................................... 33 Adding a Sensor ................................................................................................................................................................. 34 Removing/Replacing a Sensor .................................................................................................................................... 34 Testing Smart Sensors .................................................................................................................................................... 35 Checking the U30 Status ................................................................................................................................................ 35 Inspecting the HOBO U30 Station .............................................................................................................................. 35 Troubleshooting the HOBO U30 Station.................................................................................................................. 36 The Smart Sensor Expander Board ............................................................ 38 Opening the Secondary Cable Slot ............................................................................................................................. 38 Installing the Expander Board ..................................................................................................................................... 40 The Battery ............................................................................................... 42 Overview ............................................................................................................................................................................... 42 Battery Life .......................................................................................................................................................................... 43 Maximizing Battery Life ................................................................................................................................................. 44 Battery Voltage .................................................................................................................................................................. 45 Connecting the Battery ................................................................................................................................................... 46 Maintaining the Battery ................................................................................................................................................. 47 Replacing the Battery ...................................................................................................................................................... 47 Troubleshooting the Battery ........................................................................................................................................ 48 Battery Life without External Power ........................................................................................................................ 48 Reference .................................................................................................. 49 General U30 Specifications ........................................................................................................................................... 49 Analog Sensor Port ........................................................................................................................................................... 51 Time Accuracy .................................................................................................................................................................... 53 Logger Status LEDs ........................................................................................................................................................... 54 Memory ................................................................................................................................................................................. 55 Items Required for Field Installation ........................................................................................................................ 56 Accessories .......................................................................................................................................................................... 57 FCC Part 15 Compliance ................................................................................................................................................. 58 HOBO U30/NRC iii User’s Manual Tri-pod Setup ............................................................................................ 59 Guidelines for Typical Field Setup ............................................................................................................................. 59 Field Preparation Checklist .......................................................................................................................................... 61 Items Required for Installation ................................................................................................................................... 62 Task 1: Assemble Tripod ............................................................................................................................................... 64 Task 2: Install Grounding Kit ....................................................................................................................................... 71 Task 3: Temporarily Install Upper Mast (Optional) ........................................................................................... 72 Task 4: Mount Cross Arm (Optional) ........................................................................................................................ 73 Task 5: Mount Upper Mast to Lower Mast ............................................................................................................. 74 Task 6: Mount Logger to Upper Mast ....................................................................................................................... 75 Task 7: Install Guy Wire Kit (Optional) .................................................................................................................... 76 Task 8: Position and Level Sensors ........................................................................................................................... 77 Task 9: Final Setup ........................................................................................................................................................... 78 Index ......................................................................................................................................................................................... 2 HOBO U30/NRC iv User’s Manual HOBO U30/NRC v User’s Manual Onset Computer Corporation ABOUT THE HOBO U30/NRC STATION Introduction Overview The HOBO U30 Station is a data logging and monitoring device that can be easily reconfigured and adapted to a wide variety of applications. Up to 15 channels of data can be recorded and monitored remotely via HOBOlink™. Use HOBOware® Pro software to set up analog data channels, communicate with the logger locally, and perform advanced plotting and analysis. The HOBO U30 Station is a data logging system that can be easily reconfigured and adapted to a wide variety of applications. Up to 15 channels of data can be recorded and monitored with HOBOware Pro software. You can set alarms to trip for specific sensor readings that you select or for overall system conditions, such as when the memory or battery is running low. Contents The HOBO U30 Station package includes: • HOBO U30 Station • Mounting Kit • Grounding Wire • Cable Entry and Sealing Kit • Optional Analog Sensor Port, if ordered • Optional Sensor Expander Board, if ordered HOBO U30/NRC ‐ 1 ‐ User’s Manual Key Features Automatic Detection of Smart Sensors The HOBO U30 Station automatically recognizes Smart Sensors. You can connect up to 10 Smart Sensors of any type or combination just by plugging them in before logging begins. No programming, wiring or calibration is required to set them up. The connections between the Smart Sensors and the logger are digital, ensuring accurate, reliable data collection and storage. The HOBO U30 Remote Monitoring System is compatible with all Smart Sensors used with the HOBO Weather Station and HOBO Micro Station. Alarm Notification The HOBO U30 Station supports alarm notification for sensors as well as system alarms. When an alarm is detected, the system can trigger the relay contact closure and send you a notification to your email/mobile phone. Alarms can be set for individual sensors and for overall system conditions. Rechargeable Battery The HOBO U30 Station uses a Sealed Lead Acid battery that can be recharged via a solar panel or AC adapter. This provides continuous power to keep the HOBO U30 Station recording and transmitting data for years. Optional Analog Sensor Ports The HOBO U30 Station can be optionally configured with two analog sensor ports. The ports are user‐ configurable and can accept and provide excitation power to a wide range of Onset and third‐party sensors with 0‐20 V or 0‐20 mA output. The Analog sensor ports are factory‐installed. HOBO U30/NRC ‐ 2 ‐ User’s Manual U30 Station Components This topic describes the components for the HOBO U30 Station. Some components apply to specific models only, as noted. Diagram Figure 1: U30 Components Component Descriptions 1. Outer Case ‐ protects the U30. 2. Logger ‐ The U30 Station. 3. Analog Sensor Port ‐ This port is where the optional Analog Sensor Ports are factory‐installed. 4. Relay Contacts ‐ The Relay can be activated, deactivated, or pulsed on user‐defined sensor alarms. The relay can be configured as normally open or normally closed, and is rated for 30 V, 1 Amp maximum. 5. USB port ‐ Plug in a USB cable here to connect directly to a computer. 6. GSM or Wi‐Fi Antenna Connection (antenna installed on GSM or Wi‐Fi models). Ethernet Connection (for the Ethernet model only) 7. Vent ‐ This vent allows pressure to equalize inside the enclosure, but does not allow liquid to pass through. NOTE: The pressure inside the case does not match the outside air pressure exactly so a barometric pressure sensor deployed within this case cannot measure the true atmospheric pressure unless it has its own unrestricted vent to the outside. HOBO U30/NRC ‐ 3 ‐ User’s Manual 8. Smart Sensor Expansion Slot ‐ The optional Smart Sensor Expander Board is installed here. 9. Cable access openings ‐ All cables and wires are pulled through a protective rubber cable channel placed in this opening. If using the optional factory‐installed expander board for additional Smart Sensors, you will need to use the second cable access opening. 10. Smart Sensor Ports ‐ Connect up to five Smart Sensors in these RJ‐12 jacks. Use one jack to connect the optional expander board for additional Smart Sensors. 11. Battery ‐ 4‐Volt Sealed Lead Acid (SLA) battery located inside the case. 12. Battery Connector ‐ Plug in the 4‐Volt Sealed Lead battery here. 13. Ground Connector ‐ Plug in grounding wire here to ground the system. 14. External Power Supply ‐ Plug in the compatible solar panel or AC adapter here. Important: Always connect or disconnect external power before the battery. Damage may occur if the battery is unplugged before the external power is disconnected. 15. Internal Enclosure ‐ provides a second weather‐proof housing for the electronics in the HOBO U30 Station. You should never open this case. Doing so will void the warranty. 16. Status LEDs There are three Light Emitting Diode (LED) status indicators. Logging indicates whether the system is currently logging. Alarm indicates if an alarm has been tripped. Sensor active indicates that Smart Sensor network communications are occurring. For more information on LEDs, refer to Diagnostics and troubleshooting. 17. Connection LEDs (Remote Communication Models only) Top ‐ Blinks when the HOBO U30 Station is attempting to contact a network (cellular tower, Wi‐Fi, or Ethernet, depending on model) Bottom ‐ Blinks when the U30 is connected to HOBOlink. HOBO U30/NRC ‐ 4 ‐ User’s Manual Smart Sensors Description Smart sensors plug into the logger and collect data about various parameters. The HOBO U30 Station automatically recognizes Smart Sensors. You can connect up to 10 Smart Sensors of any type or combination just by plugging them in before logging begins. No programming, wiring or calibration is required to set them up. The connections between the Smart Sensors and the logger are digital, ensuring accurate, reliable data collection and storage. You do not have to stop the logger to add a new Smart Sensor. Simply connect the sensor and then select Force Relaunch on Next Connection in the Launch Configuration panel in HOBOware Pro. Refer to www.onsetcomp.com for a current list of available sensors. Cable Length The HOBO U30 Station can work with a maximum total of Smart Sensor cable lengths up to 100 meters (328 feet), as measured from the logger connection point to the electronics embedded in the individual cables. Optional Smart Sensor extension cable lengths must also be included in the total. This limitation applies to Smart Sensor cables only. The lengths of other cables, such as those connected to the Analog Sensor Port or the analog portion of smart sensor cables do not need to be included in this total. Data Channel Limitations The HOBO U30 Station can log up to 15 data channels (not including the internal battery channel). This includes the two channels in the Analog Sensor Port plus each of the Smart Sensor channels (note that some Smart Sensors may have more than one channel). If you have more than 15 channels connected, some of the sensors will be ignored. You should remove any Smart Sensors that will not be used in the deployment, and disable the second channel in the Analog Sensor Port if it is not needed (the first channel cannot be disabled). If you connect a Smart Sensor that has multiple channels (such as temperature and relative humidity), all of its channels will be logged. There is no way to disable them. HOBO U30/NRC ‐ 5 ‐ User’s Manual The Analog Sensor Port The Analog Sensor Port is an easy‐to‐configure, flexible DC signal‐conditioning option that can be factory‐ installed in the HOBO U30 Station. This two‐channel port can accept, and provide excitation power to a wide range of Onset and third‐party sensors with 0–20 V or 0–20 mA output, including devices with 4–20 mA current loop interface, and sensors with 0–2.5, 0–5, and 0–10 V DC output. The Analog Sensor Port features input protection and signal filtering, as well as delta‐sigma A/D conversion and factory calibration. This port features extremely low power operation, resulting in long battery life for unattended data logging applications. Precision electronics provide ±0.25% accuracy from 50 mV to full scale (FS). Sensors connected to this Analog Sensor Port can be configured using HOBOware Pro. Configuration options include scaling parameters, and excitation power. See page 14, as well as the HOBOware User’s Manual for configuration details. If your HOBO U30 Station does not have an Analog Sensor Port and you wish to upgrade to one, contact Onset Computer Corporation for information Sensor Excitation The Analog Sensor Port supports optional, user‐configurable sensor excitation power and warm‐up. Sensor excitation is a voltage output provided by the HOBO U30 Station to power a sensor that is connected to it. This power may be needed because the sensor is not self‐powered, or because the sensor’s power capacity cannot support a long deployment. When sensor excitation is required, the logger can provide 12 V DC sensor excitation voltage up to 50 mA total for transducers that require external power for proper operation. The excitation voltage has a programmable warm‐up time and is controlled by the Analog Sensor Port. Excitation power can affect the battery life. If your sensor does not require it, you should not include it in the channel configuration. Modes Carefully select the sensor excitation mode that best meets your needs. • Warm‐up mode The logger supplies excitation power for a brief, user‐programmable period prior to each measurement. This mode allows you to select the minimum warm‐up time needed to allow for sensor stabilization, while conserving battery power. For example, if you specify a warm‐up of one second and set the Logging Interval to one minute, the HOBO U30 Station will power the external sensor for one second, log a measurement, and then turn off the excitation power for the next 59 seconds. The warm‐up time can be set from 5 milliseconds up to 120 seconds. NOTE: If the warm‐up time selected is greater than the logging interval selected, the logger will interpret the excitation mode as continuous. HOBO U30/NRC ‐ 6 ‐ User’s Manual • Continuous mode The logger supplies constant excitation power to the sensor for the entire duration of the deployment. This mode will result in reduced battery life. Continuous mode is required if the sensor needs more than two minutes of warm‐up time. The Analog Sensor Port begins functioning when logging begins. When the ports are functioning correctly, the Active indicator LED on the port blinks once per logging interval to indicate that a successful measurement has been made. The Ex. On indicator LED will also be lit when excitation is enabled. HOBO U30/NRC ‐ 7 ‐ User’s Manual SETUP AND TEST Initial Setup and Test Before you take the U30 Station into the field for deployment you should perform some preliminary hardware assembly, configuration, and testing. Summary of Tasks 1. Open Secondary Cable Slot (page 38) (if applicable) If you ordered a Smart Sensor Expander Board and you will be using those ports now, you must remove the covering on the Secondary Cable Slot. 2. Install Mounting Plates (page 9) 3. Connect Smart Sensors (page 10) and Analog Sensors (page 12). Onset recommends that you test all sensors you plan to deploy with the logger. If you are using the Solar Radiation Shield, set up the Temperature and Temperature/RH sensors. There are several small pieces required to connect these sensors to the shield that could easily get lost in the field. It is strongly recommended you install these sensors in the solar radiation shield before going to the field. 4. Connect the Battery (page 13). 5. Connect the U30 to a computer (page 14). 6. Run HOBOware Pro and select the U30. 7. Configure the Analog Sensor Port (Optional) (page 15). 8. Configure Launch Settings, including alarms if required, and launch the logger (page 16). 9. Check the U30 Status (page 35). 10. Readout the U30. 11. Repack the logger and sensors for transit. Onset strongly recommends that you use the original packaging when possible because it is custom‐ designed to protect the weather station and its components. HOBO U30/NRC ‐ 8 ‐ User’s Manual Installing Mounting Plates Screw the mounting plates onto the back of the HOBO U30 Station case using a Phillips‐head screwdriver. Be careful to orient the plates as shown below so that the screw heads are sunk into the screw holes. Figure 2: HOBO U30/NRC Installing Mounting Plates ‐ 9 ‐ User’s Manual Connecting Smart Sensors Before You Begin • Connect Smart Sensors before you begin logging with the U30. Smart Sensors plugged in after logging has already begun will be ignored. • This procedure assumes that the Smart Sensor Expander Board and connector are already installed. See page 38 for information. Steps NOTE: If you are using the Smart Sensor Expander Board, connect sensors to those ports first. 1. Run cables through the Secondary Cable Slot. Figure 3: Run Cables through Secondary Slot 2. Plug the cables into the Smart Sensor Expander Board. Figure 4: HOBO U30/NRC Plug Cables into Expander Board ‐ 10 ‐ User’s Manual 3. Run cables for remaining Smart Sensors through the Primary Cable Slots and connect the cables into the Primary Smart Sensor Ports. Figure 5: Plug Cables into Primary Slots HOBO U30/NRC ‐ 11 ‐ User’s Manual Connecting Analog Sensors Refer to the specific sensor documentation for terminal connection details and use the pinout diagram on page 51 to connect a two‐ or three‐wire sensor or transducer to the module’s terminals. Figure 6: Connecting Analog Sensors Steps To make the connection: 1. Loosen the screw for each pin on the connector. 2. Insert the appropriate wire. Make sure all wires attached to the Analog Sensor Port are routed through the cable access opening. 3. Tighten the screw. Note on Cables To fit into the holes in the rubber cable channel, the ideal cable diameter is 0.157 in (4.0 mm). If the cable is too small, build up the diameter using heat shrink. If it is too big and you are using the secondary cable access opening, then place the cable through the left‐most hole in the rubber cable channel where the diameter can be up to 0.25 in (6.4 mm). If you are not using the secondary opening or the cable is still too big, then splice on another cable with a smaller diameter to fit through the hole. See the steps later in this section for working with the rubber cable channel. HOBO U30/NRC ‐ 12 ‐ User’s Manual Connecting the Battery This topic illustrates how to connect the battery to the U30 Station. Illustration Connect the built‐in battery cable to the battery as shown below. Figure 7: HOBO U30/NRC Connecting the Battery ‐ 13 ‐ User’s Manual Connecting the HOBO U30 Station to HOBOware Pro This topic describes the procedure for connecting the HOBO U30 Station to HOBOware Pro. 1. Connect to Computer To connect to a computer running HOBOware Pro, plug the “mini‐USB” end of the USB cable provided into the USB port on the HOBO U30 Station and connect the “A” end to the USB port in your computer. Figure 8: Connecting the U30 to a computer If the device has never been connected to this computer before, it may take some time for the computer to detect the new hardware and report that it has connected successfully. One or more messages will appear, indicating that new hardware has been found. You may also hear a chime. NOTE: Your computer may tell you to reboot before you can use the device. It is not necessary to reboot. 2. Run HOBOware Pro. 3. From the Device menu select Select Device …. 4. In the Select Device pane, click in the circle next to the desired device name and then click OK. When the device is recognized by HOBOware Pro, the status bar at the bottom of the HOBOware Pro window will show the connection status. HOBO U30/NRC ‐ 14 ‐ User’s Manual Configuring Analog Sensor Ports or a TRMSA Module The HOBO U30 Station uses smart sensors and an optional analog sensor port. FlexSmart modules and the analog sensor port are user‐configurable to accommodate a wide range of Onset and third‐party sensors. To take advantage of this adaptability, HOBOware Pro lets you configure these modules/ports at launch time, or create and save different configurations to be loaded into the modules/ports whenever needed. Refer to the HOBOware User’s Guide for more details on this topic. Steps 1. From the Device menu, choose Configure Modules/Ports. If the logger is already logging, you will be warned that the logger will have to be stopped first. The Select Channel to Configure dialog will appear showing all configurable Analog Sensors attached to the logger. 2. Click on the + sign to expand the entry and show the channels. Each channel in the module is defined by its channel number (the physical order in the module), the configured channel name, and any location (assigned at launch) defined for this channel in the logger. NOTE: The default channel names Voltage and Current are just place holders and either channel can be configured to measure voltage or current. For example, both channels can be used to monitor sensors with 4‐ 20 mA output. 3. Select a channel name and then click the Configure button to open the Channel Configuration dialog. NOTE: You can also access the Channel Configuration dialog from the Launch window. In the Channels to Log section, double‐click the module/port name to expand it, click the channel name to select it, and click the Configure button. The Configure Channel Dialog appears. 4. Change any relevant configurable parameters. 5. Save the Configuration (Optional). 6. To send the currently displayed configuration to the module/port, click Configure. The module will remain in this configuration until you send it a different configuration. HOBO U30/NRC ‐ 15 ‐ User’s Manual Launching the HOBO U30/NRC 1. Click the Launch icon on the toolbar. The Launch Logger window appears. Figure 9: Launch Window 2. Complete fields as required. Description: Enter a description if desired. Channels to Log: Make sure all of the sensors connected to the logger are visible in the Channels to Log pane. Logging Interval: Choose a logging interval of 10 seconds so that your test will yield enough data to analyze. When you re‐launch the logger in the field, you will change this to your desired value for deployment. Launch Options: Select Now. Utilities: Use any utilities as required. For information on configuring alarms for the U30/NRC, see Configuring Alarms on page 17. For information on Data Assistants and other utilities see the HOBOware User’s Guide. 3. Click Launch. The “logging ok” light on the logger should blink every two seconds during logging. HOBO U30/NRC ‐ 16 ‐ User’s Manual Configuring Alarms on the U30/NRC Use the Alarms dialog in HOBOware Pro to control the Relay Contact for the U30/NRC. Multiple alarm conditions can be configured for each channel to control the internal relay if an alarm is triggered. Steps 1. Click Alarms on the Launch dialog, or select Device > Alarms from the Main Menu. The Alarms dialog appears. 2. Click Add. The Alarm Configuration dialog appears. 3. Configure options as required. 4. Click OK. The Alarms dialog re‐appears. 5. Click Set to send the configuration to the logger. HOBO U30/NRC ‐ 17 ‐ User’s Manual Alarms Dialog for the U30 Station This topic describes the Alarms dialog for the HOBO U30/NRC. Figure 10: Alarms Dialog for the U30 Station 1. Channels This section includes all of the channels that support alarms. Select a channel and click Add to configure an alarm. 2. Alarms: This section includes all of the alarms that have been configured. 3. Relay Contacts Select if the relay is Normally Open or Normally Closed. This only applies if the Alarm Action (configured in the Alarm Configuration dialog) is set to Activate Relay or Deactivate Relay. 4. Close Relay To test the relay alarm function, click the Close Relay/Open Relay button. 5. Help: Click Help to open the Help topic for this dialog. 6. Add: Click Add to open the Alarm Configuration dialog and configure an alarm. 7. Edit: Click Edit to open the Alarm Configuration dialog and edit an existing alarm. 8. Remove: Click Remove to remove the selected alarm. 9. Relay Pulse Width This sets the duration of the Relay Pulse when the Alarm Action is set to Pulse Relay. The default is 1 second. 10. Set: Click Set to send the alarm configuration to the logger. 11. Cancel: Click Cancel to cancel any entries you have made and return to the Launch window. HOBO U30/NRC ‐ 18 ‐ User’s Manual Alarm Configuration Dialog for the U30/NRC This topic describes the Alarm Configuration dialog. Use this dialog to configure alarm thresholds and actions. You access this dialog from the Alarms dialog. Figure 11: Alarm Configuration Dialog for the U30/NRC 1. Alarm Values Set the Alarm high/low threshold and the number of samples. Select the check box for the High Alarm and/or the Low Alarm. Enter an alarm in the box(es) or use the sliders. If you enter values manually, the software may adjust them slightly to the nearest values supported by the logger. If only a high value is entered, the alarm will trigger if the reading exceeds that value. If only a low value is entered, the alarm will trigger if the reading is below that value. If both high and low are entered, the alarm will trigger if the reading falls outside of that range. You can also set the number of samples that must be displayed before the alarm will be triggered. The sample period is whatever you have configured as the sample rate on the logger. Note: To avoid unintended activation of the relay contact, set the number of samples to allow for anticipated breaches of the alarm threshold. If the measurement is still out of range when the number of samples is reached, the relay contact will be activated. 2. Alarm Action Select an action to occur when the alarm is triggered: Activate Relay (Open/Close), Deactivate, Pulse, Toggle, Open, Close. By default, the relay is deactivated when the alarm clears. To disable this, uncheck the box next to Deactivate on Alarm Clearing. 3. Help: Click Help to open the Help for this dialog. 4. Number of Samples: See Alarm Values above. 5. OK: Click OK to return to the Alarms dialog. 6. Cancel: Click Cancel to cancel all entries and return to the Alarms dialog. HOBO U30/NRC ‐ 19 ‐ User’s Manual INSTALLING THE HOBO U30 STATION IN THE FIELD Field Installation Procedure Tools Required Before you head into the field, refer to the Items Required for Installation topic on page 56 to make sure you have the necessary tools and equipment. Steps This procedure assumes that you have performed the preliminary hardware setup and configuration and have performed a pre‐deployment test. 1. Mount the HOBO U30 Station. If you are mounting the HOBO U30 Station to a tripod, see Tripod Setup (page 59). If you are mounting the HOBO U30 Station to a pole, see Mounting the U30 Station to a Pole (page 27). 2. Connect the grounding wire (optional) (page 21). 3. Plug all Smart Sensors into the HOBO U30 Station (if not already plugged in) making sure all cables are routed through the cable access opening(s). 4. Connect Analog Sensors to the Analog Sensor Port, if applicable (page 12). NOTE: It may be necessary to build‐up the diameter third‐party sensors with heat‐shrink or electrical tape to match the diameter of the holes in the rubber cable channels and ensure a weather‐tight seal. 5. Run the cable for a solar panel or AC adapter through the Primary Cable Slot, but do not connect it yet. 6. Connect equipment to the relay contact, if applicable (page 26). 7. Install the weatherproof cable channel (page 22). 8. Connect the battery (page 13). 9. Connect the solar panel or AC adapter (page 25). 10. Verify that the HOBO U30 Station powers up properly. 10. Close the door and snap the hinges shut on the HOBO U30 Station case. Consider using padlocks to secure the case. The system should begin operating as configured. HOBO U30/NRC ‐ 20 ‐ User’s Manual Connecting Grounding Wire You should connect the grounding wire if you are using the Wind Speed and Direction Smart Sensor (S‐WCA‐ MXXX) or if you are installing the HOBO U30 Station on a roof or in a location with exposure to lightning. The grounding wire may also be helpful in reducing sensor errors when installing the HOBO U30 Station near other radio or electrical equipment or antennas. Insert the grounding wire through the opening and plug it into the ground connector. IMPORTANT: If you are mounting the logger to a pole, make sure to run the grounding wire through one of the sensor cable grooves. Figure 12: HOBO U30/NRC Attaching Grounding Wire ‐ 21 ‐ User’s Manual Installing Weatherproof Cable Channels NOTE: If you are doing a pre‐deployment test setup, you do not need to install the weatherproof cable channel for the sensor cables if you are going to disconnect the sensor for transportation to the field. Guidelines • All cables and wires should be routed through the cable access opening at this point. • If you are using the Smart Sensor expander board, make sure those cables are routed through the secondary cable access opening. Steps 1. Grease the Cable Channel. Apply a small amount of silicone grease (about the size of a pea) onto your fingertip and then work a light coating into the top, bottom, and two ends (the sides with no holes) of the rubber cable channel. Also put a light coating on the inside of the two halves of the cable channel. Figure 13: HOBO U30/NRC Grease Cable Channel ‐ 22 ‐ User’s Manual 2. Place Cables in Channel. a. Hold the channel just below the HOBO U30 Station case (with the channel’s hinged side on the left and the taper facing in). b. Open the channel and lay the cables and wires into the grooves. NOTE: The solar panel or AC adapter cable must be in the leftmost (larger diameter) groove. NOTE: Use the small rubber plugs to fill any unused grooves. Center the thick part of the plugs in the groove. Plug ‘tails’ can face in or out. It may be easier to install these after the rubber cable channel has been pushed into the case. Insert the thin part of the plug into the hole and pull to center the thick part of the plug in the channel. Figure 14: Place Cables in Channel 3. Press Channel into Case. a. Close the channel, making sure the cables, wires, and any plugs remain in their grooves. b. Press the channel into the opening. To reduce the amount of excess cable in the case (especially when several Smart Sensors are connected), gently pull the cables toward you as you press the channel into place. Press the channel in until it is flush with the outside of the case. (When fully seated, the channel will project slightly into the inside of the case.) Figure 15: HOBO U30/NRC Press Channels into Case ‐ 23 ‐ User’s Manual 4. Install Secondary Cable Channel (if applicable). If you are using the Smart Sensor expander board, repeat these steps with the second cable channel. Use the larger plug for the leftmost hole if necessary. 5. Secure Channel Guide. Finger‐tighten the retaining bars on to the case to secure the channel(s). Do not use a screwdriver to tighten the thumb screws. The bars should be flat against the case. NOTE: After time, you may need a screwdriver to loosen them in the field. Figure 16: HOBO U30/NRC Secure Channel Guide ‐ 24 ‐ User’s Manual Connecting Solar or AC Power Connect a Solar Panel or AC Power, as shown below. IMPORTANT NOTES • Make sure you run the cable through the Primary Cable Slot before you install the weatherproof cable channel. • If at any point you need to unplug the battery, unplug the solar panel or AC adapter first. Damage may occur to the HOBO U30 Station if the battery is unplugged before disconnecting the solar panel or AC adapter. Figure 17: HOBO U30/NRC Connecting Solar or AC Power ‐ 25 ‐ User’s Manual Connecting Equipment to the Relay Contact Make sure any wire you use is routed through the cable access opening. The diameter of the wire should be 4.0mm (0.159”) if you are running it through a smart sensor opening, or 6.4 mm (0.25”) if running it though one of the larger cable openings, which will require having the 10 sensor input option. NOTE: These relays are only for low power switching (see specification for rating). To switch higher power, use an appropriately rated relay and use the U30 relay to switch the external relay on and off. For more information see The U30 Relay Contact on page 28. Figure 18: Connecting Equipment to Relay Contact HOBO U30/NRC ‐ 26 ‐ User’s Manual Mounting the HOBO U30 Station to a Pole NOTE: If you are using the U30 Station as a component in the Remote Monitoring System, see Tripod Setup on page 59. Figure 19: Mounting to a Pole Before You Begin This topic assumes that you have already installed the mounting plates on the U30 Station (page 9). Guidelines • Mount the HOBO U30 Station vertically to a mast or pole using the U‐bolts. Make sure the mounting plates are mounted against the flat part of the U‐bolt saddle clamps. • Mount the HOBO U30 Station vertically to a wall or board using screws. • If you are installing a grounding wire, make sure to run it through one of the sensor cable grooves. • Make sure the HOBO U30 Station remains in a vertical position once it is placed in its deployment location. If it is mounted horizontally, the battery could be damaged over time as it is charged. • Any excess sensor cables should not be coiled up and stored inside or within one foot outside the case. The Leaf Wetness Smart Sensor (S‐LWA) is especially sensitive and should be mounted at least two feet away from the case. HOBO U30/NRC ‐ 27 ‐ User’s Manual THE U30 RELAY CONTACT An Overview of the U30 Relay Contact Upon an alarm condition, the relay contact on the HOBO U30 can be opened, closed, or pulsed to control the operation of an external device such as an irrigation system or fountain. To Stop a Device If you have external equipment that you normally want running, you would set the Deactivated State of the relay to be Closed. You would set an alarm that, if tripped, would change the relay to the Active State (open) and the equipment would stop. Figure 20: Equipment Normally On See Relay Example - Stop Device. To Start a Device If you have external equipment that you normally want off, you would set the Deactivated State of the relay to be Open. You would set an alarm that, if tripped, would change the relay to the Active State (Closed) and the equipment would start running. Figure 21: Equipment Normally Off See Relay Example - Start Device. HOBO U30/NRC ‐ 28 ‐ User’s Manual Pulse Relay If you have an alarm configured with an Action of Pulse Relay, the relay will close briefly to activate a piece of external equipment and then open. For example, you would use this to take a water sample when water level reaches a certain amount. To use Pulse Relay the Deactivated State must be set to Open. The default duration is 1 second. Figure 22: Pulse Relay Power Rating The relay on the HOBO U30 Station is rated for a maximum of 30 V, 1 Amp. If you need to switch higher power devices you will need to use an appropriate external relay that is controlled by the U30. Configuration Deactivated State The Deactivated State is the normal state of the relay when no alarm has been tripped to activate the relay. You change the Deactivated State using HOBOware Pro. Alarm Action For the HOBO U30/NRC, you use HOBOware Pro to configure an alarm to trigger the relay. HOBO U30/NRC ‐ 29 ‐ User’s Manual Changing the State of the U30 Relay Contact The U30 relay contact is a latching relay that can be configured as either Normally Open or Normally Closed. The factory‐default setting is Normally Open. You can change the default relay settings in the Alarm dialog in HOBOware Pro. Steps This procedure assumes the U30 Station is connected to a computer running HOBOware Pro. 1. From the Device menu select Alarms to open the Alarms window. 2. In the Relay Contacts section, select Normally Open or Normally Closed. Alternate Method: From the Device menu select Control Relay > Set Default (Deactivated) State and then select either Open or Closed. 3. If you are setting an Alarm Action of Pulse Relay, you can set the Relay Pulse Width. The default is 1 s. 4. Click Set to send the alarm configuration to the U30 Station. 5. To test the relay, click the Close Relay or Open Relay button (button that appears depends on which state the relay is in). You should hear a click in the HOBO U30 Station. Click the button again to return to the default state. Use a digital multimeter to check for continuity to confirm that the relay is opened and closed as expected. Alternate Method: From the Device menu select Control Relay > Activate Relay, then select Deactivate Relay. Figure 23: HOBO U30/NRC Testing the Relay ‐ 30 ‐ User’s Manual Relay Example - Start Device This example shows how you would configure the relay and alarms if you have an application where you have equipment you want turned on in response to an event. For example, if you wanted to activate an irrigation system on a cranberry bog or orchard if the temperature drops below a certain temperature to avoid frost damage. Figure 24: HOBO U30/NRC Relay Example - Start Device ‐ 31 ‐ User’s Manual Relay Contact Example - Stop Device This example shows how you would configure the relay contact and alarms if you have an application where you have equipment that is normally on. For example, if you have a fountain that normally runs continuously, but you want it to turn off if the wind speed exceeds 20 MPH. Figure 25: HOBO U30/NRC Relay Example - Stop Device ‐ 32 ‐ User’s Manual MAINTENANCE General Maintenance Remote Inspection Use HOBOlink to make sure the HOBO U30 Station is operating as expected, data is still being recorded, and regular readouts are being completed. Physical Inspection Onset recommends that you periodically visit the HOBO U30 Station to perform general maintenance and test sensors annually. Regular maintenance is essential to ensure the accuracy of recorded measurements. Performing regular maintenance checks allow you to: • Verify that the logger is logging data and functioning as you expect • Identify damage • Minimize the impact of any existing damage For more information see "Inspecting the HOBO U30 Station". Checking the U30 Status 1. From the main menu go to Device > Status to open the Status window. The Status window appears, showing the status of the logger and the attached sensors. 2. Verify Sensor Readings Change the sensor readings by changing the conditions. For example, if you are measuring temperature, hold the temperature sensor in your hands for a minute or two and verify that the temperature shown in the Current Readings increases. 3. Close the Status window by clicking OK. Verifying sensor accuracy Onset recommends that you test most sensors for accuracy once a year using HOBOware Pro. For details on verifying sensor accuracy, refer to the documentation included with each sensor. For third‐party sensors (even those supplied by Onset), refer to documentation provided by the manufacturer. For a fee, Onset can verify the accuracy of a sensor. It may be possible to recalibrate some sensors. Contact Onset Technical Support for details. Cleaning the HOBO U30 Station The HOBO U30 Station does not require specialized cleaning; however, if it is deployed in a dusty or grimy location, you should wipe it down with a damp cloth occasionally to keep it looking its best. HOBO U30/NRC ‐ 33 ‐ User’s Manual Adding a Sensor New sensors will only be recognized by the HOBO U30 Station when it is not logging. If you attempt to add a sensor while the logger is recording data, it will be ignored. Logging will continue normally for all other sensors already plugged in. Smart Sensors To add new Smart Sensors: 1. Using HOBOware Pro, stop the logger from logging 2. Readout the data from the logger. IMPORTANT: All existing data will be lost when you re‐launch the logger. 3. Plug in any new Smart Sensors. 4. Re‐launch the logger. The new Smart Sensors should start recording measurements. Analog Sensors To add new sensors to the Analog Sensors 1. Connect the HOBO U30 Station to a computer via the USB cable. 2. In HOBOware Pro, select Stop Logging. 3. Readout the data from the logger. IMPORTANT: All existing data will be lost when you re‐launch the logger. 4. Connect the new sensors to the Analog Sensor Port. 5. Configure Analog Sensor Port for the new sensor. 6. Re‐launch the logger. The new sensors should start recording measurements. Removing/Replacing a Sensor If you remove a Smart Sensor while the HOBO U30 Station is logging, the Logging LED will blink red, and the logger will record erroneous data for that channel and continue logging as normal for the remaining Smart Sensors. This behavior will continue even if you plug the Smart Sensor back in, or if you plug in a new one of the same type. To stop recording erroneous data after removing a Smart Sensor, you will need to stop, readout, and re‐launch the HOBO U30 Station. If you are replacing a Smart Sensor with a new one of the same type, you will need to re‐launch the HOBO U30 Station once the new Smart Sensor is installed. The HOBO U30 Station can continue logging until you stop, readout, and re‐launch it with the new Smart Sensor. You can remove analog sensors from the optional Analog Sensor Port or replace them with new analog sensors of the exact same type in the same channel without having to stop the logger. However, in the case that you are changing the type of sensor, you will need to reconfigure the Analog Sensor Port using HOBOware Pro, which will require you to stop the logger. HOBO U30/NRC ‐ 34 ‐ User’s Manual Testing Smart Sensors Use HOBOware Pro if you need to verify the accuracy of the Smart Sensors, which is recommended on a yearly basis, or if you need to isolate a Smart Sensor that is generating an error. 1. Connect the HOBO U30 Station to the computer using the USB cable. If it is currently logging, stop logging through HOBOware Pro. 2. Unplug all Smart Sensors if you are troubleshooting an error. You can leave them plugged in if you are not getting any sensor errors and you are just checking them for accuracy. 3. Plug one Smart Sensor back in. From the Launch dialog in HOBOware Pro, check the current reading and make sure it is accurate. 4. Repeat with the remaining Smart Sensors. Checking the U30 Status To check the U30 Status: 1. From the main menu go to Device > Status to open the Status window. The Status window appears, showing the status of the logger and the attached sensors. 2. Verify Sensor Readings Change the sensor readings by changing the conditions. For example, if you are measuring temperature, hold the temperature sensor in your hands for a minute or two and verify that the temperature shown in the Current Readings increases. 3. Close the Status window by clicking OK. Inspecting the HOBO U30 Station Periodically perform a visual inspection of the HOBO U30 Station. Verify that the enclosure is free of visible damage, such as cracks, and that it is clean. Check that all cables and wires are: • Free of damage, such as cracks, cuts, and splits. • Protected in conduit if necessary (exposed cables are prone to being chewed by rodents and should be protected in conduit in locations where rodents are present). • Fastened securely. • Free of corrosion and in good condition. If moisture is visible inside the white enclosure or there is any sign of corrosion on the connectors, spray WD‐40® or an equivalent electronics‐safe corrosion inhibitor on the connectors. This will displace moisture and prevent additional corrosion. • Onset recommends that you wipe off any water on the outside of the HOBO U30 case before opening it. HOBO U30/NRC ‐ 35 ‐ User’s Manual Troubleshooting the HOBO U30 Station No status indicators are blinking • The indicators are very faint under direct sunlight. If no indicators appear to be blinking, shield the logger from the light and check the indicators again. • Check the status in HOBOlink. Make sure the battery power is not too low. There needs to be at least 3.5 volts for logging to continue and 3.9 volts for GSM communication. • The memory may be full. Read out the logger and re‐launch. • The logger may not have been launched. I made a change to the Launch or Readout Configurations, but it hasn’t taken place Any changes you make to the Launch or Readout Configurations will not take effect until the next time the HOBO U30 Station connects to the HOBOlink. If your connection interval was set to 2 hours, then changes won’t take effect until the next connection on that 2‐hour schedule. The power has run out • Recharge the battery for 12 hours with AC adapter. • If it cannot be recharged, you will need to replace the battery. Contact your Onset Authorized Dealer or Onset Technical Support. • NOTE: The U30 Station uses very durable, high‐capacity Flash memory. With this memory, data is retained even when the battery runs out of charge. • Important: Do not re‐launch the logger until the data has been recovered. If, the battery cannot be recharged and, you are still unable to read out the HOBO U30 Station, contact the vendor that sold it to you. It may be possible to retrieve the logged data. Too many calls are being made to HOBOlink Select a slower connection interval in Readout Configuration. Or, consider turning on “Night Mode,” which allows you to set up a second, slower connection interval overnight. Too much battery power is being used Make sure the solar panel is installed properly and functioning. That should provide enough power to recharge the battery during the day. Or, use the AC adapter to recharge the battery. Only some of the installed sensors are logging • Check for a loose connection. • If using the Smart Sensor Expander board, make sure it is connected to the built‐in Smart Sensor board with the expander cable. • Make sure you have not exceeded 100 meters (328 ft) of network cable for all Smart Sensors. • Make sure you have not exceeded 15 data channels. Use HOBOware Pro to see a list of all installed sensors and Analog Sensor Ports in the Launch window. The Smart Sensors are listed in ascending order by serial number. If more than 15 data channels are connected, the devices with the higher serial numbers will be ignored and their data will not be recorded. HOBO U30/NRC ‐ 36 ‐ User’s Manual Data file contains errors In rare circumstances, the data file may have become corrupted. Contact your Onset Authorized Dealer or Onset Technical Support. I launched the HOBO U30 Station in HOBOware Pro, but my settings are not being logged Launches attempted with HOBOware Pro will be overridden by the Launch Configuration set up in HOBOlink the next time a connection made. If the HOBO U30 Station is communicating with HOBOlink, then it most likely has been re‐launched with the settings saved in HOBOlink. Device is not found when connected to HOBOware Pro Check USB cable connections. Check the computer’s COM port/USB settings. I set the Launch Configurations, but it is not logging If it is the first launch, make sure you have entered a Readout Configuration. If it is not the first launch and the HOBO U30 Station is connecting but still not launching, then select “Force Re‐launch on Next Connection” and wait for the next connection. HOBO U30/NRC ‐ 37 ‐ User’s Manual THE SMART SENSOR EXPANDER BOARD Opening the Secondary Cable Slot Whether the Smart Sensor Expander Board was installed at the factory, or you are installing one yourself, you must remove the piece covering the Secondary Cable Slot to access the board. You should leave the cover installed until you are ready to use the Expander Board. Figure 26: Primary Cable Slot Steps 1. Make sure the HOBO U30 Station is turned off and all cables are disconnected. 2. Use a hammer and a bladed tool (e.g., screwdriver, chisel) to punch through at the four corners and at the ends of the piece covering the secondary cable slot. Figure 27: Opening Secondary Cable Slot 3. Punch through along the bottom of the knockout and then tap sharply in the middle to break into the opening. Remove the hanging flap. Figure 28: HOBO U30/NRC ‐ 38 ‐ Removing Flap User’s Manual 4. Peel away any residual material. Figure 29: Removing Residual Material 5. File any rough edges. For best results, the surfaces in the cable access opening should be smooth so that the rubber cable channel gasket will seal. Figure 30: HOBO U30/NRC Filing Rough Edges ‐ 39 ‐ User’s Manual Installing the Expander Board Before You Begin If you have not already done so, open the Secondary Cable Slot (see page 38). Steps 1. Insert a self‐tapping screw (supplied) into each end of the expander. 2. Lower expander onto the two standoffs near the bottom of the case. 3. Screw expander into place. Alternate Method: Place expander (without the screws) onto the standoffs. Apply a small amount of clear grease (the grease supplied with this kit can be used) at the end of the screwdriver to hold screws while lowering them into place. NOTE: The contacts of the expander jacks should be nearest to the bottom of case as shown below. CAUTION: Be careful not to trap the battery cable behind the board. Figure 31: HOBO U30/NRC Installing the Expander Board ‐ 40 ‐ User’s Manual 4. Install Connector Cable a. Plug one end of the supplied expander cable into the rightmost jack of the expander board. b. Plug the other end into the rightmost jack of the built‐in board. Figure 32: Figure 30: Installing Connector Cable HOBO U30/NRC ‐ 41 ‐ User’s Manual THE BATTERY Overview The HOBO U30 Station has a 4‐volt sealed lead‐acid battery. Charging the Battery Much like a mobile phone, the battery will start to run down if it is not recharged. Therefore, the system requires either a solar panel or an AC adapter plugged in to ensure the battery does not run too low. Even rechargeable batteries eventually fail, and will not be able to be recharged. With regular usage, the battery should last more than two years. See Maximizing Battery Life on page 44. IMPORTANT: Due to the self‐discharge characteristics of this type of battery, it is imperative that you charge the battery for at least 12 hours every six months at minimum, even if you are not actively using the HOBO U30 Station. Otherwise, permanent loss of battery capacity may occur. See Maintaining the Battery on page 47. HOBO U30/NRC ‐ 42 ‐ User’s Manual Battery Life If the HOBO U30 Station is deployed outdoors battery life will vary with the following factors: • Sensor excitation current and warm‐up time (most important factor) • Logging interval (and sampling interval, if applicable) • Number of sensors being used • Operating environment (e.g., temperature) • Size of the solar panel • Quality and quantity of solar light Estimating Battery Life The HOBO U30 Station is designed to be used with a power source to keep the 4‐volt sealed lead‐acid battery charged. Ideally, the power source is always connected and the battery will be constantly trickle‐charged. If external power source has stopped supplying power (e.g. there is power failure or the solar panel is covered), the HOBO U30 Station is capable of running from battery power alone for extended periods of time. Use the following table as a guideline for estimating how long a HOBO U30 Station will run without any source of external power. For these examples, the HOBO U30 Station has up to ten sensors installed and no excitation on the Analog Sensor Port. Connection Interval Logging Interval Typical Run Time 10 minutes 1 minute 10 days 1 hour 5 minutes 30 days 6+ hours 30 minutes 60 days Estimating battery life when excitation is used must be calculated based upon actual drain (current, duration and logging frequency). If excitation averages more than 1 mA, and charging in the field is not possible, it is recommended that the 10 AHr (S100) battery option be used with the HOBO U30 Station. For additional information on estimating battery life and selecting the correct size solar panel see the Support section at www.onsetcomp.com. HOBO U30/NRC ‐ 43 ‐ User’s Manual Maximizing Battery Life This topic provides tips for maximizing battery life. Reduce warm-up time If you are using excitation voltage, select the shortest warm‐up time needed for the sensor. Ensure that your solar panel gets full sunlight Solar panels are extremely sensitive to partial shading. Obstructing even a single cell of the panel will result in significant loss of charging power. Sampling Interval Use the sampling interval only if you have sensors that support measurement averaging. Stay within the normal operating temperature range While the logger can operate at temperatures of ‐40 to 60 C (‐40 to 140 F) the battery has much better short and long term performance when maintained between ‐20 and 40 C (‐4 and 104 C). The Sealed Lead Acid will self‐discharge. The hotter the battery gets, the faster it will self‐discharge. At 20 C, the battery loses about 20% of its capacity in 6 months, but at 50C it loses more than 50%. To maximize battery life (no charging) try to locate the logger where the temperatures will not be above 40 C (104F). Very cold temperatures will reduce the self‐discharge rate to almost zero, but the effective capacity of the battery will be reduced. Temperatures below ‐20 C (‐4 F) will reduce the effective battery capacity by more than 25%. HOBO U30/NRC ‐ 44 ‐ User’s Manual Battery Voltage The normal operating range for the battery is 3.9 to 4.3 volts. If the voltage drops below the normal range, the HOBO U30 Station will change behavior to maximize the remaining voltage until the battery can be recharged. Alternatively, you may occasionally see a voltage level higher than 4.5 volts. The following explains what occurs at various voltage levels. The voltage used in determining behavior in the chart is based on a 20‐minute average. Even though battery voltage is recorded in the data file at each logging interval, the HOBO U30 Station is operating independently on its own internal 20‐minute average. This ensures that the appropriate action is taking place within the HOBO U30 Station regardless of how frequently it is. 4.3 to 4.5 volts The battery is being charged. 4.3 volts The battery is fully charged. 3.0 to 3.6 volts Level at which the HOBO U30 Station will perform a safe shutdown. Plug the solar panel back in when you’ve finished recharging (plug the battery in first if you unplugged it). You may want to do a full readout before relaunching to be sure you have all the data from the logger. Approximately 3.0 volts The battery is too low to safely be charged with the HOBO U30 Station and may need to be replaced. Connecting the AC adapter at this point will not recharge the battery. To recharge the battery, a separate battery charger will be required. If the battery cannot be recharged and you are still unable to read out the HOBO U30 Station, contact the vendor that sold it to you. It may be possible to retrieve the logged data. Important: Do not relaunch the logger until the data has been recovered. The logger uses very durable, high‐ capacity Flash memory. With this memory, data is retained even when the battery runs out of charge. After you replace the battery, attempt to read out the data. If you are still unable to read out the station once the battery has been replaced, contact the vendor that sold it to you. It may be possible to retrieve the logged data. HOBO U30/NRC ‐ 45 ‐ User’s Manual Connecting the Battery This topic illustrates how to connect the battery to the U30 Station. Illustration Connect the built‐in battery cable to the battery as shown below. Figure 33: HOBO U30/NRC Connecting the Battery ‐ 46 ‐ User’s Manual Maintaining the Battery If you are using a solar panel for recharging the battery and there has been a steady decline in battery voltage, you will need to make a change by either reducing power consumption or increasing recharging current. Start by reducing the logging interval and/or excitation current (if you are using it). Try cleaning the solar panel or repositioning it for maximum sunlight. You can also attempt to recharge the battery for 24 hours. If the voltage is still low after attempting to recharge the battery with an AC adapter for 24 hours, then you may need to charge it with a current limited variable power supply or replace it. IMPORTANT: Due to the self‐discharge characteristics of this type of battery, it is imperative that you charge the battery for at least 12 hours every six months at minimum, even if you are not actively using the HOBO U30 Station. Otherwise, permanent loss of battery capacity may occur. Charging a Dead Battery In the event the battery is completely dead (less than 3.0 volts and the logger lights do not come on when the battery is connected), you can charge the battery externally with a current limited variable power supply (otherwise you must replace the battery). Hold the battery across a constant voltage source of 4.5 volts with a current limit of 2 Amps. When held at this voltage, the battery will seek its own current level and maintain itself in a fully charged condition. It takes up to 24 hours to fully charge a dead battery. IMPORTANT: Do not apply more than 4.6 volts absolute maximum to the battery. Do not exceed 2 Amps of current when charging. If the battery gets hot, immediately stop charging the battery. If the battery will not hold charge, it must be replaced. Dispose of the old battery per local regulations. Replacing the Battery If the battery is completely dead and recharging is not an option, follow these steps to replace the battery: 1. Disconnect the AC adapter or solar panel. 2. Disconnect the battery. 3. Unplug all sensors, the USB cable, relay, and grounding wire. 4. Unscrew the antenna cable with a 5/16 inch wrench. 5. Use a Phillips‐head screwdriver to remove the four screws at the corners of the clear, inner case. 6. Remove the clear, inner case. 7. Use a Phillips‐head screwdriver to remove the two screws that secure the battery. 8. Note the orientation of the battery and then remove it. 9. Install the new battery with the same orientation and reverse the steps to reassemble. 10. Dispose of the old battery per local regulations. HOBO U30/NRC ‐ 47 ‐ User’s Manual Troubleshooting the Battery Problem: Too much battery power is being used • Make sure the solar panel is installed properly and functioning. That should provide enough power to recharge the battery during the day. • Use the AC adapter to recharge the battery. Problem: The power has run out • Recharge the battery for 12 hours with AC adapter. • If the battery cannot be recharged, you will need to replace the battery. Contact your Onset Authorized Dealer or Onset Technical Support. Important: The logger uses very durable, high‐capacity Flash memory. With this memory, data is retained even when the battery runs out of charge. Do not relaunch the logger until the data has been recovered. If the battery cannot be recharged and you are still unable to read out the HOBO U30 Station, contact the vendor that sold it to you. It may be possible to retrieve the logged data. Battery Life without External Power The HOBO U30 Station is designed to be used with a power source to keep the 4‐volt sealed lead‐acid battery charged. Ideally, the power source is always connected and the battery will be constantly trickle‐charged. If external power source has stopped supplying power (e.g. there is power failure or the solar panel is covered), the HOBO U30 Station is capable of running from battery power alone for extended periods of time. The following table can be used as a guideline for estimating how long a HOBO U30 Station will run without any source of external power. For these examples, the HOBO U30 Station has up to ten sensors installed and no excitation on the Analog Sensor Port. It is not recommended that the U30 be deployed for longer than 6 months without any charging as the battery may be damaged from sulfation due to the long‐term low‐voltage state. Typical Run Time Logging Interval 4.5 AHr Battery (S045) 10 AHr Battery (S100) 1 second 1 ‐ 2 months 2 ‐ 3 months 1 minute 4 ‐ 6 months 6 months 5 minutes 6+ months 6+ months Estimating battery life when excitation is used must be calculated based upon actual drain (current, duration and logging frequency). If excitation averages more than 1 mA, and charging in the field is not possible, it is recommended that the 10 AHr (S100) battery option be used with the U30. See the Support section at www.onsetcomp.com for additional information on estimating battery life and selecting the correct size solar panel. HOBO U30/NRC ‐ 48 ‐ User’s Manual REFERENCE General U30 Specifications ‐20 to 40°C (‐4 to 104°F) Normal Operating Range NOTE: Operation within the extended operating range (but outside the normal range) will reduce battery service life. Sensor Inputs 5 standard; option to expand to 10 Smart Sensor Compatibility Compatible with most Onset smart sensors. See the following web site for the full list of compatible sensors. http://www.onsetcomp.com/smart_sensor_accessory_compatibility_chart Data Channels Maximum of 15 (some sensors use more than one data channel; see sensor manual for details) Expansion Slot One expansion slot is available for factory‐installed expansion port. Check www.onsetcomp.com for the latest list of options Local Communication Full Speed USB via USB mini‐B connector Dimensions 17.8 H x 11.7 D x 19.3 W cm (7.0 H x 4 .6 D x 7.6 W inches) Weight 2 kg (4 lbs 10 oz) • Outer Enclosure: Polycarbonate/PBT blend with stainless steel hinge pins and brass inserts • Inner Enclosure: Polycarbonate with brass inserts Materials • U‐Bolts: Steel with zinc dichromate finish • Gaskets: Silicone rubber • Cable entry channel: EPDM rubber • Cable entry bars: Aluminum with ABS plastic thumb screws Data Storage Memory Nonvolatile flash data storage, 512K bytes local storage Memory Modes Stop when full, wrap around when full Operational Indicators Up to seven (depending upon options) status lights provide basic diagnostics Logging Interval 1 second to 18 hours, user‐specified interval Battery Type 4 Volt, 10 AHr, Rechargeable sealed lead‐acid HOBO U30/NRC ‐ 49 ‐ User’s Manual Rechargeable Battery Service Life Typical 3–5 years depending upon conditions of use. Operation within the extended operating range (but outside the normal range) will reduce battery service life. Time Accuracy 0 to 2 seconds for the first data point and ±5 seconds per week at 25°C (77°F) Environmental Rating Weatherproof enclosure, tested to NEMA 6. (Requires proper installation of cable channel system). Mounting 3.8 cm (1.5 inch) mast or wall mount Enclosure Access Hinged door secured by two latches with eyelets for securing with user‐supplied padlocks Alarm Notification Latency Logging interval plus 2–4 minutes (typical). Onset is not responsible for failed connections or undelivered mail/text messages. Alarm Output Relay One relay contact closure can be configured as normally open, normally closed, or pulsed. Voltage: 30 V Current: 1 amp max. Sensor Network Cable Length 100 m (328 ft) maximum External power is required. Solar External Power The U30accepts the following Onset solar panels: SOLAR‐1.2W, SOLAR‐3W, SOLAR‐6W AC Power AC power adapter: AC‐U30 The CE Marking identifies this product as complying with all relevant directives in the European Union (EU). HOBO U30/NRC ‐ 50 ‐ User’s Manual Analog Sensor Port Specifications Input Channels Field Wiring Replacement detachable connectors Input Range Two, single‐ended Two‐ or three‐wire via screw terminals on detachable connector, 16–24 AWG Part of spares kit, Part No. A‐FS‐CVIA‐7P‐1 User‐configurable: 0–20 mA DC, 0–20 VDC (suitable for 2.5, 5, 10V sensors) Minimum/Maximum Input Voltage 0 / 24 VDC Minimum/Maximum Input Current 0 / 24 mA DC Minimum Current Source Impedance > 20 KΩ Accuracy ± 0.25% of FSR from 50mV to FSV ADC Resolution 12 bits Analog Sensor Port Functional Diagram HOBO U30/NRC ‐ 51 ‐ User’s Manual Pinout Pin# Left HOBO U30/NRC Function Pin# Right Function 1 Shield 1 Shield 2 Channel 1 Signal 2 Channel 2 Signal 3 Channel 2 Return 3 Channel 2 Return 4 Excitation Voltage 4 Excitation Return ‐ 52 ‐ User’s Manual Time Accuracy The internal clock in the HOBO U30 Station is set by the time on the HOBOlink server and the time zone offset from UTC that you select when you configure the device. UTC, or Coordinated Universal Time, is similar to Greenwich Mean Time. The time zone offset makes it possible to determine objective, non‐local time. This prevents conflicts and confusion before a Spring or Fall time change. Once the logger is logging, it will keep fairly accurate time. However, the following may cause errors with time reporting: • Launch time loss The HOBO U30 Station may lose up to two seconds when it is launched. This is unavoidable. • Clock drift The long‐term time accuracy is related to ambient temperature. At 25°C (77°F), the worst‐case error is ±8 parts per million (PPM), or about 5 seconds per week. The error increases as the temperature deviates from 25°C, as shown in the graph below. At a constant temperature of 20°C, the logger time error could be as much as 35 PPM (21 seconds per week). • Host Clock Error The most likely source of error is an incorrect time, or time zone setting, on the computer that launched the logger. Make sure the clock on your computer is set to the correct date and time before launching the logger. One accurate resource is http://www.nist.time.gov. The following graph shows the worst‐case time error. HOBO U30/NRC ‐ 53 ‐ User’s Manual Logger Status LEDs This topic describes the Logger Status LEDs, located on the interior enclosure on the U30 Station. Figure 34: Logger Status LEDs NOTE: The LEDs are very faint under direct sunlight. If no indicators appear to be blinking, shield the logger from the light. Logging • Blinking green Indicates the system is currently logging. It blinks every two seconds while the logger is recording data from sensors. Do not add sensors while this indicator is blinking. If this indicator is not blinking when you believe it should, make sure the HOBO U30 Station has been launched. • Blinking red There was a Smart Sensor or Analog Sensor Port communication failure. Investigate this problem immediately. Look for a loose connection, which could cause bad electrical contact with a sensor. If found, remove the offending sensor and check its wires and connector for damage and/or signs of moisture. • Blinking orange There was a communication failure, but the system has recovered. There may be an intermittent problem. Try checking the Smart Sensors one at a time to make sure they are all communicating. If you find a bad sensor, or if no sensor communicates, contact your Onset Authorized Dealer or Onset Technical Support. Alarm • Blinking: An alarm was tripped. Sensor Active • Blinking: Indicates Smart Sensor network communications are occurring. HOBO U30/NRC ‐ 54 ‐ User’s Manual Memory The HOBO U30 Station contains 512K bytes of very durable, high‐capacity, non‐volatile Flash memory, which stores data even if power runs out. Although the HOBO U30 Station has a rechargeable battery, the data would still be retained even if it were to run out of power. If you have enabled the Wrap Around When Full feature in the Launch Configuration, then memory limitations are not a concern. Once the HOBO U30 Station is full, the oldest data will be overwritten with the newest data and logging will continue indefinitely. If you have the Wrap Around When Full feature turned off, the rate at which the memory will fill up depends on the number and type of sensors connected and the logging interval. This is called the logging duration. Adding sensors decreases the logging duration; increasing the logging interval increases the logging duration. The following table shows the expected run time for several logging intervals based on the total number of bits in place, which is determined by adding together the bits per sample for each sensor measurement parameter in your system. For example, a HOBO U30 Station with the following sensors is using 49 total bits. At a logging interval of 5 minutes, the logging duration for a logger using 56 bits would be approximately 250 days. (Refer to the sensor manual to determine the number of bits each type of sensor uses.) HOBO U30/NRC ‐ 55 ‐ User’s Manual Items Required for Field Installation Equipment • Solar panel or AC power adapter • Rubber cable channel(s) • Cable channel retaining bars • Optional relay output wire (user‐supplied), 4.0 mm (0.157 in.) diameter • Mounting kit and U‐bolts • Grounding wire Tools • Phillips‐head screw driver • Small flat‐head screw driver for Analog Sensor Port screw terminals (if applicable) • Wrench or socket driver • Silicone grease • Plugs for unused cable channel holes • Phillips‐head screw driver • Wrench or socket driver HOBO U30/NRC ‐ 56 ‐ User’s Manual Accessories The following accessories can be used with the HOBO U30 Station. These accessories can be purchased from an Onset Authorized Dealer, or directly from Onset Computer Corporation. For detailed information on these accessories, including new items that may have been introduced after this manual was printed, refer to www.onsetcomp.com. 1.2 Watt, 6 Volt Solar Panel (SOLAR‐1.2W) Solar Panel for sunny locations and/or locations with low data transfer requirements. 3.0 Watt, 6 Volt Solar Panel (SOLAR‐3W) Solar Panel for moderately cloudy locations, higher latitudes, and/or medium data transfer requirements. 6.0 Watt, 6 Volt Solar Panel (SOLAR‐6W) Solar Panel for very cloudy locations, higher latitudes, and/or high data transfer requirements. AC Adapter (AC‐U30) 120 V AC, 60 Hz AC linear power supply. Output 6 Volts DC, 2 Amp. AC Adapter (Europe) (AC‐ U30‐EU) 240 V AC, 50 Hz AC linear power supply. Output 6 Volts DC, 2 Amp. 5‐Input Smart Sensor Expansion Kit (S‐ADAPT‐ X5‐10) Kit that increases the number of Smart Sensor inputs from 5 to 10. HOBO U30/NRC ‐ 57 ‐ User’s Manual FCC Part 15 Compliance Disclaimer and Revisions This equipment has been tested and found to comply with the limits for a Class B digital device, pursuant to Part 15 of the FCC Rules. These limits are designed to provide reasonable protection against harmful interference in a residential installation. This equipment generates, uses and can radiate radio frequency energy and, if not installed and used in accordance with the instructions, may cause harmful interference to radio communications. However, there is no guarantee that interference will not occur in a particular installation. If this equipment does cause harmful interference to radio or television reception, which can be determined by turning the equipment off and on, the user is encouraged to try to correct the interference by one of the following measures: • Reorient or relocate the receiving antenna. • Increase the separation between the equipment and receiver. • Connect the equipment into an outlet on a circuit different from that to which the receiver is connected. • Consult the dealer or an experienced radio/TV technician for help. This device complies with Part 15 of the FCC Rules. Operation is subject to the following two conditions: (1) This device may not cause harmful interference, and (2) this device must accept any interference received, including interference that may cause undesired operation. HOBO U30/NRC ‐ 58 ‐ User’s Manual TRI-POD SETUP Guidelines for Typical Field Setup Site Selection Use the following guidelines to help you choose an appropriate site for setting up the Station and protecting against field hazards. • When possible, select a location away from trees and buildings, particularly if you will be using the rain gauge or wind speed sensors. Place the rain bucket at a distance away from obstructions that is equal to at least three times the height of the nearest tree, building, or other obstruction, and the wind speed sensor at a distance away from obstructions that is equal to at least five times the height of the obstruction. • WARNING: Severe shock hazard. Do not set up the HOBO Station near power lines. Contact between the HOBO Station and power lines may result in a fatal shock, electrocution, or death. • Avoid placing the logger in extremely hot locations (such as on a dashboard or the roof of a greenhouse) and chronically wet locations (such as in a well or any place that is wet most or all of the time). Also avoid rising water and flood zones. • Conduit is recommended when placing a sensor in or near the ground to protect against animals, lawn mowers, tractors, exposure to chemicals, etc. • Beware of rodents, birds, cattle, and other animals that can bite, peck, or trample the HOBO Station. • Avoid placing the sensors near falling rocks, dead trees, or other objects that could fall on the HOBO Station. • A Grounding Kit (Part # M‐GKA) is required if using the wind speed or wind speed and direction sensor with the logger. A Grounding Kit is recommended if the logger will be placed in an exposed location on a tripod or tower to reduce the chance of damage from atmospheric electrical activity. • If possible, avoid sites immediately adjacent to radio/television/microwave towers and equipment. In rare situations, strong electromagnetic interference may result in sensor network errors. • Take note of the mounting considerations in the sensor manuals for additional guidelines relative to the particular sensors you are using. • For areas with winds greater than 50 mph, or if the rain gauge is attached to the top of the mast, use the Guy Wire Kit (Part # M‐GWA) and 1/2 inch Stake Kit (Part # M‐SKA) to reduce wind‐induced vibration. • 2 meter Tripod Tower Assembly (Part # MTPB): You must set up the tower on level ground; there should be no ground slope. The legs on the 2 meter tower are non‐adjustable. If the site you are using is not level, then you will need to either level it or use shims to level the tripod. Be prepared to dig if necessary. Suggested Mounting: Use 1/4 inch Stake Kit (Part #M‐SKB). • 3 meter Tripod Tower Assembly (Part # MTPA): The maximum ground slope is 13 degrees. The legs on the 3 meter tower allow for limited adjustment on uneven ground. Be prepared to dig if necessary if the slope is significant. Suggested Mounting: Use 1/2 inch Stake Kit (Part # M‐SKA). • Onset recommends that two people set up most tripod systems. Some assemblies are heavy and are easier to handle with two people. • Be sure to stabilize, level, and secure the tripod on firm ground. It may be necessary to adapt the installation to the existing site conditions as necessary (for example, if mounting the tripod on ice or rock, you may need to use a masonry clamp to secure it). • If operating in a wet environment, place several desiccant packs in the logger and plug the vent hole in the bottom of the logger enclosure to minimize moisture. HOBO U30/NRC ‐ 59 ‐ User’s Manual Mounting It is possible to mount the logger and sensors on either a 1.5 meter or 3 meter mast (Part # M‐MPB and M‐MPA respectively). The shorter mast is especially useful for smaller system configurations where you are trying to minimize the size and visibility of the system. There are many ways to install the mast depending on the site. Common mounting methods include pounding the post into the ground, setting it into concrete, and bolting it to existing structures. • If you will be mounting PAR, wind speed, or rain gauge sensors, be sure that you install the mast vertically (using Mast Level, Part # M‐MLA). • Use the Guy Wire Kit (Onset Part # M‐GWA) to stabilize a tall mast. Use 1/2 inch stakes (Part # M‐SKA) to secure the guy wires. • Mount the logger vertically and high enough that ground splash will not enter the vent on the underside of the enclosure. • If using U‐bolts, make sure they are for 1‐5/8 inch pipe because that is the hole spacing on the logger mounting bracket. • If mounting the logger to a post or wall, note that it is 2.06 inches between the center of the holes in the mounting brackets. It is recommended that you use 5/16 inch diameter bolts to mount the logger. Installing Sensors • If running cables along the ground, we recommend running them through conduit to protect them from animals (some animals like to chew on the cables), lawn mowers, and being tripped on. • For information on protecting the sensors properly, refer to the sensor manuals. • Leave enough slack in the cables so that they can be routed into the logger. • If you are deploying multiples of the same sensor type, be sure to note the serial number on the cable associated with each measurement location so you can interpret the data later. HOBO U30/NRC ‐ 60 ‐ User’s Manual Field Preparation Checklist Use the following checklist to make sure you have all the necessary materials for setting up a HOBO Station. 9 Task Check that you received all the parts for the HOBO Station system as ordered. Configure the logger. Install batteries and set up the logger for launch. If you opened any parts: Double‐check the packing lists to make sure no pieces are missing. Attach the mounting feet to the logger. See the logger’s manual. If you are using the Solar Radiation Shield: Set up the Temperature and Temperature/RH sensors. There are several small pieces required to connect these sensors to the shield that could easily get lost in the field. It is strongly recommended you install these sensors in the solar radiation shield before going to the field. See the sensor manual for details. If you are using the barometric pressure sensor, attach it to the logger now. See the sensor manual for details. Repack the logger and sensors for transit. It is strongly recommended that you use the original packaging when possible because it is custom‐designed to protect the weather station and its components. HOBO U30/NRC ‐ 61 ‐ User’s Manual Items Required for Installation Use the following checklists to make sure you have the necessary tools to set up the logger in the field. “Optional” Items depend on your site needs. 3 m Tripod (M-TPA) or 2 m Tripod (M-TPB) with Mast ___ 1/2 inch wrench ___ Mast level (Part # M‐MLA) ___ Medium size wire cutters ___ Crescent wrench ___ All‐purpose grease ___ Tape measure ___ Tie wraps ___ Redimix cement (optional) ___ Shovel (optional) 3 m Mast (M-MPA) ___ 1/2 inch wrench ___ Sledgehammer or post driver ___ Eye protection—safety glasses (if using sledgehammer/post driver) ___ Mast level (Part # M‐MLA) ___ All purpose grease ___ Tape measure ___ Redimix cement (optional) ___ Shovel (optional) Cross Arm (M-CAA) or (M-CAB) ___ 1/2 inch wrench ___ Crescent wrench Grounding Kit (M-GKA) ___ 1/2 inch wrench ___ Sledgehammer ___ Eye protection—safety glasses ___ Medium size wire cutters HOBO U30/NRC ‐ 62 ‐ User’s Manual Solar Radiation Shield (M-RSA) ___ 1/2 inch wrench ___ Phillips head screwdriver #1 (if sensors are not already installed) Light Sensor Bracket (M-LBA) ___ 1/2 inch wrench Guy Wire Kit (M-GWA) ___ Phillips head screw driver #2 ___ 1/2 inch wrench ___ Medium size wire cutters ___ Crescent wrench Stake Kit (M-SKA) or (M-SKB) ___ Sledgehammer ___ Eye protection—safety glasses 1.5 m Mast (M-MPB) ___ Sledgehammer or post driver ___ Eye protection—safety glasses Mast level (Part # M-MLA) ___ All‐purpose grease ___ Tape measure ___ Redimix cement (optional) ___ Shovel (optional) HOBO U30/NRC ‐ 63 ‐ User’s Manual Task 1: Assemble Tripod There are two types of tripods available: the 2 meter (Part # M‐TPB) and 3 meter (Part # M‐TPA). The 2 meter instructions begin on this page. The 3 meter instructions begin on page 67. 2 meter tripod/lower mast assembly instructions This is an example of a typical 2 meter tripod assembly with a Rain Gauge sensor mounted on separate 1.5 meter mast (the Rain Gauge should be further from the tripod in the field than shown in this example). Figure 35: 2 Meter Tri-pod 1. Open the 2 meter tripod and place it in an upright position. HOBO U30/NRC ‐ 64 ‐ User’s Manual 2. Using a 1/2 inch wrench, build six nut and bolt assemblies (5/16‐18) like the one shown below. Figure 36: Nut and bolt assembly 3. Take one of the nut and bolt assemblies and insert it through a tri‐clamp hole with the bolt head facing outward. 4. Loosely install a nut on the bolt to the inside of the tri‐clamp. Figure 37: Tri-clamp and bolts 5. Install the remaining five nut and bolt assemblies in the same manner for both upper and lower tri‐clamps. Make sure the bolt assemblies on the upper and lower mast tri‐clamps leave enough room for the lower mast section to slip through. 6. Slide the lower mast from the top into the tri‐clamps with the creased end of the mast facing up. The creases on the lower mast should face north and south. HOBO U30/NRC ‐ 65 ‐ User’s Manual 7. Tighten the tri‐clamp bolts by hand so that the mast is temporarily locked into position. Note: The lower mast can rest on the ground at this time. You will adjust the height of the lower mast later. Figure 38: 2 meter tripod - lower mast 8. Because the tripod for the 2 meter configuration has non‐adjustable legs, you must verify that the mounting surface area is level. If it is not, use shims or remove soil as needed. You can attach the Post Level (Part # M‐ LVA) to the mast to verify that it is vertical as you level the surface. You can also use the tri‐clamp bolts to fine tune the vertical adjustment later after you adjust the height of the mast. 9. Secure the tripod. Use either the ¼‐inch diameter stake kit (Part # M‐SKB) or bolt the tripod to cement pads with ¼‐inch anchors. Install a stake or bolt through one of the holes on each of three tripod feet. 10. If site conditions (high winds, etc.) warrant further stabilization of the tripod, use the Guy Wire Kit (Part # M‐GWA). See Task 7: Install Guy Wire Kit on page 76. HOBO U30/NRC ‐ 66 ‐ User’s Manual 3 meter tripod/lower mast assembly instructions This is an example of a typical 3 meter tripod assembly with a mast‐mounted Rain Gauge sensor. Figure 39: 3 meter tri-pod 1. Using 5/16 inch nuts, attach the three anchor plates to the three tripod foot brackets, with the large holes to the outside. Tighten the nuts securely. HOBO U30/NRC ‐ 67 ‐ User’s Manual 2. Attach the three leg U‐bolts with saddle clamps, one each onto the outer legs about 20 cm (8 inches) up from the anchor plates. Figure 40: 3 meter lower tripod 3. Open the tripod and place it in an upright position. 4. Unfold the leg brace assembly and place the assembly flat on the ground. Figure 41: HOBO U30/NRC 3 meter tripod leg brace ‐ 68 ‐ User’s Manual 5. Attach each of the three inner legs to each of the leg U‐bolt assemblies (5/16‐18 inch) using the inner stud of the U‐bolt. To attach each inner leg, remove the nut from the inner stud, slide the leg over the stud, and then tighten the nut finger. Figure 42: Three meter tripod inner leg 6. Loosen the three lock nuts on the bolts on the upper and lower mast tri‐clamp assemblies. Back the three bolts out of the upper and lower mast tri‐clamp assemblies so that the lower mast section can be slipped down through the upper mast tri‐clamps and into the lower mast tri‐clamp with the creased end of mast facing up. When the lower mast section is installed, hand‐tighten the upper and lower mast tri‐clamps. Figure 43: Three meter tripod lower mast 7. Install a Post Level (Part # M‐LVA) on the lower mast as shown in the previous figure. 8. When the tripod is oriented on the site, secure one of the three tripod legs to its mounting location and tighten the U‐bolts on this leg. 9. Adjust the second leg to level in one direction and secure this leg. 10. Use the third leg to adjust the mast close to level. HOBO U30/NRC ‐ 69 ‐ User’s Manual 11. When the mast is close to being level, secure the third leg. 12. Fine tune the mast level by sliding the U‐bolts slightly up or down. Tighten all three leg tri‐clamps using a 1/2 inch wrench. Again, verify that the mast is level. 13. After checking level and orientation, tighten all upper and lower mast U‐bolts and lock nuts. 14. Orient the lower mast creases so they face north and south. 15. Tighten the tri‐clamp bolts so that the mast is locked into position. Note the lower mast should be about 8 inches (20 cm) above the ground at this time (assuming that if you are using the wind sensor, you want it to end up at 3 meters or almost 10 feet). HOBO U30/NRC ‐ 70 ‐ User’s Manual Task 2: Install Grounding Kit This section explains how to install the grounding rod from the Grounding Kit (Part # M‐GKA) and attach it to the lower mast of either the 2 meter and 3 meter tripods. 1. Attach the ground wire to the lower mast of the tripod using the U‐bolt assembly delivered with the grounding kit. 2. Slide the ground rod clamp over the ground rod prior to driving it into the ground. This allows you to work with the clamp before the top of the rod is damaged from impact. 3. Using a sledgehammer, drive the ground rod into the ground as close as possible to the lower mast of the tripod. 4. Attach the ground wire to the ground rod. Cut off excess cable length and discard or recycle. 5. Tighten the clamp bolt. Figure 44: HOBO U30/NRC Ground wire attachment ‐ 71 ‐ User’s Manual Task 3: Temporarily Install Upper Mast (Optional) This section explains how to temporarily attach the upper mast to the tripod base. This allows you to easily work on the upper mast while it is resting on the base of the tripod. Note: If you prefer to permanently install the upper mast at this point because you will be able to reach the fully assembled tower, go to Task 5 and then return to Task 4. Otherwise, follow these temporary steps and then permanently attach the upper mast later. 1. If you will be using the Guy Wire Kit (Part # M‐GWA), install the guy wire upper mast clamp about two‐ thirds up the upper mast. Tighten the clamp by hand to temporarily hold it in place. You will need to adjust it later. 2. Stand the upper mast upright and tie a cable tie to one leg brace and one leg of the tripod using the cable ties supplied. Remove the cable ties after the cross arm and sensors are installed. Figure 45: HOBO U30/NRC Upper mast (temporary) ‐ 72 ‐ User’s Manual Task 4: Mount Cross Arm (Optional) Onset recommends that you use the cross arm to mount the Wind Speed or Wind Speed/Direction sensor because it keeps this sensor away from other sensors that could cause wind turbulence or wind shadows. It is also the best way to ensure the sensor is vertical. Steps 1. Attach the cross arm to the upper mast using the two 1/4‐20 x 2‐3/4 inch hex head bolts. Mount the cross arm on the side opposite the dimple (at the bottom of the upper mast) with the word “TOP” on the upper surface of the cross arm. 2. Pass the two bolts with flat washers on them through the two holes on the cross arm and through the two holes at the top of the upper mast. Install a nylock nut on each bolt. Do not securely tighten the bolts yet. 3. Install the mast plug into the upper mast top with the slot facing down and going over the two bolts. Note: After the mast plug is installed, it should be flush with the top of the mast. 4. Tighten the two nuts equally. Figure 46: Half cross arm (setup is same for full cross arm) For directions on mounting the Wind Speed sensor to the cross arm, see the sensor manual. HOBO U30/NRC ‐ 73 ‐ User’s Manual Task 5: Mount Upper Mast to Lower Mast NOTE: Onset recommends that two people work together to attach the upper mast to the lower mast. 1. Lightly grease the creased (upper) end of the lower mast. 2. While holding the upper mast securely, cut the cable ties that were temporarily holding the upper mast to the lower mast. 3. Slide the upper mast onto the lower mast with the dimple going into the crease and oriented north if you are in the northern hemisphere, and south if you are in the southern hemisphere. 4. When the upper and lower masts are aligned, install the 1‐5/8 inch U‐bolt assembly onto the upper mast, placing it just above the dimple (about 2.5 cm or 1 inch from the upper mast bottom). Tighten the clamp. Figure 47: Upper and lower mast assembly If you are using a Wind Speed sensor and have not attached the cross arm, go to Task 4: Mount Cross Arm (Optional) on page 73. HOBO U30/NRC ‐ 74 ‐ User’s Manual Task 6: Mount Logger to Upper Mast 1. Using the two 1‐5/8 inch U‐bolt assemblies provided, mount the logger enclosure on the lower end of the upper mast in line with the upper mast dimple. The lower housing U‐bolt can be placed directly above the U‐ bolt holding the mast pieces together. Note: When assembling the U‐bolts, place the U‐bolts around the upper mast, and install the saddle clamp. Place the logger enclosure against the saddle clamps and screw on the top U‐bolt nuts only. Figure 48: Logger Housing on Mast 2. If you are using the Guy Wire kit, position the logger enclosure so that it will not be in the way of guy wires. 3. Attach the logger’s ground wire to the lower housing U‐bolt. Screw on the lower U‐bolt nuts and then tighten all the U‐bolt nuts. HOBO U30/NRC ‐ 75 ‐ User’s Manual Task 7: Install Guy Wire Kit (Optional) NOTE: If you are using the 2 meter tripod, you will need to attach the guy wires to three 1/2 inch stakes (Part # M‐ SKA), which should be spaced evenly around the tripod at a distance of 3 to 4 m (10 to 13 ft) from the mast. 1. If you haven’t already done so, attach the upper mast tri‐clamp to the upper mast. Orient the eyebolts on the upper clamp so they align with each tripod foot or a 1/2 inch stake. 2. Attach one end of the guy cable to one eyebolt on the upper mast tri‐clamp. Open the wire clamp by loosening the screw on it. Place the clamp over the wire and tighten. Leave 2.5 cm (1 inch) of wire protruding from the clamp. Figure 49: Guy wire attachment 3. Hook one “S” hook and one turnbuckle onto the corresponding stake or leg. Stake Figure 50: HOBO U30/NRC Guying to 1/2 inch Stakes ‐ 76 ‐ User’s Manual Figure 51: Guying to 3 Meter tripod feet 4. Cut the guy cable so that it can be put through the loose end of the turnbuckle and the wire clamp. Make sure the turnbuckle is extended as shown in the figures before feeding the cable through. 5. Install the hooks, turnbuckles, and cables onto the other two stakes or tripod legs. 6. Tighten the three guy wires evenly by turning the turnbuckles. 7. Attach a Post Level (Part # M‐LVA) on the upper mast to maintain the mast at vertical. 8. The guy wires should be taut when the installation is complete. Task 8: Position and Level Sensors Once the upper mast is locked in place and secured, position the sensors at the correct heights and check that the Rainfall sensor and PAR sensors are level. See the sensor manuals for more details. HOBO U30/NRC ‐ 77 ‐ User’s Manual Task 9: Final Setup 1. Open the logger enclosure. 2. Pass all the sensor cable ends through the opening on the bottom of the logger enclosure. 3. Plug all the sensors with tabs facing up into the logger board located within the logger enclosure. It does not matter which connector you plug each sensor into. You can use a maximum of 15 channels and 100 meters (328 ft) of smart sensor cable. Note: If you are installing more than ten sensors, you will need to install an adaptor (Part # S‐ADAPT) for each additional sensor. The adaptors fit into any of the connectors on the logger board except the upper left connector and the connector second from the bottom on the right. 4. If you have a HOBO U‐Shuttle or laptop on site, check current sensor readings to ensure the sensors are all working. For the HOBO Weather Station, note that you cannot check current readings if the logger is waiting for a Button Start or a Delayed Start. 5. Neatly wrap all the sensor cables together and secure to the mast or tripod legs using cable ties. 6. Gather the excess cable and attach the cable ties to the upper mast behind the logger. Leave about a 2 inch (5 cm) drip loop of cable below the logger. Figure 52: HOBO U30/NRC Sensor Cables on Mast ‐ 78 ‐ User’s Manual 7. Seal logger enclosure (HOBO Weather Station Only). This step is especially important if the system is located in a wet environment. Once you verify that the cables are secured in the inside of the logger box, take all the cables and push them over to one side of the logger enclosure opening. Using the duct seal, make a ball that is bigger than the logger enclosure opening, stuff the duct seal into the hole from the outside, filling the void between the cables and the housing. This minimizes the possibility of dust, insects, and driving rain getting into the logger housing. Flare out the duct seal on the inside to lock it place. All cables should be neatly secured to the mast when complete. NOTE: If you are using a HOBO Weather Station in a wet environment, place several dry desiccant packs inside the logger enclosure (remove desiccant pack from its foil pouch before installing) 8. Recheck that all the U‐bolts, nuts, and clamps are secure for the entire system. 9. If you are using a Weather Station, launch the logger now. The U‐30 is automatically launched when powered‐up. 10. Verify that the logger is operating properly. Refer to the logger user manual for LED indications. 11. Close the logger door. For the HOBO Weather Station, tighten the four cover screws. Congratulations! The HOBO Station setup is complete. HOBO U30/NRC ‐ 79 ‐ User’s Manual HOBO U30/NRC ‐ 80 ‐ User’s Manual Index Components, 3 Connecting A AC Power, 25 AC Power Solar Power, 25 Connecting, 25 Contact Information, 2 Accessories, 58 Copyright, 2 Alarm Configuration Dialog, 19 Alarms E configuring, 17 E‐mail, 2 Alarms Dialog, 18 Equipment, required for installation, 57 Analog Sensor Port, 6, 52 Expander Board, installing, 41 Configuring, 15 Functional Diagram, 52 F Pinout, 53 FCC Part 15 Compliance, 59 Analog Sensors Adding, 35 G Connecting, 12 Grounding Wire, attaching, 21 B H Battery HOBOware Pro, connecting to, 14 Connecting, 13, 47 Replacing, 48 I Battery Life, 44 Maximizing, 45 Inspecting the U30, 36 without external power, 49 Installation, Field Installation Procedure, 20 Battery Voltage, 46 L C Launch U30 NRC, 16 Cable Channels LEDs, 55 installing weatherproof, 22 Cable Length, 5 M CE Specification, 51 Charging the battery, 48 Mailing Address, 2 Compliance, FCC Part 15, 59 Maintenance HOBO U30/NRC Index ‐ 1 User’s Manual Battery, 48 Sensor Excitation, 6 General, 34 Sensors Adding, 35 Maximizing Battery Life, 45 Memory, 56 Setup, Initial, 8 Mode, Sensor Excitation, 6 Slot, opening the secondary cable slot, 39 Mounting Smart Sensor Removing, 35 to a pole, 27 Replacing, 35 Mounting Plates, installing, 9 Smart Sensors P Adding, 35 Part 15 Compliance (FCC), 59 Connecting, 10 Phone Number, 2 Overview, 5 Solar Power Pinout, Analog Sensor Port, 53 Connecting, 25 R Specifications Analog Sensor Port, 52 Relay Example ‐ Normally Closed, 28, 32 CE, 51 Example ‐ Normally Open, 28, 31 U30, 50 Status LEDs, 55 Overview, 28 Power Rating, 29 T Relay Contact Changing Settings, 30 Test, initial setup and, 8 connecting equipment to, 33 Tools, required for installation, 57 Trademark, 2 Removing TRMSA Module Smart Sensors, 35 Configuring, 15 Replacing Smart Sensors, 35 V Replacing the battery, 48 Voltage, battery, 46 S W Secondary Cable Slot, opening, 39 Warm‐up Mode, Sensor Excitation, 6 Sensor Removing, 35 Weatherproof Cable Channels, installing, 22 Replacing, 35 Web Site, 2 HOBO U30/NRC Index ‐ 2 User’s Manual Onset Computer Corporation P.O. Box 3450 Pocasset, MA 02559‐3450


