1
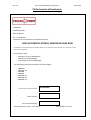
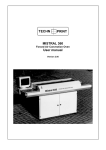
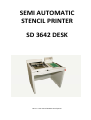
SEMI AUTOMATIC
STENCIL PRINTER
SD 3642 DESK
Rev.1.0 User manual SD3642 stencilprinter
Rev.1.0
User manual SD3642 stencil printer
10-4-2014
User manual Rev.1.0
Table of contents.
1.0
Introduction ............................................................................................................................... 2
1.1
Description ............................................................................................................................. 3
1.1
Special Functions ................................................................................................................... 3
2.0
Product specifications ................................................................................................................ 4
2.1
Size and weight ...................................................................................................................... 4
2.2
Power supply ......................................................................................................................... 4
2.3
Operation ............................................................................................................................... 4
3.0
Preparing the SD-3642 ............................................................................................................... 5
3.1
Contents of the package ........................................................................................................ 5
3.2
Installation guide ................................................................................................................... 5
3.0
Machine parts ............................................................................................................................ 5
3.1
The operating console ........................................................................................................... 5
3.2
X-Y Table ................................................................................................................................ 6
3.3
Magnetic holders ................................................................................................................... 6
3.4
Frame ..................................................................................................................................... 6
3.5
Squeegee ............................................................................................................................... 6
3.6
Emergency stop ..................................................................................................................... 6
5.0
Setting the stencil printer .......................................................................................................... 7
5.1
Mounting the stencil .............................................................................................................. 7
5.2
Placing the circuit board ........................................................................................................ 7
5.3
Setting the X-Y table .............................................................................................................. 8
5.4
Setting the squeegee speed................................................................................................... 8
6.0
Using the stencil printer ........................................................................................................... 10
7.0
Maintenance ............................................................................................................................ 11
7.1
General................................................................................................................................. 11
7.2
Setting table limits ............................................................................................................... 11
7.3
Resetting factory settings .................................................................................................... 11
8.0
Warranty .................................................................................................................................. 12
Page 1 of 13
Rev.1.0
User manual SD3642 stencil printer
10-4-2014
1.0 Introduction
Thank you for choosing the SD3642 semi-automatic stencil printer. Our products have been
developed to fulfil the highest standards in quality, functionality and safety. We hope that you
will be able to use your new Technoprint product to your satisfaction. Please read the
instruction manual thoroughly before operating and keep it in a secure environment for future
use.
!!!! WARNING !!!!
The machine can cause serious injury if falling from an incorrectly
picked table or surface!
Maintain a safe, dry and warm environment where the machine
has been placed, this prevents defects to the machine.
Do not place the machine:
• Outside
• In areas where harmful gasses and fluids may damage the
machine.
• In areas with high humidity.
• In areas without sufficient ventilation to vent the fumes.
Safety instructions
•
•
•
•
•
•
Only use this product for the intended use described in the manual, do not use
any accessories which are not approved by Technoprint.
Do not use this machine if it’s not working properly or situated in an environment
not approved by Technoprint.
Only use this machine in a dry, clean environment with a temperature between
18˚C. and 24˚C.
If the device’s temperature is colder than 17 ˚C please wait 24 hours before
operating. The transition from a cold temperature to a warmer temperature may
cause condensation on electronic parts and cannot be used safely.
Stay clear of the machines working area while in its cycle, always wait until the
table is back at its starting position.
Please make sure the surface is clean, flat and solid enough to carry the weight of
the machine. The machine should be levelled horizontally to ensure the best
results. Make sure the outlet is safe and has a PE connection to connect the
machine to the mains.
Page 2 of 13
Rev.1.0
User manual SD3642 stencil printer
10-4-2014
1.1 Description
The SD 3642 is a semi-automatic stencil printer which is used for applying solder paste
to a circuit board by using a “stencil”. The stencil which is a thin sheet, usually metal,
with a pattern of holes which match the isles on a circuit board. The paste is applied
with a squeegee. The paste is pressed through the holes and remains on the isles of the
circuit board, the thickness of the stencil determines how much paste remains on the
isles.
1.1 Special Functions
•
•
•
•
•
•
•
Extra holes are usually not required to line up the holes in the stencil and the isles
on the circuit board.
Mounting of the stencil goes fast and easy without using special tools.
Also plastic stencils can be used.
The magnetic holders make sure the placing of the circuit board is quick and easy.
The stencil printer can be used to apply solder paste on both sides of the circuit
board. If there are components soldered on one side of the circuit board, the
stencil still can be used to apply paste on the empty side, if necessary.
The table on which the circuit board is mounted is adjustable in both the X and Y
axis and provides an easy and accurate line up between the stencil and circuit
board.
After the paste had been applied the stencil will be vertically lifted off the circuit
board. This a unique feature and guarantees the best results, the edges of the isles
will be sharply confined.
If any object would be trapped between any of the moving parts of this machine it
has an electronic control and will be shut down immediately.
Despite of the safety measures mounted on the machine, do
not touch any of the moving parts while the machine is in
process.
Page 3 of 13
Rev.1.0
User manual SD3642 stencil printer
10-4-2014
2.0 Product specifications
2.1 Size and weight
Dimensions
: 950 x 750 x 800 (L x W x H)
Work surface : 300 x 400
(Max. Size circuit board)
Max stencil size : 350 x 450
Weight SD-3642 : 160 Kg. (incl. Table)
2.2 Power supply
The SD-3642 has to be connected to a voltage of 240VAC with a Frequency of 50 to 60
Hertz. A Protective Earth (PE) has to be applies as well.
2.3 Operation
The operating console contains all the buttons to safely operate the device. Results and
instructions are displayed on a display of 2 x 16 characters. Consult the section “using
the stencil printer” for further instructions how to use the stencil printer.
Page 4 of 13
Rev.1.0
User manual SD3642 stencil printer
10-4-2014
3.0 Preparing the SD-3642
3.1 Contents of the package
The machine has been packaged and transported with care if, despite of all
precautions, the machine shows defect or damaging, please contact your supplier
immediately, within 3 days.
These are all the contents the package should contain:
1. The machine.
2. 2 kinds of magnetic holders, the fixating holders and the supports.
3.2 Installation guide
Weight of the table model is 70Kg, please make sure the table or surface on which it is
placed is suitable to carry the weight of the machine and its accessories.
If the machine has been placed and connected in the manner described before, it’s
ready for use.
3.0 Machine parts
The machine consists several main parts, each with its own specific purpose.
3.1 The operating console
On the console there are seven buttons and one switch, on the display its current
process is shown. The machine will automatically enter production mode if during five
seconds no buttons are pressed.
The following buttons and switches are on the console:
[ON/OFF]
This switch turns the machine on or off.
[START]
This button starts the production cycle, the table will move from the
starting position to the left, when it’s in position the frame will lower
and the squeegee will move back and forth the number of times
“squeegee count” is set, the frame then moves up and the table
returns to the starting position. This button has a different function
during setup.
For more information check “5.3 setting the table”
[IN]
The table will move to the left and the frame will lower. The program
will then enter a new menu to set the table and squeegee speed.
For more information check “5.3 setting the table”
[OUT]
This button is only available in the settings menu.
For more information check “5.3 setting the table”
[UP]
This button is only available in the settings menu.
For more information check “5.3 setting the table”
Page 5 of 13
Rev.1.0
User manual SD3642 stencil printer
10-4-2014
[DOWN]
This button is only available in the settings menu.
For more information check “5.3 setting the table”
[SQUEEGEE +] Increases the squeegee count or speed, also has a function in the
settings menu.
For more information check “5.3 setting the table”
[SQUEEGEE -] Decreases the squeegee count or speed, also has a function in the
settings menu.
For more information check “5.3 setting the table”
3.2 X-Y Table
The circuit boards can be mounted using the magnetic holders. The machine is able to
move the table under the frame and back to the starting location.
3.3 Magnetic holders
These are fixating holders used to keep the circuit board in its correct positions.
Support holders can be placed under the circuit board to prevent it from bending while
the paste is applied. This way circuit boards are easily placed and removed.
3.4 Frame
In the frame are the squeegee and clamping strips in which the stencil is stretched.
The frame is moved vertically by the machine and at its bottom position the stencil
should be on top of the circuit board. At its highest position the table containing the
circuit board should be able to move freely under the frame. Because of these strips
the stencil can be fitted easily and efficiently, they can also be used to put tension on
the stencil.
3.5 Squeegee
The squeegee consists 2 special blades mounted at an angle of 45 degrees against each
other. When the squeegee reaches the end of its stroke it will flip, so the blade will
always have the correct angle to the moving direction.
To maintain the best results the flipping of the squeegee should not be prevented
3.6 Emergency stop
The red emergency stop is located at the front on the right side of the machine.
This switch will turn off all power and electronics. It is used if the operator is caught in
any of the moving parts of the machine. It should NOT be used to turn the machine on
or off!
Page 6 of 13
Rev.1.0
User manual SD3642 stencil printer
10-4-2014
5.0 Setting the stencil printer
Only start setting the machine if it’s in an waiting position, this can
be recognized at the text on the display:
“Ready to start”
“Squeegee count 2”
5.1 Mounting the stencil
The stencil is clamped by 2 metal strips. To place or remove a stencil the following
procedure must be followed.
• Loosen the clamping screws using the correct Allen key, these should be loosened
enough to remove the stencil easily and can be loosened without excessive force.
• Remove the old stencil
• The metal strips can be loosened and moved so they have the right distance
between them for placement of the new stencil.
• Place the new stencil in the stencil holders and fasten the screws firmly.
• Turn the tightening screw until the stencil is tensed but still has some suspension.
5.2 Placing the circuit board
Please wait until the machine is idling, make sure the stencil and circuit board are
matching and place one circuit board on the machine table. Delivered with the table
are 2 kinds of magnetic holders, the fixating holders and the supports.
• Place the fixating holders en place the circuit board between them. Then shift the
holders to the edges of the circuit board so it is clamped between.
• Move the print with the holders to a point where it will be aligned as accurate as
possible with the stencil.
• Place the print in a way so the isles where the solder paste should be applied are
visible.
The table can now be set.
Page 7 of 13
Rev.1.0
User manual SD3642 stencil printer
10-4-2014
5.3 Setting the X-Y table
Before you continue:
Wait until the machine is idling!
The X and Y axis of the table can be adjusted, it can also be rotated horizontally. Using
these features, isles can be accurately aligned with the holes in a stencil. Make sure the
correct circuit board is placed under the stencil.
1. Press [IN]. The table will now move to the left and place the circuit board under the
stencil, the frame will lower until it is on top of the print. The isles should now be
roughly aligned with the holes of the stencil.
2. If this is not the case, mark the circuit board through a pencil pad hole in the top
left corner with a marker. Repeat this procedure at the bottom right corner.
Only use an erasable pen so the print will not be damaged or has a poor solder
quality.
3. Press [OUT] the frame will now move up and the table will return to the start
position. The machine remains in the setting menu. Move the print to the marked
pad holes and repeat the procedure from step one.
4. If the circuit board is in the correct position you can start fine-tuning. Use the
rotating handles to move and rotate along the X and Y axis. If aligned properly the
holes in the stencil will match the isles on the circuit board.
5. Press [OUT] to finish setting the table.
5.4 Setting the squeegee speed
The squeegee has 2 adjustment options
a. The speed which the squeegee moves over the stencil.
b. The number of times the squeegee moves over the stencil.
It’s to the view of the operator what has to be adjusted to get the best results. In
general the default settings will meet. Setting the squeegee is done by using the
[SQUEEGEE +] and [SQUEEGEE -] button.
De table has to be set correctly and the correct circuit board must be in place.
Apply sufficient paste and make sure it’s spread along the width of the stencil. Do
not apply too much paste, it may drop off the sides of the stencil when the
squeegee is in cycle.
a. The squeegees movement speed
The speed can be adjusted by steps of 10% with a minimal speed of 10% and a
maximum of 100%. Use the [SQUEEGEE +] and [SQUEEGEE -] buttons to do this.
b. The number of times the squeegee moves over the stencil.
Page 8 of 13
Rev.1.0
User manual SD3642 stencil printer
10-4-2014
This value is call the “squeegee count”. The minimal number of times it moves over
the stencil is 1 and the maximum is 10. Usually moving twice or more has a better
result, moving it only once has a greater chance of paste not being distributed
equally along the isles but mostly on one side of them.
Follow the following procedure to change the squeegee count.
1. Press [IN] to move the table with the circuit board under the frame.
2. Adjust the counter by pressing either [SQUEEGEE +] or [SQUEEGEE -] changing
the count to a higher or lower number respectively.
3. Press [UP] to move the print to the starting position, as soon as the table
stopped moving the circuit board can be removed and a new and clean circuit
board can be placed. Continue with step 4 or 5
4. Press [DOWN] The print will now be placed back under the stencil and you can
repeat procedure 2 and 3 or continue with step 5.
5. Press [START] the squeegee will now move forward and backward the set
amount of times, if the result is not to your satisfaction, return to step 2.
Otherwise continue to step 6.
6. Press [OUT] to end this procedure. The set value will be saved by the machine
and will also be used after the machine has been turned off.
The machine is now ready for production.
Page 9 of 13
Rev.1.0
User manual SD3642 stencil printer
10-4-2014
6.0 Using the stencil printer
For the best results it’s important the room temperature is between 18˚C. and 24˚C.
Solder paste contains metal and solvents and can be very
hazardous. Therefore, work in a hygiene area and do not
consume any food or beverages near this machine.
Consideration of health, we recommend an extraction system!
Hands should be cleaned after operation of this machine!
1. When the machine is correctly set, production can begin. This is a simple process.
2.
3.
4.
5.
Place the print in the magnetic holders, make sure the print is well clamped
between the fixating holders and pressing well against the support holders.
Start by applying solder paste to the stencil, it’s recommended to do this on the
largest plane on the stencil and carefully spread it over the width of the stencil. Do
not apply too much at once, otherwise it may drop off the edges of the stencil, and
in this way it won’t be exposed to open air longer than necessary.
Press [START] the table will now move to its work location, the frame will lower so
the stencil will be on top of the print, the squeegee moves back and forth with the
previously set amount of times and speed. The “squeegee count” will count down
until it reaches 0 and the frame will move up and the table is moved back to its
starting position.
Remove the Circuit board and place it in a suitable storage area, replenish some
solder paste if necessary and repeat the procedure from 2 until every print is done.
Clean the machine, stencil and squeegee thoroughly with suitable cleaning solvent
until no paste is left on these parts. Do not use any cleaning solvent which are
harmful for the machine. Cleaning this machine regularly guarantees a longer
lifetime and the best results.
Page 10 of 13
Rev.1.0
User manual SD3642 stencil printer
10-4-2014
7.0 Maintenance
7.1 General
To prevent rust it is necessary to clean metal unpainted parts regularly with clean acidfree oil. Make sure that after production all remains of paste are thoroughly removed.
Only use cleaning solvent which the paste producer prescribes. Do not use any
aggressive solutions to clean other machine parts.
7.2 Setting table limits
The machine has been fitted with software to set the table limits correctly, if it is
necessary to recalibrate the limit sensors, please consult your supplier.
Connect the machine to the given voltage. Switch it on and simultaneously press
[SQUEEGEE +] and [SQUEEGEE -] at the same time. The program will now continue to
the sensor calibration menu. Using this the table limits and frame limits can be set.
Press:
[IN]
[OUT]
[UP]
[DOWN]
To set the left table sensor
To set the right table sensor
To set the highest frame position sensor
To set the lowest frame position sensor
To move a sensor it should first be loosened enough to be shifted. Remove the back
plate of the control console. Looking into it at the back you will notices some LED’s, if a
sensor is engaged one of the LED’s will burn. This is where the software usually stops
the movement it is making at that time, move the sensor to the desired endpoint and
tighten the screw.
7.3 Resetting factory settings
Switch on the machine and simultaneously press [START], the machine will now be
reset to the factory settings, after reset the following text will appear in the display:
“Ready to start”
“squeegee count 2”
The factory settings are:
Squeegee count: 2
Squeegee speed: 50%
The machine is now ready for normal use.
Page 11 of 13
Rev.1.0
User manual SD3642 stencil printer
10-4-2014
8.0 Warranty
All products of Technoprint have one year warranty on fabrication and/or material
defects.
If anything out of the ordinary will occur, please get into contact with your supplier. In
case parts are needed, please make photo’s and provide serial number, name of the
part and part number you require. Warranty defective parts will be send at our costs.
Defects caused by incorrect use or lack of maintenance are not covered by this
warranty.
Page 12 of 13
Rev.1.0
User manual SD3642 stencil printer
10-4-2014
CE Declaration of Conformity
Technoprint
Veldzichtweg 10B
3851 SH Ermelo
Tel. : 0341 563026
Technoprint as stated above, herewith declares that:
SEMI AUTOMATIC STENCIL PRINTER SD-3642 DESK
intended for the application of solder paste on to printed circuit boards as is common in the
electronics industry,
is in compliance with:
- Machinery directive 2006/42/EG
- EMC directive 2004/108/EG
- Low Voltage Directive 2006/95/EG
The following harmonized standards have been applied:
-
EN 60204
EN14121-1/2
EN13850
EN60335
EN61000-6-3
EN61000-6-2
EN61000-4-2.
SD-3642 DESK
Trade name of the machine:
Serial number:
Year of manufacturing:
The Netherlands, Ermelo, 01-07-2010
R.van de Beek , Director
Page 13 of 13