1
CITATIONS
©
.
'
.
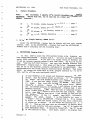
+-----------------------..----------Sample
:K3:
:K2: CITATIONS ---------------------------+
:K1: dBase II
.•
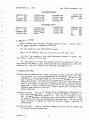
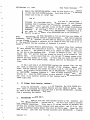
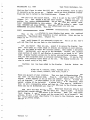
::Hermanns., The Citations Program,
:ALN:Hochschpit,
:Kalamazoo, MI: Task Think Workshops, Inc., 1983, cover.
..
.
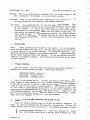
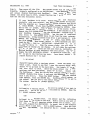
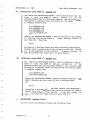
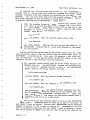
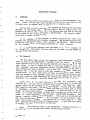
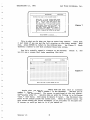
:Citation: "CITATIONS first displays a primary screen contain- :
·-----~----------------------------•
F)unction
CITATIONS ---------------------------+
•
.
:ing areas for keywords and author's last name. These are used:
:
:as an index so you may search your database for terms and
:names and these will in turn, refer you to citations which you:
:
:may then display in full. The primary screen also contains
:
The entry
:are~s for the footnote and the citation itself.
:screens may be used to 'keep and retrieve quotations, biblio- :
:
:graphic entries, idea notes t;aken from the works of Q,thers
:and any footnotes which may be associated with these. You may:
:also keep any working notes of your own origin, using your own:
:
:name as tbe author. These may be retrieved like any otaer
::X:
:citation simply by reference to your own name and/or the
---------------------------+
+-----~----------------------------•
---------------------------+
··------~--------------------------areas at the begin- :
:concept words you enter into the keyword
:ing of· the first entry screen. When a citation is too long to:
:fit into the first entry screen, then another blank screen
:appears (like this one) so that you may then complete the re-:
:
•mainder of the entry. Your citations may be organized into
any number of major topics -one per diskette. Then within that:
topic, you may use any number of keywords to identify specific:
entries -three per entry. Once entered, your citations may be:
retrieved by search and display features which range from dis~:
:
plays of everything on the diskette to only those citations
last name. If you make:
:~ontaining a given keyword or author's
:errors or otherwise want to change a ci~tion, you may edit :
:it even after you have made your entry. In addition, you may
:print your citations directly from within the program, delete
:any entries and make copies of your citations for merger by
:your wordprocessor into other docum.e nts. The program is menu
:driven and contains 10 help screens, callable at any time."
+-------------~------------------------------------------------+
irwl
•
·
TASK THINK WORKSHOPS INC.
a...:.:
P.O.
Box
2363, Kalamazoo, Mi. 49003
d.BCITATIONS
INSTALLATION AND TUTORIAL
TABLE of CONTENTS
A.
-
I
B.
Orientation
System Data
1.
2.
General File Form
3.
Special File Form
Getting Ready
1•
Prepare Diskettes
2.
Format Diskettes.
3.
Make Back-Up Copies
Install Procedure
52 Column, Single Density, dBASE II-2.3
1•
a.
dBCITATIONS Program Disk A
b.
dBCITATIONS DataBase Disk B.
2.
52 Column Double Density, Osborne 01.
a.
dBCITATIONS Program Disk A
aa. dBASE II, Version 2.3
ab. dBASE II, Version 2.4
dBCITATIONS DataBase Disk B.
b.
3.
80 Column, Double Density, Osborne 01
a.
dBCITATIONS Program Disk A
aa. dBASE II, Version 2.3
ab. dBASE II, Version 2.4
b.
dBCITATIONS DataBase Disk B.
80 Column, Osborne Executive.
4.
dBCITATIONS Program Disk A
a.
b.
dBCITATIONS DataBase Disk B.
dBCITATIONS Tutorial
A.
Overview • • • • • • •
B.
The Tutorial. •
...
. ....
.
c.
i
I-'
...
.
.
:....I
....
. ..
.
..
....
.
..
.
..
....
2
3
3
.....
... ....
.....
4
4
....
.
. ...
. .. ..
.
. . ..
...._
:
.......
..
. ....
..
.... .....
.
....
.
.
·D.
.
. . .
'
5
7
7
10
11
11
15
15
15
16
17
20
20
20
21
21
25
27
27
This product is warranteed for 60 days from the date of shipment to
perform as described herein. No other warrantees are expressed or implied.
If, after reading this booklet, you find the product will not perform the
service you desire, or you do not have the necessary hardware and software
to run it, you may return everything for full credit, provided 1 ) the
envelope containing the machine readable media remains unopened, and 2)
everything is returned iri perfect condition within two weeks of initial
shipment.
We are in a position to offer technical assistance by telephone at only
selected times.
Someone will usually be available from 9:00 A.M. to 4:00
P.M. (Eastern Time Zorte) on Mondays and Fridays and 6:00 P.M. to 8:30 P.M
on Tuesday and Thursday evenings.
Our phone is not answered by machine,
so if you do not reach anyone, there will be no cost to you.
Task Think Workshops, Inc.
2637 Taliesin Dr.
Kalamazoo, Michigan 49008
(616) 343-2363
'
j
I
J
L
J
I.
INSTALLATION ON THE OSBORNE COMPUTER
A. Orientation
dBCITATIONS is provided. with adequate files so that versions are
possible for single and double density, 52 and 80 columns.
The program
diskettes supplied are single density so that they may be read by any
properly functioning Osborne Computer.
You must, however, make selections
from the files available.
The 52 and 80 column versions are mutually
exclusive.
Never attempt to mix these files.
Some of the files are for
single density applications, some for double, and still others for the
Osborne Executive.
Some of the files go on Program Disk A and some on
DataBase Disk B.
All of the feasible combinations are laid out for you in
this installation document.
You need only select the one that best fits
your conditions and carefully do it. You may disregard all others.
This installation on the Osborne 01 will require the use of your CP/M
program and utilities diskettes containing the files COPY, PIP, SETUP,
STAT, and SYSGEN.
On the Osborne Executive you will need to use the CP/M
Plus and Osborne utilities files COPY, COPYSYS, PIP, and SHOW. Some diskette swapping is necessary during installation, but is not necessary during
the actual running of the program.
Your
that you
dBase II
built on
Osborne,
But it is
version of dBase II must also be properly installed.
Be certain
select the full screen editing features when you are making your
installation.
The very core of the way dBCITATIONS operates is
these absolutely marvelous full screen editing feature~.
Your
dBase II and dBCITATIONS are all properly made for each other.
your responsibility to make certain that they mesh correctly.
Remember, the combinations are spelled out for you in this document.
You need select only the one that fits your conditions and do it. Ypu need
not be concerned about the others.
What combinations should you select?
Single or double density. If you have double density available to you, by
all means take .that option.
We have discovered no disadvantages to
double density and no reasons to prefer single.
So, if you have the
option, choose double.
Of course, choose single if that is the way
your Osborne is configured:
dBase II Versions 2.3 or 2.4.
Either will work fine with dBCITATIONS, but
if you have both, choose 2.3 as it takes up less diskette space.
Version 2.4 is not very practical in a single density Osborne environment and we have not provided installation instructions for this
combination.
Write us for free special instructions if this is the
only way you can use dBCITATIONS.
r
'
52 or 80 column.
If you do not have the 80 column option on your Osborne,
then choose 52.
If you have the Osborne Executive, use the 80 column
version as you can't get the larger characters anyway and the 52
column display sits radically to the left of the screen.
If you have
the Osborne 01 and have both displays available to you, the choice is
not automatically 80.
The 52 column version uses less diskette space
Version 1.5
1
Task Think Workshops, Inc.
dBCITATIONS (c), 1984
and the display characters are 1.6X larger than on the 80 column
version. Determine your choice after carefully considering your needs
in relation to the following data.
1.
System. Data
The dBCITATIONS display screens use diskette space and
areas of the following sizes.
Entry Areas
Keyword 1
Keyword 2
Keyword 3
Author's Last Name
Footnote
Citation (primary screen)
Citation (secondary screen)
Total citation area
Total allocation
contain
data
Number of characters per area
80 column
16
16
16
15
228
52 column
13
13
13
15
180
589
850
1,439
-
671
992
1,663
1 ,673
1,954
i
I
\
J
Citations per double density diskette
Primary screen only
Secondary and primary
212
104
181
89
Citations per single density diskette
Primary screen only
Secondary and primary
89
44
-
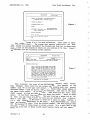
dBCITATIONS first displays a primary screen containing areas for keywords and author•s last name.
These are used like an index so you may
search your database for terms and names and these will in turn, refer you
to citations which you may then display in full.
The primary screen also
contains areas for the footnote, and the citation itself. If the citation
is too long for the space available on the primary screen, then a secondary
screen appears containing a single area to complete the citation.
In
choosing between 52 and 80 columns you may want to consider the sizes of
the entries you are most likely to make, the number of entries you'd like
to get on a diskette and the size of the display characters.
(If you have
an occasional very· long footnote, it may be extended into the citations
area, and a very long citation may be spread over two or more entries). If
you like and your equipment is capable of doing so, you may set up both 52
and 80 column versions and compare them. The files are provided for you to
do this.
The two distribution diskettes provided by Task Think Workshops,
contain the following files.
Version 1.5
\ J
\
J
l
I
l
J
\
J
l
j
Inc.
2
dBCITATIONS (c), 1984
Task Think Workshops, Inc.
52 column version
52AUTOST.COM
CT
.CMD
CIT52002.CMD
CIT52003 .. FMT
CIT52004.DBF
CIT52005 .. CMD
CIT52007 .. FMT
CIT52008.DBF
CIT52009.CMD
CIT52010.CMD
CIT52011.CMD
CIT52020.CMD
CIT52021.CMD
CIT52022.CMD
XCT
.CMD
80 column version
80AUTOST.COM
CIT
.CMD
CIT80002.CMD
CIT80003.FMT
CIT80004.DBF
CIT80005.CMD
CIT80007.FMT
CIT80008.DBF
CIT80009.CMD
CIT80010.CMD
CIT80011.CMD
CIT80020.CMD
CIT80021.CMD
CIT80022.CMD
3C
.MEM
4C
.MEM
XCIT
.CMD
2. General File Fo:rm
Most of these files follow a standard identifier code.
pret the eight character filenames as follows.
You may inter-
The CIT stands for the dBCITATIONS program.
The 52 or 80 identify the file as of the 52 or 80 column
set.
The last two numbers of the eight character filenames is simply
file number. There is no file 006.
the
The extensions are either the standard CP/M file extension of COM or
else they are the dBase II file extensions CMD (for command file), DBF (for
database file), FMT (for format file) and MEM (for memory file).
r ,
'-......i
3. Special File Fo:rm
52AUTOST.COM AND 80AUTOST.COM. These are public d9main autostart files and
are provided to you as a convenience at no charge. Each has been
customized · to start dBCITATIONS in the 80 column version when on the
same diskette as CIT.CMD and the 52 column version when on the same
diskette as CT.CMD. To function properly, the 52 and 80 prefixes will
have to be removed by renaming to simply AUTOST.COM. They carry these
names now, so that a person could PIP them to the same double density
diskette when creating a back up diskette. These will not work on the
Osborne Executive.
3C.MEM and 4C.MEM.
These files contain basic housekeeping information for
the (DBF) database files.
3C.MEM is used with dBASE II version 2.3
and
4C.MEM is used with version 2.4.
Only one or the other of them
is actually installed, depending upon your version of dBASE II. They
are found on the 80 column distribution diskette only, but one or the
other of them is required for both the 52 and 80 column versions of
dBCITATIONS.
CIT.CMD or CT.CMD.
These are the main command files for the 80 column and
52 column versions respectively.
Version 1.5
3
Task Think Workshops, Inc.
dBCITATIONS (c), 1984
XCT.CMD. This is an alternate main command file in 52 column format to use
when installing the program in a single density version.
XCIT.CMD.
This is an alternate main command file in 80 column format
use when installing the program on the Osborne Executive.
to
HELP FILES.
Files numbered 020, 021 and 022 contain Help screens.
They
may be installed on either drive or eliminated completely with no harm
to the system.
If .you do not install them or remove them after
installation to save diskette space, but then select the H)elp options
from within the program, they simply won •t be there to offer help. No
other harm is done.
The instructional tutorial that follows assumes
that they are installed.
We suggest that you do install and use them
while learning dBCITATIONS.
You may then eliminate them later if you
want to.
B.
Getting Ready
Note:
These procedures are written at two levels.
If you are experienced with the Osborne and with CP/M, you may simply follow the arrows for
a quick overview of the install process.
For those who need them, more
detailed instructions appear in the indented sections.
Osborne diskettes
may be read by machines otl)er than Osborne.
If you are installing dBCITATIONS on a non-Osborne computer, these detailed instructions may not apply
to your situation.
1.
-
Prepare diskettes
To get started, you will need from three to seven empty diskettes
depending on various choices you make. Label these diskettes,
dBCITATIONS MASTER - Back up
dBCITATIONS - Program Disk A
dBCITATIONS - DataBase Disk B
This is the minimum set up.
You may also want to label these diskettes single or double density, 52 or. 80 column, depending on your choices.
If you want to see both 52 and 80, then you will need additional diskettes
A and B, and if your system is single density, another back up diskette.
If you haven't already backed up your dBase II, you should do that too,
requiring still another diskette and label.
If you haven't backed up your
CP/M SYSTEM diskette(s) then you should do that as well.
Figure out just
what you will need before you get into the details of installation. Everything will flow together more easily if you are prepared.
2.
FORMAT al.l· of the empty diskettes you intend to use.
There are several different ways to do this on Osborne computers, so
refer to your own documentation for specific instructions.
Select the
double density CP/M version.if you have it. The general procedure follows.
Format procedure for Osborne 01.
Turn your computer on. Insert
the CP/M SYSTEM disk in drive A and the first diskette you want
Version 1.5
4
-
Task Think Workshops, Inc.
dBCITATIONS (c), 1984
Press RETURN. Wait. If your Osborne has
to format in drive B.
ESCAPE to get to CP/M. When you get to
press
feature,
the "Help"
followed by a carriage return. When
COPY,
type
prompt,
>
A
the
the menu appears select F to indicate that you want to format,
D
and if your machine is capable of double density, select the
option when asked. Then select B since the diskette you want to
When the screen asks you to place the
format is in drive B.
diskette in B, if you haven't already done so do it now, or just
When formatting is compress RETURN if it is already there.
plete, remove the diskette in B, replace it with another and
repeat this process until all the new diskettes you are going to
use are formatted.
The format procedure on the Osborne Executive is virtually the
formatting
same, except you use the arrows keys to select the
option and you don't have to select double density.
3.
r
'
-
Make Back Up Copies
Using the CP/M COPY utility or PIP, make back up copies of the two
Place these on the diskette(s) you
dBCITATIONS distribution diskettes.
If you
have already formatted and labeled dBCITATIONS MASTER - Backup.
have the Executive or a double density version of the 01, you may use PIP
to place both of the single density diskettes onto a single double density
Back up your dBaseII and CP/M SYSTEM diskettes if you haven't
diskette.
Place original
Correctly label all of these diskettes.
already done so.
distribution diskettes in a safe place. Use only the back-ups from now on.
Do yourself a favor. !f you are not deeply experienced with CP/M
Note:
utilities, then place a write protect tab on any diskettes you wish to copy
from. Obviously, do not place them on diskettes to which you want to copy.
On the Osborne 01, to simply copy dBCITATIONS, turn on the computer, place the CP/M SYSTEM Disk in drive A, press RETURN and if
A>
you have the "Help" screen, press ESCAPE to get to the
Theri type COPY followed by RETURN. When asked, choose
prompt.
Place the disSelect A as the source drive.
the C option.
tribution diskette you want to copy in drive A and the diskette
When the
to become the back up in drive B, then press RETURN.
copy is completed successfully, replace diskette A with the next
material you want to copy, put the diskette to receive it in B
and then repeat the above procedure until you have copied all the
disks you want to.
If yours is a single density system, or you are simply making
copies of both versions, and you intend to adopt the 52 column
format, then it is a good idea to add the C.MEM file to the 52
column back-up diskette. You do this using PIP. The 3C.MEM file
is only found on the diskette containing the 80 column version,
Put 3C.MEM on
but is required by the 52 column version as well.
in drive A
Disk
your 52 column back-up by placing the CP/M SYSTEM
prompt as before. Insert the 52 column
and getting to the A>
back-up diskette into drive B. Type CTRL-C to tell CP/M that you
Then type PIP followed by RETURN.
have a new diskette in B.
remove the CP/M SYSTEM disk
appears,
When the asterisk "*" prompt
Version 1.5
5
Task Think Workshops, Inc.
dBCITATIONS (c), 1984
and replace it with the 80 column diskette.
lowing command and a carriage return.
Then type the
fol-
-
B:=A:3C.MEM
When PIP finishes its work,
column back-up diskette.
you will have added 3C.MEM to the 52
the Executive and double density 01 •s you may use one less
diskette if you use PIP to combine the distribution diskettes
onto a single one.
PIP is found on the CP/M SYSTEM disk, so
using that disk, get to the A>
prompt as before.
Put the
diskette you want to receive files (dBCITATIONS MASTER - Back up)
in drive B.
Now you will need to tell CP/M to look for a new
diskette in drive B.
You do this by typing CTRL-C (hold down
the Control key and press C).
Now type PIP and press RETURN.
When the asterisk "*" appears, remove the CP/M disk from drive
A
and put in the first diskette you want to copy (say the 52
column version distribution diskette).
Then type in the following command, followed by a carriage return.
On
B:=A:*.*
When PIP has completed its functions remove the distribution
diskette and replace it with the other one.
Type the same command over again, followed by a carriage return.
I
J
I
J
B:=A:*.*
When PIP finishes, both the 52 and 80 column versions of dBCITATIONS will be backed up onto the single diskette dBCITATIONS
MASTER - Back up.
Now with the CP/M SYSTEM disk in drive A , check your backup(s) by
placing -it (them) in drive B and at the A> prompt, type CTRL-C (hold
down the CONTROL key and press C), then when the A> prompt reappears type
DIR B:
followed by a carriage return. Compare the screen listing with the printed
listing of what should be there (appears under I.A.1., above), just to make
sure that all the necessary files have been correctly backed up.
I
Version 1.5
6
dBCITATIONS (c), 1984
c.
Task Think Workshops, Inc.
Install Procedure
Note:
The following 4 aspects of the install procedure are :mutually
exclusive.
Select only one 1 (or at least one at a time) and disregard all
others. Overview do
I
.......
1.
or
2.
or
3-.
or
4.
do
-
do
do
1.
. page
. . . . page
52 column, single density, dBASE II-2.3
7
52 column, double density, Osborne 01
11
80 column, double density, Osborne 01 • ! •
80 column, Osborne Executive
....
I
. • page 16
.
• page 21
52 Column. 1 Single Density., dBASE II-2.3
Using the dBCITATIONS - Master Back Up diskette and your CP/M SYSTEM
diskette, make up the dBCITATIONS - Program Disk A and the dBCITATIONS
DataBase Disk B according the the following plari.
a.
r
'
(
'
-
dBCITATIONS Program Disk A
You will need to place the CP/M systems tracks on the diskette you
have labeled dBCITATIONS - Program Disk A.
You will also need to perform
certain SETUP operations.
If you have a 52 column version of Wordstar and
it and your printer function properly with each other, this will be fairly
easy.
Using the CP/M COPY Utility, just copy your WordStar diskette onto
dBCITATIONS - Program Disk A. Then erase all the files. The system tracks
will be left on the diskette, properly configured to run dBCITATIONS. (The
dBCITATIONS print and screen display· functions mimic WordStar). Then using
SETUP, just change the arrow keys to CP/M, program function key 1 to DO CT
[CR], and turn off the auto horizontal scroll.
If your WordStar is 52 column and functions correctly with your
printer, copy the system tracks as follows.
Turn the computer
on.
Insert the CP/M SYSTEM diskette into drive A.
Press RETURN.
If you have the "Help" screen, press ESCAPE to get to the
A> prompt.
Then type COPY followed by RETURN.
When asked,
choose the C option.
Select A as the source drive.
Remove
the CP/M SYSTEM diskette from drive A and replace it with your
WordStar diskette.
Put the dBCITATIONS - Program Disk A into
drive B, then press RETURN. When the copy is completed successfully, press RETURN twice to exit from the copy program. Remove
the WordStar diskette from drive A and replace it with the CP/M
SYSTEM diskette.
At the A> prompt, type SETUP, followed by
RETURN.
When asked, select
B as the diskette you want to
configure - that is, dBCITATIONS - Program Disk A. It is located
in drive B.
When the screen clears, you will have a whole.menu
of things you can change.
Do not change the settings for A, B
and c.
These are the ones that are successful in getting Word. Star to work correctly with your printer.
Tap "D" to toggle the
AUTO HORIZONTAL SCROLL. It should be turned off. Tap "E" to get
to the function key menu.
Once there, select 1 to program funcVersion 1.5
7
Task Think Workshops, Inc.
dBCITATIONS (c), 1984
tion key 1 to read
1: DO CT[CR]
where [CR] means enter a carriage return.
·Press the ESCAPE key
twice to exit. Check to see that 1 says the correct thing~ Then
select
X to go back to the main menu.
Now toggle "F" to set
the arrow keys · to CP/M.
Check the whole screen for correct
settings, and when satisfied, press 11 X11 to exit.
Select B as
the destination.
When the drives stop running remove your CP/M
SYSTEM diskette from drive A and move the dBCITATIONS - Program
Disk A into drive A.
Press the RESET button.
When the Osborne
logo appears , press .the RETURN key.
WordStar should appear on
the screen. When you get to the nofile menu, press "X" to get to
the system. When the A> prompt appears, type
11
11
-
ERA *·*
followed by a carriage return.
You will be asked if you want to
erase all.
You do so just type Y followed by RETURN. When the
A > prompt returns , type
DIR
followed by a carriage return.
You should get the indication
that there are no files on this disk. That's just as you want it
for now.
The all important system tracks are on there, correctly configured for dBCITATIONS. To check, see if the diskette
will produce a cold boot.
Hit the RESET button.
When the logo
appears, tap RETURN.
You should get the A> prompt indicating
the system tracks are on the diskette.
Put the · system tracks of d.BCITATIONS - Program. Disk A
foregoing method ~ the following method. Do not try to do both.
Note:
by
the
If, on the other hand, your WordStar/printer interface is not reliable, you will still need to add the system tracks to dBCITATIONS-:-Program
Disk A.
Additionally, you will need to perform the SETUP operations of
selecting a printer protocol and the baud rate at which your printer is to
receive output from the computer. These are hardware considerations and if
you don't know these for your printer1 you will need to find them out and
enter them correctly for the print functions of dBCITATIONS to operate correctly.
The systems tracks are essential to dBCITATIONS.
If you don't
want to print from within dBCITATIONS, then you may consider the SETUP
operations that deal with printing to be optional. You will, however, need
· to do some minimal SETUP operations to change the arrow keys to CP/M, turn
off the auto horizontal scroll and program function key 1 to DO CT [CR].
l
)
l
;
\
i
To add the system tracks, you need to use the CP/M program called
SYSGEN.
To SYSGEN dBCITATIONS - Program Disk A turn on the
computer.
Place the CP/M SYSTEM disk in drive
A and press
RETURN. If necessary, press ESCAPE to get past the Help feature.
When
you get to the A > prompt type SYSGEN followed by a carriage return.
When asked for the source drive, type A and then
press RETURN.
You will be asked to put the source diskette in
drive A.
You are going to use your CP/M SYSTEM diskette as the
Version 1.5
8
dBCITATIONS (c), 1984
Task Think Workshops, Inc.
source, so it is already there. Just press RETURN. Select B as
the destination diskette and when asked put the diskette labeled
dBCITATIONS - Program Disk A into drive B.. Press RETURN. SYSGEN
operates quickly and tells you when it is finished. Press RETURN
to exit from the SYSGEN program.
(
Now at the A> prompt type SETUP followed by RETURN.
Select B
as the disk you want to configure since dBCITATIONS - Program
Disk A is in drive B. · When the screen clears, the current setup
listings will appear.
If these are not correct for your printer
(get correct settings from your printer manual) change them to
conform to what is needed.
Tapping A will produce a menu of
printer options.
Select from this menu and then press 11 X11 to
return to the main menu.
Toggle B to switch between 300 and
1200 baud. Make sure ·that selection c is set to 128. Toggle D
to turn OFF the AUTO HORIZONTAL SCROLL.
Tap E to get to the
function key menu. Select 1 to program function key 1 to
I
1: DO CT[CR]
where [CR] means enter a carriage return.
Press the ESCAPE key
twice to exit.
Check to see that function key 1 is correct.
Then press "X" to return to the main menu.
Tap F to toggle the
arrow keys to CP/M. Select B as the destination drive. When the
drives stop, remove the CP/M diskette from drive A.
Place the
dBCITATIONS - Program Disk into drive A-.
Press the RESET button..
When the Osborne logo appears, press the RETURN key. You
should be able to make a cold boot with this diskette and get the
A> prompt of CP/M. If so, all is well with the system tracks.
With the system tracks correctly configured, add the necessary files
Use PIP to make the diskette contain the
to dBCITATIONS - Program Disk A.
following files.
Proper files for single density, 52 column, dBASE II-2.3
dBCITATIONS - Program Disk A
CT
.CMD
CIT52002.CMD
CIT52003.FMT
CIT52007.FMT
r
I
DBASEAPP.OVR
DBASEMAI.OVR
DBASEMSC.OVR
CIT52009.CMD
CIT52010.CMD
CIT52011.CMD
DBASEMSG.COM
DO
.COM
STAT
.COM
Turn the computer on. Place the CP/M SYSTEM diskette in drive A
and dBCITATIONS - Program Disk A into drive B.
Press RETURN.
Then press CTRL-C.
Press the ESCAPE key to get past the Help
screen and at the A>
prompt type PIP followed by a carriage
return. When the asterisk 11 * 11 prompt appears, type
B:=A:STAT.COM
f
\
followed by a carriage return.
When the asterisk prompt reappears, remove the CP/M- SYSTEM diskette from drive
A and
replace it with dBCITATIONS MASTER - Back Up (52 column version).
Now type the following commands one-at-a-time, each followed by a
carriage return and waiting between each for the asterisk prompt
Version 1.5
9
Task Think Workshops, Inc.
dBCITATIONS (c}, 1984
to reappear.
B:CT.CMD=A:XCT.CMD
B:=A:CIT52002.CMD
B:=A:CIT52009.CMD
B:=A:CIT5201?.CMD
B:=A:CIT5200?.FMT
Now remove the dBCITATIONS MASTER - Back Up from drive A and replace it with your dBASE II back-up, version 2.3. At the asterisk prompt type each of the following commands, one-at-a-time,
each followed by a carriage return and waiting for the asterisk
prompt to reappear between each.
B:=A:DBASEAPP.OVR
B:=A:DBASEMAI.OVR
B:=A:DBASEMSC.OVR
B:=A:DBASEMSG.COM
B:DO.COM=A:DBASE.COM
Replace the diskette in drive A with your CP/M System
and exit from PIP with a carriage return. Then type
diskette
DIR B:
followed by a carriage return and then confirm that dBCITATIONS
Program Disk A contains the files listed as correct for it at
the beginning of this section.
If any are missing, go back and
retrace your steps until you have them all.
b.
dBCITATIONS - DataBase Disk B
Use PIP to make this diskette contain the following files.
I
j
t
;
Proper files for Single Density, dBase II version 2.3
dBCITATIONS - DataBase Disk B
CIT52004.DBF
CITS 200.5 .CMD
CIT52008.DBF
CIT52020.CMD
CIT52021.CMD
CIT52022.CMD
C.MEM
-
With the computer turned on, place the CP/M SYSTEM diskette in
drive A and the dBCITATIONS -DataBase Disk B in drive B.
Press
RETURN and when the A>
prompt appears Press CTRL-C to tell
CP/M to look for a new diskette in drive B.
Then type PIP
followed by a carriage return. When the asterisk prompt appears,
remove the CP/M SYSTEM diskette from drive A and replace it with
dBCITATIONS MASTER - Back Up.
Then type the following commands,
one-at-a-time, each followed by a carriage return, and waiting
for the asterisk prompt to reappear between each.
B:=A:CIT5200?.DBF
B:=A:CIT52005.CMD
B:=A:CIT5202?.CMD
B:C.MEM=A:3C.MEM
Version 1.5
10
'
J
dBCITATIONS (c), 1984
I
Task Think Workshops, Inc.
I
I
Remove the dBCITATIONS MASTER - Back Up from drive A and replace
it with the CP/M SYSTEM diskette. Exit from PIP with a carriage
return and at the A> prompt type
1
DIR B:
I
'
i
\
followed be a carriage return. · Check to see if dBCITATIONS
DataBase Disk B contains the files listed above. If not, retrace
your steps until you get the diskette correctly configured.
(Remember, the 3C.MEM file is only on the 80 column distribution
diskette.
If you didn't move it to the 52 column back-up when
you made it, then it won't be on dBCITATIONS - DataBase Disk B.
Use PIP to get it there, else dBCITATIONS won't run correctly).
I
Note:
dBCITATIONS has been designed so that you may have any number of
databases, each organized around a particular topic.
Each topic requires
its own diskette B. Anytime, you may.make up additional copies of diskette
B. The program diskette A controls all of these, so only one copy of it is
needed no matter how may versions of diskette B you have.
i
\
Note:
In single density applications, the command files that produce
the Help screens are installed on drive B.
There is simply not room for
them on drive A.
The effect of this is to reduce the number of citations
you can put on the database disk.
If this is annoying to you, the file
numbers 020, 021 and 022 that are placed on drive B may be erased at any
time you want.
If you leave· them on, you can get 70 primary screen citations on the disk before it is full.
By this time you should not need the
Help screens and could remove them, making room for an additional 19 entries.
If disk A and disk B of dBCITATIONS contain the correct files, you are
now ready to start the first 11 run through" of the program.
Remove all
disks from the computer and except for disks A and B, put them in a safe
place. Do not place a write protect tab on dBCITATIONS - Program Disk A or
on dBCITAT"IONs DataBase Diskette B.
Both of these diskettes need to be
writtin to.
Press the RESET button to give yourself a fresh start.
You
may turn to the tutorial section of this booklet and begin using dBCITATIONS right away.
2.
52 Column, Double Density, Osborne 1
Using the dBCITATIONS - Master Back Up diskette, t;he CP/M SYSTEM diskette that is c~mf igured f·or double density and your dBASE II Master Backup, make up the dBCITATIONS - Program Disk A and the dBCITATIONS - DataBase
Disk B according the the following plan.
r
,
a.
-
dBC:ITAT:IONS Program Disk A
You will need to place the CP/M systems tracks on the diskette you
have labeled dBCITATIONS - Program Disk A.
You will also need to perform
certain SETUP operations.
If you have a 52 column version of Wordstar and
it and your printer function properly with each other, and if it is configured to produce double density this will be fairly easy. Using the CP/M
COPY Utility, just copy your WordStar diskette onto dBCITATIONS - Program
Version 1.5
11
Task Think Workshops, Inc.
dBCITATIONS {c), 1984
Disk A.
Then erase all the files.
The system tracks will be left on the
diskette, properly configured to run dBCITATIONS.
{The dBCITATIONS print
and screen display functions mimic WordStar).
Then using SETUP, just
change the arrow keys to CP /M, program function key 1 to DO CT [CR] , · and
turn off the auto horizontal scroll.
If your WordStar is 52 column, double density
and functions
correctly with your printer, copy the system tracks as follows.
Turn the computer on. Insert the CP/M SYSTEM diskette into drive
A. Press RETURN. If you have the 11 Help 11 screen, press ESCAPE to
get to the A> prompt. Then type COPY followed· by RETURN. When
asked, choose the c option.
Select A as the source drive.
Remove the CP/M SYSTEM diskette from drive A and replace it with
your WordStar diskette.
Put the dBCITATIONS - Program Disk A
into drive B, then press RETURN.
When the copy is completed
successfully, press RETURN twice to exit from the copy program.
Remove the WordStar diskette from drive A and replace it with
the CP/M SYSTEM diskette.
At the A> prompt, type SETUP, followed by RETURN. When asked, select B as the diskette you want
to. configure - that is, dBCITATIONS - Program Disk A.
It is
located in drive B.
When the screen clears, you will have a
whole menu of things you can change.
Do not change the settings
for A, B and c.
These are the ones that are successful in
getting WordStar to work correctly with your printer. Tap 11 D11 to
toggle the AUTO HORIZONTAL SCROLL. It should be turned off. Tap
"E" to get to the function key menu.
Once there, select 1 to
program function key 1 to read
; i
1: DO CT[CR]
where [CR] means enter a carriage return.
Press the ESCAPE key
twice to exit. Check to see that 1 says the correct thing. Then
select "X" to go back to the main menu.
Now toggle "F" to set
the arrow keys to CP/M.
Check the whole screen fpr correct
settings, and when satisfied, press "X" to exit.
Select B as
the destination.
When the drives stop running remove your CP/M
SYSTEM diskette from drive A and move the dBCITATIONS - Program
Disk A into drive A.
Press the RESET button.
When the Osborne
logo appears, press the RETURN key.
WordStar should appear on
the screen. When you get to the nofile menu, press 11 X11 to get to
the system. When the A> prompt appears , type
ERA *·*
'
i
l
j
-
j
l
followed by a carriage return.
You will be asked if you want to
erase all.
You do so just type Y followed by RETURN. When the
A > prompt returns , type
I
-
I
DIR
followed by a carriage return.
You should get the indication
that there are no files on this disk. That's just as you want it
for now.
The all important system tracks are on there, correctly configured for dBCITATIONS. To check, see if the diskette
will produce a cold boot.
Hit the RESET button.
When the logo
appears, tap RETURN.
You should get the A> prompt indicating
Version 1.5
l
)
1
i
I
j
12
dBCITATIONS (c), 1984
Task Think Workshops, Inc.
the system tracks are on the diskette.
f
l
r
1
r
Note:
foregoing
the
system tracks of dBCITATIOHS - Program Disk A
the following method. Do not try. to do both.
by
the
If, on the other hand, your WordStar/printer interface is not reliable, you will still need to add the system tracks to dBCITATIONS-:-Program
Disk A.
Additionally, you will need to perform the SETUP operations of
selecting a printer protocol and the baud rate at which your printer is to
receive output from the computer. These are hardware considerations and if
you don't know these for your printer, you will need to find them out and
enter them correctly for the print functions of dBCITATIONS to operate correctly.
The systems tracks are essential to dBCITATIONS.
If you don•t
want to print from within dBCITATIONS, then you may consider the SETUP
operations that deal with printing to be optional. You will, however, need
to do some minimal SETUP operations to change the arrow keys to CP/M, turn
off the auto horizontal scroll and program function key 1 to DO CT [CR].
To add the system tracks, you need to use the CP/M program called
SYSGEN. Be certain to use the version that is suitable to double
density. To SYSGEN dBCITATIONS - Program Disk A turn on the computer.
Place the CP/M SYSTEM disk in drive A and press RETURNe
If necessary, press ESCAPE to get past the Help feature.
When
you get to the A>
prompt type SYSGEN followed by a carriage
return.
When asked for the source drive, type A and then press
RETURN. You will be asked to put the source diskette in drive A.
You are going to use your CP/M SYSTEM diskette as the source, so
it is already there. Just press RETURN. Select B as the destination diskette and when asked put the diskette labeled dBCITATIONS - Program Disk A into drive B.
Press RETURN.
SYSGEN
operates quickly and tells you when it is finished. Press RETURN
to exit from the SYSGEN program.
1
f
Put
method~
Now at the A> prompt select the double density SETUP utility and
type SETUP followed by RETURN. Select B as the disk you want to
configure since dBCITATIONS - Program Disk A is in drive
B.
When the screen clears, the current setup listings will appear.
If these are not correct for your printer (get correct settings
from your printer manual) change them to conform to what is
needed.
Tapping
A will produce a menu of printer options.
Select from this menu and then press 11 X" to return to the main
menu.
Toggle B to switch between 300 and 1200 baud. Make sure
that selection c is set to 128.
Toggle D to turn OFF the AUTO
HORIZONTAL SCROLL.
Tap
E to get to the function key menu.
Select 1 to program function key 1 to
l
I
1: DO CT[CR]
i
'
where [CR] means enter a carriage return.
Press the ESCAPE key
twice to exit.
Check to see that function key 1 is correct.
Then press 11 X" to return to the main menu.
Tap F to toggle the
arrow keys to CP/M. Select B as the destination drive. When the
drives stop, remove the CP/M diskette from drive A.
Place the
. dBCITATIONS - Program Disk into drive A.
Press the RESET button.
When the Osborne logo appears, press the RETURN key. You
should be able to make a cold boot with this diskette and get the
Version 1.5
13
Task Think Workshops, Inc.
dBCITATIONS (c), 1984
#
A> prompt of CP/M.
If so, all is well with the system tracks.
I
With the system tracks correctly configured, add the necessary files
to dBCITATIONS - Program Disk A.
Use PIP to make the diskette contain the
following files.
Proper files for double density, 52 column, dBASE II-2.3
dBCITATIONS - Program Disk A
AUTOST .COM
CT
.CMD
CIT52002.CMD
CIT52003.FMT
CIT52005.CMD
CIT52021.CMD
CIT52022.CMD
DBASEAPP.OVR
DBASEMAI.OVR
CIT52007.FMT
CIT52009.CMD
CIT52010.CMD
CIT52011.CMD
CIT52020.CMD
DBASEMSC.OVR
DBASEMSG.COM
DO
.COM
.COM
PIP
STAT
.COM
Or, it your version of dBASE II is 2.4, set the diskette up as follows.
-":
I
;
J
Proper files for double density, 52 column, dBASE II-2.4
.dBCITATIONS - Program Disk A
AUTOST .COM
CT
.CMD
CIT52002.CMD
CIT52003.FMT
CIT52011.CMD
CIT52020.CMD
CIT52021.CMD
CIT52022.CMD
CIT52005.CMD
CIT52007.FMT
CIT52009.CMD
CIT5201.0.CMD
DBASEOVR.COM
DO
.COM
PIP
.COM
STAT
.COM
Turn the computer on. Place the CP/M SYSTEM diskette in drive A
and dBCITATIONS - Program Disk A into drive B.
Press RETURN.
Then press CTRL-C.
At the A> prompt type PIP followed by a
carriage return. When the asterisk "*" prompt appears, type
j
l
B:=A:STAT.COM
when the asterisk prompt reappears, type the following
B:=A:PIP.COM
followed by a carriage return.
When the asterisk prompt reappears, remove the CP/M SYSTEM diskette from drive
A and
replace it with dBCITATIONS MASTER - Back Up. Now type the following commands one-at-a-time, each followed by a carriage return
and waiting between each for the asterisk prompt to reappear ..
B:=A:CT.CMD
B:=A:CIT520??.CMD
B:=A:CIT520??.FMT
B:AUTOST.COM=A:52AUTOST.COM
I
'
i
Now you will need to add the d.BASE II program files to dBCITATIONS
Program Disk A. Which ones you· add depends on whether you have version 2.3
or 2.4.
Determine which you have and then continue the insta11ation process usinq the part that is applicable· to you.
' i
Version 1.5
14
dBCITATIONS (c), 1984
aa.
Task Think Workshops, Inc.
Insta.1lation usinqdBASE II, version 2.3
Now remove the dBCITATIONS MASTER - Back Up from drive A and replace it with your dBASE II back-up, version 2.3.
At the
asterisk prompt type the following commands, one-at-a-time, each
followed by a carriage return and waiting for the asterisk prompt
to reappear between them.
.._.
B:=A:DBASEAPP.OVR
B:=A:DBASEMAI.OVR
B:=A:DBASEMSC.OVR
B:=A:DBASEMSG.COM
B:DO.COM=A:DBASE.COM
Remove the dBCITATIONS MASTER - Back Up from drive A and replace
it with the CP/M System diskette.
Press a carriage return to
exit from PIP. Then type
DIR B:
followed.by a carriage return and then confirm that dBCITATIONS
Program Disk A contains the files listed as correct for version
2.3 at the beginning of this section.
If any are missing, go
back and retrace your steps until you have them all.
ab.
Instal..lation usinq dBASE II, version 2.4.
Now remove the dBCITATIONS MASTER - Back Up from drive A and replace it with your dBASE II back-up, version 2.4.
At the
asterisk prompt type the following commands, one-at-a-time, each
followed by a carriage return and waiting for the asterisk prompt
to reappear between them.
B:=A:DBASEOVR.COM
B:DO.COM=A:DBASE.COM
(
'
Replace the dBCITATIONS MASTER - Back Up diskette with your
System diskette and exit from PIP with a carriage return.
type
CP/M
Then
DIR B:
(
)
r
,
followed by a carriage return and then confirm that dBCITATIONS Program Disk A contains the files listed as correct for version
2.4 at the beginning of this section.
If any are missing, go
back and retrace your steps until you have them all.
b.
(
!
dBCITATIONS - Data.Base Disk B
Use PIP to make this diskette contain the following files.
Version 1.5
15
Task Think Workshops, Inc.
dBCITATIONS (c), 1984
Proper files for Double Density, Osborne 01
dBCITATIONS - DataBase Disk B
CIT52004.DBF
CIT52008.DBF
C.MEM
With the computer turned on, place the CP/M SYSTEM diskette in
drive A and the dBCITATIONS -DataBase Disk B in drive B.
Press
RETURN and when the A> prompt appears Press CTRL-C to tell
CP/M to look for a new diskette in drive B.
Then type PIP
followed by a carriage return. When the asterisk prompt appears,
remove the CP/M SYSTEM diskette from drive A and replace it with
dBCITATIONS MASTER - Back Up.
Then type the following commands,
one-at-a-time, each followed by a carriage return, and waiting
for the asterisk prompt to reappear between each.
-
B:=A:CIT5200?.DBF
B:C.MEM=A:3C.MEM (if dBASE II, version 2.3) or
B:C.MEM=A:4C.MEM (if dBASE II, version 2.4)
Remove the dBCITATIONS MASTER - Back Up from drive A and replace
it with the CP/M SYSTEM diskette. Exit from PIP with a carriage
return and at the A.. prompt type
DIR B:
followed be a carriage return.
Check to see if dBCITATIONS
DataBase Disk B contains the files listed above. If not, retrace
your steps until you get the diskette correctly configured.
(Remember, the C.MEM file is only on the 80 column distribution
diskette.
If you didn't move it to the 52 column back-up when
you made it, then it won't be on dBCITATIONS - DataBase Disk B.
Use PIP to get it there, else dBCITATIONS won't run correctly).
Note:
dBCITATIONS has been designed so that you may have any number of
databases, each organized around a particular topic.
Each topic requires
its own diskette B.
You.may now or any time later make up additional
copies of diskette B.
The program diskette A controls all of these, so
only one copy of it is needed no matter how may versions of diskette B you
have.
If disk,A and disk B of dBCITATIONS contain the correct files, you are
now ready
start the first "run through" of the program.
Remove all
disks from the computer and except for disks A and B, put them in a safe
place. Press the RESET button to give yourself a fresh start. Do not write
protect dBCITATIONS - Program Disk A or dBCITATIONS DataBase Diskette B as
both of these need to be written to. You may now turn to the tutorial
section of this booklet and begin using dBCITATIONS right away.
to
3.
80 Column, Double Density, Osborne 01
You will need to place the CP/M systems tracks on the diskette you
have labeled dBCITATIONS - Program Disk A.
You will also need to perform
certain SETUP operations. If you have an 80 column version of Wordstar, it
is double density
and it and your printer function properly with each
other, this will be fairly easy.
Using the CP/M COPY Utility, just copy
Version 1.5
16
I
,1
' l
-
Task Think Workshops, Inc.
dBCITATIONS (c), 1984
Then erase all
your WordStar diskette onto dBCITATIONS - Program Disk A.
The system tracks will be left on the diskette, properly conthe files.
(The dBCITATIONS print and screen display
figured to run dBCITATIONS.
functions mimic WordStar). Then using SETUP, just change the arrow keys to
CP/M, program function key 1 to DO CIT[CR], and turn off the auto horizontal scroll.
r
I
!
l
(
1
and functions
If your WordStar is 80 column, double density
correctly with your printer, copy the system tracks as follows.
Turn the computer on. Insert the CP/M SYSTEM diskette into drive
A. Press RETURN. If you have the "Helpn screen, press ESCAPE to
get to the A> prompt. Then type COPY followed by RETURN. When
Select A as the source drive.
asked, choose the c option.
Remove the CP/M SYSTEM diskette from drive A and replace it with
Put the dBCITATIONS - Program Disk A
your WordStar diskette.
When the copy is completed
into drive B, then press RETURN.
successfully, press ·RETURN twice to exit from the copy program.
Remove the WordStar diskette from drive A and repiace it with
prompt, type SETUP, folAt the A>
the CP/M SYSTEM diskette.
lowed by RETURN. When asked, select B as the diskette you want
It is
to configure - that is, dBCITATIONS - Program Disk A.
a
have
will
you
clears,
screen
the
When
located in drive B.
settings
the
change
not
Do
whole menu of things you can change.
These are the ones that are successful in
for A, B and c.
correctly with your printer. Tap "D" to
work
to
getting WordStar
toggle the AUTO HORIZONTAL SCROLL. It should be turned off. Tap
Once there, select 1 to
"E" to get to the function key menu.
program function key 1 to read
1: DO CIT[CR]
Press the ESCAPE key
where [CR] means enter a carriage return.
twice to exit. Check to see that 1 says the correct thing. Then
Now toggle "F" to set
select "X" to go back to the main menu.
Check the whole screen for correct
the arrow keys to CP/M.
Select B as
settings, and when satisfied, press "X" to exit.
When the drives stop running remove your CP/M
the destination.
SYSTEM diskette from drive A and move the dBCITATIONS - Program
When the Osborne
Press the RESET button.
Disk A into drive A.
WordStar should appear on
logo appears, p~ess the RETURN key.
the screen. When you get to the nofile menu, press "X" to get to
the system. When the A> prompt appears, type
ERA *·*
You will be asked if you want to
followed by a carriage return.
You do so just type Y followed by RETURN. When the
erase all.
A> prompt returns, type
DIR
You should get the indication
followed by a carriage return.
that there are no files on this disk. That's just as you want it
for now. The all important system tracks are on there, correctly
To check, see if the diskette will
configured for dBCITATIONS.
When the logo apHit the RESET button.
produce a cold boot.
Version 1.5
17
Task Think Workshops, Inc.
dBCITATIONS (c), 1984
pears, tap RETURN. You should get the A>
system tracks are on the diskette.
prompt indicating the
Note:
Put the system tracks of dBCITATIONS - Program Disk A by
foregoing method ~ the following method. Do not try to do both.
the
If, on the other hand, your WordStar/printer interface is not reliable, you will still need to add the system tracks to dBCITATIONS ~ Program
Disk A.
Additionally, you will need to perform the SETUP operations of
selecting a printer protocol and the baud rate at which your printer is to
receive output from the computer. These are hardware considerations and if
you don't know these for your printer, you will need to find them out and
enter them correctly for the print functions of dBCITATIONS to operate correctly.
The systems tracks are essential to dBCITATIONS.
If you don't
want to print from within dBCITATIONS, then you may consider the SETUP
operations that deal with printing to be optional. You will, however, need
to do some minimal SETUP operations to change the arrow keys to CP/M, turn
off the auto horizontal scroll and program function key 1 to DO CIT[CR].
To add the system tracks, you need to use the CP/M program called
SYSGEN. Be certain to use the version that is suitable to double
density. To SYSGEN dBCITATIONS - Program Disk A turn on the computer.
Place the CP/M SYSTEM disk in drive A and press RETURN.
If necessary, press ESCAPE to get past the Help feature.
When
you get to the A>
prompt type SYSGEN followed by a carriage
return. -When asked for the source drive, type A and then press
RETURN. You will be asked to put the source diskette in drive A.
You are going to use your CP/M SYSTEM diskette as the source, so
it is already there. Just press RETURN. Select B as the destination diskette and when asked put the diskette labeled dBCITATIONS - Program Disk A into drive B.
Press RETURN.
SYSGEN
operates quickly and tells you when it is finished. Press RETURN
to exit from the SYSGEN program.
Now at the A> prompt select the double density SETUP utility and
type SETUP followed by RETURN. Select B as the disk you want to
configure since dBCITATIONS - Program Disk A is in drive
B.
When the screen clears, the current setup listings will appear.
If these are not correct for your printer (get correct settings
from your printer manual) change them to conform to what is
needed.
Tapping
A will produce a menu of printer options.
Select from this menu and then press 11 X11 to return to the main
menu.
Toggle B to switch between 300 and 1200 baud. Make sure
that selection C is set to 128.
Toggle D to turn OFF the AUTO
HORIZONTAL SCROLL.
Tap
E to get to the function key menu.
Select 1 to program function key 1 to
'
J
'
J
' J
1: DO CIT[CR]
where [CR] means enter a carriage return.
Press the ESCAPE key
twice to exit.
Check to see that function key 1 is correct.
Then press "X" to return to the main menu.
Tap F to toggle the
arrow keys to CP/M. Select B as the destination drive. When the
drives stop, remove the CP/M diskette from drive A.
Place the
dBCITATIONS - Program Disk into drive A.
Press the RESET button.
When the Osborne logo appears, press the RETURN key. You
Version 1.5
I
;
i
J
I
18
!
Task Think Workshops, Inc.
dBCITATIONS (c), 1984
I .should be able to make a cold boot with
f A> prompt of CP/M. If so, all is well
f :
this diskette and get the
with the system tracks.
With the system tracks correctly configured, add the necessary files
to dBCITATIONS - Program Disk A.
Use PIP to make the diskette contain the
following files.
Proper files for double density, 80 column, dBASE II-2.3
dBCITATIONS - Program Disk A
f
AUTOST .COM
CIT
.CMD
CIT80002.CMD
CIT80003.FMT
CIT80005.CMD
I
CIT80007.FMT
CIT80009.CMD
CIT80010.CMD
CIT80011.CMD
CIT80020.CMD
CIT80021.CMD
CIT80022.CMD
DBASEAPP.OVR
DBASEMAI.OVR
DBASEMSC.OVR
DBASEMSG.COM
DO
.COM
.COM
PIP
STAT
.COM
Or, it your version of dBASE II is 2.4, set· the diskette up as follows.
Proper files for double density, 80 column, dBASE II-2.4
dBCITATIONS
Program Disk A
r ,
AUTOST .COM
CIT
.CMD
CIT80002.CMD
CIT80003.FMT
CIT80005.CMD
CIT80007.FMT
CIT80009.CMD
CIT80010.CMD
CIT80011.CMD
CIT80020.CMD
CIT80021.CMD
CIT80022.CMD
DBASEOVR.COM
DO
.COM
PIP
.COM
STAT
.COM
Turn the computer on. Place the CP/M SYSTEM diskette in drive A
and dBCITATIONS - Program Disk A into drive B. . Press RETURN.
Then
·press CTRL-c.
At the A> prompt type PIP followed by a
carriage return. When the asterisk "*" prompt appears, type
B:=A:STAT.COM
when the asterisk prompt reappears, type the following
B:=A:PIP.COM
f
1
followed by a carriage return.
When the asterisk prompt reappears, remove the CP/M SYSTEM diskette from drive
A ·and
replace it with dBCITATIONS MASTER - Back Up. Now type the following commands one-at-a-time, each followed by a carriage return
and waiting between each for the asterisk prompt to reappear.
B:=A:CIT.CMD
B:=A:CIT800??.CMD
B:=A:CIT800??.FMT
B:AUTOST.COM=A:80AUTOST.COM
Now you will need to add the dBASE II program files to dBCITATIONS
Program Disk A. Which ones you add depends on whether you have version 2.3
or 2.4.
Determine which you have and then continue the installation process using the part that is applicable to you.
Note:
Do
Version 1.5
section aa. or ab.
Do
not do both.
19
Task Think WorkshopsJ Inc.
dBCITATIONS (c)J 1984
aa.
Installation using dBASE II, version 2.3
Now remove the dBCITATIONS MASTER - Back Up from drive A and replace it with your dBASE II back-up, version 2.3. At the asterisk prompt type the following commandsJ one-at-a-timeJ each
followed by a carriage return and waiting for the asterisk prompt
to reappear between them.
B:=A:DBASEAPP.OVR
B:=A:DBASEMAI.OVR
B:=A:DBASEMSC.OVR
B:=A:DBASEMSG.COM
B:DO.COM=A:DBASE.COM
Now replace the diskette in drive A with your CP/M System
ette and exit from PIP with a carriage return. Type
disk-
DIR B:
followed by a carriage return and
Program Disk A contains the files
beginning of this section.
If
retrace your steps until you have
ab.
then confirm that dBCITATIONS
listed as correct for it at the
any are missing, go back and
them all.
Installation using dBASE II, version 2.4
Now remove the dBCITATIONS MASTER - Back Up from drive A and replace it with your dBASE II back-up, version 2.4.
At the
asterisk prompt type the following commands, one-at-a-timeJ each
followed by a carriage return and waiting for the asterisk prompt
to reappear between them.
B:=A:DBASEOVR.COM
B:DO.COM=A:DBASE.COM
Now replace the diskette in drive A with your CP/M System
ette and exit from PIP with a carriage return. Type
disk-
DIR B:
followed by a carriage return and
Program Disk A contains the files
beginning of this section.
If
retrace your steps until you have
b.
dBCITATIONS
then confirm that dBCITATIONS
listed as correct for it at the
any are missingJ go back and
them all.
DataBase Disk B
Use PIP to make this diskette contain the following files.
Proper files for Double DensityJ Osborne 01
dBCITATIONS - DataBase Disk B
CIT80004.DBF
CIT80008.DBF
-
C.MEM
\.
Version 1.5
20
J
dBCITATIONS .( c) , 1984
Task Think Workshops, Inc.
With the computer turned on, place the CP/M SYSTEM diskette in
drive A and the dBCITATIONS -DataBase Disk B in drive B.
Press
RETURN and when the A> prompt appears Press CTRL-C to tell
CP/M to look for a new diskette in drive B.
Then type PIP
followed by a carriage return. When the asterisk prompt appears,
remove the CP/M SYSTEM diskette from drive A and replace it with
dBCITATIONS MASTER - Back Up.
Then .type the following commands,
one-at-a-time, each followed by a carriage return, and waiting
for the asterisk prompt to reappear between them.
B:=A:CIT8000?.DBF
B:C.MEM=A:3C.MEM (if dBASE II, version 2.3) or
B:C.MEM=A:4C.MEM (if dBASE II, version 2.4)
Remove the dBCITATIONS MASTER - Back Up from drive A and replace
it with the CP/M SYSTEM diskette. Exit from PIP with a carriage
return and at the 'A> prompt type
DIR B:
followed be a carriage return.
Check to see if dBCITATIONS
DataBase Disk B contains the files listed above. If not, retrace
your steps until you get the diskette correctly configured.
......:
Note:
dBCITATIONS has been designed so that you may have any number of
databases, each organized around a particular topic.
Each topic requires
its own diskette B.
You may now or any time later make up additional
copies of diskette B.
The program diskette A controls all of these, so
only one copy of it is needed no matter how may versions of diskette B you
have.
If disk A and disk B of dBCITATIONS contain the correct files, you are
now ready ·to start the first "run through" of the program.
Remove all
disks from the computer and except for disks A and B, put them in a safe
place.
Press the RESET button to give yourself a fresh start.
Do not
write protect dBCITATIONS - Program Disk A or dBCITATIONS DataBase Diskette
B as both of these need to be written to. You may now turn to the tutorial
section of this booklet and begin using dBCITATIONS right away.
4.
80 Column, Osborne Executive
You will need to place the CP/M systems tracks on the diskette you
have labeled dBCITATIONS - Program Disk A.
You will also need to perform
certain SETUP operations. If you have a version of Wordstar that functions
properly with your printer, this will be fairly easy. Using the CP/M COPY
Utility, just copy your WordStar diskette onto dBCITATIONS - Program Disk
A.
Then erase all the files.
The system tracks will be -1eft on the
diskette, properly configured to run dBCITATIONS.
(The dBCITATIONS print
and screen display functions mimic WordStar).
Then using SETUP, just
change the arrow keys·to CP/M, select the normal vidio attribute, the
steady underline c\lrsor and program function key 1 to DO CIT[RET].
Rote:
Put the system tracks of dBCITATIOHS - Program Disk A by
foregoing method ~ the following method. Do not try to do both.
Version 1.5
21
the
Task Think Workshops, Inc.
dBCITATIONS (c), 1984
You will need the CP/M utility called COPYSYS.
With
the computer ·turned on, insert the CP/M SYSTEM Disk into drive
A.
Place the diskette you have labeled dBCITATIONS - Program
Disk A into drive B.
Press RETURN.
When the A>
prompt appears, type COPYSYS.
Press RETURN.
When the menu appears,
select "Get System from Drive A" and then press RETURN. When the
operation is complete press RETURN again.
When the next menu
appears, select "Save System to Drive B," then press RETURN.
When the system
has been successfully transferred, you are
finished with the system copying process.
Your task here is to put your WordStar printer settings onto dBCITATIONS Program Disk A, program one of the function keys, set the arrow keys
to CP/M1 set the diskette to the produce normal background attribute and
set it to produce the steady underline console parameter.
With the computer on, insert the CP/M Plus System Disk in drive A
and-the dBCITATIONS - Program Disk A in drive B.
Press RETURN.
At the A>
prompt type SETUP and press RETURN.
Use the arrow
keys to select "FROM DRIVE B" and press RETURN.
Use the arrow
keys to select "KEY DEFINITIONS" and press RETURN.
When the
function key change screen appears, define key 1 to read
DO CIT[RET]
(where [RET] means strike the RETURN key), then hold down the
CTRL key and press RETURN.
Then press the ESCAPE key to return
to the SETUP menu.
Using the arrow keys, move the cursor to CONSOLE PARAMETERS and
press RETURN. Check the current settings. If the Cursor type is
not STEADY UNDERLINE, use the arrow keys to move the cursor to
the Cursor Type position and press RETURN.
When the select
cursor screen appears, · move the cursor to the Steady · Underline
position. and press RETURN.
If the background attribute is not
NORMAL, use the arrow keys to move to the Background Attributes
position and press return·.
This changes the setting to normal.
Check to see if the arrow keys are set to CP/M. If they are not,
use the arrow keys to move the cursor to the Arrow Keys position.
Press RETURN. This will change them to CP/M.
Using the arrow keys, ·move the cursor to "PRINTER PO" and press
RETURN. Check the "BAUD RATE" setting. If it is not the same as
the baud rate needed by your printer, press RETURN.
When the
baud rate selection.screen appears, use the arrow keys to select
the correct one (you.need to determine this by reference to the
manual that goes with your printer). Press ESCAPE to move to the
"Select Protocol" screen.
Make the protocol option conform to
the one that matches your printer.
Similarly, make the device
selection conform to the needs of your printer.
When you have
made the necessary changes, return to the main selections menu,
place the cursor on "EXIT TO SAVE MENU" and press RETURN.
When
the destination menu appears, move the cursor to "TO DRIVE B"
(this is where dBCITATIONS - Program Disk A resides) and press
RETURN. When you get the message that the configuration has been
saved, press ESCAPE to exit from SETUP.
Version 1.5
22
dBCITATIONS (c), 1984
Task Think Workshops, Inc.
By placing the CP/M utilities SHOW and PIP on the dBCITATIONS
Program Disk A, you can make this into' a very powerful disk aiding you to
transfer citations from your database onto diskettes you are editing with
WordStar.
You can also check from within the program whether or not you
have space available on your diskettes to perform these transfers. Use PIP
to transfer SHOW and PIP to dBCITATIONS - Program Disk A.
I
.......
'
/
With the computer turned on, insert the CP/M Plus System Disk
into drive A and put the dBCITATIONS - Program Disk A into drive
B.
Press RETURN.
Press CTRL-C to tell CP/M to look for a new
diskette in drive B.
At the A>
prompt, type PIP and press
RETURN. When the asterisk appears, type
B:=A:PIP.COM
and press RETURN.
When the asterisk appears again, type
B:=A:SHOW.COM
and press RETURN.
SHOW and PIP will now have been added to to
dBCITATIONS - Program Disk A. Leave both diskettes in the computer and proceed.
From the dBCITATIONS MASTER Back Up (80 column version) that you made
just previously above, copy the CIT800??.CMD and CIT800??.FMT files to
dBCITATIONS - Program Disk A.
Also copy, by renaming it just plain CIT,
the XCIT.CMD file.
Do not use the plain CIT.CMD file as this is for the
Osborne 01 and won't work correctly with the Executive.·
r \
i
\-..I
The asterisk prompt should still be on the screen waiting for
commands from you.
The dBCITATIONS.-Program Disk A should still
be in drive B.
~eplace the disk in drive A with
dBCITATIONS
MASTER - Back Up (80 column version) and type .
r '
B:CIT.CMD=A:XCIT.CMD
and press RETURN.
When the asterisk prompt reappears type
B:=A:CIT800??.CMD
and press RETURN.
When the asterisk prompt reappears, type
B:=A:CIT8000?.FMT
and press RETURN.
When the asterisk prompt reappears this time,
all of the dBCITATIONS files needed to run the program will have
been copied to the dBCITATIONS - Program Disk A.
Leave this
diskette in drive B, but remove the dBCITATIONS MASTER -Back Up
from drive A and put it in a safe place.
L
f
j
The job now is to copy the necessary dBase II files to the dBCITATIONS
- Program Disk A.
dBCITATIONS does not make use of some of the files on
your dBASE II back up diskette. Besides that, dBCITATIONS places different
demands on version 2.4 than it. does on version 2.3. Consequently, you will
need to selectively copy files from your dBASE II back up diskette. Determine which version of dBASE II you have and then do one or the other of the
Version 1.5
23
Task Think Workshops, Inc.
dBCITATIONS (c), 1984
following
DO.COM.
two
PIPings.
Note that in both cases,
DEASE.COM
is
renamed
If your's is version 2.3, place it in drive A.
Then type the
following commands at the asterisk prompt, one-by-one waiting for
the asterisk prompt to reappear between each, and with each
followed by a carriage return.
B:=A:DBASEAPP.OVR
B:=A:DBASEMAI.OVR
B:=A:DBASEMSC.OVR
B:=A:DBASEMSG.COM
B:DO.COM=A:DBASE.COM
Now exit from PIP with a carriage return.
Type
DIR B:
followed by a carriage return and confirm that dBCITATIONS Program Disk A
contains the following files. If any are missing, go back and retrace your
steps until you have them all.
Proper files for Executive, 2.3
dBCITATIONS - Program Disk A
~
.CMD
CIT
CIT80002.CMD
CIT80003.FMT
CIT80005.CMD
CIT80007.FMT
CIT80009.CMD
CIT80010.CMD
CIT80011.CMD
CIT80020.CMD
CIT80021.CMD
CIT80022.CMD
DBASEAPP.OVR
DBASEMAI.OVR
DBASEMSC.OVR
DBASEMSG.COM
DO
.COM
.COM
PIP
SHOW
.COM
If your• s is version 2. 4 pla_ce it in drive A.
Then type
following two commands, each followed by a carriage return
waiting for the asterisk prompt to reappear between them.
the
and
B:DO.COM=A:DBASE.COM
B:=A:DBASEOVR.COM
Now exit PIP with a carriage return.
Type
DIR B:
and a carriage return and confirm that dBCITATIONS Program Disk A
contains the following files.
If not, check your work and using
the PIP process, make the diskette conform.
Proper Files for Executive, 2.4
dBCITATIONS - Program Disk A
CIT
.CMD
CIT80002.CMD
CIT80003.FMT
CIT80005.CMD
Version 1.5
CIT80007.FMT
CIT80009.CMD
CIT80010.CMD
CIT80011.CMD
CIT80020.CMD
CIT80021.CMD
CIT80022.CMD
DBASEOVR.COM
24
DO
PIP
SHOW
.COM
.COM
.COM
I
J
I
J
dBCITATIONS (c), 1984
B.
Task Think Workshops, Inc.
dBCITATIONS - DataBase Disk B
Use PIP to make this diskette contain the following files.
Proper files for the Osborne Executive
dBCITATIONS - DataBase Disk B
CITS2004.DBF
CIT52008.DBF
C.MEM
With the computer turned on, place the CP/M SYSTEM diskette in.
drive ~ and the dBCITATIONS -DataBase Disk B in drive ~.
Press
RETURN and when the A>
prompt appears Press CTRL-C to tell
CP/M to look for a new diskette in drive B.
Then type PIP
followed by a carriage return. When the asterisk prompt appears,
remove the CP/M SYSTEM diskette from drive A and replace it with
dBCITATIONS MASTER - Back Up.
Then type the following commands,
one-at-a-time, each followed by a carriage return, and waiting
for the asterisk prompt to re~ppear between them.
B:=A:CIT8000?.FMT
B:C.MEM=A:3C.MEM (if dBASE II, version 2.3) or
B:C.MEM=A:4C.MEM (if dBASE II, version 2.4)
Remove the dBCITATIONS MASTER - Back Up from drive A and replace
it with the CP/M SYSTEM diskette. Exit from PIP with a carriage
return and at the A> prompt type
DIR B:
-
followed be a carriage return.
Check to see if dBCITATIONS
DataBase Disk B contains the files listed above. If not, retrace
your steps until you get the diskette correctly configured.
Note:
dBCITATIONS has been designed so that you may have any number of
databases, each organized around a particular topic.
Each topic requires
its own diskette B.
You may now or any time later make up additional
copies of diskette B.
The program diskette A controls all of these, so
only one copy of it is needed no matter how may versions of diskette B you
have.
If disk A and disk B of dBCITATIONS contain the correct files, you are
now ready to start the first "run through" of the program.
Remove all
disks from the computer and except for disks A and B, put tl\em in a safe
place. Press the RESET button to give yourself a fresh start. Do not write
protect dBCITATIONS - Program Disk A or dBCITATIONS DataBase Diskette B as
both of these need to be written to.
You may now turn to the tutorial
section of this booklet and begin using dBCITATIONS right away.
Version 1.5
25
dBCITATIONS (c), 1984
Task Think Workshops, Inc.
CP/M or DOS
FUNCTIONS SKELETFN
CITATIONS© PROGRAM
dBASE II
!
CITATIONS
Options Menu
A)dd
citations
..,.__,..
A)ppend a new
citation
G )et foot note
and append
H)elp on
adding
S)top adding
and return to
Options menu
B)ack one
C)ancel to
dB.ASE II
ID)elete
#
1
E)dit
F)orward one #
H)elp on
display
~ )enu return
R)ecall
1
1
D)iagnose disk
space on B:
D)lspiay
E)xit to
Options menu
H)elp on
mal ntenance
K)eyword
directory
S)earch
H)elp on
basics
M)aintain
citations
P)rlnt
citations
Q)uit to
CP/M or DOS
Version 1.5
(
I
(
)..----t~
I
)"
N)o margin
printing
P)rint with
indentation
R)eturn to
Options menu
S)earch and
display
26
T)xt file
jv')iew X
I
)
B)road search
N~arrow search
I
-
dBCITATIONS TOroRIAL
A.
OVERVIEW
This tutorial takes you through every aspect of the dBCITATIONS program.
Later, you may skip around through the tutorial if you want to, but
to begin with, we suggest that you just follow it step-by-step.
You may
Skeleton on
program from
of that menu
~ates with a
-
It is assumed that the program is properly installed and that your
computer and peripherals are properly interfaced. The screen displays that
follow are from the 80 column, CP/M version of dBCITATIONS.
What you see
on the screens will be slightly different for other versions.
If your particular computer uses the ENTER key or ..--J instead of
the RETURN key, then press that key when you are asked to press RETURN in
the following instructions.
B.
-
-
get a visual overview of the program by studying the Functions
the facing page.
What the tutorial does is simply start the
CP/M or DOS, take you to· the Options Menu and then in and out
to the various sub-parts of dBCITATIONS.
The tutorial termireturn to CP/M or DOS.
The Tutorial
Make the normal start up for your computer using dBCITATIONS - Program
Disk A in drive A and dBCITATIONS - DataBase Disk B in drive B.
There are
three different ways to get the program started, but they all amount to the
same thing.
At the A> prompt you have to issue the command DO CT or DO
CIT, depending upon your particular version of dBCITATIONS.
This may be
done automatically with an AUTOST, BAT or SUB file. It may be done with a
function key. Or you may have to type this command in by hand. During the
installation, you will learn which of these is suitable to your system.
Once the program has this command, there will be some disk activity and you
will see a sign-on screen describing the program and showing the Task Think
Workshops, Inc. copyright.· Read the screen and press any key to go on.
Since this is the first time you have used the particular data
diskette (B), you will need to identify it as to whose disk it is and what
general topic you are assigning to it.
When asked, just type your name.
When asked for the topic, give this some thought. You may have any number
of databases - one per diskette.
Enter the name of a topic that is broad
enough to cover many entries.
But remember, it does not have to be so
broad as to cover everything you might want to enter as you may have any
number of 9ther databases.
When finished, dBCITATIONS presents a data
screen,· showing a profile of this database.
Press any key to proceed and
the main options menu appears.
This is Figure 1 on the following page.
Study this screen a moment.
You may think of it as the trunk of a tree
with different branches going off here and there.
To get from one branch
to another, you must first return to the trunk.
Note:·
Every time .you start a new dBCITATIONS - DataBase Diskette
you will need to go through this little initialization routine.
Version 1.5
27
B,
Task Think Workshops, Inc.
dBCITATIONS (c), 1984
+--------------------------------------------------------------+
dBCITATIONS
Options Menu
+---------------------------------------·-----------------------+
A)dd a new Citation ••• includes retrievinq a
footnote from a previous Citation
C)ancel to dBASE II
D)iaqnose space on B:
Figure 1
H)elp
M)aintain Citations ••• includes Keyword search,
Edit, Delete, Recall, and Makinq TXT file
P)rint Citations
Q)uit to CP/M
+--------------------------------------------------------------+
Select A, c, D, H, M, P or Q
When ready, press H or h (on menu selections, either lower or upper
case entries will work).
The screen that appears simply tells you that
help screens are spread throughout the program and that each is associated
with the part of the program on which you are working at the time. Press 2
for more help and the following screen appears.
+------------------------~-------------------------------------+
#
dBCITATIONS
Options H)elp
+-----------------------~--------------------------------------+
KeyWord 1:
Keyword 2:
Keyword 3:
Author's Last Name:
Footnote starts here and
:continues on as much of the nexe three lines as needed.
Citations starts here:
This is the way the CITATIONS entry screen
looks. There are three places to enter key
words, a place for the author's last name
and places for the footnote and citation.
Think of the keywords and author's name as
an INDEX which allows you to quickiy find
the citation. You may index an additional
author by using the name as a Keyword. You
may .enter your own oriqinal works by using
your own name as the author.
Figure 2
: :X:
+--------------------------------------------------------------+
Press any key to continue. • •
This displays the layout of the dBCITATIONS primary entry screen.
Each database entry carrys its own unique number.
This appears at the
number sign (#) in the upper left corner.
The program goes into several
different modes - such as display, edit, etc. These modes always appear at
the upper right corner.
If you ever get confused, just look in the upper
right corner to find out where you are..
Just below are the data entry
areas.
On the first line are places for three key words.
Think of these
as ways you may index your entry.
The next line has a space for an author's last name.
This gives four ways you can retrieve your citation.
(It's like looking in the back of a book for a topic or name, finding a
page and turning immediately to that page).
With dBCITATIONS you search
for the keyword or name, find the citation number, and then display that
citation.
Each of these areas is called a field. It's a good idea to not
enter anything else in these fields except topical terms and last names.~-
Version 1.5
28
dBCITATI NS (c), 1984
Task Think Worksho ps, Inc.
footnote starts further along on line 2.
Put the author's first
the remaind er of the footnote entry here. Use as much of the next
three l i es as you need to for completi on of the footnote .
Begin entering
the ~cit tion itself in the space on line 6.
After studying this screen a
any key to return to the main options menu.
What you have done
is
at the help screens branchin g from the main options menu, and
then re rned back to it.
Study the options menu a moment to see what
produced this effect.
name
{
1
Now select A (rememb er, it could be A or a).
Now you have a menu of
choices or the A)dding mode. Note the upper right hand corner.
+---------------------------------~----------------------------+
dBCITATIONS
A}ddinq
+--------------------------------------------------------------+
Alppend • • • a Citation to the database
f
G}et. • • the footnote from a previous
Citation, edit for new conditions
and append it to the database
\
Figure 3
H}elp • • • on adding a Citation
S)top • • • the addition of Citations and
return to the Options Menu
r
1
+--------------------------------------------------------------+
Choose A, G, H or
s. • •
Press H to get to the help screens for the adding mode of the program .
+------------------------~--------~---------------------------+
dBCITATIONS
Adding H)elp
I
+--------------------------------------------------------------+
You have reached the portion of the program
that is for making entries to the CITATIONS
DataBase file. You will ~utomatically append
new Citations to those previously added. The
dBASE II full screen editing features may be
used; These are explained in the dBASE user's
manual or you may see a brief description of
them on these help screens. To reduce typing
the footnote may be copied from any previous
entry onto the one on which you are currently
working.
In most cases, you need only edit
it slightly to fit your new conditions.
l
Figure 4
+----------------------------------------------+
Select
1) to return
to the-----------Adding mode,
or
press 2) for more help • • •
{.
!
will be
carry su
dBASE II
totally c
over tex
f
this screen a moment.
The word append means that new entries
t the back of the database , behind previous entries, and will
cessivel y higher numbers .
The full screen editing features of
means that the complex ities of text entry and change are almost
ncealed from you.
You may enter, edit, insert, delete and write
with almost the same abandon as you would with a high quality
1
Version 1.5
29
Task Think Workshops, Inc.
dBCITATIONS (c), 1984
text editor.
As a _work saver,. it is assumed that sometimes you will take
several' citations from the same source. When that happens, you can get the
footnote portion of a previous citation and have it automatically appear on
the new entry.
When you have digested the significance of this, press 2
for more help.
+--------------------------------------------------------------+
dBCITATIONS
Adding H)elp
+--------------------------------------------------------------+
CUrsor controls in the adding mode.
CTRL-E,A
CTRL-X,F
CTRL-S
CTRL-D
CTRL-Y
CTRL-G
CTRL-V
dBASE II uses
Be careful to
are trying to
not needed in
Backs up a field or line.
Advances a field or line.
Backs up one character.
Advances one charact~r.
Clears a field or line to blanks.
Deletes character at cursor.
Switches between overwrite and
insert modes.
Figure 5
many other Control character functions.
not accidentally use these when all you
do is move the cursor around. They are
CITATIONS and will just cause problems·.
-
+--------------------------------------------------------------+
Select 1) to return to the Adding mode, or
press 2) for more H)elp • • •
This screen shows you how to move the cursor around the screen, how to
delete and how to switch between the insert and the overwrite modes.
dBCITATIONS defaults to the overwrite mode, so you must deliberately turn
(WordStar users will note that except for CTRL-A and CTRL-F,
on insert.
the effects are quite predictable). Press 2 for more help.
+----.:--------------------------------------------------------+
•
dBCITATIONS
Addinq H)elp
:
~--------------------------------------------------------------+
Some Rules • • •
:
I
Keyword number 1 is the MASTER key word • . choose
this word so that it has the broadest meaning and
still indicates a particular Citation.
Leaving
this field blank will abort the appendinq process
and you may do this on purpose if you change your
mind and want to do something else after entering
the A)ddinq mode.
When you choose to G)et • • • a footnote from a
previous entry, you may select the previous one
or any other, if you know its number. It is then
copied onto the blank entry screen, and you need
only edit it a little to fit your new conditions.
'
J
'
J
'
J
'
l
'
J
'
i
Figure 6
~--------------------------------------------------------------+
Select 1 ) to return to A)ddinq mode, or
press 2) for more H)elp • • •
This screen tells you that you must have at least one key word (at
position K1) for an entry to be appended.
This is an easy escape if you
change your mind while adding. Just delete any contents from the Keyword 1
data field and nothing at all will be appended from that entry.
Also note
that when you are copying a footnote over from an earlier entry, you can
get the one just previously entered or any other. If it 1 s not the one just
previous, then you have to k~ow its number. Press 2 for more help.
Version 1.5
30
dBCITATIONS (c), 1984
Task Think Workshops, Inc.
+--------------------------------------------------~----------+
dBCITATIONS
Adding H)elp
+--------------------------------------------------------------+
Citation too .long to fit available space ?
Notice the X in the bottom right corner
of this and the entry screens of the program.
This is a real data field to show
that an
EXTRA screen was needed to hold
the complete text, If you do not need the
extra screen, leave that field blank. But
for longer entries, just place an X in
that field, press RETURN and a completely
blank screen will appear.
Finish the remainder of the citation on this screen and
close be pressing the RETURN key as usual.
Figure 7
::X:
+--------------------------------------------------------------+
Press RETURN to continue. • •
f
1
! ;
This is what you do when you have an extra long citation.
Leave that
X spot blank if you can get the full citation on the primary screen. When
ready, press RETURN to return to the A)dding menu.
(See Figure 3) Study
that menu a moment to see what produced these help screens.
Now let's actually append a citation to the database.
you will see a screen that looks something like this.
Choose
A.
Now
+------------------------~~---------------------------------+
#
dBCITATIONS
A)dding
+--------------------------------------------------------------+
Kl: •••••••••••••••••••• :K2: •••••••••••••••• :K3: ••••••••••••• ~ •• :
ALN: ••••••••••••••••••• : : ••••••••••••••••••••••••••••••••••••• :
:
.._
...... ....................................................... :
•••••• 0 ••••••••••••••••••••••••••••••••••••••••••••••••••••••• :
:
.,
=•••••••oO•••••••••••••••••••••••••••o••••••••••••••••••••••o••:
I
Citation: •••••••••••••••••••••••••••••••••••••••••••••••••••••• :
!••••••••••e•••••••••••••••••••••••••••••••••t:oeoo••••••••••••••:
:•G•••••••••••••••••••••••••O•••••••••v•••••••oaaci•eci•••••ciic>•••:
: • o • • • • • a• • • • • o • • • • • • o • • • • oa • ""• • a • o • • • • • • • • • • • • • • • • o o o o o • • e • o"• • • !
Figure 8
=••.&••••••••••••111•••••aeeo••••<>••oo•oa•a•••••••••••••••oo•••n••!
!•••••••oeono•O•••••••••••••••••o•••••••ci••••q•••••••••ecieeeo••:
=•••••••••••••••••••••••••0•••<11004••••••aaaeeee();•••••••••••e•••!
=······•••••••••••••••••••ci•••ii>•0•4«>••••••••••••••••••••••••···=
:
.............................................................. :
=•••••••••••••••••••••••••••••••••••o•••••••••••••••••••v•••e••=
+--------------------------------------------------------------+
Enter text and or-press RETURN to exit
r
'
Notice that you are in the A)dding mode and that this is citation
number 2.
There is already a number 1 in the database.
(The dots are of
course, not on the screen). The cursor is positioned at the first character position after K1.
Quickly make an entry by filling in the following
"junk. 11 Don't·worry, were going to delete it later.
Use the cursor controls to move around inside the screen area.
Ref er to Figure 5 since the
help screen showing the cursor movements is not available to you right now.
Of course, you could go back to it if you wanted to.
Version 1.5
31
Task Think Workshops, Inc.
dBCITATIONS (c), 1984
K1:aaaaaaaaaaaaaaaa:K2:bbbbbbbbbbbbbbbb:K3:cccccccccccccccc:
ALN:ddddddddddddddd::eeeeeeeeeeeeeeeeeeeeeeeeeeeeeeeeeeeeee:
:eeeeeeeeeeeeeeeeeeeeeeeeeeeeeeeeeeeeeeeeeeeeeeeeeeeeeeeeee:
:eeeeeeeeeeeee, p. 112.
Citation:
:
11
This is citation
2~
It is primary only."
When finished, hold down the RETURN key until the drives start to
work.
dBASE II puts a carriage return at the end of each field and line
(even if you don't) so if you just press RETURN once, the cursor will just
advance one line.
When the drives stop, the entry will have been appended
and you will be back at the A)dding menu. (See Figure 3)
Now select the
G option.
This screen appears.
Choose the citation from which you
wish to retrieve a footnote.
Fiqore 9
A) • • • the citation most recently entered
B) • • • the citation stored at number _ .
NOTE:
Select
-
-
If you do not choose A, you must
know the citation number.
A or
B.
Select the A option to retrieve the footnote from the entry you just
made.
When the screen appears, the key word and citations areas will be
blank, but the footnote will already be filled in.
Use this feature when
you take several citations from the same source.
Note that this is citation # 3 and that you are in the A)dding mode.
Type in th;i.s entry as
follows.
K1:aaaaaaaaaaaaaaaa:K2:ffffffffffffffff:K3:gggggggggggggggg:
ALN:ddddddddddddddd::eeeeeeeeeeeeeeeeeeeeeeeeeeeeeeeeeeeeee:
:eeeeeeeeeeeeeeeeeeeeeeeeeeeeeeeeeeeeeeeeeeeeeeeeeeeeeeeeee:
:eeeeeeeeeeeee,
p. 119.
'
I
I
I
I
I
' l
Citation:
:"This is citation number 3.
It is primary and secondary.":
: :X:
Version 1.5
32
'
J
(
J
dBCITATIONS (c), 1984
Task Think Workshops, Inc.
Be sure that you place an X in the bottom right corner.
Then press
RETURN until the drives start.
When the next screen appears, it will be
the secondary entry screen for citation #3. Type in the following and then
hold down the RETURN key. .
+----------------------------------------------------------+
:"This is the secondary screen for entry #3 11
When the next screen appears, both the primary and secondary entries
will have been appended to the database and you will have the option to
append, get, help or stop.
If you are not quite sure what you have been
doing, select the H option and look at the help screens again.
When you are ready to go on, select the G option to get a footnote.
When asked which footnote you want, choose B. When the screen clears, you
will be asked the number of the citation from which you wish to obtain a
footnote. Choose 2 as this is not the one most previously entered.
The new screen will have blank key word and citation areas, but the
footnote you typed in at #2 will be on the screen.
This allows you to
avoid the extra typing, even if your entries are not in sequence. Now type
the following.
K1:hhhhhhhhhhhhhhhh:K2:iiiiiiiiiiiiiiii:K3:jjjjjjjjjjjjjjjj:
ALN:dddddddddddddd~::eeeeeeeeeeeeeeeeeeeeeeeeeeeeeeeeeeeeee:
:eeeeeeeeeeeeeeeeeeeeeeeeeeeeeeeeeeeeeeeeeeeeeeeeeeeeeeeeee:
:eeeeeeeeeeee, p. 187.
Citation:
:
11
This is citation number 4."
Now with CTRL-E or CTRL-A move the cursor back to key word field K1.
With CTRL-Y delete the contents of that field.
Now hold down the RETURN
key until the drives start. What is going to happen to number 4?
When the adding menu reappears, choose the S)top option to leave the
adding mode and return to the main options menu.
Now you are back at the
main trunk of the tree {See Figure 1). Choose A to go out to the A)dding
branch and once there, choose S)top to come right back again.
See, it
really is easy to 90 out to a branch of the program and come right back
again.
Take a moment to go back to the Functions Skeleton to ponder what
you have been doing.
r
1
Now from the Options Menu, select M to go out to the M)aintain branch.
Look at the Functions Skeleton again to see the wide range of things that
happen on this branch. The menu that apprears is shown as Figure 10 on the
following page.
Take a moment to study the various options that appear in
this part of the program.
Version 1.5
33
Task Think Workshops, Inc.
dBCITATIONS (c), 1984
+---------------------------------~~-----------~--~-------+
d:SCITATIONS
M)aintain
:
+-------------------------~--------------------------------~--+
Dlisplay • • • Citations by number with
Edit, Delete, Recall and TXT file
EJxit • • • to Options Menu
Hlelp.
Figure 10
• on the Search process
K)eyWord directory
S)aarch • . • for Citation numbers by
key words or author's last name.
+--------------------------------------------------------------+
Choose D, E, H, K or
s.
Press K to look at the keyword directory..
If you typed in t.'1e
citations exactly as given above, this is what you should see.
00002 aaaaaaaaaaaaaaaa
00003 aaaaaaaaaaaaaaaa
WAITING
11
junk 11
bbbbbbbbbbbbbbbb cccccccccccccccc ddddddddddddddd
ffffffffffff ffff gggggggggggggggg ddddddddddddddd
On the left you have the number of the citation, then the t."1.ree key
words. and on the right the author's last name.
What happened to citation
#4 that you entered?
Reme..inber, you deleted the contents of of K1 • There
simply is no citation #4 in the database.
What about "fF1?
We'll get to
that later.
Note the."WAITING 11 message.
This puts dBCITATIONS into a
"holding pattern."
When you have many entries in your database, the
keyword directory choice will allow you
"page 11 ·through these fifteen at
a time.
Waiting allows you to study the screen until you press any key to
go on.
When ypu come to the end of t-lie entries, you just return to the
M)aintain menu. Do that now. Press any key.
to·
What if you would like a printed "hard" copy of all the citation
numbers, keywords and author's last names?
Let's do that now so you will
know how it works.
When you are at the M)aintain menu - that's where you
are now isn't it - just do the following.
Turn on your printer and make
any preparations necessary and position the paper as needed.
Hold down
the CONTROL key and also press P..
[On the IBM, hold down the CTRL key and
press Prtsc].
Then press K. Now whatever goes to the screen also goes to
the printer. If your printer installation was done properly, you'll have a
hard copy of the keyword directory.
To stop this function, hold down the
CONTROL key and press P again,
[PrtSc on the IEM].
Now turn off your
printer.
Is WAITING still on the screen? Get yourself back to the M)aintain menu.
'
j
Now back at the :M)aintain menu (See Figure 10), what else is on this
branch?
This whole section of the program is involved with searching your
database for ~ntries, then displaying them and then performing certain
operations on them - such as editing.
Type H so that we may look at the
various help screens t.~at deal with maintenance.
The first sucn screen
appears as Figure 11 on the following page.
Version 1.5
34
I
J
dBCITATIONS (c), 1984
Task Think Workshops, Inc.
'
l
+------------------------------------------------------------+
•
dBCITATIONS
Maintain
H)elp
:
;--------------------------------------------------------------:
Citations stores your entries by number. The
following features all require that you know
the number.
-
C)opying a footnote from a previous Citation
onto a new one, D)elete, D)isplay Citations,
E)dit, P)rint, R)ecall(un-delete}, and making
a TXT file for WordProcessor editing.
Figure 11
If you do not know the Citation number, you
may use the S}earch option to find it.
When
CITATIONS displays the number for you, there
will be leading zeroes. When you go to enter
the number, you may disregard these zeroes.
~-------------------------------------------------------------+
Select 1) to RETURN, or
r
1.
f
\
f
1
press 2) for more H)elp • • •
Now you know why the citation number is so important.
Check all the
functions for which you need to know that number. Don't panic though. The
numbers are.easy to find.
Remember,
they were listed when you did the
keyword directory operation.
You may also use the search function to find
them. This doesn't require that you page through the whole database. Note
what the screen says about zeros. Then type 2 to see this screen on the
details of the search function.
+-------------------------------------------------------------+
dBCITATIONS
Maintain
H)elp
+------------------------------------------------------------+
The seach feature has broad and narrow
-
capabilities.
Broad
-
you enter a tenn and CITATIONS
puts on the screen the.numbers
of all Citations that have the
· term as a Keyword or au th or •s
last name.
Narrow -
you enter a term and author's
last name - CITATIONS puts on
the screen the numbers of only
those Citations conforming to
the combination.
CITATIONS pauses with a WAITING message.
appears, just press RETURN to go on.
Figure 12
When this
+------------------------------------------------------------+
Select 1) to RETURN,
or press 2) for more
H)elp • • •
I
1
i
:
1
I
Use the broad search when you want to find out what your database
contains on a single topic or by a single author.
Use the narrow search
when you want to find a particular topic by a given author. Press 2 to get
the next help screen that appears here as Figure 13 on the following page.
It will explain how to copy a citation to a separate file that you may then
merge into your wordprocessor text.
You may place this file on any drive
that has space available and you may name it anything you want so long as
your name is within the name conventions of your operating system.
Once
you have a citation typed into your database, you don't have to retype it
when you want to insert it into some document on which you are working.
Version 1.5
35
dBCITATIONS (c), 1984
Task Think Workshops, Inc.
Just use this feature to get it out of your database and use
feature of your wordprocessor to get it into your document.
·screen a bit to grasp its significance to your own work.
the insert
study this
+-------------------------------------------------------------+
dBCITATIONS
Maintain H)elp
+-------------------------------------------------------------+
.
You may make a separate file of any Citation.
This allows you to edit it with your Wordprocessor. You may then reformat it 1 change
margins, enter special print instructions,
underline titles or use any other features of
your text editor.
Figure 13
To do thi~, simply D)isplay the Citation, and
select the T)XT option. You will be asked to
specify a name for the file and indicate the
drive on which the file is to be placed. The
original is left in your DataBase, but a copy
with the .TXT extension is created outside of
the DataBase. Enter this file and edit it as
you would any other file. Do not try to edit
files within the DataBase.
+-------------------------------------------------------------+
Press ANY key to return.
• •
I
,
Now let•s try the search feature.
Press RETURN to leave the H)elp
screen and return to the M)aintain menu (See Figure 10).
Imagine that you
have· 156 entries in your database, not just the two "junk" ones you just
made.
Let's see if you have anything on the topic "ggggg. 11 Type S to
select the search feature. Now you will see this screen.
l
i
j
;
j
Select from the following.
l""""I
B)road search • • • for Citations containing
a particular term or author's last name.
I
Figure 14
N)arrow search. • • for Citations on a given
topic by a particular author.
Enter
B or
l
:i
N:
!
I
Type B to indicate that you want a broad search.
When asked for the
term, type "GgGgGg" as your search term.
Pre.ss RETURN.
When the screen
clears you will see
00003
aaaaaaaaaaaaaaaa
ffffffffffffffff
gggggggggggggggg
dddddddddddddd
Citation #3 contains that term as a keyword.
Notice that dBCITATIONS
is not sensitive to the upper and lower case distinction.
You don't have
to enter your keywords in any particular way, and you don't have to
remember how you did it either.
dBCITATIONS will find them.
Notice too
Version 1.5
j
36
j
dBCITATIONS (c) 1 1984
f
I
Task Think Workshops, Inc.
L
that you don't have to enter the full term.
You do however, have to spell
11
it correctly as far as you go.
GgGgGx 11 would not have produced a match.
Press any key to return. to the M)aintain menu. (Figure 10).
r
Now let's try the narrow search.
Press S to get to the search option
(Figure 14) •
Now choose N for the narrow search.
Suppose you had 22
entries for author ddddddddddddddd, but you want only those entries for
topic bbbbbbbbbbbbbbbb by this author.
When asked.for the search term,
type BbBbBbbB and press RETURN.
When asked for the author's name 1 type
DdDdDDDddd and press RETURN. When the screen clears you will see
i
I
00002
aaaaaaaaaaaaaaaa
bbbbbbbbbbbbbbbb
cccccccccccccccc
dddddddddddddd
This is the one citation in your database that meets the combined
conditions. You may be very selective in your searching. Press any key to
return to the M)aintain menu. (Figure 10).
What would happen if you selected E right now?
Try it if you
know and then find you way back to the M)aintain menu.
f
1
Are you there?
When you are, select D to explore the display features. This opens up a wide range of actions you may take on your entries.
When you are asked to enter the citation number, enter number 3 and press
RETURN.
dBCITATIONS will now go to the database, retrieve the primary
screen portion of entry #3 and display it exactly as you typed in in. This
simple display feature allows you to survey any particular citation, long
after you have forgotten what is actually contained there.
It may be that
someone else actually types these in for you.
The display allows you to
view the actual entry at any time.
Something
lines.
f
r
new
has been added to the display.
Note the
bottom
two
B)ack one #, D)elete, E)dit, Forward one #,
H)elp, M)enuJ R)ecall, T)xt file, V)iew X
l
I
don't
These are not part of your citation.
They are just different actions you
can take from this display mode.
Press B.
Citation #3 was being displayedJ so what happens if you go back one number? That's right, entry #2
will be displayed •. So what happens if you press D?, Try it. You have now
marked citation #2 for deletion.
A screen will come on explaining that
this is not an irreverible action and that there are ways to "un-delete. 11
Press amy key and BCITATIONS will then take you back to the M)aintain menu.
Now let's edit what #3 has to say.
What keys would you press to put
dBCITATIONS into the editing mode for entry #3?
That's right.
You would
first display #-3 and then select E for editing.
When you make these
.actions, #3 will be on the screen and the cursor will be at keyword 1. Use
the cursor control keys (See Figure 5) to move to the Citations area and
add the following passage.
Version 1.5
37
Task Think Workshops, Inc.
dBCITATIONS (c), 1984
K1:aaaaaaaaaaaaaaaa:K2:ffffffffffffffff:K3:gggggggggggggggg:
ALN:ddddddddddddddd::eeeeeeeeeeeeeeeeeeeeeeeeeeeeeeeeeeeeee:
:eeeeeeeeeeeeeeeeeeeeeeeeeeeeeeeeeeeeeeeeeeeeeeeeeeeeeeeeee:
:eeeeeeeeeeeee,
p. 119.
Citation:
:
11
This is citation number 3.
It is primary and secondary.":
:This was added during the editing mode.
: :X:
Press RETURN and the secondary -screen portion of #3 will appear.
add this passage.
Now
+----------------------------------------------~-----------+
'
.
:"This is the secondary screen for entry #3"
:This too was added during editing.
Press RETURN to exit.
You will go back to the M)aintain menu.
you remember that dBCITATIONS places a carriage return at the end of
line and that you need to "hold down" the RETURN key if you haven't
ished on the last available line?
Did
each
fin-
Now display #2.
"What!" you say, "that's been deleted." Not really.
It has only been "marked" for deletion.
Go ahead.
Get #2 on the screen.
When it is there, press F to move forward one number to #3.
This B and F
feature allows you to page one-by-one, backward or forward through a series
of entries, displaying each as you go along. Now the #3 shows the addition
you just made during editing.
Press V to check and see if the secondary
screen has also been edited. Ah!, there it is. Press RETURN to exit back
to the menu.
Now lets look· at #2 again.
Can you get that displayed on the screen?
O.K., there it is.
Now suppose that you are tired and want to quit this
tutorial for a while.
Look at the Functions Skeleton.
Do you see where
you are right now?
Do you see what you would have to do to get out of the
program?
*******Don't just turn off the computer.*******
You must close your database properly or else you will have trouble
accessing some of your entries.
Well, here's how you do it. Choose M to
get back to the M)aintain menu.
From there, choose E to get back to the
O)ptions menu.
From there you choose Q to QUIT to CP/M or DOS.
Go ahead
and do it even if you don't want to stop the tutorial right now.
We'll
come right back. After you have chosen Q the following screen appears.
Version 1.5
38
-
Task Think Workshops, Inc.
dBCITATIONS (c), 1984
I
1
+----.;._--------------------------------------------------------+
dBCITATIONS
P) acking
+--------------------------------------------------------------+
-
Do you want to remove ~om the DataBase
Citations that are marked for deletion?
(((
(((
·:
If so, type the word
PACK
followed by a carriage return
If not, just press RETURN to
with the Quitting process.
********
BE CAREFUL
)))
)))
continue
Figure 15
********
You CANNOT
recall any Citations once
they have been PACKed.
+--------------------------------------------------------------+
If you are uncertain about PACKing your
Citations, just press RETURN • • •
r \
f
1
r
\
f
\
-
For right now, let's not actually PACK citation #2. (Remember, that's
the one marked for deletion).
Just press RETURN.
dBCITATIONS will shut
itself down and you will be back to the system prompt A> •
Always leave
the program with the Q option.
You may now actually stop the tutorial or
go on.
**************************
O.K., let's resume.
How do you get the program started again?
Remember, at the system prompt A>
you have to get the message to the
program DO CT or DO CIT.
Which message- and how this is done depends upon
which version and how you installed the program.
You can of course, type
this in.
Figure out how to do it and get yourself to the Options menu.
(See Figure 1) So far, we have examined the A)dd, H)elp, M)aintain and
Q)uit features.
Let's try some others.
Press c.
This sends you out of
the program and into dBASE II.
The dBASE II 11 dot 11 prompt will be on the
screen.
This is a powerful and dangerous feature of the program. You can
do all sorts of beneficial and/or evil things to your database with the
dBASE II commands available to you from that dot prompt. We considered not
having this feature in the program at all due to its potential for destruction.
But we knew that experienced dBASE II users would want it.
If
that's not you, don't ever choose this option.
Well, here you. You've done it. Now what? Here's how to get back on
track if you should accidentally wind up at the dot prompt.
Just type DO
CT or DO CIT (whichever you installed).
Go ahead.
Do it. Alright, back
at the options menu, all is well. Whew!! That was a close one. You could
have typed QUIT and that would have safely gotten you out of trouble. If
you don't know what you are doing in the world of dBASE II, then avoid that
c choice.
If you should ever get there by mistake, at least you know a
couple of ways to get out of trouble.
Either QUIT or go back into the
program.
Now·select the D option.
Watch carefully as the data doesn't stay on
the screen very long.
Why would you want to diagnose the space available
on drive B? Well, the most important reason is to make sure you have space
Version 1.5
39
dBCITATIONS (c), 1984
Task Think Workshops, Inc.
for the TXT files the program builds.
When your database becomes large,
this may be a problem.
Remember the help screen on TXT files? If not, go
back to Figure 13 and refresh yourself on what these are.
They could, of
course, go on any available drive and your operating system gives you other
ways to check the space available.
But once you are inside dBCITATIONS,
this is at least one way to check for available space.
[Note to users of DOS 2.0.
If you have used the ASSIGN feature to
send references to drive B: to some other drive, then it is that drive that
will be di~gnosed].
Now let's check the print feature.
This is an easy way to make a
"hard" copy of your entries.
You don't even have to copy them out of the
database or make TXT files of them. You are at the Options menu arn't you?
Press P to get to the P)rinting menu.
+---------------------------------------------------------------+
•
dBCITATIONS
P)rinting
:
~---------------------------------------------------------------~
N)o margin indent printing.
P)rint Citations with left margin
indented 12 spaces.
R)eturn to the Options Menu.
Figure 16
S)earch and display Citations, if you
do not know the nwnber(s) of the
Citation(s) you want to print.
*****
*****
If you choose N or P 1 make certain that
your printer is on and ready to run.
*****
*****
+--------------------------------------------7------------------+
Select N, P 1 R or S • • •
Think a moment about how your printer works. The N and P options mean
exactly what they say.
Choose the one that best.suits your equipment.
Also realize that you will need to know the number of the citation you are
going to print.
That 1 s easy now since you only have three.
Usually you
will know the number, but if you should ever get to this point and then
wonder "what number?" you can take the s option and find it.
Turn your
printer on and prepare it as necessary.
Then choose N or P.
When asked
for the number, choose #1 and press RETURN.
Now you are going to learn
what #1 is all about.
Suppose- that you have 57 entries in your database,
but when asked for the number you typed in 75.
There isn't any 75, so
dBCITATIONS gives you this error message on the screen instead.
In the
process of learning about #1 you've also learned how the print function
works, so find your way back to the Options menu.
Up to now you have been through the A)dd, C)ancel, D)iagnose, H)elp,
P)rint and Q)uit functions.
Take a moment and go back to the Functions
Skeleton. Examine the arrows to see all of the program parts you have been
through.
Is the design of the program beginning to make sense to you?
Those arrows suggest all the ways you can go in, out and around the entire
program. You have just about done it all at this point.
There
Version 1.5
is
a little bit more of the maintain function that we need
40
to
dBCITATIONS (c), 1984
Task Think Workshops, Inc.
examine. From the Options menu, select M to go back to the M)aintain menu.
Select K to look at the keyword directory,again.
Notice the asterisk by
citation #2.
That signal indicates #2 as marked for deletion.
Press any
key to get back to the menu.
Now display #2.
You do know how to do it,
don't you?
When #2 appears check the options at the bottom of the screen
and press R to R)ecall (i.e., un-delete) this entry.
Now from the menu,
select the keyword directory again and notice the asterisk is gone from #2.
It is no longer marked for deletion.
If at any time you decide you don't
really want to delete something, that is how you reverse yourself.
L
Now test yourself. What would you need to do to mark #3 for deletion?
Go ahead and do it, then check the directory again to make sure that the
asterisk is now on #3.
i......
Pressing any key will get you back to the M)aintain menu. From there,
let's check out what remains of the options from the display feature.
Check yourself. What would you do to display #2? Go ahead and do it. Get
#2 on the screen.
We have now tested all of the options shown at the
bottom of the screen except H)elp and T)xt file.
The H choice would just
produce the help screens that we have already examined by a different
route. Let's concentrate on the T)xt file process.
('
I
.j
Start by going back and examining Figure 13.
That's the help screen
for the TXT file process.
Since you already have #2 displayed, all you
need do is tap "T. 11 A new screen will appear that asks you to specify the
drive ·and filename for this file.
You will have to insert that colon
between the letter of the drive and.the filename.
Your filename will also
have to be legal for your particular operating system.
When asked to
insert the drive and filename, place the TXT file on drive B and make up
some name such as
B:CITATWO
then press RETURN.
The screen will say that a TXT file is being made and
when finished will return you back to the M)aintain menu. That•s all there
is to it.
You've been through all the functions of the program now, so let's get
rid of those 11 junk 11 files.
You have #3 marked for deletion already
right? How could you find out?
That's right - an asterisk by #3 when you
display the keyword directory.
O.K., so mark #2 for deletion too. Check
your directory if you want to make sure they both carry an asterisk.
Now
get yourself back to the O)ptions menu and select Q to quit.
This time
when the PACK option appears (see Figure 15), do type PACK.
Your typing
won't show on the screen anyplace, so do it carefully and then press
RETURN. If you didn't make any typing mistakes, a message will come on the
-screen telling you what is happening •. Just wait. dBCITATIONS will do some
internal house keeping and then shut itself down, taking you back to the
system prompt. Now type
DIR B:
and press RETURN.
In addition to the files you place on diskette B during
installation, there will ·now be a file with the TXT extension.
It's a
standard ASCII version of citation #2 - the one you just made with the "T 11
choice under maintain above.
You may enter this file directly with your
word processor or use PIP [COPY with DOS] to move it to some other
Version 1.5
41
dBCITATIONS (c), 1984
Task Think Workshops, Inc.
diskette. Do not try ~o enter you database directly with your wordprocess.
That produces great evil. Use this TXT file process to copy entries out of
the database. It only takes a moment. When you tire of checking you file,
erase it from diskette B.
There are two little things you need to be concerned about on this TXT
file process.
If you have several of these to do, give them all unique
names. Otherwise, one or more of them will be overwritten. Also remember
that dBASE II puts a carriage return· at the end of each line.
If you are
going
to change margins,
these will have to be removed by your
wordprocessor.
That's it. You've been all the way around the program. Next time you
start up the program you'll be entering your own materials - for real.
Enjoy.
Version 1.5
'
J
'
J
'
J
42