1
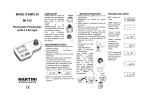
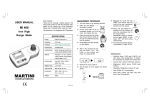
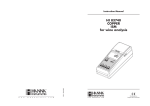
USER MANUAL
MI 412
Phosphate Low
Range Meter
Dear Customer,
Thank you for choosing a Martini product.
This manual will provide you with the
necessary information for the correct use of
the instrument.
Please read it carefully before using the
meter. This instrument is in compliance with
directives.
SPECIFICATIONS:
Range
0.00 to 2.50 mg/L PO4
Resolution 0.01 mg/L
Precision ±0.04 mg/L @ 1.00 mg/L
Light Source Tungsten lamp
Light Detector Silicon Photocell and
610 nm narrow band interference filter
Method Adaptation of ascorbic acid
method.
Environment 0 to 50°C (32 to 122°F);
100% RH max.
Battery Type 1 x 9 volt
Auto-Shut off After 10' of non-use
Dimensions 192 x 104 x 52 mm
(7.5 x 4.1 x 2”)
Weight
380 g
MEASUREMENT PROCEDURE:
1• Turn the meter on by pressing
ON/OFF.
2• When the LCD displays “- - -”, the
meter is ready.
3• Fill the cuvet with 10
mL of sample, up to the
mark, and replace the
cap.
4• Place the cuvet into the
holder and ensure that
the notch on the cap is
positioned securely into
the groove.
5• Press ZERO and “SIP”
will blink on the display.
6• After a few seconds the
display will show “-0.0”. The meter is now
zeroed and ready for
measurement.
9• Replace the cap and swirl gently
untill the powder is
completely
dissolved. Reinsert
the cuvet into the
holder and ensure
that the notch on
the
cap
is
positioned securely
into the groove.
10• Press and hold
READ
for
3
seconds and the
display will show
the
countdown
prior
to
the
measurement.
Alternatively, wait
for 3 minutes and
just press READ.
In both cases “SIP” will blink during
measurement.
11• The instrument directly displays
concentration in mg/L of phosphate.
Interferences
7• Remove the cuvet. Open it.
8• Add the content of one packet of
MI512-0 reagent.
•
•
•
•
•
Iron above 50 mg/L
Silica above 50 mg/L
Silicate above 10 mg/L
Copper above 10 mg/L
Hydrogen sulfide, arsenate, turbid
sample and highly buffered samples
also interfere.
GUIDE TO DISPLAY CODES:
ERROR MESSAGES
This prompt appears for 1 second each
time the instrument is turned on.
On zero reading
The dashes “- - -”
indicates
that
the
meter is in a ready
state and zeroing can
be performed.
Sampling In Progress.
Flashing “SIP” prompt
appears each time the
meter is performing a
measurement.
“-0.0-”, the meter is in
a zeroed state and
measurement can be
performed.
The blinking "BAT"
indicates
that
the
battery
voltage is
getting low and the
battery needs to be
replaced.
“-bA-”, the battery is
dead and must be
replaced. Once this
indication is displayed,
the meter will lock up.
Change the battery
and restart the meter.
“Conf”, the meter has
lost its configuration. Contact your
dealer or the nearest Martini Customer
Service Center.
• Blinking “-0.0-” indicates that the
zeroing procedure failed due to a low
signalto-noise ratio.
In this case
press ZERO again.
• “no L”, the
instrument can not
adjust the light
level. Please check
that the sample
does not contain
any debris.
• “L Lo”, there is
not enough light to
perform
a
measurement.
Please check the
preparation of the
zero cuvet.
• “L Hi”, there is too
much
light
to
perform
a
measurement.
Please check the preparation of the zero
cuvet.
On sample reading
• “-SA-”, there is too
much light for the
sample
measurement.
Please check if the
right sample cuvet is
inserted.
• “Inv”, the sample
and the zero cuvet
are inverted.
• “ZErO”, a zero
reading was not
taken. Follow the instruction in the
measurement procedure for zeroing the
meter.
• Under range. A blinking “0.00”
indicates that the sample absorbs less
light than the zero
reference.
Check the procedure
and make sure you
use the same cuvet
for reference (zero)
and measurement.
• A flashing value of
the
maximum
concentration
indicates an over
range condition.
The concentration of
the sample is beyond the programmed
range: dilute the sample and re-run the
test.
ACCESSORIES:
MI512-100 Phosphate
low
range
reagent (100 tests)
MI0001
Glass cuvets (2 pcs)
MI0002
Caps for cuvets (2 pcs)
MI0003
Stoppers for cuvets (2 pcs)
MI0004
Tissue for wipping cuvets
(4 pcs)
MI0005
9V battery (1 pc)
BATTERY REPLACEMENT
Battery replacement must only take
place in a non-hazardous environment.
Simply rotate the battery cover on the
back of the meter.
Detach
the
battery from
the terminals
and attach a
fresh
9V
battery while
paying
attention
to
the
correct
polarity.
Insert the battery and replace the cover.
WARRANTY
This instrument is warranted against defects
in materials and manufacturing for a period of
two years from the date of purchase.
If during this period the repair or replacement
of parts is required, where the damage is not
due to negligence or erroneous operation by
the user, please
return the meter to either distributor or our
office in the original packing and the repair
will be free of charge.
Damages due to accidents, misuse,
tampering or lack of prescribed maintenance
are not covered.