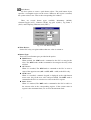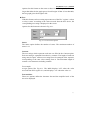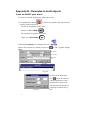
1
1. INTRODUCTIONS .......................................................................................................... 3
CLASSES OF OBJECTS ....................................................................................................... 4
GENERAL PAGE, OVERLAP PAGE, AND COMMON PAGE .................................................. 4
LIMITATION OF NO. OF OBJECTS ....................................................................................... 6
DYNAMIC DATA MANAGEMENT .......................................................................................... 7
DESIGN SCREEN BY TOOL BOX ......................................................................................... 7
2. FILE MANAGEMENT ..................................................................................................... 8
NEW [CTRL+N] ......................................................................................................... 8
OPEN [CTRL+O]........................................................................................................ 9
SAVE [CTRL+S] ......................................................................................................... 9
SAVE AS ........................................................................................................................... 10
PRINT OPTIONS ................................................................................................................ 10
PRINT ........................................................................................................................ 11
PRINT PREVIEW ............................................................................................................... 11
PRINT SETUP .................................................................................................................... 11
EXIT .................................................................................................................................. 11
3. OBJECT DESIGN ......................................................................................................... 12
OBJECT MENU .................................................................................................................. 12
TOOLBOX .......................................................................................................................... 12
SELECT OBJECT ....................................................................................................... 13
LINE .......................................................................................................................... 14
RECTANGLE .............................................................................................................. 14
CIRCLE...................................................................................................................... 15
TEXT ......................................................................................................................... 15
GRAPHICS ................................................................................................................ 17
DATE
(FOR MMI1010 ONLY)........................................................................ 19
TIME (FOR MMI1010 ONLY) .................................................................................... 19
LAMP (FOR MMI1010 ONLY) ................................................................................... 20
DATA ......................................................................................................................... 22
ANIMATION................................................................................................................ 24
SCREEN BUTTON...................................................................................................... 28
FILE BUTTON (FOR MMI1010 ONLY)....................................................................... 30
HARDCOPY BUTTON
(FOR MMI1010 ONLY) ............................................... 31
PLC CONTROL ......................................................................................................... 32
MESSAGE ................................................................................................................. 39
4. EDIT ................................................................................................................................ 41
FORMAT .................................................................................................................... 41
TEMPORARY FILE (FOR MMI1010 ONLY) ................................................................ 48
5. TOOL...............................................................................................................................49
OVERLAP ...................................................................................................................49
COPY .........................................................................................................................50
CUT ...........................................................................................................................51
DIRECTORIES ....................................................................................................................52
6. VIEW ................................................................................................................................53
100% AND 75%................................................................................................................53
TOOL BAR .........................................................................................................................53
STATUS BAR .....................................................................................................................54
TOOL BOX .........................................................................................................................54
GRAPHIC FILES .................................................................................................................54
ALIGN GRID .......................................................................................................................56
GRID ..................................................................................................................................56
OBJECT CONTENTS ..........................................................................................................56
SELECT PAGE NO.............................................................................................................57
7. PLC DEVICE ADDRESS NAMING STYLE ...............................................................58
8. DOWNLOAD ..................................................................................................................61
APPENDIX A : INSTALLATION OF THE EASYBUILDER SOFTWARE ................63
APPENDIX B : EXAMPLES TO BUILD OBJECTS......................................................64
CREATE AN ON/OFF PUSH BUTTON ................................................................................64
CREATE A NUMERIC DATA DISPLAY ..................................................................................66
APPENDIX C: DIFFERENCE BETWEEN......................................................................68
MMI700,MMI1000 AND MMI1010 ...................................................................................68
2
EasyBuilder User’s Manual
1. Introductions
The EasyBuilder is graphic editor software to configure the MMI PLC
Operator Panel. The EasyBuilder Screen Editor Software takes advantage of
the Microsoft's Windows graphical interface, and object oriented scheme. It
offers fast and intuitive configuration, simplifies application design and reduces
development costs. It makes configuration a snap, no programming. You can
draw the graphics using familiar graphics drawing tools such as Designer,
CorelDraw, AutoCAD, etc., then save the graphics in BMP format, or cut the
graphics and use PAINTBRUSH to convert it to BMP format. In the
EasyBuilder you can import any graphics in BMP format to customize your
application.
Fig.1-1 EasyBuilder Screen Editor
Each project can accommodate 256 pages at maximum. Each page is
constructed with several different objects as shown in Fig. 1-2.
Fig. 1-2: Screen Objects
3
Classes of Objects
In general, objects can be classified into five classes: static display objects,
real time clock objects, dynamic display objects, touch control objects, and
PLC objects.
• Static Display Objects:
Objects in this class consist of background graphics and text. The static display
objects include line, circle, rectangle, text and bit-map graphic objects.
• Real Time Clock Object:
Objects in this class display the MMI1010's internal clock data. The real time
clock objects include time and date objects.
• Dynamic Display Object:
Objects in this class display PLC relay or register data periodically. The
dynamic display objects include data, animation, and lamp objects.
• Touch Control Object:
Objects in this class define a rectangular region on the screen. The rectangular
region, when touched, activates a specific operation such as write data (to the
PLC's registers), switch screen, hardcopy, and file transfer. The touch control
objects include push button, screen button, hardcopy button and file button
objects.
• PLC Object:
Objects in this class define a PLC control device. The PLC control device, when
triggered, activates a specific operation such as switch screen, hardcopy, file
transfer and back light control. The PLC objects include PLC control and
message objects.
General Page, Overlap Page, and Common Page
Pages are numbered from 0 to 255. They also can be classified into three
classes: the general page, the overlap page, and the common page. Page 0 is
always used as the common page. PLC control objects and message objects
have to be defined in the common page with the exception for special
considerations. Page 0 is vested with a special characteristic. Any objects
defined on page 0 are always effective regardless of the active screen or
switches to another page. For example: A PLC control object to switch active
screens is defined in the page 0, the control device is M10 relay. No matter
what page is displayed on the screen, the screen switches to the page designated
by the PLC control object when the M10 relay turns ON.
4
EasyBuilder User’s Manual
general page
(page 1-255)
overlap page
(page 1-255)
common page
(page 0)
Fig. 1-3: the general page, overlap page and common page
When a general page (page 1-255) is called up, the MMI displays all the
objects defined in the page. It also displays all the objects defined in its overlap
page if overlap option is set for the page. All touch control objects (such as
push button, screen button, hardcopy button and file transport button) defined
in the overlap page are also effective. Besides, if there are any display objects
in the page 0, they will also be displayed on the screen, and all touch control
objects defined in the page 0 are effective too.
Each page is allowed one overlap page. An overlap page is usually
configured for common use of background graphics, tables, titles, and live data.
Any page can be set as the overlap page of another page except page 0.
PLC control objects are active in three situations. The first situation is that
it is defined in the current page, the second is that it is defined in the overlap
page, the third is that it is defined in the common page (0). The third one is the
most common usage.
When you need the same PLC control operation in several different pages,
you can use the first way to define these PLC objects in each page. In another
way, you can define these duplicate objects in an general page then use the
Overlap option to set this page as the overlap page for those that need the same
PLC control operations. If you need the same PLC control actions in every
page, you just have to put these PLC control objects in the common page.
By defining objects in an overlap page or in the common page, you save time
and memory over duplicating objects in each individual page.
5
The EasyBuilder screen displays all the current page objects and its
overlap page concurrently. To distinguish objects in the overlap page from
those in the current page, the EasyBuilder displays the overlap objects in gray.
Overlap objects cannot be moved, deleted, modified, and copied in the current
page. After the screen data has been loaded into the MMI, general page and
overlap page objects appear the same.
graphics in gray color represents
it is set in the overlap page
graphics in black color represents
it is set in the current page
Fig. 1-4 difference between objects in overlap page and in current page
Limitation of No. of Objects
The EasyBuilder does not limit the amount of static display objects in a
page. However, it limits the total amount of dynamic objects (including
dynamic display objects, touch control objects, and PLC objects) on the screen
as 256 at maximum. It also limits access to a maximum of 64 PLC data blocks.
Each data block is limited to 30 continuous registers. The above limitation
includes objects belonging to the general page, the overlap page, and the
common page. For example: there are 30 data objects defined in the overlap
page and 10 data objects defined in the common page. Then the maximum
number of dynamic objects that can be defined in the current page is 216. If you
exceed the above limitation on the page, the MMI displays the message "The
number of dynamic objects exceeds 256" or "The number of PLC data blocks
exceed 64" when it switches to the page.
6
EasyBuilder User’s Manual
Dynamic Data Management
The MMI uses dynamic data access approach to manage PLC data. You
can put a lot of data objects that access PLC relays or registers on 255 pages,
But the MMI can only access PLC data related to the current page. The system
automatically compiles a variable scan list for each display page optimized for
PLC communication.
By the dynamic data management approach, The MMI collects all
continuous PLC registers to be accessed in a command automatically. This
improves the communication efficiency and accelerates screen update speed.
Therefore, we recommend you to keep the continuity of PLC data in each
page. For an example: if registers D0, D1, D2, D4, D5 (not continuous) are
accessed in a page, it's better to rearrange them to access D0, D1, D2, D3, D4
(continuous) instead.
Design Screen by Tool Box
Configuration of the MMI is easy. To setup objects, select an icon from the
toolbox, click on the desired screen position and drag the boundary to size, a
dialog box will appear. Fill in the blanks to complete the setup. It's a clean,
simple and consistent process.
After completing screen editing, connect the MMI to COM1 or COM2 of
your PC, run the loader program, it will transfer your screen data to flash
memory of the MMI directly.
time display
13:15:20
date display
06/01/96
PLC data
display
EasyView 300 text display
bitmap graphics
1257
screen
button
blinking
GOTO PANEL
MAIN
MENU
data button
hard copy
animation graphics
file transfer
Fig.1-5 EasyBuilder Toolbox
7
2. File Management
The EasyBuilder provides some simple file operations in the File menu. Some
options frequently used in File menu have functional icons in the tool bar to
provide fast way call up.
File menu
The File menu includes all operations
pertaining to the creation, loading, saving and
printing of project files. The menu includes
the following options:
• New: Creates a new working project.
• Open: Opens an existing project as the
working project.
• Save: Saves the working project with its
original name.
• Save As: Saves the working project with a
new name.
Fig. 2-1: File menu
• Print Options: Selects data type to be
printed.
• Print: Prints out the selected data
• Print Preview: Displays the draft on the screen before printing
• Print Setup: Configures the printer
• Exit: Exits the EasyBuilder
New [Ctrl+N]
This option enables you to create a new project. You are requested to
assign a name to the project. Each project consists of five files. All these files
use the same name with different extension names. The extension names
are .prj, .tbl, .txt, .fon, and .fle. The file with extension name .prj is the
dominating file. If the name you assigned is as same as an existing project, the
EasyBuilder gives you a warning message and asks you about whether you
want to replace it or not.
8
EasyBuilder User’s Manual
Open [Ctrl+O]
Use this option to open an existing project as the working project. The .prj, .tbl
and related .bmp files must exist in the directory; otherwise it will fail to open
the project file.
Save [Ctrl+S]
This option saves the working project with its original project name and
compiles the screen data to generate the download files. It translates the
original data into another format accepted by the MMI.
.prj
.tbl
compile raw
data to generate
the download file
.txt
.fon
.fle
.tbl
After finishing the "SAVE" operation, it displays a "Memory Utilization"
window to report MMI memory usage information. It is depicted as Fig.2-2.
The memory utilization is divided into four categories. Under each category,
the maximum capacity, No. used, and free percentages are listed.
Fig. 2-2: Memory Utilization
• Objects
The maximum number of objects is 5368. The EasyBuilder will not add a
new object when there are no free objects.
• Pointers
Every text, graphic or message object needs a pointer. There are 1792
pointers in total. After all these pointers are allocated, The EasyBuilder will
not accept more text, graphic or message objects.
9
• Strings
The maximum text strings memory space is 52K bytes. When this space is
not enough to store all the text strings, EasyBuilder displays a warning
message after the "SAVE" operation.
• Graphics
There are 416K bytes to store the bit-mapped pattern font/graphic data. When
the space is not enough. the EasyBuilder displays a warning message on the
screen after the "SAVE" operation.
Save As
Use this option to save the working project as a new project name. If you
want to save the modified screen data without losing original data, you can use
this option to save the modified data as a new project. As same as the Save
option, the EasyBuilder creates a "Memory Utilization" window to display the
memory usage information after finishing the "SAVE AS" operations.
Print Options
This option allows you to select data to be processed by the Print or Print
Preview options. A simple print option menu is popped up when you choose
this option. There are four data types that you can select. It is shown in Figure
2-3.
Fig. 2-3 Print Options
Hardcopy
Select the current screen image contents.
Strings
Select all text strings used in text or message objects.
Graphic Files
Select all graphic files name used in graphic or graphic display format.
Formats
Select the format summary
10
EasyBuilder User’s Manual
Print
This option prints out data selected by Print Options.
Print Preview
The option enables you to preview a printing draft of the selected data type
without printing it out.
Print Setup
Under this option you can setup the printer driver suitable to your printer,
change paper size and rotate paper orientation.
Exit
Exits the EasyBuilder.
11
3. Object Design
Object menu
The Object menu is to create display and touch
control objects. The menu is depicted in Fig.3-1.
It includes the following options:
• Select Object: select an existing object
• Line: draw a line
• Rectangle: draw a rectangle
• Circle: draw a circle
• Text: input a text string
• Graphics: import a bit map graphics
• Date: display date
• Time: display time
• Lamp: mark a blinking area.
• Data: display current value of a specific PLC
register or relay.
Fig 3-1:
• Animation: create a graphics moving on the
Object Menu
screen.
• Push Button: set a touch cell, when activated,
writes data into PLC register or relay.
• Screen Button: set a touch cell, when activated, switches the screen to
display another page.
• File Button: set a touch cell, when activated, transfers the file between the
PLC and MMI.
• Hardcopy: set a touch cell, when activated, prints out the screen image.
Toolbox
select
object
line
rectangle
circle
text
graphics
date
time
data
animation
lamp
push
button
screen file
hardcopy
button button button
Fig. 3-2: Toolbox
12
The EasyBuilder provides a
fast way to select options in
Object menu. There is an
icon in the Toolbox for each
option as shown in Fig.3-2.
You can enable or disable
the toolbox by selecting the
Toolbox option in View
menu.
EasyBuilder User’s Manual
Select Object
The procedure to select an object on the screen is described as follows:
1) Click left on the Select Object icon
, then move the cursor to the object
that you want to select and click left again
2) Four (or two) small boxes appear in each rectangular corner of the selected
object, the status line shows the selected object type.
Fig.3-3: Select Object
3) You can then use the “Copy”, “Paste” and “Delete” options in the Edit menu
to copy or delete objects, or just drag the mouse to move the objects, or click
in the tool bar to call up the dialog box of the object.
If there are several objects at the pointed position, the EasyBuilder arranges
these objects in order and selects the first one automatically. Objects of different
types are sequenced in the following order:
line, rectangle, circle, text, graphics, date, time, lamp, data, animation,
push button, screen button, file button, hardcopy.
If there are several objects of the same type, they are arranged in the sequence
of first add first select. Clicking the mouse enables you to switch the current
selection to next object in the sorting sequence. By this way, you can select any
overlapped object easily.
You can also select multiple objects simultaneously, press the left mouse button
and drag a dashed rectangular box to cover all the target objects, release the left
mouse button. Four (or two) small painted boxes appear in each rectangular
corner of the selected objects. Drag the mouse to move the objects.
13
Line
Use this option to draw a line. Each line represents one Line object.
To draw a line on the screen, perform the following steps:
1) Choose the Line option in the Object menu or click left on the Line icon in
the toolbox.
2) Move the cursor to the start position of the line you want to draw.
3) Drag the cursor to the end position of the line.
4) Release the left mouse button, the line object is built up.
You can then select the line object and delete, duplicate or move it.
Fig.3-4 Drawing Lines, Rectangles and Circles
Rectangle
Use this option to draw a rectangle. Each rectangle represents one rectangle
object. To draw a rectangle on the screen, perform the following steps:
1) Choose the Rectangle option in the Object menu or click left on the
Rectangle icon in the toolbox.
2) Move the cursor to an arbitrary corner of the rectangle where you want to
draw.
3) Drag the cursor to the diagonal corner of this rectangle.
4) Release the left mouse button, the rectangle object is built up.
You can then select the rectangle object and delete, duplicate or move it.
14
EasyBuilder User’s Manual
Circle
Use this option to draw a circle. Each circle represents one circle object. To
draw a circle on the screen, perform the following steps:
1) Choose the Circle option in the Object menu or click left on the Circle
icon in the toolbox.
2) Move the cursor to an arbitrary corner of the square rectangle which is
tangent to the circle you want to draw.
3) Drag the cursor to the diagonal corner of this circle.
4) Release the left mouse button, the circle object is built up.
You can then select the circle object and delete, duplicate or move it.
Text
Use the option to create a text string. Each text string represents one text object.
The EasyBuilder supports both 15*8 fonts and 24*16 fonts, both fonts can be
amplified 2 multiples to 4 multiples. Each text object displays one line of text or
a text file.
To create a text
object on the
screen,
follow
these steps:
1) Choose
the
Text option in
the Object menu
or click on the
Text icon in the
toolbox.
Move
Fig.3-5: Text Object Dialog
the cursor to the
upper-left corner of the location where the text string is to appear and click left,
the text dialog as shown in Fig.3-5 is popped up.
2) Put the cursor bar at Text box, click left and input the text string that you
want to display.
3) Select font, size and other options for this text object.
4) Click on the OK button to create it or click on the Cancel button to cancel
this operation without creating any object.
5) The text string appears at the cursor position.
15
• Text:
All characters in the option will be displayed on the screen.
• Font:
There are two types of fonts (15*8 or 24*16) can be selected.
• Size:
You can choose to enlarge texts in multiples of 1, 2, 3, or 4.
• Reverse:
If you mark this option, texts are displayed in reverse color like
.
• Text File:
EasyBuilder is able to import a complete text file into the screen. Use this
option to import a text file to the EasyBuilder. Mark the “text file” option
and fill in text file name or use “browse” button to select the right text file,
the whole text file will display at the cursor position.
Fig. 3-6 Import a Text File
The text length cannot be over than the maximum MMI screen width (640
pixels for MMI1010 and 320 pixels for MMI700). Therefore, the font option
and size option that you select decide the maximum number of characters in a
line.
For example: Considering the MMI1010, with 15*8 font and 1 multiple size,
each line can accommodate 80 characters, with 24*16 font and 1 multiple size,
each line can accommodate 40 characters at maximum.
Options of a text object can be modified by selecting it and clicking
tool bar.
16
in the
EasyBuilder User’s Manual
Graphics
Use this option to import bit map graphics from a graphic package. The
EasyBuilder can display graphic files in BMP or PUT format. The size of each
image file must be less than 640*400 pixels (32k bytes). Otherwise, The
EasyBuilder will reject it. The bit map graphic files must also be in
monochrome or 16-color mode.
You can use "paintbrush" software supported by Windows to create a BMP
graphic file. The simplified steps to create a BMP file by paintbrush are
described as following:
1) Execute the paintbrush software and draw the graphics.
at the tool bar.
2) Click on the select icon
3) Move the cursor to the left top corner of the graphics. Drag the cursor to
cover the whole graphics. A dashed line box appears around the graphics.
4) Select the Copy to option in the Edit menu.
5) Fill in graphic file name, select the file format as single color or 16 color.
7) Click on the OK button to save the graphics to the file.
The details of how to use paintbrush are not illustrated here. You can use the
paintbrush on-line help or refer to other documents about paintbrush.
Use the following steps to create a graphic object on the screen:
1) Choose the Graphic option in the Object menu or click on the Graphic
icon in the toolbox, move the cursor to the upper-left corner of the graphics,
click left. A dialog box as Fig. 3-7 is popped up.
Fig. 3-7: the Graphic Object Dialog
17
2) Select the graphics filename that you want to display. The graphic that is
shown in preview window helps you identify the right one.
3) Click on the OK button to create it or click on the Cancel button to cancel
this operation without creating any object.
4) The graphic object appears at the cursor position.
The Library and Use Default options in the dialog provide another way to
choose a graphic file.
• Library option:
This option enables you to gather commonly used graphics in a library. Those
graphic files must be put under the working EasyBuilder directory (i.e.\MMI).
Whenever you click on the Library icon, a Graphic Library dialog as shown in
Figure 3-8 is popped up. The left side of the window shows the list of graphics
in the library. The Preview area at the right side displays the graphics that you
select as a default.
Fig.3-8: the Graphic Library Dialog
By using the Append, Delete, and Modify buttons in the Graphic Library
dialog, you can easily add a graphic file into the library, delete any one from it,
or modify any one in the list. You can write a comment up to 16 characters
corresponding to each file to make a simple description. The Append and
Modify option dialog is depicted in Fig.3-9.
Fig.3-9: Library Element Dialog
18
EasyBuilder User’s Manual
• Use Default:
This option displays the selected default graphics directly. The default graphics
is selected in the Graphic Library dialog.
Options of a graphic object can be modified again by selecting it and clicking
in the tool bar.
Date (for MMI1010 only)
The option creates a date object that displays current date of the MMI real time
clock (95/06/12). The date is displayed in 24*16 fonts.
Follow the following steps to create it:
1) Choose the Date option in Objects menu or click on the Date icon in the
toolbox.
2) Move the cursor to the desired screen location and click left again, a date
symbol appears and a date object is created.
Time (for MMI1010 only)
The option creates a time object that displays current time of the MMI real time
clock (23:10:10). The time is displayed in 24*16 fonts.
Follow the following steps to create it:
1) Choose the Time option in Objects menu or click on the Time icon in the
toolbox.
2) Move the cursor to the right position, click left again, a time symbol appears
and a time object is created.
19
Lamp (for MMI1010 only)
Use this option to create a lamp object that designates a blinking region on the
screen. All static objects (including line, rectangle, circle, text, and bit-mapped
graphic objects) in the region blink when the corresponding PLC control device
(a relay) turns ON (value = 1). Blink characteristics cause the object(s) to
appear for half second and disappear for another half second.
a lamp object define the rectangle region
control device = M20
L
define
object
graphic object
MOTOR
when M20=0
L
text object
when M20=1
L
L
online
operation
MOTOR
MOTOR
1/2 sec
1/2 sec
It is noted that if there is any data object in the blinking region, the display
device of the data object must be the same as the control device of the lamp
object. Otherwise, the data object in the blinking region may be blinking
irregularly
.
lamp object define a rectangle
region, control device= M10
data object, no. of state= 2,
display device= M10
when M10=0
define
object
when M10=1
online
operation
1/2 sec
20
1/2 sec
EasyBuilder User’s Manual
Follow the following steps to create a lamp object:
1) Choose the Lamp option in Object menu or click on the Lamp icon in the
toolbox.
2) Move the cursor to any corner of the rectangular region you want to set the
lamp object.
3) Drag a dashed line to create the rectangular region.
4) Release the left mouse button. The Lamp Object Dialog is popped up as
shown in Fig.3-10.
Fig. 3-10: Lamp Object Dialog
5) Assign a PLC relay as the control device.
The address assignments are different for different PLC types. Please refer to
the chapter The Types of PLC.
6) Click on the OK button. A lamp object is created and is displayed as a dash
rectangle on the screen, as depicted in Fig.3-11.
Fig. 3-11: Lamp Object
After a lamp object is created, it can be moved, deleted, duplicated or modified.
The modification allows changes to the control device not changes to the
blinking region. If you want to change the blinking region, you have to delete
the lamp object and to create it again.
21
Data
Use this option to create a data object that displays the current value of a PLC
relay or register. Data is displayed according to the format assigned to the data
object. The display formats include numeric, ASCII, filename, vertical bar
graph, horizontal bar graph, texts and graphics.
The speed of data refresh on the screen depends on the following:
• The amount of PLC data on the current screen.
• The continuity of the PLC data on the current screen.
• The PLC response time
• The display format assigned to these data object
The MMI uses dynamic data access approach to manage data. You can
access any PLC relay or data register, only PLC data defined on the current
screen will be accessed at the same time. It is better to use continuous blocks of
PLC data in each page. For example, the data on the screen includes M8, M9,
M10, M15, D20, D21, and D22. It would be better to use D23...D30
(continuous). The system automatically compiles a variable scan list for each
display page optimized for PLC communication. You don't have to worry about
how to manage data. The continuity of PLC data on the same page would
optimize the communication efficiency and speed up the data update.
To create a data object, follow the following steps:
1) Choose the Data option in Object menu or click on the Data icon in the
toolbox.
2) Move the cursor to left top corner of the position where you want to display
the data.
3) Click left, the Data Object Dialog as shown in Fig. 3-12 is popped up.
Fig. 3-12: Data Object Dialog
4) In Display Device option, fill in the address of the PLC relay or register to be
22
EasyBuilder User’s Manual
displayed. Also assign the display format in the Display Format dialog. You
may use the View Formats button to browse the format library and select an
appropriate format number.
5) Click on the OK button to create the data object.
• Display Device:
This option specifies the address of a PLC device to be displayed. Refer to
the chapter The Types of PLC to get the details about address assignments
for different PLC types.
• Display Format:
The option specifies a predefined format for the data object. The format
number can be from 0 to 255. It must be a properly defined format. Details
about how to define formats are in the Format section of the Edit chapter.
• Blink:
This option is applicable for MMI700 and MMI1000 only. If the display
format is graphic or text, it is possible to control blinking by a PLC relay.
As the above setting, display format 10 is a graphic display format, state
number =2, state graphics = but1, but2.
PLC relay M10 controls the display graphics (i.e. when M10=0 it displays
but1.bmp, when M10=1 it displays but2.bmp). If the blink field is marked,
the next PLC relay (M11) will control the blinking state, when M11=1 the
state graphics will blink in 1/2 sec. ON and 1/2 sec. OFF intervals.
The MMI accesses data as words. Therefore, if the PLC relay is the last bit in
a word, blinking is not possible.
Modifications of the dialog contents can be made by selecting the object and
in the tool bar, refer to the section Select Object.
clicking
23
Animation
Use this option to create an animation object that controls the movement of
graphics in the X-Y direction. If the control device is a double word device
(DL), it controls the movement of graphics in X-Y direction. The low address
register controls the operation in X direction, while the high address register
controls the operation in Y direction. If the control device is a single word
device (D), it controls the movement of graphics in X direction only. For
example, the control device is DL10, then the register D10 controls the
movement in X-direction and the register D11 controls the movement in Ydirection. The value in each register decides the distance from original in pixels.
The boundary limit
the movement of
graphics.
a bit-mapped
graphics
The low address
register control
the movement in
X-direction
The high address
register control
the movement in
Y-direction
Perform the following steps to create an animation object:
1) Choose the Animation option in Object menu or click on the Animation
icon in the toolbox.
2) Move the cursor to the left top corner of the desired animation region.
3) Drag the cursor to the diagonal corner of animation region.
4) Release the mouse button, the Animation Object Dialog as shown in Fig.
3-13 is popped up.
Fig. 3-13: Animation Object Dialog
5) Assign proper registers to control animation in the Control Device option.
6) Input the name of graphics file to be displayed in the animation or use
24
EasyBuilder User’s Manual
browse to select one.
7) Click on the OK button. An animation object is created and displayed as
shown in Figure 3-14.
Figure 3-14: Animation Object
• Control Device:
Set the register address that controls the animation operation.
• Graphic Name:
Set the graphics file name to be displayed on the animation. It’s a good
practice to put the animation file under the directory “Animation
graphics”(see Directories of the Chapter Tools). You can input the filename
directly or browse the files under the working directory by clicking on the
Browse button.
After an animation object is created, the animation region can not be
modified. Modifications of the dialog contents can be made after selecting the
in the tool bar, refer to the section Select Object.
object and clicking
25
Push Button
Use this option to create a push button object. The push button object
specifies a rectangular region on the screen. Whenever the region is touched,
the system writes a new value to the corresponding PLC address.
There are several button types available, Momentary (MOM),
Alternate/Toggle (ALT), Numeric (NUM), Jog plus 1(JOG+), Jog minus 1
(JOG-) and Temporary filename select (FILE).
Fig. 3-15: Push Button Dialog
• Write Device:
Set the PLC relay or register address that new value is written to.
• Button Type:
There are several button types provided in the option:
MOM button
When touched, the MMI sends a command to the PLC to energize the
relay. The MMI sends another command to de-energize the relay when
released.
ALT button
When it is touched, The MMI sends a command to the PLC to write a
value of the opposite state (ON -> OFF; OFF -> ON) to the PLC relay.
NUM button
When it is touched, a numeric keypad is displayed at the right bottom
screen area. Key-in the new value and press ENT, The MMI sends a
command to the PLC to write the new value to the PLC register.
JOG+ button
When it is touched, The MMI sends a command to the PLC to add 1 to
the current value in the corresponding register. If the current value in
register is the maximum limit, it is set to be the minimum limit.
26
EasyBuilder User’s Manual
JOG- button
When it is touched, The MMI sends a command to the PLC to subtract 1
from the current value in the corresponding register. If the current value
in register is the minimum limit, it is set to be the maximum limit.
FILE button (N/A for MMI700)
When it is touched, a list of the temporary files is displayed. Select
desired temporary files from the list and press ENT. The MMI sends a
command to PLC to write the corresponding file number to the PLC
register.
• Range Format:
Assign a range format number to set the high and low limit of the valid input
range. The format corresponding to this number must be predefined. For a
NUM type button, the range limits the number to be written into PLC register.
For JOG+/JOG- type buttons, the range limits the upper bound and the lower
bound of the value. See Format section for details.
To create a push button object, follow the steps:
1) Choose the Push Button option in Object menu or click on the Push
Button icon in the toolbox.
2) Move the cursor to the left top push button corner.
3) Drag the cursor to the diagonal push button corner.
4) Release the mouse button. The Push Button Dialog as shown in Fig, 3-15 is
popped up.
5) Assign proper selections for each option.
6) Click on the OK button. A push button object is created and displayed as
show in Fig.3-16. A complete push button includes two objects, one data
object and one push button object; both objects refer to the same PLC
address.
a push button object
to write new value into PLC relay
a data object to display
current PLC relay status
Fig. 3-16: Push Button Object
All options in the Push Button dialog are allowed to be modified again,
but the marked region for the push button is fixed. If you want to change it,
delete the object and recreate it again.
27
Screen Button
Use this option to create a screen button object. The screen button object
defines a rectangular region on the screen. Whenever the region is touched, the
MMI displays the predefined page (GOTO selection) or the last saved page on
the screen (by RETURN selection).
page
option
PLC
register
address
Fig. 3-17: Screen Button dialog
• Screen:
There are two selections in the Screen option, i.e. GOTO and RETURN.
GOTO:
The screen switches to the predefined page when this screen button is
touched. The page option must be filled in the destination page number.
RETURN:
The screen switch to the last saved page when this screen button is
touched. Under this option, the page option is ignored.
• Save:
Select whether to store current page number into memory or not.
Yes:
Store the current page number into memory before the screen switches.
This operation makes current page to be a target page when the next
screen button is pressed with RETURN option.
No:
Switch the screen and do not update the last saved page number.
28
EasyBuilder User’s Manual
• Page No. -> PLC:
Select whether to write the destination page number into a specified PLC
register or not.
Yes:
Write the page number to the PLC register specified by the Write Device
option.
No:
Switch the screen and do not write page number to PLC register. Under
this selection, the Write Device option is ignored.
• Write Device:
If Page No. -> PLC option is Yes, specify the PLC register to be written
in the destination page number.
To create a screen button object, follow the steps:
1) Choose the Screen Button option in Object menu or click on the Screen
Button icon in the toolbox.
2) Move the cursor to the left top screen button corner.
3) Drag the cursor to the diagonal screen button corner.
4) Release the mouse button. A Screen Button Object Dialog as Fig. 3-17 is
popped up.
5) Assign proper options in each dialog according to previous descriptions.
6) Click on the OK button. A screen button object is created and displayed as
shown in Figure 3-18.
screen object
graphic object
text object
a complete screen button is composed of
a screen object, a graphic object and a text
object.
Fig. 3-18: Screen Button Object
All options in the Screen Button Dialog are allowed to be modified. But the
marked region for this button is fixed. If you want to change it, delete the object
and create it again.
29
File Button (for MMI1010 only)
Use this option to create a file button object. The file button object defines
a rectangular region on the screen. Whenever the region is touched, the system
transmits the temporary file (selected by operator) to a block of PLC registers
or reads a block of PLC registers back to the temporary file.
Fig. 3-19: File Button Dialog
• Write Device:
Define the start address of a block of PLC registers to put data. The block
size depends on the number of data points defined in each temporary file (see
section temporary file). For example: The register start address is 100. The
temporary file length is 100 words. The system will transmit temporary file
data into PLC registers D100 to D199.
• File Selector:
Choose the method to select a temporary file at online operation.
NUM: pop up a numerical keypad to input the number of
temporary files.
LIST: pop up a list of temporary files to select one from them.
• Direction:
Define the file transfer direction.
->PLC: transmit data from temporary file to PLC registers.
<-PLC: transmits data from PLC registers to temporary file.
To create a file button, follow the following steps:
1) Choose the File Button option in Object menu or click on the File Button
icon in the toolbox.
2) Move the cursor to the left top corner of the file button.
30
EasyBuilder User’s Manual
3) Drag the cursor to the diagonal corner of the file button.
4) Release the mouse button. The File Button Object Dialog as shown in Fig.
3-19 is popped up.
5) Assign proper options in each dialog according to previous descriptions.
6) Click on the OK button. A file button object is created and displayed as
shown in Fig. 3-20.
file button object
graphic object
text object
Fig. 3-20: Example of a File Button
All options in the File Button dialog are allowed to be modified. But the
marked region for this button is fixed. If you want to change it, delete the object
and create it again.
Hardcopy Button (for MMI1010 only)
Use this option to create a hardcopy object. The hardcopy button object
defines a rectangular region on the screen. Whenever the region is touched, the
MMI transmits current screen image to printer to print them out.
The printer connected to MMI must be compatible with ESC/P2 commands,
(for examples, EPSON LQ-570+ printer). Otherwise, it will not work correctly.
To create a hardcopy button, follow the following steps:
1) Choose the Hardcopy Button option in Object menu or click on the
Hardcopy Button icon in the toolbox.
2) Move the cursor to the left top hardcopy button corner.
3) Drag the cursor to the diagonal hardcopy button corner.
4) Release the mouse button. A hardcopy button object is created and displayed
as shown in Fig. 3-21.
hardcopy button object
graphic object
text object
Fig. 3-21: Example of a Hardcopy Button
31
PLC Control
Use this option to create a PLC control object. The PLC control object
activates a specific operation whenever the corresponding control device is
triggered. PLC control objects are classified into four types:
• Screen switch
• Screen hardcopy
• File transfer (between PLC and MMI)
• LCD Back light power control
The PLC control object is usually defined in the common page (page 0)
unless there is some special consideration. In this way, whichever page is
displayed on the screen, the PLC control object activates the specific operation
whenever the control device is triggered.
It is recommended that you designate a continuous block of PLC registers
or relays as the control devices. It makes the PLC control objects respond faster
without affecting the screen update speed.
For examples, if you use D0, D1, D3, D4 and D5 registers as control
registers, it is better to rearrange them as D0, D1, D2, D3 and D4. Regarding
the bit device (relay), it is better to take full use of bit devices as whole word
units, since the MMI retrieves PLC relay data in word units. For example: If
you use M15, M16, M17, M40, M41 and M42, it is better to pack them as M15,
M16, M17, M18, M19 and M20.
Fig. 3-22: the PLC Control Object Summary
32
EasyBuilder User’s Manual
To create a PLC control object, follow the following steps:
1) Choose the PLC Control option in Edit menu or click on the PLC Control
icon in the tool bar. A PLC Control Object Summary window is popped
up as show in Fig. 3-22.
2) Click on the Append icon to create a new PLC control object or click on the
Modify icon to modify an existing PLC control object. A PLC control object
dialog as shown in Fig. 3-23 is popped up. If you click on the Delete icon,
the current pointed object is deleted.
3) Assign proper options in the PLC control object dialog and click on the OK
button to create the object and exit the PLC control object dialog.
4) Click on the OK button to exit the PLC Control Object summary.
Fig.3-23: PLC Control Object Dialog
• Control Type:
Assign the operation activated by this object. There are four selections in the
dialog: Screen, Hardcopy, File Transport, Backlight.
(Note: Hardcopy and File Transport are applicable for MMI1010 only)
• Control Device:
Assign the address of PLC control device, it can be a PLC register or relay.
Screen switch operation
Control Type:
Select Screen switch operation.
33
Control Device:
If you designate a word device as the control device, such as D register, the
destination page is decided by the register’s contents. Whenever the value in
the register is nonzero, the MMI takes the value as the destination page
number and switches the screen to display the page, then it writes zero into
the register if RESET option is set.
If you designate a bit device as the control device, such as M relay, the
destination page is decided by the Screen and Page No. Options. Whenever
the bit device turns ON, the MMI switches the screen to display the
destination page, and then it reset the bit device if RESET option is set.
Screen:
GOTO: designate Page No. as the destination page.
RETURN: designate the last page number saved as destination page.
Page No. :
Fill in a page number (1~255) if Bit device and GOTO is selected.
Save:
Set it to save the current page into the internal memory when performing
screen switch operation. It makes the current page as the destination page
whenever a screen switch RETURN operation option is specified.
Example
Use PLC internal relay M20 to control the switch screen operation. The
options are setup as shown in Fig. 3-24.
Fig. 3-24: Bit Device Switch Screen Operation
Whenever the M100 relay turns ON, the screen switches to display page 30
and the M100 relay is reset.
34
EasyBuilder User’s Manual
Example
Use PLC registers D50 to control the switch screen operation. The options
are setup as shown in Figure 3-25.
These two options are ignored when
control device is a word device
Fig. 3-25: Word Device Switch Screen Operation
Whenever the content in PLC register D50 becomes nonzero, such as D50 =
25, the screen switches to display page 25 and the D50 is reset to zero.
Screen hardcopy operation (for MMI1010 only)
Control Type:
Select Hardcopy operation.
Control Device:
If you designate a word device as the control device, such as a D register, the
page to be printed is decided by the register’s contents. Whenever the value
in the register is nonzero, the MMI takes the value as the page number,
switches the screen to display the page and then prints it out. After the
printing job is finished, the screen is returned to the original page and zero is
written to the register if RESET option is set.
If you designate a bit devices as the control device, such as M relay, the page
to be printed is decided by the Page No. option. Whenever the bit device
turns ON, the MMI switches the screen to display the page and prints it out.
After the printing job is done, it returns to the original page and resets the bit
device if RESET option is set.
Page No. :
Fill in a page number (1~255) if Bit device is selected.
35
Example
Use PLC register D60 to control the hardcopy operation. The options are
setup as shown in Fig.3-26.
This two options are ignored This option is ignored if control
in Hardcopy type
device is word device
Fig. 3-26 Word Device Hardcopy Operation
Whenever the value in D60 becomes nonzero, such as D60 = 30, the screen
switches to display page 30 and it is printed out. After the printing job is
finished, the screen is returned to the original page. Then D60 is reset to zero.
Example
Use PLC relay M20 to control the hardcopy operation. The options are setup
as shown in Fig.3-27.
Fig. 3-27 Bit Device Hardcopy Operation
Whenever M20 turns ON, the screen switches to display page 10 and it is
printed out. Then M20 is reset.
File transfer operation (for MMI1010 only)
Control Type:
Select File transport operation.
36
EasyBuilder User’s Manual
Control Device:
If you designate a word device as the control device, such as a D register, the
file number is decided by the register content. Whenever the value in the
register becomes nonzero, the MMI takes the value as the file number and
transfers data from the temporary file to the PLC registers or from the PLC
registers to the temporary file. After the transfer is done, the word device is
reset to zero if RESET option is set.
If you designate a bit devices as the control device, such as M relay, the file
number is decided by the File No. option. Whenever the bit device turns ON,
the MMI transfers data from the temporary file to the PLC registers or from
the PLC registers to the temporary file. After the transfer is done, the bit
device is reset if RESET option is set.
Write Device:
The start address of a block of PLC registers where the MMI transfers file.
File No. :
Fill in a file number (1~511) if Bit device is selected.
Direction:
Select the transfer direction. Select "->PLC" is to load data from the
temporary file to the PLC registers and "<-PLC" is to save data from the
PLC registers to the temporary file.
Example
Use the PLC relay M30 to control the file transfer operation. The options are
setup as shown in Fig.3-28.
Fig. 3-28 Bit Device File Transfer
Whenever M30 turns ON, the MMI transfers all the file no. 5 data to the
PLC registers starting from D200. Then M20 is reset.
37
Example
Use the PLC register D10 to control the file transfer operation. The options
are setup as shown in Fig. 3-29.
Fig. 3-29 Word Device File Transfer
Whenever the value in D10 becomes nonzero, such as D10 = 15, the MMI
takes this value and transfers all file No. 15 data to the PLC registers starting
from D200. Then D10 is reset to zero.
Backlight control operation
Control Type:
Select Backlight control for this operation.
Control Device:
designate a bit device for this operation. When the control device is switched
from 1 to 0, the MMI turns the backlight off. When the device is switched
from 0 to 1, the MMI turns the backlight on.
state of control device
1
0
turn off backlight
turn on backlight
During the period when backlight is turned off, the MMI turns the backlight
on immediately whenever the screen is touched.
38
EasyBuilder User’s Manual
Message
Use this option to create a message object. A message object activates the
printing operation and/or displaying a predefined text string whenever the
corresponding control device is triggered (the control device value is nonzero).
Note that the printer connected to the MMI must be compatible with
ESC/P2 commands (for example: EPSON LQ-570+ printer). Otherwise, it will
not work properly. If your MMI is equipped with an internal clock, it prints out
the date and time records with the message as shown below:
96/03/10 10:11:12 Warning...
96/03/10 10:11:12 The safety door is not closed.
96/03/10 10:11:13 Temperature of the spillway is too high.
A message is displayed and scrolling in the message window until the
control device value becomes 0. If there are several messages activated at the
same time, all these messages are displayed and scrolled in the message
window one after another. As shown in Fig. 3-30.
user configurable screen area
message window
Warning... The safety door is not closed. Temperature of the
Fig. 3-30 Message Window
Also note that the message window is popped up as per page configuration.
You have to mark the option "message" under Overlap (in Edit menu) settings
in order to display the message window. The message object must be defined in
the common page (page 0) unless there is some special consideration. In this
way, whichever page is displayed on the screen, the message text string object
is displayed or printed whenever its control device is triggered.
39
To create a message object, follow the following steps:
1) Choose the Message option in Edit menu or click on the Message icon in
the tool bar. A Message Objects List window is popped up as Fig.3-31.
Fig. 3-31: Message Objects List Window
2) Click on the Append button to create a new message object or click on the
Modify button to modify an existed message object. A message object
dialog as shown in Fig. 3-32 is popped up. If you click on the Delete button,
the current selected object is deleted.
3) Select options in the message object dialog and click OK to create the object.
4) Click on the OK to exit the Message Object List window.
Fig. 3-32: Message Object Dialog
• Control Device:
Assign a PLC internal relay to activate the message display and printing.
• Message:
Input a text string be printed or displayed.
• Display:
Mark this option to enable the message display function.
• Print: (for MMI1010 only)
Mark this option to enable the message printing function.
40
EasyBuilder User’s Manual
4. Edit
Click on the Edit in the menu bar to pull
down the Edit menu as shown in Fig. 4-1.
The Edit menu includes the following
functions.
• Format: define format library.
• Temporary File: define the filename and
size of each temporary file.
The functions of PLC control and message
are described in the Object Designs chapter.
Fig. 4-1: Edit Menu
Format
Each project file can define at most 256 formats. Formats represent the PLC
data type to display or the range limit for data entry. These formats are divided
into two classes: display formats and range formats. Each data object needs to
designate a display format. The MMI displays the PLC data based on the
predefined display format. Please refer to the section Data Object in the chapter
Object Designs. A push button object with NUM or JOG+/- option needs a
range format to limit the data entry range. (Refer to the Push button section in
the chapter Object Designs.)
• Display formats:
The PLC data can be displayed on the screen by using a Data object with
numeric, ASCII, filename, bar graph, text, or graphics style. For each style,
you have to define a proper format before creating the data object. The MMI
provides the following display formats.
Numeric
ASCII
File Name
Bar Graph (Horizontal)
Bar Graph (Vertical)
Text
Graphics
41
• Range format:
The range format sets bounds for data entry. The NUM or JOG+/JOG- type
push button objects use it.
NUM type push button: limit the numeric data input range.
JOG+/JOG- type push button: set the increasing upper bound and the
decreasing
lower
bound
To define a format,
follow these steps:
1) Choose the
Format option
in the Edit menu
or click on the
Format icon in
the tool bar. The
Format Table
Fig. 4-2: Format Table
(Fig. 4-2) is
displayed.
2) Move the cursor to the format number you want to define and click left.
3) Click on the Setting button to create a format option dialog as shown in Fig. 43.
4) Assign proper options in
the Format dialog and
click on the OK button to
define it.
5) Repeat steps 2 to 4 to
define other formats or
click on the OK button to
close the Format Table.
Fig. 4-3: Format Dialog
42
EasyBuilder User’s Manual
Format type
The Format type option is a general option for every format. It defines the
attribute of each format.
Numeric:
Displays the PLC register data in numeric style. The corresponding options
are depicted in Fig. 4-4. The options are used to assign the number of
Figures displayed before and after the decimal point. You can also choose to
display the value in 15*8 or 24*16 fonts and to enlarge them in 1 to 4
multiples.
Fig. 4-4: Numeric Format Options
For example: Assign options as Fig. 4-4. A number 1234 will be displayed as
123.4.
ASCII:
Displays the PLC register data as ASCII codes. The corresponding options
are depicted in Figure 4-5. With these options, you assign the number of
ASCII characters to be displayed. It uses two characters per single word.
You can also choose to display these ASCII characters in 15*8 or 24*16
fonts and to amplify them in 1 to 4 multiples.
Fig. 4-5: ASCII Format Options
The ASCII code stored in the lower byte is displayed at the left, and the
other stored in the higher byte is displayed at the right. For example: Assign
options as Fig. 4-5. The data 4241h will be displayed as "AB"
File Name:
The File Name format uses the value accessed from the PLC registers as the
temporary file number and displays the file name corresponding to this
43
number. The file name to be displayed is not allowed to be larger than 14
characters. It is displayed in 15*8 fonts. The only format option is the
amplified size (1 - 4 multiples).
Fig. 4-6: Options Corresponding to File Name Format
Bar Graph (V):
With this format, the accessed PLC register data is displayed in a vertical bar
graph as shown in Fig. 4-7.
span
length
zero
width
Fig. 4-7: vertical bar graph
Options corresponding to the format are depicted in Fig. 4-8. The Length
and Width options set the bar graph length and width in pixels. The span
and zero of the bar graph are assigned in the Max/Min options. If Max is
larger than Min, the bar graph grows from bottom to top. If Max is less than
Min, the bar graph grows from top to bottom.
Fig. 4-8: Vertical Bar Graph Format Options
Bar Graph (H):
With this format, the accessed PLC register data is displayed in a horizontal
bar graph as shown in Fig. 4-9.
zero
span
width
length
Fig. 4-9: Horizontal Bar Graph
44
EasyBuilder User’s Manual
Options for this format are the same as those for Bar Graph (V). If Max is
larger than Min, the bar graph grows from left right. If Max is less than Min,
the bar graph grows from right to left.
Text:
With this format, each text string represents one of the PLC register’s values
or relay’s states. According to the value accessed from the PLC device, the
corresponding text string is displayed on the screen.
Options for this format are shown in Fig. 4-11.
Fig 4-11: Text Format Options
States:
The States option defines the number of states. The maximum number of
states is 32.
Content:
The text strings which represent each state are filled in the Content option.
Each text string is separated from others by commas. The length of each text
string must be equal. All these text strings must be arranged in the sequence
corresponding to the state value starting from 0. The maximum length of
content is 160 characters including commas.
For example:
Assign options like Fig.4-11. The MMI displays "off" when the value
accessed from PLC register is 0, and it displays " on" when the value is 1.
Font and Size:
These two options define the character font and the amplified scale of the
text to be displayed .
45
Graphics :
Similar to the Text format, each graphic represents one of the PLC’s register
data or relay states. According to the value accessed from the PLC device,
the corresponding graphic is displayed on the screen.
Options corresponding to this format are similar to those in the text format.
The No. of states are defined in the States option. The maximum number of
states are 32. Instead of assigning a text string, we assign the filenames of
graphics corresponding to each state in the Content option. Similarly, the
filenames must also be arranged in sequence and separated with commas.
The extension name does not need to be specified in the Content option. It
is already specified by the Graphic Type option.
Fig. 4-12 Graphic Format
display left_ss
display right_ss
if reading value=0 if reading value=1
The Graphic Type option selects the bit map file format. The EasyBuilder
supports BMP and PUT formats. All files specified in the Content must
belong to the same type. It is noted that all the specified files must be located
in the “animation graphics” directory specified by “directories” option of
“tool” menu.
In the MMI700/1000, when the number of state = 1 and the reading value =1,
it will display the graphic as blinking.
46
EasyBuilder User’s Manual
Range:
The format sets NUM or JOG+/JOG- type push button limits.
Options corresponding to this format are the maximum value and the
minimum value as Fig. 4-13.
Fig. 4-13: Range Format Options
For a NUM type push button, the format limits the numbers within its range
that can be accepted. For instance, set the range format as in Fig.4-13 and
designate it to a NUM type push button object. Only the numbers from 1 to
1000 can be written into the corresponding registers.
For a JOG+/JOG- type push button, the format sets the increasing upper
bound and the decreasing lower bound. For example, the lower bound is 1
and the upper bound is 5. The JOG+ push button will vary register data
as ...1 -> 2 -> 3 -> 4 -> 5 -> 1 -> 2 ... The JOG- push button will vary
register data ... 3-> 2 -> 1 -> 5 -> 4 -> 3...
47
Temporary File (for MMI1010 only)
This function lets you create temporary files used in file transfer.
There are 512 temporary files at maximum in the MMI. The size of each
temporary file can be set to be from 1 to 255 words. The total capacity of all
temporary files is 24,576 words (24k words) at maximum. Each temporary file
can be assigned a file name with a maximum of 14 characters.
Perform the following steps to create the temporary files:
1) Choose the Temporary File in Edit menu or click Temporary File icon
in the tool bar. A Temporary File Summary as in Fig.4-14 is popped up.
2) Cursor to the desired file number and click to create a temporary file.
3) Click the Modify button to pop up the Temporary File dialog.
4) Assign the temporary file size in the Capacity dialog. The maximum
temporary file capacity is 256 (0-255) words.
5) Input the file name of the temporary file in the File Name option. The
maximum filename length is 14 characters.
6) Click on the OK button to define the temporary file.
7) Repeat step 2 to step 6 to define each temporary file.
8) Click on the OK button in Temporary File List window to close it.
Fig. 4-15: Temporary File Dialog
Fig. 4-14: Temporary File List
The created temporary files are loaded or saved by File Transport or PLC
Control objects. Please refer to the sections File Button or PLC Control in the
chapter Object Designs.
48
EasyBuilder User’s Manual
5. Tool
Click on the Tool in the menu bar to pull down the
Tool menu as Fig. 5-1. The Tool menu includes the
following functions.
• Overlap: set overlap pages and enable message
window display of each page.
• Page cut: erase all objects in the current page.
• Page copy: duplicate all objects from another page
to the current page.
• Directories: setup the directory for graphics/text files.
Fig.5-1
Tool Menu
Overlap
This function lets you set overlap page and enable the message window display
of each page (from 1 to 255). For details about overlap page characteristics,
refer to the section "General page, Overlap page, and the Common page" in
chapter "Introduction."
To assign an overlap page, follow
the following steps:
1) Choose the Overlap option in
the Tool menu or click on the
Overlap icon in the toolbar. An
Overlap table as Figure 5-2 is
popped up.
Fig.5-2: Overlay Table
2) Move the cursor to the page that you want
to setup and click left.
Fig.5-3 Overlap Dialog
3) Click on the Setting button. An Overlap dialog for the page is popped up as
shown in Fig. 5-3.
49
Overlay:
Select to set an overlap page. De-select to cancel the existing overlap relation.
Overlap Page:
Assign the overlap page for this page.
Message:
Select to enable a message window on this page. If you use a message object
to display a specific message, you must mark this option so that the message
window can display messages.
4) Choose the proper options in Overlap dialog and click on the OK button.
The overlap relation of this page is built and displayed in the Overlap Table.
5) Repeat step 2 to 4 to set overlap of each page.
Copy
The page copy function duplicates all the objects from another page to the
current page. All the original objects in the current page are erased concurrently.
All display objects (including line, circle, rectangle, text, graphic, data,
animation, and lamp objects) and touch control objects (including push button,
screen button, hardcopy button, and file transfer button objects) in the source
page are duplicated onto the current page. However, the PLC control and the
message objects are not duplicated onto the current page.
Perform the following steps to copy all the objects from source page:
Choose the Copy function in the Tool menu or click on the Copy icon in the
tool bar. The Page Copy dialog is popped up as in Fig. 5-5.
2) Assign the source page number in the Page No option.
1)
50
EasyBuilder User’s Manual
3)
4)
Figure 5-5: Page Copy Dialog
If the source page is in the
working file, select the Working
File option in the Source Type
dialog. Otherwise, select Other
File and fill the File Name
option with the source project
file. If Other File is selected,
you can also use the Browse
button to choose a file.
Click on the OK button to
duplicate the page.
Since each Data or Push button object refers to a format, the different format
definitions in different files may cause confusion when a page is duplicated
from another file. The EasyBuilder resolves this problem with the following
rules. If the format corresponding to the duplicated object does not exist in the
working file, the EasyBuilder duplicates it from the source file accompanied
with the object. If the format has already defined in the working file, the
EasyBuilder keeps it without duplicating the one from the source file. It may
cause the duplicated object to relate to an unsuitable format. You have to note
this problem in executing this function.
Cut
The page cut function erases all the objects on the current page.
Perform the following steps to delete the objects on the whole page:
1) Choose Cut option in the Tool menu or click on the cut icon in the tool bar. A
warning message is displayed and requests you to confirm it again.
Fig. 5-4: Warning Message for Page Delete
2) Click on the "Y" button to confirm the operation or click on the "N" button to
cancel it.
51
Directories
In order to provide an efficient way to manage graphic files, EasyBuilder allows
each project to create its own directory to store graphics and text files.
Static Graphics/Text: The EasyBuilder will search this directory for the
graphics files referred by graphics objects, if it cannot find the graphics files
in the default directory. It’s the same for those text files referred by text
objects.
Animation Graphics: The EasyBuilder will search this directory for the
graphics files referred to by the graphics format and animation objects, if it
cannot find the graphics files in the default directory.
ASCII Fonts: This is the directory where ASCII pattern files are located,
EasyBuilder requires both ASCFONT.15 and ASCFONT.24 files.
52
EasyBuilder User’s Manual
6. View
The View menu contains scaling
functions that allow you to choose an
appropriate way to display a page. The menu
is depicted in Fig. 6-1. It includes the
following options:
• 100%: display screen in normal size
• 75%: reduce the screen size to 75%
• Tool Bar: display the tool bar at the top of
•
•
•
•
•
•
•
the screen
Status Bar: display the status bar at the
bottom of screen
Tool Box: display the toolbox on the
Fig. 6-1 View Menu
screen
Graphics Files: display a list of the graphic files
used in the working project
Align Grid: force new added objects to be positioned on the grid
Grid: display 8x8 grid covering the whole working area
Object Contents: display the corresponding PLC device of each object
Select Page No.: display the object summary at each page
100% and 75%
These two options help you to display a page in proper scale. When either one
of them is selected, the other one is deselected automatically.
Tool Bar
open new file print
zoom
open file
version
grid
save file
online help
copy screen
temporal file
delete screen
message
format setup
PLC control
screen overlay
screen no.
PLC resgister
addressing
method
cursor
position
Fig. 6-2 Tool Bar
53
This option enables you to display the tool bar. To activate or deactivate the
Tool Bar option, simply select it. A "
been selected.
" symbol indicates that the option has
Status Bar
This option enables you to display the status bar at the bottom of the screen.
A brief description corresponding to current operation is displayed in the status
bar. Like the Tool Bar option, select the option to activate or deactivate it.
Tool Box
This option activates the toolbox for fast creation of objects. The toolbox is
opened at the right bottom side of the screen when option is selected. To move it
to another position, move the cursor to its headline and drag it.
time display
13:15:20
date display
06/01/96
PLC data
display
EasyView 300 text display
bitmap graphics
1257
screen
button
blinking
GOTO PANEL
MAIN
MENU
data button
hard copy
animation graphics
file transfer
Fig. 6-3 Tool Box
Graphic Files
This option displays the list of graphic files used in the working file. It
includes the graphic files used by Graphic object, Animation object and those
referred to in formats.
54
EasyBuilder User’s Manual
Fig. 6-4: List of Graphic Files
55
Align Grid
After this option is activated, new added objects or objects to be moved will be
positioned on the grid.
Grid
This option displays a grid in gray color on the working area. The grid size is
8*8 pixels.
Object Contents
As described in previous chapters, some dynamic objects, such as data objects,
lamp objects, animation objects, push button objects or file transfer objects,
correlate to a specific PLC relay or register. This option enables you to display
the objects along with their corresponding PLC device address.
Several selections are provided under this option for different dynamic objects
as shown in Figure 6-5. These selections enable you to specify some specific
dynamic object types to be displayed with their corresponding PLC device
address.
Fig. 6-5: the options under Object Contents
display PLC register
Fig. 6-6 Display PLC Register on the Screen
56
EasyBuilder User’s Manual
Select Page No.
The “Select Page No.” option shows the object details for each page. Choose
“Select Page No.” at “View” menu, the Fig.6-7 displays the total number of
objects in each page.
Fig. 6-7 Number of Objects Summary
or
to select the right page, then click
Press
Fig. 6-8 shows the number of each object type in the page.
,
Fig.6-8 Classified Number of Objects in a Page
57
7. PLC device address naming style
The MMI provides separate device drivers to link with most popular PLCs.
The available PLC drivers include OMROM, SIEMENS S7 200/300, A-B SLC,
MITSUBISHI, FACON FB, MATSUSHITA FP, KOYO Direct, GOLDSTAR
Master K, Sharp JW, HITACHI H..etc. More device drivers are added every
day. If you cannot find a device driver for your PLC, check technical support
person or our agent.
The names and the addressing style of devices
in different PLC types are usually different. After
you open a project file in the EasyBuilder, you
must select the proper type for your PLC from the
PLC TYPE drop-down list in the tool bar. It is
depicted in Fig.7-1. This function makes the
EasyBuilder use the same register names and Fig. 7-1: PLC type Dropaddresses as those used in your PLC program. If down List in the Tool bar
you forget to select a proper PLC type when
opening a new project, the device names and addressing method will be
different from those of your PLC.
OMRON address Style
Name
Address
MITSUBISHI FX address Style
Range
Name
Address
Range
IR
dddbb
ddd: 0~255
bb: 0~15
X
ooo
ooo: 0~177
(Octal)
HR
dddbb
as above
Y
ooo
as above
AR
dddbb
as above
S
ddd
ddd: 0~999
LR
dddbb
as above
T
ddd
ddd: 0~255
TC(PV)
ddd
ddd: 0~255
C
ddd
ddd: 0~255
DM
dddd
dddd:0~4095
M
dddd
dddd: 0~1023
DL
dddd
dddd:0~4095
TV(PV)
ddd
ddd: 0~255
CV(PV)
ddd
ddd: 0~255
D
ddd
ddd: 0~511
DL
ddd
ddd: 0~511
DL consists of two continuous DM.
DL consists of two continuous D.
58
EasyBuilder User’s Manual
MITSUBISHI AXX Address Style
Name
Address
KOYO Direct Address Style
Name
Range
Address
Range
X
hhh
hhh: 0~7FF
I (X)
ooo
0~477
Y
hhh
hhh: 0~7FF
Q (Y)
ooo
0~477
M
dddd
dddd:0~2047
M (C)
ooo
0~377
T(PV)
ddd
ddd: 0~255
T
ooo
0~177
C(PV)
ddd
ddd: 0~255
C (CT)
ooo
0~177
D
dddd
dddd:0~1023
R (V)
oooo
0~7777
DL
dddd
dddd:0~1023
RL
oooo
0~7777
DL consists of two continuous D.
All address is octal. RL consists of two
continuous R.
Matsushita FP Address Style
Hitachi H Address Style
Name
Address
Range
Name
Address
Range
X
ddh
dd: 0~99
h : 0~F
M
hhh
hhh: 000~FFF
WM
hhh
hhh: 000~FFF
Y
ddh
as above
TC
nnn
nnn: 0~511
R
dddh
ddd: 0~255
h : 0~F
L
hhh
hhh: 000~FFF
WL
hhh
hhh: 000~FFF
TC
ddd
ddd: 0~999
R
hhh
hhh: 000~FFF
SV
ddd
ddd: 0~999
WR
hhh
hhh: 000~FFF
EV
ddd
ddd: 0~999
DR
hhh
hhh: 000~FFF
DT
dddd
dddd:0~4095
DL
dddd
dddd:0~4095
All address are hex-decimal except TC,
DR consists of two continuous WR.
DL consists of two continuous DT.
GoldStar Master-K address style
FACON FB address Style
Name
Address
Range
X
ddd
0~159
Y
ddd
0~159
Name
Address
Range
P
nnh
nn: 0~99
h: 0~F
M
nnh
nn: 0~99
h: 0~F
M
dddd
0~1399
RT
ddd
0~255
T
ddd
ddd:0~255
RC
ddd
0~199
C
ddd
ddd:0~255
RD
dddd
0~4095
D
dddd
dddd:0~4095
DL
dddd
0~4095
DL
dddd
dddd:0~4095
DL consists of two continuous RD.
DL consists of two continuous D.
59
Allen-Bradley SLC address style
Name
I
dddh
O
dddh
N’s corresponding PLC address
File No.
N address
ddd:0~255
h: 0~F
7
0~255
11
256~511
ddd:0~255
h: 0~F
12
512~767
13
768~1023
Address
Range
B
dddh
ddd:0~255
h: 0~F
14
1024~1279
15
1280~1535
N
dddd
dddd:0~4095
16
1536~1791
NL
dddd
dddd:0~4095
17
1792~2047
C
dddb
ddd:0~255
b:0(PRE),
1(ACC)
18
2048~2303
19
2304~2559
20
2560~2815
dddd:0~255
b:0(PRE),
1(ACC)
21
2816~3071
22
3072~3327
23
3328~3583
24
3584~3839
25
3840~4095
T
dddb
NL consists of two continuous N.
Siemens S7 address style
Name
I
Address
nnb
Sharp JW address style
Range
Name
Address
nn: 0~99
b: 0~7
R
oooo
000~7777
Range
TC
ooo
000~777
O
nnb
nn: 0~99
b: 0~7
DM
oooo
0000~7777
DL
oooo
0000~7777
M
nnnb
nnn: 0~511
b: 0~7
Address is in octal, DL consists of two
continuous DM.
VW
dddd
dddd: 0,2,4,..
must be even
VD
dddd
dddd: 0,4,8,..
must be
quadruplicate
VD consists of two continuous VW.
60
EasyBuilder User’s Manual
8. Download
This chapter describes the operations to load a project file created by the
EasyBuilder into the MMI flash memory. Remember to save the project file
in the EasyBuilder before you start to load the project file.
The load procedure is listed as follows:
1) Connect the MMI RS232 port to COM1 or COM2 of the PC.
2) For MMI1010, set the switch SW8 =ON and set SW7 to select a
transmission speed.
ON : 19200 baud rate
OFF : 9600 baud rate
For MMI700/1000 Set the switch SW8 =ON and set SW7 to select a
transmission speed.
ON : 19200 baud rate
OFF : 9600 baud rate
3) Press the RESET button .
4) Execute the EasyView Download Utility, the screen displays as follows:
Model: select the appropriate MMI model
MMI700 = MT200
MMI1000 = MT250
MMI1010 = MT300
PLC driver: select appropriate PLC type to connect with MMI
User Project: fill in project name created by “EasyBuilder” editor software,
or use browse function to select the project.
61
COM Port: select COM port(COM1 or COM2) of your PC to connect with
MMI.
Baud Rate: transmit speed between MMI and PC, if the DIP
SW7=ON of MMI1010 (or SW3=ON of MMI700/1000) select
19200, otherwise select 9600.
After fill in the above selection, press “OK” to start the download procedure.
Note: The MMI1010 is equipped with two flash memories. One is for project
data and the other for the driver. The MMI700/1000 is equipped with one
flash memory for both project data and driver. Therefore the driver &
project can be download separately by selecting “v” in the “load driver”
and “load user project” field if the model is selected as “MMI1010”. For
the MMI700/1000 the driver and project data must be download together.
62
EasyBuilder User’s Manual
Appendix A :
Installation of the EasyBuilder software
To install the EasyBuilder software, perform the following steps :
Under the windows environment, insert the EasyBuilder diskette into disk
driver A and execute the command "A:\setup" to start the installation
program. The dialog box as Fig. A-1 is popped up.
Fig.A-1
Enter the directory in which you want to install the EasyBuilder. Click on
the OK button, the installation process will start. After the installation is
completed, it creates an MMI group in windows and an icon for the
EasyBuilder in this group.
Fig A-2
63
Appendix B : Examples to build objects
Create an ON/OFF push button
To create an ON/OFF push button, follow these steps :
to create two graphics that represent ON
1) Use paintbrush software
and OFF states respectively.
The first is the graphic of OFF state.
Name it as "BUT1.BMP"
.
The second is the graphic of ON state.
Name it as "BUT2.BMP"
.
2) Start the EasyBuilder by clicking on the icon.
3) Select the Formats by clicking on the icon
format.
to add a graphic display
file format
No. of states
filename
list
Fig. B-1
Fig. B-2
4) Click on the data object
Fig. B-3
64
icon
. Move the cursor to
a desired position to create
the data object, then click.
The data object dialog box is
popped up as shown in Fig.
B-3.
EasyBuilder User’s Manual
Fill in the PLC device address and
display format number then click on
the OK button. A data object is created
and it is shown on the screen as in Fig.
B-4.
Fig. B-4
5) Click on the push button icon
.
Move the arrow cursor to the left top
data object corner. Drag a rectangle
area to cover the data object. The
rectangular area is the effective
touch push button area. Release the
left mouse button, the push button
dialog box is popped up as in Fig. B5.
Fig. B-5
Fill in write device and button type
then click on the OK button, a push
button object is created and it is shown
on the screen as in Fig B-6.
The ON/OFF push button is
created. The rectangular area marked
with dashed-line is the effective push button touch area.
Fig. B-6
65
Create a numeric data display
To create a numeric data display, follow these steps :
1) Select Formats by clicking on the icon
Fig. B-7
and add a numeric display
format.
If you need to
limit the input
number within a
range, set a range
format as in Fig B8.
Fig. B-8
Fig. B-9
After the above setting, the format
table is shown as in Fig. B-9.
Fig. B-10
Fig. B-11
66
.
2) Click on the data object icon
Move the cursor to a desired
position to create the numerical
data, then click left. A data object
dialog box is popped up. Fill in the
PLC device address and display
format then click on the OK button.
A data object is created and it is
displayed on the screen as in Fig.
B-11.
EasyBuilder User’s Manual
Fig. B-12
3) Click on the push button icon
.
Move the cursor to the left top data
object corner. Drag a rectangle to
cover the data object. The
rectangular area is the effective push
button touch area. Release the left
mouse button. A push button object
dialog box is popped up.
Set Button type to "NUM". Click
the OK button. A push button object is
created and it is displayed on the
screen as Fig. B-13.
Fig. B-13
A numeric data is created. The
rectangular area marked with a dashed-line is the effective push button
touch area. A numerical keypad will be popped up when the effective area is
touched.
67
Appendix C: Difference between
MMI700,MMI1000 and MMI1010
MMI1010
MMI1000
MMI700
Object type
Date
optional
no
no
Time
optional
no
no
Lamp
yes
no
no
Hardcopy
yes
no
no
File button
optional
no
no
PLC control
yes
#1
#1
Message
yes
#2
#2
memory
capacity
(graphics)
416K
288K
(expandable to
928K)
Screen layout
640x480 dot
640x480 dot
288K
320x240 dot
#1: PLC control objects do not support hardcopy function.
#2: Message objects do not support printout function.
68